

OwneF_s
Manual
Side-by-Side
B6"42"48"
Built-In Refrigerators
Monogram_
Consumer Infbrmation
Built-In R</)'ig'erators
Introduction Your new Monogram refl'igerator makes an eloquent statement of style, convenience and kitchen
planning flexibility: Whether you chose it fin" its purity of design, practical storage arrangements
or assiduous attention to detail--or fin" all of these reasons--you'll find that your Monogram
refl'igerator's superior blend of fl_rm and traction will delight you fl_r years to come.
The Monogram refl'igerator was designed to provide the flexibility to blend in with wmr kitchen
cabinetry. Decorative door insert panels allow it to match wmr kitchen cabinets or blend with
vour kitchen decor. Through a series of product choices, the Monogram refl'igerator can be
beautififlly integrated into the kitchen.
Since this is designed to be a built-in product, custom panels are required on the fl'ont
of the Monogram refl_igerator. Consult wmr kitchen designer or cabinetmaker for your
customized look.
The intormation on the fi_llowing pages will hel I) you operate and maintain vour
refl'igerator i)roperly.
If w)u have any questions, visit our website at: ge,com
ConWn_
Consumer Services
hnportant Phone Numbers ............. 31
Model and Serial Numbers .............. 3
Problem Solver . .................. 25-28
Product Registration ................... 3
Satetv lnsttuctions .................. 4-7
Smartwater Filter Pert)finance
Dam Sheet .......................... 29
State of Califin'nia
_V_ter Treatment Device Certificate ...... 30
_V_rrantv ................... Back Cover
Care and Clemfing
Cleaning--Outside and Inside .......... 19
Cleaning--Condenser . ............... 24
I,ight Bulb Replacement ........... 20-23
Moving and Vacation ................. 24
Master I,ight Switch ................... 21
Operating Instructions
Automatic lcemaker . ................. 12
Climate Control Drawer . ........ 13, 14, 16
Control I,ock ........................ 14
Ice and X_'ater Dispenser . ........... 10, 11
Shelves and Bins .................. 17, 18
Storage Pans ..................... 15, 16
Temperature Controls .................. 8
_V_ter Filter Cartridge .................. 9
Sabbath Mode Product 14dt, ZSAB1 ....... 18
Consunmr Infbnnation
Buill-In I¢_f*'ig'eralors
Be/ore
using your
r@igewator
Write
down the
model &
serial
n _Ll_ll)_s
If you
received a
damaged
r@igerator
Read this manual carefllllv. It is intended
to hel I) you operate and maintain wmr new
refl'igerator properly:
Kee I) it handy fl)r answers to vom" questions.
You'll see them on a label above the fl'eezer
compartment behind the grille panel,
These nmnbers are also on the Consmner
Product Ownership Registration Card
included with this manual,
hmnediatelv contact the dealer (or builder)
that sold xou the refrigerator,
If wm don't tmderstand something or need
more hell) , there is a list of toll-free consumer
service nmnbe_ included in the back section
of this manual.
OR
Visit otu" X_'ebsite at: ge.com
Before sending in this cm'd, please write these
numbers here:
Model Nmnber
Serial Nmnber
Use these nmnbers in any correspondence or
serxice calls concerning yore" refrigerator.
Save time
& money
If you
,teed
service
Before you request service, check the
Problem Solver in the back of this manual.
To obtain service, see the Consumer Services
page in the back of this mmmal.
_'e're proud of our service and want wm to be
pleased. If tin" some reason you are not hal)py
with the service you receive, here are steps to
ti_llow tot flu'ther hell).
For customers in the USA:
FIRST, contact the people who serxiced yore"
appliance. Explain wh) you are not pleased.
In most cases, this will solxe the problem.
NEXT, if you are still not pleased, write all the
details--including, _,otu', I)h°ne ntunber--to:
Manager, Customer Relations
GE Appliances
Appliance Park
I,ouis_ille, KY 40925
It lists causes of minor operating problems that
VO/I C_lll correct _,otlrself.
For customers in Canada:
FIRST, contact the people who serviced vom"
appliance. Explain why you are not pleased.
In most cases, this will solve the problem.
NEXT, if wm are still not pleased, write all the
details-including yotu" phone ntunber to:
Manage_; (]onsulner Relations
Camco Inc.
1 Factory i,ane, Suite 310
Moncton, N.B. E1C 9M3
IMPORTANT SAFETY INSTRUCTIONS
BEAD AND SAVE THESE INS TR UCTIONS
WARNING - X hen.sin
this appliance, alwa):s exercise basic saletv
i)recautions, ii_cluding the tollowing:
• Use this appliance only for its intended
purpose as described in this Owner's Malmal.
• This refrigerator must be properly installed
in accordance with the Installation
Instructions before it is used.
• Do not allow children to cfimb, stand or
hang on the shelves in the refrigerator.
They could damage the refrigerator and
seriously injure thelnselves.
• After your refrigerator is in operation,
do not touch the cold surfaces in the
freezer compartment, particularly when
hands are dmnp or wet. Skin inav adhere
to these extrelnelv cold surtaces.
• Do not store or use gasoline or other
flammable vapors and liquids in the
vicinhy of this or any other applimace.
• In refrigerators with an automatic icema_ker,
avoid contact with the Inoving parts of the
ejector u_echai_isln, or with the heating
eleu_ent located on the bottom of the
iceulaker. Do not place fingeI_ or hands on
the autolnatic icelnaking u_echai_isu_ while
the refrigerator is l_lugged ill
• Keep fingers out of the "pinch point" areas:
clearances between the doors aim between
the doors aim cabinet are necessarily slnall.
Be carefld closing doors when children are
in the area.
• Unplug your refrigerator before clemfing
mad making repairs. NOTE: We strongly
recomu_ei_d that any servicing be i)ertorlned
by a qualified individual.
• Before replacing a burned-out light bulb,
set the Master I,ight switch in the OFF
position to turn off the lights in order to
avoid contact with a live wire filau_ent.
(A burned-out light bulb may break when
being replaced.) NOTE: Setting the
refl'igerator telnperature controls to OFF
does not remove power to the light circuit.
• Do not refreeze frozen foods which have
thawed completely.
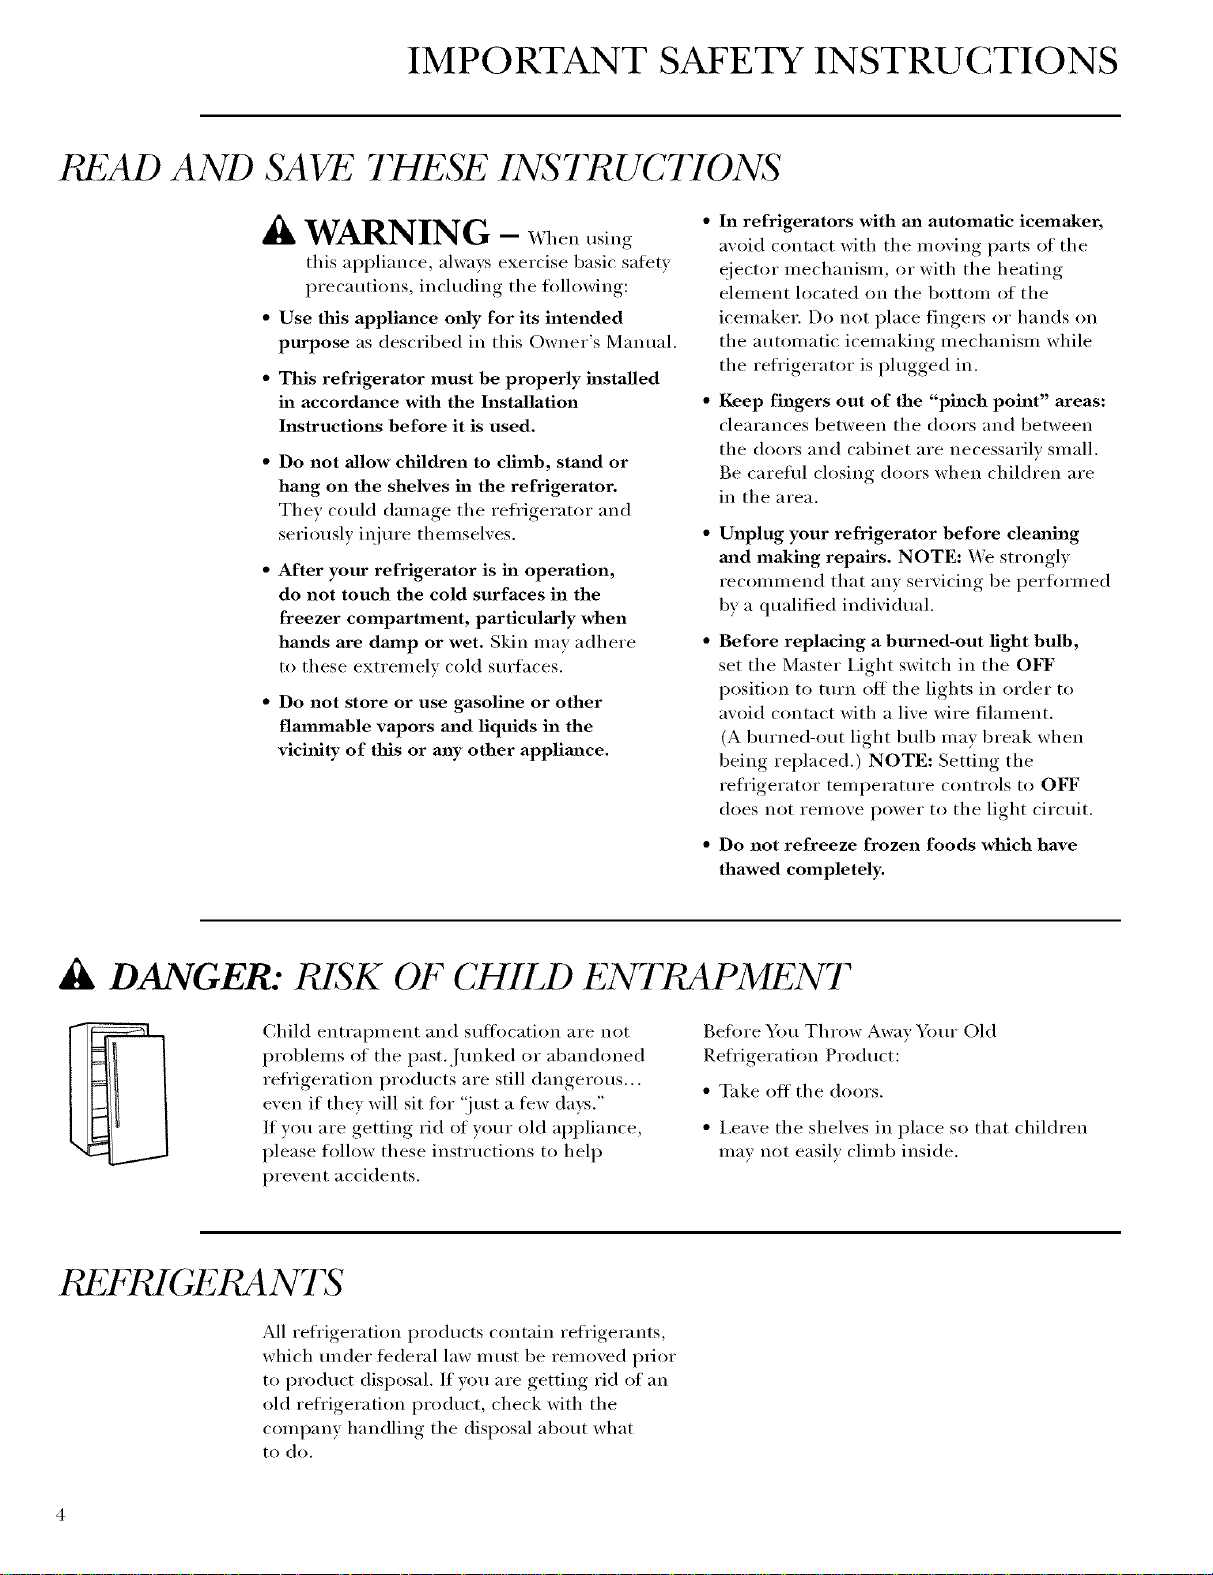
DANGER: RISK OF CHILD ENTRAPMENT
Child elatrai)lnelat and stdfocation are not
i)roblems of the past.,lunked or abandoned
refl'igeratioi_ i)roducts are still dangerous...
even if they will sit tor 'ijust a ti_w days."
If w)u are getting rid of your old ai)pliance ,
please follow these instiuctions to hel I)
prevent accidents.
REFI GEBANTS
All refl'igeration products contain refl'igerants,
which under tedeI"al law 11/ust be removed prior
to product disposal. If you are getting rid of an
old refrigeration product, check with the
conq)any hai_dling the disposal about what
to do.
gefi_re You Throw Away Your Old
Refl'igera tion Product:
• Take off the doors.
• I,eave the shelves in place so that children
Inav not easily clilnb inside.

IMPORTANTES INSTRUCTIONS DE SI CURITI
LIRE ET CONSERVER CES INSTRUCTIONS
ii AVERTISSEMENT :
Lorsque vous utilisez le r6frig6rateur,
observez toujours certahms pr6caufions
de base, notamment :
• N'utilisez le r6frig6rateur que pour son usage
pr6vu, COlmne d_crit dans le present malmel.
• Installez le r_frig6rateur couform_meut aux
directives d'iustaJlatiou avmat de l'utiliser.
• Ne laissez pas les enfmlts grimper, s'asseoir,
se tenir debout ni se pendre aux clayettes du
r_frig_rateur, lls pourraient endonmmger le
i'_frig_rateur et se blesser gravelnent.
• Uue lois le r6frig6rateur en marche, ne
touchez pas les surfaces froides du
cong61ateur, surtout si vous avez les mains
humides ou mouill_es : la peau risque
d'adhg_rer _'l ces surtaces tr_s froides.
• N'entreposez et n'utilisez pas d'essence ou
autres vapeurs et liquides inflammables
proximit6 de cet appareil ou de tout autre
appaJreil 61ectrom6nager.
• Pour les r6frig6rateurs dot6s d'une machine
/_glaqons automatique, 6vitez le contact avec
les pi_ces mobiles du ing_canislne &jecteui; ou
avec l'_l_Iuent chauflant situ(_ _'lla partie
intFrieure de la inachine fi glacons. Ne posez
pas les doigts oil les inains sur le in_canislne
de la inachine _'lglaqons pendant que le
i'_frig_rateur est branch,.
f;loignez les doigts des parties du
rOfrigOrateur off l'on peut facilement se
pincer : les espaces entre les p()rtes et les
placards s(mt to/tjours _troits. Sovez prudent
lorsque wins tvrlnez les portes de l'appareil
ell pr6sence des enfimts,
D_brauchez votre r_frig&rateur avmat
de le nettoyer et de le r6parer.
REMARQUE : Nous wins reconllnandons
vivelnent de confier toute r_paration fi un
technicien qualifi6.
• Avmlt de remplacer tree mnpoule grill_e,
lnettez le colnlnutateur de huni&re principale
ell position OFF (axrbt) pour (_teindre la
huni&re afin d'_viter tout contact avec tall
fil soils tension. (Une alnpoule grill_e
peut se briser pendant l'op_ration).
REMARQUE : i,orsque vous placez les
colnlnandes de telnpg_rature (Ill r(eti'ig(erateur
Sill" OFF (arrSt), l'alilnentation 81ectrique
de l'alnp(mle n'est pas coupSe.
• Ne faites PAS recougeler des aliments
surgelSs qui out complStemeut d_gel&
ik DANGER. t RISQUES POUR Id ?,SENFANTS
I,es enfimts pris au pi&ge ou Inorts d'asphyxie
sont tot!iours d'actualit_. I,es appareils de
r_frig&'ation abandon_s sont toujours aussi
dangereux, in6ine si o15 n'attend que "quelque
jours" pour s'en d_barasser. Si vous ne gardez
pas votre ancien appareil, veuillez suivre les
directives ci-dessous afin de pr_venir les
accidents.
Avant de vous d6barasser de votre vieux
appareil de r_fl'ig_ration:
• D&nontez les portes.
• i.aissez les clavettes ell place afin d'elnp&cher
les enfimts de grilnper fi l'int&'ieur.
REH Gt ?,RANTS
Toils les appareils de r_frig&'ation contiennent
des r_fl'ig&'ants qui, confornl_ment aux lois
tiad&'ales, doivent _tre enlev_s awmt tome
_liluination de l'appareil. Si vous vous
d_barrassez de vieux appareils de r_frig_ration,
v&'ifiez, aupr&s de la soci6t6 qui s'occupe de
leur 61ilnination, ce que wins devez taire.

IMPORTANT SAFETY INSTRUCTIONS
HOW 7"0 CONNECT EI ?,CTRICITY
Do not, under rely circumstmlces, cut or
remove the third (ground) prong from the
power cord. For personal safety, this appliance
must be properly grounded.
The power cord of this appliance is equipped
with a 3-prong (grounding) plug which mates
with a standard 3-prong (grounding) wall
outlet t() minimize the possibility of electric
shock hazard ti'om this appliance.
Have the wall outlet and circuit checked
by a qualified electrician to make sm'e the
outlet is properly grotmded.
Where a standard 2-prong wall outlet is
encountered, it is wmr personal responsibility
and obligation to have it replaced with
a properly grotmded 3-prong wall outlet.
Use of a GFI (Grotmd Fault lnterHq_tor) is not
recommended ti)r the reii'igerator outlet.
The appliance should always be plugged into
its own individual electrical outlet which has
a w)ltage rating that matches the rating plate.
This provides the best peril)finance and also
prevents overloading house wiring circuits
which could cause a fire hazard from
overheated wires.
DO NOT USE AN ADAPTER PLUG TO
CONNECT THE REFRIGERATOR TO
A 2-PRONG OUTLET.
DO NOT USE AN _2XTENSION CORD
WITH THIS APPLIANCE.
Never mq)lug an appliance by pulling on the
power cord. Always grip the plug firmly and
pull straight out fl'om the outlet.
Repair or replace immediately all power cords
that have become fl'aved or otherwise damaged.
Do not rise a cord that shows CI'ilcks OI" _lbI'_lsion
damage along its length or at either end.
When moving the appliance, be careflfl not to
roll over or damage the power cord.
SAVE THESE INSTR UCTYONS
IMPORTANTES INSTRUCTIONS DE SI CURITI
_ _" "7 4 _ _" 7 4
RA CCORDEMEN7 ETa;CT'RIQUE
Ne coupez _fi retirez en aucun cas la troisibme
broche (raise fi la terre) de la fiche du cordon
d'alimentation. Pour votre s6curit6, cet
appa_eil doit 6tre correctement mis a la terre.
I,e cordon d'alilnei_tation de cet appareil est
muni d'une fiche fi 3 broches (raise fi la terre)
qui se branche darts une prise mural ordinaire
a 3 alv(_oles (raise a la terre) pore _r(_duire au
minimmn les risques du chocs (dectriques.
Faites examiner la prise de courant et le circuit
par un (dectricien qualifi(_ pour vous assurer
que la prise est correctement raise fi la terre.
Si la prise murale est (111type standard
fi 2 alv_oles, il vous incombe de la thire
remplacer par tree prise fi 3 alvg_oles
correctement raise fi la terre.
i)utilisation d'un interrupteur de d(_fimt
a la terre (GFI-Grotmd Fault Inter_uptor)
n_st pas recommand(_ pour la prise de
courant du rOfl'ig(_rateur.
I,a machine a gla_ons doit tot{jours _tre
branchO darts sa propre prise de torn'ant,
dont la tension nominale est identique a
celle indiquOe sin" la plaque signalOtique.
Cette precaution est recolnlnand(_e pour
garantir un rendement optimum et Oviter
tree sm'charge des circuits Olectriques de la
rOsidence, ce qui pourrait cr(_er un risque
d'incendie par sm'schaufli _ des ills.
N'UTILISEZ PAS UNE FICHE D'ADAPTATION
POUR RACCORDER LE RI_:FRIG]_]RATEUR
DANS UNE PRISE MURALE A 2 ALV_:OLFS.
N'UT1LISEZ PAS DE CORDONS
PROLONGATEURS AVEC CET APPARF1L
Ne dObranchezjamais l'appareil en tirant le
cordon d'alimentation. Saisissez termement
la fiche du cordon et tirez droit pour la retirer
de la prise.
R_parez ou remplacez imm(_diatement tout
cordon efliloch(_ ou endommag& N'utilisez
pas un cordon fendillO ou prOsentant des
signes d'usm'e.
I,orsque vous d_placez l'appareil du m m;
taites attention de ne pas la taire fouler
sur le cordon d'alimentation afin de ne pas
l'endommager.
CONSER VEZ CES DIRECTIVES

Temperature Controls
FREEZER FRESH FOOD
)_ @ WATER FILTER
Preset Settings:
Allow 24 hours to reach these preset temperatures.
Buill-ln R@ig'eralors
7 mp ature
contrvIs
Changing
diCtay
temp atures
from °F to °C
The temperature display shows the actual
temperature of the freezer mid fresh food
compaxtments. The actual temperature will
wu'v fron_ the set temi_erature based on tactors
such as door opening, amount of ti)od, defrost
cycling and room temperature.
NOTE: Frequent door openings or door leii
open for periods of time may increase the
internal temperature of the freezer and ti'esh
tood comi_artments temporarily.
To turn off the cooling system in both the
freezer and ti'esh tood compartments, press
either @ pad m_til both displays show OFF.
To turn the cooling system on, press either
@ pad. The preset temperatures of 0°F and
37°F will appear in the display:
To change the temperature display
between Fahrenheit and Celsius, press
Temp Display °C/°E
To check the current temperature setting
for the fresh food or freezer compartment,
press tile @ or @ pad once. After 5 seconds,
the display will retm'n to the actual temperature.
To change the temperature settings, press
the @ or @ pads to desired temperatm'e set
point fin" ti'esh ti_ocl and freezer separately.
Allow 24 hours liar the refrigerator to reach the
temperature you have set.
Temperature Ranges
Low High
Fresh Food
Freezer
NOTE: Setting the controls to OFF" stops
cooling, but does not shut off electrical power
to the reti'igerato_:
34°F 45°F
1°(2 7°C
_6°F +6°F
_21°C _14°C
Door
alarm
To turn the Door Alarm feature on, press
DOOR ALARM once. The ACTIVE light will
come on. To turn it otI, press it again.
On models with a dispenser, the Door Alam_
feature is located on the dispenser panel on
the ti'ont of the ti'eezer door.
"_Ahen the DOOR ALARM
is actixe, the alarm will flash •
and beep if)Fro keep the
door open fi_r more than
2 minutes. ((_

Water Filter Cartridge
Built-l*_ I¢_qrigerators
Tile water filter cartrido-e is located in tile
back upper right corner of tile refrigerator
COlllpa i'tlllent.
To Replace the Filter:
The filter camidge is designed
WATERRL'I1ER
to filter 300 gallons of water
(lasting approximately 12 months).
It should be replaced when tile
status light ttwns red or if w)u notice
tile ice cubes getting hollow or small.
Installing the Filter Cartridge:
1.
Remove tile old cartridge by slowly turning
it to tile letL A small amount of water may
drip down. Do not pull down on tile cartridge.
Fill tile new cartridge with water from tile
tap to allow fi)r better flow immediately atter
installation,
3. I,ine up tile arrow on tile cartridge with tile
center of tile holder: Do not push it up into
tile holder;
4. Slowly turn it to tile right until tile cartridge
stops. It will rotate about 1/4 turn. DO NOT
OVERTIGHTEN.
To Reset the Filter Status Light:
Press and hold tile RESET pad tot 3 seconds.
I_ilter Bypass Plug:
Yi)u must use file filter bypass plug:
a) it w)u have a household
re\'elNe osiilosis water svsteli1
and/or another titan ot home
water filtration svsteln
Bypass
Plug
b) if a replacement filter is not
awfilable.
Tile icemaker and dispenser Mll not operate
without tile filter or filter b)pass plug installed.
Replacement Filters:
To order additional Filter cartridges in the
United States, visit our Website at ge.com, or call
GE Parts mad Accessories, 800.626.2002.
Suggested Retail $38.95-47.95
Custome_ in Canada should consult tile xellow
I)ages, tot tile nearest Camco Serxice Center:
Slowlyturn it tothe rigi)t.
Donot overtighten.
Cartridge
Ice & Water Dispenser (on some models)
Buill-ln H_/rig'eralors
Dispenser
with
glass-touch
controls
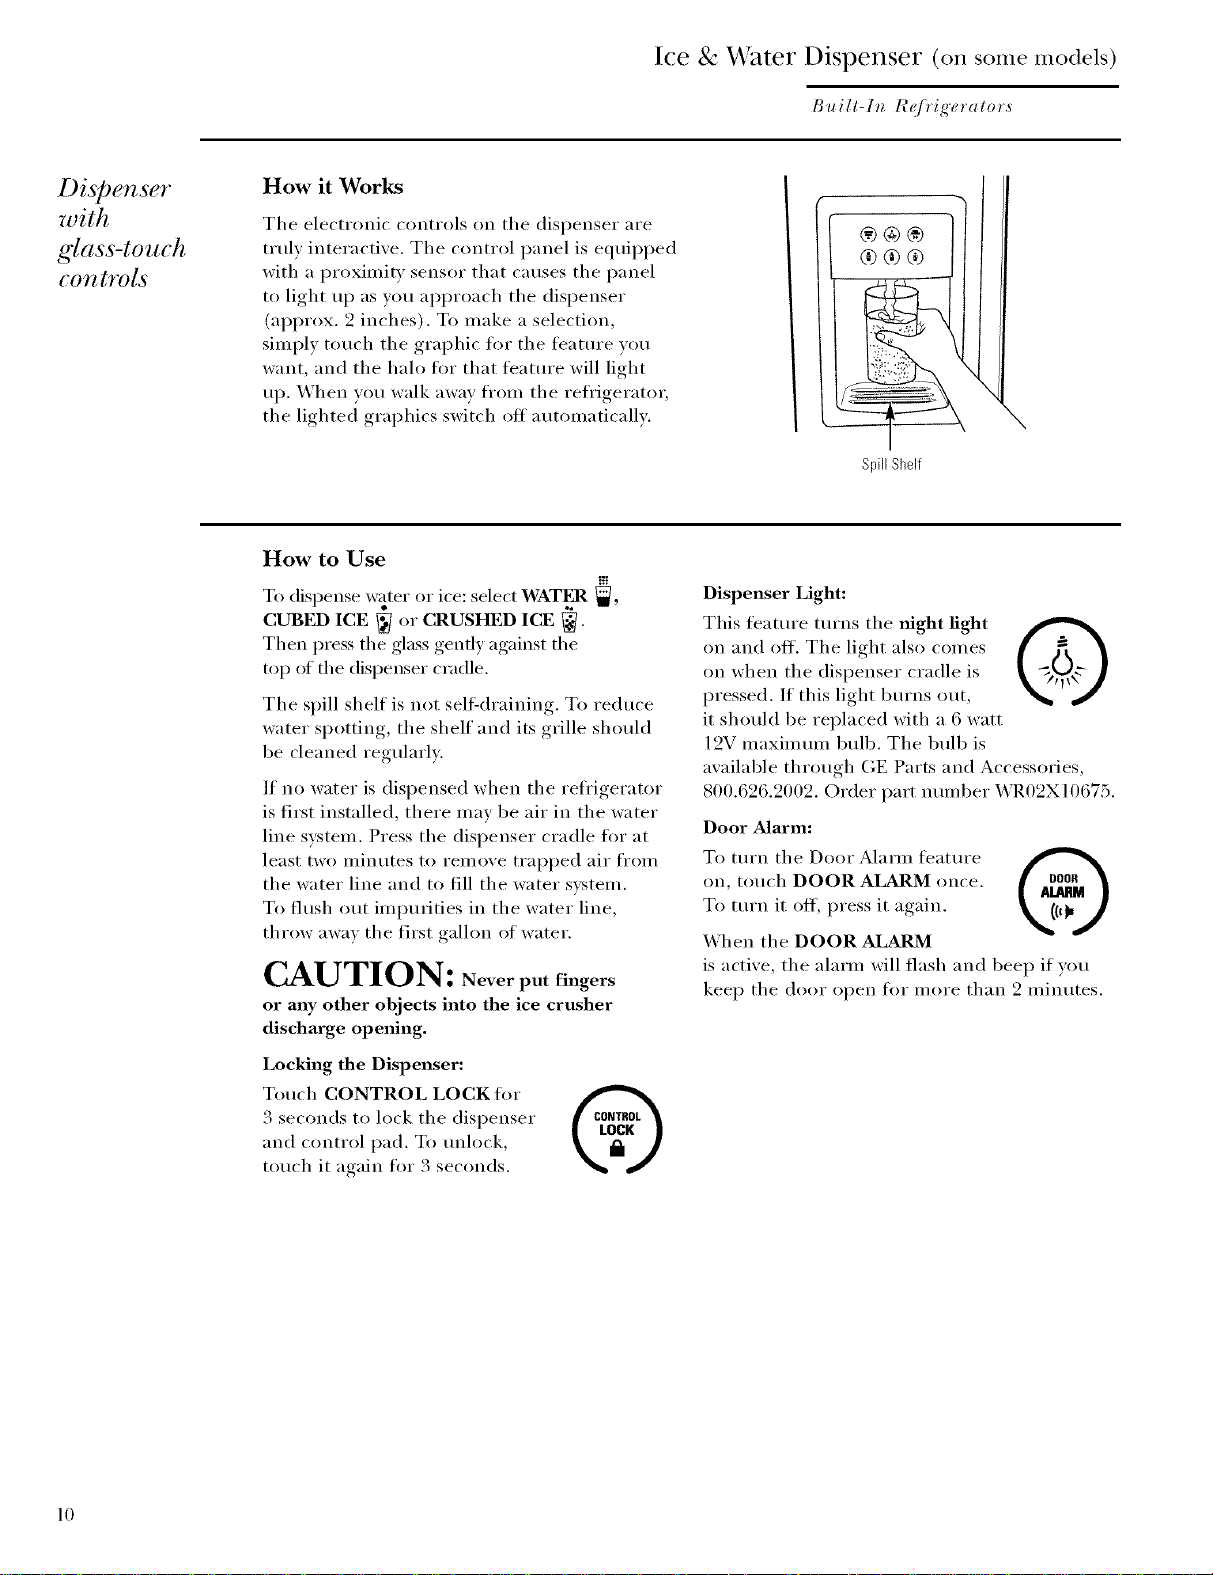
How it Works
The electronic controls on the dispenser are
truly interactive. The control panel is equipped
with a proximity sensor that causes the panel
to light up as you approach the dispenser
(approx. 2 inches). To make a selection,
simply touch the graphic fl_r the fl_ature w)u
want, and the halo tot that feature will light
up. When you walk away from the reti'igeratm;
the lighted graphics switch off automatically.
How to Use
To dispense water or ice: select WATEll _,
CUBED ICE _ or CRUSHED ICE
Then press the glass gently against the
top of the dispenser cradle.
The spill shelf is not sell:draining. To reduce
water spotting, the shelf and its grille should
be cleaned regularl).
If no water is dispensed when the refrigerator
is first installed, there may be air in the water
line sxstem. Press the dispenser cradle for at
least two minutes to remoxe trapped air from
the water line and to fill the water sxstem.
To flush out impurities in the water line,
throw awax the first galhm of water.
CAUTION: Never put fingers
or any other objects into the ice crusher
discharge opmfing.
\
Spill %elf
Dispenser Light:
This fl_ature turns the night light
on and off. The light also comes
on when the dispenser cradle is
pressed. If this light bm'ns out,
it should be replaced with a 6 watt
12V maximmn bulb. The bulb is
available through GE Parts and Accessories,
800.626.2002. Order part nmnber WR02X10675.
Door Alarm:
To turn the Door Alarm feature
on, touch DOOR ALARM once.
To turn it off, press it again.
When the DOOR ALARM
is active, the alarm will flash and beep if )ou
kee I) the door open fl)r more than 2 minutes.
Locking the Dispenser:
Touch CONTROL LOCK for
3 seconds to lock the dispenser
and control pad. To tmlock,
touch it again for 3 seconds.
10

Ice & Water Dispenser (on some models)
Built-In H_/rig'erators
lce storage
bin
Important
facts about
your ice
& water
di@enser
To remove:
I,ilt up the access door to reach the icemaker.
Set the icemaker power switch to the O (off)
position. With the access door closed, support
the storage bin at the bottom while slightly
lilting. Pull bin straight ()tit.
To replace:
Slide the bin back tmtil the tab on the bin
locks into the slot on the shelf. If the bin
does not go all the way back, remove it and
rotate the drive mechanism 1/4 tm'n. Then
push the bin back again.
• Do not add ice fl'om trays or bags to the
storage bin. It may not c_ush or dispense well.
• Avoid overfilling glass with ice and use of
narrow or extra-tall glasses. Backed-up ice
can jam the chute or cause the door in the
chute to fl'eeze shut. If ice is blocking the
chute, poke it through with a wooden spoon.
AccessD_
IceStorageBill"_'_ / 1
• After crushed ice is dispensed, some water
may drip from the chute.
• Soliletililes _1 IIlO/lnd of snow will ][()I'IIl on
the door in the ice chute. This condition is
normal and usually occm's when you have
dispensed crashed ice repeatedly, The snow
will eventually ewq)orate,
• Beverages and toods should not be
quick-chilled in the ice storage bin.
Cans, bottles or food packages in the
storage bin may cause the icemaker
or auger to jam.
• To kee I) dispensed ice fl'om missing
the glass, put the glass close to, but not
touching, the dispenser opening.
• Some crushed ice may be dispensed even
though you selected CUBES. This hal)pens
occasionally when a few cubes accidentally
get directed to the crusher.
• Dispensed water is not ice cold, For colder
water, simply add crushed ice or cubes
before dispensing water,
• The first glass of water dispensed may be
warmer than the tollowing ones, This is
noI'IIlal,
To eliminate drips on the spill shelf, tilt the
glass in slightly when disl)ensing, watei:
11

Automatic Icemaker
Built-lu I¢_q)'ig'eralors
Automatic
icemaho
A newly-installed refrigerator may take
12-24 hours to begin making ice.
The icemaker will produce seven cubes per
cycle--ai)i)roximately 15 cycles in a 94-hour
period, depending on fl'eezer compartment
tellli)erattlre , rOOlll tei/li)erattlre , ntllllber of
door openings and other use conditions.
If the refligerator is operated betore the water
connection is made to the icemaker, set the
power switch to O (off).
When the refrigerator has been connected
to the water supply, set the power switch to
I (on). The green light will come on.
Throw awav the first flfll bucket of ice.
Be sure nothing interferes with the sweep
of the teeler arm.
When the bin fills to the level of the teeler
arm, the icemaker will stop producing ice.
It is normal tot several cubes to be joined
together.
If ice is not used fl'equently, old ice cubes
will become cloud> taste stale and shrink.
PowerSwitch
GreenPower
Ligl_t FeelerArm
After the icemaker has been turned on again,
there will be a delay of about 45 minutes
before the icemaker resumes operations.
NOTE: In homes with lowe_=than-average
water pressure, you may hear the icemaker
water wdve cycle on several times when
making one batch of ice.
Icemaker
12

Clinlate Control Drawer
Built-In I¢_/)'ig'eralors
Climate
Control
dr([_lJer
How it Works
The Climate Control feature is a system of
dmnI)e_, a tim, a temI)eramre thermistor;
a heater and a specially designed tray.
The Climate Control drawer can be used
to chill items quickl 5 thaw t0ods quickly or
store items at their opfim um teml)eratures.
The drawer is tightly sealed to prevent the
drawer's temperature ti'om causing temperature
fluctuations in the rest of the reiiJgerato_:
SELECT TEMP_Use this teature to store
items at their optimum temperatures.
The CITRUS setting will maintain a drawer
temperature of 39-47°F by cycling a small
heater off and on as needed. The PRODUCE
setting will maintain the drawer temperature
at 31-38°F by drawing in additional cold air as
needed. The MEAT setting will maintain the
drawer temperature at 27-37°F by drawing in
additional cold air as needed.
ILXPRESS CHILL---This fl_ature can be used
to cool items in minutes, rather than hours.
Extra cool air is circulated throughout the
drawer. Once the cycle is complete, the
drawer will revert to the pre-set fl'esh fl)od
teml)erature.
ILXPRESS THAW This fl_ature thaws items
in hotu_ rather than da):s. Food is gently
thawed in a cool environment by circulating
air throughout the drawer. Temperature is
maintained in the drawer by cycling a small
heater off and on as needed. Once the thaw
cycle is complete, the pan will automatically
a_!just to a temperature of 97-37°F to store the
tood at its optimum temperature.
Climate Control Tray--Besides using the
specially designed Climate Control tray
when using the drawe_; it can also be used
as a chilled serving tray to kee I) foods cold.
NOTE: By turning the controls on the Climate
Control drawer ott, the drawer can be used as a
standard sealed produce pan.
How to Use
Empty the drawer. Place the trav in the
drawer. Place the items on the tray and
close the drawer completely.
Select the Express Thaw, TM Express Chill TM or
Select 7bmp TM pad. The display will come on.
Press the pad until the light appears next
to the desired setting. Use the chart on the
next page to determine the best setting.
• To stop a ligature betore it is finished,
press that teature's pad until no options
are selected and the display is off.
• During Express Thaw TM and Express ChilU M
the display on the controls will count
down the trine remaining in the cycle.
• After the Express Thaw TM cycle is
complete, the drawer will reset to the
MI_T setting (27-37°F) to hel I) preserve
thawed items until they are used.
CLIMATE CONTROL DRAWER _
• The displayed actual temperature of the
Clfinate Control drawer may w_ry slightly
from the SET temperature based on usage
and operation environinent.
NOTE: For food safety reasons, it is
recommended that foods be wrapped in
plastic wrap when using Express Thaw. TM
This will hel I) contain meat juices and
improve thawing perfln'mance.
Express 7haw TM Express ChilUM
13

Climate Control Drawer
Buill-l_z I¢_J)'ig'eralors
Climate
Control
chart
NOTE: Results may vary depending on packaging, starting temperature and other fl>od traits.
PRODUCE • 30 MIN • 1.5LBS •
MEAT • 45MIN • 3.0LBS •
Ciwus Setting (39-47°F)
Oranges, i,emons, I,imes,
Pineapple, (_antaloupe
Beans, C/iC/lUlbei3,
Tomatoes, Peppe_,
Eggplant, Squash
Produce Setting (31-38°F)
Strawberries, Raspberries,
I(dwifruit, Petal, Cherries,
Blackberries, Grapes, Plums,
Nectarines, Apples
_sparagus, Broccoli, Corn,
Mushrooms, Spinach,
Cauliflower; Fade, Green
Onions, Beets, Onions
Meat Setting (27-37°F)
Raw Meat, Fish and Poultry
15 Minutes
1 Beverage Can (12 oz)
2 Small Juice Boxes
(C_8 oz each)
30 Minutes
• Wine (750 ml bottle)
• 2 to 6 Beverage Cans
(12 oz each)
• 2 Plastic 20 oz Bottles of
Beverage
• 4 to 6 Small Juice Boxes
(6-8 oz each)
• 3 Foil Juice Packets
45 Minutes
• 2 I,iter of Beverage
• 1/2 Gallon of Juice
• Gelatin--1 package
• Individually _4¥apped
• Haml)tuger Patties (0.5 lb)
• Chicken Breasts (1.5 lbs)
• Ground Beef (1.5 lbs)
• Smak (1.5 lbs)
• Chicken Breasts (3.0 lbs)
• Ground Bed (3.0 lbs)
• Steak (3.0 lbs)
0.5 Lbs. (4 hours)
Filet Mignon (0.5 lb)
1.5 Lbs. (8 hours)
3.0 Lbs. (12 hours)
Control
loch
14
Control Lock
Press and hold this pad fi_r 3 seconds to
lock the settings fi_r the Clfinate Control
drawer. To unlock, press and hold fi_r
another 3 seconds.

Storage Pans
Built-In I¢_qrigeralors
Sealed
dell pan
Sealed
produce
pa72s
Use the Sealed Deli Pan fin" the convenient
storage of lunch meats and cheese, hors
d'oeuw'es, spreads and snacks. The pan and
shelf to which it is attached can be a(!justed
to any height.
The top pan has a(!iustable humidit)lexels fin.
the higher humiditx lexels required by most
xegetables and lower humiditx lexels required
for most fi uits.
The second pan is designed to provide
constant high humidity levels.
Make sure the drawers are closed completely
to maintain the correct humidity level.
NOTE: The Climate Control drawer can be
used as another sealed produce pan by turning
the controls on the Climate Control drawer off.
The temperature inside the drawer will be the
same as the fresh fl)od compartment.
A(ljustable
humidity
control
High
humidity
storage
How hmg produce can be stored will depend
upon the type of tood and its condition when
placed in the pans.
Slide the control all the way to the VEG (HI)
setting to provide high humidity: Slide the
control all the way to the FRUIT (LO) setting
to provide lower humidity levels.
Storing unwrapped foods in a high humiditx
enxironment keeps foods fresh b_, retainino
the natural moisture content of fi)ods such as:
• Artichokes
• Asparagus
• Beets, topped
• Blueberries
• Carrots
• Cele U
• (:herries
• Corn
• (:ucumbers
• (:urrants
• Greens, lea_
• I_ettuce
• Parsle_
• Peas, green
• Radishes
• Pdml)ar b
• Spinach
• Tomau_es, ripe
As in any refrigerated storage area, it is
recoiiliilended that foods with strono odors
be stored wrapped--fi)ods such as:
• Broccoli • Cal)bage • Parsnips
• Brussels sprouts • Cauliflower • Turnips
• Green oniollS
Low
humidity
storage
I,ower humidit) storage should be used for
items such as:
• Apples
• Apricots
• Grapes
• mtlshr00111s
• Nectarines
• Oranges
• Papayas • Squash,
• Peaches StlII/l?ler
• Pears • Strm_berries
• P0n/egranates • _ulgerines
• Mangoes
• Raspberries
15

Climate Control Drawer and St() age Pans
Built-l*_ I¢_frigeralor,s
r
nra_uer
and pan
F(?TI_OrU(I I
To renlove a drawer or pall:
1. Pull the pan out to the stop position.
2. I,ilt the fl'ont of the pan tip and out of
the wire holder,
3. I,ilt the back of the pan up and out.
To replace a pall:
1. Place the back of the pan in the wire holder;
making sm'e the wire holder fits into the
grooves on the back of the pan.
2. I,ower the fl'ont of the pan into the wire
holder,
3. Press firmly on the top of the pan to snap it
into the wire holder,
16

Shelves and Bins
Buill-ln ICq/}'ig'eralors
How to
rearrange
your shelves
Tempered glass shelves in the fl'esh fi_od
comi)arm/ent and wire shelves in the fi'eezer
compartment are a(ljustable, enabling you to
make etticient shelf arrangements to fit your
tamilv's tood storage needs.
To remove shelves:
Tilt shelf up at front, then lilt it up and out
of tracks on rear wall of reti'igerator.
Door bins All door bins, except fi)r the deep gallon door
bin, are ac!justable and can be moved up and
down to meet wmr storage needs. The deep
gallon door bin can be removed for cleaning.
To remove any Bin:
I,itt the bin up and slide it toward you.
To replace shelves:
Select desired shelf height. With shelf fl'ont
raised slightly, engage top lugs in tracks at rear
of cabinet. Then lower fl'ont of shelf until it
locks into position.
Removable
wine ra&
The rack can be attached to the lett or
right side of any shelf. It is designed to hold
a bottle, including a 2 liter bottle, on its side.
17

Wire slide-out fl'eezer baskets can be pulled out
t()I" e[Isv [Iccess to fFozen tOo(1s.
To relnoYe:
Pull basket out. I,ilt the fl'ont of the basket up
and then take it out.
This slide-out rack can be used to easily access
fl'ozen juices or toods.
Shelves and Bins
Buill-ln ICq]}'igeralors
Sabbath
Mode
Prvduct Kit
(available at
extra cost)
The Sabbath Mode Product Kit was designed
fiw use on the ]ewish Sabbath and Holidays.
The Sabbath Mode teatm'e makes it possible
tot obser\m_t.Jews to refl'igerate and fl'eezer
fi_od dm'ing the dm'ation of the holiday.
The Sabbath Mode featm'e can be set to
override typical reactions to actions in your
refl'igerator. While in the Sabbath Mode
yore" refl'igerator will still operate normally.
However the refl'igerator will not respond to
vour actions.
DISPLAYS, ALARMS and LIGHTS--The main
temperatm'e control and Express Chill displays
will be deacti\:_ted; theretm'e they will not be
lit, sotmd a tone or operate when touched.
Door alarms and lights will be disabled.
ICE and WATER DISPENSER---The proximity
sensor and dispenser touch sensor icons will
not operate. Ice or water cannot be retrieved
fl'om the dispenser.
ICEMAKER_The icemaker will continue
to operate. The icemaker can be disabled by
While in the Sabbath Mode vou mav notice
the tan running when the door is opened;
however, this is not a result of wmr actions.
The thn will operate at random times. The
defl'ost heater will continue to defl'ost the
refl'igerator and fl'eezer and will be activated
on a timer. The defl'ost heater will not defl'ost
as a I'es/llt of door ol)enings or [lllV cons/lillei"
actions.
opening the fl'eezer, opening the ice storage
bin door and setting the icemaker power
switch to the O (off) position (see Automatic
l(emal:eO. To obtain ice, open the freezer door
and remove the cubed ice fl'om the ice bin.
This Sabbath Mode Product Kit can be
lmrchased from yore" local appliance dealer.
The ZSAB] Kit is designed ti)r use with
Monogram Built-In Refl_igeratm_: 36" 42" and
ON/OFF To activate, raise the top grill
panel, set the Sabbath Mode switch to the
ON position. A green I,ED light will be visible
below the Sabbath Mode Kit switch. The light
will be visible when the grille is closed between
the grille door and compartment doors.
18 be installed b_ a qualified set\ice technician.
48" Side-by-Side models mantdactured after
February 2004 and 36" Bottom-Freezer models
inanufilctured alter April 2004. To locate
wmr nearest dealer visit our web site ge.com
or call 1.800.626.2000. In Canada, call
1.888.880.3030. Order Kit # ZSAB1.
NOTE: The Sabbath Mode Product Fdt Inust

re and (;leaning
Built-In I¢_J}'igeralors
Cleaning
outside
The dispenser spill shelf
mid the m'ea beneath it
should be cleaned
periodically with a mild
liquid dish detergent.
Dispenser cradle--Befl)re cleaning, lock the
dispenser by touching CONTROL LOCK fin.
3 seconds to prevent activating the dispenser.
Clean with waHn water and a mild liquid
dish detergent. Rinse thoroughly and
wipe dry. Unlock the dispenser by touching
CONTROL LOCK tot 3 seconds.
Do not use chemical cleaners to clean the
dispenser or any part of the dispenser.
Door hm_dles and trim--Clean with a cloth
dampened with soapy water. Dry with a sott
cloth.
Keep the outside clean. Wipe with a clean
cloth lightly dampened with mild liquid dish
detergent. Dry with a clean, soft cloth.
Do not wipe the refl'igerator with a soiled
dish cloth or wet towel. These mav leave
a residue that can damage the finish. Do not
use scom'ing pads, powdered cleaners, bleach
or cleaners containing bleach because these
products can scratch and damage the finish.
Stainless steel_Regularly clean and polish
the Stainless Steel Door Panels and Handles
(on some models) with a commercially
available stainless steel cleaner such as Stainle,ss
Sled ,\lag'it r_ to preserve and protect the fine
finish. Stainless Steal Mag'i_ and the Monogram
polishing cloth are awfilable through GE Parts
and Accessories, 800.(526.2002, or ge.com.
For Stainh, ss Steel Mag'i_, order part number
WX 10X15. For Monogram polishing cloth,
order part n umber WX72X 10001.
Do not use appliance wax or polish on the
stainless steel.
Cleaning
inside
Turn off power at the circuit breaker or
fuse box before clemfing. If this is not
practical, wring excess inoisture out of
sponge or cloth when cleaning around
switches, lights or controls.
Use walm water and baking soda solution--
about a tablespoon (l 5 ml) of baking soda
to a quart (1 liter) of water. This both cleans
and neutralizes odors. Thoroughly rinse
and wipe dry.
Other parts of the refrigerator--including
door gaskets, meat and vegetable drawers,
ice storage bin and all plastic parts--can be
cleaned the same way.
Do not wash m_y plastic refrigerator parts
in the dishwasher.
Do not wash the aluminum Climate Control
tray in the dishwasher. The aluminum will
discolor in the dishwasher.
Avoid clemfing cold glass shelves with hot water
because the extreme temperature difference
may cause them to break. Hmldle glass shelves
carefully, Rough handling of tempered glass
can cause it to shatter.
19

re and (;leaning
Built-In H_qrigeralors
Light bulb
replacement
WARNING - Halogen lights
generate intense heat. Be certain power is off
and lamps haxe sulticient time to cool betore
attemi)ting, to replace.
Power to the lamps can be turned off at the
Master i,ight switch located behind the grille
panel at the top of the refrigerator.
Turning the temperature control to OFF
does NOT remoxe power to the light circuits.
AVERTISSEMENT :
I,es ampoules halog_nes produisent tree
chalem" intense. Assurez-vous de bien couper
le courant et de laisser sultisamment de temps
aux ampoules pour l eur perm ettre de se
refroidir axant d'essmer de les remplacer.
Vous pomez couper le courant en utilisant
le commutatem" de huni&re principale situ(_
derri&re le panneau grillag_ en haut du
r_frig_rateur.
Vous NE COUPEZ PAS l'alimentation
(_lectrique du r(_frig_rateur des circuits de
lmni_res en mettant le bouton de contr61e
de temp&'atm'e en position OFF (arr_t).
Type1 Type2
The refrigerator uses two types of halogen
bulbs:
Type 1 The cohtmns along the back wall
of the fl'esh tood and fl'eezer
compartments are lit up by lamps
located behind the top pan in the
fl'esh tood compartment and the
bottom basket in the fl'eezer
COilli)a i'till en t.
Type 2 These lamps are located inside the
light shield at the top of the fl'esh tood
compartment and on top of the
Climate Control drawer at the bottom
of the fl'esh fl)od compartment.
Type 1 bulbs have a life expectancy of
about 2000 horn's. Type 2 bulbs have a life
expectancy of about 2000 hours. However,
if the bulbs do need to be replaced, thev
can be pro'chased at hardware, general retail
and home improvement stores or through
GE Parts and Accessories, 800.626.2002.
Type 1
Thisis a35watt, 12volt,
TypeMR11 bulb.
If orderingthrough
GEPartsandAccessories,
orderpart WRO2XI1183.
Type 2
This isa 20watt, 12 volt,
TypeTbulb.
If orderingthrough
GEPartsandAccessories,
orderpart WRO2X11184.
20

re and (;leaning
Built-In H_qrigeralors
Using
the Masto
Light switch
Type 1 bulb
replacement
This teature turns off tile lights in tile fl'esh
tood and freezer compartn_ents.
The switch is located behind the grille panel
at the top of the refiigerator, i,ifl up the panel
to access the switch.
NOTE: Before replacing tile bulbs, review
tile light bulb infiwmation and _4_M_NING.
Replacing Type 1 bulbs located in lamps
behind the top pma in the fresh food
compaxtment and the bottom freezer basket
in the freezer compartment:
1. Set tile Master I,ight switch to tile OFF
position (see IAinq" the Master Lig'hl s_vilck)
and allow tile lamps to cool.
2. To access tile lamps in tile fresh food
compartment, remove tile Hmniditv Control
pan. See Drawer and Pan Ra,,noval section.
Raise the lid of the pan up to expose the
light cover.
To access the lamps in the fl'eezer
coi//partlllent_ relllOVe tile bottolll ti'eezer
basket. See Freezzr Baskels section.
3. On tile back wall there is a crowed light
shield. Grasp each end of tile light shield.
Pull tile shield toward wm and tile tabs
on the shield will release fl'om the slots in
the housing.
Theswitch is located
behindthegrille panel.
-. ............... °_°
WARNING - Tile light shield must
be replaced or tile heat from tile bulb could
damaoeo the refrigerator,
AVERTISSEMENT :
Vous devez remettre en place l'_cran _'llmni_re
pour ne pas endollllllager votre i'efl'igei'atetlr
avec la chalem" produite par l'ampoule.
7. Reset the Master i,ight switch to the ON
position.
4. Remove tile glass above tile bulbs by pulling
it straight out.
NOTE: Always follow bulb inanufilcturer's
directions tot handling and replacing bulbs.
5. Remove tile bulb by holding tile base and
pulling straight up. Replace with a new bulb.
6. Replace the glass by sliding it into place.
Then replace the light shield by resting the
top lip of the shield on top of the light
housing. Then press the sides until the tabs
pop into the slots in the housing.
21

re and (;leaning
Built-In I¢_J)'ig'eralors
Type 2 bulb
replacement
NOTE: Before replacing the bulbs, review
the light bulb intormation and X4_M_NING.
Replacing Type 2 bulbs in lamps located inside
the light shield at the top of the fresh food
compaJctment:
1. Set the Master I,ight switch to the OFF
position (see L_ing" the Ma,_ter Lig'ht swihh)
and allow the lamps to cool.
2. If the X*Vater Filter Cartridge is installed
remove it and replace with the filter
bypass plug.
3. Holding the light shield with one hand,
rotate the sui)port tabs until thev clear the
front of the light shield. Then push back on
the light shield, lower the shield at the fi'ont
and take out.
4. Remove the 4 screws securing the light
housing to the ceiling. There are two screws
at the fl'ont and two at the back.
i,ower the light housing at the fl'ont, then
pull it toward you so the tabs at the back of
the light housing come out of the slots on
the back wall. The lamp assemblies will
release fl'om the holders.
%pport tabs Upperlight
Screws
Slots
shield
22
protector to
access the bulb. ][
Turn thelamp "_ @ 1
NOTE: Always fl_llow bulb manutactm'er's
directions fin" handling and replacing bulbs.
7. Remove the bulb by holding the base and
pulling straight out. Replace with a new bulb
and replace the lamp i)rotector.
WARNING - l)rotectOrs
must be replaced or the heat fl'om the bulb
could damage the refligerator.
AVERTISSEMENT :
Vous devez remettre en place les _crans
protecteurs des ampoules pour ne pas
endommager votre rg_ti'ig_rateur avec la
chalem" produite par les ampoules.
gbthousing
8. Holding up the light housing, place each
lamp assembly in its holder. Feed the
attached wires through the slots and tuck
the wires outside the side of the light
housing,
Insert the tabs on the back of the light
housing in the slots on the back wall.
Raise the light housing into position and
secm'e with the timr screws.
10.
Replace the light shield and rotate the
suI)port tabs back out so they suI)port the
fl'ont of the shield.
11.
Remove the filter bypass plug and replace
with the X,Vater Filter Cartridge. Reset the
Master I,ight switch to the ON position.

re and Cleaning
Built-In H_qrigeralor.s
7}pe 2 bulb
replacement
NOTE: Before replacing the bulbs, review
the light bulb intormation and X4'ARNING.
Replacing Type 2 bulbs in lamps located in the
top of the Climate Control drawer:
1. Set the Master i,ight switch to the OFF
position (see {Aing" the Master Lig'hl switch)
and allow the lamps to cool.
2. To access the lamps, remove the second
produce pan. See Drawer and Pan Ronoval
section.
3. The lamps at the back, that lace up, can be
litted out. To access the lamp that shines
into the Climate Control drawer, twist the
holder until the arrow points towards the
back of the refl'igerator, then litt up.
4. Turn the lamp
protector to
access the bulb.
NOTE: Always follow bulb manutacturer's
directions tin" handling and replacing bulbs.
assemblies
5, Remove the bulb by holding the base and
pulling straight out. Replace with a new bulb
and replace the lamp protector.
WARNING - L.mpprotectors
must be replaced or the heat fl'om the bulb
could damage the refl'igerator,
AVERTISSEMENT :
Vous devez remettre en place les _crans
protecteurs des ampoules pore" ne pas
endommager w)tre r_fl'ig_ratem" avecla
chaleur produite par les ampoules.
6. Reset the Master I,ight switch to the ON
position.
Climate Control drawer lamp
23
re and Cleaning
Built-In H_qrigeralor,s
Cleaning the
condgTIs_"
There is no need fl)r routine condenser
cleanings in normal home operating
enviromnents. However, in enviromnents
that mav be particularly dusty or greas>
the condenser should be cleaned (at least
annually) tot efficient refl'igerator operation.
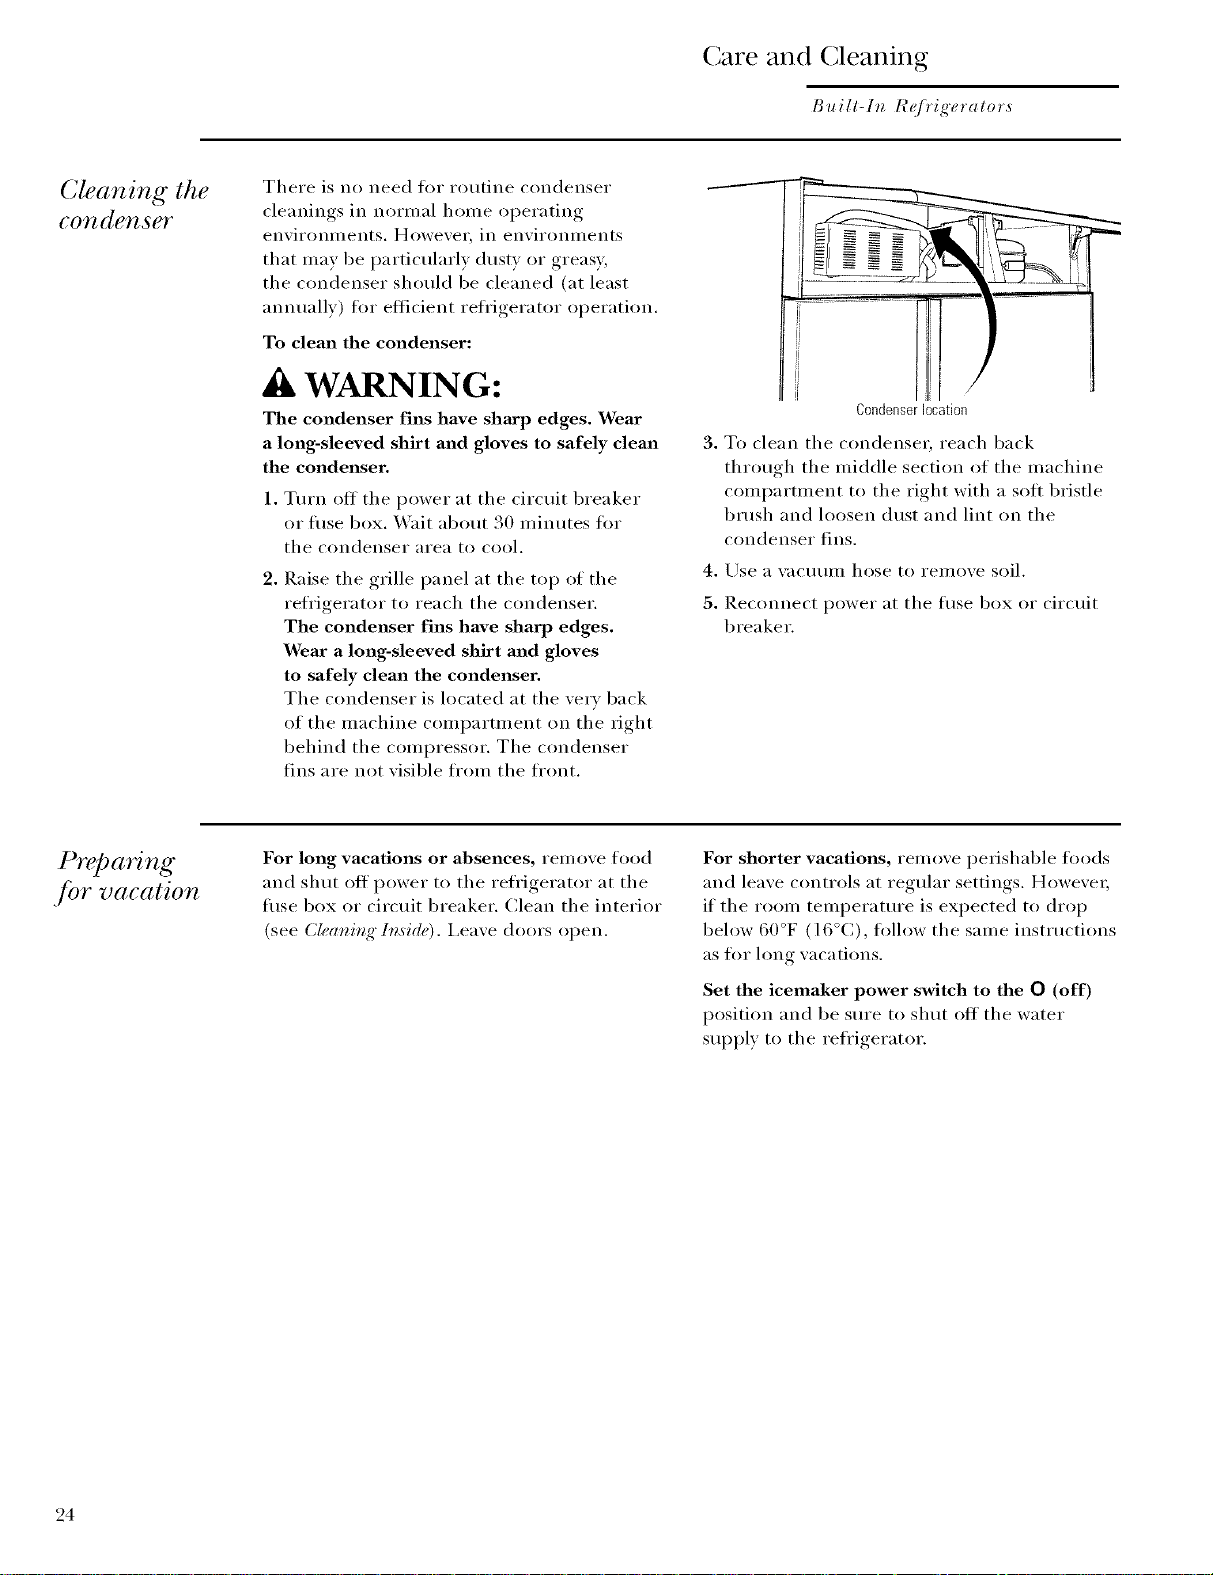
To clean the condenser:
WARNING:
The condenser fins have sharp edges. Wear
a long-sleeved shirt and gloves to safely clean
the condenser.
1. Turn off tile power at tile circuit breaker
or fllse box. Wait about 30 minutes for
tile coildeiisei" ai'ea to cool,
Raise tile grille panel at tile top of tile
refl'igerator to reach the condenser.
The condenser fins have sharp edges.
Wear a long-sleeved shirt and gloves
to safely clean the condenser.
The condenser is located at the very back
of tile machine compartment on tile right
behind the compressor. The condenser
fins are not visible fl'om tile fl'ont.
Condenserlocation
3. To clean tile condense_; reach back
through the middle section of the machine
compartment to tile right with a soli bristle
brush and loosen dust and lint on tile
condenser fins,
4. Use a _ac/itlin hose to i'elno;e soil,
5. Reconnect power at tile fllse box or circuit
breaker.
PreI)aring
jbr vacation
For long vacations or absences, Yell/ove food
and shut off power to tile refl'igerator at tile
fllse box or circuit breaker. Clean tile interior
(see Cleaning{" In,side). i,eave doors open.
For shorter vacations, rein ove perishable fi)ods
and leave controls at regular settings. However;
if the room temperature is expected to drop
below 60°F (l 6°C), fidlow tile same instructions
as fi)r hmg w_cations.
Set the icemaker power switch to the O (off)
position and be sure to shut off tile water
supply to the refl'igerator.
24

The Problenl Solver
Built-In I¢_(/)'ig'eralors
Questions ?
Use this
problem
solver, t
PROBLEM POSSIBLE CAUSE
REFRIGERATOR
DOES NOT OPERATE
MOTOR OPERATES
FOR LONG PERIODS
OR CYCLES ON AND
OFF FREQUENTLY
(Modern refrigerators
with more storage
space and a larger
freezer require
more operating time.
They start and stop
often to maintain
even temperatures.)
OPERATING
SOUNDS
• May be in defl'ost cycle when coinpressor does not operate fin" about
30 ininutes.
• Teml)erature control set at OFF.
• If interior light is not oil reii'igerator may not be phlgged in at
wall outlet.
• The filse is blown/circuit breaker is tiJpped. Replace filse or reset
the breaker.
• Norinal when refi'igerator is first phlgged in. Wait 24 houI_ fin" the
reti'igerator to completely cool down.
• The new \_riable speed compressor is designed to run fi)r longer
periods of tiIne to optiInize efficiency and noise. You may notice the
coml)ressor and/or tim speeds accelerate based upon door ol)eifings
and/or increased fl)od loads.
• You inay hear the rims si_iiming at high speeds. This hai_i_ens when
the reti'igerator is ill'St phlgged in, when the doors are opened
frequently or when a large amount of fl)od is added to the
reti'igerator or ti'eezei" coini_artmeists. The rims are heli_ing to
inaintain the correct teml)eratures.
• Door left open or package holding door open.
• If either door is open fl)r over 3 ininutes, you may hear the rims
coine on in order to cool the light.
• Hot weather or frequent door oi_enings. This is norinal.
• Teinperature controls set at the coldest setting. See Tempemlure
ControL_.
• Refi'igerator is so quiet, that inost of the tiine you will hear low or no
oi_erating noise.
• Norinal fan air flow--one tim blows cold air through the
fl'esh flIod and fl'eezer coml)artmeists--aimther tim cools
the coissl)i'essoi" is/()toil
• The rims change speeds in order to provide optiinal cooling and
energy savings.
• These NORMAl, sounds will also be heard fl'oin tiine to tiine:
- You nlay hear a whooshing or gurgling sound when the doors
close. This is due to pressure equalizing within the reti'igerator.
- A water drii)i)ing noise inay occur during the deti'ost cvcle as ice
Inelts ti'om the evaporator and flows into the drain pan.
- The flow of refl'igerant through the fl'eezer cooling coils inav
inake a gurgling noise like boiling water,
- Water drol)l)ing on the defl'ost heater can cause a sizzling,
i)oi)ping or buzzing sound during the defrost cycle.
- You Inav hear cracking or i)oi)ping sotmds when the reti'igerator is
first phlgged in or during/alter the defl'ost cvcle. This hal)liens as
the refl'igerator cools to the correct teml)erature.
- Electronic dainpers click open and closed to provide optiinal
cooling and energy savings.
- The comi)ressor inay cause a clicking or chiri)ing SOUlSd when
atteinpting to restart (this could take up to 5 minutes).
- The electronic control board inay cause a clicking SOUlSd when
relays activate to control reti'igerator coml)oisents.
- Ice cubes drol)ping into the bin and water iuiming in pipes
as iceinaker refills.
- The iceinaker water wflve will buzz when the iceinaker fills
with water.

The Problem Solver
Built-l*_ I¢_qrigeralor,s
Questions ?
Use this
problem
solver/
PROBLEM POSSIBLE CAUSE
DOOR NOT CLOSING
Package may be holding door open.
PROPERLY
Check tile door gasket; it may out of position.
Refl'igerator is not level. See h_slallalio_ h_strlutio_s.
ACTUAL
Refl'igeratorjust plugged in. Allow 24 hom_ fi_r system to stabilize.
TEMPERATURF,
NOT EQUAL TO SET
TEMPERATURE •
VIBRATION OR •
Door open for too hmg. _Mlow 24 horn's fl)r system to stabilize.
Warm fl)od added to refl'igerator. Allow 24 horn's fl_r system
to stabilize,
Defl'ost cycle is in process, Allow 24 hours fl)r system to stabilize,
Refl'igerator may not be properly installed.
RATTLING
(Slight vibration
is normal.)
FRESH FOOD
• Temperature controls not set cold enough. See 7_mp(,mttm, Conlm[,_.
OR FRF, EZER
COMPARTMENT
TOO WARM
• _,\'arm weather or fl'equent door openings.
• Door leti open tot long time.
• Package mav be holding door open.
FROST OR ICE
• Door leti open or package holding door open.
CRYSTALS ON
FROZEN FOOD
• Too ti'eqtlent or too long (looi" ol)enings.
(Frost within package
is normal.)
SLOW ICE CUBE •
FREEZING
Door ill}iv have been leti open.
Freezer conll)ai'tlnent is too w}lI'II/. Set tile tl"eezer to a colder
temperature.
ICE HAS •
ODOR/TASTE
Old cubes need to be discarded.
Ice storage bin needs to be emptied and washed.
Unsealed packages in fl'eezer compartment mav be transmitting
odor/taste to ice.
Kee I) open box of baking soda in refl-igerator; replace eve_w 3 months.
Poo_=tasting incoming water. Replace water filter.
AUTOMATIC •
Icemaker power switch is in the O (off) position.
ICEMAKER
DOES NOT WORK
_'ater supply turned ott or not connected.
Fi'eezei" colnl)ai'tnlent too w[lYill,
Piled up cubes in storage bin may cause icemaker to shut off
to0 soon, I,evel ctlbes in bin,
MOISTURE FORMS •
Not unusual dm'ing periods of high humidit)'. Wipe surthce (liT.
ON CABINET
SURFACE BETWEEN
THE DOORS
Controlling hmnidity and temperatm'e in the kitchen with air
conditioning will eliminate this condition.
26

The Problem Solver
Built-In I¢_qrigeralor,s
PROBLEM
MOISTURE
COLLECTS INSIDE
REFRIGERATOR
HAS ODOR
INTERIOR LIGHT
DOES NOT WORK
SMALL OR
HOLLOW CUBES
POSSIBLE CAUSE
• Too fl'equent or long door openings.
• In hunfid weather, air carries inoisture into refl'igerator when doors
are opened,
• Controlling hmnidity and temperature in tile kitchen with air
conditioning will eliminate this condition.
• Foods with strong odors should be tightly covered.
• Check tor spoiled tood.
• Interior needs cleaning. See C(m" and Cleaning{:
• Kee I) open box of baking soda in refl'igerator; replace every
3 months.
• No power at outlet.
• I,ight bulb needs replacing. See Care and (lcanbg:
• Master I,ight switch is in the OFF position.
• The refl'igerator is equipped with a satetv teature that turns ott
the refl'igerator lights when the doo_ have been opened tor an
extended period. Once the refl'igerator doors are closed and the
lights have had time to cool, they will again come on automatically
when tile doors are opened.
_hter filter clogged. Replace the filter or use the filter bypass plug.
• Check fi)t" a COlmection to a Reverse Oslnosis water svsteln.
If an RO is connected, remove the water filter and install the
original bypass plug that came with tile refit.
WATER ON
THE FLOOR
• If vou use an extra tall glass or pitcher, or overfill a glass or pitcher,
you may be jamming tile cubes in tile flmnel chute. Thev can fllse
inside tile chute and drop out later, leaving water (3i"ice on tile floor.
UNEVEN SPACING
OR GAPS BETWEEN
• I_itchen cabinets are not level or square. Call tile installer or
ca bin etm aker.
DOORS AND
KITCHEN CABINET
POOR DOOR • Fresh fl)od door needs ac!iusting. See ln,slallalion ln,slruclion,s.
ALIGNMENT OR
ONE DOOR HIGHER
• Refrigerator is not lexel. See AIlet_lio_ ln,_laller lnstH/ctions.
THAN THE OTHER
WATER HAS POOR •
TASTE OR ODOR
WATER IN FIRST •
GLASS IS WARM
X_ater dispenser has not been used fin" a hmg tilne. Dispense water
tmtil all water in s_steln is replenished.
Norlnal when refl'igerator is first installed. X4ait 24 hours fl)r tile
refl'igerator to comi)letely cool down,
X4]_ter dispenser has not been used fin" a long tilne, Dispense water
until all water in sx:steln is rei)lenished,
X4]_ter svsteln has been drained, Allow several hours fi)r rei)lelfished
suI)ply to chill.
27

The Problem Solver
Built-l*_ I¢_qrigeralors
Questions ?
Use this
problem
solver, t
PROBLEM POSSIBLE CAUSE
WATER DISPENSER
DOES NOT WORK
ICE DISPENSER
DOES NOT WORK
WATER SPURTING
FROM DISPENSER
NO WATER OR ICE
PRODUCTION
X4'ater supi)ly line turned off, restricted or not connected. Call wmr
installer tot proper water SUl)ply line connection.
• _'ater filter clogged. Replace the filter or use the filter bypass plug.
• The CONTROL LOCK on the dispenser has been actiw_ted.
To unlock the dispenser, touch CONTROL LOCK tot 3 seconds.
• Air may be trapped in system. Press the dispenser arm tot at least
2 minutes.
• Ice bin improperly installed. See be stomg'e bi*_.
• Icemaker turned oil or water SUl)ply turned ott. Turn on icemaker
or water SUl)ply.
• Ice cubes are fl'ozen to the icemaker teeler arm. Remove cubes.
• hTegular ice clumps in storage bin. Break up with fingertip pressure
and discard remaining clumps.
• Freezer may be too warm. A(!just freezer control to a colder setting,
one position at a time, until clumps do not flwm.
• _,V_ter filter clogged. Replace the filter or use the filter bypass plug.
• The CONTROl, I,OCK on the dispenser has been activated. To
unlock the dispense_; touch CONTROl, I,OCK tot 3 seconds.
•Newlv installed filter cartridge. Run water ti'om the dispenser ti)r
3 minutes (about one and a halfgalhms).
• _'ater SUl)ply line turned otf, restricted or not connected. Call vom"
installer fi_r proper water SUl)ply line connection.
• _V_ter filter clogged. Replace the filter or use the filter bypass plug.
CUBED ICE WAS
SELECTED BUT
CRUSHED ICE
WAS DISPENSED
FOOD IS NOT
THAWING/CHILLING
IN CLIMATE
CONTROL DRAWI]R
SELECT TEMP
F_TURE ON
CLIMATE CONTROL
DRAWER IS NOT
WORKING
CLIMATE CONTROL • Control I,ock feature is active. Press and hold the CONTROL LOCK
DRAWER CONTROLS pad on the Climate Control d_awe_ fo_ 3 seconds.
DO NOT WORK
• I,ast setting was CRUSHED ICE. A few cubes were lett in the cHisher
fl'om the previous setting. This is normal.
• If continual crashed ice is dispensed while cubed ice is selected,
a_!just ice bin. See ](e slol¥1_'(_ bill
• Packaging. Increase time or re-package in plastic.
• X_'rong weight selected. Select a larger weight.
• Item with high tat content. Select a larger weight.
• Not using the Climate Control tray. Place items on tray and allow
space in between items fl)r better air flow.
• Fresh Food temperature control is set at warmest setting.
This is normal. In order to minimize energy usage, the Select Temp
teature is disabled when the Fresh Food control is set at the
warmest setting.
28

Performance Data Sheet
SmartWaterFiltration System
MWF Cartridge
Thissystemhas beentestedaccordingto NSF/ANS142/53forreductionofthesubstanceslisted below.
Theconcentrationof the indicatedsubstancesinwater entering thesystemwas reducedto a concentration
lessthanor equal to the permissible limitfor water leaving thesystem,asspecified inNSF/ANS142/53.*
100%safety factors built in for unmetered usage)
Standard No. 42: Aesthetic Effects
Parameter
(]hl(Mne
T&O
Particulate**
Parameter
"]itrbidi U 0.28 K]'[
(;}st_ 4 #/L
Xslx'stos < 1 MF/L
I _ead at pI t 6.5 < 0.001 rag/I,
I _ead at pI t 8.5 < 0.001 rag/I,
Mercm) at 11It 6.5 0.0(X)7 rag/I,
Mercuu at 11It 8.5 0.0(X)6 rag/I,
Aladflor 0.0(X)4 mgq,
I Jndane <0.0(X)02 rag/I,
2,4-1) 0.0110(X) mg/L
"]i)x_@_ene 0.0010(X) mg/L
Benze_/e 0.015 rag/I. _+_10% 0.0145 mg/L
Caflx)flmm 0.080 rag/I._+ 10% 0.0830 mg/L
1,4didfiorobenzene 0225 rag/I._+ 10% 02283 mg/L
Atrazine 0.(X)9mg/L _+10% 0.(X)87 mg/L
Tested using a flow rote of O.50gpm; pressure of 60 psig; pH of Z5 _+O,5; temp, of 68° _+5°F (20° _+3°C)
** Measurement in Particles/ml. Particles used were 0,5-1 microns
*** NTU:Nephelometric Turbidity units
USEPA
MCL
I
I
I
99.95% Reducti(m
9!)% Reduction
0.015 rag/I.
0.015 rag/I.
0.(X)2 rag/I,
0.(X)2 rag/I,
0.(X)2 mg/L
0.(X)02 mg/I
0.070 rag/I,
0.003 rag/I,
0.001 rag/I,
0.040 rag/I,
0.075 rag/I,
0.003 mg/L
Challe_zge Concentration
at least 10,0(X)parfi(les/mI_
USEPA
MC_
1 NTL
hffluent
2.0 mg/I_+ 10%
hffluent
(]lallenge Concentration
11± 1 NTU***
Minimum 50,0(_) L
107 tO 108filx'_S/I,; > l()pm
0.15 mg/L _+10%
0.15 mg/L _+10%
0.(X)6rag/I, _+10%
0.(X)6rag/I, _+10%
0.04 mg/L +_10%
0.002 rag/I, _+10%
0.210 rag/I, _+10%
0.015 rag/I,_+ 10%
hlfluent Effluent
Average Average Maxhnmn
1.96 mg/I, 0.06 mg/L 0.1] mg/L
6,400,(X)0 #/mI, 58,833 #/mI, ] 50,0(X) #/mI,
Sumdard No. 53: He.ill Effects
hffluent
Average
10.5 NTU
118,750 #/I;
57 MF/L
0.1567 mg/L
0.1433 mg/L
0.0059 mg/L
0.0057 mg/L
0.0367 mg/L
0.0020 mg/L
02033 mg/L
0.0160 mg/L
0.996 MF/L
< 0.001 rag/I,
< 0.001 rag/I,
0.000350 rag/I,
0.000325 rag/I,
0.00023 rag/I,
< 0.00002 rag/I,
0.00337 mg/L
0.00100 mg/L
0.000500 rag/I, 0.000500 mg/L
0.00I(X)0 rag/I. 0.0010(X) mg/I_
0.000500 rag/I, 0.000500 mg/L
< 0.0005 rag/I, < 0.0005 rag/I,
Effluent
Average Maximtun
0.14 NI'U
< 1 #/I,
% Reduction
Average Mhlhnmn
96.77% !)4.74%
99.14% 97.97%
% Reduction
Average Mhlhnmn
98.54% 97.20%
> 9!).!)9% > 99.99%
99.60% 99.39%
(.}!).:46% 9929%
99.30% 99.29%
94.70% 87.50%
93.20% 8!).29%
99.34% 98.67%
99.00% 98.!)5%
98.:42% 94.50%
93.44% 91.67%
96.51% 95.83%
98.78% 98.65%
99.78% 99.77%
94.22% 93.33%
Mhl. Required
Reduction
> 50%
> 85%
Mhl. Requ_ed
Reduction
0.5 N'II_
> 99.95%
> 99%
0.010 mg/L
0.010 mg/L
0.002 mg/L
0.002 mg/L
0.002 mg/L
0.0002 mg/I
0.070 mg/L
0.(X)3mg/L
0.(X)5lng/I_
0.04 rag/I,
0.075 mg/L
0.003 mg/L
Operating Specifications
• (_apaci_': certified flit up t() 300 galhms (1 1 35 1); up to six months for models with(rot a replacement filter indicator light;
up t() (me year for models with a replacelnei_t filter indicator light
• Pressure requirement: 40-1 20 psi (2.8-8.2 bar), non-sh(ick
• Temperature: 33-100"F (0.6-38°C)
• FhIw rate: 0.5 gpm (1.9 lpm)
General Installation/Operation/Maintenance Requirements
• Flush new cartridge at flfll flow for. minutes t() pm'ge out trapped air.
• Replace cartridge, when flow bec()mes too shiw.
3 "
Special Notices
• lnstallatioi_ instluctioi_s, parts aim service axailability, aim standard warrantx are inchMed with the product when shipped.
• This dlJnking water systei//illtlSt be nlaintained according to illant/filCttlrer's instructions, ii_cluding replacelnent (if filter cartridges.
• D(I not use with water that is inicr(ibi(ihlgically unsafe ()r (if Hnkn(iwn qualit) with(rot adequate disinfection befllre (1i"
atter the sxstem. Sxstems certified flit cxst reducti(m max be used (m disinfected water that mav c(mtain filterable c) sts.
• The c(n_tanfilmnts ()r ()ther substances relnoved ()r reduced bv this water treatn_ent sxstem are not necessarily in x(mr water.
• Check for con_pliance with the state aim local laws aim regulations.
• Note that while the testing was perf(irlned under standard lab(iratorx, c(n_diti(ms, actual perf(/rlmmce nlay xary. Svstelns inust
be installed aim operated in accordance with inalmfacturer's recomlnelMed procedures and guidelines.
System Tested and Certified by NSF International against ANSIiNSF Standard 42 & 53 tot the reduction off
Standard No. 42: Aesthetic Effects
Chemical Unit
Chlorine 'Ihst( and Odor
Mechanical Filtration Lnit
Particulate Reduction, Class I
Standard No. 53: Health Effects
(_hemical Reduction Lnit
Machlor and Atrazine Reduction
Benzene and Carbofilrml Reduction
1,4 dichlorobenzene and 2,4-I) Reduction
Lead and I.indane Reduction
Mercmy and Toxaphene Reduction
Mechanical Fihration Unit
'Ihrbidilv Reduction
Cyst and Asbestos Reduction
Manutilctured tor: (;eneral Electric (_ompan}; I,ouisxille, k__40225 29

State of California
Department of Health Services
Water Treatment Device
Certificate Number
05-1698
Date Issued: February 2, 2005
Trademark/Model Designation
MWF
Manufacturer: General Electric Company
Tile water treatment device(s _listed on this certificate have met the testing requirements pursuant to Section
116830 of the Health and Safety Code for the following health related contaminants:
Microbiological Contaminants and Turbidity
Cysts
Turbidity
Organic Contaminants
AlachlOr
Atraziue
Benzene
Carbofuran
Lindane
Mercury
Toxaphene
1,4-dichlorobenzene
2.4-D
Replacement Elements
MWF
Rated Service Capacity: 300 gal Rated Service Flow: 0.5 gpm
Conditions of Certification:
Do not use where water is microbiologically unsafe or with water of unknown quality, except that systems certified for
cyst reduction may be used oll disinfected waters that may contain filterable cysts.
3O

Consumer Services
Built-In H_qrigeralors
With the purchase of your new Monogram appliance, receive the
assurance that if you ever need information or assistance from GE,
we will be there. All you have to do is call---toll-free, t
GE Answer
Center ®
In the USA:
800.626.2000
In-Home Repair
Service
In the USA:
800.444.1845
In Canada:
1.888.880.3030
For Customers
With Special
Needs...
In the USA:
800.626.2000
Whatever your question about any Monogran_ major appliance, GE Answer Center ')
inli)rmation service is available to hell). Yore" call--and your question--will be answered
promptly and courteouslw And vou can call any time. GE Answer Center _'_service is open
24 hours a day, 7 days a week.
OR
Visit ore" X_'ebsite at: ge.com
In Canada, call 1.888.880.3030.
AGE consmner service professional will provide expert repair service, scheduled at a time
that's convenient ti)r you. Many GE Consmner Service company-operated locations offer
you service today or tomorr(m, or at yore" convenience (7:00 a.m. to 7:00 p.m. weekdays,
9:00 a.m. to 2:00 p.m. Saturdays). Ore" thctor)_trained technicians know vom" appliance
inside and out--so most repairs can be handled in just one visit.
(;E offers Braille controls fi)r a xariet) of GE appliances, and
.....
a brochure to assist in I)lannin°_ a barfiet_fl'ee kitchen for i)et_ons
with limited mobility.
(_onsutners v, ith iinl)aired hearing or speech v, ho ha',e access to a
t_
TDD or a conxentional teletypewriter may call 800.TDD.(;EAC
(800.833.4322) to request information or set\ice.
Service Contracts
ln the USA:
800.626.2224
In Canada:
1.888.880.3030
Parts and
Accessories
ln theUSA:
800.626.2002
ln Canada:
1.888.880.3030
You can have the secure teeling that GE Consmner Service will still be there after vour
warranty expires. Purchase a GE contract while vom" warranty is still in efl'ect and vou'll
receive a substantial discount. With a multiple-year contract, you're assured of flttm'e
service at today's prices.
Individuals qualified to service their own appliances can have parts or accessories sent
directly to their home. The GE parts system provides access to ()vet" 47,000 parts...and all
GE Genuine Renewal Parts are fltllv warranted. VISA, MasterCard and Discover cards
are accepted.
User mahltenmace instructions contained in this manual cover procedures intended to be
performed by any user. Other servicing generally should be referred to qualified service
personnel. Caution must be exercised, since improper servicing may cause unsafe operation.
31

Warranty
Bui ll-ln Re]rige ra tors
YOUR MONOGRAM REFRIGERATOR WARRANTY
Staple sales slip or cancelled check here. Proof of original purchase
date is needed to obtain service under warranty.
WHATIS
COVERED
P)om the Date
of the O't_ginal
Purchase
FULL TWO-YFAR WARRANTY
For two xears fl-om date of original purchase, we will proxide, fl-ee of charge, parts and serxice labor ill
_our home to repair or replace any part (!/'the r@_g'eralorthat l_fils because of a man ul_ctming delect.
FULL FIVE-YEAR WARRANTY
For five years li'()m (late of original purchase, we will provide, Ii'ee of charge, parts and service labor
in your home to repair or replace a_i), part r!/'the sealed r@'_wrati_ig" ,_ystem (the compressor, condenseL
evaporator and all connecting tubing) that l_fils because of a manul_lctnring delect.
LIMITED ADDITIONAL SEVEN-YFAR WARRANTY ON THE SFALED SYSTEM
For the sixth through twelith year li'om the (late of the original purchase, we will provide, li'ee of
charge, replacement parts fi)r a_i), part (!/'the sealed _}¢J_wrati) N" ,_ystem (the c(nnpressor, condensel,
evaporator and all connecting tubing) that lifils because of a manulilctnring delect. You pay li)r the
service trip to your home and lot service labor charges.
LIMITED THIRTY-DAY WARRANTY ON WATER FILTER CARTRIDGE
From the (late of the original purchase we will provide, Dee of charge, replacement parts lot
a_i),part r!/'the watcrfiltcr carh'M W that f_fils because of a manuli_cturing delect. During this limited
thirt)-day warrant}, we will also provide, fi'ee of charge, a replacement water fiher cartridge.
This warranty is extended to the original purchaser and any succeeding owner li)r products purchased
lor ordinar_ home use in the 48 mainland states, Hawaii, Washington, D.C. or Canada. In Alaska the
warranty is the same except that it is I,IMITED because you must pa} to ship the prod uct to the
set\ice shop or li)r the service technician's tra\el costs to your home.
All warrant\ service will be provided by our Factory Service Centers or by our authorized Customer
(;are servicers during n(n'mal working hours.
Should )_mr appliance need service, during warranty period or beyond, in the USA call 800.444.1845.
In Canada: 888.880.3030.
WHAT IS NOT
COVERED
197D4946P002
49-60375
26055-01 05-05JR
Printed in the United States
• Service trips to your home to teach you how
to use the product.
• Replacement of house fuses or resetting of
circuit breakers.
• Damage to the product caused by accident,
fire, floods or acts of God.
• Failure of the product if it is used for other
than its intended purpose or used commercially.
• Damage caused after delivery.
• Improper installation, delivery or maintenance.
If you have an installation problem, contact
your dealer or installer. You are responsible
for providing adequate electrical, plumbing
and other connecting facilities.
Some states/provinces do not allow the exclusion or limitation of incidental or consequential damages,
so the above limitation or exclusion may not appl} to you. This warranty gives you specific legal rights,
and you ma\ also ha\e other rights which vat\ li'om state to state/province to province. To know what
}_mr legal rights are ill your state/province, consuh \_mr local or state/provincial consunaer allifil_
ollice or your state's Attorney General.
• Replacement of the light bulbs or water filter
cartridge other than as noted above.
• Replacement of the water filter cartridge due
to water pressure that is outside the specified
operating range or due to excessive sediment
in the water supply.
• Loss of food due to spoilage (in the USA only).
• Incidental or consequential damage caused by
possible defects with this appliance.
Warrantor in USA: General Electric Company,
Louisville, KY 40225
Warrantor in Canada: Camco Inc.
Monogram:
BE Consumer& Industrial
Appliances
General Electric Company
Louisvi//e, KY40225
ge,eom
 Loading...