

GE ZFSB26DRKSS, ZFSB25DTGSS, ZFSB23DRKSS Owner’s Manual
Owner's
Manual
Side-by-Side
Stainless Steel
Free-Standing
Refrigerators
Consumer Information
Stainless Steel Re/}'ig'eralor
Introduction Your new Monogran/ refl'igerator makes an eloquent statement of style, convenience and kitchen
plamfing flexibility. Whether wm chose it Ira" its pm'ity of design, practical storage arrangements or
assiduous attention to detail--or Ira" all of these reasons--you'll find that your Monogram
refrigerator's superior blend of ti)m/and flmction will delight you fin" vea_ to come.
The infimnation on the fi)llowing pages will hel I) you operate and maintain yore" reti_igerator properly.
If wm have any other questions, visit ore" Website at: monogram.corn
ConWn
B@Y(?
using"
_OUY
@igo'ator
Consumer Services
hnportant Phone Nmnbers .............. 31
Model and Serial Nmnbers ............... 3
Perfln'mance Data Sheet ................ 28
Problem Solver . .................... 23-27
Product Registration .................... 3
Safety Instructions .................... 4-7
State of Califln'nia
_.V_ter Treatment Device Certificate ....... 99
X.Varrantv ..................... Back Cover
Care and Cleaning
Cleaning--Outside and Inside ........... 20
I,ight Bulb Replacement ................ 92
Moving ............................... 21
Va ca tio n .............................. 21
Read this manual careflfllv: It is intended to
help you operate and maintain vour new
refl'igerator properly.
Kee I) it handy fin" answers to your questions.
Operating Instructions
Automatic Icemaker . ................ 17, 18
Additional Fea rares .................... 15
Crispers and Pans ...................... 16
CustomCool TM . ..................... 10, 11
Ice and X.V_ter Dispenser . ............... 19
Shelves and Bins .................... 13, 14
Pertormance Air Flow System ............. 8
Temperature Controls ................... 8
TurboCool _'_ . .......................... 9
X_ter Filter . .......................... 12
If wm don't tmderstand something or need
more hell), there is a list of toll-ti'ee consmner
service nmnbers included in the back section
of this ma n ual.
OR
Visit ore" Website at: monogram.corn
Consumer Information
Stainless Steel R</}Sg'erator
Write
down the
model &
serial
n lg _7_lbers
l[you
rexeived a
damaged
@igoator
Save time
& money
You'll see thenl oil a label inside the fl'esh fi_od
comi)armlent at the top on the right side.
Please write these nmnbers on the Consmner
Product Ownership Registration Card included
with the packing material.
hnmediatelv contact the dealer (or builder)
that sold you the refl'igerator.
Befl)re w)u request selwice, check the Problem
Solver in the back of this manual.
Before sending in this card, please also write
these numbers here:
Model Nmnber
Serial Nmnber
Use these nmnbers in any correspondence or
service calls concerning yore" refl'igerator.
It lists causes of minor operating problems that
VO/I C_lI1 correct vourself.
l[you
need
service
To obtain selwice, see the Consmn er Selwices
page in the back of this manual.
X_'e're proud of ore" service and want wm to be
pleased. If for some reason wm are not hai)py
with the service you receive, here are steps to
fl)llow fin" flu'ther help.
For customers in the USA:
FIRST, contact the people who serviced your
appliance. Explain why you are not pleased.
In most cases, this will solve the problem.
NEXT, if you are still not pleased, write all the
details--incl uding yore" ph one n mn be_to:
Manager, Custolner Relations
GE Appliances
Appliance Park
I,ouisville, KY 40225
For customers in Canada:
FIRST, contact the people who selwiced w)ur
appliance. Explain wily you are not pleased.
In most cases, this will solve the problem.
NEXT, if you are still not pleased, write all the
details--inchlding your phone nunfl)er to:
Manager, Consulner Relations
Mabe Canada Inc.
1 Factm T i,ane, Suite 310
Moncton, N.B. El(: 9M3
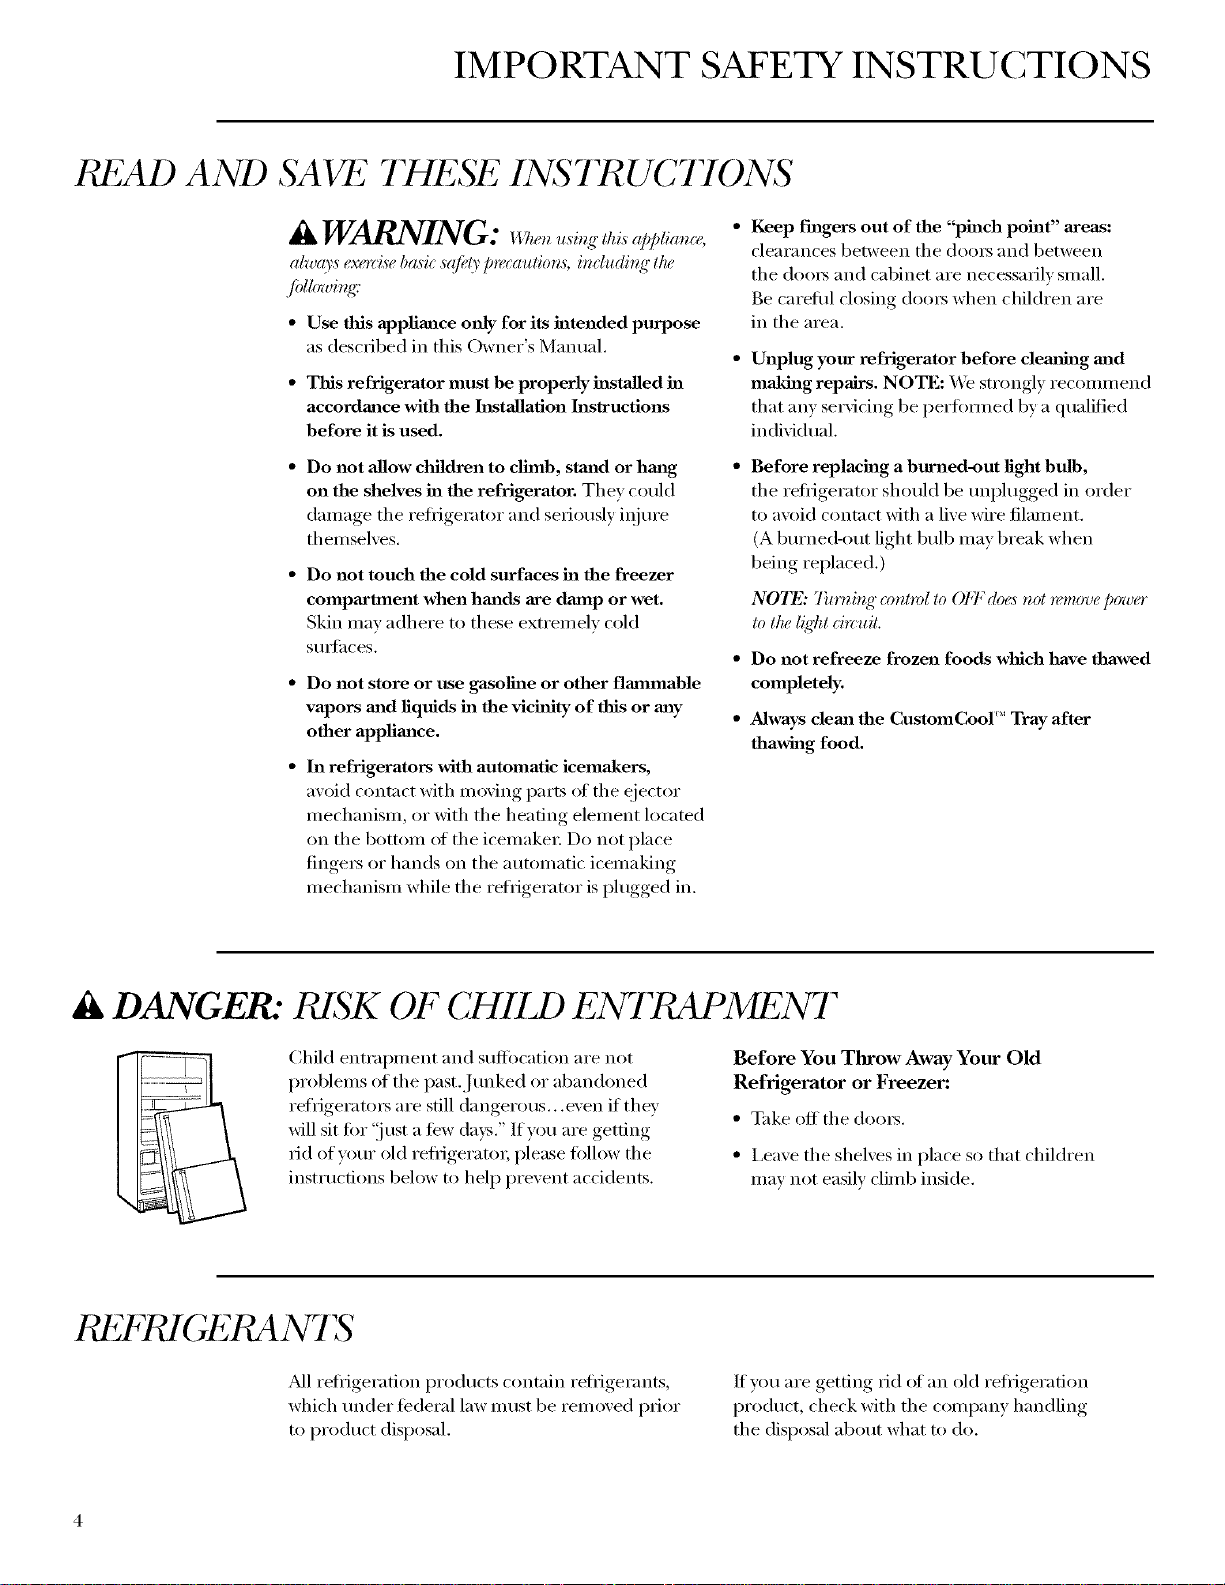
IMPORTANT SAFETY INSTRUCTIONS
READ AND SAVE THESE INSTRUCTIONS
alwtg,s ex(,rdse basi_ s_(bO'precaulion,s, im:{uding #w
fi_ll_rzving:"
• Use this appfimlce only for its intended purpose
as described in this Owner's Manual.
• This refrigerator must be properly installed in
accordance with the hlstallation Instructions
before it is used.
• Keep fingers out of the "pinch point" areas:
clearances between tile dom_ and between
the doo_ and cabinet are necessarily small.
Be careflfl closing dom_ when children are
in the area.
• Unplug your refrigerator before demlh_g and
making repairs. NOTE: We strongly recomlnelad
that any servicing be periimned by a qualified
individual.
Do not allow children to climb, staxld or hmlg
on the shelves in the refrigerator. They could
damage tile reflJgerator and seriously iI_jm'e
themselves.
Do not touch the cold surfaces in the freezer
compartment when hm_ds are dmup or wet.
Skin may adhere to these extremely cold
S/lI]_lces.
Do not store or use gasoline or other flammable
vapors and liquids in the vichfity of this or any
other applim_ce.
In refrigerators with automatic icema_kers,
avoid contnct with moving parts ot tile ejector
mechanism, or with the heating element located
on the bottom ot the icemakei: Do not place
fingei5 or hands on the automatic icemaking
mechanism while the refrigerator is plugged in.
• Before replacing a bunled-out light bulb,
tile reflJgerator should be mq_lugged in order
to avoid contnct with a live wire filament.
(A bm'ned-out light bulb may break when
being replaced.)
NOTE: 7hrniug" conlml to OlqZdoe,s r_ol_vmovep_ver
to tim l_'ht cir(:uiL
• Do not refreeze frozen foods which have thawed
completely.
• Always cleml the CustomCooF' Tray after
thawhag food.
li DANGER." t SK OF CHIIJ_) ENTRAPMENT
Child entrapment and suffocation are not
problems of tile past.Jm_ked or abandoned
will sit tot" ust a tew days " If you are ,ettin ,
rid of yore" old refi'igeratm; please tollow the
t reffigeratm_ are still dangerous...exen if they
instructions below to help prevent accidents.
REFRIGERANTS
_M1refl_igeration products contnin refl_igerants,
which under ti_deral law uulst be rein oxed plJor
to product disposal.
Before You Throw Away Your Old
Refrigerator or Freezer:
• Take offthe dome.
• I,eave tile shelves in place so that children
may not easily climb inside.
If you are oetting rid of an old refl_igeration
product, check with tile comi_anv, handling
tile disposal about what to do.
MESURES DE SI CURITI IMPORTANTES
LIRE ET CONSERVER CES INSTRUCTIONS
AVERTISSEMENT :
vous ulili,v_z1_"*_fiig_:ralelo; ob,v:m:¢zt01(iolo:s,:rtaine,_
p*'_:.mtio_:,_de ha,s,; nolammenl :
• N'utilisez le r6frig6rateur que pour son usage
pr6vu, c()mme d_cfit dans le present manuel.
• InstaMez le r_frig_rateur conform6ment aux
directives d'hlstaJlafion avaJlt de l'utiliser.
• Ne laissez pas les enfmlts grimper, s'asseoir,
se te_fir debout ni se pendxe attx clayettes du
r_frig_rateur. Ils pomTaient endommager le
rg_ffig_ratem _et se blesser gravement.
• Uue fois le r6frigOrateur eu maxche, ne touchez
pas les surfaces froides du cong&lateur, surtout
si vous avez les mains humides ou mouill_es :
la peau risque d'adh&'er 5 ces surtilces ti'_s
ti'oides.
N'eutreposez et n'utilisez pas d'esseuce ou
autres vapeurs et liquides hlflaJumables h
proximit6 de cet appaxeil ou de tout autre
appaxeil Oleclrom_uager.
Pour les rOfrigOratettrs dot6s d'tme machhm
h gla_ons automatique, &'itez le contact avec
les pi_ces mobiles du m&anisme _jectem;
ou avec l'(dg_ment chattflimt situ(_ 5 la pattie
int>riem'e de la machine 5 glacons. Ne posez
pas les doigts ou les mains sin" le mg_canisme
de la machine 5 glaqons pendant que le
rg_fl_ig_ratem" est branch(_.
• _loignez les doigts des parties du r_frig6rateur
ou l'on peut facilemeut se pincer : les espaces
entre les portes et entre les portes et les placards
sont touj om_ _troits. Soyez prudent lo_que
vous fem_ez les portes de l'appareil en prg_sence
des enfimts.
• D&brmachez votre r_frig6rateur avmlt de le
nettoyer et de le r&parer. REMARQUE : Nous
VO/IS i'ecoi//ill_lndons vivement de confier tOtlte
rg_paration 5 tm technicien qualifi_.
• Avm_t de remplacer tree mupotde grill_e,
le r6ti_igg_ratem" dolt &tre dgd)ranch(_ afin
d'6viter tout contact avec {an fil SOILStension.
(Une ampoule gfillg_e peut se briser pendant
l'op_ration).
P_2MAt_UE : Lo_:squev0us pNccz N comman(le
sur g:leiul, l'alim_,ntation dl_,(_glue (le l'ampoul:: n'('s/
pa,_co@&
• Ne facies PAS recougder des aliments surgel6s
qui out compl&temeut dOgel&
• Nettoyez toujours le couteum_t CustomCool'"
apr&s avoir d6gel6 lea aliments.
li DANGER: RISQUES POUR LES ENFANTS
i,es entimts pris au pi&ge ou morts d'asph)xie sont
tot_jom_ d'actualitO. I,es appareils de rOfl_ig&'ation
abandong_s sont toujoui_ aussi dangereux, m_nle
si on n'atmnd que "quelquejoui3" polly s'en
dOlxm_sse_: Si vous ne gardez pas votre ancien
appareil, veuillez suiwe les directives ci-dessous
afin de pr&'enir les accidents.
Avant de votes d6barasser de voa-e vieux
appareil de r6frig6ration :
• Dg_montez les portes.
• I,aissez les clavettes en place afin d'emp_cher
les enflmts de g_imper 5 l'intg_rietm
t 21:Pd(;1,S'P N7 S
Tousles appareils de rbtiJggwation confiennent
des reflJgerants qui, confl)m_Oment aux lois
tkXd&'ales, doivent &tre enlevOs a\m_t toute
_limination de l'appareil.
Si vous vous dgd)arrassez de vieux appareils de
r_tiJg_ration, v&ifiez, aupr_s de la soci_t_ qui
s'occuI)e de lem" Olimination, ce que vous
devez taire.
IMPORTANT SAFETY INSTRUCTIONS
HOW TO CONNECT EI ECTRI(;ITY
Do not, raider any circumstaalces, cut or remove
the third (ground) prong from the power cord.
For personal safety, this appliance must be
properly grounded.
The p_wer cord of this appliance is equipped
with a 3-prong (grounding) plug which mates
with a standard 3-prong (grotmding) wall outlet
to minimize the possibili_' ot electric shock
ha/m'd fl'om this appliance.
Have the wall outlet and circuit checked bv
a qualified electrician to make stue the outlet
is properly gmtmded.
_]_ere a standard 2-prong wall outlet is
encotmtered, it is yore" personal responsibili_'
and obligation to have it replaced with a
properly grotmded 3-prong wall outlet.
The refrigerator should alwa):s be plugged into
its own individual electrical outlet which has
a voltage rating that matches the rating plate.
USE OF EXT NSION CORDS
This provides the best perfinmance and also
prevents overloading house wiring drcuits which
could cause a fire hazard fl'om overheated wires.
Never tmplug yore" refl_igerator by pulling on the
power cord. Mwa):s grip plug firefly and pull
straight out fl'om the outlet.
Repair or replace immediatelv ;all p{_wer cords
that have become fl'ayed or otherwise damaged.
Do not use a cord that sho_vs cracks or abrasion
damage along its length or at either end.
_]_en moving the refl_igerator away fl'om the
wall, be careful not to roll over or damage the
power cord.
Because of potential safety hazax&s under certain
conditions, we strongly recommend against the
use of an extension cord.
SAVE
However; if you m ust use an extension cord, it is
absolutely necessary that it be a UL-listed, B-wire
grotmding _'pe appliance extension cord having
a grounding D'pe plug and outlet and that the
electrical rating of the cord be 15 amperes
(minimum) and 120 w_lts,
THESE INS TR UC770NS

MESURES DE SI CURITI IMPORTANTES
RA CCORDEMENT ELE CTtUQ UE
Ne coupez _firetirez en auctm cas la troisi_me
broche (raise a la terre) de la fiche du cordon
d'a]hnentation. Pour votre s_curit_, cet appazeeil
doit 6tre correctement mis h la terre.
I,e cordon d'alimentafion de cet appareil est
muni d'une fiche 5 3 broches (raise 5 la terre)
qui se branche darts une prise mm'al ordinaire
5 3 alv(aoles (raise 5 la terre) pore" r(aduire au
minimmn les fisques du chocs _lectriques.
Fakes examiner la prise de com'ant et le circuit
par tm (_lectficien qualifi(_ pore" w)us assm'er
que la prise est correctement raise 5 la terre.
Si la prise murale est du _'pe stnndard fi
2 alv&_les, il vous incombe de la edre remplacer
par une prise 5 3 alv0oles correcmment raise
5 la terre.
I,a machine 5 glaqons doit toujouI3 &tre
branch_ darts sa propre prise de com'ant,
dont la tension nominale est identique
5 celle indiqu_e sin" la plaque signal_fique.
CORDONS PR OL ONGA T 2UPuS
Cette pr0caution est recommand_e pour garantir
tm rendement optilmun et &'iter une sm'cha_ge
des circuits 01ectriques de la r0sidence, ce qui
pourrait ci'(_er un risque d'incendie par
sm_cha ufli _ des ills.
Ne d_branchezjamais l'appareil en firant le
cordon d'alimentation, Saisissez ti_m_ement
la fiche du cordon et tirez droit pore" la retirer
de la prise.
R_parez ou remplacez imm&liatement tout
cordon efliloch_ ou endommag_. N'ufilisez
pas tm cordon tbndill_ ou pr_sentant des signes
d' tIS/lI'e.
I,m_que vous d_placez l'appareil du ram; fifites
attention de ne pas la fifire fouler sin" le cordon
d'alimentation afin de ne pas l'endommage_:
Nous vous recommmldons fortement de ne pas
utiliser de cordons prolongateurs h cause des
risques potentiels qu'ils pr6sentent dmls certaJnes
conditions.
Touteiois si vous d_ddez d'utiliser tout de m_m e
tm cordon prohmgatem; il est absolmnent
CONSER VEZ CES DIt ?,CTII&?,S
n0cessaire qu'il s'agisse d'tm cordon 5 3 ills avec
raise 5 la terre pour ap,pareils _lectrom_nage_5
homologu_/5I, (aux Etat>Unis) ou homologu_
CSA (a u Canada), pomwu d'tme fiche et d'tme
prise raises 5 la terre de 15 amperes (minim urn)
et de 120 volts.
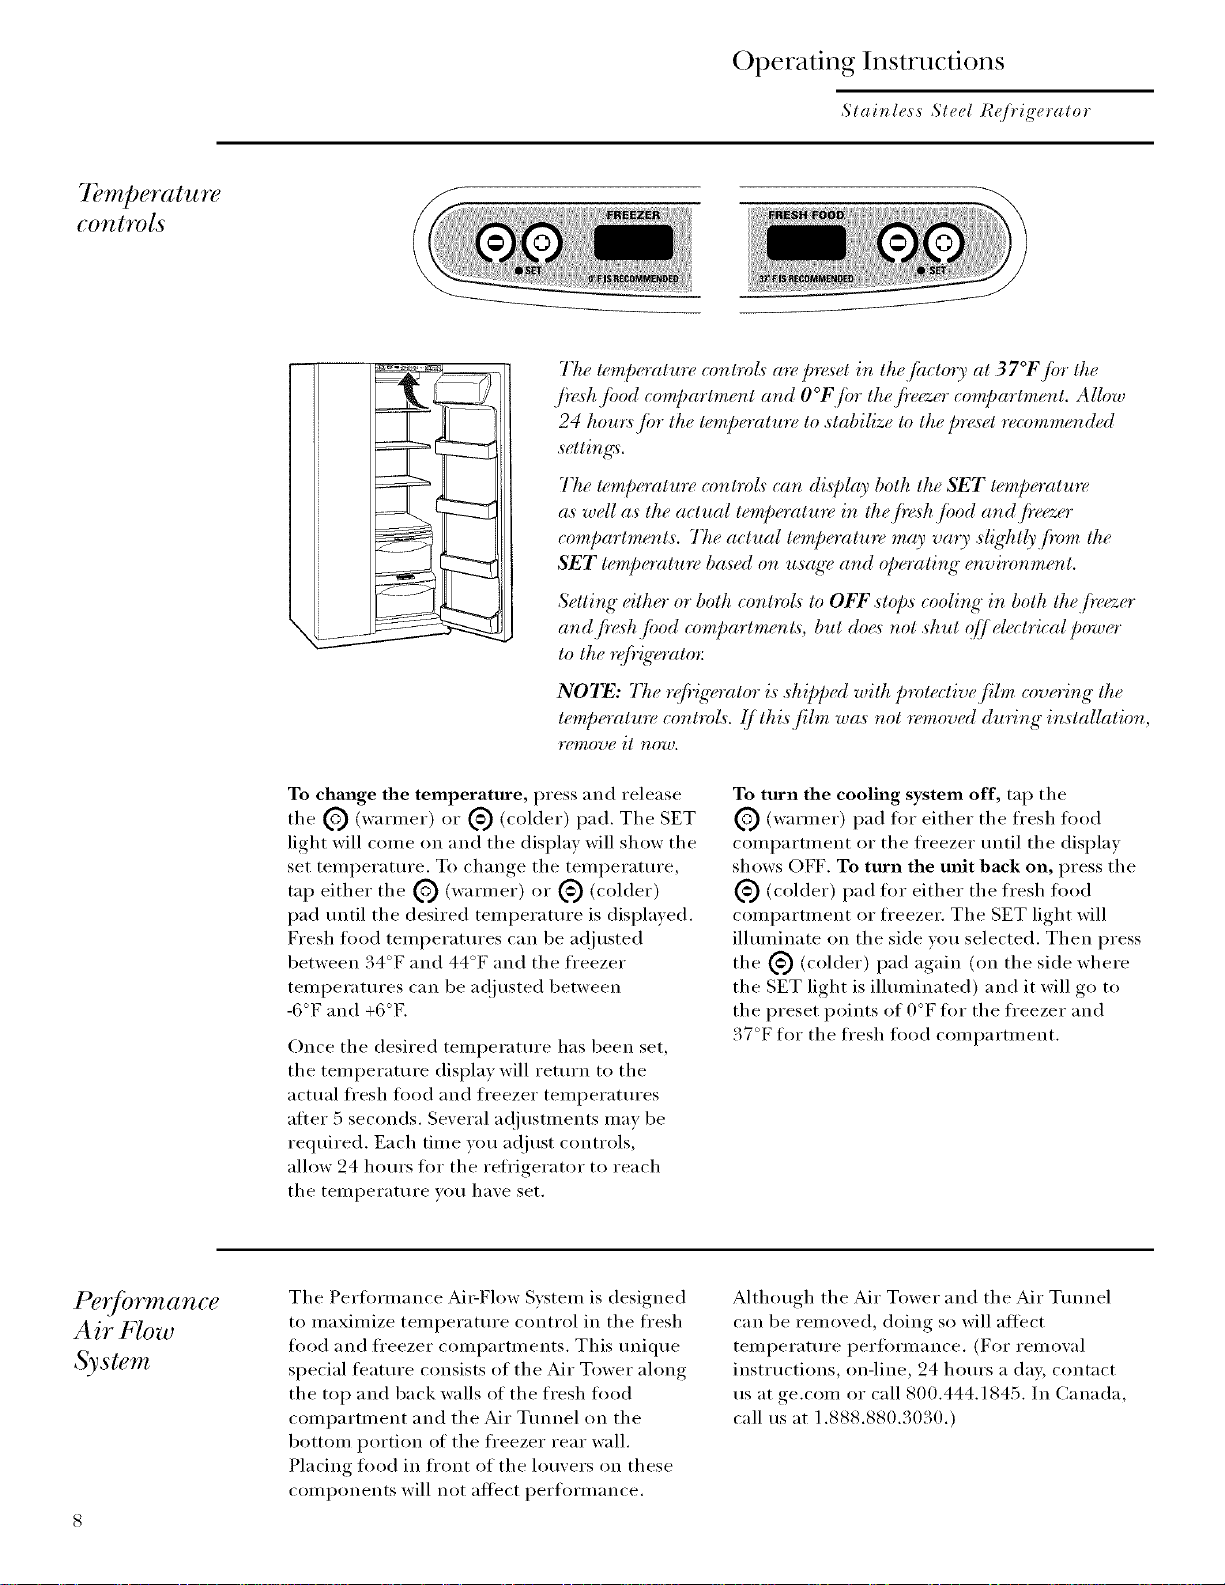
7>m[)erature
controls
Operating Instructions
Stainless Steel IG(/}'igerator
Tbe lempoature <-ontroh a'_z,p_z<setin thejhcto U at 37°Fji, r lbe
l;,o l< ,,d O°F!;,,•t/,,
24 hour:L/br the lempoature to stabilize to the p_>_etrecommended
settinffs.
77_eWmp_*ratu'r_,(-ont_v[_can display both the SET wmp_,ratm_
as well a._the actual tem[wratu'_z, in lbejiz<_hjood and,f!eezer
compartmem._. 77_eactual tem[wratu_z_may va'r), .¢igbtly jir, m lbe
SET tem/,eratu'_z, based on usage and o/wratiug eHvi'mnmem.
Setti*lg" either or both contro£ lo OFF.sto[,.s cooli,lg in both lbejiz,ezer
and,f!_h ji,od c,,mpa'rtm_'m._, but doe_ not shut qff elech@al pow_'r
to the *z_/i'igcrato*:
NOTE: 77_e r@igerator is ,,hip[wd with protective fibv covowg the
tempoatmz, cont,_£. ,!/thi.Lf!lm was not _z'mow'd during installation,
r_,move it now.
To change the temperature, press and release
the ('_ (warmer) or _ (colder) pad. The SET
light will come on and the display will show the
set tenq)erature. To change the telnl)erature ,
tap either tile @ (warn/er) or @ (colder)
pad tmtil the desired temperature is displayed.
Fresh fl)od temperatures can be a(!justed
between 34°F and 44°F and the fl'eezer
temi)eratures can be a(!justed between
-6°F and +6°E
Once the desired temperature has been set,
the temperature display will return to the
actual fl'esh fl)od and freezer temperatm'es
after 5 seconds. Several a(!jUStlnents ill}iV be
required. Each tilne vou at{just controls,
allow 24 hours ti)r the refl'igerator to reach
the temperature you have set.
To turn the cooling system off, tap the
O (warmer) pad ti)r either tile fl'esh tood
compartment or the fl'eezer tmtil the display
shows OFF. To turn the refit back on, press the
(_ (colder) pad ti)r either the fresh fi)od
compartment or fl'eezer. The SET light will
illmninate on the side you selected. Then press
the (_ (colder) pad again (on the side where
the SET light is illmninated) and it will go to
the preset points of 0°F fi)r the freezer and
37°F for the fl'esh food compartment.
I_ (?_7"OT_l<l (Ifl ("e
Air Flow
System
The Peril)finance Ai>Flow Svsteln is designed
to maxilnize temi)erature c(mtrol in the fl'esh
ti)od and fl'eezer compartments. This tmique
special feature consists of the Air Tower along
the top and back walls of the fresh ti)od
comi)arttnet_t and the Air Tutmel on the
bottom portion of the fl'eezer rear wall.
Placing fl)od in fl'ont of the louvers on these
conq)oi_ents will not affect i)erfornmnce.
Although the Air Tower and the Air Tunnel
can be removed, doing so will affect
temi)erature i)ertbrnmnce. (For remowd
ii_structions, on-line, 94 hours a day, contact
us at ge.com or call 800.444.1845. In Canada,
call us at 1.888.880.3030.)
TurboCool""
Stainless Steel R_(/}'ig'erator
How it worhs TurboCool rapidly cools the
refi'igerator compartn/ent in
order to more quickly cool fi)ods.
ZurboCool Use TurboCool when adding
a large _llilOllllt (If ti)od to the refrigerator
compartment, putting away foods atter they
have been sitting out at i'ooi// temperatm'e
or when putting away warm leiiovers. It can
also be used if the reii'igerator has been
without power fin" an extended period.
How to use 1 Press TurboCool. The refrigerator
temperatm'e display will show TC.
2 After TurboCool is complete,
the reti'igerator COll/i_artll/ei_t
will return to the original setting.
Once activated, the compressor will tm'n on
immediately and the rims will cycle on and
off at high speed as needed ti)r 8 horn's.
The compressor will continue to mn tmtil
the refrigerator compartment cools to
approximately 34°F (1 °C), then it will cycle
on and off to maintain this setting. Aiter
8 horn's, or if TurboCool is pressed again,
the refrigerator compartment will retm'n to
the original setting,
NOTES:
• The _/?it_'emtor temperature cannot be changed
during" TurboCool.
• The/h:ezer temperature is not @eted during"
TurboCool.
• 1,17_en@enin q"the @ig'erator door during"
TurboCool, the /?lns will continue to run !/
th_9' have o'eled on.
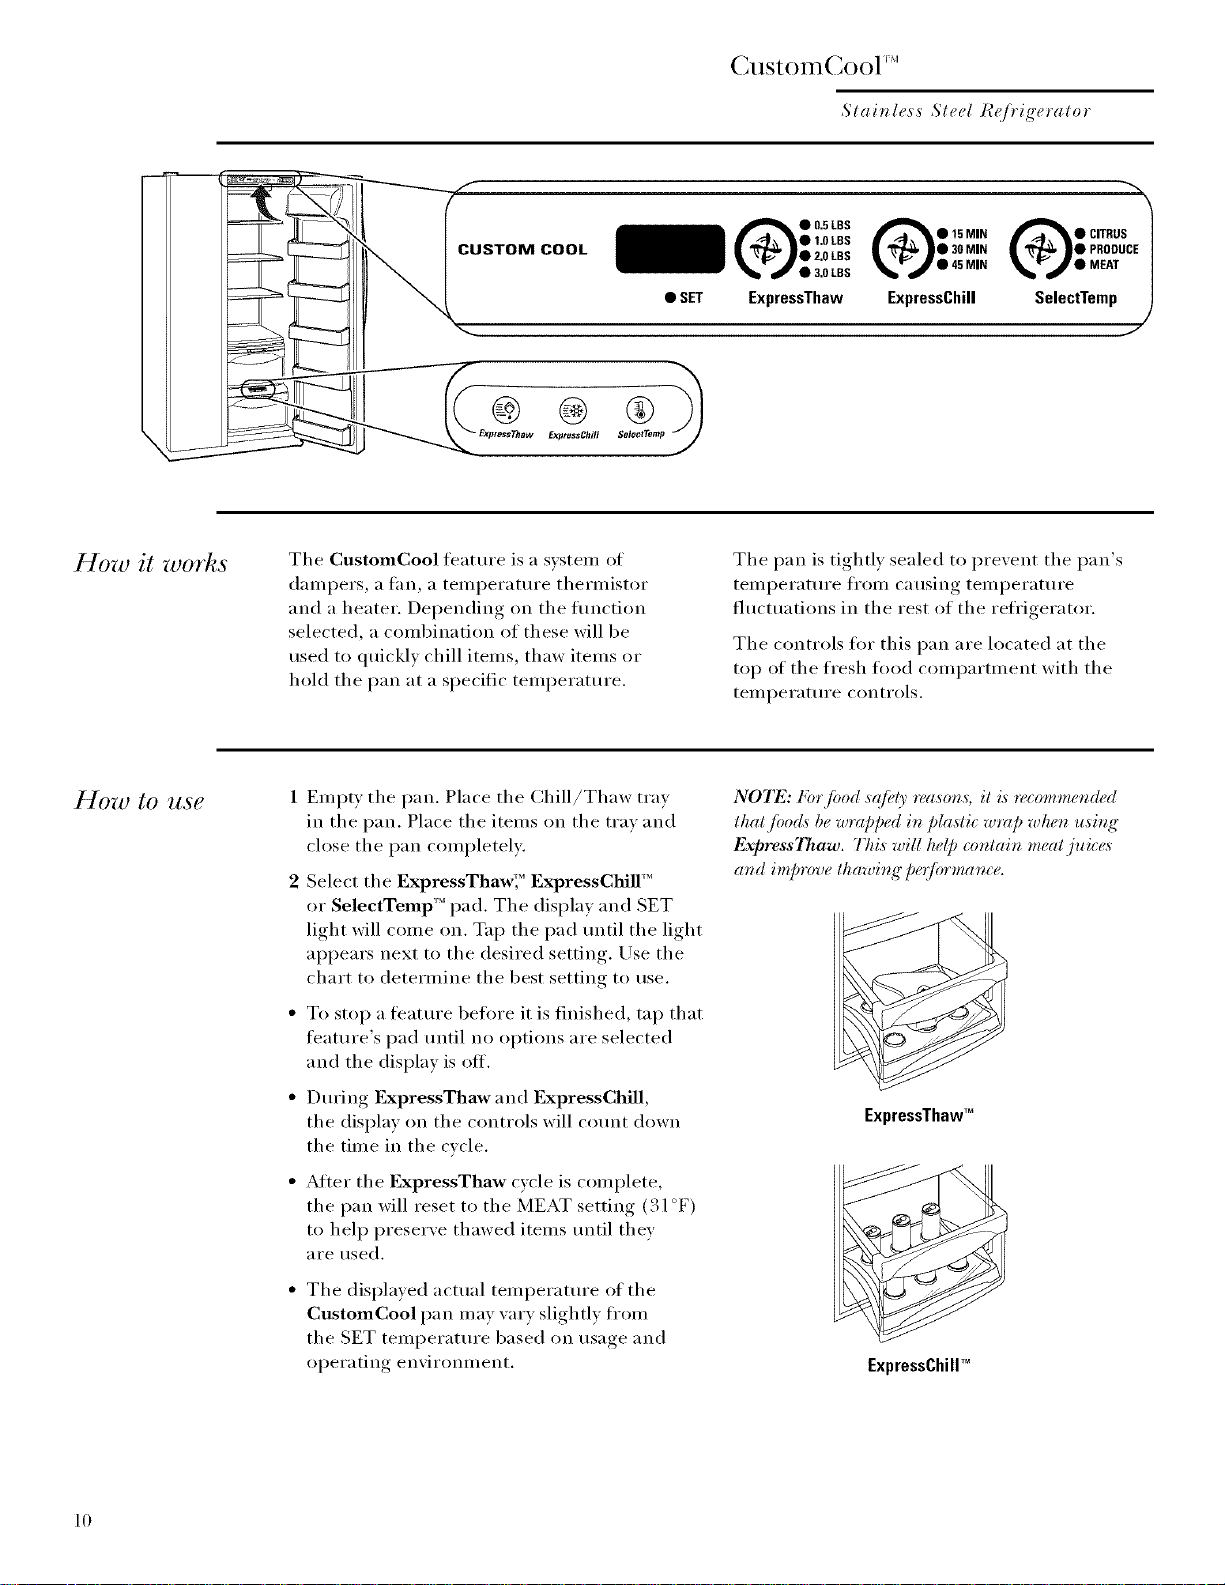
CllStOinCool :'1
Slainless Sled R¢q)'ig'eralor
How it
Hozt) to _se
CUSTOM COOL
The CustomCool feature is a system of
(lampers, a fan, a temperature thermistor
and a heater. Depending on the flmction
selected, a combination of these will be
used to quickly chill items, thaw items or
hold the pan at a specific temperature.
1 Empty the pan. Place the Chill/Thaw tray
in the pan. Place the items on the tray and
close the pan completely:
2 Select the ExpressThaw'," ExpressChill'"
or SelectTemp'" pad. The display and SET
light will come on. Tap the pad until the light
appears next to the desired setting. Use the
chart to determine the best setting to use.
• SET
is0
• 2.0 LBS
• 3.0 LBS
ExpressThaw
• 45 MIN
ExpressChill
I _ I • PRODUCE |
_b_a_ • MEAT /
C,rRus1
SelectTemp
The pan is tightly sealed to prevent the pan's
temperature ti'om causing temperature
fluctuations in the rest of the refrigerator.
The controls fin" this pan are located at the
top of the fresh fl)od compartment with the
teillperattlre controls.
NOTE: Forf*od s@(y *_ason,_; it i,s_,commended
that /bo& be wrapped in plastic w,r@ when using"
ExpressThaw. This will he@ contain meat juice,_
and improve thawing"/w@*rmance.
10
• To stop a feature betore it is finished, tap that
feature's pad until no options are selected
and the display is off.
• During ExpressThaw and ExpressChill,
the display on the controls will count down
the time in the cvcle.
After the I_pressThaw cvcle is complete,
the pan will reset to the MEAT setting (31 °F)
to help preserve thawed items until they
are used.
The displayed actual temperature of the
CustomCool pan may vary slightly ti'om
the SET temperature based on usage and
operating environment,
ExpressThawTM
ExpressChillTM
 Loading...