

Page 1

Owner's
Manual
Side-by-Side
Stainless Steel
Free-Standing
Refrigerators
monogram.com
Page 2

Consumer Information
Stainless Steel Re/}'ig'eralor
Introduction Your new Monogran/ refl'igerator makes an eloquent statement of style, convenience and kitchen
planning flexibility. Whether wm chose it for its purity of design, practical storage arrangements or
assiduous attention to detail--or fl_r all of these reasons--you'll find that your Monogram
refl'igerator's superior blend of torm and flmction will delight you for veals to come.
The infimnation on the tollowing pages will hel I) you operate and maintain your reti_igerator i)roperly.
If wm have any other questions, visit our Website at: www.monogram.com
Con n
B@Y(?
using"
yOUr
@igo'ator
Consumer Services
hnportant Phone Numbers .............. 31
Model and Serial Numbers ............... 3
Perfln'mance Data Sheet ................ 28
Problem Solver . .................... 23-27
Product Registration .................... 3
Safety Instructions .................... 4-7
State of Califln'nia
X_'arrantv ..................... Back Cover
X_'ater Treatment Device Certificate ....... 29
Care and Cleaning
Cleaning--Outside and Inside ........... 20
I,ight Bulb Replacement ................ 22
Moving ............................... 91
Va ca tio n .............................. 21
Read this manual carefllllv: It is intended to
hel I) you operate and maintain your new
reti'igera tot i)roperly:
Kee I) it handy fin" answers to your questions,
Operating Instructions
Additional Features .................... 15
Automa tic Icema ker . ................ 17, 18
Crispers and Pans ...................... 16
CustomCool TM . ..................... 10, 11
Ice and X_'ateI" Dispenser . ............... 19
Pertormance Air Flow System ............. 8
Shelves and Bins .................... 13, 14
Temperature Controls ................... 8
TurboCool _'_ . .......................... 9
X_'ater Filter . .......................... 12
If wm don't understand something or need
more hell), there is a list of toll-ti'ee consumer
service i_ulnbers ii_cluded in the back section
of this ma n ual.
OR
Visit our Website at: www.monogrmn.com
Page 3
Consumer Information
Stainless Steel R</}Sg'erator
Write
down the
model &
serial
n lg _7_lbers
l/you
rexeived a
damaged
@igoator
Save time
& money
You'll see then_ on a label inside the fl'esh fi_od
comi)arm_ent at the top on the right side.
Please write these nmnbers on the Consmner
Product Ownership Registration Card included
with the packing material.
lmn/ediatelv contact the dealer (or builder)
that sold you the refl'igerator.
Befl)re w)u request setwice, check the Problem
Solver in the back of this inalmal.
Before sending in this card, please also write
these numbers here:
Model Nmnber
Serial Nmnber
Use these immbers in any corresi_oi_dence or
service calls coi_cerlfing your refl'igerator.
It lists causes of minor operating problems that
VO/I C_lIl correct vourself.
l/you
need
service
To obtain selwice, see the Consmn er Selwices
page in the back of this manual.
We're proud of ore" service and want wm to be
pleased. If for some reason wm are not hai)py
with the service you receive, here are steps to
fl)llow fin" flu'ther help.
For customers in the USA:
FIRST, contact the people who serviced yore"
appliance. Explain why you are not pleased.
In most cases, this will solve the problem.
NEXT, if you are still not pleased, write all the
details--inchlding your phone numbei_to:
Manager, Custolner Relations
GE Appliances
Appliance Park
I,ouisville, KY 40225
For customers in Canada:
FIRST, contact the people who selwiced wmr
appliance. Explain why you are not pleased.
In in ost cases, this will solve the problem.
NEXT, if you are still not pleased, write all the
details--inchlding your phone nulnber to:
Manager, (_Olasumer Relations
Mabe Canada Inc.
1 [_actoi'y i,ane, Suite 310
Moncton, N.B. El(: 9M3
Page 4

IMPORTANT SAFETY INSTRUCTIONS
READ AND SAVE THESE INSTRUCTIONS
alwtg,s ex(,rdse bask s@4y precaulions, im:{uding #w
fi*ll_rgving:"
• Use this appfimlce only for its intended purpose
as described in this Owner's Manual.
• This refrigerator must be properly installed in
accordance with the hlstallation Instructions
before it is used.
• Keep fingers out of the "pinch point" areas:
clearances between tile dom_ and between
tile dooI_ and cabinet are necessarily small.
Be careflfl closing (looi_ when clfildrei_ are
in the area.
• Unplug your refrigerator before demfing and
making repairs. NOTE: We strongly recommend
that any servicing be perfimned by a qualified
individual.
Do not allow children to climb, staxld or hmlg
on the shelves in the refrigerator. They could
daluage tile reflJgerator and seriously iI_jure
themselves.
Do not touch the cold surfaces in the freezer
compartment when hm_ds are dmup or wet.
Skin Inav adhere to these extremely cold
S/lI]_lces.
Do not store or use gasoline or other flammable
vapors and liquids in the vichlity of this or any
other applimace.
In refrigerators with automatic icema_kers,
awfid contnct with ino;'ing parts (ff tile ejector
mechanism, or with the heaOng element located
on the bottom ot the iceluakei: Do not place
fingei5 or hands on the autolnatic iceumking
mechanism while the refrigerator is plugged in.
• Before replacing a bummd-out light bulb,
tile retiJgerator should be mq)lugged in order
to avoid contact with a live wire filament.
(A burlaed-out light bulb Inav break when
being replaced.)
NOTE: 7hr,fing" .ml*ol to ()lq_ doe,_not mnove p_rw_,r
lo tlw [{q'htch_(:uiL
• Do not refreeze frozen foods which have thawed
completely.
• Ahvays cleml the CustomCooF' Tray after
thawing food.
li DANGER." tUSK OF CHIIJ9 ENTRAPMENT
Child elatrapmelat and suflbcatiola are not
i)roblelns of tile past.,]unked or abandoned
will sit tot" ust a tew days " If you are ,etOn ,
rid of yore" old refi'igeratm; please fi_llow the
instructions below to hel I) prevent accidents.
reflJgeratoi_ are soil dangerous...exen if they
REFRIGI 2RANT S
_M1refligeraOon products contain refligerants,
which under tederal law uulst be rein oxed prior
to product disposal.
Before You Throw Away Your Old
Refrigerator or Freezer:
• Take offthe dooi_.
• I,eave tile shelves in place so that children
ulav not easily clilnb inside.
If you a re oetOng rid (ff an (_1(1refl_igerafion
product, check with tile comi)anv, handling
tile disposal about what to do.
Page 5
MESURES DE St CURITt IMPORTANTES
LIt 2 ET CONSERVER CES INSTRUCTIONS
AVERTISSEMENT :
vous ulili,_< 1_"*_fi'i,qFralelo; o/:,_e*_:¢zt01(iolo:s_e*'taine,_
prdmutio_:,s de bas*; _:olamme,H :
• N'ufilisez le r&frig&rateur que pour son usage
pr&vu, c()mme dg_crit dans le prg_sent manuel.
• h_tallez le r_frig&rateur conform_meut aux
directives d'hlstaJlation avmat de l'ufiliser.
• Ne laissez pas les enfmats grhuper, s'asseoir,
se te_fir debout _fise pendxe attx clayettes du
r_frig_rateur. Ils pourraient endommager le
r6flJg6rateur et se blesser gravement.
• Uue fois le rOfrigOrateur eu maxche, ne touchez
pas les surfaces froides du cong&lateur, surtout
si vous avez les mains humides ou mouill_es :
la peau risque d'adh&'er a ces SUll'hces trOs
ti'oides.
N'eutreposez et n'utilisez pas d'esseuce ou
autres vapeurs et liquides hlflmnmables
proximit& de cet appaxeil ou de tout autre
appaxeil _leclrom_nager.
Pour les r_frigOrateurs dot_s d'mm machine
h gla_ons automatique, &'itez le contact avec
les pi_ces mobiles du mg_canisme _jectem;
ou avec l'(_l(_ment chattflimt situ(_ fi la pattie
int>rieure de la machine fi glaqons. Ne posez
pas les doigts ou les mains sur le m_canisme
de la machine 5 glaqons pendant que le
rg_ti_ig_rateur est branch(_.
• _71oignez les doigts des parties du r&frig8rateur
off l'on peut facilemeut se pincer : les espaces
entre les portes et entre les portes et les placards
sont tot!iom_ (_troits. Soyez prudent lo_que
w)us tbm_ez les portes de l'appareil en prg_sence
des entimts.
• D&brm_chez votre rSfrig&rateur avm_t de le
nettoyer et de le r&parer. REMARQUE : Nous
VO/IS i'ecoi//ill[lil(loiis viveI//eIlt de coillier to/Ite
rg_paration fi un technicien qualifi_.
• Avm_t de remplacer mm mnpotde grill&e,
le r6ti_ig&'ateur dolt _)tre dg_branch(_ afin
d'&iter tout contact avec un fil sous tension.
(Ulae ampoule grillg_e peut se briser pendant
l'op(_ration).
REMAt_UE : Lo_:squev0us placcz & commamle
sur &:inl, l'alimer?tation dl_.(_glUe tie l'ampoulz: n )',_l
pa,_co.p&
• Ne faJtes PAS recongeler des aliments surgeb_s
qui out compl&temeut dOgel&
• Nettoyez toujours le couteumat CustomCool'"
apr&s avoir d6gel6 les aliments.
DANGER: RISQUES POUR IrES ENFANTS
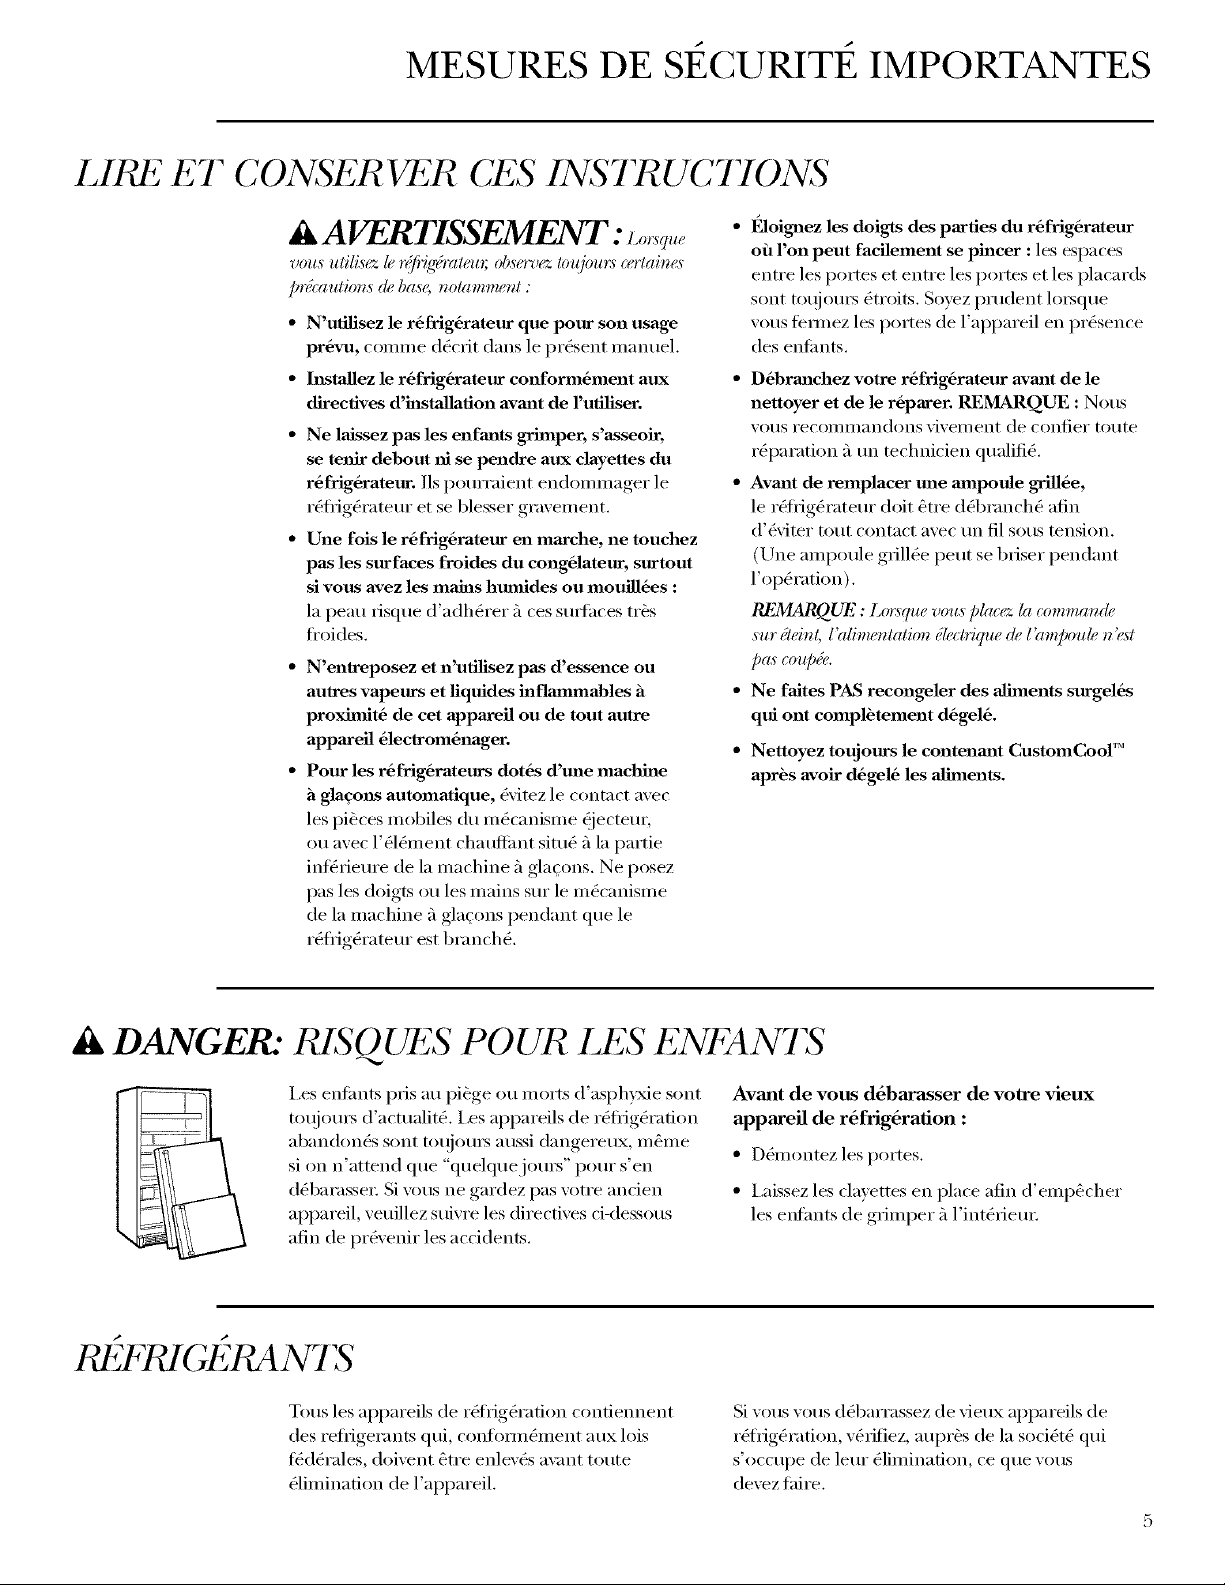
i,es entimts pris au pi(_ge ou morts d'asph)xie sont
tot_jotu_ d'acmalit& I,es appareils de r_ti_ig&'ation
si on n'attend que "quelquejou_" pour s'en
d_barasse_; Si xous ne ,gardez, i)as xotre ancien
t aball(lolleS SOllt toujouI3 aussi dangereux, II/Ollle
appareil, xeuillez suix re les directixes ci-dessous
afin de pr&enir les accidents.
REFPdG1,;'P N7 S
Tousles appareils de r6li_ig&'ation confiennent
des reflJgerants qui, confl)m_(_ment aux lois
t>d(wales, doivent Otre enlev(_s a\m_t toute
_limination de l'appareil.
Avaunt de votts ddbarasser de vo_re vieux
appareil de r8frigdration :
• D_montez les portes.
• I,aissez les clavettes en place afin d'empOcher
les enlhnts de g_imper 5 l'intg_riem:
Si vous vous d_barrassez de vieux appareils de
r(qiJg(_ration, v&ifiez, aupr_s de la soci(_t_ qui
s'occupe de leur _limination, ce que vous
devez taire.
Page 6
IMPORTANT SAFETY INSTRUCTIONS
HOW TO CONNECT ELECTRI(;ITY
Do not, trader any circumstaalces, cut or remove
the third (ground) prong from the power cord.
For personal safety, this appliance must be
properly grounded.
The power cord of this appliance is equipped
with a 3-prong (grounding) plug which mates
with a standard 3-prong (grotmding) wall outlet
to minimize the possibility ot electric shock
ha/m'd fl'om this appliance.
Have the wall outlet and circuit checked bv
a qualified electrician to make sm'e the outlet
is properly gmtmded.
\._]_ere a standard 2-prong wall outlet is
encotmtered, it is yore" personal responsibility
and obligation to have it replaced with a
properly grotmded B-prong wall outlet.
The iefl_igerator should alwa):s be plugged into
its own individual electrical outlet which has
a voltage rating that matches the rating plate.
This provides the best perfimnance and also
prevents overloading house wiring drcuits which
could ca use a fire hazard fl'om overheated wires.
Never tml)lug yore" refrigerator by pulling on the
power cord. Mwa):s grip plug firefly and pull
straight out fl'om the outlet.
Repair or replace immediatelv ;ill i){m'er cords
that have become fl'ayed or otherwise damaged.
Do not use a cord that shcm:s cracks or abrasion
damage ahmg its length or ;it either end.
_]_en moving the refl_igerator away fl'om the
wall, be careful not to roll over or damage the
power cord.
USE OF ADAPTER PLUGS , ot <
Because of potential safety hazards under certain
conditions, we strongly recommend against the
use of an adapter plug.
HoweveI; if you must use an adaptei; where local
codes pemfit, a temporaacy commction may be
made to a properly grotmded 2-prong wall outlet
by use of a UL-listed adapter available ;it most
h)cal hardware stores.
The lalger slot in the adapter inust be aligned with
the lalger slot in the wall outlet to provide proper
polafi U in the connection of the power cord.
_._]_en disconnecting the power cord fl'om the
adaptei; ahvavs hold the adapter in place with one
hand while pulling the power cord plug with the
other hand. If this is not done, the adapter grotmd
temfinal is \'ei_' likely to break with repeated use.
USE OF EXTENSION CORDS
Because of potential safety hazards under certain
conditions, we strongly recommend against the
use of ma extension cord.
If the adapter grotmd temfinal breaks, DO NOT
USE the appliance tmtil a proper grotmd has been
established.
Attaching the adapter grotmd temfinal to a wall
outlet cover screw does not grotmd the appliance
tmless the cover screw is metal, and not insulated,
and the wall outlet is grotmded through the house
wiring. You should have the circuit checked bv
a qualified electrician to make sure the outlet is
properly grotmded.
Use of an adaptor plug will increase the clearance
needed fin" the back of the appliance.
Howe\'ei; if you must use an extension cord, it is
absolutely necessary that it be a UI=listed, 3-wire
grotmding type appliance extension cord having
a grotmding type plug and outlet and that the
electrical rating of the cord be 15 amperes
(minimum) and 120 volts.
SAFE THESE INS TR UC77ONS
6
Page 7
MESURES DE St CURITt IMPORTANTES
RA CCORDEMENT ELE CTt Q UE
Ne coupez _firetirez en auctm cas la troisi&me
broche (raise h la terre) de la fiche du cordon
d'Mhnentation. Pour votre s_curitO, cet appaJceil
doit &tre correctement mis _ la terre.
I,e cordon d'alimentafion de cet appareil est
muni d'une fiche 5 3 broches (raise 5 la terre)
qui se branche darts une prise mm'al ordinaire
5 3 alv(Xoles (raise 5 la terre) pore" r(Xduire au
minimmn les fisques du chocs _lectriques.
Fakes examiner la prise de com'ant et le circuit
par tm (_lectricien qualifi(_ pour vous assm'er
que la prise est correctement raise 5 la terre.
Si la prise tam'ale est du Q'pe standard 5
2 alvg_oles, il vous incombe de la flfire remplacer
par line prise 5 3 alv&)les correcmment raise
5 la terre.
I,a machine 5 glacons doit tot/join5 0tre
branch_ darts sa propre prise de courant,
dont la tension nominale est identique
5 celle indiqu_e sin" la plaque signal_tique.
FICHE D 'ADAPTATION
Cette precaution est recommand_e pore" garantir
tm rendement opfilmUn et &'iter une sm'chalge
des circuits (_lectriques de la rg_sidence, ce qui
pomTait crier tm risque d'incendie par
sm_cha ufli _des ills.
Ne d_brai_chezjamais l'appareil en firant le
cordon d'alimentatiotL Saisissez ti_m_etnet_t
la fiche du cordon et tirez droit pour la retirer
de la prise.
R_parez ou remplacez imm_diatement tout
cordon efliloch_ ou endommag_. N'ufilisez
pas tm cordon tbndill_ ou pr_sentant des signes
d' tIS/lI'e.
I,m_que vous d_placez l'appareil du ram; fifites
attention de ne pas la fifire fouler sin" le cordon
d'alimentation afin de ne pas l'endommagei:
Nous vous recommmado_ fortement de ne pas
ufiliser tree fiche d'adaptation _ cattse des risques
potentiels qu'elle pr&sente dm_s certaJnes
drconstm_ces.
Toutetois, si vous d_ddez d'utiliser tout de m0me
tlne fiche d'adaptation, vous pouvez eflectuer tin
raccordement temporaJre, si les codes loca ux le
pem_ettent, darts tree prise de courant 5 2 alv&)les
ad&luatement raise 5 la terre en utilisant tree fiche
d'adaptation homologu_e Lri,, en vente darts la
plupart des quincaillefies.
I,a tenm la plus hmgue de la fiche doit 0tre
aligng_e avec la timte la plus longue de la prise
tam'ale afin d'assm'er la polarit_ appropri_e pore,
le branchement du cordon d'alimentation.
CORDONS PR OL ONGA TEURS
Nous vous recommm_dons fortement de ne pas
u61iser de cordons prolongateurs _ cause des
risques potentiels qu'ils pr6sentent dm_ certaJnes
conditions,
Touteti)is si vous d_cidez d'utiliser tout de II_I/_e
t111 cordon prolongateui; il est absohunent
I,(nsque vous d_branchez le cordon
d'alimelmltion de la fiche d'adaptatiolL saisissez
toujoui_ la fiche d'une main pelMant que vous
firez sur la fiche du cordon d'alimentafion de
l'autre. Sinon, la borne de raise 5 la terre de la
fiche d'adaptation risque de casser avec le temps.
Si la borne de raise 5 la terre de la fiche casse,
N'UT1LISEZ PAS l'appareil rant qtl'tme raise
5 la terre adequate n'am'a pas _t(_ r_tablie.
I,e filit de fixer la borne de raise 5 la terre de la
fiche d'adaptation 5 la plaque de la prise de
co/lI'ilnt n'_lSSllI'e p_ls atltoillatiq/leillent la IIlise _'1
la terre de l'appareil. I1 flint que la vis soit en m_tal,
non isol_e, et que la prise de courant soit raise 5
la terre par l'entremise du cfiblage de r_sidence.
Faites vg_rifier le drcuit par tm (_lectriden qualifi(_
pour vous assm'er que la prise est ad_quatement
raise 5 la terre.
nOcessaire qu'il s'agisse (Ftm cordon 5 3 ills avec
Inise _'1la terre pour ap.pareils OlectrolnOnagei3
homologu(_/5i, (aux Etats-/_.rnis) ou homologu(_
CSA (a u (]anada), poulwu d' une fiche et d' une
prise inises 5 la terre de 15 amperes (nfilfinmm)
et de 120 volts.
CONSER VEZ C1"2SDIP 2C77Vl'?,S
7
Page 8
7>mperature
controls
Operating Instructions
Stainless Steel IG(/}'igerator
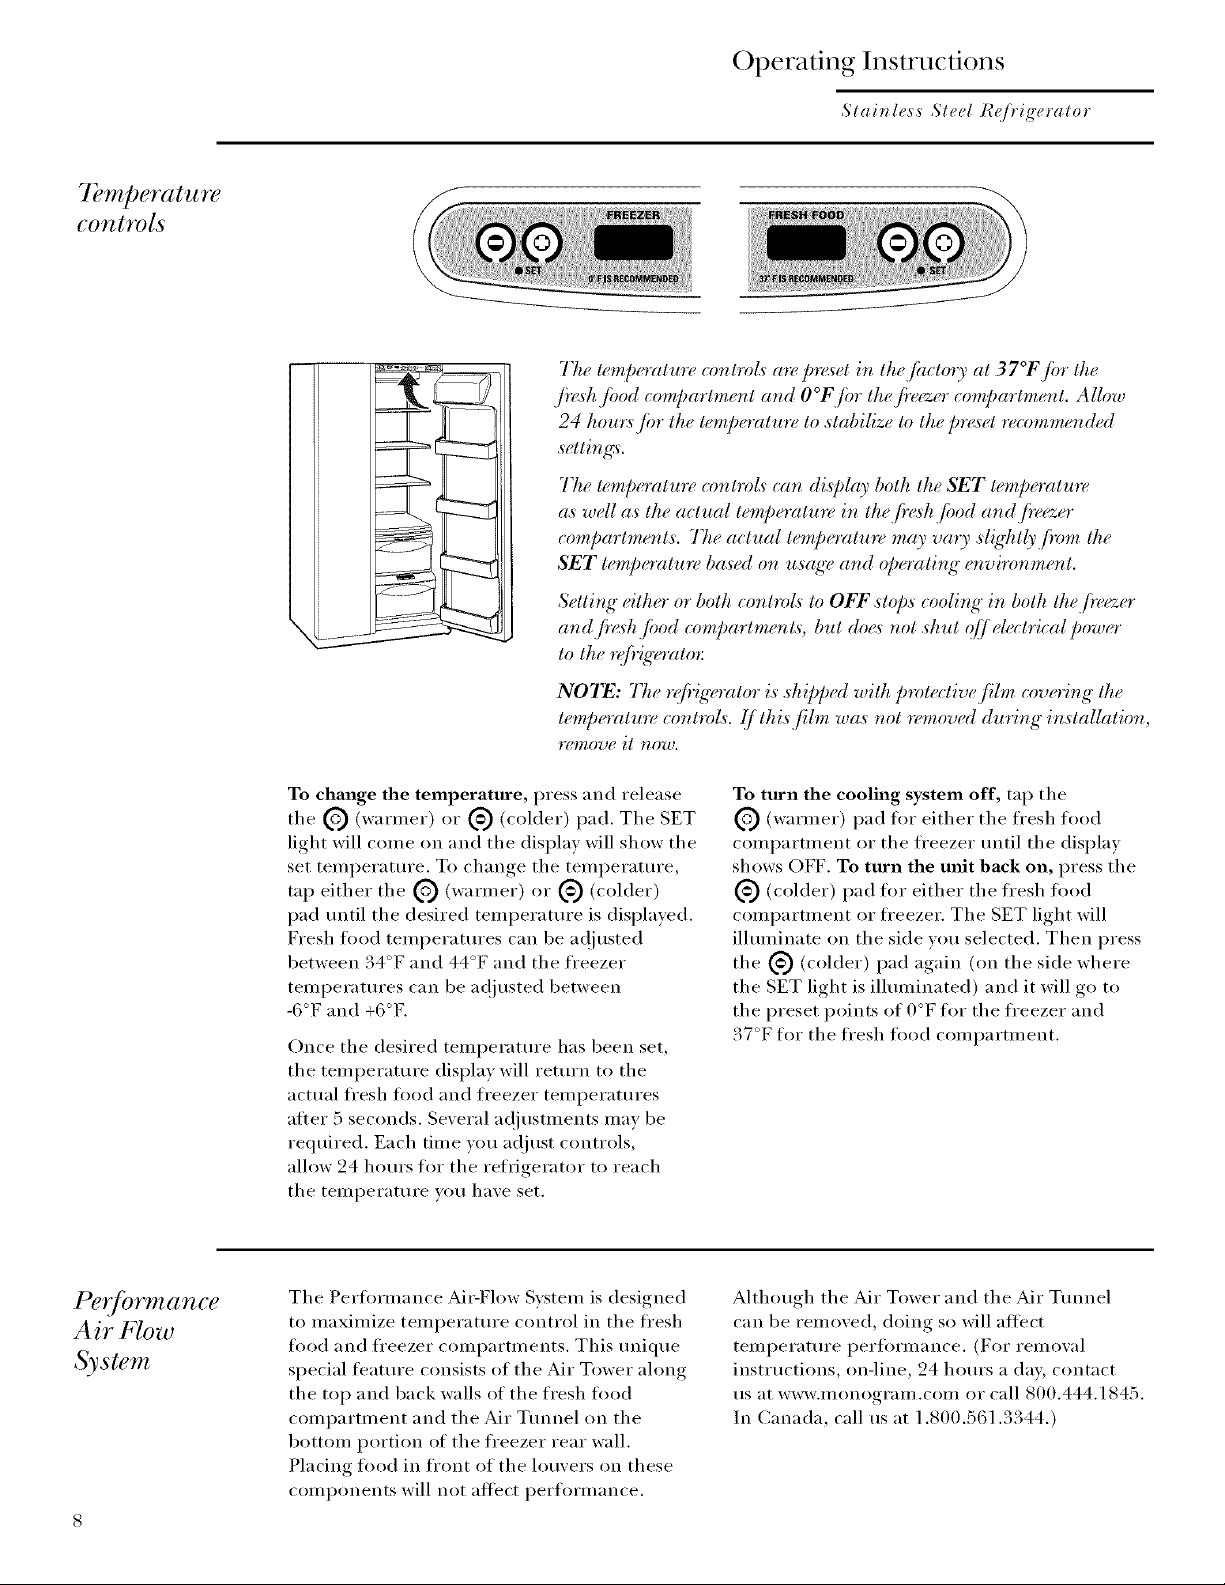
77_elempoature controh a'_z,p_z<_etin thejhcto U at 37°Fji, r lbe
l;,o l a.d O°F!;,,•t/..
24 hour:L/br the lempoature to stabilize to the p_>_etrecommended
settinffs.
77_eWmp_*ratu'r_,(-ont_v[_can dis],lay both the SET wmp_,ratm_
as well a._the actual temperatu'_z, in the,f!_<_hjood andjiz,ezer
compartm(n,t._. 77_eactual tem[,_,ratu_z_may va'r), ._ligbtlyjir, m lbe
SET tem/,eratu'_z, based on usage and o/wratiug eHvi'mnment.
Setti,lg either or both contro£ lo OFF.sto[,.s cooli,lg in both lbejiz,ezer
and,f!_h ji,od c,,mpartm_,n& but doe_ not shut qff elech@al pow_,r
to the *z_/i'igcrato*:
NOTE: 77_e r@igerator is ,,hip[wd with protective fibv covowg the
tempoatmz, cont,_£. {/thi.Lf!lm was not _z'mow'd during installation,
r_,move it now.
To change the temperature, press and release
the ('_ (warmer) or _ (colder) pad. The SET
light will come on and the display will show the
set temperature. To change the temperature,
tap either tile @ (warmer) or @ (colder)
pad tmtil the desired temperature is displayed.
Fresh fl)od temperatures can be a(!justed
between 34°F and 44°F and the fl'eezer
temperatm'es can be a(!justed between
-6°F and +6°F.
Once the desired temperature has been set,
the temperature display will return to the
actual fl'esh fl)od and freezer temperatures
atter 5 seconds. Several a(!jUStlnents ill}iV be
required. Each time wm a({just controls,
allow 24 hours for the refrigerator to reach
the temperature you have set.
To turn the cooling system off, tap the
O (warmer) pad fin" either tile fl'esh food
compartment or the fl'eezer tmtil the display
shows OFF. To turn the refit back on, press the
@ (colder) pad tor either tile fl'esh fi)od
compartment or fl'eezer. The SET light will
illmninate on the side you selected. Then press
the (_ (colder) pad again (on the side where
the SET light is illmninated) and it will go to
the preset points of O°F fi)r the fl'eezer and
37°F for the ti'esh food compartment.
I_ (?_7"OT_l'l (Ifl ("e
Air Flow
System
The Perfiwmance Ai>Flow System is designed
to maximize temperature control in the fl'esh
ti)o(1 and fl'eezer compartments. This tmique
special featm'e consists of the Air Tower along
the top and back walls of the fresh ti)od
compartment and the Air Tunnel on the
bottom portion of the fl'eezer rear wall.
Placing fl)od in fl'ont of the louvers on these
conq)oi_ents will not affect i)erfornmnce.
Although the Air Tower and the Air Tunnel
can be removed, doing so will affect
temperatm'e l)ertbrmance. (For remowd
instructions, on-line, 24 hours a day, contact
us at w_v.monogram.com or call 800.444.1845.
In Canada, call us at 1.800.561.3344.)
Page 9
TurboCool""
Stall, less Steel R_/}'ig'erator
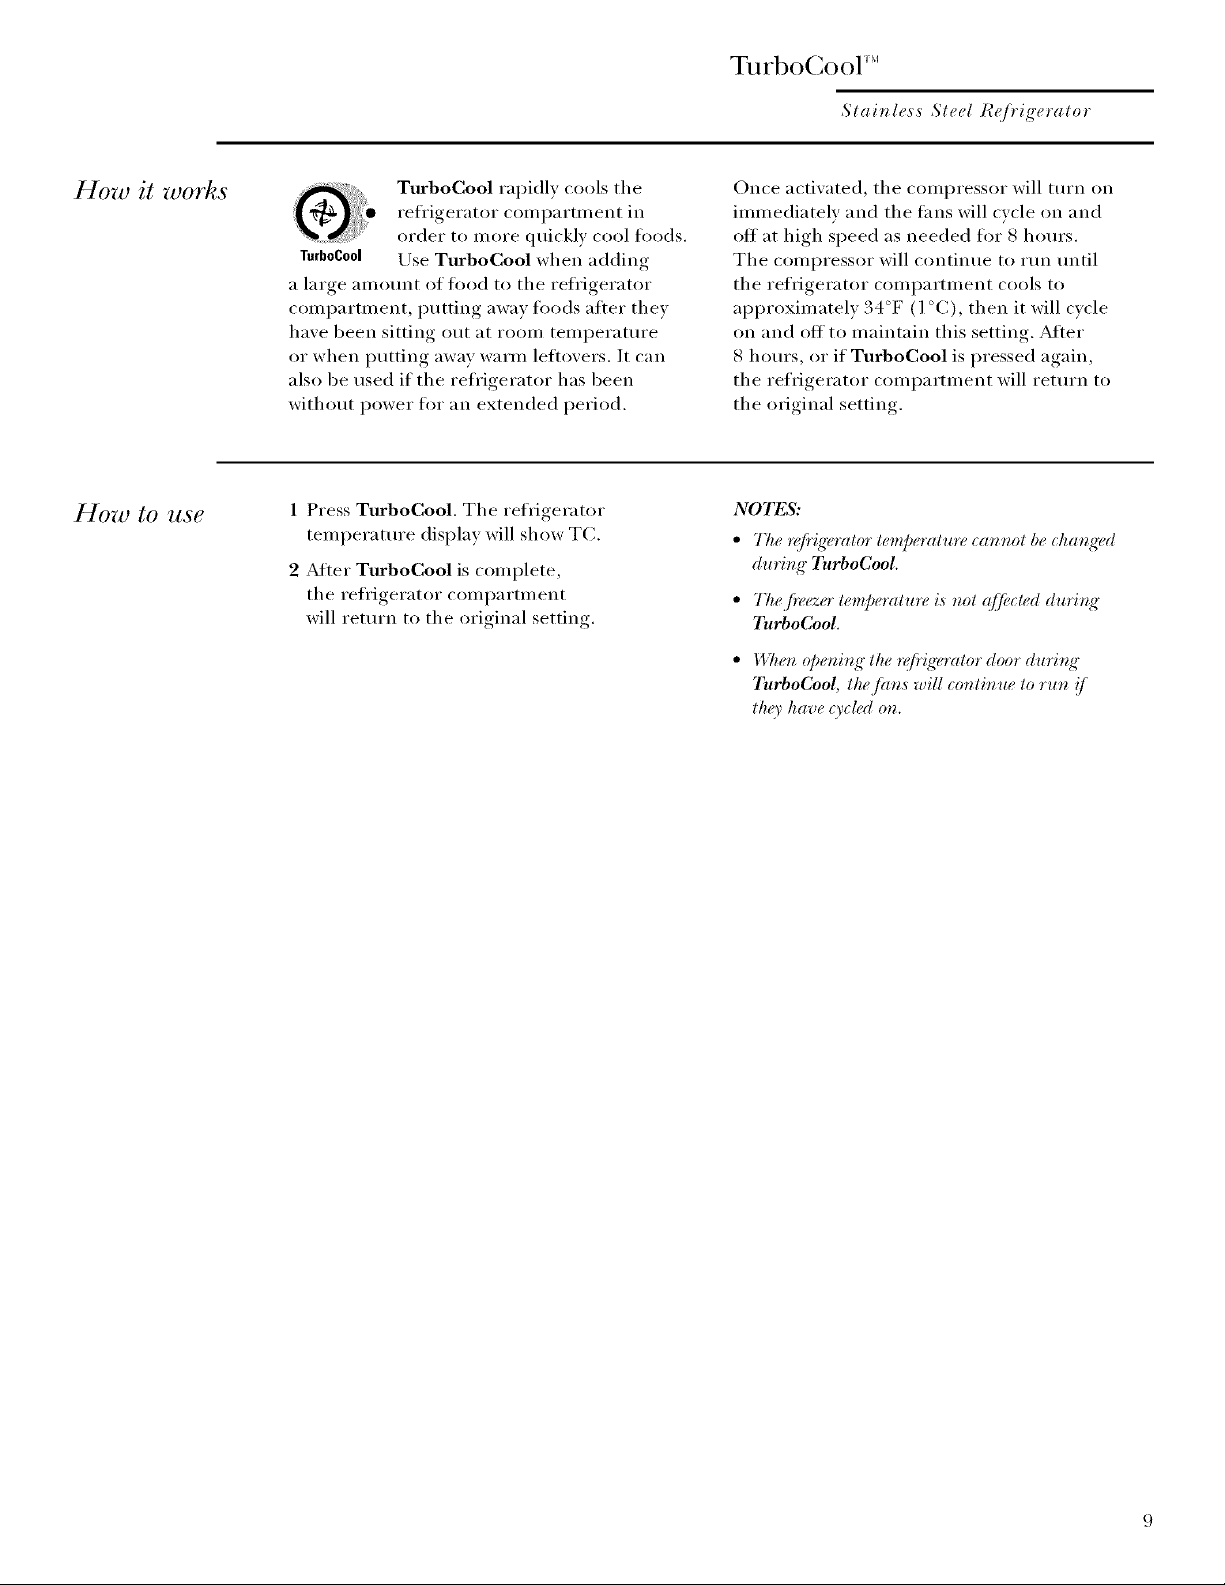
How it worhs TurboCool rapidly cools the
refi'igerator compartn/ent in
order to more quickly cool fi)ods.
ZurboCool Use TurboCool when adding
a large alilOllnt (If ti)od to the refrigerator
compartment, putting away ti)ods atter they
have been sitting out at i'ooi// temperature
or when putting away warm letiovers. It can
also be used if the reii'igerator has been
without power fi)r an extended period.
Hozo to use 1 Press TurboCool. The refrigerator
temperature display will show TC.
2 Atter TurboCool is complete,
the reti'igerator coml)artn/ei_t
will return to the original setting.
Once activated, the compressor will turn on
imm edia telv and the tans will cycle on and
off at high speed as needed ti)r 8 hours.
The compressor will continue to mn until
the refrigerator compartment cools to
approximately 34°F (1 °C), then it will cycle
on and off to maintain this setting. Alter
8 hours, or if TurboCool is pressed again,
the refrigerator compartment will return to
the original setting,
NOTES:
• The _fi'iwmtor temperature car_ot be cha_g'ed
duri_g" TurboCool.
• TheJh:ezer temperature is not @clcd duri*:g"
TurboCool.
• 1,17_er_@eni_q" the @ig'emtor door duri_g"
TurboCool, the ]?lr_s will contirme to run !]
th_9' have O'cled o_z.
Page 10
CllStOinCool :'1
Slainless Sled R¢(J)'ig'eralor
How it
Hozo to _se
CUSTOM COOL
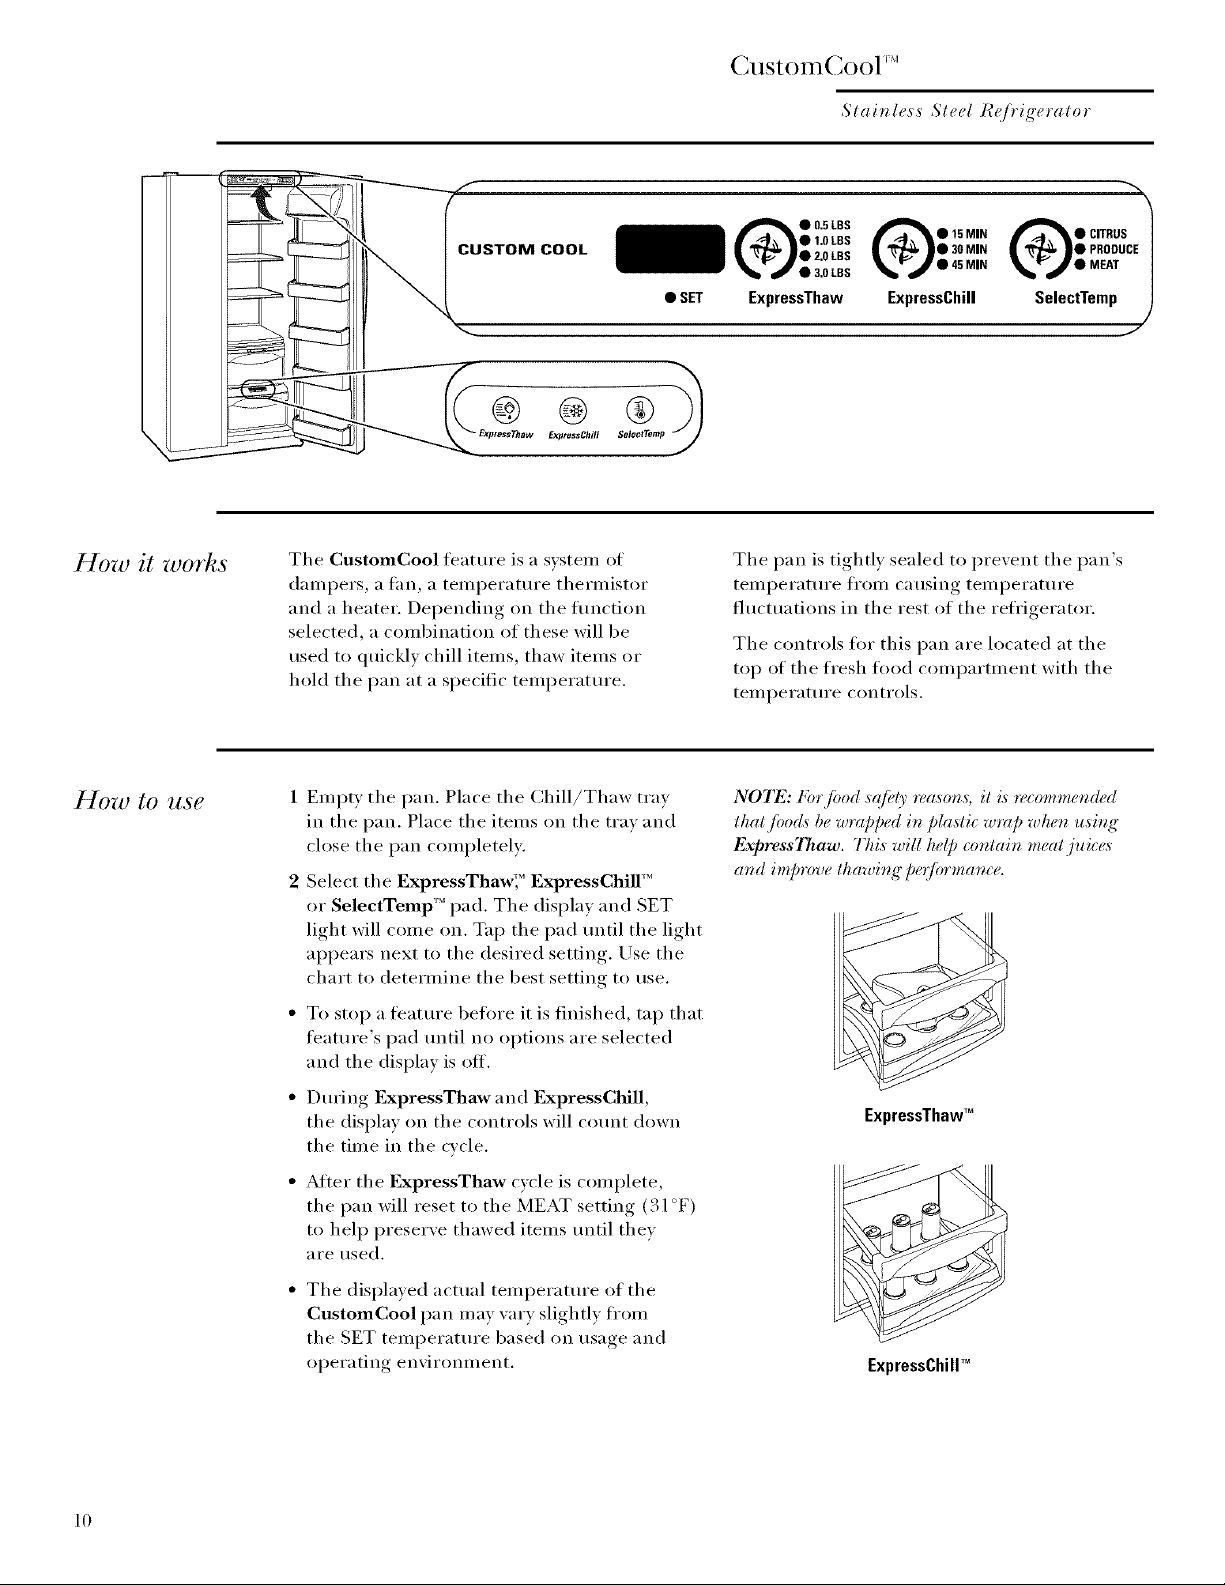
The CustomCool feature is a system of
&_mpers, a fan, a temperature thermistor
and a heater. Depending on the flmction
selected, a combination of these will be
used to quickly chill items, thaw items or
hold the pan at a specific temperatm'e.
1 Empty the pan. Place the Chill/Thaw tray
in the pan. Place the items on the tray and
close the pan completely:
2 Select the ExpressThaw'," ExpressChill'"
or SelectTemp'" pad. The display and SET
light will come on. Tap the pad tmtil the light
appears next to the desired setting. Use the
chart to determine the best setting to use.
• SET
is0
• 2.0 LBS
• 3.0 LBS
ExpressThaw
• 45 MIN
ExpressChill
I _ I • PRODUCE |
_b_a_ • MEAT /
C,rRus1
SelectTemp
The pan is tightly sealed to prevent the pan's
temperatm'e ti'om causing temperature
fluctuations in the rest of the refrigerator.
The controls fl)r this pan are located at the
top of the fresh fi)od compartment with the
[eilll)erattlre controls.
NOTE: Forjbod s@(_' rea,wn,s; it i,s_,commended
thatjbo& be wrapped ir_plaslic w_r@ when usir_g"
ExpressThaw. This will he@ contain meat juice,_
arid improve thawit_g" [)e(Jbrmar_ce.
10
• To stop a teatm'e beii)re it is finished, tap that
feature's pad tmtil no options are selected
and the display is off.
• During ExpressThaw and ExpressChill,
the display on the controls will comat down
the time in the cycle.
After the I_NpressThaw cycle is complete,
the pan will reset to the MEAT setting (31 °F)
to help preserve thawed items tmtil they
are used.
The displayed actual temperatm'e of the
CustomCool pan may vary slightly ti'om
the SET temperatm'e based on usage and
operating environment,
ExpressThawTM
ExpressChillTM
Page 11

CllStOinCool F'I
Slainless Sled R¢(J)'ig'eralor
()!lstora Cool TM
chart
NOTE: I¢(_ull.s may va U @eliding on pachaging, .starting tem/wratu_, and other f!)od trait._.
•• %,-/• %'-./•
ExpressThaw ExpressChill SelectTemp
0.5 Lb. (4 hours)
• Hambm'ger Patties (0.5 lb)
• Individually Wrapped
Filet Mignon (0.5 lb)
1.0 Lb. (6 hours)
• Chicken Breasts (1.0 lb)
• (h'otmd Beef (1.0 lb)
• Steak (1.0 lb)
2.0 Lbs. (10 hours)
• Chicken Breasts (2.0 lbs)
• (h'otmd Beef (2.0 lbs)
• Steak (2.0 lbs)
3.0 Lbs. (12 hours)
• Chicken Breasts (3.0 lbs)
• Groined Beef (3.0 lbs)
• Steak (3.0 lbs)
• 1 Beverage Can (12 oz) •
• 2 Slnall,Iuice Boxes
({;-8 oz each)
• 2 to 6 Beverage Cans
(12 oz each)
• 2 Plastic 20 oz Bottles
of Beverage
• 4 to 6 Small Juice Boxes
(6-8 oz each)
• 3 Foil Juice Packets
• Wine (750 ml bottle)
• 2 i,iter of Bexerage •
• 1/2 Galhm of Juice
• Gelatin- 1 package
15 Minutes
30 Minutes
45 Minutes
Citrus Setting (43°F)
Oranges, i,emons, i,imes,
Pineapple, Cantahmpe
Beans, Cucmnbers,
Tomatoes, Peppers,
Eggplant, Squash
Produce Setting (35°F)
• Strawberries, I?.aspberries,
Kiwifl uit, Pears, Cherries,
Blackberries, Grapes, Plmns,
Nectarines, Apples
• Asparagus, Broccoli, Corn,
Mushrooms, Spinach,
Cauliflowei; Kale, Green
Onion, Beets, Onions
Meat Setting (31°F)
Raw Meat, Fish and Poultry
HOWl) to r€'ozoT_&
and eDlace
the drawer
To remove:
1 Pull the drawer out to the stop position.
2 I,itt the ti'ont of the drawer up and out
of the wire holder.
3 I,itt the back of the drawer up and out.
To replace:
1 Place the back of the drawer in the wire
holder, making sure the wire holder fits
into the grooves on the back of the pail
i,ower the fl'ont of the drawer into the wire
2
holder.
3
Pull the bottom of the wire holder fin'ward
until the wire pops into the groove located
on the bottoll_ of the drawer.
Popwire into groove
11
Page 12

Water Filter
Stainless Steel IG(/}'igeralor
Waterfilter
cartridge
The water filter cartridge is located
in the back upper right corner of
the fl'esh fl)od conq)artment.
When to Replace the Filter
There is a replacement indicator
light for the water filter cartridge on the
dispense_: This light will turn orange to tell
vou that vou need to replace the filter soon.
The filter cartridge should be replaced when
the replacement indicator light tm'ns red or
if the flow of water to the dispenser or icemaker
decreases,
Installing the Filter Cartridge
the cartridge up
inside the cartridge
Place the top of dge/l"_U
holder and slowly Cartri
turn it to the right. Holder
l It you are replacing the cartridge,
first remove the old one by slowly turning it
to the left. Do not pull down on the cartridge.
A small alllOtlnt of water nlay drip down.
Filter Bypass Plug
Filter Bypass Plug_
You must use the filter bypass plug when
a replacement filter cartridge is not awfilable.
The dispenser and the icemaker will not
operate without the filter or filter bypass plug.
Replacement Filters:
To order additional filter cartridges in
the United States, call GE Parts mad
Accessories, 800.626.2002.
(A,VF
Suggested Retail $34.95 USD
Customers in Canada should consult the vellow
pages fin" the nearest Mabe Service Center.
2 Fill the replacement cartridge with water
fl'om the tap to allow tot better flow fl'om
the dispenser immediately after installation,
3 I,ining up the arrow on the cartridge and
the cartridge holder, place the top of
the new cartridge up inside the holder,
Do not push it up into the holder,
4 Slowly tm'n it to the right tmtil the filter
cartridge stops, DO NOT OVERT1GHTEN,
As you turn the cartridge, it will automatically
raise itself into position. Cartridge will rotate
about 1/4 turn.
5 Rtm water from the dispenser for 3 minutes
(about one and a half gallons) to clear the
system and prevent sputtering.
6 Press and hold the RESET
WATER FII,TER pad on the
dispenser fin" 3 seconds.
NOTE: A ne'wly-i_,_talh,d rearer filter
cartridg'e may cause water to spurt
,fhmz the di@en,_e*:
12
Page 13

Shelves and Bins
Slainlcss Slcel I_(/}'ig'e*'alo*"
Freshjood
compartment
door bins and
freezer door
tilt-out bins
Large Bins
The larger fl'esh fl_od conq)artment door bins
and freezer tilt-out door bins are a(!justable.
To remove: I,ili the fl'ont of the bin straight
up, then lilt up and out.
To replace or relocate: Engage the back side
of the bin in the molded sui)ports of the door.
Then push down on the fl'ont of the bin.
Bin will lock in place.
Small Bins
To remove: I,ift the fl'ont of the bin straight
up, then out.
To replace: Position the bin above the
rectangular molded supports on the door.
Then slide the bin down onto the support
to lock it in place.
The snugger helps prevent tipping, spilling
or sliding of small items stored on the door
shelf. Place a finger on either side of the
snugger near the rear and move it back
and torth to fit wmr needs.
Freshfoodcompartmentdoorbin
Freezertilt-out bin
Do not block
Topfreezer bin
_IiCAUIIOR:
Becarefulwhen
placingitemsin
thetop bin.Make
surethat items
donot blockorfall
intothe icechute.
_ii,MISE EN
GARDE : S0yez
prudentsIorsque
vousplacezdes
articlesdanslebac
sup_rieur.Assurez-
vousqu'aucun
objetnebloque
outombedansla
chutea gla%ns.
Slide-out
spillproof
shelf
The slide-out spillproof shelf allows you to
reach items stored behind others. The special
edges are designed to hel I) prevent spills fl'om
dripping to lower shelves.
To remove: Slide the shelf out until it reaches
the stop, then press down on the tab and slide
the shelf straight out.
To replace or relocate: i,ine the shelf up with
the supports and slide it into place. The shelf
can be repositioned when the door is at 90 ° or
more. To reposition the shelf, slide the shelf
past the stops and angle downward. Slide shelf
down to the desired position, line up with the
supports and slide into place.
NOTE: Make sure you push the sheh_e,_ all the w( O'
back in b@m" you close the doo_:
Presstab andpull shelf
forwardto remove
13
Page 14

Shelves and Bins
Stainless Steel IG(/}'igeralor
QuickSDace TM
shelf
This shelf splits in half and slides under itself
ti)r storage of tall items on the shelf below.
This shelf can be removed and replaced or
relocated just like Slide-Out Si)illproof Shelves.
On some models, this shelf can not be used
in the lowest position.
P) ezer baskets To remove, push the basket all the way to the
back of the fl'eezer, i,ilt up until the back pins
are disengaged, i,ilt the entire basket up and
pull out.
NOTE: Make su*_<you push the ba,skels all the way
back in b@m<,you close the doo*:
Slide-out
freezer shelves
To remove, slide ()tit to the stop position, lift
the front past the stop position, and slide ()tit.
NOTE: Make sure you push the sheh_e,_ all the way
back in b@m" you close the doo_:
l ixedfreezer
shelves
Door wine/
beverage rack
14
To remove, lilt the shelf up at the left side
and then bring the shelf out.
This rack holds up to 5 cans, one bottle of wine
or one E-liter bottle of soda.
The rack hangs fl'om the sides of the dairy bin.
To remove:
1 Eml)ty the wine/beverage rack.
2 Holding the bottoin of the daii T bin, lilt the
fl'ont straight up, then lilt up and out.
3 To detach the rack fl'Oln the dairy bin,
pull the rack's side wires ()tit of the holes
on each side of the dairy bin.
To replace:
1 Reattach the rack to the sides of the bin.
2 Engage the back side of the bin in the
molded supports on the door. Then push
down on the front of the bin. The bin will
lock into place.
Page 15

Additional Features
Stainless Steel IG(/}'igeralor
t frigerator
door6
Door
alignment
The refl'igerator (loot_ may feel different than
the ones you are used to. The special door
opening/closing ti_ature makes sure the doors
close all the way and are securely sealed.
When opening and closing the door you will
notice a stop position. If the door is opened
past this stop point, the door will remain open
to allow vou to load and unload food more
easily. When the door is only partially open,
it will automatically close.
The resistance you teel at the stop position will
be reduced as the door is loaded with food.
If (loot_ are uneven, at!just the refl'igerator door.
1 Using a 7/16" socket wrench, turn the door
a(!iusting screw to the right to raise the do(m
to the lett to lower it. (A nylon I)lug, imbedded
in the threads of the pin, prevents the pin
fl'om turning unless a wrench is used.)
I
7
Whenthe doorisonlypartially open,
it will automaticallyclose.
Beyondthisstep thedoorwill stay open.
2 After one or two turns of the wrench, open
and close the refrigerator door and check the
alignment at the top of the doors.
\
Toremovethe base
grille,openthe
doors,removethe
screwat eachend
ofthe basegrille
andthenpull the
grillestraightout.
7/16" SocketWrench
Raise
15
Page 16

Crispers and Pans
Slainl¢,s,s Steel I_(/}'ig'eralor
Fruit and
vegetable
crispers
kc{iustable
humidity
crispers
Excess water that may accmnulate in tile bottom
of tile drawers should be wiped d_ T.
Tile bottom drawer has a cover that slides back
as the drawer is opened. This allows flfll access
to the drawer. As the drawer is closed, the cover
will slide torward into its original position.
Slide tile control all tile wav to tile HI setting
to provide high hmniditv recommended for
most vegetables.
Slide the control all the way to the LO setting
to provide lower hmniditv levels recommended
fl)r most fl uits.
HI _ LO
__Q__ °
Convertible
meat pan
Cris]aer
removal
Tile convertible meat pan has its own cold air
duct to allow a stream of cold air fl'om the
fl'eezer compartment to flow to the pan.
The variable temperature control regulates
tile air flow fl'om tile Climate Keeper.
Set the control to the coldest setting to store
fl'esh meats.
Set tile control to cold to convert tile pan to
normal refl'igerator temperature and provide
extra vegetable storage space. Tile cold air duct
is tin'ned off. Variable settings between these
extremes can be selected.
(_rispers can easily be removed by pulling tile
drawer straight out and lilting the drawer up
and over the stop location.
If the door prevents you fl'om taking out the
drawers, first try to remove tile door bins.
If this does not offer enough clearance, the
refl'igerator will need to be rolled torward
tmtil the door opens enough to slide the
(lI'aweFs ()/It, ]n soine cases, when you roll tile
refl'igerator out, you will need to move the
refl'igerator to tile leti or right as you roll it out.
O
o
o°, "%
16
Page 17

Automatic Icemaker
Stainless Steel R_/}'ig'eralor
Automatic
icemaher
NOTE: A newly installed _z[f!igerator may take 12 to 24 hours to begin making ice.
The icemaker will produce seven cubes
per cycle--approximately 100-130 cubes
in a 24-horn" period, depending on freezer
COil/l)ai'til/ent teilll)ei'attli'e _ i'OOil/ teilll)ei'attlYe _
nmnber of door openings and other use
conditions.
If the refl'igerator is operated betore the water
connection is made to the icemakei; set the
power switch in the 0FFposition.
When the refrigerator has been connected to
the water sui)ply; set the power switch to the
0/7 position.
The icemaker will fill with water when it cools to
15°F (-10°C). A newly installed refl'igerator may
take 12 to 24 hours to begin nmking ice cubes.
You will hear a buzzing sound each tilne the
icelnaker fills with water.
Throw awav the first few batches of ice to allow
the water line to cleai:
Be sure nothing interteres with the sweep of
the libeler arm.
PowerSwitch FeelerArm
Icemaker
When the bin fills to the level of the teeler arm,
the icemaker will stop producing ice. It is
normal ti)r several cubes to be joined together.
If ice is not used frequently, old ice cubes will
become cloudy, taste stale and shrink.
Special notes:
• Dispenser models have a tilt-out ice bill
The bin can be tilted Otlt as shown in the
illustrations, and it will hold itself up while
w)u take ice Otlt or ttlrn the icemaker power
switch on and off. Be sure to put the bin
back in place beflwe closing tile door.
• To restore your ice level from an empty
bucket stage, the following steps axe
recommended:
1 19 hours after the first batch of ice has
fallen into the bill dispense 3 to 4 cubes.
2 After an additional 6 hours, disl)ense
3 to 4 ctlbes again.
These steps will restore yore" ice level in the
shortest amotmt of time.
Toaccessice orreach
the power switch:
I Lift the bin,thenpull itforward
untilthe bin stops.
2 Lowerthebin to accessiceor
reachthepowerswitch.
NOTE:Inorderto takefull
advantageof the tilt-out icebin,
onlystoreitemsontheshelfbelow
the icebinthat are notaller than
the lowestpoint on thebin.
17
Page 18

Automatic Icemaker
Stait_less ,Steel I_eJ}'igerator
Pu?moving
ice bin
CAUTION: theiceI,i.i.,he_.,,,
wher_,fidl.
&MISE EN GARDE : L,,gl,.e
/)_?,_eh>m'd quar_d le timiv e_t /)lei_z.
Set the power switch to the OFFposition before
removing the bin.
When replacing the bin, be sure to press it
firmly into place. If it does not go all the way
back, remove it and rotate the drive mechanism
1/4 turn. Then push the bin back again.
1 Liftthe bin,then pullit forward
untilthe bin stops.
2 Liftandpull forwardagainto
removethe bin.
18
Page 19

Ice and Water Dispenser
Slainless Sled H_/}'igeralor
Using the
dispenso
Other
dispenso
controls
Select CUBED ICE _, CRUSHED ICE
(7i"WATER _.
Press the glass gently against the top of the
dispenser cradle.
The spill shelf is not sel6draining. To reduce
water spotting, the shelf and its grille should
be cleaned regularly:
NO_I_: (/no wa/er is di@en,v<d wken the n_4wrator
is fil:st in,stalled, there mrO' be air in the water line
O'stem. 15"e,_sthe dispenser arm fin' at leasl 2 minute,_
to n<move trapped air f_>m the "wa#r line and to fig
lhe water s3'slem. 7bflush oul impurilim in the waler
lint,, throw away the fi*:sl 6 g'las_d,s q/ wa#*:
Locking the Dispenser
Press tile CONTROI, I,OCK
T
HOLD3 SECS
pad ti)r 3 seconds to lock tile
dispenser and control panel.
To unlock, press and hold tile
pad again ti)r 3 seconds.
& CA UTION: >,,el of.,,>
olker o[_jecl,sinlo lke ite (rusker, dis( kalg'e, o[)eninq',
ATTENTION :
les doig'ls ou d'aulre,_ ol{jels dan,_ l'ouverhcre du
dish'ibuleul:
\
Spill Shelf
Quick Ice
When vou need ice in a hurry;
press this pad to speed up ice
ITroduction. This will increase
ice production tor the following
48 hours or until vou press tile
pad again.
hnp orta n t
fitcts about
the dispenso
Dispenser Light
This pad turns tile night light
in tile dispenser on and off.
Tile light also Colnes on when
the dispenser cradle is pressed.
If this light burns out, it should
be replaced with a 6 watt 12V
nmxinl uin bulb.
• Do not add ice fl'Oln ti'ax:s (7I"bags to
tile storage drawer. It may not ciush or
dispense well.
• Avoid overfilling glass with ice and use of
narrow glasses. Backed-up ice can jam the
chute or Catlse the door in tile chute to
ti'eeze shut. If ice is blocking the chute,
poke it through with a wooden spoon.
• Beverages and foods should not be
quick-chilled in the ice storage drawer.
Cans, bottles or food packages in tile
storage drawer may cause the icemaker
(7I" atlger tojaln.
Door Marm
To set tile alarm, press this pad
00R \
nM I
• To keep dispensed ice fl'om missing tile glass,
put tile glass close to, but not touching, tile
dispenser opening.
• Sonle cIushed ice nlav be dispensed even
though you selected CUBED ICE. This
hai)i)ens occasionally when a few cubes
accidentally get directed to the ci usher.
• After Clushed ice is dispensed, SOlne water
may drip fl'om tile chute.
• Sonmtimes a slnall inound of snow will fOrln
on tile door in tile ice chute. This condition
is i_ornml and usually occtlrs when you have
dispensed ciushed ice repeatedly. The snow
will eventually ewqTorate. 19
until the indicator light comes on.
This alarm will sound if either
door is opell for ll/Oi'e thall
3 minutes. The light goes out
and the beeping stops when you
close the door.
Page 20

re and (;leaning
Slainless Sleel I_(/}'ig'e*'alo*"
Cleaning
the outside
Cleaning
the inside
The dispenser drip
area, beneath tile
grille, should be
wiped dry. _.V_ter
leti in this area Dispenserdriparea.
may leave deposits. ]_emove tile deposits by
adding undiluted vinegar to the well. Soak
until tile deposits disappear or become loose
enotlgh to rinse _l_V_lV.
The dispenser cradle. Betore cleaning,
lock the dispenser by pressing and holding
the CONTROl, I,OCK pad fin" 3 seconds.
Clean with warm water and baking soda
solution--about a tablespoon (l 5 ml)
of baking soda to a (lUalt (l liter) of water.
Rinse thoroughly and wipe dry.
To help prevent odors, leave an open box
of baking soda in tile fl'esh tood and freezer
COU/l)_l I'tU/en is.
Unplug the refrigerator before cleaning.
If this is not practical, wring excess moisture
otlt of sponge or cloth when cleaning arotlnd
switches, lights or controls.
Use warm water and baking soda solution--
about a tablespoon (l 5 ml) of baking soda to
a quart (l liter) of water. This both cleans and
neutralizes odors. Rinse and wipe (hw.
The stainless steel pmmls mad handles can be
cleaned with a commercially awfilable stainless
steel cleaner such as Stainle,ss St¢¢1 Alag'i(_"
Stainless Steel Maq4_ is awfilable at Ace, Tree
Value, Servistar, HWI and other leading stores.
It is also awfilable through GE Parts and
Accessories, 800.626.2002. Order part number
X._3X10X15.
Do not use appliance wax or polish on the
stainless steel.
Use of any cleaning solution other than that
which is recommended, especially those that
contain petroleum distillates, can crack or
damage the interior of the refrigerator.
Avoid cleaning cold glass shelves with hot water
because the extreme temperature difference
may cause them to break. Handle glass shelves
carefully. Bumping tempered glass can cause
it to shatter.
Do not wash any plastic refrigerator parts in
the dishwasher.
2O
The Chill/Thaw tray is dishwasher safe.
Page 21

re and Cleaning
Slainless Sleel I_(/}'ig'eralor
Behind the
refrigoator
Preparing
jbr vacation
Be careflll when moving the refl'igerator away
fl'on_ the wall. All types of floor coverings can be
danmged, particularly cushioned coverings and
those with embossed sm'taces.
Pull the refl'igerator straight out and retm'n it
to position by pushing it straight in. Moving the
refl'igerator in a side direction may result in
damage to the floor covering or refl'igerator.
For long vacations or absences, reillove tood
and mq)lug the refl'igerator. Clean the interior
with a baking soda solution of one tablespoon
(l 5 ml) of baking soda to one quart (l liter)
of water, I,eave the doors open,
Set the icemaker power switch to the OFF
position and sh tit olt the water supply to
the refl'igerator.
Secure all loose items such as shelves and
drawers by taping them secm'ely in place
to prevent damage.
When pushing the refrigerator back, make sure
you don't roll over the power cord or icema_ker
supply line.
If the temperature can drop below fl'eezing,
have a qualified servicer drain the water SUl)ply
system to prevent serious property damage due
to flooding.
Be sure the refrigerator stays in ml upright
position during moving.
When using a hand thick to move the
refl'igerato_; do not rest the fl'ont or back
of the refl'igerator against the hand truck.
This could damage the reti'igerator. Handle
only from the sides of the refrigerator.
21
Page 22

Replacing the i,ight Bulbs
Slainl¢,s,s Slcel H_(/}'igeralor
Freshjbod
com[gartment--
upper light
Freshjbod
compartment--
lower light
Setting the controls to OFT does not remove
power to the light circuit.
1 UnI_lug the refl'igerator.
2 The bulbs are located at the top of the
c(nni)artnlent, inside the light shield.
Oil some models, a screw at the front
of the light shield will have to be removed.
3 To remove the light shield, press in on the
tabs on the sides of the shield and slide
t0i'wai'd and tilt.
Setting the controls to OFF does not remove
power to the light circuit.
This light is located above the top pml.
1 UnI_lug the refl'igerator.
2 Remove the convertible meat drawer control
knob by pulling straight out.
4 After replacing the bulb with an appliance
bulb of the same or lower wattage, replace
the light shield and screws (on some models).
When repladng the light shield, make sure
that the tabs at the back of the shield fit into
the slots at the back of the light shield housing.
5 Plug the refl'igerator back in.
Dispenser
3 I,itt the light shield up and pull it out.
4 Al*er replacing the bulb with an appliance
bulb of the same or lower wattage, replace the
shield and the knob.
5 Plug the refl'igerator back in.
Setting the controls to OFF does not remove
power to the light circuit.
1 Unplug the refl'igerator.
2 Remove the shelf just above the light shield.
(The shelf will be easier to remove if it is
emptied first.) On sore e models, a screw at
the top of the light shield will need to be
i'eilloved,
3 To remoxe tile light shield, press in on the
sides, and litt up and out.
Setting the controls to OFF does not remove
power to the light circuit.
4 Replace the bulb with an appliance bulb of
the same or lower wattage, and reinstall the
light shield. When reinstalling the light shield,
make sure the top tabs snap securely into
place. Replace the screw (on some models).
5 Reinstall the shelf and plug the refl'igerator
back in.
3 Replace the bulb with a bulb of the same size
and watta re
22
1 UnI)lug the refl'igerator.
2 The bulb is located on the dispenser under
the control panel. Remove the light bulb by
turning it counterclockwise.
4 Plug the refrigerator back in.
Page 23

No FTl_(l l
operating
so_72ds
The Problem Solver
Slai_le,ss Steel I_/)'ig'eralor
and use newer tecknologg_.
Do you hear what I hear? These sounds are normal.
HUMMM...
-- WHOOSH...
Tile new high efficiency compressor may run
taster and longer than vour old reli'igerator
and you may hear a high-l)itched hum or
pulsating sound while it is operating.
Sometimes tile reli'igerator Iuns ti)r an
extended period, especially when the doors
are opened frequently. This means that the
k¥osl Guard'" teature is working to prevent
fl'eezer burn and ilni)rove ti)od i)reservation.
You may hear a whooshing sound when tile
(looi_ close. This is due to pressure equalizing
within tile refl'igeratm:
CLICKS, POPS,
CRACKS and CHIRPS
• You may hear cracking or i)opping sounds
when tile refl'igerator is first plugged in.
This hal)pens as tile refiigerator cools to
tile correct temperature.
• Electronic dampers click open and closed to
provide optimal cooling and energy savings.
• The compressor may cause a clicking or
chirping sound when attempting to restart
(this could take up to 5 minutes).
• Tile electronic control board may cause
a clicking sound when relays actiw_te to
control refl'igerator components.
• Expansion and contraction of cooling coils
during and atter deti'ost can cause a cracking
or I)oI)ping SO/lIld.
WHIB!
You may hear tile Imps si)inning at high
speeds. This hal)pens when the refi'igerator
is fii_t plugged in, when the doors are
opened fl'equently or when a large aillO/lilt
of tood is added to tile reti'igerator oi"
freezer compartments. The tans are helping
to maintain tile correct temperatures.
If either door is open fl)r over 3 minutes, you
Ill}IV hear tile ][_IIIS COllie Oil iIl order to cool
the light bulbs.
The tm_s change speeds in order to provide
optimal cooling and energy savings.
You may hear the tans iunning atier selecting
one of tile CustomCool'"settings.
WATERSOUNDS
6
• Tile flow of refl'igerant through tile fl'eezer
cooling coils may make a gurgling noise like
boiling water.
• _M_ter dropping on tile defl'ost heater can
cause a sizzling, I)oI)ping or buzzing sound
during the defl'ost cvcle.
• Awater dripping noise may occur during tile
defl'ost cycle as ice melts from tile evaporator
and flows into tile drain pan.
• Closing tile door mav cause a gurgling sound
due to pressure equalization.
• Mier an icemaking cycle, you may hear the
ice cubes dropping into the ice bucket.
23
Page 24

The Problem Solver
Stainless Steel /_])'@'eralor
Questions ?
Use this
problem
solver, t
PROBLEM POSSIBLE CAUSE
REFRIGERATOR
DOES NOT OPERATE
VIBRATION OR
RATTLING (Slight
vibration is normaL)
MOTOR OPERATES
FOR LONG PERIODS
OR CYCLES ON AND
OFF FREQUENTLY
(Modern refrigerators
with more storage space
and a larger freezer
require more operating
time. They start mad
stop often to maintain
even temperatures.)
FRESH FOOD
OR FREEZER
COMPARTMENT
TOO WARM
FROST OR ICE
CRYSTALS ON
FROZEN FOOD
(Frost within package
is normal.)
• Refrigerator may be in defrost cycle when motor does not operate
for about 30 minutes.
• Either or both controls set to OFE Set to a temperatm'e setting.
• If interior light is not on, refl'igerator may not be plugged in at
wall outlet, Push the plug completely into the wall outlet,
• The fllse is blown/circuit breaker is tripped, Replace fllse or reset
the breaker.
• The refrigerator is in showroom mode. Unplug it and plug it back in.
• Ac!iust the rollers as shown in the Installation Instructions.
• Normal when refl'igerator is first plugged in. Wait 24 horn's fi_r the
refl'igerator to completely cool down.
•Otten occm's when large am(rants offl_od are placed in refl'igerator.
This is normal.
• Door lett open or package holding door open.
• Hot weather or fl'equent door openings. This is normal.
• Temperature controls set at the coldest setting,
See Temperatm'e Controls.
• Temperature controls not set cold enough.
See Temperatm'e Controls.
• _arm weather or frequent door openings.
• Door lett open fi_r hmg time,
• Package may be holding door open.
• Door left open or package holding door open.
• Too frequent or too long door openings.
DMDER BETWEEN
FRESH FOOD
AND FREEZER
• Automatic energ) saver s_stem circulates warm liquid arotmd the
front edge of the freezer compartment to help prexent condensation
from forming on the outside.
COMPARTMENTS
FEELS WARM
AUTOMATIC
ICEMAKER
DOES NOT WORK
• Icemaker power switch is in the Off position.
• Water supply turned off or not connected. See Installation Instructions.
• Freezer compartment too warm. Allow 24 horn's tot the refl'igerator
to completely cool down.
• Piled up cubes in storage bin cause icemaker to shut off.
I,evel cubes in bin.
• Ice cubes stuck in icemaker. Turn off the icemaker, remoxe cubes
and tm'n the icemaker back on.
24
Page 25

The Problem Solver
Stainless Steel I_(/)'ig'eralor
Questions ?
Use this
problem
solver/
PROBLEM
FREQUENT
"BUZZING" SOUND
ICE CUBES HAVE
ODOR/TASTE
SMALL OR
HOLLOW CUBES
SLOW ICE CUBE
FREEZING
CUBE DISPENSER
DOES NOT WORK
POSSIBLE CAUSE
• lcemaker power switch is in tile ON position, but tile water supply
to tile refl'igerator has not been connected. Set tile power switch
to tile OFFposition. Keeping it in tile 0rl/position will damage
tile water wove.
• Old cubes need to be discarded.
• Ice storage bin needs to be emptied and washed.
• Unsealed packages in fl'esh fi)od and/or fl'eezer compartments may
be transmitting odor/taste to ice cubes.
• Interior of refl'igerator needs cleaning. See Care and Cleaning.
• X*\'ater filter clogged. Replace the filter or use the filter bypass plug.
• Door may have been left open.
• T(lI'n telili)eratHre of ti'eezer COlili)arti/lent colder.
See Temperature Controls.
• Icemaker or water supply turned ott. Turn on icemaker or water supply.
• Ice cubes are fl'ozen to the icemaker feeler arm. Remove the cubes.
• hTegular clumps in the storage bin. Break up with fingertip pressure
and discard relnaining clumps. Tile fl'eezer inay be too warln. A@lst
the fl'eezer temperature control colder one step at a time tmtil clumi)s
do not t()I'Ill,
• The dispenser is I,OCKED. Press and hold the CONTROl, I,OCK pad
fin" 3 seconds.
WATER HAS POOR
TASTE/ODOR
WATER IN FIRST
GLASS IS WARM
WATER DISPENSER
DOES NOT WORK
WATER SPURTING
FROM DISPENSER
• An item is blocking or has tallen into tile ice chute inside tile top
door bin of tile fl'eezer. Remove any item that might be blocking
or has tallen into the chute.
• X_ater dispenser has not been used fi)r a hmg time. Dispense water
tmtil all water in the system has been replenished.
• Normal when refl'igerator is first installed. Allow 24 hours fi_r tile
refl'igerator to completely cool down.
• _'_ter dispenser has not been used fin" a hmg time. Dispense water
tmtil all water in the svsteln has been replenished.
• _,\'ater system has been drained. Allow several hours fi)r tile
replenished water supply to chill.
• Water supply line turned off or not connected. See tile
Installation Instructions.
• X_ater filter clogged. Replace tile filter or use tile filter byl)ass plug.
• _dr may be trapped in tile s_:stem. Press tile dispenser arm fin.
at least 2 minutes.
• Tile dispenser is I,OCKED. Press and hold tile CONTROI, I,OCK pad
fin" 3 seconds.
• Newly installed filter cartridge. Rim water fl'om tile dispenser fin.
about 3 minutes (about 1½ gallons).
Page 26

The Problem Solver
Stainless Steel I_(/)'ig'eralor
Questions ?
Use this
problem
solver, t
PROBLEM
WATER IS NOT
DISPENSED BUT
ICEMAKER
IS WORKING
NO WATER OR
ICE CUBE
PRODUCTION
CUBED ICEWAS
SELECTED BUT
CRUSHEDICE
WAS DISPENSED
ORANGE GLOW
IN FREEZER
REFRIGERATOR
HAS ODOR
DOOR NOT
CLOSING
PROPERLY
MOISTURE FORMS
ON OUTSIDE OF
REFRIGERATOR
POSSIBLE CAUSE
• _4'ater in reserxoir is frozen. Call fin" serxice.
• Fresh tood control setting is too cold. Set to a warmer setting.
• Water sui)ply line or shutoffwdve is clogged. Call a plmnl)e_:
• Replace the filter or use the filter byi)ass pltlg.
• The dispenser is I,OCKED. Press and hold the CONTROl, I,OCK pad
fin" 3 seconds.
• The last setting was CI?,USHED ICE and a few cubes were left in the
crusher from the prexious setting. This is nomml.
• Defrost heater is on. This is normal.
• Foods with strong odors should be tightly wrapped.
• Interior needs cleaning. See Care and Cleaning.
• Keep open box of baking soda in refrigerator; replace every 3 months.
• Door gasket on hinge side is sticking or tolding over. Apply paraffin
wax to the tace of the gasket.
• A door bin is hitting a shelf inside the reti'igerator. Move the door
bin up one position.
• Not tmusual during periods of high lmmidity. Wipe sm'iace dry.
• Door left open or package holding door open.
MOISTURE
COLLECTS INSIDE
INTERIOR LIGHT
DOES NOT WORK
WATER ON KITCHEN
• Too fl'equent or too long door openings.
• In hmnid weather; air carries moisture into reii'igerator when doors
are opened.
• No power at outlet.
• I,ight bulb needs replacing. See Care and Cleaning.
• Ice cubes jammed in chute. Poke ice through with a wooden spoon.
FLOOR OR BOTTOM
OF FREEZER
HOT AIR FROM
BOTTOM OF
REFRIGERATOR
REFRIGERATOR
NEVER SHUTS OFF
BUT TEMPERATURES
• Normal air flow cooling motor. In the refl'igeration process, it is
normal that heat be expelled in the area trader the refl'igerator.
Some floor coverings are sensitive and will discolor at these saii _
and normal temperatm'es.
• Adaptive defrost keeps compressor framing (luting door openings.
This is normal. The refrigerator will cycle off after the door relnains
closed fin" two horn's.
ARE OK
REFRIGERATOR
• Door is open and DOOR AI,ARM is on.
BEEPING
26
Page 27

The Problem Solver
Slainle,s,s Steel /_(])'ig'eralor
Questions ?
Use this
problem
solver/
PROBLEM POSSIBLE CAUSE
FOOD ISN'T
THAWING/CHILLING
ACTUAL
TEMPERATURE
NOT EQUAL TO
SET TEMPERATURE
SELECTTEMP
FEATURE IS
NOT WORKING
DOORS ARE
NOT ALIGNED
• Packaging insulating fl_o(1. Increase time or re-package in plastic.
• The wrong weight is selected. Select a larger weight.
• Item with high tat content. Select a larger weight.
• Not using Chill/Thaw tray. Place items on tray and allow space in
between items fl)r better air flow.
• Unit just plugged in. Allow 24 horn's lot the system to stabilize.
• Door open fin" too hmg. Allow 24 hours tot the system to stabilize.
• _\'arm tood added to refl'igerator. Allow 24 horn's for the system
to stabilize.
• Defl'ost cycle is in process. Allow 24 horn's fin" the system to stabilize.
• Fresh tood compa rtment tempera tm'e control is set at th e warm est
setting. This is normal. In order to minimize energy usage, the
SEI.ECTTEMP teature is disabled when the fl'esh tood compartment
temperatm'e control is set at the warmest setting.
• Unlevel floor. A(!just rollers then align doors by ac!justing the fl'esh
fi)od compartment hinge. See Installation lnsttuctions.
27
Page 28

Performance Data Sheet
GESmartWater Filtration System
GWFCartridge
Health Claim Performance Certified by NSF/ANSI*
¢100% safety factors built in for unmetered usage)
Sta_ldaaxl No. 42: Aesthetic Effects
PaJemneter USEPA
MCL
Chlorine
T&O - - -
Particulate** - 98.00% 96.10%
Parameter
USEPA
MCL
Turbidity
Cysts
i,ead at pH 6.5
i,ead at pH 8.5
Lindane
AtraAne
2,40
_sbestos
1 NTU***
99.95% Reduction
15ppb
15ppb
0.0002 ppm
0.003 I)pm
0.100 ppm
99%
* Testedusinga flowrateof0.5gpm(1.8927I/m);pressureof 120psig(8.437kg/cm );pHof Z5+_0.5;temp.of68+-4.5F(20+-2.5C)
Measurementinparticles/ml
*_ NTU= NephelometricUnits
hlfluent
Challenge
1.9 ppm
200,000
Standard No. 53: Health Effects
hlfluent Effluent
Challenge
24.3 NTU
105,750
160 ppb
150 ppb
0.00062 ppm
0.0084 ppm
0.272 I)pm
690 MFI,/ml
Average
I).02 i_pln
:4,978
Average
0.07 NTU
26
1 ppb
1.8 ppb
0.00005 pI)m
0.002 ppm
0.042 I)pm
0.32 MFI,/ml
2 O O O O
Effluent
MaDdlnuln
0.05 ppm
7,800
Max_num
0.1 NTU
,DD
1 ppb
4.3 ppb
0.00005 ppm
0.003 I)pm
0.0{,}0I)pm
1.2 MFI,/ml
% Reduction
Average
98.90%
% Reduction
Average
99.71%
99.97%
99.37%
98.80%
{.}1.{.}:4%
76.19%
84.89%
99.95%
Minimum
97.37%
Minimum
99.59%
99.95%
99.37%
97.13%
91.93%
64.28%
67.63%
99.82%
Operating Specifications
• Capacity: certified fin" up to 500 galhms (1893 liter); up to oue year
• Pressure requirement: 40-120 psi (2.8-8.2 bar), non-shock
• Temperature: 33°-100 ° F (0.60-38 ° C)
• Flow rate: 0.5 gpm (1.9 lpm)
General Installation/Operation/Maintenance Requirements
• Flush new cartridge at flfll flow tin" 3 minutes to pm'ge out trapped air.
• Replace cartridge when flow becomes too slow.
Special Notices
• h]stallation instructions; i)arts and service a\Mlability; and standard warranty are inchMed with the i)roduct when shii)i)ed.
• This drinking water system unlst be maintained according t{}I//aU]ll;IcttlYeY's inst_ uctions, including replacement of
filter cartridges.
• Do uot use with water that is microbiologically tmsafi _ or of uukuowu quality without adequate disinfection before or
after the system. Systems certified fin" cyst reduction may be used on disinfected water that may contain filterable cysts.
• The contaminants or other substances removed or reduced by this water treatment s}_stem are not necessarily in y{}m"water:
• Check fin" compliance with the state and local laws and regulations.
Syslem T(sted and C( rtified 1)vNSF Internalional against ANSIiNSF
Standard 42 & 53 tk_r tile reduction ot_
Standard No. 42: Aesflzetic Effects
Chemical Unit
Taste and Odor Reduction
(_hlorine Reduction, Class I
Mechanical Filtriition Unit
Particulate Reduction, Class I
Standard No. 53: Heahh Effects
Chemical Reduction Unit
I.ead and Atrazine Reduction
Lindane and 2,4-I) Reduction
Mechanical Fihration I hilt
Turbidity Re(luction
Cyst and Asbestos Reduction
Manufi_ctm'ed fin': (;eneral Electric Company, i,ouisville, KY 40225
28
Page 29

StateofCalifornia
DepartmentofHealthServices
Water Treatment Device
Certificate Number
00-1434
Date Issued: May 30 )000
Date Rexised: February 9 2001
Trademark/Model Designation
GE Smart Water Filtration S,
GE
Manufacturer:
...........................................Replacement Elements
Rated Service Capacity: 300 gallons* Rated Service Flow: 0.5 gpm
Do not use where water is microbiologically unsaliz or with water of unknown quality, except that systems
claiming cyst reduction may be used on water containing cysts.
* 500 gallons for models that include a replacement filter indicator light.
For Purchases Made In Iowa: This fln'm must be signed and dated bx the buyer and seller prior to the consummation of
this sale. This fin'm should be retained on file by the seller for a minim um of two years.
BUYER: SELLER:
Name Name
Address Address
Citx State Zip Citx State Zip
Signature Date Signature Date
29
Page 30

Notes
Page 31

(;onsmner Services
Slai_less Sled R_fi'ig'eralor
With the purchase of your new Monogram appliance, receive
the assurance that if you ever need information or assistance from
GE, we will be there. All you have to do is call---toll-free, t
G E Answer
Center®
In the USA:
800.626.2000
In-Home Repair
Service
In the USA:
800.444.1845
ln Canada:
1.800.561.3344
For Customers
With Special
Needs...
In theUSA:
800.626.2000
Whatever wmr question about any M(mogrmn major appliance, GE Answer Cente_ ¢':
inlormation service is awfilable to hell). Your call--and your question--will be answered
promptly and courteously. And wm can call any time. GE Answer Cente_ _'_service is open
24 ho/li_ a day, Monday through Saturdaw
OR
Visit our Website at: monogram.corn
In Canada, call 1.800.561..3344.
AGE consumer service protessional will provide expert repair service, scheduled at a time
that's convenient fl_r win. Manv GE Consumer Service company-operated locations olti_r
wm service today or tomorro_, or at your convenience (7:00 a.m. to l 0:00 p.m. weekdays,
8:00 a.m. to 6:00 p.m. Saturday and Sunday). Our thctor_trained technicians know vour
appliance inside and out--so most repairs can be handled in just one visit.
In (_anada: Monday to Friday, 7:00 a.m. to 8:00 p.m. and Saturday, 8:00 a.m. to 5:00 p.m.
EDST.
(;E otters Braille controls for a varietx of (;E appliances, and a broclmre
to assist in I)lanning, a barrie_free kitchen for persons with limited
mobilitx.
Consumers *sith impaired hearing or si)eech ,d_o haxe access to a TDD or
a conxentional teletypewriter may call 800.TDD.(;EA(_ (800.833.4322)
to request inforination or serxiee.
Service Contracts
ln theUSA:
800.626.2224
ln Canada:
1.800.561.3344
Par_ and
Accesso_es
In the USA:
800.626.2002
ln Canada:
1.800.561.3344
s_c_oN _A
You can have the secure feeling that GE Consumer Service will still be there after vour
warranty expires. Purchase a GE contract while wmr warranty is still in etti_ct and wm'll
receive a substantial discount. With a multiple-year contract, you're assured of flmue service
at today's prices.
Individuals qualified to service their own appfiances can have parts or accessories sent
directly to their home. The GE parts systeln provides access to over 47,000 parts...and all
GE Genuine Renewal Parts are flfllv warranted. VISA, MasterCard and Discover cards
are accepted.
User maintenance instructions contained in this manual cover procedures intended
to be performed by any user. Other servicing generally should be referred to qualified service
persmmel. Caution must be exercised, since improper servicing may cause m_safe operation.
31
Page 32

Warranty
Stai*Hess ,Steel R<fl'ig'erator
YOUR MONOGRAM REFRIGERATOR WARRANTY
Staple sales slip or cancelled check here. Proof of original purchase
date is needed to obtain service under warranty.
WHAT IS
COVERED
P}vm the
Date of the
Or' ginal
Purchase
WHAT
IS NOT
COVERED
_13Ii_ ONE-YI_R _'ARRAN_
For one year fi'om date x)foriginal pureh_ts(, we Mll pro@le, ti'ee xffcharge, parts and service labor iu your home to repair or
replace ar_ypall o/I/le _xjJgeralorthat filils becanse of a maul(factoring defi:ct.
_13Ii_ FIVEgYEAR _,ARRAN_
For five year_ from dale of orlginal purchase, we will pro@k', flee of charge, parts and serdce labor in your home to repair or
replace arlyparl ojNe v_alat W/i'_a'ratblg F_h'm (the compressoc condense_; evaporator and N] counecdng robing) tlxat fi/ils becanse
of a mamltitemrlng defect.
LIMITH) LI}'ETIMF WARR,_JN_ ON FUlL FNTENSION SLIDES
From the date of tile originN pureh_tse w{ will prxMde, fi:e{ of charge, r{ placement parts tar any part of the fidl {xmnsion slides
that litils because of a nxanufitctttring <leti:ct. _i>u pay liw the ser@:e trip to your home aud ]i>rservice labor charges.
HMITH) THIRTY-DAY WARRANTY ON WATER HLTER CARTRIDGE
From the date ot (lie orlginal purdlase w{ will pro@l< free of ehm°ge, replacement parts tar any part of the water filter
cartridge that tidls be(ause of a manttfactnfing deli.'(t. _i>u PW for the serxi(e trip to your home and tar servi(e labor dxarges.
During this liluited thirl}-d W _;_lrrant}, we _ilI also pro@]e, frec of (harge, a replacemeut water lilter (arwldge.
q_ooooooooooo@@@@@@o@@@@@oooooooooooooooooooooooooooooo@@@@@o@@@@@@oooooo
This warranl} is ext_ nd_ d to the original purd/aser and any su/ceeding owner for pro(lit(Is purchased %r oidina U home use in
the 48 mainland states, I lawaii, Washington, D.C. or Canada. If the product is located in ml area wh_re servi(e N a GE Authodzed
See@ er is not mailable, y,.3/tma} be responsible file a trip chmge or you ra W be required to bring dxe pr,.sduct to an :\uth,.srized
GE Service lo(adon fill:se_Mee. In Alaska the warrant} is tile same except that it is I ,IMH'ED because you must pay to ship the
pro(in( t ".Othe ser\i(e shop or for lhe servi( e te(hui(Jan's tra\'el ((>sis to }O/tiT h()lne.
All warranu selM(e _i11be provided b} our I:acto U Ser@:e Cemers or b} our anthorlzed Customer Care _ setM(els during normal
working hours.
Should your appliance need serdce, during warranl> period or be} and, in the USA (:all 800.444.1845. Iu Canada: 800.561.3344.
Please haw !our serial mtmber and model number mailable wheu calling li>r see@ e.
• Service trips to your home to teach you how to use •
the product.
• hnproper lilStallatiou, delivery or n_tenanee.
If you have at] installation problem, contact your dealer or
installer. You are respollsible for providing adequate
electrical, plumbing and other connecting facilities. •
• Failure of the product if itis used for other than its intended •
purpose or used eommerdally;
• Damage caused after delivery. •
• Loss of food due to spoilage (it] the USA only).
Replacement of the water filter cartridge due to water
pressure that is outside the specified operating range or due
to excessive sediment in the water supply.
Replacement of the light bulbs or water filter cartridge
other than as noted above.
Replacement of house fuses or resetting of circuit breakers.
IucidentaJ or consequential damage caused by possible
defects with this appliance.
Damage to the product caused by accident, fire, floods or
acts of God.
Product not accessible to provide required service.
197D3359P003
49-60270-1
01-08 JR
Printed in the United States
EXCLUSION OF IMPLIED WARRANTIES--Your sole and exclusive remedy is product repair as provided i
in this Limited Warrantg. Ang implied warranties, including the implied warranties of merchantability
or fitness for a particular purpose, are limited to one gear or the shortest period allowed bg law.
Soix/e states/proxJn((_s (Io not allm_ the xxt ]/tSlOU (}r liluilation (st'indd( i/tal or ((]ixseqilelxtial dai]/ages, so lh( atxox( ]illXilatioIX
or (xclusiolx may not apply to you. This warramy (,,iv(s you sp_ dtic legal fighls and you may _dsohay( oth(r righls xdlich vary
t]7()I11 s|a[e o s[t (/p ()_1I/(( ".o 1 rov[xle "l)x k low w x t[ 3(/x" (!gl l'tg x'.s "iF( n yo/r S / e/provi /7 ( (o xs/1 3()/ "li)( i1 o" s ] (! /
pr(Mucial coxxsumerafri_irsotlice or your state's AttorueyGeneral
Warrantor in USA:General Hectrie Company;
Louisville, KY40225
Warrantor in Canada:MabeCanada Inc.
GE Consumer & Industrial
Appliances
General Electric Compang
Louisville, KY40225
ge.com
I
I
 Loading...