

Page 1
Owner's
Manual
Side-by-Side
Stainless Steel
Free-Standing
Refrigerators
www.monogram.com
Monogram;
We bring good things tolife.
Page 2
Consumer Inff)rmation
Stainless Steel I_t_/}'ig'erator
hmoduction
Your new Monogram ret]'igerator makes an eloquent statement of style, convenience and kitchen
planning flexibility, Whether you chose it fist its purity of design, practical storage arrangements
or assiduous attention to detail--or flw all of these reasons--you'll find that your Monogram
refl'igerator's superior blend of fl)rm and ftmction will delight you fin" years to come.
The inflmnation on the %llowing pages will help you operate and maintain yore" refrigerator
properly.
If you have any other questions, visit our Website at: wwwomonogrmn.com
Contents Consumer Services
Important Phone Nmnbel_ .............. 31
Model and Serial Nmnbers ............... 3
Peril)finance Data Sheet ................ 28
Problem Solver . .................... 23-27
Product Registration .................... 3
Satety Instructions .................... 4-7
State of Califl_rnia
_lter Treatment Device Certificate ....... 29
Warrant_ ..................... Back Cover
Care and Cleaning
Cleaning--Outside and Inside ........... 20
Light Bulb Replacement ................ 22
Movi,*g ............................... 21
Vacation .............................. 21
Operating Instructions
Automatic ]cemaker . ................... 17
Additional Features .................... 15
Crispers and Pans ...................... 16
CustomCool TM . ..................... 10, 1 l
Ice and Water Dispenser . ............ 18, l 9
Shelves and Bins .................... 13, 14
Perflwmance Air Flow System ............. 8
Temperatm'e Controls ................... 8
TurboCool TM . .......................... 9
_lter Filter . .......................... 12
Be[bre
using
_OUT
r@igerator
Read this manual carefully. It is intended to
help you operate and maintain yore" new
refl'igerator properl>
Kee I) it handy fin" answers to your questions.
If you don't understand something or need
more help, there is a list of toll-fl'ee consmner
service nmnbers included in the back section
of this manual.
OR
V]sit on r Websit e at: www.monogram.com
Page 3
-Wdte
down the
model &
serial
n u 711DerS
Yilu'll see them on a label inside the fl'esh fl/od
compartment at the top on the right side.
Please write these mlmbers on the (;onsumer
Product (-)wnership Registration Card included
with the packing material.
Before sending in this card, please also write
these numbers here:
Model Number
Serial Nmnber
Use these numbers in any correspondence or
service calls concerning your refl'igerator.
If you
received a
damaged
,gfrigerator
Save time
& money
If you
7teed
service
Immediately contact the dealer (or buikler)
that sold you the refi'igerator.
Befllre you request service, check the Problem
Solver ill the back of this manual,
To obtain service, see the Consumer Services
page ill the back of this manual.
We're proud of our service and want you to
be pleased. If fllr some reason you are not
happy with the service you receive, here are
steps to follow fl)r turther help,
For cusC_omers in the USA:
FIRST, contact the people who seiMced your
appliance. Explain why you are not pleased.
In most cases, this will solve the problem.
It lists ca uses of minor operating problems that
you call correct y(mrselL
For cus¢omers in Canada:
FIP.ST, contact the people who serviced your
appliance. Expkdn why you are not pleased.
Ill most cases, this will solve the problem.
NEXT, if you are still not pleased, write all the
details--inch/cling your phone Immber to:
Managel; CollStll/*er Rehtions
Camco Inc.
1 Factory I,ane, Suite 310
Moncton, N.B. El(; 9M3
NEXT, if you are still not pleased, write all the
details--including your phone nmnbel_to:
Manager, Customer Relations
GE Applia*lces
Appliance Park
I,ouisville, KY 40225
Page 4
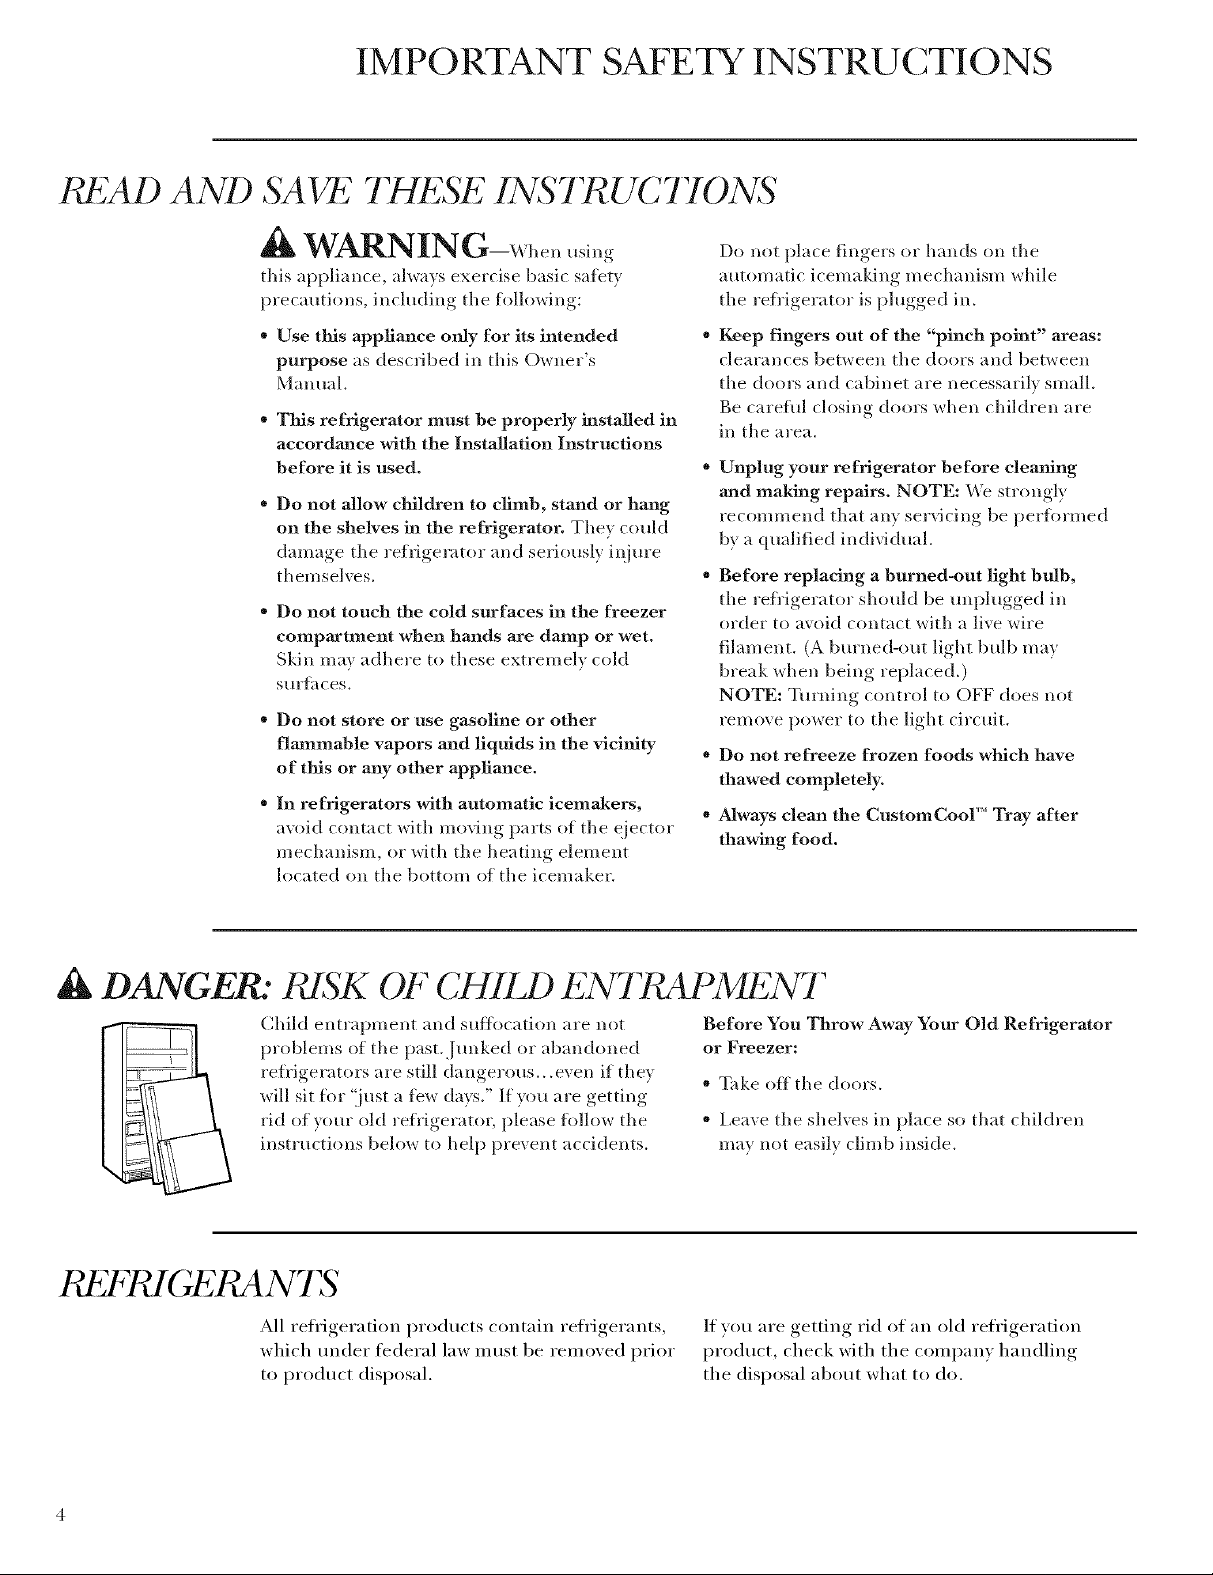
IMPORTANT SAFETY INSTRUCTIONS
READ AND SAVE THESE INSTRUC770NS
WARNING-whe,, .sin,
this appliance, always exercise basic safety
precautions, including the following:
" Use this appliance only for its intended
purpose as described in this Owner's
Manual.
" This refrigerator must be properly installed in
accordance with the Installation Instructions
before it is used.
Do not allow children to climb, stand or hang
on the shelves in the refrigerator. They could
damage the refrigerator and seriously ii_im'e
themselves,
Do not touch the cold surfaces in the freezer
compaactment when hands are damp or wet.
Skin may adhere to these extremely cold
s(*r_lces.
* Do not store or use gasoline or other
flammable vapors and liquids in tim vicinity
of this or any other appliance.
* In refrigerators with automatic icema_kers,
avoid contact with moving parts ot the ejector
mechanisuL or with the heating element
located on the bottom of the icemaker.
Do not place fingers or hands on the
automatic icemaking mechanism while
the refl'igerator is plugged ill
Keep fingers out of the "pinch point" areas:
clearances between the doors and between
the doors and cabinet are necessarily small.
Be careful closing doors when children are
in the area.
Unplug your refrigerator before cleaning
and making repairs. NOTE: We strongly
recommend that any servicing be perfln'med
by a qualified individual.
" Before repladng a burned-out light bulb,
the refl'igerator should be unplugged in
order to avoid contact with a live wire
filament. (A bm'ned-out light bulb may
break when being replaced.)
NOTE: Turning control to OFF does not
remove power to the light circuit.
" Do not refreeze frozen foods which have
thawed completely.
, Always clean the CustomCool 'MTray after
thawing food.
DANGER." t SK OF CHIIJ) ENTRAPMENT
Child entrapment and suffocation are not
problems of the past.Jm*ked or abandoned
refrigerators are still dangerous...even if thev
will sit %r 'lust a tew days." If you are getting
rid of your old refligeratoL please tollow the
instructions below to help prevent accidents.
REFRIGERANTS
All refl'igeration products contain refl'igerants,
which under federal law Inust be reuloved prior
to product disposal.
Before You Throw Away Your Old Refrigerator
or Freezer:
" Take off the doors.
* Leave the shelves in place so that children
may not easily climb inside.
If you are getting rid of an old refl'igeration
produrt, check with the (ompany handling
the disposal about what to do.
Page 5

LIPd 2 ET CONSERVER CES INSTRUCTIONS
AVERTISSEMENT :
Lorsque wins utilisez le r(_fl'ig(_rateur, obsesvez
toujours certaines prOcautions de base,
notamment :
, N'utilisez le r6frig6rateur que pour son usage
pr6vu, comme dOcfit dans le prOsent manuel.
, InstaJlez le r_frig6rateur conform6ment aux
directives d'installation avant de l'utiliser.
, Ne laissez pas les enfants grimper, s'asseoir,
se tenir debout ni se pendre attx clayettes
du r6frig6rateur. Ils pourraient endommager
le r(_frig(_rateur et se blesses" gravement.
" Une fois le r6frig6rateur en marche, ne
touchez pas les surfaces froides du
cong61ateur, surtout si vous avez les mains
huruldes ou moulll6es : la peau risque
d'adh_rer 5 ces surfllces tr_s fl'oides.
* N'entreposez et n'utilisez pas d'essence on
autres vapeurs et liquldes inflammables _t
proximit6 de cet appaaceil ou de tout autre
appareil 61ectrom6nager.
* Pour les r6frig6rateurs dot6s d'une machine
h gla_ons automatique, &'itez le contact
avec les pi_ces mobiles du m_canisme
_jectem', ou avec l'(q_ment chauflant situ_ "l
la pattie infi_rieure de la machine 5 glacons.
Ne posez pas les doigts ou les mains sur
le m_canisme de la machine a glacons
pendant (isle le r_fl'ig&'ateur est branch'.
, 1_71oignez les doigts des parties dn
r6frig6rateur off l'on peut facilement se
pincer : les espaces entre les portes et entre
les portes et les placards sont toujom's Otroits.
Soyez ptudent lorsque vous termez les portes
de l'appareil ell prg_sence des enflmts.
, D6branchez votre r&frig6rateur avant
de le nettoyer et de le r6paxer.
REMARQUE : Nous vous recommandons
vivement de confier toute r(_paration aun
technicien qualifiO.
, Avant de remplacer tree ampoule grill6e,
le rOfl'igOrateur doit Otre dObranchO afin
d'(_viter tout contact avec un fil sous tension.
(Une ampoule grill(_e peut se briser pendant
Fop&'ation). REMARQUE : Lorsque wins
placez la commande sur Oteint, l'alimentation
(qectrique de l'ampoule n'est pas coup(%.
, Ne faites PAS recongeler des aliments
surgel6s qul ont compl&tement d6gel&
Nettoyez toujours le contenaJat CustomCooF'
apr&s avoir d6gel6 les aliments.
DANGER: PdSQUI 2S POUR L 2S ENFANTS
Les enfimts pris au pi&ge ou morts d'asph};xie
sont toujoul_ d'actualit<q. Les appareils de
r_fl'ig_ration abandon_s sont toujours aussi
dangereux, mOme si on n'attend que "quelque
jours" pore" s'en d(4barasser. Si vous ne gardez
pas wme ancien appareil, veuillez suivre les
directives ci-dessous afin de prOvenir les
accidents.
P 2FPJG1,;'Pu4N75
Tousles appareils de rOfi'ig&'ation contiem_ent
des refl'igerants qui, confimn&nent a ux lois
f6dOrales, doivent &tre enlevOs awmt toute
Olimination de l'appareil,
Avaaat de vous d6barasser de votre vieux
appaxeil de r6frig6ratinn :
* D(_montez les pos'tes.
, Laissez les clayettes ell place afin d'emp6cher
les enfimts de grimper 5 l'int6riem'.
Si vous wins d_barrassez de vieux appareils de
rOfl'igOration, v&'ifiez, aupr_s de la sociOt_ qui
s'occupe de leur 61imination, ce que wins
devez taire.
Page 6
IMPORTANT SAFETY INSTRUCTIONS
HOW TO CONNECT ELECTtUCITY
Do not, under any drcumstaaaces, cut or remove
the third (ground) prong from the power cord.
For personal safety, this appliance must be
properly grounded.
The power cord of this appliance is equipped
with a 3-prong (grounding) plug which mates
with a standard 3-prong (grounding) wall outlet
to minimize tile possibility of electric shock
hazard ii'om this appliance.
Hare tile wall outlet and dreuit checked by
a qualitied electrician to make sure the outlet
is properly grounded.
Where a standaM 2-prong wall outlet is
encountered, it is your personal responsibility
and obligation to have it *eplaced with a
properly grounded 3-prong wall outlet.
Tile refrigerator should always be plugged into
its own individual electrical oudet which has
a voltage rating that matches tile rating plate.
Because of potential safety hazaacds under certain
conditions, we strongly recommend against the
use of am adapter plug.
HoweveL it you UltlSt rise all adapter; where local
codes permit, a temporary connection may be
made to a propedy grounded 2-prong wall outlet
by use of a UI Aisted adapter available at most
local hardware stores.
The larger slot in tile adapter must be aligned with
tile larger slot ill the wall outlet to provide proper
polarity in tile connection ot tile power cord.
When disconnecting the power cord ti'om tile
adaptel, always hold tile adapter ill place with one
hand while pulling tile power cord plug with tile
other hand. If this is not done, tile adapter ground
temfinal is ve_y likely to break with repeated use.
This provides tile best perfi_unance and also
prevents overloading house wiring circuits which
could cause a fire hazard _i'om ox erheated wires.
Nerer unplug your refrigerator by pulling on tile
power cord. Alwa}:s grip plug firmly and pull
straight out ti'om tile outlet.
Repair or replace immediately all power cords
that hare become tiaved or otherwise damaged.
Do not use a cord that shows cracks or abrasion
damage along its length or at either end.
\_]len moving tile refrigerator away ti'oul tile
wall, be caleflll Ilot to roll over or damage tile
power cord.
If tile adapter ground terminal breal<s, DO NOT
USE tile appliance until a proper ground has been
established,
Attaching tile adapter ground terlninal to a wall
outlet cover screw does not gro/md the appliance
unless tile cover screw is metal, and not insulated,
and tile wall outlet is grounded through tile house
wiring. You shoukl have the dreuit checked bv
a qualified electridan to make sure tile outlet is
properly grounded.
Use of all adapter plug will increase tile clearance
needed tb, tile back (ff tile appliance.
USE OF EXT>2NSION CORDS
Because of potential safety hazaacds under certain
conditions, we strongly recommend agafinst the
use of am extension cord.
Howe\w. if you must use all extension cord, it is
absolutely necessai T that it be a UIAisted, 3-wire
grounding _pe appliance extension cord having
a grounding b,pe plug and outlet and that tile
electrical rating of tile cord be 15 amperes
(minim urn) and 120 volts.
SAVE THESE INS TR UCTIONS
Page 7
RA CCORD1;MEN7 E7 ; C7PdQUE
Ne coupez _fi retirez en aucma cas la woisi_me
broche (raise a la terre) de la fiche du cordon
d'alimentation. Pour vowe s_curit_, cet appareil
doit 6we correctement mis h la terre.
I,e cordon d'alimentation de cet appareil est
muni d'une fiche 5 3 broches (raise 5 la terre)
qui se branche darts une prise m ural ordinaire
fi 3 alv0oles (raise fi la torte) pour r6duire an
minim um les fisques du chocs _lectriques.
Faites examiner la prise de courant et le circuit
par un 01ectficien qualifi0 pour vous assurer
que la prise est correctement raise fi la terre.
Si la prise mumle est du Qpe standard fi
2 alv&)les, il vous incombe de la edre remplacer
par line prise 5 3 alv&)les correcmment raise
5 la terre.
I,a machine 5 glaqons doit totljoms _tre
branch_ darts sa propre prise de courant,
dont la tension nominale est identique
5 celle indiqu_e sur la plaque signal_tique.
Nous vous recolmnmadons fortement de ne pas
ufiliser mm fiche d'adaptation h cause des risques
potentiels qu'elle prSsente dmls certaJnes
drconstaaaces.
T()utefifis, si vous d_cidez d' utiliser tout de m brae
une fiche d'adaptation, vous pouvez eflectuer un
raccordement temporaJre, si les codes locaux le
pem}ettent, dans une prise de courant 5 2 alv&)les
ad&luatement raise fi la terre en ufilisant une fiche
d'adaptation homologu_e UI,, en vente darts la
plupart des quincailleries.
I,a tente la plus longue de la fiche dolt &tre
aligng_e avecla tente la plus hmgue de la prise
murale afin d'assurer la polarit_ appropfi_e pour
le branchement du cordon d'alimentation.
Cette prOcaution est recommandOe pour gamntir
un rendement optimum et &'iter une surcharge
des circuits _lectriques de la r_sidence, ce qui
pourrait crier un risque d'incendie par
sm_cha ufli _ des ills.
Ne d_branchezjamais l'appareil en firant le
cordon d'alimentation. Saisissez ti_mmment
la fiche du cordon et tirez droit pour la retirer
de la prise.
R_parez ou remplacez imm&liatement tout
cordon efliloch_ ou endommag_. N'utilisez
pas un cordon tendill_ ou pr_sentant des signes
d' tlS/lI'e.
I,o_sque vous d_placez l'appareil du ram; thites
attention de ne pas la tifire fouler sur le cordon
d'alimentation afin de ne pas l'endommage_:
I,o_sque vous d_branchez le cordon
d'alimentafion de la fiche d'adaptafion, saisissez
toujou_ la fiche d'une main pendant que vous
tirez sur la fiche du cordon d'alimentation de
l'autre. Sinon, la borne de raise 5 la terre de la
fiche d'adaptafion risque de casser avec le temps.
Si la borne de raise fi la terre de la fiche casse,
N'UTILISEZ PAS l'appareil rant qu' tree raise
fi la terre ad&luate n'aura pas _t_ r_tablie.
I,e tifit de fixer la borne de raise 5 la terre de la
fiche d'adaptafion 5 la plaque de la prise de
CO/lI'ilnt n'[ISS/lI'e p[IS [l[ltoII/[Iti(llleIIleIlt la Illise _
la terre de l'appareil. I1 timt que la vis soit en m_tal,
non isol0e, et que la prise de courant soit raise 5
la terre par l'entremise du cfiblage de r_sidence.
Faims v&ifier le circuit par un _lectficien qualN_
pour vous assurer que la prise est ad&luatement
raise 5 la terre.
COPd)ONS PR OL ONGA T?2URS
Nous vous reco_mnm_dons fortement de ne pas
utiliser de cordo_s prolongateurs h cause des
risques potentiels qu'ils pr6sentent dmas certaJnes
conditions.
Toutefi)is si vous dOcidez d'ufiliser tout de m_me
un cordon prolongateu_; il est absolument
n_cessaire qu'il s'agisse d'un cordon 5 3 ills avec
raise 5 la terre pour ap.pareils _lectrom&mge_
homologu(_/5i, (aux Etats-Unis) ou homologu_
CSA (au Canada), pou_wu d'une fiche et d'une
prise raises 5 la terre de 15 amp0res (minimum)
et de 190 volts.
CONSER VEZ CES DIt 2C77VF, S
7
Page 8

7Hmperature
controls
OperaOng InstrucOons
Stainless Steel /b_/)'i._'era/or
The temperatm_ _vmSmlsar,,[m<_esi_ thejacto, O, at 37°F f_r she f!_h
f,od compartm_,_t and O°Ff,r the,/i(_,z_,rcompamm¢_ t. A lb,w 24
hour:Lira SheSemperaSur_ SosSabil_ze SoShe proses >_comm_,_,led.sdtb_Ks.
Tke semp(_rasutz_controls can di.spk O,bosh she SET temperature
a.s well a.s Sheactual temperature in She!_z,shjbod (md ji(_(_z(_r
comparSme_ Ss. The actual temperature m(O,vm 7 ._l_g'k@,fiwm the
SET semp_rasur_, ba.sed on u.sag_,and @eraSing e_vi'ronmer_S.
5'(4sivg"either or both conSr.Z_ SoOI_T ,sSop,_cooling" in both Shef!'e('z(_r
amlj?(*sb f!_od com/mrt_ne*_Ss;but do(*s_oS skuS qff el(_csriealDower so
ske re:¢,ii_z_raSor,
NOTE: 77te r@igeraS.r i._._hipped wish ptvs(,cSive f!lm (v_w_rin_She
temperature co,m'oLs. (!'shi.Lfihn wa._ _oS remov(d during" i_tsSallasiom
Yel)?o_e is I?OW.
[)Q/i(9 T_/'I(/,71('_
Air How
System
To change the temperature, press and release
the (_ (warnler) or @ (colder) pad. The SET
light will come on and the display will show the
set temi_erature. To change the ten_i_erature ,
tap either the (_ (wanner) or @ ((older)
pad tmtil the desired temperature is displayed.
Fresh food teini)eratures can be ac!justed
between 34°F and 44°F and the fl'eezer
telni)eratures C_lll be a(!justed between
-6°F and +6°E
Once the desired temperature has been set,
the temi)erature display will returi_ to the
actual fl'esh fi)od and fl'eezer telni)eratures
aiier 5 seconds. Several a@ustments inav be
required. Each tilne vou at!just controls,
allow 24 hours fi)I" the refi'igerator to reach
the temi)erature you have set.
The Perfm'mance AiI_Flow System is designed
to n_aximize teml)erature control in the ti'esh
fi)od and fl'eezer coml)artn/ents. This tmique
special feature consists of the ?dr Tower along
the top and back walls of the fi'esh fi)od
conq)artlnei_t and the _&Ji"Tulmel on the
bottoln portioi_ of the fi'eezer rear wall.
Placing food in fi'ont of the louvels on these
comi)oi_ents will not affect i)erfi)rmai_ce.
To turn the cooling system off, tap the
O (wariner) pad fi)r either the fresh tood
colnl)artlnent or the fl'eezer until the display
sh ows O FF. To turn the unit back on, press
the @ (colder) pad ti)r either the fresh food
conq)artmei_t or fl'eezer. The SET light will
illulninate on the side you selected. Then press
the @ (colder) pad again (on the side where
the SET light is illmninated) and it will go to
the preset points of 0°F ti)I" the freezer and
37°F for the fl'esh fl)od colnl)artlnent.
Although the Air Tower and the Air Tulmel
can be removed, doing so will affect
telllpei'attlFe perfoFillaiice. (For rell/oval
insti uctions, on-line, 24 hours a day, contact
us at _vw.monogram.('om or call 800.444.1845.
In Canada, ('all us at 1.888.880.3030.)
Page 9

TurboCooF
Stahdess Steel H_i/)'it{'erat0r
How it works
Hozl) [o use
TurboCool rapidly cools the
refl'igerator compartment in
order to more quickly cool f6ods.
Use TurboCool when addino a TurboCool
large amotmt ot tood to the refl'igerator
compartment, putting away foods after they
have been sitting out at room temperature
or when putting away warm leitove_. It can
also be used if the refligerator has been
without power for an extended period.
1 Press TurboCool. The refl'igerator
temperature display will show TC.
2 _Mter TurboCool is complete,
the refl'igerator comi)artinent
will return to the original setting.
Once actix;tted, the compressor will turn on
immediately and the rims will cycle on and
off at high speed as needed for 8 horn's.
The compressor will continue to rtm until
the refligerator coml)artment cools to
approximately 34°F (1 °C), then it will cycle
on and off to maintain this setting. Aflrer
8 horn's, or if TurboCool is pIessed again,
the refl'igerator compartment will return to
the original setting.
NOTES:
" The refl'igerator temperature cannot be
changed dm'ing TurboCool.
" The fl'eezer temperature is not affected
during TurboCool.
" When opening the reti'igerator door during
TurboCool, the rims will continue to rtm
if they have cycled on.
Page 10
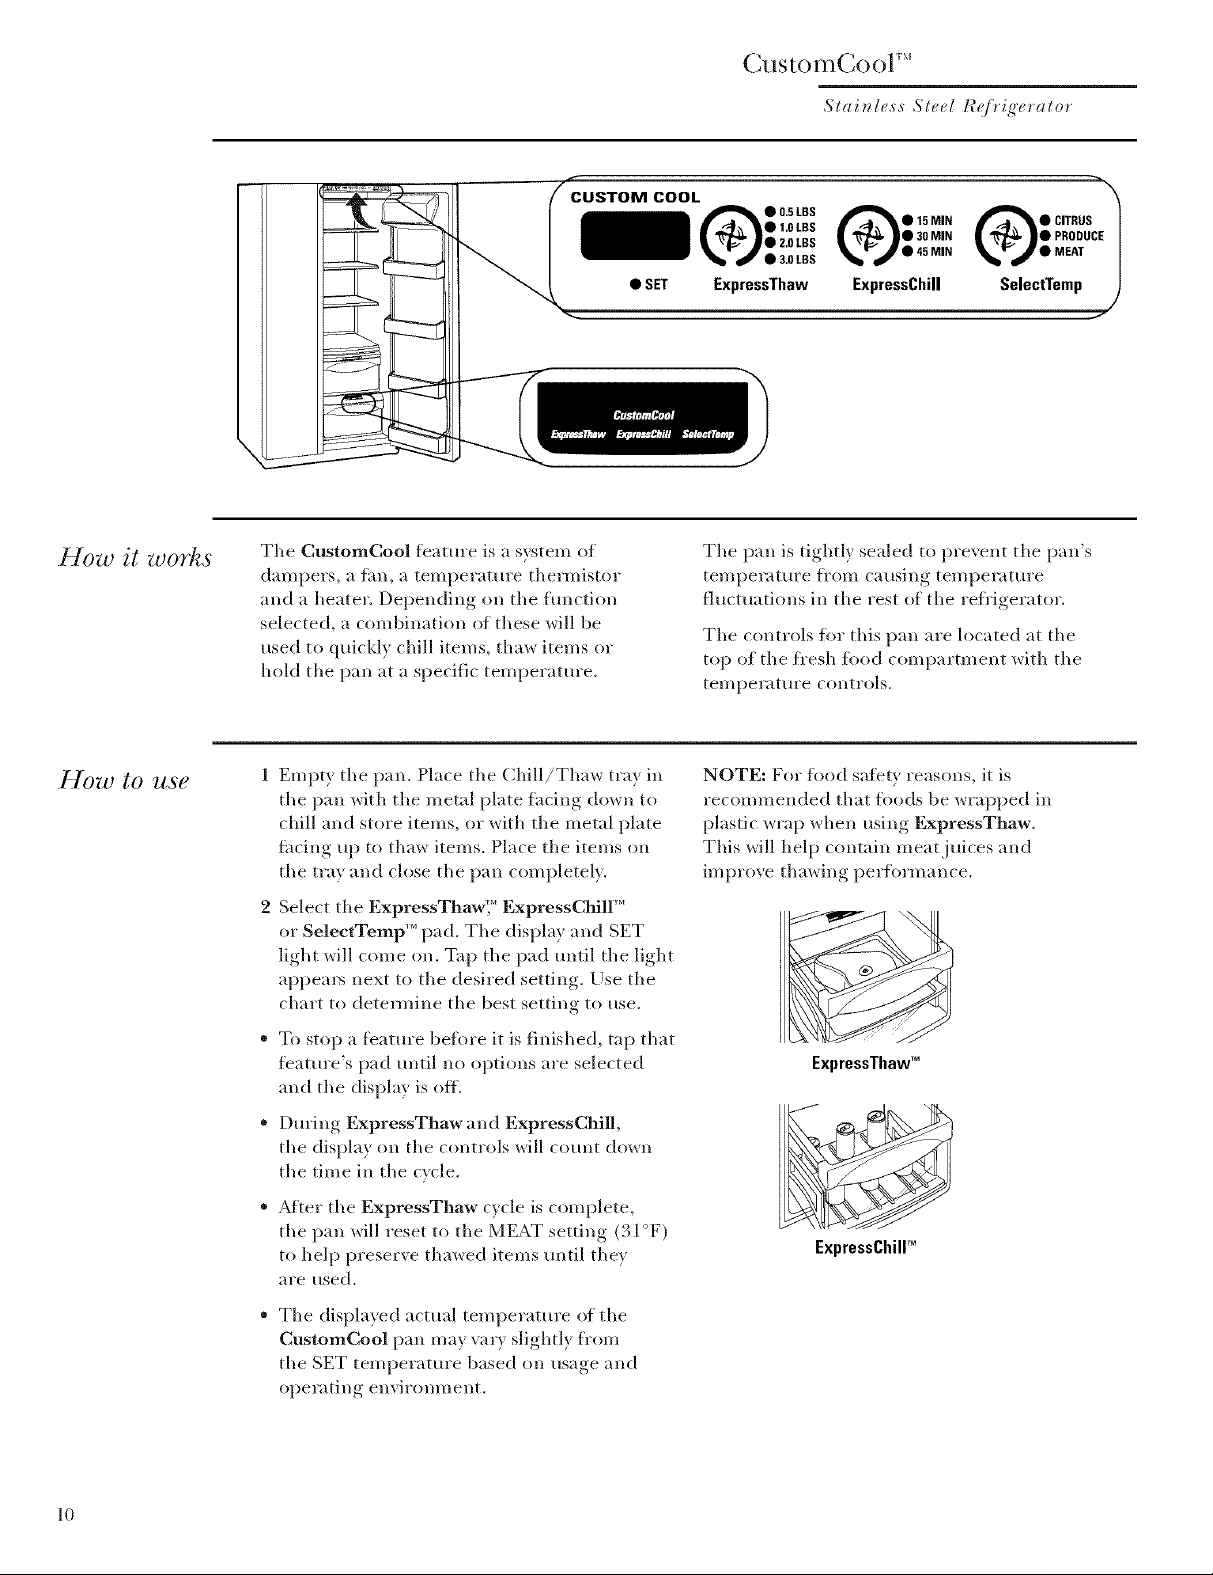
(ills t()H)(](-) Ol _'_
Stai_dess Steel I_@'ig'erator
How it
How to 7lSe
The CustomCool fl_atm'e is a system of
dampers, a tim, a temperature therinistor
and a heater. Depending on the function
selected, a combination of these will be
used to quickly chill items, thaw items or
hold the pan at a specific temperature.
1 Empty the pan. Place the Chill/Thaw tray in
the pan with the metal plate timing down to
chill and store items, or with the metal plate
liming up to thaw items. Place the items on
the tray and close the pan completely.
2 Select the ExpressThawF ExpressChill'"
or SelectTemp TM pad. The display and SET
light will come on. Tap the pad until the light
appea_ next to the desired setting. Use the
chart to detemfine the best setting to use.
, To stop a fl_ature befl_re it is finished, tap that
feature's pad until no options are selected
and the display is oil
" During ExpressThawand ExpressChill,
the display on the controls will count down
the time in the cycle.
The pan is tightly sealed to prevent the pan's
temperature fl'om causing temperature
fluctuations in the rest of the refi'igerator.
The controls flw this pan are located at the
top of the fl'esh fl_od corn partm ent with the
ten/perature controls.
NOTE: For fl)od satety reasons, it is
recommended that fl)ods be wrapped in
plastic wrap when using ExpressThaw.
This will help contain meat juices and
improve thawing perflwmance.
ExpressThawTM
10
, _Mter the ExpressThaw cycle is complete,
the pan will reset to the MEAT setting (31 °F)
to help preserve thawed items until they
are tlsed.
The displayed actual temperature of the
CustomCool pan may var_ slightly fi'om
the SET temperature based on usage and
opel'iltillg envirollI//ellt.
ExpressChilW
Page 11

CustomCool"
chart
NOTE: I)_<_ul/s may vary d@ending on packagdng; starting_ temp('rature and otherjbod traits.
Q 0.5 LBS _l_t Q 15 MIN I_I_O CITRUS
Q 1.0 LBS
eZ.OLBS R _ ]_e30ilN _[ _ ]_e PRODUCE
_P" • 3.otBs
ExpressThaw ExpressChill SelectTemp
%-./• %.-j •
0.5 Lb. (4 hours)
• Hand)urger Patties (0.5 lb)
• Individually Wrapped
Filet Mignon (0.5 lb)
1.0 Lb. (6 hours)
• Chicken Breasts (1.0 lb)
• GromM Beef (1.0 lb)
• Steak (1.0 lb)
2.0 Lbs. (10 hours)
• Chicken Breasts (2.0 lbs)
• Grotmd Beef (2.0 lbs)
• Steak (2.0 lbs)
3.0 Lbs. (12 hours)
• Chicken Breasts (3.0 lbs)
• Grotmd Beef (3.0 lbs)
• Steak (3.0 lbs)
15 Minutes
• 1 Beverage Can (12 oz) •
• 2 Small Juice Boxes
(6-8 oz each)
30 Minutes
• 2 to 6 Beverage Cans
(12 oz each)
• 2 Plastic 20 oz Bottles
of Beverage
• 4 to 6 Small Juice Boxes
(6-8 oz each)
• 3 Foil Juice Packets
• Wine (750 ml bottle)
45 Minutes
• 2 i,iter of gexerage
• 1/2 Galhm of.Juice
• Gelatin - 1 package
Citrus Setting (43°F)
Oranges, I,emons, I,imes,
Pineal)pie, Cantaloupe
Beans, ()lcumbers,
Tomatoes, Peppers,
Eggplant, Squash
Produce Setting (35°F)
• Strawberries, Raspberries,
Kiwifmit, Pears, Cherries,
Blackberries, Grapes, Plums,
Nectarines, Apples
• Asparagus, Broccoli, Corn,
Mushrooms, Spinach,
Cauliflower, Kale, Green
Onion, Beets, Onions
Meat Setting (31°F)
Raw Meat, Fish and Poultry
Custom Cool '"
rack and tray
To clean the Chill/Thaw tray, disassemble the
metal tray ti'om the plastic stand by lightly
pushing in on the handles ()f the plastic stand
and removing the metal tray. Both the metal
trav and the plastic stand are dishwasher sate.
Disassemblingthe Chill/Thawtray
To reassemble the tray, place the plastic stand
upside down (handles on bottom) on a solid
sm'lace. Place the metal plate on top of the
stand matching up the crowed side of the plate
with the crowed side of the stand. Insert one
side of the plate into the notches on the stand.
Push in on the handle on the other side of the
stand while pushing that end of the plate down
and into place. You should hear the plate
"click" into place.
ll
Page 12

Water Filter
-Water filter
cartridge
The water filter cartridge is located
in the back upper right corner of
the fl'esh tk)()(1 compa_qtment.
When to Replace the Filter
There is a replacement indicator
light tk)r the water filter cartridge on the
dispenser. This light will turn orange to tell
you that you need to replace the filter soon.
The filter cartridge should be replaced when
the replacement indicator light turns red or if
the flow of water to the dispenser 05"icemaker
decreases.
Installing the Filter Cartridge
Placethetop
of thecartridgeup
insidethecartridge
holderandslowly Cartridge
turnit totheright. Holder
1 If you are replacing the cartridge, first
remove the old one by slowly turning it to
the letL Do not pull down on the cartridge.
A small an/ount of water may drip down.
Filter Bypass Plug
FilterBypassPlu_
You must use the filter bypass plug when
a replacement filter cartridge is not available.
The dispenser and the icemaker will not
operate without the filter 05"filter bypass plug.
Replacement Filters:
To order additional filter cartridges in
the United States, call GE Parts and
Accessories, 800.626.2002.
GWF
Suggested Retail $34.95 USD
Custoi-aers in Canada should consult the yellow
pages for the nearest (:amco Service Center.
2 Fill the replacement cartridge with water
fl'om the tap to allow for better flow fl'om
the dispenser immediately after installation.
3 I,ining up the arrow on the cartridge and
the camidge holder, place the top of the
new cartridge up inside the bolder.
Do not push it up into the holder.
4 Slowly turn it to the right 5mtil the filter
cartridge stops. DO NOT OVERTIGHTEN.
,&syou mrn the cartridge, it will automatically
raise itself into position. Cam'idge will rotate
about l ,/4 turn.
5 Run water fl'om the dispenser tot 3 minutes
(about one and a half gallons) to clear the
system and prevent sputtering.
6 Press and hold the P.ESET
_'\;_TER FIIFER pad on the
dispenser fi)r 3 seconds.
NOTE: A newl>installed water
filter cartridge may cause water
to spurt fi'om the dispenser.
12
Page 13

Shelves and Bins
Stainless Steel I_/)'ige*'ator
l%sh./bod
cornpartmerzt
door bins
and fi ezer
door til>out
birzs
Large Bins
The larger fi'esh _bod compartment door bins
and fl'eezer tilt-out door bins are a@ustable.
To remove: I,ifl the front of the bin straight
up, then lilt up and out.
To replace or relocate: Engage the back side
of the bin in the molded supports of the door.
Then push down on the fl'ont of the bin.
Bin will lock in place.
Small Bins
To remove: Lift the fl'ont of the bin strldght
up, then out.
To replace: Position the bin above tile
rectangular molded supports on the dooi;
Then slide tile bin down onto the support
to lock it in place.
The snugger helps prevent tipping, spilling
or sliding of small items stored on the door
shelf. Place a finger on either side of the
snugger near the rear and move it back
and torth to fit your needs.
Freshfoodcompartmentdoorbin
Freezertilt-out bin
Slide-out
@iliproqf
shelf
The slide-out spillproof shelf allows you to
reach items stored behind others. The special
edges are designed to help prevent spills fl'om
dripping to lower shelves,
To renloge:
Slide the shelf out tmtil it reaches the stop,
then press down on the tab and slide the shelf
straight out.
To replace or relocate:
Line the shelf up with the supports and slide
it into place, The shelf can be repositioned
when the door is at 90 ° or more. To reposition
the shell slide tile shelf past the stops and
angle downward. Slide shelf down to the
desired position, line up with the supports
and slide into place,
Make sure you push the sheh_es all the way back
in b(fa'e you (lose the doo_:
Presstabandpull shelf
forwardto remove
13
Page 14

This shelf splits in half and slides under itself
fk)r storage of tall items on the shelf below.
This shelf can be removed and replaced or
relocated just like Slide-Out Spillproof Shelves.
On some models, this shelf can not be used
in tile lowest position.
Shelves and Bins
Stai_dess Ste_,l Re,]'ri_'etator,
Freezer bashers
Slide-out
.fiz ezershelves
Fixed freezer
shelves
To remove, push tile basket all tile way to tile
back of tile ti_eezer, i,ilt up until tile back pins
are disengaged. I,itt tile entire basket up and
pull otlt.
The divider can be used to organize ti)od
packages. For large packages, simply IbM
down tile divide_:
Make sure )ou push lhe ba,skels all lke wa 3 back
in b_,fin'e you _lose lke door:
To remove, slide (s/it to tile stop position, lift
tile fl'ont past tile stop position, and slide out.
Make su*_¢you push the sheh_(,s all the way back
in b_,/breyou _lose the doo_:
To remove, lift tile shelf up at tile left side
and then bring tile shelf ()/It.
Divider
14
Page 15

Additional Features
Stah_less Steel Rejrit{'erator,
Removable
beverage
The beverage rack is designed to hold
a bottle on its side. It can be attached to
any slide-out shelf.
To instaJl:
1 Line up the large part of the slots on
the top of the rack with the tabs under
the shelf.
2 Then slide the rack back to lock it in place.
The refrigerator doors may _eel di_tbrent than
the ones yon are used to. The special door
opening/closing tbature makes sm'e the doors
close all the way and are securely sealed.
When opening and closing the door ycm will
notice a stop position. If the door is opened
past this stop point, the door will remain open
to allow vou to load and tmload %od more
easilz When the door is only pallially open
it will automatically close.
The resistance you _bel at the stop position will
be reduced as the door is loaded with ii_od.
When the door is only partially open,
it will automatically close.
Beyondthis stop the door
will stay open.
15
Page 16

Crispers and Pans
Stainless Steel Rejri_'erator,
Fruit and
vegetable
cri@ers
Adjustable
humidity
crispers
Excess water that may accmnulate in the
bottom of the drawers should be wiped dry.
The bottom drawer has a cover that slides back
as the drawer is opened. This allows hdl access
to the drawer. _&sthe drawer is closed, the cover
will slide fin'ward into its original position.
Slide the control all the way to the HI setting
to provide high hmniditv recommended tin"
most vegetables.
Slide the control all the way to the LO setting
to provide lower h mniditv levels recomm ended
for most fluits.
nl _ Lo
Conve" rtzbh?
meat pan
Ori
removal
The convertible meat pan has its own cold air
duct to allow a stream of cold air fl'om the
fl'eezer compartment to flow to the pan.
The variable temperature control regulates
the air flow fl'om the Climate Keeper.
Set the control to the coldest setting to store
fl'esh meats.
Set the control to cold to convert the pan to
normal refl'igerator temperature and provide
extra vegetable storage space. The cold air duct
is tin'ned off. Variable settings between these
extremes can be selected.
Crispers can easily be removed by pulling the
drawer straight out and lilting the drawer up
and over the stop location.
If the door prevents you fl'om taking out the
drawers, first t_T to remove the door bins.
If this does not otter enough clearance, the
refl'igerator will need to be rolled forward
until the door opens enough to slide the
drawers ()tit. hi sonle cases_ when vou roll the
refl'igerator out, you will need to move the
refl'igerator to the leli or right as you roll it out.
1(3
Page 17

Automatic Icemaker
Stainless Steel I_(_/)'ig'erator
Automatic
icemaher
A newly-installed _Jiig_rator may take 12 to 24 hou'_:slo begin making ice.
The icemaker will produce seven cubes
per cyde--approximately 100-130 cubes
in a 24-hour peri(>d, depending on fl'eezer
compartment temperatm'e, room temperature,
number of door openings and other use
conditions.
If the refl'igerator is operated befl)re the
water connection is made to the icemake_.
set the power switch in the 0 (off) position,
When the refl'igerator has been connected
to the water supply, set the power switch t(>
the I (on) position,
The icemaker will fill with water when it
cools to 15°F (-10°(2), A newly-installed
reh'igerator may take 12 t(> 24 hours to
begin making ice cubes,
Yi>u will hear a buzzing sotmd each time
the icemaker fills with water.
Throw away the first few batches of ice to
allow the water line to dear,
Be sure nothing interleres with the sweep
of the _beler arm.
When the bin fills to the level of the feeler
arm, the icemaker will st(>p producing ice. It is
normal fl>r several cubes to be joined together.
If ice is not used fl'equently, old ice cubes will
become cloud> taste stale and shrink.
Power
Switch
GreenPowerLight
Pullthe upperfreezershelfstraight
outto accesstheicemaker.
Alwaysbe sureto replacethe shelf.
Theshelfcan beusedforstorage.
Icemaker
he storage
drawer
NOTE: hz homes with [owe>than-avem,w water
pressure, you may hear the icemaher O'cle multiple
times whe_z mahi_g" one batch (j ice.
To access ice, pull the drawer fl)rward.
To remove the drawer, pull it straight out and
lift it past the stop location.
17
Page 18

Ice and Water Dispenser
Stall, less SteN I:_e,/ti_'etator,
Using the
dispenser
Other
dispenser
controls
Select CUBED ICE _, CRUSHED ICE
or _'_;_TER _.
Press the glass gently against the top of the
dispenser cradle.
The spill shelf is not selfidraining. To reduce
water spotting, the shelf and its grille should
be cleaned regularly.
O no water is dispe_sed whe_z the **j}Tg'emtor is fi*:st
i_stalled, there ma 3 be air in the water line system.
Pressthe di,spe_ser armjbr at #ast two minutes to
n,move trapped airjmm the water line and to fill the
watch' system. 7b flush out impu*4ties in the wat_,r
line, throw awgO,the fit:st six glas_ds o/ wa#t:
E_
Locking the Dispenser
Press the I,OCK CONTROI,
pad for 3 seconds to lock the
dispenser and control panel.
To unlock, press and hold the
pad again for 3 seconds.
HOLD3SECS
CAUTION: >,.,,,,. o,
otker olfjeets it_to tl_eiee erusher dis_ karg'e<o_)et_it_g'<
I f , , toO'
ATTENTION
les doig'ls ou d'autres ol{jets dates l'ou'oertlm, (lit
distribl_ teu *:
Spill Shelf
Quick Ice
When you need ice in a hurry;
press this pad to speed up ice
production. This will increase
ice production for the following
48 hours or until you press the
pad again.
Dispenser Light
This pad turns the night light
in the dispenser on and off.
The light also comes on when
the dispenser cradle is pressed.
If this light bl.lrllS out, it should
be replaced with a 6 watt 12V
maximum bulb.
18
Door Alarm
RM ]
To set the alarm, press this pad
until the indicator light comes
on. This alarm will sound if
either door is open for m ore
than 3 minutes, The light goes
out and the beeping stops when
you close the door,
Page 19

Important
fizcts
about
" D(> not add ice fi'om trays or bags to
the storage drawer. It may not crush or
dispense well.
, Avoid overfilling glass with ice and use of
narrow glasses. Backed-up ice can jam the
chute or cause the door in the chute to
fi'eeze shut, If ice is blocking the chute,
poke it through with a wooden spoon.
" Beverages and ti_ot-ls shotdd not be
quick-chilled in the ice storage drawer.
Cans, bottles or ti>od packages in the
storage drawer may cause the icemaker
or auger to jam,
" To kee I) dispensed ice fl'om missing the glass,
put the glass close to, btlt not touching, the
dispenser opening.
" Some crushed ice may be dispensed even
though you selected CUBED ICE. This
happens occasionally when a tbw cubes
accidentally get directed to the crusher.
, After crushed ice is dispensed, some water
may drip ti'om the chute.
, Sometimes a small mound of snow will ti)rm
(m the door in the ice chute. This condition
is normal and usually occurs when yon have
dispensed crushed ice repeatedly. The snow
will eventually e\;q)orate.
lce storage
drawer
To remove:
Set the icelnaker power switch to the 0 (off)
position. Pull the drawer straight out and
then liIt past the stop position.
To replace:
When replacing the drawei; be sure to
press it tirlnly into place. If it does not go
all the way back, renlove it and rotate
the drive n_echai_ism 1/4 turn. Then push
the drawer back again.
1
_Mechanisrq V
19
Page 20

(;are and (;leaning
Stahdess Steel R(j} igerator
Cleaning
the outside
Cleaning
the inside
The dispenser drip
area, beneath the
grille, should be
wiped d*3. _'_ater Dispenserdriparea.
left in this area
may leave deposits. Remove the deposits by
adding tmdiluted vinegar to the well. Soak until
the deposits disappear or become loose enough
to rinse away.
The dispenser cradle. Befbre cleaning, lock
the dispenser by pressing and holding the
LOCK CONTROI, pad t_)r 24seconds.
Clean with wal'i//water and baking soda
solution--about a tablespoon (l 5 ml) of
baking soda to a quart (1 liter) of water.
Rinse thoroughly and wipe dry.
To help prevent odors, leave an open box of
baking soda in the fl'esh ii)od and ii'eezer
COin pa Ftln ell is.
Unplug the refrigerator before cleaning,
If this is not practical, wring excess moisture
out of sponge or cloth when cleaning around
switches, lights or controls.
Use warm water and baking soda solution--
about a tablespoon (l 5 ml) of baking soda to
a quart (1 liter) of water. This both cleans and
neutralizes odors. Rinse and wipe oh>
The stainless steel panels and handles can be
cleaned with a commercially axuilable stainless
steel cleaner such as Stai_dess Sted Mag'i_F'
Stainless Sl(_el MaKi_ is available at Ace, True
Value, Servistar, HWI and other leading stores.
It is also a_uilable through GE Parts and
Accessories, 800.626.2002. Order part number
WX10X15.
Do not use appliance wax or polish on the
stainless steel.
Use of any cleaning solution other than that
which is recommended, especially those that
contain petroleum distillates, can crack or
damage the interior of the refrigerator.
Avoid cleaning cold glass shelves with hot water
because the extreme temperature difference
may cause them to break. Handle glass shelves
carefully. Bumping tempered glass cam cause
it to shatter.
Do not wash amy plastic refrigerator parts in
the dishwasher.
2O
Page 21

Behind the
fiigerator
Be careful when moving the refl'igerator away
fl'om the wall. All types of floor coverings can
be damaged, particularly cushioned covel-ings
and those with embossed sur_hces.
Pull the refl'igerator straight out and return it
to position by pushing it straight in. Moving the
reti'igerator in a side direction may result ix*
damage to the floor covering or reti'igerator.
When pushing the refrigerator back, make sure
you don't roll over the power cord or icemaker
supply line.
For long vacations or absences, remove tood
and unph_g the refi'igerator. Clean the interior
with a baking soda solution of one tablespoon
(15 ml) of baking soda to one quart (1 liter)
of water. Leave the doors open.
Set the icemaker power switch to the 0 (off)
position and shut off the water supl)ly to
the refl'igerator.
Secure all loose items such as shelves and
drawe_ by taping them secm'ely in place
to prevent damage.
When using a hand truck to move the
reh'igerator, do not rest the h'ont or back
of the refrigerator against the hand truck.
This could damage the reti'igerator. Handle
only fl'om the sides of the reti'igerator.
If the temperlm*re can drop below fl'eezing,
have a qualified servicer drain the water supply
system to prevent serious l)roperty damage due
to flooding.
Be sure the refrigerator stays in an upright
position during moving.
21
Page 22

Replacing the I,ight Bulbs
5"taDde,s,s Steel Refri_'erator,
Fresh./bod
compartment--
upper light
l%sh./bod
compartment--
lower light
Setting the controls to OFF"does not remove
power to the fight circuit.
1 Unplug the refi'igerator.
2 The bulbs are located at the top of the
compartment, inside the light shield.
On some models, a screw at the fl'ont of
the light shield will have to be removed.
3 To remove the light shield, press in on the
tabs on the sides of the shield and slide
fl)rward and otlt.
Setting the controls to OFF" does not remove
power to the light circuit.
This light is located above the top pan.
1 Unph/g the refl'igerator.
2 Remove the convel'fible meat drawer control
knob by pulling straight out.
4 _&fter replacing the bulb with an appliance
bulb of the same or lower wattage, replace
the light shield and screws (on some models).
When replacing the light shiekl, make sure
that the tabs at the back of the shield fit
into the slots at the back of the light shield
housing.
5 Plug the refl'igerator back in.
Dispenser
22
3 I,itt the light shield up and pull it out.
4 _Mter replacing the bulb with an appliance
bulb of the same or lower wattage, replace
the shield and the knob.
5 Plug the refi'igerator back in.
Setting the controls to OFF" does not remove
power to the light circuit.
1 L)nplug the refl'igerator.
2 Remove the shelf just above the light shield.
(The shelf will be easier to remove if it is
emptied first.) On some models, a screw at
the top of the light shield will need to be
YeI/l oved.
3 To remoxe the light shield, press in on the
sides, and lift up and out.
Setting the controls to OFF does not remove
power to the light circuit.
1 Unphlg the refl'igerator.
2 The bulb is located on the dispenser tinder
the control panel. Remove the light bulb by
turlfing it coui_terclockwise.
4 Replace the bulb with an appliance bulb of
the same or lower wattage, and reinstall the
light shield. When reinstalling the light
shield, make sure the top tabs snap securely
into place. Replace the screw (on some
models).
5 Reinstall the shelf and plug the refrigerator
back in.
3 Replace the bulb with a bulb of the salne size
and wattage.
4 Plug the " ""_ "Kor back ill
I eli 1 *e I
Page 23

The Problem Solver
Stainless Steel I:b,jrit{'era tor,
J_ OT!_I (L [
@erati_
SOUTl([S
Newer r@igz_rato_:s,wund di/_f!_rentjiom older _zJiigerato_:_. Modern _z[f!igz_rato_:shave moreji_atums
arid u,s'_n_'w_*rt_(hnol%%
Do you hear what I hear? These sounds are normal.
HUMMM...
WHIRl
-- WHOOSH...
• The new high efficiency compressor may _tm
taster and longer than yore" old refl'igerator
and vou may hear a high-pitched hmn or
pulsating sotmd while it is operating.
• Sometimes the refrigerator runs ti)r an
extended period, especially when the doors
are opened fl'equently: This means that the
t'_ost Guard" ti_atm'e is working to prevent
fl'eezer burn and improve ti)od preservation.
• You may hear a whooshing sotmd when the
doors close. This is due to pressm'e
equalizing within the refl'igerator.
• You mav hear the fans spinning at high
speeds. This happens when the refi'igerator
is first plugged in, when the doors are
opened fl'equently or when a large alllO/lllt
of ti)od is added to the refl'igerator or
fl'eezer compartments. The rims are helping
to maintain the correct temperatures.
• If either door is open fi)r over 3 minutes, you
may hear the rims come on in order to cool
the light bulbs.
• The rims change speeds in order to provide
optimal cooling and energy savings.
• You mav hear the rims running alter
selecting one of the CttstomCooI'"settings.
CLICKS, POPS,
CRACKS and CHIRPS
• You may hear cracking or popping sotmds
when the refl'igerator is first plugged in.
This happens as the reti'igerator cools to
tile correct temperature.
• Electronic dampers click open and closed to
provide optimal cooling and energy savings.
• The compresso* may cause a clicking or
chirping sound when attempting to restart
(this could take up to 5 minutes).
• The electronic control board may cause
a clicking sotmd when relays acti_;_te to
control refl'igerator components.
• Expansion and contraction of cooling coils
during and after defl'ost can cause a crocking
or popping sound.
• On models with an i(emakeL aiter an
icemaking cycle, you may hear the ice cubes
dropping into the ice bucket.
WATERSOUNDS
6
• The flow of refl'igerant through the fl'eezer
cooling coils may make a gurgling noise like
boiling water.
• _lter dropping on the defl'ost heater can
cause a sizzling, popping or buzzing sound
dm'ing the defl'ost cycle.
• A water dripping noise may occur during the
defl'ost cycle as ice melts fl'om the evaporator
and flows into the drain pan.
• Closing the door may cause a gm'gling sound
due to pressure equalization.
23
Page 24

The Problem Solver
Stainle,_,s Steel I:_ejrifferator,
Questions ?
Use this
problem
SO[?)e_'. !
PROBLEM POSSIBLE CAUSE
REFRIGERATOR
DOES NOT OPERATE
VIBRATION OR
RATTLING
(Slight vibration
is normal,)
MOTOR OPERATES
FOR LONG PERIODS
OR CYCLES ON AND
OFF FREQUENTLY
(Modern refrigerators
with more storage
space and a larger
freezer require more
operating time, They
start and stop often
to maintain even
temperatures,)
* Refl'igerator may be in defl'ost cycle when motor does not operate fl)r
about 30 minutes.
" Either or both controls set to OFE Set to a temperature setting.
* If interior light is not on, refligerator may not be plugged in at
wall outlet. Push the plug completely into the wall outlet.
* The hlse is blown/circuit breaker is tripped. Replace ftlse or reset
the breaker.
* Tile refl'igerator is in showroom mode. Unplug it and plug it back in.
* At!just the rollel_ as shown in the Installation Instructions.
* Normal when refl'igerator is first plugged in. _%dt 24 hours fin" tile
refl'igerator to completely cool down.
* Often occurs when large amounts of fl_od are placed in refi'igerator.
This is normal.
* Door left open or package holding door open.
'_ Hot weather or fl'equent door openings. This is normal.
" Temperature controls set at tile coldest setting.
See Temperature Controls.
FRESH FOOD
OR FREEZER
COMPARTMENT
TOO WARM
FROST OR ICE
CRYSTALS ON
FROZEN FOOD
(Frost within package
is normal,)
DIVIDER BETWEEN
FRESH FOOD
AND FREEZER
COMPARTMENTS
FEELS WARM
AUTOMATIC
ICEMAKER
DOES NOT WORK
* Temperature controls not set cold enough.
See Temperature Controls.
* _'Lu'm weather or fl'equent door openings.
* Door left open for long time.
* Package may be holding door open.
* Door left open or package holding dool open.
* Too fl'equent or too hmg door openings.
* Automatic energ) saxer s)stem circulates warm liquid arotmd the
front edge of tile freezer compartment to hel l) prex ent condensation
from forming on tile outside.
* Icemaker power switch is ill tile 0 (off) position.
* _'_'ater supply turned off or not connected. See Installation Instructions.
'_ Freezer compartment too warm. Allow 24 hours for the refrigerator
to completely cool down.
'_ Piled up cubes in storage bin cause icemaker to shut off.
Level cubes in bin.
'_ Ice cubes stuck in icemaker (green power light on the icemaker is
blinking). Turn off tile icemaker, remove cubes and turn tile
icemaker back on.
24
Page 25

Questions ?
Use this
problem
SO[_)eY. !
PROBLEM POSSIBLE CAUSE
FREQUENT " Icemaker power switch is in the I (on) position, but the water supply
"BUZZING" SOUND to the refrigerator has not been connected. Set the power switch
to the 0 (off) position. Keeping it in the I (on) position will damage
the water valve.
ICE CUBES HAVE
ODOR/TASTE
SMALL OR
HOLLOW CUBES
SLOW ICE CUBE
FREEZING
CUBE DISPENSER
DOES NOT WORK
WATER HAS POOR
TASTE/ODOR
WATER IN FIRST
GLASS IS WARM
WATER DISPENSER
DOES NOT WORK
* Old cubes need to be discarded.
* Ice storage bin needs to be emptied and washed.
* Unsealed packages in fl'esh fl)od and/or fl'eezer compartments may
be transmitting odor/taste to ice cubes.
* Interior of refi'igerator needs cleaning. See Care and Cleaning.
* _'L_ter filter clogged. Replace the filter or use the filter bypass plug.
* Door may have been left open.
* Turn temperature of freezer compartment colder.
See Temperature Controls.
* Icemaker or water supply turned ofl_ Turn on icemaker or water supply.
" Ice cubes are fl'ozen to the icemaker fl_eler arm. Remove the cubes.
* Irregular clumps in the storage bin. Break up with fingertip pressure
and discard remaining clumps. The freezer may be too warm.
At!just the fl'eezer temperatm'e control colder one step at a time
tmtil clumps do not titan.
* The dispenser is LOCKED. Press and hold the LOCK CONTROI.
pad fl>r 3 seconds.
" _'_tter dispenser has not been used fl)r a hmg time. Dispense water
until all water in the system has been replenished.
* Normal when refl'igerator is first installed. Allow 24 hours fl_r the
reti'igerator to completely cool down.
* Wuter dispenser has not been used fin" a long time. Dispense water
until all water ix*the system has been replenished.
* _'_ater system has been drained. Allow several hom_ for the
replenished water supply to chill.
* _'_ater supply line turned off or not connected. See the
Installation Instructions.
WATER SPURTING
FROM DISPENSER
WATER IS NOT
DISPENSED BUT
ICEMAKER
IS WORKING
• \¥ater filter clogged. P, eplace the filter or use the filter b}pass l)lu°"-,.
• Air max be trapped in the s}stem. Press the dispenser arm for at
least two rain utes.
* The dispenser is I.OCKED. Press and hold the I.()CK (_ONTR()I.
pad tor 3 seconds.
* Newly installed filter cartridge. Rim water ti'om the dispenser for
about 3 minutes (about one and a half gallons).
* _,Liter in reservoir is fl'ozen. Call fl)r service.
* Fresh food control setting is too cold. Set to a warmer settino
25
Page 26

The Problem Solver
Stainless Steel I:_ejri_'era tor,
Questions ?
Use this
problem
SO[?)e_'. !
PROBLEM POSSIBLE CAUSE
NO WATER OR ICE
CUBE PRODUCTION
CUBED ICE WAS
SELECTED BUT
CRUSHED ICE
WAS DISPENSED
ORANGE GLOW
IN FREEZER
REFRIGERATOR
HAS ODOR
DOOR NOT CLOSING
PROPERLY
MOISTURE FORMS
ON OUTSIDE OF
REFRIGERATOR
* _'\ater supply line or shutoff ;_dve is dogged. (;all a plmnber.
* Replace the filter or use the filter bypass plug.
* The dispenser is I,OCKED. Press and hold the I,OCK CONTROl,
pad fl)r 3 seconds.
* The last setting was CRUSHED ICE and a few cubes were leR in the
crusher fl'om the previous setting. This is normal.
* Defrost heater is on. This is normal.
* Foods with strong odors should be tightly wrapped.
* Interior needs cleaning. See Care and Cleaning.
* Kee I) open box of baking soda in reflJgerator; replace every 3 months.
* Door gasket on hinge side is sticking or folding over. Apply paraffin
wax to the thce of the gasket.
* A door bin is hitting a shelf inside the refl'igerator. Move the door
bin up one position.
* Not mmsual dm'ing periods of high humidit 5 Wipe surihce dry.
* Door left open or package holding door open.
MOISTURE
COLLECTS INSIDE
INTERIOR LIGHT
DOES NOT WORK
WATER ON KITCHEN
FLOOR OR BOTTOM
OF FREEZER
HOT AIR FROM
BOTTOM OF
REFRIGERATOR
REFRIGERATOR
NEVER SHUTS OFF
BUT TEMPERATURES
ARE OK
REFRIGERATOR
BEEPING
* Too fl'equent or too long door openings.
* In lmmid weather, air carries moisture into refl'igerator when doors
are opened.
,b No power at outlet.
,b I,ight bulb needs replacing. See Care and Cleaning.
,b Ice cubes jammed in chute. Poke ice through with a wooden spoon.
* Normal air flow cooling motor. In the reti'igeration process, it is
normal that heat be expelled in the area trader the refl'igerator.
Some floor coverings are sensitive and will discolor at these safe
and normal temperatures.
* Adaptive defrost keeps compressor framing during door openings.
This is normal. The refrigerator will cycle off after the door remains
dosed for two hours.
* Door is open and DOOR ALARM is on.
26
Page 27

Questions ?
Use this
problem
SO[_)eY. !
PROBLEM POSSIBLE CAUSE
FOOD ISN'T
THAWING/CHILLING
* Packaging insulating fi)od. Increase time or re-package in plastic.
* The wrong weight is selected, Select a larger weight.
* Item with high iht content. Select a larger weight.
* Not using Chill/Thaw tray. Place items on tray and allow space in
between items for better air flow.
ACTUAL
TEMPERATURE NOT
EQUAL TO SET
TEMPERATURE
SELECTTEMP
FEATURE IS
NOT WORKING
DOORS ARE
NOT ALIGNED
* Unit just plugged in. Allow 24 hom_ fl)r the system to stabilize.
* Door open tor too long. Allow 24 hours flw the system to stabilize.
* Warm tood added to re_i'igerator. Allow 24 hours fi_r the system
to stabilize.
* Defrost cycle is in process. Allow 24 hours fbr the s}:stem to stabilize,
* Fresh fl_od compartment temperature control is set at the wai_nest
setting. This is normal. In order to minimize energy usage, the
SELECTTEMP tbature is disabled when the fi'esh iood compartment
temperature control is set at the warmest setting.
* Unlevel floor. At!just rollers then align doors by ac!justing the ii'esh
fl)od compartment hinge. See Installation Instructions.
27
Page 28

PerformanceData Sheet
GESmartWater Filtration System
GWF Cartridge
Health Claim Performance Certified by NSF/ANSI*
(100% safety factors built in for unmetered usage)
StaJadayd No, 42: Aesthetic Effects
Paxmneter
Chlorine
T &"O - -
Particul_te** 98.00% 96.11)%
Turbidity
(:vsts
Lead at pH 6.5
Lead at pH 8.5
I,indane
Atr;_zine
2,4-D
Asbestos
* Tested using a flow rate of 0,5gpm (1,8927IAn);pressure of 120psig (8,437kg/cm2);pH of Z5+_0,5;temp,of 68%4,5°F (20%25°C)
*_ Measurement in particles/ml
NTU = Nephelometric Units
USEPA
MCL
USEPAPaxmneter
MCL
1 NTU***
99.95% Reduction
15 ppb
15 ppb
0.0002 ppm
0.003 ppm
0.100 ppm
99%
[nfluent
Challenge
1.9 ppm
200,000
Average
0.02 ppm
3,978
Standard No. 53: Health Effects
Influent Effluent
Challenge
24.3 NTL I
105,750
160 ppb
150 ppb
0.00062 ppm
0.0084 ppm
0.272 ppm
690 MFL/ml
Average
0.07 NTU
26
1 ppb
1.8 ppb
0.00005 ppm
0.002 ppm
0.042 ppm
0.32 MFL/ml
Effluent
Ma_tnn
/)./)5 i)i)m
7,800
MaJdmurn
0.1 NTU
55
1 ppb
4.3 ppb
0.00005 ppm
0.003 ppm
0.090 ppm
1.2 MFL/ml
Average
9&90%
Average
99.71%
99.97%
99.37%
9s.so%
91.93%
76.19%
84.89%
99.95%
%Reduction
Minimum
97.37%
% Reduction
Min_unl
99.59%
99.95%
99.37%
97.13%
91.93%
64.28%
67.63%
99.82%
Operating Specifications
* Capacity: certified fl:,r up to 500 galhms (1893 liter); up to one year
* Pressure requirement: 40-120 psi (2.8-8.2 bar), non-shock
* Temperature: 33°-100 ° F (0.60-38 ° C)
* How rate: 0.5 gpm (1.9 1pro)
General Installation/Operation/Maintenance Requirements
* Flush new cartridge at full flow fl)r 3 minutes to purge out trapped air.
* Replace cartridge when flow becomes too slow.
Special Notices
* Installation instructions; parts all(| service a_dlability; and standard warianty are included with tile product when shipped.
* This drinking water system must be maintained according to manufilcmrer's instructions, including replacement of
filter cartridges.
* Do not use with water that is microbiologically unsafe or of unknown quality without adequate disinfection beii)re or
after tile system. Systems certified for cyst reduction may be used on disinfected water that may contain filterable cysts.
* Tile contaminants or other substances removed or reduced by this water treatment s_:stem are not necessarily in your watel;
* Check fl)r compliance with tile state and local laws and regulations.
Syst(m Tested mid Certified by NSF Int( rm_tional againsl ANSIiNSF
Standard 42 & 53 fk)r tile reduction of:
Standard No. 42: Aesthetic Effects
Chemical [ nit
T;iste and Odor Reduction
Chlorine Reduction, Class I
Mechanical Fihration knit
Particulate Reduction, Class I
Standard No. 53: Health Effects
Chemical Reduction [ 7nit
I.ead and Atrazine Reduction
I.indane and 2,41) 1).c(luction
Mechanical Eihvation l nit
"fiwbidit) Reduction
Cyst and Asbestos Reduction
' 0' ' "Manufilctm'ed fi)r: General Electric Compmlx, Louisville, KY4 22:)
28
Page 29

State of California
Department of Health Services
Water Treatment Device
Certificate Number
00-1434
Date Issued: May 30, 2000
Date Revised: February 9, 2001
Trademark/Model Designation
The water
116830 of the Health al
Organic Contaminants
Atrazllle
Lindane
2,4-D
....................................Replacement Elements
nants
Rated Service Capacity: 300 gallons '_ Rated Service Flow: 0.5 gpm
Do not use where water is microbiologically unsafe or with water of unknown quality, except that systems
claiming cyst reduction may be used on water containing cysts.
* 500 gallons for models that include a replacement filter indicator light.
For Purchases Made In Iowa: This forn/must be signed and dated by the bu}er and seller prior to the consummation of
this sale. This form should be retained on file by the seller for a minim um of two years.
BUYER: SELLER:
Name Name
Address Address
Cit_ State Zip Cit_ State Zip
Signature Date Signature Date
29
Page 30

Notes
3O
Page 31

Consumer Services
Stainle,_,s Steel I:_ejri_{'erator,
With the purchase of your new Monogram appliance, receive the
assurance that if you ever need information or assistance from GE,
we'll be there, All you have to do is call---toll-free?
GE Answer
Center _
In the USA:
800.626.2000
In-Home Repair
Service
In the USA:
800.444.1845
In Canada:
1.888.880.3030
For Customers
With Special
Needs,.,
In the USA:
800.626.2000
Whatever your question about any Monogram major appliance, GE Answer Center _
inflwmation ser_ ice is a_dlable to help. Your call--and wmr question--will be answered
promptly and courteously. And you can call any time. GE Answer (]enter" selMce is open
24 hours a da> 7 days a week.
In Canada, call 1.888.880.3030.
AGE consmner service proiessional will provide expert repair service, scheduled at a time
that's convenient fl)r win. Many GE (_onsumer Service company-operated locations offer
you service today or tomorrow, or at your convenience (7:00 a.m. to 7:00 p.m. weekdays,
9:00 a.m. to 2:00 p.m. Saturdays). Ore" fi_ctorDtrained technicians know your appliance
inside and out--so Faost repairs can be handled in just one visit.
GE offers Braille controls for a xariet) of (;E appliances, and a
brochure to assist in planning a barrie_free ldtchen for persons
with limited mobilit}.
Consumers xdth impaired heating or speech xdlo ha_e access to a
TDD or a conxentional teletype_,_riter ilia} call 800.TDD.GEA(_
(800.833.4322) to request information or service.
Service Contracts
In the USA:
800.626.2224
In Canada:
1.888.880.3030
Par_ and
Accesso_es
In the USA:
800.626.2002
In Canada:
1.888.880.3030
S_cTmoN
You can have tile secm'e feeling that GE Consumer Service will still be there after your
warranty expires. Purchase a GE contract while vom" warranty is still in effect and v(m'll
receive a substantial discount. With a m ultiple-year contract, you're assured of ftlttu'e
se_Mce at today's prices.
Individuals qualified to service their own appliances can have parts or accessories sent directE
to their home. Tile GE parts sxstem provides access to over 47,000 parts...and all GE Genuine
Renewal } arts are fullx warranted. VISA, MasterCard and Discover cards are accepted.
User maintenance instructions contained in this manual cover procedures intended to be
performed by amy user. Other servicing generally should be referred to qualified service
personnel. Caution must be exercised, since improper servicing may cause unsafe operation.
)
31
Page 32

Warranty
Slai*_le,s,s Sleel Re:/rig'eralor,
YOUR MONOGRAM REFRIGERATOR WARRANTY
Staple sales slip or cancelled check here. Proof of original purchase
date is needed to obtain service under warranty.
WHATIS
COVERED
l'}om the Date
of the Orz_ginal
Purchase
WHAT IS NOT
COVERED
FULL ONE-YFAR WARRANTY
For one year from (late of original purchase, we will provide, fl'ee of charge, parts and service labor in
your home to repair or replace a_l3,/)art (!/'the _@'i,wrator that lilils because of a man ulilctming delect.
FULL FIVE_YEAR WARRANTY
For live years fl'om (late of original purchase, we will provide, fl'ee of charge, parts and service labor
in your home to repair or replace a_l3,/)art (!/'the s_.al_.d_@g'_,rati_g" ._3'stem(the compressor, condensec
evaporator and all connecting tubing) that lifils because of a manuli_cturing delect.
This warranty is extended to the original purchaser and any succeeding owner for products
purchased fiJr ordinary home use in the 48 mainland states, Hawaii, Washington, D.C. or Canada.
In Alaska the warrant\ is the same except that it is I.IMITED because you must pay to ship the
prod uct to the service shop or flJr the set\ice technician's travel costs to your home.
All warrant\ service will be provided by our Factory Service Centers or by our authorized Customer
Care servicers during normal working hours.
Shoukl your appliance need service, during warranty period or beyond, in the USA
call 800.444.1845. In Canada: 888.880.3030.
• Service trips to your home m teach you how
to use the product.
• Replacement of house fuses or resetting of
circuit breakers.
• Damage to the product caused by accident,
fire, floods or acts of God.
• Failure of the product if it is used for
other than its intended purpose or used
commercially.
• Improper installation.
If you have an installation problem, contact
your dealer or installer. You are responsible for
providing adequate electrical, plumbing and
other connecting facilities.
• Loss of food due to spoilage (in the USA only).
• Incidental or consequential damage caused by
possible defects with this appliance.
197D3359PO02
49-60205
04-02 JR
Printed in the United States
Some states/provinces do not allow the exclusion or limitation of incidental or consequential
damages, so the above limitation or excl usion ma) not apply to you. This warranty gives you specific
legal rights, and you ma\ also ha\e other rights which vary fl'om state to state/province to province.
To know what your legal rights are in your state/province, consuh your local or state/provincial
consmner alliurs ollice or your state's Attorney General.
Warrantor in USA: General Electric Company,
Louisville, KY 40225
Warrantor in Canada: Camco Inc.
Monogram:
Webring good things to life.
General Electric Company
Louisville, KY40225
 Loading...