

GE ZET757BA1BB, ZEK737BA3BB, ZEK737BA2BB, ZEK737BA1BB Owner’s Manual
GE Monogram ®
Use and Care Guide
7_7_7_. '_qlO'YlO_a'_ql . CO'_ql
27 & 30" Convection
Wall Oven
Consumer Information
Wall Over_
Introduction
(_o_Jte_,ts
Your new Monogram wall oven makes an eloquent statement of style, convenience anti kitchen
planning flexibility. Whether you chose it fbr its purity of design, assiduous attention to detail-or
for both of these reasons-you'll find that your Monogram wall oven's superior blend of form
anti flmction will delight you fbr years to come.
Your Monogram wall oven was designed to provide the flexibility to blend in with your kitchen
cabineu T. Its sleek design can be beautiflflly integrated into the kitchen.
The information on the fbllowing pages will help you operate anti maintain your wall oven
properly.
Care and Cleaning
Broiler Pan anti Grid ....................... 36
Cookie Sheets ............................. 36
Lift-Off Oven Door ........................ 35
Oven Light ............................... 37
Probe .................................... 37
Shelves ................................... 35
Using the Self:Cleaning Oven ........... 33, 34
Consumer Services
Important Phone Numbers ................ 43
Model anti Serial Numbers .................. 3
Befbre You Call For Seta4ce ............. 38-40
Product Registration .................... 3, 41
Safety Instructions ........................ 4, 5
Warranty ................................. 44
Oven
Adjust the Oven Thermostat ................ 32
Almnimm_ Foil ...................... 4, 17, 33
Baking or Roasting ..................... 10, 17
Broiling/Broiling Guide ................ 18-20
Features ................................... 0
Oven Control, Clock anti Timer .......... 7-12
Proofing .................................. 31
Sabbath Feature ........................ 13-15
Timed Baking .......................... 21, 22
Using the Convection Oven ............. 25-30
Using the Probe ........................ 23, 24
Using the Self:Cleaning Oven ........... 33, 34
packaging
tape
To assure no damage is (tone to the finish of the
product, the safest way to remove adhesive left
fi'om packaging tape on new appliances is an
application of a household liquid dishwashing
detergent, mineral oil or cooking oil. Apply
with a sof_ cloth anti allow to soak. Wipe thT and
then apply an appliance polish to thoroughly
clean and protect the surface.
NOTE: The plastic t@e must be removed,fiom the
chrome trim on the oven parts. It cannot be removed
i/it is bahed on.
Before
usinc your
wall oven
Read this guide careflflly. It is intended to help
you operate and maintain your new wall oven
properly.
Keep it handy %r answers to your questions.
If you don't understand something or need
more help, there is a list of toll-fi'ee consumer
seia,ice numbers included in the back section
of this manual.
OR
Visit our Website at: www.monoo'am.com
Write
down the
model &
serial
numbers
!rf_Ott
received a
damaged
wall oven
Save time
& money
You'll find them on a label on the front of the
oven behind the oven door (on single oven
models) or on the front of the lower oven
behind the oven door (on double oven
models).
Fill out and return the Consumer Product
Registration Card that is packed with this
product. If you cannot find it, please send
in the duplicate card printed in the back of
this guide.
hmnediately contact the dealer (or builder)
that sold you the wall oven.
Before you request seia,ice, check the Problem
Solver in the back of this guide.
Before sending in this card, please write these
numbers here:
Model Number
Serial Number
Use these numbers in any correspondence or
seta,ice calls concerning your wall oven.
It lists causes of minor operating problems that
you can correct yourself.
]f yott
need
service
To obtain se_adce, see the Consumer Seta,ices
page in the back of this guide.
We're proud of our seia,ice and want you to be
pleased. Iffi_r some reason you are not happy
with the seta,ice you receive, here are the steps
to ff_llow for filrther help.
FIRST, contact the people who seiMced your
appliance. Explain wtU you are not pleased. In
most cases, this will solve the problem.
NEXT, if you are still not pleased, write all the
details-including your phone number-to:
Manager, Customer Relations
GE Appliances
Appliance Park
Louisville, KY 40225
IMPORTANT SAFETY INSTRUCTIONS
WARNING!
For your safe W, the inforlnation in this manual lllUSt be followed to minimize the risk of fire or
explosion, electric shock, or to prevent property damage, personal injmy, or loss of life.
IMPORTANT SAFE TY NO TICE
• The California Safe Drinking Water and Toxic
Enforcement Act requires the Governor of
Califbrnia to publish a list of substances
known to tile state to cause cancer, birtt_
defects or ott_er reproducuve harm, and
requires businesses to warn customers of
potential exposure to such substances.
SAFE TY PRE CA UTIONS
When using your appliance, follow basic safety
precautions, including the following:
• Use this appliance only for its intended use as
described in tt_is guide.
• Be sure your appliance is properly installed
and grounded by a qualified technician in
accordance wkh tt_e provided installation
instructions.
• Be sure the oven is securely installed in a
cabinet that is firmly attached to the house
structure. Never allow anyone to climb, sit,
stand or hang on tile oven door.
• Have the installer show you the location of the
circuit breaker or fuse. Mark it fbr easy
reference.
• Do not attempt to repair or replace any part
of your wall oven unless it is specifically
recommended in this guide. All ott_er
sm_,icing should be referred to a qualified
technician.
• Teach children not to play with the controls or
any other part of the oven.
• The fiberglass insulation in self-cleaning ovens
gives off a very small amount of carbon
monoxide during the cleaning cycle. Exposure
can be minimized by venting with an open
window or using a venulation fire or hood.
• Keep the oven free from grease buildup.
•Always keep combustible wall coverings, curtains
or drapes a safe distance from your oven.
• DO NOT STORE OR USE COMBUSTIBLE
MATERIALS, GASOLINE OR OTHER
FLAMMABLE VAPORS AND LIQUIDS IN
THE VICINITY OF THIS OR ANY OTHER
APPLIANCE.
• Do not let cooking grease or other flammable
materials accumulate in or near the wall oven.
Do not use water on grease fires. Smother fire
or flame or use a multi-purpose (hy chemical
or foam-type fire extinguisher.
Flame in tile oven can be smothered
completely by closing tile oven door and
turning the oven off or by using a multi-
purpose (h T chemical or foam-Vpe fire
extinguisher.
Do not use aluminum foil to line oven
bottoms, except as suggested in this guide.
hnproper installation of alumimm_ fbil may
result in a risk of electric shock or fire.
• Never leave the oven door open when you are
not watching the oven.
• Always keep dish towels, dish cloths, pot
holders and other linens a safe distance from
your oven.
• For your safety, never use your appliance for
warming or heating the room.
• Always keep wooden and plastic utensils
and canned food a safe distance away from
your oven.
Cook meat and poultry thoroughly--meat to at
least an INTERNAL temperature of 160°F.
and poultry to at least an INTERNAL
temperature of 180°F. Cooking to these
temperatures usually protects against
foodborne illness.
Before performing any service, DISCONNECT
THE OVEN POWER SUPPLYAT THE
HOUSEHOLD DISTRIBUTION PANEL BY
REMOVING THE FUSE OR SWITCHING
OFF THE CIRCUIT BREAKER.
• Do not store flammable materials in the oven.
SAFE TY P_RECA UTIONS
Do not leave children alone--children should
not be left alone or unattended in an m'ea
where an appliance is in use. They should
never be allowed to sit or stand on any part
of the appliance.
Do not touch the heating elements or the
interior surface of the oven. These surfaces
may be hot enough to bm'n even though they
are clark in color. During and after use, do not
touch, or let clothing or other flammable
materials contact, any interior area of tt_e
oven; allow sufficient time for cooling first.
Potentially hot surfhces inch.Me tl_e oven vent
openings and surfaces near the openings,
crevices around tt_e oven door, tt_e edges of
tt_e door window and metal trim parrs above
tt_e door.
Remember: The inside surface of the oven
may be hot when tt_e door is opened.
CAUTION: ITEMSOFINTEREST
TO CHILDREN SHOULD NOT BE STORED
IN CABINETS ABOVE A WALL OVEN--
CHILDRENCLIMBINGONTHEOVENTO
REACH ITEMS COULD BE SERIOUSLY
INJURED.
• Never wear loose-fitting or hanging garments
while using the appliance. Be careful when
reaching for items stored over the oven.
Flammable material could be ignited if
brought in contact with oven heating elements
and may cause severe burns.
• Do not heat unopened food containers.
Pressure could build up and the container could
burst, causing an injmy.
• Keep the oven vent unobstructed.
• Place the oven shelf in the desired position
while the oven is cool. If shelves must be
handled when hot, do nor let pot holder contact
the heating elements.
• Never leave jars or cans of fat drippings in or
near your oven.
• Pulling out the shelf to the shelf stop is a
convenience in lifting heavy foods. It is also a
precaution against burns fl'om touching hot
surfaces of tt_e door or oven walls.
• When using cooking or roasting bags in the
oven, fbllow the manufacturer's directions.
• Do not use your oven to dry newspapers. If
overheated, they can catch on fire.
• Do not use oven for a storage area. Items stored
in an oven can ignite.
• Do not leave paper products, cooking utensils or
food in the oven when not in use.
• Do not allow anyone to climb, stand or hang
on the door. They could damage tt_e oven or
cause severe personal injmy.
• Use only dry pot holders--moist or damp pot
holders on hot surfaces may result in burns
from steam. Do not let pot holders touch oven
heating elements. Do nor use a towel
or other bulky cloth.
• After broiling, always take the broiler pan out of
the oven and clean it. Leftover grease in the
broiler pan can catch fire the next time you use
the pan.
• Stand away from the oven when opening the
oven door. Hot air or steam which escapes can
cause burns to hands, face and/or eyes.
SELF-CLEANING OVEN
Do not clean the door gasket. The door gasket is
essential %r a good seal. (;are should be taken
not to rub, dmnage or move the gasket.
Do not use oven cleaners. No commercial oven
cleaner or oven liner protective coating of aW
kind should be used in or around aW part of the
oven. Residue fl'om oven cleaners will dmnage
the inside of the oven when the self clean cycle
is used.
SAVE THESE INSTRUCTIONS
• Clean only parts listed in this Use and
Care Guide.
• Before self-cleaning the oven, remove the
broiler pan, grid and other cookware.
• Be sure to wipe up excess spillage before
starting the self-cleaning operation.
• If the self-cleaning mode malfunctions, turn
the oven off and disconnect the power supply.
Have it sen_iced by a qualified technician.
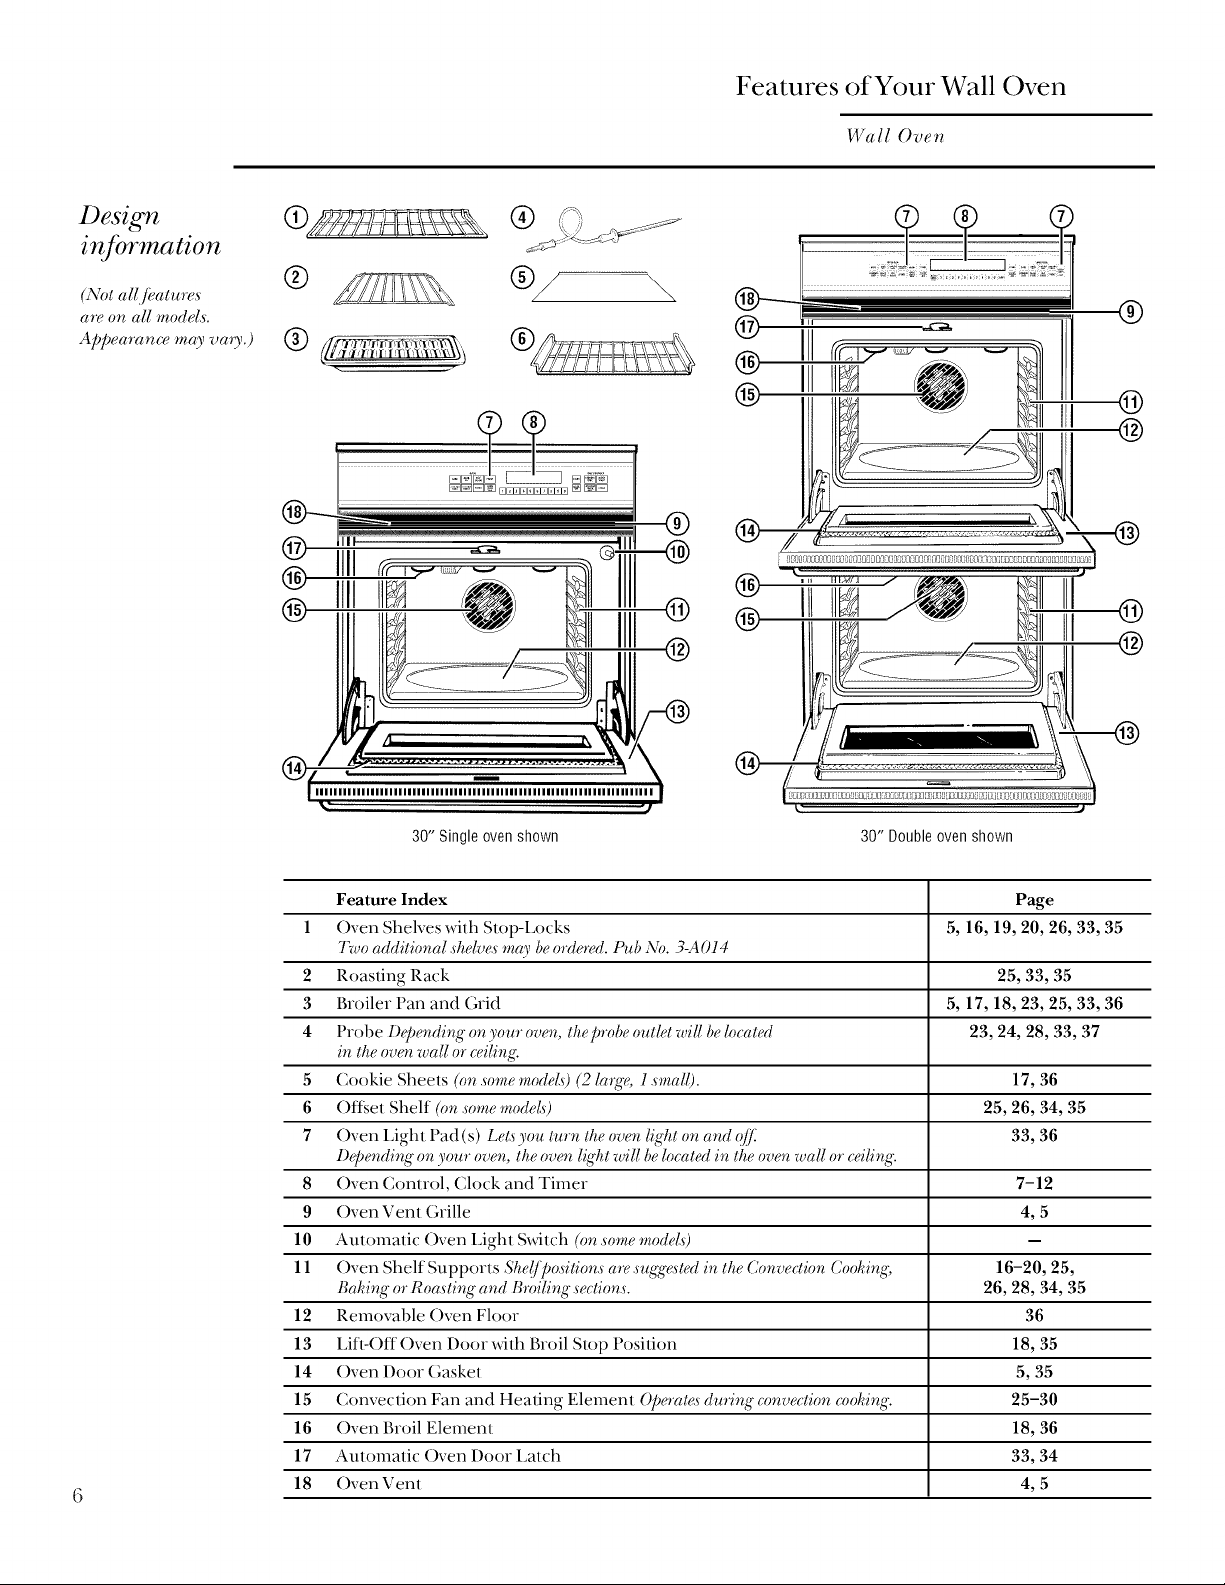
Design
information
(Not allJbature,s
are on all model,s.
Appearance may va_3!.)
®
Features of Your Wall Oven
Wall Over_
\
®
@
@
®
(,,,,,,,',,,,,,,,,,,,,,,,,,,,,,,,,,,,,,,,_,,,,,,,,,,,,,,,,,,,,,,,,,,,,,,,,,)
_" "3
30" Single oven shown
Feature Index Page
1 ()yen Shelves with Slop-Locks 5, 16, 19, 20, 26, 33, 35
Two additional .shelve.s may be ordered. Pub ;\'_. 3-A014
2 Roasting Rack 25, 33, 35
3 Broiler Pan and Grid 5, 17, 18, 23, 25, 33, 36
4 Probe Depending on your oven, thepmbe outlet will be boated 23, 24, 28, 33, 37
in the oven wall or ceiling:
5 Cookie Sheets Om .some modet# (2 la_e, 1 .small). 17, 36
6 ()ffset Shelf Om .some model# 25, 26, 34, 35
7 Oven Light Pad (s) Lel.s you turn the oven light on and q[]_ 33, 36
Depending on your oven, the oven l_ht will be lmated in the oven wall or ceilin,,4.
8 Oven Control, Clock and Timer 7-12
9 Oven Vent Grille 4, 5
10 Automatic ()yen Light Switch Ore.some modet#
11 ()yen Shelf Supports She(/jgo.silion.s are.suEg_<sled in the Conveclion Coohing, 16-20, 25,
Baking or Roa._ting and Bmiling._ection._. 26, 28, 34, 35
12 Removable Oven Floor 36
13 Lifl4)ff()ven Door with Broil Stop Position 18, 35
14 Oven Door Gasket 5, 35
15 Convection Fan and Heating Element ()peral_<s during c_mvection cooking. 25-30
16 Oven Broil Element 18, 36
17 Automatic Oven Door Latch 33, 34
18 Oven Vent 4, 5
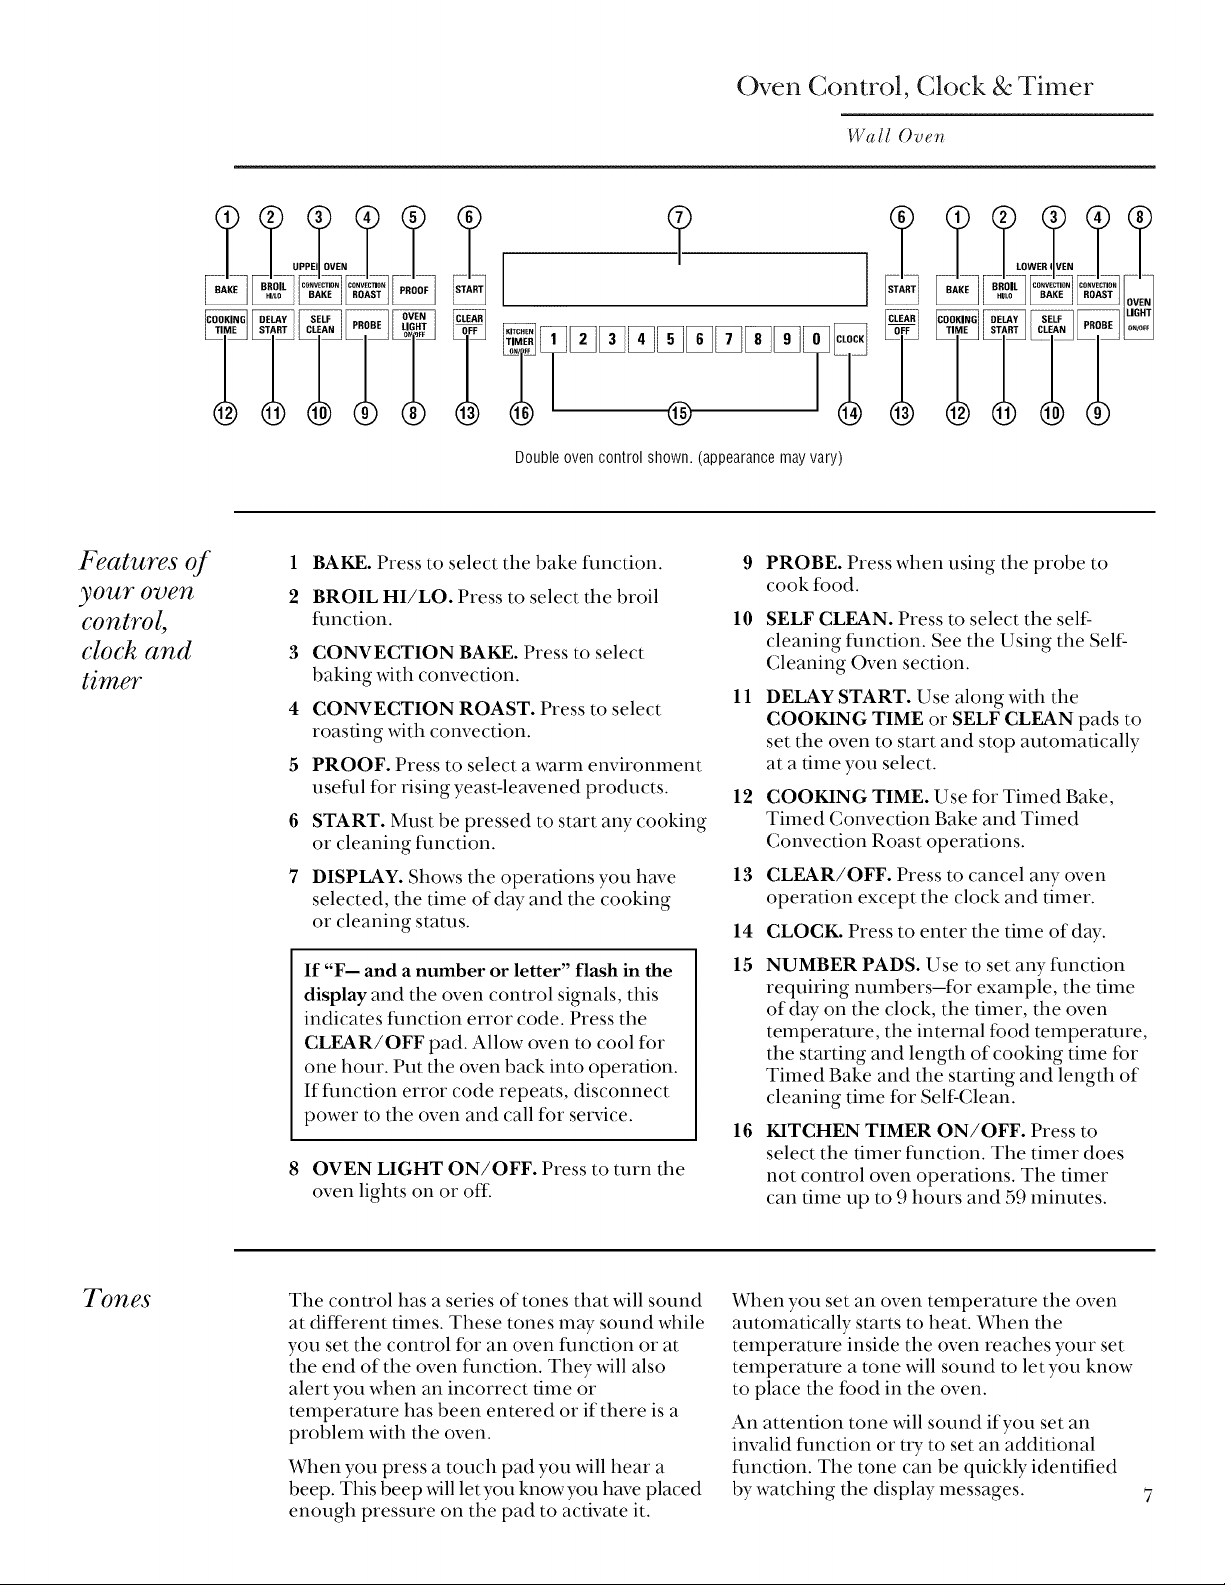
Features of
your o_en
control,
clock and
timer
?
Double oven control shown. (appearance may vary)
BAKE. Press to select the bake flmction.
1 9
BROIL HI/LO. Press to select the broil
2
flmction.
3 CONVECTION BAKE. Press to select
baking with comTection.
4 CONVECTION ROAST. Press to select
roasting with convection.
5 PROOF. Press to select a warm enviromnent
usefld fbr rising yeast-leavened products. 12
6 START. Must be pressed to start any cooking
or cleaning flmction.
7 DISPLAY. Shows the operations you have 13
selected, the time of day and the cooking
or cleaning stares.
If "F-- and a number or letter" flash in the
display and the oven control signals, this
indicates fimction error code. Press the
CLEAR/OFF pad. Allow oven to cool fbr
one hour. Put the oven back into operation.
Iffimction error code repeats, disconnect
power to the oven and call fbr sen_ice.
8 OVEN LIGHT ON/OFF. Press to turn the
oven lights on or of£
10
11
14
15
16
Oven Control, Clock & Timer
Wall Ovefz
PROBE. Press when using the probe to
cook fbod.
SELF CLEAN. Press to select the self:
cleaning traction. See the Using the Self:
Cleaning Oven section.
DELAY START. Use along with the
COOKING TIME or SELF CLEAN pads to
set the oven to start and stop automatically
at a time you select.
COOKING TIME. Use for Timed Bake,
Timed Convection Bake and Timed
Convection Roast operations.
CLEAR/OFF. Press to cancel any oven
operation except the clock and timer.
CLOCK. Press to enter the time of day.
NUMBER PADS. Use to set any traction
requiring nulnbers-fbr example, the time
of day on the clock, the timer, the oven
temperature, the internal fbod temperature,
the starting and length of cooking time fbr
Timed Bake and the starting and length of
cleaning time fbr Self:Clean.
KITCHEN TIMER ON/OFF. Press to
select the timer flmction. The timer does
not control oven operations. The timer
can time up to 9 hours and 59 minutes.
Tones
The control has a series of tones that will sound
at dif*erent times. These tones in W sound while
you set the control fbr an oven traction or at
the end of the oven traction. They will also
alert you when an incorrect time or
temperature has been entered or if there is a
problem with the oven.
When you press a touch pad you will hear a
beep. This beep will let you knowyou hmTeplaced
enough pressure on the pad to activate it.
When you set an oven telnperamre the oven
automatically starts to heat. When the
temperature inside the oven reaches your set
temperature a tone will sound to letyou know
to place the fbod in the oven.
An attention tone will sound if you set an
invalid traction or u T to set an additional
fimction. The tone can be quickly identified
by watching the display messages.
Oven Control, Clock & Timer
Wall Oven
Clock
To set the
clock
The cloel_ must besettler the automatic oven timing
J'i_nctions to wod_ properly.
The time of day clock cannot be changed
during Delay Start. (It can be changed during a
regular bake or broil operation.)
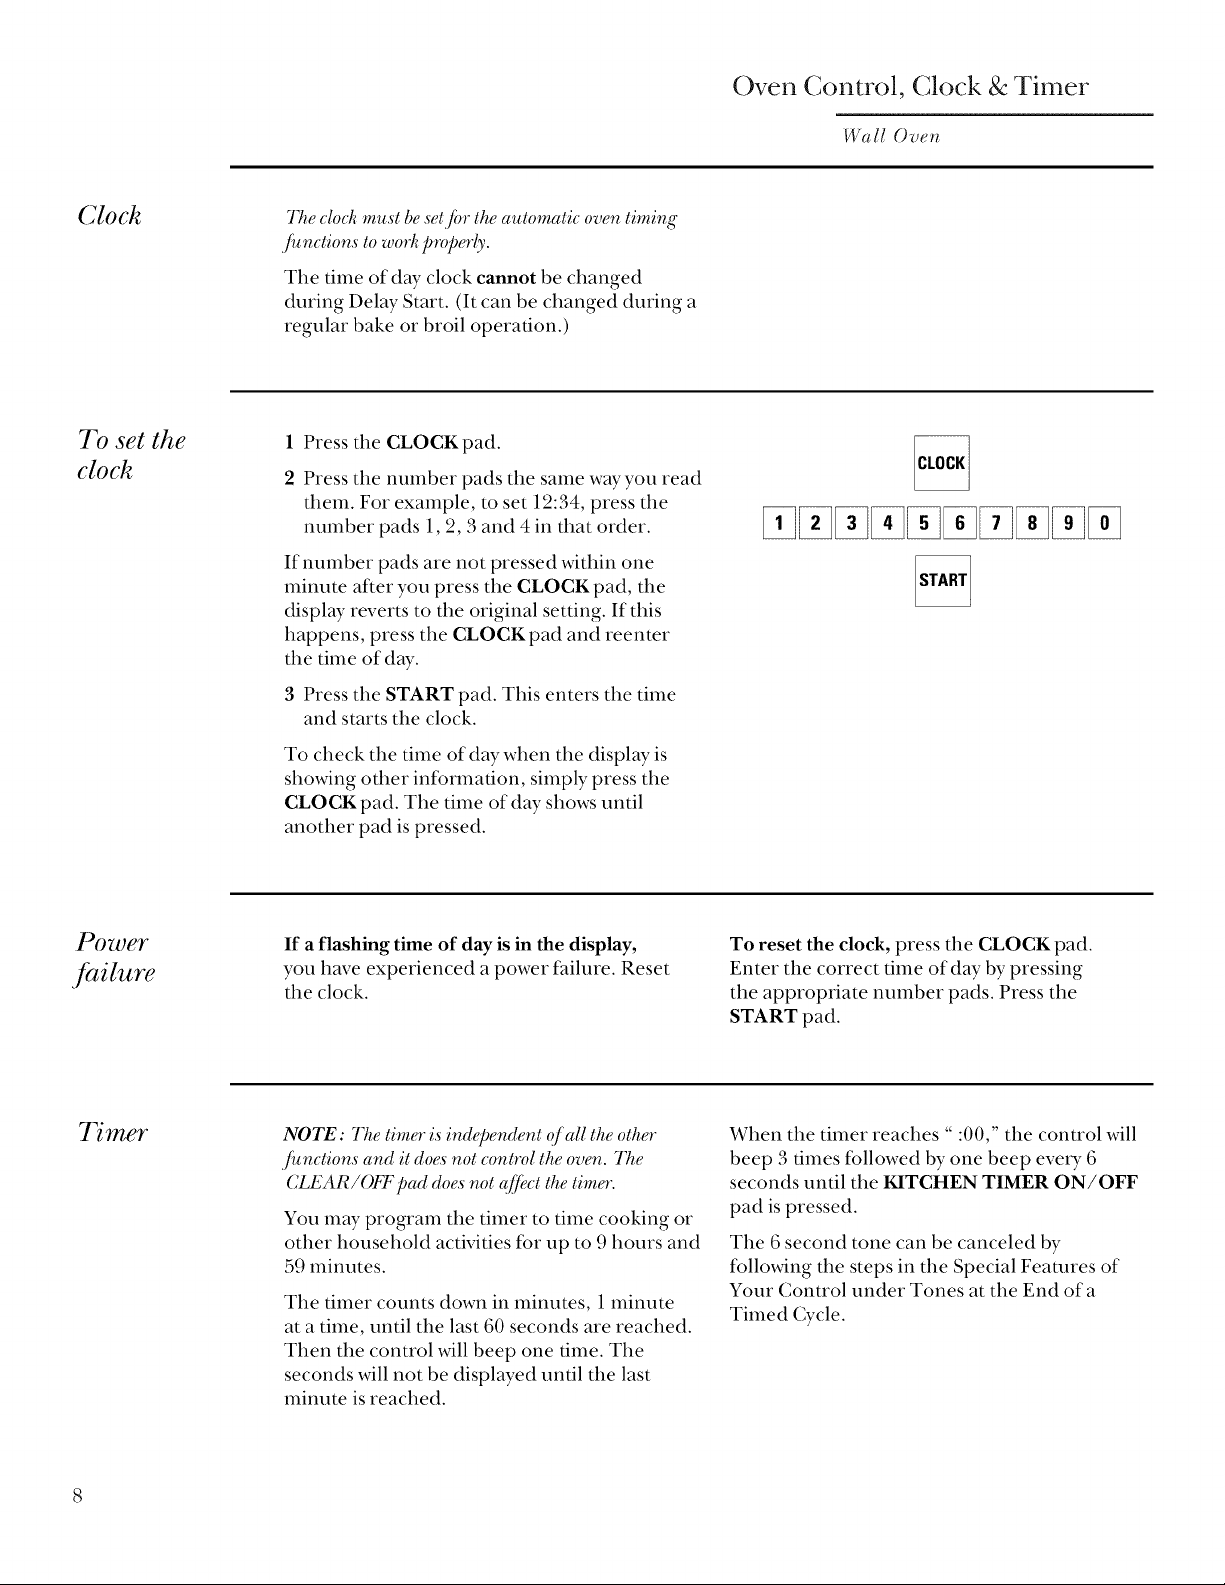
1 Press the CLOCKpad.
2 Press the number pads the same way you read
them. For example, to set 12:34, press the
number pads 1, 2, 3 and 4 in that order.
If nulnber pads are not pressed within one
minute after you press the CLOCK pad, the
displ W reverts to the original setting. If this
happens, press the CLOCK pad and reenter
the time of d W.
3 Press the START pad. This enters the time
and starts the clock.
To check the time of day when the display is
showing other information, simply press the
CLOCK pad. The time of day shows until
another pad is pressed.
Power
failure
Timer
If a flashing time of day is in the display,
you have experienced a power f_filure. Reset
the clock.
NOTE: The tim_o_is ind@endent o/all the other
.fi_nctions and it does not control the oven. The
CLEAR/OFF pad does not c_[fi'.ctthe tim_ _.
You lllay program the timer to time cooking or
other household activities for up to 9 hours and
59 minutes.
The timer counts down in minutes, 1 minute
at a time, until the last 60 seconds are reached.
Then the control will beep one time. The
seconds will not be displayed until the last
minute is reached.
To reset the clock, press the CLOCK pad.
Enter the correct time of day by pressing
the appropriate number pads. Press the
START pad.
When the timer reaches " :00," the control will
beep 3 times fbllowed by one beep eve U 6
seconds until the KITCHEN TIMER ON/OFF
pad is pressed.
The 6 second tone can be canceled by
following the steps in the Special Features of
Your Control under Tones at the End of a
Timed Cycle.
Using the
timer
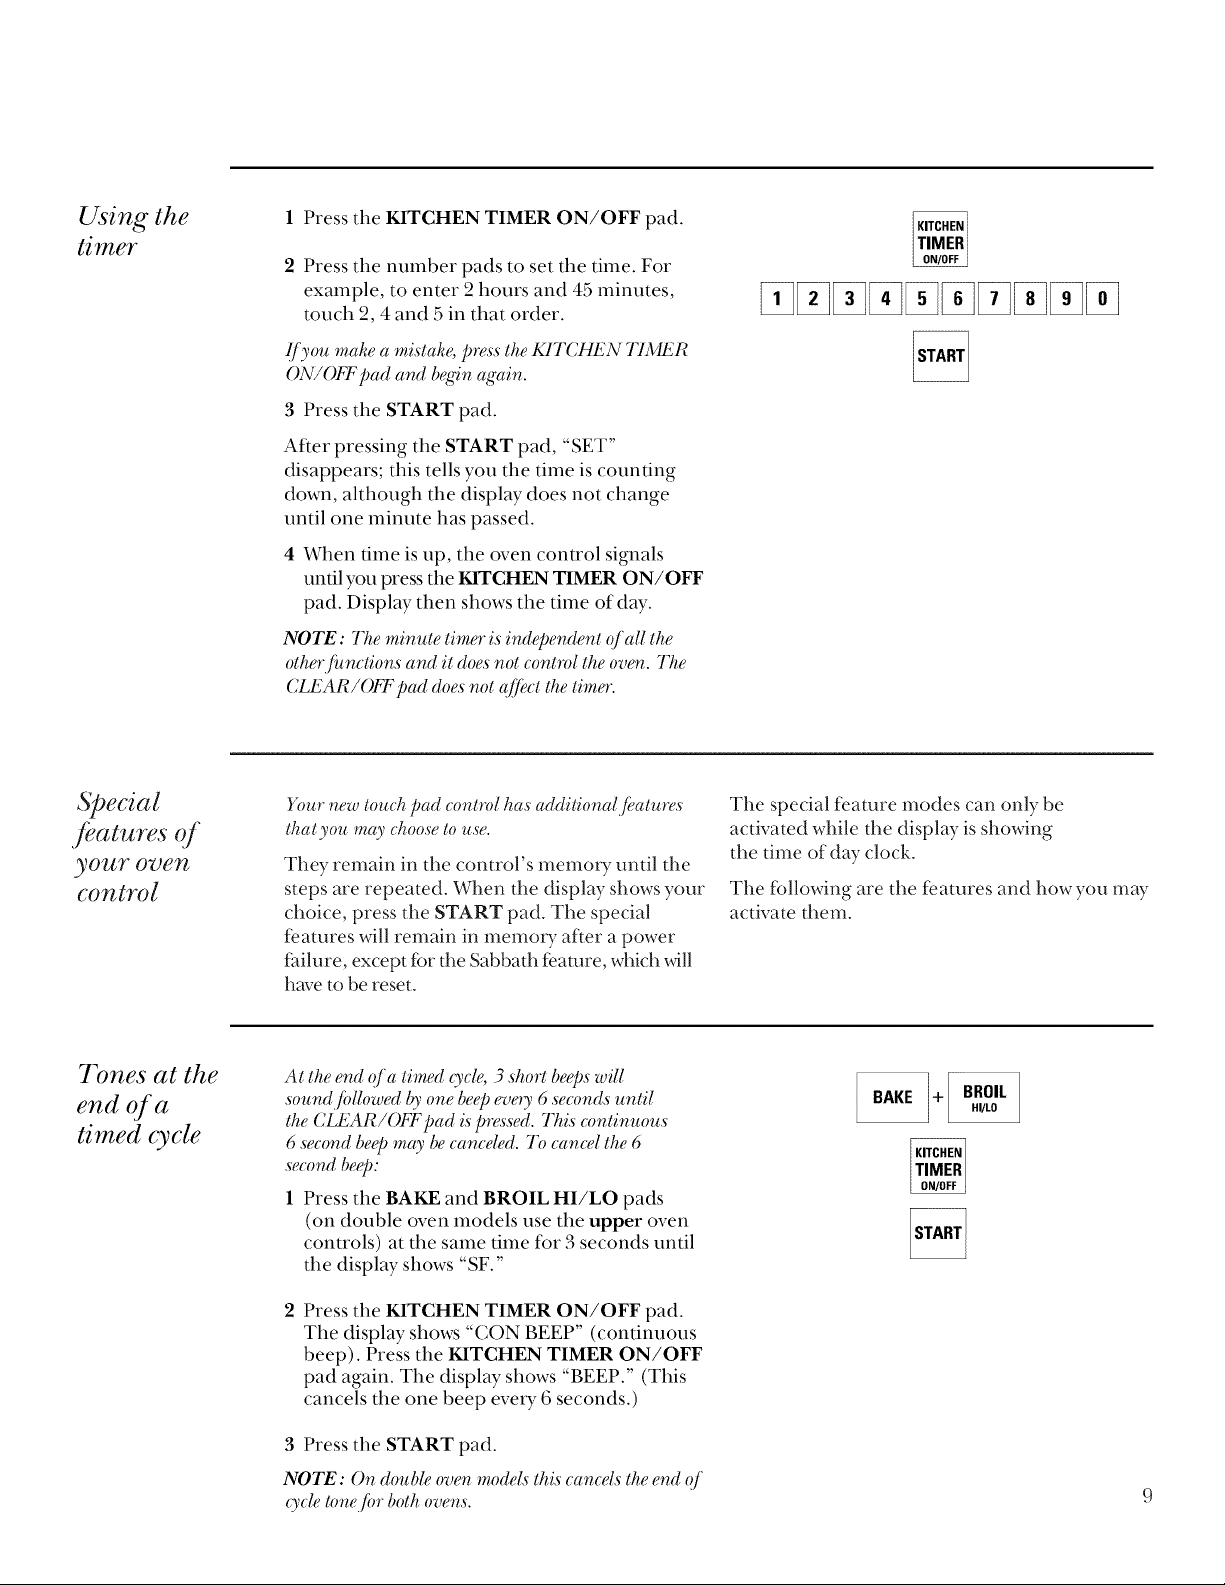
1 Press the KITCHEN TIMER ON/OFF pad.
2 Press the number pads to set the time. For
example, to enter 2 hours and 45 minutes,
touch 2, 4 and 5 in that order.
If you make a mistake, press the KITCHEN TIMER
ON/OFFpad and b_6n again.
3 Press the START pad.
After pressing the START pad, "SET"
disappears; this tells you the time is counting
down, although the display does not change
until one minute has passed.
4 When time is up, the oven control signals
until you press the KITCHEN TIMER ON/OFF
pad. Display then shows the time of day.
NOTE: The mirzute timer is irzdeperzderzt qfall the
otherJ'hnctions and it does not control the oven. The
CLEAR/OFF pad does not q[fi'.ct the tim_ _.
Special
featuresof
your o_3en
control
Tones at the
end of a
timed cycle
Your new touch pad control has additional Jkatures
that you may choose to use.
They remain in the control's memoD7 until the
steps are repeated. When the display shows your
choice, press the START pad. The special
features will remain in memo_ T after a power
f:ailure, except fbr tl_eSabbath feature, which xdll
have to be reset.
At the er_d qf a timed o'cle, 3 short be.eps will
sour_dJbllowed by or_ebeep ev(_?' 6 secor_ds ur_til
the CLEAR/OFF Dad is Dressed. This continuous
6 second beep may be cance#d. 7)_cancel the 6
second be@:
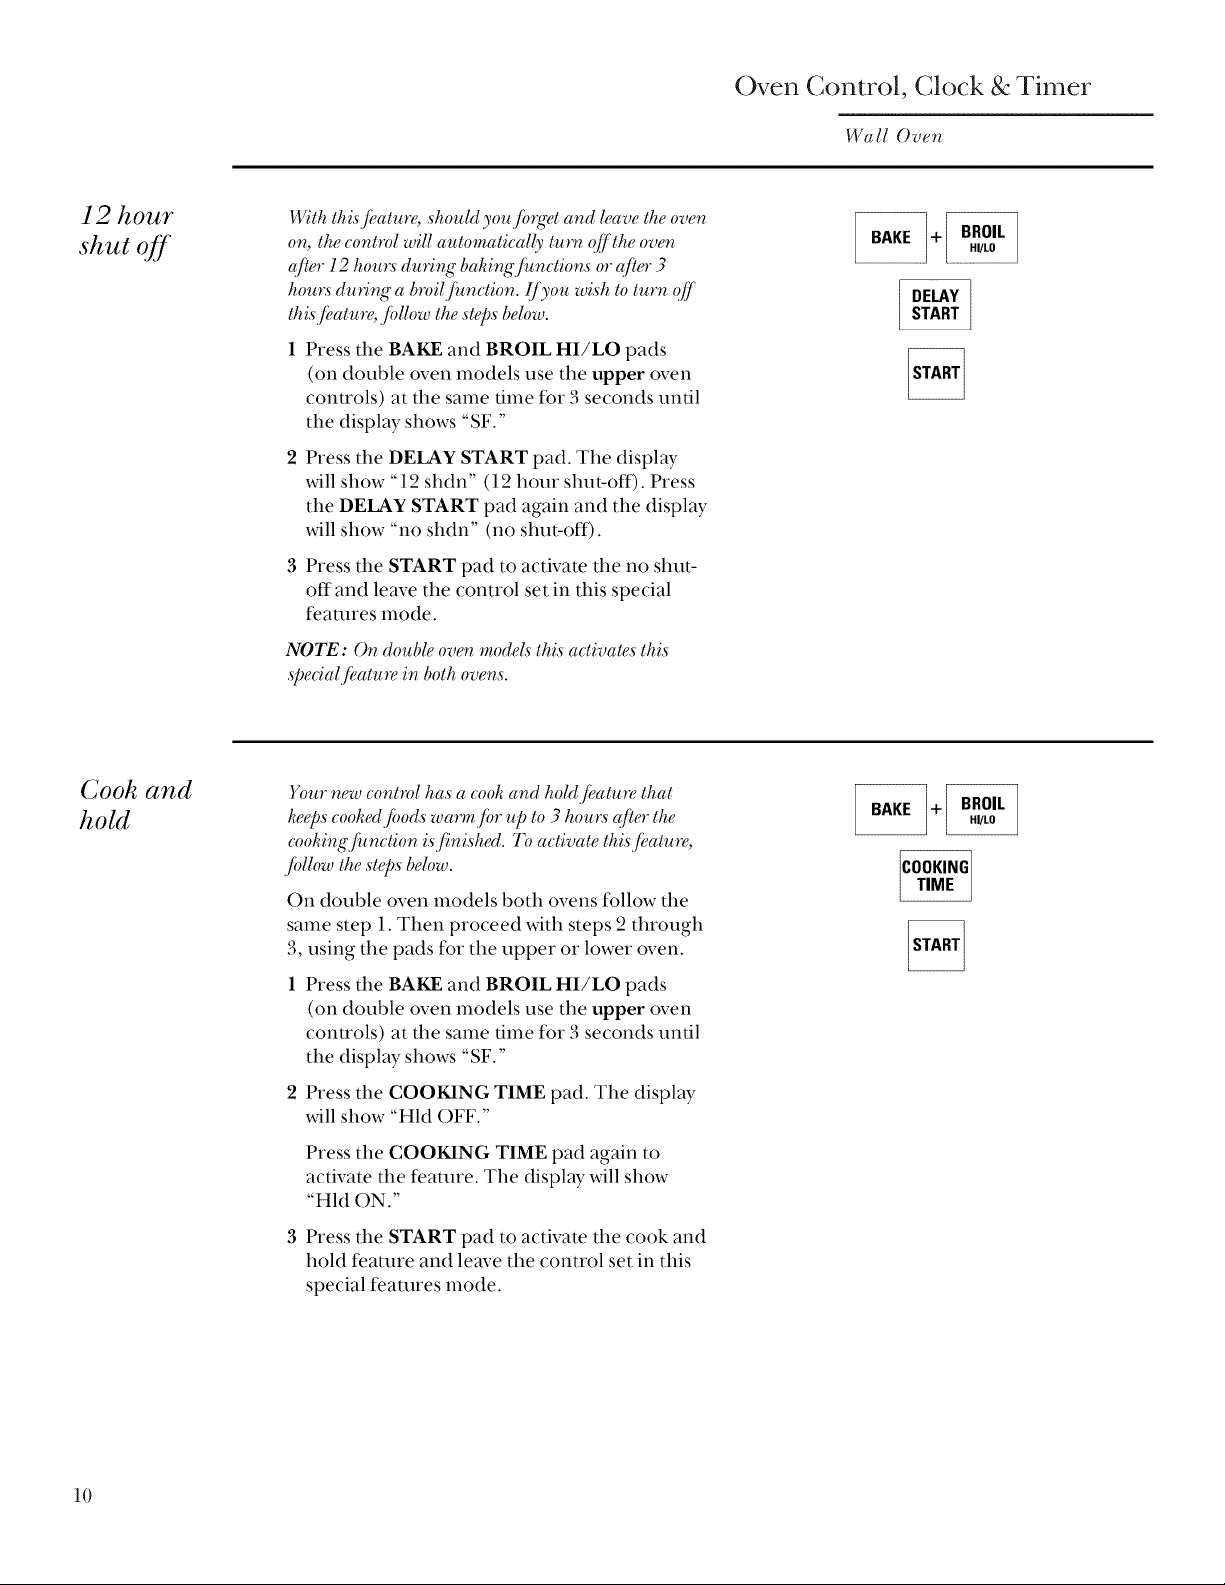
Press the BAKE and BROIL HI/LO pads
(on double oven models use the upper oven
controls) at the stone time for 3 seconds until
the display shows "SF."
Press the KITCHEN TIMER ON/OFF pad.
The display shows "CON BEEP" (continuous
beep). Press the KITCHEN TIMER ON/OFF
pad again. The display shows "BEEP." (This
cancels the one beep ever T 6 seconds.)
The special feature modes can only be
activated while the display is showing
the time of day clock.
The following are the features and how you may
activate them.
3 Press the START pad.
NOTE: On double, oven models this cancels the end (!/"
o'cle tone./br both ovens.
Oven Control, Clock & Timer
Wall Ovef_
12 hour
shut off
Cook and
hold
With this fi,ature, shouhl youJorget arid leave the over_
or_,the control will automatically tu_v_ qff the oven
(_fier 12 hours during baking functions or (_/i_n3
hours during a broil fundion, l/you wish to turr_ off
this Jkature,,fidlow the steps below.
Press the BAKE and BROIL HI/LO pads
(on double oven models use the upper oven
controls) at the same time fbr 3 seconds until
the display shows "SF."
Press the DELAY START pad. The display
will show "12 shdn" (12 hour shut-off). Press
the DELAY START pad again and the display
will show "no shdn" (no shut-off).
Press the START pad to activate the no shut-
off and leave the control set in this special
features mode.
NOTE: On double oven models this adivates this
,special,fi,ature irzboth overzs.
Your new control has a cook and hold,fi,ature that
keeps cooked,fi_ods wa_w_,/br ,ip to 3 hours _/i_ _the
cooking,fil nction is,finished. 7)_ activate this,fi,atu re,
Jollow the ste,ps below.
On double oven models both ovens fbllow the
same step 1. Then proceed with steps 2 through
3, using the pads fbr the upper or lower oven.
10
Press the BAKE and BROIL HI/LO pads
(on double oven models use the upper oven
controls) at the same time fbr 3 seconds until
the display shows "SF."
Press the COOKING TIME pad. The display
will show "Hid OFF."
Press the COOKING TIME pad again to
activate the feature. The display will show
"Hid ON."
3 Press the START pad to activate the cook and
hold feature and leave the control set in this
special features mode.

12 hour,
24 hour
or clock
black-out
Your co_Fol is set to use a 12 hour clock, l/you wouhl
prq/i_r to have a 24 hour milita_)' time clock or black-
out the clock di,splay,,/bllow the steps below.
Press the BAKE and BROIL HI/LO pads
(on double oven models use the upper oven
controls) at the same time for 3 seconds until
the display shows "SF."
2 Press the CLOCK pad once. The display will
show "12 hr." If this is the choice you want,
press the START pad.
Press the CLOCK pad again to change to the
24 hour militaxy time clock. The display will
show "24 hr." If this is the choice you want,
press the START pad.
Press the CLOCK pad again to black-out
the clock display. The display will show
"OFF." If this is the choice you want,
press the START pad.
NOTE: l/the clock is ifz the black-out mode you will
not be able to use the Delay Start function.
Control
lockout
Your conlrol will allow you to lock down the touch
pads so they cannot be activated when pressed.
Press the BAKE and BROIL HI/LO pads
(on double oven models use the upper oven
controls) at the same time for 3 seconds until
the display shows "SF."
Press the SELF CLEAN pad. The display will
show "LOC OFF."
Press the SELF CLEAN pad again. The
display will show "LOC."
3 Press the START pad to activate the control
lockout feature and leave the control set in
this special features mode.
When this feature is on and the touch pads are
pressed the control will beep and the display
will show "LOC."
NOTE:
• On double oven models this activates this ,special
,/i_ature Jbr both ovens.
• The control lockout mode will not (_[fi_ctthe CLOCK,
TIMER ON/OFF and OVEN LIGHT ON/OFF
touch pads.
11

Oven Control, Clock & Timer
Wall Oven
Fahrenheit
or Celsius
temperature
selection
Usi
convection
conversion
Your oven conlrol is set to use the Fahrenheit
lemperature selections but you may change this
to use the Celsius se&ctions.
Press the BAKE and BROIL HI/LO pads
(on double oven models use the upper oven
controls) at the same time for 3 seconds until
the display shows "SF."
Press the BROIL HI/LO pad. The display
will show "F" (Fahrenheit).
Press the BROIL HI/LO pad again. This will
show "C" (Celsius).
Press the START pad. The new setting will be
displayed for both ovens.
NOTE: On double oven models the new setting will be
di,splayed Jbr both ovens.
By using the Convection Conversion Ji_ature you can
automatically converl the oven temperature,fi_om
n_g_dar baking to Convection Bake lemp_atures.
7)_converl the oven temp_ature Jbr convection
baking,,fidlow the sleps below.
Press and hold the CONVECTION BAKE
pad fbr 4 to 5 seconds.
12
"CON Conv Bake" will show in the display.
Using the nmnber pads, enter the
telnperamre recolmnended in the recipe.
3 Press the START pad.
The display shows the converted (reduced)
temperature. For example, if you entered a
recipe temperature of 350°F., the displ Wwill
show 325°F. when it is converted.
4 Press the CLEAR/OFF pad when baking is
finished.
NOTE: Conversion must be set each time you want to
use it. It is not hehl in memo U.
Using tile Sabbath Feature (onsomemodels)
DesignedJbr use on the Jewish Sabbath and Hofidays.
H/all Overt
Sabbath
Feature:
How to set
fi_r regular
baking or
roasting
The Sabba&/eature can f,_',usedfiJrbalfingi_vasting only.
It carmot & used,fiwcor_vectior_,broilir_g;sd[-dearfi_g; _w
DelayStart co&ing:
Make sure the clo& shows the correct time o/day.
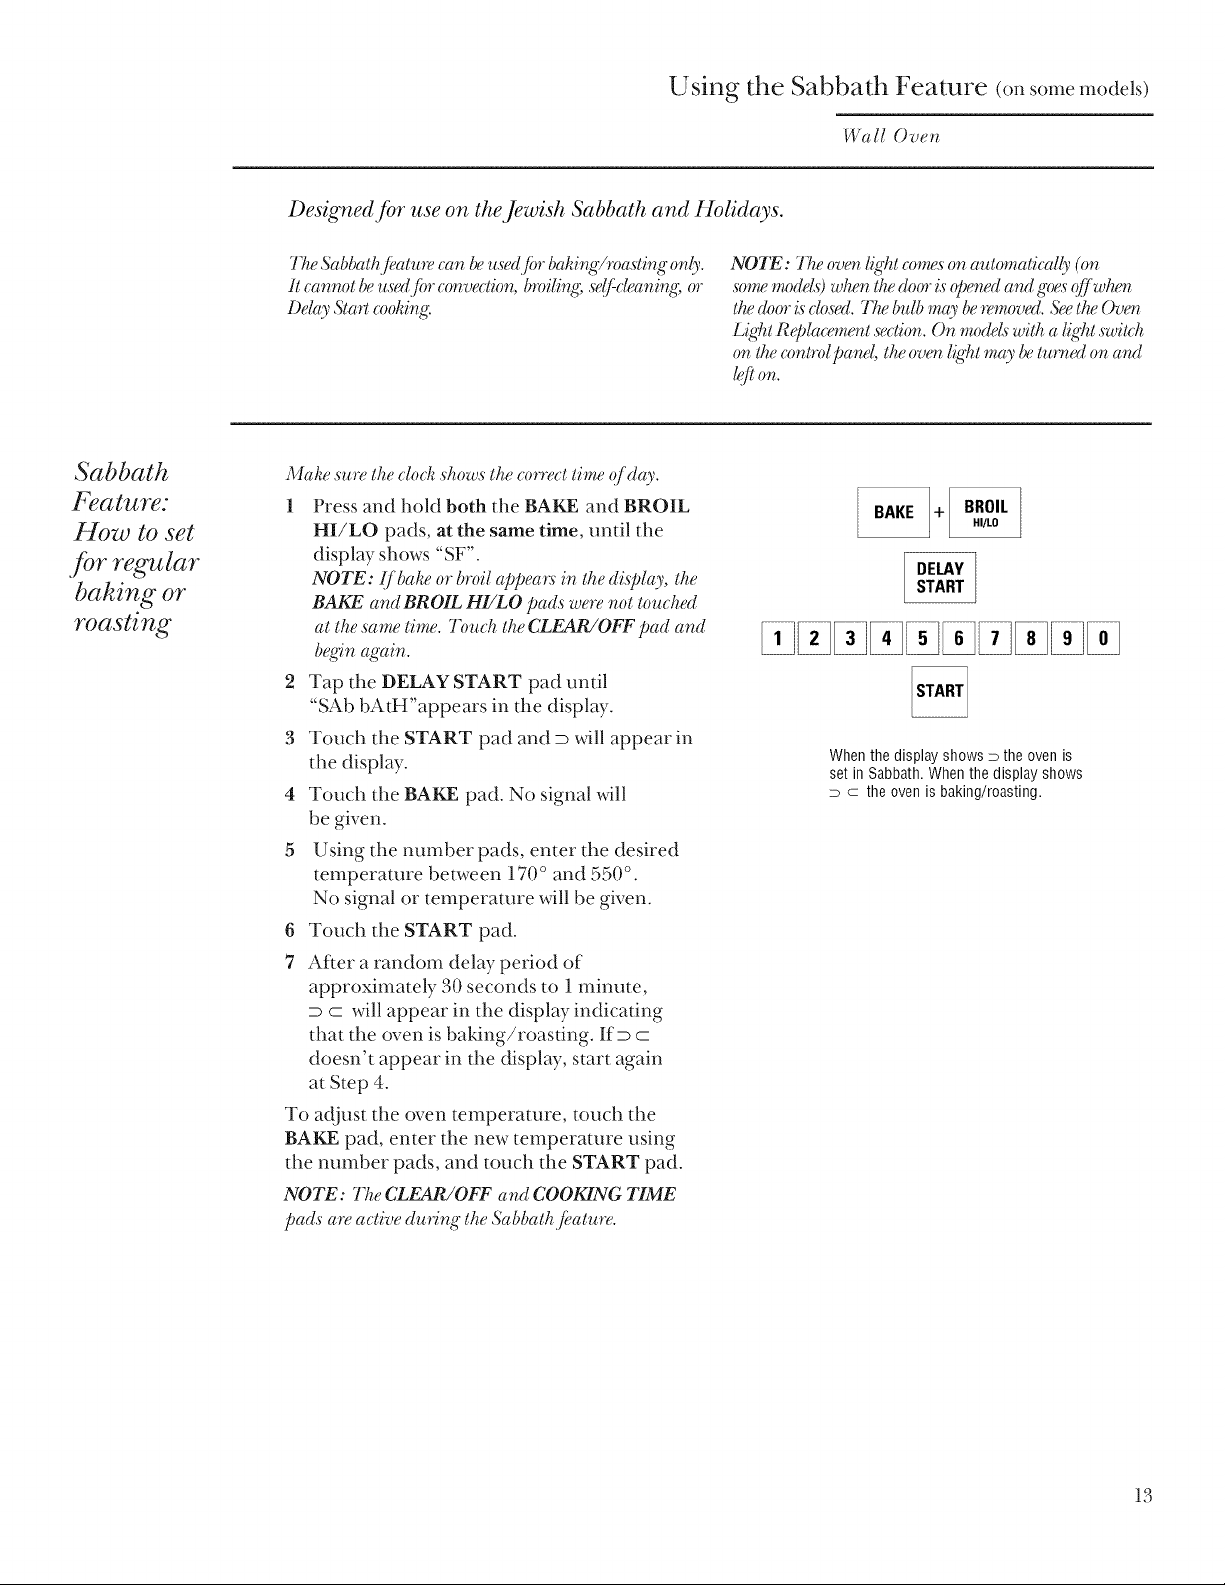
1 Press and hold both the BAKE and BROIL
HI/LO pads, at the same time, until the
display shows "SF".
NOTE: lJbal_eor broil appea_:s in the di,splay, the
BAKE and BROIL HI/LO pads were not touchd
at the same thne. 7)inch the CLFAR/OFF pad and
begin again.
2 Tap the DELAY START pad until
"SAb bAtH"appears in the display.
3 Touch the START pad and D will appear in
the display.
4 Touch the BAKE pad. No signal xdll
be given.
5 Using the number pads, enter the desired
temperature between 170 ° and 550°.
No signal or temperature will be given.
6 Touch the START pad.
7 After a random delay period of
approximately 30 seconds to 1 minute,
D C will appear in the display indicaung
that the oven is baking/roasung. IfD C
doesn't appear in the display, start again
at Step 4.
To adjust the oven temperature, touch the
BAKE pad, enter the new temperature using
the number pads, and touch the START pad.
NOTE: The CLFAR/OFF and COOKING TIME
pads are active during" the Sabbath./kature.
NOTE: The overt l_gt_tcow,mson automatically (on
,so'_vmmodel.sOwhen the do_wis oper_edand goes qff wh¢_
the door h dosed. The tmlb may be removed. See the ()ver_
L_t_l_tR@lacemer_t section. On modeh with a l_t_,lztswih:h
on the contnd panel, the ov_ l_g'htmay betwv_ed on and
WhenthedisplayshowsD theovenis
setin Sabbath.Whenthedisplayshows
D C the ovenisbaking/roasting.
13
Using tile Sabbath Feature (onsomemodels)
Wall Oven
Sabbath
Feature:
How to set for
timed baking or
roasting-
immediate start
and automatic
st@
Mahe sure the elo& shows the correcttime (?/day.
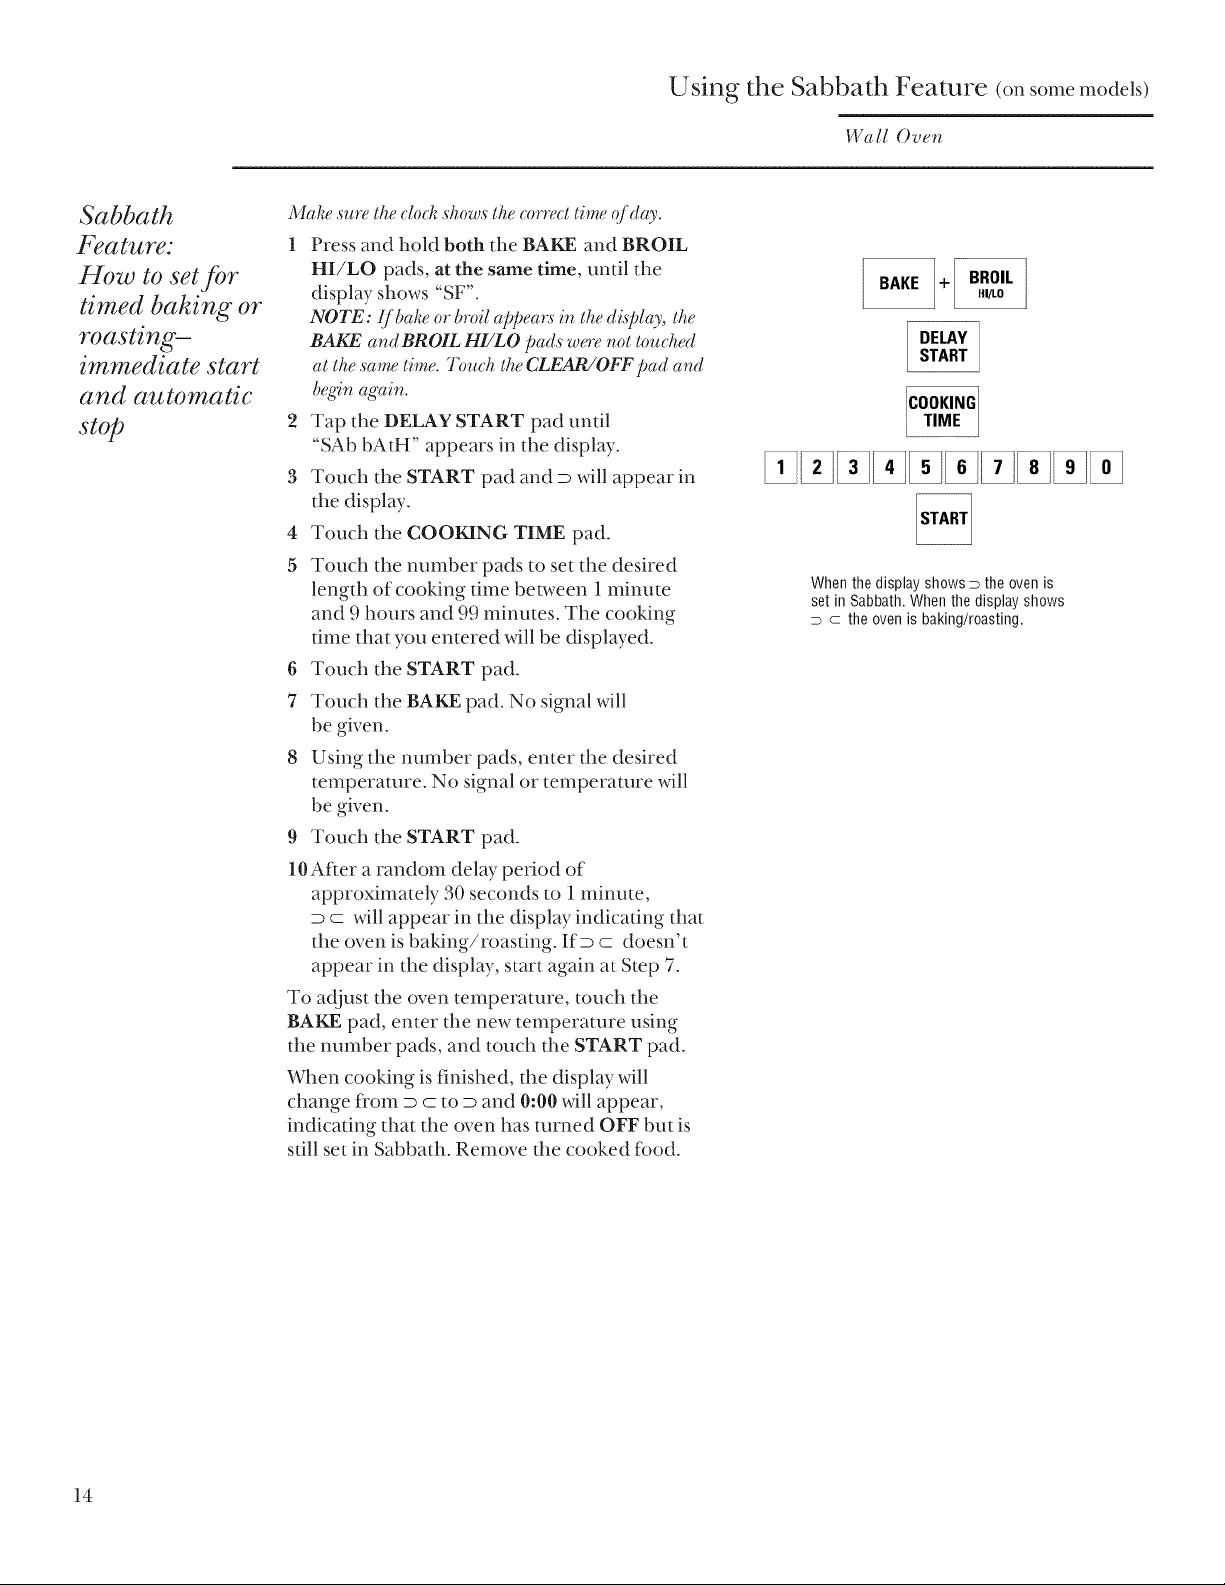
1 Press and hold both the BAKE and BROIL
HI/LO pads, at the same time, until the
display shows "SF".
NOTE: If babe or broilappea_:s ir_the dhplay, the
BAKE and BROIL HI/LO pads woe not to,lehed
at the same time. 7b,_eh the CLEAR/OFF pad and
be€in again.
2 Tap the DELAY START pad until
"SAb bAtH" appears in the display.
3 Touch the START pad and D will appear in
the display.
4 Touch the COOKING TIME pad.
5 Touch the number pads to set the desired
length of cooking time between 1 minute
and 9 hours and 99 minutes. The cooking
time that you entered will be displayed.
6 Touch the START pad.
7 Touch the BAKE pad. No signal will
be given.
8 Using the number pads, enter the desired
temperature. No signal or temperature will
be given.
9 Touch the START pad.
10After a random delay period of
approximately 30 seconds to 1 minute,
D C will appear in the display indicating that
the oven is baking/roasting. IfD C doesn't
appear in the display, start again at Step 7.
To adjust the oven temperature, touch the
BAKE pad, enter the new temperature using
the number pads, and touch the START pad.
When cooking is finished, the display will
change fi'om D C tO D and 0:00 will appear,
indicating that the oven has turned OFF but is
sull set in Sabbath. Remove the cooked fbod.
WhenthedisplayshowsDtheovenis
setinSabbath.Whenthedisplayshows
D C theovenisbaking/roasting.
14
 Loading...