

Page 1
Owner's
Manual
30" Convection
Wall Oven
ZET1038
ZET1058
www.monogram.com
Monogram:
Page 2
Consunmr Infbrmafion
Wall Oven
hmvduction
Contents
Your new Monogran_ wall oven makes an eloquent statement of style, convenience and kitchen
planning flexibility. Whether w)u chose it ti)r its purity of design, assiduous attention to detail--
or tot both of these reasons--you'll find that yore _Monogram wall oven's superior blend of torm
and flmction will delight you for vears to come.
Yore" Monogram wall oven was designed to provide the flexibility to blend in with your kitchen
cabinetry: Its sleek design can be beautiflflly integrated into the kitchen.
The inflwmation on the tollowing pages will hel I) you operate and maintain wmr wall oven
properl>
Care and Clemahlg
Broiler Pan, Grid and
Convection Roasting Rack .............. 29
Oven Door . ......................... 31
Oven i,ights ........................ 30
Racks .............................. 29
Oven
A(!just the Oven Thermostat ............ 26
Almninmn Foil ............. 6, 7, 13, 19, 22
Baking/Roasting .................. 13, 20
Broiling/Broiling Guide ............ 22, 23
Controls . . . 11, 14, 15, 17, 19, 20-22, 24, 25, 27
Convection Cooking ............... 15-19
Consumer Services
hnportant Phone Nmnbers ............ 35
Model and Serial Nmnber . .............. 3
Problem Solver . ..................... 32
Features ............................ 10
Proofing ............................ 21
SeffCleaning Instructions ........... 27, 28
Timed Cooking ................... 24, 25
Product Registration ................... 3
Safety Instructions ................... 4-9
_V_rrantv ........................... 36
Page 3
Consumer Information
Wall Oven
J_e[ore
using your
wall oven
Writ e
down the
model &
serial
n u ,l_lbers
Read this manual careflllly. It is intended to
hel I) you operate and maintain w)ur new wall
oven properly.
Kee I) it handy ti)r answers to vour questions.
You'll find them on a label on tile front trim
behind tile o'_en door.
Fill out and return tile Consmner Product
Registration Card that is packed with this
product.
If wm don't tmderstand something or need
more hell), there is a list of tolMree consmner
service nmnbers included in the back section
of this manual.
OR
Visit om _"_,_ebsite at: www.monogra_m.com
Before sending in this card, please write these
nmnbers here:
Model Nmnber
Serial Nmnber
Lrse these nulnbers in any corresl)ondence or
set\ice calls concerning yore" wall oxen.
If you
received a
damaged
wall oven
Save time
& money
If you
,teed
service
hmnediatelv contact tile dealer (or builder)
that sold you the wall oxen,
Before you request serxice, check tile
Problem Solxer in tile back of this manual.
To obtain setwice, see tile Consmner Services
page in the back of this manual.
X_'e're proud of our service and want wm to be
pleased. If tot some reason you are not hal)py
with the service you receive, here are two steps
to fl)llow fl)r flu'tiler hell).
FIRST, contact the people who serviced yore"
appliance. Explain wily you are not pleased. In
most cases, this will solve the problem.
It lists causes of minor oi)erating, problems that
_o/I can correct yourself.
NEXT, if you are still not pleased, write all tile
details--including yore" phone nmnbe_to:
Manage_; Customer Relations
GE Appliances
Appliance Park
I,ouisville, KY 40225
Page 4
IMPORTANT SAFETY INSTRUCTIONS
IMPORTANT SAP 2 TY NO TICE
• The California Safe Drinking Water mid
Toxic Enforcement Act requires the
Governor of Caliti)rnia to publish a list
o][ s/ibstances known to the state to Catlse
cancel; birth detects or other reproductive
harm, and requires businesses to warn
customers of potential exposure to such
s/Ibsta nces.
SAFETY PRE CA U770NS
When using your electrical appliances, basic
safety precautions should be followed,
including the following:
• Be sure all packing materials are removed
from the oven before operating it to i)revent
fire or smoke damage should the packing
material ignite.
• Use this appliance only for its intended use
as described in this Owner's Manual.
• Be sure your appliance is properly installed
and grounded by a qualified technician in
accordance with the provided installation
instructioi_s.
• Be sure the oven is securely installed in a
cabinet that is firmly attached to the house
structure. Never allow anyone to clilnb, sit,
stand or hang oi5 the oven door.
• Have the installer show you the location of
the circuit breaker or fuse. Mark it tor easy
FeteFence,
• Do not attempt to repair or replace rely part
of your wall oven unless it is specifically
recommended in this mmmal. All other
servicing should be referred to a qualified
tech nicia n.
• Teach children not to play with the controls
or any other part of the oven.
• Never leave the oven door open when you
are not watching the oven.
• The fiberglass insulation in self-demi ovens
gives off a very small amount of carbon
monoxide during the cleaning cycle.
Exposure can be minimized by venting
with an open window or using a ventilation
t_lIl oI" hood.
•IMPORTANT: Thehealthof
some birds is extremely sensitive to the fiunes
given off durilag the sell:cleaning c}cle of any
o_en. Move birds to another well-ventilated
i'ooin .
• Always keep dish towels, dish cloths, pot
holders mid other linens a safe distmice from
your oven.
• For your safety, never use your appliance
for warming or heating the room.
• Do not store flmnmable materials in the
oven.
• Always keep wooden and plastic utensils
and cmmed food a safe distance away from
your oven.
• Always keep combustible wall coverings,
curtains or drapes a safe distance from
your oven.
• DO NOT STORE OR USE COMBUSTIBLE
MATERIALS, GASOLINE OR OTHER
FLAMMABLE VAPORS AND LIQUIDS IN
THE VICINITY OF THIS OR ANY OTI_]R
APPLIANCE.
• Do not let cooking grease or other flammable
materials accumulate hi or near the wall oven.
• Do not use water on grease fires. Never pick
up a flaming pan. Tm'n the controls off.
Flalne in the oven can be slnothered
comi)letely by closing the oven door and
turning the oven off or by using a In ulti-
I)urpose dry chemical or ti_am-tyl)e fire
extinguisher.
Page 5

MESURES DE SECURITE IMPORTANTES
AVIS IMPOR 77ANT EN MA 77ERE DE SECUR17 f
• Le California Safe Drinking Water and Toxic
Enforcement Act exige que le gouverneul" de
(_alifl)rnie publie une liste de substances que
l'on salt occasionner le cancel; des anomalies
cong_nitales ou d'autres anomalies de
reproduction, et exige que les entreprises
avertissent leurs clients des dangers que leur
font courir une exposition _'lces substances.
MISSURES DE S ?,CUPd77E
Pour utiliser des appareils 61ectrom6nagers,
vous devez suivre des pr6cautions 616mentaires
de s6curit6, en particulier :
• Assurez:vous d'mflever tous les mat6riaux
d'embaJlage du four awmt de le nlettre ell
nlarche, pour (_viter tout danger d'incendie
ou de domn/age dO _'lla fllnlg_e sices
matgwiaux d'emballage prennent fell.
• N'ufilisez cet appaxeil que pour l'usage auquel
il eat deatin6, connne eN)liqu(_ dans le pl'g_sent
Manuel (Ill propl_ig_taire.
• Assurez_vous que votre appaxeil eat bien h_staJl6
et mis h la terre par un installateur qualfli(_,
confimng_nlent aux directives d'installation
fl)urnies.
• Assurez:vous que le four est bien h_staJl6 dm_s
tree armoire solidement fix6e h la charpente
de la r6sidence. Ne laissez pei_onne glJlnper,
s'asseoir Oil inontei" Sill" la porte (hi t0/lI_
ou s'y agrippel:
• Demmldez h l'installateur de vous montrer
l'emplacement du disjoncteur ou du fusible.
IdenfifieMe pour pouvoir le trouver fimilenlent.
• Ne tentez pas de r6pamer ifi de remplacer
auctme pilate du four, h mohas que cela ne soit
recommmld6 dm_s le prOsent ramrod. Tout
autre selxice d'entrefien dolt &tl'e assul'6 par un
l'_pal'ateur qualifi(_.
• Apprenez aux enfm_ts fine pasjouer avec lea
commmldes ou toute autre piece (Ill fi)ui:
• Ne 1MssezjmnMs la porte du four ouverte
lol_que vous ne surveillez pas l'appareil.
• L'isolement en fibre de verre dans les fours
auto-nettoym_ts 6met un trbs petit montant de
gaz carbmfique pendant le cycle de
nettoyage. Vous pouvez r(_duire w)tre
exposition _'l ce gaz ell a6rant, ell ouvrant la
fen&tre ou ell utilisant un ventilateur ou une
hotte d'a&'ation.
•IMPORTANT: ( ertninsoiseaux
sont extr&nlement sensibles _'lla flml_e produite
pendant le progrannne d'autonettoyage de
n'impol-te quel t0/n: Placez les oiseaux dans
une autre pibce bien a&'6e.
• Ga_lez toujours lea lhlgea h vaJsselle, lea
mitaJnes de four et autres articles en tissu h tree
dJstaa_ce s6curitaJre de votre four.
• Pour votre s6curit6, n'ufilisez pas cet appareil
pour r6chauffer la pibce.
• Ne rmagez pas de mat6riaux inflammables dmls
le four.
• Gaaxtez toujours lea ustensiles en plastique et en
bois, de m6me que les aliments en conserve,
tree distance s6curitaire de votre four.
• Gmxlez toujours lea rev6tements muraux
combustibles, les rideaux et lea tenturea a tree
dJstaa_ce s6curitaJre de voice four.
• NE PAS EMMAGASINEZ OU UTILISEZ DES
MATI_:RIELS COMBUSTIBLES, L'ESSENCE
OU LES AUTRES VAPEURS ET LES
LIQUIDES IN_IAMMABLES A PROXIMIT]_:
DE CECI OU AUCUN AUTRE APPAREIL
• Ne laissez pas de graJsse ou autres matibrea
hlflmnmablea s'acctunuler dm_s le four ou
proximit6 de ce denlier.
• Ne tentez pas d'6tehldxe des feux de graJsse
avec de l'eau. Ne soulevezjalnais une casserole
ell flalnlnes. Mettez tousles I'_glages ell position
off (arl'_t).
Vous pouvez Oeindre COlnplOenlent les
flalnnles ell ternmnt la porte (Ill ti)ur et ell
_teignant l'appareil, ou ell ufilisant un
exfinctetlr chinlique _'lpo/idi'e Oil _'lino/isse.
Page 6

IMPORTANT SAFETY INSTRUCTIONS
SAb 2 TY PRE CA UTIONS
• Do not use aluminum foil to line oven
bottoms, except as suggested in this mmmal.
lnq_roper installation of ahmfinmn ti)il may
result in a risk of electric shock or fire.
• Cook meat and poultry thoroughly--meat to
at least an INTERNAl, telnl)erature of 160°F
and poulti T to at least an INTERNAl,
teml)erature of 180°E Cooking to these
teml)eratures usually protects against
foodborne illness.
• Before performing may service,
DISCONNECT THE OVEN POWER
SUPPLY AT THE HOUSEHOLD
DISTRIBUTION PANEL BY REMOVING
THE FUSE OR SWITCHING OFF THE
CIR(:UIT BREAIZER.
• Do not leave children aJone--children should
not be left alone or unattended in an area
where an ai)pliance is in use. They should
never be allowed to sit or stand on any part
of tile al)l)liance.
• Do not touch the heating elements or the
interior surface of the oven. These surtaces
may be hot enough to burn even though they
are dark in color. During and after use, do
not touch, or let clothii_g or other flamnmble
materials contact, any interior area of the
oven; allow sufliciei_t tilne fin" cooling first,
Potentially hot surihces include the oven vent
oI)elfings and surlaces near tile oi)elfings,
crevices around the oven dooi, the edges of
tile door window and inetal trim parts above
the door.
Remember: Tile inside surihce of tile oven
may be hot when the door is opened.
• CAUTION: ITEMS OF INTEREST
TO CHILDREN SHOULD NOT BE
STORED IN CABINETS ABOVE AN
OVEN--CHILDREN CLIMBING ON THE
OVEN TO RI?_.CH ITEMS COULD BE
SERIOUSLY INJURED.
• Never wear loose-fitting or hanging garments
while using the appliance. Be careful when
reaching fl)r items stored over tile oven.
Flammable material could be ignited if
brought in contact with oven heating
elei//ents and iil_lV Catlse severe b/iYns.
• Use tufty dry pot holders--moist or dam I)
pot holders on hot surtaces inav result in
burns fl'om steam. Do not let pot holders
touch hot heating elen_ents. Do not use a
towel or other bulky cloth.
• Keep the oven vent mmbsl_ucted.
• Keep the oven free from grease buildup.
• Strand away from the oven when ope_fing the
oven door, Hot air or steam which escapes can
cause burns to hands, tilce and/or eyes.
• Never "open door broil" with children nearby.
Thev could quickly come into contact with a
hot oven interior surlilce, causing severe burns.
• After broiling, always take the broiler pm_ out
of the oven m_d deml it. I,eflover grease in tile
broiler pan can catch fire tile next tilne vou
use tile pail
• Large scratches or impacts to glass doors cml
lead to broken or shattered glass.
• Never leave jaacs or cm_s of fat drippings in or
nero" your oven.
Page 7
MESURES DE SECURITE IMPORTANTES
MES URES DE CURI TE
• N'ufilisez pas de papier d'aJmnhfium pour
couvrir la sole du four, sauf de la facon
hldJqu6e dm_s le pr6sent mmmel. Une
utilisation inad&luate du papier d'ahuniniuna
peut pr6senter des risques de chocs 61ectriques
ou d'incendie.
• FaJtes cuire la vimade et la volaJlle h fond la
temp&'atm'e INTERNE de la viande doit 6tre
d'au moins 160 °E et celle de la volaille d'au
moins 180 °F. ia cuisson 5 ces temp&'amres
internes assure g_n_ralelnent une bonne
protection contre les intoxications alimentaires.
• Avm_t d'effectuer tree r6parafion, COUPEZ
TOUJOURS L'ALIMENTATION DU FOUR
AU PANNI?_U DE DISTRIBUTION EN
ENLEVANT I,E FUSIBI,E OU EN
Dt_CI,ENCHA_NT I,E DISJONCTEUR.
• Ne laissez pas les enfmats sm_s surveillmace--
I1 ne fimtjamais laisser les enemts seuls ou sans
surveillance pros de l'appareil, hn_que cehfi-ci
fimctimme. On (hilt _galement lem" inmrdire de
grimper ou de s'asseoir sin" l'appareil.
• Ne touchez pas aux 616ments chauffm_ts, _fi
attx paacois du four. Ces sm_i_ces peuvent &tre
suflisamment chaudes pore" causer des brt_dm'es,
re&me si elles ne sont pas rouges. Pendant et
apr0s l'ufilisation, tifites en sorte que w)s
v&tements et autres mat_riaux inflammables ne
viennent pas en contact avec les patois du fimr.
I,aisseMes d'abord refl'oidir.
i,es surfilces susceptibles de devenir chaudes
comprennent notamment l'&'ent du fi)m" et les
sm'ti_ces qui l'entom'ent, les asp&_itbs autour de
la porte du t0/lI; la Stllq_ilce p&_iph&_ique du
hublot et les motflures m_talliques au-dessus
de la porte.
N'oubfiez pas : I,es patois du fimr peuvent &tre
chaudes hnNque vo/is ()/l\'i'ez 1_1porte.
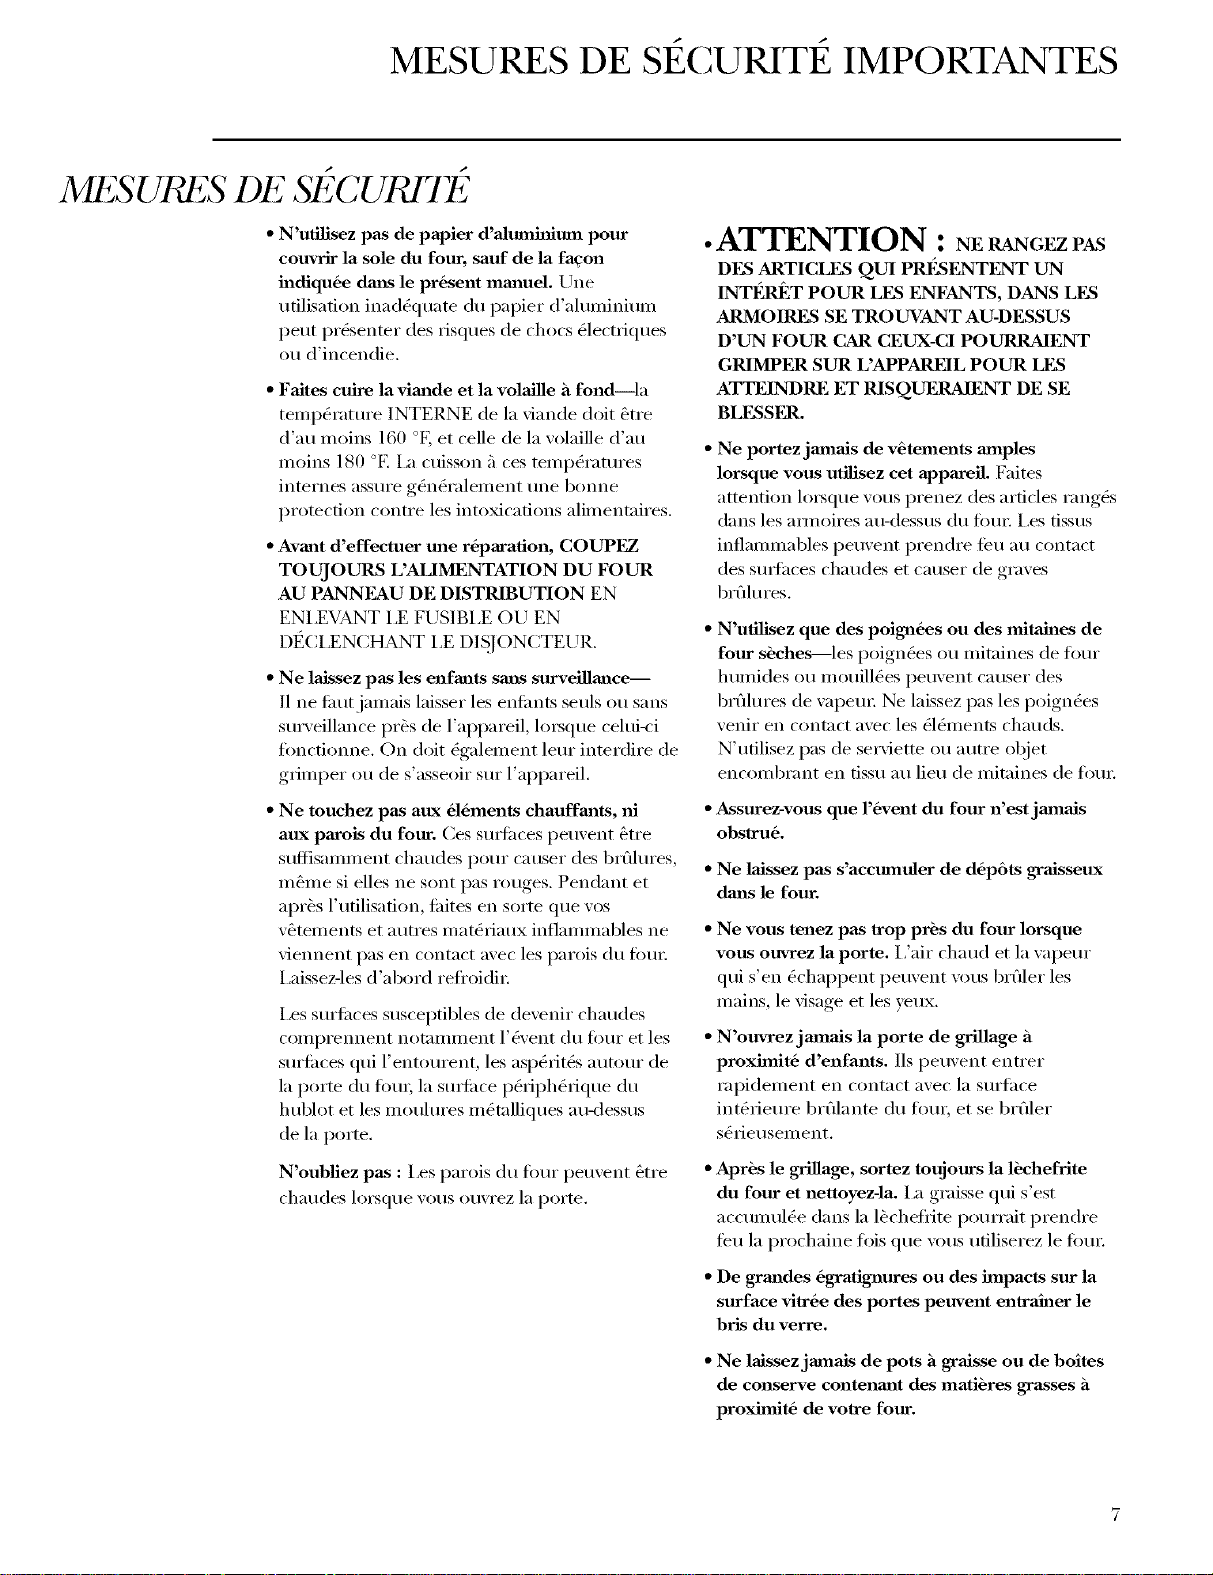
•ATTENTION : NERANGEZPAS
D_kS ARTICLES QUI PRF£ENT_2qT UN
INT]_R_T POUR LES ENDkNTS, DANS LES
ARMOIP&_S SE TROUVANT AU-DESSUS
D'UN FOUR CAR CEUX-CI POURRA1ENT
GRIMPER SUR L'APPARE1L POUR LES
ATTEINDRE ET RISQUERAIENT DE SE
BLESSER.
• Ne portez jamaaJs de v6tements mnples
lorsque vous utilisez cet appaxeil. Faites
attention lo_que vous prenez des articles ranges
dans les am/oires au-dessus du fi)uI; I,es tissus
inflammables peuvent prendre tiql au contact
des sm_hces chaudes et causer de graves
brt_dures.
• N'ufilisez que des poign6es ou des mitaJnes de
four si_ches--les poign_es ou mitaines de tiara"
humides ou mouill_es peuvent causer des
br01m'es de wq)em: Ne laissez pas les poign_es
venir en contact avec les _l&nents chauds.
N'utilisez pas de setMette ou autre objet
encombrant en tissu au lieu de mitaines de ti_m _.
• Assurez:vous que l'6vent du four n'est jmnaJs
obslru6.
• Ne laissez pas s'accumuler de d6p6ts graisseux
dm_s le four.
• Ne vous tenez pas trop pr6s du four lorsque
vous ouvrez la porte. I,'air chaud et la wq)em"
qui s'en (_chappent peuvent \'ous brt_der les
mains, le visage et les veux.
• N'ouvrez jmnaJs la porte de grillage ia
proxhnit6 d'enfants. Ils peuvent entrer
rapidement en contact avec la sm'tace
int(_riem'e b_fllante du timr, et se b_ filer
s_fieusement.
• Apr6s le grillage, sortez toujours la 16chefrite
du four et nettoyez-la. I_a graisse qui s'est
accumul_e darts la l_chefl_ite pomTait prendre
teu la prochaine lois que w)us utiliserez le tom:
• De grm_des 6gratignures ou des impacts sur la
surface viir6e des portes peuvent en_'aJner le
bris du verre.
• Ne laissez jamaJs de pots h graJsse ou de boltes
de conserve contenm_t des matibres grasses
proxhnit6 de vo_'e four.
Page 8
IMPORTANT SAFETY INSTRUCTIONS
SAFE TY PRE CA UTIONS
• Children in walkers, or children crawling, can
be attracted to the round oven door hmldle
and may grab mad open the oven door. This
can result in iI_iury fi'om tile door being pulled
open on a child, or severe burns if the oven
is in use and hot.
• Do not heat unopened food containers.
Pressure could build up and tile container
could burst, causing an iI_jury.
• Place the oven rack in the desired position
while the oven is cool. If racks nlust be handled
when hot, do not let pot holder contact tile
heating elelnents.
SEI =CIJ¢;ANING OVEN
• Do not deml the door gasket. Tile door gasket
is essential tor a good seal. Care should be
taken not to 11117,dalnage or inove tile gasket.
• Do not use oven demmrs. No CO111uleI"cial oveu
cleaner or oven liner protective coating of any
kind should be used iu or arouud auy part of
the oven. Residue fl'Oln oven cleanei_ will
dalnage the inside of the oven when the sell:
clean cycle is used.
• Clean only parts listed in this Owner's MmmaJ.
• Pulling out the rack to the stop-lock is a
convenience in lifting heavy foods. It is also
a l)recautiou agaiust burus fl'oln touchiug
hot suYlhces of tile door or oven walls.
• When using cooking or roasting bags in the
oven, fi)llow tile lnalmfiacturer's directions.
• Do not use your oven to dry newspapers.
If overheated, thev cau catch on fire.
• Do not use oven for a storage area. ltelns
stored in an oven can iglfite.
• Do not leave paper products, cooking utensils
or food in the oven when not in use.
• Do not allow anyone to climb, stand or hmlg
on the door. They could dalnage tile oven or
cause severe l)ersoual iI_iury.
• Before self-clem_h_g the oven, remove the
broiler pan, grid and other cookware.
• Be sure to wipe up excess spillage before
starting the self-clemth_g operation.
• If the self-demth_g mode malfunctions, turn
tile oven off' and disconnect tile power supply:
Have it serviced bv a qualified techlfician.
• The oven racks may be demmd in the oven
dttrh_g the self-clemthlg cycle.
SAVE THESE INSTRUCTIONS
Page 9
MESURES DE SECURITE IMPORTANTES
MESURES DE SECURITE
• Les enfm_ts en maJcchette ou les enfmlts qui
rmnpent peuvent 6tre attir6s pax la poign6e
ronde de porte du four et peuvent la saisir, et
aJnsi ouvrir la porte. Cela peut occasiolmer
fine ou\'erture de la porte sur l'enLmt OH
des bI filures s_rieuses si le fi)ur est en
t0i_ctiolmelnei_t et chaud.
• Ne faites pas chauffer de r6dpient ferm6.
I,'accunmlatioi_ de pressioi_ dans le r6cipient
peut le tidi'e _clateI; causant ainsi des blessures.
• Placez les clayettes h la hauteur d6s@6e lorsque
le four est froid. Si vous devez les inaifipuler
loi_que le t0ur est chaud, _vitez que vos
initaines de t0/lr ei_trent en contnct avec
les _l_ii_ents du t0ur.
FOUR A UTONI?, TTO YANT
• Tirez la clayette jusqu'au verrouillage-arrSt
si vous devez soulever des casseroles lourdes.
Vous &viterez ainsi de w)us brfiler en touchant
aux patois de la porte ou du fi)uI:
• Lorsque vous utilisez des sachets pour la cuisson
ou le r6tissage, suivez les directives du fid)ricant.
• Ne faites pas s_cher de journaux dmas le four.
S'ils surchauflimt, ils risquent de prendre teu.
• N'entreposez pas d'articles dm_s votre four.
Ils pourraient prendre teu.
• Ne laissez pas de produits en papier,
d'uste_siles de cuisson ou d'aJiments dm_s le
four lorsqu'il n'est pas utifis_.
• Ne laissez persom_e grimper ou monter
sur la porte du four, ou s'y agripper. Cela
pourrait endolnlnager l'appareil ou causer
de graves blessuies.
• Ne nettoyez pas le joh_t de la porte. Cejoint est
essentiel 5 une bolme _t;mch_it_. I1 timt _viter
de le r_curei; de l'endonmmger ou de le
d_placeI:
• N'utilisez pas de produits nettoym_ts
commerciaux pour le four. I1 ne fimtjamais
utiliser des produits nettowmts comn_erdaux ou
des enduits protecmui_ dans le Ibm" ou pr&s des
pi_ces du ti)tli: i,es rbsidus de ces produits
nettoyants endolnlnageront l'int_iieur (Ill Ibm"
h)i3que \'otis ef]ecttlerez Ills atltonetto};ige.
• Ne nettoyez que les pibces hldJqu6es dm_s le
pr6sent manuel d'ufilisation.
CONSERVEZ CES DIRECTIVES
• Avmit de commencer l'autonettoyage, elflevez la
l_cheffite, la grille et autres ustensiles de cuisine.
• Avmlt de commencer l'autonettoyage, essuyez
les aliments renvers6s.
• Si le programme d'autonettoyage fonctiom_e
real, _teignez le four et coupez l'alin_ei_tntioi_
blectiique. Faites rbparer l'appareil par un
techlficien qualifi_.
• Vous pouvez nettoyer les clayettes du four
pendmit le cycle d'auto-nettoyage.
Page 10

Features of Your Wall Oven
W{ll! Ove_
Desig_z
injbrmation
(NOt all fi.atur(<s
4ppear_mce m_ty vao,. )
®
, oo?o
@
xx @
ZET1038 shownwith Eurosty/e knobs
Feature Index Page
1 ()yen Rack (4 each oven), Broiler Pan, Grid 8, 20, 22, 23, 27, 29
and Conve(tion Roasting Rack (1 each oven)
2 ()yen Door (;asker 8, 27, 31
3 Model and Serial Nmnbers 3, 34
4 Halogen Oven IJghts 30
5 Broil Element 22, 29
6 Clock and Timer 11, 20
7 Mode Sele(tor Knob {Imob appearance mO' vary) 14, 15, 17, 19-22, 24, 25, 27, 28
8 ()yen ()N IJght 14, 15, 17, 19-22, 24, 25, 27, 28
9 t]EATIN(; IJght 14, 20-22, 24, 25, 27, 28
10 I o(ked Door Indicator Iight 14, 27, 28
11 Temperature Conux)l Knob &nob appearmtce may vmT) 14, 15, 17, 19-22, 24-29
12 ()yen Control Knob {l¢_tob _@pearm_e m O' vary) 14, 15, 17, 19-22, 24-29
13 ()Yen Vent 6, 7
14 Amomafic ()ven Door I.mch 27, 28
15 ()yen Rack Supl)orls 20
16 (2mvection Fan 15
17 Bake Elemem hv_&'r the ove_/loor) 29
18 ()yen Door 22
10
19 Convection Floor Rack 12
ZET1058 shown withProsb/le knobs
Page 11
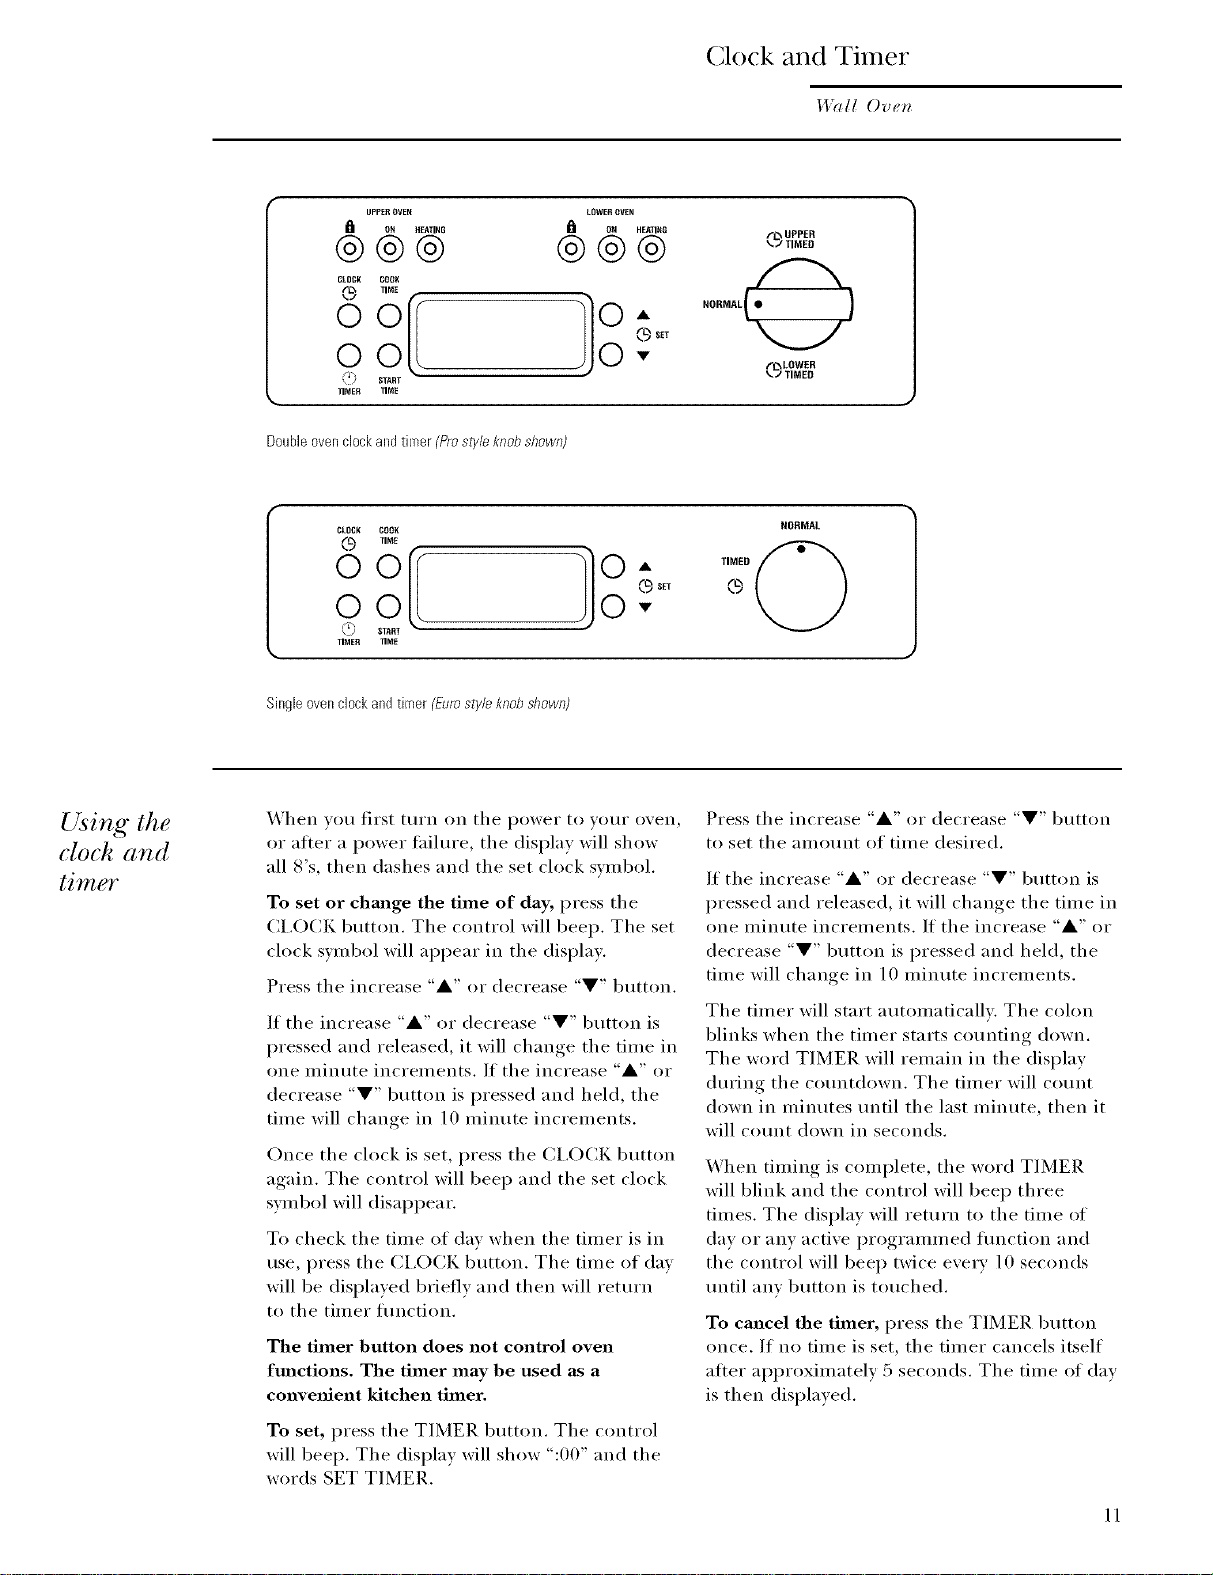
Clock and Timer
Wall Oven
UPPER _VEN
ON HF_TING
@@@
CLOCK COOK
lIME
°ol
0
\/ 8TART
IIMER lIME
Doubleovenclockandthner (Prostyleknobshown)
(_ TIME
kJ START
TIMER TIME
Singleovenclockandtimer (Eiirostyleknobshown)
LOWER OVEN
OH HE_IR8
@@@
(_SET
O-
0•
r_', UPPER
'_J TIMED
!"-'N
NORMAL_
_LOWER
TIMED
NORMAL
TIMED
sn
Using the
cloch and
timo
_'_ hen vo/i tirst ttu'n on tile power to _O/lI" ox, en
or after a power taihlre, the display will show
all 8's, then dashes and the set clock sxmbol.
To set or chmlge the time of day, press the
CI,OCK button. The control will beep. The set
clock swnbol will appear in the displa>
Press the increase "A" or decrease "V" button.
If the increase "A" or decrease "V" button is
pressed and released, it will change the time in
one minute increments. If the increase "A" or
decrease "V" button is pressed and held, the
time will change in 10 minute increments.
Once the clock is set, press the CI,OCK button
again. The control will beep and the set clock
swnbol will disappear.
To check the time of day when the timer is in
use, press the CI,OCK button. The time of day
will be displayed briefly and then will return
to the timer flmction.
The timer button does not control oven
fm_ctions. The timer may be used as a
convenient kitchen timer.
To set, press the TIMER button. The control
will beep. The display will show ":00" and the
words SET TIMER.
Press the increase "A" or decrease "V" button
to set the amount of time desired.
If the increase "A" or decrease "V" button is
pressed and released, it will change the time in
one minute increments. If the increase "A" or
decrease "V" button is pressed and held, the
time will change in 10 minute increments.
The timer will start automatically. The colon
blinks when the timer starts counting down.
The word TIMER will remain in the display
during the countdown. The timer will count
down in minutes tmtil the last minute, then it
will COtlnt down in seconds.
When timing is complete, the word TIMER
will blink and the control will beep three
times. The display will return to the time of
dav or any active programmed flmction and
the control will beep twice every 10 seconds
tmtil any button is touched.
To cancel the timer, press the TIMER button
once. If no time is set, the timer cancels itself
after approximately 5 seconds. The time of day
is then displayed.
11
Page 12

Before You Begin
Wall Ove*_
Oven air
An internal cooling fan operates during all
()veil modes. The warin air fl'om inside the ()veil
./IOW
will be exhausted ()tit through vents located
between the door and control panel.
Do not allow this air flow to be obsti ucted such
as by drai)ing kitchen towels over the front of
the ()veil in undercounter ai)plications.
Oven Tclchs To avoid possible burns, place the racks
ill the correct position befl)re you turn the
ox,en on.
The correct rack position depends on the
kind of ti)od and the browning desired.
The racks have stoI>locks, so that when placed
correctly on the sui)ports, they will stop befl)re
conling colnpletely out, and will not tilt. When
placing and renloving cookware, pull the rack
()tit to the buln l) on the rack SUl)port.
The ovenIlas
4 rackpositions.
To remove a rack, pull it toward you, tilt the
fl'ont end up and pull it ()tit.
To replace, place the end of the rack (stoI>
locks) on the suI)port, tilt tip the ti'ont and
push the rack in.
Convection
Floor Rach
Bahing
pans/sheets
To avoid possible burns, always use ()veil
Initts and the Rack Grasp Handles on each side
when inoving this special rack and NEVER
pull this rack past the STOP position during
cooking. This rack is designed to slide on the
oven bottonl and extend to stop against the
open ()veil door.
To remove this rack, pull it toward you, tilt the
front end up and pull ()tit.
NOTE: This special rack is to be used only in
the oven bottonl position.
To replace, always be sure the Rack Gi'as I)
Handles are toward the fl'ont of the oven.
Otherwise, toods could slide ott the back
during extension.
Use the i)roper baking pan. The type of
finish on the pan deternlines the alllO/int
of browning that will occur.
• Dark, rough or dull pans absorb heat
resulting in a browner, crisper crust.
Use this type fl)r pies.
Grasp
Handle
Door
Stop
Position
• Shiny; bright and snlooth pans reflect heat,
resulting in a lighter, n/ore delicate browning.
Cakes and cookies require this type of pan
or sheet.
• Glass baking dishes also absorb heat.
X._hen baking in glass baking dishes, the
ten/perature max need to be reduced by 25°F.
12
Page 13

Baking Tips
Wall Ove*_
I)(in
placement
Preheating
Aluminum
bil
For even cooking and proper browning, there
must be enough rooln tor air circulation in the
oven. Baking results will be better if baking
pans are centered as inuch as possible rather
than being placed to the fl'ont or to the back
of the oven.
Preheat the oven if the recipe calls fl)r it.
To preheat, set the oven at the correct
temperature--selecting a higher temperature
does not shorten preheat time. Preheat the
oven for at least 15 minutes, or tmtil the
HEATING light goes off. This may take up
to 20 minutes.
Preheating is necessary for good results when
baking cakes, cookies, past_ T and breads.
Preheat tot at least 15 minutes.
Never entirely cover a rack with aluminum foil.
This will distm'b the heat circulation and result
in poor baking. A smaller sheet of foil may be
used to catch a spillover by placing it on a lower
rack several inches below the tood.
Pans should not touch each other or the walls
of the oven. Allow 1- to ] 1/._>,,space between
pans as well as fl'om the back of the oven, the
door and the sides.
If you need to use two racks, use rack
positions A and C and stagger the pans so
that one is not directly above the other:
The HEATING light will come on and stav on
tmtil the oven temperature reaches the pre-set
temperature. When the light goes off, toods
with recipes requiring a preheated oven
should be placed in the oven.
NOLO: This l{_{'ht will CYCLI'2 o*z at_d off dlo'b_g"
lhe remainder o/lhe cookit_g" pmce, ss.
Convection
jitn
Coohwclre
jbr
convection
coohing
\_]_en using the convection oven, a tim circulates
hot air ove_; under and around the fi)od.
This circulating hot air is evenly distributed
throughout the oven cavity'. _s a result, t0ods are
evenly cooked and browned--otten in less time
with convection heat.
NOTT2: The _o,vectior_ ih, will 9'cle o, a,d (j/while
_oo/¢ir_g"to be,sI di,_lribuh, hot air in tlw ore,.
DO NOT &eve the door @_%ibr/o_g'period,_ (?/thaw
whi/_ usbq" _or_veclion cooki, K or you mr9' sho*'h_pzlhe
lifl_q/ tlu, convection Iwati,g" el_m_,,L
Befiwe using your convection oven, check to see
if your cookware leaves room fi)r air drculation in
the oven. If you are baking with several pans,
leave space between them. _Mso, be sure the pans
do not touch each other or the walls of the oven.
Paper and Plastic
Heat-resistant paper and plastic containe_3 that
}lI'e i'ecoillillended li)I" use in i'egtllar ()veils can be
used in convection ovens. Plastic cookware that is
heat-resistant to temperatures of 400°F can also
be used.
Metal mad Glass
Any type ot cookware will work in your convecfon
oven. However; metal pans heat the tastest and
_lI'e i'ecoi//illended t0r convection baking.
Shinv (n(m-dark) pans are recolnn/ended fl)r
best results.
Glass or cei'ai/lic l)_lns cook illoi'e slow1v.
When baking cookies, pm will get the best
results if you use a flat, shiny (non-dark) cookie
sheet instead (ff a pan with low sides.
For recipes like oven-baked chicken, use a pan
with low sides. Hot air cannot circulate well
arotmd fi)od in a pan with high sides.
13
Page 14

Oven Controls
Wall Oven
Using
the oven
controls
Mode Selector Knob
(_ UPPER
NORMAL
TIMER 0
® _ NORMAL
TIMED
(L%LOWER
%" TIMED
Siw/eovenmo_/s _ub/e ovenmo_b
Use to set the oven for normal cooking or
timed cook and cleaning functions.
NORMAL - Use for nornlal cooking fiulctions.
TIMED - Use to set the oven to cook or clean
tor a selected length of tiine and
turn off autonlaticallv. Oil double
()veil nlodels, select UPPER TIMED
or LOWER TIMED to choose which
()veil YOU want to set for tiined
cooking or cleaning.
Temperature Control Knob
OFF
CLEAN• 7200
o_Oo, '_WARM
ERNIL "250
50¢._ ."
450 " " • "
Use to set the oven temperature for cooking
or clemahlg.
WARM - Keeps cooked foods warnl fin" up to
2 hours afier the cooking flinction
is finished, or can be activated
indei)endently to kee I) ah'eady
cooked toods w}ti'ili.
BROIL - Broil flInctions can be set at any
tenil)erature, though inost broiling is
done at tenil)eratures above 400°F.
CLEAN - Tenil)erature setting tor sellXclean
cycle,
400 358
• 300
Indicator Lights
°©
OVENON@
HEATING@
Lights come on when cooking and cleaning
functions are operating• Double oven models
have separate lights for the upper and lower
ovens,
(Locked Door) - I,ight will coIne on and
smv oil while the oven
door is h)cked during a
self:clean cycle.
OVEN ON - I,ight will conle on and stay on
while any, cooking or cleanino,..,
fiulction is in use.
HEATING - I,ight will conle on and stay on
until the ()veil tenil)erature
reaches the pre-set tenil)erature.
This light will (N(',I,E oil and
off during the renlainder of
the cooking process.
Oven Control Knob
SELF CONVECTION
CLEAN. , ROAST
BROIL* __C" BAKECONVECTION
BARE ONVECTION
Use to select cooking or clemfing functions•
CONVECTION ROAST - Good tor large
CONVECTION BAKE - Ideal for evenly
CONVECTION BROIL - Good tin" broiling
PROOF - Maintains a warnl environnlent
usefld tor rising yeast-leavened
i)roducts.
BAKE - Use tor standard, non-convection oven
baking.
OFF
PR_0F BROIL
tender (tits of nleat,
tlncovered.
browned baked fimds
cooked oil single or
inultiple shelves.
fish or snialler cuts
of i/lea t.
BROIL - Use for standard, non-convection
14
broiling.
Page 15

Convection Baking
Wall Oven
How to set
the oven jot
convection
baking
NORMAL OFF OFF
fL_ OVEN {IN
%.., , BANE
T,MER .wA. OC
0 A
Mode Selector Knob
Singleovencontrolsshown.
Convection Baking is ideal fi)i" evenly browned
baked fl)ods cooked on single or n/ultiple
shelves. Preheating is not necessaiw with fl)ods
having a bake tiine of over 15 ininutes.
When set Oil Convection Bake, the rear bake
eleinent operates whenever heating. (Fan
operates.)
O Turn the Mode Selector Knob to NORMAl,
Using the TeInI)erature Control Knob, set
the desired teini)erature, up to 500°F.
Turn the ()veil (;ontrol Knob to
CONVECTION BAIZE.
Check the food for doneness at the
nliniinun/ tin/e on the recipe. Cook longer
if necessa i'_.
NEATINO (0) 5 BAKE ONVECTION
CLEAN• "200
BROIL °E5 0
Temperature Control Knob
m SELF " CONVECTION
BROIL• , CONVECTION
400 a50 PR_)OF
Oven Control Knob
The OVEN ON light and the oxen interior
lights turn on and renlain on until the o;en
control knob has been turned to OFF.
The HEATING light will coine Oil and stay Oil
until the ()veil teinl)erature reaches the pre-set
teini)erature. This light will CY(;I,E on and off
during the renlainder of the cooking process.
NOTE:
• You will hear a conxection Jan while cooking
with this feature.
• A cooling tim will turn on to cool internal
parts. This is nornlal, and the fan nlav
continue to i'/in even a_[ier tile ()veil is
turned off.
Turn the Oxen (_ontrol Knob to OFF when
conxection cooking is finished.
Type of Food Rack Position
Biscuits (1 rack) B
Biscuits (3 racks) A, B & C
Mu/lins and Cupcakes (1 rack) B
Mu/l]ns and Cut)cakes (2 racks) A & C
Cookies (1 rack) B
Cookies (3 racks) A, B & C
2-I,aver Cakes (1 rack) B
4-Laver Cakes (2 racks) A & C
1 Frozen Pie (1 rack) B
on cookie sheet)
2 Frozen Pies (2 racks) A & C
on cookie sheet)
Casseroles (1 rack) B
12" Frozen Pizza (1 ra(k) B
2-12" Frozen Pizzas (2 racks) A & C
Roasting (large cuts of meat, A, Floor Rack
turkeys, etc.)
®
©
®
®
Floorrack
15
Page 16

Convection Baking
Wall Oven
1-Rack
convection
baking
Multi-rack
convection
bahing
The comecfion tim circulates the heated air
e'_enlv oxer and arom_d the fi)od using the bake
and broil elements.
X4q_en comecfion baking with only 1 rack, place
the rack on position B or C at the center of the
oxen and remoxe the tlntlsed i'ac]_s. Cook times
Because heated air is drculated evenly
throughout the oven, toods can be baked
with excellent results using multiple racks.
The amotmt _ff time required ti)r multi-rack
baking may increase slightly tiw some toods,
but overall time is saved because two to three
times as much tood is cooked at once. Cookies,
Inuflins, biscuits and other quick breads give
good results with multi-rack baking.
Many toods may be cooked using the special
()mvecfion Floor Rack in combination with the
other oven rocks. Foods such as chocolate chip
and sugar cookies, pizza and pies have shown
good results when convection baking using as
many as 3 racks plus the floor rack.
mm decrease so fi_od should be checked earlier
than )ackaoe directions to make sm'e that it does
[ &
not ox ei'cook.
Ideal tot cooking large casseroles and lasagna
with good results.
Adapting
recipes
YOU can use )our fi_xorite recipes in the
COlr_ ection o_,ell.
X_]_en convection baking, reduce baking
temperatm'e by 25°F. No temperatm'e
a(!iusnnent is necessa_ y when convection
roasting.
Use pan size recomnlended.
Some package instructions tot fl'ozen casseroles
or main dishes have been developed using
COilli/lei'cial convection ovens. For best results
in this oven, preheat the oven and use the
tempemtm'e on the package.
16
Page 17

Convection Ro sting
Wall Oven
How to set
the oven jar
convection
roasting
NORMAL Ore OFF
TIMED
(3 OWNON , . CONVECTION
Mode SelectorKnob
Singleovencontrolsshown.
Convection Roasting is good fiIr roasting large
tender CEltS(If nleat, uncovered. Meat and
potdtry are browned on all sides as if thev were
I_1 • WARM
CLEAR • • 200
@ CLEAN. .ROAST
HEATING (0) 5 BAKE ONVECTION
8ROLL "250
450 "* . . " 300 BROIL
_oo 350 PROOF
Temperature Control Knob
• BROIL BARE
Oven Control Knob
The OVEN ON light and the oxen interior
lights turn on and renlain on until tile Oxen
(;ontrol Knob has been turned to OFE
cooked on a rotisserie. _'_]EeIl set on Convection
Roast, the top eleinent and the bake elenient
operate whenevei _heating. (Fan operates.)
Turn the Mode Selector Knob to NORMAl,
Using the TeInI)erature (3ontrol Knob, set
the desired teinl)erature, up to 500°F.
Turn the ()veil (_ontrol Knob to
CONVECTION ROAST.
0 Check the fi)od for doneness at the
niininlunl tiine on the recipe. Cook longer
if necessary.
The HEATING light will conEe on and stay oil
until the oven teini)erature reaches the pre-set
teini)erature. This light will CY(;I,E on and ott
during the renlainder of the cooking process.
NOTE:
• You will hear a conxection fi_ii while cooking
with this feature.
• A cooling tan will ttu'n on to cool internal
parts. This is nornEal, and the tan nlav
contintle to I'lln even atter tile ()veil is
turned off.
Convection
roasting
tips
1_ Turn tile Oxen (:onti'ol Knob to OFF when
conxection cooking is finished.
Using the roasting rack provided, heated air will
be circtilated ovei; under and arotuld the food
being roasted. The heated air seals in juices
quickly for a Inoist and milder inteiior while, at
the sanEe tiine, creating a iich golden brown
extelJoi:
_'_lEeIl wm are convection roasting, it is iini)ortant
that yoti use the broiler pan and grid and the
special roasting rack. The pan is used to catch
grease spills and the gild is used to i)i'event
grease spatteis, while the roasting rack alh)ws the
heated air to circulate under the nleat and
increase browning on the underside of the nleat
or potiltry:
• Place the gild on the broiler pan and ptIt the
roasting rack over theni, nlaking sure the posts
on the roasting rack fit into the holes ill the
broil er pan.
• Place nleat on the roasting rack.
Roastingrack
Post
Grid
Broilerpan
• X,\]Een convection roasting large cuts (ff nieat,
place the pan on either the Convection Fh)or
Rack or a rack in position A.
17
Page 18

Convection Roasting
Wall Ove*_
Convection
roasting
,guide
Meats Mhmtes/Lb. Oven Temp. Internal Temp.
Beef Rib, Boneless Rib, Rare 20-24 325°F 140°F+
Top Sirloin Me(lium 24-28 325°F 160°F
(3 to 5 lbs.) Well 28-32 325°F 170°F
Beef Tenderloin Rare 10-14 325°F 140°F+
Medium 14-18 325°F 160°F
Pork Bone-in, Boneless (3 to 5 lbs.) 23-27 325°F 170°F
Chops (1/2 to 1" thick) 2 chops 3(t-35 total 325°F 170°F
4 chops 35-40 total 325°F 170°F
6 chops 40-45 total 325°F 170°F
Hmn Calmed, Butt, Shank (3 to 5 lbs.) 14-18 325°F 140°F
(illlly cooked )
Lmnb Bone-in, Boneless (3 to 5 lbs.) Medium 17-20 325°F 160°F
xd,\_ll 20-24 325°F 170°F
Seafood Fish, whole (3 to 5 lbs.) 30-40 total 400°F
I.obst(r "['_lils(6 to 8 oz. each) 20-25 total 350°F
Poultry Whole Chicken (2/_ to 31/zlbs.) 24-26 350°F 180°-185°F
Cornish Ilens Unsmfibd (1 to 1½ lb,,.) 50-55 total 350°F 180°-185°F
Stuttk,d (1 to 1_/_lbs.) 2),'>-60total 350°F 180°-185°F
Duckling (4 to 7>lbs.) 24-26 325°F 180°-185°F
"[-m-keB whole*
lJnstuflk, d (10 to 16 lbs.) 8-11 325°F 180°-185°F
l Jnstuttbd (18 to 24 lbs.) 7-10 325°F 180°-185°F
Turkey Breast (4 to 6 lbs.) 16-19 325°F 170°F
* Stuff,U bird_ g¢meral{3_'qui_e 3(_45 mi_ut_<sadditio_aI _*)a_tb_gtime. Shidd h'g:sa_(t b_'ast with/oil to p_*'g,e_tove_b_*)w_zb_gm_d
(h3'i_g o/ ski_l.
73e [.kS. i)e/m_¢me_t oi Ag'rh:ullmv sa)'s ' l{mv b_,/ is]wjmlm; but you shouht h_ww that coohi_Nil to o_d3 140°1``mea_s some /ood
fioiw_li_g o_ga_lisms m(9' survive." (.Svu_:e: 5@ N)od Book. }gin Kitche_z (;uide. US,I)A l{_,_..]u_ze195'5.)
18
Page 19

Convection Broiling
Wall Ove*_
How to set
the oven jot
convection
broiling
NORMAL
(9 0vER0.(_)
HEATING @
Mode Selector Knob
Singleovencontrolsshown.
CLEAR• • 200
BROIL •250
TemperatureControlKnob
Convection Broil is good flw broiling fish or
smaller CtltS of meat. The door illtlSt be closed
when Convection Broiling. When set on
Convection Broil, both top elements operate
whenever heating. (Fan operates.)
O If the meat has tat or gristle around the
edge, cut vertical slashes through both
about 2" apart. If desired, the tat mav be
trimmed, leaving a laver about 1/8" thick.
Place the meat or fish on the broiler grid
in the broiler pan. Always use the grid so
that any tat will drip into the broiler pan;
otherwise the juices may become hot
enough to catch on fire.
Tm'n the Mode Selector Knob to NORMAl..
@
O
Using the Temperatm'e Control Knob, set
the desired temperature, up to 500°F. Most
broiling is done at temperatures aboxe
400°E
Turn the Oven (]ontrol Knob to
CONVECTION BROIl.
OFF
_0_lO0, q' WAIIM
5
45tl=_ • . . • " 300
400 350
SELF * CONVECTION
CLEAN. . ROAST
BROIL BAKE
BAKE ONVECTION
OFF
• e@lc tCONVECTION
PROOF BROIL
OvenControlKnob
Use caution when _eachmg into the oxen
during broiling, as areas aboxe the door max
be hot.
Turn tile Oven Control Knob to OFF when
convection cooking is finished.
The OVEN ON light and the oven interior
lights ttlI'n Oil and remain on tlntil the Oven
Control Knob has been tin'ned to OFE
The HEATING light will come on and stav on
tmtil tile oven temperature reaches the pre-set
temperature. This light will CYCI,E on and off
during the remainder of the cooking process.
NOTE:
• You will hear a comection fan while cooking
with this featm'e.
• A cooling tim will turn on to cool internal
parts. This is normal, and the tan mav
continue to mn even after the oven is
turned off.
Aluminum
bil
O
Turn the fl)od only once during broiling.
Check the fl)od fl)r doneness at the
minimum time on the recipe. Cook
hmger if necessary.
You can use aluminum fl)il to line the broiler
pan and broiler grid. However; you must mold
the f0il tightly to the grid and cut slits in it just
like the grid.
%,
19
Page 20

Baking
Wall Oven
How to set
the ove'n for
baki'ng"
NORMAL
(9 0rE.0.
T,MEO0
Mode Selector Knob
Singleovencontrolsshown.
R£ATIRG (_
CLEAR • * 200 BANE
BROIL •250
Temperature Control Knob
O Turn the Mode Selector Knob to NORMAL
Using the Tenlperature Control Knob, set
the desired ten/perature, tip to 500°F.
Turn the ()veil (_ontrol Knob to BAKE.
Check the tood for doneness at the
nEininlun/ tin/e on the recipe. Cook longer
if necessary:
Turn the Oven (_ontrol Knob to OFF when
baking is finished.
A cooling tan will autonlaficallv ttlrn on to cool
internal parts. This is noi_nal, and the tim n/ay
contintle to I'Hn even alter tile ()veil is till'ned (3_'_'
OFF •
_i CLEAN, . ROAST
5 BAKE ORVECTION
40o 350 PROOF
be placed in the oxen. This light will CYCI,E
(Ill and ott during the renlainder of the
cooking, I)r°cess.
• WARM O]'C
SELF CONVECTION
BROIL• • CONVECTION
OFF
BROIL
Oven ControlKnob
®
®
Floorrack
The OVEN ON light and the oxen interior
lights turn on and renlain on until tile Oxen
Control Knob has been turned to OFE
The HEATING light will colne Oil and stay on
until the oven ten/perature reaches tile pre-set
tenlperature. When the light goes ott, foods
with recipes requiring a preheated oven shotild
Type of Food Rack Position
Angel tbod cake A
Biscuits or mu/lh/s B or C
Cookies or cup(aLes B or C
Brownies B or C
I _mer cakes B or C
Bm/dt or pound cakes A
Pies or pie shells A or (2
Single Pie B
Frozen ]ties B (on cookie sheet)
Casseroles B or C
Roasting Use Convection
Roast
NOTE: XYhen roasting, use the Conxecfion
Roast teature.
2O
Page 21

Proofing
Wall Oven
How to set
the oven jbr
proofing
NORMAL
(9 0vE.0.(_
T,MED
It_TIN G @
Mode Selector Knob
Singleovencontrolsshown.
The i)roofing feature nlaintains a warnl
environinent useflll fl)r rising yeast-leavened
products.
Place the covered dough in a dish in the
()veil Oil rack A.
O Turn the Mode Selector Knob to NORMAl.
NOTE: For best results, cover the dough with
a cloth or with greased plastic wrap (the plastic
nlav need to be anchored underneath the ti'ont
of the container so the oven Jan will not blow
it oft).
Turn the ()veil (:ontrol Knob to PROOK
SELF " CONVECTION
CLEAN• • ROAST
BROIL BAKE
BAKE ONVECTION
OFF
• OtC •CONVECTION
PROOF BROIL
Oven Control Knob
The TeInl)erature Control Knob does not afli_ct
the proof tenlperature.
The OVEN ON light and the ()veil interior
lights turn on and renlain on until the Oven
(_ontrol Knob has been turned to OFF.
NOTE: The HEATING light does not colne on
during a PROOF ol)eration.
Set the nlinute tiiner ti)r the n/inin/un/
proof tin/e.
When I)roofing is finished, turn the Oven
(_ontrol Knob to OFF.
• To axoid lowering the (/_eI1 teinl)erature and
lengthening l)r°°fin°_ tiine, do not open the
o_,en door tlnnecessaFilv.
• Check bread products earE to axoid oxei:
l )I'O Oil1 n _
NOTE: Do not use the l)roofing nlode for
waiming tood or keeping tood hot. The
proofing oven teini)erature is not hot
enough to hold ti)ods at saii _ tenlperamres.
21
Page 22

Broiling
Wall Oven
How to set
the oven
Jbr broiling
NORMAL OF_F SELF =* CONVECTION
(_j OVENON • • • CONVECTION
CLEAN• • 200 BROIL BAKE
8ROLL =250
OFF
,0,'.%." BANE 0NVE0,,0N
45o "40"0' 351 PR_)OF BROIL
Mode SelectorKnob
Singleovencontrolsshown.
Temperature Control Knob
O If the meat has fat or gristle aroEu_d the
edge, cElt vertical slashes through both
about 2" apart. If desired, the fat may be
trimmed, leaving a laver about 1/8" thick.
O Place the meat or fish on the broiler grid ill
the broiler pan. Always use the grid so that
any tht will drip into the broiler pan;
otherwise the juices may becolne hot
enough to catch on fire.
Position a rack on the recommended rack
position as suggested ill the Broiling Guide.
I,eave the door open to the broil stop
position. The door will stay open by itself',
yet the proper temperature is maintained
ill the oven.
Turn the Mode Selector Knob to NORMAl_
O
O
Turn the Temperature (]ontrol Knob to the
desired setting, ElI) to 500°F. Most broiling is
done at temperatures above 4000[: .
Turn the Oven Control Knob to BROIl.
O
"X._lEen broiling is finished, turn the Oxen
Control Knob to OFF.
NOTE: A cooling tim will turn on to cool
internal parts. This is normal, and the tim
may c(mtintm to run even after the oven is
turned off.
The OVEN ON light and the oxen interior
lights turn on and remain on until the oxen
control knob has been turned to OFE
The HEATING light tm'ns on.
Tile broiler does not need to be preheated
fi)r most broiling. Howevei; foods that cook
quickly, such as thin strips of meat or fish
may require a short preheating period of
2 to 3 minutes to allow the food stu'lhce to
brown ill the same time the food takes to be
cooked tlErotlglEotlt.
Turn the fl)od only once dtu'ing broiling.
Tilne the foods for the first side according
to the Broiling Guide,
Use caution when reaching into the oven
during broiling as areas above tile door lnav
be hot.
Oven Control Knob
Theovendoorhas
a broil stopposition.
Aluminum
jbil
22
You can use almninun/ fl)il to lille the broiler
pan and broiler grid. However, you must 1hold
the foil tightly to the grid and cElt slits ill it just
like the grid.
<d -
Page 23

Broiling
1Vail Oven
Broiling
,guide
TI.. s/a,, w_._ql_t,thidme_s,
sirethug lemj_o*tlm_, and
wig ajj<d Im£kg lkm,a.
Thi_g.id,, i_bawdon meal_
*The U.5;.l)_j_mtmo*t oi
Agric*dtm_'s(B's '7¢m_'bed i_
p@uho; bulyou _hould
know tkal _oohi_wit lo o_l()
140°F m_,ans somefi)od
poiso_i)_g0_m*/,sm,smay
_m'viv_,."(,%m_< _,, l,'ood
Bo&. }{)mKilck_'_l(;td&.
{_S])AR_',J.June 19,";5.)
Qumltity/ Rack 1st Side 2nd Side
Food Thickness Position Minutes Minutes Comments
Bacon 1/2 lb. (about C 4½ 4½ _MTam,e_ in single la}er.
8 thin slices)
Ground Beef 1 lb. (4 patties) C 10 7 Space exenl). Up to
X&ell Done 1/2 to ./4 8 patties take about
thick the same time.
Beef Steaks
Ra re
Medimn
Well Done
Rare t
Medimn
Well Done
Chicken
split lengthwise
Bakery Products
Bread (Toast)
Toaster Pastries
English Muffins
Lobster Tails
Fish
2 to 4 slices
2 (split)
2-4
to 1/2" thick
Hmn Slices 1" thick g 8 8
(precooked)
Pork Chops 2 (1/ 2" thick) C 10 10
Well Done 2 (l" thick), g 13 13
about 1 lb.
.q "
1" thick
(1 to 1½ lbs.)
1½" thick
(2 to 2½ lbs.)
1 whole
(2 to 2½ lbs.),
1 Dk,, (2)
(6 to 8 oz. each)
I-lb. fillets 1/4
C
C
C
C
C
C
A
C
C
C
B
C
6
8
12
10
15
25
35
1½-2
1½-2
3-4
13-16
5
6
11
7-8
14-16
20-25
10-15
1/2
1/2
!)o not
Steaks less than l" thick
cook throtwh betore
browning. Pan frying is
recommended.
Slash tat.
Reduce time about 5 to
10 minutes per side for
cut-u I) chicken. Brush
each side with melted
butter. Broil skin-side-
down first.
Space evenh'. Place
English muffins cut-
side-up and bmsh with
butter, if desired.
Cut through back of
shell. Spread open.
Brush with melted butte_
befl)re broiling and after
half of broiling time.
Handle and ttlrll veiw
careflfllv: B_ush with
lemon butter before
and during cooking, if
desired, Preheat broiler
to illcrease bYowilillg.
Increase time 5 to l 0
minutes per side fi)r 1½"
thick or home cm'ed.
Slash tat.
Lamb Chops
Medimn
_4'ell Done
M editma
Well Done
Wieners, l-lb..Dko_. (10) If desired, split in half
Sausages, lengthwise; cut into
Bratwurst 5 to 6" pieces.
2 (1" thick),
10 to 12 oz.
2 (1½" thick),
about 1 lb.
C
C
C
g
C
10
12
14
17
6
9
10
12
12-14
1-2
Slash tat.
23
Page 24

71reed
cooking
(immediate
start and
automatic
CLOCK _
n_E
(g) _Er
°o(I "
Timed Cooking
Wall Oven
.©
ovm o.
., . • ao_
stop)
Mode Selector Knob
Singleovencontrolsshownset forconvectionbaking.
Timed cooking allows you to set the oven to
cook for a selected length of time and turn
off automatically. On double oven inodels,
you will not be able to set a timed cooking
or cleaning flmction in both ovens at the
SaISSe time.
To set the oven to turn on immediately:
NOTE: Befi)re begimfing, make sure the clock
shows the correct time of day.
To avoid possible burns, place the racks
its the correct position before xou tm'n the
oxen ois.
Turn the Mode Selector Knob to TIMED
(on double oven models, select UPPER
TIMED or I,O_'_ ER TIMED, dei_ending, on •
the o;en )ou are using).
Turn the Oxen (_ontrol Knob to the desired
cooking flmction.
Temperature Control
Knob
The display will show COOK and the cooking
time CO/listdowis,
The oxen will continue to cook for the
programmed amomst of time, then mrn off
automaticallx.
At the end of timed cooking, the word
COOK will blink in the display and the end
oI cwle tone will somM. To clear the end oI
cvcle tone, press any button. Turn the Oven
Control Knobs to OFF and the Mode
Selector Knob to NORMAl.
NOTE:
• You will hear a comection tim while cooking
with conxection ligatures.
A cooling tim will turn on to cool internal
parts. This is normal, and the Jan mav
continue to mn even after the oven is
turned off.
Using the Temperature (_ontrol Knob,
set the desired temperature, up to 500°F.
NOTE: The OVEN ON & HEATING lig'h,ls and
the oven interior lig'hl,s will not turn on until the
oven starts healing
I_ Press the COOK TIME button.
NOTE: If yore" recipe requires preheating, you
may need to add additional time to the length
()f cooking time (ai_proximately 15 minutes).
Press the increase "&" or decrease "V"
button to set the cooking time. (The
maxim mn cooking time is 11 horn's and
50 minutes. The minimmn cooking time
is 1 minute.)
The X._;&_RMtemperatm'e setting of this oven
is available to kee I) hot cooked fl)ods warm.
Food kept in the oven hmger than two horn's
at these low temperatures may not be safe
t() eat.
Foods that spoil easil 5 such as milk, eggs,
fish, stultings, poultry and pork, should not
be allowed to sit for more than one hour
befl)re or after cooking. Room teml)erature
promotes the growth of harmful bacteria. Be
sure the oven light is ()fit because heat from
the bulb will speed harmflfl bacteria growth.
If the increase "&" or decrease "V" button
is not pressed within 5 sec(mds ()f pressing
the COOK TIME butt(m, you will need t()
press COOK TIME again.
24
Page 25

Timed Cooking
Wall Oven
71med
cooking
(delayed
start and
automatic
st@)
Timed cooking allows you to set the oven to
cook for a selected length of thne and turn off
automatically. On double ()veil inodels, you
will not be able to set a tiined cooking or
cleaning flulction in both ()veils at tile same
tiine.
To delay the start of cooking:
NOTE: gelore beginning, inake sure tile clock
shows tile correct tilne of day.
To avoid possible burns, place tile racks
ill tile COITeCt position befl)re vou turn tile
()veil oil,
Turn tile Mode Selector Knob to TIMED
(on double oven models, select UPPER
TIMED or I,OWER TIMED, dei)ending on
the oven you are using).
Turn the ()veil (;ontrol Knob to the desired
cooking flmction.
Using tile Tenq)erature Control Knob,
set the desired telni)erature, up to 500°E
Press the START TIME button.
Press tile increase "A" or decrease "V"
@
button to set tile time of day you want tile
oven to turn on and start cooking.
If the increase "&" or decrease "V" button
is not pressed within 5 seconds of i)ressing
the START TIME button, you will need to
press START TIME again.
Press the COOK TIME button.
O
Press tile increase "A" or decrease "V"
O
button to set the cooking tilne. (The
inaxini uni cooking tinie is 11 hours and
50 minutes. The niininiuln cooking tilne
is 1 minute.)
If tile increase "A" or decrease "V" button
is not pressed within 5 seconds of i)ressing
the COOK TIME button, you will need to
press COOK TIME again.
NOTE: The OVEN ON & HEATING lig'hts and
the oven interior lig'hls will not turn on until the
oven starts healing"
Tile display will return to tile tiine of day and
show the word DEI,AY. When the start tiine is
reached, the display will show the word COOK
and the cooking tiine countdown.
At this tiine, the OVEN ON light and the oven
interior lights turn on and remain on until tile
end of timed cooking.
Tile ()veil will continue to cook fl)r tile
i)rogranin_ed aniount of time, then turn off
automaticallv:
(_ At tile end of tinIed c(Ioking, tile word
(_OOK will blink in tile display and an end
of cycle tone will sound. To clear the end of
cycle tone, press anv button. Turn tile Oven
Control Knob to OFF and the Mode
Selector Knob to NORMAl,.
NOTE:
• You will hear a convection tan while cooking
with convection teatures.
A cooling tim will turn on to cool internal
parts. This is norlnal, and tile thn mav
contintle to I'/lll even after tile oven is
turned off.
Tile WARM tenq)ei'ature setting of this ()veil
is awfilable to kee I) hot cooked fl)ods warln.
Food kept in the ()veil longer than two hours
at these low tenii)eratures inav not be sate
to eat.
Foods that spoil easily, such as nIilk, eggs,
fish, stuffings, poultry and pork, should not
be alh)wed to sit for more than one hour
beff)re or after ciioking. Room temi)erature
i)romotes tile growth of harmtul bacteria. Be
sure the oven light is off because heat fl'om
the bulb will speed harlnfli1 bacteria growth.
Page 26

Adjust the Oven Thermostat
Wall Oven
Do it
yoursel/:t
7b adjust
the overz
thermostat
You may feel that your new oven cooks
differently thaa_ the one it replaced. X_
i'ecoululend th_lt vo/l use VO/U" new ()veil tk)i"
a few weeks to 1)ec()me more familiar with
it, ti)llowing tl/e times given in vo/u" recipes
as a guide.
If you think your new oven is too hot or too
cool, you can adjust the thermostat yourself.
If vou think it is too hot, a(!just tile thermostat
to make it cooler. If vou think it is too cool,
a(!just the thermostat to make it hotter.
0
Ptdl tile Temperature Control Knob off tile
shatt, look at the back of the knob and note
the c/uTent setting before making any
a(!j t,stlnents.
0
i,oosen both screws on the back of the knob.
0
To increase tl/e oxen teli/pei'attli'e, UlOVe tl/e
index mark one notch toward tl/e words
"MAI_ HOTTER."
We do not recommend the use of thermometers,
such as those found in grocery stores, to check
tile temperature setting of vo/u" new oven.
These thermometers mav \_Hw 20-40 degrees.
mark
To decrease tl/e oven teulpei'attu'e, inove tl/e
index u/ark one notch toward tl/e words
"MAKE COLDER."
Each notch changes tl/e temperature by
10 degrees Fahrenheit.
0
Tighten tile screws.
0
Replace tile knob, matching tile fiat area
of tl/e knob to tl/e shall
CLEAN•
Backof tbe TemperatureControlKnob
OFF
500
• • . 300
450 •
400 350
Frontof theTemperatureControlKnob
(knobappearaucemayvary)
• WARM
• 200
e
" 250
26
Page 27

Self-Cleaning Oven
Wall Oven
How to set
the oven jot
cleaning
The oven must be completely cool in order to
set the self-clean cycle.
X4'erecmnmend venting with an open window
or using a ventilation tim or hood during the
fi_t sel6clean cycle.
Clean soil fl'om the fl'ame around the oxen
door and outside the door ,asket These areas
must be cleaned by hand.
Do not clem_ the door gasket by hmld as this
could dmnage it.
Wipe up excess grease and other tood spills
with a damp cloth. This will minimize the
amount of smoke created dining sell'cleaning.
_ocK s_K
@ T_ME
©
Mode Selector Knob
Remoxe all cookware, broiler pan, grid and any
almninum fifil fi'om the oxen,
The oxen racks max be left in the oxen during
the sel6clean cxcle.
Make sure the oven light lens and lens frmne
are in place.
Do not use commercial oven cleaners or oven
protectors in or near the self-clemahlg oven.
IMPORTANT: The health of sonle birds is
extremely sensitive to the flm/es given off
during the sell:cleaning cycle of anv oven.
Move birds to another well-ventilated room.
O_F
SEL_ COt_WCTIO_
CLE,_U• ° no,,sT
S_KE" "COUVE_TION
• SROIt
PnOOF
OvenControlKnob
Singleovencontrolsshownset forcleaning.
You can set the oven to turn on immediately,
clem_ for a selected length of time and turn off
automatically. On double oven models, you
will not be able to set a timed cooking or
cleaning flmction in both ovens at the same
time.
NOTE: Before beginning, make sure the clock
shows the correct time of day.
Turn the Mode Selector Knob to TIMED
O
(on double ()veil inodels, select UPPER
TIMED or I,OWER TIMED, depending on
the oven you are cleaning).
Tm'n the Oven Control Knob to SEI,F
O
CI,EAN,
@
Tm'n the Temperature Control Knob
to CI,EAN,
Clean time is normally 3 hours. You can
change the clean time to any time between
2 and 4 hours, depending on the amount of
soil in VO/li" oven.
Press the COOK TIME button if a time
other than 3 hom_ is needed.
Press the increase "_" or decrease "IV"
button to set the cleaning time.
If the increase "at" or decrease "V" button
is not pressed within 5 seconds of pressing
the COOK TIME button, you will need to
press COOK TIME again.
The display will show CI,EAN and the clean
time remaining.
As the oven heats to the clean temperature,
the door will lock automatically. The locked
door, HEATING and the oven OVEN ON
indicator lights turn on.
Atier the clean cycle is complete, the oven
has cooled and the locked door indicator
light is off, tm'n the Oven Control Knobs
to OFF and the Mode Selector Knob
to NORMAl,,
If xour oven is connected to a 208V electrical
supply we recommend that xou set your clean
time for 4 hours.
27
Page 28

Self-Cleaning Oven
Wall Oven
How to
delay the
start o/
cleaning
You can set the oven to delay the start of
clemling, clean for a selected length of time
mad turn off automatically. On double oven
models, you will not be able to set a timed
cooking or cleaning flmction in both ovens at
tile same time
NOTE: Before beginning, make sure tile clock
shows tile correct time of day.
Turn tile Mode Selector Knob to TIMED
O
(on double oven models, select UPPER
TIMED or I,OWER TIMED, depending on
the oven you are cleaning).
Turn tile Oven Control Knob to SEI,F
@
CI,EAN.
O
Tm'n tile Temperature Control Knob
to CI,EAN.
Press tile START TIME button.
O
Press tile increase "at" or decrease "V"
O
button to set tile time of day wm want tile
oven to turn on and start cleaning.
If the increase "at" or decrease "V" button
is not pressed within 5 seconds of pressing
the START TIME button, you will need to
press START TIME again.
Clean time is normally 3 horn's. You can
change tile clean time to any time between
2 and 4 hours, depending on tile all/O/int of
soil iI1 VO/II" oven.
Press tile COOK TIME button if a time
other than 3 hom_ is needed.
Press tile increase "at" or decrease "V"
button to set tile cleaning time.
If the increase "at" or decrease "V" button
is not pressed within 5 seconds of pressing
the COOK TIME button, you will need to
press COOK TIME again.
The display will return to the time of dav
and show the word DELAY. When the start
time is reached, the display will show the word
CI,EAN and the clean time remaining.
As tile oven heats to tile clean temperature,
the door will lock automatically. The locked
door, HEATING and OVEN ON indicator
lights mrn on.
At*er tile clean cycle is complete, tile oven
has cooled and the locked door indicator
light is off, turn the Oven Control Knobs to
OFF and the Mode Selector Knob to
NORMAl,.
If your oxen is connected to a 208V electrical
supply, we recommend that you set _our clean
time fl>r 4 hours.
IMPORTANT: It will be necessary to grease
all rack side edges with a light coating of
vegetable oil after clemahlg them by hand
or in the oven. This will help maintain tile ease
of sliding tile racks in and out of tile oven.
If white spots remain, remove them with
warm sudsv water and rinse thoroughly with a
vinegar and water mixture. These deposits are
usually a salt residue that cannot be removed
by the clean cycle.
28
If the oven is not clem_ after one clem_ cycle,
repeat tile cycle.
You may notice some white ash in the oven.
_¥ipe it up with a damp ch>th after tile
o_,en cools.
Page 29

re and (;leaning
Wall Ove*_
Control
panel and
knobs
Oven
heating
elements
Oven rachs
Clean up spatters with a (lmn I) cloth. Remove
heavier soil with warm, soapy water.
Do not use abrasives of any kind on tile control
panel or knobs.
Tile control knobs mav be removed fi)r easier
cleaning. To remove a knob, pull it straight off
tile stem. Wash tile knobs in soap and water but
do not soak.
IMPORTANT: Make sure to replace tile knobs
in their original positions after cleaning so tile
Temperatm'e Control Knob is placed on tile
correct stein,
Do not clean tile broil element. Any soil will
bt/rn ott when tile elelnent is heated.
Tile racks and Convection Floor Rack may
remain in the oven dm'ing the selt:cleaning
cycle without being damaged,
Tile bake element is not exposed and is trader
tile oven floor. If sl)illovers, residue or ash
accumulate on tile oven floor, wipe up heft)re
seltZcleaning.
Broiler pan,
,grid and
Convection
Roasting
Rach
IMPORTANT: It will be necessary to grease
all rack side edges with a light coating of
vegetable oil after clem_hlg them by hand or
in the oven, This will hel I) maintain the ease
of sliding the racks in and out of the oven,
After broiling, remo_e tile broiler pan and _,*rid
from tile oxen. Remoxe tile grid from tile pan. Convection
Careflfllv pour otlt tile grease from tile pan into Roasting
a i)roper container. _&'ash and Yinse tile broiler
pan and grid in hot water with a soap-filled or Grid
plastic scom'ing pad.
If food has burned on, sprinkle tile grid with Broilerpan
deter_ent xd/fle h )t and coxer with wet paper
towels or a dishcloth. Soaking the pan will
Yeillo_,e btlrned-on foods.
Tile broiler pan and grid may be cleaned
with a COllllnercial o_.en cleaner.
Tile broiler pan, grid and Conxection
Roastiw, Rack can also be cleaned in the
dishwasher.
Do not store a soiled broiler pan, grid
or Comection Roasting Rack anywhere
iI1 tile o_,eil.
• ' Rack
CAUTION: Do not clean tile broiler pan,
grid or Comection Roasting Rack in a
self cleaning oxen.
29
Page 30

re and Cleaning
Wall Oven
Oven lights
Each ()veil is equipped with two hah)gen lights
located oil the back wall of the ()veil. The lights
conic on when the door is opened or when the
()veil is in a cooking cycle. Tile ()veil lights do
not come on during sellXcleaning.
Each light asseinblv consists of a i'einowd)le lens
fl'aine, a reinowd)le lens, a light bulb and a bulb
socket that is fixed in place.
CAUTION: Befl)re rei)lacing the bulb,
disconnect electrical power to tile ()veil at tile
niain flIse or circuit breaker panel.
Be sure to let the light cover and bulb cool
coinpletely.
D)r your satet)'; do not touch a hot bulb with
bare hands or a dainp ch)th.
To remove:
O Reinoxe tile lens franie b) unscrewing
the screw.
Renioxe tile lens.
Using ghIxes or a dr_ chIth, reinoxe tile bulb
by pulling it straight ()/it,
To
replace:
0
Use a new 12-volt Halogen bulb, size T3, (;4
pins, not to exceed 20 watts.
Lens_frame
\
Screw
Lens
Bulbsocket
/
-_ alogen
Bulb
NOTE: Higher wattage bulbs will danlage
VOtlI" ()veil,
Using gloves or a dry cloth, renlove tile bulb
fl'oin its packaging. Do not touch the bulb
with bare fingers.
Push the bulb straight into the receptacle all
tile way.
Replace tile lens, nlaking sure that it is
fiimly pressed in place.
Replace the lens franle and tasten in place
with the screw. The lens and lens fi'anle nlust
be in place when using the oven.
l'br improved l{t_'hting"in,side the oven, clean the
g'la,_scover /h_quenlly usin K a wet cloth, Thi,_
should be done when the oven i,sconzp[¢lely coo[,
Reconnect electrical power to the ()veil.
Rei)laceinent bulbs nlav be i)urchased
by calling 800.626.2002. Order Part Nuniber
WB08X10002.
3O
Page 31

re and (;leaning
Wall Oven
7b clean
the door
Inside of the door:
• Because the area inside the gasket is cleaned
during the sell_clean cycle, you do not need to
clean this by hand. Any soap lett on the liner
causes additional stains when the oven is
heated so be sure to rinse thoroughl>
• The area outside the gasket can be cleaned
with a soap-filled scom'ing pad.
• Do not rub or clean the door gasket--
the fiberglass material of the gasket has an
extremely low resistance to abrasion. An intact
and well-fitting oven door gasket is essential
tot energDeflicient oven operation and good
baking results. If you notice the gasket
becoming worn, fl'ayed or damaged in any
way or if it has become displaced on the oven,
you should have it replaced.
Outside of the door:
Painted Surfaces (on some models)
Clean these with soap and water or a vinegar
and water solution.
CSSSSSS3 CSSSSSSS3 CSSSSSSD CSSSSSSS3CSSSSSSS3
Gasket
Do not use commercial oven cleaners, cleaning
powders, steel wool or harsh abrasives on any
painted surlace.
Stainless Steel Surfaces (on some models)
Do not use a steel-wool pad; it MU scratch
the surface.
To clean the stainless steel sur[hce, use CEIL_dVIA
BRYTE '_Stainless Steel Appliance Cleane_: Apply
with a damp cloth, clean the surfilce and wipe with
a (h_' cloth or paper towel to a high gloss. Repeat
if necessma:.
To order
To order CER_d'4A BRVFE <')Stainless Steel
Appliance Cleane_; please call om _toll-fl'ee
ntllubeI':
National Parts Center 800.626.2002
CERAMA BRYI_ _
Stainless Steel Appliance
Cleaner .................. # PM l (;X311
31
Page 32

The Problem Solver
I,l'all Ove_
Questions?
Use this
problem
solver/
PROBLEM POSSIBLE CAUSE
OVEN WILL NOT •
WORK •
OVEN LIGHT(S)
DO NOT WORK
FOOD DOES NOT
BAKI_ OR ROAST
PROPERLY
FOOD DOES NOT
BROIL PROPERLY
OVEN WILL NOT
SELF CLEAN
"CRACKING" OR
"POPPING" SOUND
DURING CLEANING
A fllse in your home may be blown or the circuit breaker tripped.
The oven controls are not properly set.
• The oven controls are set tot cleaning. If necessau, allow the oven to cool
then open the door.
• Make sure the Mode Selector Knob is set to NORMAL.
• If the ((\'el/ _Js on during a power outage, turn tile Oven Control Knob oii_
then back to tile desired fimction to restart the oven.
• The light bulb is loose or detective. Tighten or replace tile bulb.
• The men is sell=cleaning or ill a "TIMED" dela} mode. The oven lights do
not come on during sell=cleaning or during a "TIMED" delay mode until
the men begins heating.
• The men controls are improperly set. See the "How to set your men tor
baking or roasting" section.
• O_en not preheated tor a long enough time (use at least 15 mim(tes).
• Incorrect cookware or cookware of improper size being used. See tile "How
to set your oven fllr baking or roasting" section.
• Racks in the wrong position. See the "How to set the ()veil fl)r baking or
roasting" section.
• Use a fl(il tent to slow down browning during roasting.
• The oven controls are not set at BROIl,. Turn both the Oven Control
and O_en Temperature Knob to BROIl,
• hnproper rack position being used. See the Broiling Guide.
• Food is being cooked ill a hot pail.
• Cookware is not suited fl)r broiling. Use the broiling pan and grid that came
with VO//r O\'eI/.
• Numinum foil used on the broiling pan and grid has not been fitted
properly and slit as recommended.
• In some areas the power (voltage) may be low. Preheat the broil element
tor 10 minutes. Broil tor tile longest period of time recommended in tile
Broiling Guide.
• The oven temperature is too high to set a sell:clean operation.
Allow the oven to cool to room temperature and reset the controls.
• The controls are not properly set. Be sure the Mode Selector Knob is set in
the TIMED position.
• This is normal. This is the sound of the metal heating and cooling
during both the cooking and cleaning flmctions.
32
F2KCESSIVE SMOKING •
OCCURS DURING
CL_N/NG
OVEN NOT CLEAN
AFTER A CLEAN
CYCLE
OVEN RACKS ARE
DIFIqCULT TO SLIDE
Excessive soil. Turn the Oven Control Knobs to OFE Open the
windows to rid the room of smoke. Wait until the locked door
indicator light goes off. _A]pe up excess soil and reset the clean cycle.
• The oven was heavily soiled. Clean up heart spillovers befl(re starting
the clean cycle. Hea_ilv soiled ovens may need to sell:clean again.
• Oven is connected to a 208V electrical supply. Set wmr cleaning
time tor 4 hours.
• The oven controls are not properly set. Be sure the Mode Selector
Knob is set ill the TIMED position. See the "Sell:Cleaning" section.
• Tile racks were cleaned in a seltZclean cycle. Apply a small amount of
vegetable oil to a paper towel and wipe the edges of the oven racks with the
paper towel. Do not spray with Pare _ or other lubricant spra}s.
Page 33

Notes
33
Page 34

Notes
34
Page 35

Consumer Services
II'all Ove*_
With the purchase of your new Monogram appliance, receive the
assurance that if you ever need information or assistance from GE,
we will be there. All you have to do is call toll-free:
GE Answer
Center ®
ht the USA:
800.626.2000
In-Home Repair
Service
In the USA:
800.444.1845
In Canada:
1.888.880.3030
For Customers
With Special
Needs...
In the USA:
800.626.2000
Whatever wmr question about any Monogram major appliance, GE Answer Cente_ ¢':
information service is available to hell). Yore" call--and yore" question--will be answered
promptly and com'teouslv. And vou can call anv time. GE Answer Center _ service is open
24 horn's a day; 7 days a week.
OR
Visit our Website at: www.monogram.com
In Canada, call 1.888.880.3030.
AGE consumer service protessional will provide expert repair service, scheduled at a time
that's convenient for you. Many GE Consmner Service company-operated locations ofter
you service today or tomorro_, or at wmr convenience (7:00 a.m. to 7:00 p.m. weekdays,
9:00 a.m. to 2:00 p.m. Saturda):s). Our factory-trained technicians know your appliance
inside and out--so most repairs can be handled in just one visit.
GE ofters Braille controls for a xarietv of GE appliances and a
brochure to assist in I)lanning, a barrie>fi'ee kitchen for persons
with limited mobility.
Consumers with impaired hearing or speech x_ho haxe access to a
TDD or a conventional telet)pewriter may call 800.TDD.(;EAC
(800.833.4322) to request information or serxice.
Service Contracts
In the USA:
800.626.2224
ln Canada:
1.888.880.3030
Parts and
Accessories
ln theUSA:
800.626.2002
ln Canada:
1.888.880.3030
s_oN
You can have the secure feeling that GE Consumer Service will still be there after wmr
warranty expires. Pro'chase a GE contract while vom" warranty is still in effect and wm'll
receive a substantial discotmt. With a multiple-year contract, you're assm'ed of flffure
service at today's prices.
Individuals qualified to service their own appliances can have parts or accessories sent
directly to their home. The GE parts system provides access to over 47,000 parts...and
all GE Genuine Renewal Parts are flfllv warranted. VISA, MasterCard and Discover cards
are accepted.
User mahltenmlce instructions contained in this mmmal cover procedures intended to he
performed by any user. Other servicing generally should be referred to qualified service
persmmel. Caution must be exercised, since improper servicing may cause mlsafe operation.
35
Page 36

Warranty
Wall Ove*_
YOUR MONOGRAM WALL OVEN WARRANTY
Staple sales slip or cancelled check here. Proof of original purchase
date is needed to obtain service under warranty.
WHATIS
COVERED
P)vm the Date
of tlle O'_ginal
Purchase
WHAT IS NOT
COVERED
FULL ONE-YEAR WARRANTY
For one )ear fi'om date of original purchase, we will provide, free of charge, parts and
serxice labor in your home to repair or replace any part of the oven that tails because of
a malmfhCtUlJi_g defect.
This warranty is extended to the original purchaser and an} succeeding owner Ii)r products
purchased Ii)r ordinary heine use in the 48 mainland states, Hawaii, Washington, D.C. or Canada.
In Alaska the warranty is the same except that it is IJMITED because wm must pay to ship
the product to the service shop or Ii)r the service technician's tra\el costs to wmr home.
All x_arrantx service will be proxided bx om _ Factorx Serxice Centers or bx om _ authorized Customer
Care :>serxicers dinting normal working hotu_s.
Should your appliance need service, dinting warrant) period or beyond, in the USA call
800.444.1845. In Canada: 888.880.3030.
• Service trips to your home to teach you how
to use the product.
• Replacement of house fuses or resetting of
circuit breakers.
• Damage to the product caused by accident,
fire, floods or acts of God.
• Damage after delivery.
• Failure of die product if it is used for
other than its intended purpose or used
commercially.
• Improper installation, delivery or
maintenance.
If you have an installation problem, contact
your dealer or installer. You are responsible
for providing adequate electrical, gas,
exhausting and other connecting facilities
as described in the Installation Instructions
provided with the product.
• Incidental or consequential damage caused by
possible defects with this appliance.
49-80294 {
01-05 JR
Printedin Italy
Some states/provinces do not allow the exclusion or limitation of incidental or conseqtmntial
dalnages, so the above limitation or exclusion may not apply to you. This warranty gives you specific
legal rights, and w)u may also ha\e other rights which vary fi'om state to state/province to province.
To know what your legal rights are in your state/province, consuh w)ur local or state/provincial
consumer al)'ifirs olfice or w)ur state's Attorney General.
Warrantor in USA: General Electric Company,
Louisville, KY 40225
Warrantor in Canada: Camco Inc.
Monogram:
GEConsumer & Industrial
Louisville, KY40225
©2005 GECompany
 Loading...