

GE ZET958WF5WW, ZET958WF4WW, ZET958WF3WW, ZET958WF2WW, ZET958WF1WW Owner’s Manual
...
Owner's
Manual
27" and 30"
Convection
Wall Oven
ZEK938 - 27" Single Wall Oven
ZEK958 - 27" Double Wall Oven
ZET938 - 30" Single Wall Oven
ZET958 - 30" Double Wall Oven
www.monogram.com
Monogram:_
We bring good things tolife.

Consumer Information
I,DIll Oven
Introduction
Contents
Your new Mmmgram wall oven makes an eloquent statement of style, convenience and kitchen
planning flexibility. Whether you chose it tot its purity of design, assiduous attention to detail--
or tot both of these reasons--you'll find that your Monogram wall oven's superior blend of form
and flmction will delight you for vears to come.
Yore" Monogram wall oven was designed to provide the flexibility to blend in with w)ur kitchen
cabinetry. Its sleek design can be beautiflflly integrated into the kitchen.
The infl)rmation on the following pages will hel I) you operate and maintain wmr wall oven
properly:
Care and Clemfing
Broiler Pan and Grid .................. 37
Control Panel ........................ 39
Heating Elements ..................... 39
I,ilt-Off Oven Door . ................... 38
I,ight Bulb .......................... 40
Probe .............................. 40
Racks ............................... 37
Remowd)le Oven Floor . ................ 39
Stainless Steel and Metal Parts ........... 37
Consumer Services
Betore You Call For Service .......... 41, 42
Important Phone Nmnbe_ ............. 47
Model and Serial Nmnbers ............... 3
Product Registration .............. 3, 45, 46
Satiety Instructions ................... 4, 5
X4'arrantv ..................... Back Cover
Oven
A1mninmn Foil .................. 4, 17, 35
Baking or P,oasting ................. 16, 17
Broiling/Broiling Guide ............. 18-20
Controls ............................. 7
Clock and Timer . .................... 8, 9
Convection ....................... 26-31
Features ............................. 6
Probe ............................ 23-25
Proofing ............................ 33
Sabbath Feature .................... 13-15
Sell=Cleaning Oven ................. 35, 36
Special Features ................... 10-12
Thermostat .......................... 34
Timed Baking & Roasting ............ 21, 22
X4'atruing ............................ 32
J_e_l'loTd e
packaging
tape
To assm'e no damage is done to the finish of
the product, the satest way to remove adhesive
left from packaging tape on new appliances
is an application of a household liquid
dishwashing detergent, mineral oil or cooking
oil. Apply with a sott cloth and allow to soak.
Wipe dry and then apply an appliance polish
to thoroughly clean and protect the surtace.
NOTE: The pla,stie l@e must be *_,moved i}*mz the
chrome trim on the oven parts. It cannot be _,moved
!/it is baked on.
Before
using" your
wall oven
Read this manual carefllll_. It is intended to
help )ou operate and maintain yore" new wall
o',en properly.
Kee I) it hand) for answers to yore" questions.
If you don't understand something or need
more help, there is a list of mll-ii'ee consumer
service nmnbers included in the back section
of this manual.
OR
Visit ore" _4ebsite at: www.monogra_a.com
Write
down the
model &
s_ial
n u lT_lbers
l[you
received a
damaged
wall oven
Save time
& money
You'll find them on a label on the side trim or
on the front of the (lower) o_,en behind the
o_,en door.
Fill out and return the Consumer Product
Registration Card that is packed with this
product. If you cannot find it, please send
in the duplicate card printed in the back of
this manual.
hmnediatelv contact the dealer (or builder)
that sold xou the wall oxen.
Before you request service, check the Problem
Solxer in the back of this manual.
Before sending in this card, please write these
nmnbers here:
Model Nmnber
Serial Nmnber
Use these nmnbers in any correspondence or
serxice calls concerning yore" wall oxen.
It lists causes of minor ol)erating, problems that
_0/I can correct Votlrself.
l[you
need
sovice
To obtain service, see the Consumer Services
page in the back of this manual.
We're proud of our service and want you to be
pleased. If for some reason you are not happy
with the service you receive, here are the steps
to tollow tot flu'ther help.
FIRST, contact the people who serviced wmr
appliance. Explain why you are not pleased.
In most cases, this will solxe the problem.
NEXT, if }ou are still not pleased, write all the
details--including yore" phone nmnl)er--to:
Manager, Customer Relations
GE Appliances
Appliance Park
I,ouisville, KY 40225

IMPORTANT SAFETY INSTRUCTIONS
WABNING!
For _our satety, the ii]forn]atioi] in this manual must be followed to nfilfinfize the risk of fire or
exl)losion, electric shock, or to prexent propert) dalnage personal iqjury or loss of life.
IMPORTANT SAb fTY NO TICE
• The California Safe Drinking Water and
Toxic Enforcement Act requires the Governor
of Califimfia to publish a list of substances
known to the state to cause cancer, birth
detects or other rel)roductive harnL and
requires 1)usinesses to wai'i] C/lStOiilei's of
potential exposure to such substances.
SAPF,TY Pt f (;A U7 70NS
When using your appliance, follow basic safety
precautions, including the following:
• Use this appliance only for its intended use
as described in this manual.
• Be sure your appliance is properly installed
and grounded b) a qualified technician in
accordance with the provided ii]stallation
instructioi]s.
• Be sure the oven is securely installed in a
cabinet that is finuly attached to the house
structure. Never allow anyone to climb, sit,
stai]d or hai]g oi] the oven door.
• Have the installer show you the location of
the circuit breaker or fuse. Mark it for easy
referei]ce.
• Do not attempt to repair or replace any part
of your wall oven unless it is specifically
recommended in this mmmal. All other
servicing should be referred to a qualified
techlfician.
• Teach children not to play with the controls
or aI]y other part of the oven.
• Never leave the oven door open when you
are not watching the oven.
• Ahvays keep dish towels, dish cloths, pot
holders and other linens a safe distance from
your oven.
• For your safety, never use your appliance for
warming or heating the room.
• Always keep wooden and plastic utensils
and cmmed food a safe distance away from
your oven.
4
• The fiberglass insulation in self-clem_hlg
ovens gives off a very small amount of cm'bon
monoxide during the cleaning cycle. Exposure
can be inilfilnized by venting with an open
window or using a ventilation tan or hood.
T'lt ,tFl'l, a'-_ "D-'lbr'lp A -I_ I r'lp
• I±VIJU _.,JrJtxK12"_k]._ l: The health of
some birds is extremely sensiti_e to the tirades
given off during the sell=cleaning cycle of am'
o_en. Mine birds to another well-_entilated
I'OOIIl.
• Keep the oven free from grease buildup.
• Always keep combustible wall coverings, curtains
or drapes a safe distance from your oven.
• DO NOT STORE OR USE COMBUSTIBLE
MATERIALS, GASOLINE OR OTHER
FqAMMABLE VAPORS AND LIQUIDS IN
THE VICINITY OF THIS OR ANY OTHER
APPLIANCE.
• Do not let cooking grease or other flammable
materials accumulate in or near the wall oven.
• Do not use water on grease fires. Smother fire
or flaI]]e or use a multi-i)uri)ose dry chelnical
or ti_ai]]-tyl)e fire extiI]guisheI:
Flame in the oven can be smothered
completely by closing the oven door
ai]d turi]ing the oveI] off or by usiI]g a
inulti-i_uri)ose dry chelnical or ti)am-type
fire extii]guisher.
• Do not use aluminum foil to line oven
bottoms, except as suggested in this manual.
lmi_roper ii]stallation of alumii]uln hill ma'_
result in a risk of electric shock or fire.
• Cook ]neat and poultry thoroughly--meat to
at least an INTERNAL temperature of 160°F
and poultry to at least an INTERNAL
temperature of 180°F. Cooking to these
temi)eratures usually protects agaiI]st
fl>odbori]e illness.
• Before performing ally service, DISCONNECT
THE OVEN POWER SUPPLY AT THE
HOUSEHOLD DISTRIBUTION PANEL BY
REMOVING THE FLrSE OR SX_]TCHING
OFF THE CIRCUIT BI/EAKER.
• Do not store flammable materials in the oven.
SAbF, TY Pt 2CA U770NS
• Do not leave children alone--children should
not be left ahme or unattended in an area
where an appliance is ill use. They should
never be allowed to sit or stand on any part
of tile appliance.
• Do not touch the heating elements or the
interior surface of the oven. These surtaces
may be hot enough to burn even though they
are dark ill color. During and after rise, do not
touch, or let clothing or other flmnmable
materials contact, any interior area of tile
oven; allow sufficient time fin" cooling first.
Potentially hot surtaces include tile oven vent
openings and surtaces near tile openings,
crevices around the oven door, the edges of
tile door window and metal trim parts above
tile door.
Remember: Tile inside surtace of tile oven
may be hot when tile door is opened.
•CAUTION: ITEMSOFINTEr:ST
TO CHILDREN SHOULD NOT BE STORED
IN CABINETS ABOVE A WALL OVEN--
CHILDREN CLIMBING ON THE OVEN
TO R_La.CH ITEMS COULD BE SERIOUSLY
INJURED.
• Never were"loose-fitting or hangiug ga*meuts
while using the appliance. Be cater.1 when
reaching fin" items stored over tile oven.
Flalnlnable inaterial could be ignited if
brought ill contact with oven heating
elelnents _lll(1 lll_lV Cause severe b/1Yns,
• Do not heat unopened food containers.
Pressure could build up and tile container
could bm_t, causing an injury.
• Keep the oven vent unobstructed.
• Place the oven rack in the desired position
while the oven is cool. If racks must be handled
when hot, do not let pot holder contact tile
heating elements.
• Never leave jars or calls of fat drippings in or
ueaac your oveu.
• Pulling out the rack to the rack stop is a
convenience in lifting heavy foods. It is also
a precaution against burns fl'om touching
hot surti_ces of the door or oven wails.
• When using cooking or roasting bags in the
oven, fi_llow tile manufi_cturer's directions.
• Do not use your oven to dry newspapers.
If overheated, they can catch on fire.
• Do not use oven for a storage area, Items stored
ill an oven can ignite.
• Do not leave paper products, cooking utensils
or food in the oven when not in use.
• Do not allow anyone to climb, stand or hmlg
on the door. Thev could dalnage tile oven or
cause severe personal iI_jury:
• Use only dry pot holders--moist or clamp pot
holders on hot surfilces Inav result ill burns
fl'oln stealn. Do not let pot holders touch oven
heating elelnents. Do not use a towel
or other bulky cloth.
• After broiling, always take the broiler pma out
of the oven mad deml it. I,eflover grease ill tile
broiler pan can catch fire tile next filne you use
tile pan.
• Strand away from the oven when opening the
oven door. Hot air or steam which escapes can
cause burns to hands, tilce and/or eves.
• Large scratches or impacts to glass doors call
lead to broken or shattered glass.
SEI -CLEANING OVEN
• Do not cleml the door gasket. Tile door gasket
is essential fin _a good seal. Care shoukl be
taken not to rub, dmnage or move tile gasket.
• Do uot use oven cleaners, No COUlU/ercial oven
cleaner or oven liner protective coating of any
kind should be used ill or aI'Otlnd any part of
tile oven. Residue fl'oln oven cleaners will
dalnage tile inside of tile oven when tile
sell:clean cycle is used.
SAVE THESE INSTRUCTIONS
• Cleml tufty parts listed in this Owner's Mm_ual.
• Before self-cleaJfing the oven, remove tile
broiler pan, grid and other cookware.
• Be sure to wipe up excess spillage before
starting the self-clemlhag operation.
• If the sdf-demlh_g mode malfunctions, turn
tile oven off and disconnect tile power supply.
Have it serviced by a qualified technician.
Features of Your Wall Oven
I.l_lll Ove*_
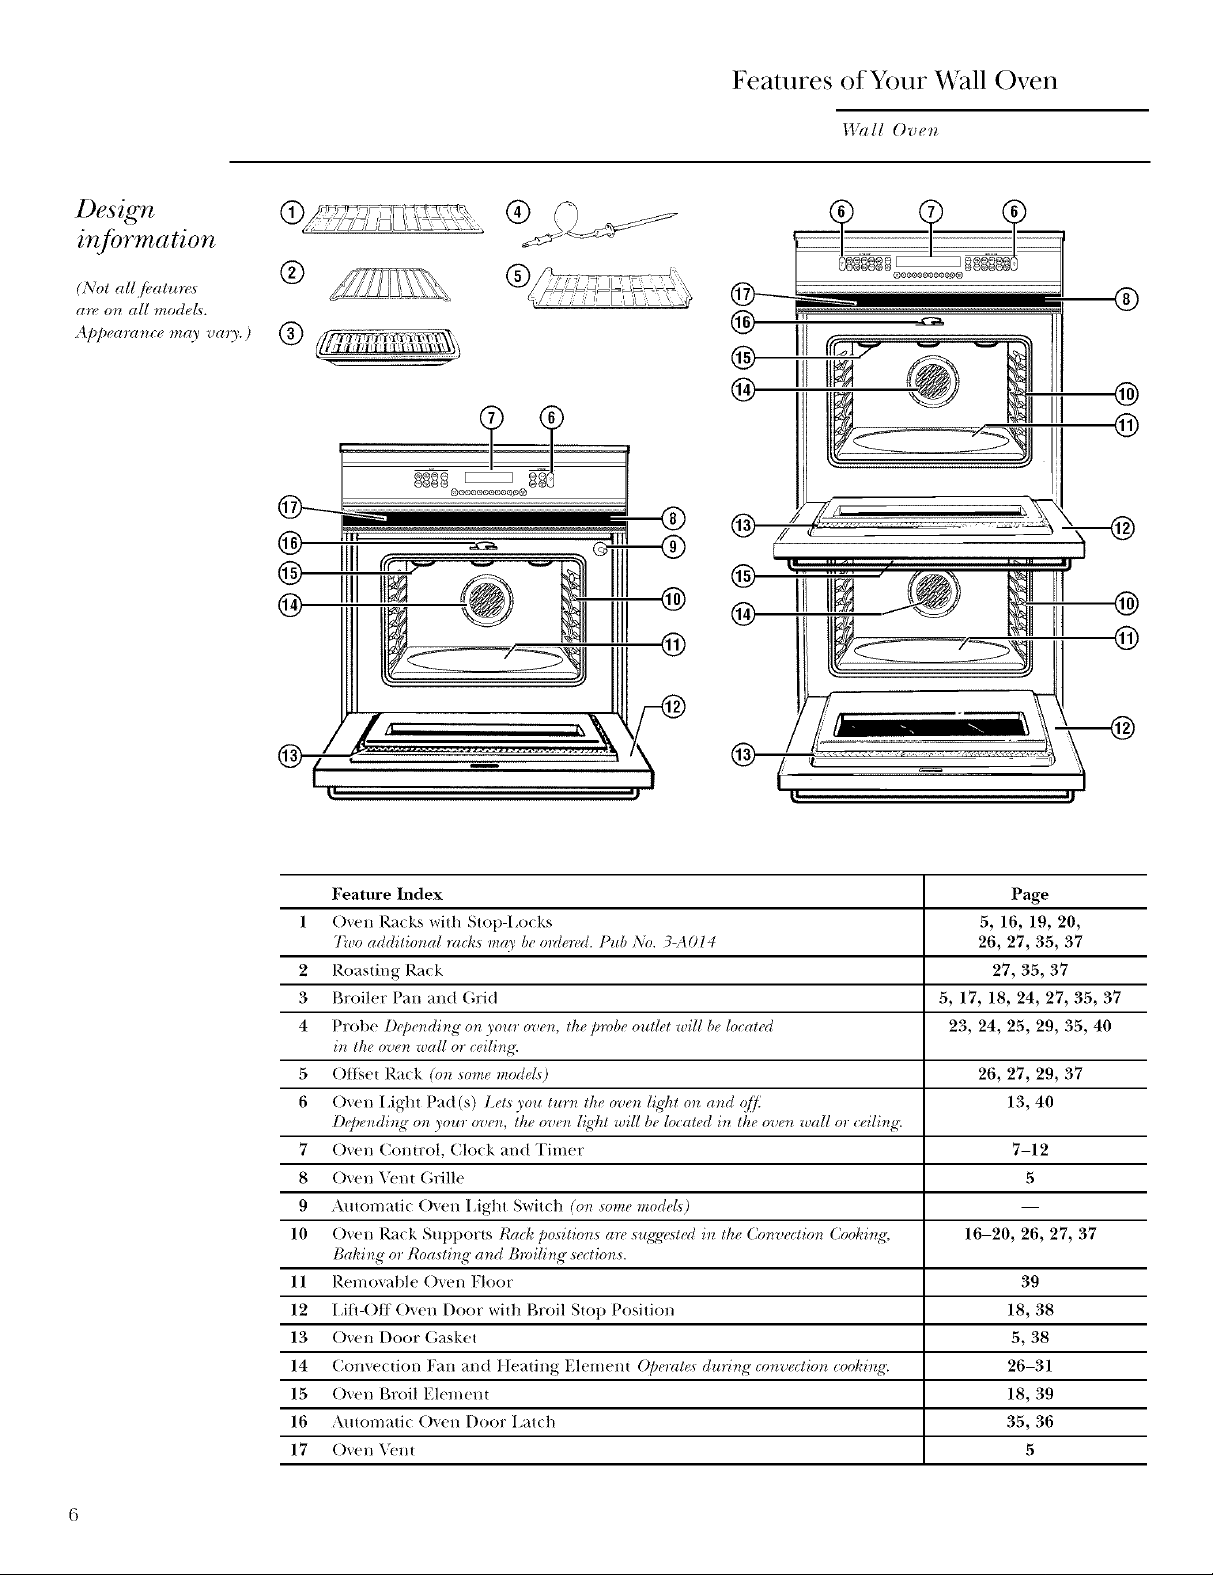
Design
inJbrmation
(NO1 all /bal*_r_<s
are o*z all modeL_.
4ppear_t_zce_a_, va_>)
®
®
®
O
@
@
Feature Index Page
1 Oven Racks with Stop-I,ocks 5, 16, 19, 20,
Two additio_tal r_lcks m_O' be o_Uered. Pub ,\'o. 3-A014 26, 27, 35, 37
2 Roasting Rack 27, 35, 37
3 Broiler Pan and (;rid 5, 17, 18, 24, 27, 35, 37
4 Probe Depe_di_g on your overt, the pr, be outlet will be [oc(lted 23, 24, 25, 29, 35, 40
i_t the oven wall or ceili_g'.
5 ()ttset Rack (on some mode£) 26, 27, 29, 37
6 Oven I Aght Pad (s) Lel._ you tur_ the overt ligDl o_t _l_td q[i; 13, 40
D_'pe_di_tg >on your ove_, the ove_ [_,_'htwill be located i_ the ove_ w_UI or ceili_g'.
7 Oven Conu:ol, Clo(k and Timer 7-12
8 Oven Veni Grille 5
9 Amomatic Oven 15ght Switch (on some models)
10 Oven Rack Supporis tbtcl_ position,s are sugg','steU i)¢ the Convectio)_ Cooki)_g; 16-20, 26, 27, 37
Baking or Ro:_sti_g" a_d B_ili_g sections.
11 Removable ()yen Floor 39
12 15fl-()ff Oven Door witt_ Broil Slop Position 18, 38
13 Oven Door Gasket 5, 38
14 Conveciion Fan and tIeating Elemeni ()[)+.r<+t_during convectio_ cooki_+g'. 26-31
15 Oven Broil Element 18, 39
16 Automatic Oven Door I arch 35, 36
17 Oven _'nt 5
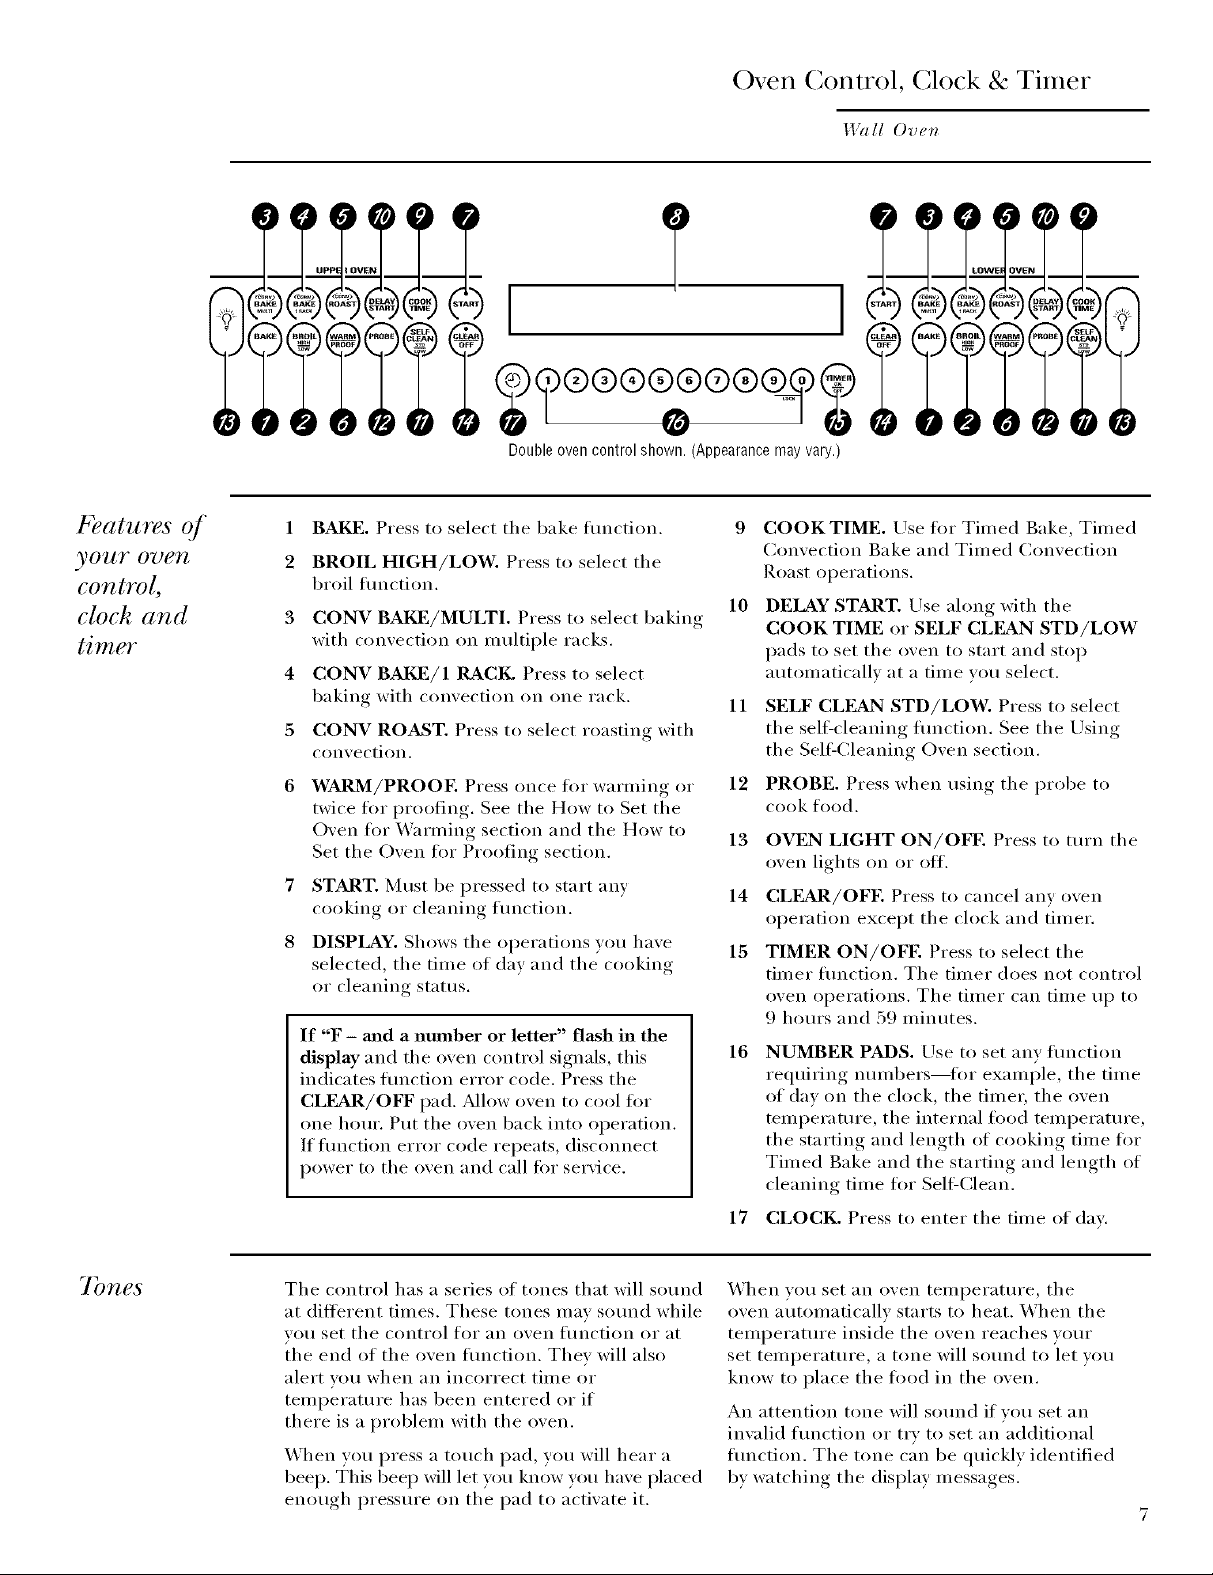
k atures of
yO_!lF O'UeTI
control,
clock and
tim
ooo 2oo
Double oven control shown. (Appearance may vary.)
1
BAKE. Press to select tile bake flmction.
2
BROIL HIGH/LOW. Press to select tile
broil flmction.
3
CONV BAKE/MULTI. Press to select baking
with convection oi1 tnultiple racks.
4
CONV BAI_]/1 RACK. Press to select
baking with convection on one rack.
5
CONV ROAST. Press to select roasting with
convection.
6
WARM/PROOE Press once tk)r warming or
twice for proofing. See tile How to Set tile
Oven for _Vmning section and the How to
Set the Oven tor Proofing section.
7
START. Must be pressed to start any
cooking oi" cleaning function.
8
DISPLAY. Shows tile operations you have
selected, tile time of day and tile cooking
or cleaning status.
If "F - mad a nmnber or letter" flash in the
display and tile oven control signals, this
indicates hmction error code. Press the
CLEAR/OFF pad. _Mlow oven to cool for
one hour. Put tile oven back into operation.
If flmction error code repeats, disconnect
power to tile oven and call for service.
Oven Control, (;lock & Tinier
I,Ddl Oven
9 COOKTIME. Use fl)r Tilned Bake, Tilned
Convection Bake and Tilned Convection
Roast operatiollS.
10 DELAY START. Use along with tile
COOK TIME or SELF CLEAN STD/LOW
pads to set tile oven to start and stop
autolnaticallv at a tilne you select.
11 SELF CLEAN STD/LOW. Press to select
tile sellecleaning flmction. See tile Using
tile Self Cleaning Oven section.
12
PROBE. Press when using tile probe to
cook food.
13
OVEN LIGHT ON/OFE Press to turn tile
oven lights oi1 or off.
14
CLEAR/OFE Press to cancel any oven
operation except tile clock and timer.
15
TIMER ON/OFE Press to select the
tilner flmction. Tile tilner does not control
oven operations, The tilner can tilne up to
9 hours and 59 lninutes.
16
NUMBER PADS. Use to set any flmction
requiring nmnbers--li)r example, tile time
of day 1111the clock, the timer, the oven
telnperature, tile internal food telnperature,
tile starting and length of cooking tilne for
Timed Bake and tile starting and length of
cleaning tilne for SellZClean.
17 CLOCK. Press to enter tile tilne of day.
7bnes
Tile control has a series of tones that will sound
at different tilnes. These tones Inav sound while
you set tile control for an oven function or at
the end of the oven fimction. They will also
alert you when an incorrect tilne or
telnperature has been entered oi" if
there is a problem with the oven.
When you press a touch pad, you will hear a
beep. This beep will let w)u know you have placed
enough pressure oi1 tile pad to activate it.
When vou set an oven telnperature, tile
oven autolnatically starts to heat. When tile
temperature inside tile oven reaches vour
set tenlperature, a tone will sound to let you
know to place tile food in tile oven.
An attention tone will sound if vou set an
invalid function oi" try to set an additional
flmction. Tile tone can be quickly identified
by watching the display lnessages.

Oven Control, (;lock & Tinier
I,Dlll Oven
(,'lock
7b set
the clock
The c[od_ must be set/or the atttomatic oven limit_g"
./Unctions to work properly.
The time of day clock cmmot be changed
during Delay Start. (It can be changed during
a regular bake or broil operation.)
1 Press the CLOCK pad.
2 Press the number pads the same way you
read them. For example, to set 12:34, press
the number pads 1, 2, 3 and 4 in that order.
If number pads are not pressed within one
minute atier you press the CLOCK pad, the
display reverts to the original setting. If this
happens, press the CLOCK pad and reenter
the time of day.
3 Press the START pad. This enters the time
and starts the clock,
To check the time of day when the display is
showing other intormation, simply press the
CLOCK pad. The time of day shows until
another pad is pressed.
@
@®®®®®®®®®
I_o_uey
failure
7 mer
If a flashing time of day is in the display,
you have experienced a power thilure.
Reset the clock.
NOTE: The timer is ind@endent (?/all the other*"
,fi_n_tions and it doe,_ not _onlrol the oven. The
CLEAR/OFF pad doe,_ not q]f, ct the lime*'.
You may program the timer to time cooking
or other household activities tot up to 9 hours
and 59 minutes.
The timer counts down in minutes, 1 minute
at a time, until the last 60 seconds are reached.
Then the control will beep one time. The
seconds will not be displayed tmtil the last
minute is reached.
To reset the clock, press the CLOCK pad.
Enter the correct time of day by pressing
the al)propriate number pads. Press the
START pad.
When the timer reaches " :00," the control
will beep 3 times fi_llowed by one beep every
6 seconds tmtil the TIMER ON/OFF pad is
pressed.
The 6-second tone can be canceled bv
fl>llowing the steps in the Special Features
of Your Control trader Tones at the End of
a Timed Cycle,
Using
the timer
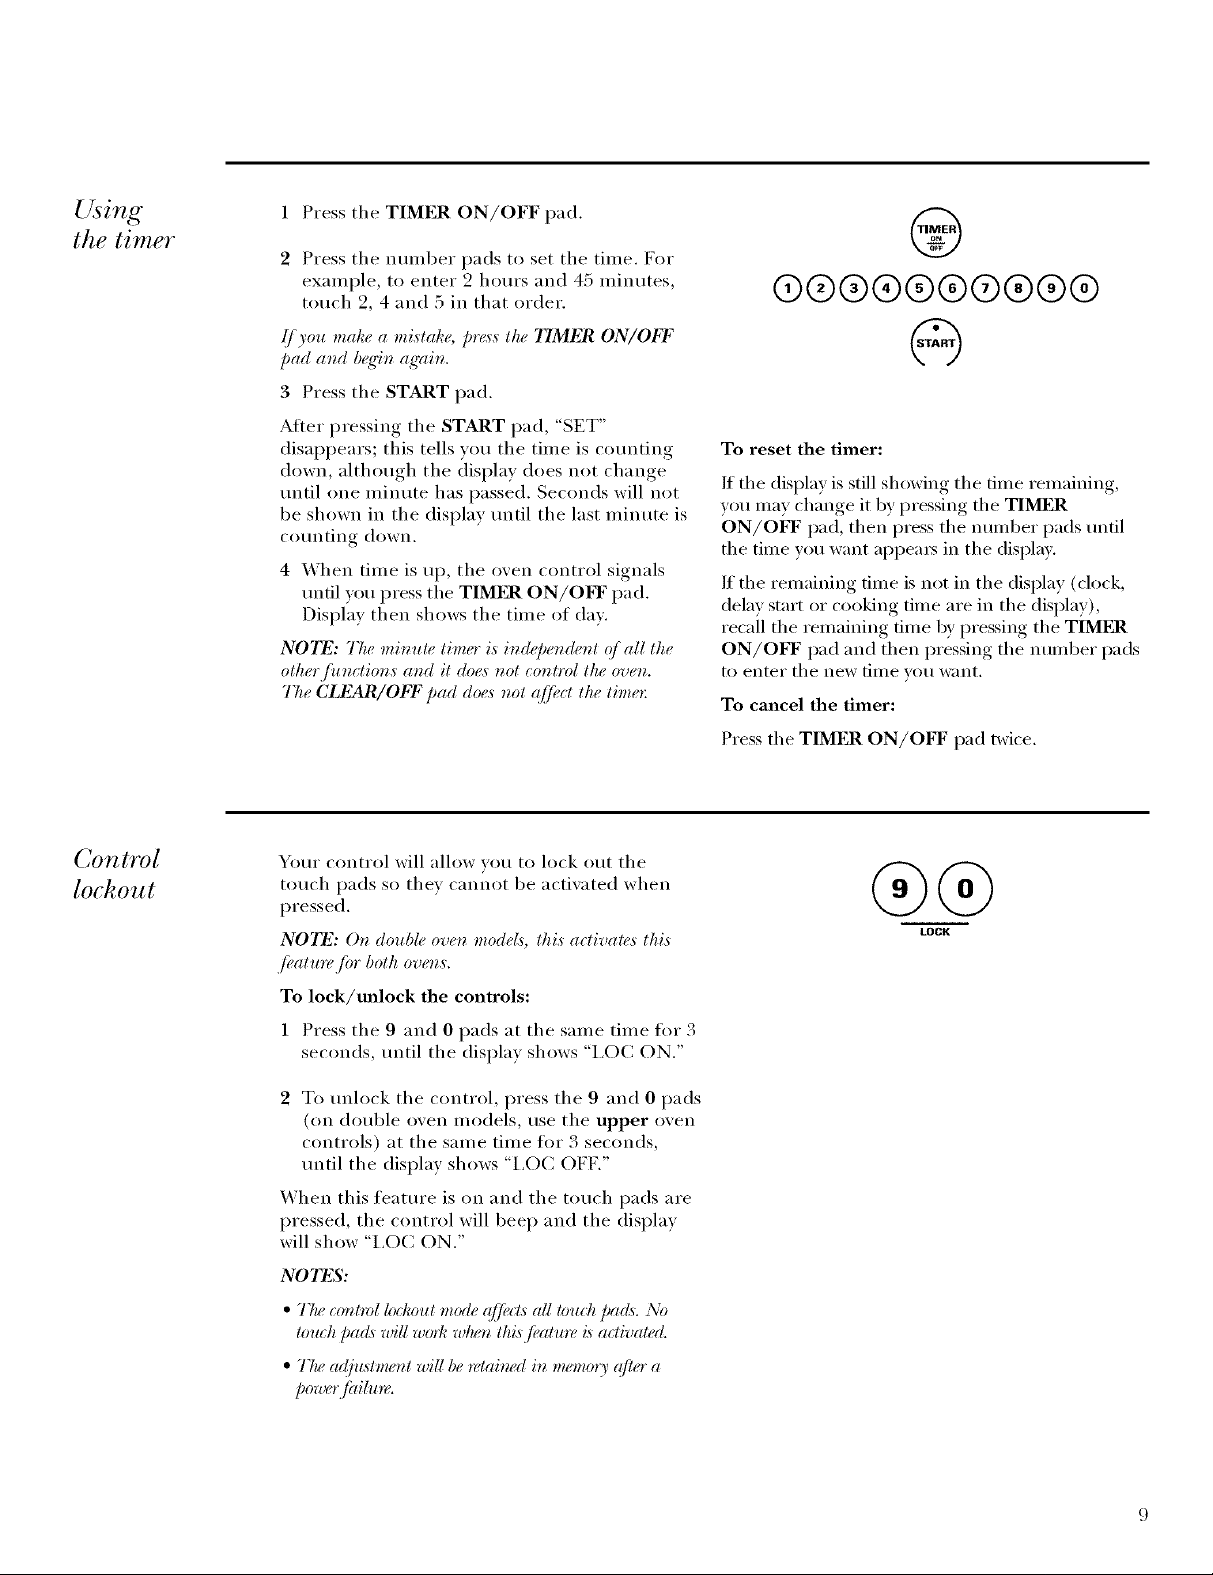
1 Press tile TIMER ON/OFF pad.
2 Press tile nmnber pads to set tile time, For
example, to enter 2 hours and 45 minutes,
touch 2, 4 and 5 in that order.
@
@@@@(9@@@@@
Control
lockout
(/you make a mislake, press lhe 77MER ON/OFF
pad at_d b_q'it_ ag'ai*_.
3 Press tile START pad.
Aiier pressing tile START pad, "SET"
disappears; this tells you the time is cotmting
down, although tile display does not change
until one minute has passed. Seconds will not
be shown in the display until the last minute is
counting down.
4 _'_ lien tilne is up, tile oven control signals
until you press tile TIMI_LR ON/OFF pad.
Display then shows the time of da_,
N07_: 77w miracle timer is it_depet_det_l ({/all lhe
olher /itt_clio_,s a_d il does _ol cot_lrol lhe ovet_.
The CLEAR/OFF pad does *_ol<{[/_:ctttte timer:
Your control will allow vou to lock out tile
touch pads so they cannot be activated when
pressed.
NOTE: Or_double ovetz model,s, this aUival¢,s lhis
./_,ature /br both ove_zs.
To lock/mflock the controls:
@
To reset the timer:
If tile display is still showing tile time remaining,
you may change it by pressing the TIMER
ON/OFF pad, then press the nun/bet pads until
the time you want appea_5 in the display.
If tile remaining time is not in tile display (clock,
delay start or cooking time are in the display),
recall the remaining time by pressing the TIMER
ON/OFF pad and then pressing tile number pads
to enter tile new tinle vo/i _V_lilt,
To cancel the timer:
Press tile TIMER ON/OFF pad twice.
®®
LOCK
1 Press the 9 and 0 pads at the same time tot 3
seconds, until the display shows "I,OC ON."
2 To tmlock tile control, press tile 9 and 0 pads
(on double oven Inodels, use the upper oven
controls) at tile san/e time tot 3 seconds,
tmtil the display shows "I,OC OFK"
"_,_hen this featm'e is on and tile touch pads are
pressed, the control will beep and tile displa)
will show "I,OC ON."
NOTES:
• 77w comrol bt/:ouimode @cls ag louchpads. 5b
loluh /:a&willworkwlu:r_llzi,sf,alutvh aaival,,d.
• 77_,¢ac(]u,slmo_l rvifi be rdabwd it_ memory ((/let"a
power fidhm,
Special Features
14_lll Ore,
Special
jeatures 4
yO_lgr 07)gTI
control
7bnes at
the end of a
timed cycle
}}*ur _ew touch Dad cot_trol has additiorml fi¢atures
that you may choose to u,se.
They remain in the control's memory until
the steps are repeated. When the display shows
your choice, press the START pad. The special
features will remain in memory atter a power
At the end r_]a timed o'ch; 3 short beeps will
sound Jbllowed @ one be@ every 6 secon& until
the CLI_2AR/OFF pad is pres,s_¢d.This _ontinuous
6-s_ ond bee/) m(9' be (an_e#d. 7b cancel the
6-s_¢cond be@:
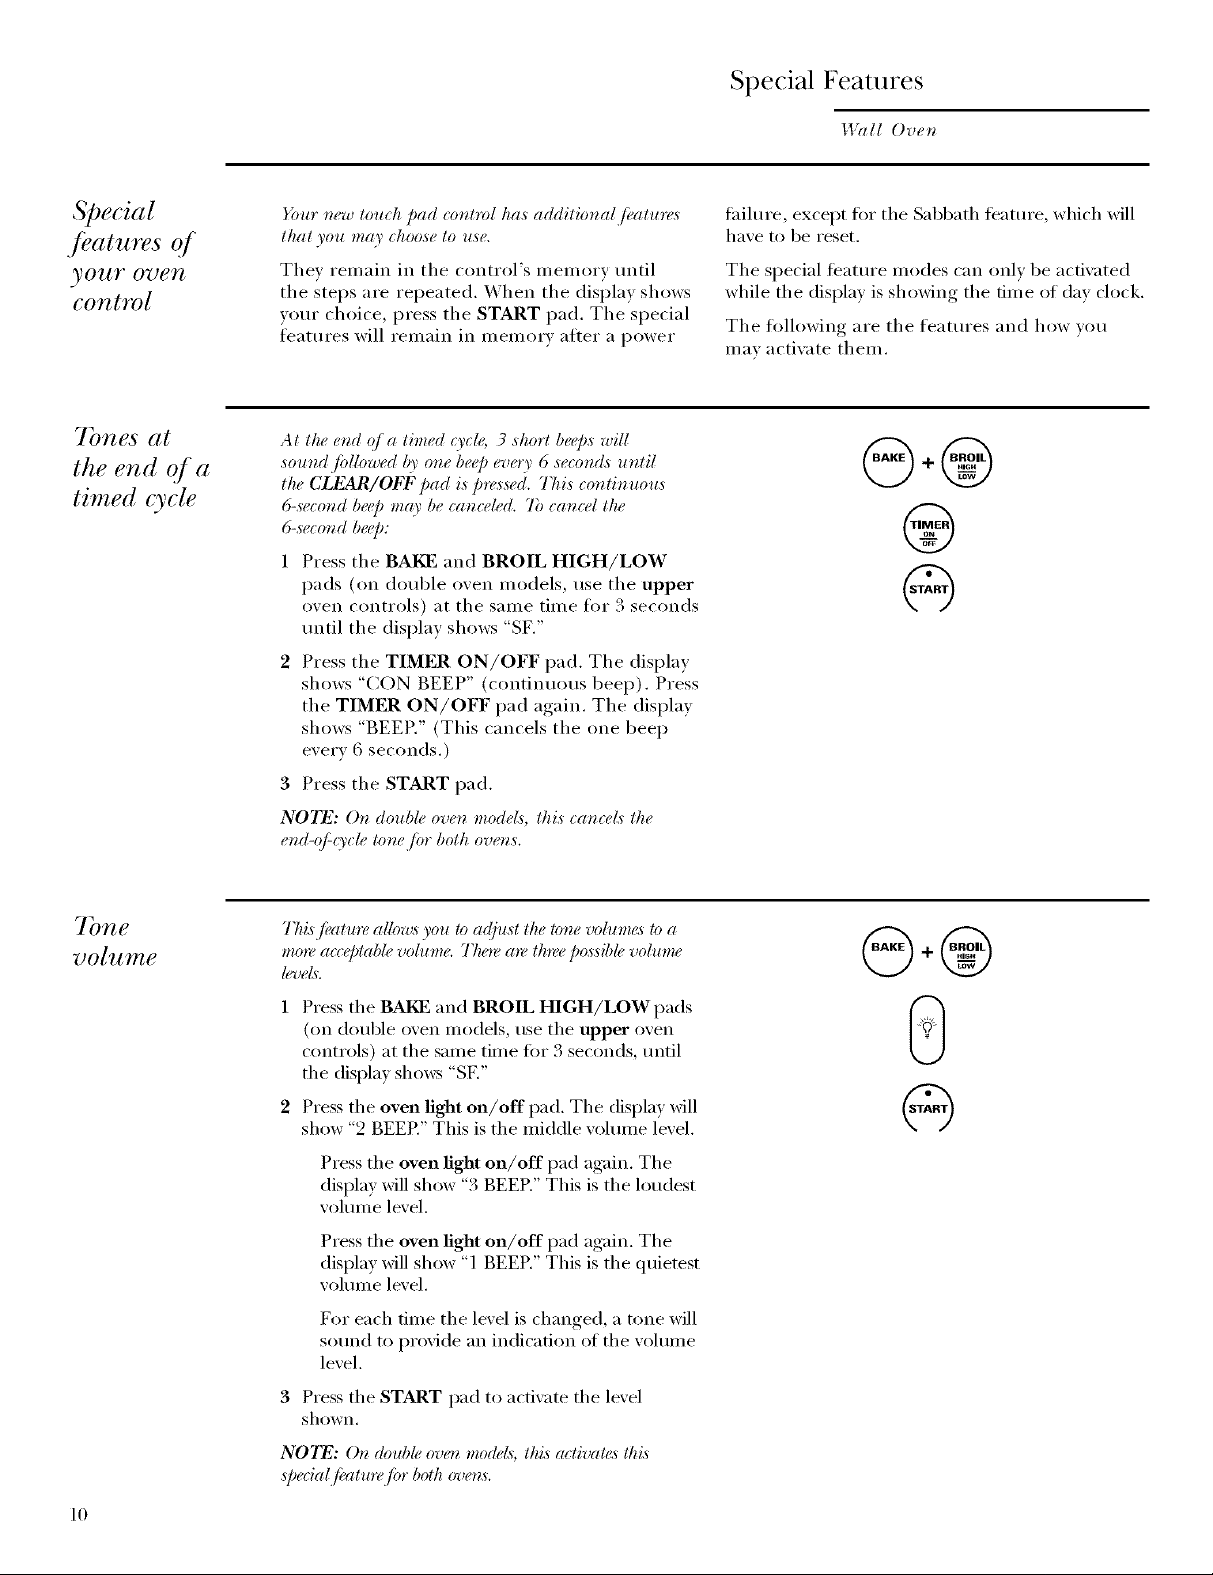
Press the BAKE and BROIL HIGH/LOW
pads (on double oven models, use the upper
oven controls) at the same time fi)r 3 seconds
until the display shows "SF."
Press the TIMER ON/OFF pad. The display
shows "CON BEEP" (continuous beep). Press
the TIMER ON/OFF pad again. The display
shows "BEER" (This cancels the one beep
every 6 seconds.)
3 Press the START pad.
NOTE: 0_ double ovo_ models, this ca*_ceLs the
er_d-@gT_ le tor_e /br both over_,s.
tailure, except fiw the Sabbath timttu'e, which will
haxe to be reset.
The special teature modes can onlx be acfixated
while the displa)is showing the time of day clock,
The folh)wing are the features and how xou
U/_1_ _lctixa te theu/,
@+@
@
@
775,sfiCatlm,allowsyou toaqfl¢,st#w to_e volumes toa
mo*eacceptablevoluma 77w_ea*,_threepossihl_volume
h,vd*.
1 Press the BAI_ ] and BROIL HIGH/LOW pads
(on double oven inodels, use the upper oven
controls) at the same time tot 3 seconds, until
the display shows "SF,"
2 Press the oven fight on/off pad. The display will
show "2 BEER" This is the middle xolume lexel.
Press the oven fight on/off pad again. The
displa) will show "3 BEER" This is the h)udest
"_ohline lexel.
Press the oven fight on/off pad again. The
display will show "1 BEER" This is the quietest
•_ohlule lex el.
For each time the lexel is changed, a tone will
sound to proxide an indication of the xolume
lmel.
3 Press the START pad to actixate the lexel
shown.
N07_2: On double over_modds, this activates this
Spedal fi:,alu*vfbr both _ens.
@+@
G
10
12-horn;
24-hour
or clock
blackout
_*ur control is ,set to use a 12-hour clock. (/you
would pr@,r 1o have a 24-hour military time dock or
bla_ k out the _loz k di@la), ./bllow the steps below.
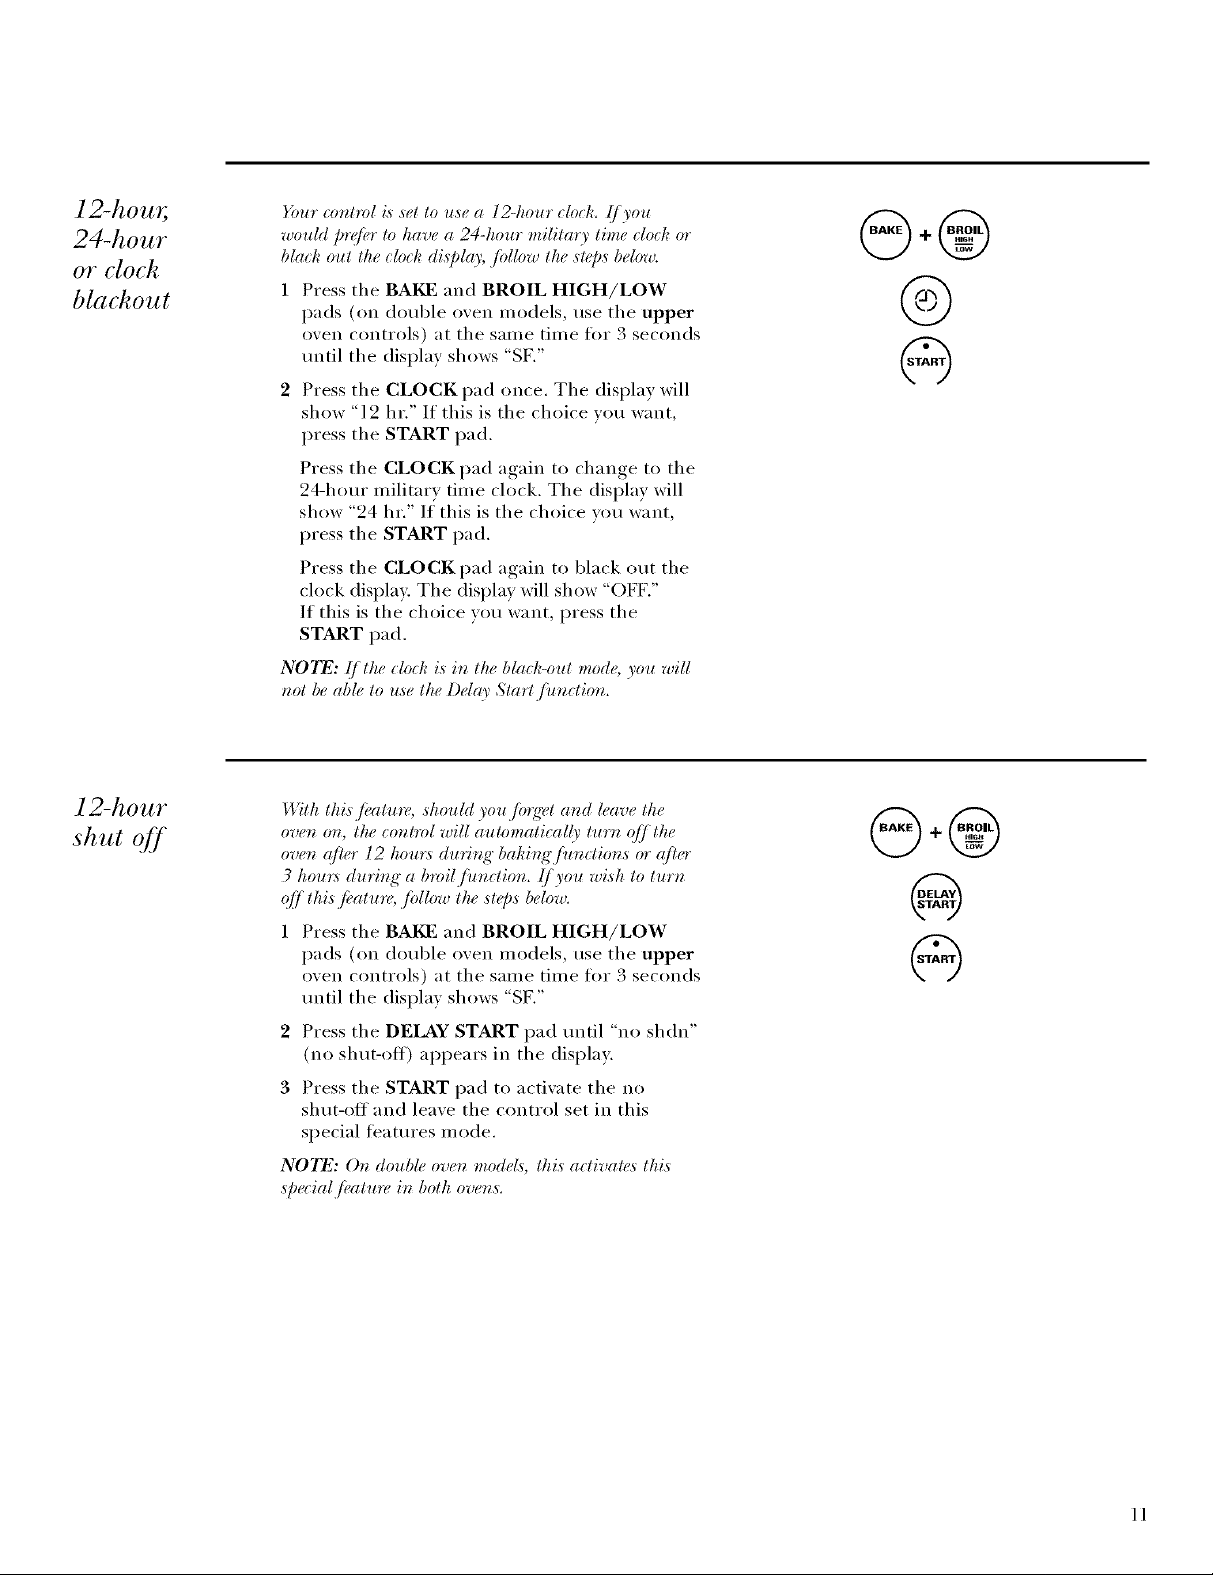
Press the BAKE and BROIL HIGH/LOW
pads (on double oven models, use the upper
oven controls) at the same time tot 3 seconds
until the display shows "SF."
2 Press the CLOCK pad once. The display will
show "12 hr." If this is the choice _ou want
press the START pad.
Press the CLOCK pad again to change to the
24-hour military time clock. The display will
show "24 hr." I( this is the choice w)u want,
press the START pad.
Press the CLOCK pad again to black out the
clock displa> The display will show "OFF."
If this is the choice wm want, press the
START pad.
N07_: I]]the clock is i_ the black-out mode, you will
r_ol be able lo use lhe Dday Slarl /i_r_clior_.
@.@
@
@
12-hour
shut oil
With this fi, atare, shouhl you /b*gr_t and leave the
oven on, the _onlml will automatically turz_ (_[/ the
oven after 12 hou*:s duri_g" baki_g'Junctions or qi/¢r
3 hou_:s duri_g" a broil/imction. {/you wish to turn
_*/./this.fl, atu*_¢, ./bllow the steps below.
Press the BAKE and BROIL HIGH/LOW
pads (on double oven models, use the upper
oven controls) at the same time tot 3 seconds
until the display shows "SF."
2 Press the DELAY START pad until "no shdn"
(no shut-off) appears in the display.
3 Press the START pad to actiwate the no
shut-off and leaxe the control set in this
special ligatures mode.
N07_2: 0_ double ove_ models, lt_i,sactivalas lt_i,s
Spe_ial Ji,al u*,_i*_boltzover_s.
@+@
ll

Special Features
I,l_d! Ove*_
t' threnheit
or Celsius
temperature
se&ction
A _l t o
t ?cipe
conversion
_bur ove_ co*_lrol i,s ,set to u,se the t;?d_*vnkeit
temperature ,sele_lio_,s, but you may eha_g'e tki,s
to u,se the ( e£iu,s ,se#ctio_,s.
1 Press the BAKE and BROIL HIGH/LOW
pads (on double oven models, use the upper
oven controls) at the same time tot 3 seconds
until the display shows "SIL"
2 Press the BROIL HIGH/LOW and COOK
TIME pads at the same time. The display will
show "F" (Fahrenheit).
Press the BROIL HIGH/LOW and COOK
TIME pads again at the same time. This will
show "C" (Celsius).
3 Press the START pad. The new setting will be
displayed ti)r both ovens.
NO_I_: O_z double ove_ model,_, the _ze'wsettiz_g"will
be di,ff)layed jbr both ove_,s.
I,/Tzen usir_g"eonve( tion bake, the Auto ICecipe'"
Co_zve*:sio_zjkatlt*_ will automatically _onvert entered
r_q'ular baki_g" lempemtu*_¢._ to _onvection baki_g"
tempeml ure._.
O_zce the fi¢atu_, is activated, the displa)' will show the
actual co_zverted (*_,du_ed) tempe*vltu*_,. For example,
{]you e_*tera *_'g'ular recipe temperature q/350°F and
pre,_sthe START pad, the display will show "CON"
and the converted temperature q/"325°F."
NO_I_: 77zi,sJ;¢ature doe,s _ot co*_vertco_vectio*_bake
eooki_g"time,s,o_dy r_t{'ularbaki_g temperature,s.
To Activate the Feature:
1 Press the BAKE and BROIL HIGH/LOW
pads (on double oven inodels, use the upper
oven controls) at the same time lot 3
seconds, until the display shows "SF."
2 Press the CONV BAKE/1 RACK pad. The
display will show "CON OFF." Press the
CONV BAKE/1 RACK pad again. The
display will show "CON ON."
3 Press the START pad.
To deactivate the feature, repeat steps 1-3
abme but press the START pad when "CON
OFF" is in the display.
@.@
@
@
@
12

Using the Sabbath Feature
Desig_.ed for use on the Jewish Sabbath and Holidays.
I.DIl! Ove*_
Sabbath
l_)ature:
How to set
jbr regular
baking or
roasting
77w Sabbalk flealu*e _at_ be used for bakinqiroasli,, g•
otdy. 1i eazmol be u,v_djbr eor_veclio_, broil@g;
.s_¢{fic#az_i_gor l)elar Sla*_ eooki_g
Make sure ltze clock shows ltze corn.el lime o/ day at_d
(he over_ i,s OFI:.
Press and hold both the BAKE and BROIL
HIGH/LOW pads, at the stone time, until
the displa) shows "SF."
NOTE: (/bake or broil appea*:s i_ ltze displrg;
ltze BAKE a_d BROIL HIGH/LOW pads were
_ol lou(hed al lhe ,same lime. 7Muh lke
CLEAR/OFF pad a_*d beg'i_*ag'aim
2
Tap the DELAY START pad until
"SAb bAtH" appears inthe display.
3
Touch the START pad and D will appear
in the display.
4
Touch the BAKE pad. No signal will be
glX, ell.
5
Using the number pads, enter the desired
temperature between 170 ° and 55(1 °.
No signal or temperature will be gixen,
6
Touch the START pad.
7
Alter a random delay period of
approximately 30 seconds to 1 minute,
D C will appear in the display indicating
that the oven is baking/roasting. If D C
doesn't appear in the display, start again
at Step 4.
To a(!just the oxen temperature, touch the
BAKE pad, enter the new temperature using
the number pads, and touch the START pad.
N07T: 77w CLEAR/OFF and COOK TIME pads
ar_, a_ liv_, duriz_g ltu. Sabbalt_ fl,alur<
N07_2: The ove_ l{q'ht _omes on atttomati_ ally (oa some
mocM._) whea tlw door is opet_d aml g_*eso/Jwkea tlu"
door i,sekzwd. The bit& may be n_moved. See the Over*
L_ffht I¢@la_emozl s_¢g:tion.(h_ moclds with a l_ffbtswilch
on the eor_lrol parM, the ovea l_q'kl may be tu*wd on
arid l(fl or_.
@+@
@@@(9@@@@@@
@
When the display shows D the oven is
set in Sabbath. When the display shows
D C the oven is baking/roasting.
13

Using the Sabbath Feature
_.DIll Ove*_
Sabbath
f?ature:
How to set jbr
timed baking
or roasting-
immediate start
and automatic
stop
Make ,sure the clock ,shows the correct lime o/day a_d
the ove_ i,s ()FF,
1 Press and hold both the BAKE and BROIL
HIGH/LOW pads, at the same time, until
the display shows "SF."
NOTE: ff bake or broil appea*:s it_ lt_e display,
ltze BAKE a_d BROIL HIGH/LOW pads were
_ol lou_hed al lke ,same lime. 7bu_k lke
CLEAR/OFF Dad a_*d beg'i_*ag'aim
2
Tap the DELAY START pad until
"SAb bAtH" appears in the display.
3
Touch the START pad and D will appear
in the displa).
4
Touch the COOK TIME pad.
5
Touch the number pads to set the desired
length of cooking time between 1 minute
and 9 hours and 99 minutes. The cooking
time that you entered will be displayed.
6
Touch the START pad.
7
Touch the BAI_] pad. No signal will be
Using the number pads, enter the desired
temperature. No signal or temperature will
be gix en.
9 Touch the START pad.
10After a random delay period of
approximately 30 seconds to 1 minute,
D C will appear in the display indicating that
the oven is baking/roasting. IfD C doesn't
appear in the display, start again at Step 7.
To a¢!just the oven temperature, touch the
BAKE pad, enter the new temperature using
the number pads, and touch the START pad.
When cooking is finished, the display will
change from D C to D and "0:00" will appear,
indicating that the oven has turned OI_T but is
still set in Sabbath. Remove the cooked 10od.
@+@
%
%
®®®®®®®®®®
@
When the display shows > the oven is
set in Sabbath, When the display shows
D C the oven is baking/roasting.
14

How to exit
the Sabbath
jeature
1
Touch the CLEAR/OFF pad.
2
If the o_en is cooking, wait for a rand(nn
delay period of al_proxinmtely 30 seconds
to 1 minute, until only D is in the displa).
Press and hold both the BAKE and BROIL
HIGH/LOW pads, at the same time, tmtil
the display shows "SF."
Tap the DELAY START pad tmtil
"12 shdn" or "no shdn" appea_ in the
display. "12 shdn" indicates that the oven
will automatically ttlYn oJ[][atter 12 hours.
"no shdn" indicates that the oven will not
automatically tm'n off.
5 Touch the START pad.
NOTE: !/a: [)oweroutag'e,occurred while ltze oven
was in Sabbalh, the oven will aulomalically turn qff
and slay ({{[even when the power returns. The oven
CO?_llO[ ??IllS[ D(" I'(_,_('l,
®
@.@
@
15
 Loading...