

Page 1

GE Monogram ®
Use and Care Guide
Stainless Steel
Professional
36" & 48" Range
Page 2
Consumer Information
Stainless Steel Range
Exclusive
40_oint
inspection
Contents
Please call for y(mr exclusive 40-Point Inspection! In the U.S.A.: 800.444.1845.
In Canada: 888.880.3030.
Owners of Monogram professional ranges enjoy the additional benefit of a complimentaiy visit
by a specially- trained lechnician. This includes lemperature calibration of each oven and cooktop
element. This is Monogram's way-of ensuring correct installation and precise operation of your
new professional range.
Our Preferred Service Specialists are always at your service. If any Monogram appliance should
ever require service, please call 1he Monogram Preferred Smwice number shown above. Call
anytime--24 hours a day-, 7 day-sa week. The Monogram Preferred Smwice Specialist will promptly
coordinate a smwice appointment.
If you have any other questions--please call the GE Answer Center e'800.626.2000.
Care and Cleaning
Broiler Pan and Grid ................ 27
Burner As_mbly ................... 28
Griddle ............................ 29
Grille .............................. 30
Oven Light ........................ 27
Shelves ......................... 26, 30
Consumer Services
Imporlant Phone Numbe_ .......... 33
Model and Serial Number. ........ 3, 35
Problem &)tver ................. 31,32
Product Regisuafion ........... 3, 35, 36
Safely-Insffuctions ............... 2, 4-8
Warramy .......................... 34
Oven
Aluminum Foil ............... 6, 19, 22
Baking/Roasting ................ 17-19
Broiling/Broiling Guide ......... 22, 23
Consols ............ 9, 17, 18, 21,22, 25
Convection Cooking ............. 20, 21
Features ............................ 9
Proofing ........................... 18
Self-Cleaning Insu'uctions ........ 24, 25
Surface Cooking
Controls .................. 9, 10, 13, 16
Cookware .......................... 13
Features ............................ 9
Griddle ........................ 15, 16
Grille .......................... 13-15
Etecmc lgnimL_ ..................... 11
Simmering ......................... 11
WARNING: If the information in this
guide is not followed exactly, a fire or
explosion may result causing property
damage, personal injury or death.
-- Do not store or use gasoline or other
flammable vapors and liquids in the
vicinity of this or any other appliance.
- WHAT TO DO IF YOU SMELL GAS
•Do not try to light any appliance.
•Do not touch any electrical switch; do
not use any phone in your building.
•Immediately call your gas supplier from
a neighbor's phone. Follow the gas
supplier's instructions.
•If you cannot reach your gas supplier,
call the fire department.
- Installation and service must be
performed by a qualified installer, service
agency or the gas supplier.
AWARNING
• ALL RANGES CAN TIP
g
• INJURY COULD RESULT
• INSTALL ANTI-TIP
BRACKET PACKED
INSIDE OVEN
• SEE INSTRUCTIONS
Page 3
Before
using
y our
range
Read this guide carefully-. It is intended to help
you operate and maintain your new range
properly.
Keep it handy- for answers to your questions.
If you don't understand something or need
more help, call:
GE Answer Center ®
800.626.2000
24 hours a day, 7 days a week
Write
down the
model &
serial
numbers
fyou
received a
damaged
range
Save time
& money
You'll find them on a label in 1he rear of the
burner box below the burner grates.
These numbers are also on the Consumer
Product Ownership Registration Card
included in this guide.
Immediately contact dae dealer (or builder)
that sold you the range.
Before you request service, check the Problem
Solver in the back of this guide,
Before sending in this card, please write these
numbers here:
Model Number
Serial Number
Use Ihese numbers in any correspondence or
service calls concerning your range,
It lists causes of minor operating problems that
you can correct yourself.
If you
need
service
To obtain service, see Ihe Consumer Services
page in the back of this guide.
We're proud of our selwiee and want you to be
pleased. If for some reason you are not happy
with the service you receive, here are three
steps to follow for further help.
FIRST, contact the people who serviced your
appliance. Explain why you are not pleased. In
most cases, this will solve the problem.
NEXT, if you are still not pleased, write all the
details--including your phone number--to:
Manager, Customer Relations
GE Appliances
Appliance Park
l_ouisville, KY 40225
FINALLY, if your problem is still not resolved,
write:
MajorAppliance Consumer
Action Program
20NorthWackerDrive
Chicago, IL60606
Page 4
IMPORTANT SAFETY INSTRUCTIONS
IMPORTANT SAFE TY NO TICE
• The California Safe Drinking Water and
Toxic Enforcement Act requires 1he
Governor of California to publish a list of
substances known It the state to cause
cancer, birth defects or other reproductive
harm, and requires businesses to warn
customers of potential exposure to such
substances.
• The fiberglass insulation in self-dean ovens
gives off a very small amount of carbon
monoxide during the cleaning cycle. Exposure
can be minimized by venting with an open
window or using a ventilation fan or hood.
SAFETY PRE CA UTIONS
When using your appliance, follow basic safety
precautions, including the following:
• Have the installer show you the location of
the range gas cut-off valve and how to shut it
off if necessary.
• Be sure all packing materials are removed
from the range before operating it to prevent
fire or smoke damage should the packing
material ignite.
• After prolonged use of a range, high floor
temperatures may result and many floor
coverings will not withstand this kind of use.
Never install the range over vinyl tile or
linoleum that cannot withstand such use,
Never install it directly over interior kitchen
carpeting,
• Gas appliances can cause minor exposure to
four of these substances, namely benzene,
carbon monoxide, formaldehyde and soot,
caused primarily by the incomplete
combustion of natural gas or LP fuels.
Properly adjusled burners, indicated by a
bluish rather than a yellow flame, will
minimize incomplete combustion, Exposure
to these substances can be minimized by
venting with an (}pen window or using a
ventilation fan or hood,
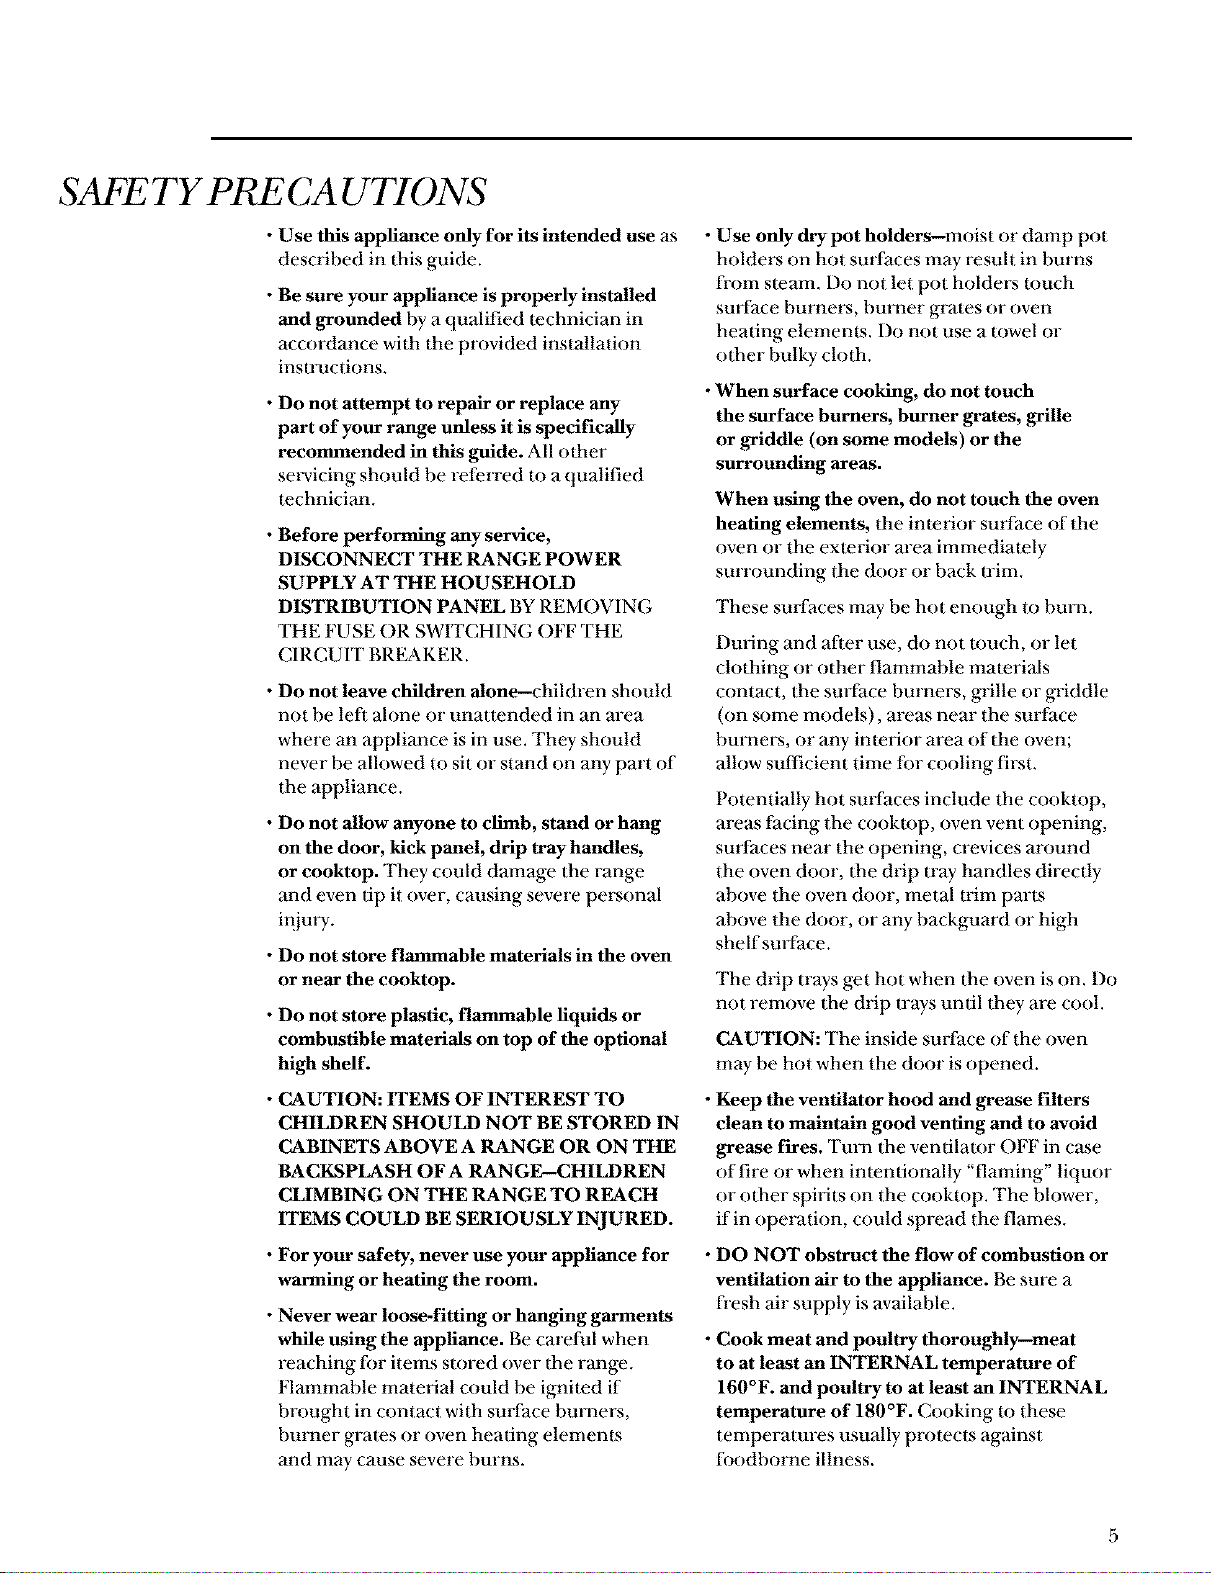
AWARNING--
All ranges can tip and injury
could result. To prevent
accidental tipping of the range,
attach it to the wall by installing
the Anti-Tip device supplied.
To check if the device is installed
and engaged properly, carefully
tip the range forward, The Anti-
Tip device should engage and
prevent the range from tipping
over.
If you pull the range out from the wall for
any reason, make sure the device is properly
engaged when you push the range back against
the wall.
• Locate the range out of kitchen traffic path
and out of drafty locations and areas with
poor air circulation.
• Be sure your range is correctly adjusted
by a qualified service technician or installer
for the type of gas (natural or LP) that is
to be used.
WARNING: These adjustments must be
made by a qualified service technician in
accordance with the manufacturer's
instructions and all codes and requirements
of the authority-having jurisdiction. Failure to
follow these instructions could result in
serious in.juU or properly damage. The
qualified agency performing this work
assumes responsibilily for the conversion.
If it is not, there is a possible risk of the range
tipping over and causing injmy if you or a child
stand, sit or lean on an open door.
Please refer to the Anti-Tip information in the
installation instructions.
Failure I{)take this precaution could result in
tipping of the range and injm T.
Page 5
SAFE TY PRE CA UTIONS
• Use this appliance only for its intended use as
described in this guide.
• Be sure your appliance is properly installed
and grounded by a qualified lechnician in
accordance with the provided installation
insu'uctions.
• Do not attempt to repair or replace any
part of your range unless it is specifically
recommended in this guide. All oflaer
selwicing should be referred to a qualified
technician.
• Before performing any service,
DISCONNECT THE RANGE POWER
SUPPLY AT THE HOUSEHOLD
DISTRIBUTION PANEL BY REMOVING
THE FUSE OR SWITCHING OFF THE
CIRCUIT BREAKER.
• Do not leave children alone--children should
not be left alone or unattended in an area
where an appliance is in use. They should
never be allowed to sit or stand on any part of
the appliance.
• Do not allow anyone to climb, stand or hang
on the door, kick panel, drip tray handles,
or cooktop. They could damage 1he range
and even tip it over, causing severe personal
injury.
• Do not store flammable materials in the oven
or near the cooktop.
• Do not store plastic, flammable liquids or
combustible materials on top of the optional
high shelf.
• CAUTION: ITEMS OF INTEREST TO
CHILDREN SHOULD NOT BE STORED IN
CABINETS ABOVE A RANGE OR ON THE
BACKSPLASH OF A RANGE--CHILDREN
CLIMBING ON THE RANGE TO REACH
ITEMS COULD BE SERIOUSLY INJURED.
• For your safety, never use your appliance for
warming or heating the room.
• Never wear loose-fitting or hanging garments
while using the appliance. Be careful when
reaching for items stored over Ihe range.
Flammable material could be ignited if
brought in contact with surface burners,
burner grates or oven heating elements
and may cause severe burns.
• Use only dry pot holders--moist or damp pot
holders on hot surfaces may result in burns
from sleam. Do not let pot holders touch
surface burners, bul_qer grates or oven
heating elements. Do not use a towel or
other bulky- cloth.
• When surface cooking, do not touch
the surface burners, burner grates, grille
or griddle (on some models) or the
surrounding areas.
When using the oven, do not touch the oven
heating elements, the interior surface of the
oven or the exterior area immediately-
surrounding the door or back trim.
These surfaces may be hot enough to burn.
During and after use, do not touch, or let
clothing or other flammable materials
contact, the surface burners, grille or griddle
(on some models), areas near the surface
burners, or any interior area of the oven;
allow sufficient time for cooling first,
Potentially hot surfaces include the cooktop,
areas facing the cooktop, oven vent opening,
surfaces near the opening, crevices around
the oven door, the drip tray handles directly
above the oven door, metal trim parts
above the door, or any backguard or high
shelf surface.
The drip trays get hot when flae oven is on. Do
not remove the drip trays until flaey are cool.
CAUTION: The inside surface of the oven
may- be hot when the door is opened.
• Keep the ventilator hood and grease filters
clean to maintain good venting and to avoid
grease fires. Turn flae ventilator OFF in c_se
of fire or when intentionally "flaming" liquor
or other spirits on the cooktop. The blower,
if in operation, could spread the flames.
• DO NOT obstruct the flow of combustion or
ventilation air to the appliance. Be sure a
fresh air supply is available.
• Cook meat and poultry thoroughly--meat
to at least an INTERNAL temperature of
160°F. and poultry to at least an INTERNAL
temperature of 180°F. Cooking to these
temperatures usually protects against
foodborne illness.
Page 6
IMPORTANT SAFETY INSTRUCTIONS
SAFE TY PRE CA UTIONS
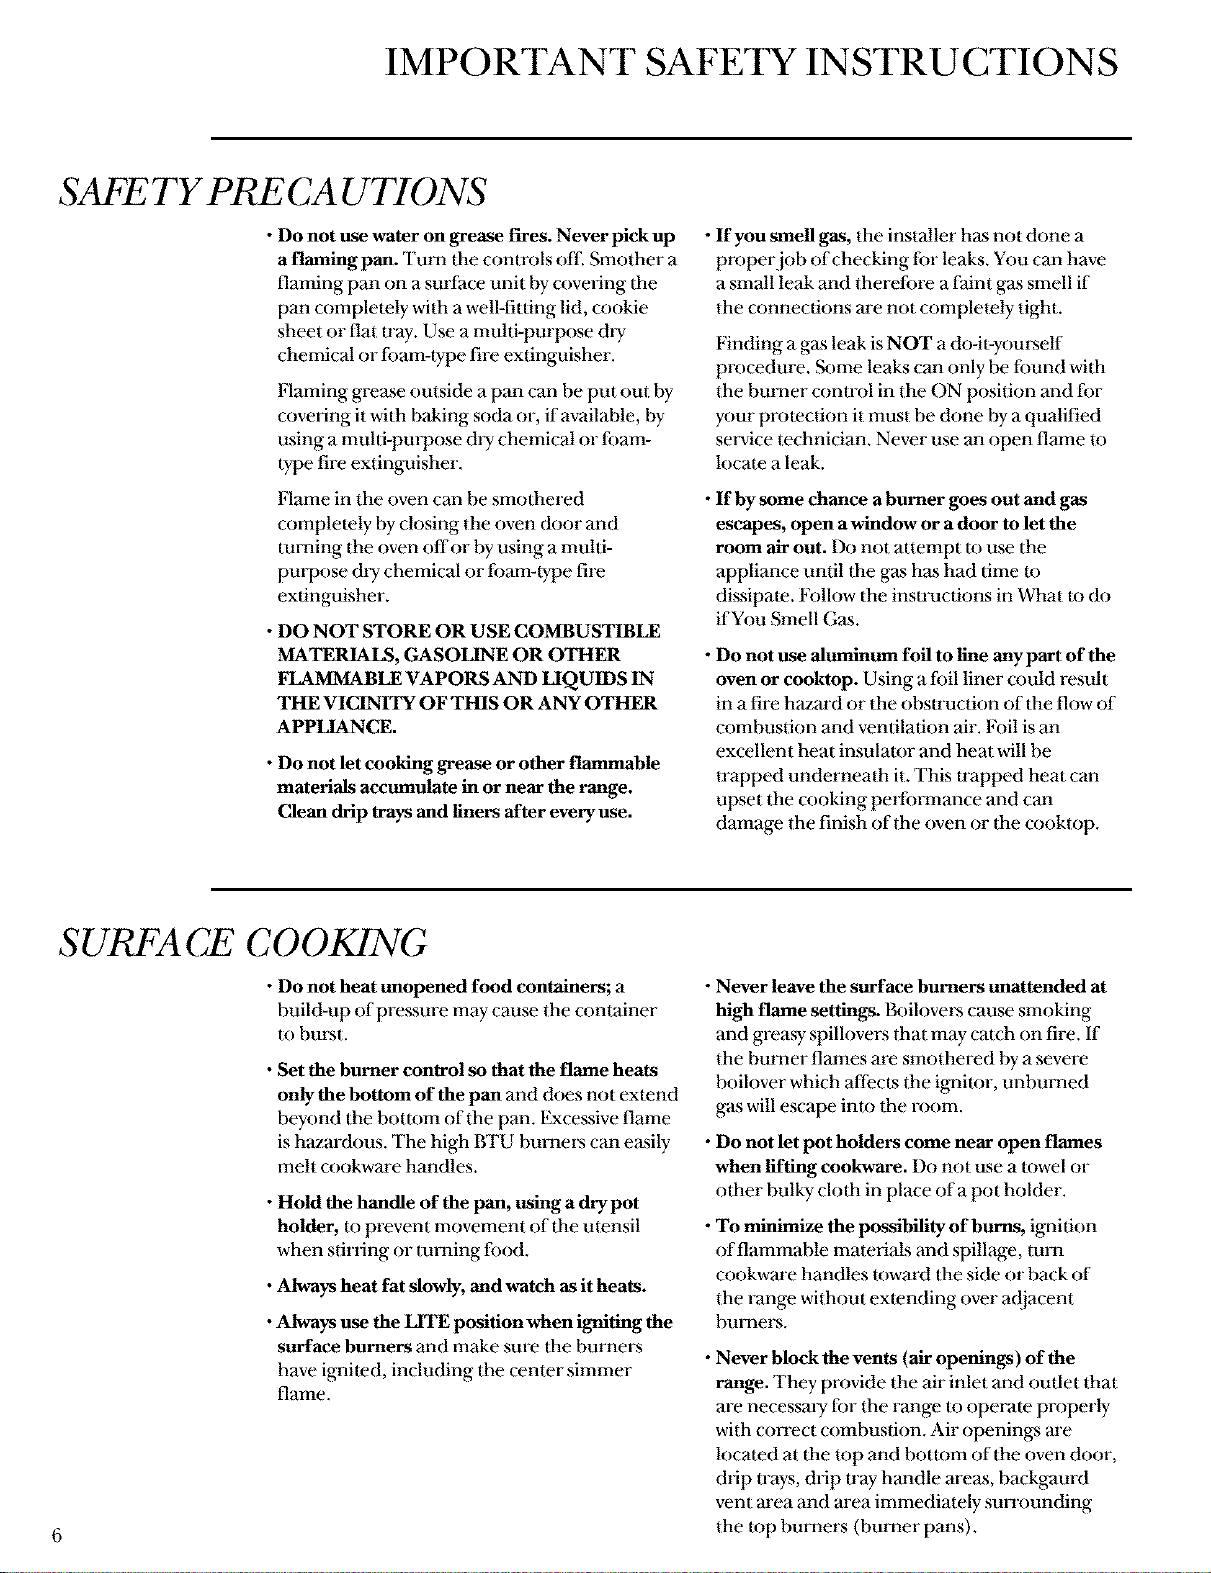
• Do not use water on grease fires. Never pick up
a flaming pan. Turn 1he controls off. Smother a
flaming pan on a surface unit by covering tim
pan completely with a well-fitting lid, cookie
sheet or flat u'ay. Use a multi-purpose dry
chemical or foam-type fire extinguisher.
Flaming grease outside a pan can be put out by
covering it with baking soda or, if available, by
using a multi-purpose &y chemical or foam-
type fire extinguisher,
Flame in the oven can be smothered
complemty by closing the oven door and
turning 1he oven offor hy using a multi-
purpose dry chemical or foam-type fire
extinguisher.
• DO NOT STORE OR USE COMBUSTIBLE
MATERIALS, GASOLINE OR OTHER
FLAMMABLE VAPORS AND LIQUIDS IN
THE VICINITY OF THIS OR ANY OTHER
APPLIANCE.
• Do not let cooking grease or other flammable
materials accumulate in or near the range.
Clean drip Ways and liners after every use.
• If you smell gas, the installer has not done a
proper job of checking for leaks. You can have
a small leak and therefore a faint gas smell if
the connections are not completely tight.
Finding a gas leak is NOT a do-il-youi,'self
procedure. &)me leaks can only be found wilh
the burner control in the ON position and for
your prolection it must be done by a qualified
scqwice technician. Never use an open flame to
locate a leak.
• If by some chance a burner goes out and gas
escapes, open a window or a door to let the
room air out. Do not attempt t{)use the
appliance until 1he gas has had time to
dissipale. Follow the insu_uctions in What to do
if You Smell Gas.
• Do not use aluminum foil to line any part of the
oven or cooktop. Using a foil liner could result
in a fire hazard or the obsu'uction of the flow of
combustion and ventilation air. Foil is an
excellent heat insulator and heat will be
trapped underneath it, This trapped heat can
upset the cooking performance and can
damage the finish of the oven or the cooktop,
SURFACE COOKING
• Do not heat unopened food containers; a
buil&up of pressure may- cause the container
to bm_t.
• Set the burner con_ol so that the flame heats
only the bottom of the pan and does not exlend
beyond the bot|om of flae pan, Excessive flame
is hazardous. The high BTU burneI,'s can easily
melt cookware handles.
• Hold the handle of the pan, using a dry pot
holder, to prevent movement of the mensil
when stirring or turning food.
• Always heat fat slowly, and watch as it heats.
•Always use the LITE position when igniting the
surface burners and make sure the burners
have ignited, including the center simmer
flame.
• Never leave the surface burners unattended at
high flame settings, l_)iloveI ,'scause smoking
and greasy- spillovers that may- catch on fire. If
the burner flames are smothered hy a severe
boilover which affects the ignitor, unburned
gas will escape into the room.
• Do not let pot holders come near open flames
when lifting cookware. Do not use a towel or
other bulky cloth in place of a pot holder.
• To minimize the possibility of bunts, ignition
of flammable materials and spillage, turn
cookware handles toward the side or back of
the Fange without extending over a{ljacent
burners.
• Never block the vents (air openings ) of the
range. They provide the air inlet and outlet that
are necessmy for the range 1{)operale properly
with correct combustion, Air openings are
located at the top and bouom of the oven door,
drip trays, drip u'ay handle areas, backgaurd
vent area and m'ea immediately surrounding
the top burners (burner pans),
Page 7
SURFACE COOKING
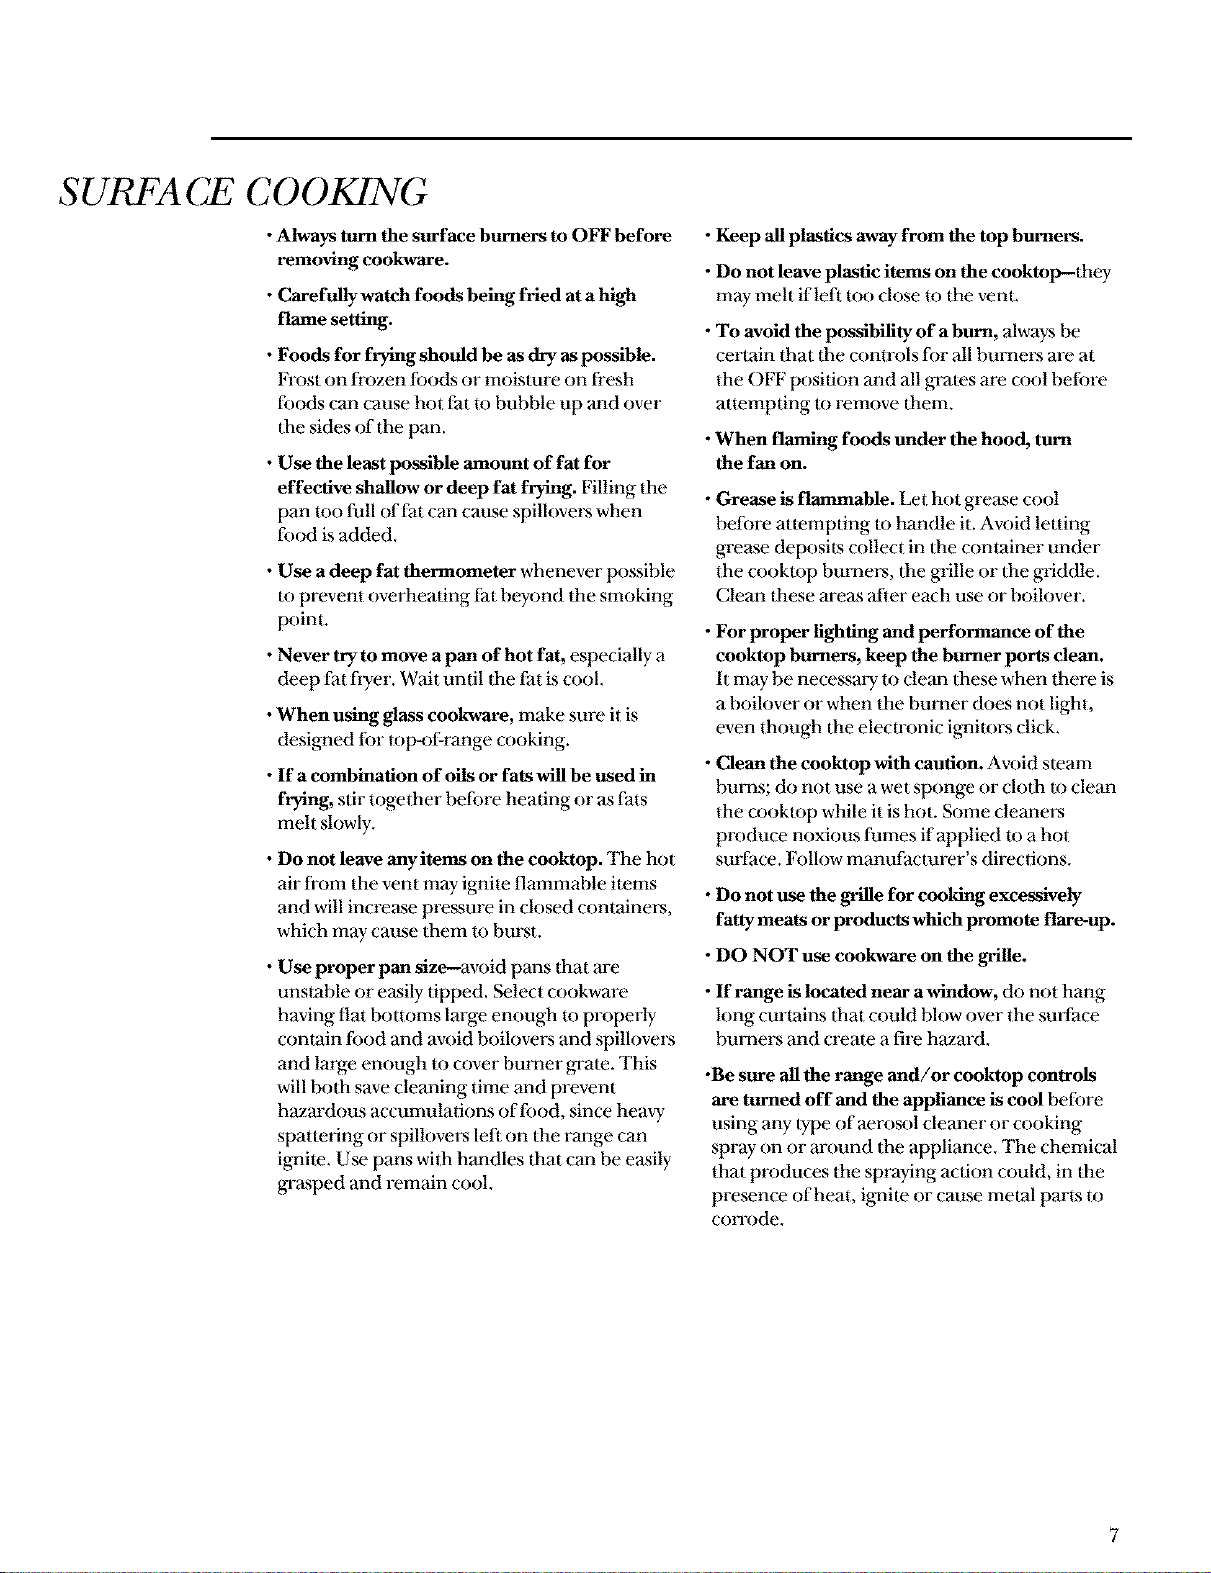
•Always turn the surface burners to OFF before
removing cookware.
• Carefunywatch foods being fried at a high
flame setting.
• Foods for frying should be as dry as possible.
Frost on frozen foods or moislure on fresh
foods can cause hot fat to bubble up and over
the sides of the pan.
• Use the least possible amount of fat for
effective shallow or deep fat frying. Filling the
pan too full of fat can cause spill(wens when
food is added.
• Use a deep fat thermometer whenever possible
to prevent overheating Pat beyond the smoking
point.
• Never try to move a pan of hot fat, especially a
deep fat flyer. Wait until the fat is cool.
•When using glass cookware, make sure it is
designed for top<if-range cooking.
• If a combination of oils or fats will be used in
frying, stir together before heating or msfats
melt slowly.
• Do not leave anyitems on the cooktop. The hot
air from the vent may ignite flammable items
and will increase pressure in closed containe_,
which may cause them to burst.
• Use proper pan size--avoid pans Ihat are
unstable or easily tipped. Select cookware
having flat bottoms large enough to properly
contain food and avoid boilovers and spilloveL's
and large enough to cover burner grate. This
will bolh save cleaning time and prevent
hazardous accumulations of food, since heavy
spattering or spillovers left on Ihe range can
ignite. Use pans with handles that can be easily
grasped and remain cool.
• Keep all plastics away from the top burners.
• Do not leave plastic items on the cooktoI>-they
may-melt if left to() close to the vent.
• To avoid the possibility of a burn, always be
cerlain that the controls for all burners" are at
the OFF position and all grales are cool before
attempting It remove them.
• When flaming foods under the hood, turn
the fan on.
• Grease is flammable. Let hot grease cool
before atlempting It handle it. Aw)id letting
grease deposiks collect in Ihe container under
the cooklop burne_, flae grille or Ihe griddle.
Clean these areas after each use or boilover.
• For proper fighting and performance of the
cooktop burners, keep the burner ports dean.
It may be necessm 7 to clean these when there is
a boilover or when the burner does not light,
even though flae electronic ignitors click.
• Clean the cooktop with cantion. Avoid sleam
bums; do not use a wet sponge or cloth u_ clean
the cooktop while it is hot. Some cleane_
produce noxious fumes if applied to a hot
surface. Follow manufacturer's directions.
• DOnot use the grille for cooking excessively
fatty meats or products which promote flare-up.
• DO NOT use cookware on the grille.
• If range is located near a window, do not hang
long curtains flaat could blow over the surface
burners and create a fire hazard.
•Be sure all the range and/or cooktop controls
are turned off and the appliance is cool beff)re
using any lype of aerosot cleaner or cooking
spray- on or around the appliance. The chemical
that produces the spraying action could, in Ihe
presence of heat, ignite or cause metal parts to
COITOde.
Page 8
OVEN
IMPORTANT SAFETY INSTRUCTIONS
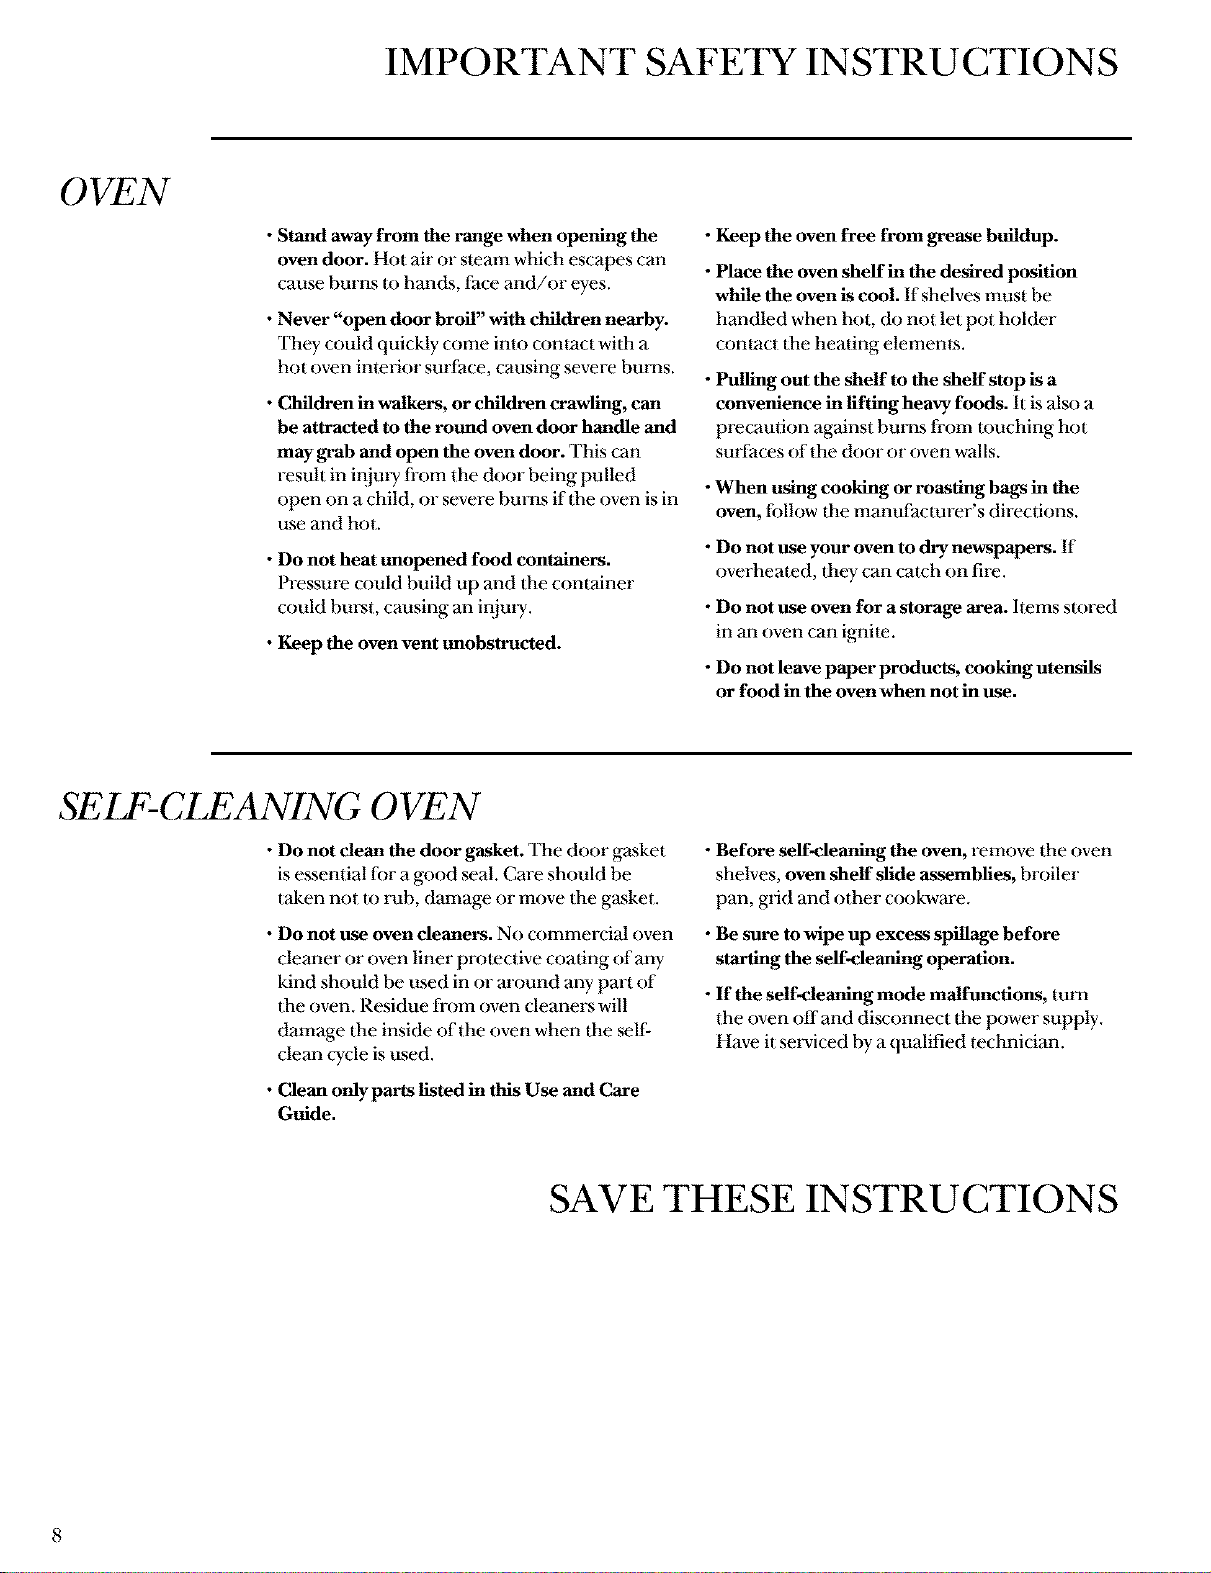
• Stand away from the range when opening the
oven door. Hot air or steam which escapes can
cause burns to hands, face and/or eyes.
• Never "open door broil" with children nearby.
They could quickly come into con_ct with a
hot oven interior surface, causing severe burns.
• Children in walkers, or children crawling, can
be attracted to the round oven door handle and
may grab and open the oven door. This can
result in injmy from the door being pulled
open on a child, or severe burns if the oven is in
use and hot.
• Do not heat unopened food containers.
Pressure could build up and the container
could burst, causing an injmy.
• Keep the oven vent unobstructed.
SEI -CI ANING OVEN
• Keep the oven free from grease buildup.
• Place the oven shelf in the desired position
while the oven is cool. If shelves must be
handled when hot, do not let pot holder
contact the heating elements.
• Pulling out the shelf to the shelf stop is a
convenience in lifting heavy foods. It is also a
precaution against bums from 1ouching hot
surfaces of the door or oven walls.
• When using cooking or roasting bags in the
oven, follow the manufacturer's directions.
• Do not use your oven to dry newspapers. If
overheated, they can catch on fire.
• Do not use oven for a storage area. Items su)red
in an oven can ignite.
• Do not leave paper products, cooking utensils
or food in the oven when not in use.
• Do not clean the door gasket. The door gasket
is essential for a good seal. Care should be
taken not to rub, damage or move the gasket.
• Do not use oven cleaners. No commercial oven
cleaner or oven liner prolective coating of any
kind should be used in or around any part of
the oven. Residue from oven cleaners will
damage the inside of the oven when the _lf-
clean cycle is used.
• Clean only parts listed in this Use and Care
Guide.
SAVE THESE INSTRUCTIONS
• Before self-cleaning the oven, remove the oven
shelves, oven shelf slide assemblies, broiler
pan, grid and other cookware.
• Be sure to wipe up excess spillage before
starting the self-cleaning operation.
• If the self-cleaning mode malfunctions, turn
the _wen offand disconnect the power supply.
Have it serviced by a qualified technician.
Page 9
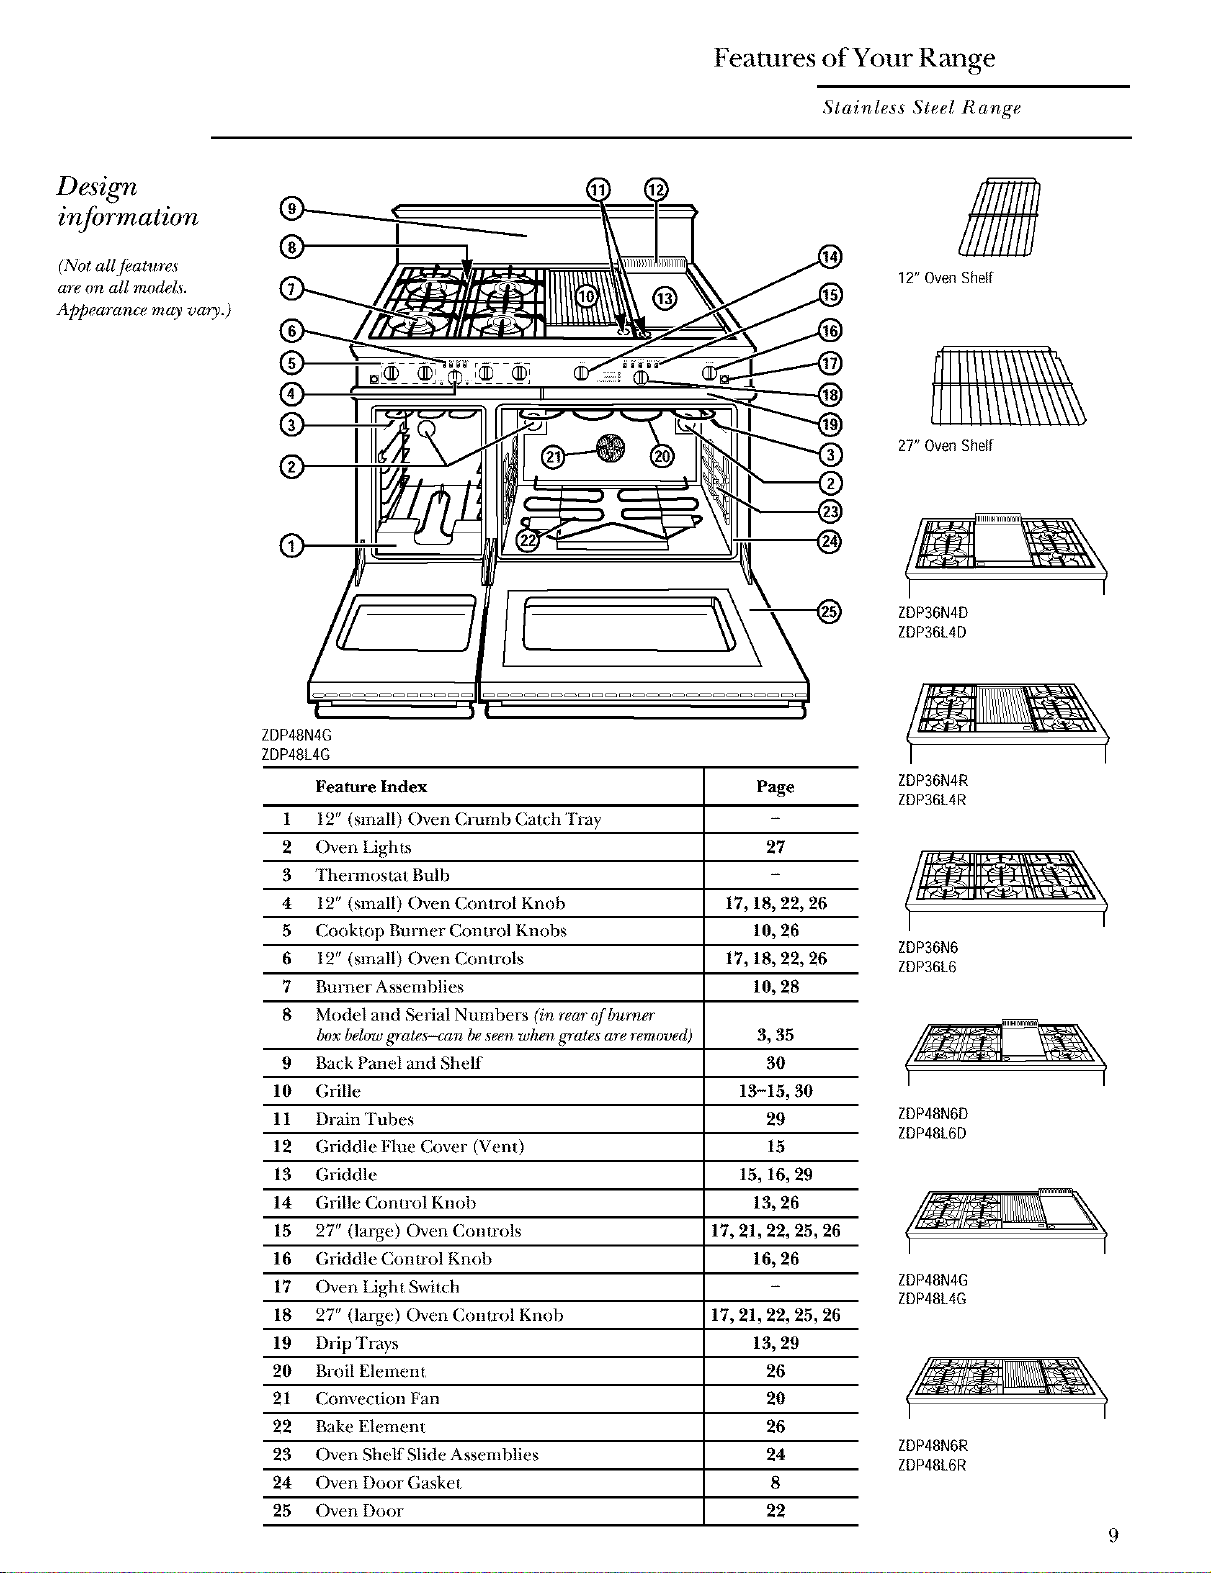
information
(Not alljkatures
are on all models.
Appearance may vary.)
Features of Your Range
Stainless Steel Range
@
12" OvenShelf
®
®
® @
ZDP48N4G
ZDP48L4G
Feature Index Page
1 12" (small) Oven Crumb Catch 'Fray
2 Oven Lighls 27
3 ThermosI:_t Bulb
4 12" (small) Oven Comrol Knob 17, 18, 22, 26
5 Cookmp Burner Control Knobs 10, 26
6 12" (small) Oven Comrols 17, 18, 22, 26
7 Burner Assemblies 10, 28
8 Model and Serial Numbers (in rear (fbur_wr
box below grates-can be seo_when grates are r_oved) 3, 35
9 Back Panel and Shelf 30
10 Grille 13-15, 30
11 Drain Tubes 29
12 (;riddle Flue Cover (Vent) 15
13 (;riddle 15, 16, 29
14 Grille Control Knob 13, 26
15 27" (laNe) Oven Comrols 17, 21, 22, 25, 26
16 (;riddle Comrol Knob 16, 26
17 Oven Light Swiuh
18 27" (lm-ge) Oven Comrol Knob 17, 21, 22, 25, 26
19 Drip Trays 13, 29
20 Broil Element 26
21 Convection Fan 20
22 Bake Element 26
23 Oven Shelf Slide Assemblies 24
24 Oven DoorGasket 8
25 Oven Door 22
IIIIIIIIl\\\\\\\\
27" Oven Shelf
ZDP36N4D
ZDP36L4D
ZDP36N4R
ZDP36L4R
ZDP36N6
ZDP36L6
ZDP48N6D
ZDP48L6D
ZDP48N4G
ZDP48L4G
ZDP48N6R
ZDP48L6R
Page 10
Surface Cooking
Stainless Steel Range
Control
knobs
The con_ol knobs are in front of the burner,
grille or gaiddle they control. The oven and
griddle controls are placed slightly lower than the
surface burner con_ol knobs.
The surface burners have an infinite number of
heat setting,'s as there are no fixed positions
between HI and 11),
To turn ON a surface burner, push the control in,
then mrn it counterclockwise to the LITE
position.
Check to be sure the burner you turned on is the
one you want to use.
You will hear dae ignitor click. When the gas is
ignited all around the burner and into the central
simmer burner below the simmer cap, turn the
knob back to the desired setting.
When using the simmer burner always ensure
that it lights from the main burner.
Push the control inand turn it counterclockwise
to the LITEposition•
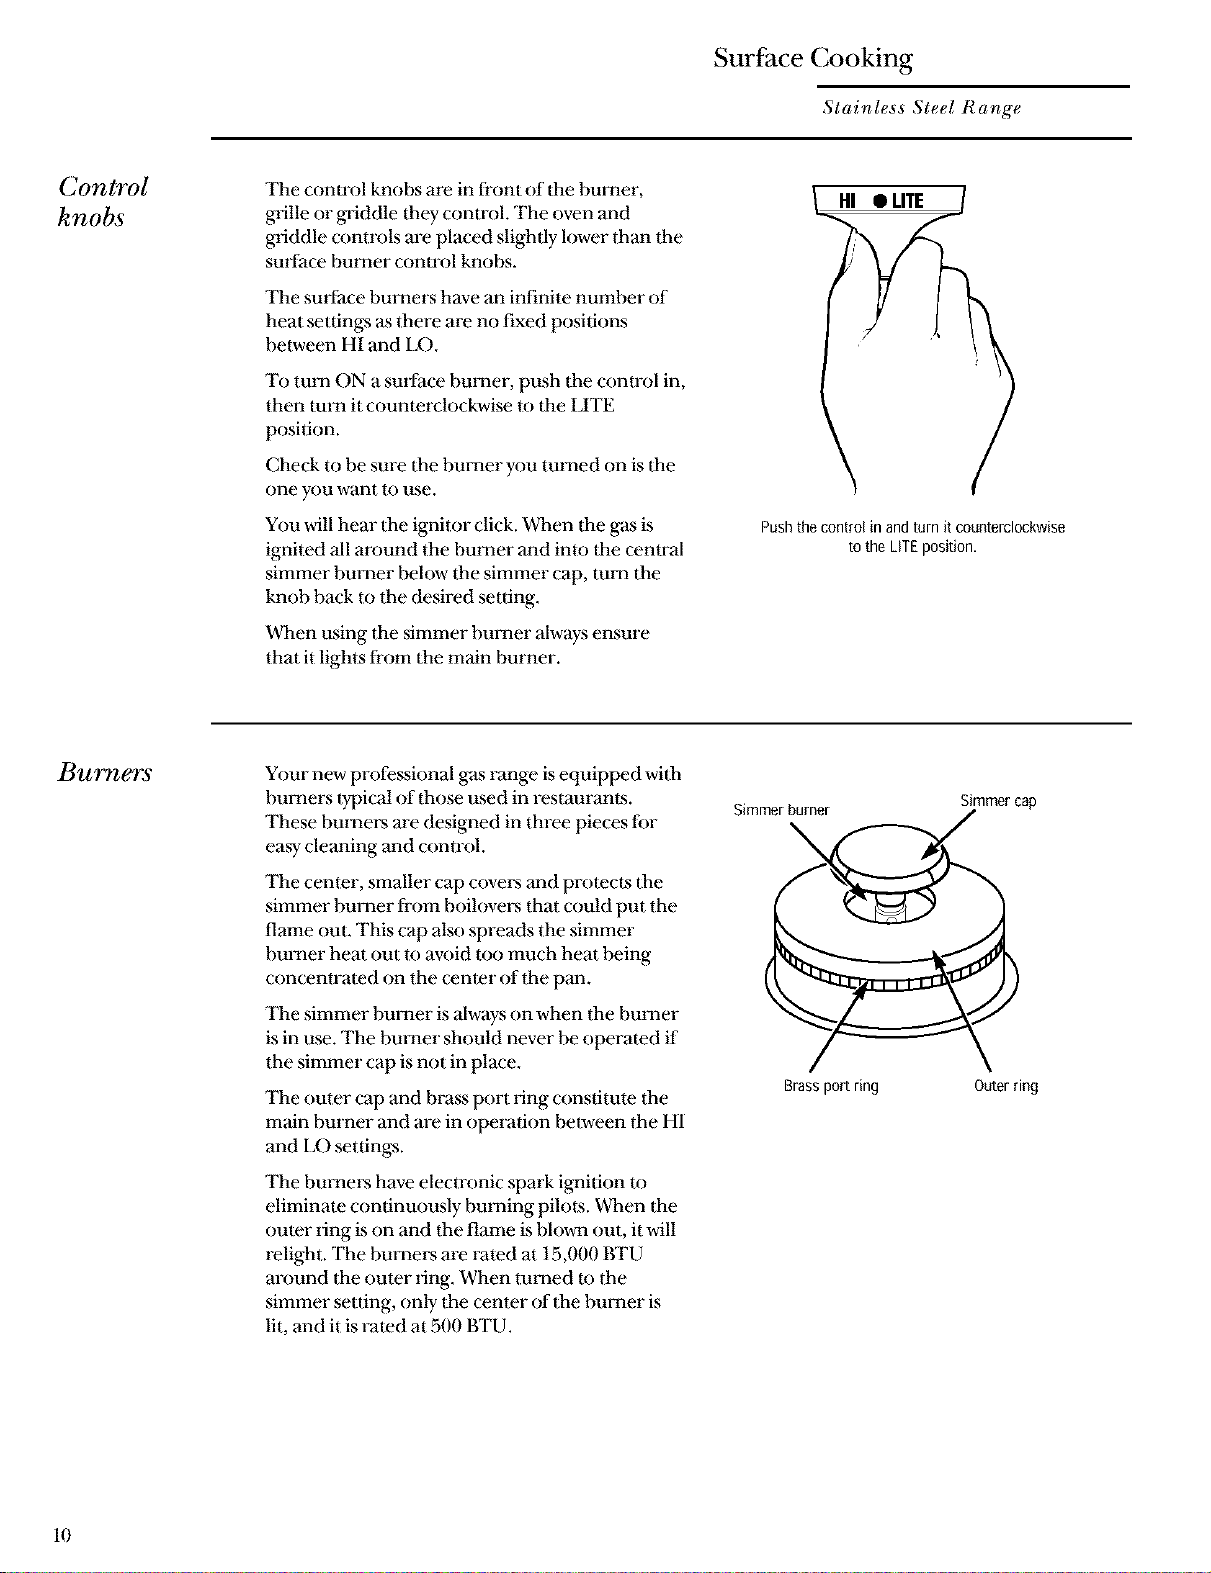
Burners
Your new professional gas range is equipped with
burners typical of those used in restaurants.
These burners are designed in three pieces for
easy-cleaning and control.
The center, smaller cap coveL'sand protects the
simmer burner from boilove_ that could put the
flame out. This cap also spreads the simmer
burner heat out to avoid too much heat being
concentrated on the center of the pan.
The simmer burner is always on when the burner
is in use. The burner should never be operated if
the simmer cap is not in place.
The outer cap and brass port ring constitute the
main burner and are in operation between the HI
and LO setting.'s.
The burnel_ have electronic spark ignition to
eliminate continuously burning pilots. When the
truer ring is on and the flame is blown out, it will
relight. The burners are rated at 15,000 BTU
around the outer ring. When turned to the
simmer setting, only the center of the burner is
lit, and it is Fated at 500 BTU.
Simmer burner
Brassport ring
Simmer cap
Outer ring
10
Page 11
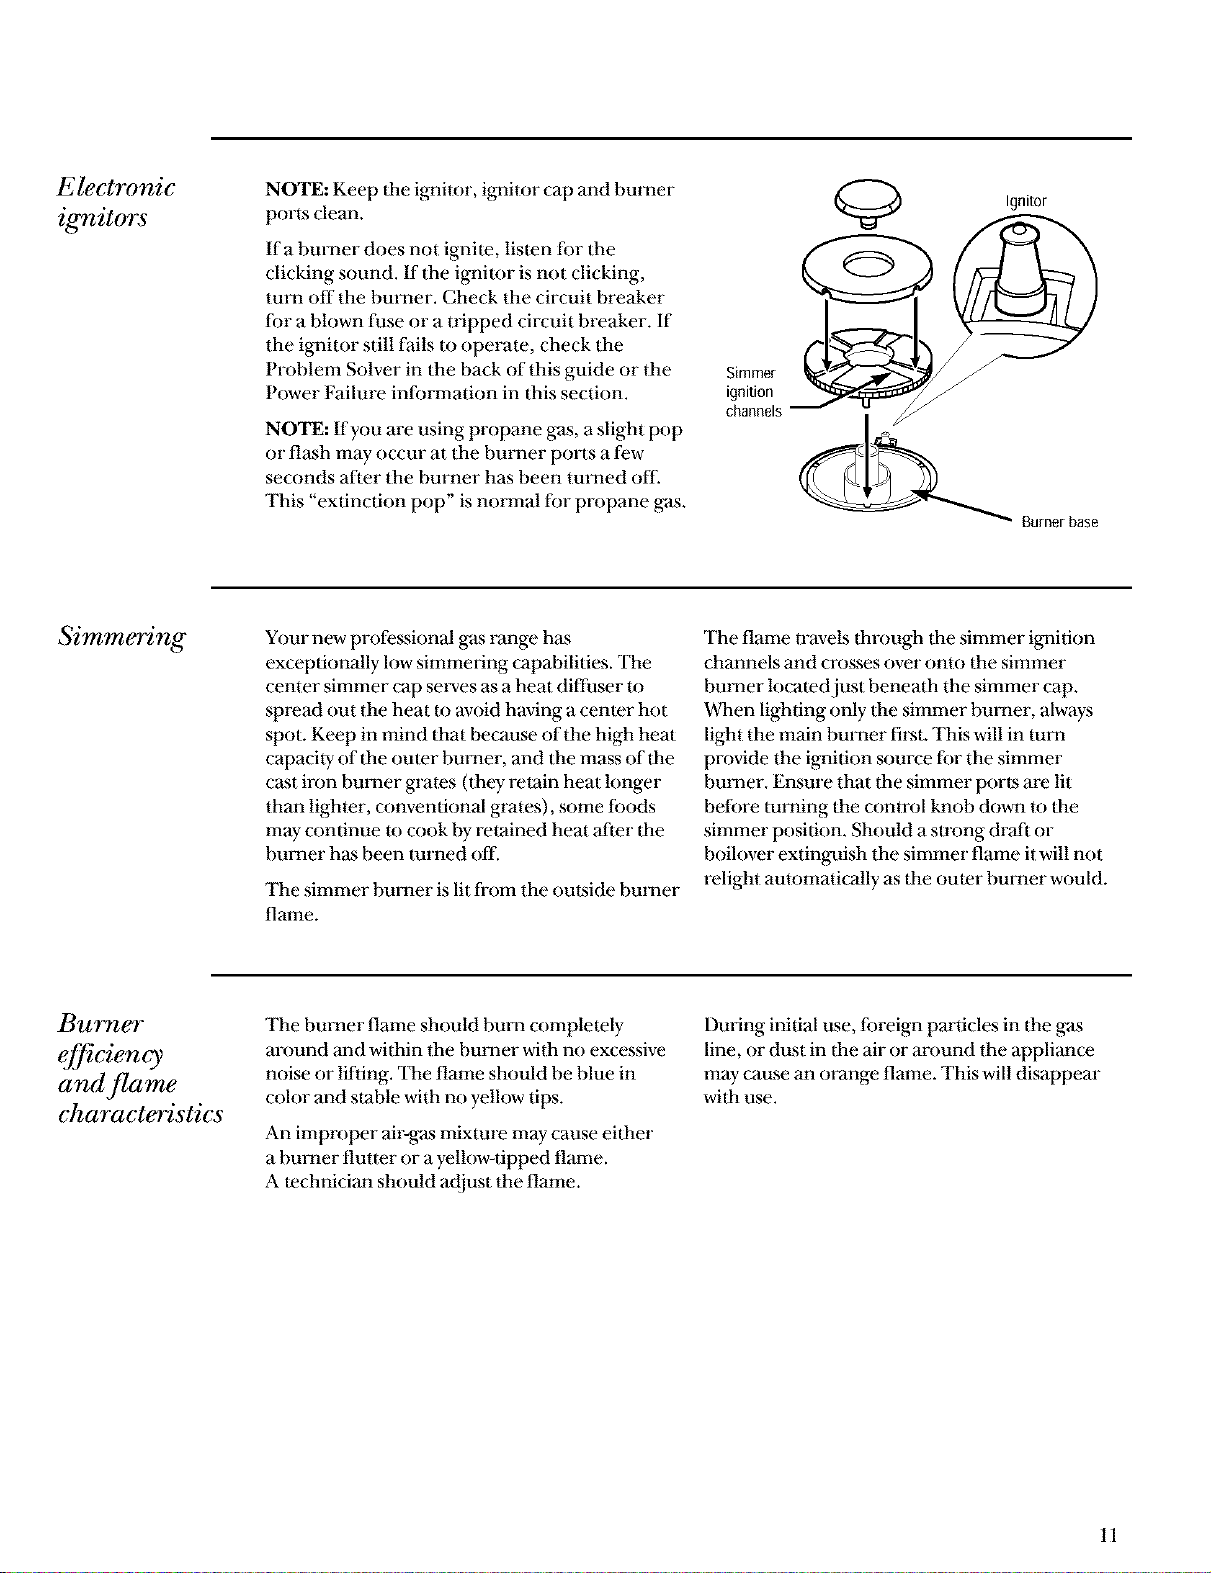
Electronic
ignitors
NOTE: Keep the ignitor, ignitor cap and burner
ports clean.
If a burner does not ignite, listen for Ihe
clicking sound. If flae ignitor is not clicking,
turn off the bm'ner. Check the circuit breaker
for a blown fuse or a tripped circuit breaker. If
the ignitor still fails to operate, check the
Problem Solver in dae back of this guide or the
Power Failure information in tiffs section.
NOTE: If you are using propane gas, a slight pop
or flash may occur at the burner ports a few
seconds after the burner has been turned off.
This "extinction pop" is normal for propane gas.
Simmer [__
i2 1&
Q
Ignitor
Burner base
Simmering
Burner
efficiency
and flame
characteristics
Your new professional gas range has
exceptionally low simmering capabilities. The
center simmer cap serves as a heat diffuser to
spread out the heat to avoid having a cemer hot
spot. Keep in mind flaat because of the high heat
capacity of the ouler burner, and Ilae mass of the
cast iron burner grates (they retain heat longer
than lighter, conventional grates), some foods
may-continue m cook by retained heat after the
burner has been turned off.
The simmer burner is lit from the outside burner
flame,
The burner flame should burn completely
around and wilhin the burner with no excessive
noise or lifting. Inne flame should be blue in
color and stable with no yellow tips.
An improper air-gas mixture may cause either
a burner flutter or a yellow-tipped flame.
A technician should adjust the flame.
The flame travels fl,rough Ille simmer ignition
channels and crosses over onto the simmer
burner localedjust beneath the simmer cap.
When lighting only Ille simmer burner, always
light the main bul-ner fiE'st. This will in mrn
provide the ignition source for the simmer
burner. Ensure that dae simmer ports are lit
before mining Ihe control knob down to Ihe
simmer position. Should a slrong draft or
boilover extingafish the simmer flame it will not
relight automatically as the outer burner would.
During initial use, foreign particles in flae gas
line, or dust in flae air or around the appliance
may cause an oFange flame. This will disappear
with use.
11
Page 12

Surface Cooking
Stainless Steel Range
Flame
height
The correct height of the flame mainly depends
on the size of the bottom of the cooking utensil,
the material of the cooking ulensil, the amount
and type of food and the amount of liquid in
the utensil.
For safe handling of cookware, never let the
flame extend up the sides of the cookware. Any
flame larger than the bottom of the cookware is
wasted heat and only serves to heat the handle.
Watch the flame, not the knob, as you reduce
heat.
•For safely- reasons the flame must never extend
beyond the bottom of lhe cooking utensil.
Never allow flames to curl up the side of the
pan.
•Be velT careful if the pans have plastic handles,
as these large professional-size burners can
flame up on the outside of the pan and melt or
bubble the handles.
•Ulensils which conduct heat slowly (such as
glass-ceramic) should be used with medium to
low flames. If you are cooking with a large
amount of liquid a slightly- larger flame can
be used.
Incorrect Correct
_f
._1
Note:The flame size on agas burner should match the
eookware you are using.
The electric ignition lhat lights the surface
burners will not operate during a power
failure.
To light the surface burners during a power
failure, turn the control knob ff)r the burner
you want to light to I JTE while holding a
lighted match to the outer ring. After the
flame is burning all the way around the burner,
adjust the flame.
It is necessm T to light each burner separately-
each time you want to use it during a power
failure.
The grille or griddle (on some models),
or oven sections can not be used during a
power failure.
12
Page 13

CookwaTe
Do not operate a burner for an extended
period of time without cookware on the grate.
The finish on the grate may chip without
cookware to absorb the heat.
Glass: There are two 1ypes of glass cookware--
those for oven use only and those for surface
cooking (saucepans, coffee and teapots). Glass
conducts heat veIy slowly.
Using the
grille
(on some models)
Aluminum: Medium-weight cookware is
recommended because it heats quickly and
evenly. Most foods brown evenly in an
aluminum skillet. Use saucepans wilh tight-
fitting lids for cooking with minimum amounts
of water.
Cast Iron: If heated slowly, most skillets will
give satisfactoIy results.
Enamelware: Under some conditions, the
enamel of some cookware may- melt. Follow
cookware manufacturer's recommendations
for cooking methods.
Beff)re starting m cook on flae grille, be sure the
drip tray and liners are in place and that you
have the grille racks tin-ned to the side you want
for cooking.
Heatproof Glass-Ceramic: Can be used ff)r
either surface or oven cooking. It conducts
heat vel T slowly- and cools vel T slowly-. Check
cookware manufacturer's directions to be sure
it can be used on gas cooktops.
Stainless Steel: This metal alone has poor
heating properties, and is usually- combined
with copper, aluminum or other metals for
improved heat distribution. Combination
metal skillets generally work satisfactorily if
flaey are used at medium heat as the
manufactm'er recommends.
Wok: A large, professional-sized wok and
wok ring, specially designed for use on this
range, is available fi'om your dealer. Ask for
model ZXWK22Y.
Preheat dae grille ff)r 15 minutes wida dae
control knob set on HI. When the grille is
preheated, place the food on the grille. Cook it
to the desired doneness.
NOTE: The longer you preheat the grille, the
darker flae grille marks will be on your ff)od.
During cooking it may-be necessmy to adjust the
heat setting. The control knob may-be set to any
position between HI and LO.
For proper searing and browning the grille
requires high heat.
Wida large pieces of meat or pouln T you will
need to turn the heat to a lower heat setting
after dae food has been seared. This lower heat
setting will allow the food to cook through
without burning the outside.
Marinades and barbecue sauce should be added
toward dae end of cooking time. The heat
should be turned to low when sauces are added.
Do not leave the grille unattended while it is on.
When you are finished cooking allow flae grille
and the drip trays to cool before cleaning them.
They should be cleaned each time they are used.
1
\
13
Page 14

Surface Cooking
Stainless Steel Range
Excessive
grille flare-
ups and
flaming
Grille rack
Occasionally- grease drippings ignite, These
drippings will create minor puffs of flame for a
second or two, This is normal when cooking on
a barbecue, You may find it handy 1o have a
spray- bottle filled with water to lightly- spray the
flare-up.
If the flame becomes excessive, remove the
food from the grille, l,ower the heat setting,
Replace the food when the flare-up subsides,
The two-piece rack is reversible. Place the side
with the two grooved tabs toward the back of dae
cooktop. The grille rack is made of cast iron and
has a black porcelain finish.
One side of the grille (side A) is ridged and
should be used for foods where you want the fat
to run off, such as steak or hamburger patties.
The ridges are sloped so the fat runs toward dae
front of the grille and can easily- run down to flae
cooler area of the drip tray and away from the
intense heat of the burner.
The other side of the grille (side B) was
designed for foods that need more support
while cooking, such ;us fish.
To prevent flare-ups from happening, 1rim the
fat from around the edges of steaks and chops,
use hamburger that is lean, remove the fat
from poultry, etc.
When turning any kind of meat or pouluT, the
melting fat will drop onto the briquettes and it
may create a flare-up. If dais happens, use a
long-handled spatula to move the food to
another area.
DIID
1111
1111
Food cooked on this grille achieves the same
flavor as food cooked on an outdoor grille. The
imense radiant heat from dae ceramic
briquettes caramelizes the fats and,juices that
are brought to the surface of the food, giving it
the barbecued flavor.
This gas grille may cook slightly faster than you
are used to.
SideA SideB
14
Page 15

Grilling
hints
•When turning the meat over, always use a
spatula as it will not puncture the meat
allowing the juices to run out. This will help to
keep Ihe meat,juicy. Turn the meat only once,
asjuices are lost when the meat is repeatedly
turned. Season or salt the meat after it has
been cooked; these procedures have a
tendency to dlT the meat out.
•Be sure to trim any excess fat from meat or
poulti T. To prevent sleaks or chops from
curling while lhey are being cooked, slit lhe
fat around lhe edges at about 2-inch intervals.
To lest for aloneness, make a small cut in the
center of the meat.
•The doneness of meat is affected by Ihe
thickness of Ihe cut. It is impossible to cook a
thin piece of meat to arare doneness. A steak
should be at least 1-inch thick to have it turn
out rare and juicy. The cooking time is
affected by the lemperature of the meat when
you start I() cook it, the size and shape of Ihe
cut and the kind of meat you are cooking. The
degree of doneness desired also affects the
time.
•The U. S. Department of Agriculture says,
"Rare beef is popular, but you should know
that cooking it Io only 140°F. means some
food poisoning organisms may- survive."
(Source: Safe Food Book. Your Kitchen
Guide. USDA Rev.June 1985.)
Before
using the
(l(He
(on some models)
The buih-in griddle is made from Type 304
stainless steel, highly polished to provide a
smoolh cooking surface. It is normal for it to
darken with use as oils cook omo Ihe SUlTace to
provide a stick-resistant base or "seasoning."
Since lhe griddle is made from stainless steel
the surface will not rust.
The griddle is thermostatically comrolled and
cycles on and off to maintain the set lemperamre.
The "HEATING" light indicates that the burner
is on.
The griddle assembly is not to be removed for
cleaning and is held in place by three rear screws.
These screws keep flae griddle from shifting in
transit, and are also used for positioning to avoid
breaking ignition components.
Once the unit is in position, the rear center
shipping screw can be removed. It is located
benealh lhe griddle flue cover. Remove the flue
cover by lifting it straight up. Be careful not Io
scratch the backguard during removal of the
flue cover.
The two outer screws are leveling screws. Do not
remove these two screws. They can be turned to
level flae griddle or Io provide a forward slope to
help grease and oils to drain away from Ihe food
being cooked. After using the griddle a few
times you will be able to judge the slope best for
the foods you are cooking and your personal
preference.
Removethe center shipping
screw, Leavethe two outer
leveling screws in place.
Griddleflue cover
When replacing the griddle flue cover ensure
that the cover slips to the outside of lhe front
and back metal flanges of the fixed griddle
assembly-. This will ensure a tight fit of the flue
cover.
15
Page 16

Surface Cooking
Stainless Steel Range
Seasoning
the griddle
Before using the griddle for the first time it
must be seasoned.
If the griddle has not been used for a period of
time, it should be reseasoned.
To season the griddle:
1 Clean the griddle thoroughly wida hot, soapy
water to remove any protective coating.
2 Rinse with a mixture of 1 quart water and 1
cup white vinegar. DI T thoroughly.
3 Pour 1 teaspoon vegetable oil into Ihe center
of the griddle. Do not use corn oil as it gets
sticky-. Rub the oil over the entire surface of
the griddle using a heavy cloth.
Beff)re starting Io cook on dae griddle, be sure
the drip tray and liners are in place. Select the
cooking temperature and preheat for 15
minutes. When the griddle is preheated, the
HEATING light will turn off, Place the food on
the griddle and cook to the desired doneness.
4 Turn the control knob to a medium setting
(350°F.). Turn the heat offwhen the oil
begins to smoke. Allow the griddle to cool.
5 Repeat step 3. Be sure to cover the entire
surface with the oil.
6 Repeat step 4, Allow the griddle to cool.
Wipe the entire surface of the griddle
using a heavy cloth, Apply a velT Ihin layer of
vegetable oil. The griddle is now ready to use.
NOTE: When the griddle is properly seasoned
it can be used widaout any additional
shortening. However, shortening can be used
for flavor.
16
Page 17

To avoid possible burns, place the shelves in the
correct position before you turn the oven on.
The correct shelf position depends on the kind
of food and the browning desired.
The shelves have stop-locks, so 1hat when placed
correctly on the supporls, 1hey will stop before
coming completely out, and will not tilt. When
placing and removing cookware, pull 1he shelf
out to 1he bump on the shelf support.
To remove a shelf, pull it toward you, tilt the
fi'ont end up and pull it out.
Using the Ovens
Stainless Steel Range
How to set
the ovensJbr
baking or
roasting
To replace, place the end of the shelf (stop-
locks) on the support, tilt up the fi'ont and push
the shelf in.
OFF BAKE BROIL PROOF
8e88
OVEN
,4R%
OVEN ON Q/ II II *_ HEATING
© _ ©
12" oven control
(48"ranges only)
1 Push in the BAKE selector button on the side of
the conu'ol panel above the oven you wish to use.
2 Using the thermostat dial, set the desired
temperature.
•The OVEN ON light turns on and remains on
until 1he OFF selector button has been pushed
or the thermostat dial has been turned to the
OFF position,
•The HEATING light tm-ns on. Once the
HEATING light initially cycles off, the oven is
preheated,
3 Check the food ff)r doneness at the minimum
time on the recipe. Cook longer if necessary.
4 Push in the OFF selector button on the side of
the control panel above the oven you are
using when baking is finished.
OVEN ON O
HEATING O
DOOR LOCKED O
When roasting use the A or B shelf position.
The oven has 3 shelf positions.
OFF BAKE BAKE BROIL CLEAN
GONV.
8e808
OVEN
©
27" oven control
©
®
®
NOTE: When roasting, check the weight of the
meat, Place the meat fat side up, or for poultry,
breast side up, on the roasting grid in a shallow
pan, The melting fat will baste the meat. Select a
pan as close to the size oflhe meat as possible.
(The broiler pan with grid is a good pan for this,)
17
Page 18

Using the Ovens
Stainless Steel Range
How to set
the 12"
oven for
proofing
(48" ranges only)
The proofing feature maintains a warm,
non-drafiy environment useful for proofing
yeast-leavened products.
1 Place the dough in a dish in the small oven.
2 Push in the PROOF selector button on the
left hand side of the control panel above the
thermostat dial.
•The OVEN ON light and oven interior light
turn on.
•The HEATING light will not turn on.
•The thermostat dial does not affect the proof
temperature.
3 Set a minute timer for the minimum proof
time. When proofing is finished, push the
OFF selector button.
•To avoid lowering the oven temperature and
lengthening proofing time, do not ()pen the
oven door unnecessarily.
Proofing time may be decreased when you use
the large oven at the same time you are
proofing.
OFF BAKE BROIL PROOF
0@0o
OVER
OVEN ON QQ H H ) HEATING
© _ ©
12" oven control
Check bread products early to avoid over-
proofing.
For optimum results, if you are using the
large oven ff)r extended periods of time, it is
recommended that you complete the proofing
before turning the large oven on.
NOTE: Do not use the proofing mode for
wanning food or keeping ff)od hot. The proofing
oven temperature is not hot enough to hold
foods at safe temperatures (above 140°F.).
18
Page 19

Baking
pans/sheets
Use the proper baking pan. The 1ype of finish
on the pan delermines the amount of browning
that will occur.
•Dark, rough or dull pans absorb heat resulting
in a browner, crisper crust. Use this type
for pies.
•Shiny, bright and smooth pans reflect heat,
resulting in a lighter, more delicate browning.
Cakes and cookies require this type of pan
or sheet.
•Glass baking dishes also absorb heat. When
baking in glass baking dishes, dae temperature
may-need to be reduced by 25°F.
Pan
placement
For even cooking and proper browning, there
must be enough room for air circulation in the
oven. Baking results will be be tter if baking
pans are centered as much as possible rather
than being placed to the fi'ont or to the back of
the oven.
Pans should not touch each olher or the walls
of the oven. Allow 1- to 1%-inch space between
pans as well as from the back of the oven, the
door and the sides.
Preheating Preheat flae oven if 1he recipe calls for it. To
preheat, set d,e oven at the correct
temperature--selecting a higher temperature
does not shorten preheat time.
Aluminum
foil
Never entirely cover a shelf with aluminum foil.
This will disturb the heat circulation and result
in poor baking. A smaller sheet of foil may be
used to catch a spillover by placing it on a lower
shelf several inches below the food.
If you need I{)use two shelves, stagger flae pans
so one is not directly above the other. Check
1he food on 1he bouom shelf sooner Ihan the
minimum time. The food on the lower shelf
may cook slightly faster than the food on the
upper shelf.
Preheating is necessm T for good results when
baking cakes, cookies, pasu T and breads.
19
Page 20

Using the Ovens
Stainless Steel Range
What is
convection
cooking?
In a eonveetion oven, a fan circulates the heated
air evenly-, over and around the food. This
circulating hot air is evenly disMbuted
throughout the oven cavity. As a result, foods
are evenly- cooked and browned-<)flen in less
time with convection heat. Preheating is not
necessary wida foods having a bake time of over
15 minutes.
•Food is heated faster in a convection oven.
When using the convection feature, many
types of food can be cooked at lower
temperatures than those suggested for
regular ovens.
•Good for large quantities of baked foods.
•Good resuhs with cookies, biscuits, brownies,
cream puffs, sweet rolls, angel food cake and
bread.
•Ideal for baked foods cooked on two or three
shelves. Because heated air is circulated evenly
throughout the oven, foods can be baked with
excellent results on t_o or three shelves at a
time. Muhi-shelf baking may increase cook
times slightly for some foods but the overall
result is time saved. Multi-shelf baking
provides very good results with cookies,
biscuiLs and other quickbreads.
•Recipe books oflen give times and
temperatures for cooking in regular ovens.
Convection ovens make it possible to reduce
the temperature by 25°F.
•Check foods for doneness at the minimum
suggested cooking time.
•Some package insu'uctions for frozen
casseroles or main dishes have been developed
using commercial convection ovens. For best
results in this oven, preheat the oven and use
the temperature on the package.
2O
Page 21

How to set
the 2 7"
oven foT
convection
baking
1 Push in the CONV. BAKE selector button on
the right hand side of the control panel above
the thermostat dial (close to the center on 36"
ranges).
2 Using the thermostat dial, set the desired
temperature.
•The OVEN ON light turns on and remains on
until 1he OFF selector butlon has been pushed
or the thermostat dial has been turned to the
OFF position.
•The HEATING light turns on. Once 1he
HEATING light initially cycles off, the oven
is preheated.
3 Check the food ff)r doneness at the minimum
time on the recipe. Cook longer if necessary.
4 Push in the OFF selector button on 1he right
hand side of the con_ol panel above the
thermostat dial when convection baking
is finished.
OVEN ON O
HEA'nNGO
DOOR LOCKZD 0
OFF BAKE BAK]E BROIL CLEAN
CONV.
@@oO@
OVEN
27" oven control
Convection
cookwaTe
Before using your convection oven, check to
see if your cookware leaves room for air
circulation in Ihe oven. If you are baking with
several pans, leave space between lhem. Also,
be sure lhe pans do not touch each other or
the walls of the oven. Use Ihe pan size
recommended in the recipe.
When baking cookies, you will get the best
results if you use a flat cookie sheet instead of a
pan with low sides.
For recipes like oven-baked chicken, you
should use a pan with low sides. Hot air cannot
circulate well around food in a pan with high
sides.
Metal and Glass
Any 1ype of cookware will work in your
convection oven. However, metal pans heat
the fastest and are recommended for
convection baking.
•Darkened or matte-finished pans will bake
faster than shiny pans.
•Glass or ceramic pans cook more slowly.
Paper and Plastic
Heat-resistant paper and plastic containers that
arc' recommended for us(_'in regular ovens can
be used in convection ovens. Pl&stic cookware
that is heat-resistant to temperatures of 400°F.
can also be used.
21
Page 22

Using the Ovens
Stainless Steel Range
How to set
the ovens
for broiling
OFF BAKE BROIL PROOF CONV.
8@o@ 8 8 8 o 8
OVEN ON HEATING
0 O O00R LOCKED O
OVEN
12" ovencontrol
(48"rangesonly)
1 If the meat has fat or gristle around the edge,
cut vertical slashes through bolh about 2
inches apart. If desired, the fat may be
trimmed, leaving a layer about 1/8 inch trick.
2 Place the meat or fish on the broiler grid in
the broiler pan. Always use the grid so flaat
any fat will drip into the broiler pan; odaerwise
the juices may become hot enough to catch
on fire,
3 Position a shelf on flae recommended shelf
position as suggested in the Broiling Guide.
OFF BAKE BAKE BROIL CLEAN
OVEN
HEATING O
OVENON O @
27" oven control
Leavethe door open to
the broil stop position.
Aluminum
foil
4 Leave the door open m Ihe broil stop position.
The door slays open by itself, yet the proper
temperature is maintained in the oven.
,5 Push in the BROII, selector button on the side
of 1he control panel above the oven you wish
to USe.
NOTE: A cooling fan will be activated when the
BROII, selector button is pushed. This cooling
fan cools the oven controls when open door
broiling. Use caution when reaching into the
oven during ()pen door broiling as drip way
handles may be hot.
6 Turn the control knob below the selector
button to BROIL.
You can use aluminum ff)il It) line Ihe broiler
pan and broiler grid. However, you must mold
the foil tightly to the grid and cut slits in it just
like the grid.
The broiler does not need to be preheated ff)r
most broiling. However, ff)ods Ihat cook
quickly, such as thin strips of meat or fish may
require a short preheating period of 2 to 3
minutes to allow the food smTace m brown in
the same time the food takes to be cooked
throughout.
Turn the food only once during broiling. Time
the foods for the first side according to the
Broiling Guide.
7 When broiling is finished, push in the OFF
selector button.
22
Page 23

Broiling
guide
Suggested shelf positions and cooking times are intended msgeneral guidelines only. Experiment
with these settings for specific foods and your personal preference.
Food Thickness Position Minutes Minutes Comments
Quantity/ Shelf 1st Side 2nd Side
Bacon 1/2 lb. (about C 3-5 3-5 Arrange in single layer.
8 thin slices)
Ground Beef 2 lbs. (8 patties) B 10-13 7-10 Space evenly. Up m 8
Well Done 1/2 to 3/4" patties take about the
thick same time.
Beef Steaks
Rare
Medium
Well Done
1" thick
(1 to 1_/2lbs.)
B
B
B
7
8-10
20-25
6-9
7
Steaks less than 1" thick
cook through before
15
browning. Pan fiTing is
recommended.
Rare
Medium
Well Done
Chicken
1V/' thick
(2 to 2_Albs.)
1 whole
(2 to 2V._lbs.),
split lengthwise
B
B
A
A
10
15
25
30-35
7-8
14-16
20-25
25-30
Slash fat.
Reduce time about 5 to
10 minutes per side ff}r
cut-up chicken. Brush
each side with melted
butter. Broil skin-side-
down first.
Bakery Products
Bread(Toast) 2 to 4 slices C 1VF2 1/2 Space evenly. Place
Toaster Pastries 1 pkg. (2) C 1_A-2 1/2 English muffins cut-
English Muffins 2 (split) C 4-6 side-up and brush with
butter, if desired.
Lobster Tails 2-4 B 14-18 Do not Cut flart)ugh back of
(6 to 8 oz. each) turn over. shell. Spread open.
Brush with mehed butter
before broiling and afmr
half of broiling time.
Fish lqb. fillets 1/4 B 8-10 5-10 Handle and mru vely
to 1/2" thick carefully. Brush with
lemon butter before
and during cooking, if
desired. Preheat broiler
to increase browning.
Ham Slices 1" thick B 9 8-10 Increase time 5 _t)10
(precooked) minutes per side for 1V/
thick or home cured.
Pork Chops 2 (1/2" flaick) B 15 10-15 Slash fat.
Well Done 2 (1" flaick), B 15-20 15-18
about 1 lb.
Lamb Chops
Medium 2 (1" flfick), B 8-10 4-7 Slash fat.
Well Done 10 to 12 oz. B 12-15 8-10
Medium 2 (P// thick), B 10-13 10-12
Well Done about 1 lb. B 17 12-14
Wieners, l-lb. pkg. (10) B 6-8 1-4 If desired, split in half
Sausages, lengthwise; cut into 5
Bratwurst to 6" pieces.
23
Page 24

Self-Cleaning 27" Oven
Stainless Steel Range
Before a
clean cycle
Oven
shelf slide
assembly
NOTE: When the 27" oven is set for self-
cleaning, only the surface burners may be
used. The 12" oven, the griddle and/or the
grill cannot be used.
The range must be completely cool in order to
set the self-clean cycle.
We recommend venting wida an open window
or using a ventilation fan or hood during the
first self-clean cycle.
An inlerlock system has been designed so that
the self-clean cycle will not slart until the shelf
slide assemblies have been removed.
The roller-assisted shelf supports are designed
to withsland standard baking temperatures.
They will not withstand the extreme
temperatures of self-cleaning.
To remove the slide assemblies:
1 I.oosen the retaining screws on both sides of
the oven.
Remove all cookware and any aluminum foil
from the oven.
Remove flae oven shelves and shelf slide
assembly.
Make sure the oven light bulb cover is in place
and the oven light is off.
Do not use commercial oven cleaners or oven
protectors in or near the self-cleaning oven.
Lift up and off
Push
rod
2 Lifi up slightly- and pull the entire assembly
out. Set aside.
To replace the slide assemblies:
When self-cleaning is finished, and the oven has
cooled, replace the assemblies and retaining
screws.
1 Guide the rear of the shelf slide assembly inu)
the bottom rear bracket.
2 Guide the top rear of the shelf slide assembly-
into the top "U"-shaped bracket.
3 Lif! up the push rod so that it rests on the
ledge of the side support of the assembly.
4 Reattach Ihe assembly securely to the oven
with the retaining screw. Repeat for the other
side of the oven.
BOttO_T
bracket
Pull the entire
assembly out.
24
Page 25

How to set
the 27"
oven for
self-cleaning
The clean cycle takes about 5 hours plus about
30 minutes to cool down.
1 Push in the CLEAN selector button on flae
right hand side of the control panel above the
thermoslat dial.
2 Set the thermostat dial to CLEAN.
•Cooling blower 1urns on.
•The OVEN ON light and HEATING light
tUl_ ()n,
•The DOOR I_OCKED light tm-ns on.
3 When cleaning has finished, push the OFF
selector button.
The blower and the OVEN ON light will tm-n
off once the cycle has finished.
The door latch will ()pen antomatically after the
oven temperature falls below 550°F.
HSA_N¢ ©
DOORLOCKZDO
OVEN ON O
OFF BAKE BAK]! BROIL CLEAN
CONY.
@@@0¢
OVEN
27" oven controt
A_teT a
clean cycle
If white spots remain, remove them with warm
sudsy water and rinse flaoroughly with a vinegar
and water mixture. These deposits are usually- a
salt residue that cannot be removed by the
clean cycle.
If the oven is not clean after one clean cycle,
repeat the cycle.
You may notice some white ash in the oven.
Wipe it up with a damp cloth after the oven
cools.
25
Page 26

Care and Cleaning
Stainless Steel Range
Control
panel and
knobs
Oven
heating
elements
Oven
shelves
Clean up spatters with a damp cloda. Remove
heavier soil with warm, soapy water.
Do not use abrasives of any kind on the control
panel.
The control knobs may be removed for easier
cleaning. To remove a knob, pull it straight off
the slem. Wash the knobs in soap and water but
do not soak.
Do not clean the bake elements or the broil
elements. Any soil will burn offwhen the
elemems are heated.
Clean the shelves with an abrasive cleanser or
steel wool. Afler cleaning, rinse dae shelves
with clean water and dIy with a clean cloth.
The bake elements can be lifted gently to clean
the oven floor. If spillovers, residue or ash
accumulate around dae bake elemems gently
wipe around the element with warm water.
Ceramic
b 4quettes
The layer of ceramic briquettes, under 1he
grille racks, will last for many years with proper
care.
Burned-on food particles and ash can be
emptied off the radiant tray- when cool by
shaking over a waste receptacle,
Chipping or cracking of the briquettes may
occur as they may- get brittle with age,
depending on Ihe frequency- of use. This is
normal and does not affect the performance.
Do not replace the radiant _ay/briquettes with
alternates.
26
Page 27

Oven light
NOTE: The glass cover should be removed only
when cold. Wearing latex gloves may offer a
better grip.
The light bulb is located on the back of the
oven. Before replacing the bulb, disconnect
electrical power to the range at the main fuse
or circuit breaker panel.
Let the bulb cool completely before removing
it. For your safety, do not touch a hot bulb with
a {lamp cloth. If you do, the bulb will break.
To remove:
Turn to remove the cover, then remove the
bulb.
To replace:
Put in a new 40-watt appliance bulb. A 40-watt
appliance bulb is smaller than a standard
40-watt household bulb.
Install and tighten the cover.
Reconnect electrical power to the range.
QSocket
I
Bulb__ I_
V/' Max. length
I
I
Glass cover [
Broiler pan
and grid
After broiling, remove the broiler pan from the
oven. Remove the grid from the pan. Carefully
pour out the grease fi'om the pan into a proper
container. Wash and rinse the broiler pan and
grid in hot water with a soap-filled or plastic
scouring pad.
If food has burned on, sprinkle the grid with
detergent while hot and cover with wet paper
towels or a dishcloth. Soaking the pan will
remove burned-on foods.
The broiler pan may be cleaned with a
commercial oven cleaner. The grid is chrome;
do not use an oven cleaner to clean it.
Both the broiler pan and grid can also be
cleaned in the dishwasher.
Do not store a soiled broiler pan and grid
anywhere in the range.
r/-tltl 7Irl ngl' )¢
t 't£!ll]rl I 1
27
Page 28

Care and Cleaning
Stainless Steel Range
Burner
assembly
The burner assemblies should be washed
regularly and, of course, after spillovers.
Turn all the consols to OFF before removing
the burner parts.
The elecn'ode of the spark ignitor is exposed
beyond the top of the burner. When cleaning
the burner trays, be careful not to snag flae
electrode of the spark ignitor with your cleaning
cloth. Do not hit the spark ignitor. Be careful not
to turn on any surface controls while cleaning
the burner trays. A slight electrical shock might
result which could cause you to knock over hot
cookware,
The burner grates, burner tops and trim rings
can be lihed off, making them easy to clean.
Removing them gives you access to the burner
bodies and burner trays.
To avoid snagging clofla on spark ignitors, leave
burner caps in place when cleaning burner
trays.
The burners have been designed in three pieces
for ease of cleaning. When the burner grate and
the burner are cool, remove the grate. The
center ring, the burner cap and the port ring
can easily be lifted off. Wash these part.s in hot
soapy water, rinse and do_-thoroughly.
Ignitor
CAUTION:
Do not operate the burner without all burner parts in place,
The burner grates, center ring and the burner
cap are porcelain enamel. When cool flaey may
be wiped clean using hot soapy water, then
rinsed and wiped dlT. When lifting the burner
grates be careful as they are heavy. Place them
on a protected surface, so they won't scratch the
surface of the cooktop.
The port ring is brass; a bristle brush can be
used to clean out the toothed burner ports, if
necessap/.
After cleaning, it is important to make sure the
locating pin on the bottom side of the brass port
ring is properly aligned with the corresponding
hole in flae burner base. Incorrect alignment
will produce a potentially dangerous flame and
poor burner performance.
28
Page 29

Drip trays,
drip tray
liners and
drain tubes
Located beneath the cooklop are one or two
drip t_ays. If you have a griddle or a grille flaere
will also be a way liner. The drip trays and liners
are made of stainless steel, The drip trays are on
rollers so they are easy to remove and replace,
To remove the drip tray, pull it forward, If
someflaing has spilled into the tray it should be
cleaned up as soon as possible to prevent
"baked on" food soil,
Grease from the griddle or the grille drains
through the drain tubes into the tray and into
the liner below,
Do not allow the grease to accumulate in the
drip tray or liner as it can be a fire hazard. Clean
the drip tray and liner as soon as they are cool.
Clean with hot soapy water.
To clean the drain tube use a soapy bottle
brush, A mild abrasive cleaner such as Bon-
Ami* or Soft Scrub* can be used. For stubborn
stains, use a soap-filled steel wool pad or a harsh
abrasive cleaner such as Comet* or Ajax,_)
rubbing lightly. Rinse all parts thoroughly.
Drain tubes
Drip tray andliner
Griddle
(on some models)
Thoroughly clean flae griddle of grease and
food pm'ticles, using a square-edged spatula,
while it is still hot.
Wipe the griddle with a dl y heavy coarse cloth
to remove any remaining residue and food
particles.
Wash with hot soapy water, rinse and dlT.
Once the griddle has cooled rub the surface
lightly with vegefable oil. Do not use corn oil or
cooking sprays as they get sticky-,
If the griddle is cleaned wifh anything other
than a dry heavy coarse cloth, it will need to be
reseasoned.
Never flood the hot griddle wifh cold water.
This could cause the griddle to crack or warp.
lnnnnnnnnnnnnnnnnnnn
©
29
Page 30

Care and Cleaning
Stainless Steel Range
Grille
(_m some models)
Back panel
and shelf
Clean the grille immediately- after cooking.
Turn off the burner. To protect your hand fi'om
steam and heat, wear a barbecue mitt. Scrub the
grille by dipping a brass bristle barbecue brush
fi'equently into a bowl of water.
The steam created softens the food particles
and assists the cleaning process. The food
particles will drop into the drip tray or into the
radiant tray-holding dae ceramic briquettes. Be
sure to clean the drain tube, drip tray and liner
after they have cooled.
The back panel and shelf are made of stainless
steel.
Do not use a steel wool pad; it will scratch the
surface.
Clean with hot soapy water. Rinse and dry.
If the panel and shelf have food soil remaining,
uy a general kitchen cleaner, such as
Fantastik_, _ Simple Green _ or Formula 4092 _
For hard to clean soil use a standard stainless
steel cleaner such as Bon-Ami, _'Cameo _'or Bar
Keepers FriendP Apply- cleaner with a damp
sponge, rinse daoroughly and dlT. Always scrub
lightly in the direction of the grain.
After cleaning, use a stainless steel polish such
as Stainless Steel Magic?
12" oven
porcelain
interim
(48" ranges only)
34)
With proper care, the porcelain enamel finish
on flae inside of the oven--top, bottom, sides,
back and inside of the door--will stay new-
looking for years.
Let the range cool before cleaning. We
recommend daat you wear rubber gloves when
cleaning the range.
Soap and water will normally do the job. Heavy
spattering or spillovers may- require cleaning
with a mild abrasive cleaner. Soapy, wet metal
pads may also be used. Do not allow food spills
with a high sugar or acid content (such as milk,
tomatoes, sauerkraut, fruit juices or pie filling)
to remain on dae surface. They may- cause a
dull spot even after cleaning.
Household ammonia may make the cleaning
job easier. Place 1/2 cup in a shallow glass or
potlel T container in a cold oven overuight.
The ammonia fumes will help loosen the
burued-on grease and food.
If necessary, you may use an oven cleaner.
Follow the package directions.
Cautions about using spray-on oven cleaners:
•Do not spray on the electrical consols and
switches because it could cause a short circuit
and result in sparking or fire.
•Do not allow a film fi'om the cleaner I{) build
up on the temperature sensor--it could cause
the oven to heat improperly. (The sensor is
located at dae top of dae oven.) Carefully- wipe
the sensor clean after each oven cleaning,
being careful not to move the sensor as a
change in its position could affect how the
oven bakes.
•Do not spray any oven cleaner on the oven
door, handles or any exterior surface of the
oven, cabineks or painted surfaces.
The cleaner can damage these surfaces.
Page 31

The Problem Solver
Stainless Steel Range
Questions ?
Use this
problem
solve*!
PROBLEM POSSIBLE CAUSE
SURFACE BURNERS
DO NOT LIGHT
•Burners assembled incorrectly after cleaning. Make sure the burner
assembly is put together correctly and that the port ring is aligned.
•Clean the ignitor orifice.
•Inspect the manual cu(-offvalve to insure daat it is not closed.
•Make sure the electrical plug is plugged into a live power outlet.
•Check for a power outage.
SURFACE BURNER
FLAMES VERY
LARGE OR YELLOW
TICKING SOUND OF •The spark ignitor is not deactivated. Turn the burner OFF and
SPARK IGNITOR relight. Some ticking is normal. If ticking is excessive call for smwice.
AFTER SURFACE
BURNER LIGHTS
STRONG ODOR
OVEN LIGHT
DOES NOT WORK
FOOD DOES NOT
BAKE OR ROAST
PROPERLY
•Improper LP gas connection. See the Installation lnsu'uctions.
•Improper air/gas ratio in surface burners. Adjust the air shutters.
•The light bulb is loose or defective. Tighten or replace the bulb.
•The switch operating light is broken. Call for service.
•The oven con(rols are improperly set. See the "How to set your oven
for baking or roasting" section.
• Incorrect cookware or cookware of improper size being used.
See the "How to set your oven for baking or roasting" section.
•Use a foil tent to slow down browning during roasting.
FOOD DOES NOT
BROIL PROPERLY
•The oven control is not set at BROII. Push in the BROIL selector
button for Ihe oven you want to use.
•The oven door is not open to the broil stop position as recommended.
•Improper shelf posilion being used. See the Broiling Guide.
•Food is being cooked in a hot pan.
•Cookware is not suited for broiling. Use the broiling pan and grid
that came with your range.
•Aluminum foil used on Ihe broiling pan and grid has not been fitted
properly and slit as recommended.
•In some areas Ihe power (voltage) may- be low. Preheat 1he broil
element for 10 minutes. Broil for the longest period of time
recommended in the Broiling Guide.
31
Page 32

The Problem Solver
Stainless Steel Range
Questions ?
Use this
problem
solver!
PROBLEM POSSIBLE CAUSE
OVEN WILL NOT
WORK
OVEN WILL NOT
SELF CLEAN
UNABLE TO USE
THE 12" OVEN,
GRIDDLE AND/OR
GRILLE W HEN
SELF-CLEANING
•Plug on the range is not completely- inserted in the electrical outlet.
•A fuse in your home may be blown or flae circuit breaker tripped.
•The oven controls are not properly set.
•The oven controls are set for cleaning. If necessaly, allow the oven to
cool then open the door.
•The oven temperature is Ioo high Io set a self-clean operation.
Allow the range to cool to room temperature and reset the consols.
•The consols are not properly set.
•The self-clean cycle will not start until the shelf slide assemblies have
been removed.
•When the 27" (large) oven is set for cleaning, only the surface
burners may be used. The 12" (small) oven, the griddle and/or
the grille cannot be used.
"CRACKING" OR •This is normal. This is the sound of the melal heating and cooling
"POPPING" SOUND during both the cooking and cleaning functions.
DURING CLEANING
EXCESSIVE SMOKING •Excessive soil. Press the OFF selector button. ()pen the windows to
OCCURS DURING rid the room of smoke, Wait until the DOOR LOCKED light goes
CLEANING off. Wipe up excess soil and reset the clean cycle.
OVEN NOT CLEAN •The oven was heavily soiled, Clean up heavy spillovers before starting
AFTER A CLEAN the clean cycle, Heavily soiled ovens may-need to self-clean again.
CYCLE •The oven controls are not properly set. See the Self-Cleaning section.
.32
Page 33

Consumer Services
With the purchase of your new Monogram appliance, receive the
assurance that if you ever need ir_ormation or assistance from GE,
we'll be there. All you have to do is call-toll-free!
GE Answer
Center ®
800.626.2000
In-Home Repair
Service
In the U.S.A.:
800.444.1845
In Canada:
888.880.3030
For Customers
With Special
Needs...
800.626.2000
Whatever your question about any Monogram major appliance, GE Answer Center _)
information service is available to help. Your call--and your question--will be answered
promptly and couNeously. And you can call any time. GE Answer Center e'service is open
24 hours a day, 7 day-s a week.
A GE consumer service professional will provide expert repair selwice, scheduled at a time
that's convenient for you. Many GE Consumer Service company-operated locations offer
you smwice today- or tomorrow, or at your convenience (7:00 a.m. to 7:00 p.m. weekdays,
9:00 a.m. to 2:00 p.m. Saturdays). Our factory-trained technicians know your appliance
inside and out--so most repairs can be handled in just one visit.
GE offers, free of charge, a brochure to assist in planning a
bmTier-fi'ee kitchen for persons with limited mobility.
Consumers with impaired hearing or speech who have access to a
TDD or a conventional tele(ypewriter may call 800. FDD.GLa, C
(800.833.4322) to request information or smwice.
Service Contracts
800.626.2224
Parts and
Accessories
800.626.2002
mD,_
You can have the secure feeling that GE Consumer Service will still be there after your
wmTamy expires. Purchase a GE contact while your warramy is still in effect and you'll
receive a substantial discount. With a multiple-year contract, you're assm'ed of future
smwicc at today's prices.
Individuals qualified to seIwice their own appliances can have parts or accessories sent directly
to the'rh<_ }me. The ( E pm Lssystempr<,_ " }vides access to <}ver 47 000parts, ...andall (E(, ,enume"
Renewal I arts are fully warranted. VISA, MasterCard and Discover cards are accepted.
User maintenance instructions contained in this guide cover procedures intended to be
performed by any user. Other servicing generally should be referred to qualified service
personnel. Caution must be exercised, since improper servicing may cause unsafe operation.
)
33
Page 34

WARRANTY
YOUR MONOGRAM RANGE WARRANTY
Staple sales slip or cancelled check here. Proof of original
purchase date is needed to obtain service under warranty.
WHA T IS
COVERED
WHAT IS NOT
COVERED
FULL ONE-YEAR WARRANTY
For one year from date of original purchase,
we will provide, free of charge, parts and
service labor in your home to repair or
replace any part of the range that fails
because of a manufacturing defect.
LIMITED FIVE-YEAR WARRANTY
For five years from the date of original
purchase, we will provide, fi'ee of charge,
replacement gas surface burners if they fail
in normal household use. (The grille,
griddle and oven burners are not included.)
You pay-for dae service trip to your home
and all service labor charges.
•Service trips to your home to teach you how
to use the product.
Read your Use and Care material.
If you daen have any questions about
operating dae product, please conlact your
dealer or our Cuslomer Relations office at
the address below, or call, toll free:
GE Answer Center ®
800.626.2000
consumer information service
•Discoloration of 1he griddle plate
•Chipping of porcelain enamel grates
•Replacement of house fuses or resetting of
circuit breakers.
This warranly is extended to the original
purchaser and any succeeding owner for
products purchased for ordinm T home use
in the 48 mainland states, Hawaii and
Washington, D.C. In Alaska the warramy is
the same except that it is LIMITED because
you must pay I{}ship dae product to the
service shop or for the service lechnician's
_avel costs to your home.
All warranty service will be provided by our
Factory Service Cemers or by our authorized
Cuslomer Care _)servicers during normal
working hours.
Should your appliance need service, during
warranty period or beyond, in the U.S.A.
call 800.444.1845. In Canada: 888.880.3030.
•Damage I{}dae product caused by accident,
fire, floods or acts of God.
•Failure of flae product if it is used for other
than its inlended purpose or used
commercially.
• Improper installation.
If you have an installation problem, contact
your dealer or installer. You are responsible
for providing adequate elecmcal, gas,
exhausting and odaer connecting facilities
as described in the Installation lnsu-uctions
provided with the product.
WARRANTOR IS NOT RESPONSIBLE
FOR CONSEQUENTIAL DAMAGES.
34
Some slates do not allow the exclusion or limilation of incidenlal or consequential damages,
so the above limilation or exclusion may- not apply to you. This warranty gives you specific
legal rights, and you may-also have olher rights which vmT fi'om state to state.
To know what your legal rights are in your state, consult your local or state consumer affairs
office or your state's Attorney General.
Warrantor: General Electric Company. If further help is needed concerning this warranty,
write: Manager--Customer Relations, GE Appliances, Louisville, KY 40225
ZDP36L4D ZDP36N4D ZDP48L4G ZDP48N4G
ZDP36L4R ZDP36N4R ZDP48L6D ZDP48N6D
ZDP36L6 ZDP36N6 ZDP48L6R ZDP48N6R
Page 35

X_po±l:_r_,u_,aodm I
uoDna_.s_a_I d.utsaam_
lanpoa d aoumsuo D
saoue.qddv39
IIIII l , ce
General Electric Company
Warranty Registration Department
P.O. Box 34070
Louisville, KY 40232-4070
..................................................................................................................... J
1st Class
Letter
Stamp
Here
3.5
Page 36

Consumer Product Ownership Registration
[)ear Customer:
Thank you ff_r purchasing our product and thank you for placing your confidence in us. We are proud to
have you msa customer!
ppli •Follow these three steps to protect your new a ance investment:
g
your Consumer
Product Ownership
Registration today.
Have the peace of mind
of knowing we can
contact you in the
unlikely event of a
safety modification.
After completing this
registration, write your
model and serial numbers
M this guide.You will need
this inlbrmation should
you require sen,ice. The
smwice number in the
USA: 800.444.1845. In
Canada: 1.888.880.3030.
Read your "Use and Care
Guide" carefully. It will
help you operate)_)ur
new appliance properly.
If you have questions, or
need more infimnation,
in the USA, call the GE
Answer Center ®
800.626.2000. In Canada,
call 1.888.880.3030.
Important: To ensure that your product is registered, fold and mail the form below. No envelope is needed.
FOLD HERE
Consumer Product Ownership Registration
Range
Product Model Serial
Mr. Q Ms. Q Mrs. [] Miss []
First I Last]
Name I I I I I I I I I Name I I I I I I I I I I I I I I
I
g
Street I
Address
Apt. # I
City I ,
Date Placed
In Use I I I
Momh
Louisville, KY 40225
I I I I I I I I I I I I I I I I I I I I I I
, , , , , , , i
i i i i i i i i i i i i i i State Code I
Day L--l_ Year L--l_
TAPE CLOSED
,'honeI , , I-I , , I-I
Number
I I,I _ipI
10652-1
Pa_ No. 164D3333P066-1
Pub No. 49-8823-2
1-99 CG
I I I
I I
I III
I
I
I
36
Printed inthe United States
 Loading...