

Page 1

Owner’s
Manual
Compactor
ZCGS150
ZCGP150
www.monogram.com
Page 2

2
Consumer Information
Compactor
Your new Monogram compactor makes an eloquent statement of style, convenience and kitchen
planning flexibility. Whether you chose it for its purity of design, practical features or assiduous
attention to detail—or for all of these reasons—you’ll find that your Monogram compactor’s
superior blend of form and function will delight you for years to come.
The information on the following pages will help you operate and maintain your compactor
properly.
If you have any other questions, visit our Website at: www.monogram.com
Introduction
Contents
Appliance Registration . . . . . . . . . . . .3, 15, 16
Care and Cleaning . . . . . . . . . . . . . . . . . . . .10
Consumer Services . . . . . . . . . . . . . . . . . .3, 13
Model and Serial Number Location . . . . . . .3
Operating Instructions . . . . . . . . . . . . . . . .6–9
Features . . . . . . . . . . . . . . . . . . . . . . . . . . .6
Using the Trash Compactor . . . . . . . . . .7–9
Trash Bag Installation . . . . . . . . . . . . . . . .7
Loading . . . . . . . . . . . . . . . . . . . . . . . . . . .8
Compacting . . . . . . . . . . . . . . . . . . . . . . . .8
Removing a Full Trash Bag . . . . . . . . . . . .9
Problem Solver . . . . . . . . . . . . . . . . . . . . . . .11
Safety Instructions . . . . . . . . . . . . . . . . . . .4–5
Warranty . . . . . . . . . . . . . . . . . . . . . . . . . . . .12
Page 3

3
Consumer Information
Compactor
Before
using
your
compactor
Read this manual carefully. It is intended to
help you operate and maintain your new
compactor properly.
Keep it handy for answers to your questions.
If you don’t understand something or need
more help, there is a list of toll-free consumer
service numbers included on the Consumer
Services page in the back section of this
manual.
OR
Visit our Website at: www.monogram.com
Write
down the
model &
serial
numbers
You can locate your model and serial numbers
on the label on the front of the frame.
Before sending in the card, please write these
numbers here:
Model Number
Serial Number
Use these numbers in any correspondence or
service calls concerning your compactor.
If you received
a damaged
compactor
Immediately contact the dealer (or builder)
that sold you the compactor.
Save time
& money
Before you request service, check the Problem
Solver in the back of this manual.
It lists causes of minor operating problems that
you can correct yourself.
If you
need service
To obtain service, see the Consumer Services
page in the back of this manual.
We’re proud of our service and want you to be
pleased. If for some reason you are not happy
with the service you receive, here are steps to
follow for further help.
FIRST, contact the people who serviced your
appliance. Explain why you are not pleased.
In most cases, this will solve the problem.
NEXT, if you are still not pleased, contact us
on our website, write all the details—including
your phone number—or write to:
Manager, Customer Relations
GE Appliances
Appliance Park
Louisville, KY 40225
Page 4

4
IMPORTANT SAFETY INSTRUCTIONS
READ ALL INSTRUCTIONS BEFORE USING
WARNING!
For your safety, the information in this manual must be followed to minimize the risk of fire,
explosion, electric shock, or to prevent property damage, personal injury, or death.
PROPER INSTALLATION AND MAINTENANCE
This compactor must be properly installed
and located in accordance with the Installation
Instructions before it is used. If you did not
receive an Installation Instructions sheet with
your compactor, you can receive one by visiting
our Website at www.monogram.com
.
• This compactor is for household use only.
Use this appliance only for its intended
purpose as described in this Owner’s Manual.
• Close supervision is necessary when any
appliance is operated near children. Do not
allow the compactor to be used as a toy, or to
run unattended at any time.
• Turn the knob to OFF and remove it when
not compacting trash. This will help prevent
anyone from tampering with the compactor
or children from operating it.
• Do not push trash into the drawer
with hands or feet. Trash might contain
broken glass, sharp pieces of metal, or other
sharp objects that might cause injury.
• When removing or carrying the trash bag,
keep the bag away from your body. Sharp
objects may have pierced it.
• Be careful when cleaning the inside of the
cabinet or trash drawer. Glass fragments may
be stuck to the ram, imbedded in the drawer
surface or lying in the bottom of the cabinet.
• Do not install or store compactor where it will
be exposed to outside conditions.
• Make sure the compactor is properly installed
and leveled on a floor that can support its
weight.
• Do not touch moving parts.
• Do not compact food waste such as raw meat
and fish, rinds, personal hygiene items and
disposable diapers. These items create very
strong odors and should not go into the
compactor.
• Do not use as a freestanding unit. Use only as
a built-in unit.
PRECAUTIONS AGAINST UNREASONABLE
USE OF YOUR COMPACTOR:
• Never compact shotgun shells, cartridges for
firearms, fireworks, etc., which are highly
explosive.
• Never compact flammable materials such as
paint, oil- or gasoline-saturated rags, engine
starting fluid cans, paint thinner cans, etc.—
spontaneous combustion or explosive vapor
concentrations could occur.
• Never compact containers of toxic chemicals
such as strong insecticides or other poisonous
materials—compaction could release
hazardous fumes.
• Never compact aerosol cans containing
explosive or highly toxic chemicals.
(If you are sure the aerosol cans contain
non-hazardous materials such as shaving
cream, cheese spread and whipped cream,
they may be compacted.)
• Do not compact lit cigarettes, cigars, or other
hot or burning items.
• Do not store or use gasoline or other
flammable vapors and liquids in the vicinity of
this or any other appliance.
• Do not overload your appliance.
• Handle a loaded trash bag with care. Sharp
objects can pierce the bag and cause injury. Do
not overload trash bag with heavy material such
as glass.
SAFETY PRECAUTIONS
When using electrical appliances, basic safety precautions should be followed, including the
following:
Page 5

5
READ AND SAVE THESE INSTRUCTIONS
IMPORTANT SAFETY INSTRUCTIONS
• To prevent hazard of electrical shock,
this compactor must be properly installed and
grounded in accordance with the Installation
Instructions before it is used.
• Do not operate with a damaged cord set,
plug, motor, or after damage in any manner.
Have the appliance examined, repaired, or
adjusted by an authorized service technician.
• Do not take apart this appliance. Incorrect
reassembly can cause electric shock when
subsequently used.
• Unplug the compactor before making any
repairs. NOTE: We strongly recommend that
any servicing be performed by a qualified
person.
• Do not use an adapter plug or an extension
cord with this appliance.
• Follow National Electric Codes or prevailing
local codes and ordinances. This appliance
must be supplied with 120V, 60Hz and
connected to an individual, properly
grounded branch circuit protected by a 15 or
20 amp circuit breaker or time delay fuse.
• If the electric supply provided does not
meet the above requirements, call a licensed
electrician.
• We recommend that a separate circuit serving
only this appliance be provided.
• Do not, under any circumstances, cut or
remove the third grounding prong from the
power cord.
• This appliance must be grounded. In
the event of a malfunction or breakdown,
grounding will reduce the risk of electric
shock by providing a path of least resistance
for electric current.
• This appliance is equipped with a cord having
an equipment grounding conductor and a
grounding plug. The plug must be plugged
into an appropriate outlet that is properly
installed and grounded in accordance with
local codes and ordinances.
WARNING:Improper
connection of the equipment grounding
conductor can result in a risk of electric shock.
Check with a qualified electrician if you are in
doubt as to whether the appliance is properly
grounded.
• Do not modify the plug with this appliance.
If it will not fit the outlet installed, have a
proper outlet installed by a qualified
electrician.
ELECTRICAL SAFETY
When using electrical appliances, basic safety precautions should be followed, including the
following:
Page 6
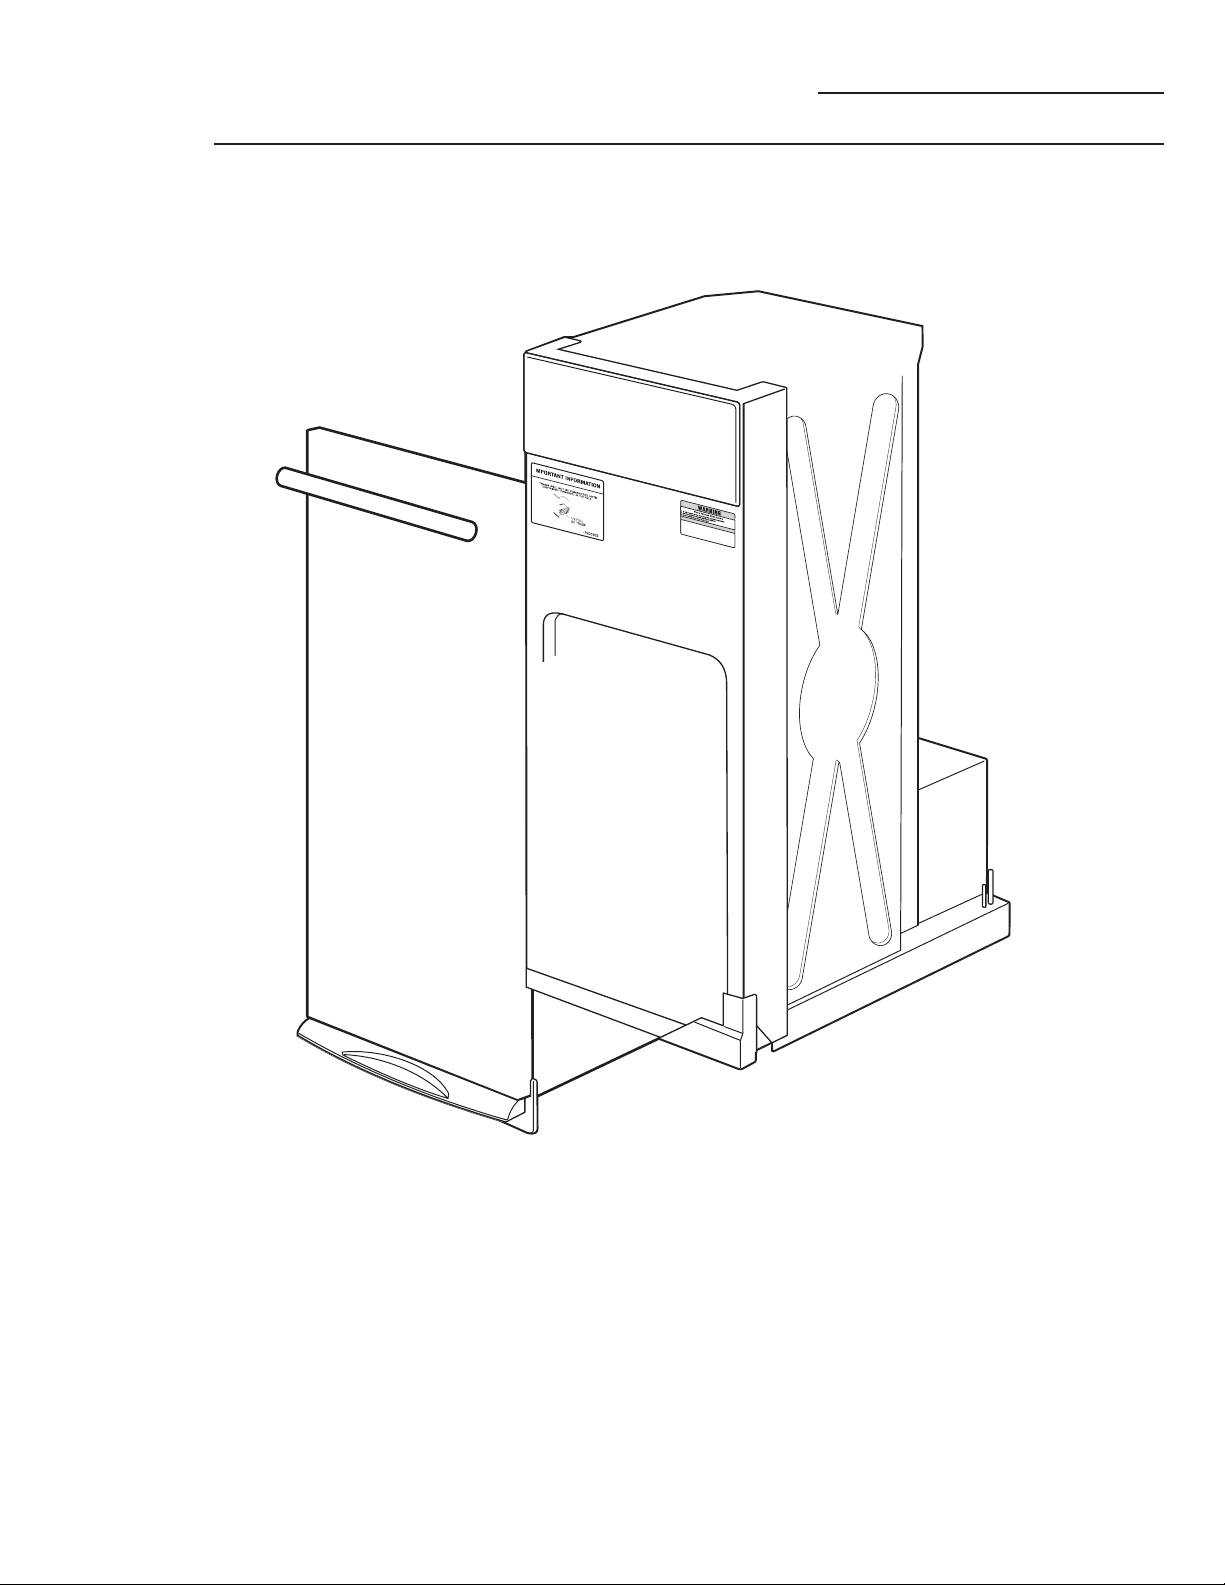
6
Compactor
Features
Page 7
7
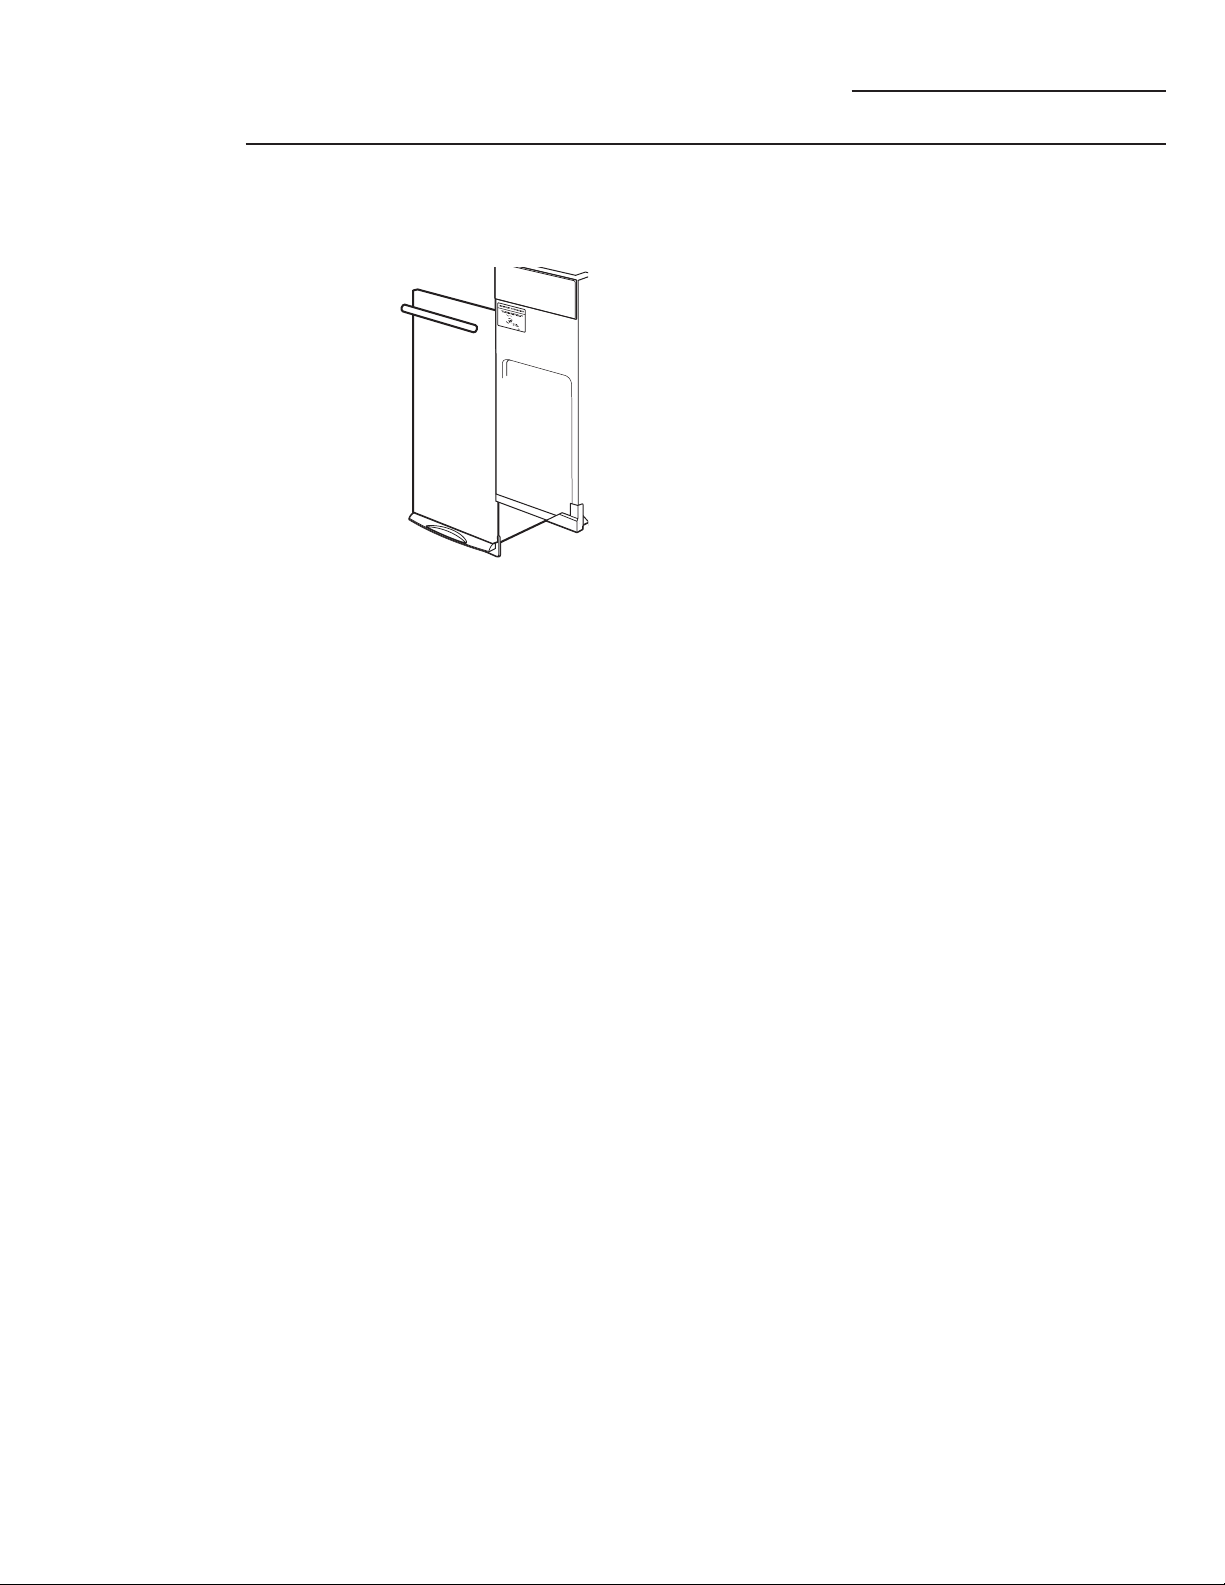
Using the Trash Compactor
Compactor
ON/OFF
Knob
The removable knob is provided for your
protection as a safety measure. When the knob
switch is in the OFF position, the compactor
will not operate.
Child Lockout Instructions:
Lock the compactor when it is not in
use, by removing the knob. This will keep
children from operating the compactor and
prevent anyone from tampering with it.
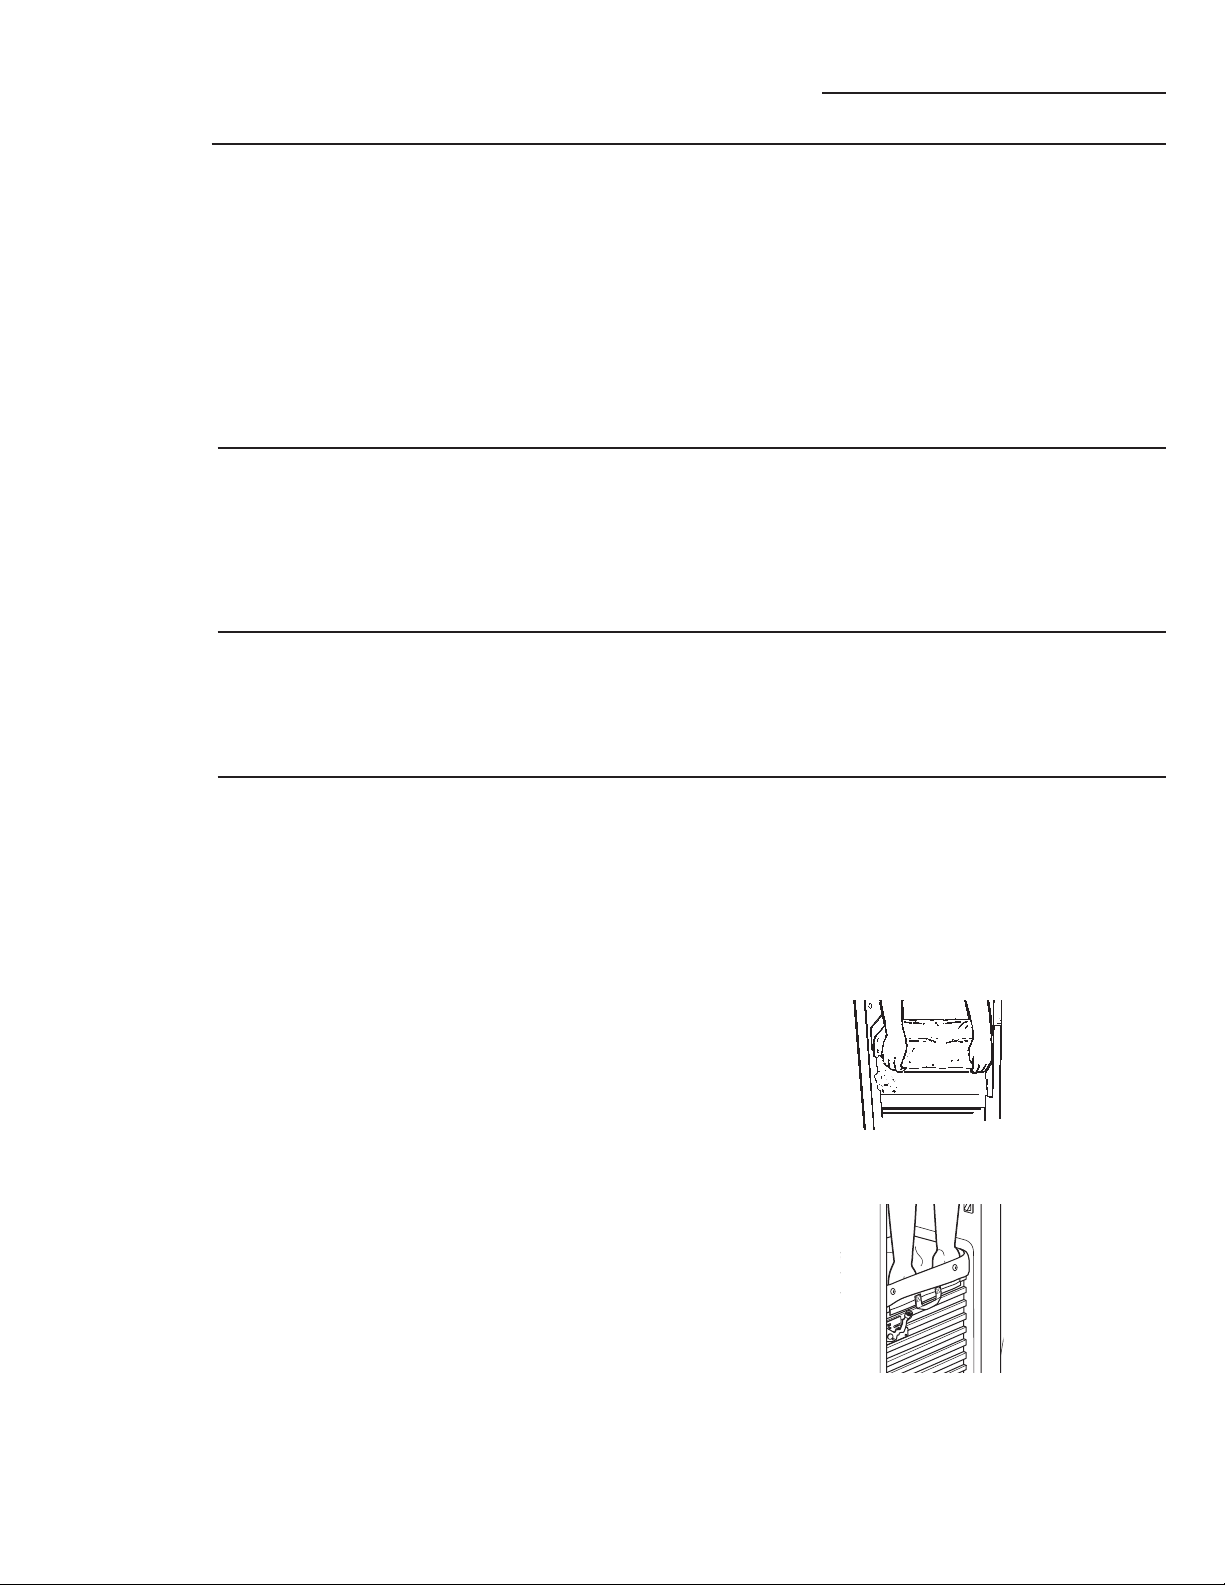
Drawer
Safety
Switch
The compactor has two safety switches to
ensure that the drawer is in its fully closed
position for operation. The compactor will not
cycle without the drawer being fully closed.
How It Does
and How It
Works
Your compactor reduces household trash to as
little as one-fourth of its original volume.
It compacts most refuse, including paper,
cans, bottles, jars, plastic containers, wrappings,
sweepings and some food wastes.
Drop trash into the disposable bag (designed
for compactor use) that lines the compactor
trash drawer and close the drawer. When you
start the compactor, an electrically-operated
ram moves down into the drawer, compacts
trash, moves back up again—and the
compactor shuts off automatically.
NOTE: The trash drawer must be at least 1/2
full before you will notice compaction because
the ram does not travel all the way down into
the drawer. By adding trash, compaction is
transferred to the items below until all trash is
compacted.
Trash Bag Installation
Before installing a new bag, be sure that:
1. The drawer side is securely locked.
2. The container is clean and free of sharp
debris that may puncture the bag.
Reinforced plastic bags came with your
compactor and are ready to be installed.
You must use the specially designed
heavy-duty trash bags included with your
compactor. These bags are available from
your dealer or Factory Service Center. Ask
for catalog number WC60X5017. If you prefer,
you can order by mail. A handy order form is
provided with your compactor and is included
in every replacement bag package.
To install a new bag:
1. Place the bag into the drawer over the bag
caddy. Open the bag and pull the top edges
over the drawer top.
2. Lock the bag in place by pulling the four
prepunched holes over the bag retainer
buttons. Holes will expand over the
buttons without harming the bag.
3. Press inside of bag against the drawer
bottom, sides and corners for a smooth fit.
Page 8
8
Using the Trash Compactor
Compactor
Loading
Slightly lift and pull the compactor door
handle or press the foot pedal and pull the
drawer out.
Remember:
• To help keep the ram clean when compacting
messy food waste, place a couple of folded
sheets of newspaper on top of the load to be
compacted.
• Items too bulky to go into the drawer can be
folded to fit. If it cannot be folded to fit into
the drawer, do not attempt to force it in.
• Folded newspaper is also helpful when
compacting a large glass bottle, or several
bottles or jars, or any other items that might
shatter.
• Although it is not necessary to compact until
the drawer is full or nearly full, we suggest
that, for maximum compaction, you start the
compactor each time a significant amount of
trash is added.
Page 9

9
Using the Trash Compactor
Compactor
1. Pull the drawer completely open.
2. Remove the top of the bag from the bag
retainer buttons. Pull up all four bag cuffs.
3. Push the side-lock latch down and tilt the
drawer side open.
4. Lift the bag out, using the bag caddy.
Page 10
10
Care and Cleaning of the Compactor
Compactor
Cleaning
the Unit
As is true of most appliances, proper care is needed to give you continued
satisfaction. Before cleaning the compactor, turn the knob to the OFF
position and remove. If you will be away for more than a couple of days,
remove the compactor bag. Lock the compactor by removing the knob,
and store it in a safe place.
Stainless steel panels:
Stainless steel panels can be cleaned with
Cerama Bryte®or a similar product using a
clean, soft cloth.
Cerama Bryte is available from GE Parts by
calling 800.626.2002.
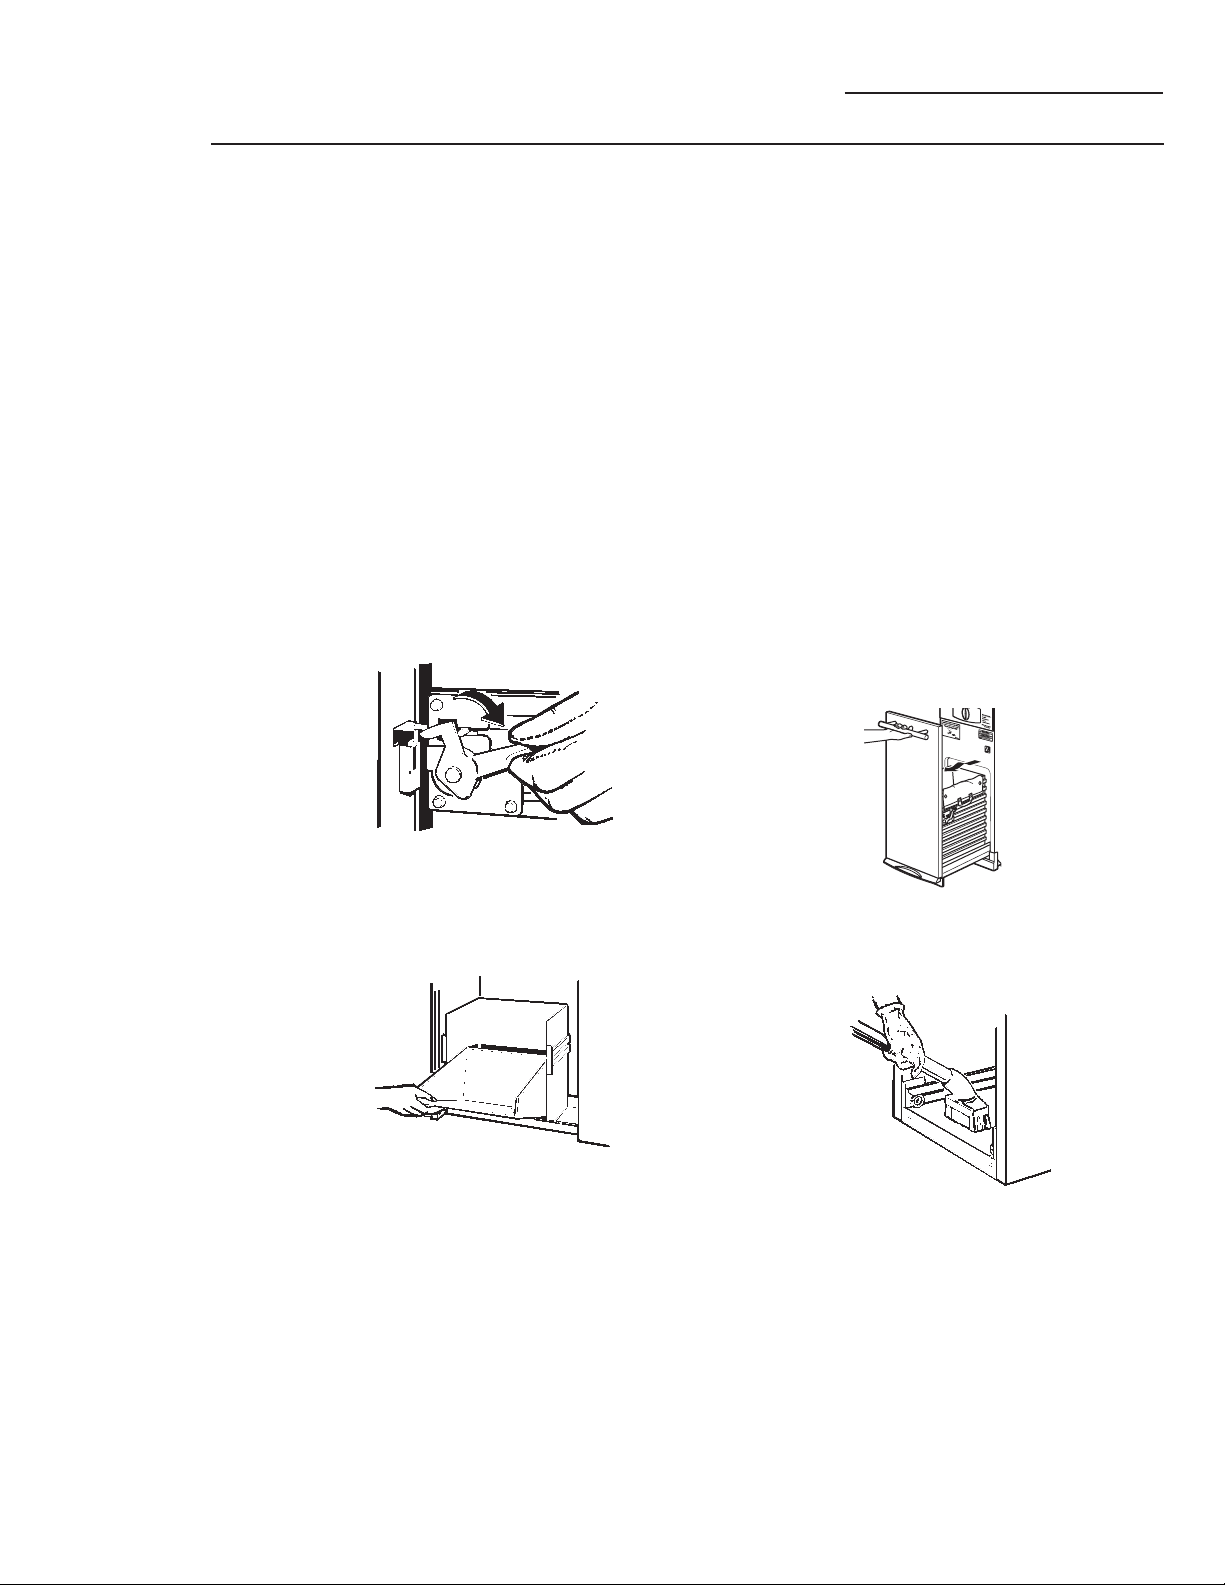
To clean the drawer interior:
1. Remove the bag. See page 9.
2. Wear protective gloves. There may be bits of
glass in the drawer. Press the side door latch
down.
3. Hold the side door latch and tilt the side of
the drawer until the latch clears the drawer
front. The drawer side can be removed by
tilting and sliding it out.
4. Wash with a damp cloth using warm, soapy
water. Rinse and then dry with a soft cloth.
5. If the drawer side was removed, slide it back
into the tilted position.
6. Press the side door latch down while pressing
the side to the upright position. Lock the
side door latch.
To clean the cabinet interior:
1. Pull the drawer out until it stops. Note the
tracks in which the drawer rollers move.
2. Lift the front to clear the drawer stops. Grab
the drawer on both sides. Pull it out the rest
of the way and set it aside.
3. Vacuum inside of the cabinet. Liquid spills or
wet trash should be cleaned up by hand, or
use a vacuum designed to pick up liquid.
4. Wash, rinse and dry the inside.
Page 11

11
Questions?
Use this
problem solver
PROBLEM POSSIBLE CAUSE WHAT TO DO
Compactor won’t operate Compactor is unplugged • Make sure the cord is plugged securely into
a working outlet.
Circuit breaker/fuse is • Check house circuit breakers /fuses.
tripped/blown Replace fuses or reset breaker.
Knob switch may not be • Make sure the switch is in the ON position.
in the ON position
• Foot pedal may not have been lifted up
long enough to start the compaction cycle.
Drawer may not be closed • Check to make sure the drawer is firmly
closed.
Compactor has an automatic• If you have just compacted repeatedly,
thermal motor reset this protector may have opened the motor
circuit. Wait a few minutes and the motor
reset will reclose automatically.
Drawer is hard Trash may have fallen • Remove any trash.
to close behind the drawer
Drawer will not The ram is not all the • Lift up on the foot pedal and release to
open way up allow ram to complete a cycle.
Little or no apparent Drawer is not full • The drawer must be at least 1/2 full of
compaction enough trash before you will see any amount of
compacting. The ram does not travel all the
way to the bottom. Trash in the bottom of
the drawer will be crushed during later
cycles.
Trash is stuck between ram • Remove any trash.
and basket
Before You Call For Service
Compactor
Page 12

YOUR MONOGRAM COMPACTOR WARRANTY
Staple sales slip or cancelled check here. Proof of original purchase
date is needed to obtain service under warranty.
WHAT IS
COVERED
From the Date
of the Original
Purchase
Some states do not allow the exclusion or limitation of incidental or consequential damages,
so the above limitation or exclusion may not apply to you. This warranty gives you specific legal
rights, and you may also have other rights which vary from state to state. To know what your
legal rights are in your state, consult your local or state consumer affairs office or your state’s
Attorney General.
Warrantor: General Electric Company, Louisville, KY 40225.
WHAT IS NOT
COVERED
• Service trips to your home to teach you
how to use the product.
• Improper installation, delivery or
maintenance.
• Replacement of house fuses or resetting
of circuit breakers.
• Failure of the product if it is abused, misused,
or used for other than the intended purpose
or used commercially.
• Damage to the product caused by accident,
fire, floods or acts of God.
• Incidental or consequential damage caused by
possible defects with this appliance.
• Damage caused after delivery.
Warranty
Compactor
12
ONE-YEAR
Any part of the compactor which fails due to a defect in materials or workmanship. During this
full one-year warranty, GE will also provide, free of charge, all labor and in-home service to
replace the defective part.
This warranty is extended to the original purchaser and any succeeding owner for the products
purchased for ordinary home use in the 48 mainland states, Hawaii, Washington, D.C. or Canada.
In Alaska the warranty is the same except that it is LIMITED because you must pay to ship the
product to the service shop or for the service technician’s travel cost to your home.
All warranty service will be provided by our Factory Service Centers or by our authorized
Customer Care®servicers during normal working hours.
Should your appliance need service, during warranty period or beyond, in the U.S.A. call
800.444.1845.
Page 13

13
Consumer Services
Compactor
With the purchase of your new Monogram appliance, receive the
assurance that if you ever need information or assistance from GE,
we’ll be there. All you have to do is call—toll- free!
GE Answer
Center
®
In the USA:
800.626.2000
Whatever your question about any Monogram major appliance, GE Answer Center
®
information service is available to help. Your call—and your question—will be answered
promptly and courteously. And you can call any time. GE Answer Center®service is open
24 hours a day, 7 days a week.
OR
Visit our Website at: www.monogram.com
In-Home
Repair Service
In the USA:
800.444.1845
A GE consumer service professional will provide expert repair service, scheduled at a time
that’s convenient for you. Many GE Consumer Service company-operated locations offer you
service today or tomorrow, or at your convenience (7:00 a.m. to 7:00 p.m. weekdays, 9:00 a.m.
to 2:00 p.m. Saturdays). Our factory-trained technicians know your appliance inside and out—
so most repairs can be handled in just one visit.
Service Contracts
In the USA:
800.626.2224
You can have the secure feeling that GE Consumer Service will still be there after your
warranty expires. Purchase a GE contract while your warranty is still in effect and you’ll
receive a substantial discount. With a multiple-year contract, you’re assured of future
service at today’s prices.
Parts and
Accessories
In the USA:
800.626.2002
Individuals qualified to service their own appliances can have parts or accessories sent directly
to their home. The GE parts system provides access to over 47,000 parts…and all GE Genuine
Renewal Parts are fully warranted.
User maintenance instructions contained in this manual cover procedures intended to be
performed by any user. Other servicing generally should be referred to qualified service
personnel. Caution must be exercised, since improper servicing may cause unsafe operation.
For Customers
With Special
Needs…
In the USA:
800.626.2000
GE offers Braille controls for a variety of GE appliances, and a
brochure to assist in planning a barrier-free kitchen for persons
with limited mobility.
Consumers with impaired hearing or speech who have access to a
TDD or a conventional teletypewriter may call 800.TDD.GEAC
(800.833.4322) to request information or service.
www.monogram.com
Page 14

14
Notes
Compactor
Page 15

15
General Electric Company
Warranty Registration Department
P.O. Box 34980
Louisville, KY 40232-2150
Place
1st Class
Letter
Stamp
Here
GE Appliances
Consumer Product
Ownership Registration
Important Mail Today
Page 16

165D4700P317
49-5993
Printed in China
08-05 JR
Consumer Product Ownership Registration
Dear Customer:
Thank you for purchasing our product and thank you for placing your confidence in us. We are proud to
have you as a customer!
Follow these three steps to protect your new appliance investment:
1
Complete and mail
your Consumer
Product Ownership
Registration today.
Have the peace of mind
of knowing we can
contact you in the
unlikely event of a
safety modification.
2
After completing this
registration, write your
model and serial
numbers in this manual
and store this document
in a safe place. You will
need this information
should you require
service. The service
number in the USA:
800.444.1845. In Canada:
1.888.880.3030.
3
Read your “Owner’s
Manual” carefully.
It will help you
operate your new
appliance properly.
Important: If you did not get a registration card with your product, detach and return the form below to
ensure that your product is registered, or register online at www.monogram.com.
Consumer Product Ownership Registration
Product Model Number
Serial Number
Compactor
Important
M
ail
T
od
ay!
First
Name
Apt. #
Street
Address
City
Last
Name
Zip
CodeState
Date Placed
In Use
Month Day Year
Phone
Number
TAPE CLOSED
FOLD HERE
Mr. Ms. Mrs.
Miss
GE Consumer & Industrial
Louisville, KY 40225
Monogram®
✄ ✄
✄
www.monogram.com
E-mail Address*
*Please provide your e-mail address to receive, via e-mail, discounts, special offers and other important
communications from GE Appliances (GEA).
■■ Check here if you do not want to receive communications from GEA’s carefully selected partners.
FAILURE TO COMPLETEAND RETURN THIS CARD DOES NOT DIMINISHYOUR WARRANTY RIGHTS.
For information about GEA’s privacy and data usage policy, go to www.monogram.com and click on “Privacy
Policy” or call 800.626.2224.
GE Consumer & Industrial
Appliances
General Electric Company
Louisville, KY 40225
ge.com
Page 17

Manuel du
propriétaire
Compacteur
ZCGS150
ZCGP150
www.monogram.com
Page 18

2
Information pour le client
Compacteur
Votre nouveau compacteur Monogram présente un style éloquent, une grande commodité et
de la souplesse dans l’agencement des cuisines. Que vous l’ayez choisi pour la pureté de sa ligne,
pour ses fonctions pratiques ou en raison de l’attention apportée aux détails ou pour toutes ces
raisons, vous découvrirez que l’agencement sophistiqué entre forme et fonction de votre
Monogram vous fournira des années de plaisir.
L’information des pages suivantes vous aidera à faire fonctionner et à entretenir correctement
votre compacteur.
Si vous avez d’autres questions, visitez notre site Web à : www.monogram.com
Introduction
Contenu
Enregistrement de
l’appareil électroménager . . . . . . . . .3, 15, 16
Entretien et nettoyage . . . . . . . . . . . . . . . . .10
Garantie . . . . . . . . . . . . . . . . . . . . . . . . . . . .12
Instructions de sécurité . . . . . . . . . . . . . .4 et 5
Modèle et emplacement
du numéro de série . . . . . . . . . . . . . . . . . . . .3
Mode d’emploi . . . . . . . . . . . . . . . . . . . . .6 à 9
Caractéristiques . . . . . . . . . . . . . . . . . . . . .6
Chargement . . . . . . . . . . . . . . . . . . . . . . . .8
Compactage . . . . . . . . . . . . . . . . . . . . . . . .8
Installation du sac
d’ordures ménagères . . . . . . . . . . . . . . . .7
Retrait du sac d’ordures ménagères . . . . .9
Utilisation du compacteur pour ordures
ménagères . . . . . . . . . . . . . . . . . . . . . .7 à 9
Service à la clientèle . . . . . . . . . . . . . . . . .3, 13
Solution de problèmes . . . . . . . . . . . . . . . . .11
Page 19

3
Information pour le client
Compacteur
Avant
d’utiliser
votre
compacteur
Lisez attentivement ce manuel. L’information
des pages suivantes vous aidera à faire
fonctionner et à entretenir correctement
votre compacteur.
Gardez-le à portée de la main pour répondre à
vos questions.
S’il y a quelque chose que vous ne comprenez
pas ou si vous avez besoin d’aide, il y a une liste
de numéros de service à la clientèle à la section
arrière de ce manuel.
OU
visitez notre site Web à : www.monogram.com
Inscrivez
les numéros
de modèle
et de série
Vous pouvez trouver vos numéros de modèle et
de série sur la plaque à l’avant du cadre.
Avant d’envoyer la carte, veuillez inscrire ces
numéros ici :
Numéro de modèle
Numéro de série
Utilisez ces numéros pour toute
correspondance ou appel de service au sujet de
votre compacteur.
Si vous recevez
un compacteur
endommagé
Contactez immédiatement le concessionnaire
(ou le constructeur) qui vous a vendu le
compacteur.
Gagner
du temps et
économisez
Avant toute demande de service, consultez la
section Solution de problèmes à l’arrière de
ce manuel.
Vous y trouverez une liste des causes de
problèmes de fonctionnement mineurs que
vous pouvez corriger vous-même.
Si vous
avez besoin
de service
d’entretien
ou de
réparation
Pour obtenir le service, reportez-vous aux
pages du service à la clientèle à l’arrière de
ce manuel.
Nous sommes fiers de notre service et nous
tenons à votre satisfaction. Si pour quelque
raison que ce soit vous n’êtes pas satisfait du
service reçu, voici les étapes à suivre pour
obtenir de l’aide supplémentaire.
D’ABORD, contactez les personnes qui
ont réparé votre appareil. Expliquez votre
insatisfaction. Dans la plupart des cas, cette
démarche solutionnera le problème.
ENSUITE, si vous n’êtes toujours pas satisfait,
contactez-nous sur notre site Web, écrivez tous
les détails y compris votre numéro de
téléphoneou écrivez à :
Manager, Customer Relations
GE Appliances
Appliance Park
Louisville, KY 40225
Page 20

4
AVERTISSEMENT !
Pour votre sécurité, vous devez suivre l’information contenue dans ce manuel pour réduire les
risques d’incendie, d’explosion, de choc électrique ou pour éviter tout dommage matériel, des
blessures ou la mort.
BONNE INSTALLATION ET ENTRETIEN
Ce compacteur doit être installé correctement
et placé conformément aux instructions
d’installation avant de l’utiliser. Si vous n’avez
pas reçu de feuillet d’instructions d’installation
avec votre compacteur, vous pouvez
en trouver un en visitant notre site Web à
www.monogram.com.
• Ce compacteur est réservé à l’utilisation
résidentielle. Utilisez cet appareil seulement
pour l’usage auquel il est destiné selon ce
manuel du propriétaire.
• Il faut une supervision étroite lorsque l’appareil
est utilisé par ou près d’enfants. Ne laissez
jamais le compacteur être utilisé comme jouet
ou fonctionner sans supervision.
• Mettez le bouton à la position OFF (arrêt)
et retirez-le lorsque vous ne faites pas de
compactage d’ordures ménagères. Cela
empêchera toute mauvaise utilisation du
compacteur et empêchera les enfants de
l’utiliser.
• Ne poussez pas les déchets dans le tiroir avec les
mains ou les pieds. Les déchets pourraient
contenir du verre cassé, des pièces de métal
tranchantes ou d’autres objets coupants qui
pourraient provoquer des blessures.
• En retirant ou transportant le sac d’ordures
ménagères, gardez le sac loin de votre corps.
Les objets coupants peuvent l’avoir percé.
• Attention en nettoyant l’intérieur de l’armoire
ou le tiroir à ordures ménagères. Les fragments
de verre pourraient être collés au coulisseau,
incrustés dans la surface du tiroir ou au bas de
l’armoire.
• N’installez pas et ne rangez pas le compacteur à
un endroit où il sera exposé aux conditions
extérieures.
• Assurez-vous que le compacteur est bien installé
et à niveau sur un sol qui peut supporter son
poids.
• Ne touchez pas aux pièces mobiles.
• Ne compactez pas de déchets alimentaires
comme de la viande crue et du poisson, des
couennes, des articles d'hygiène personnelle et
des couches jetables. Ces articles produisent de
très fortes odeurs et ne vont pas dans le
compacteur.
• Ne l’utilisez pas comme appareil amovible.
Utilisez seulement comme appareil encastré.
PRÉCAUTIONS CONTRE L’UTILISATION
DÉRAISONNABLE DU COMPACTEUR :
• Ne compactez jamais de cartouches à plomb, de
cartouches d’armes à feu, de pièces de feu
d’artifice, etc. qui sont très explosifs.
• Ne compactez jamais de matériaux
inflammables comme peinture, chiffons saturés
d’huile ou d’essence, contenants de liquides de
démarrage à moteur, contenants de diluant de
peinture, etc. Il pourrait y avoir une combustion
spontanée ou des concentrations de vapeurs
explosives.
• Ne compactez jamais les contenants de produits
chimiques toxiques comme des insecticides forts
ou autres matériaux toxiques; le compactage
pourrait dégager des vapeurs dangereuses.
• Ne compactez jamais d’aérosols contenant des
produits chimiques explosifs ou très toxiques. (Si
vous êtes certains que les aérosols contiennent
des matériaux non dangereux comme la crème
de rasage, le fromage à tartiner et la crème
fouettée, ils peuvent être compactés.)
• Ne compactez pas les cigarettes, les cigares
allumés ou autres articles chauds ou en feu.
• Ne rangez et n’utilisez pas d’essence ou autres
vapeurs et liquides inflammables près de cet
appareil ou de tout autre appareil
électroménager.
• Ne surchargez pas votre appareil
électroménager.
• Manipulez un sac à poubelle plein avec soin.
Les objets pointus peuvent percer le sac et vous
blesser. Ne surchargez pas le sac à poubelle de
matières lourdes comme du verre.
PRÉCAUTIONS DE SÉCURITÉ
IMPORTANTES INSTRUCTIONS DE SÉCURITÉ
LISEZ TOUTES LES INSTRUCTIONS AVANT
D’UTLILSER CET APPAREIL.
En utilisant des appareils électriques, il faut toujours suivre les précautions de base, y compris ce
qui suit :
Page 21

5
LISEZ ET CONSERVEZ CES INSTRUCTIONS
IMPORTANTES INSTRUCTIONS DE SÉCURITÉ
• Pour éviter tout danger de choc électrique, ce
compacteur doit être bien installé et mis à la
terre conformément aux instructions
d’installation avant de l’utiliser.
• Ne faites pas fonctionner avec un cordon,
une fiche ou un moteur endommagés ou
après tout autre dommage. Faites examiner,
réparer ou ajuster l’appareil par un
technicien de service autorisé.
• Ne démontez pas cet appareil. Un appareil
mal remonté pourrait provoquer un choc
électrique lors de son utilisation subséquente.
• Débranchez le compacteur avant
toutes réparations. REMARQUE : Nous
recommandons fortement que toute
réparation soit exécutée par une personne
qualifiée.
• N’utilisez pas d’adaptateur ou de rallonge
avec cet appareil.
• Suivez les codes nationaux de l’électricité
ou les codes et ordonnances en vigueur
localement. Cet appareil doit être alimenté
d’un courant de 120 V, 60 Hz et branché à un
circuit exclusif mis à la terre correctement et
protégé par un disjoncteur de 15 ou 20
ampères ou un fusible temporisé.
• Si l’alimentation électrique fournie nerépond
pas aux exigences précédentes, appelez un
électricien agréé.
• Nous recommandons de prévoir un circuit
distinct pour cet appareil.
• Ne coupez et ne retirez dans aucun cas la
troisième broche de masse du cordon.
• Cet appareil doit être mis à la terre. Dans le
cas de mauvais fonctionnement ou de panne,
la mise à la terre réduira le risque de choc
électrique en fournissant une voie de
moindre résistance pour le courant
électrique.
• Cet appareil est doté d’un cordon et d’une
fiche avec mise à la terre. La fiche doit être
branchée dans une prise appropriée
correctement installée et mise à la terre
conformément aux codes et règlements
locaux.
AVERTISSEMENT :
Toute mauvaise connexion du conducteur de
mise à la terre de l’équipement pourrait mener
à un risque de choc électrique. Consultez un
électricien qualifié si vous n’êtes pas certain
que l’appareil soit bien mis à la terre.
• Ne modifiez pas la fiche de cet appareil. Si
elle n’entre pas complètement dans la prise,
faites installer une prise appropriée par un
électricien qualifié.
SÉCURITÉ ÉLECTRIQUE
En utilisant des appareils électriques, il faut toujours suivre les précautions de base, y compris ce
qui suit :
Page 22

6
Compacteur
Caractéristiques
Page 23

7
Utilisation du compacteur pour ordures ménagères
Compacteur
Bouton
ON/OFF
(marche/arrêt)
Le bouton amovible est fourni pour votre
protection comme mesure de sécurité. Lorsque
l’interrupteur du bouton est à la position OFF
(arrêt), le compacteur ne peut pas fonctionner.
Instructions pour le verrou d’enfants :
Verrouillez le compacteur lorsqu’il n’est pas
utilisé en retirant le bouton.Cela empêchera les
enfants d’utiliser le compacteur ainsi que toute
autre utilisation abusive.
Interrupteur
de sécurité
du tiroir
Le compacteur a deux interrupteurs de
sécurité pour faire en sorte que le tiroir soit
complètement fermé lorsqu’il est en marche.
Le compacteur ne fonctionnera pas si le tiroir
n’est pas complètement fermé.
Ce qu’il fait
et comment il
fonctionne
Votre compacteur réduit les ordures
ménagères jusqu'à aussi peu qu'un quart
du volume original.
Il compacte la plupart des déchets, y compris le
papier, les cannettes, les bouteilles, les bocaux,
les contenants de plastique, les enveloppes, les
restes de balayage et certains déchets
alimentaires.
Déposez les déchets dans le sac jetable (conçu
pour les compacteurs) à l'intérieur du tiroir
d'ordures ménagères du compacteur et fermez
le tiroir. Lorsque vous allumez le compacteur,
un coulisseau électrique se déplace vers le bas
dans le tiroir, compacte les ordures ménagères,
recule à nouveau et le compacteur s'éteint
automatiquement.
REMARQUE : Le tiroir à ordures ménagères
doit être au moins rempli à moitié avant de
noter le compactage car le coulisseau ne se
déplace pas jusqu'au fond du tiroir. En ajoutant
des ordures, le compactage est transféré aux
articles en dessous jusqu'à ce que tout
soit compacté.
Installation du sac d’ordures ménagères
Avant d’installer un nouveau sac,
assurez-vous que :
1. Le côté du tiroir est bien verrouillé.
2. Le contenant est propre et libre de débris
tranchants qui pourraient percer le sac.
Des sacs de plastique renforcés sont fournis
avec votre compacteur et sont prêts à être
installeés.
Vous devez utiliser les sacs d'ordures
ménagères robustes spécialement conçus pour
cet usage et inclus avec le compacteur. Ces sacs
sont disponibles chez votre concessionnaire ou
au centre de service de l'usine. Demandez le
numéro de catalogue WC60X5017. Si vous
préférez, vous pouvez commander par la poste.
Un formulaire de commande pratique est
fourni avec votre compacteur et est inclus
dans chaque sac de remplacement.
Pour installer un nouveau sac :
1. Placez le sac dans le tiroir sur le chariot
de sac. Ouvrez le sac et tirez les bords
supérieurs par dessus le dessus du tiroir.
2. Verrouillez le sac en place en accrochant
les quatre trous prépercés sur les boutons
de retenue du sac. Les trous s’élargiront
sur les boutons sans problème pour le sac.
3. Pressez l’intérieur du sac contre le bas du
tiroir, les côtés et les coins pour un
ajustement facile.
Page 24

8
Utilisation du compacteur pour ordures ménagères
Compacteur
Chargement
Soulevez un peu et tirez la poignée de la porte
du compacteur ou enfoncez la pédale et sortez
le tiroir.
Rappel :
• Pour aider à garder le coulisseau propre
en compactant des ordures ménagères
salissantes, placez quelques feuilles de
journaux pliées sur le dessus de la charge
à compacter.
• Les articles trop gros pour entrer dans le
tiroir se replient pour s’ajuster dans le tiroir.
Si ce n’est pas possible, n’essayez pas de les
forcer.
• Les journaux repliés sont aussi utiles pour
compacter une grosse bouteille de verre ou
plusieurs bouteilles ou bocaux ou tout autre
article qui pourraient éclater.
• Bien qu’il ne soit pas nécessaire de compacter
jusqu’à ce que le tiroir soit plein ou presque
plein, nous suggérons, pour un compactage
maximum, d’utiliser l’appareil chaque fois
que vous ajoutez une quantité importante
de déchets.
Page 25

9
Utilisation du compacteur pour ordures ménagères
Compacteur
1. Ouvrez complètement le tiroir.
2. Retirez le dessus du sac des boutons de
retenue du sac. Poussez les quatre revers
du sac.
3. Poussez le verrou de côté vers le bas et
penchez le côté du tiroir pour ouvrir.
4. Sortez le sac avec le chariot du sac.
Page 26

10
Entretien et nettoyage du compacteur
Compacteur
Nettoyage de
l’appareil
Comme pour la plupart des appareils électroménagers, il faut un bon
entretien pour une satisfaction continue. Avant de nettoyer le compacteur,
tournez le bouton à la position OFF (arrêt) et retirez. Si vous prévoyez d’être
absent pendant quelques jours, retirez le sac du compacteur. Verrouillez le
compacteur en retirant le bouton et rangez-le en lieu sûr.
Panneaux d’acier inoxydable :
Les panneaux d’acier inoxydable se nettoient
avec Cerama Bryte®ou tout produit semblable
avec un chiffon propre et doux.
Cerama Bryte est disponible auprès de GE Parts
en appelant le 800.626.2002.
Pour nettoyer l'intérieur du tiroir :
1. Retirez le sac. Voir page 9.
2. Portez des gants protecteurs. Il pourrait y
avoir des morceaux de verre dans le tiroir.
Enfoncez le verrou de porte latérale.
3. Tenez le verrou de porte latérale et penchez
le côté du tiroir jusqu'à ce que le verrou
dégage l’avant du tiroir. Le côté du tiroir
se retire en le penchant et le glissant pour
le sortir.
4. Lavez avec un chiffon humide à l’aide d'eau
tiède savonneuse. Rincez et asséchez avec un
chiffon doux.
5. Si le côté du tiroir a été retiré, remettez-le en
position penchée.
6. Enfoncez le verrou de la porte latérale en
pressant le côté à la position verticale.
Verrouillez le verrou de porte latérale.
Pour nettoyer l’intérieur de l’armoire :
1. Sortez le tiroir jusqu’à ce qu’il s’arrête.
Notez les rails où se déplacent les roulettes
du tiroir.
2. Soulevez l’avant pour dégager les butées du
tiroir. Agrippez le tiroir des deux côtés.
Sortez jusqu'au bout et mettez de côté.
3. Passez l’aspirateur à l’intérieur de l’armoire.
Nettoyez à la main les déversements liquides
ou les déchets humides ou passez un
aspirateur conçu pour ramasser le liquide.
4. Lavez, rincez et asséchez l’intérieur.
Page 27

11
Questions?
Utilisez ce
tableau de
résolution
de problèmes
PROBLÈME CAUSE POSSIBLE QUOI FAIRE
Le compacteur ne Le compacteur est bloqué • Assurez-vous que le cordon est bien
fonctionne pas branché dans une prise sous tension.
Le fusible ou disjoncteur • Vérifiez les fusibles ou les disjoncteurs.
est grillé/désactivé Remplacez le fusible ou réinitialisez le
disjoncteur.
Le bouton de l’interrupteur • Assurez-vous que l’interrupteur est à la
pourrait ne pas être à la position ON (marche).
position ON (marche)
• La pédale n’a peut-être pas été soulevée
assez longtemps pour lancer le cycle de
compactage.
Le tiroir n’est peut-être • Assurez-vous que le tiroir est bien fermé.
pas fermé
Le moteur du compacteur • Si vous avez compacté plusieurs fois en peu
comporte un mécanisme de temps, cette protection pourrait avoir fermé
protection thermique qui se le moteur. Attendez quelques minutes et le
remet en marche moteur se remettra en marche
automatiquement automatiquement.
Le tiroir est difficile Des ordures pourraient être • Retirez toutes les ordures.
à fermer tombées derrière le tiroir
Le tiroir ne s'ouvre pas Le coulisseau n’est pas à la • Soulevez la pédale et relâchez pour
fin de sa course permettre au coulisseau de terminer
un cycle.
Peu ou aucun Le tiroir n’est pas • Le tiroir doit être au moins rempli à
compactage apparent assez rempli Le coulisseau ne se déplace pas jusqu’au
bas. Les ordures au bas du tiroir seront
écrasées durant les cycles subséquents.
Des ordures sont coincées • Retirez toutes les ordures.
entre le coulisseau et
le panier
Avant d'appeler le service...
Compacteur
Page 28

GARANTIE DE VOTRE COMPACTEUR MONOGRAM
Agrafez votre reçu ou votre chèque encaissé ici. La preuve de date
d’achat original est nécessaire pour obtenir le service sous garantie.
CE QUI EST
COUVERT
À partir de la
date d’achat
original
Certaines états/provinces n’acceptent pas d’exclusion ou de limites aux dommages indirects et
consécutifs, il se peut donc que l’exclusion précédente ne s’applique pas dans votre cas. Cette
garantie vous donne des droits juridiques précis et vous pourriez aussi avoir d'autres droits qui
varient d’une juridiction à l’autre. Pour connaître vos droits juridiques dans votre état, consultez
votre bureau des affaires aux consommateurs local ou d’État ou l’avocat général de votre État.
Garant : General Electric Company, Louisville, KY 40225.
CE QUI
N'EST PAS
COUVERT
• Les déplacements du service pour vous
enseigner comment utiliser le produit
chez vous.
• Mauvaise installation, livraison ou
maintenance.
• Remplacement des fusibles résidentiels ou
réinitialisation des disjoncteurs.
• Défaillance du produit suite à un abus,
mauvaise utilisation ou utilisation à des
fins autres que celles prévues ou
utilisation commerciale.
• Dommage au produit suite à un accident,
incendie, inondations ou force majeure.
• Dommages indirects ou consécutifs causés
par des défauts possibles de l’appareil.
• Dommages après la livraison.
Garantie
Compacteur
12
UN AN
Toute pièce du compacteur qui connaît un défaut de matériaux ou de fabrication. Durant cette
garantie complète d’un an, GE fournira aussi, sans frais, toute la main d’œuvre et le service à
domicile pour remplacer une pièce défectueuse.
Cette garantie est offerte à l’acheteur original et à tout autre propriétaire pour les produits
achetés pour une utilisation résidentielle dans les 48 états continentaux, Hawaii, Washington
(D.C.) ou au Canada.
En Alaska, la garantie est la même sauf qu’elle est LIMITÉE puisque vous
devez payer l’expédition du produit à l’atelier de service ou le coût du voyage d’un technicien de
service chez vous.
Tout le service sous garantie est fourni par nos Centres de service en usine ou par un technicien
de Customer Care®autorisé durant les heures normales de travail.
Si votre appareil doit être réparé durant la période de garantie ou après cette période, aux É.-U.,
appelez le 800.444.1845.
Page 29

13
Service à la clientèle
Compacteur
Avec l’achat de votre nouvel appareil Monogram vous recevez
aussi l’assurance que si vous avez besoin d’information ou d’aide
de GE, nous serons là pour vous. Vous n’avez qu'à appeler le
numéro sans-frais !
GE Answer
Center
®
Aux É.-U. :
800.626.2000
Peu importe votre question au sujet des appareils électroménagers Monogram, le GE Answer
Center®est disponible pour vous aider. Vous aurez une réponse à vos questions rapidement et
de manière courtoise. Vous pouvez appeler en tout temps. Le GE Answer Center®est ouvert
24 heures par jour, 7 jours par semaine.
OU
visitez notre site Web à : www.monogram.com
Le service de
réparation
In-Home
Aux É.-U. :
800.444.1845
Un professionnel du service à la clientèle GE vous fournira un service de réparation expert à
un moment qui vous convient. De nombreux endroits gérés par GE Consumer Service vous
offrent un service le jour même ou le lendemain ou selon ce qui vous convient (7 h 00
à 19 h 00 la semaine, de 9 h 00 à 14 h 00 Samedi). Nos techniciens formés en usines
connaissent parfaitement votre appareil et ils peuvent donc s’occuper de la plupart des
réparations en une seule visite.
Contrats de
service
Aux É.-U. :
800.626.2224
Ne vous inquiétez pas non plus pour le service après la fin de votre garantie, GE Consumer
Service sera encore là. Achetez un contrat de GE avant la fin de votre garantie et vous aurez
un rabais important. Avec un contrat de plusieurs années, vous êtes assuré d’avoir les prix
actuels pour le service à l’avenir.
Pièces et
accessoires
Aux É.-U. :
800.626.2002
Les personnes qualifiées pour la réparation de leurs propres appareils peuvent faire envoyer
directement les pièces ou les accessoires à leur résidence. Le système de pièces GE offre un
accès à plus de 47 000 pièces et toutes les pièces de rechange authentiques de GE sont
entièrement garanties.
Les instructions de maintenance de l’utilisateur dans ce manuel couvrent les procédures à
effectuer par tout utilisateur. Tout autre entretien ou toute réparation doivent être confiés à
du personnel qualifié. Il faut être prudent puisqu’un mauvais entretien ou une mauvaise
réparation pourraient provoquer un fonctionnement dangereux.
Pour les clients
aux besoins
spéciaux...
Aux É.-U. :
800.626.2000
GE offre des contrôles en braille pour une gamme d’appareils GE et
une brochure pour aider à planifier une cuisine sans obstacle pour
les personnes à mobilité limitée.
Les clients malentendants ou ayant des difficultés d’élocution et qui
ont accès à un ATME ou à un téléimprimeur traditionnel peuvent
appeler le 800.TDD.GEAC (800.833.4322) pour demander de
l’information ou des services.
www.monogram.com
Page 30

14
Remarques
Compacteur
Page 31

15
General Electric Company
Warranty Registration Department
P.O. Box 34980
Louisville, KY 40232-2150
Placez
un timbre
de 1
re
classe ici
GE Appliances
Enregistrement du
propriétaire de produit
au consommateur
Important Postez dès aujourd’hui !
Page 32

GE Consumer & Industrial
Appliances
General Electric Company
Louisville, KY 40225
ge.com
165D4700P317
49-5993
Imprimé en Chine
08-05 JR
Enregistrement du propriétaire de produit au consommateur
Chère cliente, cher client,
Merci d’avoir acheté notre produit et merci de nous faire confiance. Nous sommes fiers de vous
compter parmi nos clients!
Suivez ces trois étapes pour protéger votre investissement dans un nouvel appareil électroménager :
1
Veuillez remplir et poster
votre enregistrement de
propriétaire du produit au
consommateur dès
aujourd’hui.
Vous n’aurez plus à vous
inquiéter puisque vous
saurez que nous pouvons
vous contacter dans le
cas fort peu probable
d’unemodification
de sécurité.
2
Après avoir terminé cet
enregistrement, inscrivez
vos numéros de modèle
et de série dans ce
manuel et rangez-le en
lieu sûr. Vous aurez
besoin de cette
information pour tout
service de réparation.
Le numéro aux É.-U. :
800.444.1845. Au
Canada, appelez le
1.888.880-3030.
3
Lisez attentivement
votre « Manuel du
propriétaire ».
Il vous aidera à
faire fonctionner
correctement votre
nouvel appareil.
Important : Si vous n’aviez pas de carte d’enregistrement avec votre produit, détachez et retournez le formulaire plus
bas pour assurer l’enregistrement de votre produit, ou enregistrez-le en ligne à www.monogram.com.
Enregistrement du propriétaire de produit au consommateur
Produit Numér
o de modèle Numéro de série
Compacteur
Important
P
o
stez d
ès
au
jo
u
rd
’h
u
i !
Prénom
Apt. no.
Adresse
municipale
Ville
Nom
Code
Zip/
postal
État/
Province
Date
d’installation
Mois Jour Année
Numéro de
téléphone
FERMER À L’AIDE D’UN RUBAN ADHÉSIF
PLIER ICI
M. Mme
Mllel
GE Consumer & Industrial
Louisville, KY 40225
Monogram®
 Loading...