

©
GEAppliances
Models
14, 16,18
_geapplia,oes.com Part No. 162D3905PO08 Pub.No. 49-60056 9-99JR
Congratulations!
m
YouAre Now Part of the GEFamily
Welcome to the GE family. We're proud of our
u
quality products and we are colrmfitted to providing
dependable service. You'll see it in this easy-to-use
Owner's Manual and you'll hear it in the friendly
voices ofom" ca_stomer service deparnnent.
m
Best of all, you'll experience these values each time
you use your refrigerator. That's important, because
your new refrigerator will be part of your family for
many years. And we hope you will be part of ours for
m
a long time to come.
We thank you for buying GE. We appredate your
purchase, and hope youwill continue to rely on us
m
.h
whenever you need quality appliances for your home.
GE& You,A ServicePartnership.
YOURRECORDS
m
Write the model and serial numbers here:
#
m
#
m
m
m
You can find them on a label on the upper left side of the fresh
food compartment.
Staple sales slip or cancelled check here.
Proof of the original purchase date is needed to obtain service
under the warranty.
READTHISMANUAL
Inside you will find many helpful hints on how to use and
maintain your refrigerator properly.Just a little preventive care
on your part can save you a great deal of time and money over
the life of your refrigerator.
IFYOUNEEDSERVICE
You'll find many answers to common problems in the Before You
CallForService section. Ifyou review our chart of Troubleshooting
"tipsfirst, you may not need to call for service at all.
If you do need service, you can relax knowing help is only a
phone call away. A list of toll-free customer service numbers is
included in the back section. Or, in the U.$., you can always call
the GE Answer Center ®at 800.626.2000, 24 hours a day, 7 days
a week. ta Canada, call 1_00-361-3400.
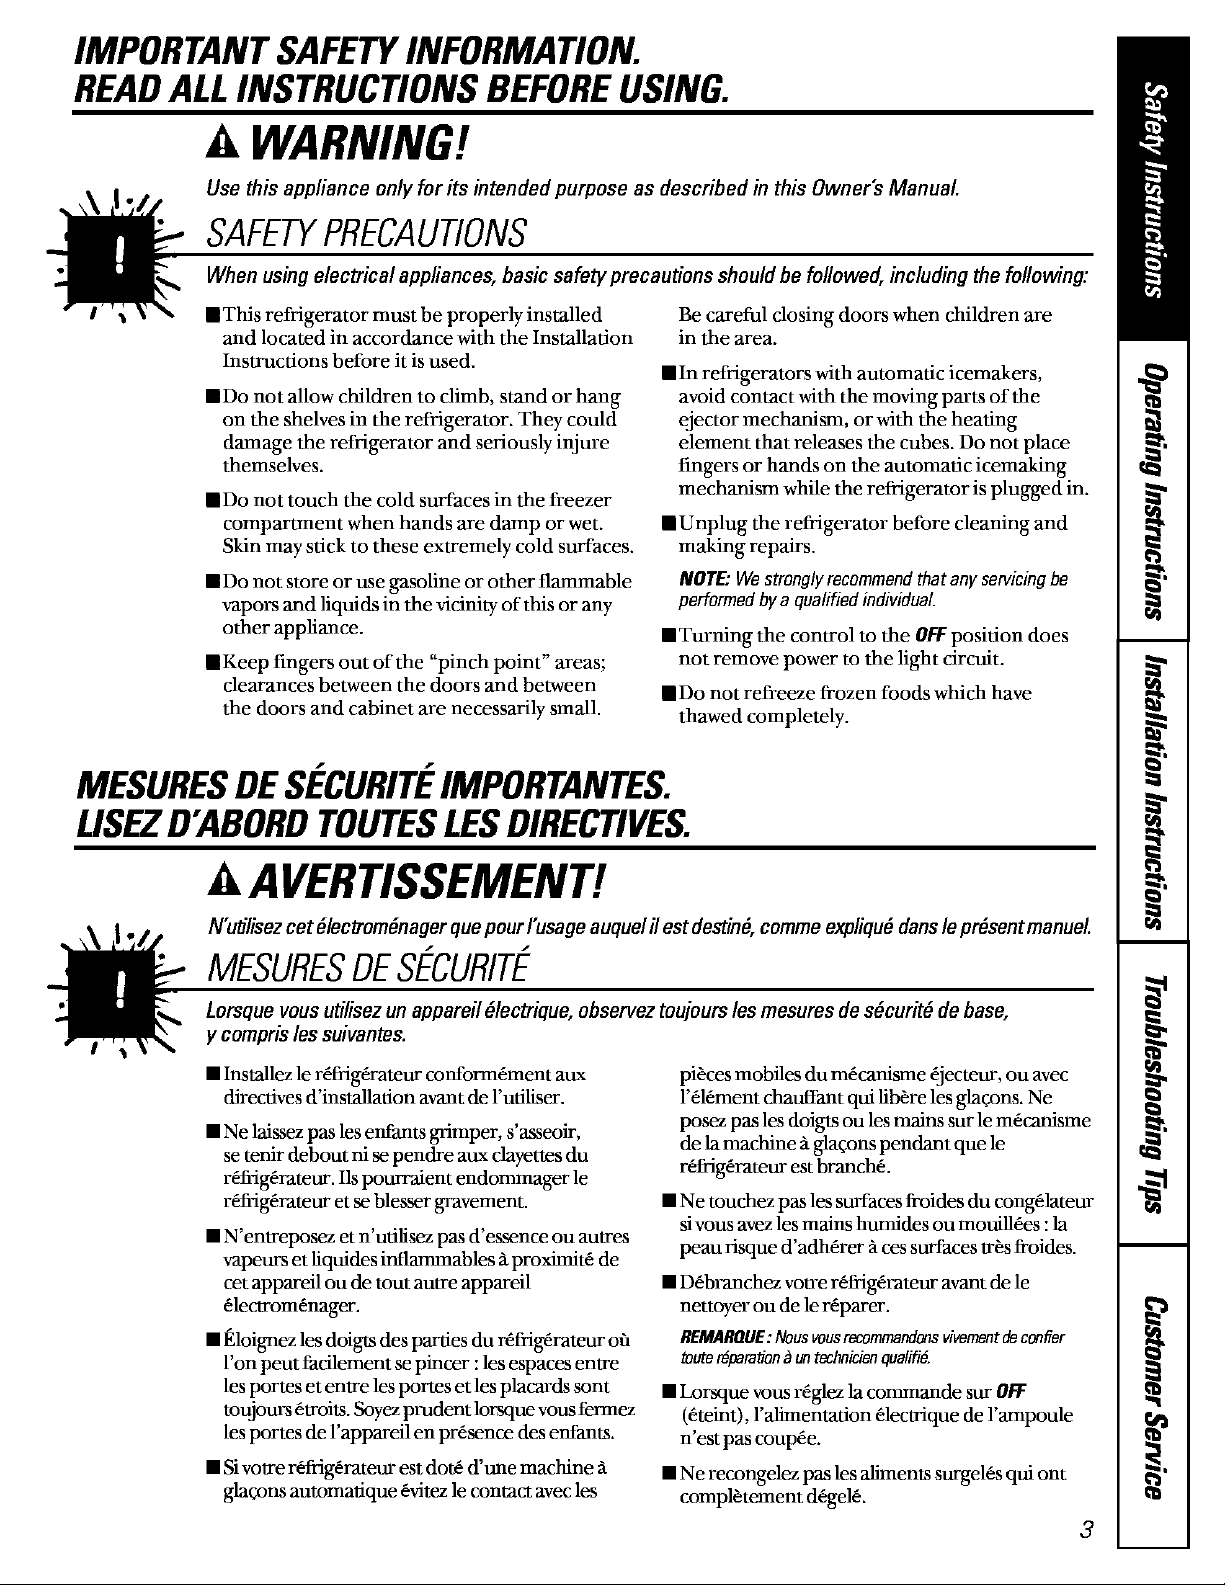
IMPORTANTSAFETYINFORMATION.
READALLINSTRUCTIONSBEFOREUSING.
WARNING!
Use this appliance only for its intended purpose as described in this Owner's Manual
SAFETYPRECAUTIONS
When using electrical appliances, basic safety precautions should be followed, including the following:
• This refrigerator must be properly installed
and located in accordance with the Installation
Instructions before it is used.
• Do not allow children to climb, stand or hang
on the shelves in the refrigerator. They could
damage the refrigerator and seriously injure
themselves.
• Do not touch the cold surfaces in the freezer
compartment when hands are damp or wet.
Skin may stick to these extremely cold surfaces.
• Do not store or use gasoline or other flammable
vapors and liquids in the vicinity of this or any
other appliance.
• Keep fingers out of the "pinch point" areas;
clearances between the doors and between
the doors and cabinet are necessarily small.
Be careful closing doors when children are
in the area.
• In refrigerators with automatic icernakers,
avoid contact with the moving parts of the
ejector mechanism, or with the heating
element that releases the cubes. Do not place
fingers or hands on the automatic icemaking
mechanism while the refrigerator is plugged in.
• Unplug the refrigerator before cleaning and
making repairs.
NOTE:Westronglyrecommendthatanyservicingbe
performedbya quafifiedindividual
• Turning the control to the OFFposition does
not remove power to the light circuit.
• Do not refreeze frozen foods which have
thawed completely.
MESURESDES 'CURIT "IMPORTANTES.
LISEZD'ABORDTOUTESLESDIRECTIVES.
A,AVERTISSEMENT!
N'utilisez cet #lectrom6nager quepour rusage auquel il est destin#, comme expliqu# clansle prOsentmanuel
MESURESDESECURITE
Lorsque vous utilisez un appareil #lectrique, observez toujours les mesures de sOcurit# de base,
y compris les suivantes.
• Installez le r_frigarateur conform_ment aux
directives d'installation avant de l'utilise_.
• Ne laissez pas les enfants grimper, s'asseoir,
se tenir debout ni se pendre aux clayettes du
r_frig_rateur. Ils pottrraient endommager le
r_frig_rateur et se blesser gravement.
• N'entreposez et n'utilisez pas d'essence ou autres
vapeurs et liquides inflammables _ proxhnitfi de
cet appareil ou de tout autre appareil
_lectrom_nager.
• £1oignez les doigts des parties du r_frig_rateur o_
l'on peut facilernent se pincer : les espaces entre
les portes et entre les portes et les placards sont
toujours _troits. Soyez prudent lorsque vous fermez
les portes de l'appareil en presence des enfants.
• Sivotre r_frig_rateur est dotk d'une machine _t
glaqons automatique _vitez le contact avec les
pieces mobiles du m_canisme _jectettr, ou avec
l'_l_ment chauffant qui lib_re les gla_ons. Ne
posez pas les doigts ou les mains sur le m_canisme
de la machine &glagons pendant que le
r_frig_ratettr est branch,.
• Ne touchez pas les surfaces froides du congelateur
si vous avez les mains humides ou mouillees :la
peau risque d'adherer &ces surfaces tres froides.
• Debranchez votre refrigerateur avant de le
nettoyer ou de le reparer.
REMARQUE: Nousvousrecommandonsvivome_tdoconfier
touter#paralion_ untechnicie_qualifi#.
• Lorsque vous reglez la commande sur OFF
(eteint), l'alhnentation electrique de l'ampoule
n'est pas coupee.
• Ne recongelez pas les ailments surgel_s qui ont
compl_tement d_gel&
3
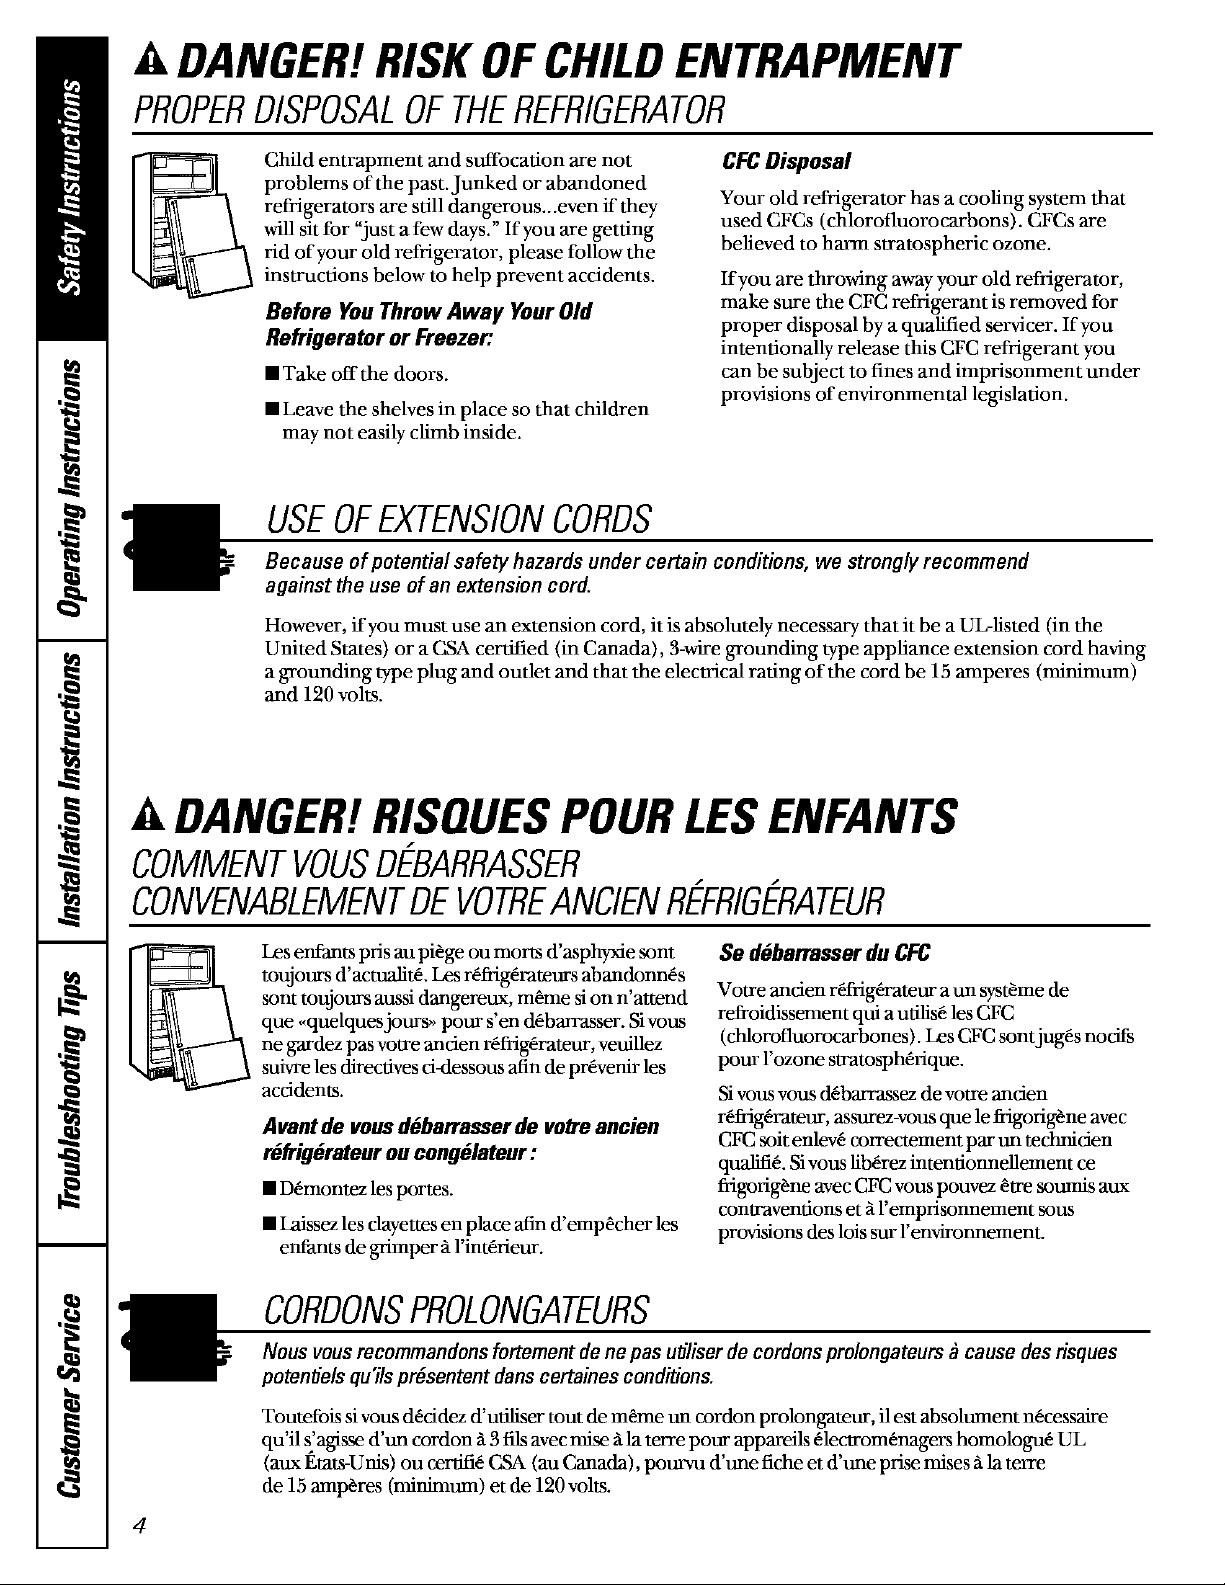
A DANGER!RISKOFCHILDENTRAPMENT
PROPERDISPOSALOFTHEREFRIGERATOR
Child entrapment and suffocation are not
problems of the past.Junked or abandoned
will sit for "just a few days." If you are getting
rid of your old refrigerator, please follow the
_ efrigerators are still dangerous...even if they
instructions below to help prevent accidents.
Before YouThrow Away YourOld
Refrigerator or Freezer:
• Take off the doors.
• Leave the shelves in place so that children
may not easily cfimb inside.
CFCDisposal
Your old refrigerator has a coofing system that
used CFCs (chlorofluorocarbons). CFCs are
befieved to harm stratospheric ozone.
If you are throwing away your old refrigerator,
make sure the CFC refrigerant is removed for
proper disposal by a qualified selwicer. If you
intentionally release this CFC refrigerant you
can be subject to fines and imprisonment under
provisions of environmental legislation.
USEOFEXTENSIONCORDS
Because of potential safety hazards under certain conditions, we strongly recommend
against the use of an extension cord.
However, if you must use an extension cord, it is absolutely necessary that it be a UL-listed (in the
United States) or a CSA certified (in Canada), 3-wire grounding type appliance extension cord having
a grounding type plug and outlet and that the electrical rating of the cord be 15 amperes (minimum)
and 120 volts.
DANGER!RISQUESPOURLESENFANTS
COMMENTVOUSOEBARRASSER
CONVENABLEMENTDEVOTREANCIENRE-FRIGERATEUR
Les enfants pris au pi_ge ou morts d'asphyxie sont
toujours d'actuafit& _ r_frig_rateurs abandonn_s
sont toujours aussi dangereux, m_me si on n'attend
que ,,quelquesjours,_ pour s'en d_ban-asser. Sivous
ne gardez pas votre ancien r_ffig_rateur, veuillez
sffwre les directives d_lessous afin de pr_venir les
accidents.
Avant de vous ddbarrasser de votre ancien
rdfrigdrateur ou eongdlateur :
• D_montez les portes.
• Laissez les clayettes en place afin d'emp_cher les
enfants de grimper &l'int_rieur.
CORDONSPROLONGATEURS
Nous vous recommandons fortement de ne pas utiliser de cordons prolongateurs _ cause des risques
potentiels qu'ds pr#sentent clans certaines conditions,
Se ddbanasserdu CFC
Votre ancien r_frig&-ateur a un syst_me de
refroidissement qui a utilis_ les CFC
(chlorofluorocarbones). Les CFC sontjug_s nocifs
pour l'ozone sWatosph_rique.
Si vous vous d_barrassez de votre ancien
r_frig_rateur, assurez-vous que le frigorig_ne avec
CFC soit enlev_ correctement par un technicien
qualifi& Sivous lib_rez intentionnellement ce
frig_orig_ne avec CFC vous pouvez etre somnis aux
contraventions et _tl'emprisonnement sons
provisions des lois sur l'environnement.
Toutefois si vous d_ddez d'ufiliser tout de m_me un cordon prolongateur, il est absolument n_cessaire
qu'il s'agisse d'un cordon _t3 ills avec nfise _tla terre pour appareils _lectrom_nagers homologu_ UL
(aux Etats-Unis) ou certifi_ CSA (au Canada), pom_m d'une fiche et d'une prise raises _.la terre
de 15 amperes (minimum) et de 120 volts.
4
IMPORTANTSAFETYINFORMATION.
READALLINSTRUCTIONSBEFOREUSING.
A WARNING!
HOWTOCONNECTELECTRICITY
Do not, under any circumstances, cut or remove the third (ground) prong from the power cord.
For personal safe_ this appliance must be properly grounded.
The power cord of this appliance is equipped
with a 3-prong (grounding) plug which mates
with a standard 3-prong (grounding) wall outlet
to minimize the possibility of electric shock
hazard from this appliance.
Have the wall outlet and circuit checked by a
qualified electrician to make sure the outlet is
properly grounded.
Where a standard 2-prong wall oudet is
encountered, it is your personal responsibility
and obligation to have it replaced with a properly
grounded 3-prong wall outlet.
The refrigerator should always be plugged into
its own individual electrical outlet which has a
voltage rating that matches the rating plate.
This provides the best performance and also
prevents overloading house wiring circuits which
could cause a fire hazard from overheated wires.
Never unplug your refrigerator by pulling on the
power cord. Always grip plug firmly and pull
straight out from the outlet.
Repair or replace immediately all power cords
that have become frayed or otherwise danaaged.
Do not use a cord that shows cracks or abrasion
damage along its length or at either end.
When moving the refrigerator away from the
wall, be careful not to roll over or damage the
power cord.
MESURESDES 'CURIT "IMPORTANTES.
LISEZD'ABORDTOUTESLESDIRECTIVES.
A AVERTISSEMENT!
RACCOROEMENTELECTRIQUE
Ne coupez ni retirez en aucun cas la treisi#me broche (mise _ la terre) de la fiche du cordon
d'alimentation. Pour votre s#curit#, cet appareil doit #tre correctement mis _ la terre.
Le cordon d'alimentation de cet appareil est muni
d'une fiche _t3 broches (mise a la ten'e) qui se
branche darts une prise murale ordinaire ft 3
alv_oles (mise ftla terre) pour r_duire au minimum
les risques de chocs 41ectriques.
Faites exanfiner la prise de courant et le circuit par
un _lectriden qualifi_ pour vous assurer que la prise
est correctement raise &la ten'e.
Sila prise murale est du type standard ft 2 alv_oles, il
vous incombe de la faire remplacer par une prise ft3
alv_oles correctement mise &la terre.
Le r_frig_rateur doit toujours _tre branch_ dans sa
propre prise de courant, dont la tension nominale est
identique ftcelle indiqu_e sur la plaque signal_tique.
Cette precaution est recoInmand_e pour garantir
un rendement optimum et _viter une surcharge des
circuits _lectriques de la r_sidence, ce qui poun'ait
crier un risque d'incendie par surchauffe des ills.
Ne d_branchezjan_tis le r_frig_rateur en tirant sur le
cordon d'alimentation. Saisissez fermement la fiche
du cordon et tirez droit pour la retirer de la prise.
R_parez ou remplacez imm_diatement tout cordon
effiloch_ ou endommag& N'utilisez pas un cordon
fendill_ ou pr_sentant des signes d'usure.
Lorsque vous d_placez votre r_frig_rateur du tour,
faites attention de ne pas le faire rouler starle cordon
d'alimentation afin de ne pas l'endommager.
5
IMPORTANTSAFETYINFORMATION.
READALLINSTRUCTIONSBEFOREUSING.
USEOFADAPTERPLUGS(Adapterplugs not permitted in Canada)
Because of potential safety hazards under certain conditions, we strongly recommend against
the use of an adapter plug.
However, if you must use an adapter, where local
codes permit, a temporaryconnectionmay be made
to a properly grounded 2-prong wall outlet by use
of a UL-fisted adapter available at most local
hardware stores.
The larger slot in the adapter must be aligned with
the larger slot in the wall outlet to provide proper
polarity in the connecton of the power cord.
When disconnecting the power cord from the
adapter, alwayshold the adapter in place with
one hand while pulling the power cord plug with
the other hand. If this is not done, the adapter
ground terminal isvery hkely to break with
repeated use.
If the adapter ground terminal breaks, DONOT
USEthe refrigerator until a proper ground has
been established.
Attachingtheadaptergroundterminalto a walloutlet
coverscrewdoesnotgroundtheapplianceunlessthe
coverscrewis metal,andnot insulated,and thewall
outlet isgroundedthroughthehousewiring.Youshould
havethe circuitcheckedbya qualifiedelectricianto
makesumtheoutlet is properlygrounded.
Readandfoflow thisSafetyInformationcarefufly.
SAVETHESEINSTRUCTIONS
MESURESDESECURITEIMPORTANTES.
LISEZD'ABORDTOUTESLESDIRECTIVES.
FICHEO'ADAPTATION€icesd'_daptationnonpermisesa. Canada)
Nous vous recommandons fortement de ne pas utiliser une fiche d'adaptation _ cause des fisques
potentiels qu'elle pr#sente clanscertaines circonstances.
Toutefois, si vous d6ddez d'ufifiser tout de m6me
tree fiche d'adaptation, vous pouvez effectuer un
raccordementtempotaire,si les codes locaux le
permettent, dans une prise de courant _ 2 alv6oles
ad6quatement mise _ la re(re en ufilisant une fiche
d'adaptaton homologu_e UL, en vente dans la
plupart des quincailleries.
La fente la plus longale de la fiche doit _tre align6e
avec la fente la plus longue de la prise mmaie afin
d'assurer la polarit_ appropri_e pour le
branchemem du cordon d'alimentation.
Lorsque vous d_branchez le cordon d'alimentation
de la fiche d'adaptation, saisissez toujours la fiche
d'une main pendant que vous tirez sur la fiche du
cordon d'alimentation de l'au/we. Sinon,
la borne de nfise ftla re(re de la fiche d'adaptation
risque de casser avec le temps.
Sila borne de raise _tla terre de la fiche casse,
NTJTILISEZPASI'appareiltant qu'une raise alla terre
adequate n'aura pas _t_ r_tablie.
Lefait defixerlabornedemise_ la termdela fiche
d'adaptation_ laplaquedela prisedecourantn'assure
pasautomatiquementlamise_ la terredeI'appareil.II
faut quelavissoitenm#tal,nonisol#e,etquelaprisede
courantsoitmise_ la termparfentremiseduc#blagede
la r#sidence.Faitesv#rifierle circuitpar un#lectricien
qualifi#pour vousassurerquelaprise estad#quatement
mise_ laterre.
Veuillezfireetsuivreattenfivementcosmesuresdes#curit#.
CONSERVEZCESDIRECTIVES
6
Aboutthetemperaturecontroldial
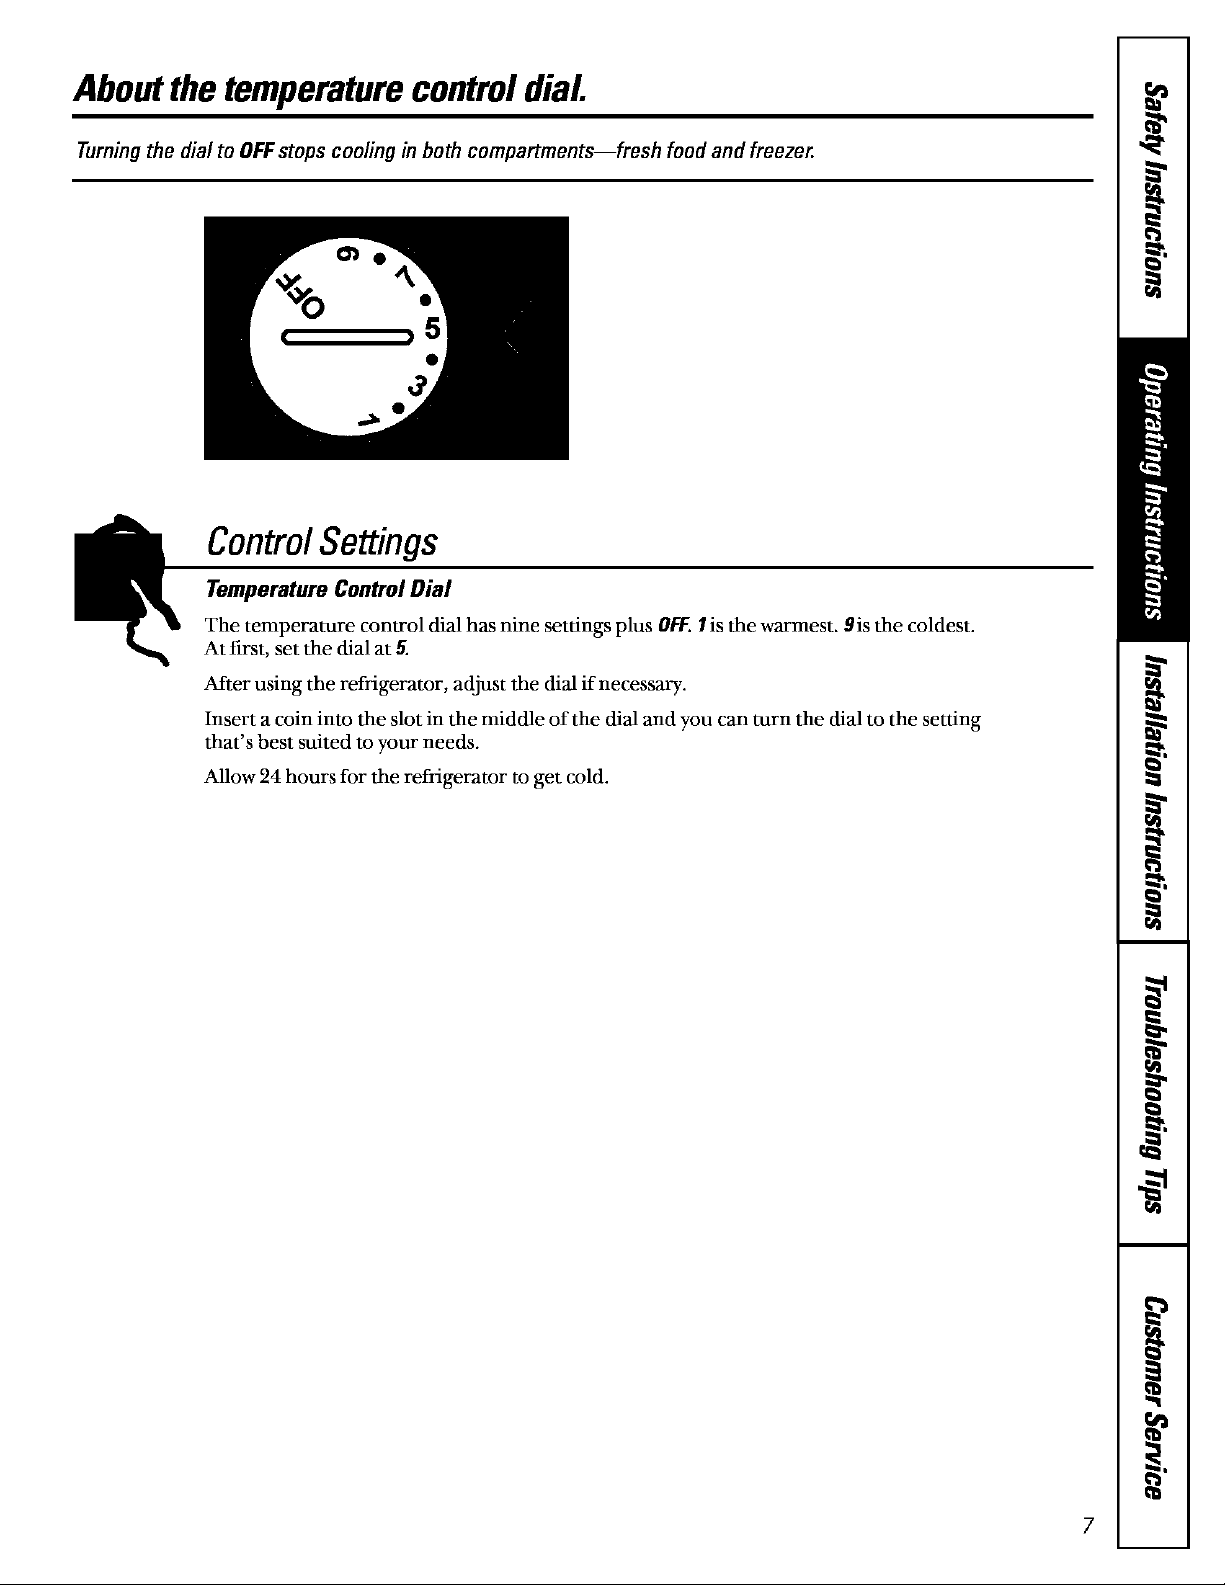
Turning the dial to OFFstops cooling in both compartments--fresh food and freezer.
,5
ControlSettings
Temperature ControlDial
The temperature control dial has nine settings plus OFF.I is the warmest. 9is the coldest.
At first, set the dial at 5.
After using the refrigerator, adjust the dial if necessary.
Insert a coin into the slot in the middle of the dial and you can turn the dial to the setting
that's best suited to your needs.
Allow 24 hours for the refrigerator to get cold.
7
Aboutthefreshfoodcompartmentshelves.
Shelf supports at various levels allow you to custom-space your shelves. Not all features are on all models.
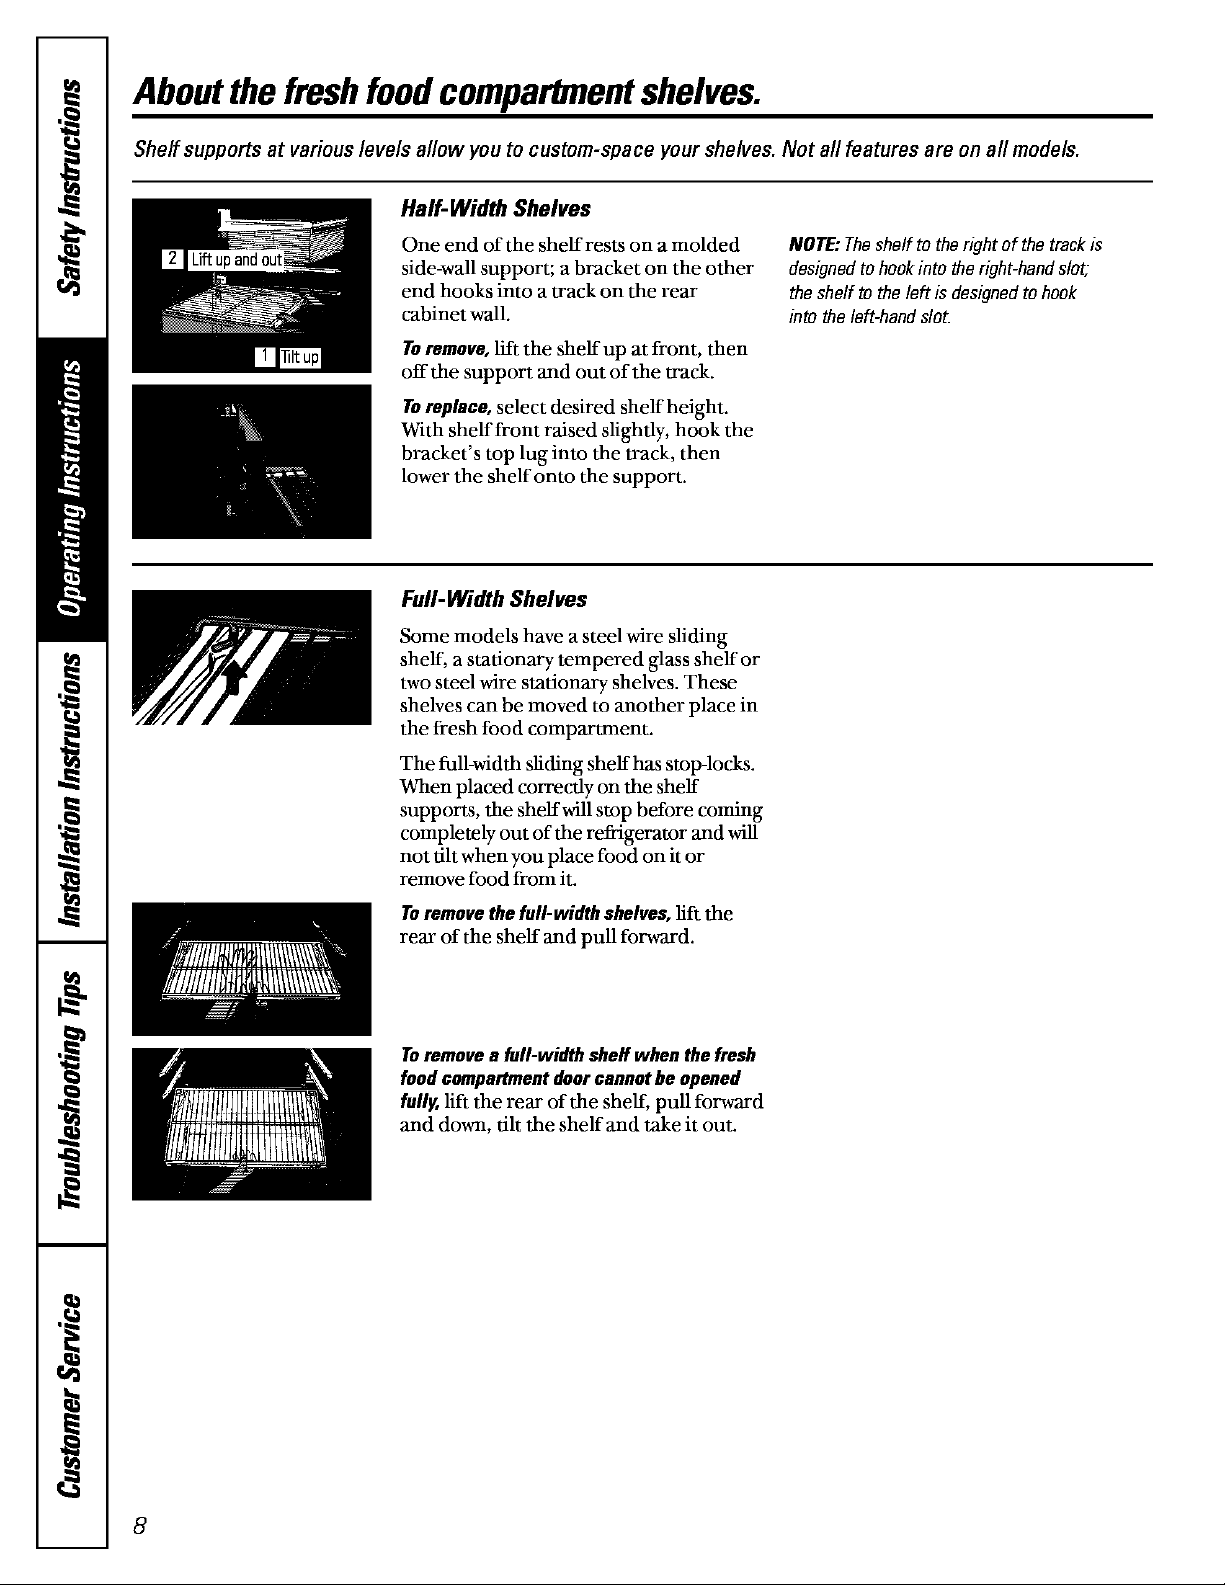
Half-Width Shelves
One end of the shellrests on a molded
side-wall support; a bracket on the other
end hooks into a track on the rear
cabinet wail.
Toremove, lift the shell up at front, then
off the support and out of the track.
Toreplace, select desired shellheight.
With shellfront raised sfightly, hook the
bracket's top lug into the track, then
lower the shellonto the support.
Full-14rtdthShelves
Some models have a steel wire sliding
shell, a stationary tempered glass shell or
two steel wire stationary shelves. These
shelves can be moved to another place in
the fresh food compartment.
The full-width sliding shelf has stop-locks.
When placed correctly on the shell
supports, the shellwill stop before coming
completely out of the refrigerator and will
not tilt when you place food on it or
remove food from it.
NOTE:Theshelfto theright of thetrackis
designedto hookinto theright-handslot,
thesheff tothe leftis designedtohook
into theleft-handslot.
Toremovethefull-width shelves,lift the
rear of the shell and pull forward.
Toremovea full-width sheffwhen thefresh
foodcompartmentdoorcannothe opened
fully,lift the rear of the shell, pull forward
and down, tilt the shelland take it out.
8
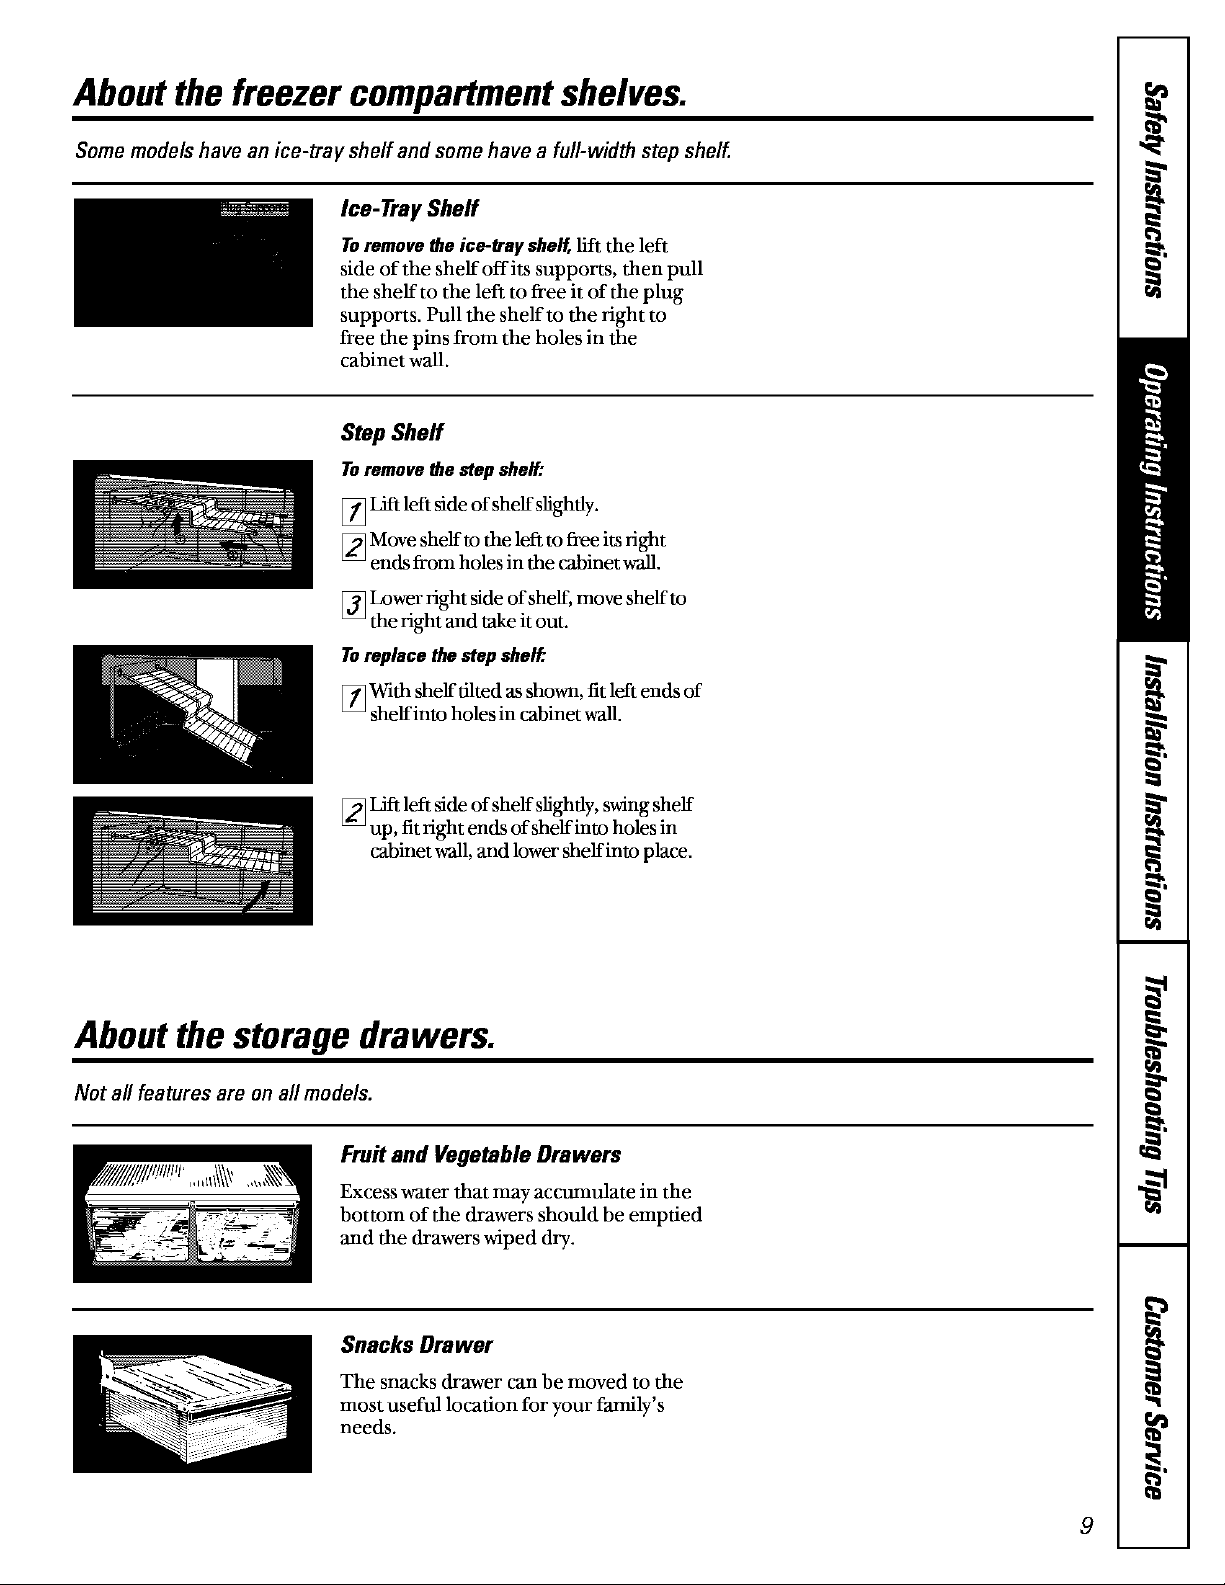
Aboutthefreezer compartmentshelves.
Some models have an ice-tray shelf and some have a full-width step shelf.
Ice- TraySheff
Toremoveb_eice-trayshelf, lift the left
side of the shelf offits supports, then pull
the shelf to the left to free it of the plug
supports. Pull the shelf to the fight to
free the pins from the holes in the
cabinet wall.
StepSheff
Toremovethe step shelf:
[] Lift left side of shelf slightly.
[]Move shelf to the left to free its fight
ends from holes in the cabinet wall.
[]Lower fight side of shelf, move shelf to
the fight and take it out.
Toreplace the stepshelf:.
]With shelf tilted as shown, fit left ends of
shelf into holes in cabinet wall.
[]Lift left side of shelf slightly, swing shelf
up, fit fight ends of shelf into holes in
cabinet wall, and lower shelf into place.
Aboutthestoragedrawers.
Not all features are on all models.
Fruit and Vegetable Drawers
Excess water that may accumulate in the
bottom of the drawers should be emptied
and the drawers wiped dry.
Snacks Drawer
The snacks drawer can be moved to the
most useful location for your family's
needs.
9
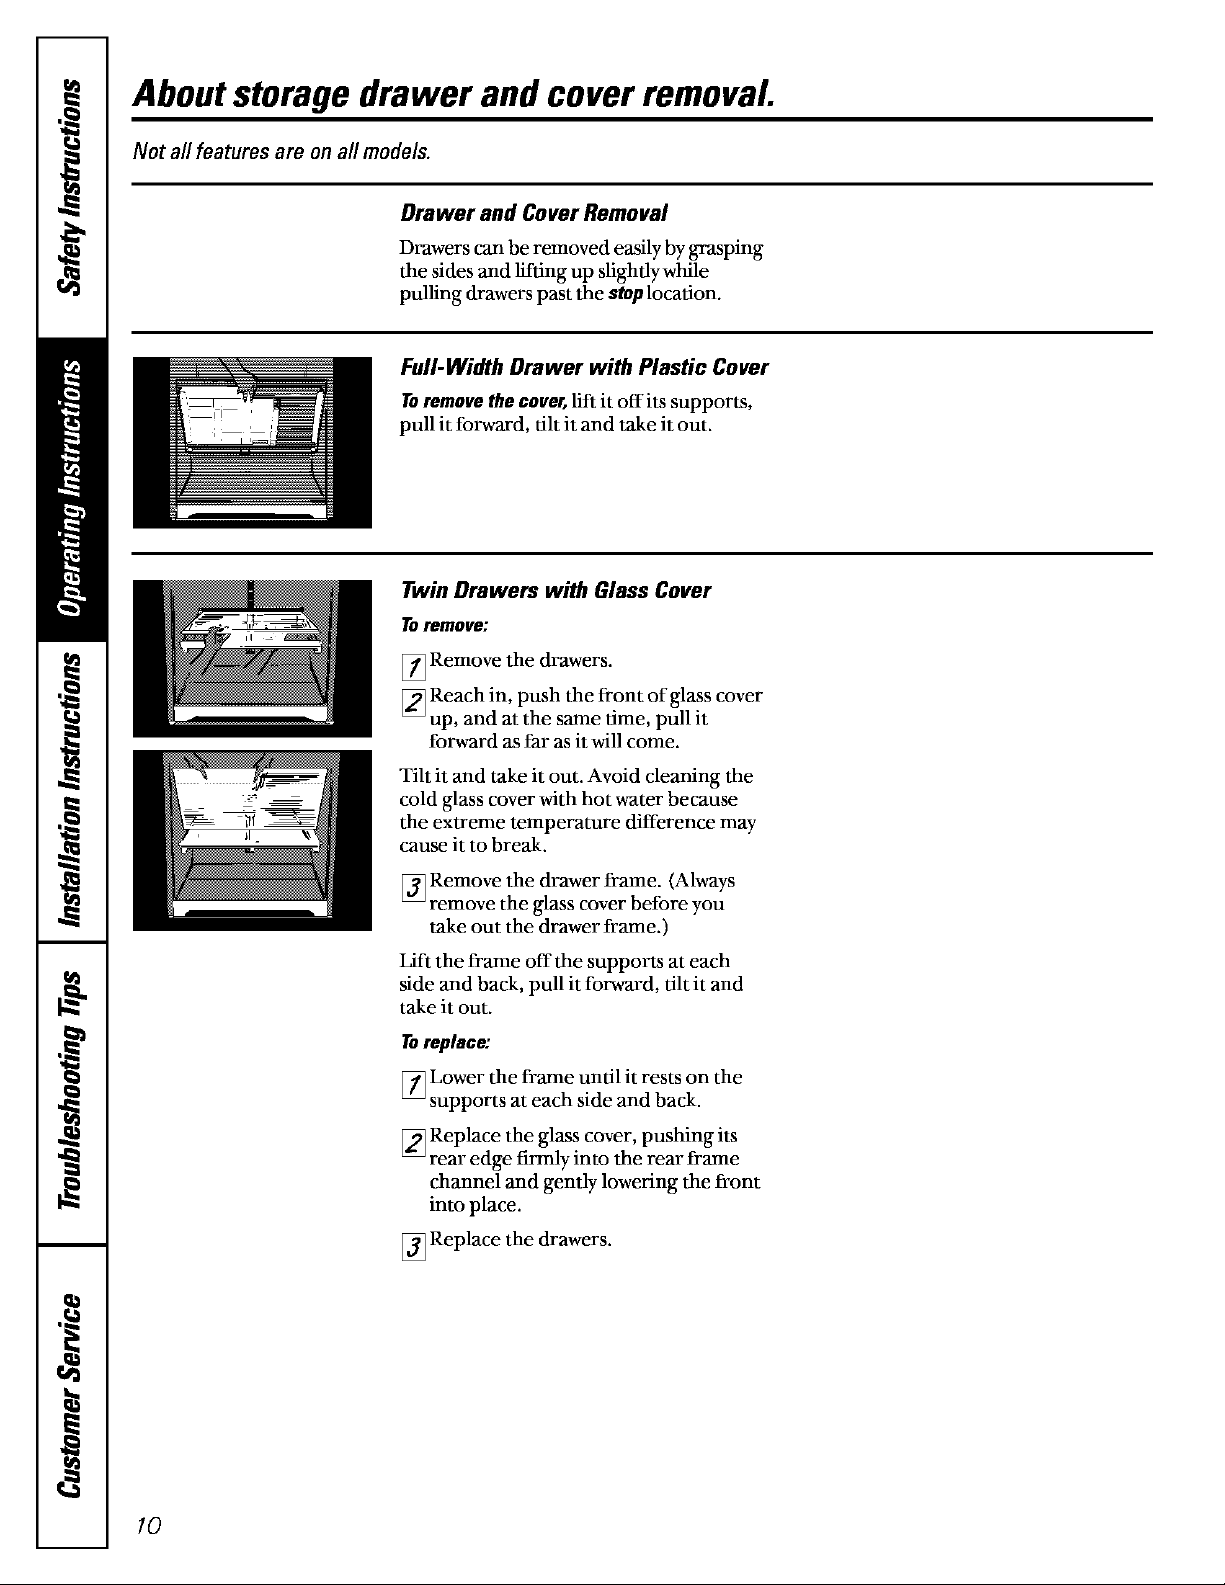
Aboutstoragedrawer andcoverremoval
Not all features are on all models.
Drawer and Cover Removal
Drawers can be removed easily by grasping
the sides and lifting up slightly while
pulling drawers past the atop location.
Full-Width Drawer with Plastic Cover
Toremovethecover,lift it offits supports,
pull it forward, tilt it and take it out.
Twin Drawers with Glass Cover
Toremove:
[]Remove the drawers.
[]Reach in, push the front of glass cover
up, and at the same time, pull it
forward as far as it will come.
Tilt it and take it out. Avoid cleaning the
cold glass cover with hot water because
the extreme temperature difference may
cause it to break.
[]Remove the drawer frame. (Always
remove the glass cover before you
take out the drawer frame.)
Lift the frame off the supports at each
side and back, pull it forward, tilt it and
take it out.
Toreplace:
[]Lower the frame until it rests on the
supports at each side and back.
[]Replace the glass cover, pushing its
rear edge firmly into the rear frame
channel and gently lowering the front
into place.
[]Replace the drawers.
10
 Loading...