

Page 1
0
Models:
1_ Watts
JVM1650
JVM1651
SpacemakerXL Microwave Oven
Owner's Manual
Important SafetyInformation
[]
Operating Instructions
[]
Helpful Information
11
m
[]
Page 2
READ ALL SAFETY
INFORMATION BEFORE USING
Page 3
Welcome m tile GE t_tmily.
We're proud of our quality
products and we believe
in dependable service.
You'll see it in this easT-to-
use manual and you'll hear
it in tile tiiendly voices of
our (onsulller selwice
department.
Best of all, you'll
experience these values
each time you use yollr
microwave. That's
important, because your
new microwave will be
part of your ihmily tor
a long time.
Start HereL.. Before using your Microwave
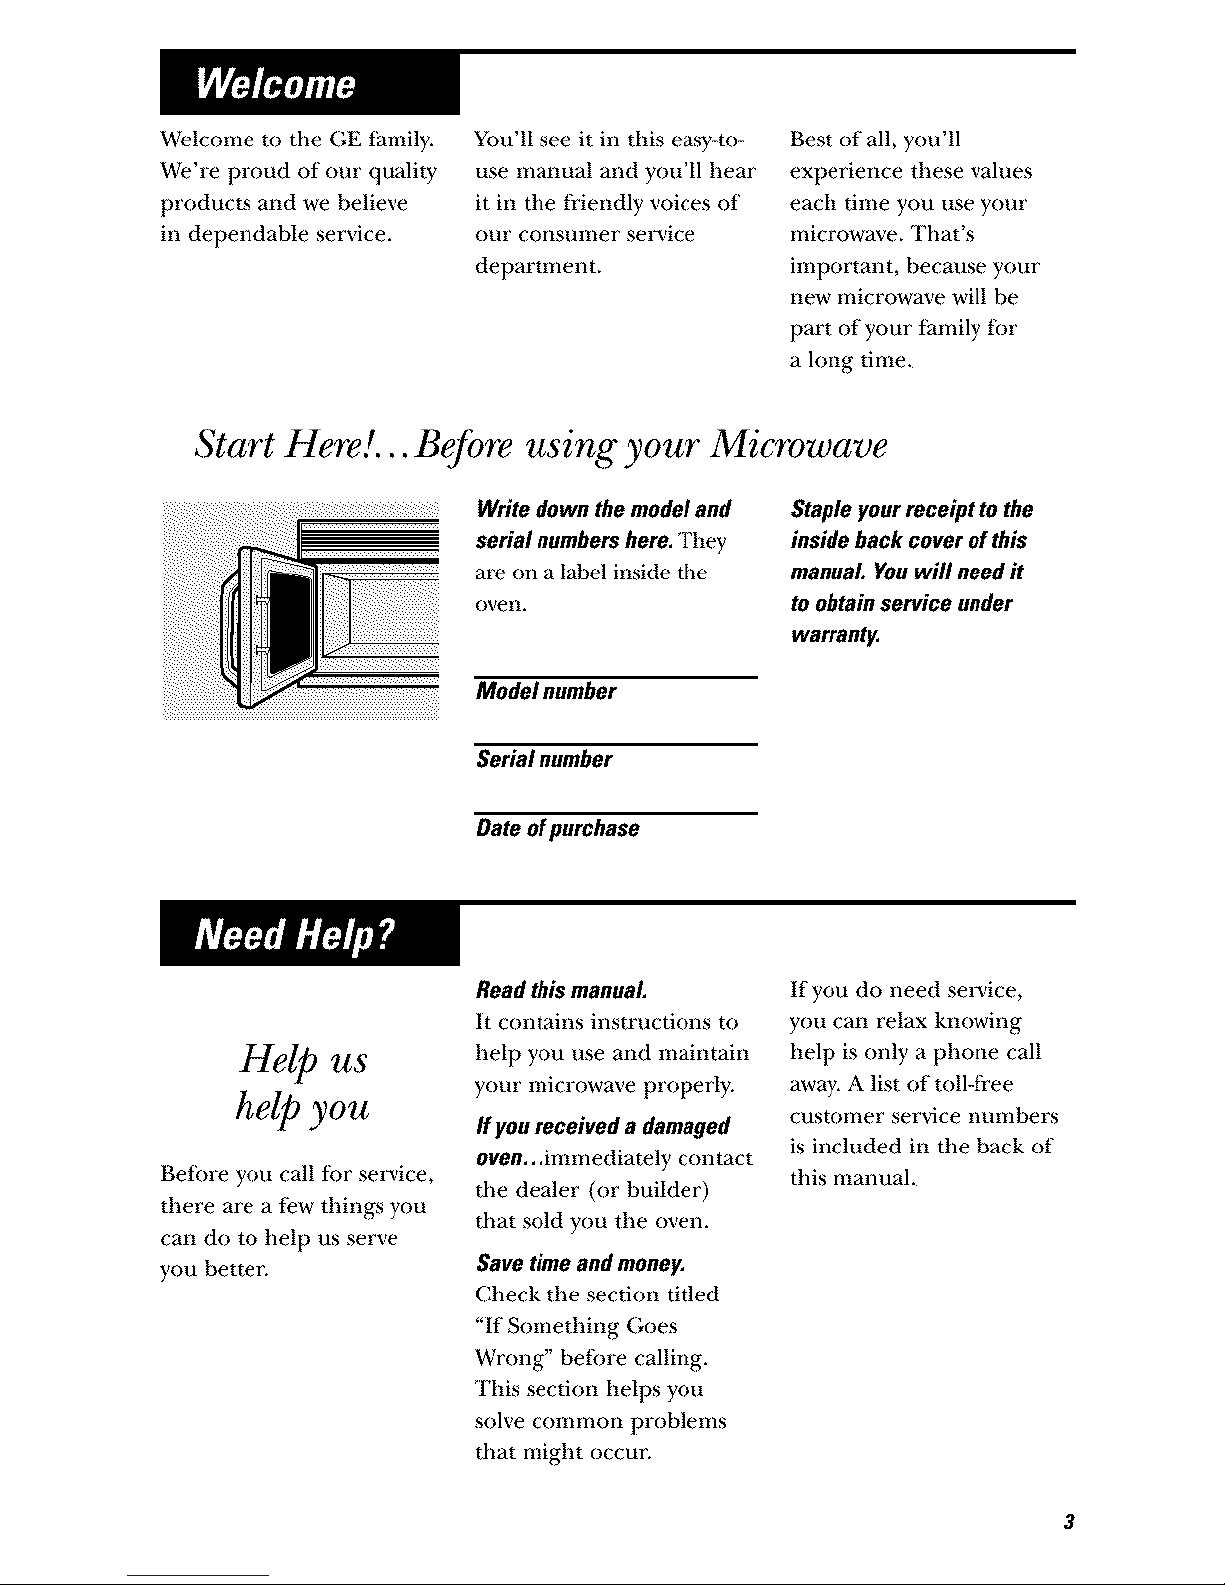
Write down the model and
serial numbers here, They
are on a label inside tile
oven.
Staple your receipt to the
inside back cover of this
manual You will need it
to obtain service under
warranty,
Model number
Serial number
Date of purchase
Help us
help you
Betbre you call tk)r selwice,
there are a f_w things you
can do to help us serve
you better.
Read this manual
It contains instructions to
help you use and maintain
your microwave properly.
If you received a damaged
oven,, .immediately contact
the dealer (or builder)
that sold you the oven.
Save time and money,
Check the section titled
"If Something Goes
Wrong" betbre calling.
This section helps you
solve commoll problems
that might occun
tfyou do need seriice,
you can relax knowing
help is only a phone call
away, A list of toll-fi'ee
customer service nunlhers
is included in tile back of
this manual.
3
Page 4

READ ALL SAFETY
INFORMATION BEFORE USING
• Read and fbllow the
specific "Precautions to
Avoid Possible Exposure
to Excessive Microwave
Energy" on page 2.
• Tills appliance must be
grounded. Connect only
m properly grounded
outlet. See Grounding
instructions section on
page 10.
• DO not illount this
appliance over a sink.
• Install or locate this
appliance only in
accordance with the
provided Installation
instructions.
• Tills over-the-range oven
was designed tk)r use over
ranges no wider than 36"
tt may be installed over
both gas and elect]tic
cooking equipment.
• Do not operate this
appliance if' it has a
damaged power cord or
plug, if it is not working
properly, or if it has been
damaged or dropped.
• DO not cover or block
any openings on the
appliance.
• Use this appliance only
fbr its intended use as
described in this mamml.
Do not use corrosive
chemicals or vapors in
this appliance, This
microwa'¢e oven is
specifically designed m
heat, d] T or cook fbod,
and is not intended
tbr labm-amry o1'
industrial use.
Page 5
I!1
• Do not store this
appliance outdoors.
Do not use this product
near water--_)r exanlple,
in a wet basenlent, near
a swimming pool, near
a sink or in shnilar
locations.
• Keep power cord away
ti'om heated surfaces.
• Do not immerse power
cord or plug in water.
• To reduce tile risk of fire
in the oven cavity:
-- Do not overcook tood.
Caretully attend
appliance when paper,
plastic or other coln-
bustible materials are
placed inside tile oven
while cooking.
-- Renlove wire twist-ties
and metal handles
t_om paper or plastic
containers beibre placing
them in the oven.
-- Do not use tile oven
tor storage purposes.
Do not leave paper
products, cooking
utensils or tood in tile
oven when not in use.
-- If materials inside tile
oven ignite, keep the
oven door closed, turn
the oven Off and
disconnect tile power
cord, or shut off power
at tile fuse or circuit
breaker panel. K tile
door is opened, tile fire
may spread.
-- Do not use tile Sensor
Features twice in
succession Oil tile same
R)od portion. If food is
undercooked after tile
tlrsL coun[down_ ilse
TimeCookfor additional
cooking time.
• See door surface
cleaning instructions ixl
the Care and Cleaning
section (s) of this manual.
• This appliance must only
be se_'iced by qualified
service personnel.
Contact nearest
authorized service tacility
tor examination, repair
or adjustment.
• As with any appliance,
close supervision is
necessary when used
by children.
• Do *lot store anything
directly on top of tile
microwave oven SUl't_4ce
when tile microwave oven
is in operation.
SAVE THESE INSTRUCTIONS
5
Page 6
m
SPECIAL NOTES ABOUT MICROWA VING
Arcing is the microwave
term fin' sparks in the
oven. Arcing is caused by:
• The metal shelf not
installed correctly
so it touches the
microwave wall.
• Metal or toil touching
the side of the oven.
• Foil not molded m tbod
(upturned edges act like
antennas).
• Metal, such as twist-ties,
poultry pins, or gold-
rimmed dishes, in tile
illici owa've.
• Recycled paper towels
containing small metal
pieces being used in the
microwave.
• Do not pop popcorn in
your microwave oven
unless in a special
microwave popcorn
accesso] 3, or unless you
use popcorn labeled for
use ill microwave ovens.
• Some products such _s
whole eggs and sealed
containers--tbr example,
closed jars--are aNe to
explode and should not
be heated in this
microu,ave oven. Such use
of the microwave oven
could result in i_ury.
• Do not boil eggs in a
microwave oven. Pressure
will build up inside egg
yolk and will cause it to
burst, possibly resuhing
in i_!jm_'.
• Operating tile microwave
with no food inside tor
more than a minute or
two inay cause damage
to tile oven and could
start a fire. It increases
the heat around the
magnetron and can
shorten the lite of
the oven.
• Foods with unbroken
outer "skin" such as
potatoes, hot dogs,
sausages, tomatoes,
apples, chicken livers
and other giblets, and
egg yolks should be
pierced to allow steam
to escape during
cooking.
Page 7
I!1
SAFETYFACT
SUPERHfEATEDWATER
Liquids, such as water,
coffee or tea, are able to
be overheated beyond the
boiling point without
appearing to be boiling.
Visible bubbling or boiling
when the container is
removed from the microwave
oven is not always present.
THIS COULD RESULT
IN VERY HOT LIQUIDS
SUDDENLY BOILING OVER
WHEN THE CONTAINER IS
DISTURBED OR A SPOON
OR OTHER UTENSIL IS
INSERTED INTO THE LIQUID,
To reduce the risk of il_jm T
to persons:
-- Do not overheat tile
liquid.
-- Stir tile liquid both
before and half, ray
through heating it.
-- DO not use su~aigh/-
sided containel._ wifll
llarrow necks.
-- Alter beating, allow tile
container to stand in
tile microwave oven
ior a short time belore
renloving tile container.
-- Use extreme care when
inserting a spoon or
other utensil into tile
conminezt
• Avoid beating baby tood
in glass jars, even with
tile lid ott] Make sure all
intant ff)od is thoroughly
cooked. Stir food to
disnibute tile heat evenly.
Be caretid to prevent
scalding when warming
tk3rmula or brea_st milk.
Tile container may t_el
cooler than the milk
really is. Always test the
milk betkwe fbeding
tile baby.
• Don't deli'ost ti'ozen
beverages in narrow-
necked bottles (especially
carbonated beverages).
Even if the container is
opened, pressure can
build up. This can cause
the container to burst,
possibly resulting in
injur)z
• Itot fbods and steam
can cause burns. Be
caretul when opening
any containers of hot
fired, including popcorn
bags, cooking pouches
and boxes. '[_) prevent
possiNe hi.jury, direct
steam away tl*onl bands
and t_me.
• Do not overtook
potatoes. They could
dellyd_ate and catch
fire, causing damage
to your oven.
• Cook meat and poultry
thorougldy--meat m
at least an INTERNAL
temperature of 160°F
and poultry to at least an
INTERNAL temperature
of 180°E Cooking to
these temperatures
usually protects against
toodborne illness.
7
Page 8
m
SPECIAL NOTES ABOUT MICRO WAVING
Make silre all cookware
used in your microwave
oven is suitable fbr
nticrowaving. Most glass
casseroles, cooking dishes,
measuring cups, custard
cups, potter)* or cbina
dinnerware which does not
have metallic trim or glaze
with a metallic sheen Call
be used, Some cookware
is labeled "suitable for
microwaving?'
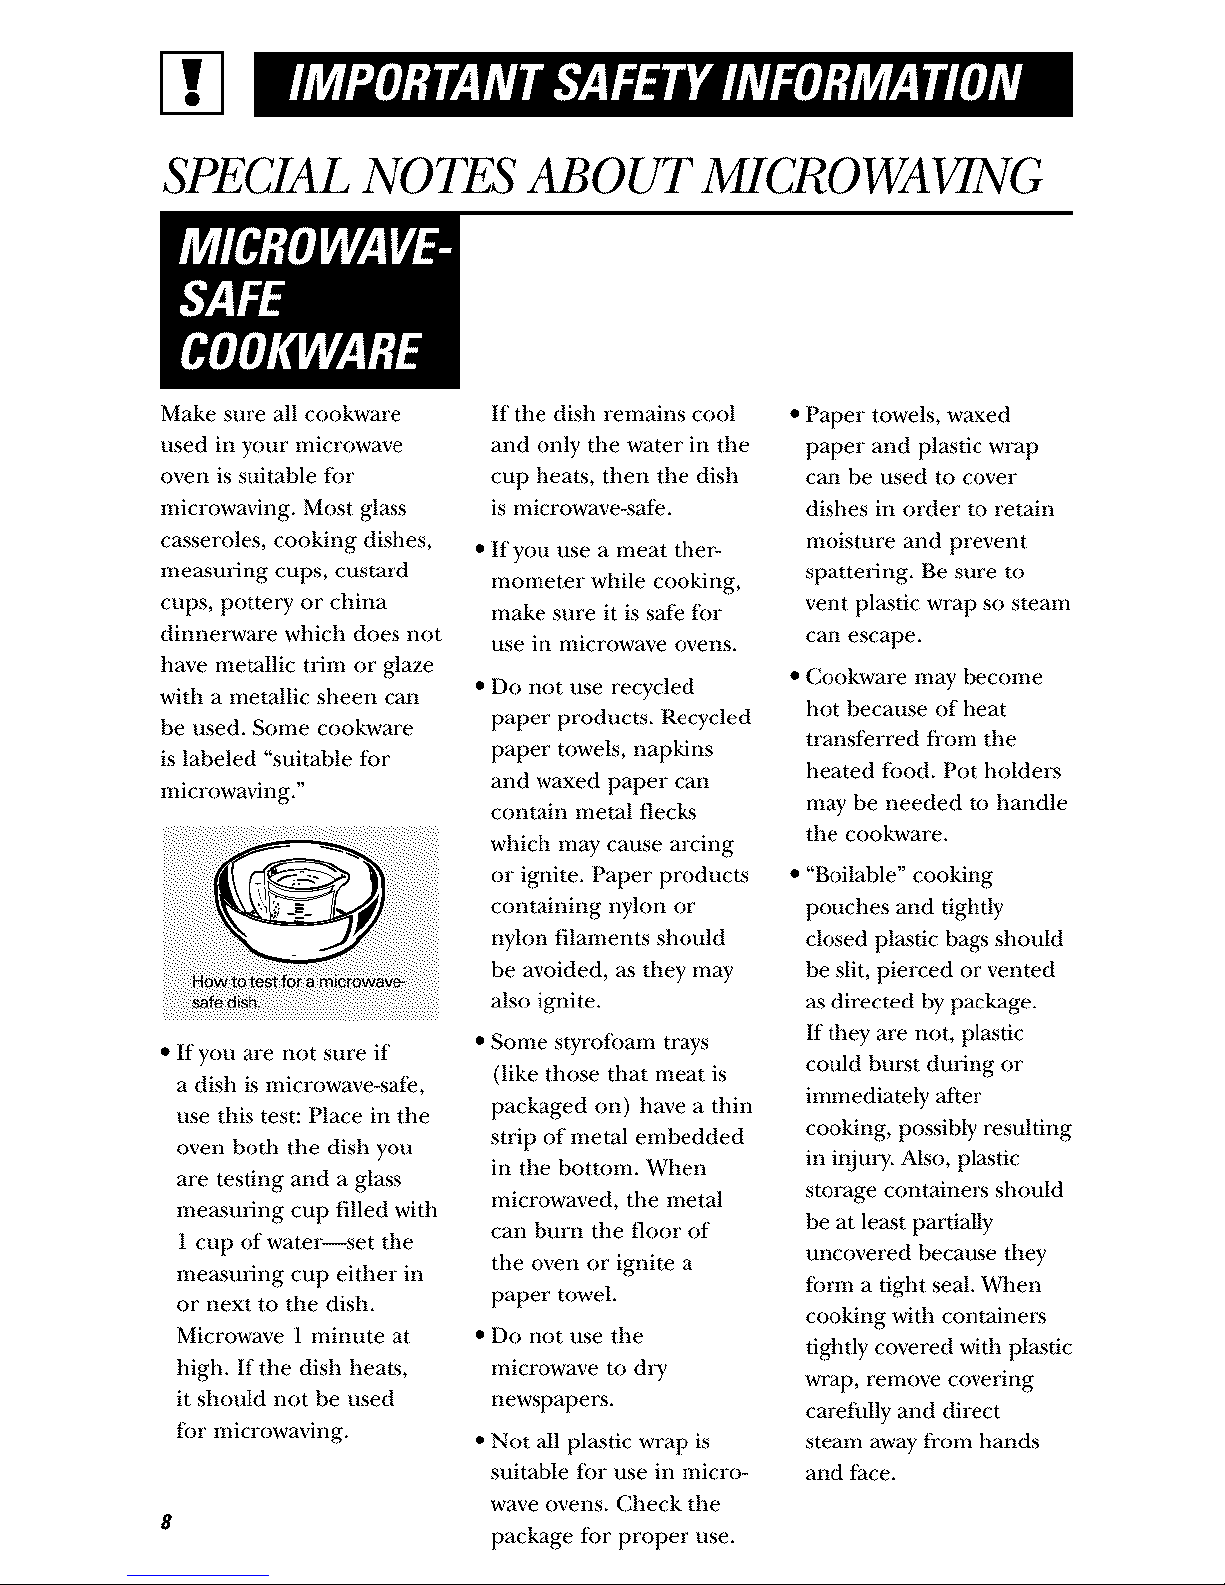
• If you are not sure if
a dish is microwave-safb,
use this test: Place ill the
oven both tile dish you
are testing and a glass
measuring cup filled with
1 cup ofwatel=-set the
measuring cup either in
or next to tile dish.
Microwave 1 minute at
high. If tile dish beats,
it should not be used
for microwaving.
8
tf tile dish remains cool
and only tile water in the
cup heats, then the dish
is microwave-safe.
• If you use a meat the>
mometer while cooking,
make sure it is safe for
use ill Inicrowave ovens,
• Do not use recycled
paper products. Recycled
paper towels, napkins
and waxed paper can
contain metal fIecks
which may cause arcing
or ignite. Paper producks
containing nylon or
nylon filaments should
be avoided, as they may
also ignite.
• Some styrolbam trays
(like those that meat is
packaged on) have a thin
strip of metal embedded
in the bottom. When
microwaved, tile metal
can btlrn tile floor of
tile oven or ignite a
paper towel.
• Do not use the
microwave to d13*
newspapers.
• Not all plastic wrap is
suitable tbr use in micro-
wave ovens. Check the
package for proper use.
• Paper towels, waxed
paper and plastic wrap
Call be used to cover
dishes in order to retain
moisture and prevent
spattering. Be sure to
vent plastic wrap so steam
can escape.
• Cookware lllay becolne
hot because of heat
transferred from the
heated fbod. Pot holdeL's
may be needed m handle
the cookware.
• "Boilable" cooking
pouches arid dgbtly
closed plastic bags should
be slit, pierced or vented
as directed by package.
If they are not, plastic
could burst during or
immediately after
cooking, possib b, resulting
in ilOtn T, Also, plastic
storage containers should
be at least partially
uncovered because they
fbrm a tight seal. When
cookillg Widl containers
tightly covered with plastic
wrap, remove covering
carelillly and direct
steam away ti'om hands
and face.
Page 9

I!1
• Use fbil only as directed
in this manual. _
dimlers may be
microwaved ill foil Ways
less thin1 3/4" high;
remove tile top fk)il cover
and retm'n tile tray to tile
box, When using fbil in
the microwave oven,
keep tile tbil at least
1" away fi'om the sides
of tile oven.
• Plastic cookware--Plastic
cookware designed for
microwave cooking is
very useful, but should
be used carefidly. Even
microwave-safb plastic
may not be as tolerant of
overcooking conditions
as are glass or ceramic
materials and may sofien
or char if sut)jecmd to
sho_ periods of
overcooking. In longer
exposures to over-
cooking, tile food and
cookware could ignite,
Follow these guidelines:
Use microw'ave-sale
pla_stics only and use
them in strict compliance
_4th the cookware
manufacturer's
reconlnleildations.
2 Do not micro_ave enlpl 3,
containers.
3 Do not permit children
to use plastic cookware
without complete
supmMsion.
The fan will operate
automatically under
certain coilditions (see
Automatic Fan f>amre).
Take care to prevent tile
starting and spreading of
accidental cooking fires
while tile vent ihn is in use.
• Clean tile underside of
tile microwave often.
DO not allow grease
to build up on the
microwave or tile
t_m filters.
• 111the event of a grease
fire oi1 tile surface units
below the microwave
oven, smother a flaming
pan on the suri_lce unit
by covering the pan
completely with a lid, a
cookie sheet or a flat Way.
• Use care when cleaning
tile vent fro1 filte]_.
Corrosive cleaning
agents, such as lye-based
oven cleaners, nlay
damage tile filters.
• When preparing
flaming toods under
the nlicrowave, turn
the fan on.
• Never leave surface units
beneath your microwave
oven unattended at high
heat settings. Boilovers
cause smoking and
greasy spilloveL_ that may
ignite and spread if tile
microwave vent fan is
operating. 'lb minimize
automatic fan operation,
use adequate sized
cookware and use high
heat on surt_lce units
only when necessm T.
9
Page 10
03
GROUNDING INSTRUCTIONS/OPTIONAL KITS
WARNING
Improper use of the
grounding plug can result
in a risk of electric shock,
This appliance must be
grounded, hl the event of
an electrical short circuit,
grounding reduces the
risk of electric shock hy
pro*iding an escape wire
tot the electric current.
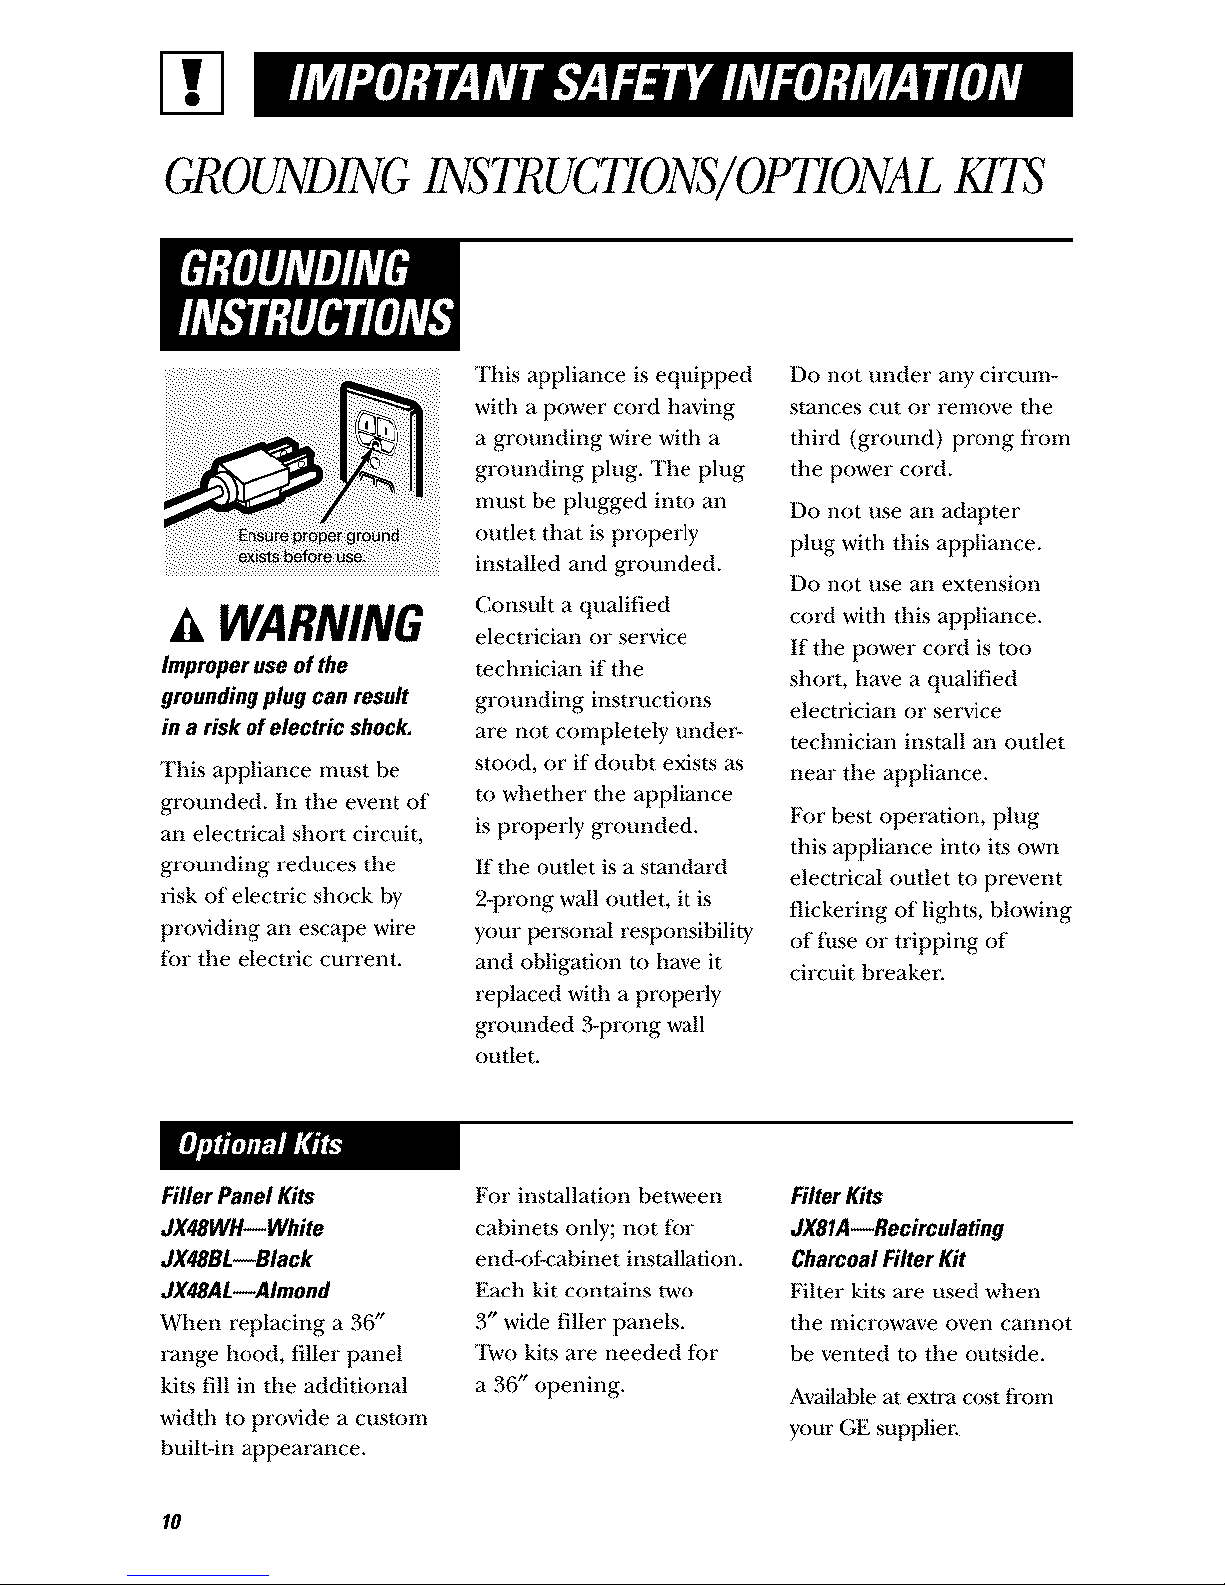
This appliance is equipped
with a power cord having
a grounding wire with a
grounding plug. The plug
must be plugged into an
outlet that is properly
installed and grounded.
Consult a qualified
electrician or service
technician if tile
grounding instructions
are not completely trader-
stood, or if doubt exists as
m whether the appliance
is properly grounded.
If the outlet is a standard
2-prong wall outlet, it is
your personal responsibility
and obligation to have it
replaced with a properly
grounded 3-prong wall
oudet.
Do not under any circum-
stances cut o1' rexz]o_,'e the
third (ground) prong from
tile power cord.
Do not use an adapter
plug with this appliance.
Do not use an extension
cord with this appliance.
tfthe power cord is too
short, have a qualified
electrician or service
technician install an outlet
near the appliance.
For hest operation, plug
this appliance into its own
electrical outlet to prevent
flickering of lights, blowing
of fllse or tripping of
circuit breaker'.
Filler Panel Kits
JX48WH--White
JX48BL--Black
JX48AL--AImond
When replacing a 36"
_ange hood, tiller panel
kits fill in the additional
width to provide a custom
built-in appearance,
For installation hetween
cabine_ only; not ff)r
end-of:cabinet installation.
Each kit contains two
3" wide filler panels.
Two kits are needed for
a 36" opening.
Filter Kits
JX81A--Recirculating
Charcoal Filter Kit
Filter kits are used when
tile microwave oven (aHnot
be vented to the outside.
Available at extra cost from
your GE supplien
10
Page 11
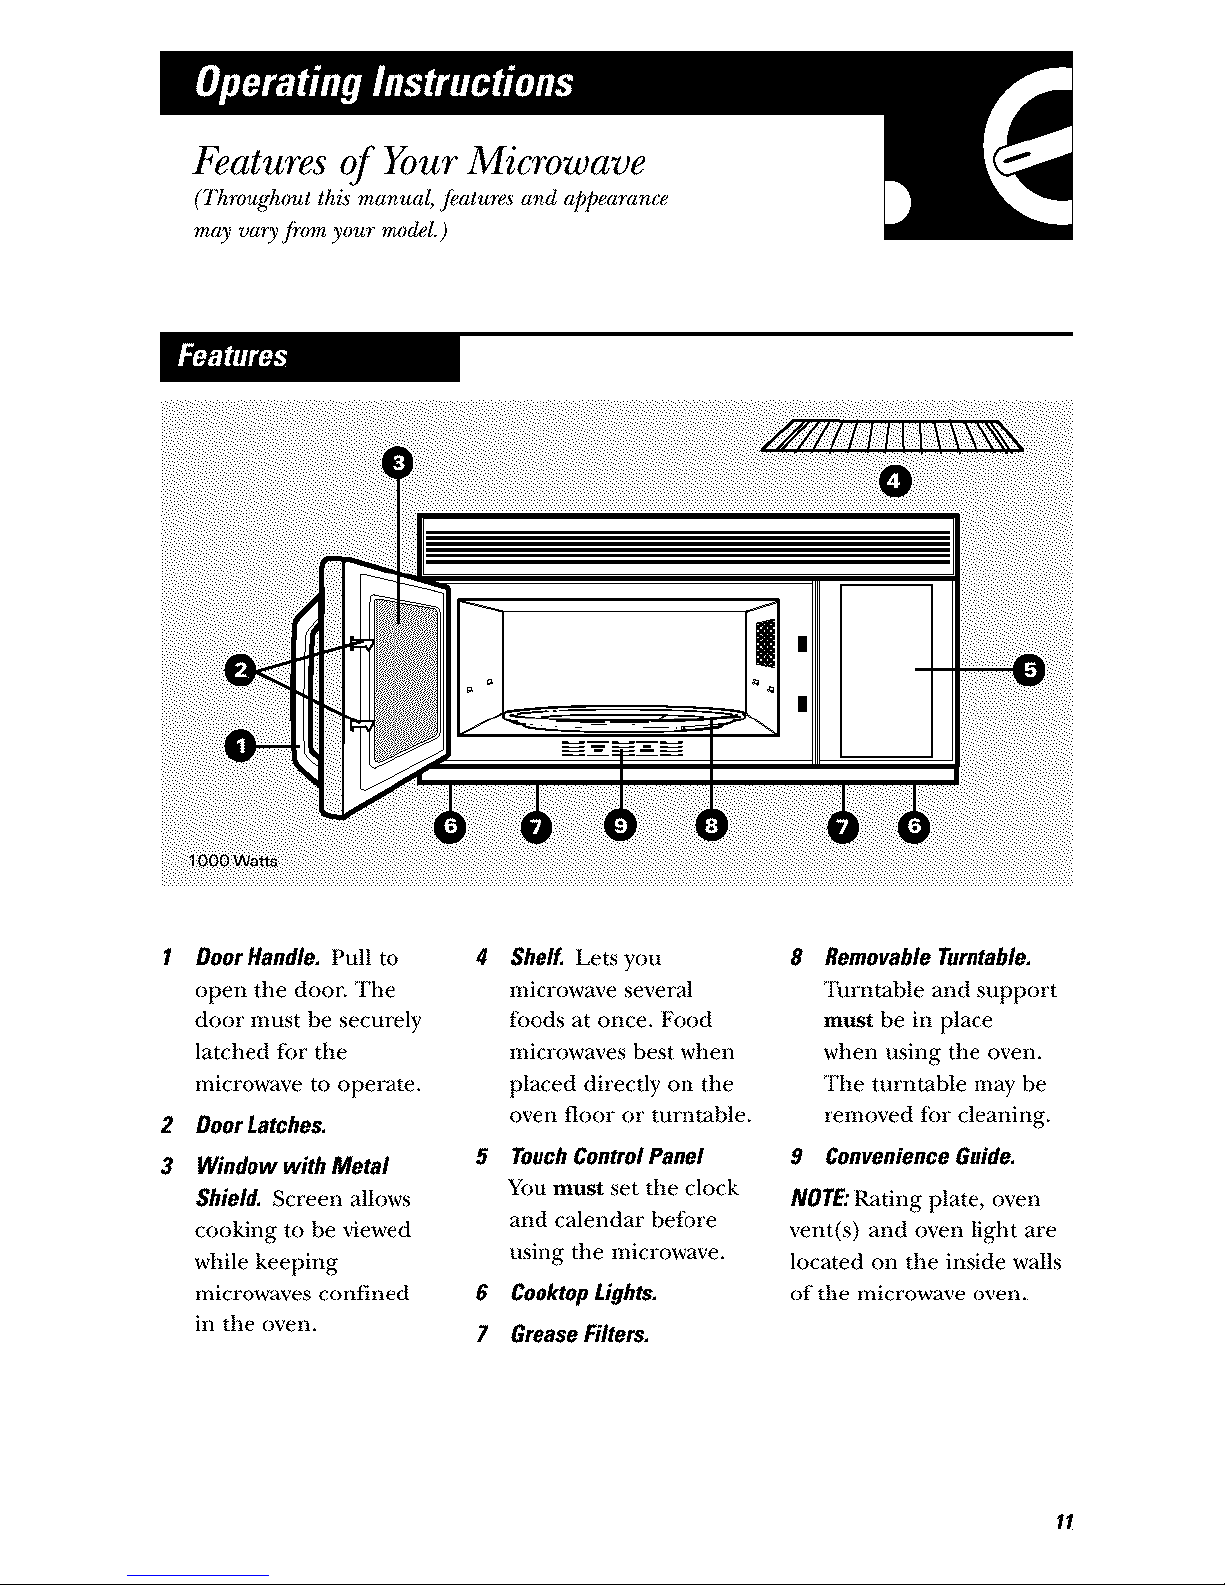
Features of Your Microwave
(Througlumt this manual, j_atures and appearance
may va_ j_,n your rrmdeL )
I DoorHandle, Pull to
open tile door. The
door must be securely
latched for the
microwave to opm_ate.
2 DoorLatches.
3 Window with Metal
Shield, Screen allows
cooking to be viewed
while keeping
microwaves (onfined
ill the oven.
4 Shelf, Lets you
microwave several
ff)ods at once. Food
microwaves best when
placed directly on tile
oven floor or turntable.
5 Touch ControIPanel
You must set the clock
and calendar befi_re
using tile microwave.
6 Cooktop Lights,
7 Grease Filters,
8 Removable Turntable,
Turntable and support
must be in place
when using tile oven.
The turntable may be
removed tor cleaning.
9 Convenience Guide.
NOTE:Rating plate, oven
vent(s) and oven light are
located on the inside walls
of the microwave oven.
II
Page 12

The Controls on Your Microwave Oven
(Througlun_t this manual, features and appearance may va_3"from your model.)
You can
microwave by
time, temperature,
or with the
convenience
features,
1 2 3
4 5 6
77meFeatures
Time Cooking
TIME COOK ! &|l_ Amount of cooking time.
(Pres Amount of defiosting time.
EXPRESS COO]( Starts immediately[
Power level 1-10.
Starts immediatelyl
12
Page 13
_!_ii_!ii_iiiii!iiii!_¸i!iii_i_iii_ili¸I_:ii!iiii¸ii_iiii;_
_ili ¸i_i !ii!!i!;iii!;iiiii_iii::i!;)
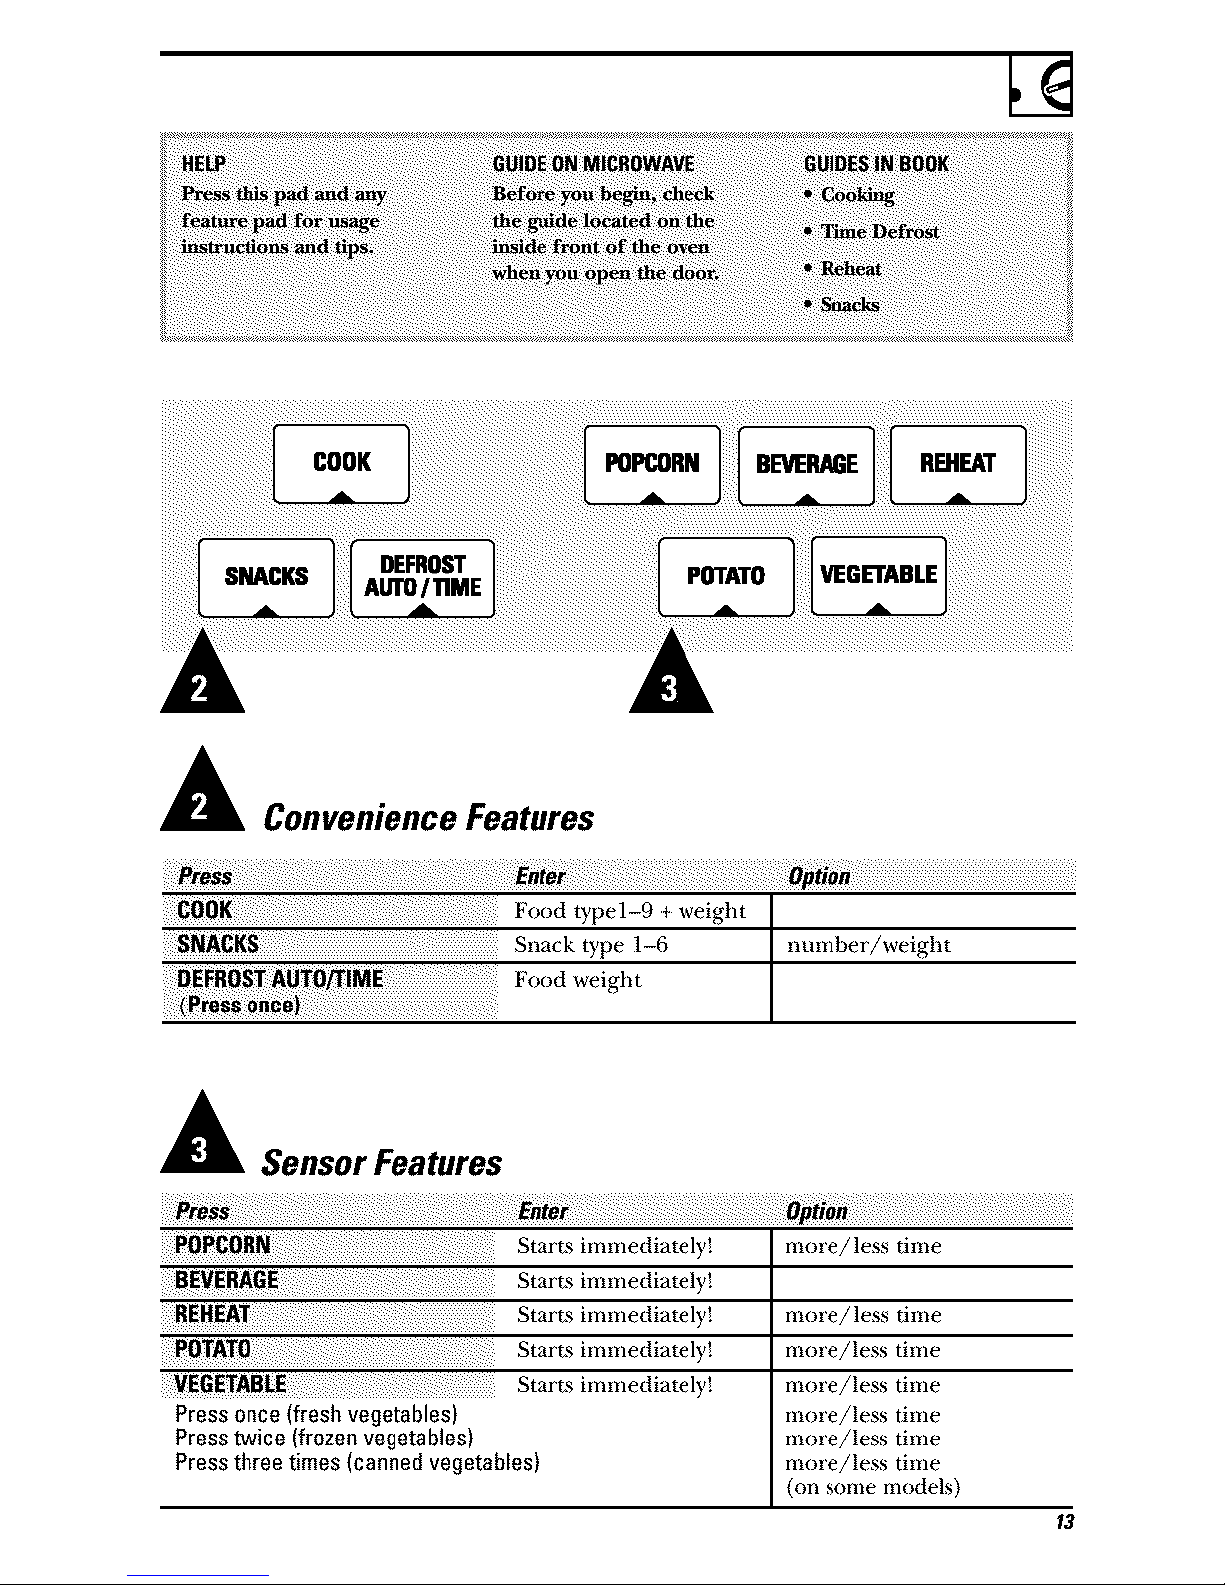
A Convenience Features
Snack type 1-6 number/weight
Food weight
A SensorFeatures
Starts immediately!
Starts immediately!
_EHEAT Starts immediawly!
Starts immediately!
VE Starts immediately!
Press once (fresh vegetables)
Presstwice (frozenvegetables)
Press three times (canned vegetables)
more/less time
more/less time
more/less time
more/less time
more/less time
more/less time
more/less time
(on some models}
13
Page 14
14
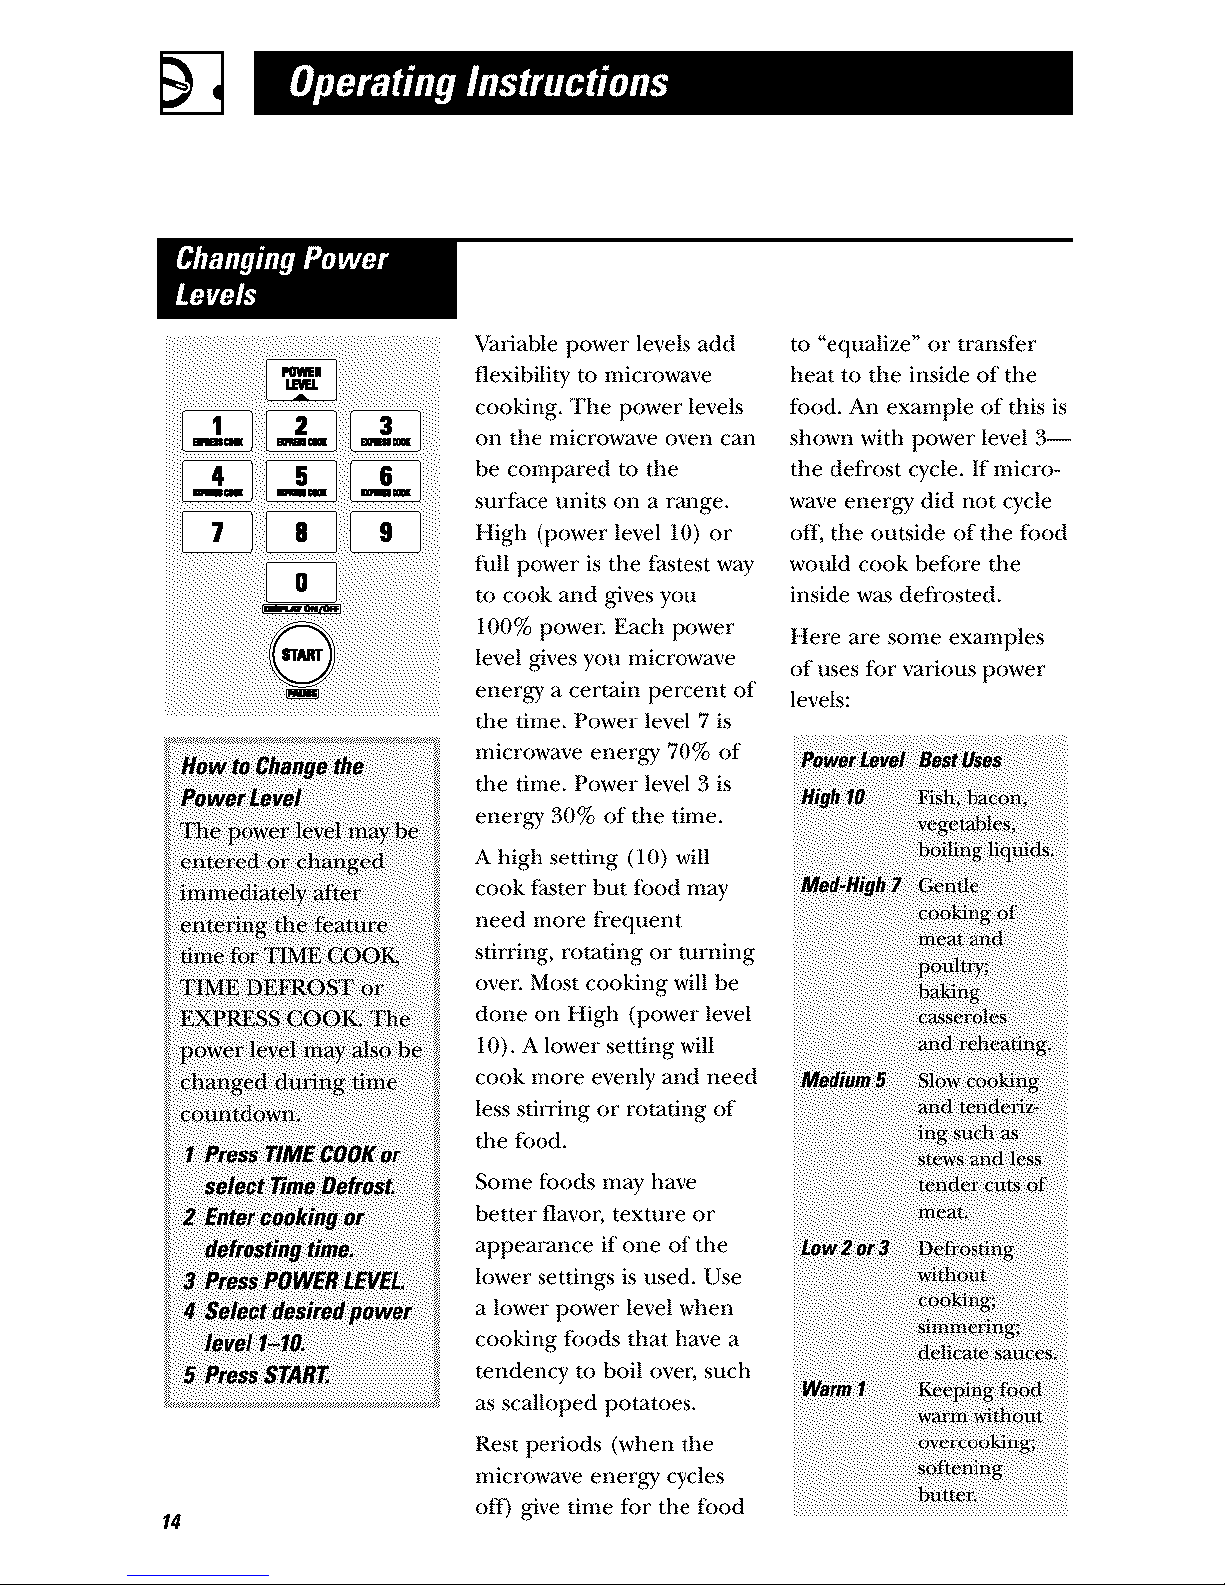
Variable power levels add
flexibility to microwave
cooking, Tbe power levels
on the microwave oven can
be compared to the
surface units on a iange.
High (power level 10) or
fifll power is the fastest way
to cook and gives you
100% powel: Each power
level gives you microwave
energy a certain pezcent of'
the time, Power level 7 is
microwave energy 70% of
the time. Power level B is
energy .80% of the time.
A high setting (10) will
cook faster but tood may
need more fl'equent
stirring, rotating or turning
over. Most cooking will be
done on High (power level
10). A lower setting will
cook nlore evenly and need
less sti_ing or rotating of
the fbod.
to "equalize" o1' transl_er
beat to tbe inside of the
iood. An example of this is
sbown with power level 3--
tbe defl'ost cycle. If micro-
wave energy did not cycle
off, the outside of tbe fbod
would cook before fl*e
inside was defrosted,
Here are some examples
of uses ik)r various power
levels:
Some foods may have
better flavor, texture or
appem-ance if one of the
lower settings is used. Use
a lower power level when
cooking fbods tbat bave a
tendency to boil over, such
as scalloped potatoes.
Rest periods (wben the
microwave energy cycles
of D give time for the ff_od
Page 15

Time Features
Time Cook I
Allows you to microwave
for any time up to 99
ndnutes and 99 seconds.
Power level 10 (High) is
automatically set, but you
may change it for more
flexibility.
You may open tile door
during Time Cook to
check tile food. Close tile
door and press START
to resume cooking.
time Cook fl
Lets you change power
levels automatically during
cooking. Itere's how to
do it:
1 Press TIME COOK.
2 Enter the fil._t cook time.
3 Change tile power level
if you don't want full
powel: (Press POWER
LE_q£L. Select a desired
power level 1-10.)
4 Press TIME COOK
again.
5 Enter the second cook
time.
6 Change tile power level
if you don't want fl_ll
power. (Press POWER
LE_q£L. Select a power
level l-lO.)
7 Press STAR'E
At tile end of Time Cook I,
Time Cook II counks down.
Page 16

Cooking Guide far Time Cook I & II
NOTE:Usepower level High (10)unlessotherwise noted,
Ve_ta _ount Tim Comm
In 1½-qt. oblong glass baking dish,
place 1/4 cup water.
In 1-qt. casserole.package
In P/_I t. casserole, place 1/2 cup ,*_lter.
In 1-% casserole, place 2 tablespoons
watei_
In 1-qt. casserole, place 1/4 cup water.
bunch In 2-qt. casserole, place 1/2 cup water.
6 to 9 rain.,
Med-High (7)
5 to 7 min.
9 to 11 min.
6 to 8 rain.
6 to 8 rain.
17 m 21 rain.
7 to 10 min.
9 to 13 min.
5 to 7 min.
5 to 7 min.
1 bunch
(1½ m Pk lbs.)
lO-oz, package
lO-oz, package
In 2-qt. casserole, place 1/2 cup water.
In 2-qt. oblong glass baking dish, place
1/4 cup water.
Ill 1-qt. casserole.
In 1-qt. casserole, place 3 tablespoons
watei;
8 to 11 min. Ill 1½- or 2-qt. casserole, place 1/4 cup
water.
7 to 10 min. In 2- or 3-qt. casserole, place 1/4 cup
water.
lb. 7 to 9 rain. In 1_/_Clt.casserole, place 1/4 cup water.
lO-oz, package 5 to 7 min. In 1-qt. casserole, place 2 tablespoons
water.
9 to 14 min. In 2-qt. casserole, place 1/2 cup water.
10 to 17 rain. In 2-qt. casserole, place 1/2 cup water.
5 to 7 min. hi 1-qt. casserole, place 2 tablespoons
water.
16
Page 17

In l-qt. casserole, place 2 tablespoons
wateIL
lO-oz, package
Pe_,
2 lhs. unshelled
package
4 potatoes
(6 to 8 oz. each
(6 to 8 oz.)
10 to 16 oz.
package
1 to2 squash
lb. each
5 to 7 min.
3 to 4 min.
)er ear
to 6 min.
3 to 4 min.
)er ear
5 to 7 min.
9 to 12 min.
5 to 7 min.
9 to 12 min.
3 to 4 min.
5 to 7 min.
5 to 7 min.
5 to 7 min.
8 to 11 min.
In 2-qt. oblong glass baking dish, place
corn. If' corn is in husk, use no water;
if' corn has been husked, add 1/4 cup
water. Rearrange alter half of time.
Place in 2-qt. oblong glass haking dish.
Cover with vented plastic wrap.
Rearl-ange after half of time.
In l-qt. casserole, place 3 tablespoons
water.
In 1-qt. casserole, place 1/4 cup water.
In l-qt. casserole, place 2 tablespoons
water.
Peel and cut into 1 inch cubes. Place
in 2-qt. casserole with 1/2 cup water'.
Stir after half of time.
Pierce with cooking fork. Place in
center of the oven. Let stand 5 minutes.
In 2-qt. casserole, place wa_shed spinach.
In INt. casserole, place 3 tablespoons
water.
In 1V_qt. casserole, place l/4 cup wamn
Cut in half and remove fibrous
membranes. In 2-qt. oblong glass
baking dish, place squash cut-side-
down. Turn cut-,side-up alter 4 minutes.
17
Page 18

Time Features
18
Allows you to defiost fi)r
tile length of' time you
select. See the Defl'osting
Guide fin suggested times.
Power level 3 is automati-
cally set, but you may
change tills for more
flexibility. You may defi'ost
small items more quickly
by raising the power level
after entering tile time.
However, they will need
more tiequent attentioll
than usual.
Power level 7 cuts tile total
defrosting time in about
hall power level 10 cuts
the total time to approxi-
mately 1/3. Rotate or stir
fbod frequently.
At one half of selected
deflosting time, tile oven
signals TURN. At this time,
tUl'n flood over and break
apart or rean-ange pieces
fi)r more even defl'osting.
Shield any warm areas with
small pieces of foil.
A dull thumping noise may
be heard during defiosting.
Tills sound is normal when
die oven is not operating
at High power.
Defrosting rips
• Foods tiozen in paper or
plastic can he defrosted
in tile package. Tightly
closed packages should
be slit, pierced or vented
AKFER ibod has partially
defl'osted. Plastic storage
contahlers should be at
least partially uncovered.
• Family-size, prepackaged
fl'ozen dinners can be
defl'osted and micro-
waved. If the fbod is in a
toil container, transfer it
to a microwave-sai_ dish.
• Foods that spoil easily,
such as milk, eggs, fish,
stuffings, poultry and
pork, should not be
allowed to sit out fl)r
more than one born
after deli"osting. Room
temperature promotes
the growth of barmfftl
bacteria.
• For more even defl'osting
of linger tbods, such as
beef, lamb and veal
roasks, use Auto Defrost.
• Be sure large meats are
completely defiosted
before cooking.
• When deli-osted, fbod
should be cool but
softened in all areas. If still
slightly icT, remm to the
microwave very briefly, or
let it stand a tew minutes.
Page 19

Defrosting Guide
Place block in casserole. '[ilrn over and
break up after half tile time.
1 rain.
3 m 5 rain.
6 to 8 rain.
5 m 7 min.
3 to6mi,,.
2 to 5 min.
2 to 5 rain.
5 to 7 mira
12 to 16 min.
per lb.
5 to 7 rain.
per lb.
15 to 19 min.
17 to 21 min.
7 to 13 min.
per lb.
5 to 9 rain.
per lb.
Place unopened package in oven.
Let stand 5 minutes after defiosting.
Place unopelled package in oven.
Microwave just tlntil tl'anks can be
separated. Let stand 5 minutes, if
necessary, to complete defi'osting.
'fiarn meat over at]er bali the time.
Use power level 1.
Place unwrapped meat in cooking disb.
'[_trn over after bali tile time and shield
warm areas with foil. When finished,
separate pieces and let stand to complete
defiosting.
Place wrapped chicken in disb. Unwrap
and turn over after half the time. Wile::
finished, separate pieces and microwave
2 to 4 minutes more, if necessary.
Let stand to finish defiosting.
Place wrapped chicken in disb. After half
tile time, unwrap and turn chicken over.
Shield warm areas with flfil. Finish
defi'osting. If necessary, nm cold water it:
the cavity until giblets ca:: be removed.
Place unwrapped ben iil tile oven breast-
side-up. '[\:rn over at]er bali tile time.
Run cool water in tile cavity until giblets
call be removed.
Place unwrapped breast in disb breast-
side-down. After half the time, turn over
and shield warm areas witb tbil. Finish
defi'osting. Let stand 1 to 2 bouh's in
refiigerator to complete defi*osfing.
Page 20

Time Features
,k,s,sa,u,ok..a tosot
cooking time for 1-6 minutes.
Presso,,oo;thoEx,,ress
Cook pads (flom 1 to 6)
for 1 to 6 minutes of
cooking at power level 10.
For example, press the
2 pad fbr 2 minutes of
cooking time.
The power level can be
changed as time is
counting dowll. Press
POWER LEVEL and
enter 1-10.
ADD
30 SEC.
You can use this feature
two ways:
• It will add 30 seconds to
the time counting dowll
each time the pad is
pressed.
• It can be used as a quick
way to set 30 seconds of
cooking time.
Page 21

Convenience Features
The Snacks feature
automatically sets tile
microwax4ng times and
power levels to waI'in a
valqety of snack foods.
I Press SNACKS.
2 Select snack type l-6
(see tile Snacks Guide
below).
3 Enter tile number of
items or tile food weight
in ollxlces_
4 Press STARI]
HiutYou can press
and hold tile SNACKS pad
dining cooking to display
tile snack type and
remaining microwaving
time.
Snacks Guide
1 to 4
1 to 2
1to
1 to 4
8 to 40 oz.
4 to 16 oz.
21
Page 22

Convenience Features
The Cook teature
automatically sets the
cooking times and power
levels tbr a variety of tbods.
I Press COOK.
2 Select tbod type 1-9 (see
the Cook Guide below).
3 Enter weight in ounces.
4 Press KDkRT
Hint" Press and hold the
COOK pad during cooking
to display the tood type
and remaining cook time.
CookGuide
4 to 20 oz.
4 to 20 oz.
4 to 16 oz.
8 to 40 oz.
5Fish 4 to 16 oz.
4 to 40 oz.
8 to 48 oz.
Use microwave-safe casserole or bowl.
Cover u4th lid or vented plastic wrap.
Use microwave-safe casserole or howl.
Follow package instructions ftir adding
water. Cover with lid o1' vented
)lastic wrap.
Use microwave-safe casserole o1' bowl.
Add 2 tablespoons water £br each serving.
Cover u4th lid or vented plastic wrap.
Pierce skin with tork. Place potatoes on
oven floor o1' tmntahle.
Use oblong, square or round dish. Cover
with vented plastic wrap or wax paper.
Use oblong, square or round dish. Cover
with vented plastic wrap.
Use round casserole dish. Crumble meat
into dish. Cover with lid or vented plastic
wrap. Drain and stir at signal.
Layer strips on a plate, 4 to a layer.
Cover each layer with a paper towel.
Follow package instructions to prepare
)izza fbr microwaving.
Page 23

'FileDeDostAuto/Time
f0aturegivesyoutwoways
todeti'osttlozen(()ods.
PressDEFROST
AUTO/TIMEoncetk)r
AutoDetiostortwicetk)r
TimeDeliost.
UseAutoDefl'ostformeat,
poultryandfishupm
6pounds.UseTime
Defi'ostfornlostother
tiozenti)ods.
AutoDetiostautomatically
setsthedeti'ostingtimes
andpowerlevelstogive
evendeti'ostingresultsti)r
meat.s,poultryandfish.
Thereisahandyguide
locatedontileinsidetiont
oftileoven.
i :; _:_,,un
• Remove meat ti'om
package and place on
microwave-saI> dish.
• '[_vice dulii*g deti'ost,
the oven sigHals TURN.
At each TURN signal,
turn the fi)od over.
Remove defi'osted meat
or shield warm areas with
small pieces of fi)il.
• Atler deii'osting, most
meals need to stand
5 minutes to complete
deii'osting. Large roasts
should stand fi)r about
30 minutes.
23
Page 24

Sensor Features
____i!!i¸I!¸i¸ilili_ii!i_!iii¸ili_ii!iliili¸!!i¸i¸_!
• The proper containel,'s
and covers are essential
f_w best seilsor cooking,
• Always use microwave-
saI_ containel's and cover
them with lids or vented
plastic w_-ap. Never use
tight sealing plastic
containers--they can
prevent steam ti'oin
escaping and cause
tk_od to overcook.
• Be sure tile outside of
the cooking container's
and tile inside of the
microwa_'e oven are dry
belore placing tbod in
the oven. Beads of
moisture turning into
steam can mislead tile
sensol\
24
Page 25

HowtoUsethePopcorn
Feature
1 Follow package
instructions, using Time
Cook if tile package is
hess than 1.75 ounces or
larger thail ,_.5 Ollnces.
Place the package of
popcorn in the center
of tile microwave.
2 Press POPCORN. The
oven starts immediately.
If you open tile door while
"POPCORN" is displayed,
"SENSOR ERROR" will
appem: Close the door,
press CLEAR/OFF and
begin again.
If food is undercooked
after tile co/lntdown,/ise
Time Cook for additional
cooking time.
How to Adjust the Popcorn
Program to Provide a Shorter
or Longer Cook Time
tfyou find that the brand of
popcorn you use underpops
or overeooks consistently,
you can add or subtrart
20-30 seconds m the
automatic popping time.
To add time:
Alter pressing POPCORN,
press 9 immediately aider
tile oven starts for an extra
20 seconds.
Press 9 again m add
another 10 seconds (total
30 seconds additional time).
To subtract time:
M'_er pressing POPCORN,
press 1 immediately after file
oven starts tbr 20 seconds
less cooking time.
Press 1 again to reduce
cooking time another
10 seconds (total 30 seconds
less time).
Press BEVEI_M;E to heat a
cup of coffee or other
beverage.
If fbod is undercooked
after tile Co/lntdown/lse
Time Cook tor additional
cooking time.
Drinks heated with the
Beverage feature may be
very hot. Remove the
container with care.
25
Page 26

Sensor Features
How to Change the
Automatic Settings
'[b reduce time by 10%:
Press I after tile feature
pad.
'[b add 10% to cooking
tbne: Press 9 after the
feature pad.
iature[wlc_
How to Use the Reheat
Feature
1 ['lace covmed fbod in
the oven. Press REHEA'E
The oven star_s
immediately.
2 The oven signals when
steam is sensed and tile
time remaining begins
Cotlnting down.
Do not open tile oven
door until time is counting
down. If the door is
opened, close it and press
STAKF immediatel>
After removing food from
the oven, stir, if possible,
to even out the temperature.
Reheated foods may have
wide variations in
temperature, Some areas
may be extremely hot,
If food is not hot enough
alter tile co(lntdown, (lse
Time Cook for additional
rebeafing time.
Some Foods Not
Recommended For Use
With Reheat
tt is best to use Time Cook
for these foods:
• Bread products.
• Foods flint must be
reheated uncovered,
• Foods fllat need to be
stirred or rotated.
• Foods calling for a dry
look or crisp surface
after reheating,
Page 27

Vegetable and Potato
1 Place covered food in
tile oven. Press tbe food
pad. (For vegetables,
press tbe VEGETABLE
pad once fbr fi'esb
vegetables, twice tot
fi'ozen vegetables, or
three times f_)r canned
vegetables.) The oven
starts immediately.
2 The oven signals when
steam is sensed and time
renlaining is counting
down. Turn or stir tile
fbod if necessaD,.
Do not opeil tile oven
door until time is counting
down. If the door is
opened, close it and press
STAKI" immediately.
Cooking Guide
tf tood is undercooked
afler the countdo_'n, use
Time Cook tot additional
cooking time.
Howto Changethe
AutomaticSettings
(automaticsettingsfor
canned vegetablescannot
be adjustedonsomemodels)
You can adjust tile cooking
time for all foods m suit
your personal taste,
Reducetimeby 10%:
Press 1 after tile fbod pad.
Add 10%to cookingtime:
Press 9 after tile food pad.
4-16 oz.
4-16 oz.
4-16 oz.
1/2-2 lbs.
Cover with lid or vented plastic wrap.
Follow package instructions f_)r adding water.
Cover with lid or vented plastic wrap.
Add 1/4 cup water per se]xing.
Cover with lid or vented plastic wrap.
Pierce skin with fork. Place potatoes
on the turntable.
27
Page 28

Other Features Your Model May Have
HELP
The HELP pad displays
f_atttre iniormation and
helpful hints. Press HELP,
then select a f_ature pad.
'lb remind you that you
have tood in tile oven, tile
oven will display "FOOD IS
READY" and beep once a
minute until you either
open the oven door or
press CLIL/\R/OFF.
Press to enter tile time of
day or to check the time of
day while microwaving.
I Press CLOCK.
2 Enter time of day.
3 Select AM or PM.
4 Press STAKF (71'CLOCK.
5 Enter tile month, day
and year. Example:
012303 (Janua W 23,
2003)
8 Press STAP.T o1' CLOCK.
To check the time of day
while microwaving, press
CLOC_
To check the date while
microwaving, press and
hold CLOCK tor about
three seconds.
Page 29

AM/PM
The scroll speed of the
display cml be changed.
Press and hold tile
AM/PM pad about 3
seconds to bring up the
display. Select 1-5 for
slow to thst scroll speed.
0
'lb turn the clock display
oil, press atld hold 0 for
about three secollds.
To redisplay the clock,
repeat.
Delay Start allows you to set
the microwave to delay
cooking up to 24 tlours.
I Press DELAY START.
2 Enter file time you
want tile oven to start,
(Be sure tile microwave
clock shows tile C(nTect
time of day.)
3 Select AM or PM.
4 Select any combination
of Defrost Auto/Time
or Time Cook 1 & I1.
5 Press START.
Tile Delay Start time will
be displayed plt,s "DS."
Tile oven will automatically
start at tile delayed time.
Tile time of day may be
displayed by pressing
CLOCK.
29
Page 30

Other Features Your Model May Have
Timer On/Off operates as
a illin/lte timer and can be
used at any time, even
when the oven is operating.
1 Press 'rIMER ON/OFE
2 Enter time you want to
coIlnt down.
3 Press 'rIMER ON/OFF
to start.
When time is up, tile oven
will signal. 'lk) turn off the
timer signal, press 'rIMER
ON/OFE
NOTE:Tile timer indicator
will be lit while tile diner
is operating.
START
In addition to starting
mmly flmcfions,
START/PAUSE allows you
m stop cooking without
opening the door or
clearing the display.
30
The Reminder feature can
be used like an alarm clock
and can be used at any
time, even when tile oven
is operating. The
genlinder Lime can be set
up to 24 hours later.
1 Press REMINDER.
2 Enter tile tinle you want
tile oven to remind you.
{Be sure tile microwave
clock shows tile correct
time of day.)
3 Select AMor PM.
4 Press _MINDER. When
Reminder sig_ml occurs,
press _MINDER to tm'n
it ott_ The Reminder
time may be displayed by
pressing REMINDER.
NOTE: Tile REM indicator
will remain lit to show that
tile Reminder is set. 'lb
clear tile Reminder befbre
it occurs, press REMINDER,
then 0. Tile REM indicator
will no longer be lit.
Page 31

CLEAR
You nlay lock tile control
panel to prevent die
microwave _om being
accidentally started or
used by children.
To lock or tinlock tile
controls, press and hold
CLEAR/OFF tbr about
three seconds. When the
control panel is locked,
an "L" will be displayed m
tile extreme right.
TL
For best cooking results,
leave tile turntable o11.
It can be turned offfor
large dishes. Press
TURNTABLE to turn
tile turntable oi1 or ott_
Sometimes the turntable
can become too hot to
touch. Be carefM touching
tile turntable during and
after cooking.
VENTFAN
The vent fan renloves
steam and other vapors
ti_om surtace cooking.
Press VENT FAN once fbr
high fSn speed, twice tk_r
low tan speed or a third
time to turn tile t_tn of[.
An automatic tan teature
protecks tile microwave
tronl too much heat rising
flora tile cooktop below it,
It automatically turns on at
low speed if it senses too
nmch heat.
if you have turned tile fhn
on you may find that you
cannot turn it ot_ The fan
will automatically turn off
when the internal parts are
cool. It may stay oi1 fbr
30 minutes or nlore aider
tile cooktop and microwave
controls are turned oil.
31
Page 32

Other Features Your Model May Have
SURFACE
LIGHT
Press to turn tile surface
light on o1' olt_
On sonle nlodels, there is
a night light option.
Press SIjRFACE LIGttT
once f_r blight light, twice
for the night light or three
times to turn tile light off.
'Pile beeper sound level
can be adjusted. Press
BEEPER VOLU ME,
Choose 0-3 tbr mute
m loud.
You can set tile night
light m turn on and off
automatically at any time
you want.
I Press AUTO NITE
LtGH'E
2 Enter tile time you want
the light to turn on.
Select AM or PM.
3 Press AUTO NITE
LIGHT again and enter
tile time you want the
light to turn off. Select
AM or PM.
# Press AUTO NITE
LtGH'E
NITE will stay lit m remind
you that tile feature is set.
You can review the Auto
Nite Light settings by
pressing AUTO NITE
LIGHT
To e]_ase your settings
and turn off tile automatic
t>ature, press AUTO NITE
LIGHT, then 0.
32
Page 33

How to Use the Shelf
When Microwaving
Food microwaves best
when placed on file
turntable or on tile shelf'
ixl the lower position.
Only use tile shelf when
reheating on move than
one level. Do not store the
shelf inside the oven cavity.
Tile shelf gives you the
option to reheat more
than one dish of' food at
tile same time,
33
Page 34

Other Features Your Model May Have
• To reheat on 2 levels
or
• To reheat 2 dishes on the
lower level:
I Multiply reheat time
by 1'/2.
2 Switch places after 1/2
tile time.
• To reheat on 3 levels
I Double tile reheating
time.
2 Switch places twice and
give the dishes a 1/2
turn during reheating.
(Place dense foods, or
those that require a
longer cook time, on tile
upper shelf first.)
34
Page 35

Microwave Terms
Arcing is the microwave term for sparlcs in d_e oven. Arcing is
caused by:
• the metal shelf being installed incorrectly and touching the
IlliCl'O_*_a'v'e walls.
• metal or ioil touching tim side of tile oven.
• tbil d,at is not molded m fbod (upturned edges act like
alltellnas).
• metal such as twist ties, poultry pins, gold-rimmed dishes.
• recycled paper towels containing small metal pieces.
(:overs hold in moisture, allow fbr more even heating and reduce
cooking time. Venting plastic wl-ap or covering with wax paper
allows excess steam to escape.
In a regular oven, you shield chicken breasts or baked toods m
prevent ovelq_rowning. When microwaving, you use small strips of
foil to shield thin parts, such as the tips of wings and legs on
poultlT, which would cook belt)re larger parts.
When you cook with regular ovens, foods such as roasts or cakes are
allowed to stand to finish cooking or to set. Standing time is
especially important in microwave cooking. Note that a microwaved
cake is not placed on a cooling rack.
At'_er covering a dish with plastic wrap, you vent the plastic wrap by
turning back one corner so excess steam can escape.
35
Page 36

Care and Cleaning
An occasional tho_'ough
wiping vdth a solution of
baking soda and water
keeps tile inside fresh.
NOT£: Be certain the power
is off before cleaning any
part of tbls oven.
Walls, Floor, Inside Window,
Metal and Plastic Parts on
the Deer
Some spatte_ can be
remo,_ed _i*h a paper'
towel, others may require
a damp cloth. Remove
greasy spattel"s with a sudsy
cloth, then rinse with a
damp cloth. Do i_ot use
abrasive cleanel's or sharp
tttens[ls on r_wen walls.
Never use a commercial
oven cleaner on any part
of your microwave.
RemovableTurntableand
TurntableSupport
'['o prevent breakage,
do not place tile turntable
iilto water iust after
cooking. Wash it carefldly
in Wal_l]* s_ldsy _4atel- _)r
in the dishwasher: The
turmable and support
can be broken if d_x;pped.
Remember, do not open'ate
tile oven without the
turntable and support
i'p,place.
Shelf
Clean with mild soap and
_a,a_e_'<_"i_ the O.ishwasher.
Do not dean in a self-
cleaning oven.
36
Page 37

W
Case
Clean tile outside of the
microwave with a suds),
cloth. Rinse atld then d_3'.
Wipe the window clean
with a damp cloth.
Control Panel and Door
Wipe with a damp cloth.
Dry thorougldy. Do not use
cleataing sprays, large
amounts of soap and water',
abrasives or sharp ot)jects
on the panel--they can
damage it. Some paper
towels can also scratch
the control panel.
DoorSeal
it's important m keep the
area clean where the door
seals against the microwave.
Use only mild, non-abrasive
demrgents applied with a
clean sponge or sot} cloth.
Rinse well.
Bottom
Clean off tile grease and
dust oi1 the bottom dizen.
Use a sohldon of warm
water and detergent.
Do not use a steel-wool
pad; it will scratch the
surface.
'lb clean stainless steel
surfaces, rise a hot, damp
cloth with a mild detergent
suitable for stainless steel
surfaces. Use a clean, hot,
damp cloth to remove soap.
D1T with a dry, clean cloth.
If fbod soil remains, try a
gene_al kitchen cleanel;
such as Pantastik_ Simple
Green¢_ or Formula 4092 o
For hard-to-clean soil, use
a standard stainless steel
cleatler, such _s Bon-Anli ®
or Cameo2o
Apply cleaner with a damp
sponge. Use a clean, hot,
damp cloth to remove
cleanen DU with a dry,
clean cloth. Always scrub
lightly in the direction of
the grain.
After cleaning, use a
stainless steel polish, such
as Stainless Steel Magic, _
Revere Copper and
Stainless Steel Cleanerp
or Wenol All PmTpose
Metal Polish_ Follow the
product instructions for
cleaning the stainless steel
surtace.
37
Page 38

%
Light Bulb Replacement
I 'lb replace tile buli)(s),
tirst disconnect tile power
at the main fl_se or circuit
breaker panel or pull
tbe plug.
2 Remove tbe screw at tile
fi'ont of tile light cover
aild lower tile co_,el_
3 Be sure tile bulb(s) to be
replaced are cool before
removing, After breaking
tile adhesive seal, remove
tile bulb by gently turning,
4 Replace tile screw.
Connect electrical power
to the oven.
I 'lb replace tbe oven light,
tirst disconnect the power
at the main tuse or circuit
breaker panel or pull
tbe plug.
2 Remove tile mp grille by
taking out the 2 screws
tbat hold it in place,
3 Next, remove the screw
located above tile door
near tile center of tile
oven tbat secures the
ligbt housing.
4 Replace tile screw,
Connect electrical power
to the oven.
38
Page 39

The Exhaust Feature W
The vent fan has 2 metal
reusable grease filters.
Models tbat recirculate air
back into tile morn also
use a charcoal filtel_
The metal filters trap
grease released by foods
on the cooktop. They also
prevent flames flora fbods
on the cooktop fl'om
damaging the inside of
the microwave.
For this reason, tile filters
must ALWAYS be in place
when the hood is used.
Tile grease filters should
be cleaned once a month,
or as needed.
To remove, slide it to tile
rear using tlm tab. Pull it
down and out.
To dean the grease filter,
soak it and then swish it
around in hot water and
detergent. Don't use
all_tlilonia oI' ail_tIllonia
products because they will
darken tile metal. Light
brLtshing can be used to
remove embedded dirt.
Rinse, shake and let it dry
befbre replacing.
To replace, slide the filter
ill the fi'ame slot on tile
back of the opening. Pull
up and to tile fi'ont to lock
into place.
39
Page 40

%
The Exhaust Feature
If' tile model is not vented
to tile outside, tile air will
be recirculated through a
disposable charcoal filter
that helps remove smoke
and odors.
Tile charcoal filter should
be replaced when it is
noticeably dirty or
discolored (usually after
6-12 months, depending
on hood usage).
'lb remove the cbarcoal
filtel; disconnect power at
the nlain fllse or circtlit
breaker panel or pull
the plug.
Remove tile top grille by
removing tile 2 screws that
hold it in place, glide tile
filter towards the fi'ont of
tile oven and remove it.
'lb install a new filter,
remove plastic and other
outer w_apping fi'om the
new filte_
insert tile filter into tile
mp opening of the oven
as shown. It will rest at all
angle on 2 side support
tabs and in tiont of the
right rear tab. Replace
tile grille and 2 screws.
4O
Page 41

Before You Call Far Service
Proble_ Pb_ible Cause Wh_ D
A fuse in your home Replace fuse or reset circuit breaken
Reheat
may be blown or the
circuit breaker tripped.
Power surge.
Plug not fully inserted
into wall outlet.
The cooktop fight is
located below the oven
floor. When the light
is on, the heat it
produces may make the
oven floor get warm.
The control has been
locked.
You have tried to start
the Reminder without
a valid time of day.
You have tried to start
the Auto Nite Light
without a valid time of
day entered for the
on-thne and off-time.
You have tried to chm_ge
the power level when it is
not allowed.
When using a Sensor
feature, the door was
opened before steam
could be detected.
Steam was not detected
in maxbnum amount of
time.
Sensor Reheat is for
single servings of
recommended foods.
Unplug tile microwave oven, dlen plug
it hack in.
Make sure tile 3-prong plug on the
oven is fully inserted into wall outlet.
• This is normal.
• Press and hold CLEAR/OFF fbr
about 3 seconds to unlock tile control
Start over and enter a valid time
of day.
Start over and enter a valid time
of day.
Many of the oven's i>atures are preset
and cannot be changed.
• Do not open door until steam is
sensed and time is shown counting
down on display.
• Use Time Cook to heat fi)r more time.
• Use Time Cook for large amounts
of tbod.
41
Page 42

Before You Call For Service
• Steam or vapor escaping
fronl around the door.
• Light _eflection around
door or outer case.
• Dimming oven light and
change in tile blower
sound at power levels
other than high.
• Dull thumping sound
while oven is operating.
• T_Cradio intert_rence
might be noticed while
using the microwave.
Similar to tile interference
caused by other small
appliances, it does not
indicate a problem wifll
tile microwave. Plug tile
microwave into a dift_rent
electrical circuit, move tile
Fadio or _ as fbr away
flora tile microwave as
possible, or check the
position and signal of
tile _/radio antenna.
42
Page 43

Notes
43
Page 44

Notes
44
Page 45

Notes
45
Page 46

We'll Be There!
vvvvw.GEAppliances.com
www.GEAppliances.com
Have a (t/lestion Or need
asskstance wifll your
appliance? '[if the GE
Appliances Website 24 hours
a day, any day oftbe yearl
For greater convenience and
faster sels'ice,yOU call :low
download Owner's Matltlals,
order lYarks, catalogs, or even
schedttie se_ce o:l-lixle. Yotl
can also "Ask Our'lbam of
Experts _'"y ) n ques runs,
alld so much nlole...
800.GE.CARES
(800.432.2737)
www.GEAppliances.com
Expert GE repair service is
only one step away f_om
your doo:: Get on-line mad
scbedule your service at yotir
com'enience 24 bom_ any
day of tbe year!
Or call 8(KI.GE.C_kRES
(800.432.2737) during
nonn_ bttsinesvs llOLII_.
800.TDD.GEAC
(800.833.4322)
GE support-s flae Universal
Desig_i concept--products,
_rvices and environlnellts
that call be used by people
of all ages, sizes and
capat)ilities. We recognize
tile need to design tbr a
_de range of physical and
mental abilities and
impairments. Fordetails
of GE's Universal Design:
applications, including
kitchen design ideas R)r
people vdth disal)ilities,
cbeck out our Website today.
For the hearing impaired,
please call 800.TDD.GEAC
(800.833.4322).
wvvw.GEAppliances.com
800.626.2224
Purchase a (;E extended
wa::_antyand learn about
special dkscoun_ that a_
availa_e while ycmr wmTamy
ks still in effect.You can
pin.base it ondine at_fime,
or call 800.626.2224 during
normal business hours. GE
( ]onstlme[' Home Services
u_ll still be fllere _ter your
u_rranty expires,
40
Page 47

wvvw.GEAppliances.com
800.626.2002
Individuals qualitied
to service their own
appliances can have
parts or accessories sent
directly m their home,
(VISA, MasterCard and
Discover cards are
accepted.)
Order on-line today,
24 hours eve13, day or
by phone at 800.626.2002
during normal business
houl,'s.
Instructions contained
in this manual cover
procedures to be
performed by any user.
Other servicing generally
should be referred
to qualified service
personnel. Caution
must be exercised, since
improper servicing may
cause unsafe operation.
vvvvw.GEAppliances.com
Register your new
appliance on-line-
at your convenience!
Tinlely product regiswation
will allow tor enhanced
commtlnication and
prompt service under tile
terms of your warranly,
should tile need arise.
You may also mail in tile
pre-printed regiswation
card included in the
packing material.
Page 48

Staple sales slip _r canceUed check lw_. P_vo] _ original
purchase date is _tegded lo obtain service under wmvanty.
FULL ONE-YEAR WARRANTY
For one year fl'om date of original
purchase, we will provide, flee of charge,
par_s and service labor in your hollle
to repair or replace any pm't oJtlw
mitwowave cn_en that fails because of
a manuthcturing def)ct.
LIMITED ADDITIONAL
NINE- YEAR WARRANTY
For tile second through the tenth year
fl'om tile date of original purchase,
we will provide, tiee of charge, a
replacement magnetron tube if tile
magnetron tube thils hecause of a
manulhcturing def>ct. You pay tor tile
service trip to your home and service
labor charges.
This warranty is extended to tile original
purchaser and any succeeding owner for
products purchased for ordinary home use
in tile 48 mainlatM states, Hawaii and
Washington, D.C. In Alaska tile wan-anty
is the same except that it is LIMrI'ED
because you must pay to ship the product
to tile service shop or t_)r tile service
technician's wavel costs to your home.
All wan_anly selwice will be provided hy
our Factory Service Centers or hy our
authorized Customer Care ®sel_'icers
dining normal working hours.
Should your appliance need service,
during warrant 3, period or beyond, call
800.GE.C&RES (800.432.2737).
Warrantor is not responsible for consequential damages.
• Service tlips to your home to teach • Failure of tlae product if it is misused, or
you how to use tile product, used _r other than tile intended purpose
• hnproper installation, delivery or or used commercially.
maintenallce. • Damage to product caused by accident,
If you have an installation problem, contact fire, floods or acts of God.
your dealer or installen You are responsible • Incidental or consequenlial damage
tbr proxiding adequate electrical, caused by possible detects with this
exhausting and other connecting facilities, appliance.
• Replacement of the cooktop light bulbs. • Damage caused alter delivery.
• Replacement of house fuses o1' resetting
of circuit breakers.
164D3370P272] JVM1650
49-40342 J _-o3JR p_.tedi°K0_._ JVM1651
 Loading...