

Page 1
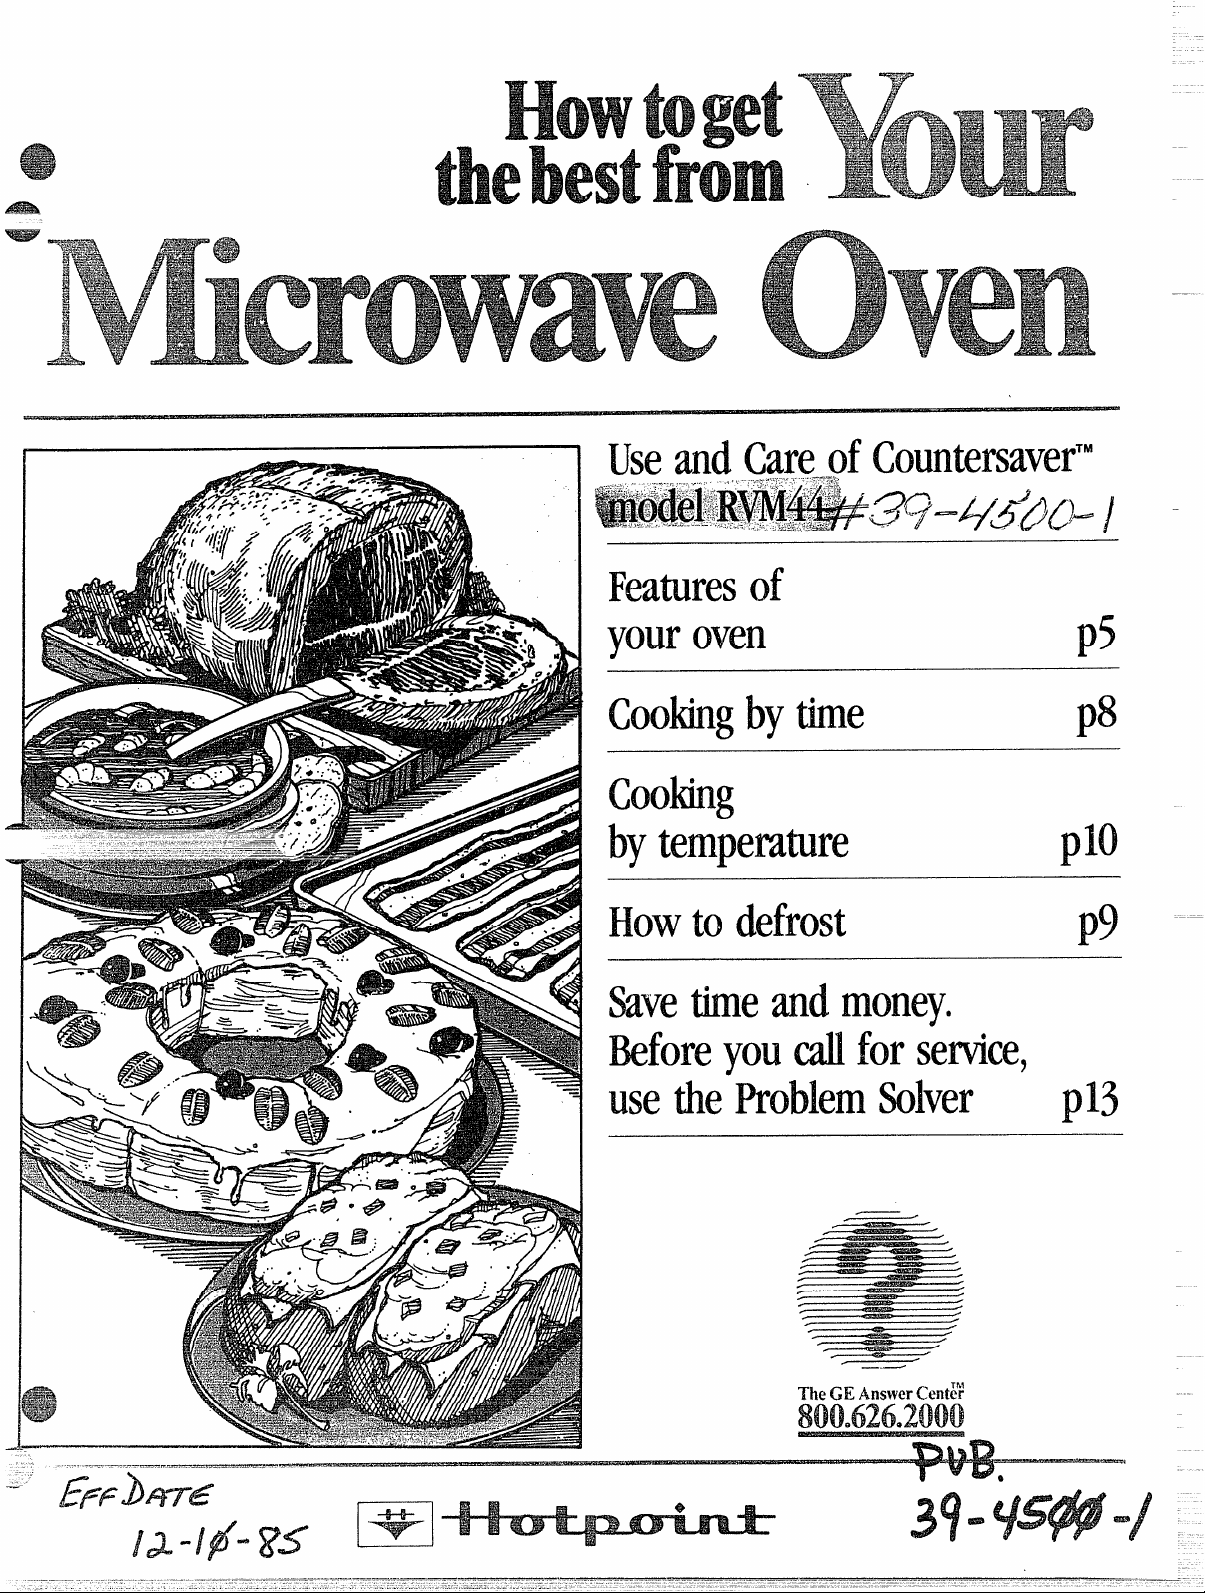
andCareofCountersaver’”
‘@!#6b&m_
‘...,.,’*..-..................~....,~+-.-,,;-‘-L...-.,l,,..l:-,&.:.
......-...:,.,.,.:.7-T,;;.
.-->,....
‘39=44-249-] -
Featuresof
youroven p5
Cookingbytime
cooking
bytemperature
Howtodefrost
Savetimeandmoney.
Beforeyoud forservice,
usetheProblemSolver
p$
plo
p9
. ....—.=.-—----
/
-.-—
%“
m
—-
Page 2
it is !ntsnded to help you operate
a;7cl irla~ntain your new Microwave
Oven properly.
Keep it handy for answersto your
questions.
If you don’t understand something
or need more help. . .
Call, toll free:
The GE Answer Center’”
800.626.2000
consumer information service.
or write: (include your phone
number);
Consumer Affairs
Hotpoint
Appliance Park
Louisville, KY 40225
....
write m? and
serial
You’llfind them on a label inside
the oven on the upper left side.
These numbers are also on the
Consumer Product Ownership
Registration Card that came with
your Microwave Oven. Before
sending in this card, pleasewrite
these numbers here:
ModeiNo.
Be sure ym.M
Ch#enis
it is import~nt that we,the manufacturer, know the location of your
Microwave Oven should a need
occur for adjustments.
Your supplier is responsible for
registering you as the owner.
Pleasecheck with your supplier to
be sure he has done so; also send
in your Consumer Product Ownership Registration Card. If you move,
or if you are{~~t the original purc#wme~’piea&%&vriteto us, stating
model and serial numbers.This
appliance must be registered.
Pleasebe cedain thatit is.
Write to:
Hotpoint
Range Product Service
Appliance Park
Louisville, KY 40225
If ~43u
Wenl. . *
immediately contact the dealer (or
builder) that sold you the Microwave Oven.
save time and
Before you request serwiee,check
the Problem Solver on page 13. It
lists minor causes of operating
problems that you can correct
yourself.
received a
(a) Do Not to operate this
oven with the door open since open
door operation can result in harmful
exposure to microwave energy. It is
important not to defeat or tamper
with the safety interlocks.
{b)DoNot !PkMeany object
between the oven front face and the
door or aliow soil or cleaner residue
to accumulate on sealing surfaces.
(c)DO Not Operate the oven if it is
damaged. It is particularly important
that the oven door close properly
and that there is no damage to the:
(1) door (bent)
(2) hinges and latches (broken or
loosened)
(3) door sealsand sealing surfaces.
SerialNo.
Usethese numbers in any
correspondence or servicecalls
concerning your Microwave Oven.
This microwave oven is UL iisted for installation over electric
and gas ranges,
The electric output ofthis
microwaveoven is 600Watts.
2
Page 3
,>.>, .,. . ‘-
-.
\ ~...-.
t,.
. . -.
E{sfp:eAfiiCI.OV\IaV in g . . . . , , . . , . . . 2
.—-”-,.
?, -<
‘F”baturesof YourOven . . . .. . . ,. . 5
\-
~~;-~~=~ouchCcntrol Panel . . . . .. . . . 6,7
‘?+ow to Time Cook . . . .. . . .. . . .. 8
, -.--..jg-;~‘:,>:’.*
‘
.
:
2 <,<: 2 !3kics
-YeiyInstiwcticms ., . . .., , . . . 3,4
l--low:0Defrost . . ., . . . . . .. . . , . . 9
How to Temp Cook . . .. . . .. . . . 10
Grounding Instructions . . .. . . . . 11
Careof YourOven . . . . . .. . . 12,13
The Problem Solver .. . . . . . . .. . 13
The Exhaust Feature . . . .. . . . . . 14
ConsumerServices. . . .. . . . .. . . 15
Warranty . . . .. . . . . . . . . Back Cover
eMake sure all utensils used in
your microwave oven are labeled
“suitable for microwaving”. Check
your Cookbook for specific test
to determine ‘(microwave-safe”
utensils.
@ Papertowels, wax paper, and
plastic wrap can be used to cover
ishesin order to retain moisture
:<* prevent spattering.
---
&
Q Some microwaved
*:@irring,rotating, or rearranging.
‘%%-’Checkyour CookbOokfOrspecific
G
instructions.
@Some foods such as unshelled
eggs and hot dogs must be pierced
to allow steam to escape during
cooking.
--.,..
f
.“‘:
,)
foodsrequire
When using electrical appliances
basic safety precautions should
be followed, including the
following:
WARNING-–TOreducethe risk
of burns, electric shock, fire,
injury to persons or exposure to
excessivemicrowave energy:
@ Use this appliance only for its
intended use as described in this
manual.
@ Read and follow the specific
“PRECAUTIONS TO AVOID
POSSIBLE EXPOSURETO
EXCESSIVEMICROWAVE
ENERGY” found on page 2.
@ This appliance must be
grounded. Connect only to
properly grounded outlet. See
“GROUNDING INSTRUCTIONS”
found on page 11.
@ For best operation, plug this
appliance into its own electrical
outlet, to prevent flickering of
lights, blowing of fuse or tripping of circuit breaker.
e Install or
locate this appliance
only in accordance with the pro-
vided installation instructions.
e Do not cover or block any
openings on the appliance.
e Do not use outdoors.
@ Do not immerse cord or plug
in water.
@ Keep cord away from heated
surfaces.
@ Do not let cord hang over
edge of table or counter.
@
Do not operate this appliance
if it has a damaged cord or plug,
if it is not working properly, or if
it has been damaged or dropped.
@ This appliance should be serviced only by qualified service
personnel. Contact nearest
authorized service facility for
examination, repair or
adjustment.
@ As with any appiiance, close
supervision is necessarywhen
used by children,
@ See door cleaning instructions on page 1.2.
reduce the risk of fire in
@ To
the oven cavity:
—Do not.overcook food. Care-
fully attend appliance if paper,
plastic, or other combustible
materials are placed inside the
oven to facilitate cooking.
—Removewire twist-ti& from
paper or plastic bags before
placing bag in oven.
—Do not use your microwave
oven to dry newspapers.
—Papertcwds and
wax paper. Recycled paper
products can contain metal
fiecks which may causearcing
or ignite. Paper products containing nylon or nylon filaments
should be avoided, as they may
also ignite.
—-Donot pop in your
oven unless in a spe-
cial microwave popcorn acces-
sory or unless you use popcorn
labeled for use in microwave
ovens.
—Do not operate the oven while
empty !0 avoid damage to the
oven and the of%re. If by
accident the oven should run
empty a minute or two, no harm
is done. However, try to avoid
operating the oven empty at all
times—it savesenergy and pro-
longs life of the oven.
—If materials inside the oven
should ignite, keep oven door
closed, turn oven off, and disconnect the power cord, or shut
off power at the fuse or circuit
breaker parml.
@ Some products such as
whole eggs and sealedcontainers—for example, closed
glass jars—may explode and
should not be heated in this
oven.
(continued next page)
,-
>’
fs#EEa5
v
‘x$
Page 4
I -. - =.
., ,.
,
T ..
\-
“! .-, . .: . L..> s..v->;
!“ :
4
. . .
,..
~i~~~~ j.~~--+
ii,,+-1.
i~~~s,s’special& meat anc1egg
“.$ 2-?. :.+
. ., .=
,.:
~ { p~:>q~~;~::;
-J.
,, :>,
t
=:.-.,
;’.-,. 5.
:t
~-;mj;:yg
: f~~fj ~~
‘Oj “J
G .%mwitho-httheir
{Hixtures.
“a fcwm>’?(SC”’MX?JfRXXmhew%”-’
~~~~in ~a~’r~l.~~neck go~ties;
~We~i-ai~Ycarbonated ~neso
Even]?the container is
~>re~~urecan build tJP.~hi~ can
opened,
;ause the container to burst,
resultjn~ in injury.
Q use metal only as in
Nletaistrips as used
on meat, masts are helpful when
used as shown in Cookbook.
TV dinners may be cooked in
metal trays. However, when
using metal in microwave oven,
@ep at least ~~W
jyf)~ $j~~~~of ~v~~m
@ may
become hQtbecause of heat
transferred from the heated
food. This is especially true if
plastic wrap has been covering
the top and handles of the
utensil. Potholders may be
needed to handle the utensil.
43 the oven floor
$Xw$ too hot to touch.
Be careful touching the floor
during and after cooking.
o Do not use any
in food you are microwaving
unless that thermometer is
designed or recommended for
use in the microwave oven.
@ F3WKWethe
gwokwfrom the oven not
using it to cook with. Ifyou leave
the probe inside the oven without
in~e~ing
it in food or liquid, and
turn cmmicrowave energy, it can
create electrical arcing in the
~wn, and damage oven wails.
@3
utensils designed for microwave
cooking are very useful, but
should be used carefully, Even
microwave plastic
may not be as
tolerant of overcooking conditions as are g!assor ceramic
materials and may soften or
char if subjected to short periods
of overcooking, In longer exposures to overcooking, the food
and utensils could ignite. For
these reasons:1) Use microwave plastics only “and use
them” in strict compliance with
the utensil manufacturer’s
recommendations. 2) Do not
subject empty utensils to microwaving. 3) Do not permit children
to use plastic utensils without
complete supervision.
69 cooking pork follow
our directions exactly and
always cook the meat to at least
170°. This assuresthat, in the
remote possibility that trichina
may be present in the meat, it
will be killed and meat will be
safe to eat.
6 eggs (in and Outof
shell) is not for
microwave cooking. Pressure
can build up inside egg yolk and
may cause it to burst, resulting
in injury.
@? with outer
“skin” such as potatoes, hot
dogs or sausages,tomatoes,
apples, chicken livers and other
giblets, and eggs (seeabove)
should be pierced to allow
steam to escape during cooking.
a
and bags
should be slit, pierced or vented
as directed in Cookbook. [f they
are not, plastic could burst during or immediately after cooking,
possibly resulting in injury. A&m,
plastic storage containers should
be at least partially uncovered
becausethey form a tight seal.
When cooking with containers
tightly covered with plastic wrap,
remove covering carefully and
direct steam away from hands
and face.
—Neverileaw tmiis
athigh heat
Boilover causes smoking and
greasy spiilovers that may ignite
and spread if vent fan is operating. To minimize automatic fan
operation, use adequatesized
utensils and use high heat set-
tings only when necessary.
—h theeventof a greasefire,
smother flaming pan on surface
unit by covering pan completely
with well-fitting lid, cookie sheet
or flat tray.
—-Never
oven
becauseit may spread the
flames.
—Keep htxxi and grease
clean, according to instructions
on pages 13and 14,to maintain
good venting and avoid grease
fires.
mm? fcmdsWider the
vim h? ventfan
Page 5
>
.
I
$i%i%
-$<
.-
:
G
&:fii%
%E&’
‘~fJm
~lPJ
Ill
Y&!!~>
!1
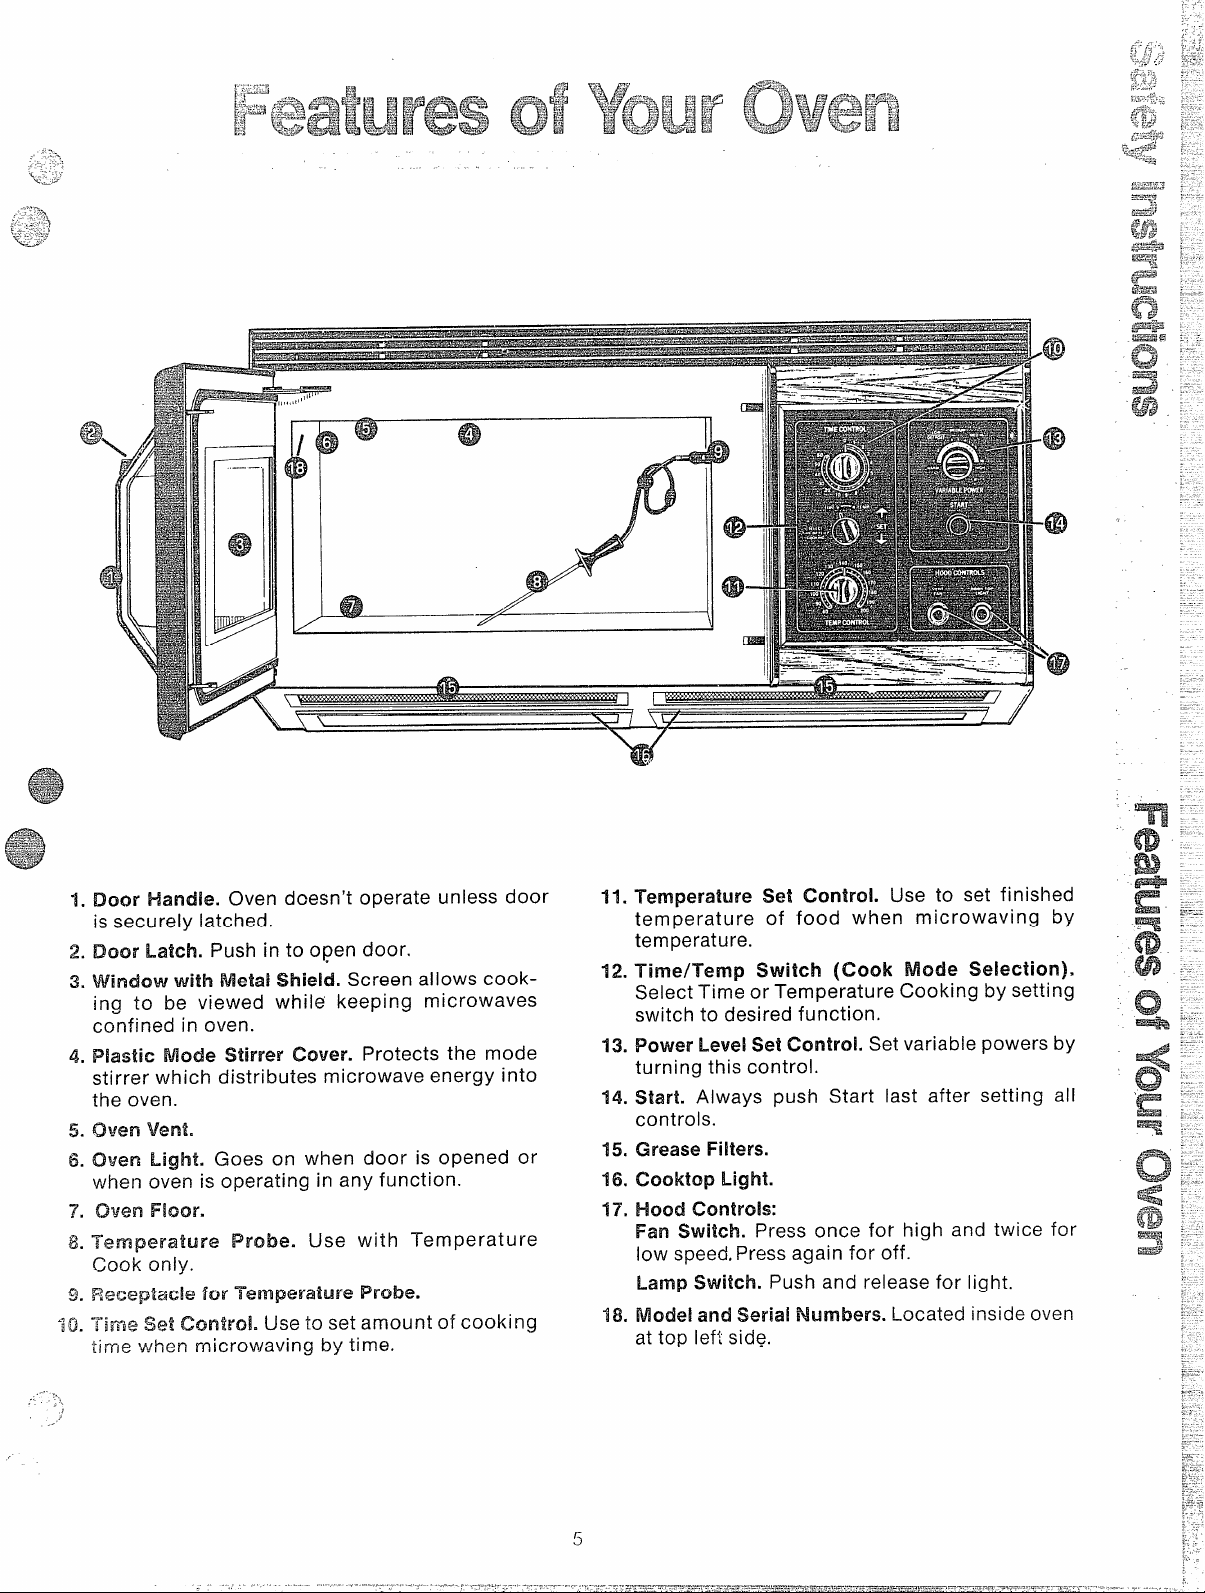
Door Handle. Oven dcesn’t operate unless door
1.
is securely latched.
Door Latch. Push in to open door.
2.
3.
ing to be viewed whiIe keeping microwaves
confined in oven.
Plastic Mock Stirrer Cover. Protects the mode
4.
stirrer which distributes microwave energy into
the oven.
oven vent.
5.
Oven Light. Goes on when door is opened or
6.
when Oven is operating in any function.
oven Floor.
7’.
~“emperature Probe. Use with Ternperatu re
il.
Cook only.
c1
i%%+eeptaciefor Temperature Probe.
4.
e>.
t ;me Set Control. Use to set amount of cooking
iiimewhen microwaving by time.
with Metal Shield. Screen allows cook-
\
&=-
—
W?&w ~
i .-. -..
?
,1zc-II -===-=. -=-%F=’ -
——,
a
-.
w
Temperature M Control. Use to set finished
11.
temperature of food when microwaving by
temperature.
Time/Ternp Switch (Cook Mode Selection)=
12,
Select Time or Temperature Cooking by setting
switch to desired function.
Power Level Set ControL Set variable powers by
13,
turning this control.
14,
Start. Always push Start last after setting all
controls.
GreaseFilters.
15,
Cookhp Light.
16!
HW3dcontrols:
17.
Fan Switch. Press once for high and twice for
low speed.Press again for off.
Lamp Switch. Push and release for light.
Model and SeriaBNumbers. Located inside oven
18.
at top left side.
-_—--- —-—-- -
~—+.@
...-— —.-
--/
,
,..4
,“. +
,,
.,
Page 6

TIME CONTROL.
Your microwave oven has a circular timer that can be
rotated manually. The timer indicator moves toward
“O” only when the oven is cooking or defrosting with
microwave energy.
When the timer reaches “O” a bell will sound to tell
you that cooking is completed and the power, interior light and fan are shut off automatically.
Remember, if you open the door before the timer -
reaches “O”, cooking or defrosting will stop. When
you close the door and press START, cooking starts
again where you left off.
T’lME/TEiMPSWITCH
To cook by Time, turn to the left, set timer. To cook
by Temperature, turn to the right and set tempera-
ture dial.
CONTROL
Insert temperature probe into food and place into
oven. Insert cable end into receptacle on oven wall. If
oven will not start when START is pushed, recheck to
make sure the probe is securely attached.
tBE$aBY––:L---—--—===:--=--===-==-
——
1
.
—
Dial the finished temperature following the recipe directions. NOTE: If the actual temperature of the food
in the oven is higher than the temperature you dial,
the oven will not start. Check temperature again to
make sure you’ve set the dial correctly. If not, reset. If
so, the food in the oven has already reached the desired finished temperature and no more heating is
needed.
When preset internal temperature is reached, oven
automatically turns off to signal that cooking has
stopped. Remove the cable end of the probe from receptacle, take food and probe out together.
NOTE: The actual temperature of the food during
cooking may be determined by turning the TEMP
CONTROL dial to a lower setting until the oven turns
off. (Before restarting, open and close oven door to
reset control)
—-A-—
—
1
6
.-
Page 7

.“ ..”. .,
. . . . . .:_. ...
,-==
:n—,..L=-
-
. ,-. . - --
—
------
VARIABLE POWER CONTROL
Your new microwave oven allows you a complete
selection of microwave power levels from which to
_.L.
choose. Always check with The A.4~crowaveGuide
and Cookbook to find out which power level is
recommended for the food you’re cooking.
The Variable Power Control is marked with 10 settings. However, you can adjust the power level to
select settings between the numbers marked on con-
trol, to fit the type, amount and kind of food you are
cooking. In this way, you have complete control over
the amount of microwave power used for cooking
your food and, you have flexibility to cook all food
types, because power can be adjusted.
HOOD CONTROLS
Fan Switch. Press once for high speed. Press twice
for low speed. Press again for off.
/
k
--
Lamp Switch. Push and release for light.
/
AUTOMATIC FAN FEATURE
Cooking appliances installed under the oven might,
under some heavy usage conditions, cause temperatures high enough to overheat some internal parts
of the microwave oven.
To prevent overheating from taking place, the vent
fan is designed to automatically turn on at low speed
if excessive temperatures occur. Should this happen,
the fan cannot be manually turned off, but it will auto-
matically turn off when the temperature is reduced.
The fan may stay on up to approximately 30 minutes
after the range and microwave oven controls have
been turned off.
7
Page 8

The time cooking feature allows
-——
you to presetthe cooking time.
The oven shuts off automatically.
Power Level 10is recommended for
most time cooking, but you may
change this for more flexibility.
Seeyour Cookbook.
To become better acquainted with
time cooking, makea cup of coffee
by following the steps below.
—
— .—
—
1
-..
/
--/
Step 1: Fill a cup 2/3 full of water
and add 1‘teaspoon of freeze dried
coffee. Use acup that has no metal
decoration. Place cup in oven and
close door.
/= - - -- ----–-
Step4. Turn Time Set to 1%or halfway between 1and 2for a cooking
time of 1 minute and 30 seconds.
Step 2. Turn Power Level Control
to HIGH.
Step 3. Turn Time/Temp Switch to
the left to TIME.
Q. Iset my oven forthe time called
for in the recipe but at the end of
the time allowed, my dish wasn’t
done. What happened?
A. Since house power varies due
Q. I want to cook my dish on a
Power Level other than HIGH, what Cook recipes give you atime range
do I need to do?
A. To change the Power Level,turn
the Variable Power Level Control
to Power Level desired.
to time or location, many Time
to prevent overcooking, Set the
oven for minimum time, test the
food for doneness, and cook your
dish a little longer, if necessary,
Step 5: Push START. When oven i
cooking, interior light comes on,
and a fan starts to operate to tell
you oven is operating.
Step 6. When time is up, oven signals and shuts off automatically.
NOTE: When setting a time of less
than 1 minute, rotate timer % turn
and then back to desired time
setting.
Q. Can I interrupt my Time Cooking to check the food?
A. Yes. If there is time remaining
on the Ti mer, simply close the door
and push START.
NOTE: Microwave power will not
come on until you are ready. You
must push START for cooking to
begin.
8
Page 9

How Use
—
The Defrost setting is designed
r even thawing necessary for
arge amounts of food and is one
of the most important advantages
of a microwave oven.
@ Power Level 3 is recommended
for most defrosting, but you may
change this for more flexibility.
@ See your Cookbook for the
complete defrosting chart.
To become better acquainted with
the defrost function, defrost frozen
pork chops by following the steps
below.
=ep 1: Place package of chops in
e oven and turn Variable Power
evelControl to 3(LOW/DEFROST).
Step3. Turn Time Set to 8 minutes.
Step 4: Push START. Interior light
comes on and a fan starts telling
you oven is operating.
Step 5. When oven signals and
shuts off, turn package over and
close door.
Tips
@ Foods frozen in paper or plastic
can be defrosted in the package.
@ Foreven defrosting, many foods
need to be broken up or separated
part of the way through the defrosting time.
..
,-
@JHomemadedinners canbefrozen
in shallow foil trays and heated for
later use.Select foods which microwave well.
e Pre-packaged
can be defrosted
cooked.
frozen dinners
and microwave
I
Step 6.Turn Time Set to 8 minutes,
Step 2. Turn Time/Temp Switch to
the left to TIME.
Q. Can I Defrost small
hurry?
A. Yes, small porous foods
breadsand rolls; and small portions
ozen foods may be microwaved A. Yes. You may open the door at “‘-
gher power. Check the “t-low to any time during microwaving. To
Convert Defrost Times” Chart in the
okbook for the amount of time
ed when using higher powers.
terns n a
like
and push START. When oven shuts
off, separate pieces and let stand to
complete defrosting.
Q. When I closed the door, I hear a
dull thumping noise. What is it?
A. This sound is normal. It is letting
you know the oven is using a Power
Level lower than HIGH. Defrosting time can vary according
G?.Can I open the door during
defrosting to-check on the progress
of my food?
resume defrosting, close the door,
oven begins operating if time is left
on timer. if not, resettimer.
o Check your Cookbook for other
defrosting tips.
Q. Why don’t the defrosting times in
the Cookbook seem right for my
food?
A. Cookbook times are average.
to the temperature in your freezer.
Set your oven for the time indicated
in your Cookbook, If your food isstill
not comnletel~ thawed at the end of
. --- .. .. .. .
that tim~, re-set your oven and
adjust the time accordingly.
9
Page 10

For many foods, internal temperature is the best
test of doneness.
Roasts or poultry are cooked to your preference
when temperature cooking. Heating or reheating
foods accurately to a serving temperature you
desire is simple and easy.
TEMP COOK takes the guesswork out of cooking
because the oven shuts off automatically when the
food is done.
The
The temperature probe is a food thermometer that
gauges the internal temperature of your food; it
must be used when using TEMP COOK.
HANDLE
I
SENSOR
CLIP
CABLE
to Cook Basic
Step 1. Insert temperature probe
as directed in Cookbook and attach probe securely in oven wall,
Close the door.
Step 2. Turn Tim.e/Temp Switch to
TEMP.
Step 3. Turn Variable Power Level
Control to 10 (HIGH).
Step4. TurnTemperature Setto 170.
Step 5. Push START button. inte-
rior light and fan come on to tell
you oven is operating.
Step 6. When temperature is
reached, the oven will automatically shut off. Remove probe and
food from the oven.
ChokingTips
@ Use a lower power level setting;
it will heat more evenly eventhough
requiring more time.
~ Be sure frozen food has been
completely defrosted before inserting probe. Probe may break off if
used in frozen foods.
o Always insert probe into the
center of meaty areas; take care
not to touch the fat or the bone.
@ Insert probe as horizontally as
possible into foods as directed in
the recipes. Make sure the handle
does not touch the food.
o Use the clip to keep the probe
in place while heating.
e Cover foods as directed in
Cookbook for moisture control and
quick, even heating,
w
Q. Can I leavemy probe in the oven
if it’s not inserted in the food?
A. No. If the probe is left inside the
oven, touching the oven wall, and
not inserted in food, you may damage the oven.
Q. Are there any foods I can’t
TEMP COOK? ture to set?
A. Yes. Delicate butter icings, ice A. Your Cookbook contains sec-
cream, frozen whipped toppings, tions on all types of foods showing
etc., soften rapidly at warm te-m- the temperatures needed to cook
peratures. Batters and doughs as the foods to different degrees
well as frozen foods are also cfifficult to cook precisely with the to Reheating Charts in the front
probe. It is best to TIME COOK
these foods. temperatures.
Q. How do I know what tempera-
of doneness. For reheating, refer
of the Cookbook for specific
10
Q. Oven would not start although
I dialed the temperature correctly.
What is wrong?
A. If you have not securely seated
the end of the probe into the
receptacle in the oven wall, or if
you haveforgotten to use the probe
or if the actual food temperature is
higher than set temperature, oven
will not start.
Page 11

This appliance must be grounded,
Inthe event of an electrical short
ircuit, grounding reduces the risk
electric shock by providing an
scapewire for the electric current.
This appliance is equipped with a
ord having a grounding wire with
agrounding plug. The plug must be
plugged into an outlet that is prop-
erly installed and grounded. (Fig. 1)
WARNING—lmproper use of the
grounding plug can result in a risk
of electric shock.
‘1
.
,
Q
;
\
Fig. 1
Consult a qualified electrician or
servicetechnician if the grounding
instructions are not completely
understood, or ‘if doubt exists asto
whether the appliance is properly
grounded.
INSURE PROPER GROUND
EXISTS BEFORE USE
Where astandard two-prong
receptacle is encountered, it isyour
personal responsibility and obligation to haveit replaced with a properly grounded three-prong wall
receptacle.
wall
Do Not under Any ch’a.ml-
stancesCM or Removethe
Third (Ground) ProngFrom
The Power Cord.
Do Not like an AdapterPlug
WithThis Appliance.
Do Not Usean Extension
Cord With ThisAppliance.
Page 12

Care Oven
YourNetvMicrowaveOvenisa
Valuab!eAppliance,ProtectIt From
MisuseBy Following TheseFMes:
e Keepyourovencleanand
sweet-smelling.Opening the oven
door a few minutes after cooking
helps “air-out” the interior. An
occasional thorough wiping with a
solution of baking soda and water
keepsthe interior fresh.
@ Don’tusesharp-edgedutensils
withyouroven.The interior and exterior oven walls can bescratched.
The control panel can be damaged.
@ Don’tremovecoveroverthe
“stirrer”at the top of the oven (microwave feature 4 on page5). You will
damage the oven.
BE CERTAINPOWER IS (3FF
BEFORE
CLEANINGANY
F?AFrrw THIS OVEN.
Door-inside.Glass:Wipe up spatters
daily, wash when soiled, with a minimum of sudsy warm water. Rinse
thoroughly and dry.
Metal and plastic parts on door:
Wipe frequently with a damp cloth
to remove all soil. DO NOT USE
ABRASIVES, SUCH AS CLEANING
POWDERSOR STEEL AND PLASTIC PADS.THEY MAYMAR THE
SURFACE.
How toWan the Outside
Case.Clean the outside of your
oven with soap and damp cloth,
then rinse and dry. The outer pane
of the window is glass.Just wipe
clean with a damp cloth. Chrome
trim is best wiped with a damp cloth
and then with a dry towel.
ControlPanel.Wipe.with a damp
cloth. Dry thoroughly. Do not use
abrasivesor sharp objects on the
panel. They can damage it.
DoorSurface.When cleaning surfaces of door and oven that come
together on closing the door, use
only mild, non-abrasive soaps or
detergents applied with asponge
or soft cloth.
Specialnotewhen usingBrown‘N
SearDish:High heat generated on
bottom of Brown ‘N Sear Dish can
causescorched appearing stains to
bakeonto the oven floor if greaseis
present.These may be removed
with Bar Keepers Friend@Cleanser
by SerVaasLaboratories, Inc.
After using Bar KeepersFriend@
Cleanser, rinse and dry thoroughly,
following instructions on can. Do
not use Bar Keepers Friend@
Cleanser on the painted surfaces
such asthe walls. It may scratch the
paint.
Bar Keepers Friend@Cleanser is
sold in many grocery, hardware,
and department stores.
AutomaticTemperatureProbe.
Probe is sturdy, but care should be
taken in handling. Do not twist or
bend; avoid dropping temperature
probe.
Clean assoon after using as possible. To clean, wipe with sudsy
cloth, then rub lightly with plastic
scouring ball if necessary.Rinse
and dry. (Or wash in dishwasher.)
How toClean the Inside
Walls, floorand plasticcover.Because there is little heat except in
the food, or sometimes in the utensils, spills and spatters are easyto
remove. Some spatters can be removed with a paper towel, others
may require a damp cloth. Remove
greasy spatters with a sudsy cloth,
then rinse and dry. Do not use
abrasive cleaners on oven walls.
NEVER USE A COMMERCIAL
OVEN CLEANER ON ANY PART
OF YOUR MICROWAVEOVEN.
12
Page 13

To replace hood lamp, first disconnect power at
main fuse or circuit breaker panel or pull plug.
Remove 2 screws from each side of lower panel and
3 screws from front edge. Lower panel until it rests
on range below. Be sure bulb to be replaced is cool
before removing. Remove bulb or bulbs and replace
with 40 watt appliance bulbs. Raise lower panel and
replace screws, Connect electrical power to micro-
wave oven.
0 replace your oven lamp, first disconnect power at
ain fuse or circuit breaker or pull plug. Remove the
top grill by taking off 2 screws which hold it in place.
Next, remove the single screw on top left that
‘-- secures lamp housing. (On models so
Open oven door for easier removal of the lamp housing assembly. Then grasp tab and pull out and up to
clear’ door hinge and front lip of oven. To remove
bulb, push it inward gently and turn to left, then pull
outward from socket. Replace with GE Lamp
= 25 T8DC.
Do not attemptto operate the oven unless the grill is
in place.
equipped,)
The
Problem:The oven doesn’t seem to work at all.
Solution: Check first to see that the 3-prong plug is
inserted firmly into the proper receptacle, Next,
check to see if afuse needs replacing at control box.
Problem: Oven won’t start when using temperature
probe.
Solution: Check to make sure Time/Temp switch is
set at TEMP. Make sure the cable end is securely
“seated” into oven receptacle and that temperature
set on dial is higher than actual temperature of food.
Problem: Hood fan isn’t working right.
Solution: If it doesn’t work at all, check the main
fuse or circuit breaker. If it works but is faster than
usual, the filter may need cleaning. If fan goes on
and off, it’s probably overheating. Check to make
sure the filter is clean. If it is, call for service. If fan is
on and can’t be turned off, see page 7 about the
automaticfan feature.
Prob!em:Microwave power won’t come on.
Solution: Check to be sure the door is securely
closed and the timer set. If a dish is touching the
door when it seems to be closed, it actually may not
be firmly closed.
Problem:Oven goes off before set time haselapsed.
Solution: Check to be certain the fuse protecting
the receptacle into which cord is plugged is operating. If fuse has not blown and power still does not
function, call for service.
/411TheseThingsAre
cmYour C9ven:
1.
Steam or vapor escaping from around the door.
2. Light reflection around door or outer case.
3. Dull thumping sound while operating at power
levels other than high.
4. Dimming oven light and change in blower sound
may occur while operating at power levels other
than high.
5. Some TV-Radio interference might be noticed
while using your microwave oven. It’s similar to the
interference caused by other small appliances and
does not indicate a problem with your oven.
Clean off the grease and dust on hood surfaces
often. Use a warm detergent solution. About 1 table-
oon of ammonia may be added to the water. Take
re not to touch the filters and enameled surfaces
lth this. Ammonia will tend to darken metal.
13
Page 14

The
I—J
..——
The exhaust hood feature on your microwave oven
is equipped with a metal filter which collects grease.
When the fan is operated, air is drawn up through
To remove grease filter, grasp the “finger hold” on
the filter and push to the rear. The filter will drop out.
To replace grease filter, insert the filter in the top
frame slot on the back of the opening. Push to the
rear and upward to snap into place.
the filter and is then discharged through provided
ventina to the outside. The hood also has a light –
for illuminating the counter surface.
.,:.;
\
....
?’LM
w
...~”. ... ..“
‘.%%
-’---=2h
Soak, then agitate filter in hot detergent solution.
Don’t use ammonia or other alkali because it will
darken metal. Light brushing can be used to remove
embedded dirt. Rinse, shake and remove moisture
before replacing. Filters should be cleaned at leas
once a month. Never operate your hood without th
filter in place. In situations where flaming might
occur on surfaces below hood, filter will retard entry
of flames into the unit.
14
Page 15

_
—
At Hotpoint we’recommitted to providingyou withthe best applianceswe know how to buildand weknowthat you
want yourappliancesto giveyou many years of dependableservice.
Our ConsumerServicesare designedwith your needsand wantsin mind.
WarrantyProtection
Beforeyournewapplianceleft the factory,it went
throughrigorousteststo detectmanufacturingdefects.
Convenient Service
Whetheryour applianceisin orout of warranty,you’re
just a phone callawayfromour nationwidenetworkof
FactoryTrainedServiceprofessionals.
Simplycallour Hotpoint serviceorganization. Lookin
the White orYellowPagesof yourtelephonedirectoryfor
HOTPOINT FACTORYSERVICE,GENERAL
ELECTRIC-HOTPOINTFACTORYSERVICEor
HOTPOINT CUSTOMERCARE”SERVICE.
Servicecan normallybe scheduledat yourconvenience
and the techniciandrivesa fully-stockedparts service
truck sothat, in mostcases,the repaircanbe completed
inone visit.
We’reproud of our serviceandwantyouto be pleased,
but if forsomereasonyouare not happywith the service
youreceive,hereare threestepsto followfor furtherhelp.
Andyou havea writtenwarrantyto protectyou.Seethe
warrantyon theback pageofthis book fordetails.
FIRST,contact thepeoplewhoservicedyour appliance.
Explainwhyyouare not pleased.Inmostcases,this will
solvethe problem.
NEXT,if youare still not pleasedwriteallthedetails
—includingyourphonenumberto:
Manager,ConsumerRelations
Hotpoint
AppliancePark
Louisville,Kentucky40225
FINALLY,if yourproblemisstillnotresolved,write:
MajorApplianceConsumerActionPanel
20 North WackerDrive
Chicago,Illinois60606
ServiceContracts
For trouble-freeservicebeyond
thewrittenwmmmiy period.
If you preferto budgetyour repair expenditures ; “ ‘ :. Servicecontractsletyoupaytoday’spricesfor
insteadof beingsurprisedby them, Hotpoint
offersservicecontracts forvaryinglengthsof ~ - “ - ;
timeon all Hotpoint major appliances.With a ! ~WWWX’~2
contract, we’llkeepyourapplianceingood
operatingconditionduringthe contract period
at rioadditional charge.
The Quick W@System
Youcm save money andtime
bydoing it yourself.
For do-it-yourselferswhowouldprefer to fix
Hotpoint major appliancesthemselves...
Hotpoint offersan industryfirst, the Quick
Fix”System.
*“,,,,..,..“.,-.-.,,-:
“m,,,.>.mu,u \
..
‘.,
\ ...AL-.=:..-:-’--’”‘-j
....=..---~m>;
; ~>---’-----
$&;,!?.,$-l$.*
D
*
serviceamonth, ayear,or severalyearsfrom
now.And, you’llreceiveservicefromHotpoint
trained servicetechniciansusingonlygenuine
Hotpoint parts, If youhaveany questionsabout
ServiceContracts, call TOLL-FREE
800.626.2224.(InKentucky,call800.292.2057.)
A program for do-it-yourselfappliancerepair,
the systemincludesstep-by-steprepairmanuals
for refrigerators, most non-microwaveelectric
ranges,dishwashers,and standard and large
capacitywashersand dryers,plusspecialiy
packagedreplacementparts, and technicalhelp
witha tollfree 800 nutnber.
Help ForYouByPhone
Shouldyou needhelpin the selectionand
purchaseof newappliances, or havequestions
about the operation of the Hotpoint appliances ~
younowown—orhaveany other questions
about Hotpoint consumerproductsor services,
youare onlya TOLL FREE callaway.
m
~
TheGE Answ’erCent#
800.626.2000
The GE AnswerCenterTMconsumer
informationserviceisopen24hoursa day,
sevendaysa week.
Our staff of expertsstandsreadyto assistyou
anytime.
15
Page 16

i
~,~;:
11~-—=
Saveproofof originalpurchasedate
such as your sales slip or cancelled check to establish warranty period.
!Is:
~~~~+~~~”‘j~
2-
~~ ~Service trips to yourhometo
Somestates do notallowthe exclusionor limitationof incidentalor consequentialdamages,so the abovelimitationor exclusion
maynot applyto you. Thiswarrantygives
Toknow what yourlegalrightsarein yourstate,consultyour localorstateconsumeraffairsoffice oryourstate’sAttorneyGeneral.
Hfurther help is needed concerningthis warranty,contact:
Manager–Consumer Affairs, Genera! Electric Company,Appliance Park, Louisville,KY 40225
FULL(XNE=YEARWARRANTY
For one year from date of original
purchase,we will provide,free of
charge, parts and service labor in
your home to repair or replaceany
part d themicrowaveovenhnge
that fails because of a manufacturing defect.
LIMITED Additional
F(NJR=YEARWARRANTY
For the second through fifth year
from date of original purchase,
we will provide, free of charge,a
replacement magnetrontubeif the
magnetron tube fails becauseof a
manufacturing defect, Youpay for
the service trip to your home and
service labor charges.
teach you how to use the product.
Readyour Use andCare material. “
If you then haveany questions
about operating the product,
Consumer Affairs office at the
address below, or call, toll free:
The GE Answer CenterTM
800.626.2000
consumer information service
s Improper installation.
If you havean installation problem,
contact your dealer or installer.
Youare responsible for providing
adequate electrical, exhausting
and other connecting facilities.
youspecific legalrights,andyou may also haveotherrightswhichvaryfrom stateto state.
Warrantor:Genera! ElectricCompany
This warranty is extended to the
original purchaserand anysucceed-
ing owner for products purchased
for ordinary home use in the 48
mainland states, Hawaii and
Washington, D.C.In Alaska the
warranty is the same except that it
is LIMITEDbecauseyou must pay
to ship the product to the service
shop or for the service technician’s
travel costs to your home.
All warranty servicewill be provided
by our Factory Service Centers or
by our authorized Customer Care”
servicers during normal working
hours.
Look in the White or Yellow Pages
of your telephone directory for
HOTPOINTFACTORYSERVICE,
GENERALELECTRIC-HOTPOINT
FACTORYSERVICEor HOTPOINT
CUSTOMERCARE@SERVICE.
@
Replacement of house fuses
or resetting of circuit breakers.
@Failure of the product if it is
used for other than its intended
purpose or used commercially.
. Damage to p;oduct caused
by accident, fire, floods or acts
of God.
WARRANTORIS NOTRESPONSIBLE FORCONSEQUENTIAL
DAMAGES.
ll~m
r–-
II
,,*.X
II*’”
l~a-=
tmk—
—11X<
~!~::
u.
~s
—.
—-
~..
— .-
11:z—
!!g:
II><
c%=-
,,g%t.-
II
IIN*
Ise—m
w=:
II ‘-
$!!5.>
In:z—
!!g;
II>-
&7&-
11
,,y,=
p$i:’
..- —
llkIlxx
II -
,,~::
pgt
InkAIIXK
~~~:
l~&%-
,,==<
Ilxu
II*=.
18:=—
ll?G-
,,~~
Ilxa
 Loading...