

Page 1
———
>’
-.
.&.<’..-
,.-.,,.
. , .-
=
.r.—
:,..”, . —
.
-—
—
—
—
-—=e———
—
. —-———————.———
-.
.—
— -.
—
.
I
,..s. =..=-. -—
6 -–
m ,, ,
!.. .
..-
, . .
, ,
—.. : -
-:, -:;..
:!
!,. .., -!
‘ ‘, , ,
-,. ’.,:5:.;,$:-.,;=- .
:!
“.’..>::;:;:::::l,...,—
.,:..;+l, ,
.$ .,.,. >.’ ‘
-7.=;::;s::,.:=,.:.
,: ..!++:,,’.
..:,#@:
>---
‘
g&’ =-?-+--~- .-.-.. ,+g.
.--”+-.—-—-——— - -——— ———
--.= -.,.
.’ .,----
Page 2
3
~EJŠ•S»••Ç²•|£²•(¨²•pEJŠ •º•ð¢²•,¨²•d£²•pEJŠ•–º
Registration Information ... . . ....... . .... . . . .
Grounding Instructions . . . . .. . . . . . . . . . ...... . ..... . . . . . . . ......3
How to UseYour Microwave OvenforAll It’sWorth . . . . . . . . . ........4
Safety Tipsto FollowWhileMicrowaving . . . . . . . . . . . . . . . . . . . . .. ...4
How to Usethe Control Panel . . . . . . . . . . .... . . . ..... . . . . . ........6
Howto TimeCook . . . . .... . . . . . .. . . . ..... . . . . . . . . . . . . . . . . . . . . . 8
Howto Temp Cook . . . . . . . . . . . .... . . . . . . . . . . . . . . . . . . . . . . . . . ...9
Closeup: TheTemperature Probe . . . . . ....... . . . . . . . . . . . . . . .. ..10
Three Levels of Power Make Your Microwave Oven
MoreVersatile . . . . . . . . .. . . .. ... . . ........ . . . . . . . ..........~l
HowtoClean&CareforYour NewMicrowaveOven ... . ..........12
TheExhaustFeature . . . ... . . . . ... . . . ....... . . . . . . . . . . . .. .....14
BeforeYouCallforService . . . . ..... . . ..... . . . . .... . . . . . . . . . . . . 15
..... . . . . ........2
m
a!!
Q
-Because even the finest, precision-built appliances may
aquire service from time to time, we have established a
_-nationwide service organization. No matter where you
live,the network of franchised distributors, dealers, and
‘ervice technicians make sure your new microwave
vencontinues to giveyou satisfactory performance.
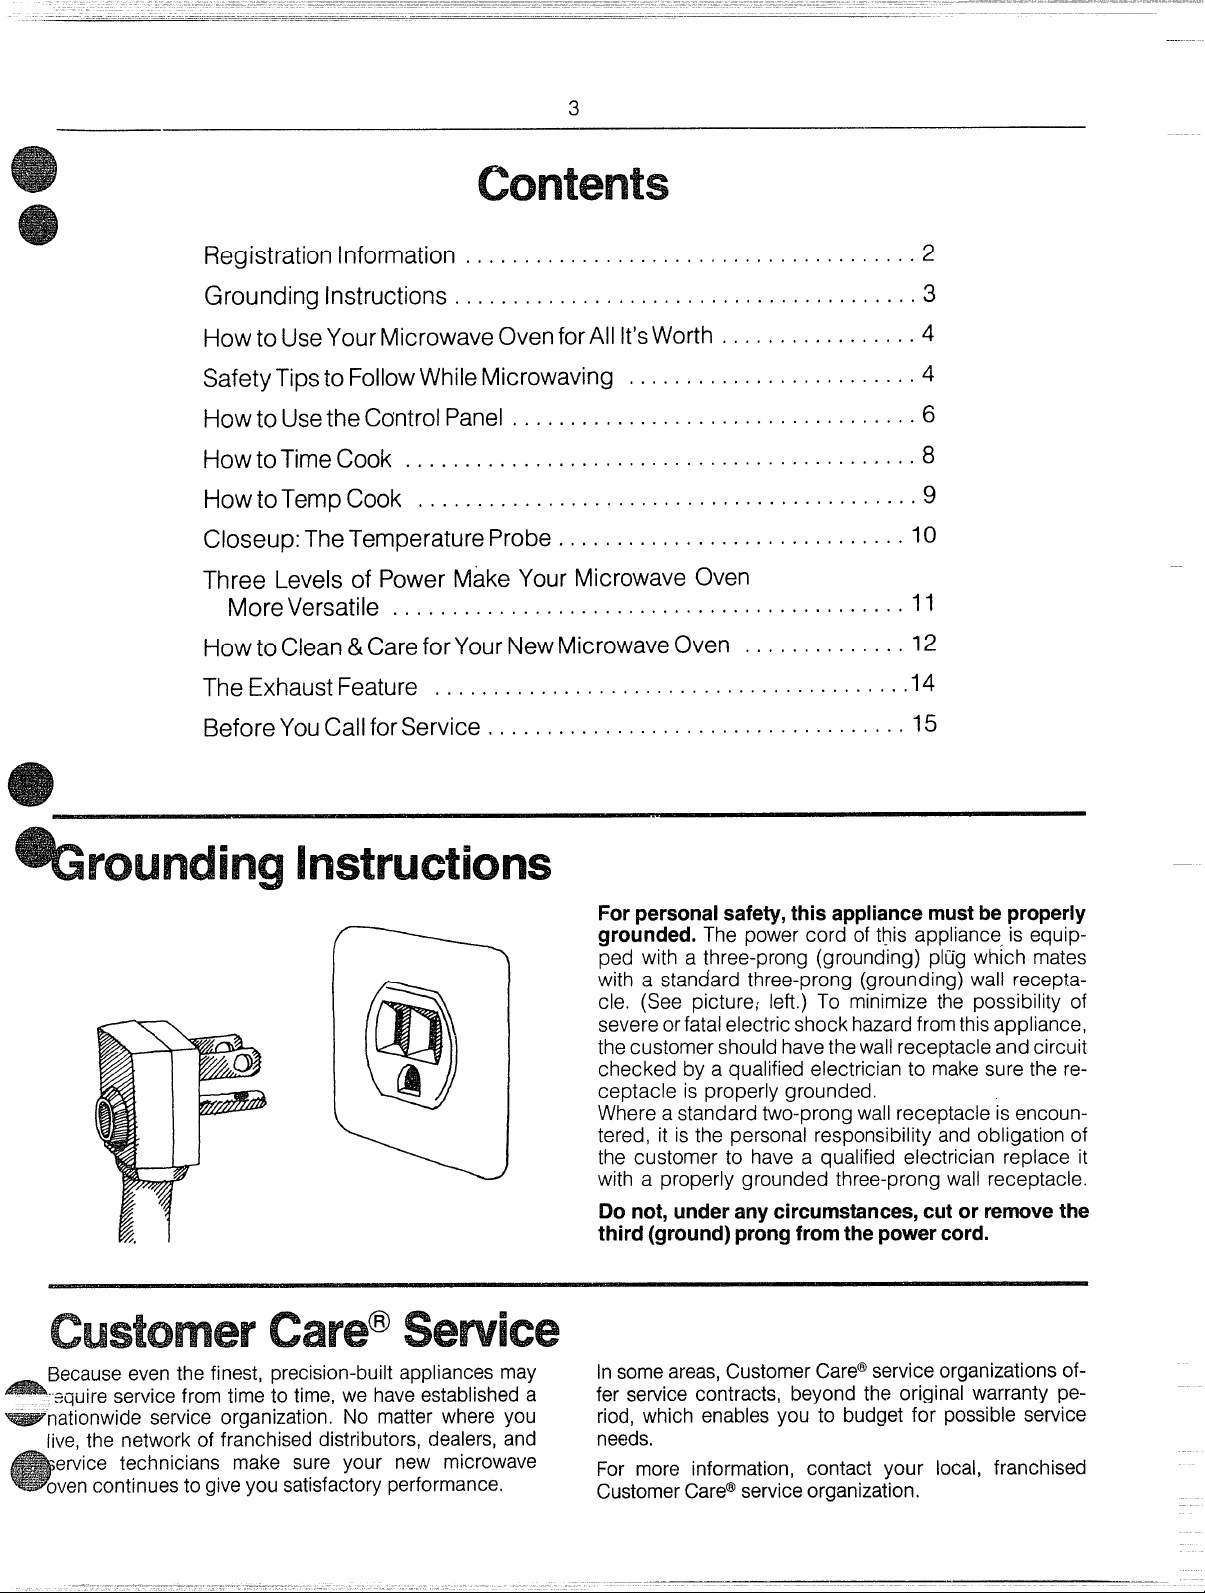
For personal safety, this appliance must be properly
grounded. The power cord of this appliance is equip-
ped with a three-prong (grounding) plug which mates
with a standard three-prong (grounding) wall receptacle. (See picture; left.) To minimize the possibility of
severe orfatal electric shock hazardfromthis appliance,
the customer should havethe wall receptacle and circuit
checked by a qualified electrician to make sure the receptacle is properly grounded.
Where a standard two-prong wall receptacle is encountered, it is the personal responsibility and obligation of
the customer to have a qualified electrician replace it
with a properly grounded three-prong wall receptacle.
Do not, under any circumstances, cut or remove the
third (ground) prong from the power cord.
Insomeareas,CustomerCare@serviceorganizations of-
fer service contracts, beyond the original warranty pe-
riod, which enables you to budget for possible service
needs.
For more information, contact your local, franchised
CustomerCare@serviceorganization.
Page 3
———
Cook foodsthe best way. Cook by time or by temperature. Your oven lets you tailor the way you cook to the
food. Useyour CountersaverTMMicrowave Oven Cook-
ing Gude & Recipe Book to help you select which kind
of cooking to use.
Fast, familiar cooking by time. You’ll find most of your
microwave meals will be cooked by time. Useit forall it’s
worth with most casseroles, vegetables, appetizers,
snacks and small, individual foods like potatoes, hot
dogs, hamburgers and meatballs. It’s also great for pie
crusts, desserts like baked fruit, puddings and candies.
Use temperature cooking when you can’t afford
guesswork. The solid-state microwave thermometer
tells you the internal temperature of food...a reassuring
way to cook roast, ham and other foods that need a
specific temperature for the right doneness.
4
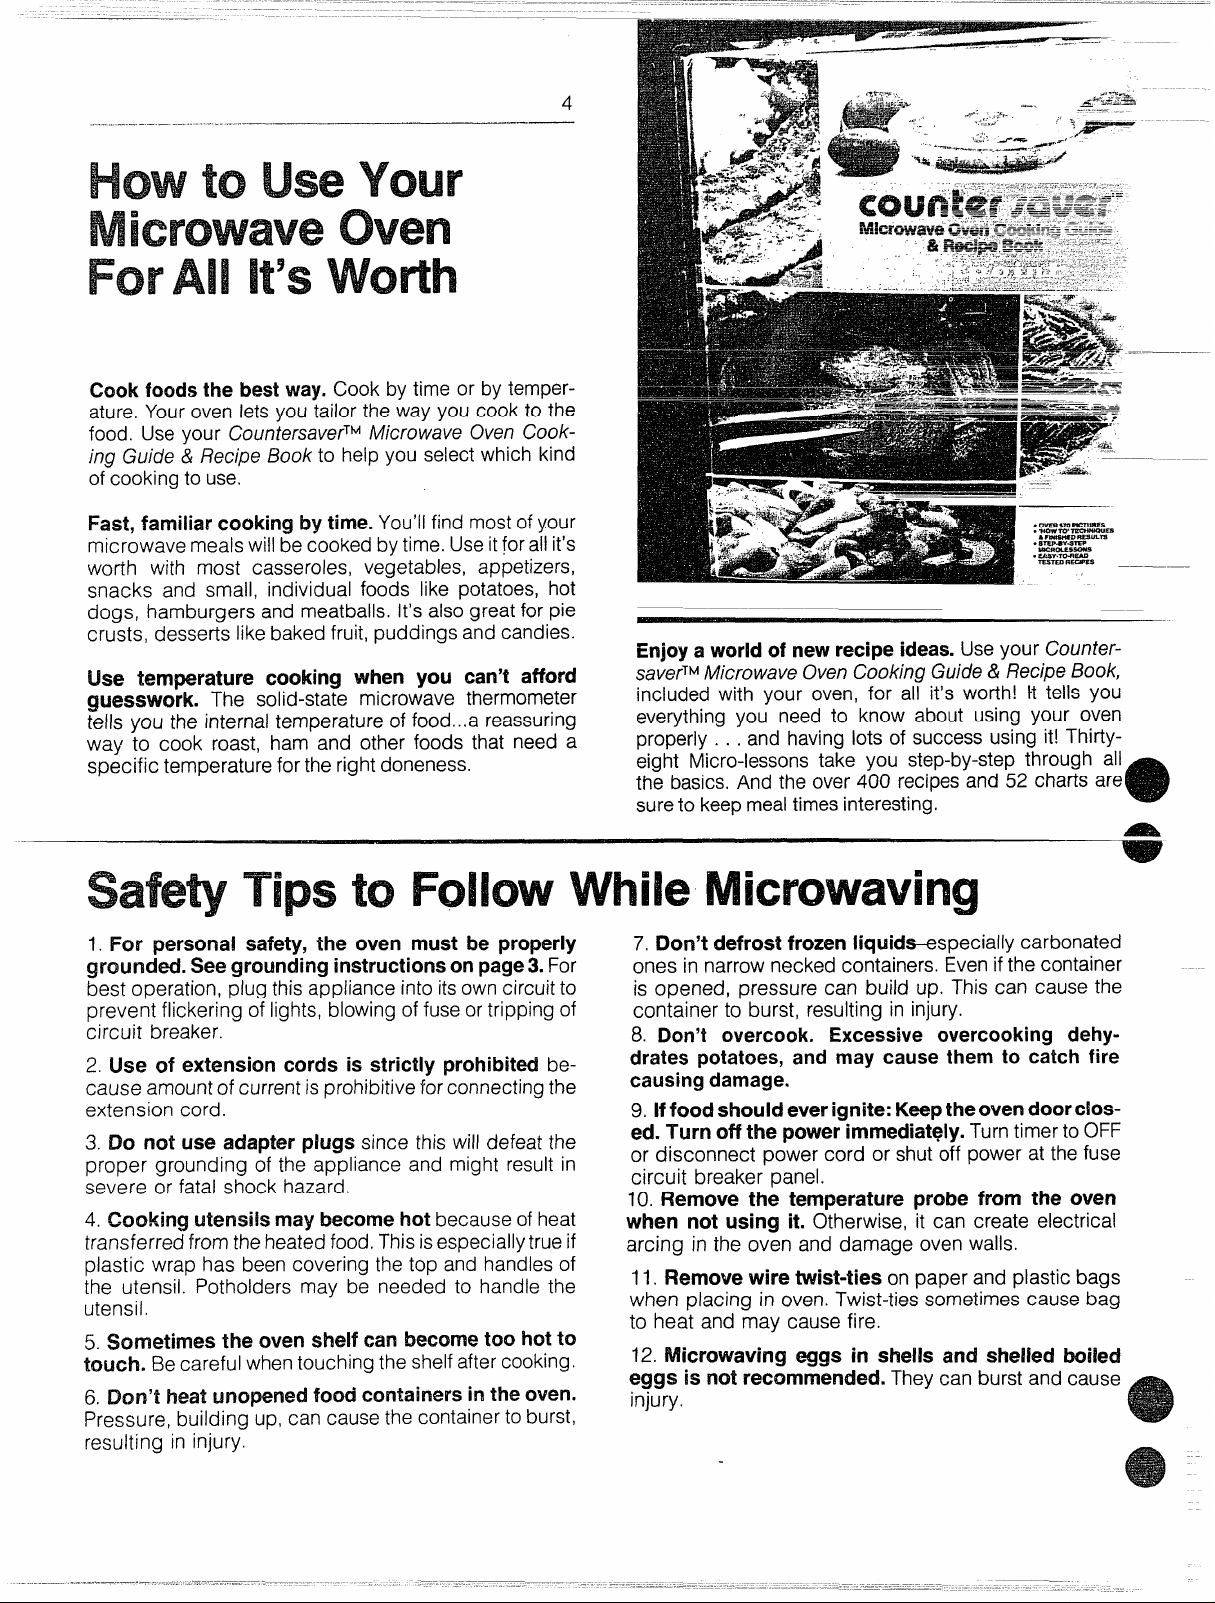
Enjoya world of new recipe ideas. Useyour Counter-
saverTMMicrowaveOvenCooking Guide& RecipeBook,
included with your oven, for all it’s worth! H tells you
everything you need to know about using your oven
properly . . .
eight Micro-lessons take you step-by-step through ail
the basics.And the over 400 recipesand 52 charts are
sureto keepmealtimes mterestlng
and having lots of success using it! Thirty-
1. For personal safety, the oven must be properly
grounded. See grounding instructions on page 3. For
best operation, plug this appliance into itsown circuit to
prevent flickering of lights, blowing of fuse or tripping of
circuit breaker.
2. Use of extension cords is strictly prohibited because amount of current is prohibitive for connecting the
extension cord.
3. Do not use adapter plugs since this will defeat the
proper grounding of the appliance and might result in
severe or fatal shock hazard.
4, Cooking utensils may become hot because of heat
transferred from the heated food. Thisisespecially trueif
plastic wrap has been covering the top and handles of
the utensil. Potholders may be needed to handle the
utensil.
5. Sometimes the oven shelf can become too hot to
touch. Becareful whentouching the shelf aftercooking.
6. 13m’t heat unopened food containers in the oven.
Pressure, building up, can cause the container to burst,
resulting in injury.
7. Don’t defrost frozen liquids-especially carbonated
ones in narrow necked containers. Evenif the container
is opened, pressure can build up. This can cause the
container to burst, resulting in injury.
8. Don’t overcook. Excessive overcooking dehy-
drates potatoes, and may cause them to catch fire
causing damage.
9. Iffood should ever ignite: IQeptheoven doorclosed. Turn off the power immediately. Turntimer to OFF
or disconnect power cord or shut off power at the fuse
circuit breaker panel.
10. Remove the temperature probe from the oven
when not using it. Otherwise, it can create electrical
arcing in the oven and damage oven walls.
11. Remove wire twist-ties on paper and plastic bags
when placing in oven. Twist-ties sometimes cause bag
to heat and may cause fire.
12. Microwaving eggs in shells and shelled boiled
eggs is not recommended. They can burst and cause
injury.
Page 4
-.—..— — ..—.
—–
5
—
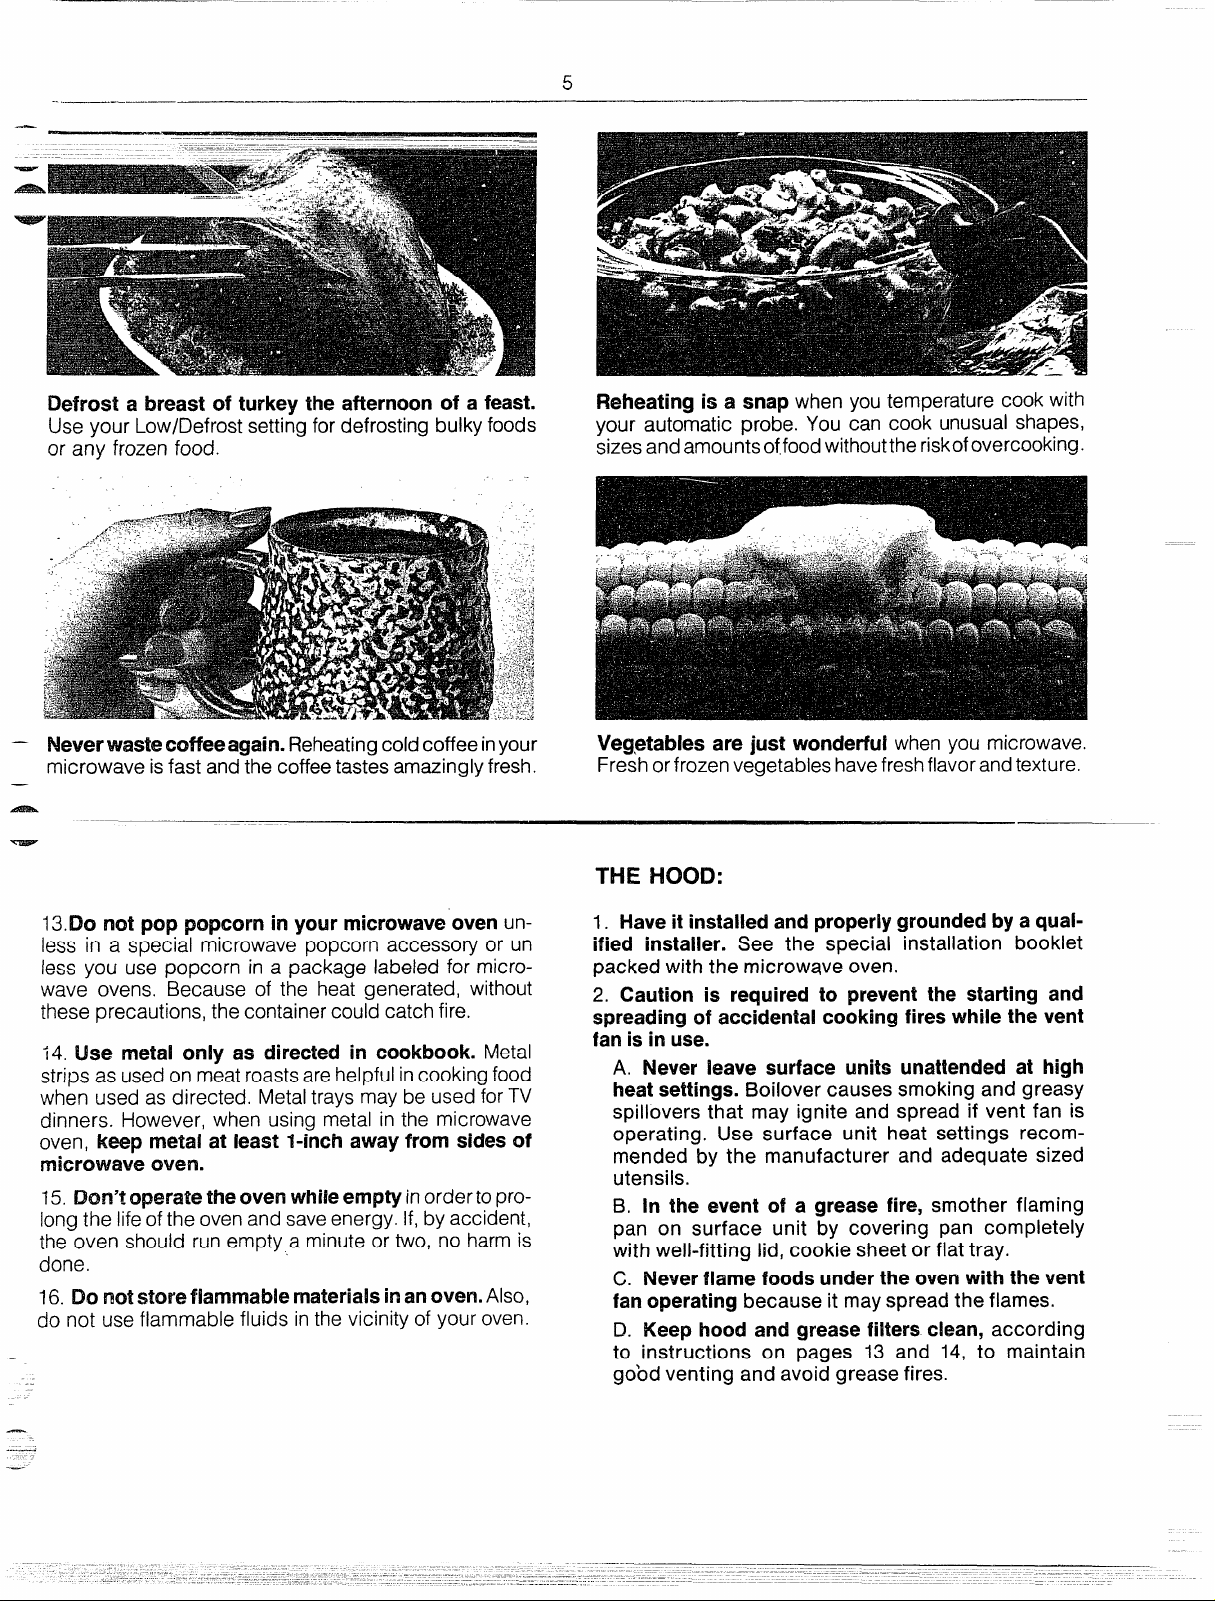
Defrost a breast of turkey the afternoon of a feast.
Use your Low/Defrost setting for defrosting bulky foods
or any frozen food.
– Neverwastecoffeeagain. Reheatingcold coffee inyour
microwave isfast and the coffee tastes amazingly fresh.
—
~
13.Do not pop popcorn in your microwave oven unless in a special microwave popcorn accessory or un
less you use popcorn in a package labeled for microwave ovens. Because of the heat generated, without
these precautions, the container could catch fire.
14. Use metal only as directed in cookbook. Metal
strips as used on meat roastsare helpful incooking food
when used as directed. Metaltrays may be used for TV
dinners. However, when using metal in the microwave
oven, keep metal at least l-inch away from sides of
microwave oven.
15. IMn’toperate the oven whileempty inorderto pro-
long the life of the oven and saveenergy. If, by accident,
the oven should run empty a minute or two, no harm is
done.
16. Do notstoref!ammable materials inanoven. Also,
do not use flammable fluids inthe vicinity of your oven.
.-
Reheating is a snap when you temperature cook with
your automatic probe. You can cook unusual shapes,
sizesand amounts of.foodwithoutthe riskofovercooking.
Vegetables are just wonderful when you microwave.
Freshor frozenvegetables havefreshflavorandtexture.
THE HOOD:
1. Have it installed and properly grounded by a qualified installer. See the special installation booklet
packed with the microwave oven.
2. Caution is required to prevent the starting and
spreading of accidental cooking fires while the vent
fan is in use.
A. Never leave surface units unattended at high
heat settings. Boilover causes smoking and greasy
spillovers that may ignite and spread if vent fan is
operating. Use surface unit heat settings recommended by the manufacturer and adequate sized
utensils.
B, In the event of a grease fire, smother flaming
pan on surface unit by covering pan completely
with well-fitting lid, cookie sheet or flat tray.
C. Never flame foods under the oven with the vent
fan operating because it may spread the flames.
D. Keep hood and grease filters clean, according
to instructions on pages 13 and 14, to maintain
gobd venting and avoid grease fires.
—
.—
--
Page 5
...————
-—.-.--..—.——
.—.--—..——
——.. _...—
—.—.—.—.....———-—-—
How
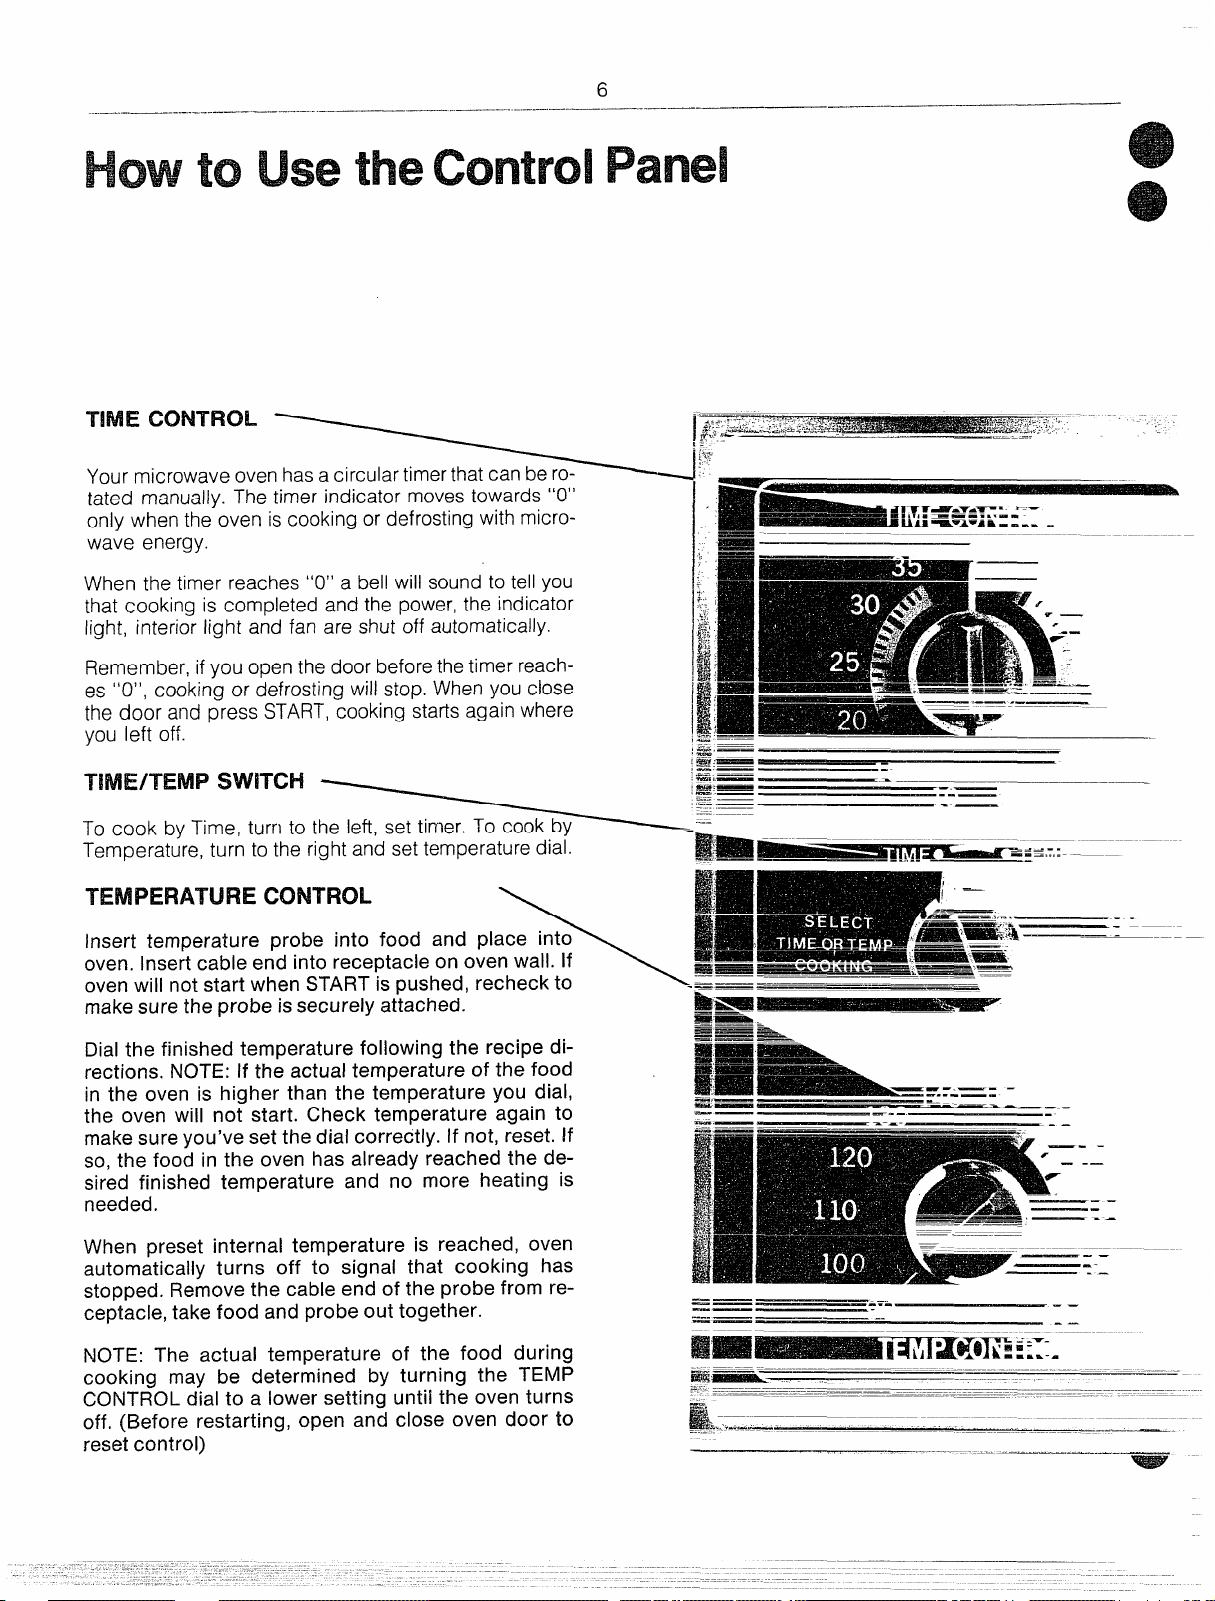
TIME Ccm!mcm
Your microwave oven hasa circular timer that can be ro-
tated manually. The timer indicator moves towards “O”
only when the oven is cooking or defrosting with microwave energy.
When the timer reaches “O” a bell will sound to tell you
that cooking is completed and the power, the indicator
light, interior light and fan are shut off automatically.
Remember, if you open the door before the timer reach-
es “O”, cooking or defrosting will stop. When you close
the door and press START,cooking starts again where
you left off.
6
— ...—
-EEEiE—
—.
SWITCH
To cook bv Time, turn to the left, set timer. To cook by
Ternperat;re, turn to the right and set temperature dial,
TEMPERATURECONTROL
\
Insert temperature probe into food and place into\
oven. Insert cable end into receptacle on oven wall. If
oven will not start when START is pushed, recheck to
make sure the probe is securely attached.
Dial the finished temperature following the recipe directions. NOTE: If the actual temperature of the food
in the oven is higher than the temperature you dial,
the oven will not start. Check temperature again to
make sure you’ve set the dial correctly. If not, reset. if
so, the food in the oven has already reached the desired finished temperature and no more heating is
needed.
When preset internal temperature is reached, oven
automatically turns off to signal that cooking has
stopped. Remove the cable end of the probe from receptacle, take food and probe out together.
~-~
.—.—
.J.-
sE??-
~—
.—.
-—
-...———
:,
gal!miai - ---:::– f.~:.-
\
——— —
~—-– -–––––—– –..—- . ,
~= ~–
———
—-.-——
+’—
=mL—
~.~,
~.— —=
.m——
.—
.-—
/ –—
——-—
.—-—===...
,, , –......-- :
*:
=,a=, .,,—
-------
—.—-.
—
— --
— —.
-.~.
—. --—- —
. ... . .
“—
‘—--
—-
——
-—
——
——
——
--.—
——
-=.
— -.
-—
.—
NOTE: The actual temperature of the food during
cooking may be determined by turning the TEMP
CONTROL dial to a lower setting untii the oven turns
off. (Before restarting, open and ciose oven door to
reset controi)
——-—-——-—..————-,.—.-.—
Page 6

—-— —..—— —-—
—————
——.———.———-.—
––-----–--TV.limn-isalttl lmillll~ T,y o
—— .- —-—— .—
--
—-—————
-— .—
.- —-—
—.
——
———
—
————
-.=.===
.-.—- -
—-.-—.——
-.----———
.—-———
—
... .--—-..
. . . .
——
.—— -= -.. .—--=-
—.
-———
--— —.—
-—
——---_——
..— ——-. . . . ..
. . .. .. .
— -. -.-—.—-
———
——
—-- ——
—.
———
———. —
-—
—-— —..
—..—
———-----
——.—.—
,—
——
—.
——
—. ~-;
-.. :,,,’
— . . .
———..
—
——,
-r , .
= —i-.,
~1 “,::
-.
~i
—, .-
—..,~=~— —,- ,
-----
—=;.=.,.=—
~-i$ :
---
==.
-_.--.—— — , ,.:
—-------
7
lvlui--rwow~~
,.
,.,
‘ :
Your new microwaveoven has three power settings for
you to choose from. Always check with your Countef-
saverTMMicrowaveOven Cooking Guide & Recipe Book
to find out which power level is recomm~nded for the
food you’re cooking.
Low Power isused for defrosting foods, delicate foods
and ones that take longer, slower cooking. It usesabout
50Y0ofthe oven power.
Medium Power uses about 70Y0ofthe oven power; it is
the power levelyou’ll usefor ease inheating andcooking
foods requiring extra attention at High Power.
High Power is full or 100% power. You’ll use it for fast
cooking and forfoodswhich tolerateheatandspeedwell.
-—.
—-.—
-———.——
-------
——— ——— ———
—-—-- =---- —... -
— — — ————
—— -.— _ _
.—— —— ..-.
-—,_-—=
-—-—— ————.
— —..
-—
—. ,.
—- .2!
— ~:
.-.
--,!.
.,,+
.Ii
:$i
iii
.1
.
HOODCONTROLS
/
/
/
/
Fan Switch. Pressonce for high speed. Presstwice for
low speed. Press again for off.
Lamp Switch. Push and hold lamp switch until fluorescent lamp lights.
AUTOMATIC FAN IFEATURE
Cooking appliances installed under the oven might,
under some heavy usage conditions, cause temper-
!
atures high enough to overheat some internal parts
of the microwave oven.
To prevent overheating from taking place, the vent
fan is designed to automatically turn on at low speed
if excessive temperatures occur. Should this happen,
the fan cannot be manually turned off, but it will automatically turn off when the temperature is reduced.
The fan may stay on up to approximately 30 minutes
after the range and microwave oven controls have
been turned off.
Page 7

—
.-
c-..
Leftoversfor reheating
.,.J-\....- -—————
—.
8
————-.—————....——.—.-.—..——.——.——-—.———-..
Time cooking is the mostfamiliar to you already.Thedifference is, with a microwave oven, you preset the time
and the oven turns off automatically.
7.-
.-. -—
...——
You’ll use Time Cook for simple jobs, like reheating, for
delicate foods, vegetables or baked potatoes.
.-
-.
Many Time Cook recipes give you a time range in minutes. If you set the oven to stop when it’s time to stir or
turn, the oven signals that food needs attention. Setthe
oven for the minimumtime, check and continue cooking,
.-
—
if necessary.
TO TIME COOK A
PLATE OF LEFTOVERS
.-
1. Place plate of food inoven. Oven
interior light comes on automatically
when door is open. Close ovendoor;
it latches automatically. Plateshould
be covered with wax paper or plastic
wrap for more moisture.
2. Select PowerLevel. Seerecipes
for suggested power levelsforfoods.
Set at High for a plate of leftovers.
3. Select Time/Temp setting. Set
switch to Time by turning the
Time~emp switch to the left.
4. Set time control for first halfof
cooking time. Rotatethe circular
timer to 1
Y2 minutes for a plate of
leftovers. Check itafter thistime and
if it needs more, reset the timer.
5. Push START. Whenoven iscooking, interiorlight comeson, afanstarts
to operate and an indicatorlight
comes onto tell youovenisoperating.
& When time reaches O,a bell will
sound to tell you your leftovers are
partially heated andthe power,lights
and fan shut off automatically. Rotate
plate 1/2turn; resettime for second
half of cooking.
Page 8

You’ll find Temperature Cooking to be the most accurate. Useit for cooking meatloaf, roastsand other foods
wherethe internal temperature is the best test of “done-
ness”. TemperatureCooking takesthe guessworkout of
cooking because the oven shuts off automatically when
the food reachesthe presettemperature. Look for Basic
Meatloaf in the Ground Beef section of your Counter-
saverTMMicrowave OvenCooking Guide& RecipeBook.
I+(NVTO TEMPCOOKA MEATLOAF
BasicMeatloaf
1. Insert the temperature probe
into meatloaf as directed in your
CountersaverTMMicrowave Oven
Cooking Guide & Recipe Book.
Place meatloaf with probe into
the oven.
4. Set the T%mVTernp switch (see
—
picture no. 3, page 8) to Temp by
-.-irning the switch to the right and
—
‘-dialing the finished temperature of
-1 70°.press START.
2. Insert the cable end of thetemperature probe into the receptacle on
the oven wall.
5. When preset internal temperature
of the meatloaf is reached, oven
automatically turns off.
3. Set the power levelat High.
6. Disconnect cable end from the
oven and take the meatloaf and
probe out together.
Page 9

The
10
—
Ittells you when food cooked best to a certain doneness
isreadyfor servingwithoutchecking,peekingorguessing.
ToCook ByTemperature, insertTemperature Probeinto
food, set power level.SetTime/Temp switchto Temp by
turning the switch totheright anddialing thefinished ternperature following recipe directions in your Cookbook.
The Temperature Probe will give you bestresultswhen
cooking a mixture of precooked foods heated together
as a main dish. It’s best, too, for reheating leftovers.
Use The Clip on the cable to loop the cable when need-
ed. Looping cable makes itshorter, helpskeep Temper-
ature Probe where it should be and prevents slipping.
THESEFOODSTURNOUTGREATWHEN
Y’(XJUSETHETEMPERATUREPROBE
@Casseroles
o plates of food
e Beverages
soups
e
e
Beef, lamb and ham loaves
e Roasts and pot roasts
Dips
e
In general, insert the probe into the centermost part of
the food ashorizontally as possible. Insertat least l-inch
into food.
THESEFOODS ARENOTF?ECOMMEMMD
IFORLEEWITHTHETEIVIPE!RATUREPROBE
* Delicate butter icings, ice cream,
frozen whipped toppings
stewing, simmering, candy making
e
e Individual foods cooked inbatches
e Starchy vegetables
e Batters and
e Most frozen foods
doughs which are baked
—
Page 10

———-—.—.—.——
—
11
LowPOWER
Choose Low for defrosting, delicate
foods, softening butter or frostings,
reheating delicate foods, warming
baked goods, dried peas andbeans,
pot roasts and dips.
Cup custards microwave very well
on Low power level. The recipe is on
page 235 of your Cookbook.
NEDNJM
You’ll use Medium most of the time
for meats like roastand all chops and
steaks. It’salsogreatforcreamsoups.
Make a perfect omelet every time
with recipe variations on page 165of
the Cookbook, power level Medium.
POWER
HIGH
This isthe power levelfor mostmicrowave cooking. It’s great for boiling
candy, pudding and sauces, cook-
ing most vegetables, chicken pieces,
fish and hamburgers.
Candy making ismorefun with a microwave. Set the power levelto High.
You’ll find the recipe on page 224.
POWER
—
A less tender roast, like this chuck
— roast, likes the longer, slower cook-
- in9 you 9et with Low power.
-
Delicious Chicken Teriyaki takes a
Medium setting. You’ll find the recipe
on page 129of the Cookbook.
The ali-American favorite hamburger and variations. You’ll find the
recipe and a Microlesson starting on
page 70 of your Cookbook.
Page 11

12
HowtoC1ean&CareforYourNewM~~~ow~~~~~em
Clean the outside ofyourovenwith soapandwater,then
rinse and dry. Theouter paneofthewindow isglass.Just
wipe clean with a damp cloth. Chrometrim isbest wiped
Never use a commercial oven cleanerfor conve~tion-
al overts cmany part of your microwaveoven or abra-
sive cleaners em wa!is. Most spatlers come off with a
paper towel, others with a damp cloth, greasy oneswith
with a damp cloth and then with adry towel. Ifthe cord of
your microwave oven becomes soiled, unplug and wash
with a damp cloth. Be sure it’s dry before plugging in.
soap and water. Never removethecover overthe “stirrer”
attop of ovenfor cleaning. Besureto thoroughlycleanthe
metal and plastic parts on door to prevent soilbuildup.
Page 12

—
-.—.-—-
—.
13
I
TOreplace hood lamp, first disconnect power at main
— fuse or circuit breaker panel or pull plug.
.:-.
‘(~w~
from each side of lower panel and 3screws from
Remove 2
— front edge. Lower panel until it rests on range below.
fingers on top near each end of
lamp. press down
and roll top of lamp gently toward front until itstops. Remove. Replace with same type and wattage lamp. Hold
lamp near each end and insertprongs insockets. Gently
roll top of lamp toward rear of range until it stops. Raise
lower panel and replace screws.
To replace your oven lamp, first disconnect power at C!@anoff the grease and dust on hood surfaces ollen.
main fuse or circuit breaker or pull plug. Removethe
Use a warm detergent solution. About 1 tablespoon of
top grill by taking off 2 screws which hold it in place. ammonia may be added to the water. Take care not to;
— Next, remove the single screw on top left that secures
+:-J-iphousing. Open oven door for easier removalof the
.
–- lamp housing assembly. Thengrasp tab and pullout and
touch the filters and enameled surfaceswiththis. Ammonia will tend to darken metal.
~up to clear door hinge and front lip of oven. To remove
-IIJlb, push it inward gently and turn to left, then pull
~-outward from socket Replace with GE Lamp #25T8DC.
Do not attempt to operate the oven unless the griHis
in place.
Page 13

14
——-—-..... -.
.--—.”.
——
———
—— -.—— .————-———-
The —
The exhaust hood feature on your CountersaverTMmicrowave oven is equipped with a metal filter which removesgrease.When the fan is operated, air is drawn up
To remove grease filter, grasp the finger hold onthe fil-
ter and push to the rear. The filter will drop out.
TOreplace grease filter, insertthe filter inthe topframe
slot on the back of the opening. Push to the back and
upward into place.
through “the filter and is then discharged through provided venting to the outside. The hood also has a light
for illuminating the counter surface.
Soak, then agitate filter in hot detergent solution. Don’t
use ammonia or other alkali because itwill darken metal.
Light brushing can be used to remove inbedded dirt.
Rinse,shake and remove moisture beforereplacing. Fil-
tersshould be cleaned at least once a month. Never
operate your hood without the filter in place. In situa-
tions where flaming might occur on surfaces below
hood, filter can retard entry of flames into the unit.
Page 14

15
Thesethingsarenormalwithyourmicrowaveoven:
Steamorvaporescaping from around thedoor.
1.
Problem:Theovendoesn’tseemtoworkatall.
Solution:Checkfirstto seethatthe3-prongplugis inserted
firmlyintothe properreceptacle.Next,checkto see
if a fuse
needsreplacingatthecontrolbox,
2. Lightreflectionarounddooror outercaseor throughthe
topgrill.
Problem:Microwavepowerwon’tcomeon.
Solution:Checkto be surethe door issecurelyclosedand
thetimerset.Ifadishistouchingthedoorwhen itseemstobe
closed,itactuallymaynotbefirmlyclosed.
Problem: Oven won’t start when using temperature
probe.
Solution:Check to make sure Time/Temp switch is set
at TEMP.Make sure the cable end is securely “seated”
into oven receptacle and that temperature set on dial is
higherthan actual temperatureof food”in oven.
— Problem: Hood fan isn’t working right.
~d@@n: If it doesn’t work at all, check the main fuse or
—
circuit breaker. If it works but is faster than usual, the fil-
_-ter may need cleaning. If fan goes
.:biy overheating,
~-lf it is, call for service. If fan is on and can’t be turned
Checkto make sure the filter is clean.
on and off, it’s prob-
off,see page 7 about the automatic fan feature.
Problem:Ovengoesoffbeforesettimehaselapsed.
Solution:Checkto be certainthefuseprotectingtherecep-
tacleintowhich cordis pluggedis operating.Iffusehas not
blownandpowerstilldoesnotfunction,callforservice.
Problem:TV-RadioInterference.
Solution:Some interferencemight be noticed while using
yourmicrowaveoven.It’ssimilarto theinterferencecausedby
othersmall‘appliancesand doesnot indicatea problemwith
youroven.
Page 15

(Includes Cooking Centersand Microwave Ovens)
FROM HOTPOINTTO YOU - Thiswarrantyis extendedbyl-btpoint to theoriginal purchaserand
to anysucceeding
the 48 contiguous states, the state of Hawaii or the District of Columbia, and employed in ordinary
home use.
owner and applies to products purchased in the United States, retained within
WHATWEWILL!30- If your Hotpoint Microwave Range fails because of a manufacturing defect
within one year from the date of original purchase, we will repair the product without charge to
you. Parts and service labor are included. Service will be provided in the home in the 48 con-
tiguousstates,the stateof Hawaii or in the District of Columbia.
HOW TO OBTAINSERVICE - Servicewill be providedby our local Customer CareRfactory serv-
ice organization or by one of our franchised Customer Care servicers during normal business
hours after you notify us of the need for service. Service can be arranged by telephone.
Look for “HOTPOINT FACTORY SERVICE” in the White Pages of your telephone directory or
“HOTPOINT CUSTOMER CARE@SERVICE” in the Yellow Pages or write to the address given
below.
WHATIS NOT COVERED- This warranty does not cover the failure of your Microwave Range if it
is damaged while in your possession, used for commercial purposes, or if the failure is caused by
unreasonable use including failure to provide reasonable and necessary maintenance. IN NO
EVENT SHALL HOTPOINT BE LiABLE FOR CONSEQUENTIAL DAMAGES. This warranty does
not apply to the state of Alaska nor to the Virgin Islands, Guam, American Samoa, the Canal Zone
or the Commonwealth of Puerto Rico.
Some states do not allow the exclusion or limitation of incidental or consequential damages, so
the above limitation or exclusion may not apply to you. This warranty gives you specific legal
rights, and you may also have other rights which vary from state to state.
AI’)DITKN$IALLIMITED FOUR-YEAR
MAGNETRON TUBE WARRANTY
The magnetron tube is covered in the above full warranty. In addition to that warranty, if the
magnetron tube faiIsbecauseof a manufacturing defect within thesecond through the fifth yearfrom
date of the original purchase, we will furnish without charge, a replacement magnetron tube. You
must pay the service labor charge for the home call, diagnostic work, and removal, and reinstallation
of the new magnetron tube.
All other provisions of this additional limited warranty are the same as stated in the full warranty
above.
——
LIMITED WARRANTY
Applicable to the State o~Alaska
In the state of Alaska free service including parts will be provided to correct manufacturing de-
..—
= fects at our nearest service shop location or in your home, but we do not cover the cost of trans:.
portation of the product to the shop or for the travel cost of a technician to your home. You are
responsible for those costs. All other provisions of this limited warranty are the same as those
:.
stated in the full and limited warranties above.
‘b
WHERE TO GET FURTHER HELP
$
:?
rarity, contact:
:.
G
‘k
z
t!
Manager—Consumer Affairs
General Electric Company
Appliance Park, WCE-Room 316
Louisville, Kentucky 40225
A bill of sale, cancelled check or other payment record should
chase date andto establish the warrantyperiod.
- if you wishfurther help or Information concerning this war-
WARRANTOR–
General Electric Company
Appliance Park
Louisville, Ky. 40225
bekeptto verifytheoriginalpur-
GENERALELECTRICCOMPANY
Range Marketing Department
Appliance Park e Louisville, Kentucky 40225
Pub. No. 39-4427 2/81 PartNo.862A2WP121
 Loading...