

Page 1
o
0
the best from
Buflt-h
Contents
89
12
14 15
6, 14
12
2
13
7
19
6
4
5
2
Alumlnum FOII
Appllance Reg]strat]on
Bdklng Bdk]ng
Brolllng Bro]l]ng Gu]de
Care
dnd Cleanlng
ClocWT]mer
Consumer Services
Control Settings
Energy-Saving Tips
Features
Light; Bulb Replacement
Model and Serial Numbers
Guide
HowtogetYour
Oven
Use
and
Care
of
Model
m524GP
0
Problem Solver
Roasting, Roasting Guide
Safety Instructions
Shelves
Thermostat Adjustment
Warranty
GE Answer
800.626.2000
Center’”
Back Cover
10,
16
11
2-4
6
14
Page 2
Help us help you...
Before using your oven,
read this book carefully.
It is intended to help you
operate and maintain your new
oven properly.
Keep it handy for answers to
your questions.
If you don’t understand something
or need more help, write (include
your phone number):
Consumer Affairs
Hotpoint
Appliance Park
Louisville, KY 40225
Write down the model
and serial numbers.
You’ll find them on a label on
the front of the oven behind the
oven door.
These numbers are also on the
Consumer Product Ownership
Registration Card that came with
your oven. Before sending in
this card, please write these
numbers here:
If you received
a damaged oven...
Immediately contact the dealer (or
builder) that sold you the oven.
Save time and money.
Before you request
service . . .
Check the Problem Solver on
page
16.
It lists causes of minor
operating problems that you can
correct yourself.
If you need service...
To obtain service, see the
Consumer Services page in
the back of this book.
We’re proud of our service and
want you to be pleased. If for some
reason you are not happy with the
service you receive, here are three
steps to follow for further help.
FIRST, contact the people who
serviced your appliance. Explain
why you are not pleased. In most
cases, this
NEXT, if you are still not pleased,
write
your phone number—to:
Manager, Consumer Relations
Hotpoint
Appliance Park
Louisville, Kentucky 40225
FINALLY, if your problem is still
not resolved, write:
Major Appliance
Consumer Action Panel
20 North
Chicago, Illinois 60606
will
solve the problem.
all
the details—including
Wacker
Drive
Model Number
Serial Number
Use these numbers in any
correspondence or service calls
concerning your oven.
2
Page 3

IMPORTANT SAFETY INSTRUCTIONS
Read all instructions
before using this
appliance.
When using electrical
appliances, basic safety
precautions should be
followed, including the
following:
● Use this appliance
its intended use
this manual.
● Have the insta~er show you
the location of the circuit
breaker or fuse.
easy reference.
●
Be sure your
is properly
grounded
technician in accordance with the
provided Installation Instructions.
●
Don’t attempt to repair or
apptiance
instalied
by a
qutified
replace any part of your
oven
utiess
it is
recommended in this book.
other servicing should be referred
to a qualified technician.
“
Before performing any
service, DISCONNECT THE
OVEN POWER SUPPLY
AT THE HOUSEHOLD
DISTRIBUTION PANEL
BY
REMOVING THE FUSE
OR
SWITC~NG O=
THE CIRCUIT BREAKER.
● Do not leave children
alone—Children should not be
left alone or unattended in an
area where appliance is in use.
They should never be allowed
to sit or stand on any part of
the appliance.
“
Don’t allow anyone to climb,
stand or hang on the door.
They could damage the oven.
● CAUTION: ITEMS OF
INTEREST TO CHILDREN
SHOULD NOT BE STORED
ody
for
as described in
Mark it for
.
and
specifidy
All
IN CABINETS ABOVE
AN OVEN. CHILDREN
CLIMBING ON THE OVEN
TO REACH ITEMS COULD
BE SERIOUSLY INJURED.
● Never wear loose-fitting or
hanging garments while using
the appliance.
reaching for items stored in
cabinets over the oven.
Flammable material could be
ignited
with hot heating elements and
may cause severe burns.
“
DO NOT STORE OR
if
brought in contact
Be careful when
USE COMBUSTIBLE
MATERULS, GASOLINE
OR OTHER FLAMMABLE
VAPORS AND LIQUIDS
THE
VIC~ITY
OF THIS
~
OR ANY OTHER
APPLIANCE.
● Use only dry pot holders—
Moist or damp potholders on hot
surfaces may result
steam. Do not let pot
hot heating elements. Do not
use a towel or other bulky cloth.
● For your safety, never use
in burns from
holdem
touch
your appliance for warming
or heating the room.
●
Storage in or on appliance—
Do not store flammable materials
in
the
oven.
.
Keep hood and grease filters
clean to maintain good venting
and to avoid grease fires.
● Do not let cooking grease
or other flammable materials
accumulate in or near
the oven.
Q
Do not use water on grease
fires.
Flame in oven can be
smothered by completely
closing door and turning oven
off or use dry chemical or
foam type extinguisher.
Q
Do not touch heating
elements or interior surface
of oven.
These surfaces may be
hot enough to burn even though
they are dark in color. During
and after use, do not touch, or
let clothing or other flammable
materials contact any interior
area of the oven; allow
sufficient time for cooling,
first.,
Potentially hot surfaces
include the oven vent openings
and surfaces near the openings,
crevices around the oven
door and the edges of the
door window and metal trim
above door.
Remember: The inside surface
of the oven may be hot when
the door is opened.
●
When
cooking pork,
follow
the directions exactly and
always cook the meat to an
internal temperature of at least
170°F.
This assures that, in the
remote possibility that trichina
may be present in the meat, it
the
will be killed and
meat will
be safe to eat.
Oven
● Stand away from oven
when opening oven door.
The hot air or steam which
escapes can burn hands, face
an~or
● Don’t heat unopened food
containers in the oven.
Pressure could build up
the container could burst,
causing an injury.
●
unobstructed.
● Keep oven free from
grease buildup.
● Place oven shelf in desired
position
If shelves must be handled
when
contact heating units in
the oven.
eyes.
Keep oven vent duct
whtie
oven is
hot, do not let pot holder
(continued next
and
COOI.
puge)
3
Page 4
IMPORTANT SAFETY
INSTRUCTIONS
● Pulling out shelf to shelf stop
is a convenience in lifting
heavy foods. It is also a
precaution against burns from
touching hot surfaces of door
or oven walls.
. When using cooking or
roasting bags in oven, follow
the manufacturer’s directions.
● Do not use your oven to dry
newspapers. If overheated,
they can catch fire.
● Do not use aluminum foil to
line oven bottoms, except as
suggested in manual. Improper
installation of these liners may
result in a risk of electric shock
or fire.
(continued)
Energy-Saving
Tips
●
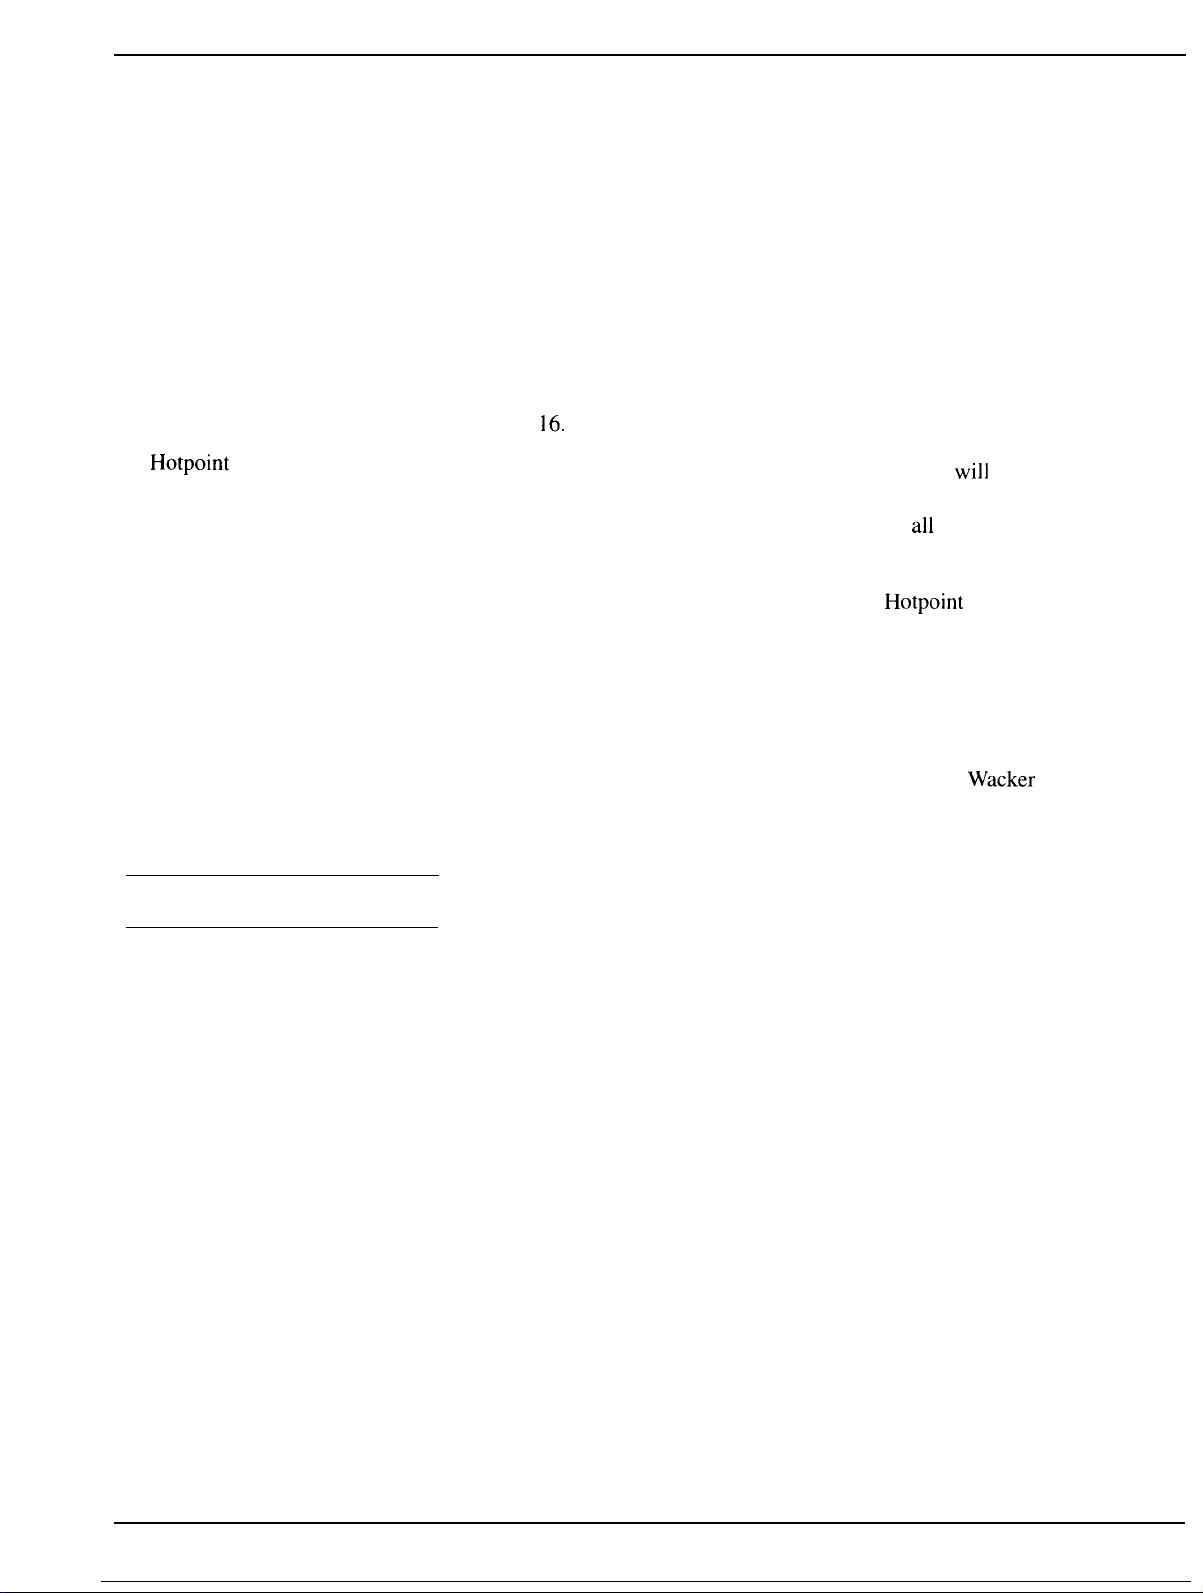
[>llring bilking, ~ivoict l“rcc]LIcn[
door”
openings. Keel)
:1s
short ii [i tile
is opened.
ctoor”
:1s
possihlc i 1’ it
open
If You Need
.
Read
“The Problem Solver”
Sertice
on page 16 of this book.
● Don’t attempt to repair or
replace any part of your range
unless it is specifically
recommended in this book.
All other servicing should be
referred to a qualified technician.
SAVE THESE
INSTRUCTIONS
● U
sc rcs iclllill tlc:it
wtlenevcr possihlc [() tin ist)
cooking”
etc. Atsc). :Idd rol ts or precookcct”
desserts to
resiclll:il tle:i[ 10
c:lsscrotcs. ()\cIl IIICLIIs.
Will”lll
i n [
IIC OLL:n
oven, llsing
WIIIIII
[henl.
4
Page 5
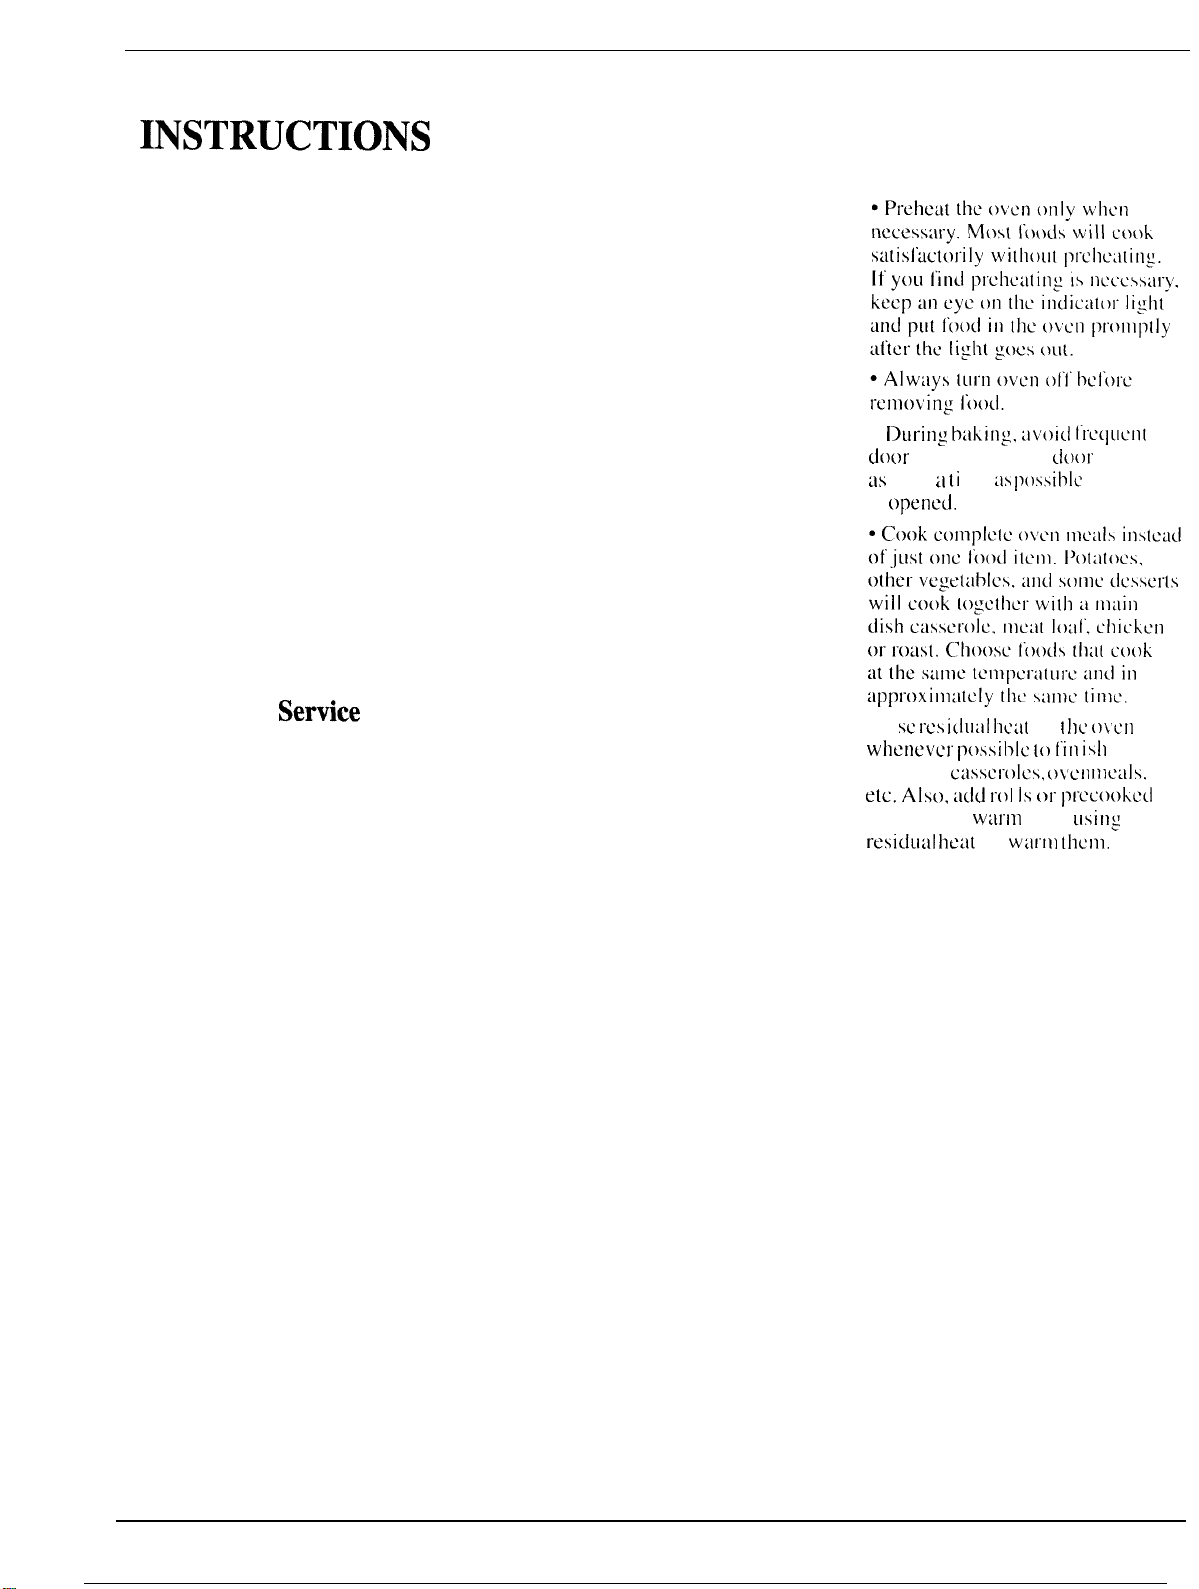
Features of Your Oven
—m,... ,,,
Feature
I Grille
2
Oven Cycling Light
3
Oven TEMP Knob
4 Oven SET Knob
Index
—-
Explained
on page
6
6
6
Ill
e
I
Explained
Feature Index on page
I
8 Oven Interior Light
9 Oven Shelf Supports
10 Broil Unit
11 Broiler Pan and Rack
6,14
12,
I
I
12,15
15
5 Automatic Oven Timer
6
Minute Timer
7 Oven Light Switch (lets you turn
interior oven light on
and Clock
and off>
7
7
6
12 Bake Unit
13
Removable Oven Door
14 Oven Shelves
15 Model and Serial Numbers
16
Oven Vent
I
8,15
14
I
I
6,15
I
6
I
Page 6
Using Your Oven
Before Using Your Oven
1. Look at the controls. Be sure
you understand how to set them
properly.
2. Check oven interior.
the shelves. Take a practice run
at removing and replacing them
properly to give sure, sturdy
support.
3. Read over information and tips
that follow.
4. Keep this book handy so you
can refer to it, especially during
the first weeks of getting
acquainted with your oven.
Look at
Oven Controls
The controls for your oven are
marked OVEN SET and OVEN
TEMP.
The OVEN SET knob has
settings for BAKE, BROIL and
TIME BAKE. When you turn to
the desired setting, the proper
heating units are activated for
that operation.
The OVEN TEMP knob maintains
the temperature you set for
oven operation as well as for
broiling. Turn to set temperatures.
normal
Oven Cycling Light
A light between the OVEN TEMP
and OVEN SET knob glows until
the oven reaches your selected
temperature, then goes off and on
with the oven unit(s) during
cooking.
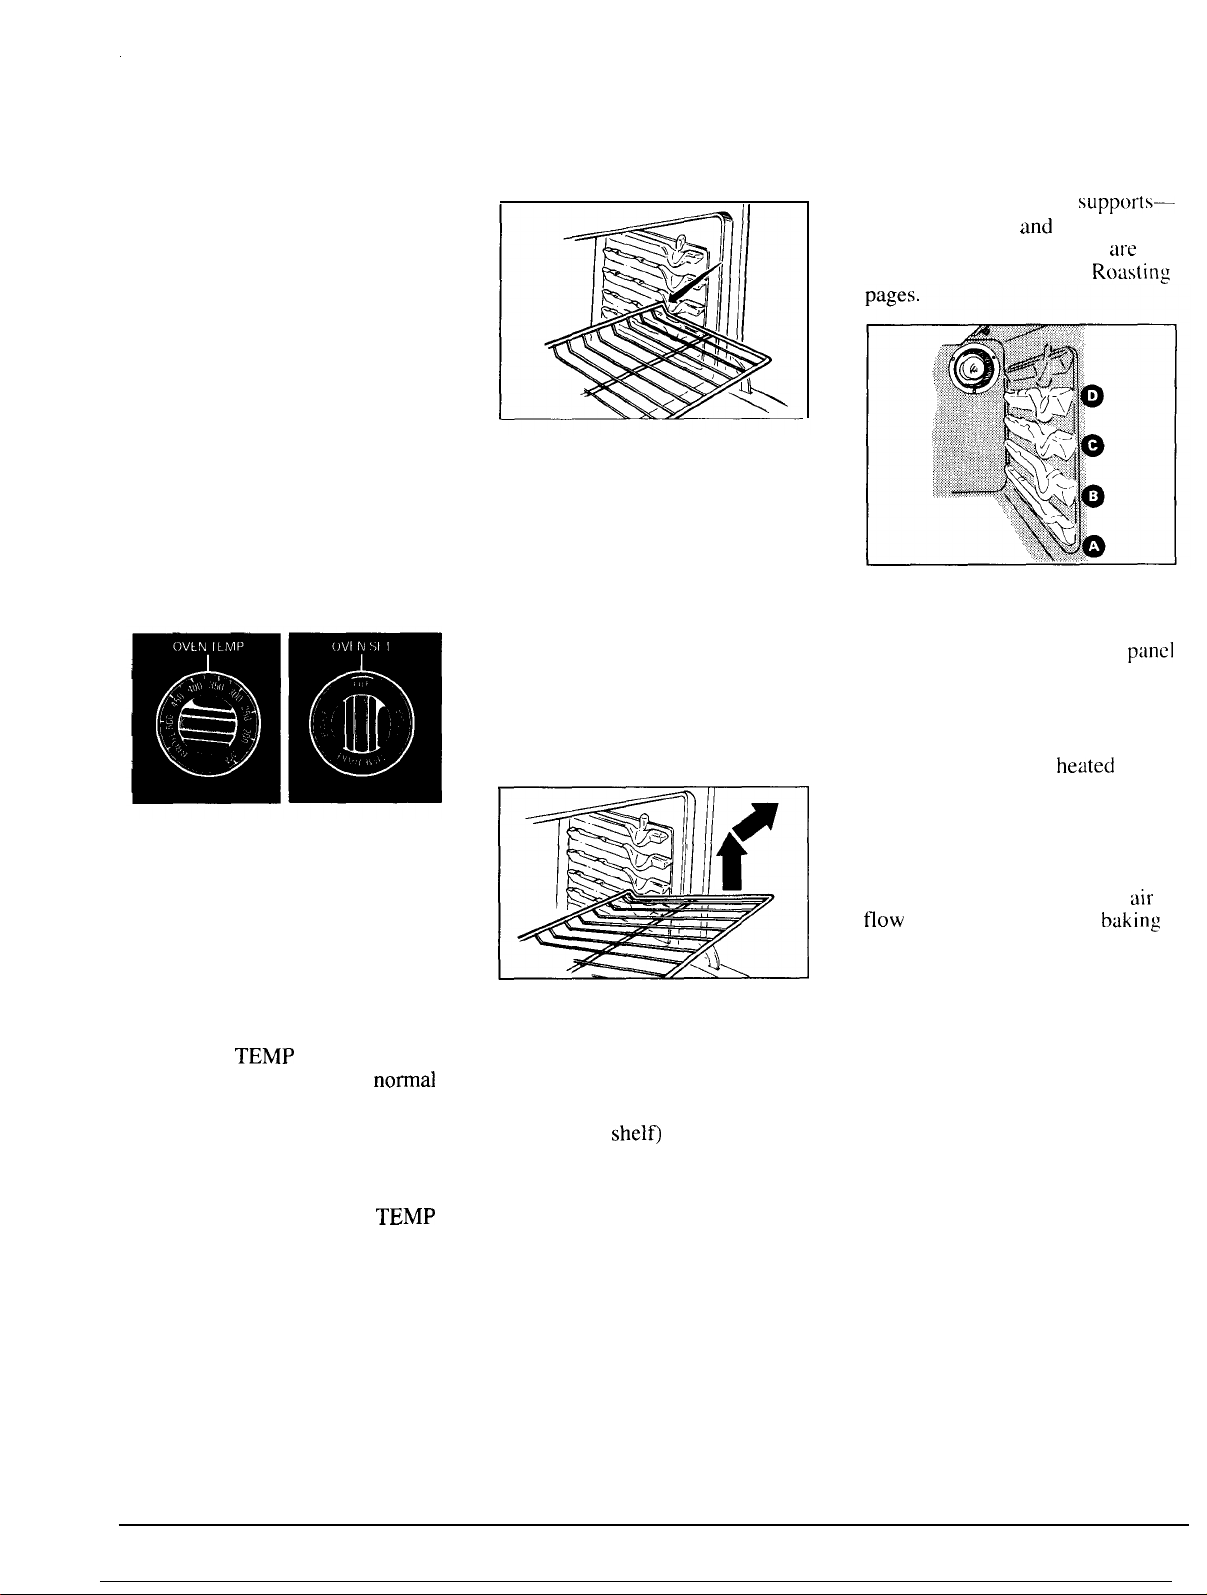
Oven Shelves
The shelves are designed with
stop-locks so when placed
correctly on the shelf supports,
they will stop before coming
completely out of the oven and
will not tilt when you are
removing food from them or
placing food on them.
When placing cookware on a shelf,
pull the shelf out to the “stop”
position. Place the cookware on
the shelf, then slide the shelf back
into the oven. This will eliminate
reaching into the hot oven.
To remove a shelf from the oven,
pull it toward you, tilt front end
upward and pull shelf out.
To replace, place shelf on shelf
support with stop-locks (curved
extension of
toward rear of oven. Tilt up front
and push shelf toward back of
oven until it goes past “stop” on
oven wall. Then lower front of
shelf and push it all the way back.
shelo facing up and
Shelf Positions
The oven has four shelf
A (bottom), B, C
Shelf positions for cooking
suggested on Baking and
and
supports-
D (top).
are
Rotisting
Oven Light
Use the switch on the control
to turn the light on and off.
panel
Oven Vent
When the oven is on,
moves through a vent above the
door and below the grille.
The vent area could get hot
during oven use.
The vent is needed for proper
flow
in the oven and good
results. Do not block this vent.
heated
air
baking
air
6
Page 7

Clock and Timers
The ~;lock
range
serve several purposes.
and
Timers
on your
are helpful devices that
Clock & Minute Timer
To
set the
in and turn
right to
the
knob
to
OFF,
The
combined
Use it to time cooking operations.
You’]]
that is
clock
Minu[es
on
the center
To set the Minute Timer,
the
knob to
~)u,ihi}?(q i}?,
reaches the number
you want to time.
At the end of the set time, a
buzzer sounds to tell you time
is up. Turn the knob,
/)L/,\hi/7,q
rcochcs OFF and
clock,
push the knob
(I]c clock
the correct time. Then
out and
Minute
recognize it as the pointer
hands.
Timer
with the
diflcrent
are
mtirked
ring of the clock.
the teft,
untit
i/7,
llntil
hands to the
continue turning
has been
range clock.
in color from the
up to
60
turn
~vithour
the pointer
of minutes
)vithout
the pointer
[hc
buzzer stops.
let
Automatic Oven Timer
This Timer will automatically start
and stop your oven for you. Here’s
what you
1. Make sure both your range
clock and the DELAY START dial
show the correct time of day.
When either the DELAY START
dial or DELAY STOP dial is
pushed in and turned, it will “pop”
into place when the time shown
on the range clock is reached.
2. Set the STOP TIME control.
Push in and turn the STOP TIME
knob to the time you want the oven
to turn itself off.
Foods that are highly perishable
such as milk, eggs, fish, stuffings,
poultry and pork should not be
allowed to sit out for more than
one hour before or after cooking.
Room temperature promotes the
growth of harmful bacteria.
Note: Be sure the oven light is off
because heat from the bulb will
speed harmful bacteria growth.
Note: There must be at least a
half-hour difference between the
DELAY START and STOP TIME
dials, and times can be set
up to 11 hours and 45 minutes-in
advance.
3. Set the DELAY START control.
Push in and turn the DELAY
START dial to the time you want
the oven to turn itself on. (If you
want it to start cooking immediately,
do not set DELAY START time.)
4. Set the OVEN SET knob to
TIME BAKE.
5. Set the OVEN
the desired cooking temperature.
do:
onlv
TEMP knob to
The oven will turn itself on
immediately unless you have set
the DELAY START control for a
later starting time. It will operate
at the temperature you selected
and turn itself off at the Stop
Time you selected.
After you take your food out
of the oven, be sure to turn the
OVEN SET knob to OFF.
Questions and Answers
Q. How can I use my Minute
Timer to make my surface
cooking easier?
A. Your Minute Timer
time total cooking which includes
time to boil food and change
temperatures. Do not judge
cooking time by visible steam
only. Food will cook in covered
containers even though you can’t
see any steam.
Q. Must the Clock be set on
correct time of day when I
wish to use the Automatic Timer
for baking?
A. Yes, if you wish to set the
DELAY START or STOP TIME
dials to turn on and off at set times
during timed functions.
Q. Can I use the Minute Timer
during oven cooking?
A. The Minute Timer can be
used during any cooking function.
The Automatic Timers (DELAY
START and STOP TIME dials)
are used with TIME BAKE
function only.
Q. Can I change the clock while
I’m Time Cooking in the oven?
A. No. The clock cannot be
changed during any program that
uses the oven timer. You must
either stop those programs or
wait until they are finished before
changing time.
will help
7
——
Page 8

Baking
When cooking a food
for
the first
time in your new oven, use time
given on recipes
thermostats, over
may
“drift” from the factory
setting
between
5
may
and
an old and
[0 1()
minutes is not unusual. You
think
as a
guide. Oven
a
period of years,
a difference in timing
a new oven of
that
the new oven is not
performing correctly. However,
your new oven has been set
correctly
at
the factory and is more
apt to be accurate than the oven it
replaced.
How to Set Your Range
for Baking
Step 1:
certain to leave about 1 inch of
space
oven
Close oven door. During baking,
uvoid
prevent undesirable results.
Place
food in oven, being
between pans and
for
good circulation of heat.
frequent
door
walls
openings to
of
that you set. Examples of Immediate
Start (oven turns on now and you
set it to turn off automatically) or
Delay Start and Stop (setting the
oven to turn on automatically at a
later time and turn off
at
a preset
stop time) are shown below.
How to Set Immediate
Start and Automatic Stop
NOTE: Before beginning.
sure the hands of the range clock
show the correct time of
Immediate Start is simply setting
oven to start baking now
off at a later time automatically.
Remember, foods continue
cooking after controls are off.
Step
1: To set Stop Time, push in
knob on STOP TIME dial and turn
pointer to time you want oven to
turn off; for example,
DELAY START dial should be
the same position as the time of
day on clock.
day.
and
6:()().
make
turn
The
at
Step 1: To
knob on
turn pointer- [() lime
to turn
Step
2: To
knob on STOP TIME
pointer to time you want oven to
turn off: for
meatls
and one-half hours
NOTE:
diat must be
on
range ctock
set
start time, push in
DELAY START dial
and
you want oven
on: [or
example,
set
Stop Time, push in
example.
3:30.
dial and
6:()().
turn
This
your recipe called for two
of baking time.
Time on STOP TIME
later
than time shown
and DELAY
START dial.
Step 2: Turn OVEN SET knob to
BAKE and OVEN TEMP knob to
temperature on recipe or on
Baking Guide.
Step 3:
at
longer if
Check foods
for doneness
minimum time on recipe. Cook
necessary. Switch off heat
and rcmove foods.
How to Time Bake
The
autom~tic
are
designed
off automatically
8
oven timer controls
to turn the oven on or
tit
specific times
Step 2: Turn OVEN SET knob
[o
TIME BAKE. Turn OVEN TEMP
knob to oven temperature; for
example,
start immediately and will stop
250°F.
The oven will
at
the time you have set.
How to Set Delay Start
and Stop
Delay
Start
and
Stop is setting the
oven timer
off automatically at a later time
than the present time of day.
to
turn the oven on
and
Step 3: Turn OVEN SET knob
to TIME BAKE.
TEMP
recommended
Ptacc I’()()d
and
[urrrcd
have set.
knoh to 2500F.
in
automa[ icat Iy
on and
Turn OVEN SET to OFF
and rctnovc
Caret’ut ty recheck
above. I 1. al I [operations
explained.
Tur-n
OVEN
or
tcmperdture.
oven. ctosc
the
the oven
ol’f
at the times you
food from oven.
the steps given
ar-e
oven
wilt operate
wil
done
tis
should.
door
I be
us
it
Page 9

Baking Guide
1. Aluminum pans conduct heat
quickly.
b~king,
For most conventional
light, shiny finishes
give best results because they
help prevent
overbrowning.
For
best results, we recommend dull
bottom surfaces for
and
pie plates.
cake
pans
2. Dark or non-shiny finishes and
glass
cookware generally absorb
Food
Bread
Biscuits (
Coffee cake
Corn
Gingerbread
Muffins
Popovers”
Quick
Yeast
Plain rolls
Sweet
Cakes
(without shortening)
Angel food
Jelly roll
Sponge
Cakes
Bundt
Cupcakes
Fruitcakes
Layer
Loal
Cookies
Brownies
Drop
Rcfrigcrtitor
Rolled or sliced
E’ruits,
other Desserts
Btikcd
cLls(ard
Puddings, Rice
and Custard
Pies
Frozen
Meringue
One
l-W() C1.LISt
Pastry shell
Miscellaneous
Baked
Sctilloped dishes
SOLlf[leS
1/2
in. thick)
bread
or muffins
loaf
bread
bread (2 loaves)
rolls
cakes
apples
crust
potatoes
Cookware
Shiny Cookie Sheet
Shiny Metal Pan with
satin-finish bottom
Cast-iron or Glass
Sbiny Metal
satin-finish bottom
Shiny Metal Muffin Pans
Deep Glass or Cast-iron Cups
Metal
or Glass Loaf Pans
Metal or Glass Loaf Pans
Oblong
Shiny
Shiny Oblong or Muffin Pans
Aluminum Tube Pan
Metal Jelly Roll Pan
Metal or Ceramic Pan
Metal or Ceramic Pan
Shiny Metal Muffin Pans
Metal or Glass Loaf or
Tube Pan
Shiny Metal Pan with
satin-finish bottom
Metal or Glass Loaf Pans
Metal or Glass Pans
Cookie Sheet
Cookie
Sbeet
Cookie Sheet
Glass or Metal
Glass Custard Cups or Casserole
(set in pan of
Glass Custard Cups or Casserole
Foil Pan on Cookie
Spread to crust edges
Glass or Satin-finish Metal Pan
Glass or Satin-finish Metal Pan
Glass or Satin-finish Metal Pan
Set on Oven Shelf
Glass or Metal Pan
Glass Pan
Pan
Pan with
or
Muffin
Pans
bot
water)
heat, which may result in dry,
crisp crusts. Reduce oven heat
25”F.
if lighter crusts are desired.
Rapid browning of some foods
can be achieved by preheating
cast iron cookware.
3. Preheating the oven is not
always necessary, especially for
foods which cook longer than
Oven
Temperature
4000-4750”
350°-4000
4000-4500
3500
4000-4250
.375°
350°-3750
375°-4250
375°-4250
350”-3750
325°-3750
375°-4000”
325°-3500
325°-3500
3500-3750
275°-3000
3500-3750
3500
325°-3500
3500-4000”
400°-4250
375°-4000
3500-4000”
3000
325°
4000-425””
325”-35[)
4000-4250
4000-4250”
4500
325”-4000”
~~5°-~750
300”-3500
Sbeet
Pans
Shelf
Position!
B, C
B
B
B
B
B
B
A, B
B
B
A
B
A
A, B
B
A. B
B
B
B, C
B, C
B. C
B. C
B
B
B
A
B
B
B
B
B
B
B
-
3500”
0
30
Time,
Minutes
15-20
20-30”
20-40”
45-55
20-30
45-60
45-60
45-60
10-25
20-30”
30-55
10- i 5
45-60
45-65
20-25
2-4
hrs.
20-35
40-60
25-35
10-20
6-12
7-12
30-60”
30-60”
50-90”
45-70
15-25
40-60
40-60”
12-15
60-90”
30-60”
30-75
to 40 minutes. For food with short
cooking times, preheating gives
best appearance and crispness.
Although preheating is not
necessary with meats, it is
preferred for baked goods.
4. Open the oven door to check
fo(~d
as little as possible to prevent
uneven heating and to save energy.
Comments
Canned, refrigerated biscuits take 2 to
4 minutes less time.
Preheat cast-iron pan for crisp crust.
Decrease about 5 minutes
mix, or bake at
then at
Dark metal or glass gives deepest
browning.
For thin rolls, Shelf B may be used.
For thin rolls, Shelf B
Two-piece pan is convenient,
Line pan with waxed paper.
Paper liners produce moister crusts.
Use
3000F.
individual cakes.
Bar cookies from mix use same time.
Use Sbelf C and increase temperature
Z5
to
500F.
Reduce temperature to
arge
custard.
~ook
bread or rice pudding with
:ustard base 80 to 90 minutes.
~arge
pies use
ro
quickly brown meringue.
!OOOF. for 8
~ustard
emperature and longer time.
lncrcase time
size.
450°F.
350°F.
for 10 to 15 minutes.
and Shelf B
for more browning.
400°F. and
to 10 minutes,
fillings require lower
for lar&e
for muffin
for 25 minutes,
mav
be used.
for
small or
3000F.
for
more time.
use
amount or
9
Page 10

Roasting
Roasting is cooking by dry heat.
Tender
roasted uncovered in your oven.
Roasting temperatures, which
should
spattering to a minimum. When
roasting, it is not necessary to
sear,
to your meat.
Roasting is really a
procedure used
Therefore, oven controls
BAKE or TIME BAKE. (You may
hear
indicating the oven is working
properly. )
follow these steps:
Step 1: Check weight of meat,
place, fat side up,
in
rack is a good pan for this. ) Line
broiler pan with aluminum foil
when
cooking with fruits, cooking
heavily cured meats, or for basting
food duritlg
spilling these materials
liner or door.
Step 2: Position in oven on shelf
in A or B position. No preheating
is necessary.
meat
or poultry
be low
bas(e,
a
slight clicking sound,
a
shallow pan. (Broiler
u~ing pan for
and
steady, keep
cover or
Rofisting
.
cooking. Avoid
for
meats.
/”-k-
on
marinating,
add
baking
is easy; just
roasting rack
can
water
are
pan
on
oven
o
~
be
set
with
(o
and
Step 4: Most meats continue to
cook slightly while standing, after
being removed from the oven.
Standing
roasts
allows roasts to firm up and makes
them easier to carve.
temperature will rise about 5° to
10°F.;
temperature rise, if desired,
remove roast from oven sooner (at
5° to
the guide).
NOTE: You
TIME BAKE, as described on
page 8, to turn oven
automatically.
Remember that food will continue
to cook in the hot oven and
therefore
the desired internal temperature
has been reached.
time recommended for
is;
10 to 20 minutes. This
l~ternal
to compensate for
10°F.
less than temperature in
may
wish to use
on
and off
should
be removed when
Frozen Roasts
● Frozen roasts of beef, pork, lamb,
etc., can be started without
thawing, but allow 10 to 25
minutes per pound additional time
(10 minutes per pound for roasts
under 5 pounds, more time for
larger roasts).
● Thaw most frozen poultry before
roasting
Some commercial frozen poultry
can be cooked successfully without
thawing. Follow directions given
on packer’s
to ensure even doneness.
label.
Questions and Answers
300°F.
to check for
lbs.,
with reduced
I
cook a roast
Q. k it
donens
A. Checking the finished internal
temperature at the completion of
cooking time is recommended.
Temperatures are shown in
Roasting Guide on opposite
page. For roasts over 8
cooked at
time, check with thermometer at
half-hour intervals after half the
time has passed.
Q. Why is my roast crumbling
when I try to carve it?
A. Roasts are easier to slice if
allowed to cool 10 to 20 minutes
after removing from oven. Be sure
to cut across the grain of the meat.
Q. Do I need to preheat my
oven each time
or poultry?
A. It is unnecessary to preheat
your oven.
Q. When buying a roast, are
there any special tips that would
help me cook it more evenly?
A. Yes. Buy a roast as even in
thickness as possible, or buy rolled
roasts.
Q. Can I seal the sides of my foil
“tent” when roasting a turkey?
A. Sealing the foil will steam
the meat. Leaving it unsealed
allows the air to circulate and
brown the meat.
n~
with a meat thermometer?
Step 3: Turn OVEN SET to BAKE
and OVEN
poultry
for
best brownin:.
TEMP to
tnay be
325°F. Small
cooked at
375°F.
10
—
——
Page 11

Roasting Guide
1. Position oven shelf at B for
small-size roasts (3 to 5
lbs.)
and
A for larger roasts.
2. Check weight of roast. Place
meat fat-side-up, or poultry
breast-
side-up, on roasting rack in a
shallow pan. The melting fat will
baste the meat.
Select
a pan as
close to the size of the meat as
possible. (Broiler
pan
with rack is remove the roast from oven sooner
a good pan for this.)
~pe
Meat
Tender cuts; rib, high quality sirloin
tip, rump or top round*
Lamb
leg
or bone-in shoulder*
Veal
shoulder, leg or loin*
Pork loin, rib or shoulder*
Ham, precooked
‘K For boneless rolled roasts over 6
inches thick. add 5 to 10 minutes per
pound to times given above.
Poultry
Chicken or Duck
Chicken pieces
Turkey
at
Oven
Temperature
325°
325°
325°
325°
325°
325°
350°
325°
3. Remove fat and drippings as
necessary. Baste as desired.
4. Standing time recommended
for roasts is 10 to 20 minutes. This
allows roasts to firm up and makes
them easier to carve. Internal
temperature
10°F.;
temperature
(at 5° to
will
rise about 5° to
to compensate for
rise,
if desired,
10°F.
less than
temperature in guide).
Doneness
Rare:
Medium:
Well Done:
Rare:
Medium:
Well Done:
Well Done:
Well Done:
To Warm:
Well Done:
Well Done:
Well Done:
Approximate Roasting Time
in Minutes per Pound
3 to 5 Ibs.
24-35
35-39
39-45 3 I-33
21-25
25-30 24-28
30-35
35-45
35-45 30-40
18-23
minutes per pound (any weight)
3 to 5
lbs. Over 5 Ibs.
35-40 30-35
35-40
10 to 15 Ibs. Over 15 Ibs.
16-22
5. Frozen roasts can be
conventionally roasted by adding
15 to 25 minutes per pound more
time than given in guide for
refrigerated roasts. (15 minutes
per
pound for roasts under 5 pounds.)
Defrost poultry before roasting.
Internal
Temperature ‘F
6 to 8 Ibs.
18-25
25-31
20-23
28-33
30-40
12-19
I
30°- 140°
150°- 160°
170°- 185°
130°- 140°
150°- 160°
170°- 1 85°
170°-1800
1700-1 80°
1 I 5°-1250
185°-1900
1 85°- I 90°
In thigh:
185°-1900
11
-.
—
Page 12

Broiling
Broiling is cooking food by intense
radiant heat from the upper unit in
the oven. Most fish
of meat can be broiled. Follow
these steps to keep spattering and
smoking to a minimum.
Step 1: [f meat has
near edge, cut vertical slashes
through both about 2“ apart. If
desired,
leaving layer about 1/8” thick.
Step 2: Place meat on broiler rack
in broiler pan which comes with
oven. Always use rack so fat drips
into broiler pan; otherwise juices
may become hot enough to catch
fire.
Step 3: Position shelf on
recommended shelf position as
suggested in Broiling Guide. Most
broiling is done on D position.
Step 4: Leave door ajar at stop
(except when broiling chicken).
The door stays open by itself, yet
the proper temperature is
maintained in the oven.
Step 5: Turn OVEN SET knob to
BROIL and OVEN
BROIL. Preheating units is not
necessary. (See notes in Broiling
Guide.)
fat
may be trimmed,
and
tender cuts
fat
or gristle
TEMP knob to
Step 6: Turn food only once
during broiling. Time foods for
first side per Broiling Guide.
Turn food, then use times given for
second side as a guide to preferred
doneness. (Where two thicknesses
and times are given together, use
first times given for thinnest food.)
Step 7: When finished broiling,
turn OVEN SET knob to OFF.
Serve food immediately, leaving
the broiler pan and rack outside
oven to cool during meal for
easiest cleaning.
Use of Aluminum Foil
1.
If desired, broiler pan may be
lined with foil and broiler rack
may be covered with foil for
broiling. ALWAYS BE CERTAIN
TO MOLD FOIL THOROUGHLY
TO BROILER RACK, AND SLIT
FOIL TO CONFORM WITH
SLITS IN RACK. Broiler rack is
designed to minimize smoking and
spattering, and to keep drippings
cool during broiling. Stopping fat
and meat juices from draining to
the broiler pan prevents rack from
serving its purpose, and juices may
become hot enough to catch fire.
2. DO NOT place a sheet of
aluminum
may result in improperly cooked
foods, damage to oven finish and
increase in heat on outside surfaces
of the oven.
foil
on shelf. To do so
Questions & Answers
Q. Why should I leave the door
closed when broiling chicken’?
A. Chicken is
recommended for
broiling. This is because chicken is
relatively thicker than other foods
you broil. Closing the door
more heat in
chicken to cook evenly throughout.
Q. When broiling, is it necessary
to always use a rack in the pan?
A. Yes. Using the rack suspends
the meat over
cooks,
thus keeping meat drier.
protected by the
cooler, thus preventing cxcessi
spatter
Q. Should I salt the meat
broiling?
A. No.
and allows
Always
meat with
with a fork
When broiling poultry or fish,
brush each side often with butter.
Q. Why are my meats not turning
A. In some areas,
(voltage) to
In
unit
broiler
Check to see if you arc using the
recommended shelf position.
for longest period of time indicated
in the Broiling
only once during
Q. Do I need to grease my
broiler rack to prevent meat
from sticking?
A. No. The broiler rack is designed
to reflect broiler heat, thus
the surface cool
meat
However, spraying
lightly with a vegetable cooking
spray before cooking wit
cleanup easier.
the
and
Salt
out as brown as they should’?
these cases,
for I ()
pan
from
the
only
closed-door
the
oven which allows
the
pan. As
juices
stilt after
minutes
sticking to the
fail
into the pan,
rock find
smoking,
draws out
them
to evaporate.
cooking. Turn
tongs:
piercing meat
allows
juices to escape
the power
the
oven may be tow.
preheat
before ptacing
with
food
Guide.
broi
enoLlgh
the
food
hotds
[hc meat
Juices are
stay
before
the
juices
the broil
in
oven,
Turn food
t
ing.
keeping
to
pt”evetl[
surlacc.
broiler
I
make
vc
Broit
rack
12
Page 13

Broiling Guide
1. Always use broiler
pan
and
rack
that comes with your oven. It is
designed to minimize smoking and
spattering by trapping juices in the
shielded lower part of the pan.
2. Oven door
should be alar for all
foods except chicken; there is a
special position on door which
holds door open correct
ly.
3. For steaks and chops, slash fat
evenly around outside
edges
of
meat.
To slash, cut crosswise through
Food
Bacon
Ground Beef
Well Done
Beef Steaks
Rare
Medium
Well Done
Rare
Medium
Well
Done
Chicken (4500
Bakery Products
Bread (Toast) or
Toaster Pastries
English Muffins
Lohster tails
(6
to 8 oz. each)
Fish
Ham slices (450”)
(precooked)
Pork chops
Well Done
Lamb chops
Mcdiurn
Well Done
Medium
Well Done
Wieners
similar precooked
stiLlsages.
br~twulst
)
and
Quantity
Thickness
X ib, (LlboLlt X
thin slices)
I lb. (4
X
to X in.
I in,
( I to I Y!
17: in, thick
(2
to 2X tbs. )
1
whole
(210
split
2 to 4 slices
1 pkg.
2
(split)
t -lb.
Y
in.
1 in.
2
(7!
2
( I
~lboLlt I lb.
2
( I in.
about ) () to ) ?
2
( I ‘A
about I lb.
1 -lb. pkg. ( 10)
andlor
potties)
(hick
[hick
lbs.
)
2Y? Ibs.
),
lcng(hwise
(2)
l’illcts
71 to
thick
thick
in. )
in.
(hick).
thick)
in.
thick),
oz.
outer fat surface just to the edge of
the meat. Use tongs to turn meat
over to prevent piercing meat and
losing juices.
4. If desired, marinate meats or
chicken before broiling. Or brush
with barbecue sauce last 5 to 10
minutes only.
5. When arranging food on pan, do
not let fatty edges hang over sides,
which could soil oven with fat
dripping.
Shelf
Position
D
D
D
D
D
D
D
D
B
D
D
c
D
c
D
(:
D
D
D
c
D
First Side
Time, Minutes
5
X-9
9
12-13
13
10
Is
25
28-30
2-3
3-4
13-16
5
8
IO- 12
12-13
x
10
10
17
6
Second Side
Time, Minutes
~1~
6-7
7
5-6
8-9
6-7
Y-l
2
16-18
1
X-20
z-1
Do not
turn over
5
x
4-5
8-y
4-7
10
4-6
12-14
l-~
6. Broiler does not need to be
preheated. However, for very thin
foods,
or to increase browning,
preheat if desired.
7. Frozen Steaks can be
conventionally broiled by
positioning the oven shelf at next
lowest shelf position and increasing
cooking time given in this guide
1 X
times per side.
Comments
Arrange in single layer.
Spdce
evenly.
Up 108 patties
Ste~ks
less than 1 in. thick cook
through
t“ecornrnended,
Reduce time about 5 to 10 min. per side
for
cut-up chicken, Brush each side with
melted butter”. Broil with skin-side-down
first and bruit
Space evenly. Place
side-up
Cut
through back of shell, spread open.
Brush with melted butter before broiling
and alter
Handle
lemon
butter
desired. Preheat broiler to increase browning.
lncre~se
I X
in. thick or home-cured ham.
S]ash fat.
Slosh fat.
If’ desired, split sausages in half
lengthwise;
take
about same time.
before
browning, Pan frying is
Slash fat.
with door closed.
En&lish
muffins
and
brush with butter, if desired.
htilf
of broiling time.
and
turn very carefully. Brash with
befcrre
and during cooking, if
time 5 to 10 min. per side for
cut
into 5- to 6-in. pieces.
cut-
13
Page 14

Care and Cleaning
Proper
important
you efficient and satisfactory
service.
carefully in caring for your oven
to
maintenance.
care and
so
Follow
tissure
safe and proper
cleaning are
your oven will give
these directions
Oven Shelves
You
may
clean oven shelves
with
a
mild abrasive cleanser,
following manufacturer’s directions.
After
cleaning, rinse the shelves
with
clean
water and dry with a
clean
cloth.
To remove heavy, burned-on soil,
soapy metal pads may be used
following manufacturer’s
directions. After scrubbing, wash
with soapy water, rinse and dry.
Broiler Pan & Rack
After broiling, remove the broiler
pan
and rack and carefully pour off
the grease. Wash and rinse the pan
and
rack in hot, soapy water.
If
food
has burned on, sprinkle the
rack
while hot with detergent and
cover with wet paper towels or a
dishcloth. That way, burned-on
foods will soak loose while the
meal is being served.
Do not store a soiled broiler pan
and
rack in the oven.
.,. ._
The oven lamp (bulb) is covered
with
a
glass removable cover
which is held in
shaped wire. Remove oven door, if
desired, to reach cover easily.
To remove:
● Hold hand under cover so it
doesn’t fall when released. With
fingers of same hand, firmly push
back wire bail until it clears cover.
Lift off cover. DO NOT REMOVE
ANY SCREWS TO REMOVE
COVER.
● Replace bulb with 40-watt home
appliance bulb.
To replace cover:
● Place it into groove of lamp
receptacle. Pull wire bail forward
to center of cover until it snaps into
place.
When in place, wire holds
cover firmly. Be certain wire bail is
in depression in center of cover.
● Connect electric power to oven.
place
with a
bail-
Removable Oven Door
Ill
To replace the door,
the hinges are in the special stop
position. Position the slots in the
bottom of the door squarely over
the hinges. Then
slowly and evenly over both
hinges at the same time.
snap back against the oven
pull
them back out.
make sure
lower the door
If hinges
frame,
Adjusting Oven
Thermostat
Use
the time given on a recipe
when cooking the first time.
Oven thermostats, in time,
may “drift” from the factory
setting and differences in timing
between an old and a new oven
of 5 to 10 minutes are not
unusual. If you find that your
foods consistently brown too little
or too much, you may make a
simple adjustment in the
thermostat (OVEN TEMP) knob.
Pull the knob off the shaft,
at the back of the knob and note
the current setting before
making any adjustment. The
knob is factory set with the top
screw directly under the pointer.
look
Porcelain Enamel and
Painted Surfaces
Any acid
lemon
or mixtures containing tomato or
vinegar) should be wiped up
immediately. See guide for
cleaning suggestions.
foods
spilled (such as
or other citrus fruit juices,
Oven Light Bulb
The light bulb is located on the
back
wall
of the oven. Before
replacing
elec(ric
main fuse or circuit breaker panel.
Let the bulb cool completely before
removing it. Do not touch a hot
bulb with a damp cloth. If you do,
the bulb will break.
the
bulb, disconnect
power to the oven at the
14
The oven door is removable to
make the interior more accessible.
To remove the door,
inches to the special stop position
that will hold the door open. Grasp
firmly on each side and lift the
door straight up and off the hinges.
Note: Be careful not to place hands
between the hinge and the oven
door frame as the hinge could snap
back and pinch fingers.
open it a few
L
To adjust the thermostat:
1.
Pull off the knob.
2. Loosen both screws on back of
the knob.
3. Hold both parts of the knob and
turn so the top screw moves in the
desired direction. To increase the
tem~erature
,
turn knob handle so
moves toward the word
To reduce the temperature
indicated, turn knob handle so
the screw moves toward the word
“COOLER.” You will hear and
the notches as you turn the knob.
4. Tighten the screws.
5. Return the knob to the
Re-check oven performance before
making any additional adjustments.
indicated bv the knob.
tha~
the screw
“HO~R.”
that
feel
range.
.——
Page 15

Cleaning Guide
N()’rP;: I.et
I’,iu’l’
Ilrui[er l)~in and
Rack
(.’ontrol Knohs
Ilake
Unit and
[ Init
outside (;lass
N’lctal
Porcelain
and
I;namel
Painted Surfaces
oven parts cool before touching or handling.
MATERIALS TO USE
● Soap
and
IIroil
E’inist
Water
Q
Soap-Filled Scouring Pad
_
Commcrciai Oven
Cleaner
. Dishwasher
c
Mild Soap and Water
● Soap
and
Water
●
Soap and Water
. Paper Towel
●
Dry Cloth
●
Soap and Water
Drain
fat, cool pan and rack slightly. (Do not let soiled pan and rack stand in oven to
cool. ) Sprinkle on detergent. Fill the pan with warm water and spread cloth or paper
towel over the rack. Let pan and rack stand for a few minutes. Wash; scour if
necessary. Rinse and dry. OPTION: The broiler pan and rack may also be cleaned in a
dishwasher.
Pull off knobs. Wash gently but do not soak. Dry and return controls to oven making
sure each knob goes back where it came
Do not clean the bake unit or broil unit. Any soil will burn off when the unit is
heated. NOTE: The bake unit is hinged and can be lifted gently to clean the oven
tloor.
If
spillover,
around
the unit with warm water. The broil unit is permanently attached.
Wash all glass with cloth dampened in soapy water. Rinse and polish with a dry
If knobs are removed, do not allow water to run down inside the surface of
while cleaning.
DO NOT USE steel wool,
abrasives, ammonia, acids
or commercial oven
cleaners.
DO NOT USE oven
cleaners, cleansing
powders or harsh
abrasives. These might
scratch the surface.
GENERAL DIRECTIONS
from.
residue or ash accumulates around the bake unit, gently wipe
glass
Wash, rinse, and then polish with a dry cloth,
If acids should spill on the range while it is hot, use
a dry paper towel or cloth to wipe up right
away. When the surface has cooled, wash and
rinse. For other spills, such as fat smatterings, etc.,
wash with soap and water when cooled and then
rinse.
Polisb
with dry
clotb.
cloth
OYCII (;askct
Silicone
(
ttcal
l{csis[:ln[ )
Kubhcr
shel\es
()~en
l)oor’!:
oven
I,iner:):
((
’A(J’I’10N:
in LIsc, I
Sllill;t:c
lr))ll)~.(li:[l~.lj,
when
igh(
bLI
Ibs
01” i]l;ltin~idcs. 1“].ui[ .j~!iccs, I(M1:I(()
l\itl]
L:Irc hc. ing
o
Soap
and Water
I
Soap
and
I
Soap-Filled
Water
Scourin&
Pad
, Commercial Oven
[’leaner
~
Soap and Water
,
.Soap
~md
Water
, Soap-Filled Scouring Pad
I
Commercial Oven
Cleaner
sauces
~nd
[ttkcn
IIOt [[)
Ioucb any hoI p[~rtion c>f
hasting materials containing
On edge of oven frame. Clean off soil with
Your shelves can be cleaned by using any and
sudsy
water and rinse thoroughly.
all
mentioned materials. Rinse
thoroughly to remove all materials after cleaning, NOTE: Some commercial oven
cleaners cause darkening and discoloration. When using for
small
part
of shelf and check for discoloration before completely cleaning.
DO NOT USE oven
cleaners, cleansing powders
or harsh abrasives.
To remove oven door for easier cleaning, see
instructions on page 14. Use soap and water to
thoroughly clean both the inside and outside of door.
first time, test cleaner on
Rinse well. NOTE: Soap left on door liner causes
additional stains when the oven is reheated.
Cool
before cleaning.
FOR LIGHT SOIL: Frequent wiping with mild soap and water (especially after
cooking meat) will prolong the time between major cleanings, Rinse thoroughly.
NOTE: Soap left on liner causes additional stains when oven is reheated.
FOR HEAVY SOIL: Choose a non-abrasive cleaner and follow label instructions,
using thin layer of cleaner. Use
~n
stubborn spots. Rinse
of rubber gloves is recommended. Wipe or rub lightly
well.
Wipe off any oven cleaner that gets on thermostat
bulb. When rinsing oven after cleaning, also wipe thermostat bulb.
the oven, When the
acids mtiy c;l~tse disc(>loratic)n, Spillovcrs sh(>uld
sL[rf>ice
is
COOI, cle:m :md rinse,
be wiped up
15
--
—
Page 16

...—..—
.,—.—
--
~~,
—--
—-
-.
~-;
~
---
Questions?
Use This Problem Solver
-.—
PROBLEM
OVEN DOES NOT
WORK
AUTOMATIC OVEN
TIMER DOES NOT
WORK PROPERLY
BAKING RESULTS
UNSATISFACTORY
BROILING RESULTS
UNSATISFACTORY
POSSIBLE CAUSE AND REMEDY
● Difficulty may be
circuit fuse, a tripped oven circuit breaker, the
depending on nature of the power supply. If a circuit
control box uses fuses, the oven fuse (a cartridge-type) should be changed BUT ONLY
BY SOMEONE FAMILIAR WITH ELECTRICAL
these procedures,
NOTE: Apartment tenants or condominium owners should
management to perform this check before calling
●
Oven controls are not properly set.
●
Check to be certain step-by-step directions were followed correctly. Review pages on
use of timer.
●
Check material and size of baking utensil; placement of shelf and food in oven. If the
oven was used for broiling just before it is preheated for baking, turn the oven
completely off and open the door wide so it can cool
oven door and preheat as directed on Baking page.
c
Be sure OVEN TEMP and OVEN SET are set at BROIL. If there was excessive
smoking and spattering: Were shelf and broiler pan at position suggested on broiling
guide? If aluminum foil was used on broil rack, was
in
the main distribution panel of your house caused by a blown oven
main fuse
the fuse blows or circuit breaker trips again,
or the main circuit breaker,
breaker is involved, reset
CIRCU~S.
for
service.
(5
to 10 minutes). Then close the
it
handled according to directions?
If after doing one of
cdl
for service.
rquest
their building
it.
If the
If you need more
GE Answer
800.626.2000
consumer information service
help...call, toll free:
Center@
16
Page 17

Page 18

Notes
18
Page 19

Wdll
Be There
With the purchase of your new HotpoiIlt appliance, receive
the assurance that if you ever need information or
assis-
@nce, we’ll be there. Ml you have to do is cdl—toll-free!
In-Home Repair
Service
808-GE-CARES
($00-432-273fl
our consun]el- service profi’ssionals”
will
pro~ide experl lepair semice
your
I{otpoillt” appliance, scheduled
at
a
time
that’s convenient
Many
(;E1 (:OIISUII1(’I Se~~icc
operated
today
venience
days,
our
your appliance inside
most repairs earl be han(iled in just
OIle \’isit.
locations”
or
tolnorrow:
(7:()() a,il]. to 7:()()
!J:()()
a.m. to
fhctoI-y-tI:~illc>(f
offkr
or at your
2:()() lJ.nl.
technicians
you
p.m. week-
aIld
011
fi)r
you.
conlpany-
service
corl-
Saturdays).
know
out-so”
Service Contracts
880-626-2224
YI)LI CaII tla~e
(;k: (:ollsulller
the]-e
warra~lty
contract
eflk’ct
and you
discouIlt.
tract,
al today’s pri(es,
Parts
8f10-626-2002
Individuals qualified to service their
own appliances
parts or a(cessol-ies s{tit dire.(tl}
their bonle, free
our parts
over
47,()()() (icIIu il]c
and all
Master(;ard
accepted.
User maintenance instructions
contained in this booklet cover procedures intended to be performed by
any user. Other servicing
should be referred to quatified service personnel. Caution must be
exercised, since improper servicing
may cause unsafe operation.
[he
sec~]re fi’elitl~ ttlat
Scllice ~till
afier yotIr
expires,
wtlilc’ your Ltarratlt}
YOU.I-C,
’]1
Lkrith
assured
Hotpoinl”
I>urttl:lse
recei\t: a
a
tnultiple-ycal- colI-
stilt
t){’
plt)(tt](t
a (;l;,
is still
sul)statltia}
offi[f[]r[, sellice
andAccessories
c;iII tla\e ]Iee(te(t
to
of”
stlippillx (tlargt!
systc’nl pro~ides acc(?ss to
k~:tlc’wal I>a]-ts.
are Ftllt?’ W’arl”:ult[’(f. t~ls:f,
aIId
I)isc(jitr ca~(fs aI-{
generdy
it]
.
GEAnswer
Center”
8D&626.2800
~~’tlatt>~’c>r your
I {otpoit]t”
( ;enlei” illfi)rnlation service is
al)le t( )
help.
(tuc’stiotl-witl he answered
;It](l (ot]rteously.”
1 it]lc.
(
;E: Answer (;ente@ sem,ice
ol)et]
24 hours a
Telecommunication Device for the Deaf
{lucstion about
nlajor appliance,
Yl)ur cafl-and your
And
you
day;
7
days a
-1 \ ‘
.+
1.
-’
ff-?:’~:::,:.o,
.+,&%: , . . .
.:< - ~ F
-
‘p.
=? ~, ,
>
.-—
. . .
Su.,m A.
— . . . .
—. ..=
“ -m- . . . . . ,
can
week.
,, :~ L-z:,
,.,
For Customers With
Special Needs...
800.626.2000
.
~’l)otl rt>(luest, we witl pro~ide
cotltrols” for
app]ianc’c’s,
pla])tlillg a harrierfree kitchen
pctsons
tain
these
N()().(i2tj.2()
( :ot)sunlers with impaired hearing
{)1 sl)c,e(t~ ~~,t]() have
or a
(att 800-’I’DD.(;FA(:”
t( ) Le(tuc>st information”
a
variety’ otHotpoint
and a brochure
witl]
Iinlited
itetns,
()().
co]lvention;”
tc) :~ssist
nlobility. ‘Ii) [)h-
free of-charge, call
access to a
d
teletypewriter
(800-833-432~)
or service.
any
(JE Answ,
avail.
prc)mptf)
cafl
an
is
‘
-
,.-.’..,i~....
,
,.
3
‘
:y:~-’:
,.<m..,
‘:
---- —-
Braiiie
in
fc)r
T.DD
tnay
.-
Page 20

YOUR HOTPOINT BUILT-IN OVEN
WARRANTY
Save proof of original purchase date such as your sales slip or
cancelled
check to establish warranty period
WHAT IS COVERED
FULL ONE-YEAR WARRANTY
For one year from date of original
purchase, we will provide, free of
charge, parts and service labor in
your home to repair or replace
pati of the
oven
that
fails because
any
of a manufacturing defect.
This warranty is extended to
the original purchaser and any
succeeding owner for products
purchased for
ordina~
the 48 mainland states, Hawaii and
Washington,
D.C.
In Alaska the
warranty is the same except that it is
LIMITED because
ship the product to
vou
~he servic’e ;hop
or for the service technician’s travel
costs to your home.
All warranty
by our Factory
sewice will be provided
Sewice Centers or
by our authorized Customer Care’
servicers during normal working
hours.
Look in the White or Yellow Pages
of your telephone directory for
HOTPOINT FACTORY SERVICE,
GENERAL
ELECTRIC-HOTPOINT
FACTORY SERVICE or HOTPOINT
CUSTOMER CARE” SERVICE.
WHAT IS NOT COVERED
Service trips to your home to teach
you how to use the product.
Read your Use and Care material.
●
Replacement of house fuses or
resetting of circuit breakers.
●
Failure of the product if it is used
●
If you then have any questions for other than its intended purpose
about operating the product, please or used commercially.
contact your dealer or our
Consumer Affairs office at the
address below, or call, toll free:
GE Answer
Center’”
800.626.2000
●
Damage to product caused by
accident, fire, floods or acts of God.
WARRANTOR IS NOTRESPONSIBLE
FOR CONSEQUENTIAL DAMAGES.
consumer information service
● Improper installation.
If
you have an installation problem,
contact your dealer or installer.
You are responsible for providing
adequate electrical, gas, exhausting
and other connecting facilities.
Some states do not allow the exclusion or limitation of incidental or consequential damages, so the above limitation or exclusion
may not apply to you. This warranty gives you specific legal rights, and you may also have other rights which vary from state to state
To know what your legal rights are in your state, consult your local or state consumer affairs office or your state’s Attorney General,
home use in
must
~av
to
(
,.
Part No. 164 D2092P236
Pub. No. 39-4689
MNU051
10.90 CG
Warrantor: General Electric Company
If further help is needed concerning this warranty, write:
Manager—Consumer Affairs, GE Appliances, Louisville, KY 40225
RK524GI
 Loading...