

Page 1
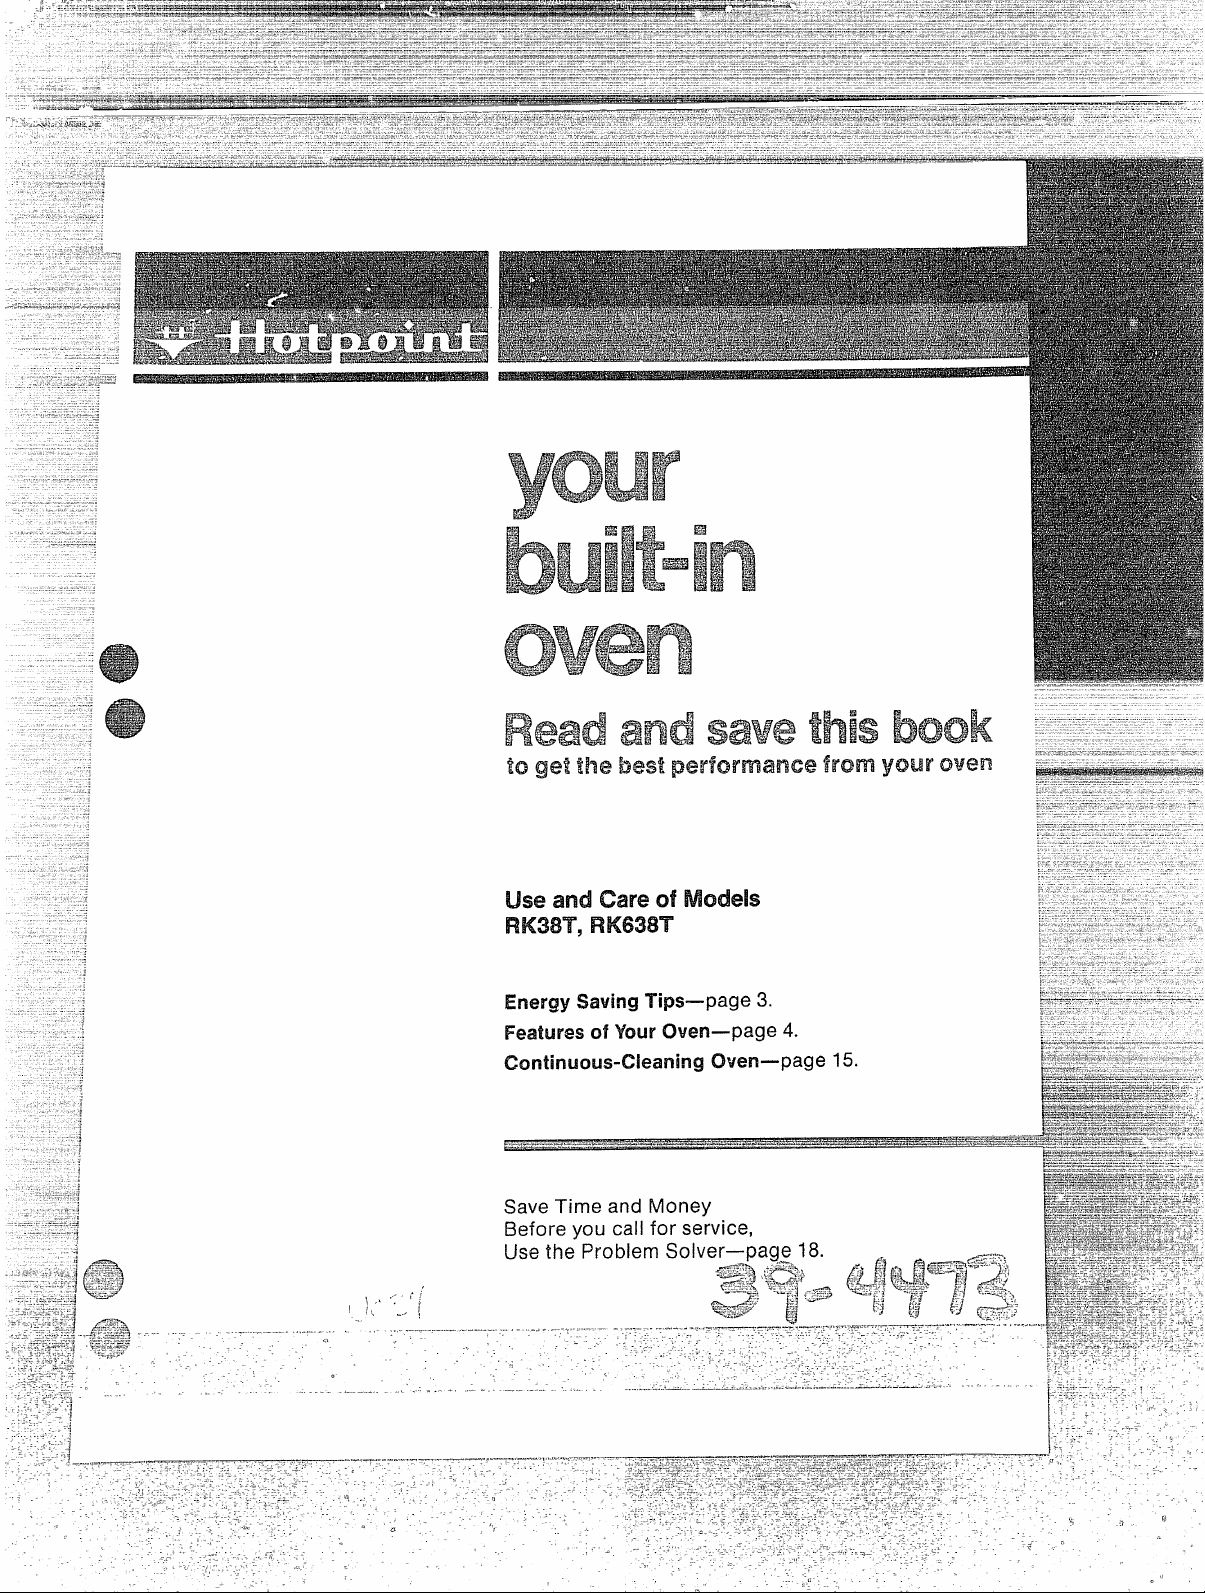
UseandCare ofModels
Energy SavingTips—page 3.
Features of Your(Men—page 4.
CWm-page 15.
Page 2
It is designed to help you operate and
maintainyournew Oven properly.
Keep it handy for answers to your
questions.
if you don’t understand something or
need morehelp. . .
Writeto: (includeyour phone number);
ConsumerAffairs
Hotpoint
AppliancePark
Louisville,KY 40225
1
Page 3
——..
Don’t leave children alone or unattended in the area where an oven is in
operation.
Don’t allow anyone to climb, stand or hang on the oven door.
They could
damagethe oven.
~AUTICIN: DO NOT STORE ITEMS OF INTEREST 1’0 CHILDREN IN CABINErH3
A130VE AN OVEN —CHILDR13NTCLIMJ31NG ON THE OVEN TO REACH ITEMS
CO~JLVBE SERIOUSLY INJURED.
hTevel. use your oven forwarming03?heating the 1’OOmO
}q~a,.proper wp~~el
—loosefitting or hanginggarmentsshouldneverbe worn
whileusing theappliance.
Use on~ydry potholders-moist or
damp potholders on hot surfaces may
resultin burns from steam.Do not let potholderstouch hot heatingelements.
Do not use a towelor otherbulky cloth.
..
Stand away fI-omoven when opening oven door to let hot air or steam escape
before removing or placing food inside.
Place ouen rachs in clesiredpsition while oven is COOLIf racksmustbe handled
~
whenhot, do not let potholdercontact hot heatingelement in oven.
Pu[!ing out shelf allthe way to the shelf stop is a convenience in lifting heavy
oods. Itis also a precautionagainstburns from touching hot surfaces of the
oor or oven waHs.
Don ‘thek~tunopened food containers in the oven. PressurecouldbuildUP and
thecontainercould burst, resultingin injury.
J$’henusing coohingor roasting bags in oven, f~~~ow~an~fact~~er’s diI”ecti~ns*
Don’t use aluminum foil anywhere in the oven
except as described in this
booklet. Improperinstallationcould resultin a shock, fire hazard,or damage
to theoven.
not store f[ammabte materials in an oven.
Do
~0
NOT USE WATER ON GREASE FIRES. NEVER PICK UP A FLAMING PAN.
Smotherflaming pan by covering pan completely with well-fitting lid, cookie
sheetor flat tray.
F1aminggrease
outside pan can be extinguished by baking soda or, if avail-
able. a multi-purposech’ychemicalor foam type extinguisher.
M-hencooking in theoven, flamecan be smothered by completely closing door
anc{turnin,g
~/hell cooking pork, follow our dire~~ions
017EN SET to OFF.
exactly and always cook themeatto at
least170°.Thisassuresthat,in theremotepossibilitythattrichinamaybe present
inthemeat,itwillbe killedand meatwill be safeto eat.
,!
-;-j&g-
-::—-.:..%-.
- :3(:~;~oII’t ;l~ternptto repairor replaceany part of your oven unlessit is specifically
=,-;.-=--
:.-.-
-;.:
,:,.--j.-...-
‘:;~~($~~flfiiiLonncctOlell ~ltOIIC1l~il.c~lit~rca~eror main fuse before performing
_--$
--:=.”:]
RcadThe ProblemSolver-page 18.
rccomrnendcdin this book. /411other servicingshould be referredto a qualified
~ ~;.’ --. ~
==~~wchni cian.
.,
.G
,’
any
2
Page 4
Uslmt!$ YCJUR
Baking,Chart..
Broiling,Chart.
g’J-~~@
. . . . . . . . . . . . . . . . . . . . . . . . . . . . . . . . . . . . . . . . . . . . . . . . . . . . . . . . . . . . . . . ..
. . . . . . . . . . . . . . . . . . . . . . . . . . . . . . . . . . . . . . . . . . . . . . . . . . . . . . . . . . . . .
.9,
OtherOvenFeatures-hIinute Timer,ClockAutomaticOvenTimer.. .. . . . . . . . ~. . . . . . . . . 11,12
Roastimz,Chart. .. .. . . . . . . . . . . . . . . . . . . . . . . . . . . . ~. . . . . . . . . . . . . . . . . . . . . . . . . . . . . . . .8
CareofYourOven. . . . . . . . . . . . . . . . . . . . . . . . . . . . . . . . . . . . . . . . . . . . ...............13, 14
CleaningCharts,Parts,AllFinishes.. .. . . . . . . . . . . . . . . . . . . . . . . . . . . . . . . . . . . . . . . .......17
Lamps,HowToReplace.. . . . . . . . . . . . . . . . . . . . . . . . . . . . . . . . . . . . . . . . . . . . . . . . . . . . .14
OvenCare.... . . . . . . . . . . . . . . . . . . . . . . . . . . . . . . . . . . . . . . . . . . . . . . . . . . . . . . . . . . . . . . 15,16
OvenThermostat,Adjusting.. . . . . . . . . . . . . . . . . . . . . . . . . . . . . . . . . . . . . . . . . . . . . . .......13
PorcelainEnamel.. . . . . . . . . . . . . . . . . . . . . . . . . . . . . . . . . . . . . . . . . . . . . . . . . . . . . . . .......13
UseofAluminumFoil. . . . . . . . . . . . . . . . . . . . . . . . . . . . . . . . . . . . . . . . . . . . . . . 2,8,9, 10,14,18
:=j~3..g=cg#&
TheProblemSolver.... ... ... ... ... ... ... ... .. .. .. .. ... .. .. ... .
Energy-ConservationTips.... ... .. .... .. ... ... ... ...
Features,Chart.. .. .... .. ... ... .. ..
IfYouNeedService.. ... ... .. .... ..
... ... .. .... .. ... .... .. ... .. .. .. .. ... ... ... ... ... ... ....
.. .... .. ... .... .. .... .. ... .. .. ... .. ... .... ... ... ... .
ModelandSerialNumberLocation. .. ... ... ... ... .
RemovableAluminumFoilOvenBottomLiner... . ... ...
.. .... .. .. .. .... .. ... .... ... .. ... .. .. ... 3
.. .... .. ... ... ... ... .. ... .. ... .. ... .. .
... ... ... ... ... .. ... ... ... .. .. .. .. ... .
.. ... ... .... .. ... .... .. .. ...
19-22
1,18
SafetyTips ... ... ... .. ... ... .. ... ... .. .. .. ... .. .. .. ... .. .. ... ... .. ... ... ... ... .. .. .. .... . 1,2
Warranty,.,... ... .. ... ... ... .. ... ... ... .. ... .. .. .. .. .
:w..,:--:::~;:a~+:~~~~~-
-J-s.-&.\.--A.&~..--=,..-.!.-.&>-
.. ... ... ... .. ... ... ... .. . .. .
BackCover
7
10
4
5
1.
Preheatthe oven only when necessary.Most 4.
foods tvillcook satisfactorilywithoutpreheat-
ing. If J“oufind preheating is necessary,keep
an eye on the indicatorlight,and put food in
the oven promptly after the Iight goes out.
‘?
“.
Alw’aysturnoven OFF before removingfood.
During baking,avoid frequent door openings.
3.
Keep door open us short a time as possible
Cook completeoven mealsinsteadof just one
food item.Potatoes,othervegetables,andsoxne
dessertswill cook togetherwith a main-dish
casserole,meat loaf, chickenor roast.Choose
foodsthatcook at thesametemperatureinapproximatelythe sametime.
5,.
Page 5
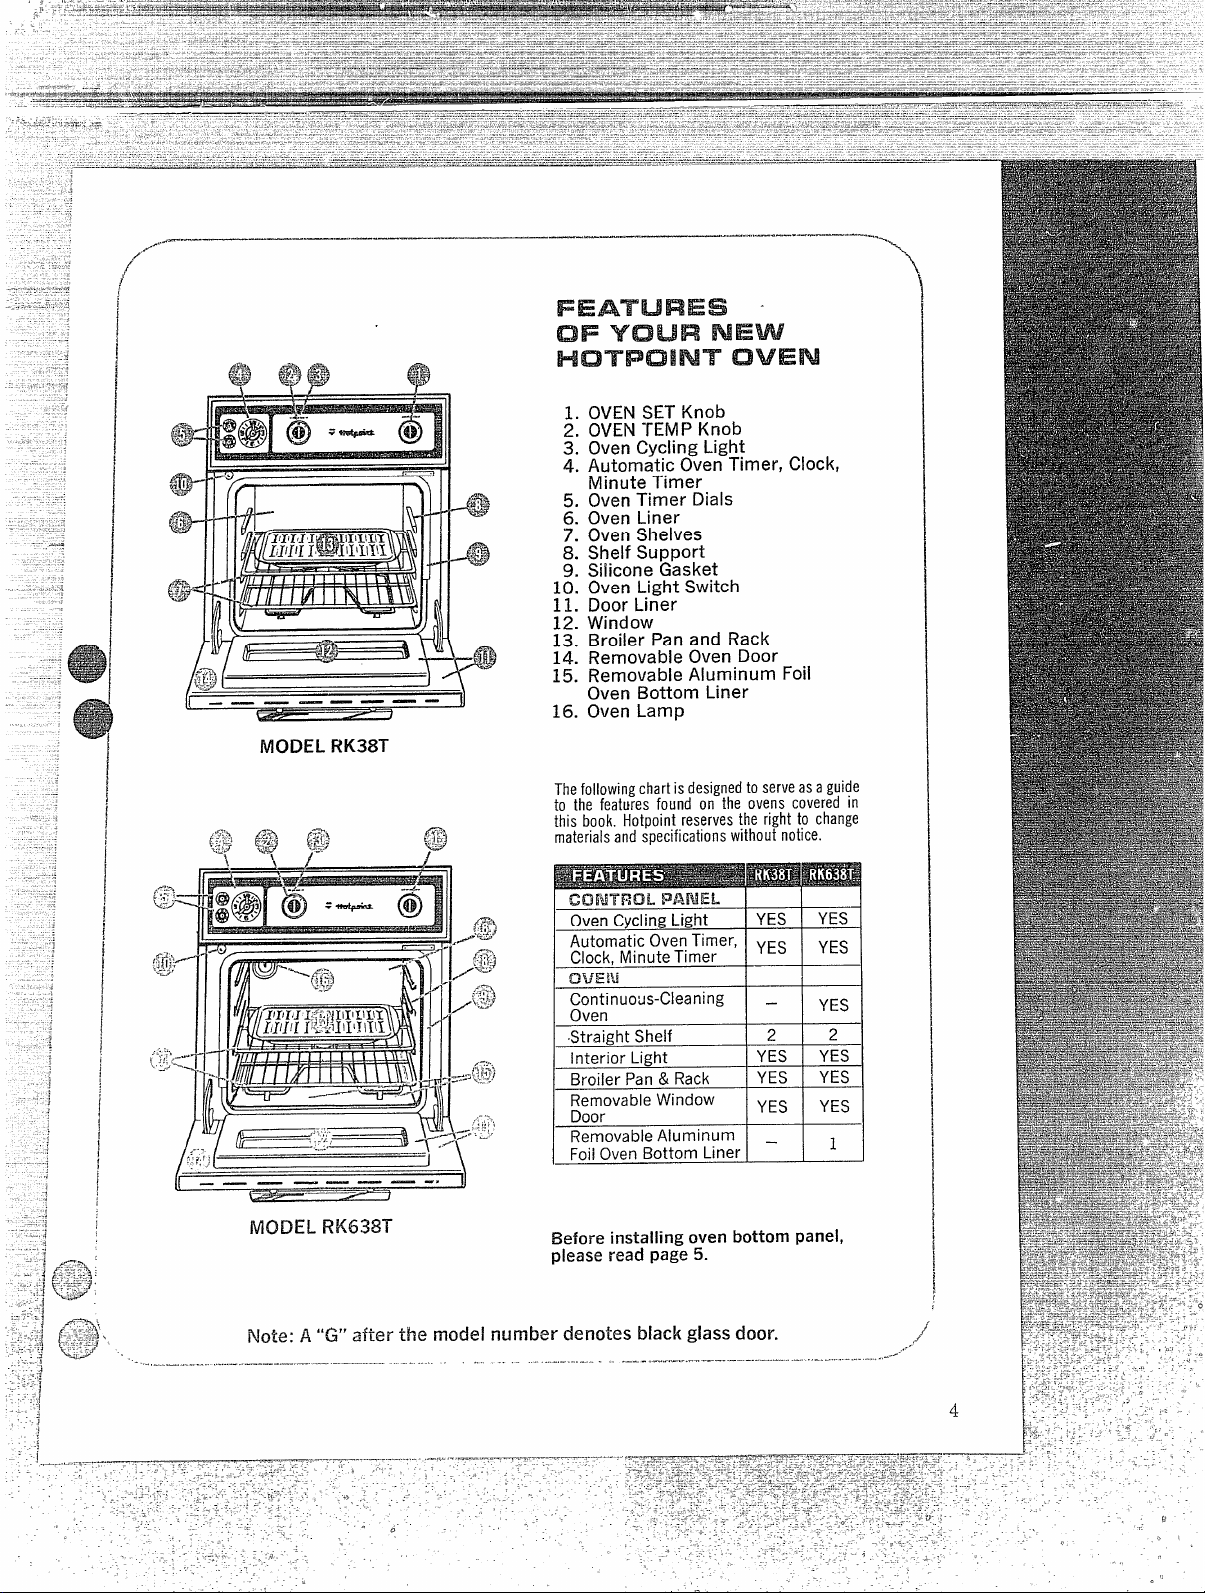
@@$@
-=?-’
MODEL RI(38T
1. OVENSET Knob
2. OVENTEMP Knob
3. Oven Cycling Light
4. Automatic Oven Timer, Clock,
Minute Timer
5. Oven Timer Dials
6. Oven Liner
7. Oven Shelves
8.
ShelfSupport
9. SiliconeGasket
10. OvenLightSwitch
Door Liner
11.
12. Window
13. Broiler Pan and Rack
14. Removable Oven Door
15. Removable Aluminum Foil
Oven Bottom Liner
16. Oven Lamp
Thefollowingchartisdesignedto serveasaguide
to the featuresfound on the ovenscoveredin
this book.Hotpointreservesthe right to change
materialsandspecificationswithoutnotice.
CONTROL P#ifi!EL
Oven Cycling Light
;y;:~$:::;y;;-er’ YES
~k~&
Continuous-Cleaning .
Oven
Straight Shelf
Interior Light
Broiler Pan & Rack
~:~rovable Window
Removable Aluminum
Foil Oven Bottom Liner
I
1
{
RIODELRK638T
J
Before installing oven bottom panel,
YES
YES
YES
YES
YES
YES
YES
2
–
2
YES
YES
YES
1
please read page 5.
,
8
Page 6
\
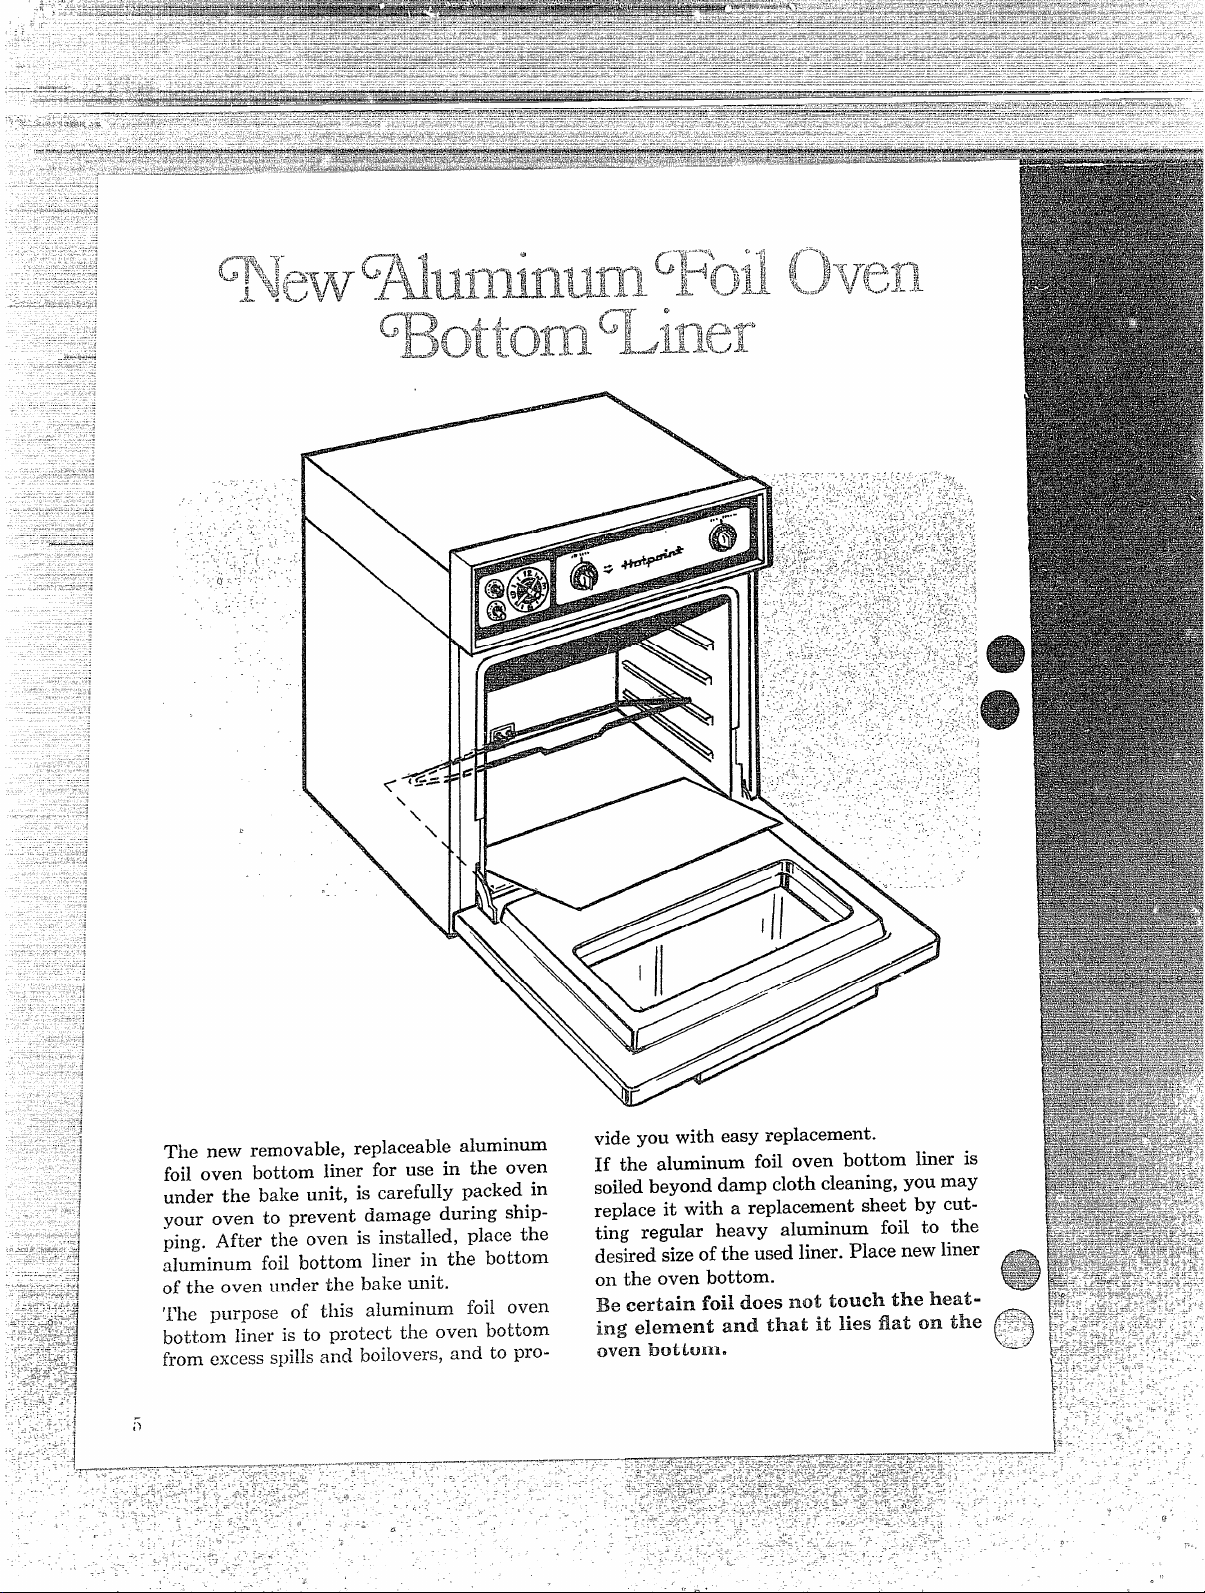
The new removable, replaceablealurnin~
foil oven bottom liner for use in the oven
underthe bake unit, is carefully packed in
your oven to prevent damage during shipping. After the oven is installed, place the
aluminum foil bottom liner in the bottom
of the oven underthe bake unit.
‘1’he purpose of this aluminum foil oven
bottom
liner is to protect the oven
from excessspillsand boilovers,and
o
videyou with easyreplacement.
If the aluminumfoil oven bottom liner is
soiledbeyond dampclothcleaning,you may
replaceit with a replacementsheetby cuttirw redar heavy al~inum foil tO the
bottom
to pro-
Page 7
Your oven is designed to give you top re-
.
.sultsin baking,roasting,and broilingwhen
usedas recommended.
. ... ..
‘.-.. ..L-,.:j,.>-&
,.1.::;, ..,,
.......----
x~; .
i;;,<<:~p:;.,
.>-,>~4;,,*~f_.~
......?
. .*G>.+
7“~zJLJJz
t,-,
s..m.!-.:
1. Look at thecontrols.Ee sureyou under-
standhow to set themproperly. See directionsfor the AutomaticOvenTimer so you
will understandits use with the controls.
2. Checkoveninterior.Look at theshelves.
Takea practicerunat removingand replac-
ing them properly, to give sure sturdy SUP-
port.
3. Read over information and tips that
follow.
4. Keep thisbookhandy soyou canreferto
it, especially duringthe first weeks of gettingacquainteciwith your oven.
,-
. r,.. . ...
“7, :! ,:
See instructionson page 16.
SHELF
The oven has two straightshelvesand four
shelfsupports for variety and flexibilityin
locatingshelves. Shelf positions are identified on the BAKE and BROIL CEIAR’TS
$===
=::~”W:>,:.,+’
:<&\.J* *~
The controlsfor theovenareryarkedOVEN
SET and OVEN TEMP. OVEN SET has
settingsforBAKE,TIMED BAKE,BROIL,
and OFF. Wheriyou turn the knob to the
desiredsetting,theproperheatingunitsare
thenactivatedfor that operation.
OVEN TEMP mair@ns the temperature
you set from WARM (150°) to BROIL
(550°). A cycling light near this control
glowsuntil oven reachesthe selectedtemperature,thengoesoff andonwith theoven
unit during cooking. PREHEATING the
oven, even to high temperaturesettings,is
speedy—rarelymore than about 10 minutes.Preheattheovenonly whennecessary.
Most foods will cook satisfactorilywithout
preheating.If you find preheatingis necessary, keep an eye on the indicator light,
andput food in theoven promptlyafterthe
light goes out.
,
..
I -. .
,- -
~.
>! ; .
The ovenlightcomeson automaticallywhen
the door is opened. Use the switchnearthe
handle to turn the light on and off when
door is closed.
6
Page 8

Whencooking a food for the first timein your
newoven,usetimegivenonrecipesasa guide.
Oventhermostats,overa periodof years,may
“drift”fromthefactorysetttinganddifferences
in timingbetweenanoldanda newovenof 5
tO IO minutes are not unusualandyou may be
inclinedto thinkthat the newoven is not performingcorrectly.However,your new oven has
been
set correctlyat thefactoryand is more
apt to be accuratethan the ovenit replaced.
1. It is recommended that you operate the
rangefor a numberof weeksto becomefamiliar
with your new oven’s performance. However,
if you find that your foods consistentlybrown
too little or too much,you may make a simple
adjustmentin the thermostat(OVEN TEMP)
knob. See section titled “Care o) Your New
Oven.”
2. Use tested recipes from reliable sources.
.Measureingredients accurately and combine
carefully. Use correct size bakingutensil.
3. Place shelf at position suggested on chart
below.
4. Preheatthe oven only whennecessary.Most
foods will cook satisfactorilywithout preheating. If you find preheatingis necessary,keep
an eye on the indicator light and put food in
the ovenpromptly after the light goesout.
5. To set oven: close oven door. Turn OVEN
SET to BAKE andOVEN TEMP to temperature on recipe or cmBakingChart.
6. Place food in oven being certain to leave
aboutl-inch of spacebetweenpansandwallsof
oven for good circulation of heat. Close oven
door. Duringbaking,avoidfrequentdoor openings to prevent undesirableresults.
7. Check foods for donenessat minimumtime
on recipe. Cook longer if necessary. Remove
foods and switch off heat. When cooking food
for firsttime in this oven,use times on recipes
as a guide. Be certain foods are done before
removingfrom oven. See Baking, Before You
Callfor Product 5’eruice.
NOTE: Informationaboutbakingat high altitudescan usuallybe obtainedat your stateagri-
culturalstation.
(
BREADS, QUiCK @
Biscuits
Coffee Cake
Corn Bread
Gingerbread
Plalrr Muffins
Popovers
Quick Loaf Bread
B, C
B, A
A, B
425-475
350-400
425-450
B
B
350
400-425
B
B
375
350-375
BREADS, YEAST @
2 loaves
Rolls, plain
Rolls, sweet
CAKES @
(without shortening)
Angel Food
Sponge
Jelly Roll
CAKES o
Bundt Cakes
Cupcakes
Fruit Cakes
Layer
Layer, Chocolate
Loaf
NOTE” When two shelt posltlons arc listed, the first one gives well browned and cooked food. If You desire a different
browrrlng, use the second shelf posltlon the next time you cook. Foods I!sted with three shelf positions cook successfully
on any posltlon Ilsted, alone or in an oven meal.
A, B
A, B
B, PI
A
A
B
A, B
B
A, B
B
B
B
375-425
375-425
350-375
325-375
325-350
375-400
325-350
350-375
275-300
350-375
350-375
350
10-20
20-30
25-40
30-45
20-30
45-60
45-60
45-60
10-25
20-30
30-55
45-60
10-15
45-65
20-25
?-4
20-35
25-30
40-60
COOKIES @
Brownies
Drop
Refrigerator
Rolled or Sliced
PIES
Frozen
Meringue @
One Crust
Pastry Shell
Two Crust
MISCELLANEOUS
Apples, Baked
Custard, CUP
Potatoes, Baked
hrs.
Puddings, Rice
Scalloped Dishes
souffle’s
,),
0, c
B, C
B, C
B, C
For best results use satin-finish (anodized)
aluminum or glass utensils; place frozen pies, in
foil plate, on bak!ng sheet
B, A
A, B
A, B, C
A, B, C
and Custard
A, B, C
325-350
350-400
400-425
375-400
400-425
A
325-350
400-425
B
400-425
B
350-400
300-350
B
325-400
B
325-375
300-350
B
450
325
25-35
10-20
6-12
7-12
45-70
15-25
45-60
12-15
40-60
30-60
30-60
60-90
50-90
30-60
30-75
..-. . .
:. --.:’”
i“i-””-”:i ‘-- -
, -.
Page 9

...--wfz+-t>
<:P;~q<Fcbt:~:3;h,d=&5
IB
~-wwY’wfJr
.
Roasting is oven cooking of tender meat or
poultry by d~y heat. Roasting temperatures
shouldbe steadyand low. (Low temperatures
keepspatteringto a minimum.)It is notnecessaryto sear,cover,basteor add water.
EDR
1. Check weightof meat,andplace,fat sideup,
on roastingrackin a shallowpan. (Broilerpan
withrack is a good pan for this.)*
2. Placein oven on shelfin A or B position.No
preheatingis necessary.
3.
Turn @EN SET to BAKE andOVEN
TEMP to 325.Smallpoultrymaybe cooked
at375forbestbrowning.
4. The RoastingGuidebelow givesapproximate
timeinminutesperpound.Thesetimesshould
onlybeusedasa guide.A meatthermometer,
insertedintothecenterof thethickestpartof
themeat,istheonlyaccuratetestfordoneness.
$EEF@
Standing Rib
Rare
fvledi urn
Well Done
Rolled Rib
LAMB
Leg
Shoulder
PORK, fresh
Loirr
Fresh Ham, Shoulder
PORK, cured
Ham, Precooked
Ham, Cook before
Eating
Shoulder, Picnic
Add 5-10 min. / pound to times given for standing rib roasts.
For boned and rolled shoulder, add 10 min. / pound to times
3-5 Ibs. 6-8 lbs.@
24-30 min. 18-22 min.
30-35 min.
35-45 min.
3-5 tbs. 6-8 Ibs.
30-35 min.
3-5 Ibs. 6-8 Ibs.
35-40 min.
14-18 min. per lb.
Under 10 Ibs.
20-30 min.
25-35 min.
5. Most meatscontinueto cook slightlywhile
standingafter being removed from the cwen.
For rareor mediuminternaldoneness,if meat
isto stand10-20minuteswhilemakinggravyor
for easier carving, you may wish to remove
meat from oven when internaltemperatureis
5-10”F below temperaturesuggestedon chart.
If no standingis planned,cook meat to suggested temperature on chart. When food is
done,turnOVEN SET to OFF.
&ol$?
a. Frozen roasts of beef, pork, lamb, etc., can
be started without thawing, but allow 10-25
minutesperpoundadditionaltime (10min.per
poundfor roastsunder5 pounds,more time for
largerroasts).
b. Thawmostfrozenpoultry before roastingto
ensureevendoneness.Some commercialfrozen
poultry can be cooked successfully without
thawing. Follow directions given on packer’s
label.
22-26 min.
28-33 min.
30-35 min.
30-35 min.
30-40 min.
10-15 tbs.
17-20 min.
$@XI.
130-140
150-160
170-185
175-185
180-185
170-175
185-190
130
155-160
170
.>---.=-.
..
i
-i- --<
t---- -# ~=,
. .
,-+ f:;jj$$’ yl;
!;. -.-:’
:=——,
.
--,, ;:7: !&-r
“-: .-j
:.-: ~
.-
. .
. .
:.?
POULTRY
Chicken
Ready-to-Cook wt,
Turkey
Ready-to-Cook wt.
VEAL
!-E% Loin, Shoulder
:!MC hos passed, check meat therrnomet:r for internal tern p=rature at flalf-hour intervals.
crcd beef, found In some markets, may require less cooking time than regular beef. When cooking tendered beef,
ate cook I
~.icll-cfonc
NOTE: Line broiler pan with aluminum fo[l when using pan for marinating, cooking with fruits, cooking heavily cured
,~leats, o r for basti n: foocl d uI-Ing cookI ng. Avoid spi IIing these materia [s on oven Iiner or door. If spi Iled, follow in struc-
IIE tl me LJsin~ shortest t Ime g!ven In mIn utes/pou nd for desired doneness. Also this type of beef is usua I[y
at170Interna I tem perotu rc.
3-5 Ibs.
35-40 min.
Under 10 Ibs. 10-15 Ibs. Over 15 lbs.
20-30 min. 20-25 min.
3-5 Ibs. 6-8 Ibs.
30-40 min.
Over 5 Ibs.
30-35 min.
15.20 min.
25-35 min.
T&h
85-190
80-185
StuKing
170-180
165
165
8
Page 10

.,.mw.=mi.-.!--his....-----.. --. ".,w..-.-.-.., ----
#+-
/
[
-..—--.—!.——
.5.... -.—”.!—-.----’---7-
—....—..”u”---
-’-,
)
Broiling is cooking foods by intense radiant
heat from the upper unit in the oven. Most
fish and tender cuts of meat can be broiled.
I?oI1ow these steps to keep spattering and
smoking to a minimum.
1. If meat has fat or gristle near edge, cut
vertical slashes through both about 2-in.
apart. If desired fat may be trimmed, leaving
a layer about I/g-in.thick.
2. Place meat on broiler rack in broiler pan
which comes with range. Always use rack so
fat drips into broiler pan; otherwise juices
may become hot enough to catch fire. Aluminum foil may be used to line broiler pan and
rack. But, be CERTAIN to cut openings in
foil, to correspond with rack so fat drips into
pan below. See note under Broiling Chart
on followingpagebeforemarinatingandus-
ing barbecuesauce.
3. Letterson charton followingpage indi-
cate whereto positionshelf for best browning while cookinginside of food to desired
doneness.
Placing food closer to top of oven increases
smoking,spattering,exteriorbrownon meat
andthepossibilityof fatson foodscatching
fire.
4. LEAVE DOOR AJAR about 3 inches—
door stays open by itself, and keeps heating
unit at proper temperature for broiling.
5. SWITCH OVEN SET and OVEN
TEMP CONTROLS TO BROIL. Be sure
word BROIL is centered at index marker.
INDEX
—1
MARKER
OVENTEhIIPSETTING
FORBROILING
Preheatingtheunitis notnecessary.*
6. Turn food only once during cooking.
Time foods for firstside as on chart. Turn
food,thenusetimesgivenforsecondsideas
a guideto preferreddoneness.(Where two
thicknessesandtimesaregiventogether,use
firsttimesgivenfor thinnestfood.)
7. Turn oven off, serve food immediately,
leavepan
outside oven to cool duringmeal
foreasiestcleaning.
Cookingtimesgivenareapproximateand shouldbe usedonly asa guide;
theyare basedon meatat refrigeratortemperaturewhenplaced in oven.
...——.————————
-—..-.—----------------—
‘::NICITE:If your oven is being operated
on lowpower(voltage),broiledfoods
--—-....--~-.:.$.=-.,”
may be lighter brown than expected, even though directions have been care-
fully followed. 13rowningcan be improved as follows:
1. l?ollow directions given above for settingup theoven,preparingfood,settingcontrolsand
leavingdoor ajar.
.2. Preheatthe broil unit for 10 minuteswith food andbroiler panoutsidethe oven.
type,thickness,etc.
:)
Page 11

.—. ... .
.- ....
.-
BEEF,GWXJN~
Well Done
BEEF STEAKS@
Thin steaks,M- %inch thick, cookthrough very quickly. For bestoutside browning, panfrying is
recommended—see
achievebest browning on secondside, cookfirst side just to change meat color then turn and
cookto doneness as preferred.
Rare
Medium
Well Done
Rare
Medium
Well Done
CHKXEN @
FISH
LOBSTERTMLS@
.Wface CookingChart If oven broiling is preferred, useD shelf position. To
1 inch thick
(1 -
l%lbs.)
1% thick
(2 -2% Ibs.)
2- 2% lbs., split
I lb. fillets
%- H inch
2 (6-8 oz.
each)
c
c
c
c
;
A
c
B
i
12
10
E
35
8
13-16
6-9
6-8
8-10
7-8
14-16
20-25
10-15
4-5
HANISLICES
Raw, Cook Before
Eating
PORKCHOPS
Well Done
CHOPS
LAMB
Medium
Well Done
Medium
Well Done
!$?.J~\pJ~~s
BAKERY
Toaster pastries
PRODUCTS
Bread (Toast) or
English Muffins
slices, % inch
1-2
(about 1 lb.)
lfiinch (l%lbs. )
2 (% inch)
2 {1 inch) –about 1 lb.
2 (1 inch)
about 10-12 oz.
2 (lx inch)
about 1 lb.
1lb.pkg.(10)
2-4 slices
1 pkg. (2)
2-split
c
B
c
B
c
c
c
El
c
c)
D
-
4
8
12
10
17
8
10
10
17
6
IZ -2
3-4
4-5
9-11
4-6
12-14
4-7
8-10
4-6
12-14
1-2
%
10
Page 12

:L”l$,:; ~q~~fl~.= ~$,
:iLJ~L3EMk+?t#
~.:<>,,
~~~.-j
u
& ~akut>=. -.
.7,.,-,.=7 @T.=.. %!i=>
,6,::[:.1;
p:;.~~j=<
i:,=$:[j(~~jt:~.;~r-j+
‘lXe Minute Timer is combined with the
range clock. Use it to time all your precise
cooking operations.
You’ll recognize the
Minut~‘l’irneras thepointerwhichis differ-
entin coior and shapethanthe clock hands.
.
Minutes me marked, up to 60, in a ring
aroundtheMinuteTimer knob.
‘N) SEri’(H-IlllWNUTX TINUH?,turn the
knob, u, IithoLLtpushing in,
until pointer
reaches numberof minutesyou wishtotime.
At the end of theset time, a buzzersounds
to tell you time is up. Turn knob,
pushing in, untilpointer reachesOFF.
without
TO SET THE CLOCK,push in the Minute
Timer knob and rotatethe clock hands or
digital figures to the correct time. The
Minute Timer pointer may move also, so
after setting the correct time, let the knob
out and turn the Timer pointerto OFF.
Page 13

The automaticoven controls are designed
for the homemakerwho can’t be tied down
tobeingin thekitchenorathomeatspecific
timesto turnan oven on or off. These controls can be presetto start and stop your
oven for you. Or, if you preferto startthe
food yourself,the timer will take over the
job of turningtheoven off.
To set the automatic ouen timer, use thetwo
dialsnext totheclock, markedSTART and
STOP. IZachdial ismarkedofl in 15minute
segmentsand numberedby the hour. The
pointerson thesedials
can be moved only
whenknobis pushedin. (Whenthepointers
areturnedyoucanheara “ratchety”sound.)
If pointercan be turnedit meansknob has
beenpushedinandpointerhasbeenset.To
becertainknobis inout position,turnknob
so pointeris at time showingon the clock.
Knob will pop out and cannot then be
turned.(Note: Beforeyou setthesedials,be
sure the oven clock shows the correct time
of the day.)
3. a. Turn OVEN SET’{:toTIME BAKE.
b. Turn OVEN TEMP* to proper tem-
perature for food to be cooked. Place food in
oven,closedoor andautomaticallytheoven
will be turned
on and off at the times you
haveset.
B. TO SET OVEN TO START IMMEDI-
ATELY AND TO TURN OFF AUTO-
MATICALLY AT A LATER TIME, follow
only A 2 and A 3 above.
C. When food is removed from oven turn
OVEN SET to OFI?.
*OVEN INDICATOR LIGHTS
at TIME
BAKE settingworkdifferentlythantheydo
at BAKE setting.Do not be concernedif no
light appears. Carefully recheck the steps
given above. If all operationsare done as
explained,ovenwilloperateasit should.
B%3mdk
W?ij%ihi!?f’’@2?IE.!!iT
~~~@gQ
A. TO SET THE AUTOMATIC OVEN
TIMER SO IT WILL SWITCH THE
OVEN HEAT ON AND OFF AUTOMATICALLY AT A LATER TIME THAN
SHOWS ON THE OVEN CLOCK, DO AS
FOLLOWS:
1.
Set START time. Push in knob on
START dial
wantoven to turnon. The illustrationshows
START pointerat3:30.
‘) Set STOP time. Push in knob on STOP-.
di:]land
to turn d.
ime at 6:00.
i
.4utomaticTimer worksonly if STOP time
is set for a later time th:ln sl,ows on rarkge
clockand on START dial.
HIM turn pointer to time you
turn pointer to time you want oven
The illustration shows the STOP
Meats,fruits and vegetablesgenerallytake
wellto automaticcooking.You cancook one
food, or several foods together as long as
theyrequirethesametemperatureandtime.
However, foodsof ahighlyperishablenature,
such as milk, eggs, fish, stuffings,poultry,
and pork, should not be cooked automatically unlessstandingtime in theovenis not
morethan2 hoursbefore andabout2 hours
aftercooking of thesefoods. In all cases,no
matterwhat the nature of the food, unless
cookingis to startimmediately,foodsshould
be thoroughlychilled in therefrigeratorbeforeplacingin theoven.
Page 14

-.
--
—.—
‘%-—-.. -—.’ -~
. . .=
Propercareandcleaningproceduresareessentialfor a long and satisfactorylife for
your oven. Included in this section are directions and Cleaning Chartsfor cleaning
all parts of the oven. When cleaning oven,
wearingof rubberglovesis recommendedto
protectthe hands.
PULL KNOB OFF OF SHAFT. NOTE
EXISTING SETTING ON BACK OF
KNOB BEFORE MAKING ANY
ADJUSTMENT. SEE SKETCH.
-.,
..=,-.,
.-=:=->$: -*=..
.-s; - :
~. g~ ~~-:
,@ ~.- ‘.-, w,-, .-.
t==~
~ !~; “ p
J gj &~: & B g ~ g-lgsk!
The porcelain enamel finish is essentially
glassfusedon steelat hightemperatureand
is breakableif misused.This finishis acid
resistant.However, any acid foods spilled
(such as lemon or other citrus fruit juices,
or mixtures containingtomato or vinegar)
shouldbe wipedup immediately.See chart
forcleaningsuggestions.
.,
‘ “ , , .- - : -- ~ - ~-,.:. -
L , -.., -: ~ }! , 1,: ,. .= ., ~ [ <~~<~~Q‘~-[,”~
-’%---———-.--.---..-----==
%
1
.
The oven lamp (bulb) is covered with a
glass,removablecoverwhichisheldin place
witha bail-shapedwire.Removeoven door,
if desired,to reachcover easily.
1. TO REMOVE, hold hand under cover
.Wit doesn’tfall whenreleased.With fingers
of same hand, firmly push back wire bail
untilit clearscover. Lift offcover.DO NOT
REMOVE ANY SCREWS TO REMOVE
THIS TYPE OF COVER.
2. Replace lamp with 40-watthome appliancebulb.
3. TO REPLACE cover, place it into
~l.ooveof lamp receptacle. Pull wire bail
forward to center of cover until it snaps
into place. Whenin place,wire holds cover
firmly,but be certainwire bail is in deP~”es-
sion in centerof cover.
4. Connect electric power to range.
- ,,-
TO REN1017Edoor, open to BROIL posi-
tion,or w%ereyou feelhinie catch slightly.
(lrnsp door at sides;
lift door up and away
f~,~nlhinges.
%%
%
%.
——.
1. If desired,broilerpanmay be lined with
-&”d
.
foil and broiler rack may be covered with
foil for broiling. ALWAYS BE CERTAIN
TO MOLD FOIL THOROUGHLY TO
BROILER RACK., AND SLIT FOIL TO
CONFORM WITH SLITS IN RACK.
Broilerrack is designedto minimizesmoking and spattering,
and to keep drippings
cool duringbroiling.Stopping fat and meat
juices from drainingto the broilerpan prevents rack from serving its purpose, and
may let juices become hot enough to catch
fire.
2. DO NOT place a sheet of aluminumfoil
over broil unit or on shelf. To do so may
resultin improperly cooked foods, damage
to oven finish,and increasein heat on outside surfacesof the range.
Page 16

--..-—.——s.. .—.—-....—.———
,f--
The top, bottom,sides,andbackof theoven
~iner,anddoor innerlinerare finishedwith
a speciul coating which cannot be cleaned
in the usualmannerwithsoap, detergents,
commercial oven cleaners,coarse abrasive
pads or coarse brushes.Their use and/or
theuse of ovensprayswillcausepermanent
damage.
The speciul
coating is a porous ceramic
materiul which is dark in color and feels
slightly rough to the touch. If magnified,
the surfacewouldappearas peaks, valleys,
andsub-surface“tunnels.”This roughfinish
tendsto preventgreasespattersfrom forming little beadsor dropletswhichrundown
the side walls of a hard-surfaceoven liner
leavingunsi.ght]ystreaksthat requirehand
cleaning. Instead, when spatter hits the
porous finish it is dispersed and is partially
absorbed. This dispersal action increases
the exposure of oven soil to heated air,
whichresultsin oxidationof soil. This finish
alsoreducesthevisualeffectof residualsoil.
It may not disappear co~mpletelyand at
some time afterextendedusage, stainsmay
appear. See “To Clean Oven” at right to
minimize this effect.
special conting
The
:mnounts of spatter.
works best on small
It does no-t work well
with larger spills, especially sugars, egg or
—.—.-...--. t.r.t.!—— -——.——--—,
dairy
mixtures. For this reason, the oven is
equipped with a removable, replaceable al
rninumfoil oven bottom liner which protects
the porous finish
from spillovers. Avoid spills on inside surface of the oven door. The special oven liner
finish is not used on oven shelves. Shelves
are removable and can be taken to the sink
for cleaning. These parts clean easiest when
soil is still moist, before it has carbonized or
burned on. Also, they can be cleaned with
abrasive and commercial oven cleaners. Follow the manufacturer’s directions regarding
use of gloves and eye protection when using
wvencleaners. Also, these materials must be
used with the parts outside theoven to avoid
damage to the special coating.
on the bottom of the oven
--%,k
1. Let rangepartsget cool before handling.
It is recommendedthat rubber gloves be
worn when cleaningrange parts manual~y.
2, Remove allcookingutensilsincludingthe
broilerpan and rack.
% Remove oven shelves and clean them‘-?@&:
-.
manuallywith scouringpads or mild abrasive.
To removeshelvesfromtheoven,whencool,
1
:.cs=-,+
E:;
d
~:>
----2
c
15
Page 17

~., Remove excess spillsand boilovers from
umin.umfoil oven bottom liner before re-
moving it from oven. This is to prevent
excessliquidsfrom spillingonto the porous
finish. Then remove aluminum foil liner
manually.(Beforecleaningor removingthe
aluminumfoil liner, lift bake unit out of
theway.)
If the alum.in
um foil is soiledbeyond cleaning with damp cloth, replace it with a replacementsheet.You may makea newtray
by usingthe old sheetas a patternand cut
thenewlinerfromregularheavyweightaluminumfoil, then placeon the oven bottom.
..,....--—
-—.——-. >.-.-...--..,—.—..,..-=.-=..+.
5. Clean oven window. Use mild nonscratching cleanser and damp cloth. Avoid
spilling water or cleaner on porous surface.
6.
soil visibility n-mybe reducedby operat-
ing theoven at 400°F.Chxsedoor;set oven
switchtobakeandoventemperaturecontrol
to400°F.Timeforatleast4hours.Repeated
cycles may be necessary before irnprcwe-
mentin appearanceis apparent,partia.darlY
on ovendoor.Formoderatetoheavy soiling
of ovendoor, use methoddescribedin itern
(7) belowbefore r
unning400”F. cycle. The
oventimercan be used to controlthe cycle
automaticallyat a timeconvenientfor you.
Some slight smokingmay occur, similarto
that which may occur during other Time
Bakecooking.
DURING ‘THE OJ?ERATION OF THE OVEN, THE DOOR,
WINDOW AND OTHER. RANGE
SURFACES WILL GET’ HOT
ENOUGH TO CAUSE BURNS. DO
NOT‘i%XHX1.LET THE RANGE COOL
BEFORE REPLACXNG ALUIMINU~
FOIL OVEN BOTTOM LINER AND
OVEN SHELVES IF THEY WERE
REMOVED.
If a spillover or heavy soiling occurs on
7’.
the
porous surface, as soonas practical after
the oven has cooled, remove as much of the
soil as possible using a small amount of
water and a stiff bristle nylon brush. When
using water, use it sparingly and change it
frequently, keeping it as clean as possible,
and be sure to blot it up with paper towels,
cloths, or sponges. Do not
rub or scrub with
papertowels,cloths or sponges,since these
will leaveunsightly lint on the oven finish.
If waterleavesa whitering on the finishas
it dries, apply wateragain and blot
it with
a clean sponge, startingat the edge of the
ring and workingtoward the center.
Use care in removingandreplacingalu-
minumfoilovenbottomlinerandshelves,
andin placingandremovingdishesand
to avoid scratching, rubbing or
food
otherwise damaging the
porous finish on
theovenwallsanddoor.
Do not usesoap,detergent,commercialoven
cleaner, silicone oven sprays, coarse steel
padsor coarsebrusheson theporous surface.
These productswill spot, clog, and mar the
poroussurface andreduceitsabilityto work.
Page 18

—.....
NOTE:Letrm~a
part(s)coolWore cleaoingmamfally. Itis rwOmmwtletlthat ruhberfjlovesbeworn to protecttheIxm.ts.
I
Broiler Pan
and Rack
Control Knob$
Heatin Units
F(Near 100rand
Top of Oven)
o
Out~j~~ Finish
IMetal
Porcelain
Enamel
ven Gasket
Silicone Rubber
(Heat Resistant)
heives
Soap and Water
Soap-Filled
Scouring Pad
Plastic Scouring PaG
Mild Soap and
Water
Soap and Water
Soap and Water
‘afYzwt:’‘r
Soap and Water
Soap and Water
Soap and Water
Soap-Filled
Scouring Pad
Commercial Oven
Cleaner
(Do not let soiled pan and rack stand in oven to cool.) Drain fat, cool
pan and rack slightly. Sprinkle on detergent: fill pan with warm water.
Spread cloth or paper towel over rack, let stand a few minuw=i. Wash,
scouring if necessary. Rinse and dry, (Or wash in dishwasher.)
Pull off knobs. Wash gent$! but do not-immerse in water. Dry and
return knobs to same locat~oris o,n range, matching flat area On knob
and shaft.
Heating units do not require manual cleaning: soil burns off when unit
is heated. The bake unit is hinged so you can lift it to reach oven floor.
The broil unit is permanently attached.
Wash all glass with cloth dampened in soapy water. Rinse and polish
with dry cloth. Knobs on control panel are removable, if desired, If
knobs are removed, do not allow water to run down inside surface of
glass while cleaning.
Wash, rinse, then polish with dry cloth. DO NOT USE steel wool,
abrasives, ammonia, acids or commercial oven cleaners which may
damage flrrish.
Acids–wipe immediately if range is hot; use dry paper towel or cloth.
When surface is cool, wash and rinse. Other–such as fat smatterings,
etc., wash with soap and water when cooled, rinse. Polish with dry cloth.
Avoid cleaning powders or harsh abrasives which may cause scratching
of surface. See note on porcelain enamel. Care Section.
Locate when door is open. Clean off soil with sudsy water and rinse
thoroughly.
For cleaning, any materials mentioned here can be used. Rinse thoroughly to remove all materials after cleaning.
Note: Some commercial oven cleaners cause darkening and discoloration. When using for first time, test cleaner on small part of shelf and
check for discoloration before completely cleaning.
USE THESE DIRECTIONS FOR STANDARD OVEN ONLY. FOR CONTINUOUS CLEAN ING OVEN: Refer to
“Oven Care’” section, pages 15 and 16, for directions on care of special porous ceramic coating.
/en Door
Inside”: (Liner}
‘en Llncr’
CAUTION: When
n-use ll~;ht bulbs
:an bccomf? warm
?nough to break
f touched with
nofst cloth or
OWCI. When clearing.,avoid warm
~mps with clear-
ingcloths If lamp
over Is removed.
;ce Lamp Replace-
7erl t, C’<?r e
~ection )
Snllla~c of marl nadcs.
~I~nle~~Ia[ely wlt h a paper toivcl When su rfac~ Is cool, clean and rtrise.
[7
See Column at Right
Soap and Water
Comlmerclal Oven
Cleaner
S;:;-~;;d Scour-
FOR STANDARD OVEN: Remove door: see directions, Care Section. DO
NOT place door under running water, or immerse. Use directions for
cleaning as for Oven Liner, below.
Cool before cleanln .
FOR LIGHT SOIL: requent wiping with mild soap and water ( articu-
Iarly after cooking meat) will prolong the time between major c caning.
Rinse thorou~hlv. NOTE: Soa~ Iett on liner causes additional stains when
oven is rehea?ed.
FOR HEAVY SOIL: Choose a non-abrasive cleaner and follow label instructions, using thin la c!r of cleaner. Use of rubber gloves is recommended: Wipe or rub Iig tly on stubborn spots.
Rinse well. Wipe off any oven cleaner that gets on thermostat bulb. When
rinsing oven after cleaning, also wipe thermostat bulb, found in back, or
on side, near top of oven.
F
K
r
Page 19

To%/eTimeand
!, ., [..:
beforeyoucdl forserwice, check the Solver
if vou have a ~roblem. it mav be minor. you may be able to correct it Yourself.Just
..
us~-~his-Prob’lem Solver to- locate your problem and then follow the suggested
recommendations.
Check to be certainstep-by-stepdirectionswere
followedcorrectly.Reviewpagesonuseoftimer.
Checkmaterialandsizeofbakingutensil;placementof shelfandfoodinoven.If theovenwas
useclforbroiling,justbeforeitispreheatedfor
bakingafoocl,turntheovencompletelyoffand
openthedoor
utes ). Then C1OSCthe oven door and preheat as
directed on
-,,! .,
“!
9
]](’ SLlI”(2 ()\7~~hT ‘l’~~p ~Ild o~’~~ s~rr 2iI”e Set
at
1311011..If there was excessive smoking and
sl)iit,tol.illg: JYO1.()sh(~]f
suggested on broiling chnrt’? If aluminum
tio~
foil was used on broil rack, u-as it hancllccl acc~)r(ling to directions<?
wide so it can cool ( b to 10 min-
Bahin.gpage.
andbroiler panat Posi-
Wi.ff-ief%!Maned the P53r%sd
~~~~f-j~~,qg~>p~
l+~f~pki g-1.g
men$+~~~e ~~~~
Thedifficultymightalsobeinthemaindistributionpanelofyourhouseby ablownovencircuitfuse, a trippedovencircuitbreaker.the
mainfuse,orthemaincircuitbreaker,dependin upon.the natureof the powerSUPPIY.If a
circuitbreakeris involved,resetit. If thecontrolbox employsfuses,the ovenfuse (a cartridge-type)shouldbe changed.BUT ONLY
BY SOMEONEFAMILIAR WITH ELECTRICALCIRCUITS.
Apartmenttenantsandcondominiumowners
shouldrequesttheirbuildingmanagementto
performthischeckbeforecallingforservice.
If afterreplacingtheovencircuitfuseorresettingthecircuitbreaker,thefuseblowsorcircuit
breakertripsopenagain,callyourserviceman.
I
WHENYOU CALL HOTPOINTFOR SER-
~ltc~ helptllemgiveyou
1. Givinganaccuratedescriptionofthetrouble.
cTivh~ thecomplete model or catalogue nunl-
f?.
ber of your oven. Below is an example of name
plate. Locate name plate: open oven door and
look aboveoven opening.
,-- ....—
,~: 1
I
; @ “SE ON3WI17E60HZ *C ONLY
‘
I
h,ADC IN U S A
——.. -.—
APPLIANCE PARK+%+
MODELNO
tiwc~ ‘ER’’LNO “ ,
prompt service by:
-.—
%nRw:M%’@L:’o::” )
0
-—
-.—
18
Page 20

AL4B,4rtiA
Birmingham -35210
2500 Crestwood Boulevard
(205) 956-0333
(Decatur-Huntsville)
Huntsville -35805
1209 Putnam Drive
(205) 830-0150
Mobile -36606
1107 Beltline Highway South
(205) 471-1451
AFi;ZONA
Phoenix -85031
25 South 51st Avenue
P.O. BoX 14278
(602) 272-9345
Tucson -85705
2015 North Forbes Boulevard
Suite 111
(602) 623-8415
A?KANSAS
Little Rock -72209
8405New Benton Highway
(501)568-7630
~~:}>~~;~~~
(San Bernardino-Riverside)
Bloomington -92316
10121Cactus Avenue
(714) 877-3434
(San Francisco)
Burlingame -94010
1649Adrian Road
(415)981-8760
Fresno -93727
1809North Helm Street
(209)255-1851
LosAngeles -90058
2815 East 46th Street
(213) 586-5480
Sacramento -95825
1721Bell Street
(916)929-2247
Sari Diego -92101
3554 Kettner Boulevard
(714) 297-3221
San Jose -95123
5761-B Winfield Blvd.
(408) 629-3500
Van Nuys -91405
6843 Lennox Avenue
(213) 989-5710
c 34.2 !;,’!DQ
Colorado Springs -80909
1865N. Academy - Suite B
(303) 597-8492
Denver -80207
rj~~oEast 39th p,venue
(303)320-3301
. .
.
,-~;-j~:;:;-:-
ijcig’~port -06604
615 North Washington Ave.
(203) 367-5311
East Hartford -06108
265 Prestige Park, Plaza3
(203) 528-9811
DELAWARE
(Brandywine - Wilmington)
Glen Mills, PA -19342
BOX 210
R.D.#2.
(215)358-1500
DISTR:CT OF COLUM13iA
Jessup, MD -20794-0110
8201Stayton Drive
BOX 127
P.O.
(301)953-9130
FLORIDA
Fort Lauderdale -33309
1101West McNab Road
(305) 974-6708
Fort Meyers -33901
1910Courtney Drive
(813) 939-2812
Jacksonville -32205
5226 Highway Avenue
(904) 783-1330
(Pompano-W. Palm Beach)
Lake Worth -33460
1802 Madrid Avenue
(305) 655-7040
Miami -33167
3200 N.W. 1IOth Street
(305) 685-5144
Orlando -32807
6545 East Colonial Drive
(305) 273-6370
Tallahassee -32301
1205South Adams Street
(904) 222-6931
Tampa -33611
5201 S. Westshore Boulevard
Box 13708- Interbay Station
(813) 837-1906
GE13RGfA
Atlanta -30325
1695 Marietta Boulevard
P.O. Box 19917
(404) 352-6000
Savannah -31406
211 Television Circle
(912) 925-0445
P,/;tV.fi,i!
Honolulu -96813
404 Cooke Street
(808) 533-7462
IG::; :12
(Boise)
Garden City -83704
5250 Chinden Boulevard
(208) 376-5880
1205 Nor[h Hagen
(217) 359-4088
Chicago -60638
5600West 73rd Street
(312)594-2424
Elk Grove Village -60007
10 King Street
(312)593-2525
Lombard -60148
837-B35 Westmore Avenue
(312)629-8010
Peoria -61614
7708 North Crestline Drive
(309) 692-5070
Rockford -61107
401 North 2nd Street
(815)962-7200
Springfield -62702
2252South 15th Street
(217)753-8088
INDIANA
Evansville -47714
1016-K S. Weinbach Avenue
(812)476-1341
Fort Wayne -46808
4632 Newaygo Road
(219) 484-9005
Gary -46409
5185.BroadwaY
(219) 981-2533
Indianapolis -46219
6233 Brookville Road
(317) 356-8861
South Bend -46613
1902Miami Street
(219) 288-0685
IOWA
Cedar Rapids -52405
118 First Street, N.W.
(319) 366-8579
Davenport -52802
1074 South Dittmer
P.O. Box 3188
(319) 326-5101
Des Moines -50313
1637 N.E. 58th Avenue
(515) 266-2191
Waterloo -50703
2829 Falls Avenue
(319) 236-1393
I{ANSAS
Kansas City -66115
2949 Chrysler Road
(913) 371-2242
Wichita -67211
820 East Indianapolis
(316) 267-3366
~-<~ij”~”~j~:;:}’
Lexington -40505
1144 Floyd Drive
(606) 255-0848
Louisville -40218
4421 Bishop Lane
P.O.
BOX 32130
(502)452-3511
LOUISIANA
Rouge -70814
Baton
2935 Crater Lake
(504) 926-5062
(New Orleans)
Harahan -70123
701 Edwards Avenue
(504) 733-7901
Shreveport -71102
1430Dalzell Street
(318) 425-8654
MAINE
South Portland -04106
54 Darlincl Avenue
(207) 775=6385
NlA13YLARlD
Salisbury -21801
Twilly Centre
329Civic Avenue
(301) 742-3900
JessuD-20794-0110
8201 Stayton Drive
BOX 127
P.O.
(301)953-9130
MASSACHUSETTS
(Cape Cod)
Hyannis -02601
80 Enterprise - Unit 11
(617) 771-5905
Pittsfield -01201
1450 East Street
(413) 499-4391
(Boston-South)
Westwood -02090
346 University Avenue
(617) 329-1250
(Boston-North)
Woburn -01801
57 Commerce Way
(617) 944-7500
iVllCHiGAN
Grand Rapids -49508
350 28th Street, S.E.
(616) 452-9754
Lansing -48912
1004 E. Michigan Avenue
(517) 484-2561
Troy -48084
1150 Rankin
(313) 583-1616
Westland -48185
953Manufacturer’s Driv,.
(313) 584-5190 -=:Q;
Drive
~v::N:~~~QT$$,
(Minneapolis-St. Paul) “-Edina -55435 ~_~.
7450 Metro Bouleva -~j:j~.
(612) 835-5270 . -=
(J
.—...-
..4.-,(.
~:<.=--:>=,-
o
Page 21

F.fllszlssJPPl
Jacks~n-39209
3251ri6ustrial Drive
(601)352-3371
SSQURI
M!
Kansa~City, KS -66115
2949Chrysler Road
(913)371-2242
St. Lou}s-63178
1355V:arson Road, North
P.o. Ba. 14559
(314)993-6200
Springfield -65907
1334Y:estSunshine
(417)ml-0511
NEBRASKA
Lincoln -68503
1145fi;orth 47th Street
(402)464-9148
Omahz -68117
6636‘“F”Street
(402)331-4045
NE\j~~A
LasV~as -89109
3347S~Hiahland Drive
6465 S. Virginia Street
oun: Hollv -08060
Route S8&“Easlick Avenue
(609) 261-3500
North Caldwell -07006
5 Fa!rfield Road
(201) 256-8850
(Asbury Park)
Oakhurst -07712
2111 Highway 35
(201) 493-2100
Vineland -08360
749 North Delsea Drive
(609) 696-1506
NEY; :: EXICU
Albuquerque -87107
3334 Princeton Drive, N.E.
(505) 834-1861
NEw ‘“’.:nK
Albany -12205
Interstate Avenue
2
(518) 438-3571
Brook:yn -11234
5402 ;{’.enue “N”
(212) 253-8181
Buffalc - “4225
3637 union Road
(716) C36-2268
(Westc’lester County Area)
Elrnsfcrd -10523
Fairvleiv Indus[riat Park
Route =9-A
(Nassau-Suffolk County)
Melville -11747
336 South Service Road
(516) 293-0700
(Orange County Area)
Newburgh -12550
1135Union Avenue
(914)564-2000
Rochester -14622
1900Ridge Road East
(716) 544-7100
Ronkonkoma -11779
76 Union Avenue
(516) 467-7700
Syracuse -13204
965 West Genesee Street
(315) 471-9121
NORTH CAROLINA
Charlotte -28234
700Tuckaseegee Road
P.O.
BOX 34396
(704)372-8810
Greensboro -27406
2918 Ba!tic ,Avenue
(919) 272-7153
Raleigh -27604
2013 New Hope
Church Road
(QI9) 876-5603
OHIO
Akron -44319
2262 S. Arlington Road
(216) 773-0361
Cincinnati -45242
10001Alliance Road
(513) 745-5500
Cleveiarid -44142
20600 Sheldon Road
(216) 362-4200
Columbus -43212
1155West Fifth Avenue
(614) 294-2561
Dayton -45414
5701 Webster Street
(513) 898-7600
Toledo -43611
3300 Summit Street
(419) 729-1651
G:<LAF!Of\fA
Oklahoma City -73118
3228 North Santa Fe
BOX 18669
P.O.
(405) 528-2381
Tulsa -74112
6913 East 13th
(918) 835-9526
oR5(20i’!
(Portland Area)
Beaverton -97005
14305 S,W, Millikan Way
(503) 646-1176
Eugene -97402
1492 West Sixth Street
(503) 342-7285
.,..;-! .,(}, .-., t,.
... .
.>,l-. ,,!. }t,
—: ,,,
(Brandy wine-Wilmington)
Glen Mills -19342
BOX 210
R.D. /12,
(215) 358-1500
Johnstown -15905
214Westwood Shopping Plaza
(814)255-6721
(Harrisburg)
Camp Hili -17011
2133Market Street
(717)761-8185
Monroeville -15146
150Seco Road
Monroeville Industrial Park
(412)665-3700
Philadelphia -19115
9900 Global Road
(215)698-3270
(Allentown)
Whitehall -18052
1906 MacArthur Road
(215)437-9671
Rf-fODEISLAND
East Providence -02914
1015Waterman Avenue
(401) 438-0300
SOLITt-fCAROLiNA
Columbia -29602
825 Bluff Road
Box 1210
/
(803)771-7880
Myrtle Beach -29577
702 Sea Board Street
Sea Board Industrial Park
(803)626-7411
N. Charleston -29405
7325-B Associate Drive
Pepperdan Industrial Park
(803) 552-5193
(Greenville)
Taylors -29687
25 Hampton Village
(803) 292-0830
TENNESSEE
Chattanooga -37403
613 East 1lth Street
(615) 265-8598
Johnson City -37601
2912 Bristol Highway
(615) 282-4545
Knoxville -37919
3250 Mynatt Street, N.W.
(615) 524-7571
Memphis -38118
3770 South Perkins
(901) 363-1141
Nashville -37204
3607 Trousdale
(615) 834-2150
“~.~~p.s
Austin -78704
2810 S. First Street
(512) 442-7893
Corpus Christi -78415
3225 Ayers Street
(512) 884-4897
Dallas -75247
8949 Diplomacy Row
P.O.
BOX 47601
(214) 631-1380
El Paso-79925
7600Boeing Drive
(915) 778-5361
(Brownsville)
Harlingen -78550
1204North Seventh
(512)423-1204
Houston -77207
P.O.
BOX 26837
2425 Broad Street
(713)641-0311
Lubbock -79490
4623 Loop 289 West
BoX 16288
P,O.
(806)793-1620
(Odessa)
Midland -79701
BOX 6286
P.O.
Midland Terminal
(915) 563-3483
San Antonio -78216
7822Jones-Maltsberger
(512) 227-7531
UTAH
Salt Lake City -84125
2425South 900 West
P.O. Box 30904
(801) 974-4600
VIRGINIA
Fairfax -22031
2810 Dorr Avenue
(703) 280-2020
Norfolk -23502
4552 E. Princess Anne Dr.
(804) 857-5937
Richmond -23228
2910 Hungary Spring Rd.
(804) 288-6221
WASHINGTON
(Tri-City)
Kennewick -99336
Union Square
Suite 206
101 North Union Street
(509) 783-7403
Seattle -98188
401Tukwila Parkway
(206) 575-2711
Spokane -99206
9624 E. Montgomery St.
(509) 926-9562
WEST VIRGINIA
(Charleston)
Huntington -25704
1217 Adams Avenue
BOX 7518
P.O.
(304) 529-3307
Wheeling -26003
137 North River Road
(304) 283-8511
~lisCQNS~N
Appleton -54911
343 W. Wisconsin Ave.
(414) 731-9514
Milwaukee -53225
11100 W. Silver Spring Rd.
(414) 462-9225
I
Page 22

Your new oven is a well designed
and engineered product.
left the factory, it went through
rigorous tests, just to make
it wasas defect-free as possible.
you have a warranty to pro-
And
tect you against any manufacturing defects during the early
period of your oven’s life.
Now you can have the same
trouble-free and surprise-free ser-
vice for as long as you own your
oven. You can buy a Hotpoint
“.-
‘-: Service Contract.
.. .
usuallyjust pennies a day
For one low fee
. .Hotpoint will take care of any
repairs your oven needs—both
parts and labor. Youare protected
r the length of your contract<
n when costs go up, you pay
Lhingmore.
&
nt more information? There’s
bligafion. You can get infor-
Ion on Service Contracts any
time. Just write your name and
address, date of installation, and
the model and serial number of
your appliance and send to:
Manager, Service Contracts
Hotpolnt
WCE-315
Appllance Park
Louisville. Kentucky 40225
Before it
sure
If you’re the kind of person who
likes to do-it-yourself—or if you’re
interested in saving money on
out-of-warranty repairs—Hotpoint
now offers some real help:
Sfep-t&Step Repair Manual
You can use this manual to solve
common repair problems.
Hotpoint makes it easy because
your manual contains important
do-it-yourself information:
e charts to help you
diagnose
problems
@easy to understand instructions
o step-by-step photos with repair
procedures
e a skiil level index
o the recommended tools needed
to perform repairs
Replacement Parts
When repairing your appliance, be
sure to use authorized Hotpoint
replacement parts. Each part is
packaged in a color coded box
with:
e easy parts identification
e estimated time of repairs
s siep-by.step instructions
o recommended tools
Where to Purchase Step-by-S!ep
Repair Manuals and Parts
You can purchase t-fotpoint repair
manuals and replacement parts
for your appliance from authorized participating Hotpoint
dealers.
NOTE: Of course, repairs should
be attempted only by individuals
possessing adequate backgrounds of electrical, electronic
and mechanical experience. Any
attempt to repair a major
appiitmce may result in personal
injury and property damage.
In many cities, there’s a Hotpoint
Factory Service Center. Call, and
a radio-dispatched truck will
come to your home by appointment—morning or afternoon.
Charge the work, if you like. All
the centers accept both Master
Card add Visa cards. (See page 24.)
or look for Hotpoint franchised
Customer Care” servicers. You’ll
find them in the Yellow Pages
under “HOTPOINT
CUSTI)MER
CAREU SERVICE” or “GENERAL
.~l. ECTF3IC—HOT?OINT CUS-
If you are dissatisfied with the
service you received, here are
three steps you should follow:
First, contact the people who ser-
viced your range. Explain why you
are dissatisfied. In most cases,
this will solve the problem.
Next,if you are still dissatisfied,
write all the details—including
your phone number—to:
Manager, Consumer Relations
Hotpoint
WCE-312
Appliance Park
Louisville, Kentucky 40225
Finally, if
resolved, write:
Major Appliance
Consumer Action Panel
PCINorth Wacker Drive
Chicago. Illinois 60606
yourproblem is still not
This panel, known as MACAP, is a
group of independent consumer
experts under the sponsorship of
several industry associations. Its
purpose is to study practices and
advise the industry of ways to
improve customer service.
Because MACAP is free of
industry control and influence, it
is able to make impartial recommendations and consider each
case individually.
Page 23

..
.
.-
.—.....U.-.
—
Save prcsi of originalpurchasedatesuch as your sales slip or canceiled check to establish warranty period.
—-.+.%.—G
‘~$’~~”~ [~
—
FULL ONE”YIZAR
For one year from date of original
purchase,we will provide,free of
charge,parts and service labor in
your home to repair or replace
part of the rangethat fails because ‘ashingt?nI ‘“C” ‘n‘taska ‘he
of a manufacturing defect.
e Service trips to your home to
teach you how to use the product.
Readyour Useand Care material.
If you then have any questions
about operating the product,
please contact your dealer or our
Consumer Affairs office at the
address below.
This warrantv is extendedto the
original purc~aser and
ing ownerfor products purchased
for ordinary
mainland states, Hawaii and
any
warranty
is LIMITEDbecauseyou must pay
to
ship the product to the service
shop or for the service technician’s
travel costs to your
All warranty
by our Factory Service Centersor
by our franchised Cus?omerCare@
servicers during normal working
home use in the 48
IS the same except that it
servicewill be provided
anysucceed-
home.
u
I_E_A
~ Improper installation.
If you have an installation problem,
contact your dealer or installer.
Youare responsible for providing
adequate electrical, exhausting
and other connecting facilities.
 Loading...