

Page 1
--’’-
*
—.—
W get
BEST
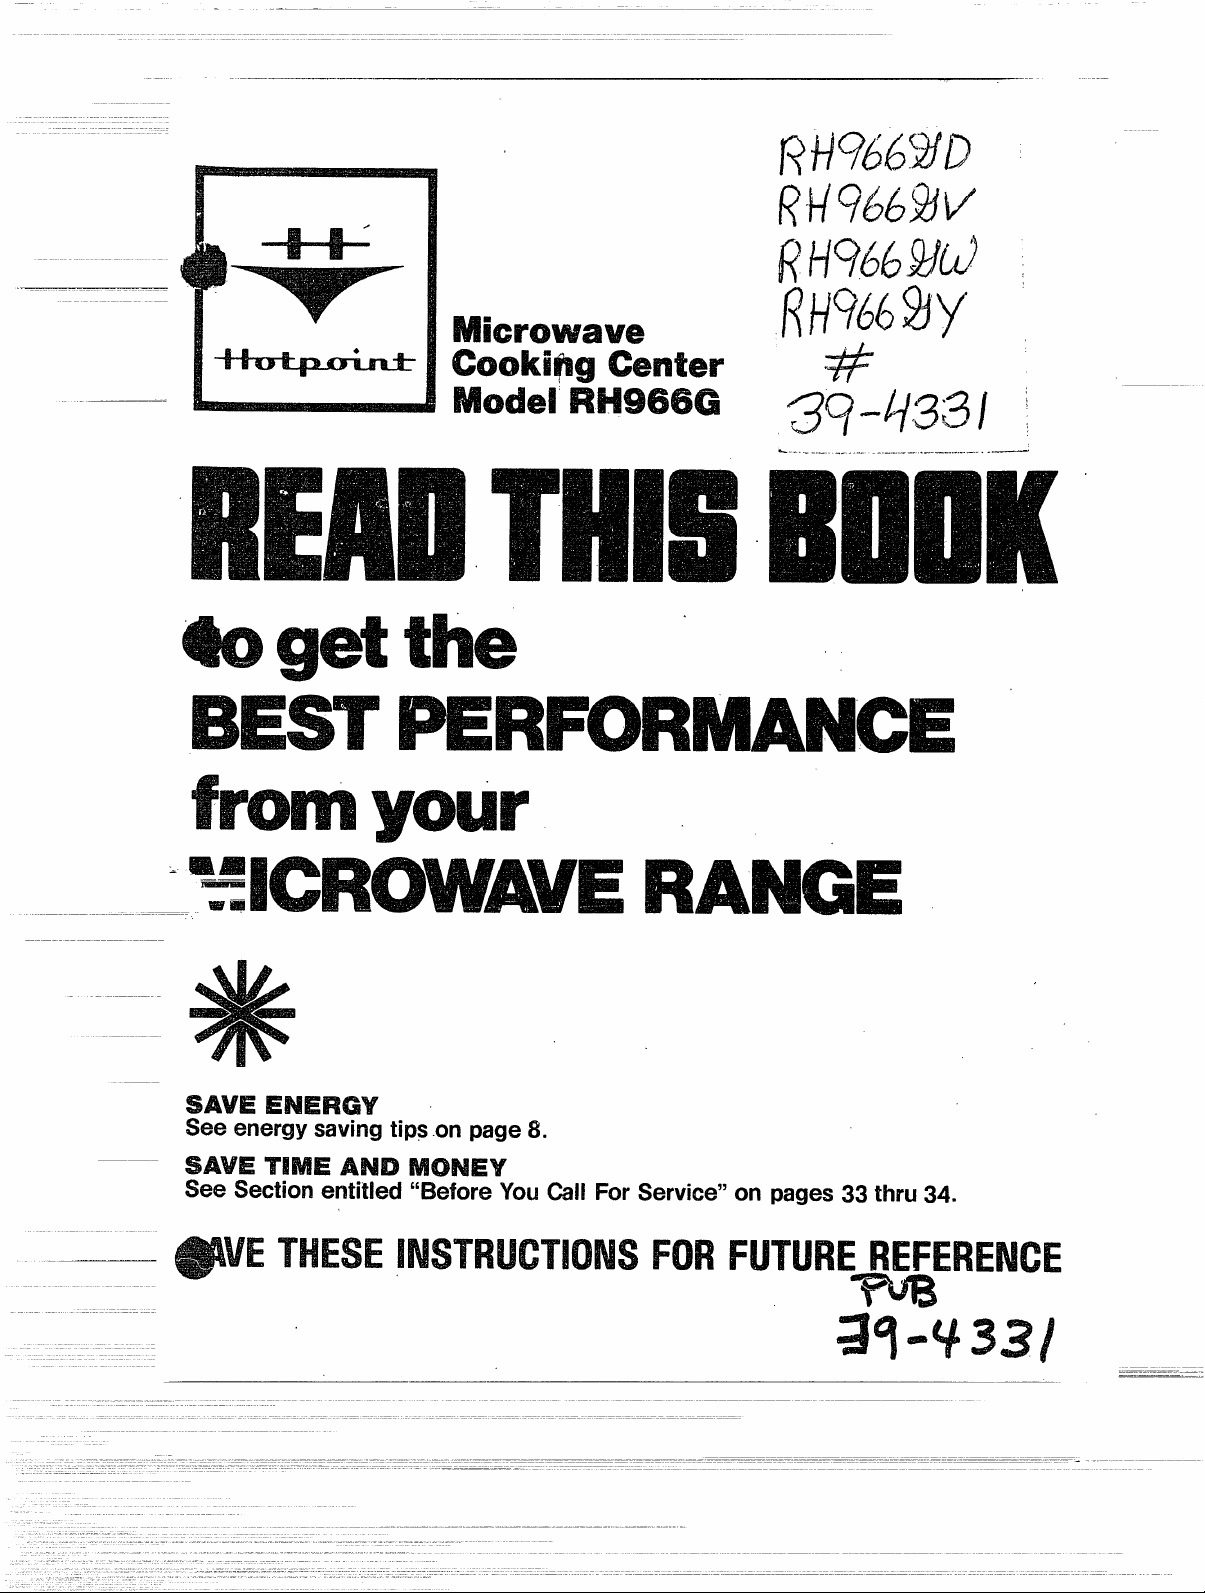
Microwave
cooki~gcenter
ModelRH966G
.
#
=----.. ...... -.--—-.——..—-- ..—
the
ERFORMANCE
f~Omyou~
._:YICROWAVERANGE
w
-4mafsa
*
SAVE ENERGY
See energysavingtipson page8.
SAVE TnME AND MONEY
See Sectionentitled “BeforeYouCallForService”on pages33 thru 34.
@vETHESEINSTRUCTIONSFOR
FUTUREREFERENCE
M
Page 2

DearXzcrowdue ~ookifig ~effter Owlzer~
It is our sincere hope that you enjoy every feature of your newoven.
If you have any questions about your new oven, how to useany feature a different way, or special cookingtechniques
that are not answered in the Use and Care Book which comes with your oven, pleasewrite or call the Hotpoint COn-
would like to hear from you.
Your’Hotpointovenhasa nameplateon which is stampedthe modelnumberand serial number.To
locate nameplate,openconventionalovendoorand lookat frame aboveovenopening.
Modelandserial numbersarealso onthe PurchaseRecordCardwhich camewith your range.Before sendingin this card, pleaserecordthe numbersin the spacebelow,or get them from nameplate describedabove,and record here.
ModelNumber
Pleasereferenceboth these numbers in any future correspondenceor productservicecalls co
cerningyouroven.
It is designed to give you dependable cooking re-
Serial Number
ELECTRICALLY
When you get your new range...
Have it installed and properly grounded by a qualified
Have the installer show you the location of the range circuit breaker or fuse, and
mark it for easy reference.
Don’t assume that you know how to operate all parts of the range. Some features -
may work differently from those on your previous range. ~
Do take the time to read our suggestions for best use.
installer.
m
When usingyour range...
e DO NOT TOUCH HEATING ELEMENTS OR INTERIOR SURFACE OF OVEN.
These surfaces may be hot enough to burn even though they are dark in color.
During and after use, do not touch, or let clothing or other flammable materials
contact any heating elements or interior area of oven until all of these areas
have had sufficient time to cool. Other potentially hot surfaces include the
cooktop and areas facing the cooktop, oven vent openings and surfaces near
the openings, crevices around the oven door and the edges of the door window.
.
1
Page 3
——-—
Don’t leave children alone or- unattended in the area where a range is hot or
in operation. They could be severely burned.
Don’t allow anyone to climb, stand or hang on the door, drawer or top surface
of the range. They could damage the range and even tip it over causing severe
personal injury.
CAUTION:
DO NOT STORE ITEMS OF INTEREST TO CHILDREN IN CABINETS
ABOVE A RANGE OR ON THE BACKSPLASH OF A RANGE–-CHILDREN
CLIMBING ON THE RANGE TO REACH ITEMS COULD BE SERIOUSLY lNJURED.
e
Wear prqw apparel
—Ioosefitting or hanging garments should never be worn
while using the appliance.
Never use your appliance forwarding or heating the room.
Use Proper Pan Size—This appliance is equipped with one or more surface units
of different size. Select utensils having flat bottoms large enough to cover the
surface unit heating area. The use of undersized utensils will expose a portion
of the heating area to direct contact and may result in ignition of clothing. Proper
relationship of utensil to heating area will also improve efficiency.
e
Never leave surface units unattended at high heat settings. Boilover causes
smoking and greasy spillovers that may ignite..
only dry potholders—
Use
moist or damp potholders on hot surfaces may result
in burns from steam. Do not let potholders touch hot heating elements. Do not
use a towel or other bulky cloth.
e
(Hazed cooking utensils
—only certain types of glass, glass/ceramic, ceramic,
earthenware, or other glazed utensils are suitable for range-top service without
breaking due to the sudden change in temperature.
To minimize burns, ignition of flammable materials, and spillage due to unin-
tentional contact with the utensil, the handle of a utensil should be positioned
so that it is turned inward and does not extend over adjacent surface units.
e
When flaming foods under the hood, turn the fan off. The fan, if operating, may
spread the flame.
Stand away from range when opening oven doorto let hot air or steam escape
before removing or placing food inside.
Place oven racks in desired position while oven is cool. If racks must be han-
dled when hot, do not let potholder contact hot heating element in oven.
Pulling out shelf all the way to the shelf stop is a convenience in lifting heavy
foods. It is also a precaution against burns from touching hot surfaces of the
door or oven walls.
e
Don’t heat unopened food containers in the oven. Pressure could build up and
the container could burst, resulting in injury.
e
When using cooking or roasting bags in oven, follow manufacturer’s directions.
Be sure reflector pans and vent ducts are unobstructed and in place. Their ab-
sence during cooking could damage components and wiring.
Don’t use aluminum foil to line reflector pans or anywhere in the oven except
as described in this booklet. Improper installation could result in a shock, fire
i
hazard, or damage to the range.
2
Page 4
Keep hood and grease filters clean according to instructions to maintain good
venting and to avoid grease fires.
Don’t immerse or soak removable surface units. Don’t put them in a dishwasher.
Do not store flammable materials in an oven or near the cooktop.
DO NOT
USE WATER ON GREASE FIRES. NEVER PICK UP A FLAMING PAI
Smother flaming pan on surface unit by covering pan completely with well f
ting lid, cookie sheet or flat tray.
Flaming grease outside pan can be extinguished by taking soda or, if available,
a multi-purpose dry chemical or foam type extinguisher.
When cooking in the oven, flame can be smothered by completely closing door
and turning OVEN SET to OFF.
Also see frying tips, surface unit pages.
Self-CleaningOven...
Do not clean door gasket. The door gasket is essential for a good seal. Care
should be taken not to rub, damage, cv move the gasket.
Do not use oven cleaners. No commercial oven cleaner or oven liner protective
coating of any kind should be used in or around any part of the oven.
Clean only parts listed in this Use & Care booklet.
Before self-cleaning the oven, remove broiler pan and other utensi s.
MicrowaveOven...
@
Cooking utensils may become hot because of heat transferred from
the heated
food. Pot holclers may be needed to handle them.
Also, under some cooking operations the shelf can become too hot to touch.
THEREFORE, DURING AND AFTER COOKING, CAUTION SHOULD BE EXER-
CISED IN TOUCHING THE SHELF.
Remove wire twist-ties on Paper and plastic bags before placing in microwave oven. Twist-ties can cause” heating of- the bag ‘under ce~ain ctinditions, and can cause fire.
If you needservice...
Read “Before You Call for Product Service” at rear of book.
Don’t attempt to repair or replace any part of your range unless it is specifically
recommended in the book. All other servicing should be referred to a qualified
technician.
Read the warranty on the warranty sheet* which accompanies your Use and
Care Book.
Disconnect range at range circuit breaker or main fuse before performing any
.
service.
If you did notreceivethe warrantysheet,dropa card to the PublicationsDistributionSection,Gener
*
ElectricCo.,P.O.Box 111,NewConcord,
Givethemthecompletemodel number of your range plus your name, address and zip code, and a warranty
sheet will be sent yop.
Ohio 43762.
a
3
Page 5

Safetytipsto followwhilemicrowaving
—
.
Y.=
W#l
. .
1. Cooking utensils may become hot because
ofheattransferredfromtheheatedfood.This
is especially true if plastic wrap has been
coveringthe top andhandlesof the utensil.
Pot holders may be needed to handle the
utensil.
2. Sometimes, the oven shelf can become too
h@ to touch. Be careful touchingthe shelf
duringand after cooking.
3. Don’t heat unopened food containers in
the oven. Pressurebuildingup cancausethe
containerto burst, resultingin injury.
4. Don’t defrost frozen liquids—especially
carbonatedones—
containeris opened,pressurecan build up.
This cancausethecontainerto burst,resultimzin iniurv.
d’riesout, and caneven ignitein somecases.
6. If food should ever ignite: Keep the oven
door closed. Turn off the power immediately:
turntimerto OFF or disconnectpowercord
or shut off powerat the fusecircuit breaker
panel.
7. Remove the temperature sensor from the
oven when not using it to cook with. If you
leavethe sensorinsidethe oven withoutinsertingitinfoodorliquid,andturnonmicrowaveenergyit cancreateelectricalarcingin
&
the oven, and damageoven walls.
8. !?~move wire twist-ties on paperand plastic bags before placing in oven. Twist-ties
sometimescausebag toheat,andmay cause
fire. Foods in paper or plastic bags should
only beheatedfor shortperiodsof time:
9. Boiling eggs (in or out of shell) is not rec-
oinmended for microwavecooking. Pressure
can build upinsideegg yolk andmay cause
it to burst,resultingin injury.
10. Do not pop popcorn in your microwave
oven urdessin a specialmicrowavepopcorn
accessory or unless you use popcorn in a
package labeled for microwave ovens. Because of the heat generatedwithout these
precautions,the containercould catch fire.
—.@
Don’t overcook food excessively. Food
in the oven. Even if the
11. Use metal only as directed in cookbook.
Metalstripsasusedon meatroastsarehelpful in cooking food when used as directed.
Metal trays may be used for TV dinners. ~
However,whenusingmetalinthemicrowave
oven, keep metal at least 1-inch away from
sides of microwave oven.
12. Do not operate the oven while empty to
avoid damage to the oven and the danger of
fire. If by accidenttheovenshouldrunempty
a minuteor two,no harmis done.However,
try to avoidoperatingthe ovenemptyatall
times-it savesenergyand prolongs life of
theoven.
13. Foods with unbroken outer “skin” such
as potatoes,hot dogs or sausages,tomatoes,
apples,chickenliversand othergiblets,and
eggs (see above) should be piercedto allow
steamto escapeduringcooking.
14. “BoilableY’ cooking pouches and tightly
closed plastic bags or plastic wrap tightly
coveringcontainersshouldbe slit,prickedor
vented as otherwisedirected in Cookbook.
If theyarenot, plasticcouldburstduringor
immediatelyafter cooking resulting in in-
jury. Also, plasticstoragecontainersshould
be at leastpartiallyuncoveredbecausethey
form such a tightseal.
15. Do not use your microwave oven to dry
newspaper. If overheated,it can catch fire.
16. Plastic utensils—Plastic utensils de-
signedformicrowavecookingare veryuseful,
butshouldbeused carefully.Evenmicrowave
plasticmay notbe astolerantof overcooking
conditionsas are glassor ceramicmaterials
and may softenor charif subjectedto short
periodsof overcooking.Inlongerexposuresto
overcooking,the food and utensilscould ignite. For these reasons: 1) Use microwave
plasticsonly “and use them” in strictcompliancewith the utensilmanufacturer’srec-
ommendations. 2) Do not subject empty
utensilsto microwaving.3) Do not permit
childrento useplasticutensilswithoutcomplete supervision.
———.
1. Steamor vaporescapingfrom aroundthe 2. Light reflecting around door or outer
door. case.
All these things are normal width ymnr micrmwaveoven:
4
Page 6

It is essentialthatwe, the -manufacturer,know at all timesthe location of themicrowaveoven
youarenow using.Weaskthatyou—
Checkwith your supplierto be surehe has registeredyou asan owner of thisappliance. (He
1.
shouldhave doneso by sendingin the cardon theoutsideof the cartonwhenthis appliance
wasdeliveredor by maintaininghis o~ registrationfile.)
If you move,pleaserenewyour registrationby writingto the addressbelow.
2.
3.
If you are not the originalpurchaserof this appliance,pleaseestablishthefact that you are
nowthe ownerof this applianceby writingto—
Hotpoint Product Service Section
General Electric Company
Range Marketing Operation AP 2-210
Appliance Park, Louisville, Kentucky 40225
Pleasestite-MODEL and SERIAL NUMBERS. (These numbersare located by opening conventionalovendoor and lookingon frameaboveopening.) Spaces areprovidedon page 1 for each
customerto recordthe modeland serialnumberof his orher own microwavecookingcenter,for
futurereference.
This appiiance must be registered—please be certain that it is.
e
PRECAUTIONSTOAVOIDPOSNBLE EXPOSURE
TO-EXCESSIVEMICROWAVEENERGY
(MicrowaueOvenChly’1
—
DONOT ATTEMPT to operatethisovenwiththedooropensinceopen-dooroperation
~
“ can resultin harmfulexposuretomicrowaveenergy.It isimportantnotto defeator
tamperwiththe safetyinterlocks.
~ 130MN PLACE any object betweentheovenfrontface and thedoororallow soilor
g cleanerresidueto accumulateon sealingsurfaces.
~ DO NOT OPERATE the oven if it is damaged.
“ oven doorclose properlyand thatthereis no damageto the (1) Door (bent), (2)
hinges and latches (brokenor loosened), (3) door sealsandsealingsurfaces.
~ THE OVEN SHOULD not be adjustedor repairedby anyone except properly quali-
“ fiedservicepersonnel.
It is particularlyimportantthat the
(
Page 7
—.
—
—
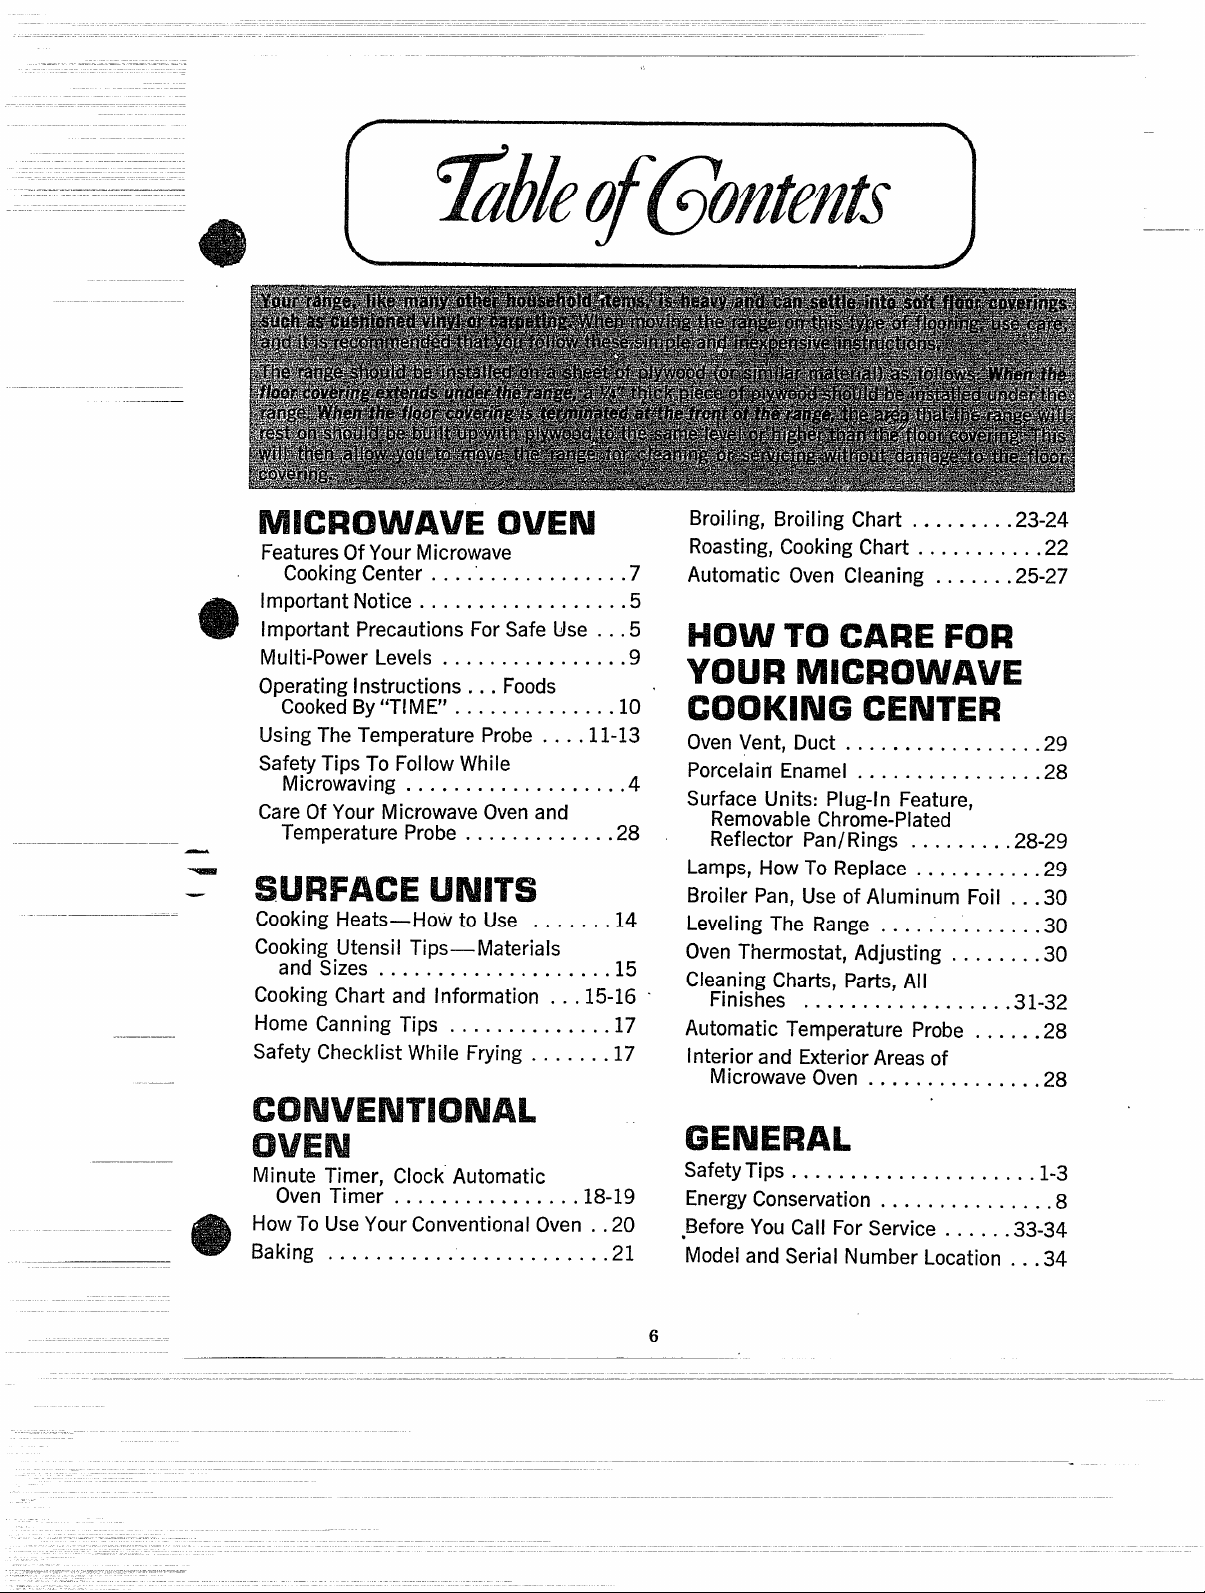
MICROWAVEOVEN
Features Of Your Microwave
Cooking Center . . ..” . . . . . . . . . . ...7
Important Notice . . . . . . . . . . . . . . . . ..5
important Precautions For Safe LJse. ..5
Multi-Power Levels . . . . . . . . . . . . . . ..9
Operating Instructions . . . Foods
CookedBy ’iT!ME’’ . . . . . . . . . . . . . . 10’
UsingTheTemperatureP robe . ...11-13
Safety Tips To Follow While
Microwaving . . . . . . . . . . . . . . . . . . .4
Care Of Your Microwave Ovenand
Temperature Probe . . . . . . . . . . ...28
SURFACEUNITS
Cooking Heats—How to Use . . . . ...14
Cooking Utensil Tips—Materials
and Sizes . . . . . . . . . . . . . . . . . . ..15
Cooking Chart and Information . ..15-16 -
Home Canning Tips . . . . . . . . . . . . ..17
Safety Checklist While Frying . . . . ...17
Broiling, Broiling Chart . . . . . . ...23-24
Roasting, Cooking Chart . . . . . . . . ...22
Automatic Oven Cleaning . . . . ...25-27
HOWTOCAREFOR’
YOURMICROWAVE
COOKINGCENTER
Oven Vent, Duct . . . . . . . . . . . . . . . . .29
Porcelain Enamel . . . . . . . . . . . . . . . .28
Surface Units: Plug-In Feature,
Removable Chrome-Plated
Reflector Pan/Rings . . . . . . ...28-29
Lamps, How To Replace . . . . . . . . ...29
Broiler Pan, Use of Aluminum
Leveling The Range . . . . . . . . . . . . . .30
Oven Thermostat, Adjusting . . . . . ...30
Cleaning Charts, Parts, All
Finishes . . . . . . . . . . . . . . . ...31-32
Automatic Temperature Probe . . . ...28
Interior and Exterior Areas of
Microwave Oven . . . . . . . . . . . . ...28
Foil . ..30
Minute
Oven
HowTo
Baking
Timer, Clock’Automatic
Timer . . . . . . . . . . . . . . ..l8-l9
UseYour Conventional Oven ..20
. . . . . . . . . . . . . . . . . . . . . . . .
21
GENERAL
Safety Tips . . . . . . . . . . . . . . . . . . . . . 1-3
Energy Conservation . . . . . . . . . . . . ...8
,13eforeYou Call For Service . . . ...33-34
Model and Serial Number Location . ..34
6
Page 8
——
—
-—
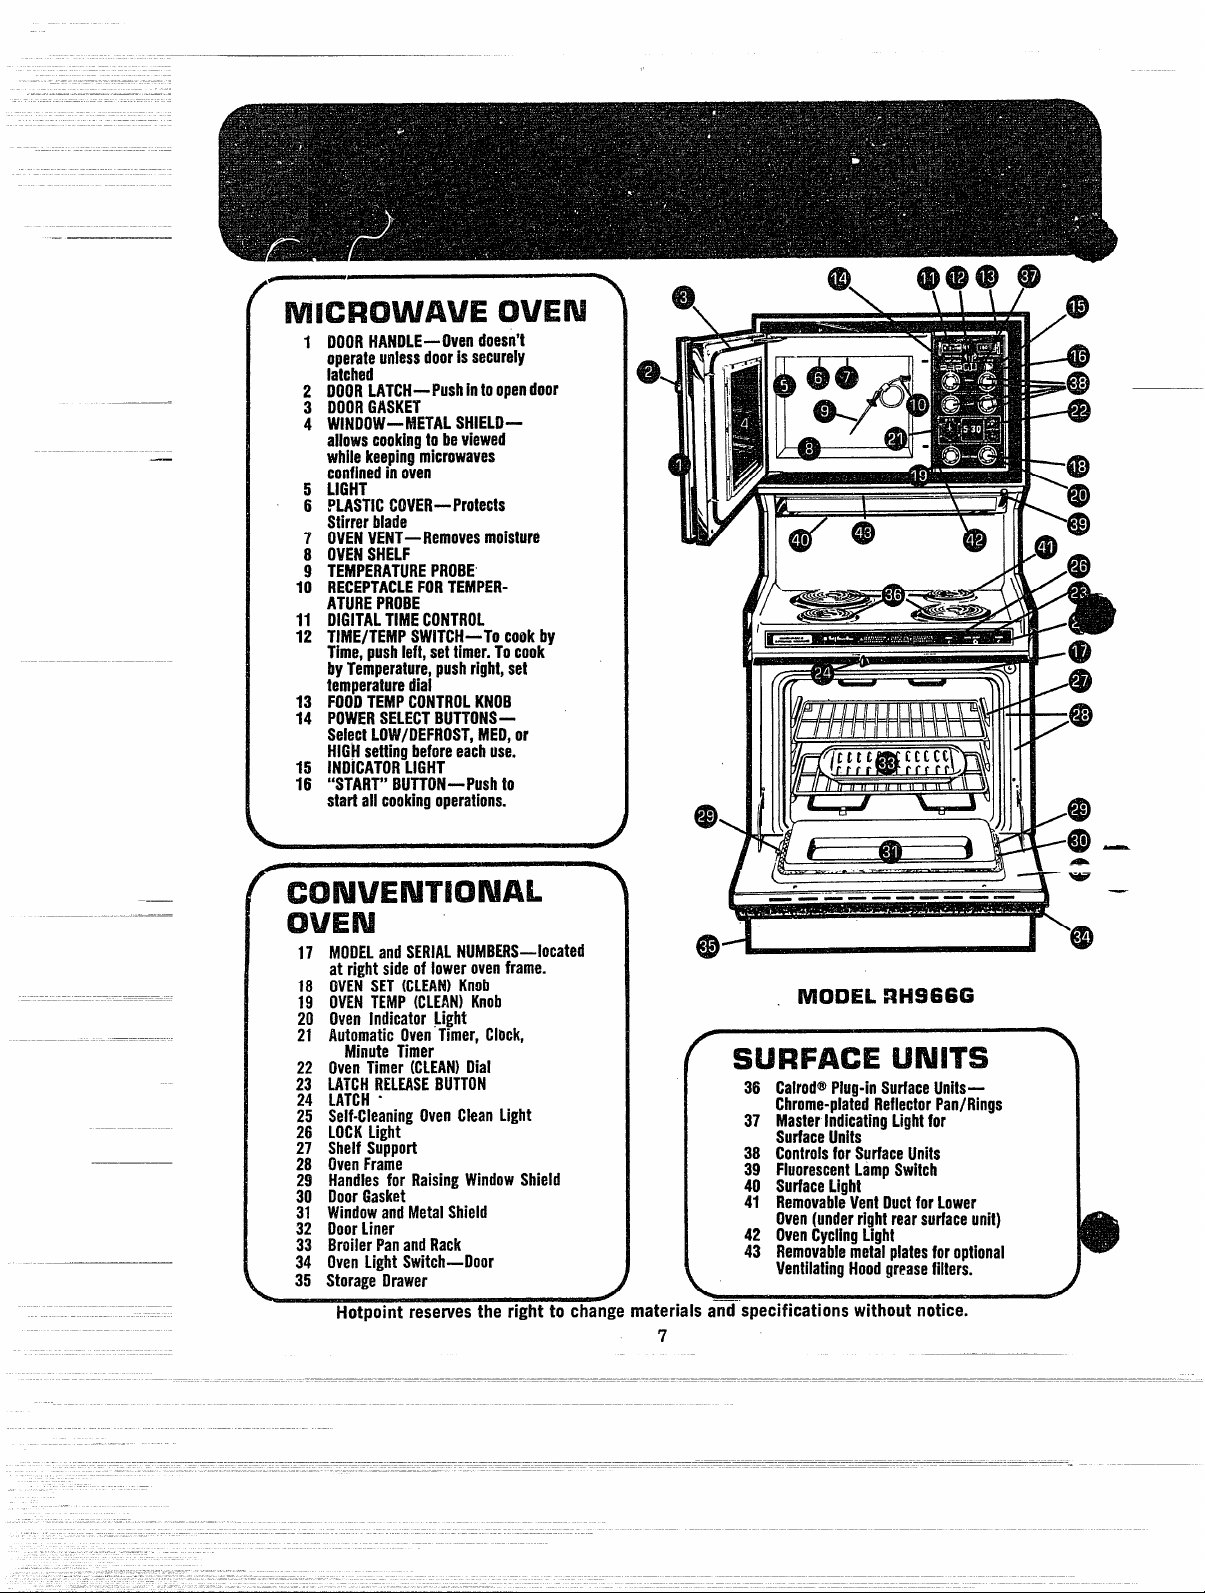
MICROWAVEOWEN
1 DOOR HANOf-E-Oven doesn’t
onerate unlessdoor is securely
Iihched
2 DOOR LATCH—Push intoopendoor
3 DOOR GASKET
WINDOW—METAL SHIELtI—
4
allowscooking
while keepingmicrowaves
confinedin oven
LIGHT’
5
pLASTIC COVER_ protects
6
Stirrer blade
7
OVEN VENT—Removes moisture
8
OVEN SHELF
TEMPERATURE PROBE
1;
RECEPTACLEFORTEMPERATUREPROBE
DIGITALTIMECONTROL
TlfME/TEMPSWITCH-To cookby
Time,pushleft,set timer.To cook
by Temperature,pushright,set
temperaturedial
FOODTEMPCONTROL KNOB
POWER SELECTBUTTONS—
Selectt.OW/DEFf?OST, MED,or
HIG~ settingbeforeeach use.
15
INDICATORLIGHT
16
*’START’’BUTTON— Pushto
start all cookingoperations.
\
CONVENTIONAL
tobeviewed
OVEN
17 MODEL and SERIAL NUMBERS-located
at right sideof lower ovenframe.
18 OVEN SET (CLEAN) Knob
19 OVEN TEhtP (CLEAN) Knob
20 Oven Indicator Light
21 Automatic Oven Timer,Clock,
Minute Timer
22 Oven Timer (CLEAN) Dial
;: ;:]#RELEASE BUTTON
25 Self-CleaningOven Clean Light
26 LOCK Light
27 Shelf Support
28 Oven Frame
29 Handles for Raising Window Shield
30 Door Gasket
31 Window andMetalShield
32 Ooor Liner
33 Broiier Panand Rack
34 Oven Light Switch—Door
35 Storage Drawer
%,
.
Hotpoint reserves the right to change materials and “specifications without notice.
. . . . .
u
\
I
/
,-
{
m
4
\
6)
4
———— ———— ——
\__/
—
e
suRF4hcElmlrrs
36 Calrod@Plug-inSurfaceUnits—
Chrome-platedReflectorPan/Rings
37 MasterIndicatingLightfor
Surface Units
38 Controlsfor SurfaceUnits
39 FluorescentLamp Switch
40 SurfaceLight
41 Removabl~Vent DuctforLower
Oven (under right rearsurfaceunit)
42 Oven Cyclingt.ight
43 I?emovablemetalplatesforoptional
VentilatingHood greasefilters.
/
7
Page 9
A MICROWAVE
COOKING
1. Use proper power level as recommendedand
DO NOT OVERCOOK. smallquantities.
2. Do not operate the oven while empty. If by
accident theoven shouldrun empty a minute
or two,no harmis done. However,try to avoid
operatingthe oven empty at all times—saves
energy and also ensures good long term life
of oven.
to start cooking (if time allows, do not use
HIGH heat to start). medium hiizh-cmick
brownings,medium-’slow frying, l;w—finish
cooking most quantities, simmer—double
boiler heat, finish cooking, and special for
7. When boilingwaterfor tea or coffee,heat only
theamountneeded.It isnot economicalto boil
a container full of water for only one or two
cups.
ELTOP-OF=THE-RANGE
COOKING
1. Use cooking utensils of medium weight alu-
e
—
minum, tight-fittingcovers, and flat bottoms
which completely cover the heated portion of
the surface unit.
2. Cookfreshvegetableswitha minimumamount
of water in a coveredpan.
3. “Keep an eye” on foods when bringingthem
quicklyto cookingtemperaturesatHIGH heat.
When food reaches cooking temperature, reduce heat immediatelyto lowest setting that
will keepit cooking.
4. Use residualheat with surface cooking when-
everpossible.For example,when cooking eggs
in the shell bring water to boil, then turn to
OFF position
5. Always turn surface unit OFF before remov-
ing utensiL
6. Use correct heatfor cookingtask. . .highheats
r
to complete the cooking.
ENERGY COSTS IN AUTOMATICALLY SELF-CLEANING YOUR OVEN
Self cleaning ovens help conserve energy since their specifically designedinsulation
systemmeansless electricity (than nonself-cleaningovens) is necessaryduringnormal
bakingand roasting.In fact, enoughenergy is savedthroughouta year’s time to pay
for the averageenergycosts usedin automaticallyself-cleaningthe ovenover thesame
periodof time.
1. Preheat the oven only when necessary. Most
foods will cook satisfactorilywithout preheating. If you find preheatingis necessary, keep
an eye on the indicatorlight, and put food in
the oven promptly after thelight goesout.
2. Always turn oven OFF before removing food.
3. During baking,avoid frequent door openings.
Keep door open as short a time as possible
when it is opened.
4. For self-cleaningoven,be sure to wipe up ex-
cess spillagebefore self-cleaningoperation.
5. Cook complete ovenmeals instead of just one
food item.Potatoes,other vegetables,and some
desserts will cook together with a main-dish
casserole,meat loaf, chicken or roast. Choose
food: thatcook at thesametemperaturein approxnately the sametime.
6. Use residualheat in ovenwheneverpossibleto
finishcooking casseroles,ovenmeals,etc. Also
add rolls or precooked dessertsto warm oven,
using residual heat to warm them.
\
———.—
FACT: A
oven electrically. Basedon nationalaverageelectric rate of 3.8# per Kilowatt hour (1977
Hotpoint‘seIf cleaningoven usesabout 4.3 KWH to automatica~lyself clean the
DOE data) costfor self cleancycle isabout16#.
r
8
/
Page 10
MICROWAVE OVEN
With your Multi-Power Microwave Oven you have the
about anytype of food. Usethe cookbook provided with
HIGH or *4FWII on” (100Y0)
Power, abwt 625 watts OUW CW. water heating @st)=
versatility to cook just
your ovento guide you.
Boiling candy, puddings and sauces, cooking small to medium-size vegetables, pastry
shells,chicken pieces, fish, hamburgers,bringing to boil soups, stewsand simmered-type
meats.
Also, cooking baked-type fruits such as apples, beverages, many moist cakes and bar
cookies such as brownies,appetizers and fast melting of butter.
MHI—Cooking custard-type vegetable casseroles, whole head of cauliflower, omelets,
commercially frozen souffles,some cookies,finishcooking fudge, breadpudding and other
dessert custards, drying homemade noodles and roasting some meats with automatic
temperature control, including “Carefree Roasting.”
LOW/ l)EFFIOST-Use for most defrosting.Also dried beans and peas, pot roasting . . .
even poaching eggs. . .
are possible at this setting. Shortbread and meringue cookies
are cooked well at LOW. And softening and melting at this powerlevel, although longer
than at higher power levels,maybe preferredbecause theproduct ismore evenlyheated.
@
—
—
9
Page 11

MICROWAVE z’=’
The operating instructionsbelow tell you how to start, interruptand stop cooking in the
oven. While you are reading these instructions why not make a cup of coffee or other
hot beverage as you learn to use the controls? Use a plastic-coated paper cup for hot
drinks,or pottery or chinacup not decoratedwith metal.Fillcup ~ fullof waterand add
a teaspoon of freeze driedcoffee. Remove spoon.
Place food (or cup of coffee) in oven. Oveninte-
rior light comes on automatically whendoor is
open. Close ovendoor; it latches automatically.
Select Power LeveL See recipe for suggested
power levels for foods. For your cup of coffee,
setat HIGH.
[1
Select TIME/TEMP setting. For your cup of
coffee, set switch to TIME by pushing Time/
Temp Switch to the left. SEE SPECIAL OPERATING INSTRUCTIONS PAGE 11.
Set Time Control (1~ to 1~ minutes for cof-
fee). Digital timer goes up to 59 minutes and
59 seconds. Wheel at left of timer sets increments of 10 minutes; knob at right of timer
sets minutes and seconds. To set minuteknob,
grasp knob and push in. Turn to desired time
setting. Timer can be reset during cooking if
needed.
Push “START” button. When oven is cooking,
interior light comes on, a fan starts to operate
and an indicator lightcomes onto tell you oven
is operating.
The timerindicator moves toward “O” only when the oven is cooking or defrosting with
microwave energy.
When the timer reaches “O,” a bell will sound to tell you that cooking is completed and
the power, the indicator light, interior light and fan are shut off automatically.
Remember . . . ifyou openthe door before the timerhas reached “O,” cooking or defrosting stops, the timer stops and‘oven indicator light goes out. When you close the door and
push “START” button again, cooking resumes whereyou left off!
10
Page 12

..—
HANDLE
CABLE
SENSOR
CLIP
The tem~eraturetmobeis designedto help make your microwave cooking more accurate
whilere~uiringless attention for approp;ate foods. Up to now, microwave cooking has
been done by TIME. Now you can cook many foods to a pre-set TEMPERATURE,
andbe assuredthat they areas hot asyou want them to befor serving,or proper doneness.
Seepage 12 for many foods recommended for cooking with your automatic temperature
probe. Page 12 also lists foods not recommended for use with the probe.
.
#----
In general insert probe into centermost
part of fopd
Insert at least l-inch into food.
Place food with probe into oven.
as horizontally as possible.
2❑
Insert cable end into receptacle on oven
3❑
wall until “seated.”
BE SURE PROBE IS ATTACHED SE-
CURELY TO OVEN RECEPTACLE. If
probe is not attached securely, the oven
will not turn on when “Start” button is
pressed, as a reminder to secure cableend
of probe to oven receptacle.
Use clip on cable to loop cable where appropriate. Looping cable not only controls
length of cable but also supplies more
stability of probe in food (helps prevent
Close oven door
(continued next page)
o
probe slipping in food).
firmly to insure proper latching.
11
m
—
—
Page 13

e
4❑
—-
Set oven controls, following recipe infermation in special section for Automatic
Temperature cooking, located in back
pages of Cook Book, which accompanies
oven.
your
a.
Set power level.
b.
Set TIME/TEMP switch to TEMP
(push switch to right)
ished temperature
information. (NOTE: If the actual
temperatureof food in ovenishigher
than the temperature you dial the
ovenwillnot turnonwhen “START”
button is pressed. Check temperature on dial to be sure it is set cor-
rectly. If not, reset. If so, then food
in oven has already reached or exceeded desired finishedtemperature
. . .no further heating needed!)
c.
Push “START” button.
When preset internal temperature is
reached,interior light and fan shutoff and
the oven automatically turns off. Remove
cable end of probe from receptacle, then
remove food and temperature probe
together.
following recipe
and dial fin-
NOTE: So that you can plan an approximate servingtime, recipes for usingtemperature
probe giveboth temperatureto setand approximatecooking time. If oventurnsoff
unusually early, it may be that probe has slipped out of place in cooking. (This
—
e
-:
can happen with any food thermometer.) ‘When this happens, reposition thermometer and continue cooking. To determine actual cooking temperature of
food, turn TEMP control dial to lower temp setting until oven turns off.
12
Page 14

MICROWAVE OVEN
1.
Casseroles-150°-1600internaltemperaturegivesbest donenesson mixtureof precooked
foodsheatedtogetherintoamaindish. Rawfoodssuchas hamburgerorothermeat,vegetables
and saucesstartingfrom “scratch” should be precookedbefore combiningtogetherinto
casseroleheatedtoabove temperature.Theadvantigeof thetemperatureprobe: it tellsyou
whencasseroleis at correcttemperatureforserving,withoutchecking,peekingor guessing.
2.
Reheatingleftovers
oftentheamount of leftoverfoodisnotknown,therefore,timeto cook is only aguess.Cooking toa presettemperature (usually 140to 155°) eliminatestheguesswork.
PlatesofFood—ingeneral,placetemperatureprobein largestpieceof food,thencoverplate
3.
withwaxpaper (or lightlywithplasticwrap). A presettemperatureof 150to160°givespiping hot food.
4.
Beveragesand soups—useclip on cableof probeto helpstabilizeprobein liquids.A preset
temperatureof 130°is “warmto drink,”about170°is“steaminghot.”
Beef,lambandhamloaves—besureto placeprobeashorizontallyaspossible,anduseclip
5.
to stabilizeprobe in meatmixture.
For best results,consultmeat loaf recipes in cook book and do not exceedtotal weightof
meat.A good ruleof thumbto follow inpi-eparingmeatloaf mixturesis to use 1cup liquid
(milk,wateror juice suchastomato) to 1~2totalpoundsgroundmeat.
6.
Roasts–carefreemicrowavemanyroasts.VeryspecificinstructionsareincludedinCookbook.
7.
Dips—hot dipsare a popularappetizer.An internaltemperatureof 90-130° (dependingon
theingredients)isjust rightto serveguests.
—thistype of food is excellentto heatwith temperatureprobebecause
—
@
. .
1.
Stewing, simmering and candy making—this type of cooking involves bringing food to a boiling or simmering temperature and holding it at that temperature for a long period of time.
2.
Delicatebuttericings,ice cream,frozenwhipPedtopping,etc.—thesesoftenrapidlyatwarm
. .
temperatures.Lowestsettingon temperatureprobeis 9(?0. —
3.
Many foods inthe frozenstate---becausetemperatureprobeshouldnotbe forcedintorockhardfoods,it couldbreak.However,afterdefrosting,manyconveniencefoodsmaybe heated
with the probeto the precisetemperaturefor serving.
4.
Individualfoodscookedin batches-in cookingwithmicrowaveenergy,differencesfromone
food to another,evenof the sametype of food canresultin different’cookingtimesof foods
inthesamebatch.A variationinsize (suchasincupcakes,sandwiches,etc.) ormoisturecontent (such as in potatoes andothervegetables)can causevariationin cookingspeed.Temperatureprobein one foodin abatchmightnot correctlyindicateinternaltemperatureofall
foods cooked together.
5.
Starchyvegetables-potatoes whichcook to steamyhot temperaturestend to stickto tem-
peratureprobedue to starchynatureof interior. (Cleanimmediatelywithsoapycloth,then
rub lightlywithplasticscouringball,if necessary.)
6.
Battersand doughswhich arebaked. This type of food should be observedwhen cook-
ing to bestjudge whendone.Also, periodicturningof thedishis usuallyrequiredonthese
delicatefood types.
13
—
Page 15

sURFACE UNITS
surface~ooking
SPECIAL NOTE: With the upperoven beingover thecooking surface,you mayfindthatfoodsyou boilon thesurfaceunitsmay~ause
watercondensationor waterdropletson the undersideof the upper
(microwave) oven.This is especiallytrueof foods boiledwithwater
suchasvegetables,rice,noodles,etc. or foodsnaturallyhighin moisture,suchas saucesor gravies.
Steamcondensationwillnot damageyour range,but if you wishto
minimizethepossibilityof condensation:
1. Coverpots and panswithlids wheneverpossiblewhenboiling
high-moisturefoods on thesurfaceunit.
2. Selecta frontsurfaceunitfor boilingany foods, when possible.
-.
~our sur$aceunitsand controlsare designedto giveyou aninfinitechoiceof heat settingsfor
cookingon top of therange.Onmodelsso equipped,a diagramabove or below each control
knob showsthe correspondingunit which thatknob controls.
..
How‘TOsetYinursurface LhlitCcmtrdsi
.
‘e
—
—
step‘1
Graspcontrol
knoband
pushin. . .
step 2
Turneither
clockwiseor
counterclockwise
todesired
heatsetting.
\k
Controlknobmustbe pushedintoset only from OFF position.Whencontrolisinanyposition
other thanOFF, it may be rotatedwithoutpushingin; whenrotatedto OFF, controlknob
popsout.
At ~HI position,there is a slightniche so control “clicks” into the ~ ~
highestsetting;thelowestsettingis between
and
LOW. (Seediagram). A slightturnofthecontroladjuststheheat
upordown,dependingonyourneeds.Inaquietkitchen,youmayhear
slight “popping” soundsduringcooking,indicatingheatsettingsare
beingmaintained.
Be sureyou turncontrolto OFF whenyou finishcooking. An indicator light willglow when
ANY heaton any surfaceunitis on.
~OO~i~~ ~ui~~
HIGH
IWEII Ill
NIEII
LOW
WARl!l
NOTE: 1.
Quickstartforcooking;bringwatertoboil.
Fastfry,panbroil;maintainfastboilonlargeamountof food.
Saut6andbrown;maintainslow boil onlargeamountof food.
CookafterstartingatHIGH; cook withlittlewaterincoveredpan.
Steamrice,cereal;maintainservingtemperatureof mostfoods.
At HIGH, MED HI, neverleavefood unattended.Boiloverscause smoking;
greasyspilloversmaycatchfire.
At WARM, LOW, melt chocolate,butteron smallunit.
for UsingHeats
OFF and WM or OFF
,~ ~
t
00
I
(0
●
14
Page 16

SURFACE UNITS
1.
2.
3.
4.
.—
Utensilsshouldbe flaton bottomandshouldmatchsizeof surfaceunit (largepanson large
units,smallpanson smallunits).
Aluminumutensilsof mediumweightarerecommendedfor surfacecookingbecause they
heatevenlyandquickly.Skilletsdo a goodjob ofbrowningfoodsandsaucepans(withtight
fittinglids) areidealfornutritiouscookingwithlittlewater.Useregular,andnon-sticktype
finishes.Follow directionsgivenin theSurfaceCookingCharton thefollowingpages.Recommendedaluminumutensilswereusedin testingfood forthischart.
Use heat settingno higherthan mediumor follow manufacturer’sdirectionswhenusing
utensilsmadeof thefollowingmaterials:castiron,glassceramic(pyroceram),andstainless
steel.Also, sometypesof enamelwarewhichundercertainconditionscmddmeltandfuse to
surfaceunitwhenhigherheatsareused.Manufacturersofglasscookingutensilsalsorecom-
mendheatsno higherthanMED andusinga wiregridbetweenutensilandelectricsurface
unit.Obtaingridwhenutensilis purchased,or at HousewaresSectionof mostdepartment
stores.
IT IS MOST IMPORTANT FOR GOOD HEAT CONDUCTION THAT UTENSILS
WITH FLAT BOITOMS BE USED. Special cookingequipmentwithoutflat bottoms,
suchas the orientalwok,are notrecommended.Life of surfaceunit can be shortenedand
rangetop canbe damageddue tohightemperaturesrequiredin thistype cooking.
..—
o
e
J~@ceGoQkingGhdfl
=-:.:.
—-_
CEREAL
Cornmeal
Grits
Cooked in shell
Fried “Sunny Side
up
Poached
Scrambled
HI —Cover eggs with cool
water. Cover pan and bring to
steaming point switch to
MED— Melt butter. Add eggs
and cover skillet; or do not
cover but baste with fat.
HI—Quickly bring water to
steaming point, Switch to
HI —To heat butter until light
golden color. Switch to
—.—....
---—-----
—=-=_--—..-
HI—Bring waterto boil.Before
addingcereal,switchto
COOKING DIRECT’,ONS
—_.-=-=-=..-.=_=
.. ... .....=---
LOWor WM, thenstirin
cereal. Finish according to
package directions.
LOWor WM. Cook 3.4 min.
for soft eggs, about 15 min.
for hard-cooked.
Continue cooking until white
is “just set”, about 3-5
more minutes.
MED or LOW. Carefully add
eggs. Cook uncovered about
5 minutes for medium
doneness.
MED or LOW. Add egg mixture,
cook stirring to desired
doneness. Remove from heat.
---
-----------—-.-
.....--...—--
-—
1. Cereals bubble and
expand when cooking.
Use large enoughpan
to prevent boilover.
2. For steamed rice, switch _
to WM; cover and cook
25 minutes.
Begin timing when first
wisps of free steam
come from cover.
Variation: Start heating
fat at HI; when melted,
switch to LOW, add eggs.
When bottoms are just set
turn eggs “over easy” to
cook other side.
Eggs are easy to handle in
wide shallow skillet or pan.
Remove with slotted spoon
or pancake turner to
drain.
Eggs continue to set
sllghtly after removing
from heat.
m
Page 17

..
———
. . ..
,,
..
_~u~insmallsaucepanon
~f~
small surface unit. Cover for
semi-sweet chocolate or
butterscotch pieces.
Allow about 10-15 min. to
melt through. Stir to smooth.
Macaroni
Noodles
Spaghetti, etc.
HI —To bring salted water to
boil in covered utensil. Add
pasta slowly so boiling doesn’t
stop. Switch to
HI —To melt fat. Switch to
HI or MEDHi—Cook uncovered until tender.
MED, add food. Cook to
desired doneness.
1.) Heat should be hi.eh
enough so that water stays
at rolling boil throughout
cooking. 2.) Use !arge
enough pan to avoid
boilover.
-.. T...-.._-6e-...------>.- .- ----- .
11 W% L?IWH; :0: Hr!iii%ifiu
,-,’
,,
..
I
Page 18

—
—
%me~dnfling%ps
Canningshouldbe doneon rangetop only. DO NOT CAN IN OVEN OR IN MICROWAVE
OVEN.
In surfacecookingof foods otherthancanning,the useof 1argediameterutensils (extending
more than l-inch beyond edgeof cooking area) is notrecommended.However,when canning
withwater-bathor pressurecanner,large-diameterutensilsmaybe used.Thisisbecouseboiling
watertemperatures(evenunderpressure) are not harmful to cooktop surfacessurrounding
heatingunit.
HOWEVER,DO NOT USELARGE DIAMETER CANNERS OROTHER LARGE DIAM-
ETER UTENSILS FOR BOILING OR FRYING FOODSOTHER THAN WATER. Most
syrup or sauce mixtures—
boiling water.Such temperaturescould eventuallyharm cooktopsurfacessurroundingheatingunits.
OEEEUWE FCNAA3WING Pmwrs IN Cmlniinm:
1. Bring waterto boil on HIGH heat,then afterboilinghas begun,adjustheat to lowestset-
tingto maintainboil (savesenergyand best usessurfaceunit).
2. Be surecannerfitsovercenterof surfaceunit.If yourmodelrangedoesnotallowcannerto
be centeredon surfaceunit,usesmallerdiametercontainersfor goodcanningresults.
“~. Flat-bottomedcannersgivebest canningresults.Be surebottomof canneris flator slight
indentationfitssnuglyoversurfaceunit.Cannerswithflangedorrippledbottoms (often found
in enamelware)arenot recommended.
and all types of frying-cook at temperaturesmuch higherthan
a
@
~==
RIGHT
4.
When canning,userecipesfromreputablesources.Reliablerecipes are availablefrom the
manufacturerof your canner,manufacturersof glassjars for canning,such as Balland Kerr;
and,the UnitedStatesDepartmentof AgricultureExtensionService.
5. Remember,in followingthe recipes,canningis a processthat generateslarge amountsof ~
steam.Be carefulwhile
NOTE: If yourrangeis beingoperatedon lowpower (voltage),canningmay takelongerthan
expected,even thoughdirectionshave beencarefullyfollowed.The processmay be improved
by: 1) Usinga pressurecanner,and2) For fasterheatingof largewaterquantities,beginwith
HOT tap water.
@ Use minimumamountof fat for effectiveshallowor deep-fatfrying. Fillingthepan too
full of fat cancausespilloverswhenfood isadded.
# Keep an eye on foods whichfry at highor mediumhigh heats.
@ If a combinationof oils or fatswill be usedin frying, stir togetherbefore heating,or as
fats melt slowly.Alwaysheat fat slowly, andwatchfat asit heats.
@ Use deep fat thermometerwheneverpossible to preventoverheatingfat (beyond the
smokingpoint).
# Foodsfor fryingshouldbe asdry as possibleon exteriorsurfaces.Frost on frozenfoods
or moistureon freshfoods can cause hotfat to bubbleup and oversidesof pan.
@ Keep rangeand ventilatinghood freefrom greaseaccumulation.
canningto preventburnsfromsteamorheat.
17
WRONG
e
—
.
Page 19

CONVENTIONAL COOKING: “’-”
..—
K3igital
—- -———.-—-. - ---
‘l’ClSJfl’‘1’Hli
of the Minute Timer and turn Knob in either
direction to set the Digital Clock numerals to
the correct time.
(After settingthe clock, let the knob out, and
turn the Minute Timer pointerto OFF.)
Clock and
C6J3CK
(JIXJ~K,push m the center knob
Minute Timer
. . . --
MINLJTE TniviER
TO SET THE MINUTE TIMER, turn the
center knobclockwise,withoutpushingin, until
pointer reachesnumber of minutesyou wish to
time (up to 60).
At the end of the set time a buzzer sounds to
tell you time is up. TO TURN OFF BUZZER
turn center Knob, without pushing in, until
pointer reachesOFF.
Automatic OwenTimer
The automatic oven controls are designed for
the homemaker who can’t be tied down to being
in the kitchen or at home at specific times to
turn an oven on or off. These controls can be
preset to start and stop your ovenfor you. Or,
if you prefer tostartthe food yourself,they will
take over the job of turning the oven off.
18
Page 20

To set the automatic oven timer, use the two
dials next to the clock, marked START and
STOP. Each dial is marked off in 15 minute
segmentsandnumberedby thehour.The pointerson thesedialscan be movedonly whenknob
is pushed in. (When the pointers are turned
you can hear a
can be turned it means knobhas been pushed
in and pointer hasbeenset.To be certainknob
isinout position, turnknobso pointerisat time
showing on the clock. Knob will pop out and
cannot then be turned. (Note: Before you set
thesedials,be sure the hzmdsof the rangeclock
showthe correct timeof day.)
“ratchety” sound.) If pointer
B. TO SET
THE OVENTO STARTIMME-
DIATELY AND TO TURN OFF AUTO-
MATICALLY AT A LATER TIME, follow
only A2 and A3 above.
C. When food isremovedfrom oventurnOVEN
SET to OFF.
*OVEN INDICATOR LIGHTS at TIME
BAKE settingwork differentlythan they do at
BAKE setting.Do not be concernedif no light
appears. Carefully recheck the steps given
above. If all operationsare done as explained,
oven will operateas it should.
@
A. TO SET THE AUTOMATIC OVEN
TIMER SO IT WILL SWITCH THE OVEN
HEAT ON AND OFF AUTOMATICALLY,
AT A LATER TIME THAN SHOWS ON
THE RANGE CLOCK, DO AS FOLLOWS:
1. Set START time. Pushin knob on START
dial and turn pointer to timeyou want oven to
turnon. The illustrationshowsSTART pointer
at 3:30.
2. Set STOP time.Push in knob on STOP dial
and turn pointer to timeyou want oven to turn
off. The illustration shows the STOP time at
6:00.
Automatic Timer works only if STOP time is
set for a later time than showson range clock
and on START dial.
3. a. Turn OVEN SET* to TIME BAKE.
b. Turn OVEN TEMP* to proper temperature for food to be cooked. Place food in oven,
ciose the door and automaticallythe oven will
be turned on and OHat the times you have set.
CookingFoodsAutcematically
With Your OwenTitier
Meats,fruitsand vegetablesgenerallytakewell
to automatic cooking. You can cook one food,
or severalfoods togetheras longasthey require
the same temperatureand time. However foods
of ahighlyperishablenature,suchas milk,eggs,
fish,stuffings,poultry, and pork, shouldnot be
cooked automatically unless standing time in
the oven is not more than 2 hours before and
about 2 hours after cooking of these foods. In
all cases,no matterwhatthe natureof thefood,
unless cooking is to start immediately, foods
should be thoroughlychilled in the refrigerator
before placing in the oven.
LAMP OVER SNJRFACEUNITS
Surface lampswitchlocationis underrightside
of controlpanel.Lamp maybe lightedby pressing the lamp switchbutton.Be sureto holdbutton depresseduntil light comes on.
e
—
19
Page 21

—
.
OVEN
.
Your oven is designedto give you top resultsin
baking, roasting, and broiling when used as
recommended.
CONVENTIONAL
t-
Mmx
1
MAl?KER~~pO’NIE”
OWN TEMP
SETTING FOR :
Beforeking Your(hen
1. Look at the controls.Be sure you understand
.
how to set them properly. Read over the directions for the AutomaticOven Timer so you understandits use with the controls.
2. Checkoveninterior.Look at the shelves.Take
a practice run at removingand replacing them
properly, to give suresturdy support.
3. Read over informationand tips that follow.
4. Keep this book handy so you can refer to it,
especially during the first weeks of getting ac-
e
quaintedwith your oven.
NORMAL
COOKING
For CLEAN, rotate the knobto the right (clockwise) until the red pointer is pointing up, toward the index marker. When this location is
reached, the control should snap into final
position.
//
(!?!!!M
OwenCmtmh
The controls for the oven(s) are markedOVEN
SET and OVEN TEMP. OVEN SET has settings for BAKE, TIME BAKE, BROIL,
CLEAN, and OFF. When you turn the knob to
the desiredsetting, the proper heatingunits are
~ thenactivatedfor thatoperation.
OVEN TEMP maintains the temperature you
set from WARM (150°) to BROIL (550°) and
alsoat CLEAN (880°). A light near this control
glows until oven reaches the selected temperature, then goes off and on with the oven unit(s)
during cooking. PRE-HEATING the oven, even
to high temperature settings, is speedy—rarely
more than about 10 minutes. Preheat the oven
only whennecessary. Most foods will cook satisfactorilywithoutpreheating.If you findpreheating is necessary, keep an eye on the indicator
light and put food in the oven promptly after
.
light goes out.
IMPORTANT: The OVEN TEMP control has
a red pointer that is used only for CLEAN. For
normalcooking, line up the desired temperature
(marked on the outer edge of the control knob)
withtheindexmarkerlocated immediatelyabove
the control.
Oven Interim
Shelwes
The shelve (s) are designed with stop-locks so
thatwhenplaced correctly on the shelf supports,
(a) will stop before coming completely from the
oven, (b) will not tiZtwhen removing food nor
when placing food on them.
TO REMOVE shelve(s) from the oven, when
cool, lift up rear of shelf, pull forward with stoplocks along top of shelf supports.
TO REPLACE shelve(s) in oven, insertshelf
with stop-locks resting on shelf supports. Push
shelf toward rear of oven; it will fall into place.
When shelf is in proper position, stop-locks on
shelf will run under shelf support when shelf is
pulled forward.
chumLight
The light comes on automaticallywhen the door
is opened.Use switchonwindowdoor toturnlight
on and off when door is closed.
20
—
——
Page 22

CONVENTIONAL OVEN
Bdklng
When cooking a food for the first time in your new oven, use time
e
given on recipes as aguide.Oven thermostats,over a period ofyears,
may“drift” from thefactory settinganddifferences in timingbetween
an old anda new oven of 5 to 10 minutesare not unusualand you
may be inclined to think that the new oven is not performing correctly. However, your new oven has been set correctly at thejactory
and is more apt to be accuratethanthe oven it replaced.
1. It is recommended that you operate the
rangefor a numberof weeks to becomefamiliar
withyour newoven’s performance.However,if
you find that your foods consistentlybrowntoo
little or too much, you may makea simple adjustment in the thermostat (OVEN TEMP)
knob. See section titled “Care of Your New
Oven.”
2. Use tested recipes from reliable sources.
Measure ingredients accurately and combine
carefully.Use correct sizebakingutensil.
3. Placeshelfat positionsuggestedon chart below.On modelsso equipped,lettersare marked
on wall of large oven. On modelswhereletters
are not markedon oven, lowest positioncorrespondsto A inchart, B isnext highestposition,
etc.
4. Preheatthe oven only whennecessary.Most
foodswillcooksatisfactorilywithoutpreheating.
If you findpreheatingis necessary,keepan eye
.- ——
BREADS, QUICIQ
Biscuits
CoffeeCake
CornBread
Gingerbread B 350 30-45
Plain Muffins
Popovers B
QuickLoaf Bread B 350-375
B, C 425-475 10-20
B, A 350-400 20-30
B 425-450 25-40
A, B 400-425 20-30
375 45-60
_-—
45-60
on the indicatorlight and put food in the oven
promptlyafter lightgoesout.
5. To set oven: Close oven door. Turn OVEN
SET to BAKE and OVEN TEMP to temperatureon recipeor on BakingChart.
6. Place food in oven, being certain to leave
about l-inch of space betweenpans and walls
of oven for good circulationof heat.Closeoven
door. Duringbaking,avoid frequentdoor openingsto preventundesirableresults.
7. Check foods for donenessat minimumtime
on recipe. Cook longer if necessary. Remove
foodsandswitchoff heat. When cookingfood for
first time in thisoven,use timeson recipesas a
guide.Be certainfoods are done before removing from oven. SeeBaking,Before You Callfor
ProductService.
NOTE: Informationabout baking at highalti-
tudescan usuallybe obtainedat your stateagri-
culturalstation.
— --- .— ---
-——
COOKIES1
Brownies
Drop
Refrigerator
Rolledor Sliced
—
————-— ——
B, C
C,B
C, B
C, B
325-350 25-35
350-400 10-20
400-425 6-12
375-400 7-12
CAKES1
(withoutshortening)
Angel Food
Sponge
Jelly Roll
A
A
B
325-37!5
325-350 45-60
375-400 10-15
30-55
MISCELLANEOUS
———.——————
For best results, use shiny aluminum utensils, with dull finish on bottom, ‘To RAISE YEAST DOUGHS, cover lightly
1
with cloth and place in your well insulated oven to keep away from drafts. Yeast doughs raise best at 85° .to
oven lamp should be off during rising. FRUIT CAKES: place large ones on lower shelf position; place small or loaf
Dantwe on shelf in center of oven.
TO br-ownmeringue only, use 400, 8-10 rein; to cook meringue through, use lower temperatures for times given.
2
NOTE: When two shelf positions are listed, the first one gives well browned and
browning, use the second shelf position the next time You cook. Foods listed with three shelf positions cook successfully on any position listed, alone or in an oven meal.
——— .—————.—
—————
.———-—
—.
Apples,Baked
Custard,Cup
Potatoes,Baked
Puddings,Rice
and Custard
Scalloped Dishes
Souffles
A, B, C
A, B, C
A, B, C
cooked food. If Youdesire a different
350-400
300-350
B
325-400
B
B
325
325-375
300-350
30-60
30-60
60-90
60-90
30-60
30-75
llOJ, so
21
Page 23

CONVENTIONAL OVEN
m-
—
—,,,1=:=
Roastingisovencookingof tendermeator poultry by dry heat. Roasting temperaturesshould
be steady and low.
(Low temperatures keep
spatteringand oven cleaning to a minimum.)
It is not necessaryto sear, cover, baste or add
water.
Hmrs Km IMMwT’lnm
1. Checkweightof meat,and place, fatside up,
5. Most meats continue to cook slightlywhile
standingafterbeing removedfrom theoven.For
rareor mediuminternaldoneness,if meat is to
stand 10-20minuteswhilemakinggravy or for
easier carving, you may wish to remove meat
from ovenwheninternaltemperatureis 5-10”F
below temperature suggested on chart. If no
‘standingisplanned,cook meatto suggestedtem-
peratureon chart.
on roastingrack in a shallowpan. (Broiler pan
with rack isa good panfor this.)**
2. Place in oven onshelfin A or B position.No
preheatingisnecessary.
W3F/
FROZEN IRCUW’IS
a. Frozen roastsof beef,pork, lamb,etc., can be
started without thawing, but allow 10-25minutes per pound additional time (10 min. per
pound for roastsunder5 pounds,more timefor
largerroasts).
4. The chart below gives approximate time in
minutesper pound. These timesshouldonly be
used as a guide. A“meatthefiometer, inserted
into thecenter of the thickestpart of the meat,
is the only accuratetest fordoneness.
! ~~:’,,a,l,.,~:~g~:<:;:----.----- .--—---
........=-----J =.-..........
BEEF 2
Standing Rib
Rare
Medium 30-35 min. 22-26 min.
Well Done
Rolled Rib
Add 5-10 min./pound to times givenfor standingrib roasts.
3-5 Ibs. 6-8 Ibs.1
24-30 min.
35-45 min. 28-33 min.
b. Thaw most frozenpoultry before roastingto
ensureeven doneness.Some commercialfrozen
poultrycan becookedsuccessfullywithoutthaw-
ing.Followdirectionsgivenon packer’slabel.
——.— ------
—----
18-22 min.
,.,~-
-=.=-..-= :L::
-------------—
-------- ----
------ ------
==:,_~:=____-:
130-140
150-160
170-185
——
22
Page 24

CONVENTIONAL OVEN
Broiling is cooking foods by intense radiant heat from the upper unit in the oven.
Most fish and tender cuts of meat can be
broiled. Follow these steps to keep spattering and smoking to a minimum.
9. If meathas fator gristle nearedge, cut
vertical slashes through both about 2-in.
apart. If desiredfat may betrimmed,leaving a layer about ~-in. thick.
2. Place meat on broiler rack in broiler
pan which comes with range. Always use
rack so fat drips into broiler pan; otherwise juices may become hot enough to
catch fire. Aluminum foil may be used to
line broiler pan and rack. But, be CERTAIN to cut openings in foil, to correspond with rack so fat drips into pan
below. See note below before marinating
and using barbecue sauce.
3. Letters on oven wall, and chart below,
indicate where to position shelf for best
browning while cooking inside of food to
desired doneness. Placing food closer to
top of oven increasessmoking, spattering,
exteriorbrown onmeat and thepossibility
of fats on foods catching fire.
4. LEAVE DOOR AJAR about 3 inches
—door stays open by itself, and keeps
heating unit at proper temperature for
broiling.
5. SWITCH OVEN SET and OVEN
TEMP CONTROLS TO BROIL. Preheating unit is not necessary.tt
6. Turn food only once during cooking.
Time foods for first sideas on chart. Turn
food, then use times given for second side
as a guide to preferred doneness. (Where
two thickrwsses and times are given to-
gether, use first times given for thinnest
food.)
7. Turn oven off, servefood immediately,
leavepan
outside oven to cool duringmeal
for easiest cleaning.
Cooking times given areapproximate and
should be used only as a guide; they are
based on meat at refrigeratortemperature
when placed in oven.
———
t’t~o?~: If your range is
lighterbrown than expected, eventhough directionshave been carefully followed.
Browning can be improved as follows:
1, Follow directions given on this page for setting up the oven, preparing food,
setting controls and leaving door ajar.
2. Preheatthe broil unit fgr 10minuteswith food andbroilerpan outsidethe oven.
3. Place food in oven, leave door ajar and time first side of food as directed. Turn
food and time second side, BUT for the LONGEST time given on the chart for
your particular food type, thickness, etc.
being operated on low power (voltage), broiled foods may be
23
Page 25

- ————
——
CONVENTIONAL z=:
BROILINGCHART
.—
m-
. ..... .—— --------- — ---- -- -.-----_.————
-----
❑...- .-.-=—:———
1 I I I
Bacon
. I _ _____
Beef Steaks2
Thin steaks,~2-~4 inch thick cook through very quickly.. Forobest outside browning, pan frying is
recommended. See Surface Cooking Chart. If oven broll!ng IS preferred, use D shelf position. To
achieve best browning on second side, cook first side just to change meat color then turn and
cookto donenesspref~rred.
R~~~
Medium
Well
Done
Rare
Medium
Wei’1
Done
I
V2 lb. about
8 thin slices
1 in. thick
(1-1Y2Ibs.)
1Y2in. thick
(2-2Y2Ibs.)
------- - —-..---------.- -----
c
I
4“
I -----’ ‘--
2-3
I
6-9
6“8
8-10
l~;6
20-25
Fish
Ham Slices
RawCookBefore Eating
~
Lamb Chops
Medium
Well Done
Medium
Weli Done
B;ke~ Products
Bread(Toast)or
ToasterPastries
1 lb. fillets
%-?42in.
1-2slices,
about 1lb,
ly2. in
(1Y2
2(1 in.)
about10-12oz.
2
(1Y2in.)
about 1 lb.
2-4slices
1pkg.(2)
I
L
V2 in.
Ibs.)
k-
c
c
B
c
c
c
B
12
1:
10
17
8
8
4-5
4-5
9-11
4-7
8-10
1::?4
lx-l--::
1, SeeUsing YourOvenfor positioningshelves.
2. See noteonroastingchart abouttenderedbeef.
3. Brusheachsidewith fat. Broil skinsidedownfirst. Forall weightsof chicken,BROILWITHDOOR
CLOSED.For any weight over2 Ibs., cook first side 5 minutes longerthan time givenon chart.
4. Cut lobster lengthwisethrough hard backwith sharp knife—breakopenand brush with melted
oil or butterandagainafter half thecooking.
NOTE: Line broiler pan with aluminum foil when using pan for marinating, cooking with fruits,
cookingheavilycured meats,orfor bastingfoodduring cooking.AvoidspiIling thesematerials
on oven liner or door. If spilled,~wipe up immediately with a papertowel; whensurface is
COOI,cleanand rinse.
24
Page 26

CONVENTIONAL OVEN
HOW TO OPERATE
BEFORESTARTINGYOUR
SELF=CLEANING
OVEN CYCLE,CHECKTHESETHINGS:
TO PREVENT SMOKING,
1
2
(!8
4fD
5
6
(a) Wipe up excess grease or boiloverson oven !4ttorn.
e
(~)Remove broiler pan, rack and other cooking utensils.See photo in
front of book to identify.
Clean spattersor spillson ovendooroutsidegasketand areaaroundoven
opening. SeeOVEN FRAME, DOOR LINER followingpages. NEVER
e
USE COMMERCIAL OVEN CLEANER IN OR AROUNDTHE SELFCLEANING OVEN.
DO NOT CLEAN REFLECTOR. l?AN/RINCS FROM MODELS
WITH PLUG-IN SURFACE UNITS IN SELF-CLEANING OVEN.
e
They are chrome-piated and will discolor.
On modelsso equipped,be sure rotisseriereceptacle is closed.
Be sure oven light is o#.
e
On models so equipped,raise
fullyraisedposition.
e
Shieldmust-be up so door can
the window shieldby
be latched for oven to
operate.
“m
e
liftinghandles to
_—
THENFOLLOWTHESEEASYSTEPSF(IR
THECOMPLETESELF-CLEANOPERATION:
CLOSE OVEN DOOR. TURN
A
OVEN SET KNOB TO CLEAN.
TURN OVEN TEMI’ KNOB TO
THE RIGHT (CLOCKWISE)
PAST BROIL SETTING TO
CLEAN. THE POINTER ON
THE OVEN TEMP CONTROL
SHOULD POINT UPWARD TO-
WARD THE INDEX MARKER.
(When this locationis reached the
control should snap into fina~
position. )
25
OVEN TEM/lPSEITING FORCLEANCYCLE
Page 27

e
BI e
CONVENTIONAL OVEN
PUSH AND HOLD LATCH RELEASE BUTTON WHILE SLIDING
LATCH TO RIGHT UNTIL IT IS INCLEAN POSITION.(OVENSET
knobmust be in OFF or CLEAN positionbeforelatch can be moved.)
ON YOUR AUTOMATIC OVEN TIMER:
CHECK START
TIME AS THE RANGE CLOCK. IF NOT, TURN START KNOB UNTIL
POPSOUT AND CANNOTBE TURNED.
SET THE POINTERAHEAD, ON THE DIAL MARKEDCLEAN,FORAS
MANYHOURS AS NEEDED TO CLEAN THE AMOUNT’OF SOIL IN
YOUROVEN. SUGGESTEDTIMESFOR CLEANINGARE.
Self-Cleanoven alone,1?42hoursformoderatesoil,2 hoursormorefora more
heavilysoiledoven.
DIAL TO BE CERTAIN POINTER IS AT THE SAME
IT
c1
2
e
e
For exampleifrangeclockreads7:00, setpointeronCLEANdialat 8:30for
a moderatelysoiled oven.
OVEN CLEANING LIGHT will glow when all stepshave been set up
properly.
When the LOCK LIGHT firstcomes on this indicatesthat the oven is
hot and the door will soonbe LOCKED. The light will stay on during
cleaning time and until oven heat decreasesin temperature again. See
more informationunder When Lock Light Glows.DOOR AND WINDOW GET HOT DURING SELF-CLEAN CYCLE. DO NOT TOUCH.
WHEN LOCK LIGHT IS OFF, PUSH ANDHOLD LATCH RELEASE
BUTTON WHILE SLIDING LATCH LEFT TO OPEN POSITION.
Now, open the oven door to see your sparklingoven! (Lower window
shieldby pushinghandles toward bottom of window.)
TURN OVEN SET TO OFF.
See More Information On the Self-Cleaning Oven, next page.
26
—
Page 28

CONVENTIONAL OVEN
—
xoreIBjrm@tiofl
ON THESELF-CLEANBNGOVEN.
HCMNk works
Your oven is cleaned by -heat (at temperatures
above usual cookingheats) which causessoil to
disappear from the oven. A device in the oven
further convertssoil into an essentiallyodorless
and colorless vapor. A slight odor may be detected, especiallyduring the first few cleanings.
i3efc3PeCkming,
Check the IFdkwwing
OVEN FRAME AND DOOR LINER —Door
liner outside the woven gasket (see photograph
in front of book to identify) and the oven frame,
are sealed off from the oven during cleaning,
therefore, are not cleaned automatically. However, during cleaning these areas heat enough
to “bake on” soil present so it becomes harder
to clean. If theseareasare soiled, removebefore
cleaning automatically, using soap filled steel
wool pad, if necessary. Rinse thoroughly to remove soap before cleaning. DO NOT CLEAN
GASKET.
CARE OF WOVEN GASKET—On oven door,
thewovenfiber-glassgasketis essentialfor agood
oven seal. CARE SHOULD BE TAKEN NOT
TO RUB, DAMAGE OR MOVE THE GASKET.
DO NOT useany cleaningmaterialson the gasket, and to do so mightdarnageit.
NO COMMERCIAL OVEN CLEANER OR
OVEN LINER PROTECTIVE COATING OF
ANY KIND SHOULD BE USED IN OR
AROUND ANY PART OF THE SELFCLEAN OVEN. ALSO DO NOT USE PIECES
OF FOIL TO CATCH SPILLOVERS OR TO
DELAY CLEANING OF SELF-CLEAN
OVEN.
CleanOnlyOwenShelves
tinYour SehClean Owen:
a. During cleaning,shelves may become irides-
cent and may lose some luster. (Oven shelves
discolor to a deep gray after many cleanings.)
b. Oven shelvesmay become so clean that they
will not slide easily on shelf supports after self-
.-
cleaning. To reduce this condition, dampen fingertips with small amount of cooking oil. Rub
lightly over rightand left sides of shelves(where
they contact shelfsupports). Use a lightapplic
tion of oil so it doesn’t run down and soil ove
walls.
m
Self-Cieaning OvenIlhXes
ASH—Some types of soil,eventhoughthey disintegrate,will leave a deposit in the oven. This
appears as a light film or a darker,heavier ash,
depending upon the amount of soil which was
in the oven. This ash can be removed with a
wipe of a moist sponge or cloth. IF PART OF
A DARK DEPOSIT REMAINS AFTER WIPING WITH A MOIST SPONGE, THE SELF
CLEANING OVEN WAS NOT TIMED LON
ENOUGH. The deposit will be removed in subsequentcleanings.
HAIR-LIKE LINES may be noticed on the
gray enameledsurfacesof the self-cleaningoven.
This is a commoncondition, resultingfrom heating and cooling during cleaning. These lines do
not affect oven performance.
WHEN LOCK LIGHT GLOWS—If you cook at
high temperaturesjust before cleaning,the Lock
Light may glow when OVEN SET is switchedto
CLEAN. The glow indicatesthat the oven is too
hot for LATCH to be movedto CLEAN and the
oven must be cooled first. See preceding pages
for information on glowing Lock Light during
cleaning.
IF SMOKING OCCURS DURING CLEAN-
ING because of excessive grease in oven or
utensil being left in oven, DO NOT TRY TO
FORCE DOOR OPEN but follow these steps:
a. SWITCH OVEN SET TO OFF.
b. Open windows and door to rid the room of
smoke.
c. A11owoven to cool AT LEAST ONE HOUR
before opening the oven door.
d. Correct the condition which caused smoking
and start the self-cleaning oven operatingagain.
HEATING AND COOLING of metal during
cleaning or during cooking result in “crackling”
soundswhich are considerednormal.
a
27
Page 29

MICROWAVE COOKING CENTER: CARE ANO CLEANING
-roper care and cleaning procedures are essentialfor a longand satisfactorylife for yourrange.
Included in this section are directions and
CLEANING CHARTS for cleaningall parts of
the range.When cleaningrangemanually,wearing of rubber gloves is recommended to protect
the hands.
lP0rw2f#~in
The porcelain enamel finishis essentially glass
fused on steel at high temperatureand is breakable if misused. This finish is acid resistant.
However, any acid foods spilled (such as lemon
or other citrus fruit juices, or mixturescontaining tomato or vinegar) should be wiped up immediately.See chart for cleaningsuggestions.
hand Finish
A Walls, FlcmPand
lastk Cower
e
Because there is little heat except in the food,
or sometimesin the utensils,spills and spatters
are easy to remove.Some spattercan beremoved
with a paper towel, others may require a damp
cloth. Remove greasy spatterswith a sudsycloth,
then rinse,and dry. Clo
on oven wa
attempt to remove the cover over the “stirrer”
at the top of theoven for cleaning.NEVER USE
A COMMERCIAL OVEN CLEANER ON ANY
PART OF YOUR MICROWAVE OVEN.
SCORCHED-APPEARING STAINS ON THE SHELF
OF YOUR MICROWAVE
greasebakingonto shelf while preheatingBrown
‘N Sear Dish, may be removed with DELETE.
(Note: Grease does not normallybake ontooven
interior in microwave operation; however, high
heatsgeneratedon bottomof Brown ‘N Sear Dish
can cause baked-on condition on shelf only, if
grease is present.)
After usingDELETE, rinseanddry thoroughly,
following instructions on can. Do not use
DELETE on the painted surfacesof the oven,
suchas the walls.It will scratchthe paint.
DELETE ( Catalog No. WX1OX4) may be
purchased from your local Hotpoint dealer or
from your Hotpoint Authorized Service Center,
check the”yellow pages” for location and phone
IIs.Underno circumstancesshouldyou
not use abrasive cleaners
OVEN,usually caused by
B. Door–hide
Glass-wipe up spattersdaily, washwhensoiled
with a minimum of sudsy warm water. Rinse
thoroughlyand dry.
Metal and Plastic Parts on Door—to assure a
tight seal around door, this area must be wiped
frequentlywith a damp cloth to removeall soil.
A buildup of soilcouldresultin leakageof microwave energy from the oven. DO NOT USE
ABRASIVES, SUCH AS CLEANING POWDERS OR STEEL AND PLASTIC PADS.
THEY WILL MAR THE SURFACE OF
THESE PARTS. ALSO, ALL CLEANING
MATERIALS USED ON THE DOOR PARTS
MUST BE THOROUGHLY RINSED OFF.
~.
AutomaticTemperature
Probe
Probe is sturdy,but care shouldbe taken in handling.Do not twistor bend;avoid droppingtemperatureprobe.
Clean as soon after using as possible.To clean,
wipe with sudsycloth, then rub lightlywithplastic scouringball if necessary.Rinse and dry. (Or
washin dishwasher.)
DO NOT USE TEMPERATURE PROBE IN
OVEN UNLESS IT IS INSERTED INTO
FOOD, AND TIME/TEMP SWITCH IS AT
TEMP.
PLUG-lNSURFACEUNHTS
Clean area under reflector pans frequently. Accumulatedsoils, especiallygrease,may catchfire.
To make your cleaning job easier, the surface
units on your range are Plug-Ins which can be
removed.
TO REMOVE PLUG-IN SURFACE UNIT:
a. Always be certain that the control for that
surfaceunitis at OFF positionand the unit coils
are cool before attemptingto remove the unit.
Plug-in Surface Unit
1
ELETE may also be sold at local grocery or
hardwarestores,or at housewaresdepartmentof
some departmentstores.
28
T
G
A
Page 30

MICROWAVECOOKING CENTER: CARE AND CLEANING
b. Raise the unit coil, at point opposite recep-
tacle,aboutone inchabovethe pan/ring and pull
it awayfrom thereceptacle.
c. Carefully pull the unit terminalsthrough the
openingin thereflectorpan/ring.
After removing the Plug-In surface unit, re-
move the chrome-plated reflector pan/ring to
clean underthe unit.
NOTE: Ranges with Plug-In surface units have chrome-
plated reflector pan/rings.
DO NOT COVER WITH ALUMINUM FOIL. Clean as recommended in Cleaning Chart.
Wipe around edges of the surface unit opening
in the cooktop, clean the bowl-shapedarea below theunitand rinsewithdamp clothor sponge.
To FBepkaceIwJg”hl unit
a. Place chrome-platedreflector an/ring into
the unit recessin thecooktop so e unit recep-
tacle can be seen through openingin reflector
pan.
b. Insert theterminalsof Plug-In unit through
opening in chrome-plated pan/ring and into
receptacle. s
c. Guide the surface unit into place so it fits
evenly.
J
Caution in Caring for
Plug-in SurfaceUnits
DO NOT immerse Plug-In surface units in
liquid of any kind. See the Cleaning Chart
for cleaningof surfaceunitcoils.If thespider
or medallionare cleaned, be certain to wipe
all cleaning materials thoroughly from the
unit coils before returning the unit to the
range.
DO NOT attemptto cleanPlug-In surface
units in an automatic dishwasher or selfcleaning oven.
DO NOT let thetwo electricalends of the
Plug-In surface unit get damaged or bent.
The terminals are sturdy and will not be
damaged if handled with reasonable care.
The Plug-In unit terminals and receptacle
are designedto line up automaticallywhen
pluggedtogether. If the terminalsare badly
bent and cannot be plugged into the receptacle,theunit shouldbe takento the product
servicecenterfor replacement.
DO NOT attempt to clean, adjust or in
any way repairthe Plug-In receptacle. If an
abundanceof liquid shouldaccidentally spill
and collect inside the receptacle, call your
product serviceman.
The Master ovenis ventedthrougha duct which
islocatedunderrightrearsurfaceunit.Cleanthis
duct frequently. To remove, lift rear surface
unit, remove reflector pan, and lift out duct. To
reposition, place solid part of duct over round
opening under the cooktop. Then position hol
in duct so it sets directly under round open”
in reflector pan. Duct mustbe in correct positl
so moistureand vapors from ovencan be vente
during use.
NEVER COVER HOLE in oven vent duct with
aluminumfoil or any other material.To do so
prevents the oven vent from functioning properly during cooking.
*
LAMP REPLACEMENT
Fluorescent
Surface Lamp
WHEN CHANGING A FLUORESCE
LAMP, DO NOT TOUCH THE METAL AT
ENDS OF LAMP.
a. Pushbuttonseitherside of glasspanelcovering
lamp and let swing down for accessto lamp.
b. Roll lamp, one quarterturn,remove.
C. Check type and wattageof lamp; replace with
same kind. Hold lamp near each end and insert
prongsinto sockets.Gentlyrolllampuntilit stops.
d. Connect electric power to range. Start
seeinstructionson
Surface Cookingpages.
lamp;
m
a. Removethe threeslottedscrewsin lamp cover;
see diagram. Remove cover; replace lamp with
40 watt appliancelamp.
b. Replace lamp cover with three screws.
c. Connect electric power to range.
29
e
Page 31

MICROWAVE COOKING CENTER: CARE ANO CLEANING
OwenLampIMierowaueChmnll
Microwaveoven lampshouldlast almost as long
as the armliancelasts. To re~lace it reauiresa
Product‘Servicecall. -
~w~lirI~ ~~c
Range
A levelingscrew is located at each cornerof the
baseof therange.By removingthebottomdrawer,
you can level the rangeto an uneven floor with
theuseof anutdriver.
Adjusting Owen Thermostat
When cooking a food for the first time in your
new oven, use time given on recipe as a guide.
Oven thermostats,over a period of years, may
“drift” from the factory setting and differences
in timing betweenan old and a new oven of 5
to 10 minutesare not unusual.Your new oven
hasbeenset correctly at the factory and is more
apt to be accurate than the oven which it replaced.However, if you findthat your foodscon-
sistentlybrown too little or too much, you may
ke a simple adjustment in the thermostat
ven Temp) knob.
PULL KNOB OFF OF SHAFT. LOOK AT
BACK OF KNOB AND NOTE CURRENT
SETTING, BEFORE MAKING ANY ADJUSTMENT. To increase oven temperature,
adjust toward HI or RAISE; to decrease tem-
perature adjust toward LO or LOWER. Each
notch changes oven temperature 10 degrees.
Oven temperaturecan be raised by 20 degrees
or loweredby 30 degrees.
./
POINTER
‘1
pointer towardRAISE to increasetemperature;
toward LOWER to decrease temperature.Each
a
notch changes oven temperature 10 degrees.
(NOTE: On self-cleaningovens, the oven temperaturecan be raised by 20 degrees or lowered
by 30degrees). Tightenthescrews.
3. Return knob to range, matching flat area on
hob andshaft.Recheck ovenperformancebefore
makingan additionaladjustment.It is important
to return knobsto shaftsfrom which they came.
Llsed Aluminum Fail
A. IN MICROWAVE OVEN, use metalonly as
directed in the Cook Book. Metal strips as used
on meat roasts are helpful in cookingfood when
used as directed. Metal trays may be used for
TV dinners. However,when using metal in the
microwaveoven,keep metal at least l-inch away
from sides of microwaveoven.
L A
B IN CONVENTIONAL OVEN, if desired,
broiler pan may be lined with foil and broiler
rack may be covered with foil for broiling. ALWAYS BE CERTAIN TO MOLD FOILTHOROUGHLY TO BROILER RACK AND SLIT
FOIL TO CONFORM WITH SLITS IN RACK.
Broilerrackis designedto minimizesmokingand
spattering, and to keep drippings cool during
broiling.Stoppingfat andmeatjuices from draining to the broiler panpreventsrack from serving
itspurpose,andmay let juicesbecomehot enough
to catch fire.
C. ON CHROME-PLATED REFLECTOR
PAN/RINGS. Do not cover with aluminumfoil.
Cleanas recommendedin CleaningChart.
—
1. Hold knob firmly in one hand so pointer is at
top.
2. With other hand, loosen 2 screws and move
pointerone notchin thedesireddirection.Adjust
30
Page 32

NOTE:Letrangepart(s)cod before cleaning rnamwally.
It is
recommended that rubber gloves be WOFOto protect the hands.
.—=.—.—..—.
Chrome-Plated
Reflector
Pan/Rings
Broiler Pan
and Rack
Soap and Water
Stiff.,Bristled Brush
Soap-Filled
Scouring Pad
Soap and Water
Soap-Filled
Scouring Pad
Plastic Scouring Pad
Clean as below or in dishwasher. DO NOT CLEAN IN SELF-CLEAN OVEN,they will discolor.
Wipe all rings after each cooking, so unnoticed spatter will not “burn =
on” next time you cook. To remove “burned-on” spatters use any or
all cleaning materials mentioned, Rub lightly with scouring pad to
prevent scratching of surface. See picture on Surface Cooking pages
for sizes of pansto use to prevent permanent discoloration.
(Do not let soiled pan and rack stand in oven to cool.) Drain fat, cool
pan and rack slightly. Sprinkle on detergent, fill pan with warm water.
Spread cloth or paper towel over rack, let stand a few minutes. Wash,
scouring is necessary. Rinse and dry. (Or wash in dishwasher.)
31
Page 33

MICROWAVE COOKING CENTER: CARE AND CLEANING
mw 5i!?l@leag%gr%tcrowave(jhvkitig-~entir
NOTE: Let range part(s) cool before cleaning manually.
U is recommended that rubber gloves be worn to protect the hands.
crowaveOven Door
@
Inside
Optional Ventilating
Hood Metal Grease
Filters
—
L
..-
— .-..e=s.:::::=a.ss.==~..~~...— —
Soapand Water
Soapand Water
.. ...
‘aE:2%‘r
Soap and Water
Damp Sudsy Cloth
Soap and Water
I
__L------.--—.. ..-- ——--
.,,qsg~:q::=-::.C-_____
Wash all glass with cloth dam ened in soapy water. Rinse and po!ish
with dry cloth. Knobs on con rol panel are removable, if desired. If
knobs are removed, do not allow water to run down inside surface of
glasswhile cleaning.
Wash, rinse then
~h#?fiammonia, acids or commercial oven cleaners which may damage
.
Acids— if range is hot use dry paper towel or cloth to wipe UP right
away. When surface
$?i~?~%ftc., wash with soap and water when cooled, rinse. Polish with
.
Avoidcleaning powdersor harshabrasiveswhich may cause scratching
of surface. See note on porcelain enamel. Care Section.
To assure a tight seal around doorthis area must be wiped frequently
with a damp cloth to remove all soil, A build up of soil could result
in leakage of microwave energy from the oven. DO NOT USE ABRASIVES, SUCH AS CLEANING POWDERSOR STEEL AND PLASTICPADS.
THEY WILL MAR THE SURFACE OF THESE PARTS. ALSO,ALL CLEANING MATERIALS USED ONTHE DOORPARTS MUST BE THOROUGHLY
RINSED OFF.
Soak, then agitate in hot detergent solution. Don’t use ammonia or
other alkali because it will darken metal. Light brushing may be
help remove imbedded soil and dust. Rinse, shake, and remove
to
moisture before replacing.
polishwith dry cloth. DO NOT USE steel wool, abra-
is cool, wash and rinse. other—such as fat spat-
1’
used
*Spillage of marinades, fruit juices “and basting materials containing acids may cause discoloration,so should be wiped
up immediately with a paper towel. When surface is cool, clean and rinse.
32
—
—
Page 34

IF, WHEN COOKING WITH AUTOMATIC TEMPERATURE PROBE, N(9 COOKMIG
TAKES PLACE AFTER “STARTs’ BUTTOM HAS BEEN PRESSED:
a.Check to be sure TIME/TEMP Switch is set at TEMP. If set at TIME, andTimer is,at
“O,” no cooking takes place. (If time remainson Timer, oven willoperate until time reaches
“O,” then go off.)
b.when cookingwithTEMPERATURE PROBE, check to be sure cable end is securely
“seated” into oven receptacle. If it is not securely “seated,” and oven is otherwiseset for
Temperature Probe Cooking, oven will not start to tell you firm connection has not been
made.
C.When cookingwithTEMPERATURE PROBE, check to be sure temperatureset on di
is higher than actualtemperatureof food inoven. If food has reached or exceeded temper
ture set on dial, oven will not start to tell you set temperaturehas been reached.
iF THE MICROWAVE POWER WON’T COME ON
Check to be certainthe door issecurely closed, and the timer set. If a dish touches the door
when the door seems closed, it actually may not be firmly closed. Unless the door is closed
to engage the safety interlocks, the microwaveenergy cannot come into the oven. Check to
be certain that TIME/TEMP switch is pushed all the way right or left. An “in-between”
setting should be avoided.
if=MICROWAVE ENERGY GOES OFF BEFORE SET TIME HAS ELAPSED
Check the house fuse protecting the range circuit. If fuse has not blown and power con-
tinues to go off, this signalsa problem, so call serviceman.
*
~
——
IF LAMP BURNS OUT
Changing Microwave oven lamp requires a Product Service call. However, original lamp
is designed to last for about the life of range.
TV-IRAIDM3!BWIEFtFEM?ENCE
Some TV and radio interference might be noticed while operating the microwave oven. I
is similar to the interference caused by other small appliances such as vacuum cleaner
mixers, etc. It does not indicate a problem with your oven.
—
33
w
b
Page 35

When Rangek Working But
T’sv3ubkk With A Feature:
AUTOMATIC OVENTIMERS. Check to be certain
step-by-step directions were followed correctly.
Reviewpageson use of timer.
BAKING.Checkmaterialand sizeof bakingutensil; placement of shelf and food in oven. If the
oven was used for broiling, just before bakinga
food, turn the oven completely off and open the
door wide so it can cool (5 or 10minutes). Then
ovenmay be used for baking.
BROILING.Be sure OVEN TEMP is set at
ROIL. If there was excessive smoking and
attering: Were shelf and broiler pan at posi-
a
on suggested on broiling chart? If aluminum
foil was used on broil rack, was it handled according to directions?
SURFACE UNITS. If lights on range are working
but the oven or surface units do not heat, call
serviceman.
CAN’TLATCHDOOR.Check the step by step directionsfor latchingdoor: (a) Did you pushand
hold in latch release while moving latch? (b)
Turn Oven Set knob to CLEAN. Glowing Lock
Lightafter knobis turned showsoven is too hot
from previous oven use and door won’t latch.
—
Open door wide so oven can cool, then latch
can be moved. (c) Be sure the door shield is in
up position and is firmly in place. (d) Oven Set
must be at”CLEAN or OFF before latch can be
moved.
ODOR,SOUNIIS.Check More Information on the
Self-C’leaningOven, Care Section.
OVEN
DOESN’T CLEAN. Check the directions to
be certain ALL operations were done correctly
for startingthe cleaningcycle. Cleanlightshould
come on,
Possible causes of the problem: (a) Failure to
set proper AutomaticTimer dial. The STOP dial
must be set and advancedbeyond the timenoted
on range clock. (b) The STOP dial was not ad-
vancedfor long enoughtime. (c) A thick pile of
spilloverwhencleanedleavesa heavy layer of ash
“ spotswhichcould haveinsulatedthe area from
rtherheat.See page27concerningash. (d) Both
a
VEN SET and OVEN TEMP must be at
CLEAN setting.
SMOKING. Cooking utensils and excessive
amounts of spillovers and liquid grease not
baked on were not removed before starting
SELF-CLEANING OVEN.
If ovenand surfaceunitsdo not heat,and lights
on the range are not working,check first to see
that the three-pronged plug connected on back
of range is fully insertedin wall receptacle.
RangeHouseFuse
The difficulty might also be in the main distribution panel of your house by a blown oven
circuit fuse, a tripped oven circuit breaker,the
main fuse, or the main circuit breaker,depending upon the nature of the power supply. If a
circuit breaker is involved, reset it. If the con-
trol box employs fuses, the oven fuse (a car-
tridge-type) should be changed. BUT ONLY
BY SOMEONE FAMILIAR WITH ELECTRICAL CIRCUITS.
Apartment tenants and condominium owners
shouldrequesttheirbuildingmanagementtoperform this check before calling for service.
If after replacing the oven circuit fuse or resetting the circuit breaker, the fuse blows or
circuit breaker trips open again, call your serviceman.
t0u15vILLE, w. *~ MAo[ IN us A
E
p
Is
=s5
FCC TYPE APF+?OVAL
lb
USE ON 3 wIRE W HZ AC. ONLY
MOOEL NO
cOLOR KW
n
GENERAL ELECTRIC CO ~, ‘$JF 1
--
120/240 v
Page 36

-,
,“
—.......
e. !
CUSTOMERCARE
m ● ■ EVERYWHERE
t
YourHotpointapplianceisoutstandingin featuresandhas
been well-designed,with the help of home economists,
withthehomemakerin mind.Youwill findit dependable,
precision-builtand reliablein performance.
Similarly,intensiveefforts have establishedan efficient,
well trained,nationwideproductserviceorganization.No
or move—the networkof thou-
/
I
!)
matterwhereyou live—
sands of Hotpoint franchised distributors, dealers and
servicetechniciansarehappytoserveyouandmakedoubly
sureyour newappliancegivesyou continued,satisfactory
performance.
Notice to Owner
ForProfessionalMaintenance,call
Hotpoint Franchised Service—it’s
nearby. Get telephone number
from your dealer or the “yellow
pages” andwrite it here.
Hotpointwantsyouto bepleasedwith your new
HotpointAppliance.Part of our commitmentto
keepingyou pleasedis providingthe best possible servicewe can.
Should your Hotpointapplianceneedservicing,
call your localdealer.He”mayprovidethe serv-
ice himself,or refer youto a.qualified servicer
in yourarea.
If you do not havea servicing dealer, call the
Factory Service office in your area. A list of
these offices and telephone numbers is included with your appliance.
If the service you receiveis not to your satis-
faction, herearethree stepsyou shouldfollow
to makeit right:
t’First, contact the peoplewho servicedyour
Hotpoint appliance.Explainyour point of view
and why you are displeased. in most cases,
this first step will solve most problems.
2. If you still have not resolvedyour problem,
write all details,including yourtelephone num-
RANGE MARKETING DEPARTMENT
GENERAL ELECTRIC COMPANY
Appliance Park, Louisville, Kentucky 40225
Q331 +
n~~
Pub.No.394F$&&==
For.service after the warranty period: ~
Eventhefinestprecision-builtappliancesmayrequireserv-
ice fromtimeto time.In someareas,franchisedCustomer
Care@serviceorganizationsofferservicecontracts,beyond the originalwarrantyperiod,whichenableyou to budget
for suchpossibleoccurrences.
e
Contactyour local franchisedCustomerCare serviceorganizationto ascertainwhetherservicecontractsareavailableinyour area,andto learnthedetailsof theirplan
its
termsand conditions.
ber and the model and serial number to Hotpoint direct. The addressis:
MANAGER—CUSTOMER
HOTPOINT
WATI’ERSON CITY EAST 312
APPLIANCE PARK, LOUISVILLE, KY. 40225
If you are dissatisfied with the action taken,
3.
the final step wouldbe to send full information
to:
MAJOR APPLIANCE
CONSUMER ACTION PANEL
20 NORTH WACKER DRIVE,
CHICAGO,ILL. 60606
This panel,knownas MACAP,is a groupof independentconsumerexperts under the sponsorshipof several industry associations. Its
purposeis to study industry practices and to
advise the industry of ways to improve customer service.
Freeof industry control andInfluence,MACAP
is able to make impartial recommendations,
consideringeachcaseindividually.
RELATIONS
and
.—
—
.
e
QUALITY PRODUCT Of GCNERAL ELECTRIC COMPANY
~
@
~PartNo.862A299P1O2I
 Loading...