

Page 1
Howtoget thebestfrom
RGB744GE
RGB745GE
conbnK
Anti-TipDevice 3,29,30 Self-CleaningInstructions 14,15
ApplianceRegistration 2
Careand Cleaning 14-19 ThermostatA.djustment 20
Clock and Timer- 9
Consumer Services
Features
I
Flooring under ~nge
InstallationInstructions
I
Leveling 29 Surface Cooking 7
~Modeland Serial Numbers 2, 6,24 Burner Grates
I
oven 8,9
Air Adjustment 20 Control Settings
I
Baking,BakingGuide
Broiler Pan and Rack 13,17,19 Flame Size
I
Broiling,BroilingGuide
Control Settings 8,9 Warranty
I
Door Removal
Light; Bulb Replacement
oven BottomRemoval 18 Instillation
Ove(lVents
35
6
23,24
22-32
10,~~
13
17
8, 18
4,9, 17
Shelves
PowerOutage? Problem Solver
SafetyInstructions 2-5
Setthe Clock
Setthe Timer 9
Burners 17,19
Cookware Tips
LightingInstructions 7
Back Cover
8,9, 17,19
21
16,19
7,21
22-32
useandcare
& Instigation
8
of models
-94
9
7
7
Preheating 10,11
Roasting,RoastingGuide 12
1
GE Answer center@
800.626.2000
Page 2
Readthk bookcareful~y.
It is intendedto help youoperate
and maintainyournewrange
properly.
Keepithandy foranswersto your
questions.
Ifyoudon’tunderstandsomething
or needmore help, write (include
yourphonenumber):
ConsumerAffairs
Hotpoint
AppliancePark
Louisville,KY40225
writedownthemodeI
andserialnumbers.
You’llfind them on a label located
either on the front frame when you
open the ovendoor or behind the
storagedrawer or kick panel.
These numbers are also on the
Consumer Product Ownership
RegistrationCard that came with
your range. Beforesending in this
card, please write these numbers
here:
Model Num—ber
If youneedservice,..
Toobtainservice,seethe
ConsumerServicespagein the
backofthis book.
Toobtainreplacementparts,
contactGE/HotpointAppliance
PartsMarts or FactoryService
Centers.
We’reproudofourserviceand
wantyoutobe pleased. If for some
reasonyouare nothappywiththe
serviceyou receive,here are three
steps to followfor further help.
FIRST,contactthepeoplewho
servicedyourappliance.Explain
whyyouare not pleased. In most
cases, this will solvetie problem.
NEXT, if youare stillno-tpleased,
writeallthe details-including
yourphone number-to:
Manager, ConsumerRelations
Hotpoint
AppliancePark
Louisville,Kentucky40225
FINALLY,if yourproblem is still
notresolved, write:
Major Appliance
Consumer ActionPanel
20 North WackerDrive
Chicago,Illinois60606
Serial Number
Usethese numbers in any
correspondence or service calls
concerning your range.
Immediately contact the dealer (or
builder) that sold youthe range.
/-‘
/’
,/../
Page 3
I]wPQRTmT
SAFETY NmIcE
TheCalifornia SafeDrinking
%VaterandToxicEnforcement
ActrequirestheGovernor
CaliforniatopubIishalistof
substancesknowntothestate
tocause cancer,bifi defectsor
otherreproductiveharm, and
requiresbusinessestowarn
customersofpotentialexposure
10suchsubstances.
Gasappliancescancause
minorexposureto fourofthese
substances,namelybenzene,
carbonmonoxide,formaldehyde
andsoot,causedprimarilybythe
incompletecombustionofnatural
gasor LP fuels.Properlyadjusted
burners,indicatedbyabluish
ratherthan ayellowflame,wili
minimizeincompletecombustion.
Exposuretothesesubstancescan
beminimizedbyventingwith
anopenwindowor usinga
ventilationfanor hood.
\vheH You&t Your Raage
QHavethe instiller showyou
thelocation ofthe range gas
of
system,itis your personal
responsibilityandobligationto
haveanungroundedoutletreplaced
witha properly-grounded,threeprongoutletin accordancewith
theNationalElectricalCode.Do
notuse anextensioncord witl~
thisappliance.
@Besure allpattingmaterials
are removed fromthe range
beforeoperatingit, to preventfire
or smokedamage should the
packingmaterialignite.
e Besure your range iscorrectly
adjusted by
technician or insbller forthe
type ofgas (natural or LP) on
wtich it is to be used. Your
rangecan beconvertedforuse
on eithertypeofgas. See
Instigation Instructions.
@After prolonged use ofa
range9
may result and ImaRy floor
a qualified service
high floor temperatures
coveringsWilinotWithsbnd
this kind of use. Neverinstallthe
rangeovervinyltileor linoleum
thatcannotwithstand suchtypeof
use. Never installitdirectlyover
interiorkitchencarpeting.
@CAUTION:ITEMS OF
mTEmsT
sHomD Nm BE
cABxmTs ABQW AWGE
mcHILDmN
smmDDJ
o~ON TmBaCkSplaSh
OF A RANGB-cHILDmN
cl.IMBING ONTHE MNGE
mmAcH ITEMSCOULDBE
SEWOUSLYINJUMD.
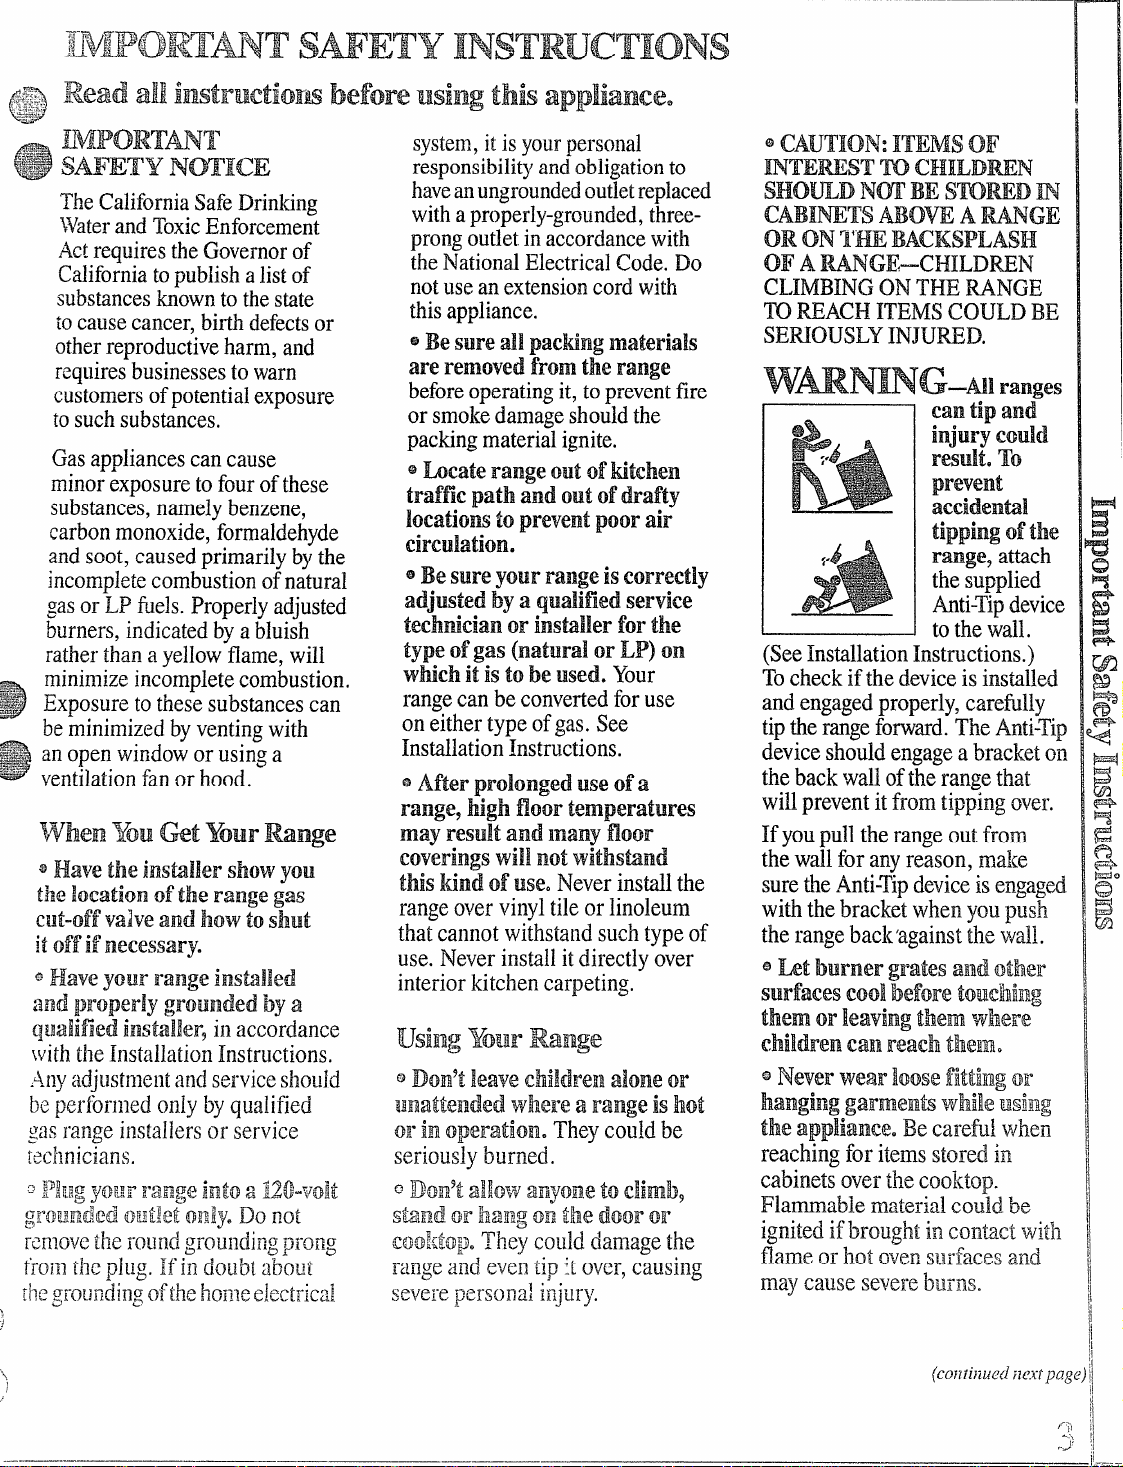
wmNNG–Allranges
Can tip
injury Could
result. To
prevent
aceidentil
tippingofthe
rmge~ attach
thesupplied
Anti-Tipdevice
I
tothewall.
(SeeInstallationInstructions.)
Tocheckif the deviceis installed
andengagedproperly,carefully
tiptherangeforward.TheAnti-Tip
device shouldengagea bracketon
thebackwalloftherangethat
willpreventit fromtippingover.
If youpull the rangeoutfrom
thewallfor anyreason, malce
surethe.Anti-’ipdeviceisengagd
withthebracketwhen youpush
the rangeback’againstthewall.
and
Page 4
.—..-.. .——.——.—
e ~seod~ d~ pt holden—moist
or damppotholdersonhotsurfaces
mayresultinburnsfromsteam.
Donotletpotholderscomenear
openflameswhenfifiingcookware.
Do notusea towelorotherbulky
clotl~inplaceofa potholder.
@Tominimizethe possibility
ofburns9ignitionofflammable
materials,and spillage,turn
cookwarehandlestowardtheside
orbackof therangewithout
extendingoveradjacentburners.
@Mwaysturn sunrfaeeburner
controltoOFFbeforeremoving
cookware.
ecarefully watchfoofi being
fried atahighflamesetting.
e~~~~~~~~~~~~~~~~fi(a~~
opetings)oftherange.They
providethe air inletandoutlet
whichis necessaryfortherange
to operateproperlywithcorrect
combustion.Air openingsare
locatedat therear ofthe cooktop,
atthetopoftheovendoor and
underthekickpanelor storage
drawer.
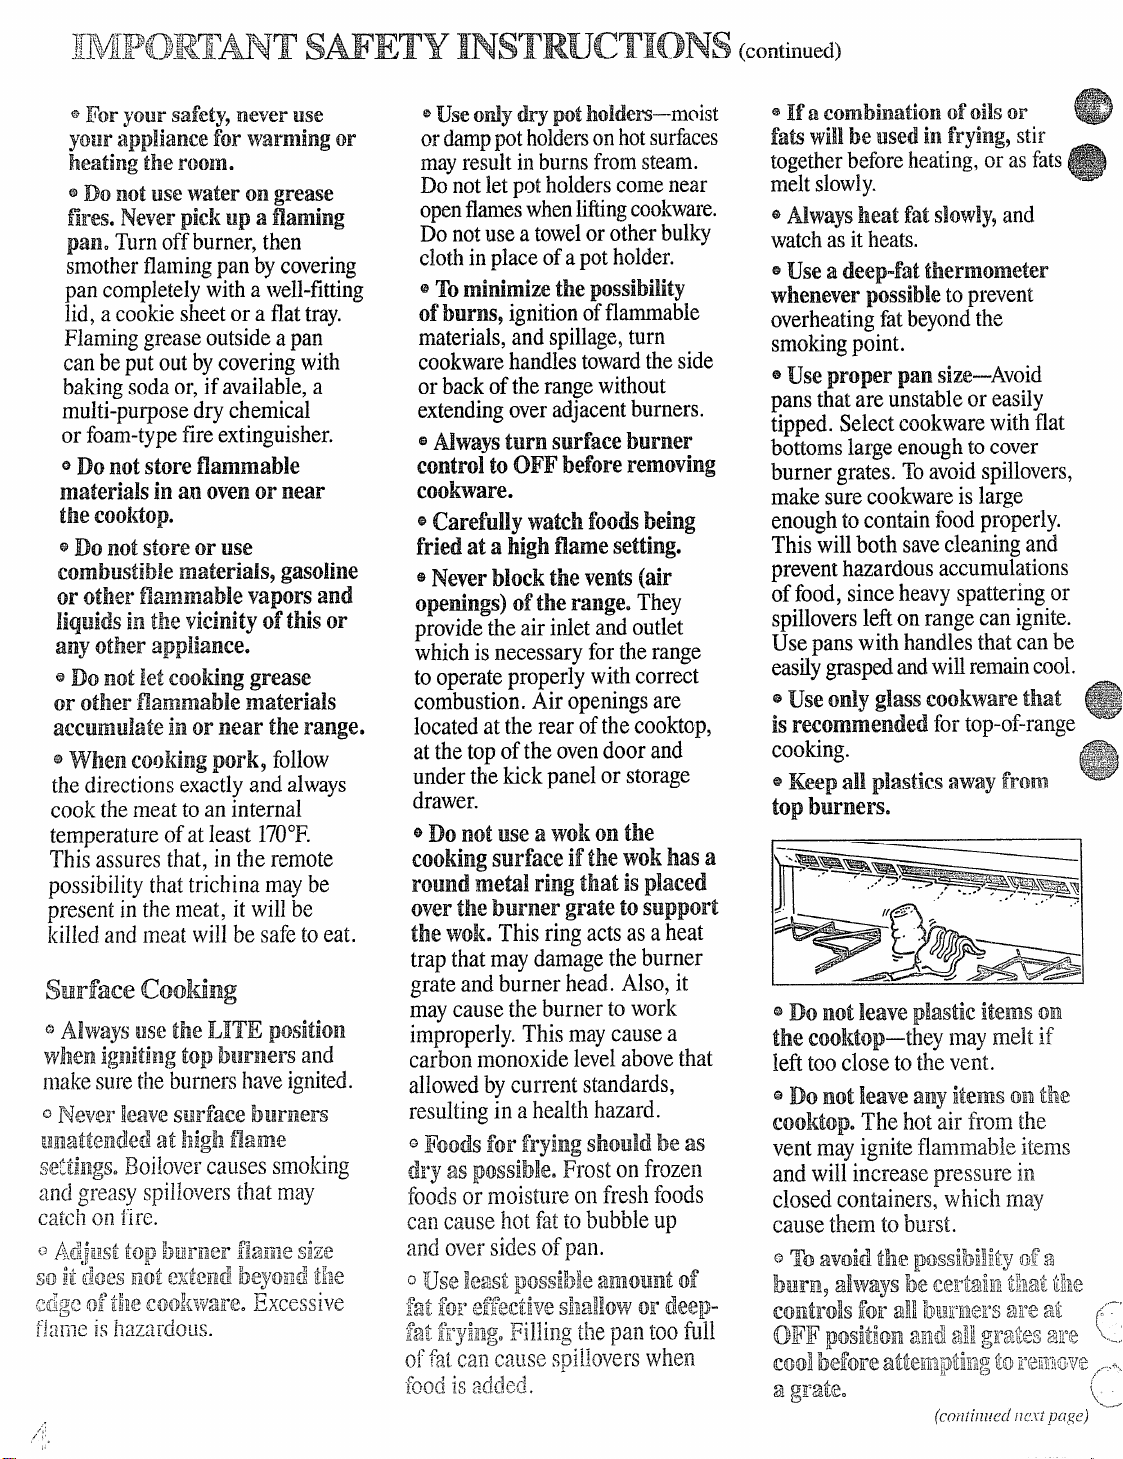
@~~ ~~~~$~~~~~ ~~~~~
tooting surfaceif thewokhasa
roundme@lring
that is placed
overthe burner gratetosupport
thewok.This ring acts as aheat
trap thatmaydamagetheburner
grateandburner head. Also,it
maycausethe burnerto work
improperly.This maycausea
carbonmonoxidelevelabovethat
allowedbycurrent standards,
resultingin ahealthhazard.
~Foods for frying should he
dry as possible. Frost
on frozen
as
foodsor moist~]reon fresl~foods
ca~~causehot fat lo bubbieup
and OVer
ol~$&~$~s~~~s~~~leamolgntof
sides ofpan.
.
fat for effeci:il~eSlla!lov+or dee~3”
:~$f~’jy~1?G-
fl.iaolqillingtilepan too till
off~~~~nQauseSpilioverswhen
.f~:
~~~~~(j,{~~.~.,
faR
will be used infrying, stir -
togetherbeforeheating,or as fats
meltslowly.
@Mways heat fatslowly9 and
watchasit heats.
~$e a deep-fat thermometer
@
wheneverpossibleto prevent
overheatingfatbeyondthe
smokingpoint.
o USeproper pan size—Avoid
pansthatareunstableor easily
tipped.Selectcookwarewith.flat
bottomslargeenoughtocover
burnergrates.Toavoidspillovers,
makesurecookwareislarge
enoughto containfoodproperly.
Thiswillboth savecleaningand.
preventhazardousaccumulations R~‘
offood,sinceheavyspatteringor
spilloversleftonrangecan ignite.
Usepanswith handles that canbe ~:
easilygrasp~ andwiflremaincool.
@Useonly glasscookwarethat
isrecommendedfor top-of-range
cooking.
Keepall plastics awayfrom
@
@~~ not]eaveplastic itemson
the coolitop–they maymeltif ‘:’,
lefttoocloseto tl~event.
eDo notleaveany itemsonthe ‘“:;:;
cooktop.Thehot air from the
ventmayigniteflammableitems
and willincreasepressure in
closed containers,whic]~may
causethem.to burst.
Page 5

e IJseoniyglass cookware
that is reeom~llended
in gas ovens.
@.AIwa’ysremove broiler pan
from Ovenas soon as you fltish
brailimg. Grease lefi in
cancatchfireifovenisused
withoutremovingthegreasefrom
thebrofierpan.
e When broiling, if meat istoo
closeto the flame9the fat may
igfite. Trimexcessfattoprevent
excessiveflare-ups.
@Make sure broiler pan is in
pIaeecorrectly to reducethe
possibilityofgreasefires.
@If you should have agrease
fire in thebroiler pan,turnoff
oven,andkeepdoor closedto
containfire untilitburnsout.
@Donot Cleandoor gasket,
Thedoorgasket is essentialfor a
goodseal. Care shouldbe taken
nottorub, damageor movethe
gasket.
@Do not use ovenCleaners.No
commercialovencleaneror oven
linerprotectivecoatingofany
kindshouldbeused in or around
anypartoftheoven.
@Beforeself-cleaning the oven9
removebroiler pan and other
cookware.
e clean only parb listed in this
use and care BQQIL.
@Iifeeprange clean nnd free of
accumulations of ‘greaseor
Spi]loverswhich may igdtee
for use
thepan
@Read ‘tTheProblem sQlver99
on page21ofthisbook.
eDon9tattempttorepair
or replace any partofyour
range unlessit
recommended
otherservicingshouldbe referred
toaqualifiedtechnician.
is specifically
inthis book. All
SAW TmsE
msTRucTIoNs
Page 6
..—..
——
——
@
@@@@
I
RGB7@GEN
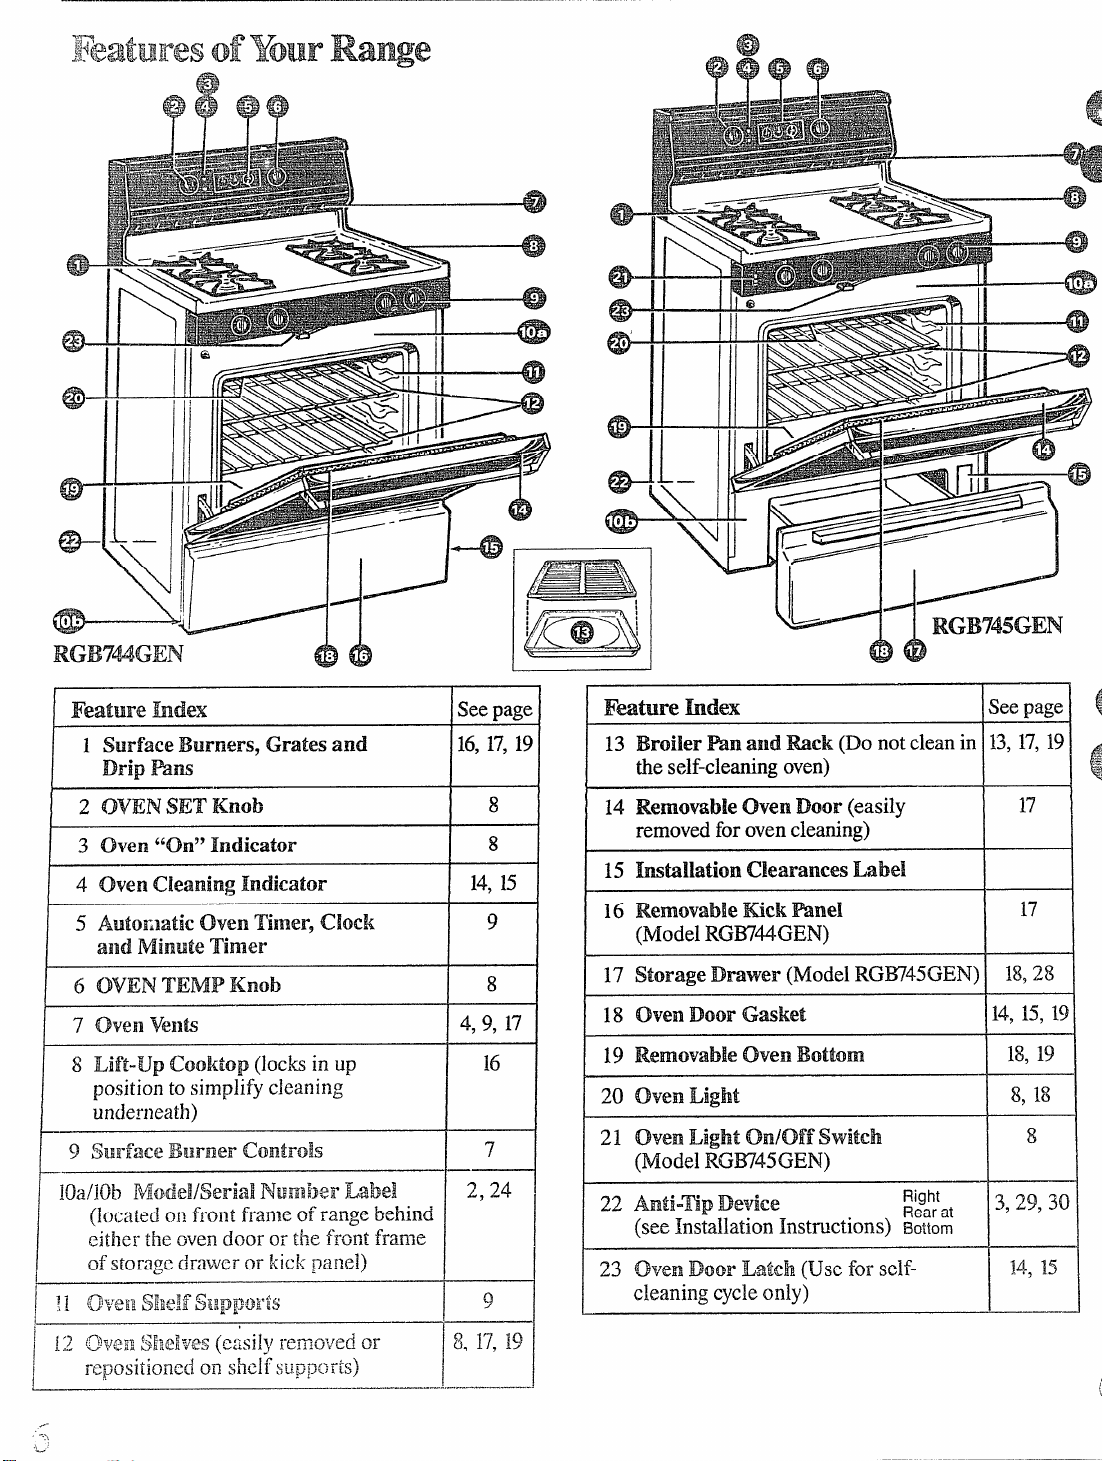
I Feature hdex
1 surfaceBurners, Grates and
Drip mm
I
2 OVEN SET Knob
I
/ 30 Ven “on9’Indicator
6 OVEN TEMP Knob
I
ISeepage I
16,17, 19
II
8
I
8
I
-
U4<N
13 Broiler Hn axld~ek (Do not clean in 13,17,19
tie self-cleaning oven)
I
I
14 Removable
removedfor oven cleaning) -
16 Removable=ek Mnel
(Model RGW44GEN)
17 Storage Dmwer (Model RGW45GEN) \ 18,28
19 Removableoven Bottom
20 ovenLight I 8,18
21 oven Light on/off switch 8
(Model RG~45GEN)
22
Anti-rep De=dee
(seeInstallationInstmctions) ~~;~~
OvenDoor(easily 1171
Right
I I@
I
I
17
II
I
18,19
I
I
I
3,29,3
II
.,--
. ...
L=
{(
ti ,
Page 7
Sllrfa.cecooKng
&g$.
v$# ~IectrieIgtition
~\:g’:-
Yoursurfaceburnersare lighted
~%~byelectricignition,eliminatingthe
3
needforstandingpilot lightswith
constantlyburningflames.
In case ofa power outage, youcan
lightthe surfaceburners on your
rangewith a match. Hold a lighted
matchto theburner, then turn the
knobtothe LITE position. Use
extreme caution
burnem thisway.
Surfaceburners in use whenan
electricalpower failureoccurswi~
continueto operatenormally.
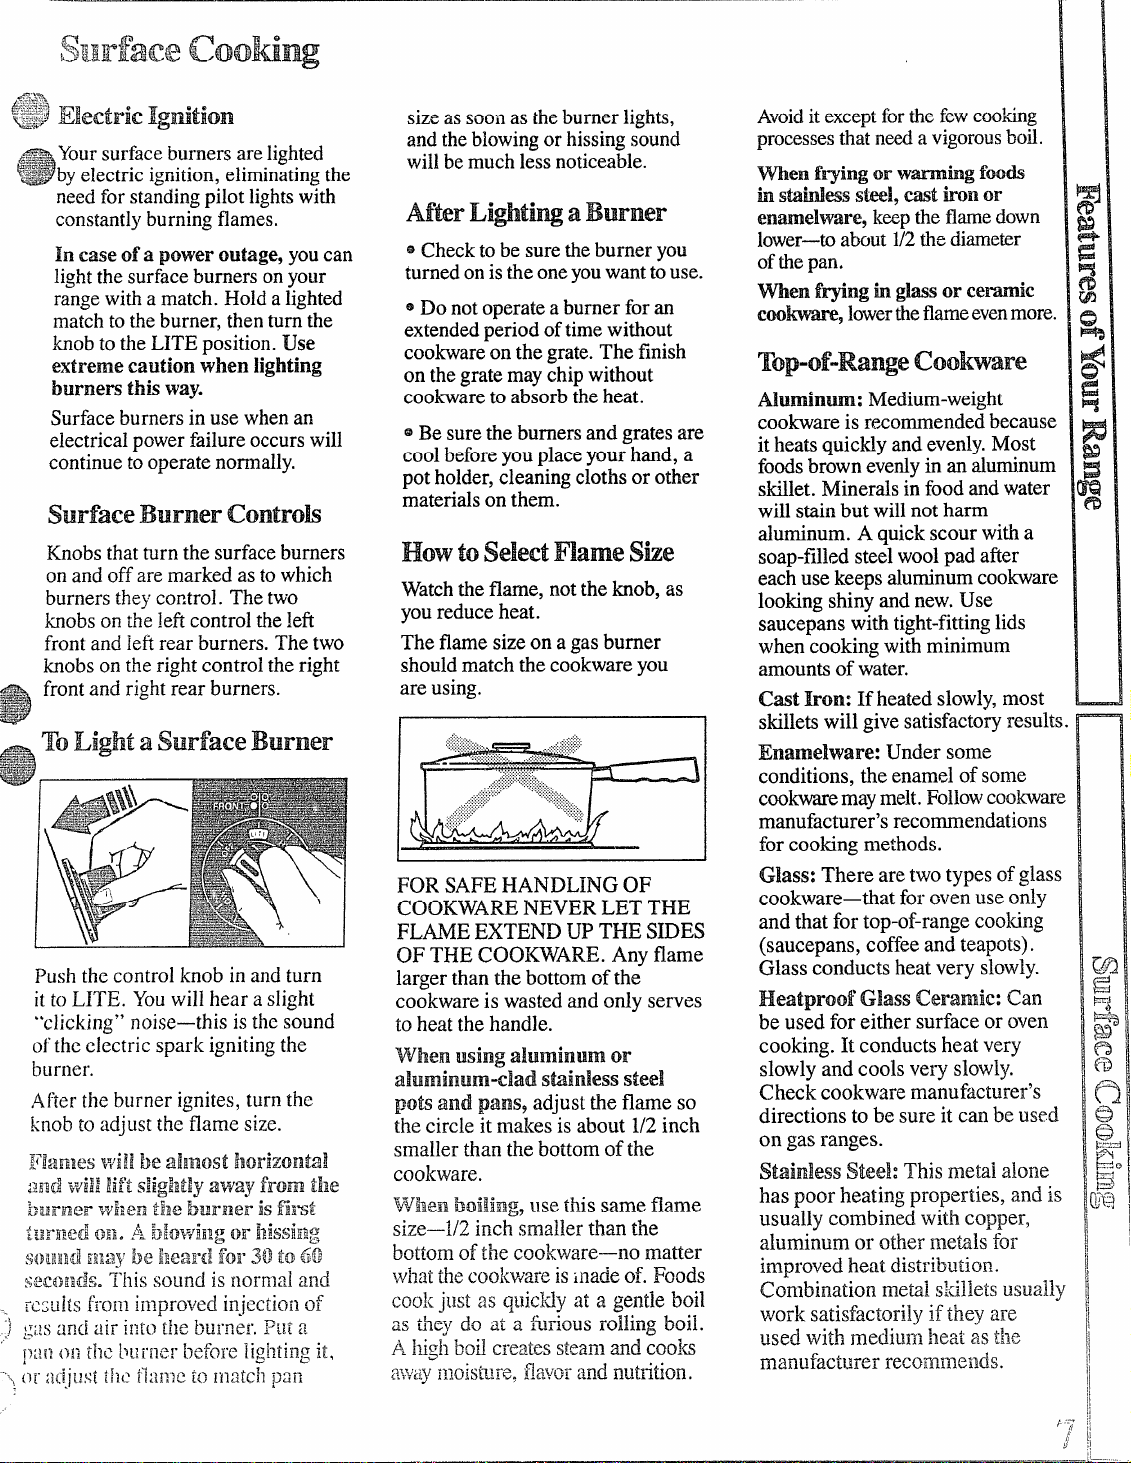
surface Burner Controk
Knobsthatturn the surfaceburners
onand off are marked as to which
burners they control. The two
knobson the lefi control theleft
frontand left rear burners. The two
knobson the right control the right
frontand rightrear burners.
;
-!
when lighting
sizeassooilas theburnerlighfi,
andtheblowingor hissingsound
willbemuchlessno~iceable.
After Li@tiW a Bwner
~Checkto be sure theburner you
turnedonisthe oneyouwantto use.
@Do notoperatea burner for an
extendedperiod oftimewithout
cookwareon the grate.The finish
on the grate maychip without
cookwareto absorb the heat.
@Be sure the burnersand gratesare
coolbeforeyouplaceyour hand, a
potholder,cleaningcloths or other
materialson them.
How to select mame she
Watchthe flame, not the knob, as
youreduceheat.
The flame sizeon a gasburner
shouldmatch the cookwareyou
are using.
FOR SAFE HANDLING OF
COOKWARENEVER LET THE
FLAME EXTEND UPTHE S~ES
OF THE COOKWARE.Any flame
larger than the bottom of the
cookwareis wasted and ordy serves
to heat the handle.
when using aluminum or
aiuminum-clad sminless steel
potsand pans9adjusttheflameso
the circle it makes is about 1/2inch
smaller than the bottom of the
cookware.
kI~~]enboiling, usethis same flame
size—-l/2inch smaller than the
bottomof the cookware—no matter
WJ~~a~the~~o}{wareis inade of. Foods
cook jtlst as q~licldyat a gentie boil
as fijey do at a.~furiousrolling boil.
A Ydghbod creates steammd cooks
~;~;~Ti]~oist~~re.fl~avorand n~~trition.
Avoidit exceptforthefewcooking
I
processesthatneeda vigorousboil.
men f~ing or Wmhg fook
h SWMWSSki, cast tioll or
enmelware~ keeptheflamedown
lower—--toabout1/2thediameter
ofthepan.
men f~ng h glassor Cemic
c~-~ lowertheflameevenmore.
Top-of-Range Coohare
Muminm: Medium-weight
cookwareis recommendedbecause
itheatsquicUy and evenly.Most
foodsbrownevenlyin an aluminum
skillet.Minerals in food and water
willstainbut will not harm
aluminum. A quickscour with a
soap-filledsteelwoolpad after
eachuse keepsaluminumcookware
lookingshinyandnew.Use
saucepanswith tight-fittinglids
when cookingwith minimum
amountsof water.
Cmt Iron: If heated S1OW1Y,most
skillets will givesatisfacto”~results.
Enamelware: Under some
conditions, the enamel of some
cookwaremaymelt.Followcookware
manufacturer’srecommendations
for cooking methods.
Glass: There aretwotypes of glass
cookware—thatfor oven use only
and that for top-of-riingecooking
(saucepans, coffee and teapots).
Glass conducts heat very slowly.
Heatproof Glass Ceramic: Can
be used for either surface or oven
cooking. It conducts heat very
slowlyand cools very slow~y.
Check cookware manu~~cturer’s
directions to be sure it can be used
on gas ranges.
StainlessSteel:This metal alone
has poor heating properties, and is
usually combined with copper,
aluminum or other metals for
improved heat distribution.
Combination me~l skillets usually
woxksatisfactorily if they are
used with mediun] heat as tl~e
manufacturer recom~lleilds.
},
,’
!f
Page 8
~~~~~y~~~g~~~~~~
The{)ven !bMrnerandbroil
burneronyourrangeare!ighted
e~ectricignition.Theovenand
by
broiler
cannotbeoperatedinthe
eventofa powerfailure.
Tolighteitherburner,
OVENSETknobtothedesiredoven
operationandthe OVEN TEMP
knobtothe desired temperature.
The burner shouldignite within
60 seconds.
CAUTION:DO NOT MA= ANY
ATTEMPTTOOPERATE THE
ELE~~C IGNITION OVEN
DUR.TNGAN ELE~RICAL
POWEROUTAGE.Theovencamot
befit duringa poweroutage. Gaswdl
notflowunlessthe glowbar is hot.
If the oven is in use when a power
outageoccurs,theoven burner shuts
offand cannot be re-lit untilpower
is restored.
Before using Your oven
Be sureyou understand how to set
the controlsproperly. Practice
removingand replacing the shelves
while theoven is cool. Read the
information and tips on the
followingpages. Keep thisbook
handy where youcan refer to it—
especiallyduringthe firstfewweeks.
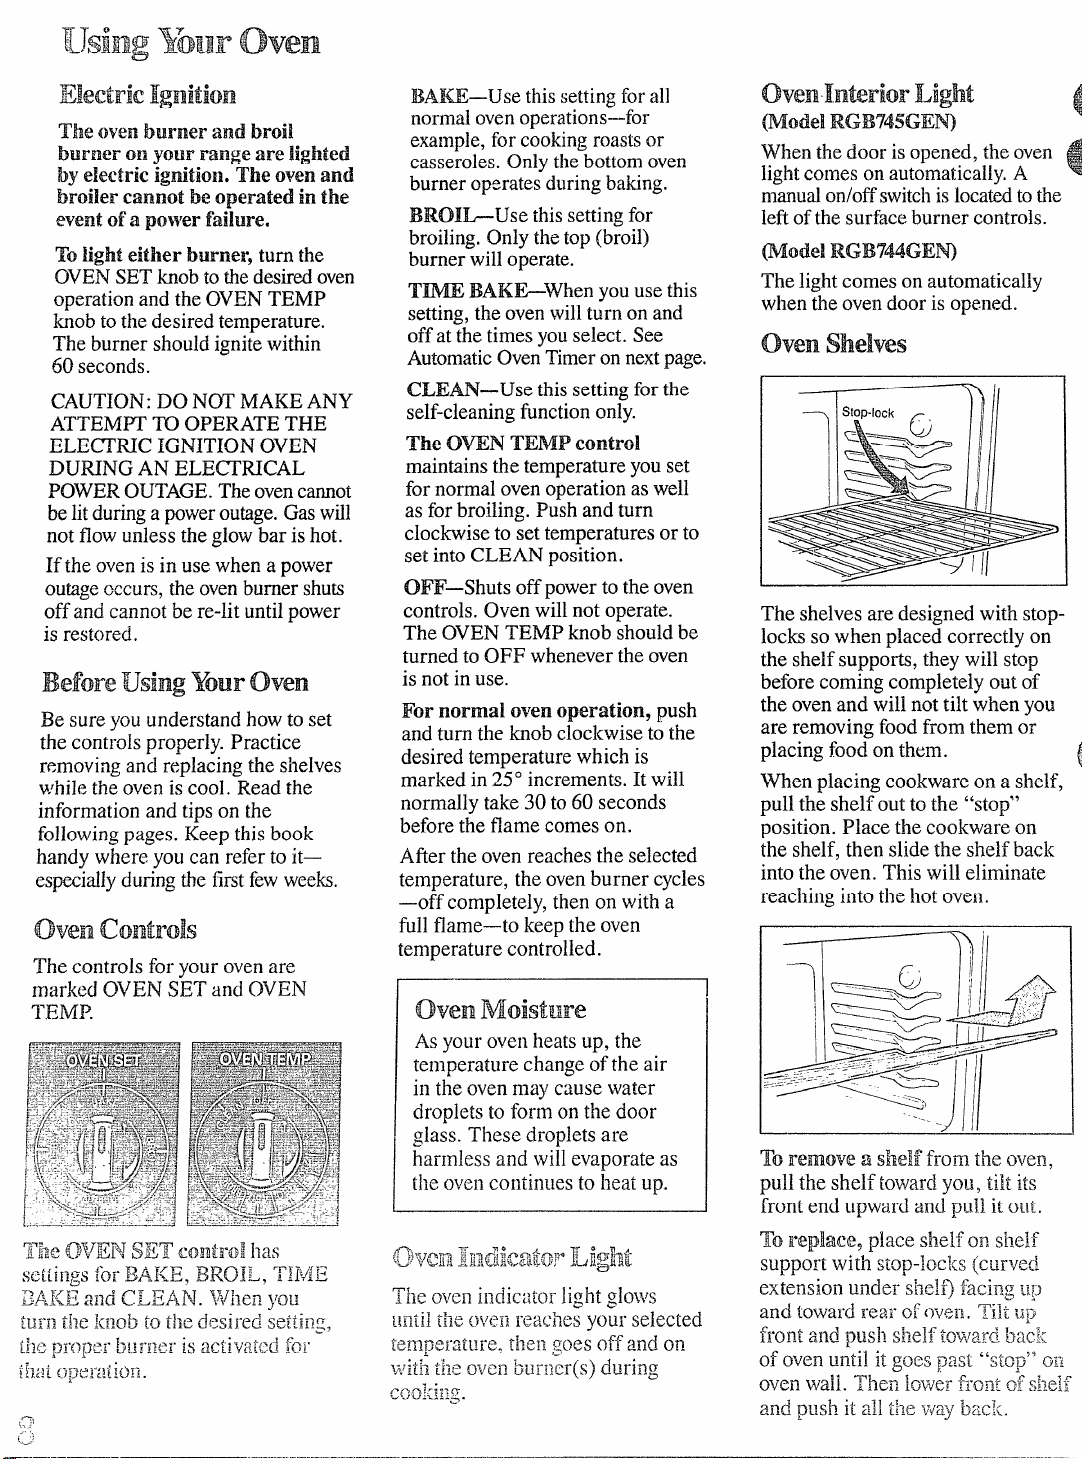
oven Controk
The controjs for your ovenare
marked OVEN SET and OVEN
TEMP.
turn the
BAm—Use thissetting for all
normalovenoperations—for
example,for cookingroastsor
casseroles.Only thebottomoven
burner operatesduringbaking.
BROI&Use thissettingfor
broiling,Only thetop(broil)
burnerwilloperate.
Tm BAK&When you use this
setting,the ovenwillturn on and
offatthe timesyouselect. See
AutomaticOvenTimeronnext page.
CLEM—Use thissettingforthe
self-cleaningfunctiononly.
The OWN TEMP Control
maintains the temperatureyouset
fornormal ovenoperationaswell
as for broiling. Push and turn
clockwiseto settemperaturesor to
set into CLEAN position.
0~—Shuts offpower to the oven
controls. Oven will not operate.
The OVEN TEMP knob shouldbe
turned to OFF whenever the oven
is not in use.
For normal o~’enoperation, push
and turn the knob clockwiseto the
desired temperature which is
marked in
normally take 30 to 60 seconds
beforethe flame comes on.
Afier the ovenreaches the selected
temperature, the ovenburner cycles
—offcompletely,then on with a
full flame-to keeu the oven
temperature contr~lled.
25°increments.It will
ovenMoistEre
Asyour oven heats up, the
temperature changeof the air
in the ovenmay cause water
droplets to form on the door
glass. These droplets are
harm~essand will evaporate as
the oven continues to heat up.
When the door is opened, the oven
lightcomes on automatically.A
manualon/offswitchislocatedtothe
Iefiofthe surfaceburner controls.
The lightcomes on automatically
whenthe ovendooris opened.
ovenshelves
t
The shelvesare designedwith stoplocksso when placed correctly on
the shelfsupports, they will stop
beforecomingcompletely out of
the ovenand will not tilt when you
are removingfoodfrom them or
placing food on them.
When placing cookwareon a shelf,
pullthe shelf outto the “stop”
position. Place the cookware on
the shelf, then slidethe shelf back
into the oven. This will eliminate
reaching into the hot oven.
I
Page 9
. . ,... ___________
~G.
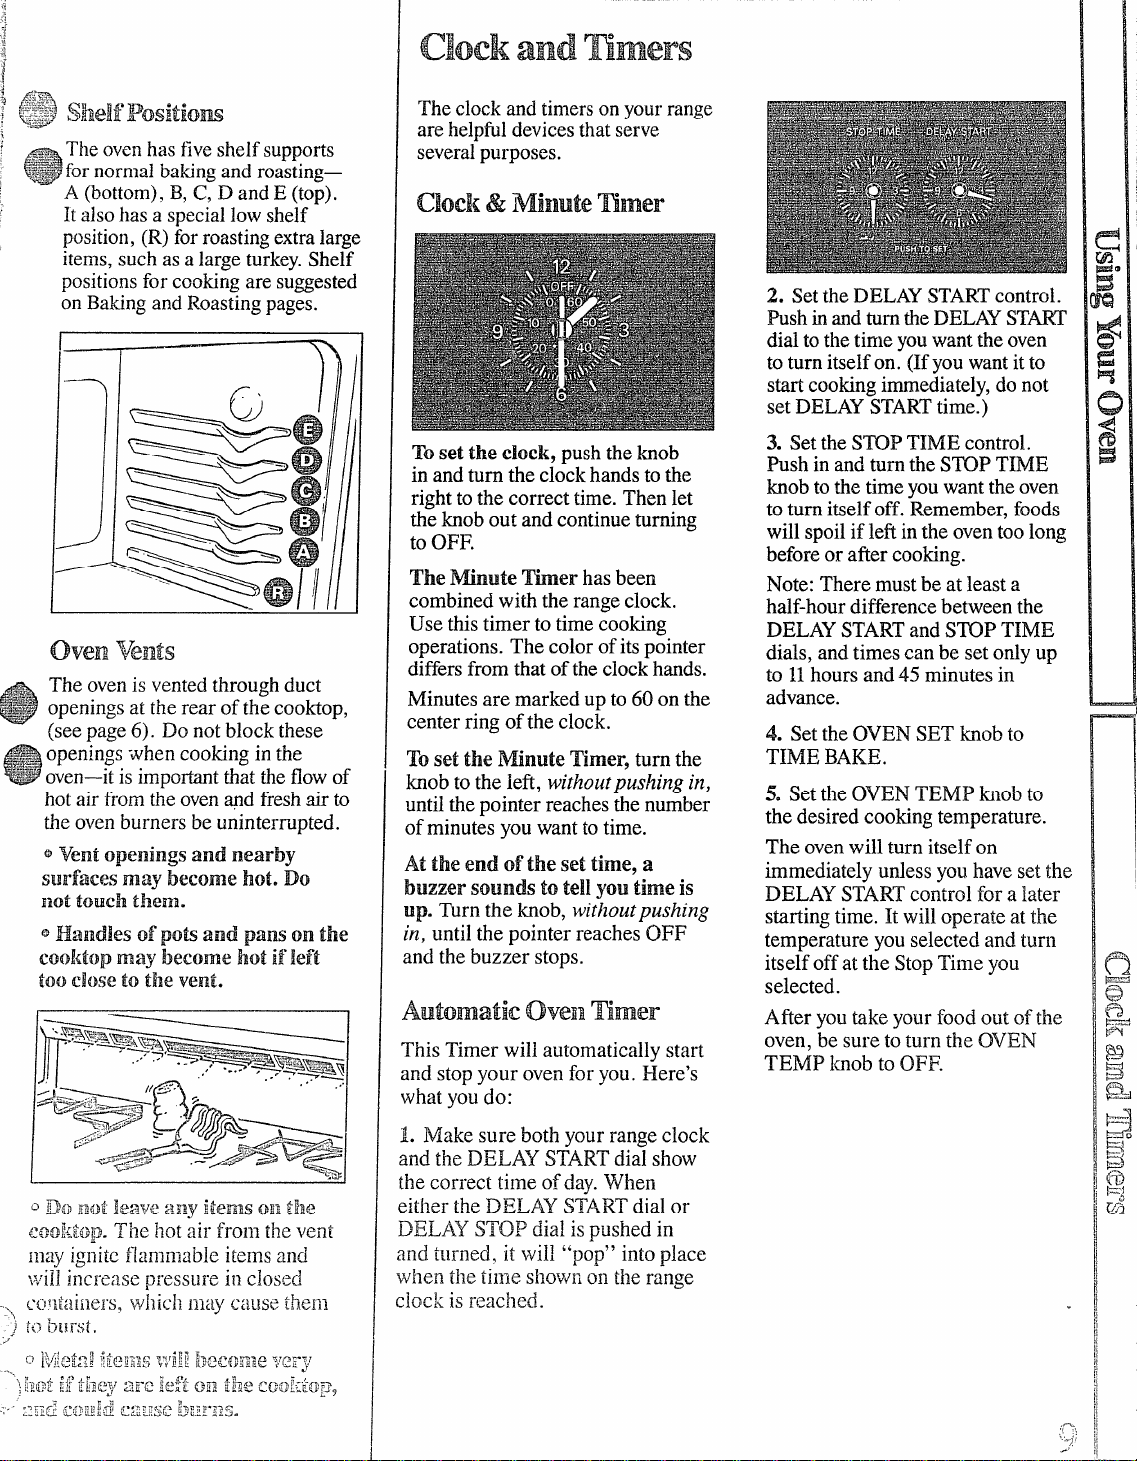
The oven has five.shelf supports
%* fornormalbakingand roasting—
A (bottom),B,C, .Dand E (top),
Italsohas a speciallowshelf
position,(R) forroastingextralarge
items,suchas a large turkey.Shelf
positionsfor tooting are suggested
The clock and timerson yourrange
are helpful devicesthat serve
severalpurposes.
2. Setthe DELAYSTARTcontrol.
Wsh inandturnthe DELAYST~
dialtothetime youwant the oven
toturn itself on. (Ifyou wantitto
startcookingimmediately,do not
setDELAYSTARTtime.)
The ovenis ventedthrough duct
openingsat the rear of the cooktop,
(seepage6). Do not block these
open;ngs‘whencookinginthe
oven—itis importantthat theflowof
hot
airfromtheoven ~d freshairto
L5eovenburnersbeuninterrupted.
@vent openings and nearby
surfacesmay become hot. Do
120ttoune~lthein.
~ HaIldlesof po@and panson the
Cool{topmay becomehot if left
too‘closeto the vent.
Toset the clock, push the knob
in andturn the clockhandstothe
righttothe correct time. Then let
theknobout and continueturning
toOFF.
The Mnute her hasbeen
combinedwith the range clock.
Use thistimer to time cooking
operations. The color ofitspointer
differsfrom that of the clockhands.
Minutesare marked up to 60 on the
center ring ofthe clock.
Toset the Mnute Timer, turn the
knob to the Iefi,
withoutpushingi??,
untilthe pointer reachesthenumber
ofminutesyou want to time.
Atthe end ofthe settime,a
buzzersounds to tell you time is
up. Turn the knob,
untilthe pointer reaches OFF
in,
and the buzzer stops.
This Timer will automatically start
and stop your oven for you. Here’s
what you do:
withoutpushirzg
3. Setthe STOPTIME control.
Push in and turn the S~P TIME
knobtothe time you want the oven
to turn itself off. Remember,foods
will spoilif left in the oventoolong
beforeor afier cooking.
Note: There mustbeat leasta
half-hourdifferencebetweenthe
DELAYSTARTand S~P TIME
dials, andtimes can be set ody up
to 11hours and 45 minutes in
advance.
4. Setthe OVEN SET knob to
TINIEBAKE.
5. Set the OVEN TEMP knobto
the desired cookingtemperature.
The ovenwill turn itself on
immediatelyunlessyou have set the
DELAYSTARTcontrol for a later
startingtime. It will operate at the
temperature youselected and turn
itselfoffat the StopTime you
selected.
Afier youtake your food
oven,be
sure to turn the OVEN
TEMP knob to OFF.
outoftl~e
.,”
1. Make sure both your range clock
and the DELAY STARTdial show
thecorrect time of day.When
~itherthe DELAY STARTdial or
DELAYSTOP dial ispushed in
~ndt~~rned,it will “pop”intoplace
~vllelltlIe
-\
;
u~ockis reached.
time show~lon tile range
“
Page 10
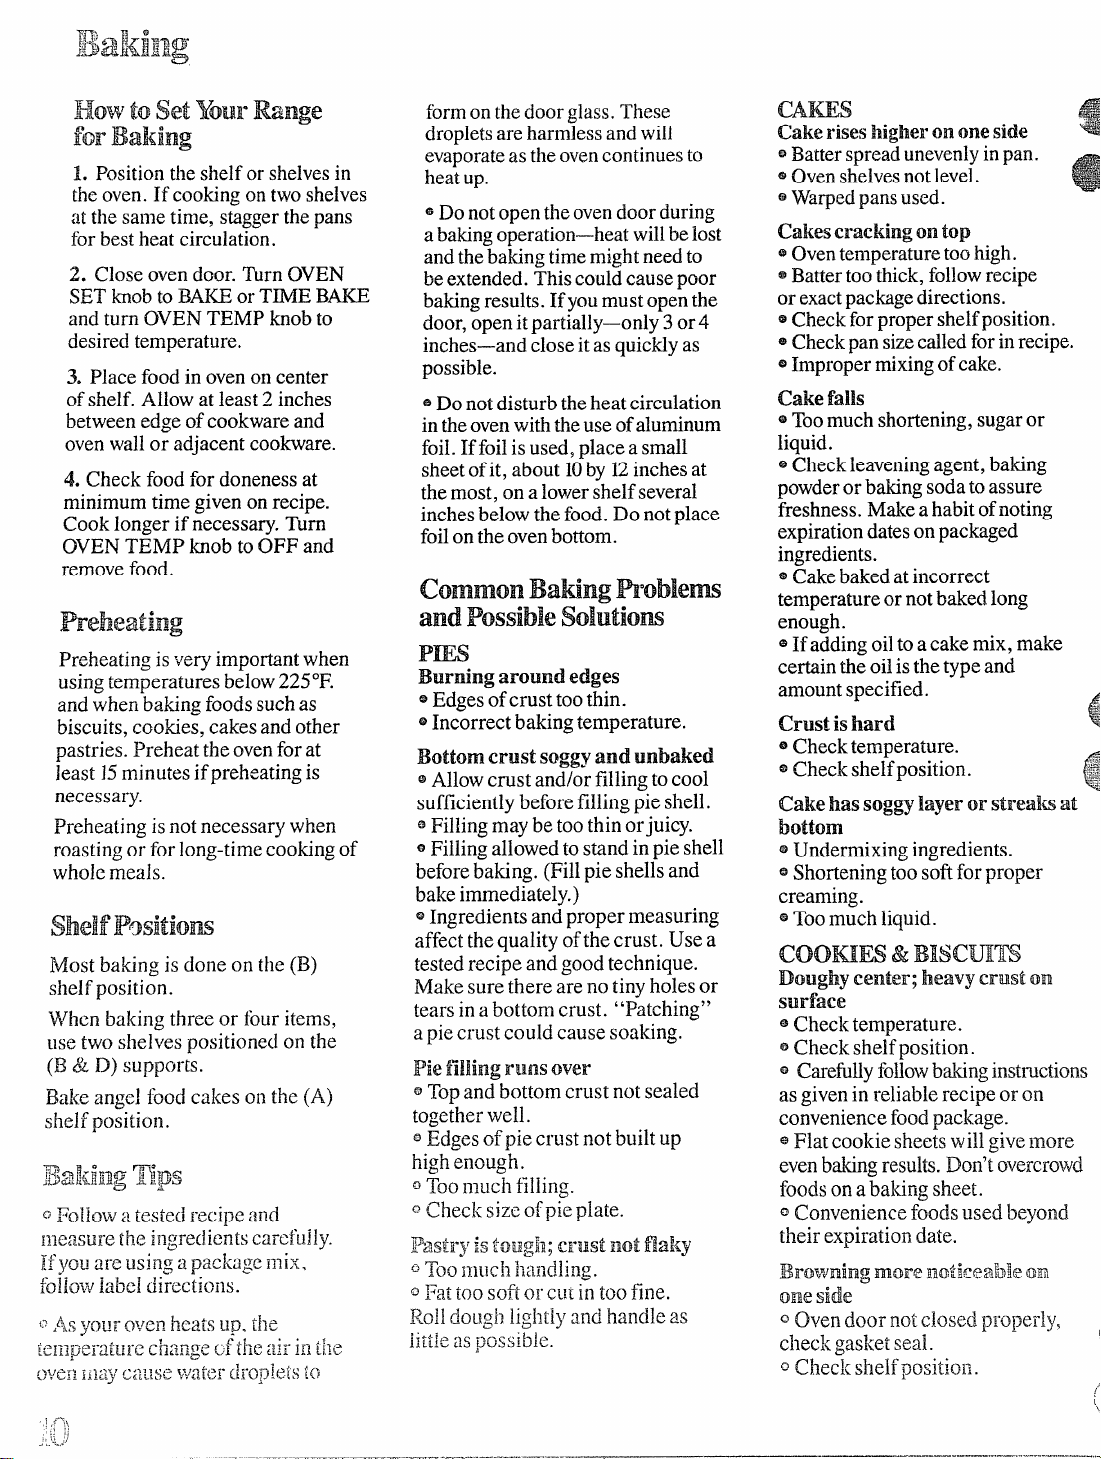
.HoMrtosetYourRznge
forBaking
1. Positiontheshelfor shelvesin
theoven.If cookingon two shelves
at the sametime, staggerthe pans
forbestheat circulation.
2. Closeovendoor.TurnOVEN
SETknobtoBAKEor T~E B~
and turn OVEN TEMP knobto
desiredtemperature.
3. Place foodin ovenon center
ofshelf. Allow at least 2 inches
betweenedgeofcookwareand
ovenwallor adjacent cookware.
4. Check foodfor donenessat
minimumtime given on recipe.
Cooklonger ifnecessary.Turn
OVENTEMP knob to OFF and
removefood.
Reheating
Preheatingisveryimportantwhen
usingtemperaturesbelow225”F.
andwhen baking foodssuchas
biscuits,cookies,cakesand other
pastries. Preheat theoven for at
least 15minutesifpreheatingis
necessary.
Preheating isnotnecessary when
roastingor for long-timecookingof
wholemeals.
SheIfP9Si~~om
Most bakingisdoneon the(B)
shelfposition.
Whenbakingthreeor fouritems,
usctwoshelvespositionedonthe
8L D) supports.
(B
Bakeangel foodcakes on the (A)
shelf position.
E“’’=ne~j~~
FjakiEEkg .
~Follow:1tested recipe and
me:lsurethe ingredients carefully.
Ifyouarc using a package mix,
followlabel directio~ls.
t’‘dk~y}~y~vcnheatsup, Ille
~em’oerai~irechan~-e(:.fthe ::irintile
s
:>lJ@~)?lj;~y~;;pt~~[:~~c~{;~
,,SQ.-A
d;opleis fcf
formonthedoorglass.These
dropletsare harmlessand will
evaporateastheovencontinuesto
heatup.
@Donotopentheovendoorduring
abakingoperation—heatwillbelost
andthebakingtimemightneedto
beextended.Thiscouldcausepoor
bakingresults.If youmustopenthe
door,openimpartially—only3 or4
inches—andcloseit asquicklyas
possible.
@Donotdisturb theheatcirculation
intheoven withtheuse ofaluminum
foil.Iffoilisused,place a small
sheetofit, about 10by12inchesat
themost,on a lowershelf several
inchesbelowthe food. Do notplace
foil on the ovenbottom.
~o~~o~ ~~ti~~
RobRem
andPossibleSolutiom
Pm
Burningaround
eEdges
oIncorrectbakingtemperature.
Bottom crust soggyand
@
sufficientlybeforefillingpieshell.
~Fillingmaybe too thin orjuicy.
~Filling allowedto stand in pie shell
beforebaking. (Fillpie shells and
bakeimmediately.)
QIngredientsandproper measuring
affectthequality ofthe crust. Use a
testedrecipe and good technique.
Makesure there are no tiny holesor
tearsina bottom crust. “Patching”
apiecrust couldcause soaking.
Pie filling runs over
QTopand bottomcrust not sealed
togetherwe~].
~
Edgesofpiecrustnotbuiltup
highenough.
QToomuchfilling.
CIChecksizeofpiep~ate.
Fasiry tstough; Crlistnotflal<y
0~(>0
~ Fattoo sofior cutifltoo
Polldo~lqhlightlyandhandle
little as
ofcrust too thin.
A11ow crust and/or fi~]ingto COO1
IIILICh]l:llld]i12g.
pos~ible.
edges
unbaked
fine.
as
cAms
Cake riseshigher on one side
Batterspreadunevenlyinpan.
s
~Ovenshelvesnotlevel.
~Warpedpansused.
Cakes cracking on top
Oventemperaturetoohigh.
@
~Batter toothick,followrecipe
orexactpackagedirections.
@Checkforpropershelfposition.
~Checkpan’siz~calledforinrecipe.
~~nlpropermixingofcake.
cake fa~ls
~Toomuchshortening,sugaror
liquid.
~Checkleaveningagent,baking
powderor bakingsoda to assure
freshness.Makeahabitofnoting
expirationdatesonpackaged
ingredients.
~Cakebakedatincorrect
temperatureor notbaked long
enough.
~If addingoiltoacakemix, make
certainthe oilisthetype and
amountspecified.
Crust ishard
Cakehassoggylayer or strealwat :”
bottom
Underminingingredients.
@
~Shorteningtoosoftfor proper
creaming.
~Toomuch liquid.
Cooww & Blscmm
Doughy center;
surface
~
Checktemperature.
heavycrust om
s Checkshelfposition.
~CarefiHyfollowbakinginstructions
asgiveninreliablerecipeoron
conveniencefoodpack~ge.
Flatcookie sheetswillgivemore
@
evenbakingresults.Don’tovercrowd
foodson abaking sheet.
~Conveniencefoodsused beyond
their expirationdate.
Brownimgmore llotieeab]e on
one side
~Oven door
cl~eck
Q Checkshelf
notclosf:dproperly,
gasketsead.
positio13.
Page 11
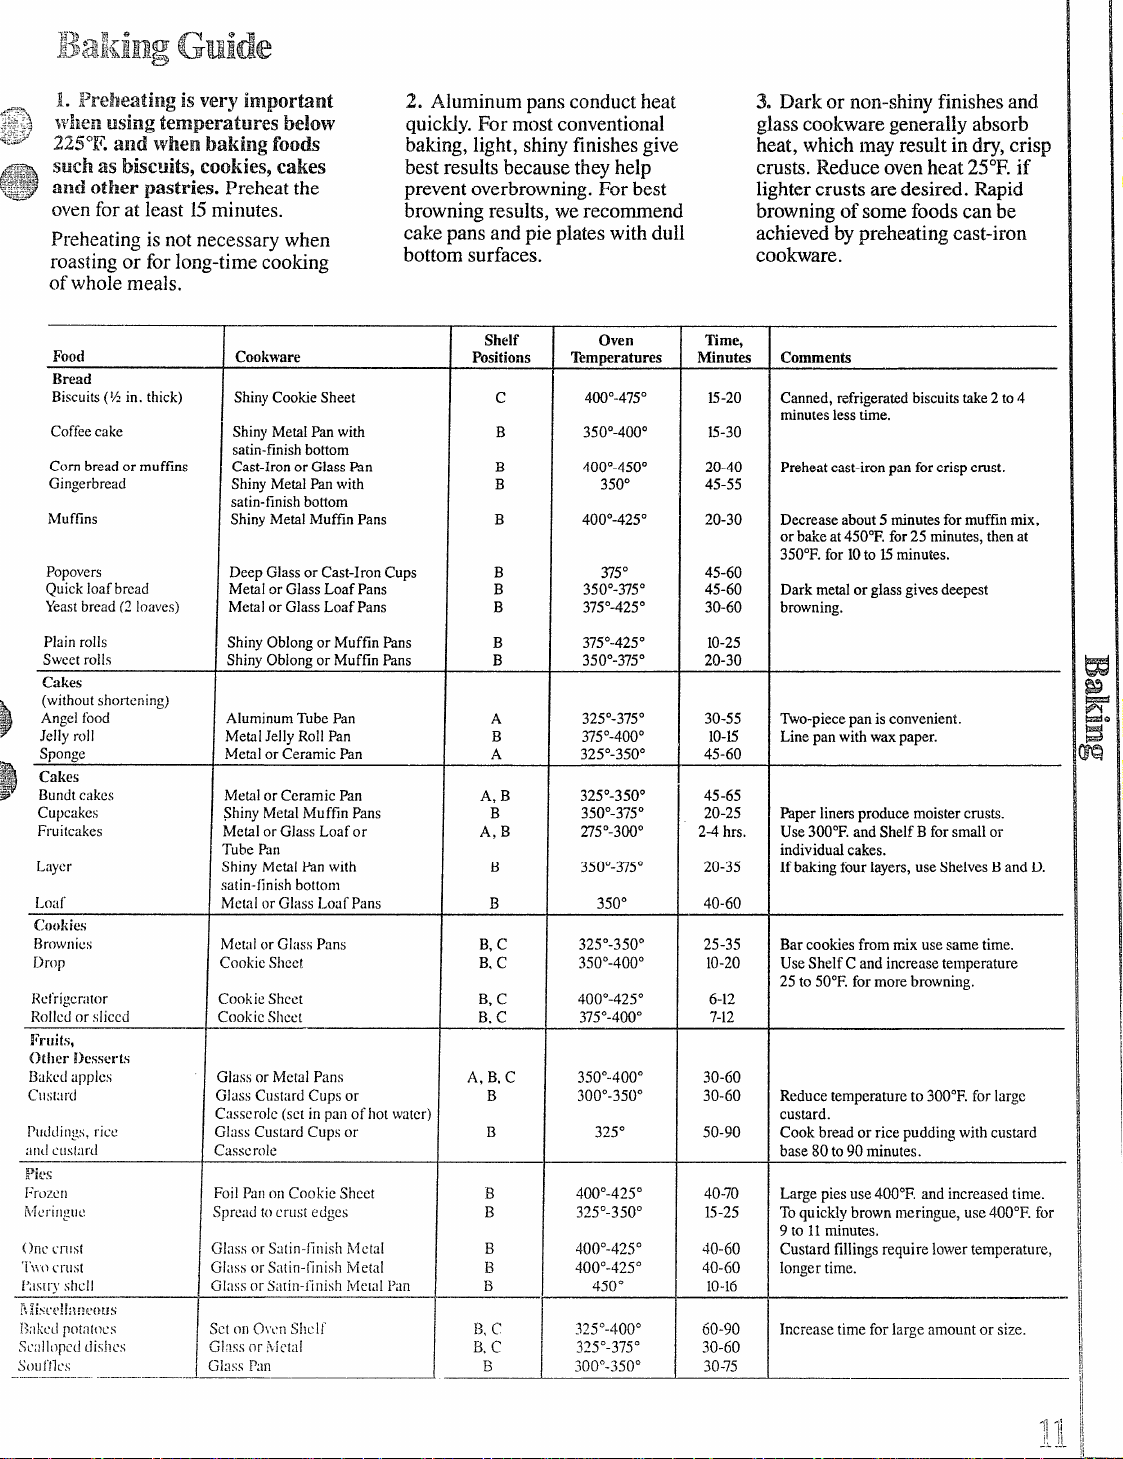
13:3+1’iiERgGuide
———
1. ~~relleatiiigisvery inlpor~nt
;rElenusing temperatures below
225*N.and }Vhenbakislgfoods
such as biseuiti9eookies9Cakes
and otl~erpastries.Preheatthe
ovenforat least 15minutes.
Preheatingis notnecessary when
roastingor forlong-timecooking
ofwholemeals.
Foot]
Bread
Biscuits(%in.
Coffeecake
Cornbreador muffins
Gingerbread
Muftins
Popovers
Quickloafbread
Yeastbread(2loaves)
Plainrolls
Sweetrolls
cakes
(withoutshortening)
Angelfood
Jellyroll
Sponge
Cakes
Bundtcakes
Cupcakes
Fruitcakes
Liiy(:r
Loiif
(;ookies
13rowI)ics
Drop
I{cfrigcrilIclr
Rolled orsliced
thick)
Cookware Positions 1 Temperatures
ShinyCookieSheet
ShinyMetalPanwith
satin-finishbottom
Cast-IronorGlassPan
ShinyMetalPanwith
satin-finishbottom
ShinyMetal hluffinPans
>eepGlassorCast-IronCups
WetalorGlassLoafPans
MetalorGlassLoafPans
;hinyOblongorMuffinPans
;hirwOblongor MuffinPans
~IuminumTubePan
IetalJellyRollPan
4etalorCeramicPan
4etalorCeramicPan
hinyMcta[MuffinPans
MetalorGlassLoafor
TubePJn
ShinyMetalPanwith
satin-finishbottom
Mc(alorGlassLoafPans B
Met:llorGlassPans
CookieSheet
CookieSheet
CookieSheet
2. Aluminumpansconduct heat
3. Dark or non-shinyfinishesand
quicldy.For mostconventional glasscookwaregenerallyabsorb
baking,light, shinyfinishesgive
heat, whichmayresult in dry,crisp
bestresultsbecausethey help crusts.Reduceovenheat25°F. if
preventoverbrowning.For best
browningresults, werecommend
cakepansandpieplateswith dull
lighter crusts are desired. Rapid
browningof somefoodscan be
achievedbypreheatingcast-iron
bottomsurfaces. cookware.
shelf
c
B
B
B
B
B
B
B
B
B
A
B
A
A,B
B
A,B
B
I
B,C
B.C
B,C
B.C
1
400°-4750
350°-4000
400°-4500
400°-4250
350°-3750
375°-4250
375°-4250
350°-3750
325°-3750
375°-4000
325°-3500
325°-3500
350°-3750
275°-3000
350°-3750
325°-350”
350°-4000
400°-4250
375°-4000
Oven
350°
375°
350°
Time,
Minutes
15-20
15-30
~o-40
45-55
20-30
45-60
45-60
30-60
10-25
20-30
30-55
1o-15
45-60
45-65
20-25
2-4hrs.
20-35
40-60
25-35
10-20
6-12
7-12
Commen@
Canned,refrigeratedbiscuitstake2to4
minuteslesstime.
Preheatcast-ironpanforcrispcrust.
D&reaseabout5minutesformuffmmix,
orbakeat450”F.for25minutes,thenat
350°F.for10to 15minutes.
Darkmetalorglassgivesdeepest
browning.
tie-piece panis convenient.
Linepanwithwaxpaper.
Paperlinersproducemoistercrusts.
Use300°F.andShelfBforsmallor
individualcakes.
Ifbakingfourlayers,useShelvesBandD.
Barcookiesfrommixusesametime.
UseShelfCandincreasetemperature
25to 50°F.formorebrowning.
Glass orMetalPans
510SSCUStilrdCUpSor
;asscrole(setin
GlassCusulrdCupsor
~asserote
‘oilPar]onCookieSheet
ipreadtocrustedges
;fassOrS:itirr-finishNfctal
;I;ISSorSiltin-finishNletal
;1:1SSorSiitin-fiilisflFt4e[ilI
p2nofhotwater)
i’an
A,B,C
B
B
B
B
B
B,
c
350°-4000
300°-3500
325°
400°-4250
3~5°_350”
400°-4250
400°-4250
450°
~~j”-d~()”
3~5°_3750
300°-3500
30-60
30-60
50-90
40-70
15-25
40-60
40-60
10-16
60-90
30-60
30-75
Reducetemperatureto300°F.forlarge
custard.
Cookbreadorricepuddingwithcustard
base80to90minutes.
Largepiesuse400”F.andincreasedtime.
Toquicklybrownmeringue,use400”F.for
9to 11minutes.
Custardfillingsrequirelowertemperature,
longertime.
Increasetimeforlargeamountor
size.
j_:~
Page 12

Roastingiscookingbydryheat.
Tendermeat or poultry can be
roasteduncoveredinyouroven.
Roastingtemperatures,which
shouldbe low and steady,keep
spatteringto a minimum.When
roasting,itis not necessarytosear,
baste,coveror add water~oyour
meat.
The ovenhas a speciallowshelf(R)
position just abovethe oven bottom.
Use it when extra cooking space is
needed—forexample,when roasting
a large turkey.
RoastingGuide
Roastingiseasy,just followthese
steps:
Step 1:Positionovenshelfat (B)
positionfor smallroasts(3 to 5
pounds) and at (A)positionfor
largerroasts.
Step 2: Check weightof roast.
Placemeatfat-side-upor poultry
breast-side-upon roastingrack in
a shallowpan. The meltingfatwill
bastethemeat. Selecta pan as close
tothesizeof the meat as possible.
~roder pan withrackis a good
pan forthis.)
Step 3: Turn OVENSET knob to
BA~ or TIRIE BAKE and OVEN
TEMP knob todesiredtemperature.
Check the RoastingGuide for
temperaturesand approximate
cookingtimes.
Step 4: Most meatscontinue to
cook slightlywhilestandingafier
being removed from the oven.
Recommended standingtime for
roasts is 10to 20 minutes. This
allowsroasts to firm up and makes
themeasier to carve. Internal
temperaturewillrise about5°to
10”F.;tocompensatefortemperature
rise, if desired, removetheroast
fromthe ovenwhen its internal
temperatureis5°to IO”F.less than
temperatureshownin the Roasting
Guide.
Frozenroastsofbeef, pork,
lamb, etc., can be roasted without
thawing,but allow H to25 minutes
additional time
perpound(allowM
minutesadditionaltimeperpound
forroastsunder
time per pound for larger roasts).
Thawmost frozenpoultry before
roastingto ensure evendone~~ess.
Somecommercial frozen poultry
can be cooked successfullywithout
thawing.Followdirectionsgiven
on packer’slabel.
This allowsmore than one food
to be cooked at the same time. For
example:Whfleroastinga 20-pound
turkey on shelf R, a second shelf
maybe positioned on sl~elfsupport
D sothat scalloped potatoescan be
cooked at the same time. Calculate
the total cooking time that will
enable both dishes to complete
cooking at the same time. Allow 15
5 pounds, more
to20minutesof additionalcooldng
timeforthepotatoes.
Type
Meat
Tendercuts:rib, highquality
sirlointip,rumpor topround*
Lamblcgor bone-inshoulder*
Vealshoulder,Icgor loin*
Porkloin.ribor shoulder’:
H:lm,precooked
*Forbonelcssro]ledro;lstso~’er
:ldd5LO10minu[espcr lb.totimesgi]~cnabove.
6inchesthic!<.
oven
Temperature
325°
325°
325°
325°
3250
Doneness
Rare:
Medium:
Well Done:
Rare:
Medium:
Well Done:
WellDone:
WellDone:
ToWarm:
WellDone:
WellDone:
Well Done:
ApproximateRoasting~me Internal
inMinutwper Wund
3to 5lbs.
24-35
35-39
39-45
21-25
~5-30
30-35
35-45
35-45
18-23minutesperpound(anyweight)
3
to5Ibs. over5lbs.
35-40
35-40
to15ibs.
10
16-22
6tO8 ~bS.
18-25
25-31
31-33
20-23
24-28
28-33
30-40
30-40
30-35
Ovea’u lbs.
12-19
Temperature“F
130°-1400
150°-1600
170°-1850
130°..1400
150°-1600
170°-1850
1’70°-1800
170°-1800
115°-1250
Page 13

rangeisdesignedforwaist-high
$~~~ broiling.A speciallydesigned
3
‘~ broilerpan andrackallowsdripping
fattodrainawayfromthefoodsand
bekeptawayfromthehighheatof
thegas flame.
————
piercedmeatlosesjuices.
steak andchopsShollldbeat
~
least 1incl~thick forbestbrotiing
results.Thinnersteaksandchops
shouldbepanbroiled.
The ovendoor should be closed
during broiling.
How to Broil
1. Ovendoesnotneed tobe
preheatedforbroiling.
2. Ifmeathas fatorgristlenear the
edge,cutverticalslashesthroughit
about 2 inchesapart, butdon’tcut
intomeat. Werecommendthatyou
trimfattopreventexcessive
smoking, leavinga layerabout
1/8inchthick.
3. Arrange foodonrack and
positionthe broilerpan onthe
appropriateshelfintheoven.
Placingfoodclosertoflame
increasesexterior browningoffood,
butalsoincreases spatteringandthe
possibilityoffatsand meatjuices
igniting.
4, Closetheovendoorbutdo
notlatchit. If the door latch is
moved to’tile right during a broil
operation, the door nlay 10C1{and
youmaynet be able to open it until
Quantity
Food Thickness
Bacon
GroundBeef
WellDone
BeefSteaks
Rare 1in.thick
Medium (1to 1%lbs.)
WellDone
Rare 1
Medium
WellDone
Chicken(450°) 1whole
BakeryProducts
Bread(Toast)or 2t04slices
ToasterPastries 1pkg,(2)
EnglishMuffins 2,split
L4)bsterTails 2-4
(6to8oz.each)
Fish
HamSlices(450°) 1in.thick
Precooked
Pork
chops
WellDone
I,nnll)Chops
Medium
WC1lDone
Medium
WellDone
——
f?ie~lers.
similarpmcooke~i
Saus:lgcs,
br:it~vurst
——
andlor
Y2lb.(about8
thinslices)
1lb.(4patties)
1/2to +4in.thick
Y2in.thick
(~to2~ ]bs.)
(2to2%lbs.),
splitlengthwise
l-lb.filletsX to
1/2in.thick
2(Min.thick)
~(1in,thick),
about1lb.
[
i
2(1in,thick)
about10to12OZ.
~(l~zin.thick),
about1lb.
l-ib. pkg.(10)
shelf
Positiom
D
c
c
c
c
B,C
B,C
B
B
D
D
c
c
B,C
c
c
B
B
B
B
C,D
1stSide
2ndSide
~me,
Mnutes
25-30 25-30 Reducetimeabout5to10
14-17 Donot
4
Time,
Minutes
5 2%
9-1o 7-8 takeaboutsametime.
9
12
13
10
15
25
16-18
2.3
3-6
5
8
10 4-5
13
Comments
Arrangeinsinglelayer.
Spaceevenly.Upto9 patties
7
Steakslessthan1inchcook
5-6
throughbeforebrowning.
8-9
Panfryingisrecommended.
6-7
Slashfat.
9-12
minutespersideforcut-up
chicken.Brusheachsidewith
meltedbutter.Broilskin-sidedownfirst.
‘/2-2
Spaceevenly.PlaceEnglish
muffinscut-side-upandbrush
withbutter,ifdesired.
CutthroughbackofshelIand
turn
spreadopen.Brushwithmelted
butterbeforeandafterhalfof
over.
broilingtime.
Handleandturnverycarefully.
5
Brushwithlemonbutterbefore
andduringbroilingif desired.
Preheatbroilertoincrease
browning.
8
Increasetime5to10minutesper
sideforI’/z-inchthickorhome
curedhamslices.
Slashfat.
11-13
T
8
10
10
17
6
4
4-7
10
4-6
12-14
]-2
Slashfat.
Ifdesired,splitsausagesinhalf
lengthwise;cutinto5-to6-inch
pieces.
Page 14

—..—
Opek”atingtheseIf”c]eatingoven
Step 1: Removethe broilerpan,
broilerrack, all cookwareand any
a~uminumfoilfromthe oven—they
can’twithstandthehighcleaning
temperatures.(Ovenshelves may
beleftin oven. Note: Shelveswill
discolorduringthe self-cleancycle.)
Step 2: Wipeupheavysoilon the
ovenbottom.
A. Oven
B.
C. OvenLight
Step 3: With a dampened cloth,
clean spatters or spillson oven
front frame (A) and only that area
on the ovendoor that is outside the
gasket (B). Do not clean gasket.
Polishcleaned areas with a dry
cloth. Never use a commercial
ovencleaner in or around self-
cleaning oven.
FrontFrame
OvenDoor Gasket
Step 4: Closethe doorandmake
suretheovenlight(C) is off.
Ovenshelvesmaybecleanedin the
self-cleaningoven.However,they
willdarken,losetheirlustera~~d
becomehardto slide.Tomake
shelvesslidemoreeasily,after
eachself-cleancycle,dampen
fingerswitha smallamountof
cookingoi~and rub lightlyover
edgesofshelfthatcontacts[~elf
If yourrangeisequippedwith
porcelainenameldrip pans, you
cancleanthem in theself-cleaning
oven.Afterwiping off anyboilovers
thatare not stuckon, place onepan
upside down on each ovenshelf.
Do notuse commercialoven
cleanersor oven protectorsin or
near the self-cleaningoven.A
combinationofanyof these
productsplus the high clean cycle
temperaturesmaydamagethe
porcelainfinishofthe oven.
hportixlt
The ovendoor mustbe closedand
latchedand all controlsmust be set
correctly forthe clean cycleto
workproperly.
How to set oven
for Cleatiw
step 1:
hsh in and turn OVEN SET and
OmN
tirectiontoCLE~;
will snap into final position when
the CLEAN locationis reached.
mmhObS~.~il~kwk~
Controls-
step2:
Slide the latchhandleto the right as
faras it will go.
step3:
Set the
~Make sure both the range clock
andthe DELAYSTARTdial show
the correct time of day.When
\
pushed in and turned, the DELAY
STARTdial and the S~P TIME
dialwill “pop” into place when the
time shownon the range clock is
reached.
~Decide on cleaning hours
necessary.
RecommendedCleaning Time:
Light to Modemte SOU–2--3
(thin spills and light spatters)
Hea~ soil—4 hollrs
(heavy,greasy spillsand spatters)
o Add these hours to present time
ofday,then push in a~~dturn S~lP
TIME dial clockwise to this desired
stoptime. CLEAN~G light glows,
showingcleaning has started.
The CLEANING light will glow,
indicating oven is hot, and door
cannot be opened. Oven door gets
hot during self-cleaning. DO NOT
muc13.
automatic oven timer:
hom
Page 15

@+~#ftercleaningiscomplete,the
doorwillstaylockeduntilthe oven
‘-@
coolsand the CLEANING light
goesoff. This takesabout30
minutes.
step1:
WhenCLEmG lightis off, slide
the latchhandle to the leftas far as
it willgo and open the door.
step2:
Push and turn OVEN’ TEIMPknob
toOFF.
NmE: If
stopcleaning at a later time than
shownon clock, push in and turn
DELAYSTARTdial to time you
wish to start. Add the hours needed
forcleaning to this “stirt” time,
then push in and turn S~P TIME
dial to this desired stop time. Oven
willautomatically turn onand off
at the set times.
YOUwish to start and
Queaioma~ldAmwers
Q. why won’tmy ovenclean
timedstely even
alfthe timeand clean linobs
correctly?
A. Checkto be surethe DELAY
STARTdialis setto the sametime
asthe rangeclock. Also check to
be surethelatchhandleis movedto
the right.
Q. Mthe ovenClwk k not WoR’tig,
can I stil~self-elmn my oven?
A. No. The AutomaticOvenTimer
usesthe range clockto help start
and stopthe self-cleancycle.
Q. can I use Comercial oven
C!eanerson any part of my
self-cleating oven?
A. No cleaners or coatingsshould
be used around anypart of this
oven.If you do usethem and do not
thoroughlyrinse the oven with
water,wipingit absolutelyclean
afterwards, the residue can scar the
ovensurfaceand damage rneti
parts the next time the ovenis
automaticallycleaned.
Q. can I ‘clean
around the oven door?
A. No,
a good oven seal, and care must be
taken not to rub, damage or move
this gasket.
Q. After having just used the
oven?the CLEANING light came
on and I could not move
handIe*why?
A.
temperature bakingsor broilings,
the CLEANING light may come
on. The ovendoor can’tbe latched
for self-cleaning while the
CLEANING light is on. If this
happens, let the oven cool until the
CLEANING light goes off. Then
the ovendoor can be Iatched for
se~f-cleaning.
Q. l~ihat Should I do if excessive
Snlol<ingfoefcursduring cleaning?
A. This is c~dsed by excessive soil,
a~ldyou silould switch tileOVEN
wind~ws ‘tor’idroom.ef Smol<e.
this gasketis essential for
After several continuoushigh-
thoughI set
the woven Gasket
thelatch
~~. openTE?iiP knob to 0..
Allowthe oventocoolforat least
one hour beforeopeningthedoor.
Wipeupthe excesssoilandreset
thecleancycle.
Q. k the “craeMillg” sound I
hear during Cleaningnormal?
A. Yes.This is themetalheating
andcoolingduringboththe
cookingand cleaningfunctions.
Q. Should there be anyodor
duringthe ‘cleaning?
A. Yes,there maybe a slightodor
duringthefirstfewcleanings.Failure
towipeout excessivesoilmight
dso causean odorwhen cleaning.
Q.
What causes the hair-like
linesOnthe
oven?
A. This is a normal condition
resultingfrom heatingand cooling
duringcleaning.Theydo not affect
howyourovenperforms.
Q. why do I haveash left in my
ovenafter cleating?
A. Sometypes ofsoilwill leave
a depositwhich is ash. It can be
removedwith a damp spongeor
cloth.
Q. lvy oven shelves do not slide
easily.what is the matter?
enamel surface of my
A. Aftermany cleanings,oven
shelvesmaybecome so clean they
do not slideeasily.Tomake shelves
slide more easily, -aftereach selfclean cycle,dampen fingers witha
small amount of cooking oil and
rub lightlyover edgesof shelf
that
contactshelfsupports.
Q. Myoven shelveshavebecoERe
gray after the self-clean
this norma~?
A. Yes.During theself-clem cycle,
the shelvesmay lose some luster
and discolor to a deep gray.
Q. cm I COolifood on
cycle. Is
theCooldo}l
vdhilethe 0ve]2isself-cleaning?
A. Yes.
cleaning, you can use the cool<top
just asyou nol:mallydo. I-Iowever,
be carefil wi~ensanding in front of
the range—the ovenbecomes veyy
hot ‘whileself-cleaning.
While the ovenis self-
Page 16

Propercare andcleaningare
importantso your rangewillgive
youefficientand satisfactory
service. Followthese directions
carefullyin caring for itto help
assuresafeandpropermaintenance.
outerPaintedFi*h
When the range is cool, washthe
top,front and, if exposed, the sides
withtid soapand water.Neveruse
anyharsh abrasives or cleaning
powdersthatmay scratchor mar the
painted surface. Rinsethe surface
with clean water and dry with a soft
cloth. If youwish, occasionally
applya thin coat of mild cleaning
waxto help protect the finish.
There are a number of precautions
you can taketo avoidmarring the
porcelain enamel surface of the
cooktopand prevent it from
becomingdull. Don’tslide heavy
pans across it. If you spill foods
with a lot of acid (tomatoes,
sauerkraut, fruitjuices, etc.) or
foodswith high sugar content,
clean them up as soon as possible.
If allowed to set, these foods could
callsea dull spot. Also, no matter
how stubborn the food stain, never
use harsh abrasive cleansers. They
could permanently damage tl~e
enamel surface. Werecommend a
cleanser such as “Soft Scrub””
brand cleanser or a similar
cleaniI}gproduct.
SoftScrub@is a registered trader~larkof
the Clorox CompaIIy.
Control Wnel
It’sagoodideato wipe the control
panelclean aftereach use of the
oven.Foramorethoroughcleaning,
theknobscan be removedby
pullingthem offtheknobsterns.
Clean with mild soap and water,
rinsewith clean water and polish
dry with a soficloth.
Do notuse abrasivecleansers,
strongliquidcleanersor oven
cleanerson the controlpanel—
theywill damagethe finish.
Burner
Grates should be washedregularly
and, ofcourse, afier spillovers.
Washthem in hot, soapywater and
rinse with clean water.Dry the
grates with a cloth—don’tput them
back on the range wet. When
replacing the grates, be sure they’re
positionedsecurelyovertheburners.
Togetrid of burned-on food, soak
the grates in a slightlydiluted
liquidcleaner.
Although they’redurable, the
grates will gradually lose their
shine, regardless ofthe best care
youcan give them. This is due to
their continual exposureto high
temperatures.
Do notoperate a burner for an
extendedperiod of time without
cookware on the grate. The finish
on the grate may chip without
cookware to absorb the heat.
Drip &m
~Renlovethe grates. Then liftout
the porcelain drip pans. Drip pans
can be cleaned in dishwasher or by
hand–after pans cool slightly,
sprin~e on detergent, wash or
scour with hot water, rinse and dry.
The porcelain enamel drip pans can
alsobecleaned automatically in the
self-cleaning ovtn. After wiping
off boiloveYstl?at
l~laceolzcnari~pside UW,R’E3
iach Siveif.
,
Gmtes
L
2re Ilotstuck 011,
on
Lift-up cool~top
Cleanthearea under the cooktop
often.Built-upsoil, especially
grease, may catchfire.
Tomakecleaningeasier, the
cooktopInaybe lifted up.
1. Besureburners are turned off.
2. Removethe grates.
3. Grasp the twofront burner wells
and lift up.
Dual supportrods will hold the
cooktopup while youclean
underneath it.
After cleaningunder the CODktOP,,$~<i:
with hot, soapy water and a clean .‘
cloth, lower the cooktop. Be
carefulnot to pinch your fingers.
ovenAir vents
Yourrange is ventedthrough air
ventsatthe rear of the cooktop, at
the top ofthe oven door and under
the kick panel. Nlakesure these
ventsaren’tblocked.
The combustion quality ofburner
flames needs to be determined
visually.See instructions on pages
7,20 and 21.
Page 17

heinteriormoreaccessible.
If foodhas burned on, s]~rinkle
therack while hot with detergent
and coverwith wetpaper towelsor
a dishcloth.That way,burned-on
foodswillsoak loosewhilethe
mealisbeing served.
Do not store a soiledbroilerpan
and rack in the oven.
Toremove the door, openitafew
inches to the special “stop”position
thatwillholdthe dooropen. Grasp
fidy oneach sideandlifithedoor
straight up and offthehinges.
l~ote:Becarefulnottoplacehands
betweenthe springhingeandthe
ovenframeasthehingecouldsnap
backandpinchyour fingers.
Washwithhot, soapywater.For
~odel RGB7@GE~
The kick panel maybe removedfor
cleaningunder the range.
Toremove, lift up bottomofpanel
slightlyto disengagethe panel from
the tabs at the base of the range.
Pullbottom of panel forwarduntil
springclips are released at top of
panel.
To
replace, insertthetwoslotsat
bottomofpanelontothetwotabsat
baseofrangeandpushtopofpanel
forwardtoengagespringclips.
The burners can be taken out of
the rangefor easiercleaning. If
shipping screw is in place, remove
anddiscard it. Burner can then be
lifiedstraightup and removed.
Toremoveburned-onfood,soak
the burner
usd forcleaningtheinsideof coff=
makersand water. Soak the burner
for20 to 30 minutes.If the food
doesn’trinse off completely,scrub
itwith soap and water and a brush
or plasticpad. Do not use steel
woolor abrasive cleaners because
they will clog tie burner openings.
If the holes become clogged, clean
themwith a safetypin or paper clip.
Beforeputting theburner back, dry
itthoroughlyby setting it in a warm
ovenfor 30 minutes. Then place it
back in the range, making sure it
is properly seatedand level.
Do
materials inamovenor near
the cool<$opoDo not store or
use combustible materials,
gasolineor other flammable
vapors and liquidsin the vicinity
of this or any other appliance.
in a sofiotionofa product
notstorenmmable
Theholes
range must be kept clean at all
times for proper ignitionand an
even, unhampered flame.
in the burners of your
Neverbloc!<the vein@(air
openings)
provide
oftherange. They
theair inletand.outl~t
whichis necessaryfortherange
tooperateproperlywithcorrect
combustion.Airopeni~~gsare
located.atthe rearofthe
cooktop,at thetopoftheoven
doorand.underthetick
panel
or storagedrawer.
Page 18

ReBllovabIeovenBottom
Theovenbottomcanbe removedto
cleanlargespillsbutovenbottom
mustbereplacedbeforeusing
self-cIeaningcycle.
Toremove:
Removeknurled screwsholding
1.
downrear of ovenbottom.
2. Grasp ovenbottomat finger
slotson each side.
3. Lifirear ofovenbottomenough
to clear the ~ipof range frame, then
pullout.
Toreplace the ovenbottom:
1. Slide ovenbottom into oven so
front fitsunder lip of range frame.
2. Grasp ovenbottomat finger
slotsand push it back and then
down to rest on supports at rear
ofoven.
3, Replaceknurled screws.
ovenllotEoInhas a porcelain
The
enamel finish. Tomakecleaning
easier,protectthe ovenbottom
fromexcessivespillovers.Thisis
particularlyimportant when baking
a fruitpieor other foodswith high
acidcontent. Hot fruit fillingsor
foodsthat are acidic(such as milk,
tomatoesor sauerkraut, and sauces
withvinegaror lemonjuice) may
causepittinganddamageto the
porcelainenamelsurface.
If a spilloverdoesoccur on the
ovenbottom, allowthe ovento cool
first. Youcan then clean the oven
bottomwith soapandwater,a mild
abrasivecleanser, soap-filled
abrasivepads or a causticoven
cleaner, followingthe
manufacturer’sdirections.
Removable stor~e Dmwer
~odel
The storagedraweris a goodplace
to storecookwareand bakeware.
Do not storeplasticsand fl~~ble
materialin the drawer.
Do not overloadthestoragedrawer.
If the drawer is too heavy,itmay
slipoffthe track when opened. To
open the drawer, grasp the center of
thehandle and pull straightout.
The storagedrawermaybe removed
for cleaning under the range.
To R-emove:pull the drawer straight
out and lifi over the guide stops.
To replace: lift overthe guide stops
and slide the drawer into place.
RGB745GEN
ovenLampRepiacememt
CAUTION:Beforereplacingyour
ovenbulb, disconnectelectrical
powerto the rangeat the main fise
or circuitbreakerpanel. Be sure to
letthelamp coverand bulbcool
completely.
The ovenlamp ~ulb) is covered
with a removableglass coverthatis
tieldin place with a bail-shaped
wire.Removeovendoor,ifdesired,
to reach covereasily.
To
remove:
~“Holdhand under cover so it
doesn’tfall when released. With
fingersofsamehand, firtiy push
back wire bailuntilit clears cover. ‘$$~ .
Lift off cover. DO N~ ~MOVE ~
ANY SCREWS~ REMOVE
COYER.
~Replacebulbwith a 40-watt
householdappliancebulb.
To
replacecover:
~Place it into grooveof lamp
receptacle. Pu1lwire bail forward
to center of coveruntil it snaps ilsto
place. When in place, wire holds ~-(
coverfirmly. Be certain wire bail is
in depression in center of cover.
~Connect electrical power to the
range.
. . —.-—
Page 19

@SoapandWater
s Soap-FilledScouringPad
oPlasticScouringPad
@Dishwasher-Safe
~DampCloth
~PaperTowel
~Soapand Water
ControlKnobs @MildSoapandWater
OutsideGlass~nish e SoapandWater
Metal%rts
PorcelainEnamel
andMnted Surfac&
~Soapand Water
ePaperTowel
s DryCloth
~SoapandWater
ovenD’oofi
Oven Gasket
~SoapandWater
GSoapandWater
Shelves
(SeeSelf-Cleaning
~Soapand Water
~Dishwasher-Safe
OvenDirections)
SurfaceBurner
Grates
3SoapandWater
~PlasticScouringPad
1SolutionofMild Liquid
DetergentandWater
Soapand Water
IMildAbrasiveCleanser
DampCloth
SoapandWater
Soap-FilledScouringPad
PlasticScouringPad
Drainfatandcoolpanandrackslightly,(Donotletsoiledpanandrackstandinoventocool.)
Sprinklewithdetergent.Fillthe panwithwarmwaterand
Spr&dda dampclothor papertowel
overtherack. Letpanandrackstandfora fewminutes,Wash;scourifnecessary.Rinseand
dry.O~ION: Thebroilerpan andrackmayalsobecleanedina dishwasher.
Do N~ USE
abF~SiVeS,
cleaningpowders,steelwool
W~pewitha dampclothto removesoil.Donotwipewhen
ovenis inuse.
orplasticba~ls.Theywill
marthesurface.
Pulloffknobs.Washgently,but do notsoak.Dryandreturn controlknobstorange.
Washallglasswithclothdampenedinsoapywater.Rinseandpolishwitha drycloth.If
knobsareremoved,donotallowwatertorundowninsideopeningsintheglasswhilecleaning.
DO N~ USEsteelwool,
abrasives,ammonia,acidsor
Tosafelycleansurfaces:wash,rinseandthendrywitha
SOftcloth.
commercialovencleaners.
DON~ USE ovencleaners,
cleansingpowdemor harsh
abrasives.Thesemight
scratchthe surface.
Ifacidsshouldspillonthe rangewhileitishot,useadry
papertowelor clothto wipethemuprightaway.Whenthe
surfacehascooled,washandrinse. Forother spills,suchas
fatsmatterings,etc., washwith soapandwaterwhenthey
havecooledandthenrinse. Polishwith a dry cloth.
DO N~ USEovencleaners,
cleansingpowdersor harsh
abrasives.
INSIDEOFDOOR:CleanONLYthedoorliner outsidethe
gasket.Thedooris automaticallycleanedifthe ovenisin
theself-cleancycle.DO NOTrubor damagethegasket.
Avoidgettingsoapandwateron thegasketor in any
openingsonthe door.
OUTSIDEOF DOOR:Usesoapandwaterto thoroughly
cleanthetop, sidesandfrontoftheovendoor.
AvoidgettingANYcleaningmaterialson thegasket.
Allowtocoolbeforecleaning.Frequentwiping withmild soapandwaterwillprolongthe
tilmebetweenmajorcleanings.Be sure to rinse thoroughlytoavoidadditionalstains.
Shelvescanbecleanedina dishwasherorbyhand,usingsoapandwater.Rinsethoroughlyto
removeanysoap afiercleaning.Shelvesmayalsobe cleanedin self-cleaningoven,but will
discolorandlose someluster.
DONW cleanin self-
:Ieaningoven.
Liftout whencool. Soak5 to 10minutes,ifdesired,ina
solutionof mildliquiddetergentandwarmwater.Scour
withmaterialsmentionedatleft to removeburned-onfood
particles.
10 N~ cleanin self-
:leaningoven.
10 N~ USX steel woolor
ibrasiveclea~lersbecause
heywillciog the burner
)peningsandscratchthe
)tnrners.
Wipeoffburner heads.If heavyspilloveroccurs,remove
burnersfromrange(see page 17)audsoakthem for20 to30
minutesin solutionofmild liquiddetergentandwater.If
soildoes notrinse off completely,scrubburnerswith soap
andwateranda brush or plasticpad. If theholes become
clogged,cleanthemwitha toothpick.Beforeputtingthe
burnersback, shakeoutexcesswaterandthen dry burners
in a warmovenfor 30minutes.
Drip panscan be cleanedin self-cleaningoven,dishwasherorby hand—afterpanscool
slightly,sprinkle withdetergent, washor scour withhot water,rinseand dry.
Theovenbottom panel canberemovedforcleaning(see page 18),
—
d . . fruit.jtiiccs,tomatosz~t~cesand bas{ingmatcriais containingacids maycausediscoloration. Spilloversshouldbe wipedup“’Spillageof rn:!rina cs
Forcleaning, rcrnovcdrawerbypullingit ali the wayopen, tilting upthe front andthen lifting
it out. Wipethe drawerwith a dampcloth or spongeandthenreplaceit. Neveruse harsh
abrasivesor scouring pads.
Page 20

——..—
.——
ovenTem2p@mture
Adjmtmen$
The temperaturecontrolin your
newovenhas beencarefullyadjusted
to provideaccurate temperatures.
However,if yournew oven is
replacingone youhaveusedfor
severalyears, youmaynoticea
differencein the degree of
browningor the lengthoftime
requiredwhen usingyourfavorite
recipes. This is becauseoven
temperaturecontrolshavea
tendencyto “drifi” overa period of
years.
Beforeattemptingtohavethe
temperatureofyournew oven
changed,be sure youhavecarefully
followedthebaking time and
temperaturerecommendedby the
recipe. Then, afteryou haveused
the ovena fewtimes and you feel
the ovenis too hot or too cool,
there is a simple adjustmentyou
can makeyourself on the OVEN
TEMP knob.
Pull theknob off the shaft and look
atthe back side. There is a disc in
the center of the knob skirt with a
pointeropposite one of the screws.
temperature,movethe screw
oppositethepointertowardtheleft.
Each click willchangethe oven
temperatureapproximately1O°F.
(Rangeisplus or minus60°from
thearrow.)
Wesuggest that youmakethe
adjustment one click from the
originalsettingandcheck oven
performancebeforemakingany
additional adjustments.
After the adjustmentis made,
press skirt and knob togetherand
retightenscrewsso they are snug,
butbe carefil not to overtighten.
Re-installknob on rangeand
checkperformance,
Air adjustment shuttersforthe top
and bottom burners regulatethe
flowofair to the flames.
I
=-
AiradjustmentI
shutter
Toad,justthe flowofairtoeither
burner,loosen
thePhillipshead
screwand rotatethe shut{erto
allowmore or lessair intothe
burnertube as needed.
The
flamesforthe ‘top@roiI)
burner shouldburn steady with
approximately1“blue cones and
shouldnot extendout over the edges
oftheburner baffle.
To determine if the
bottom
burner flames are proper, remove
the ovenbottom (see page 18)and
the burner baffle.
I
—
l—
Noteposition of pointer to screw
before adjustment
Cooler
Hotter
I
Theair adjustmentshutterforthe
topburnerisinthecenterofthe
rearwalloftheoven.
ToreInove the burner baffle, use
anutdriver to removethe 1/4”hex
headscrewshownintheillustration
above.Donotremoveanyother
screws.Pullbafflestraightoutuntil
itisfreefromtheslotth>tholdsit
at rearofoven.
Theflamesshouldhave1/2”to3/4”
blueconeswithnoyellowtippi~~g.
Whenthebaffleisbackinplace,
theflameswillresettle.
Page 21

POSSIBLE CAUSEAND/oR WHAT mDo
~Plugon range.isnotcompletelyinsertedin the electricaloutlet.
a The circuitbreaker in your househasbeen tripped, or a fise hasbeen bl{~wn.
QOvencontrolsnotproperly set.
~Door left in locked positionafter cleaning.
TOPBURNERS
Do NOT LIGHT
OR ~0 NOT
~~~~
EVENLY
BURNERSHAVE
YELLOWOR
YELLOW-TIPPED
FLAMES
~~~~ERY LARGE
OR YELLOW
OVENDOES N~
COOK PROPERLY
OVEN WILL NOT
SELF--CLEAN
:::or COME ON
~Makesure electrical plug is pluggedinto a livepoweroutlet.
s Burner holes on the sideor around the
topof burnermaybeclogged,Removeburner
and cleanthem with a safetypin or paper clip. Make sure youdo not enlargetheholes.
e Burners may not be fittedcorrectly onto the mountingbrackets. Removeand reinstall
.
themproperly.
I I
~~
(A]Yellowfimes– ~) Yellowtipson inner
Call for service
cones—Normal for LP gas
.
softblueflmes–
(c)
Normal for natural gas
~If burner flames look like (A), call for service. Normal burner flames shouldlook
like ~) or (C), depending on the type ofgas you use.
~With LP gas, someyellowtippingon inner cones is normal.
~If range is connected to LP gas, check dl steps in the Installation Instructions.
~Make sure thermostat capillary bulb (located in upper portion of oven)is in correct
~osition,isnot touchingovensides, and is not coated with anything.
QAluminum foil being used improperly in oven.
~Oven vent blocked on top of range.
@incorrect cookware being used. Check each cooking section for cookware tips or
recommendations.
QOven bottom not securely seated in position.
i“
@Oventemperatureis toohigh to setself-cleanoperation.Allow therangetocoolto
roo~mtemperatureandresetthecontrols.
@Doorlatchhandlenotmovedallthewaytotheright.
QRange ~]ec~r~calplugmustbesec~~~~yseatedina livepower outlet. Check for blown
fuseortrippedcircuitbreaker.
I
QBulb maybe loose or burned out,
‘~
Electricalplugmustbe pluggedintoalivepoweroutlet.
I
I
-+_.—.————-—__-—
1
-——.
. .
——
c, “;1
//Ii
.-+.-.
Page 22

If you Snlell gas:
1. openWhdows.
2. Don’t touch electriml switches.
Exthguishanyopenflame.
3*
Immediatelycall your gassupplier.
4.
Donotstoreorusecombustiblematerials,
gasohe orotherflammablevaporsand
tiquidsh thevichity ofthisoranyother
appfiance.
Readthesetistructionscompletely
mrefuuye
and
Do notattempt tooperatethe ovenofthis
rangeduring a power failure.
1
Remove
allpackingmaterialand
LiteraturefromovenbeforeConaecthggas
andelectrimlsupplytorange.
DBMENSBONSANDCLEAUNCES
Provideadequate clea~ancesbetween the range
and adjacentcombustible surfaces.
Deplhincl.Handleand
OvenDoorClosed
2811
IMPQRTANR
Savethesehstructionsfor
theIomle~ectrimlkspector’s use.
INSTALLER: Leave theseinstructions
with theappfianceafier tistaUation is
completed.
OWNER: Keep this Use and Care Guide
and the InstaUation Instructions for
future use.
This appliance must be properly
grounded.
Improper
hstallation,adjustment,
alteration serviceor maintenancecan
museinjuryor property
damage.Referto
thismanual.Forassistanceoradditional
information,consulta qualtiiedinstaller~
se~%’ieeagency,mallufaetllrer(dealer)or
thegasSappliere
‘~<
46’/2”
:::::t
L
\ \ \
& l/4ff
Page 23

~~1~~~<- s~wi :Q
8:+a$s’akAIRktiT$RFEWYBNsTRucF!@?#s
111stallation ofthis range nltlst conform
with Ioml Codes>01-ill the absellcc oflocal
Co(iesj W’itllthe National FuelGas code,
ANSI Z223. 1, latest editioi~.
This range has been design-certifiedbythe
Ameriun GasAssociationaccordingto
Z21.1, latest edition. As with any appliance using
gas and generating heat, there are certain safety
precautions you should follow.You will find these
precautions on pages 2-5. Read them carefully.
QHave your range installed by a qualified installer
or selwice technician.
ANSI
~Yourrange must be electricallygroundedin
accordancewith Iocalcodesor,in the absenceof
localcodes,in accordancewith the National
ElectricalCode(ANSI/NFPA70,latest edition).
See Groundingon page 26.
@Beforeinstallingyour range onlinoleumor any
other synthetic floorcovering,make sure the floor
coveringcan withstand 180°F.withoutshrinking,
warping or discoloring.Donot installthe range
overcarpeting unless a sheet of l/4-inch thick
p~ywoodor similarinsulator is placed between
the range and carpeting.
@.Makesure the wallcoveringsaround the range
can withstand heat generated by the range up to
Zoo°F.
@
Avoidplacingcabinets abovethe range. To
reduce the hazard caused byreaching overthe
openflames ofoperating burners, installa
ventilationhood overthe range that projects
Forwardat Ieast 5 inches beyondthe front of the
=binets.
~The ventilating hood must be constructed of
;heetmetal not less than 0.0122-inchthick (No.28
J.S. Standard gage).Install abovethe cooking top
vitha clearance of not less than 1/4inchbetween
he hood and the underside ofthe combustible
llaterialor metal mbinet. The hood must be at
east as wide as the appliance and centered over
[leappliance. Clearance between the cooking
urface and the ventilation hood surface MUST
JEVER BE LESS THAN 24-INCHES.
If cabinets are placed abovethe range, allowa
]i~linlunlclearance of30inches between the
]oking surface and the bottom ofunprotected
~hinets.
@Ifa 30-inchclearancebetweencookingsurface
and overheadcombustiblematerialor metal
cabinetscannotbemaintained,protect the
undersideofthe cabinetsabovethe cookingtop
with not less than l/4-inch insulatingmillboard
coveredwith sheet metalnot less than 0.0122-inch
thick(No.28U.S.Standard gage).
~Clearance between the cookingsurface and
protectedcabinetsMUST NEVER BE LESS
TH~ 24 INCHES. The vertial distancefrom
the plane ofthe cookingsu~faceto the bottom of
adjacentoverheadcabinetsextendingcloserthan
1inchto the plane ofthe range sidesmust notbe
lessthan 18inches.(Seediagram onpage 22.)
~CaUtiOn: Items of interestto childrenshould
notbe stored in cabinets abovea range or onthe
backsplash ofarange–children climbingon the
range to reach items couldbe seriously injured.
Allranges cantip and injury
couldresult.Topreventatidental
tipping of the range, attach the
,suppliedAnti-Tipdeviceto the
wall.(Seepages 29 and 30.)To
checkifthe deviceis installed
and engaged properly,carefully
tip the range forward. The
Anti-Tipdeviceshould engage a
bracket on the back wall of the
range. This willprevent the
range from tipping over.
If you pullthe range out from the wallfor any
reason, make sure the Anti-Tipdeviceis engaged
with the bracket when you push the range back
against the wall.
~For your safety,never use your range for
warming or heating the room. Yourovenand
range top are not designed to heat your kitchen.
Topburners should not be operated without
cookware on the grate. Such abuse couldresult in
fire and damage to your range and willvoidyour
warranty.
Q Donot store or use combustible materials,
gasolineor other flammable vapors and liquids in
the vicinity ofthis or any other appliance.
Explosions or fires couldresult.
e Do not use oven for a storage area. Items st~~ed
in the ovencan ignite. –
GDonot let cooking grease or other flammable
materials accumulate in or near the range.
Page 24

c Sce Dimensionsand Clearancesonpage 1for
allrough-ina~~dspacingdimensions. These
dimensionsmust be met for safeuse ofyour
range.The lomtion ofthe electricaloutlet and
pipe opening shown onpage 25 maybe adjusted
to meet specificrequirements.
~ The range maybe placedwith O“clearance
(flush)at the back walland side wallsofthe range.
Donotlocatethe range where it maybe subjectto
strong drafts. Any openingsin the flooror wall
behindthe range shouldbe sealed. Make sure the
openingsaround the base ofthe range that supply
fresh air for combustionand ventilationare not
obstructed by ~rpeting or woodwork.
Yourrange, 1ikemany other household items, is
heavyand can settle into soft floor coveringssuch
as cushioned vinylor carpeting. Use care when
movingthe range on this type offlooring.It is
recommended that the followingsimpleand
inexpensiveinstructions be followedtoprotect
your floor.
The range should be installed on a sheet of
plywood(or similar material) as follows:Whenthe
floor coveyi~zgendsat thefyont of theYange,the area
that the range will rest on should be built up with
plywoodto the same levelor higher than the floor
covering.This willallowthe range to be moved
for cleaning or servicing,
Phillipsandflat-bladescrewdrivers
Penciland ruler
Twopipewrenches(oneforbackup)
1%”open-endor adjustablewrench
3/16”open-endor socketwrench
Nutdriver
In addition,for LP gas conversion,youwill need:
@5/16”open-endwrench
~1/2”open-endwrench
ABnET!oNAkmTERIALsYoumY NEED
~Gaslineshut-offvalve
@Pipejoint sealantor pipethread tape with Teflon*
that resists actionofnaturaland LP gases
@Flexible metal applianceconnector(1/2”I.D.).A
5-footlengthis recommendedfor ease of
installationbut other lengths are acceptable.
@Flareunionadapter for connectiontogas supply
line(3/4”or 1/2”N~ x 1/2”I.D.)
@Flare union adapter for connectiontopressure
regulatoron range(1/2”N~ x 1/2”I.D.)
*Teflon:Registered trademark of DuPont
PmPAmwIoM
~Removeall tape and packaging.Be sure to
removeplastic filmthat coverssome chrome parts
(aroundovendoors,side trim).
QTakethe accessorypack out ofthe oven.
@Checkto be sure that norange parts havecome
loose during shipping.
[
(
J
!
The model and serial numbers labelis mounted
on the front frame of the range and, depending on
range model, should be visiblewhen you open the
ovendoor, pull out the storage or broiler drawer,
~}rremovethe kick panel.
Page 25

Yourrange is designedto operate at a pressure
between4 and 13inchesofwater columnon
naturalgas or,if designedforLP gas (propane
or butane), between 10and 13inchesofwater
column.Makesure youare supp~yingyourrange
with the type ofgas forwhichit is designed.If,
at allytimein the future,youdecideto use this
range on a differenttypeofgas, conversion
adjustments must bemadebya qualifiedservice
technicianbeforeattempting to operate the range
onthat gas.
For proper operation,the pressure ofnatural gas
suppliedto the regulatormust be between
4and
i3 inchesofwater column.For LP gas, the
pressure supplied must bebetween 10and 13
inchesofwater column.When checkingfor
proper operation ofthe regulator,the inlet
pressure must beat least 1inchgreater than the
operating (manifold)pressure as givenabove.The
pressure regulator locatedat the inlet ofthe range
manifoldmust remain inthe supplylineregardless
ofwhether natural or LP gas is beingused. A
flexiblemetal applianceconnector used to connect
the range to the gas supplylineshould havean
I.D.of1/2inchand be 5 feet in length (shorter and
longer lengths are acceptable)for ease of
installation.
Shut off the main gas supply valvebefore
disconnectingthe old range and leaveit offuntil
new hook-uphas been completed.
Because hard piping restricts movement ofthe
range, the use ofan A.G.A.-certifiedflexiblelmetal
appliance connector isrecommended unless local
codesrequire a hard-piped connection.Never use
an OICIconnector when installing a new range.
Toprevent gas leaks, put pipe joint compound on,
or wrap pipe thread tape with Teflon*around, all
male (external) pipe threads.
‘r~eflon:IIegisterecl tradenlarli ofDuPont
i?
4
Recommendedarea
for120Voutleton
rearwallandareafor
thruthewall
connectionof
pipestuband
shut-offvalve.
Recommendedarea
forthruthefloor
connectionof
pipestuband
shut-offvalve.
pressureRegulatorAdapter
Rexib!eConnectorHookup
&~L
m ‘“ “
FE
+~~
into
Range
I ‘A
pipe
Manifold
Gasshut-offvalve
Installer: Informthe consumer
of the location of the gas shutoff valve.
Install a manual gas line shut-offvalveinthe
1.
I
~fl~
?F
9
1+
Flexconnector
Adapter
/
Nipple
,4,& ?,
*
q
5
*
*J
.
--7
BlackIronPipe+
Y;ory“J
Gas pipe
\
RgidRpeHookup
Adapter
+
90”
Elbow
.>
d
Adapter+
-.
1
Nipple
~
gas line in an easily accessed location outside of
the range. Make sure everyoneoperating the
range knows where and howto shut offthe gas
supply to the range.
2. Install male 1/2”flare union adapter to the 1/2”
NPT’internal thread at inlet ofpressure regulator.
3. Install male 1/2”or 3/4” flare union adapter to
the NFT internal thread ofthe manual shut-off
valve, taking care to back-up the shut-offvalveto
keep it from turning.
~. connect flexible metal app~ianceco~~nectortO
the adapter on the range. Position range to per~nit
connection at the shut-off va]ve.
(co??tiJl?~cd
;?exfj)ag~)
Fj ~=”
,/’-,‘;)
-. c-
Page 26

,.....—..————
E
~~lh~~l~~]~o~~~~~io~sh~~e ~ee~*~~~e,m~ke
,~a
all range controls are in the offpositionand
s~~re
turn onthe maingas supp~yvalve.Use a liquid
leak detectorat alljoints and connectionsto check
forleaks inthe system.
1 CAUTION:
CHECK FOR GAS LE.AKS.
I
Do Nm USE A FLAME m
When using test pressures greater than 1/2psig
topressure test the gassupply system of the
residence,disconnectthe range and individual
shut-offvalve from the gas supply piping.When
using test pressures of1/2psig or lessto test the
1
gas supplysystem, simply isolatethe range from
the gas supplysystem by closingthe individual
shut-offvalve.
ElectrimlRequirements
120-volt,60 Hertz, properly grounded branch
circuit protected by a 15-amp or 20-amp circuit
breaker or time delay fuse.
Extension
Cord CautiOns
Becauseofpotential safety hazards associated
with certain conditions,westrongly recommend
against the use ofan extension cord.However,
ifyoustili elect to use an extension cord, it is
absolutely necessam that it be a UL-listed, 3-wire
grounding-type appliance extension cord and that
the current carrying rating ofthe cordin amperes
be equivalentto,or greater than, the branch
circuit rating.
%f%wfiding
IMPORTANT—(Please read carefully)
FOR PERSONAL SAFETY, THIS APPLI~CE
MUST BE PROPERLY GROUNDED.
The power cord of this appliance is equipped with
a three-prong (grounding)plug which mates with
:~stanclarc]three-prong grounding wallreceptacle
LOminimize the possibility of electric shock
Ilazard
1
,
rhe customer should
]avethe wallreceptacle
]nd circuit checked by
iaualified electrician
o inakesure the
. .
eceptacle
1
)i-~p~r]y grounded.
from ~hisappliance.
PREFERRED
PJETHOD
is
—..
Where a standard two-prongwallreceptacleis
encountered,it isthe personal responsibilityand
obligationofthe customer tohaveit replacedwith
a properlygroundedthree-prongwallreceptacle. ~
Do Nm, UNDER ANY CIRCUMSTANCES, ‘
CUT OR REMOVE THE THIRD (GROUND)
PRONG FROM THE POWER CORD.
~UsageSituatio,3s w12ereApplian& PoweI.
cord will be Disconnected Infrequently.
i
An adapter maybe used onlyona 15-ampcircuit.
Donotuse an adapter on a 20-ampcircuit.Where
localcodespermit, a TEMPORARY
CONNECTION may be made to a properly
grounded two-prongwa~lreceptacle bythe use of
a UL-listedadapter, availableat most hardware
stores.The larger slot in the adapter must be
alignedwith the larger slot in the wallreceptacle
to provideproper polarity inthe connectionofthe
powercord.
TEMPORARYMETHOD
(ADAPTERPLUGSNOT
PERMITTEDINCANADA)
c~u~lo~:
ALIGNLARGE
PRONGSISLOTS
Q
-e
l’~-- ‘.~-
2’
a
,
w-’ :~;;;;;\;pER
FIRMCONNECTION
BEFOREUSE
k~taching the adapter ground
.
i‘~
Q
/
terminal to the wallreceptacle coverscrew
doesnot ground the applianceunless the cover
screw is metal, and not insulated, and the wall
receptacle is grounded through the house
wiring.The customer shouldhavethe circuit
checkedby a qualified electrician to make
sure the receptacle is properly grounded.
When disconnecting the powercord from the
adapter, always hold the adapter with one hand.
If this is not done, the adapter ground terminal is
very likelyto break with repeated use. Should this
happen, DO N~ USE the applianceuntil a
proper ground has again been established.
sage situations whe~e Appliance Power
❑u
cord will be Disconnected Frequently.
Do not use an adapter plug in these situations
because disconnecting ofthe power cord places
undue strain on the adapter and leads to eventual
failure ofthe adapter ground terminal. The
customer shouldhavethe two-prongwallrecep’ncle
replacedwith a three-prong (grounding)receptacle
by a qualifiedelectricianbeforeusing the ap]~lian.ce.
..—
f
i
4
$
‘:
(
Page 27

Ek::tT13!C&&tO~t!4ECWl@&4S(cent’d)
~~
in~talla~ion of ~ppli~nc~s designed for
‘1’IIc
~?~~>~]i~~home insta]]a~i~n m~~st ~OnfOr~~ with the
‘} fi’~~nufa~tuz-~d Home ~on~t~uction and Safety
.
‘“f~tanda~d, Title 24 ~~.R, F’art 3280 (formerly the
wl~~de~al Standard for ~o~il~ Home ~onstru~tion
??and ~afet~, ~itle Z4, HUD, Part Z80) or, when
“such standard is not applicabl~, the Standard for
l’manufactured Home installations, latest edition
(fi~anufa~tured Home Sites, ~ommunities and
~et-Ups), ANS1 A225.1, latest ~dition, or with
local codes.
gj~gf~~g~g~g~~~~~
1. Locatedisconnectplug at leftrear ofburner
boxonthe range back.
2. Pinchsidesofconnectorand pullout ofrange
back.
[La
—
The combustionaualitv ofburner flamesneeds to
be determinedvi;ually;
(A)Yellow flames—
.,
Call for service
Yellow tipson
(B)
innercones—
Normalfor LP gas
(c)softblue flames—
Normal fornatural gas
If burner flames looklike(A),callfor service.
Normalburner flames should looklike(B)or (C),
dependingon the type ofgas you use.
With LP gas, someyellowtipping on inner cones
is normal.
Sealany openingsin the wallbehind the range
<.:-ecompleted.
ECHECRSURFACEBUR!4ERiGHIT1@M
Operation ofall cooktopand ovenburners should
be checked after range and gas sLlpplylines have
been carefullychecked for leaks.
Push in one of the surface burner controlsand
tt~rnit to the LITE position.Youwillhear a
snapping sound indicatingproper operation ofthe
spark Inodule.Oncethe air has been purged from
the supply lines, burner shouldlight within 4
seconds, After burner lights,rotate knob out of
the LITE position. TWeach burner in succession
L~ntilal~burners havebeen checked.
❑CHECKOVENBURNERIGNirioN
The ovenisdesigned to operate quietly and
automatically.Tooperate the oven,turn the
OVENSET knob to BAKE and OVENTE-MP
knob to 350°F.After 30-60 seconds, the oven
burner will igniteand burn until the set
temperature is reached. The ovenburner will
continueto cycleon and offas necessary to
maintain the ovenat the temperature indicated by
the OVEN TEMP knob.
The ovenrequires electricalpower to operate. In
the case ofa power outage, the ovenburner on
this model cannot be lit manually with a match.
Gas willnot flowunless the glowbar is hot.
If the ovenis in use when apower outage occurs,
the ovenburner shuts offand cannot be re-iit until
poweris restored.
—-
P:jF,j
r.
.--’.,4 ,,;
Page 28

The air adiustrnent shutter for the toDburner is in
the center if the rear wallofthe oven:
:
~’
/
The flamesforthe top (broil)burner shouldbe
steady with approximately1“blue conesand
shouldnotextendout overthe edges ofthe burner
baffle.
Todetermine ifthe bottom burner flames are
burning properly,removethe oven bottom and the
burner-baffle(seebelow).Flames shouldhave
approximately1“ blue coneswith noyellow
tipping.When baffleis back inplace,the flames
...
w1llresettle.
..’
-.>.
“-:=:,:,9 q
/’
Y\ .
Model RGB744GEN
The shutter for the bottom burner is near the
back wall behind the kickpanel. Removethe kick
panel by lifting
pulling it towards you until the spring clips at the
top of the panel are released.
rilodel RGB745GENI
The shutter for the botto~]~burner is near the
ba~;l~wall
~~ora~e ~Y~w~r by ~ulli~~
out an{ltilting
I
‘Foadjl.lstthe flowofair to either
~hc ~hilli~s~e~~ screw ~nd rotate
i-tII~Ta~-CIopen ~Ir c~osed positio]l as neeclecl.
.—— —
LIP the bottom of the panel and
~~hiilcl the sto~a~e clrawer. Remove the
the drawer ail the way
Llp ai the fro~lt.
bu~ile~,loosen
the shutter
Toremovethe ovenbottom:
1. Removeknurled screws holdingdownrear of
ovenbottom.
2. Grasp ovenbottom at finger slots on each side.
3. Lift rear ofoven bottom enough to clear the lip
of range frame, then pull out.
Remove screw
.\—
‘“-”-T~\—
Toremove the burner baffle:
1. Use a nut driver to remove the l/~!”he~~-head
screw shown in the illustration above. Do not
remove any other screws,
2. Pull bafflestraight out until it is free from the
slot that holds it at rear of oven.
Page 29

P
ElLEt7EE!l?$&TMERANGE
IR”ModelRGB744GEN
~~lfthe kick panel isin place,removeit by liftingup
;>][hebottomofthe paneland pullingit towardyou
- untilthe spring clipsat the top ofthe panel are
&leased”
Wb. Model RGB745GEN
Removethe storage drawerbypullingit allthe
wayout and tilting up at the front.
2. Use a 3/16”open-endor socketwrench toback
outbothrear levelinglegsapproximatelytwoturns.
3. Use a 13A”open-endor adjustable wrench to
back out the front levelinglegstwo turns.
wAmlNG:
~ Rangemust be secured with the Anti-Tip
devicesupplied.
@Unlessproperlyinstalled,the range co~~ldbe
tippedbyyouora childstanding,sitting or
leaningon an opendoor.
@After installingthe Anti-Tipdevice,verify
that it is inplacebycarefullyattempting to tilt
the range forward.
@This range has been designedtomeet all
recognizedindustry tip standards for all
normalconditions.
*The use ofthis devicedoesnot preclude
tipphg ofthe rangewhennotproperlyinstiled.
~If the Anti-Tipdevicesuppliedwith the
range doesnot fit this application,use the
universalAnti-TipdeviceWB02X.7909.
1. Mark the wall where the RIGHT EDGE of the
range is to be located. Be sure to allow for the
countertop overhang if you intend to install the
range next to cabinets.
Install the ovenshelvesin the ovenand
;sition the range where it willbe installed.
“Check for Ievelr]essbyplacing a spirit levelor a
~p,partially filled with water, on one of the oven
cks. If using a spirit Ievel,take two readings—
iththe levelplaced diagonallyfirst inone
7“.fl~fterthe range is level,slide the range away
fi’omthe wail so that the Anti-Tipdevicecan be
i~~stalled.
2. Locate the outside edge of the device2~8°
towardthe center ofthe range from the marked
edge ofthe range.
3. Using the deviceas a template, mark the
positionof the hole for the screw.
4. For woodconstruction, drilla pilot hole at an
angle of 20 degrees from the horizontal. A nail or
awl may be used if a drill is not available,
Mount the Anti-Tipdevicewith the screwprovided.
For cement or concrete construction, youwill
need a 1/4’/x
11/2” lag bolt and a l/2~i~.D.sleeve
anchor, which are no~provided. Drill the
recommended sizehole for the l~ardware,
Install the sleeve anchor into the drilled hole and
then install the lagbolt through the device.I’he
bolts must be properly tightened as recomme~~t!ed
forthe hardware.
Page 30

Backof
Range
L
~//
5. Slidethe range against the wall, and check for
proper installation by grasping the front edges
ofthe rear surface unit openingsand carefully
attempting to tilt the range forward.
Anti-TipBracket
>W
Page 31

.—
M&@l#k7ERTEMEPRSSSUWREaukAmRFOBwGAS
%,
:2 +
1. Remove the cooktopand locatethe pressure
~$regulatorat right rear of the range.
$~~.Determine which figure,
isappropriate foryour regulator type.
If it is regulator m:
1. Use a cointoremovethe capfrom the pressure
regulator.
2. Ttu-nthe cap overand engage it inthe slots.
shouldnowbevisibleonthe top ofthe cap.
If it isregulator ~:
1. Unscrew the plastic-protectedhex-nutcap
assembly from the top center ofthe regulator.
2. Carefullypry the protective plasticcap offthe
threaded metal cap. Gentlypull the plastic washer
offthe other threads.
3. Replacethe plastic cap ontothe threaded end
displayingthe gas type you desire. Press the
plasticwasher ontothe remaining threads.
4. Reinsert the capassemb~yinto the regulator.
Donot over-tighten,but ensure the seating of the
washer.
❑, ❑or ❑,
WARNING: Donotremovetl~epressurere~lator fromthe range.
~
LP
‘w~ -’
Levershown closed.
Electrlc Ignition models only.
a/\w-.
❑
s>
:& NAT [r5
into
Range
@~
Do
OR
not remove this protective cap
except
forconversion
PULL OPEN.
I
If it is regulator
1. Removecap and forciblysnap out plastic
plungerfrom bottom of cap,
2. Turn plunger overand forciblysnap back in
~riginallocation.Note: Plunger must snap into
~osition;the gas type youare converting to must
]e visible on lowerside of plunger.
3. Reinsert the assembly into the regulator.
❑:
❑ Q~;lQ
1
F----””—-”--” —’—-’—’
2. Lift burner assemblies straight up and set aside to gain access to
surface burner spuds.
3. With a 5/16”wre~lch,remove each of the four brass spuds onthe
surface burner gas inlet tubes, and replace them with th-ered-tinted
I.P gas spuds mounted in a holder at the right rear of the range
~~bovethe rem~lator.(Mo*untthe brass natural .qasspuds in this
securely screwed
hookup.
Electric Ianition models onlv.
ROTATE OPEN.
~ %~y
;$@\~~?;Q&;
<* )’C>PY
>
..
,’
‘& /
Page 32

OwenB@m@F
1. Remove
drawer,ovenbottomandburner baffle(seepage
28).The ovenburner orificespud is located
behindametal shieldat center bottom ofrange.
2. Removethe metal shield and use a 1/2”wrench
to turn the ovenburner orificespud clockwise.
Tighten spud onlyuntilit issnug with the base.
Toprevent leakage, do not overtightenspud or
loosenspud after it is snug.
ovendoor,kick panelor storage
❑SBJW$T&IRAwu$TMEMT$KUVEER
The air adjustment shutter forthe top burner is
locatedat the back wdllof the oven.The air
adjustment shutter for the bottomburner’is
locatedon the backwallbehind the kickpanel.
The air adjustment shutter foreither burner sit
onthe hoodofthe valve
and islocatedat the open
end ofthe venturi tube.
Toadjust either shutter,
loosenthe Phillipshead
screwand rotate the
sht~ttertothe fullopen
position.
Screw
shutter
[1
>--“
Air
y
a 1/2” wrench to turn the upper burner
Use
orificespud clockwise.Tighten spud only until it
issnug with the base. Toprevent leakage, do not
~vertightenspud or loosenspud after it is snug.
Observe
burning properly. The flames for the top burner
should bum steady with approximately 1“ blue
cones and should not extend out over the edges o :;
the baffle.
Todetermine if the bottom burner flames are
burning properly, remove the ovenbottom and t@
burner baffle (see page 28).The flames should ~
haveapproximately 1“blue cones with no yellow
tipping. When the baffle is back in place, the
flames willresettle.
the top burner flames to see if they are
-’g
t
Page 33

at a time that’s convenient for you.
Iany GE consutner Semite companyperdtecl localic)ns offer yOLI
service
today or toinorrow, or at your con-
~enience (700 a.m. to 7:00p.m.weekdays,!):00a.m. to 2:00 p.m. Saturdays).
OLIrbctorytrained technicians know
Tc)urappliance inside and out—so
;Ilost repairs can be handlecl in just
O1lCvisit.
have tO dO is c~l—tOll-~ree!
Whatever your question about any
Hotpoint major appliance, GEAnswer
Cente@ information service is available to help. Your call-and your
question—will be answered promptiy
and courteously. And you can call any
time, GE Answer Cente@ service is
open 24 hours a day ‘7daysa week.
Youcan have the secure feeling that
GE Consumer Service will still be
there after your Hotpoint product
warranty expires. Purchase a GE
contract while your warranty is still in
effect and you’llreceive a substantial
discount. With a multiple-year contract, you’re assured of filture service
at today’sprices.
TelecommunicationDevicefor tie Deti
*-. - .....,.,..-on..-.
.,.. —. ... -. --—...
~.,’,.
Upon request, we will provide Braille
controls for a variety of Hotpoint
appliances, ancl a brochure to assist in
planning a barrier-fi-ee kitchen for
persons with limited mobility To obmin these iterns, free of charge, call
800.626.2000.
Consumers ‘withimpairecl hezirillg
or speech who have access to a T13D
or a conventional teletv~ewriter rnav
c(41800-TDD-GEAC (8{0-833-4322)‘
1
Page 34

WARRANW
Save proofoforiginal purchase date such as your sales slip or cancelled check to establish warranty period.
q
WHAT!s NOTCOVERED
FULL ONE-YEARWARRANTY
Forone yearfrom dateof original
purchase,wewill provide,freeof
charge,partsandservicelabor
inyour home to repairor replace
anypaft of the range that fails
becauseof a manufacturingdefect.
@Service trips to your hometo
teach you howto usethe product.
Readyour Useand Cam
material.
Ifyou then haveanyquestions
about operating the product,
please contact yourdealer or our
Consumer Affairs office atthe
address beiow,or call, toll free:
GE Answer Center”
800.626.2000
consumer information service
@Improper installation.
Thiswarrantyisextendedto
theoriginal purchaserand any
succeedingownerfor products
purchasedfor ordinaryhomeuse
inthe 48 mainland states,Hawaii
andWashington,D.C.inAlaskathe
warrantyisthe sameexceptthat it is
LIMITEDbecauseyoumust payto
shipthe product to the service shop
orforthe service technician’stravel
coststo your home.
All warrantyservicewill be provided
byourFactoryService Centersor
byour authorized CustomerCare”
servicersduring normalworking
hours.
Lookinthe White or YellowPages
ofyourtelephone directoryfor
GENERAL ELECTRICCOMPANY,
GENERAL ELECTRICFACTORY
SERVICE,GENERAL ELECTRIC-
HOTPOINTFACTORYSERVICEor
GENERAL ELECTRICCUSTOMER
CARE@SERVICE.
@Replacement of housefuses or
resettingof circuit breakers.
@Failureof the product if it is used
for otherthan its intended purpose
or used commercially.
@Damageto product caused
byaccident, fire, floods or acts
of God.
WARRANTORISNt?TRESPONSIBLE
FORCONSEQUENTIAL DAMAGES.
Some states do not allow the exclusion or limitation of incidental orconsequential damages, so the above limitation or exclusion
may not apply to you. Thiswarrantygives you specific legal rights, and you may also have other rights whichvaryfromstatetostate.
Toknowwhatyourlegalrights are inyourstate,consultyour local or state consumer affairs office or your state’sAttorney General.
~r.~ .,‘,._.__....m_a.- -
- ...
if you have an installation problem,
contact your dealer or installer.
Youare responsible for providing
adequateelectrical, gas,exhausting
and other connecting facilities.
&waB’’antor: Ge81eFai Electric Connpany
j’; g~~~;n~r iqelp js iqeed@G; ConGeFning this Warrantyy E~4i’ite:
RF=T..s-
~k~cd~jcl~j<>;—&cBnsQEll@EJ-+,8Be;9B%7y
.—
-..C.T,>.. ----- —.———.-—
=,
—
,.-.._..—-. ....—.,...’-,,,—-...
● 4‘--<-“.
= GE l~ppiiancesa Lauiswille5 KY 40225
-.._—_=—
- —-..—
,<
— .—
..— -..-..”,..-.-.,,—,—..-.--..—
—Q——=”.-.---’d::i==>.-d::.--=.-->...—...... ...-—--A............—...=.
/
...
~.
,..-->,
/’ \
 Loading...