

Page 1
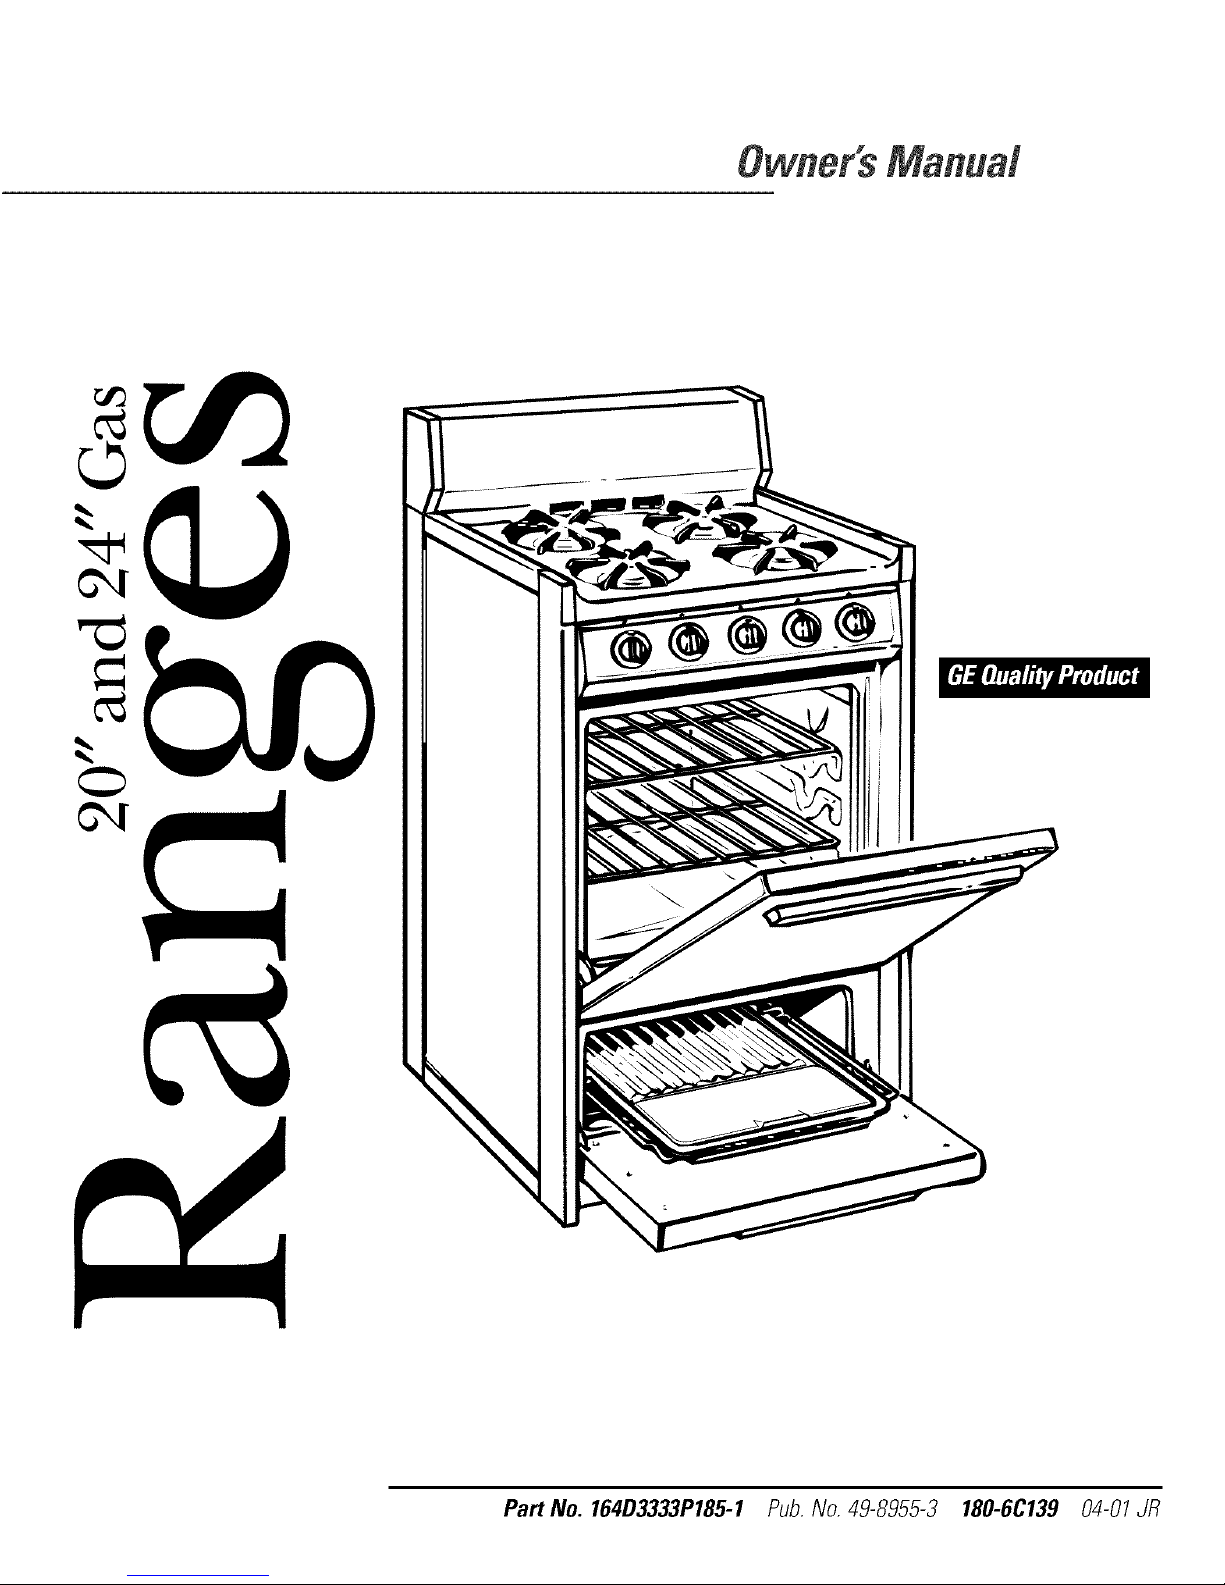
Owner'sManuel
©
Part No. 164D3333P185-1 Pub.No. 49-8955-3 180-6C139 04-0! JR
Page 2

READALLINSTRUCTIONSBEFOREUSING
A WARNING!
IMPORTANTSAFETYNOTICE
The California Safe Drinking Water and ToxicEnforcement Act requires the Governor of California to
publish a list of substances known to the state to cause cancer, birth defects or other reproductive
harm, and requires businesses to warn customers of potential exposure to such substances.
Gas appliances can cause minor exposu,e to f()tlFof flmse substances, namely benzene, carl)on
monoxide, f_[maldehyde and soot, caused primarily by tile incomplete combustion of natural
gas or I,P fllels. Pmpedy adjusted burners, indicated by a bh|isll rather than a yellow flame, will
minimize incomplete combustion. Exposure to these substances can be minimized by venting
with an open window or using a ventilation tan or hood.
WARNING: If the information in this
manual is not followed exactly, a fire or
explosion may result causing property
damage, personal injury or death.
-- Do not store or use gasoline or other
flammable vapors and liquids in the
vicinity of this or any other appliance.
WHAT TODO IF YOUSMELLGAS
• Do not try to light any appliance.
• Do not touch any electrical switch; do
not use any phone in your building.
• Immediately call your gas supplier
from a neighbor's phone. Follow the
gas supplier's instructions.
• If you cannot reach your gas supplier,
call the fire department.
-- Installation and service must be
performed by a qualified installer,
service agency or the gas supplier.
WARNING!
ANT/-TIPDEVICE
• ALLRANGESCAN TIP
• INJURY TOPERSONS
COULDRESULT
• INSTALLAN_TIP
DEVICESPACKEDWITH
RANGE
• SEEINSTALLAtiON
INSTRUCtiONS
2
Page 3

Congratulations/.
YouAre Now Partof OurFamily.
Welcome to the fainily. We're proud of c,ur quality pro(hlcts and we me committed
to proxiding dependable seixice. You'll see it in this easy-to-use Owner's Manual and
you'll hear it in the fiiendly voices of our customer seiYice deparunent.
Best ()fall, you'll experience these values each time you use )_)ur range. That's
important, beomse y_tur new range will be part of your Lunily ti)r many years.
And we hope you will be pmt of ours tor a long time to come.
We thank y()u tor buying our product. We appreciate your purchase, and hope y(tu
will continue to rely on us whenever you need quali/y appliances for your home.
A Service Partnership.
%11 t
{' /MPoRrANr;
_ [k_r_ Fill out and return the Consumer Produ(t Registration Card
that is pa(ked _dth tiffs produ(t.
FORYOURRECORDS
Write the model and serial numbershere:
#
#
You can find them on a label under the cooktop on the right
side wall.
Staple sales slip or cancelled check here.
Proof of the original purchase date is needed to obtain set,ice
under the W,uTanty.
Safety Information
Anti-Tip Device ............ 4
SafetyPrecautions ....... 4,5
Oven .................... 5
SurfaceCookingUnits ...... 6
Operating Instructions
UsingtheSurfaceBurners.. 8,9
Usingthe Oven........ 10-17
Careand Cleaning
Lift-UpCo&top ........... 18
Burners.................. 19
OvenShelves ............. 19
RemovableOvenBottom .... 20
Lift-Off OvenDoor ......... 21
PorcelainOvenInterior...... 22
Installation Instructions
BeforeYouBegin ......... 23
Dimensions& Clearances.. 24
Anti-Tip Device............ 27
Connectthe Rangeto gas...29
Air ShutterAdjustment ..... 32
READTHISMANUAL
Inside you _411find many helpfifl hints on how touse and maintain
y{tur range properly.Just a little prevendve cme on your pmt can save
you a great deal of time and money over the life of your range.
TroubleshootingBps
BeforeYouCall
ForService .............. 34
IFYOUNEEDSERVICE
You'll find ma W answers to common problems in the Before YouCall
ForService section. Ifyou review our chm't of TroubleshootingTips
first, you may not need to call ti)r sei_'ice at all.
If}xn] do need sei_-ice, }_u can relax knoxdng help is only a phone
call away. A list of toll-flee customer sei_-ice numbers is included in
the back section of this manual.
Customer Service
Warranty................ 35
ServiceTelephone
Numbers ......... BackCover
3
Page 4

IMPORTANTSAFETYINFORMAtiON.
READALLINSTRUCtiONSBEFOREUSING.
A WARNING!
Foryoursafe_ the informationin thismanualmustbefollowed tominimizetherisk offire or
explosion,electricshock,or topreventpropertydamage,personalinjury,or lossof life.
A WARNINGANti-TIPDEVICE
A# ranges can tip and injury could result. Toprevent accidental tipping of the range, attach an
approved Anti--fip device to the floor. (See Installation Instructions.)
Tocheck if the device is installed and engaged properly, carefully tip the range forward. TheAnti--tip
device should engage and pravent the range from tipping over.
If you pu# the range out from the waft for any reason, make sure the Anti--tip device is engaged when
you push the range back against the wall. If it is not, there is apossible risk of the range tipping over
if you or a child stand, sit or lean on an open door.
SAFETYPRECAUtiONS
Besureallpackingmaterialsareremovedfrom therangebefore operating#topreventfire or smoke
damageshouldthepackingmaterialignite.
4
• Have dm installer show you the location of
the range gas cut-offvalve and how to shut
it off if necessa U.
• Have your rmlge installed and properly
g_mnded by a qualified installer, in
accor, lan(,e with tile Iuslallation Insmlctions.
Any a(!justment and sere'ice should be
pe_tbrmed only by qualified gas range
installers or ser_ice teclmicians.
• Plug your range into a 120-volt g_,mnded
outlet only. Do not r,emove the r_mnd
g_mn(ting prong fi_)m the plug. Ifin doubt
about the grounding of the home elecuical
system, it isyour personal responsibility
and obligmion to have an ung_mnded
outlet replaced with a properly g_mnded,
th,,ee-prong outlet in acct,,lance with the
National Electrical Code NFI'A-70 latest
edition. In Canada, the appliance must be
electrically gTounded in acco,dance with
the Canadian Electrical Code. Do not use
an extension co_,l with this appliance.
• Do not attempt to repair or replace any
part of your rang,e unless it is specifically
recommended in this manual. All other
se,_qcing should be refe,Ted to a qualified
technician.
• I,)cate range out of kitchen uatfic path
and out ofdrafty locations to prevent pilot
outage (on standing pilot models) and
poor air cirodation.
• Be sure your range is con`ectly a¢!justed by a
qualified sere'ice teclmician or installer for
the type of gas (natural or LI') that is u) be
used. Your range can be converted for use
with either type of gas. See tim Installation
hlstmctkms.
WARNING:These a(!jusmmnts must be
made by a qualified se,s'ice technician in
acct,,lance with the manufacm,,er's
insmlctions and all codes and,,equirements
of the authority having,jurisdiction. Failure
to follow these instructions could ,,>suit in
serious injuU or property damage. The
qualified agent TperR)mdng this work
assumes ,,esponsibility for the conversion.
• After prolonged use of a rang,e, high floor
temperatures m W result and many floor
coverings will not withstand this kind of
use. Never install the range over vinyl tile or
linoleum that cannot withsland such type
of use. Never install it directly over interior
ldtdlen carpeting.
• Do not leave children alone or unattended
whe,,e a rang,e is hot or in operation. They
could be seriously burned.
• Do not allow anyone to climb, stand or
hang on the door, broiler (kawer or range
top. They couM damage the rang> and
even tip it over, causing severe personal
iqju¢.
• Clean only parts listed in this manual.
Page 5

SAFETYPRECAUTIONS
2...__ Never wear loose fitting or hanging garments while using the appliance. Be careful when reaching
_ _'__'_ foritemsstored in cabinetsoverthecooktop.Flammablematerialcouldbeignitedifbroughtin
contact with flame or hot oven surfaces and may cause severe bums.
• I,et burner gTates and ()tiler smiaces cool
1)eR)r,eU)uclring them or leaving them
where children can r,eaclr them.
• For your safety, never use your appliance
for warming or beating dre morn.
• Do not use water on g_,easefires. Never pick
up a flaming pan. Turn offburner, then
smother flaming pan by covering pan
completely with x_ll4itting lid, coolde
sheet or fiat tr W.Flaming g¢,easeoutside a
pan can be put out by covering with baking
soda or, if available, a multi-purpose dU
chemical or fimm-type fire extingldsher.
• Do not stor,e flammable materials in alloven,
a rang,e broiler drawer or near a cooku)p.
• Do not stor,e or use combustible materials,
gasoline or otlmr flammable vapors and
liquids in the vicinity of this or any other
appliance.
• Do not let cooking gTease or other
flammable materials accumulate in
or near the range.
• cautioN.. Items of interest to children
should not be stored in tire cabinel_s above
a rang,e or on tire backsplash of arang,e-
children dimbing on the range to reach
items could be seriously iqjur,ed.
\l|l
cook MEATANDPOULTRYTHOROUGHLY...
_ _P" _ Cookmeat andpoultry thoroughly--meat to atleast an INTERNALtemperatureof 160°Eandpoultry
toat least an INTERNALtemperatureof 180°ECookingtothese temperaturesusuallypretectsagainst
foodbomeil/ness.
OVEN
Stand away from range when opening oven door. Hot air or steam which escapes can cause bums
to hands, face and/or eyes.
• Do not use tim oven fi)r a storage area.
Items stor,ed in fire oven can ignite.
• Place tire oven shelves in tire desired
position while tire oven is cool.
• Keep the oven fi,ee fiom g_,easebuildup.
• Pulling out tire shelf to tire shelt_stop is a
convenience in lifdng heaxy foods. It is also
a precaution against bums from touching
hot smiaces of tire ok)or or oven x_lls.
• Do not heat unopened R)od containers.
Pressure could build up and the container
could burst, causing an in,juU.
• Do not use aluminum Rill am_imr,e in fl_e
oven except as described in tiris book.
Misuse could result in a fire hazard or
damage m the rang,e.
• V_qrenusing cooking or masting bags in tire
oven, follow the manutacu|r,er's directions.
• Use only glass cookwar,e drat is
recommended for use in gas ovens.
• After broiling, always take the broiler pan
out of the range and clean it. I,efk)ver
gTease in tire broiler pan cml catch fire the
next time you use the pan.
• V_qmnbroiling, ifmeat is too dose u) the
flame, the fat m Wignite. Trim excess fat to
prevent excessive tar,e-ups.
• Make sure tire broiler pan is in place
cor_,ectlvto reduce the possibility of
gTease fires.
• lt>)u should have a g_,ease fire in tire
broiler pan, mm olf oven control, and
keep broiler drm_r and oven door closed
to contain fire until it bums out.
• Never leave jars offat drippings on
or near your range.
5
Page 6

IMPORTANTSAFETYINFORMATION.
READALLINSTRUCTIONSBEFOREUSING.
a, WARNING'!
SURFACECOOKINGUNITS
Use proper pan size--Avoid pans that are unstable or easily tipped. Select cookware having flat
bottoms large enough to properly contain food and avoid boilovers and spillovers and large enough to
cover burner grate. This will both save cleaning time and prevent hazardous accumulations of food,
since heavy spattering or spillovers left on range can ignite. Use pans with handles that can be easily
grasped and remain cool
• Always use file LITEposition (on elecuic
ignition models) or the HI position (on
standing pilot models) when igniting top
burners and make sure the burners have
ignited.
• Never leave smthce burners unattended
at high flame settings, l_)ilover causes
smoking and g_easy spillovers that m W
catch on fire.
• Adjust the mp burner flame size so it
does not extend beyond the edge of the
(:ookware. Excessive flame is hazar, Mus.
• Use only d U pot holders-moist or damp
pot hoMers on hot smihces m W result in
bums fl_ml steam. Do not let pot holders
come near open flames when lifting
cookx_le. Do not use a tox_l or other
bulky clofll in place of a pot holder.
• To minimize the possibility of burns,
ignition of flammable materials, and
spillage, turn cookware handles toward the
side or back of file range without extending
over a(!jacent burners.
• Always turn tim smlhce burner to OFF
l_fbr_ removing the (:ookware.
• Carefhlly watch foods being flied at a high
flame setting.
• Never blo(:k the vents (air openings) of the
range. They provide the air inlet and outlet
flint are necessa U ff)r the range to operate
properly with correct combustion. Air
openings are located at the rear of the
cooktop, at dm top and bottom of the oven
door, and at the bottom of the range under
the broiler drinker.
• Foods for flying shouM be as (hT as
possible. Frost on fiozen foods or moisture
on flesh foods can cause hot fat to bubble
up and over sides of the pan.
• Use least possible amount of fat fbr effective
shallow or deep4at fiTing. Filling the pan
too fhll of fat can cause spillovers when
food is added.
• V_qmnflaming foods under the hood,
turn the fan on.
• Ira combination of oils or Inks will be used
in flying, stir uNether before heating or as
faks melt sloMy.
• Always heat fat slowly, and wat(:h as it heats.
• Use a deep fat them_ometer whenever
possible u) prevent overheating fat 1)eyond
the smoking point.
• V_qmn using glass cookware, make sure it is
designed for mp-of:range cooking.
• Keep all plastics away from top burners.
• Do not leave plastic items on the cooktop-
they may melt ifleft too close to the vent.
• Do not leave any items on the cooktop. The
hot air fiom the vent may ignite flammable
items and will increase pressure in closed
containers, which may cause them to burst.
• To avoid the possibility of a burn, ah_ys be
certain that the conmfls for all burners are
at the OFF position and all gTates are cool
bef0r_ attempting to remove them.
• Should _x)u have a g_ase fire, turn the fan
oftL The fan, if operating, may spread the
flames.
• ff range is located near a win(bw, do not
hang long curtains that couM blow over
the top burners and create a fire h_ar,1.
• Wqlen a pilot goes out (on standing pilot
models), you will demct a faint odor (fig'as
as your signal m relight the pilot. V_qmn
relighting the pilot, make sure burner
controls are in the OFFposition, and follow
instructions in this manual m r_light.
• If you smell gas, and >)u have already made
sure pilots are lit (on standing pilot
m odels),mrn off tim gas to tim range and
call a qualified sere'ice technician. Never
use an ()pen flame to locate a leak.
• Keep range clean and flee ofaccumulations
ofg_ease or spillovers, which may ignite.
• Be carefifl when you clean the cooktop
because tim area over tim pilot (on standing
pilot models) will be hot.
Page 7
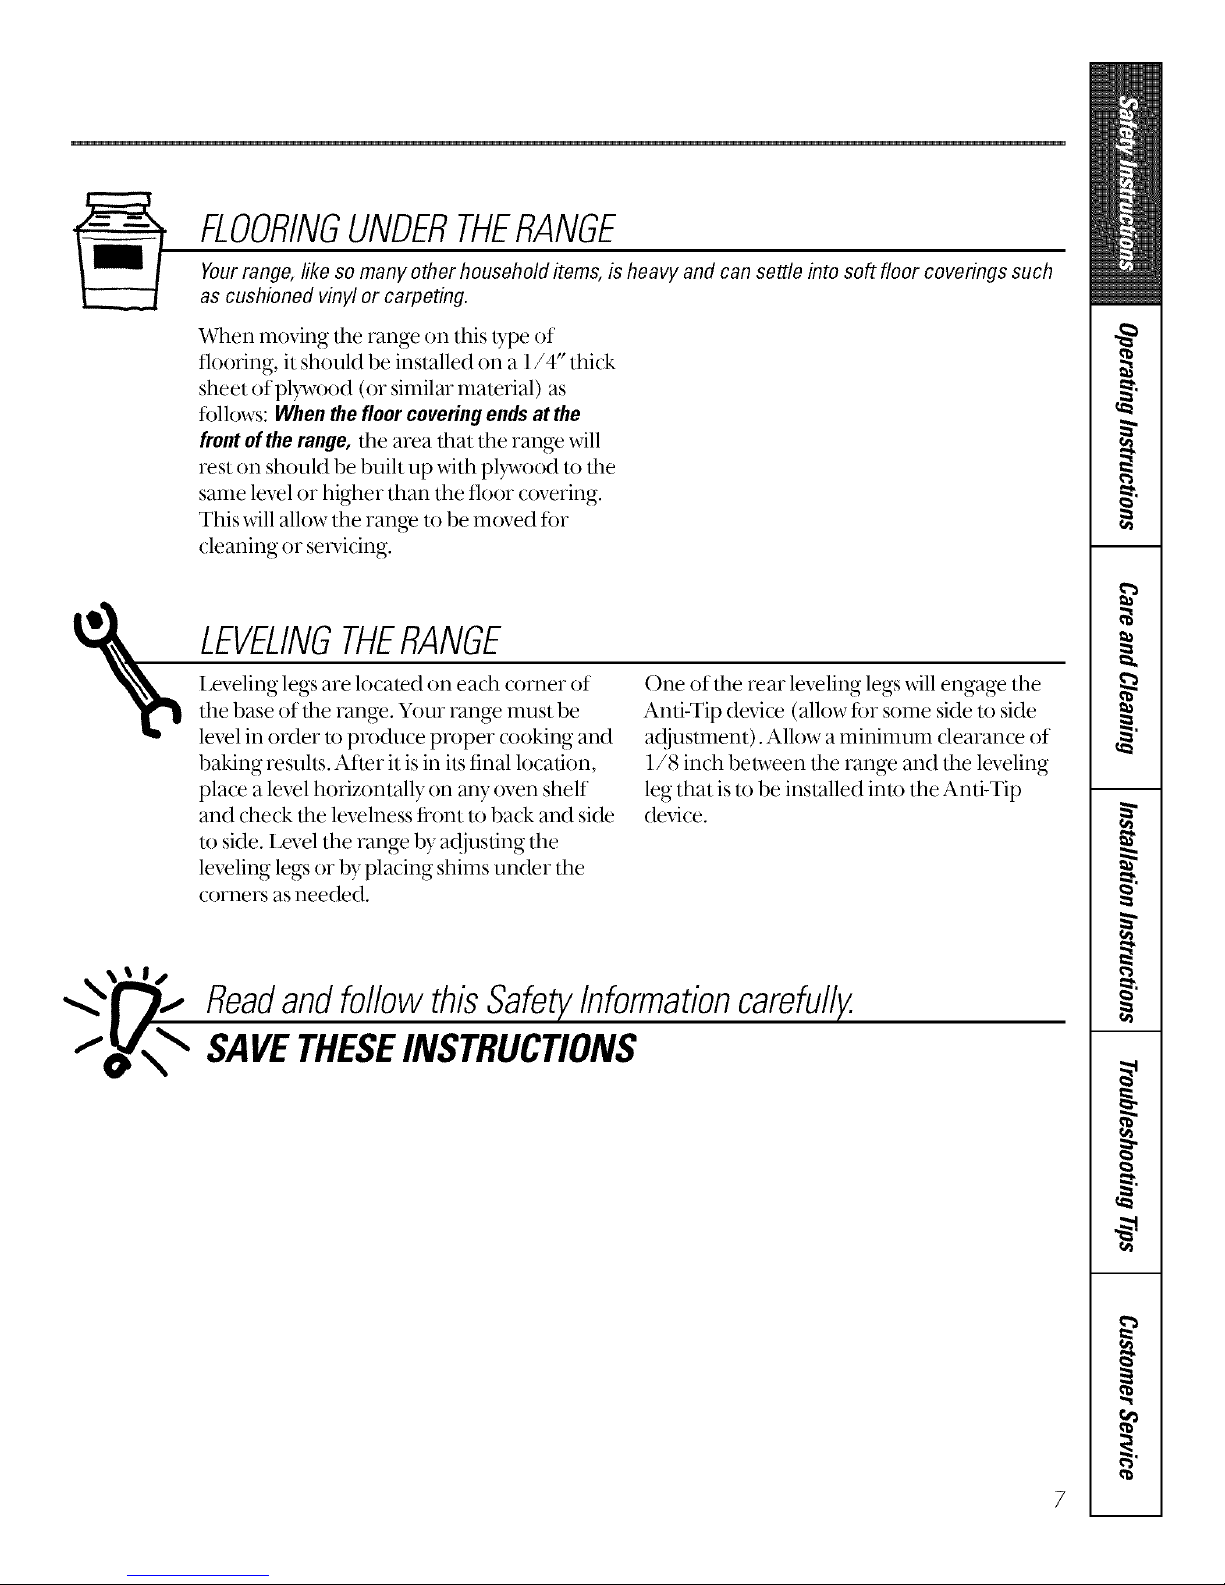
FLOORINGUNDERTHERANGE
Yourrange, like so many other household items, is heavy and can settle into soft floor coverings such
as cushioned vinyl or carpeting.
V_qmn **loving dm range on this type of
flooring, it should be installed oil a 1/4" thick
sheet ofpl}_vood (or similar material) as
follows: When thefloor coveringends at the
front ofthe range, the area that the range will
rest (m should be built up with plD_x_od to the
same level or higher than tim floor covering.
This will allow tim range m be moved for
cleaning or servicing.
%
LEVELINGTHERANGE
I,eveling legs are located on each corner of
the base of dm range. Your range must be
level in o,,ler to produce proper cooking and
baking results. After it is in its final location,
place a level horizontally on any oven shelf
and check the levelness flont m back and side
u) side. Level the range by ad,jusfing the
leveling legs or by placing shims under the
corners as needed.
One of tim rear leveling legs will engage the
Anti-Tip device (allow f0r some side m side
a(!jusmmnt). Allow a mininmm clearance of
1/8 inch between the range and the leveling
leg that is m be installed into the Anti-Tip
device.
ReadandfollowthisSafetyInformationcarefully.
SAVETHESEINSTRUCTIONS
Page 8

Usingthesurfaceburners.
Throughout this manual, features and appearance may vary from your model
Lighting Instructions for Electric Ignition Models
Thesurfaceburnersonsomemodelsareflghted
byelectricignition,e//_ninatingtheneedfor
standingpilot/l_?htswithconstantlyburning
flames.
Incaseofa powerfailure,y{)u can ligh t
the sudilce burners on y{)m range xdth a
match. HeM a lighted match to the
burner, then turn tile knob to tile LITE
position. Useextremecautionwhen
lightingburnersthisway.
The electrode of tile spark igxfitex is
exposed. When one burner is turned
to LITE,all the burners spmk. Do not
atmmpt to disassemble or clean
m'ound any burner while another
burner is on.An electric shock may
result, which couM cause you to
knock _)ver hot cookw;ue.
Stlrfa( e btlri]eis in tlse when an
elecnical power failure occurs will
(onfinue to operate nora]ally.
Toppilots
adjustmentscrew
Manifoldpipe_ 0 0
Thermostat"_""_
Toppilots adjustment screw controls
flTerate of gas to the top burner
pilots.
LightingInstructionsfor StandingPilot Models
Thesurfaceburners ontheserangeshave
standingpilots that must be /it initially
Tolight them:
] Be sure suYlh(e 1)urner ( onuol knobs
are in the OFFposition.
[] I,ifi the (ooktop up or off (see the
Careand cleaning of the range se(tion).
[] I,ocate the 2 pih)t ports and light
each of theln with a inatch.
[] lfthepilotsneeda({iusting, mrnthe
a({iusting s(rew lo(ated on the pilot
fiher.
] I,ower tile cooktop. Yotlr sHithce
burners are now ready for use.
[] Observe lighted burners. Compare
the flames to pictures in the Before
youcallforservicese(tion.If any
flalne is unsatisfactolT, call fi)r
service.
\
Surface Burner Controls
Theknobsthatturnthesurfaceburnersonand
offarelocatedonthecontrolpanelonthefront
oftherange.Thetwoknobsonthe/eftcontro/
theleftfrontandleft rearburners.Thetwoknobs
onthen_?htcontroltherightfrontandWht rear
burners.
ToLight a Surface Burner
[]
Push tile conuol knob in and turn it
to LITE(Hhm pilot inodels). On
ele(tri( ignition models, you will
hear a little clickingnoise-the
sound of the electric spark igniting
the burner.
[] After the burner ignites, mrnthe
knob to ac{iusttile flame size.
AfterLightingaBurner
• Check to be stlre tile burner you turned
on is tile one yot] want to use.
• Do not operate a burner fi)r an
extended period of time without
cookw, ue on the grate. The finish on
the grate may chip without cookware
to absorb the heat.
• Be sure the burners and grates are
_ool befi)re you pla(e your hand, a
pot hoMer, (leaning (loths or other
inaterials on theln,
8
Page 9
!
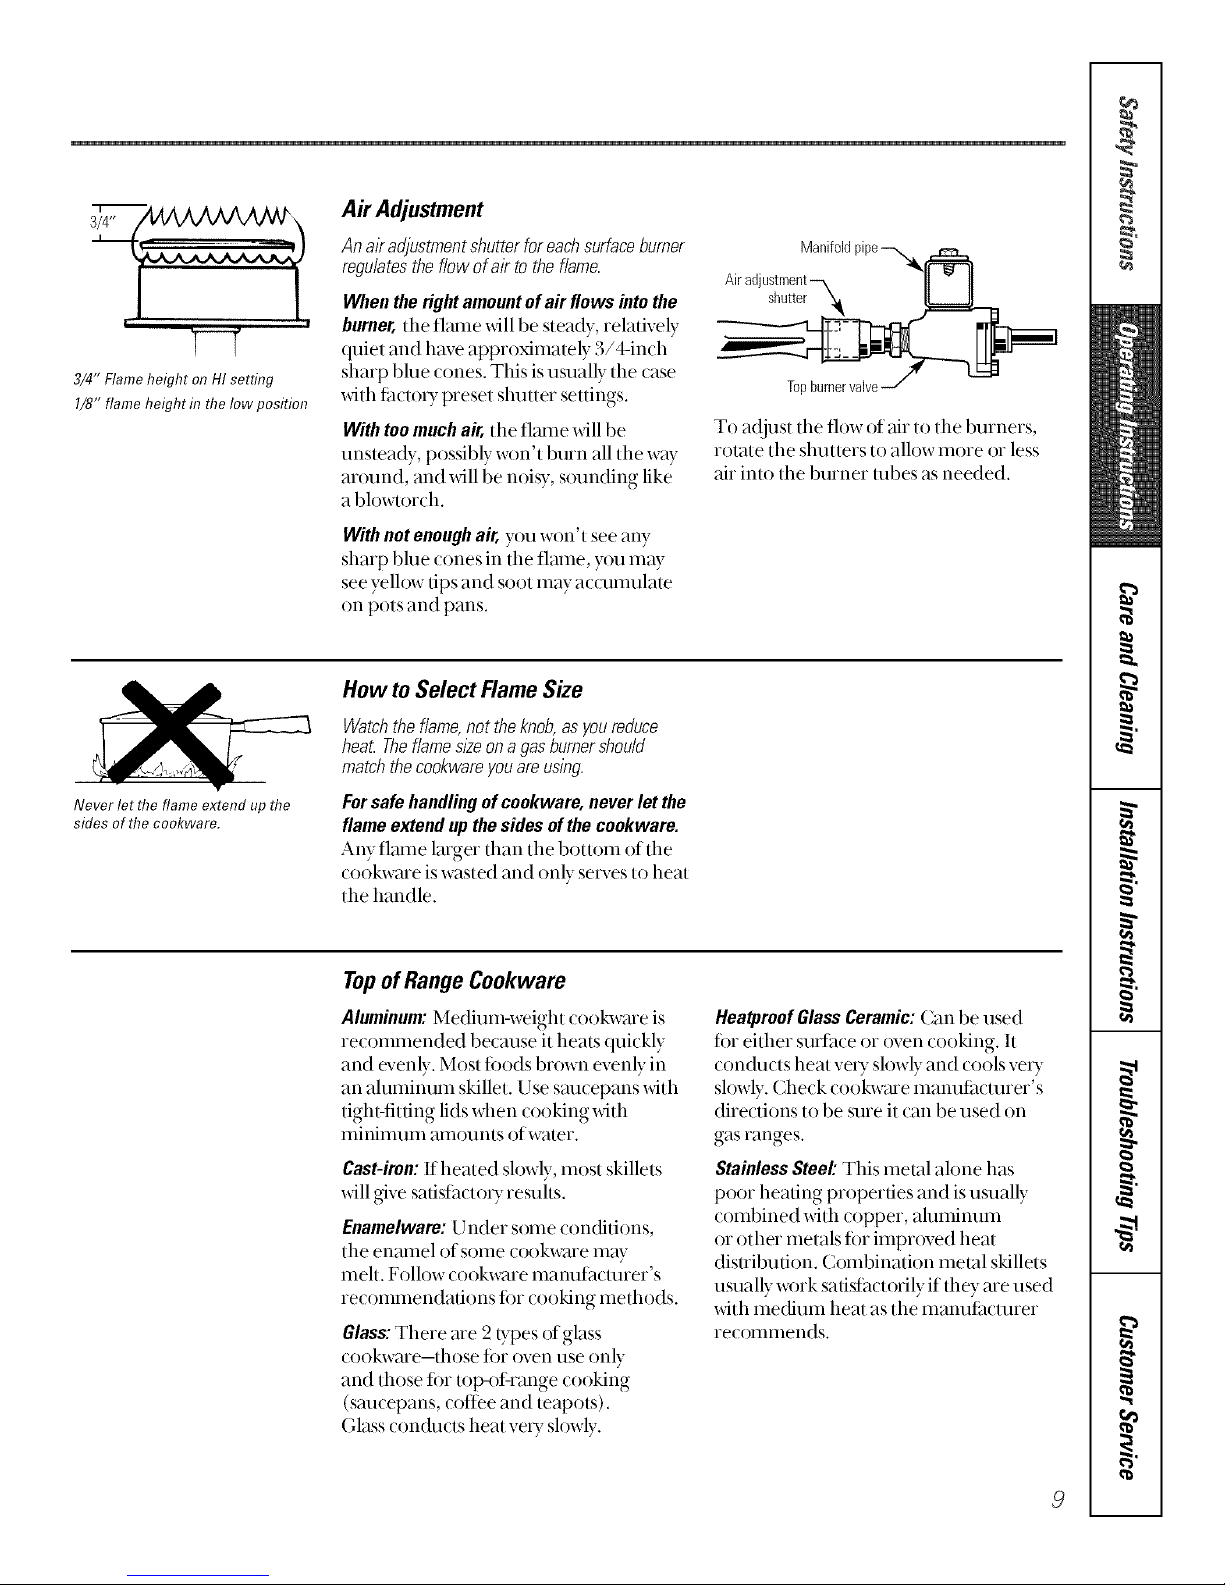
3/4" Flameheight on HI setting
I/8" flame height in the low position
Air Adjustment
An aYadjustment shutter for each surfaceburner
regulates the flow of air to theflame.
Whentherightamountofa# flowsintothe
burner,the flmne xdll be steady, relatively
quiet and have approximately 3/4-inch
sharp blue cones. This isusually the case
xdth fitcto_Tpreset shutter settings.
With tee much air, the fl_une xdll be
unsteady, possibly wtm't burn all the w_ff
around, and will be noisy, st)unding like
a blowtorch.
Withnotenoughair,you wtm't see any
sharp blue cones in the flmne, you may
see yelh)w tips and soot may accumulam
on pots and pans.
_TnrJ burnervalve-../
To a(!just the flow of air to the burners,
rotate the shutters to allow more or less
air into the burner tubes as needed.
Never let the flame extend up the
sides of the cookware.
How to Select FlameSize
Watchthe flame,not the knob,asyou reduce
hea_ Theflame sloeona gas burnershou/d
match thecookware youare using.
Forsafehandlingofcookware,neverletthe
flameextendupthesidesofthe coekware.
Any flame larger than the bottom of the
cookwme is wasted and only serves to heat
the handle.
Topof RangeCookware
Aluminum:Medium-weight cookwme is
recommended beomse it heals quickly
and evenly. Most fi)ods brown evenly in
an aluminum skillet. Use sm_cepans with
tight-fitting lids when cooking with
nfininnnn :41tlotln|s ofw;ner.
Cast-iron:If heated sh)wly, most skillets
_dll give safisl[hcto_Tresuhs.
Enamelware:Under some contritions,
the enmnel of some cookwme may
melt. Follow cookware manufacturer's
recommendations fin cooking methods.
Glass:There me 2 types of glass
cookware-those fin oven use only
and those fi)r top-of range cooking
(smmepans, coffee and teapots).
Glass con(hints heat ve_y slowly.
HeatproofGlassCeramic:Can be used
fi)r either smthce or oven cooking. It
con(h_cts heat vexT slowly and cools vexT
slowly. Check cookwme manufimmrer's
directions to be sure it can be used on
gasranges.
StainlessSteel'.This metal alone has
poor heating properties and is usually
combined with copper, ahmfinum
or other metals fin imprt)ved heat
disnibufion. Combination metal skillets
usually w{nk sads_,mtorily if they are used
with medium heat as the manufimmrer
iecollllllends.
Page 10

Usingthe oven.
Throughout this manual, features and appearance may vary from your model
Lighting Instructions for Electric Ignition Models
Theovenburner is hghtedby electricignition.
To light tile burner, mrn the OVENTEMP
knob to the desired temperature. The
• . . (
bm nex shouM hght x_tlnn 30-,)0 se( onds.
After the oven reaches the selected
temperature the oven burner _)Tcleson
and off to maintain the selected
temperature.
Power Outage--Electric Ignition Models
Aburnerin usewhenane/ectncalpowerfailure
occurswillcontlbueto operatenormallyYour
ovenmaybeusedduringane/ectricalpower
outagebycarefullyfo/lowlbgthestepsbelow
Tolighttheovenpilotduringan electrical
poweroutage:
[] Be sure the OVENTEMPknob is in
the OFFposition.
[] Open both the oven and broiler
doors and wait 5 minutes to alh)w
any pilot gas to dissipate.
[]
Unplug the range flom the wall
outlet, mrn offflm dr(tilt breaker, or
remove the fi]se to avoid accidental
ignition of the oven if electrical
power is restored while you are
lighting the pilot,
[] Remove the broiler pan.
[] I,ocate the oven pih)t assembly by
h)oking into the broiler opening.
The pilot is at the ba(k of the broiler
comp_uunent, on the left side of the
burner.
NOTE:Theovenmustbeat roomtemperature
beforeyoushouldattempttohghttheovenpilot
manually
[]
[]
Turn the OVENTEMP knob to the
desired temperature setting.
I,ight the pih)t with a match and
withchaw your arm immediately
be(ause the oven burner may light in
aslittle as 20 se(ends.
[] Replace the broiler pan and ch)se
the oven and broiler doors.
NOTE:It isnecessarytolightthepilotmanually
eachtimetheovenisuseddunwapoweroutage.
Lighting Instructions for Standing Pilot Models
Thestandingovenpilot mustbelitinitially • To light the oven burner, mrn the
Tolight the oven pilot:
[] Besure the OVENTEMPknob is in
the OFFposition.
] Remove the oven bottom. See the
Careand cleaningofthe range section.
[] Find the oven pih)t port at the back
of the oven.
OVENTEMPknob to the desired
temperature. The burner shouM
light xdthin 60 se(onds.
• Power failure? An electrical power
failure will not affect the standing
oven pih)t.
[] Using a hmg match or match holder,
reach in and light the oven pilot.
[] Repla(e the oven bottom and (lose
the door. Your oven and broiler are
now ready for use.
10
Page 11

OvenControl
YouroveniscontrolledbyanOVENTEMPknob.It
willnormallytake30-90secondsbeforethe
flamecomeson.
After the oven reaches the selected
temperature, the oven burner (Tcles-off
completely, then on _dth a flfll flame-to
maintain the selected temperature.
Air Adjustment
An airadjustmentshutterfortheovenburner
regulatestheflowofair totheflame.
You'll lind the shutter against the back
wall behind the broiler drawer. To reach
it remove the oven bottom (see the Care
and cleaningofthe range section) and the
burner baffle.
Toadjusttheflowof air,loosen the Phillips
head soew and rotate the shutter to allow
more or less air into the burner robe as
needed.
When _e right amount ofair flows into
the burner, the flame shouM be steady,
with approxima/ely 1/2 inch blue cones,
and shouM not extend out over the
baffle edges.
Bump
OvenShelves
The shelves me designed with stop-locks
so when placed conectly on the shelf
supports, they will stop befi)re coming
completely out of the oven and will not
tilt when )_m me rem_)ving ti)od flom
them or placing ti)od on them.
When pladng cookwme on a shelf,
pull the shelf out to the bump on the
shelf support. Place the cookwme on the
shelf, then slide the shelf back into the
oven. This will eliminate reaching into
the hot oven.
Toremove the shelves from the oven, pull
them t{)ward you, flit flont end upwmd
and pull them out.
Toreplace,place shelf on shelf support
with stop-locks (cucved extension of
shell) fitdng up and toward back of oven.
Tilt up fiont and push shelf tow:trd back
of oven until it goes past the bump on the
shelf support. Then lower flont of shelf
and push it all the way back.
17
Page 12

Usingthe oven.
Throughout this manual, features and appearance may vary from your model
OvenSheffPositions
The oven has Ibm shelf supports-A
(bottoln), B, g and D (top).
Shelf positions tot cooking me suggested
in the Usingyour ovenfor bakingand Using
your ovenfor roasting sections.
The oven has 4shelf positions.
Oven Vents
• The oven isvented through (hlct
openings at tile rear of the cooklop.
• Do not block the opening when
cooking in tile oven-it is important
that the flow of hot air flom the oven
and flesh air to the oven burner be
uninterrupted.
• Tile vent openings and neafl)y sudaces
may become hot during baking and
broiling. Do not touch them.
• Do not leave plastic items on the
cooktop-they may meh ifleft too close
to the vent.
• Handles cffpots and pans on tile
cooklop may become hot if left too
close to the vent.
• Metal items will become very hot if they
are left on the cooklop and could cause
buI'ns.
• Do not leave any items on tile cookmp.
The hot air flom the vent m W ignite
flammable items and will increase
pressure in closed containers, which
may cruise them to burst.
Thetype ofmargarine will affect baking performance!
Mostrecipesforbaklnghavebeendeve/oped
usingh/#hfatproductssuchasbutteror
margarine(80%fat).ffyoudecreasethefat,the
recipemaynotgivethesameresu/tsaswitha
higherfatproduc_
Redpe tifilure can resuh if cakes, pies,
pastries, cookies or candies me made with
lowtat spreads. The h_wer the tilt content
of a spread pro(hlct, the more noticeable
these differences become.
Federal standmds require pro(hmls
labeled "margarine" to contain at least
80% tilt by weight. Lowtat spreads, on
the other hand, contain less fitt and more
water. The high moisture content of these
spreads attects tile texture and flavor of
baked goo(g. For best resuhs with your
old tm-ofite recipes, use mmgmine,
butter or stick sprea(g containing at
least 70% vegetable oil.
12
Page 13

Usingtheovenforbaking.
Toavoid possib/e bums, place £heshelves in the desired posifion before you turn £heoven on,
How to Set the Oven For Baking
I_ Close the ovendoor. Then mrn the
OVENTEMPknob to tile desired
temperature.
V2] Check the food for doneness at
file mininnml time on file recipe.
Cook hmger itne< essmy. Turn
tile OVENTEMP knob to OFFand
remove tile toed.
Place most foods inthe middle of
the oven.
OvenShelves
Arrange tile oven shelf or shelves in tile
desired locations while the oven is (eel.
Tile correct shelf position depends on the
kind of food and tile 1)ro_lling desired.
As a general role, place most fi)ods in tile
mkklle of the oven, on either the shelf
position B or C. See the chmt fi)r
suggested shelf positions.
Typeof Food
Angelfoodcake
Biscuits,muffins
Cookiesorcupcakes
Brownies
Layercakes
Bundtorpoundcakes
Piesorpieshells
Frozenpies(oncookiesheet)
Casseroles
Shelf Position
A
BorC
BorC
BorC
BorC
AorB
BorC
A
BorC
Preheating
Preheat the oven for l 0 minutes iftile
redpe callsforit. Preheat means
bringing the oven up to tile spedtied
temperature before putting tile toed in
tile oven.
Topreheat,set theovenat thecorrect
temperature--selecting a highertemperature
doesnot shortenthe preheat rime.
Preheating is necessa U tar good resuhs
when baking cakes, cookies, pasu 7 and
breads. Fox most casseroles and roasts,
preheating is not necessa U.
Baking Pans
Usetheproperbakingpan.Thetypeof finishon
thepandeterminestheamountofbrowningthat
wi//occur
• Glass baking dishes also absorb heat.
When baking in glass baking dishes,
hxwerthe temperature by 25 OF.and use
tile recommended cooking time in the
redpe. This is not necessa U when
baking pies or casseroles.
• Dark, rough or dull pans absorb heat
resuhing in a browner, (risper (rest.
Use tiffs type for pies.
• Shiny, bright and smooth pans reflect
heat, resulting in a lighter, more
delicate br{xx_lling.Cakes and cookies
require this type of pan.
Pan Placement
Fox"even cooking and proper brox_lling,
there nmst be enough room ti)r >fir
circulation in tile oven. lktking results will
be better ifbaking pans me centered as
nmch as possible rather than being placed
to tile flont or to the back of the oven.
Pans sh(xuld not touch each other or tile
walls of the oven. Allow 1 to 1_/2inch
space between pans _Lswell as fiom tile
back of the oven, the door and tile sides.
Ifyouneedtousetwoshelves,staggerthe
panssooneisnotdirectlyabovetheother 13
Page 14

Usingthe ovenforbaking.
Throughout this manual, features and appearance may vary from your model
Cookies
Forevencookingand properbrownlbg there
mustbe enoughroom for air circu/afion in
the oven.
l'_tking resuhs _dll be beuer ifbaking pans
me centered as nmch as possible rather
than being placed to the front or to the
back of the oven.
Pans shouM not touch each other or tile
walls of the oven. Allow l to 11/,_,inch
space between pans _Lswell as flom the
back of the oven, the door and the sleds.
If youneedtousetwoshelves,staggerthepans
sooneis notdirectlyabovetheother
For best results, use only one cookie
sheet t7 the oven at a time.
OvenShelves
Flat cookie sheets (with_ut sides)
pro&ice better-looking cookies. ( ookies
baked in ajelly roll pan (short sides all
around) may have dmker edges and pale
or light browning may occur.
Do not use a cookie sheet so large that it
t_)uches tile walls or the door of tile oven.
Never entirely cover a shelf with a large
cookie sheet.
Pies
For best resuhs, bake pies in dark, rough
or (hill pans to produce a br_x_ller,
crisper cmst.
Frozenpies in foilpans should beplaced onan
aluminumcookiesheetfor baklhg since theshiny
foil panreflects heat away from thepie crust, the
cookiesheethelps retain it.
Cakes
Whenbaklbgcakes,warpedorbentpanswill
causeunevenbakingresultsandpoorlyshaped
products.
A cake baked in a pan larger than the
recipe recommends will usually be oisper,
thinner and drier than it shouM be.
If baked in a pan smaller than
recommended, it may be undercooked
and batter may overfl()w.
Checkthe recipeto makesure thepan sl2eused
is the one recommendecL
AluminumFoil
Never entirely __)vera shelf with
ahmfinum fi)il. This will disturb the heat
circulation and resuh in poor baking.
A smaller sheet offi)il may be used to
catch a spillover by placing it on a lower
shelf several inches beh)w the fi)od.
14
Don'tPeek
Set the timer fi)r the estimated cooking
time and do not open the door to look at
your food. Most redpes pr{)vide
ininilnuln and maxinmm baking times
such as "bake 30-411nfinutes,"
DONOTopen the doorto checkuntil the
minlfnumtime. Openingthe oven doorfrequent/)/
duringcookingallows heat to escapeand makes
baklbgtlTneslonger Yourbaklbgresultsmayalso
beaffectecL
Page 15

Usingthe oven formasting.
Roasting is cooking by dry heat. Tender meat or poultry carl be roasted uncovered in your oven. Roasting
temperatures, which should be low and steady, keep spattering to aminimum.
Roasting is really a baking procedure used for meats. Roasting is easy;just follow these directions."
Place the shelf in theA or B
position.
How to Set the Oven For Roasting
[] Place tile shelf in tile A or B position.
No preheating is ne(essa U.
[]
(heck tile weight of tile meat. Place
it fat side up (or for pouhiT, breast-
side-up) on a roasting rack in a
shallow pan. The melting tht will
baste the meat. Select a pan as close
to the size of the meat as possible.
IJne the pan with aluminum fi)il
when using tile pan fi)r mminafing,
cooking _dth fi_uits,cooking hemily
cured meats, or basting tood during
cooking.
[] Turn tile OVENTEMPknob to tile
desired setting.
[] After roasting is complete, mrn tile
OVENTEMPknob to OFFand then
remove tile ti)od fiom the oven.
15
Page 16

Usingtheovenforbroiling.
Broiling is cooking food by direct heat from above the food, Most fish and tender cuts of meat can be bmi/ect Follow
£hesesteps to keep spattering and smoking to a minimum,
Yourrange has a compartment below the oven for broiling. A specially designed broiler pan allows dripping fat to
drain awayfmm the food,
Both the oven andbroiler compartment doors should'be closed during broiling.
How to Set Your Oven for Broiling
[] You can change tile distance oftim []
fi)od fi'om the heat som(e by
positioning the broiler pan in tile []
broiler compamnent-A (bottom of
broiler compamnent) or second
position. Most broiling sh¢mM be
clone in position A.
[]
[]
Preheat the broiler fi)r best resuhs.
If the meat has fat or gristle around
the edge, cut vertical slashes through
it about 2 indms apmt, but don't cut
into the meat. We recommend that
you trim the tat to prevent excessive
smoking, leaving a layer about 1/8
inch thick.
[]
Turn tile OVENTEMPknob to BROIL.
Turn inost foods once during
cooking. Time foods fi)r about one-
half tile total cooking time, mrn
ti)od, then continue to cook to
preterred doneness.
Turn tile OVENTEMP knob to OFF.
Remove tile broiler pan fiom tile
broiler compartment and serve tile
/i)od imme(fiately. I_eave tile pan
outside the range to cool.
[] Close tile oven and broiler
compartment door.
Useof AluminumFoil
You can use alulninuln fi)il to line your
broiler pan. However, you must rooM the
fi)iltightly to tile pan.
16
Page 17

Broiling Guide
• The oven and broiler (ompartment
doors nmst be closed during broiling.
• Ahvays use the broiler pan that comes
xdth your range.
• If desired, marinate meals or chicken
betbre broiling. Or, brush with
barbeom smlce the last 5 m 10 minums.
• When mTanging tbod on pan, do not
let fitt/y edges hang over the sides. The
fitt drippings will soil the broiler
compartment.
• Use tongs to mrn the meat. Pierced
meat losesjuk es.
Food
Bacon
GroundBeef
Beef Steaks
Medium
Chicken
Fish
Amountor Shelf
Thickness Position
1/2lb.
(about8tlfin slices)
1lb. (4 patties)
1/2to 3/4" thick
1to 11/zIbs.
1whole
2 to 2VzIbs.,
split lengthwise
1lb. fillets
1/4to I/2" thick
Time In Minutes
First Side Second Side
31/Lrain. 3rain.
10 11 rain. &5 rain.
12min. 5 6 rain.
30_5 rain. 25 30min.
5 rain. 5rain.
Comments
Arrangein single laye
Spaceevenly.
Steakslesstban 1"
thickcookthrough
beforebrowning.Pan
frying isrecommende(
Reducetimeabout5
to 10minutesper sid{
for cut-up cbicken.
Brusheachsidewitb
meltedbutter.Broil
skin-side-downfirst.
Handleandturn very
carefully.Brushwitb
lemonbutter before
andduringcooking,if
desired.Prebeat
broilerto increase
browning.
/7
Page 18

Careand cleaningof the range.
Be sure electrical power is off and all surfaces are cool before cleaning any part of the range.
Proper care and cleaning are important so your range will give you efficient and satisfactory service. Follow these
directions carefully in caring for your range to assure safe and proper maintenance.
If your range is removed for cleaning, servicing or any reason, be sure the anti-tip
device is re-engaged properly when the range is replaced. Failure to take this
precaution could result in tipping of the range and cause injury.
How toRemovethe Rangefor CleaningandServicing
Folh)w these steps to remove the range
ti)r se_x_i(ingor (leaning hard to rea(h
suffhces.
[] Shut offthe gas supply to the range.
[] Disconnect the elecuical supply to
tlle range.
[] Disconnect the gas supply robing to
tlle range.
[] Reverse these steps to re-install the
range. If the gas line has been
disconnected, check tin gas leaks
after re-connection. See the
Installation Instructions fin the gas
lead test method.
NOTE."A trainedtechnicianshouldmakethegas
installation,disconnectionandre-connectionof
thegassupplytotheappliance.
[]
Slide the range fi)_w_ud tofiee the
range fi)ot fiom the Anti-Tip bra(ket.
See the Installation Instructions for
the h)cation of the bracket.
Lift-Up/OffCooktop
Cleantheareaunderthecooktopoften.Built-up
soil,especiallygrease,maycatchonfke.
To make cleaning easier, the cooktop
may be lifted up or off.
Be sure all burners me turned offbetore
raising the cooklop. Then rem_)ve the
grates.
(hasp the two fiont burner wells and lift
the cooktop up or off. Be carefifl of the
pih)ts when the cooktop is up.
After cleaning underneath the cooklop
with hot, soapy water and a clean cloth,
lower or replace the cooklop. Be cmefifl
not to pinch y{)ur fingers.
18
Burner Grates
Gratesshouldbe washedregularlyandafter
spi//overs.Washtheminhot,soapywaterand
nnsewithdean water
After cleaning, (hT thoroughly by putting
them in a w:um _)venfin a tew minutes.
Don't put the grates back on the range
while they are wet. When repladng the
grates, be sure they're positioned seouely
)vet the burners.
To get rid ofburne(bon fi)od, place the
grates in a c_)vered container (or plastic
bag) with l/4 cup ammonia to loosen
the soil, Then scrub with a soap-filled
scouring pad if necessary.
Although they're durable, the grates will
gradually lose their shine, regmdless of
the best cme you can give them. This is
due to their continual exposure to high
temperatures.
Do not opei'4te a burner J}.)ran extended
period of time without cookw_ue on the
grate. The finish on the grate may chip
x_thout cookware to absorb tim beat.
Page 19

Burners
Theholesin the surfaceburnersof your range
mustbe kept cleanat all tlYnesforproper ignition
andan even,unhamperedflame.
Youshouldcleanthesurfaceburners
routinely,especiallyafterbadspillovers,
which could ('log these holes. "v\tpe off
tile smtitce burners. If hea Wspilh)ver
OCCllI'S, I'eIIl()ve the StlFlhce bllineis
flom the _>mge.The burners lift out fi)r
cleaning. I Jfl up the coohop and then
lift out the smthce burners.
NOTE."Ascrewholdseachoftheburnersin
placetokeepthemfromwobbhbgaroundduring
shipmenLflemoveanddiscardtheshipping
screwflit theburnertoonesideat theend
closestto theigniter Thisdisengagesit from
thegasvalvesatthefrontof therange.It rifts
outeasily
Toremove burned-on food, soak the surlace
burner in a solution of mild liquid
detergent and hot water. Soak the su_thce
burner tin 20 to 30 minutes. For more
stubborn stains, use a cleanser like Soft
Scrub <Pbrand or Bon Am(' brand. Rinse
well to rem{)ve any uaces of the cleanser
that might clog the su_thce burner
openings. Do not use steel wool becm(se
it _dll clog the su_time burner openings
and soatch the smthce burners. If the
holes become clogged, clean them xdth a
small pin or se_dng needle.
Before putting the surface burnerback,
shake out excess water and then (hy it
thoroughly by setting it in a warm oven
for 30 minutes. Then place it back in the
range, making sure it is properly seated
and level.
ControlPanel andKnobs
It's a good idea to wipe the control panel
atier each use of the oven. Clean with
mild soap and water or vinegar and water,
rinse with clean water and polish (hy with
a soft cloth.
Do not use abrasive cleansers, suong
liquid cleaners, plastic scouring pads or
oven cleaners on the conuol panel-they
will (hmage the finish. A 50/50 solution
ofvinegm and hot water works well.
Thecontrolknobsmayberemovedforeasier
cleaning.
To remove the knob, pull it suaight off
the stem. Wash the knobs in soap and
water or a vinegar and hot water
solution but do not soak.
OvenShelves
The shelves can be cleaned by hand using
soap and water or with an abrasive
cleaner. Arier cleaning, rinse the shelves
with clean water and &y.
To rem()ve heaxy, burned-on soil, you
may use so)uring pads. Arier scrubbing,
wash _dth soapy water, rinse and (h)'.
Metal Parts
Donotusesteelwool,abrasives,ammonia
orcommercialovencleaners.
To sately clean smthces: wash, rinse and
then &y with a soft cloth.
18
Page 20

Careand cleaningof the range.
RemovableOvenBottom
First remove the shelves fiom the oven.
The oven bottom litis fiom the rear.
Grasp each side of the oven bottom and
lift upward fiom the rear until the bottom
is clear-lift it to remove fiom the flont.
NOTE:If theovenbottomIsreplacedincorrectly,
itmaywarpandcauseundesirablebakingresults.
Cleaningthe OvenBottom
Theovenbottomhasaporcelainenamelfinish.
To make cleaning easier, protect the oven
bottom fiom excessive spillovers. This is
particularly important when baking a
fi_uitpie or other toods with high acid
content. Hot fl_uitfllings or fi)ods that
are addic in coment, such as tomatoes
or sauerkrm_t, and stances with vineg_u
or lemon juice, may cause pitting and
dmnage to the porcelain enmnel sudime.
Toprotecttheovenbottomsurface, place
a piece of ahmfinum tk)ilslightly larger
than the baking dish on the shelfbeh)w
to catch any boilovers. It should not
complelely cover the shelf as this
would cm_seuneven heat in the oven.
Ahmfinum titil sh_tuld not be placed
on the oven bottom.
lfa spilh)ver does occur on the oven
bottom, alh)w the oven to cool first. You
can clean the bottom with soap and
water, a mild abrasive cleanser, soap-flied
steel wool pads or an oven cleaner
tollowing paclclge directions.
Ii !,
Broiler Drawer
The broiler pan is held in place by a xdre
broiler rock.
Toopen the broiler:
[] (;ently lift up and pull tbtward on
the drop down broiler door.
[]
[]
[]
Pull the broiler pan fbtward. It x611
reach a tempora U stop position.
Continue to pull f)tward and the
broiler pan will pull out to expose
the entire broiler grill smlhce.
Remove the broiler pan flom the
broiler ra(k by lifting up on the fiont
ofthe broiler pan st)it will clear the
xdre rack. Then pull ti)rward slightly
and use both hands to lift the pan
fee of the rack.
D returnthepantothebreilerreck:
[] Pull the _fire rack Out tOthe stop
position.
[] Insert the pan into the recessed
section of the broiler rack.
[] Slide the pan in place under the pan
ret_finers. Push the pan to the rear of
the broiler compartment.
[] (lose the broiler door.
20
Page 21

Broiler Pan
After broiling, remove tile broiler pan
and (arefiflly pour out tile grease in tile
pan into a proper container.
Ifti)o(1 has burned on, sprinkle the pan
with detergent while hot and c{)verwith
wet paper towels or a dishcloth, l'_urned-
on ti)ods will soak loose while the meal is
being served.
Wash; scour if necessa U. Rinse and &y.
The broiler pan may also be cleaned in a
dishwasher. Do not store a soiled broiler
pan anywhere in the range.
Lockingmechanismlever
To,oc \\\
applyforce_,_.
Tounlockapplyforce
Lift-OffOvenDoor tonsomemodels)
The oven door is removal)le (on some
models) but it is heax T. You may need
help rem(Mng and replacing the door.
Toremovethedoor:
[] Open the door to the fifll open
position.
[] Raise the hxking mechanism by
appl}dng force to the locking
mechanism lever.
[] Close the door until it stops against
the locking mechanism.
[] (hasp firmly on each side and lift the
door straight up and offthe hinges.
Toreplace the door:
[]
Position the sh)ts in tim bottom of
the door squarely over the hinges.
Then lower the door slowly and
evenly over both ltinges at the
same time.
[]
Open the door to the fifll open
position and press the locking
mechanism back into its original
position.
DONOTATTEMPTTOCLOSETHEDOOR
UNTILTHISSTEPISCOMPLETETHE
HINGEORDOORCOULDBEDAMAGED.
TOCLEANTHEDOOR:
Insideofdoor:
• S{)ap and water will normally do the
.job. Hemy spattering or spilh)vers m W
require cleaning with a miM abrasive
cleaner. Soapy, wet metal pads may also
be used. Do not allowtood spills with a
high sugm or acid conmnt (such as
milk, tomatoes, smmrlaaut, trait juices
or pie filling) to remain on the surlime.
They may cause a dull spot even
after cleaning.
• If necessary, you may use an oven
cleaner. Folh)w packslge directions.
Outsideof door:
• Use soap and water to thoroughly clean
the top, sides and fiont oftim oven.
Rinse well.
• Spillage of mminades, fiatitjuices,
tomato sauces and basting materials
containing adds may cause
discoloration and shouM be wiped up
imme(fiately. When surlace is cool,
clean and rinse.
• 1)o not use oven cleaners, cleansing
powders or hmsh abrasives on the
outside of the door.
2/
Page 22

Careand cleaningof the range.
Porcelain Oven Interior
With proper care, the porcelain enamel
finish on the inside of the oven _dll stay
nm_qooking fin yems.
Lettherangecoolbeforecleanlbg.
We recomi_lend that you wear rtlbber
gh_veswhen cleaning the range.
Soap and water will normally do the job.
Hem T spattering or spillovers may
require cleaning with a mild abrasive
cleaner. Soapy, wet metal pads may also
be used. Do not allow tood spills with a
high sugm or acid content (such as
tomatoes, sauerkraut, fi_uitjuices or pie
filling) to remain on the surlace. They
may cruise a dull spot even after cleaning.
Householdammoniamaymakethe
cleaningjob easier.Place1/2 cup in a
shallow glass or pot/e U container in a
cold oven overnight. Tile mnmonia
flmms will help loosen the burned-on
grease and fi)od.
Ifnecessargyoumayuseanovencleaner
Followpackagedirections.
Cautions about using spray-on oven
cleaners:
• Do not spray on tile electrical conuols
and s_witchesbecmlse it c()uld cruise
a short circuit and resuh in sparking
or fire.
• Do not allow a fihn flom tile cleaner to
build up on tile temperature sensor-it
could cause tile oven to heat
improperly. (The sensor is located at
tile top of tile oven.) Cmeflflly wipe tile
sensor clean after each _ven cleaning,
being carefifl not/o move the sensor as
a change in its position could affect
how the oven bakes.
• Do not spray any ()ven cleaner on tile
ou/side of tile oven door, handles or
any exterior surlhce of tile oven, wood
or painted surlimes. The cleaner can
dmnage these surlimes.
22
Page 23

Instaliadenof therange.
Read theseinstructions completely and careMly.
Important!
Remove all packing material and literature from
oven before connecting gas and electrical
supply to range.
Before YouBegb
Read these instructionscompletely and
carefully.
IMPORTANT."Save these instructions for the
local electrical inspector's use.
INSTALLER:Leave these instructions with the
appliance after installation is completed.
CONSUMER:Keep this Owner's Manual and the
Installation Instructions for future use.
Thisappliance mustbe properly grounded,
ForYourSafety
If yousmell gas:
[] Open windows.
[] Don't touch electrical switches.
[] Extinguish any open flame.
[] Immediately call your gas supplier.
Do not store oruse combustiblematerials,
gasoline orother flammable vapors and liquids
in the vicinityof thisor anyother appliance.
WAflNINg/
• Improper installation, adjustment, alteration,
service or maintenance can cause injury or
property damage. Refer to this manual
For assistance or additional information,
consult a qualified installer, service agency,
manufacturer (dealer) or the gas supplier.
• Flexible connectors--If the range b
connected with a flexible connector, use
caution when moving it away from the wall.
Flexible connectors are not intended for
repeated bending. Do not allow cleaners to
get on them. Never reuse old flexible
connectors; this can cause gas leaks and
personal injury. Always use NEW flexible
connectors when installing a gas appliance.
They must comply with ANSI Z21.24,latest
edition.
23
Page 24

Installationoftherange.
Read theseinstructionscompletely and carefully.
Dimensionsand Clearances
Provide adequate clearances between the range and adjacent combustible surfaces.
25_1/2"_
fromwail
tofront of
panel
Minimum to 30"
cabinetson
eitherside 18" Minimum
ot range __
36"
C
_.inimum towail on
either side of range
aBuve Jb [leiyllL
Maximumdepth
40W"
_Depthincluding handle: 25-9/16."
Depth to front of control knobs: 26-I/8."
0" clearance below cooking top and at rear ofrange
Models A B C
20" Wide 20" 203/s" 2"
24" Wide 24" 243/a" 0"
24
Important Safety Instructions
Installation of this range must conform with local
codes, or in the absence of local codes, with the
National Fuel Gas Code,ANSI Z223.1,latest
edition. In Canada,installation must conform
with the current Natural Gas Installation Code,
CAN/CGA-B 149.1or the current Propane
Installation Code, CAN/CGA-B149.2,and with
local codes where applicable.
This range has been design-certified bythe
American GasAssociation according to ANSI
Z21.1,latest edition and Canadian Gas
Association according to CAN/CGA-1.1latest
edition. As with any appliance using gas and
generating heat, there are certain safety
precautions you should follow. Youwill find
these precautions in the Important Safety
Instructions in the front of this guide. Read them
carefully.
• A range should NOTbe installed directly over
ldtchen cmpefing unless an insulating pad of
1/4-inch thick piece of pl}_vood is placed
between tile range and cmpet.
• Be sure )_)ur range isproperly installed by a
qualified installer or set_ice technidan.
• This range nmst be electrically grounded in
accordance with local codes, or in their
absence, with the National Electrical Code
ANSI/NFPA No. 70, lamst edition and
Canadian Gas Assodadon according to
CAN/CGA-1.1 latest edition. See Electrical
Connection Infi)rmation.
•Betore installing the range in an area covered
xdth linoleum or any other synthetic floor
o)vering, make sure the floor o wering can
withstand heat at least 90 °F. ab_)veroom
temperature without shrinking, warping or
discoloring.
• Make sure tile wall coverings around tlle range
can _dthstand tile heat generated by the range.
• Make sure all conuols ieF[lain ill the OFF
position when tile T_lngeis not in use.
Page 25

Read theseinstructions completely and carefully.
ToolsYouWill Need
Forlevelinglegs:
• ( hannel lock pliers
Forgassupplyconnection:
• Pipe wrench
ForconversionfromNaturaltoLPgas:
• 1/2-inch open-end wrench
Forburnerflameadjustment:
• Phillips head and bladeqype s(rewdrivers
p
Additional Materials YouMay Need
• (;as line shut-offvalve. ForFlexibleConnection:
• Pipe joint sealant that resists action of I 2 gas.
• 1/2-inch pipe nipple,
ForRigidConnection:
• Pipe fittings as required.
• Flexible metal appliance connector
(same 3/4-in(h or 1/2-in(h I.D. as gas
supply line).
• Flare union adapter line
(1/2-m( h NPT x 3/4-m( h or 1/2-m(h I.D.).
Installo gtheBackguard
[] Remove the cooktop.
[] Place the backguard on top of the end panels
at the rear of the range.
[] (_onnect the "disconnect plug" (for power u)
the ba(kguard fiom the range).
[] Insert the machine screws through the lower
inside flange ofthe end (aps and the end
panels. Se(ure with the hex nuts provided.
[]
Insert the inachine screwsthrough the
elongated holes at the bottom of the
backguard and side flange of the burner box.
Secure xdth the hex nuts provided.
[] Attach the lower edge of the backguard to
the vent outlet with 2 sheet inetal sciews.
25
Page 26

Installationoftherange.
Read theseinstructionscompletely and carefully.
RangeLocation
Do not set the range over holes in the floor or other locations where it may be subject to strong
drafts. Any opening in the waft behind the range and in the floor under the range should be sealed.
Make sure the flow of combustion or ventilation air is not obstructed.
Recommendedgasandelectricsupplylocation
/
-- GasHookup
Area
30" Min.
Checklocal codes before making connections.
Models A B
20" Wide 203/a" 2"
24" Wide 243/8" 0"
26
Page 27

Read theseinstructions completely and carefully.
WARNING'!
Anti-Tip Bracket
• ALL RANGES CAN TIP
• INJURY COULDRESULT
• INSTALLANTI-TIP DEVICE
PACKEDWITH RANGE
• SEEINSTRUCTIONS
ToolsYouWill Need
• Phillips head s(rewdriver
} t/ f• 1,_ or adlustable wrencll
• Flat blade s(rewdriver
Anti-TipBracketInstallationInstructions
Anti-tipbracketattachestothefloortoholdeitherrear
rangeleg.Whenfasteningtothefloor,besurethatthe
screwdoesnotpenetrateelectncalwlYingorplumbing.If
youcannotbesureof this,useashorterscrewthatwillnot
penetratethroughthefloonbg
[] Decide whether tile anti-tip bracket xdll be
installed on tile right or levi side of the range
location.
[] Screw dm bracket securely to tim floor wifll
tlle screw provided. The screw is self drilling
in w{_o(1,pl}_v{)od,pmticle and chip board,
and most metal flmning. If attaching to
mason U, )_)u can Nly suitable screws and/or
anchors at hmdwme stores. Use a masomy
drill to drill the required holes.
[] Ifthe bracket side of the range is next to a
(abinet, plate the brat ket against balk wall
and (al)inet.
If there is no ac!jacent cabinet, detemfine
where the location of the range side (painted
outside panel) will be. Place the bracket with
its outside edge at this location and against
the back wall.
Outside edge of bracket
shouldbeflushwithtbe Wallbehindrange
outsideofthe range
Adjacentcabinet ]
_i, orfinallocation ]
Anti-tipbracket / Wall
[] Using tile x_Tench,back out tlle fi)m range
legs at least two turns. Level tlle range. See
tile Protect YourFloor and Levelingthe Range
infi)m_afion in tim Installationtherange
se(tion of thismanual for leveling
infi)m_ation.
[] Slide tile range into place.
27
Page 28

Installationoftherange.
Read theseinstructionscompletely and carefully.
ConvertBurner Orifices and PressureRegulator(if necessary)
[] ConvertingBurnerOrificestoLPGas: SCPRegulator:
NAT
LPgas setting
28
Tighten the orifice hoods fin"tile sudace burners
and oven burner approximately two complete
turns to the closed position and a(!just top pilots,
ifequipped. The gas pressure regulator must be
converted/o the 12 gas setting so that it will
pr(Mde a pressure of 10 inches water column to
the xvmgemanitixld.
[] ConvertingBurnerOrifices toNaturalGas:
(onlyifrangehasbeenoperatedprewouslyonLPgas)
NAT gas setting
Uns(rew the orifice hoods fin all burners (top
and oven) approximately two complete turns,
until the flame on the burner does not increase in
length. A(!just the top pilots (if equipped). The
gas pressure regulator must be set to the natural
gas setting so that it will provide a pressure of 4
inches of water cohmm in the range manitold.
[] RegulatorConversion:
All ranges me equipped with a gas pressure
regulator tin controlling and m_fintaining a
uniform gas pressure in the gas manifold of the
range. The burner orifices me sized tin the gas
pressure delivered by the regulator supplied.
The pressure regulator must not be rem()xv(1.
To convert the regulator fiom one gas to another,
reter to the ti)llowing illusuafion that applies:
Harper-Wyman Regulator:
_ _ NAT
For a Harper-W}qnan regulator, remove converter
cap by inserting a coin into slot in top and
twisting. Turn cap over and re-install.
On the SCP regulator, unscrew the converter
using a b/8 x;Ten(h. Turn tlle (ap over and
reinstall.
NOTE."Whatyoureadontheconvertercaporplungerls
thetypeofgasfor whichtheregu/atorlsseLIfyoursreads
NAT,theregulatorissetfornaturalgas.IfyoursreadsLP,
theregulatorissetforLR
• Forproperoperation,themaximuminletpressure
totheregulatormustbenomorethan14inchesof
water columnpressure.Fox-(hecking the
regulator, the inlet pressure must be at least
1-inch of water cohHnn (3.4 KI'A) greamr than
the regulator ou/put setting. If the regulator is
set fin 4 inches of water column pressure, the
inlet pressure nmst be at least 5 inches. If the
regulator is set fi)r 10 inches, the inlet pressure
must be at least 11 inches.
• The gas supply line to the range should be 1/2
indl or 3/4 indl pipe.
Forstandingpilotmodels,make the necessmy oven
pilot a(!jusUnent (see directions in the If Range
HasStandingPilots--Light andAdjust Surface
Burner Pilots section). Also burner air shutter
a(!justlIlents illav be nexessmy on all models to
complele conversion (see the Surface BurnerAir
ShutterAdjustment section).
Page 29

Read theseinstructions completely and carefully.
Connectthe Rangeto Gas
Thehouse piping and connector used to connect the range to the main gas supply must be
clean, free of metal shavings, rust, dirt or liquids (oil or water). Contaminants in the supply lines
can work their way into the range manifold and cause failure of gas valves or controls and clog
burners or pilot orifices.
[]
[]
[]
[]
House Flareunion Nut Appliance Nut Flareunion Rangepressure
piping adapter connector adapter regulator
If tile range is to be connected to house
piping xdth flexible or semi-rigid metal
appliance connector, conneclor nuts MUST
NOTbe connected directly to pipe threads.
The appliance connector must be installed
by using the proper flme union adapters _dth
the connector. Cutoffvalve, appliance
connector and adapters are not supplied
with the range. (Because solid pipe resuicts
moxJng the range, we recommend use of
A.G.A. certified flexible tubing.) In ( anada,
flexible connectors must be single wall metal
connectors no longer than 6 Det in length.
Install a manual slmtoffvalve in tim gas line
in an easily ac(essible lo(ation outside of the
range. Be sure you know how and where to
shut offthe gas supply to the _wnge.
Check for leaks. After connecting the range
to gas, check the system ti)r leaks with a liquid
leak detector atall.joints and connections.
[] Tighten all connections as necessa U to
prevent gas leakage in the range or supply
line.
[]
CAUTION:Do not use a flame to check for
gas leaks.
Clmck alignment of valves after connecting
the range to the gas supply to be sure tlle
manflold pipe has not been moved. A
misalignment could cruise the valve knob
stem to rub on the control panel, resuhing in
a gas leak at the x;tlve.
Disconnect the range and its individual shut-off
valve fiom the gas supply piping system during
any pressure testing of the system at test pressures
greamr than 1/2 psig.
Isolate the range fiom the gas supply piping
s):stem by closing its incfivichml manual shuH)ff
valve (hning any pressure testing of the gas supply
piping s}\stem at test pressures equal to or less
than 1/2 psig.
CheckingManifold GasPressure
If it should be necessmy to check the manifold gas
pressure, connect manomeler (water gauge) or
other pressure device m the top burner orifice
fiuthest flom the manflold inlet and mrn burner
xvtlve on.
For an accurate pressure check have at least
2 other top burners burning. Be sure the gas
supply inlet pressure is at least one inch above
spedfied range manitold pressure.
The gas supply pressure sh()uld never be over
14 inches W.(. When properly a({justed ti)r
Natural Gas the W.C. pressure is 4inches; fin 12
Gas the W.C. pressure is 10 inches. The serial
plate, located under the main top in the burner
box area, indicates tot which/ype of gas your
range was timtoU a({justed.
29
Page 30

Installationoftherange.
Read theseinstructionscompletely and carefully.
ToMake Electrical Connection(if range has electric ignition)
CAUTION--FOR PERSONALSAFETY."DO NOT
USEAN EXTENSION CORDWITH THIS
APPLIANCE.
• This appliance nmst be supplied xdth the
proper voltage and flequemy, and connecled
to an in(fivi(hml, property grounded and
pol_uized branch dr(uit, protected by a circuit
breaker or time<lel W fi]se, as noted on the
rating plate.
• '_,\tfing nmst contoHn/o National Electric
(odes or the prevailing local code fi)ra range t)f
this kilowatt rating. (See the rating pla/e under
the cooklop fi)r this intonnation.)
• If the electric supply provided does not meet
the above spe(ifi(ations, (all a li(ensed
elecuician.
WARNING!
Electrical GroundingInstructions
This appliance is equipped with a throe prong
grounding plug for your protection against shock
hazard and should be plugged dirocfly into a
properly grounded receptacle. Do not cut or
remove the grounding prong from this plug.
INSURE PROPERGROUNDEXISTSBEFOREUSE
Light andAdjust Surface BurnerPilots (if range has standing pilots)
[] Purge all air flom supply system by ranting
one top bunmr valve fhlly ONfor 15se(onds. _!_ Topburnerpilots _,_
[] Tmnvalve OFFandlight pilot bmners.
A(!iust pilot fl_unes using the a(!iusting s(rew
on tl_eback oflhe thermostat, so that each
flame is approximately 1/4-inch in height.
[] To light any top bmner, push and turn
bmner knob to the LIFEposition.
Toppilots adjustment
screwcontrolsthe
rate ofgasto the top
burnerpilots.
[] When burner has ignited, rotate knob 1o
desired flame setting.
Manifold pipe
Tbermostat
Thermostat
Sensor,_,
30
Page 31

Read theseinstructions completely and carefully.
If RangeHas Electric Ignition
There are sepam/e ignition dexices ti)r tile left
and fight hand sudhce burners. Both of these
ignitors are ONwhen any knob is turned to the
UTE setting. The ignitors will spark as long as any
of the top burner knobs are at the LITE setting.
In the event of an electrical power taihne, the top
burners (an still be used. To light a burner, hold a
lighted kit(hen match a(!jacent to the top burner
to beused and mrn valveknob to LITE.USE
EXTREMECAUTION.
OvenPilot Adjustment
Onpilot models remove thermostat knob.
Check position of pilot gas selector to make sure
selector is turned to the correct position fi)r the
ffpe of gas that is to be used. To change/o LR
insert small blade screwdriver in slot and mrn
fiflly clockwise so that indicator poims to LR To
change to NAg mrn fiflly counterclockwise so that
indicator points to/VAT.
• If desired, the gas to the oven pilot can be
turned offby turning the selector so the pointer
is at the OFFposition, nfidway between the LP
and NATsettings. (Thermostat on your range
may not appear exactly as sh_wn in diagrmn.)
Ovenpilot selectorkey
switchesfrom LPto NAT Pointer
Front view
• On electric ignition models the gas to tlle oven
burner can be turned oil A iilantlal shuFofl
valve is provided on manifold pipe.
St o OvenOperation
[] With tile oven dmrmostat trial in the OFF
position, light standing pilot on oven burner
pilot assembly. On electric ignition models
do not attempt to manually light the oven
pilot.
[]
Turn the thermostat trial to any temperature
setting. The oven pilot flame will enlmge
and engulf the mer{u U bulb. After
approximately 30-45 seconds the main
burner will come on.
With control knobin OFF
position,light standingpilot.
Flameshouldappearasshown.
[] The oven can be used during periods of
power outage. (See the Using the surface
units section.)
Mercurybulb
C
31
Page 32

Installationoftherange.
Read theseinstructionscompletely and carefully.
SurfaceBurnerAY Shutter Adjustment
The approximate height of tile flmne at tile
high or flfll ON position is a distinct inner blue
cone of at least 3/4 inch. Turn valve knob
counterclockx_ise 90 o/o the fifll ONposition
and a({just air shutmr as tollows:
] To (x)riect ayellowllatlle--hl(Tease size of air
shutter opening.
[] To correct a lifting, but distinct, blue flame--
Decrease size of air shutter opening.
3/4"
Lockscrew __
Airshutter_
Orifice--___ _
OvenBurnerAir ShutterAdjustment
Lockscrew
Orificecap,
Air shutter
The oven burner flame should be a clean, blue
flame with distinct inner cones approximately 1/2
inch long. A soft, lazy flame with indistinct cones
means too much gas or not enough air.A noisy
lifting flame means too much air.
ff adjustmentsarenecessary:
[] First loosen tile lock s(rew located at tile top
of tl_eair shutter, tllen rotate tile air shutter
to the correct setting, and retighten screw.
[] Oven burner flame can be checked as
follows (without burner baffle in place):
] To correct a yellow Haiile--lncrease size
of air shutter opening.
[] To correct a lifting, but distinct, blue
flame-Decrease size of air shutter
opening.
[] The air shutter should be set approximately
2/3 open ti)r natural gas, and approximately
fifll open on I_t_gas.
[] Tile oven burner air shutter a({iusmmnt is
tile same on ranges _dth a gas pilot or electric
ignition.
[] Repeat steps 1 through 3 fin the broil
burner, if equipped, to properly at!lust tile
broil burner flame.
32
Page 33

Read theseinstructions completeIF and carefu#y_
WhenAll HookupsAre Complete
[] Make sure all _ontrols are left in the OFF
position.
[] Make sure tim flow of combustion and
ventilation air to the range isunobstructed.
MobileHomeInstallation:
Be sure the installation of this range in a
manutacmred or mobile home conli)m_s with the
Manufltcmred Home ( onstmction and Safely
Title 24 CFR, Pmt 3280 [ti)mmrly the Federal
Standard ti)r Mobile Home Construction and
Salely Title 24, H.U.D. (Pmt 280)] or when such
standards me not applicable, the Smndmd ti)r
Manutitcmred Home Installations 1984
(Manufitcmred Home Sites Communities and
Set-Ups), ANSI A225. l-latest edition, or with local
cocDs. In Canada, mobile home installation nmst
be in accordance with the cunent CAN/CSA
Z241!/MH Mobile Home Installation Code.
ModelandSerialNumberLocation:
The serial plate lot y_Jmrange is located under
the cooktop on the right side of the burner box.
In addition to the model and serial numbers, it
tells y{m the ratings of the burners and type offl_el
and pressure t_)r wlfich the range was a_!iusted
when it left the titcto_y.
When ordering parts, always include the model
number and serial number to ensure proper
replacement pmts. Pmts m W be obtained
through General Electric/Hotpoint Facto U
Seccice Centers or General Electric/Hotpoint
m_thorized (ustomer Care <'sec_icers.
?3
Page 34

Before YouCallForService...
Problem
Topburners do not light
or donot burnevenly
Burnershave yellow or
yellow-tipped flames
Troubleshooting -tips
Save time and money/.Review the chart on this page
first and you may not need to call for service.
Possible Causes What To Do
The pilots are not lit. • On models xdth standing pilots, lift tim cooktop and
(on standing pilot models) hold a lit match next to the pilot opening between the
flont and rear burners.
Plug on range is not • On models _ith electric ignition, make sure elecuical
completely inserted in plug is plugged into a live, properly grounded outlet.
the electrical outlet.
Burner holes on the side • Rem_)ve the burners and clean them with a salety pin
or around the top of the or paper clip. Make sure you do not enlarge the holes.
burner maybe clogged.
Burners may not be fitted • Remove the burners and reinstall them properly.
correctly onto the mounting
brackets.
The combustion quality of
burner flames needs to be
determined visually.
• Use the illusuations below to delermine if your burner
fl_unes me normal. If burner flames look like A, call fin
service. Normal burner flmnes should look like B or C,
depending on the/ype of gas you use. With I_P gas, some
yellow tipping on outer cones is normal.
A-Yellow flames B-Yellow tips C-Soft blueflames
Callfor service onouter cones Normal for natural
Norma/for LPgas gas
Burner flames very LP ,gas is improperly • (heck all steps in the Installation of the range
large or yellow connected, section.
Oven will The thermostat capillary • Make suie the thermostat capillmy bulb (located in the
not work bulb must be clean and upper portion of the oven) is in the correct position, not
unobstructed, t_)uching oven sides and not coated with anything.
The oven vent is blocked. • The {)ven vent, on the back of the range, nmst be
unobstructed.
Oven control improperlyset. • See the Using the oven sections.
Incorrect cookware or • See the Using the oven for baking or roasting section.
cookware of improper
size being used.
Oven bottom not securely • See the Care and cleaning of the range section.
seated in position.
Strong odor Improper alr/gas ratio • A(!just oven burner air shutter. See tim Installation of
in the oven. the range section.
This is temporary.
• An odor flom the insulation around the oven liner is
normal tin the first tew times the oven is used.
34
Page 35

GasRange Warranty.
_ II warranty service provided by our Factory Service Centers
or an authorized Customer Care®technician. For service,
call 800-GE-CARES.
For The Period Of'. We Will Replace, At No Charge To You:
OneFear
Fromthedate ofthe
originalpurchase
Anypartof tile range which filils (h_eto a detect in materials or workmanship.
During this full one-year warranty,we xdll also pr{Mde, free of charge, all labor
and in-home service to replace the detective part.
What is Not Covered:
• Service uips to your home to teach you how to
use the pro(h_ct.
• hnproper installation.
• Failure of the product if it is abused, misused, or
used tor other than the inmnded purpose or used
cotntnetdally.
• Replacement of house fi_ses or resetting of drofit
breakers.
• Dmnage to the pro&_ct cm_sed by accident, fire,
floods or acts of God.
• lnddental or consequential dmnage to personal
property cm_sed by possible detecls with this appliance.
This warranty is extended to the original purchaser and any succeeding owner for products purchased for
home use within the USA. In Alaska, the warranty excludes the cost of shipping or service calls to your home.
Some states do not allow the exclusion or limitation of incidental or consequential damages. This warranty
gives you specific legal rights, and you may also have other rights which vary from state to state. To know
what your legal rights are, consult your local or state consumer affairs office or your state's Attorney General.
Warrantor: General Electric Company.Louisville, lot"40225
35
Page 36

ConsumerSupport.
GEAppliancesWebsite vvvvvv.GEAppliances.com
Have a question or need assistance xdth your appliance? TU tile GE Appliances Website 24 hours a day,
any day of the yem! For greater comvnience and taster sevfice, yt)u can m)w download Owner's Manuals,
order pmts, catalogs, or even sche&fle sevvice on-line. Y_nlcan also "Ask Our Temn of Experts ......
your questions, and so much more...
ScheduleService
vvvvvv.GEAppliances.com
Expert GE repair se_x,iceis only one step away fiom your door. Get on-line and schedule your se_x,iceat
your(onvenien(e 24hoursanydayoftheyear!Or(al1800-(;E-(;ARES 800-432-2737) during normal
business hours.
RealLifeDesignStudio
vvvvvv.GEAppliances.com
GE supports the Universal Design concept-products, sevvices and environments that can be used by
people of all ages, sizes and capabilities. We recognize the need to design tina wide range of physical and
mental abilities and impairments. For details of GE's U niversal Design applications, including kitchen
design ideas tin people with disabilities, check out our Website today. For the heming impaired, please call
80(!-TDD-GEAC (800-833-4322).
ExtendedWarranties
vvvvvv.GEAppliances.com
Purchase a GE extended warranty and learn about special discounts that are available while your warranty
is still in efl>ct. You can purchase it on-line anytime, or call 800-626-2224 during normal business hours.
(;E ( onsumer Home Sev_4(es _dll still be there after your warranty expires.
PartsandAccessories
vvvvvv.GEAppliances.com
ln(fixdduals qualified to sev_dcetheir o_1 appliances can have parts or accessories sent directly to their homes
(VISA, MasterCard and Dis(over (ards are a((epted). Order on-line today, 24 hours m,e_yday or by phone at
800-626-2002 during normal business hours.
Instructions contained in thismanual coverprocedures tobe performed byany user.Other servicing generally
should be referred to qualified service personnel Caution must be exercised, since improper servicing may cause
unsafe operation.
ContactUs
www. GEAppliances.com
If you are not satistied with tile service you receive flom GE,contact us on our Website with all the details
includingyour phone number, orx_Tite to: Genera[ Manager, Customer Relations
GE Appliances, Appliance Park
I,ouisville, KY 40225
RegisterYourAppliance vvvvvv.GEAppliances.com
Register your new appliance on-line--at your convenience! Timely produ(t registration will allow for
enhanced (ommuni(ation and prompt sev_dceunder the terms of your warranty, should tile need arise.
You may also mail in the pre-printed registration card included in the packing material, or detach and
use the ti)rm in this Owner's Manual.
Printed in flTeUSA
 Loading...