

Page 1
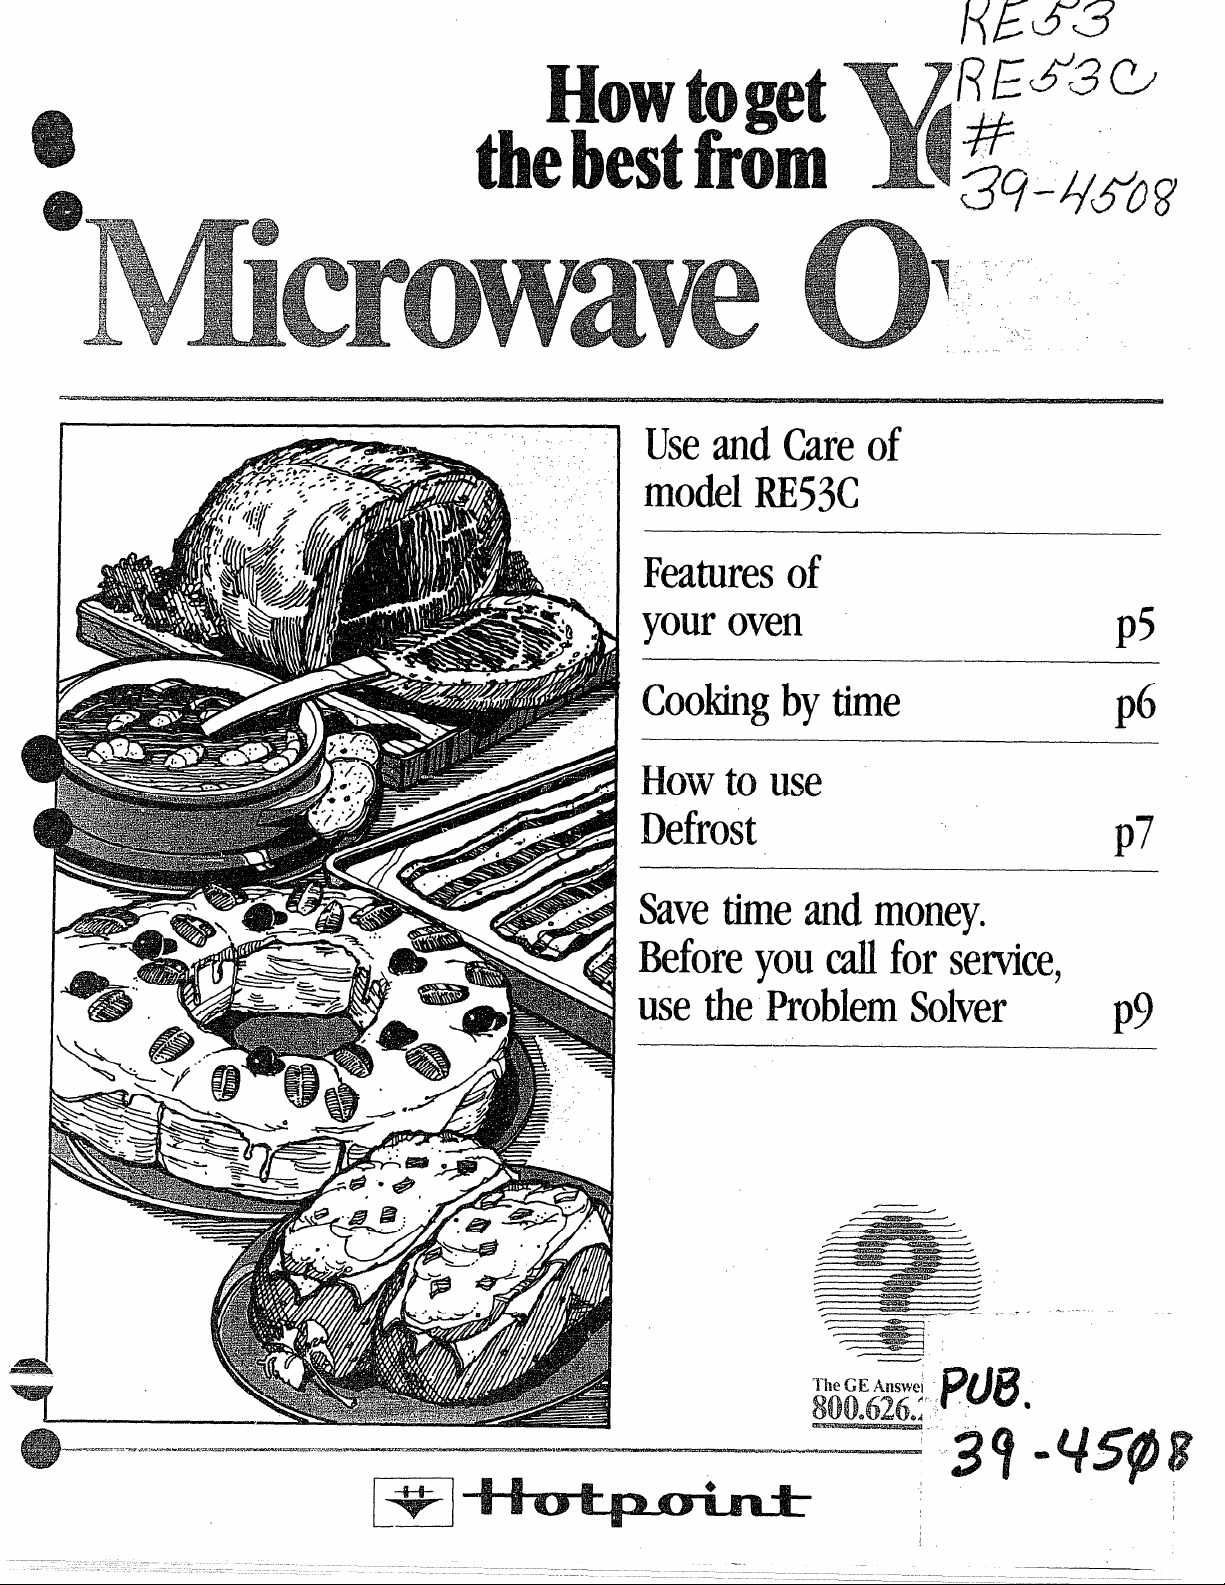
g
thebestfrom
UseandCareof
modelRE53C
Featuresof
-,
youroven
ICookingbytime
Howtouse
Defrost
Savetimeandmoney.
Beforeyoucallforservice,
usetheProblemSolver
p5
p6
p7
p9
Y
----
Page 2
Read This Book Caref,uHy.
is designed to help you operate
II
and maintain your new Microwave
Oven properly.
Keep it handy for answers to your
questions.
If you don’t understand something
or need more help. . .
Call, toll free:
The GE Answer Center’”
800.626.2000
consumer information service
or write: (include your phone
number);
Consumer Affairs
I+otpoint
Appliance Park
Louisville, KY 40225
Write Down the Model and
Serial Numbers.
On the lower back of the Oven.
These numbers are also on the
Consumer Product Ownership
Registration Card that came with
your Microwave Oven. Before
sending in this card, please write
these numbers here:
Be Sure YourOven is
Registered.
Itis important that we, the manufacturer, know the location of
your Microwave Oven should a
need occur for adjustments.
Your supplier is responsible for
registering you as the owner.
Please check with your supplier to
be sure he has done so; also send
in your Consumer Product
Ownership Registration Card. If
you move, or if you are not the
original purchaser please write to
us, stating model and serial numbers. This appliance rmsfibe reg-
istered. Pleasebe certain that it is.
Write to:
Hotpoint
Range Product Service
Appliance Park
Louisville, KY 40225
you receiveda damaged
If
OVe!lm . .
immediately contact the dealer (or
builder) that sold you the Micro-
wave Oven$
1. Do Not Attempt to bperate this
oven with the door open since
open door operation can result in
harmful exposure to microwave
energy. It is important not to
defeat or tamper with the safety
2.
Do Not Place any ~bject
between the oven front face and
the’ door or-allow soil or cleaner
residue to accumulate on sealing
surfaces. ~! ‘ , . “
,,
% Qo,NotO@erate’thkoven if it is
. damaged.’ Nis particul,arl~ impor-
L$ant’that the-bve.ndoorclose pro-
. perly’and ‘that !here, is:~nodamage
‘to,~he (1)door (bent),’ hinges
.- and latches (broke,nj,o~-”loosened),
Annr csnnlf2 “=n-A Qn’alin’m
IQj
~ adjusted ‘c
mrepaired.by::anyone
)Derlv’aualified’+ervice
]Model No.
Serial No.
Use these numbers in any correspondence or service calls concerning your Microwave Oven.
Save Time and Money. . .
Before YouCall for Service.
Check the Problem Solver (page
9). It lists minor causes of operating problems that you can correct yourself.
It could save you an unnecessary
service call.
2
Page 3
Before Microwaving . . . .. . . .. . . 2
Grounding Instructions . . .. . . .. 3
Safety Tips . . . . . . .. . . .. . ... ...4
Features of Your Oven . .. . . . .. . 5
Time Cook . . . . . .. . .. . . .. . . . . ..6
efrost . . . .. . . .. . .. o..... . . ...7
Care of Your Oven . . .. . . . .. . ...8
The Problem Solver . . . . . .. . . ..9
Notes . .. . . . . . .. . .. . . . . . ... . . .10
Consumer Services . . ... . . .. . . 11
Warranty. . ... . . .. . ...Back Cover
@Make sure all utensils used in
your microwave oven are labeled
“suitablef ormicrowaving”. Check
your Cookbook forspecifictest
to determine ’’microwave-safe”
utensils.
e Papet-towels, waxpaper, and
plastic wrap can beused tocover
dishes in orderto retain moisture
and prevent spattering.
IS Many microwaved foods
equire stirring, rotating, or rear-
ranging. CheckyourCookbook
r specific instructions.
Steam buildsup pressurein
foods which are tightly covered
by askinorrnembrane. Pierce
potatoes, egg yolks and chicken
Iivers to prevent bursting.
@All recipes utilize high power
unless otherwise indicated.
@Whole poultry and roasts may
require turning or rotating for
even cooking results. See cookbook for specific instructions.
@When microwaving casseroles,
best results are achieved with
recipes that can bestirred.
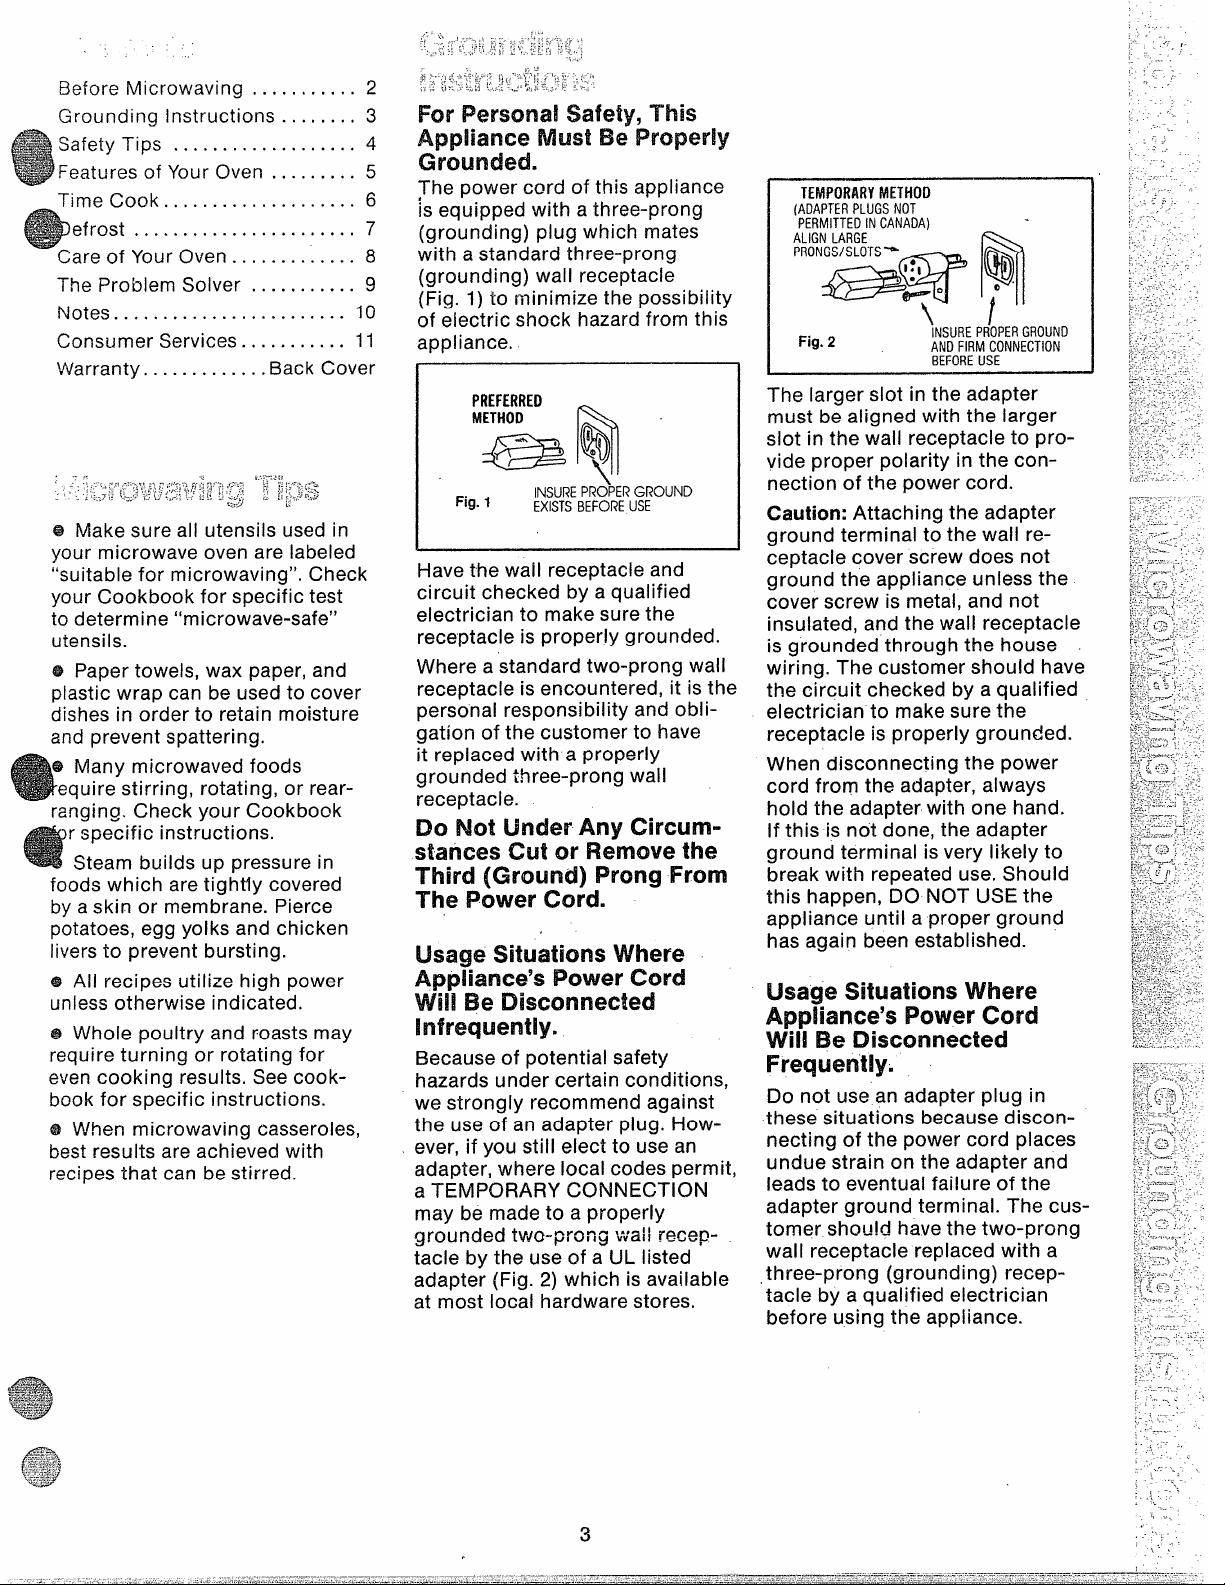
Rx’ Persona!safety,‘This
Appliance Must EmProperly
GKmKkxL
The power cord of this appliance
js equipped with a three-prong
(grounding) plug which mates
with a standard three-prong
(grounding) wail receptacle
(Fig. 1) to minimize the possibility
of electric shock hazard from this
appliance.
Fig.1
INSURE PRO_bERGROUND
EXISTSBEFORE USE
Have the wail receptacle and
circuit checked by a qualified
electrician to make sure the
receptacle is properly grounded.
Where a standard two-prong wall
receptacle is encountered, it is the
personal responsibility and obligation of the customer to have
it replaced with a properly
grounded three-prong wall
receptacle.
lX3 !?+Jot
Under Any Circumstances cut or Remove the
Third (Ground) Prong From
The Power Cord.
Usage Situations Where
Appliance’s Power Cord
VW Be IDkxmrtected
llnfrequently.
Because of potential safety
hazards under certain conditions,
we strongly recommend against
the use of an adapter plug. However, if you still elect to use an
adapter, where local codes permit,
a TEMPORARY CONNECTION
may be made to a properly
grounded two-prong wall receptacle by the use of a UL listed
adapter (Fig. 2) which is available
at most local hardware stores.
TEMPORARYMETHOD
(ADAPTERPLUGS NOT
PERMITTEDIN CANADA)
$k%~w p
Fig.2
iNSURE PR’OPERGROUND
ANDFIRMCONNECTION
BEFOREUSE
.
The larger slot in the adapter
must be aligned with the larger
slot in the wall receptacle to provide proper polarity in the connection of the power cord.
Caution: Attaching the adapter
ground terminal to the wall receptacle cover screw does not
ground the appliance unless the
cover screw is metal, and not
insulated, and the wall receptacle
is grounded through the house
wiring. The customer should have
the circuit checked by a qualified
electrician to make sure the
receptacle is properly grounded.
When disconnecting the power
cord from the adapter, always
hold the adapter with one hand.
[f this is not done, the adapter
ground terminal is very likely to
break with repeated use. Should
this happen, DO NOT USE the
appliance until a proper ground
has again been established.
Usage Situations Where
AppWNLMX2ySPower Cord
Will Be IDisconneck!
IFrequernt!y.
Do not use an adapter plug in
these situations because discon-
necting of the power cord places
undue strain on the adapter and
leads to eventual failure of the
adapter ground terminal. The customer shou!d have the two-prong
wall receptacle replaced with a
three-prong (grounding) recep-
tacle by a qualified electrician
before using the appliance.
.
3
Page 4
SAVE THESE INS’IT?LJCTIONS
1. For personal safety the oven
must be properly grounded. See
grounding instructionson page 3
of this book. For best operation,
plug this appliance into its own
electrical outlet, to prevent flickering of lights, blowing of fuse or
tripping of circuit breaker.
2. Use of extension cords.Be-
cause of potential safety hazards
under certain conditions we
strongly recommend against the
use of an extension cord. However, if you still elect to use an
extension cord, it is absolutely
necessary that it be a UL listed
3-wire grounding type appliance
extension cord and that the cur-
rent carrying rating of the cord in
amperes be 15amperes or greater.
Such extension cords are obtainable through Hotpoint service. If
you do use an extensioncord with
your microwave oven, the interior
light may flicker and the blower
sound may vary when oven is
in use.
3. Be certain to placethe front
surface of the door three inches
or more back from the countertop
edge to avoidaccidental tipping
of the appliance in normal usage.
4. Use metal only asdirected in
Cookbook. Foil strips as used on
meat, roasts are helpful when
used as shown in Cookbook.
TV dinners may be cooked in
metal trays. However, when using
metal in microwave oven, keep
metal at least1-inch away from
sides of oven.
5. Do not operate the ovenwhile
empty to avoid damage to the
oven and the danger of fire. If by
accident the oven-should run
empty a minute or two, no harm is
done. However, try to avoid operating the oven empty at all times
—it saves energy and prolongs
life of the oven.
6. Cooking utensils may become
hot because of heat transferred
from the heated food. This is
especially true if plastic wrap has
been covering the top and han-
dles of the utensil. Pot holders
may be needed to handle the
utensil.
7. Sometimes,thecooking plate
can becometoo hotto touch. Be
careful touching the cooking plate
during and after cooking.
8. Do not useanythermometer in
food you are microwaving unless
that thermometer is designed or
recommended for use in the
microwave oven.
9. Removewire twist-ties on paper
and plastic bags before placing in
oven. Twist-ties sometimes cause
bag to heat, and may cause fire.
10. Don’t defrostfrozenbeverages
in narrow necked bottles especially carbonated ones. Even if the
container is opened, pressure can
build up. This can cause the container to burst, resulting in injury.
11. Don’tovercook.Excessive
overcooking dehydrates potatoes,
and may cause them to catch fire
causing damage.
12. Boiling eggs (in and out of
shell) is not recommended for
microwave cooking. Pressure can
build up inside egg yolk and may
cause it to burst, resulting in
injury.
13. Foodswith unbrokenouter
“skin”such as potatoes, hot dogs
or sausages, tomatoes, apples,
chicken livers and other giblets,
and eggs (see above) should be
pierced to allow steam to escape
during cooking,
14. “Boilable”cooking pouches
and tightly closedplastic bags
should be slit, pricked or vented
as directed in Cookbook. If they
are not, plastic could burst during
or immediately after cooking,
possibly resulting in injury. Also,
plastic storage containers should
beat least partially uncovered
because they form a tight seal.
When cooking with containers
tightly covered with plastic wrap,
remove covering carefully and
direct steam away from hands
and face.
15. Do not pop popcorn in your
microwave oven unless in a spe-
cial microwave popcorn acces-
sory or unless you use popcorn
labeled for use in microwave
ovens. Because of the heat generated without these precautions,
the container could catch fire.
16. Plastic Utensils—Plasticuten-
sils designed for microwave
cooking are very useful, but
should be used carefully. Even
microwave plastic may not be as
tolerant of overcooking conditions as are glass or ceramic ‘
materials and may soften or char
if subjected to short periods of
overcooking. In longer exposures
to overcooking, the food and
utensils could ignite. For these
reasons: 1) Use microwave plastics only “and use them” in strict
compliance with the utensil manufacturer’s recommendations.
2) Do not subject empty utensils
to microwaving. 3) Do not permit
children to use plastic utensils
without complete supervision.
17. Do not useyour microwave
oven to dry newspapers.If overheated, they can catch fire.
18.When cooking pork follow our
directions exactly and always
cook the meat to at least 170°.
This assures that, in the remote
possibility that trichina may be
present in the meat, it will be
killed and meat will be safe to eat.
19.Avoidheating baby food in
glass jars even without their lids
especially meat and egg mixtures.
●
Page 5

Y t-================~
?.
Door Handle. Pull to open door. Door must be
securely latched for oven to operate.
2
,m. .
Door Latches.
3.
Choke Door Seal.
&
Door Screen. Metal screen permits viewing of
foods and keeps microwaves confined inside
oven.
5.
Front Panel.
6.
Oven Interior Light. Turns on when the door is
opened or when the oven is operating.
7.
Stirrer Cover. Protects the microwave energy
distributing antenna. Do not remove this cover.
You will damage the oven.
Ivk)cidFIE53C
8.
Cooking Guide. Quick reference for frequently
prepared foods.
9.
Power Control’Knob. This control can be set at
LOW/DEFROST or HIGH.
10.
35 Minute Timer with expanded first five min-
utes. Set timer to desired cooking or defrosting
time.
11.
Cook Light. Glows red when oven is operating.
12=
Start Bar. Press to start oven.
13.
Cooking Tray Holder.
14.
Cooking Tray.
15.
Model and Serial Numbers.
.
5
.
. —
Page 6

cooking byTime
—
The time cooking feature allows To become betteracquainted
you to presetthe cooking time. with time cooking, make a cup
The oven shuts off automatically.
Power Level High is recommended below.
for most time cooking, but you
may change this for more flexi-
bility. See your Cookbook.
of coffee by following the steps
Step 1: Fill a cup 2/3 full of water
and add 1teaspoon of freeze
dried coffee. Use a cup that has
no metal decoration. Place cup in
oven and close door.
Step 2: Set Timer Control. For
coffee, set at 1 minute and 20 to
30 seconds. Timer may be reset
during cooking if needed.
Step 3: Turn Power Control Knob
to power level HIGH.
Step 4: Press the START Bar.
Step 5: When time is up, a bell will
sound. Also, the run light, cooling
fan, stirrer fan, and cook light
indicator will go off.’
Note: To set timer less than 2
minutes, turn the Timer Control
past 2 and then back to the
desired time.
Questions
and Answers
Q. I set my oven for the time
called for in the recipe, but at the
end of the time allowed, my dish
wasn’t done. What happened?
A. Since house power varies due
to time or location many Time
Cook recipes give YOIJa time recommended.
range to prevent overcooking. Set
the oven for minimum time, test
the food for doneness, and cook
your dish a little longer, if
necessary.
IQ.What happens if I accidentally Q. Can I interrupt my Time Cook
operate the microwave oven with function to check the food?
out food in it?
A. Accidental use for short close the door and press START
periods of time does not damage Bar. The timer must be set for
the Magnetron, but, it is not cooking to resume unless time is
A. Yes.To resume cooking, simply
remaining on timer.
6
Page 7

HowtouseDefrost
The Defrost setting is designed
or thawing and is one of the most
“mportant advantages of a micro-
w
wave oven.
Power Level LOW/DEFROST
must be used for defrosting.
e
~See your Cookbook for th’e
complete defrosting chart.
To become better acquainted with
the defrost function, defrost a 2 lb.
package of frozen pork chops by
following the steps below.
Step 1: Place package of frdzen
chops in the oven and close door.
Step 2: Turn Power Control Knob
to LOW/DEFFIC)ST.
DefrostingTips
e Foods frozen in paper or plastic
can be defrosted in the package.
@For even defrosting, many foods
need to be broken up or separated
part of the way through the de-
frosting time.
e Homemade dinners can be
frozen in shallow foil trays and
heated for later use. Select foods
which microwave well.
e pre-packaged frozen dinners
can be defrosted and microwave
cooked.
Questions
andAnswers
O, \~hy don’t the defrosting times
in the Cookbook seem right for
my food?
A. Cookbook times are average.
Defrosting time can vary according to the temperature in your
freezer. Set your oven for the time
“ndicated in your Cookbook. If
our food is still not completely
thawed at the end of that time, re-
tyour oven and adjust the time
cordingly.
Step 3:Turn Timer Control to
7 minutes.
Step 4: Close oven door and press
the START Bar.
Step 5: When oven turns off, turn
package over, close door, and set
timer to 7 minutes.
Q. Should all foods be completely
thawed before cooking?
A. Some foods should not be
completely thawed before cook-
ing. For example, fish cooks so
quickly it is better to begin
cooking while it is still slightly
frozen.
Q. Can I open the door during
defrosting to check on the prog-
ress of my food?
A. Yes. You may open the door at
any time during microwaving. To
resume defrosting, close the door
and press the START Bar. The
oven begins operating if time is
left on timer. If not, reset timer.
. Check your Cookbook for other
defrosting tips.
Q. l-tow do I determine the
amount of time needed for
defrosting foods?
A. Defrost according to defrost
chart found in your cookbook.
Note, however, that in your
microwave oven, there are no
extra defrost functions. So, special techniques may be necessary.
m&_
B
m
.—
km
K-
m:
.Wz_
.—
7
———
Page 8

CareforYourMicrowaveOven
Your New MicrowaveOvenisa ValuableAppliance,
Protect It From MisuseBy Following These Rules:
@ Keep your oven clean and sweet-smelling.
Opening the oven door a few minutes after cooking
helps “air-out” the interior. An occasional thorough
wiping with a solution of baking soda and water
keeps the interior fresh.
@ Don’t usesharp-edgedutensilswith youroven.
The interior and exterior oven walls can be
scratched.The control panel can be damaged.
@ Don’t removethe stirrercover at the top of the
oven (microwave feature 7 on page 5). You may
damage the oven.
CERTAIN POWER IS OFF BEFORE
BE
Walls,floor and plasticcover. Because there is little
heat except in the food, or sometimes in the utensils, spills and spatters are easy to remove. Some
spatters can be removed with a paper towel, others
may require a damp cloth. Remove greasy spatters
with a sudsy cloth, then rinse and dry. Do not use
abrasive cleaners on oven walls. NEVER LJSE A
COMMERCIAL OVEN CLEANER ON ANY PART
OF YOUR MICROWAVE OVEN.
Door-inside. Glass: Wipe up spatters daily, wash
when soiled, with a minimum of sudsy warm water.
Rinse thoroughly and dry.
Metal and plastic parts on door: Wipe frequently
with a damp cloth to remove all soil. DO NOT USE
ABRASIVES, SUCH AS CLEANING POWDERS OR
STEEL AND PLASTIC PADS. THEY MAY MAR THE
SURFACE.
Cooking tray. Itis occasionally necessary to re-
move the cooking tray for cleaning of the tray or
oven. To prevent breakage, do not place tray into
water just after cooking. The tray can be broken if
dropped. Wash it carefully in warm, sudsy water or
in the dishwasher.
Special note when using Brown ‘N Sear Dish: High
heat generated on bottom of Brown ‘N Sear Dish
can cause scorched appearing stains to bake onto
the oven floor if grease is present. These may be
removed with Bar Keepers Friend@ Cleanser by
SerVaas Laboratories, Inc.
After using Bar Keepers Friend@ Cleanser, rinse.
and dry thoroughly, following instructions on can.
Do not use Bar Keepers Friend@ Cleanser on the
painted surfaces such as the walls. It may scratch
the paint.
Bar Keepers Friend@ Cleanser is sold in many
grocery, hardware, and department stores.
CLEANING ANY PART OF THIS OVEN.
How toClean the Outside
Case. Clean the outside of your oven with soap and
damp cloth, then rinse and dry. The outer pane of
the window is glass. Just wipe clean with a damp
cloth. Chrome trim is best wiped with a damp cloth
and then with a dry towel.
Control Panel. Wipe with a damp cloth. Dry thoroughly. Do not use abrasives or sharp objects on
the panel. They can damage it.
Cord. If the cord becomes soiled, unplug and wash
with damp cloth. For stubborn spots, sudsy water
may be used, but be certain to rinse and dry thoroughly before plugging cord into outlet.
Oven Lamp Replacement. First unplug the oven.
Then remove Lamp compartment cover by removing
screws which hold cover in place,coveris locatedonthe
side of the outer case. Replace with 25 watt appliance
bulb. Replace compartment cover, plug in the oven.
8
Page 9

—
The ProblemSolver
-
OTOSaveTime and Money–
beforeyoucdl forservice,checkthe ProblemSolver
If you have a problem, it may be minor. You maybe able to correct it yourself. Just usethis Problem Solver to
locate your problem and then follow the suggested recommendations.
[ PROBLEM
OVEN WILL NOT COME ON
I
1
FOODS ARE EITHER OVERCOOKED OR UNDERCOOKED
WiEi=l
POSSIBLE CAUSE AND REMEDY
-A fuse in your. home may be blown or the circuit breaker tripped.
Replace fuse or reset circuit breaker. ~
,,
Make’ sure .3-prong plug on oven- is fully inserted into wall
receptacle. - : .
. .
Dbor not securely closed. ‘
Make sure Start B&r has been @ushed. ~ .“
Cook’ing times-‘mayvary because of starting food temperature, food
density or amount of foods in oven.”Setadditional cooking time for
completion. . ,
,“,
,.
,-
Incorrect Power, Level set. Check Cookbook ~for- recomrnerided
Power Level ~r changing Ievels.,during cooking’ if necessary.
Dish was notrotated, turned or stirred. Some dishes require specific
inst~uction~. Check Cookbook or r,ecipefor these instructions.
!-i.
,l’x
1,
>,
. . .
,“, -, .,.
,.. -,. .
,,
‘/
AllTheseThings:’AreN6rmal(WYOLWIi’kkXOWtiiiiN? t)@~: - “
1. Steam or vapor escaping from around the door.
2. Light reflection around door or outer case.
3. Dimming oven light and change in blower sound
may occur while operating at power levels other
than high.
.>
.,
4. Dull thumping sound’ ”wh,ile operating at
LOW/DEFROST.’ ~
~5. Some TV-R’adio interference might be noticed
while using your rn’icr,owav,e’.oven~It’s similar to the
interferefice causeff.by othei small applianc-es,&nd
does not indicate. a probiem with your oven;
,.
.,
. .
,’-
,, -,.. ,
.-’
..- !.
‘..,’,
,-
,’,
-.
.’
Page 10

ConsumerServices
..~c,~
At Hotpoint we’re committed to providing you with the best appliances we knowhow
to build and we
service.
know that you want your appliances to give you many years of dependable
—
our ConsumerServicesare designedwithyour
Warranty Protection
Yournewapplianceis a welldesignedandengineered Seethe warrantyon the backpageof this bookfor
product.Beforeit left the factory,it wentthrough
rigoroustests to detectmanufacturingdefects.And
youhaveawrittenwarrantyto protectyou.
PromptServiceatyourConvenience
Whetheryourapplianceis in or out of warranty,
you’rejust a phonecall awayfromournationwide
networkof FactoryServiceprofessionals.
Simplycall ourHotpointserviceorganiz@ion.
You’llfind themin theWhite Pagesunder“Hotpoint
FactoryService;’and in the YellowPagesunder
“Hotpoint CustomerCare@Service.”
Serviceis scheduledat yourconvenienceandthe
techniciandrivesa fully-stockedpartsservicetruck
so that, in mostcases,the repaircanbecompleted
in onevisit.
We’reproudof ourserviceandwantyouto be
pleased,but if for somereasonyouarenot happy
with theserviceyoureceive,herearethreestepsto
follow for furtherhelp.
needs and wants in mind.
details.
FIRST,contactthepeoplewhoservicedyour
appliance.Explainwhyyouarenot pleased.In most
cases,this will solvethe problem.
NEXT,if youare still not pleasedwriteall the details
—
includingyourphonenumberto:
Manager,ConsumerRelations
Hotpoint
AppliancePark
Louisville,Kentucky40225
FINALLY,if yourproblemisstill not resolved,write:
MajorApplianceConsumerAction Panel
20NorthWacker Drive
Chicago,Illinois60606
ServiceContracts
Fortrouble4reeservicebeyond
thewrittenwarrantyperiod.
If you preferto budgetyour repaire
insteadof beingsurprisedbythem,
offersservicecontractsfor varying
time on all Hotpoint majorapplianc
TheQuickFixTMSystem
You cansavetimeand money
bydoingit yourself.
TheQuickFix’MSystemis designedto
meetthe needsof bothexperiencedor
beginningdo-it-yourselfersandtakesa
of mysteryout of homeappliancerepai
Step-by-StepManualscoveringthe repairof ~
standardand largecapacitywashers,standardand
largecapacitydryers,refrigerators,dishwashers
andranges(non-microwave),includeinstructive
g!%-
‘%%%+&.&
1!
..,:-2:
L
$2$?&,@#j#j@%
&&zT._&.*.-<”?:.
@&p..@#~~=
&$$@&+cpF...
+&@@&--.=2’#’..
~q+@’@@4:FW3
%
J!$$$!$~,~
=i&!z&+r%+.
&?*
HelpforYouIByPhone
Shouldyouneedhelpin the selectionand
purchaseof newappliances,or have
questionsaboutthe operationof the I-fotpoint
appliancesyou nowown—orhaveanyother
cuestionsabout our consumerproductsor
servicesyouare onlya TOLL-FREEcall away.
m
TheGE AnswerCen#;
800.626.2000
Mostof the repairscanbemadewith thekitchen
drawervarietyof tools youalreadyhaveat home.In
fact, the screwdriveris calledfor most often inQuick
Fix’MSystemprocedures.
~
TheGEAnswerCenter’” 800.626.2000
consumerinformationserviceis open24
hoursa day,sevendaysa week.
~
Ourstaff of expertsstandsreadyto assist
T..
youanytime.
d
11
-—
Page 11

‘%
Saveproofof originalpurchasedatesuchasyoursalessliporcancelledcheck to establish warranty period.
.
Ili!ii31
II
WHATE COVERED
LIMITED ONE-YEARWARRANTY This warranty is extended to the
For one yearfrom date of original
purchase,we w~llprovide,free of
charge, parts and service labor to
repair or replaceanypartof the
microwaveoventhat fails,because
of a manufacturing defect.
LIMITED ADDITIONAL
FOUR=YEARWARRANTY
For the second through fifth year
from date of original purchase,
we will provide,free of charge, a
replacement magnetron tube if the
magnetron tube fails becauseof a
manufacturing defect. Youpay for
service labor charges.
Foreach of the abovewarranties:
Toavoidanytripcharges,you
musttakethe microwaveovento a
HotpointFactoryServiceCenter
or a Hotpoint Customer Care@
Service Shopand pick it up
following service. In-homeservice
is also available, but you must pay
for the service technician’s travel
costs to your home.
original purchaserand any succeeding ownerfor products purchased
for ordinary home use in the 48
‘mainland states, Alaska, Hawaii
and Washington, D.C.
Ail warrantyservicewill be c)rovided
by our Factory Service
by ourauthorized Cusl
servicersduring normal VVUI
hours.
Look in the White or
of your telephone direi
HOTPOINTF/’‘iTfin”
GENERALELt~
FACTORYSERVICEor
CUSTOMERCARE@
●uIUIIT SERVICE,
“=--’- HOTPOINT
) Centers or
tomer Care@
ml*’#nrbinn
eIIOW rages
yrII---- m-----
ctory for
I Hlb-1
r HOTPOINT
SILnv lu~.
n}i ly
14
I
*’
P
I
II
1
I
I
,
(
I~
II
I
!
I
~~~~ is~~~COVERED 0Improperinstallation.
Some states do not allow the exclusion or limitation of incidental or consequential damages, so the above limitation or exclusion
may not apply to you. This warranty gives you specific legal rights, and you may also have other rights which vary from state to state.
To know what your legal rights are in your state, consult your local or state consumer affairs office or your state’s Attorney General.
I
Manager—Consumer Affairs, General Electric Company,Appliance Park,Louisville,KY 40225
Part No. 862A724 P94
Pub. NO, 39-4508
8/83
. Failure of the product if it is
If you havean installation problem,
contact your dealer or installer.
Youare responsible for providing
adequate electrical, exhausting
and other connecting facilities.
e Replacement of house fuses
or resetting of circuit breakers.
6
Warrantor:General Electric Company
If further help is neededconcerningthis warranty,contact:
used for other than its intended
purpose or used commercially.
o Damageto product caused
by accident, fire, floods or acts
of God.
WARRANTORIS NOT RESPONSIBLE FORCONSEQUENTIAL
DAMAGES.
*
+
n~
QUALITY PROOUCT OF GENERAL ELECTRIC COMPANY
A
Il!l
 Loading...