

Page 1
How to
get
the best from
YourMnge
Contents
Aluminum Foil
Anti-Tip Device
Appliance Registration
Care and Cleaning
Automatic
Consumer Services
Important Phone Numbers
Features
Installation Instructions
Leveling
Model
Using Your Oven
Baking
Broiling/Broiling Guide 19, 20
Control Settings
Door
Clock/Timer
and
Serial Numbers
Removol
5,
16,
3,5,28
17,
24-28
10-11
I 1, 12
13-16
6,7
19
31
31
II
27
Light: Bulb Replacement 12,26
Preheating
2
5
5
2
Roasting/Roasting Guide 17,
Self-Clean Instructions
Shelves
Thermostat Adjustment
Problem Solver
Safety Instructions
Surface Cooking
Home Canning Tips
Control Settings
Cookware Tips 9, 10
Warranty
GE Answer Center
800.626.2000
4, 12,
15,
17,21,26
Back Cover
21-23
29,30
2-5
8,9
9,
,,
Useand
18
12
10
Guide
8
Care
Models
M754N
M755GN
M756GS
m757GN
MNU096
Rev.
2
Page 2
HELP US HELP YOU...
Before using your range,
read this book carefully.
It
is intended to help
operate
range
Keep it
your questions.
If
or need more help, write (include
your
and
maintain your new
properly.
handy for
you don’t understand something
phone number):
Consumer Affairs
Hotpoint
Appliance Park
Louisville,
KY 40225
you
answers
to
IF YOU NEED SERVICE...
Write down the model
and serial numbers.
You’ll find them on a
behind the
the storage drawer.
These numbers are also on the
Consumer Product Ownership
Registration Card that came with
your range. Before sending in
this card,
numbers here:
Model Number
Serial Number
Use these numbers in any
correspondence or service
concerning your range.
range
please
label
door or behind
write these
calls
If you received
a damaged range...
Immediately contact the dealer (or
builder) that sold you the range.
Save time and money.
Before you request
service . . .
Check the Problem Solver in the
back of this book. It lists causes of
minor operating problems that you
can
correct yourself.
To
obttiin
service, see the
Consumer Services page in the
back of this book.
We’re
proud of our service
want
you to be pleased. If for some
reason yOLI are
scrvicc
you receive, here are three
steps to
not happy with the
follow for
further help.
and
WORTANT
FIRST, contact the people who
serviced your appliance. Explain
why you are not pleased. In most
cases, this will solve the problem.
NEXT, if you are still not pleased,
write all the details—including Chicago,
your phone number—to:
Manager, Consumer Relations
Hotpoint
Appliance Park
Louisville. KY 40225
SAFETY
Read dl instructions before using this appliance.
IMPORTANT SAFETY NOTICE
●
The California Safe Drinking Water and Toxic
Enforcement Act
California to publish a list of substances known to
the state to
cause birth defects or other
reproductive harm, and requires businesses to
warn customers of potential exposure to such
substances.
requires the Governor of
FINALLY, if your problem is still
not resolved, write:
Major Appliance Consumer
Action Panel
20 North
Wacker
IL 60606
Drive
~STRUCTIONS
●
The fiberglass insulation in self-clean ovens
gives off
monoxide during the cleaning cycle.
Exposure can be minimized by venting with an
open window or using a ventilation fan or hood.
a very
small
amount of carbon
2
Page 3
When using electrical appliances, basic safety
precautions should be followed, including the
following:
●
Have the installer show you the location of the
circuit breaker
or fuse. Mark it
foreasy
reference.
●
Use this appliance only for its intended use
as described in this manual.
●
Be sure your appliance is properly instilled
and grounded
by a qualified technician in
accordance with the provided installation
instructions.
●
Do not attempt to repair or replace any part of
your range unless it is specifically
recommended in this book.
All other servicing
should be referred to a qualified technician.
●
Before
performing
THE RANGE
any
service,
PO-WER
SUPPLY AT THE
DISCONNECT
HOUSEHOLD DISTRIBUTION PANEL
BY REMOVING THE FUSE OR SWITCHING
OFF THE CIRCUIT BREAKER.
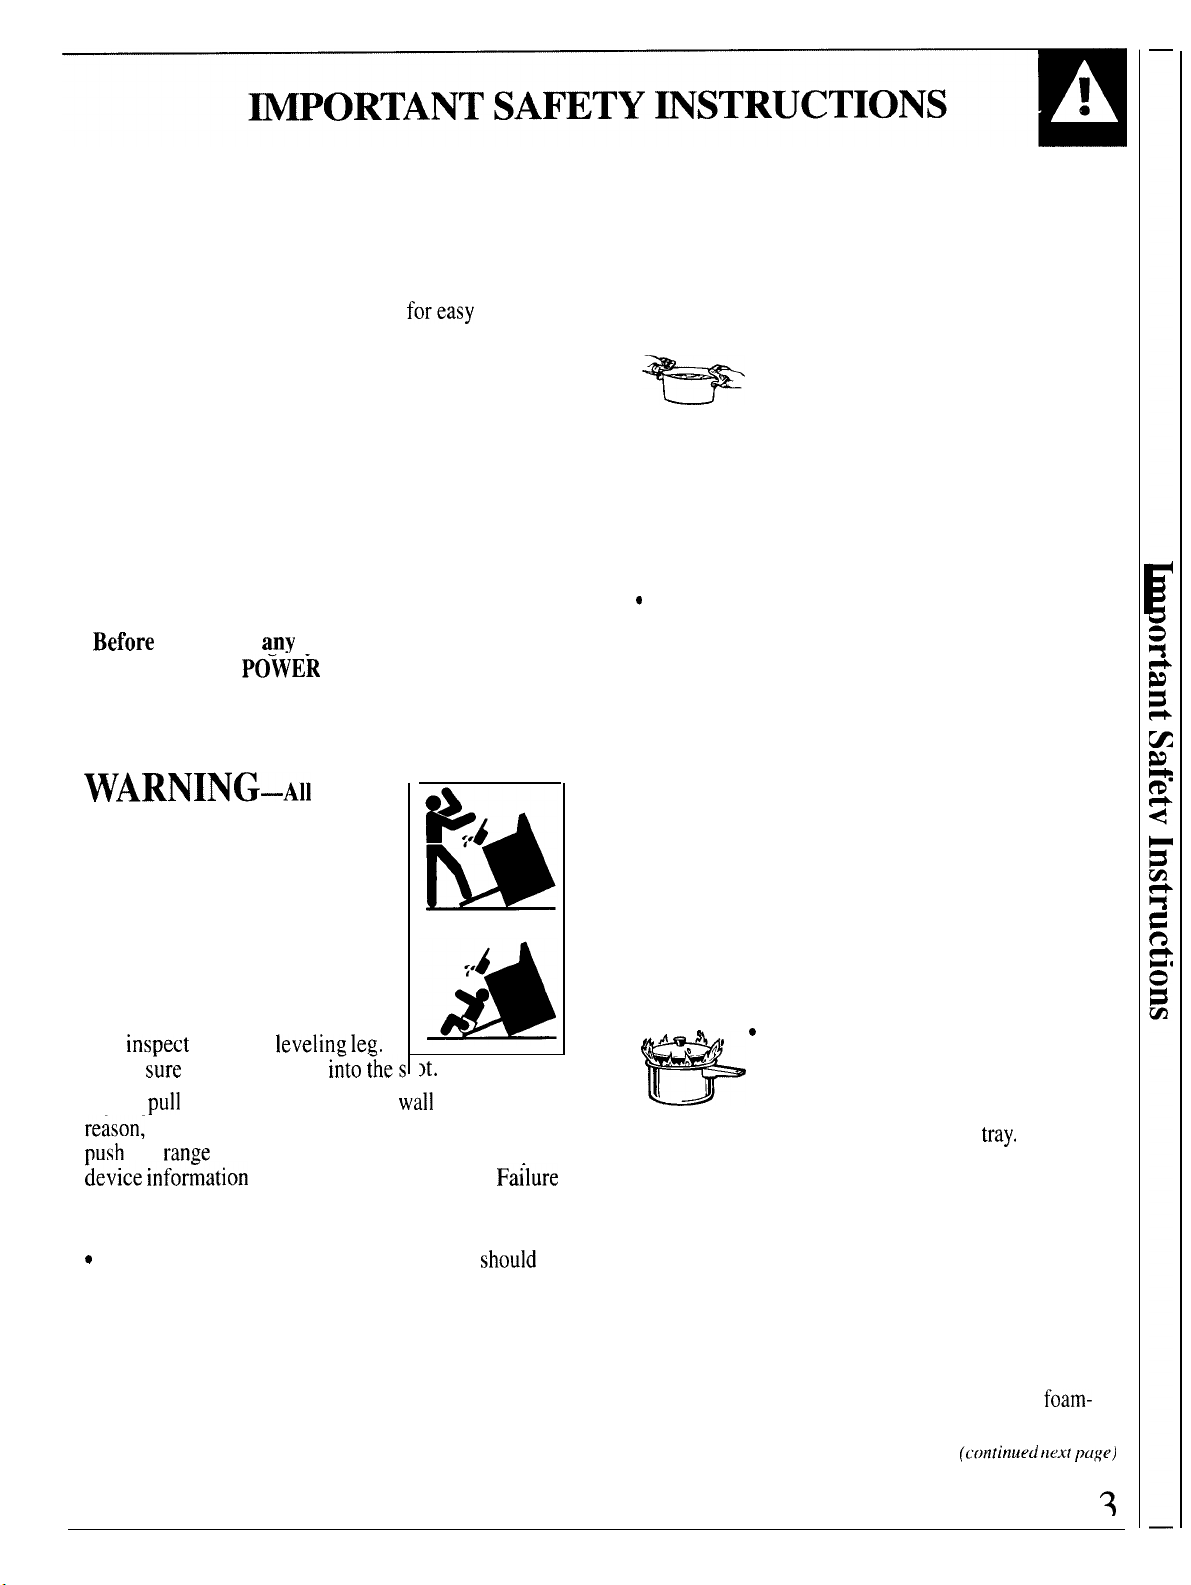
WARNING–A1l
ranges
can tip and injury could result.
To prevent accidental tipping of
the range from abnormal usage,
including excess loading of the
oven door,
attach it to the wall or
floor by installing the Anti-Tip
device supplied. To insure the
device is properly installed and
engaged, remove the drawer panel
and
inspect
Make
If you
reason;
~ush
the
~evice
the rear
;ure
it fits securely
pull
the range out from the
leveling leg.
i~to ~hes
)t.
wall
for any
make sure the device engages before you
ran~e
back. Please refer to the Anti-Tip
info~ation in the back of this book.
Failure
to take this precaution could result in tipping of the
range and injury.
s
Do not leave children alone—
children
should
not be left alone or unattended in an area where an
appliance is in use. They should never be allowed
to sit or stand on any part of the appliance.
●
Teach children not to play with the controls or
any other part of the range.
●
Do not allow anyone to climb, stand or hang on
the door, drawer or range top. They could
damage the range and even tip it over, causing
severe personal injury.
●
CAUTION: ITEMS OF INTEREST TO
CHILDREN SHOULD NOT BE STORED IN
CABINETS ABOVE A RANGE OR ON THE
BACKSPLASH OF A RANGE—CHILDREN
CLIMBING ON THE RANGE TO REACH
ITEMS COULD BE SERIOUSLY INJURED.
●
Use only dry pot holders—
moist or
damp pot holders on hot surfaces may
result in burns from steam. Do not let
pot holders touch hot heating elements. Do not
use a towel or other bulky cloth. Such cloths can
catch fire on a hot surface unit.
●
Always keep dish towels, dish cloths, pot
holders and other linens a safe distance from
your range.
Q
Always keep wooden and plastic utensils and
canned food a safe distance from your range.
●
Always keep combustible wall coverings,
curtains or drapes a safe distance from
your range.
●
DO NOT STORE OR USE COMBUSTIBLE
MATERIALS,
GASOLINE OR OTHER
FLAMMABLE VAPORS AND LIQUIDS IN
THE VICINITY OF THIS OR ANY OTHER
APPLIANCE.
●
KEEP HOOD AND GREASE FILTERS
CLEAN TO MAINTAIN GOOD VENTING
AND TO AVOID GREASE FIRES. DO NOT
LET COOKING GREASE OR OTHER
FLAMMABLE MATERIALS
ACCUMULATE IN OR NEAR THE RANGE.
Q
4
{
‘ b ~’
&
well-fitting lid, cookie sheet or flat
Do not use water on grease fires.
Never pick up a flaming pan.
Smother flaming pan on the surface
unit by covering pan completely with
tray,
Flaming
grease outside a pan can be put out by covering
with baking soda or, if available, a multi-purpose
dry chemical or foam-type fire extinguisher.
Flaming grease outside a pan can be put out by
covering with baking soda or, if available, a
multi-purpose dry chemical or foam-type
extinguisher.
Flame in the oven can be smothered completely
by closing the oven door and turning the OVEN
SET knob to OFF. or using a chemical or
foam-
type extinguisher.
(cf)nfitzuecf ttext puge)
?
Page 4
i
●
J
●
Do not touch heating elements or interior
surface of oven.
to
burn even though they are dark in color. During
and
after use, do not touch, or
MPORTANT
SAFETY
(continued)
These surfaces maybe hot enough
let
clothing or other
flammable materials contact surface units, areas
nearby surface units or any interior area of the
oven; allow
Potentially hot surfaces include the
facing
the
sufficient time
cooktop,
oven vent opening, surfaces
for cooling first.
cooktop,
areas
near the opening, crevices around the oven door,
and metal trim parts above the door.
Remember: The inside surface of the oven maybe
hot
when the door is opened.
●
When cooking pork,
exactly
and
always cook the meat to an internal
temperature of at least
follow the directions
170°F.
This assures that, in
the remote possibility that trichina may be present
in the meat, it will be killed and the meat will be
safe
to
eat.
~STRUCTIONS
. Never leave the door open when you are not
watching the range.
●
After broiling,
the range and clean it. Leftover grease in the broiler
pan can catch fire the next time you use the pan.
●
Never leave jars or cans of fat dripping on or
near your oven.
. Never wear loose-fitting or hanging garments
while using the appliance.
could be ignited if brought in contact with hot
heating elements and may cause severe burns.
●
For your safety, never use your appliance for
warming or heating the room.
Self-Cleaning Oven
●
Do not clean the oven door gasket.
gasket is essential for a good seal. Care should be
taken not to rub, damage or move the gasket.
always take the broiler pan out of
Flammable material
The door
Oven
.
Stand away from the range when opening the
oven door.
cause
burns to hands, face and/or eyes.
vu llUL llcdL
Hot air or steam which escapes can
Ullupclluu
lUUU
cullLdlllcl
s.
Pressure could build up and the container could
burst, causing an injury.
Keep the oven vent duct unobstructed.
Keep the oven free from grease buildup.
Place the oven shelf in the desired position while
the oven is cool.
If the shelves must be handled
when hot, do not let pot holder contact the heating
units in the oven.
Pulling out the shelf to the shelf
stop
is a
convenience in lifting heavy foods. it is also
a precaution against
birns
from touching hot
surfaces of the door or oven walls.
●
When using cooking or roasting bags in oven,
follow the manufacturer’s directions.
●
Do not
use your oven to dry newspapers.
If overheated, they can catch fire.
●
Do not leave paper products, cooking utensils,
or food in the oven when not in use.
Do not
store flammable materials in an oven or near the
surface units.
4
●
Do not use oven cleaners. No
cleaner or oven
liner
protective coating of any kind
commercial oven
should be used in or around any part of the oven.
Residue from oven cleaners will damage the inside
of the oven when the self-clean cycle is used.
●
Clean only parts listed in this Use and
Care Book.
●
Before self-cleaning the oven, remove the broiler
pan
and other cookware.
●
Be sure to wipe up excess spillage before starting
the self-cleaning operation.
●
If the self-cleaning mode malfunctions, turn off
and disconnect the power supply.
Have serviced
by a qualified technician.
Surface Cooking Units
. Use proper pan
with one or more surface units of different size.
Select cookware having
to cover the surface unit heating element.
The use of undersized cookware will expose a
portion of the surface unit to direct contact and
may
result
in ignition of clothing. Proper
relationship of cookware to surface unit will also
improve efficiency.
●
Never leave the surface units unattended at high
heat settings.
spillovers
that may catch on fire.
size—This appliance is equipped
Boilover
causes smoking and greasy
flatbottoms
large enough
—.——.—.—
Page 5
●
Be sure the drip pans and the vent ducts are
not covered and are in place.
Their absence
during cooking could damage range parts and
wiring.
. Do
not use aluminum foil to line drip pans
or
anywhere in the oven except as described in this
book. Misuse could result in a shock, fire hazard
or damage
.
Only certain types of glass,
to
the range.
glasdceramic,
earthenware or other glazed containers are
suitable for range-top service;
others may break
because of the sudden change in temperature. See
section on Surface Cooking for suggestions.
●
Never clean the
cooktop
surface when it is hot.
Some cleaners produce noxious fumes and wet
cloths could cause steam burns if used on a
hot
surface.
●
To minimize the possibility of burns,
tlammable
materials, and spillage, the handle of a
ignition of
container should be turned toward the center of the
range without extending over nearby surface units.
●
Always
turn the surface unit to OFF before
removing cookware.
●
Keep an eye on foods being fried at HI or
MEDIUM HIGH heat.
●
To avoid the possibility of a burn or electric
shock,
always be certain that the controls for all
surface units are at the OFF position and all
surface units are cool before attempting to lift or
remove the unit.
●
Do not immerse or soak removable surface
units. Do not put them in a dishwasher. Do not
self-clean the surface units in the oven.
●
When flaming foods are under the hood,
turn the fan off.
The fan, if operating, may
spread the flame.
●
Foods for frying should be as dry as possible.
Frost on frozen foods or moisture on fresh foods
can cause hot fat to bubble up and over sides of
the pan.
●
Use little fat for effective shallow or deep-fat
frying.
spillovers
●
If a combination of oils or fats will be used
in frying,
melt
●
Always heat fat slowly,
●
Use a deep fat thermometer whenever
possible
Filling the pan too full of fat can cause
when food is added.
stir together before heating, or as fats
sIowly.
and watch as it heats.
to prevent overheating fat beyond the
smoking point.
●
Never try to move a pan of hot fat, especially
a deep fat fryer. Wait unit the fat is cool.
SAVE THESE
INSTRUCTIONS
Installing
Your
range,
like many other household items, is
heavy and can settle into soft floor coverings such as
cushioned vinyl or carpeting. When moving the
range on
recommended
instructions be followed.
The range should be installed on a
of plywood (or similar material) as follows: When the
floor
that the
plywood to
covering. This
cleaning or servicing.
this type of flooring, use care,
that
these simple
covering ends at the
range
will rest on should be built up with
the same Icvet
wit] at]ow the range
jront
or higher than the
and
and
inexpensive
1/4
inch thick sheet
of
the range,
to be moved
it is
the area
floor
for
Leveling
Leveting
of the
level the range
nutdriver.
To remove the drawer, pull the drawer out all the
way, tilt up the front
drawer, insert
stop on the range glides. Lift drawer if necessary to
insert easily. Let the front of drawer down, then push
in to
Onc
Tip device. Allow
Allow a minimum
range
into the Anti-Tip device.
screws
range.
ctose.
of the
and
the leveling screw that is to be installed
are
located on each comer of the base
Remove the bottom drawer and you can
on
an uneven floor with the use of a
and
take it out. To replace the
gtides at
rear teveting
back of the drawer beyond
screws will
for
some side to side adjustment.
ctearance
of l/8 inch between the
engage
the Anti-
5
Page 6
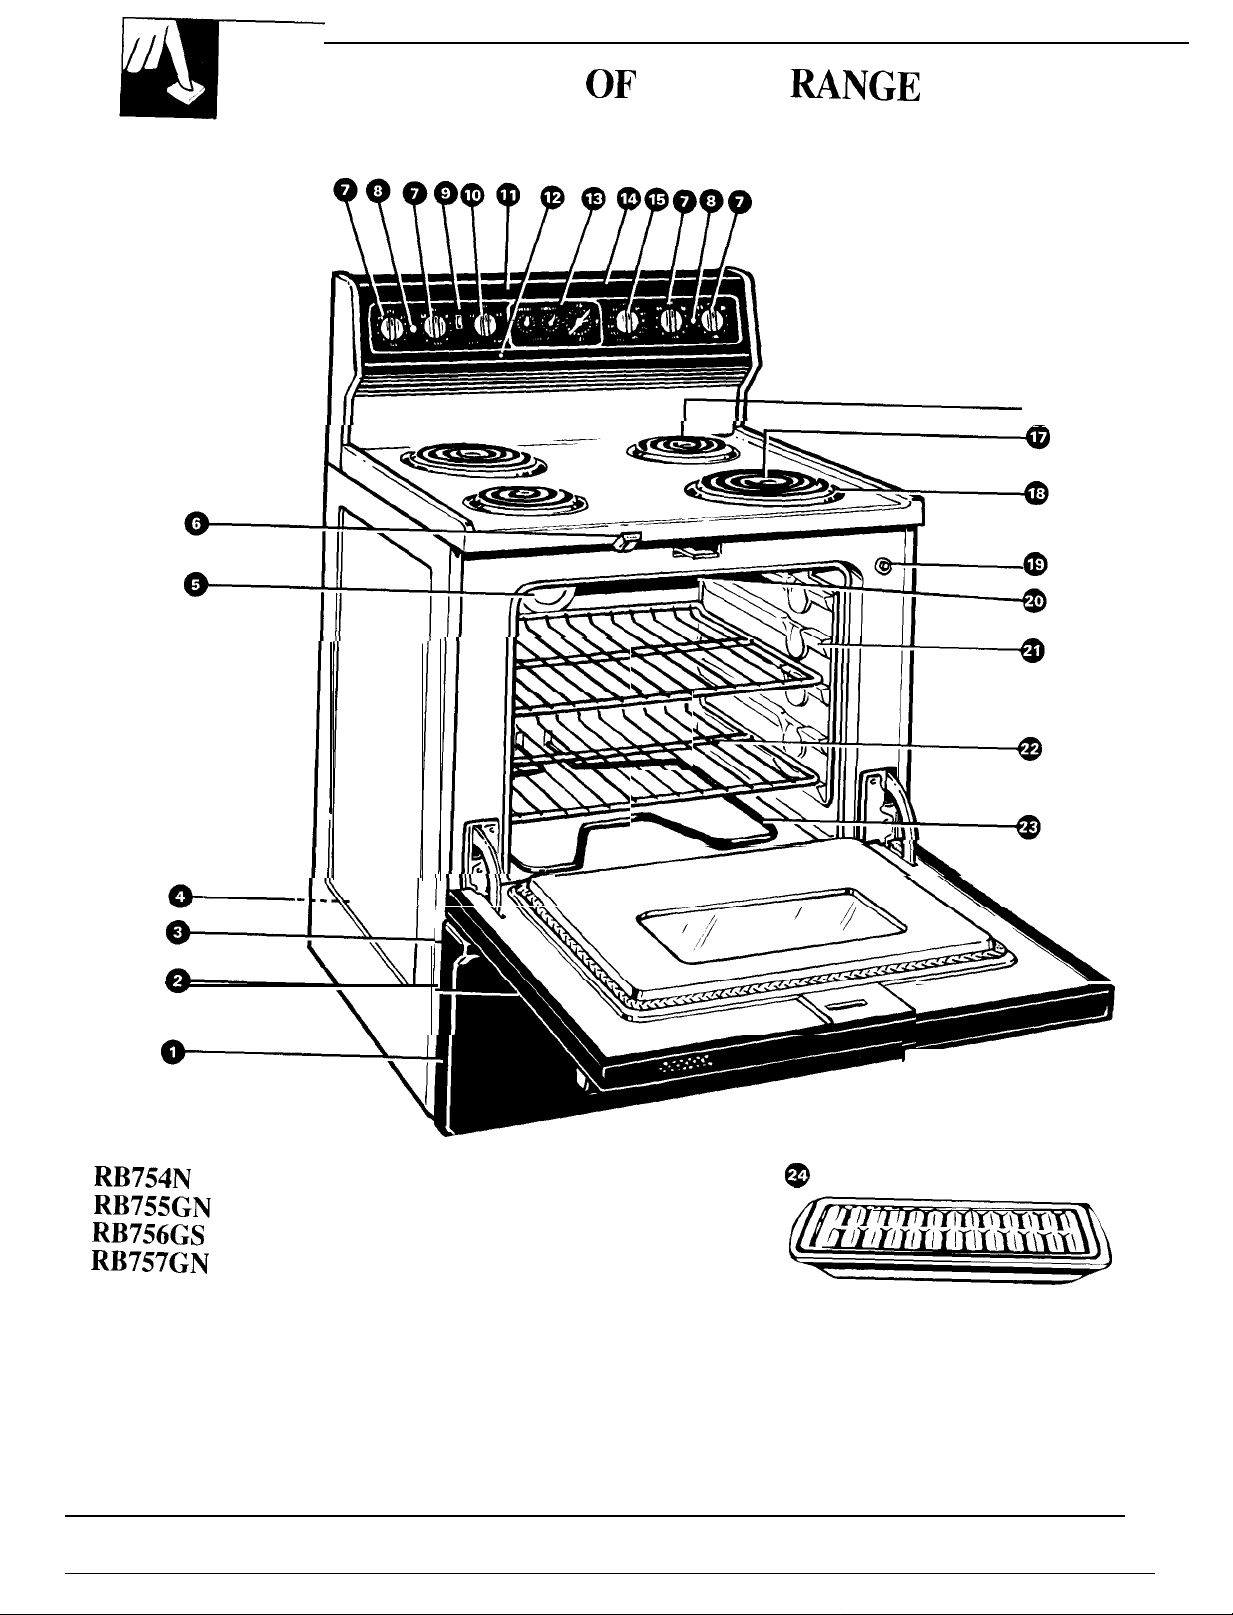
FEAT
URES
OF
YOUR
RANGE
—
~~
Models
RB754N
RB755GN
RB756GS
RB757GN
6
v
\
@
(shown)
Page 7
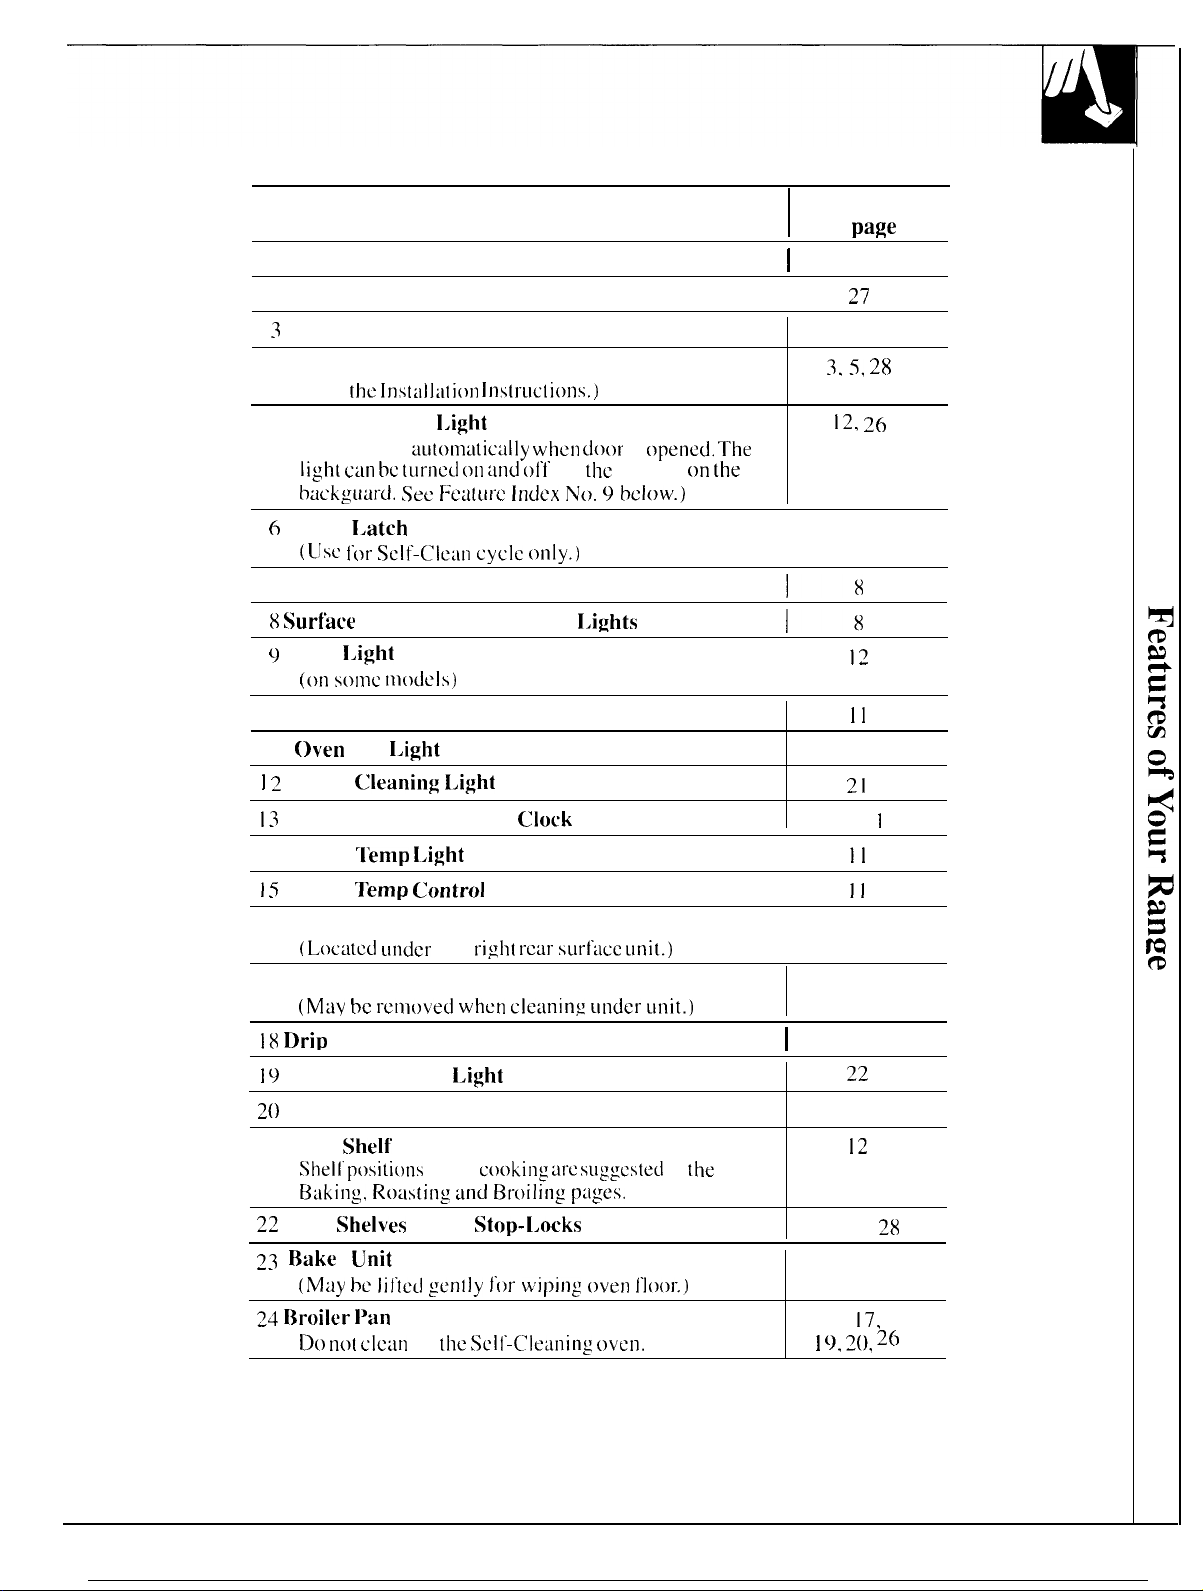
Feature Index
1 Storage Drawer
2 Removable oven Door with Broil Stop Position
3
Model and Serial Numbers
4 Anti-Tip Device
(See
the Instilll:ilion ]JIS[l-LICtloIIS.)
5 oven Interior
(Conies 011
light c:lI1 bc tllrnecl (JI1 :Lnd 011
btickglIard. See I;C:l[lII”C Index No, 9 bciow.)
6
Door
7 Surface Unit Controls
I,atch
(Llsc Ior Sctf-(:le:ln cyctc only.)
I,ight
tilitonl~ltic:illy when cio~)r
by
the
switch on
is
(~perrcd.
The
the
Explained
page
on
I
5,27
I
27
2
3.5, 28
12, ~~
22
I
8 Surfhce
~
oven
t () oven Set Control
11
t z
oven
13
Automatic oven Timer.
14 oven
15
Oven
16 oven Vent Duct
17 Plug-In Surf”ace Units
18
Dri~ Pans
19
Automatic oven
20
Broil Unit
21 oven
2Z
oven Shetves with Stop-t.ocks
~~
Bake
24
Broiter
Unit “ON’” Indicator
I.ight
Switch
(on sorllc nlodels)
oven
Set
I.ight
Cteaning I.ight
Ctock
Ternp I,ight
Temp Controt
(L(~c:itcd lIndcr
(May bc I-enlt)ved when cle;~ninx llrlder Llnit.)
Shetf Supports
Shell’ pt)sitic)ns
B~iking, R()[lstirlg and Br-oiling p:tges.
the
right I-car slIrfLlcc Llnit.)
I.ight
Switch
11)1”
cooking” :Ire sllggcstecl
I.ights
and Minute Timer
unit
(M~ly be liltc~l gentty Jor wiping oven I’loor.)”
l’an
and Rack
Do nol clclln
in
the Sctl-(’lc:irlirlg oven.
in
the
I
I
I
I
I
12, 15,
] (), Z(), 26
1~
II
II
21
1o-1
II
11
4,26
24
24
22
19,27
12
27
17.
5,
t
28
7
Page 8
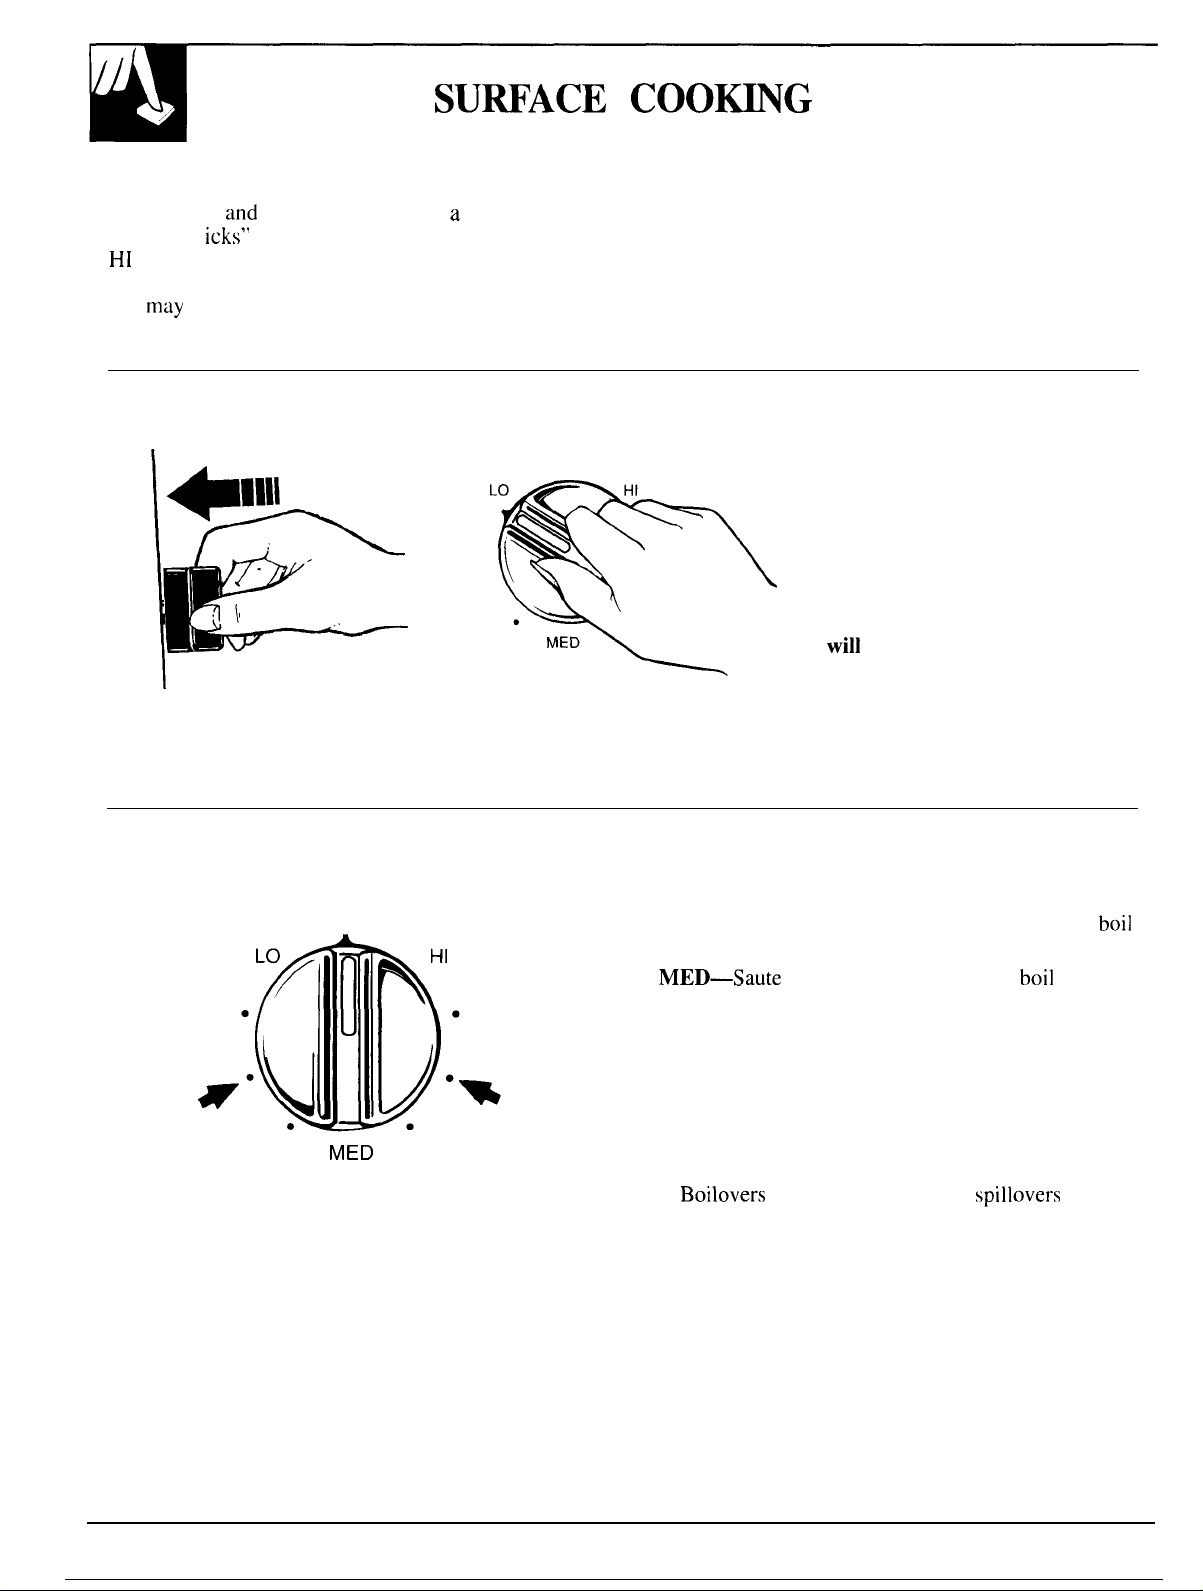
SU~ACE COO~G
Surface Cooking with Infinite Heat Controls
At both OFF
control “cl
HI
marks the highest setting; the lowest setting is
between the words LO and OFF. In a quiet kitchen,
you
may
indicating heat settings selected are being maintained.
and
HI positions, there is a slight niche so Switching heats to higher settings always shows a
icks”
at those positions; “click” on the word
hear slight “clicking” sounds during cooking,
How to Set the Controls
OFF
.
.
1. Grasp’ the control knob and
push in.
2. Turn the knob either clockwise
or counterclockwise to desired
heat setting.
quicker change than switching to lower settings.
The control must be pushed in to
set only from OFF position.
When the control is in any
position other than OFF, it may
be rotated without pushing in.
Be sure you turn the control to
OFF when you finish cooking.
The surface unit indicator light
will
glow
when ANY heat on any
surface unit is on.
Cooking Guide for Using Heat Settings
OFF
Medium
Low
MED
Medium
High
HI—Quick start for cooking; bring water to boil.
Medium High—Fast fry, pan broil; maintain fast
on large amount of food.
MED—Saute and brown; maintain slow
amount of food.
Medium Low—Steam rice, cereal; maintain serving
temperature of most foods.
LO—Cook after starting at HI; cook with little water
in covered pan.
NOTE:
1. At HI, Medium High never leave food unattended.
Boilovers
catch fire.
2. At Medium Low, LO, melt chocolate, butter on
small unit.
cause smoking; greasy
boil
spillovers
boil
on large
may
8
Page 9
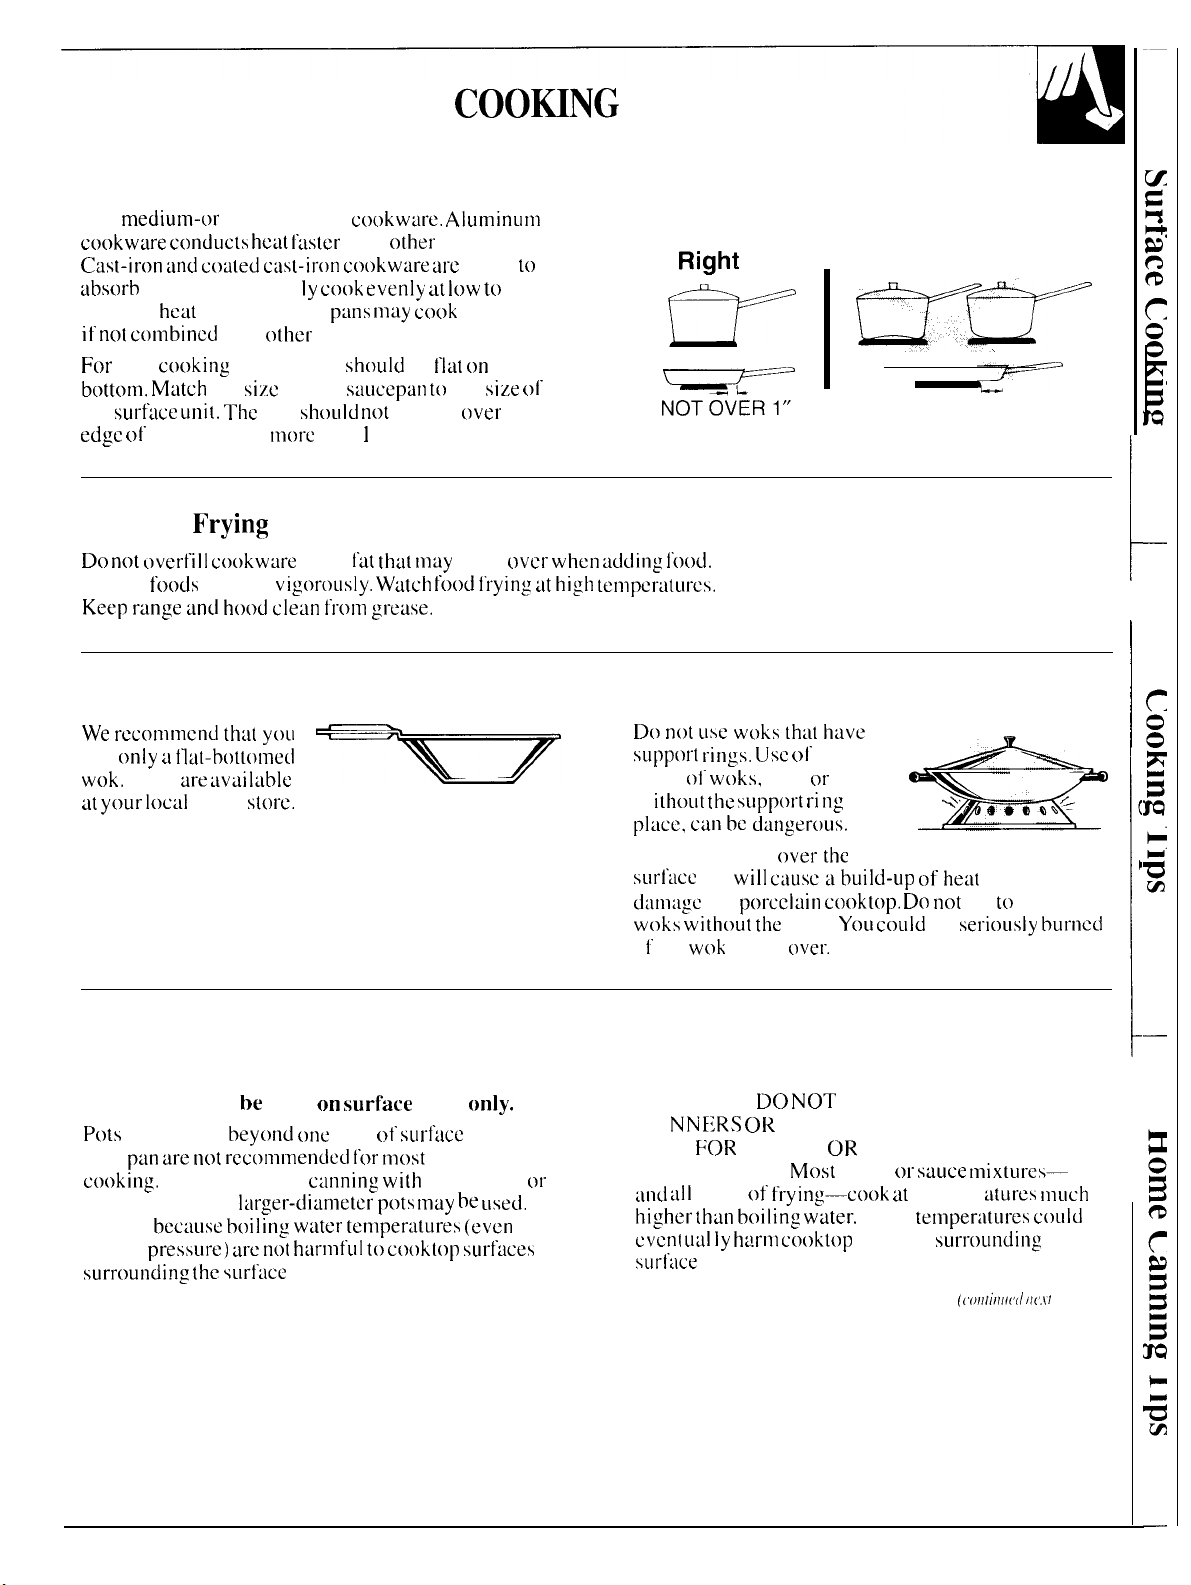
Cookware
Use
medium-t)r
cookware” conducts heat I:tstcr
Cast-iron :lnd coated c:lst-iron cookware” arc
~ibsorb
heat, but general Iy
medium
if not combined
For
best
b(~ttc~m. M~ltch
the
surf:lce uni[. The
edge I)F
the trim ring
heavy-weigh[
heat
settings. Steel
with
cooking”
results pans
the
size
pan
cookwtlre.” Aluminum
than
c(}(~k evenly at low tt)
p:ins may cook”
other
metals.
should
01 the
tnot-c
s;luccpan to
shoLIld not
than 1 inch.
other
metals.
be
tlat on
extend
COO~NG
slow
to
unevenly
the
the
size ol-
over
the
TIPS
Right
[T
Wrong
Wr
OVER 1“
Deep Fat
Do not t)vertill cookwure”
Frosty
Keep rtinge ancl hood” clean t’tonl gretise.
Frying
foods”
bubble
with
Iat th:lt may
vig(~rously. Watch food” ~’t-ying ilt high tetnpertiturcs.
Wok Cooking
We rcc(llllnlcnd th:lt yoLI
use
(lnly LI ilat-bott(~tneci
wok.
They
are :iv~i l~lble
at your Ioc:ll
retail
store.
HOME CANNING TIPS
Canning should be done on
Pots
that extend
drip
piln are nc~t recommended l(~r most
cooking.”
pressure canner,
This is
under
surrounding the surf[lce
However. when
bec:lusc boiling wtlter ternper:ltures (even
pressut-e) :lre not h[lrnlful to cooktop surftices
beyond C)IIC
lilrger-di:lrneter pc~ts may be used.
surfac:e
inch
c:lnning wi[h
unit.
units
(lt sLII”f:Ice
water-buth
spill
only.
unit’s
surface
(~vcr when tidding I’()()cl.
D() not LISe wc)ks th~~t have
support rings, Usc 01”
types
(Ji’ woks,
w
ith~)ut the support ri tlg
pl:ice, can be datlgerous.
Placing the ring ovet-tbe
surl~lceu
nit
CJt-
d:lnl;tgc
woks without the
i 1’ the
HOWEVER, DO
CA
POTS
THAN WATER.
:ul~i :111
higher th~n boiling water.
cvenl LItil Iy hdrnl c(~oktt)p
surf}lce
the
w(>k
NNEZRS OR
FOR
types
units.
these
with
(>r
in
*
will c~lusc:lbui]d-up (>fhe:lt
porcclfiin cooktop. Do not
ring.
YOLi coLLld
tipped
(~ver.
NOT
USE LARGE DIAMETER
OTHER LARGE DIAMETER
FRYING OR BOILING FOODS OTHER
Most
syrup or
(Jf frying—cook” at
temper: i(ures
Such
surfaces
temper:ltut-es could
that will
try to use such
be
sel”iously bLIrnccl
sauce mixtures-
surrounding
((’011/;/1//1(/
/!(.\’!
much
/)(/,! 1,)
9
Page 10

HOME CANNING
(continued)
Observe the Following Points in Canning
T~S
1. Be sure the
unit.
canner to be centered on the surface unit, use
smaller-diameter pots for good canning results.
2. For best results, use canners with flat bottoms.
Canners with flanged or rippled bottoms (often
found
the surface unit
Flat-bottomed canners are recommended.
canner
fits over the center of the surface
If
your
range
or its location does not allow the
in enamelware) don’t make good contact with
and
take a long time to boil water.
AUTOMATIC
TMER Am
To Set the Clock
To set the clock,
the clock hands to the correct time. (If the Automatic
Timer pointer should move also, let knob out, turn the
Timer pointer to OFF.)
push the right most
knob
in and turn
3. When canning, use recipes and procedures from
reputable sources. Reliable recipes and procedures
are available from the manufacturer of your canner;
glass
manufacturers of
and Kerr; and the United States Department of
Agriculture Extension Service.
4. Remember that canning is a process that generates
large amounts of steam. To avoid burns from steam
or heat, be careful when canning.
NOTE: If your house has low voltage, canning may
take longer than expected, even though directions
have been carefully followed.
The process time will be shortened by:
(1) using
(2) starting with HOT tap water for fastest heating
a
pressure canner, and
of large quantities of water.
jars for canning, such as Ball
CLOCK
To Set the Minute Timer
The Minute Timer has been combined with the range
clock. Use it to time
operations. You’ll recognize the Minute Timer as the
pointer which is different in color and shape than the
clock hands.
To set the Minute Timer,
pushing in, until pointer reaches number of minutes you
wish to time. (Minutes are marked, up to
center ring on the clock. ) “At the end of the set time,
buzzer sounds to tell you time is
pushing in,
until
all
your precise cooking
turn the center knob, without
60,
in the
u
up,
Turn knob, without
pointer reaches OFF and buzzer stops.
Time Bake Uses Automatic Timer
Using the Automatic Timer, you
the oven starting immediately and turning off at the Automatic Timer to set the length of time needed to
STOP TIME set, or set both DELAY START and STOP clean whether you wish to clean immediately, or delay
TIME
dials
to automatically start and stop oven at a
later time of day. It takes the worry out of not being night. See the Operating the Self-Cleaning Oven section
home to start or stop the oven. of this book.
Setting the dials for Timed Baking is explained in detail
in the Baking section of this book.
can
Time Bake with The self-cleaning function on your range uses the
Self-Clean Uses Automatic Timer
until
the cleaning
low energy times such as during the
10
Page 11

Questions
Q.
How
and
Answers
can
1 use the Minute Timer to make my
surf-ace cooking easier’?
A. The
Q. Must the
A. Yes.
Minulc
which includes time to boil
tcmperotures. [)() 11o(
visible steam only.
containers even
day
when 1 wish to use the Automatic Timer
for
baking’?
STOP TIME
Timer will help
clock
il’
you
wish to se[ [hc
time total
food and change
judge cooking time by
Food will
though
you
ctin
be set on correct time of
I>
E1.AY
diuls to
turn on
during [imcd I’unc[ions,
Before Using Your Oven
1.
Look at the controls. Be sure
to set
[hcm
properly. Read over
[he Au(omtilic
use with
2.
Check
oven
a
prac[ ice
properly to
3.
Read
over [he
Oven Timer so you understand its
the conlrols.
inlcrior.
run at
give
Look at
rcmov ing
the
and replacing them
sure, sturdy support.
information
and
Q. Can I use the Minute Timer during
oven cooking?
cooking,
A. The Minute Timer
function. The Automatic Timers (DELAY START
and STOP TIME dials) are used with TIMED
cook in covered
’t see
any
steam
BAKE and CLEAN functions.
Q. Can I change the time of day on the
clock while I’m Time Baking in the oven?
A. The time of day on the clock should not be
changed during any program that uses the oven
START or
Jnd
off at set times
timer. You must either stop those programs or wait
until they are finished before the changing time.
USING YOUR OVEN
yoLi
understand how
[he
directions for
shelves. Take
tips that
foltow.
4. Keep this book handy so you can refer to it,
especially during the first weeks of using your
new range.
NOTE: You
the first few times you turn your oven on. This is
normal in a new oven and will dissipate in a short
time. To speed the process, set a self-clean cycle (see
the Operating the Self-Cleaning Oven section) lasting
a minimum of
can
be used during any cooking
may
notice a “burning” or “oily” smell
3
hours.
Oven
The controls for
OVEN
The OVEN SET knob has
BAKE,
knob to the
are
The
you set,
also at
Controls
Ihc oven arc marked
TEMI>.
scliings
CI,EAN, BROIL
desired
then
~ctivated
for that operation.
and
setting,
OFF. When
the
OVEN TEMP knob maintains the temperature
I’rom
WARM (
C7LEAN
(
880GF.
1500F.)
)
OVEN SET and
for BAKE, TIMED
yOLI
turn the
proper heating units
to BROIL (5500 F.)
The oven set light glows when the knob is turned
to BAKE,
The oven temp light glows until
your
the
oven uni(
TIMED
BAKE,
CLEAN or BROIL.
the
selcctcd {cmpcraturc, then goes
during cooking.
oven reaches
off
and
on with
((’011/;/111(,(/ 11(,.[r
and
/)(/,? (,)
OVEN SET
BROIL
.
L/
@
CLEAN
~
OFF
\
~~~~
.
@
.
.
TIMED BAKE
~
OVENTEMP
11
Page 12

Oven Shelves
USING YOUR OVEN
(continued)
The shelves are designed with
stop-locks so when placed
correctly on the shelf supports,
they
will
stop before coming
completely out of the oven and
will
not
tilt
when you are
removing food from them or
placing food on them.
When
placing cookware on a shelf,
pLIll
the shelf out to the “stop”
posi~ion.
the shelf,
into the oven. This will eliminate
reaching into the hot oven.
Place the cookware on
then slide the shelf back
Shelf Positions
The oven has
supports, identified in this
illustration as A (bottom), B,
C and D (top).
Shelf positions for cooking
are
suggested i n the Baking,
Roasting
sections.
and
Broiling
four
shelf
(-*.
‘:.%QT
~..~~~
P4
To remove the shelves
oven, pull them toward you, tilt the
front end upward and pull them out.
To replace,
shelf support with the stop-locks
(curved extension of
up and toward the rear of the oven.
Tilt up the front and push the shelf
toward the back of the oven until it
goes past “stop” on the oven wall.
Then lower the front of the shelf
and push it all the way back.
place the shelf on the
from the
shelfi
facing
Oven Light
A manual switch (on some models) is located on the
control panel. The light turns on when the oven door
B
Ii
is opened or when the control panel light switch is
turned on.
F
Do Zt
If you don’t think the oven is heating at the right
temperature when you are baking or roasting, you
can reset the thermostat yourself.
When cooking food for the first time in your new
oven,
thermostats, over a period of years, may “drift” from
the
between an
not unusual. Your oven has been set correctly at the
which it replaced.
We do not recommend the use of inexpensive
thermometers, such as those found in the grocery
s[ore.
oven. These thermometers can vary by
To decide how much to change the temperature,
set
the temperature in your recipe, then bake. The results
of this
temperature should be changed.
Yourse~-Adjust
use time given on recipes as a guide. Oven
factory setting and the differences in timing
old
and a new oven of 5 to 10 minutes are
factory and is more likely to be accurate than the oven
to check the temperature setting of your new
the
oven temperature
“[cst” should
the Oven Thermostat
2040
degrees.
25°F.
higher or lower than
give you an idea of how much the
Pull knob off shaft. Look at back of knob and note
current setting before making any adjustment.
To make an adjustment, carefully
screws until the back of the knob can be rotated, then
move the pointer one “click” from the original setting.
If you would like the actual
oven temperature (at any
setting) to be approximately
15°F.
hotter, move the pointer
clockwise in the “HOTTER”
direction.
If you would
temperature (at any setting) to
be approximately
counterclockwise in the “COLDER” direction.
After making the adjustment,
and return the knob to the range–the
shaft must
back of the knob. Check the oven performance. Make
additional adjustments if needed.
align
like
the actual oven ~
15°F.
cooler, move the pointer
with the
flat
side of the
loosen
(
o
retighten
flat
the two
‘m
%
&
“’”
the screws
side of the
hole
in the
12
Page 13

I)o
not
lock
the oven door with the door latch during baking. The latch is
used for self-cleaning only.
Your
oven
temperature is
system,
using
I(
is
reconlmcndcd
the
time
given
t)vcn’s perl(~rnlancc. If
contr(~lled
that
on recipes
you think an
very accurately using an oven control
yoLI
operate the oven
tis
a
guide to become
adjustment
KJf/r,\((/Adjust the Oven Thermostat section.
How to Set Your Range for Baking
for a
number of weeks
familiar with your new
is necessary, see the
D()
It
To avoid possible burns,
correct
1. Turn
2.
p(~siti(ln
the OVEN
OVEN
TEMP knob to
Check
food for
recipe.
Cook
and remove
before
SET
d(~neness a[
tonger
the
l’c)(~ds.
place
the shelves in the
you
turn
[he
knob
to BAKE
the
desired temperature.
minimum time
i t
ncccssat-y.
oven
and
Turn off the heat
How to Time Bake
Do
not lock the oven door with the door latch
during
cleaning only.
The au[omatic oven timer
turn
that
Examptes 01” Immedititc
stop
olf aLltonlaticalty
Stop (setting
a later
be described.
NOTEI:
the
To set the
the ctock
Timer
Timer pointer (o OFF. )
timed baking. The latch is used for
controls are designed to
the
oven on or
yOll
set.
(C)VCI1
tLll”IIS
time dnd
Before
r-tinge clc~ck show the
clock,
hands
sht)uld rn(~vc
(JII aut~~maticatly
Start and
C)I1 IIC)W ~lld
)
(~r ~etay
the oven
turn off
yell Set it to
Start and
to turn
tit
a preset stop time) will
beginnitlg, rnakc
correct time of day.
push
the
right
tt~
the correct time. (If
also,
let
the knob out,
at specific times
Automatic
t)n automatictilly
sure the hands of
most
knob in
Automatic
the
on.
the
on
TIMED
self-
tllrn
at
and
turn
Automatic
tur-n
the
OVEN SET
BROIL
.
6/
/
@
@
CLEA*N
BA~NG
OFF
~
TlhED
BAKE
.
BAKE
o
250.
200
WARM
300. .
.
●
CLEAN
\
g
0~,
OVEN
350
● . .400
\ 1
~1,,1
;<’’”0 60
:10
2,
20 40 ~
,\\\~.
‘,/,, ,,
/
k
TEMP
‘2,, 0
?3
>:\
\
13
Page 14

TMED BAmG
(continued)
How to Set Immediate Start and Automatic Stop
To avoid possible burns,
place the shelves in the
correct position before you turn the oven on.
The oven will turn on immediately and cook for a
selfected
length of time. At the end of Cook Time,
the oven will turn off automatically.
1,
20 40
/4,
‘,/,,,,
/
1.
To
set
the Stop Time, push in the knob on the
STOP TIME
PUSH TO SET
dial
and turn the pointer to the time
you want the oven to turn off-for example,
!
,,\\\
~
.>: \
\
6:00.
The DELAY START should be at the same position
as the time of day on the clock.
OVEN SET
BROI
●
CLEAN
OFF
~
BAKE
.
TIMEO BAKE
Q
250,
200
WARM
OVEN TEMP
3:0
300.
. “
.
.
Q
●
\\
●
>
@
CLEAN
.400
.
●
.450
.
●
500
.
BROIL
2. Turn the OVEN SET knob to TIMED BAKE.
Turn the OVEN TEMP knob to the oven
temperature—for example,
250°F.
The oven
will start immediately and will stop at the time
you have set.
NOTE: Foods that are highly perishable such as milk,
eggs, fish, stuffings, poultry and pork should not be
allowed to sit for more than one hour before or after
cooking. Room temperature promotes the growth of
harmful bacteria. Be sure that the oven light is
off
because heat from the bulb will speed harmful
bacteria growth.
How to Set Delay Start and Automatic Stop
To avoid possible burns,
correct position before you turn the oven on.
You
can
set the oven control to turn the oven on
automatically, cook for a specific length of time and
then turn off automatically.
1. To set the Start Time, push in the knob on
the DELAY START dial and turn the pointer
to the time you want the oven to turn on—for
example,
3:30.
2. To set the Stop Time, push in the knob on the
STOP TIME dial and turn the pointer to the time
you want the oven to turn off—for example,
This means your recipe called for two and one-half
hours of baking time.
NOTE: The time on the STOP TIME dial must be
later than the time shown on the range clock
DELAY START
dial.
place the shelves in the
6:00.
and
the
3. Turn the OVEN SET knob to TIMED BAKE.
Turn the OVEN TEMP knob to
250°F.
or the
recommended temperature.
Place the food in the oven, close the door and
automatically the oven will be turned on and off at the
times you have set.
4. When baking is completed, turn the OVEN SET
to
OFF and remove the food from the oven.
NOTE:
● When setting oven for Delay Start, OVEN SET light
comes on when the Timer is set.
● Foods that are highly perishable such as milk,
eggs, fish, stuffings, poultry and pork should not
be allowed to sit for more than one hour before or
after cooking. Room temperature promotes the
growth of harmful bacteria. Be sure that the oven
light is off because heat from the
bulb
will speed
harmful bacteria growth.
14
Page 15

For
bes( baking
results,
Oven Shelves
follow
these
sllggestions:
Art-ange
the
oven
shelf or shelves in
the desired
whi Ic the oven
locations
is
cool. The correcl
shelf position
depends on the
of food
browning
As a
place-most foods in the
on
for
and
xcncral
either
suggested shell positions.
the
desired.
rule,
shelf
kind
position B
Preheating
Preheat
means bringing
temperature
set
higher-
the
oven
bcl’orc
the
oven at
tcrnperatut-e does
it’ the
recipe calls for it. Preheat Preheating is necessary for good results when
the
oven up to
putting in the
[he
correct
middle
of
the oven,
or
(~. Scc [he
the
chart
specified
food.
To preheat.
terlli?er:ltLrr”e—se tecting u
not shorten preheat time.
I ~pe
of Food
I Angel food cake
I
Biscuits orrnuffins
I
Cookies orcupcakes
I
Brownies
I
Layer cakes
I
Bundtor pound cakes
Pies or pie shells
Frozen pies
I
Shelf Position
1A
I Bor
C
I
BorC
I
BorC
I
BorC
I
A
orB
B or C
A (on cookie sheet)
Casseroles B or C
Roasting A or B
baking
cakes, cookies, pastry and breads. For most casseroles
and
roasts, preheating is not necessary. For ovens
without a preheat indicator light or tone, preheat
I () minutes. After the oven is preheated place the food
in the oven as quickly as possible to prevent heat
from escaping.
I
I
I
I
I
I
I
Baking Pans Pan Placement
(Jsc the proper haking
pan deter-rnincs
●
Dark,
rough
or- du 11 pans absorb heat resulting i n
browner.
●
S11
i
irl
a
cookies
● Glass
in glass
25;F.
the recipe.
cr-ispcr-
ny,
bright
Iighler, more dcl icatc
requir-c
hak
i
rlg dishes
baking
and
usc
This is not necessary
or casseroles,
pan. The type of
the
amount of browning that will occur.
crust.
Use
this
and smooth pans
browning.
this type
of.
pan.
also absorb
dishes.
the
lower- the ternper-atur-e
recommended
finish
on the For even cooking and proper browning, there must be
type for
r-ei.lect
pies.
heat, resulting
Cakes
hcdt.
When
and
cooking time in
when
baking
baking
by
pies
enough room
a
results
much as possible rather than being placed to the
for
air circulation in the oven. Baking
will
be better if baking pans are centered as
or to the back of the oven.
not
Pans should
touch each other or the walls of the
oven. Allow 1 to 1
as from the back of the oven, the door and the sides.
If
you use 2 shelves, stagger
not directly above the other.
X
inch space between
the
pans so that one is
(C”[)llt;llll(’(1
puns as
tr(,.rf
front
well
/)(l,q(’)
15
Page 16

BAmNG
(continued)
Baking Guides
When
using prepared baking mixes, follow package recipe or instructions
for
the
best
baking
results.
Cookies
When
baking
cookies, flat cookie sheets (without
sides) produce better-looking cookies. Cookies baked
in a
jelly
roll
pan
(short sides
dtirker
edges and pale or light browning may occur.
Do
not
use
a
cookie sheet so large that it touches the
walls or the door of the oven. Never entirely cover the
shelf
with a large cookie sheet.
For best results, use only
at fi [i me.
all
around) may have
1
cookie sheet in the oven
Pies
For best results, bake pies in dark, rough or
to produce
pans
for
baking since the shiny
from the pie crust; the cookie sheet helps retain it.
u
browner, crisper crust. Frozen pies in foil
should be placed on an aluminum cookie sheet
foil
pan reflects heat away
dull
pans
Aluminum Foil
Never entirely cover a
This will disturb the heat circulation and result in poor
baking. A smaller sheet of foil may be used to catch a
spil]over
below the food.
by placing it on a lower shelf several inches
shelf
with aluminum foil.
Cakes
When baking cakes, warped or bent pans will cause
uneven baking results and poorly shaped products.
A cake baked in a pan larger than the recipe
recommends will usually be crisper, thinner and drier
than it should be. If baked in a pan smaller than
recommended, it may be undercooked and batter may
overflow. Check the recipe to make sure the pan size
used is the one recommended.
Don’t Peek
Set the timer for the estimated cooking time and do DO NOT open the door to check until the
not open the door to look
provide minimum and maximum baking times such
:IS “bake 30-40”
minutes.”
at
your food. Most recipes minimum time. Opening the oven door frequently
during cooking allows heat to escape
baking times longer. Your baking results may also
be affected.
and
16
makes
Page 17

R(~asting
uncovered
is
in
steady, keep
Roasting
is
controls arc
these
directions:
c(~{~king
sp~lttering to a
really a baking procedure
by
your oven.
dry het~t. Tender meat {Jr poultry can
Roasting temperatures, which
minimum.
used
set to BAKE or TIMED BAKE.
be
should
for metits. Therefore,
Roasting
is easy; just
roasted
be
low ilnd
oven
follow”
1. Place
the
shelf in A or B
No preheating is
2. Check the
weight
meat,
(JI.
the
and pl~lce
it, fat-side-up,
{jr poultry
bre~lst-side-up
on a
roasting
r~lck
in
a
shallow piU1.
The
meltinu
fat
will
bas~e the me~lt.
size
ot’
the
rack
is a
g{~c>d pi~n f{~r
~luminum foil
cooking”
with fruits,
Ior busting food”
m~~terials
inside the
position.
necess:lry.
Select u
nle~it us possible.
this. ) Line the broiler
when using
cooking” heavi Iy-cured
during
cooking.” Avc)id
t~ven t)r inside
pan as close to
(The
broi Icr pun
pan for
marinating,
the
the
with
pan
with
meats,
or
spilling these
oven d(}(~r.
OVEN SET
BROIL
.
L/
@
@
CLEA;
3. Turn
the
OVEN
ct~oked at 3500F. f{~r
a SI ight
clicking
w(}rking
Most
metits continue t~~ cook
after
being
recommended for
allows roasts to firm
carve. lnterna]
1
OOF.; to compensate for
desired,
~
OFF
\
BAKE
.
TI;EO
BAKE
OVEN SET
TEMP
knob
sound,
properly. )
removed from
roasts
temperature
renl(~ve
the
knob to
to
best
indicating the
up
roast from
internal temperature is 5° to
temperature
4. Turn the OVEN SET
shown
in the
knob to
is completed.
NOTE:
●
You may
the
wish to use Timed Baking,
Baking section
of this
and off. automatictdly.
● Remember that
oven
~lnd therefore
ft)(~d
will
should be
desired internal temperature
OVEN
Q
250.
200
WARM
3
●
-
CLEAN
TEMP
350
BAKE. Turn the
325°F. Sm~dl poultry m:ly be
br{]wning. (Y(~Ll may he~lr
(~ven
is
slightly while standing
the
oven. Sttindi ng [i
is 1 ()
and
[() 20
minutes: This
makes them easier
wi]]
rise
about
me
to
S0 to
temperature increase, it
the
oven
when
roast’s
10OF.
less
th~in
Roasting
book,”
continue to c(~(~k
Guide.
OFF when
ro:lsting
;1s
described i n
to turn the oven
in the
removed
h:is
been
when the
rei~chcd.
c)n
hot
For Frozen Roasts
Frozen ro~ists
with(>ut
Iddition:d
per
pound for roasts
larger r(~asts).
of beef,
thawing, but UI
time per
pound
under 5
pork, ltunb,
low
etc.,
can
I () to 25 minutes
( I () minutes
pounds, rn(~re
be started
~idditionill time
time
for
Thaw most frozen poultry before rc)asting to ensure
doneness. Some conlmerci:]l frozen poultry c:ul
even
be
cooked
directions given on
successfully
package label.
with(~ut thtiwing. Follow”
((
’())1/ilif/(,(/ //(,.1/ /l(/,q(,
)
Page 18

Questions and Answers
ROAST~G
(continued)
Q.
Is it necessary to check for doneness with a
meat thermometer?
A. Checking the finished internal temperature
at
the completion of cooking time is recommended.
Temperatures are shown in the Roasting Guide.
For roasts over 8 pounds, check with thermometer
at half-hour intervals after half the time has passed.
Q. Why is my roast crumbling when I try to
carve it?
A. Roasts are easier to slice if allowed to cool 10 to
20 minutes after removing them from the oven.
Be sure to cut across the grain of the meat.
ROASTING
Oven
Temperature
Meat
Tender cuts; rib. high quality sirloin
tip, rump or top round*
Lamb
leg
or bone-in shoulder*
Veal shoulder,
Pork loin, rib or shoulder*
Ham,
precooked
le&
or loin*
Poultry
Chicken or Duck
Chicken pieces
Turkey
325°
325°
325°
325°
325°
325°
350°
325°
Doneness
Rare:
Medium:
Well Done:
Rare:
Medium:
Well Done:
Well Done:
Well Done:
To Warm:
Well Done:
Well Done:
Well
Done:
Q. Do I need to preheat my oven each time I cook a
roast or poultry?
A. It is rarely necessary to preheat your oven; only
for
very small roasts, which cook a short
length
of time.
Q. When buying a roast, are there any special tips
that would help me cook it more evenly?
A.
Yes. Buy a roast as even in thickness as possible,
or buy rolled roasts.
Q. Can
I
seal the sides of my foil “tent” when
roasting a turkey?
A. Sealing the foil will steam the meat. Leaving
it unsealed allows the air to circulate and brown
the
meat.
GU~E
Approximate Roasting Time
in Minutes per Pound
6 to 8
3 to 5
24-33
35–39
4045
21-25
25-30
30-35
3545
3545
17-20
to
5 lbs.
3
3540
3540
10 to
18-25
Ibs.
Ininutes
15 Ibs.
per pound (any weight)
lbs.
I 8-22
22-29
30-35
20-23
24-28
~g–~~
30-40”
30-40”
Over
5
30-35
Over 15 Ibs.
15-20
Ibs.
Internal
temperature
1400-1
5001”
1
500-1600”
I 700-1 85°
1400-1
5001”
1500-1600”
1700-1
85°
170”-1800”
I 700-1800
11 5°– 125°
I 85°-1900
I
850–1
900
[n
thigh:
1 85°–1900
‘F.
*For boneless rolled roasts over 6 inches thick, add 5 to I () minutes per pound to times
PThc
U.S. Department of Agriculture says “Rare beef is popular, but you should know
some
food poisoning organisms
may
survive.” (Source: Safe Food Book.
Your
Kitchen Guide. USDA Rev.
18
given above.
that
cooking it to only
140”F. means
June
1985. )
Page 19

Do not
lock the oven door with the door latch
baking. The
Broiling is
the
upper unit in the
latch
is used for self-cleaning only.
cooking food
oven.
by intense radiant
Most
l’ish
and
tender
during
heat from
cuts of
meat can be broiled. Follow these directions to keep
spattering and smoking
1.
11’
the meat
has fat or
vertical slashes through both about 2
If
desired,
1/8
inch thick.
2.
Place meat on
which
tat
drips
fat may
the broiler rack in the broiler pan
comes
with the
into
the broiler pan; otherwise juices
become hot enough to
3. Position the
us
suggested in Broiling Guide. Most broiling is done
shelf
on C position, but if your
votts,
you
mtiy
wish to use a higher position.
LIJ
a minimum.
gristle
near
the edge,
inches
cut
apart.
be trimmed, leaving a layer about
range.
Always use the
rack so
may
catch fire.
on the
recorntnended shetf
range
is connected to 208
position
-
4. Leave the door
open to the
broil
K
stop position.
The door stays
open
by itself, yet the
proper
temperature
is maintained
in the oven.
5.
Turn the OVEN SET knob to BROIL. Turn
the
OVEN TEMP knob to BROIL. Preheating is not
necessary. (See notes in the Broiling Guide, )
Turn the
6.
for
Turn the food, then use the times
second
two
first times
7. Turn the OVEN SET and
the food immediately,
oven to
food only
once during cooking. Time
the first side according to the
side
iis
a guide to preferred doneness.
thicknesses
cool
and
given for
thinnest food. )
during the
times are given together, use the
TEMP
knobs to OFF. Serve
and
leave the pan outside the
tncal for
easiest
Broilinz
Guide.
given l~)r [he
ctedning.
foods
(Where
Use of Aluminum Foil
You con
your
However, you must
tightly to
it just like the rack.
use aluminum
broitcr
pan and broiler rack.
the rtick
and cut s] its in
toil
mold
to tine
the
toil
Without the slits, the
prevent
draining to the broiler pan. The
juices could become
catch on fire. If you do
SI
its, you are trying,
Questions & Answers
Q. When broiling, is it necessary to always use a
rack in the pan?
A.
Yes. Using the
As the meat
keeping meat drier. Juices are protected by the rack
and stay cooler, thus preventing excessive spatter
and smoking.
Why are my meats not turning out as brown as
Q,
they should?
A.
[n some tireas,
be
low.
In these
minutes
oven. Check to see
recommended
period of time indicated in the Broiling Guide.
Turn
food
rack
suspends the
cooks,
the juices
the
power (voltaue) to
ca~es, pr~heat fie
before ptacing broiter
if.
you are using the
shetl.
position.
only
once
during broiling.
meut over
fall
into the pan, thus
broil unit
pan with
Broit f’or
the
ranze mav
food
longest
the pan.
~~r
1 ()’
in
fat and
foil
will
meat juices
hot
enough to
not
not
broiling.
Q. Do I need to grease my broiler rack to prevent
meat from sticking?
A.
No,
heat, thus keeping the
prevent meat from sticking to the
However, spraying the
vegetable cooking spray
cleanup easier.
Q.
Should I salt the meat before broiling’?
A. No. Salt draws
evaporate.
with tongs; piercing
-juices
brush each side often with
from
cut the
The broiler
Always salt after cooking, Turn
to escape. When
~Qm:b9’
+$~g)$,
[2
rock
is designed
surlace cool enough
broiter
before
out
the juices and
metit
with a
broiling p(~ultry or
,,
‘ /
., b
~
[() re[lect
broiler
surface.
rack tightly with a
cook
ing
wit 1 make
allows
them to
fork
also at tows
fish,
butter.
((”<~lll;~lilt,[l
.,,
to
meat
/l(.\’/ /)(/,q(,)
10
Page 20

BRO~ING GUmE
1. Always use
the
broiler pan and rack that comes
5. When arranging
food
on the pan, do not let
with your oven. [t is designed to minimize smoking edges, which could soil oven with
and
spattering by trapping juices in the shielded
lower part of the pan.
2. The oven door should be open to the broil
stop position.
3. For steaks
and
chops, slash fat evenly around
outside edges of meat. To slash, cut crosswise oven shelf at next lowest
through outer fat surface just to the edge of the
meal.
Use tongs to turn meat over to prevent
piercing meat
and
losing juices.
4. If’ desired, marinate meats or chicken before
broiling, or
hrush
with barbecue sauce last 5 to
hang over the sides.
6. The broiler does not need to be preheated.
However, for very thin foods, or to increase
browning, preheat if desired.
7. Frozen steaks can be broiled by positioning the
shelf
increasing cooking time given in this guide 1
times per side.
8. If your range is connected to
may be broiled by preheating the broiler
positioning the oven shelf one position higher.
10 minutes only.
,Second
Food
Bacon
Ground Beef
Well
D(me
Beef Steaks
Rtirc
Medium
D(me
Well
R:ue
Medium
Well Done
Chicken
Bakery Products
Bre~id (Toast) or
Totister Ptistries
English Muf’lins
Lobster Tails
Fish
Ham Slices
(precooked)”
Pork Chops
Well
Done
Lamb
Chops
Medium
Well Done
Medium
Dune
Well
Wieners
prcco(~ked s:IusLIges.
hmtwurst
and
similar
Quantity
Thickness
1/2 lb, (fibout 8
thin slices)
1 lb. (4 patties)
1/2 tu
1 inch
( I
IY: incb tbick
(2 102X lbs.)
I wht)le
(2 to 2Y
split lengthwise
2 tu 4 slices
1
pkg. (2)
2 (split)
2-4
(6 tn
I -lb. fillets l/4
I/2 inch thick
1
2
(
2 (
about
2
( 1 inch)
about I
2 (
about
I -lb.
andor
I
3/4 inch thick
thick
to
I x
Ibs.)
Ibs.),
I
8
oz. each)
to
incb
thick
1/2 inch)
1 inch thick) B
I lb.
() to I
~
OZ.
Ifi
inch)
1 lb.
pkg.
( 10)
Shelf First Side
Position
c
c
c
c
c
c
c
c
A
c
c
B
c
B
c
c
c
c
B
c
Time. Minutes
I
4%
10
6
8
12
10
15
25
35
I ~.~
34
13-16
5
8
10
13
10
12
14
17
6
Time, Minutes
I
I
Side
4fi
7
5
6
II
7-8
14-16
20-25
10-15
1/?
Do not
turn over
5
8
10
13
12-14
l_~
Comments
S[e:lks Icss (h:]n
tbrough hcfore br(]wning. f’~ln
trying
Slash lat.
Reduce time ah(~ut
minutes
Brush
Broil skin-side-down I’irst.
Space
rnuf’~ins
with
“-Cut
open,
huttcr
hall’ 01 time.
H:mdle ~n(i
Brush with
ond
during
Prehea~
browninx.
Incretise time 5 to
side
cured.
Sl:ish f’at
Sl~sh t’ut.
11
desired, split
Icngthwisc; cut into 5- to
pieces.
fat
dripping,
position and
208
volts, rare steaks
I inch
is recommended.
pcr side l(~r
c~ch si(ic
ekenl].
cut-side-up
hutter. if
tb;~)u:h back of
turrl over,
beli)re
hrniler tu
For I Z,
5 to 10
cut-up chicken
with
Pl~cc
English
desired.
shell.
Brush with
broiling
turn very
Iem(m hutter bet”ure
cooking”
if’
incre:ise
10 minutes per
inch thick or
s~usagcs
fatty
Y?
and
[hick cook”
nlclleci hut[ct-.
:]nd
brush
Spre~id
meltccl
and ~tl’tet-
c~irefully.
ticsired.
home
in
half’
6-inch
20
Page 21

OPEmTING
THE SELF-CLEANING OVEN
\
Before a Clean Cycle
The range must be completely cooled in order to
set the self-clean cycle. You
oven to cool
1. Remove
and any
withstand [he high cleaning temperature.
NOTE:
They will discolor
self-clean
2. Wipe up heavy soil on oven bottom. If you use
soap, rinse thoroughly before self-cleaning to
prevent
Q
3.
Clean spattet-s
A),
under
liner outside the door gasket
the oven cavity (about I inch into the oven). Use
detergent and hot water with a soap-filled steel
woo] pad, then rinse
mixture. This wi 11 help prevent a brown residue
from
forming when the
fireas
with a
Clean the top, sides and outside
with soap and water. Do
cleaners.
before
the
broiler pan, broiler rack
aluminum
The
oven
cycle.
stuining.
A. oven E’rent
B.
Openings in Door
C.
oven Door {;asket
D. oven
or soil on the oven
the
fr(~nt edge
dry
you
foil
shelves
and
become
I.ight
well
cloth.
may
have to allow
cun
slide the
from the oven-they
amy
be left in the oven.
l“rame
of the
tind
with a vinegar
oven
is heated
no(
use abrasives or oven
door latch.
all
cookware
hard
to slide after the
o
front frame
cooktop,
front
the door
the front edge of
and
Buff
of oven door
(
water
thes
the
cannot
e
u
Do not let water run down through openings in
the top of the door (B). To help prevent
from
getting in these slots when cleaning, open the
door as far as
Do not rub or clean the door gasket (C)—the
fiberglass material
low resistance to abrasion, An intact
fitting oven
oven operation
notice the
damaged in
on the door, you should have it replaced.
4. Close the oven door
is off. If the oven 1
the bulb will be shortened or it
to burn out immediately.
The oven shelves
oven. However, they will darken, lose their
become hard to slide. Wipe the shelf supports with
cooking oil
s] ide
more easily.
Do not use commercial oven cleaners or oven
protectors in or near the self-cleaning oven.
A combination
high
clean cycle
porcelain finish of the oven.
Important
The oven door must be closed
be set correctly
it will
gasket is essential
gasket
any way
after
self-cleaning to make the shelves
of
temperatures
for
go.
of the
gasket
has an extremely
for
energy
and
good
baking
results. If you
becoming worn,
or if it has become displaced
and
make sure the
ight
is not turned off, the 1
may
be cleaned in the self-c] caning
any
of these
the
clean
pl”oducts
may damage the
and all
cycle to work properly.
frayed
may
controls must
((
water
and well-
-eff’icicnt
or
t)vcn
light
i}e
cause the bulb
luster and
plus the
’()}1[;!11((,(/
//(,.\/ /)(l,ql,)
of
—-
———.
—-.————
71
AA
-1
Page 22

OPE~TING
THE SELF-CLEANING OVEN
How to Set the Oven for Cleaning
(continued)
OVEN SET
BROIL
. .
CLEAN
1. Turn the
CI.EAN.
when
the
~
OFF
TIMED BAKE
OVEN
BAKE
SET and OVEN TEMP knobs to
~ OVENTEMP
350
3
250.
2009
WARM
CLEAN
The controls will snap into final position
CLEAN location is reached.
2. Close the oven door.
Slide the latch
the
right
handle to
as far as it will go.
J
2;
Never force the latch
handle.
Forcing the handle
will dtimage
the door lock
s
Ill\*
mechanism.
3. Set the automatic oven timer:
Make sure both the clock and the START dial
show the correct time of day. When the START
knob is pushed in and turned, it will “pop” into
place when the time shown on the clock is reached.
Decide on the cleaning hours necessary.
Recommended cleaning times:
Moderate Soil—2 hours
(thin spills and light spatter)
Heavy Soil—3 hours
(heavy, greasy spills and spatter)
Add these hours to present time
and turn the
STOP
dial clockwise to this desired
of
day, then push in
stop time. The CLEANING light glows, indicating
cleaning has started. This
light
cycles on
and
with the oven heating units after the oven reaches
cleaning temperature.
The oven door and window get hot during
self-
cleaning. DO NOT TOUCH.
off
After a Clean Cycle
1.
After cleaning is complete,
turn the OVEN SET knob
to OFF.
2. When oven has
fallen
below the locking
temperature, slide the
latch handle to the left
as far as it will go
open the door. If you
cannot
slide
the
and
latch,
s
allow additional time
for cooling.
Never force the latch handle. The
easily. Forcing the latch handle may damage the
door
lock.
OVEN SET
BR
~ ~~~
OFF
latch
slides
~
You may notice some white ash in the oven. Just
wipe it up with a damp cloth after the oven cools.
If white spots remain, remove them with
a soap-
filled steel wool pad. Be sure to rinse thoroughly with
a vinegar and water mixture. These deposits are
usually a salt residue that cannot be removed by the
clean cycle.
If the oven is not clean after one clean cycle, repeat
the cycle.
@l
22
Page 23

How to Delay Start of Cleaning
Follow
follow steps I
in
needed
to this
at
the
direction
and
turn the START
for
cleaning to this Start time, then push in
desired Stop
the set
[imes.
in the
Before a
and
2 of How to Set the Oven
dial
to the time you wish to start.
Time. The oven will automatically turn on
Clean Cycle section
for
Cleaning. Then push
Questions and Answers
~.
If my oven
day, can I still self-clean my oven?
A. It the
Q. Why won’t my
A. Check to be sure the START
Q.
A. No cleaners 01 coatings
Q. What should I do if excessive smoking occurs
A. This is
Q. 1s the “crackling” or “popping” sound
A.
clock
will
n{)t be
specific time.
even
knobs correctly?
time as
handle is moved to
Can
I use commercial oven cleaners on any part
of my self-cleaning
part
of.
thoroughly
absolutely
the
oven
time
the
during
should turn
Open
windows to
oven tt~ cool
opening
reset the clean
during cleaning normal?
Yes. This is the metal heating
both the ct)oking :Ind cleuning
clock
is not set to the correct time of
is not
set to
able to
oven
though
I set all the time and clean
the r~nge clock.
this
oven. If
rinse the oven with water, wiping it
clean
afterwards,
surface
oven is
cleaningt~
(:aused
the door. Wipe up
tiutomatica]ly
by excessive
the
OVEN SET knob to
until the latch
cycle.
the
correct time
set a delay clean
clean immediately
dial
Also check to be sure
the
right.
oven’?
should
be used around
you do use them
the
residue
and damage
rid room
metal parts the next
cleaned.
soil, and you
of smoke. Allow the
slides
the
excess
and cooling
functions.
to end at
is set to the same
easily
and
OFF.
soil and
of
day
do
not
can
scar
beiore
I
hear
during
a
tind
then
Add
the hours
and
turn the STOP dial
you
A. This is
latch
any
Q. Why do I have ash left in my oven
A. Some types of soil will leave a deposit, which
Q. My oven shelves do not slide easily. What is
A.
Q.
A. Yes. After the self-cleaning cycle, the shelves may
Q. Can I cook food on the
A. Yes. While the oven is self-cleaning, you
and
off
Q. Should there be any odor during the cleaning?
may
A. Yes, there
cleanings. Failure to wipe
also
cause an
Q. What causes the hair-like lines on the enameled
surface of my oven?
a normal
and
cooling during cleaning. They do
how your oven performs,
after cleaning’?
is ash. It
or cl(~th.
the matter?
After many cleanings, oven shelves
so clean
s] ide
dampen
and
contact shelf supports.
My oven shelves have become gray after the
self-cleaning cycle. Is this normal?
lose
is self-cleaning?
the
they do
more easily,
fingers with a
rub lightly over sides of shelf where they
some
cookt(~p
be an odor during the first
out
excessive soil might
odor when cleaning.
condition, resulting from heating
can
be removed with a damp
not
slide easily. To make shelves
after
each self-cleaning cycle,
small amount
luster
and
discolor to a deep
cooktop while
just as you normally
do.
not atfect
sponge
may
become
of
cooking oil
grfiy.
the oven
few
can
LISe
—.—
——
Page 24

CAm
AND CLEANING
Proper
will
these
safe
care and
give
cleaning
you efficient
are
and
satisfactory service.
directions carefully in
and
proper maintenance.
important so your
caring for
it to help assure
range
Follow
Removal of Packaging Tape
The salest way
tape on
to the
finish
household liquid dishwashing detergent, mineral oil
or cooking oil. Apply with a soft cloth and allow to
soak. Wipe
thoroughly clean and protect the surface. This
procedure is
and other plastic
to remove adhesive left from packing
new tippliances
to assure no
damage
of the product is an application of
dry and
then apply an appliance polish to
also safe
for the face of microwave doors
and Lexan
parts.
is done
a
Surface Units and Drip Pans
To clean
highest setting
off any soil.
CAUTION
● Do not immerse the surface units in liquids of
any kind.
●
Do
● Do not bend the surface unit plug terminals.
● Do not attempt to clean, adjust or in any way repair
the plug-in receptacle.
To remove the drip pans
must be removed first. Make sure the surface units are
completely cool before touching them.
Lift
and
Do
If you do, it may not lie flat on the drip pan when
you plug it back in.
Repeated lifting of
inch above the drip pan can permanently damage
the receptacle.
the
surface units. turn the control to the
for
a minute. The coils will burn
not clean the surface units in a dishwasher.
for cleanin&,
the
surface unit about 1 inch above the drip pan
the surface units
Drip Pan
pull it out.
not lift the surface unit more than 1 inch.
the
surface unit more than 1
BE SURE ELECTRICAL POWER IS
OFF BEFORE CLEANING ANY PART
OF THE RANGE.
NOTE: The plastic tape that is not removed
from the chrome trim on oven parts cannot be
removed if baked on.
To replace a surface unit:
● Replace the drip pan into the recess in the
Make sure opening in the pan lines up with the
receptacle.
● Insert the terminals of the surface unit through the
opening in the drip pan
● Guide the surface unit into place so it rests evenly.
and
into the receptacle.
Drip Pans
Remove the surface units. Then lift out the drip pans.
The drip pans can be cleaned by hand. Place them
in a covered container (or a plastic bag) with 1/4 cup
ammonia to loosen the soil. Then scrub with a soap
filled scouring pad if necessary. Rinse with clean
water and polish with a clean soft
cloth.
The drip pans may also be cleaned in the dishwasher.
Clean the area under the drip
pans
Built-up soil, especially grease, may catch fire.
Do not cover drip pans with foil. Using foil so close
to the receptacle could
cause
possible shock, fire or
damage to the range.
CAUTION: Be sure all controls are turned to OFF
and surface units are cool before attempting to
remove them.
Do not clean in a self-cleaning oven.
cooktop.
often.
24
Page 25

Control Panel and Knobs
it’s a
good idea to wipe the c{)ntrol
of the oven. Clean
and
water. rinse with
soft
cloth.
with mild
clean
panel
soap and water
water
and polish
after
each use
or vinegar
dry with
Do not use abrasive cleansers, strong liquid
cleansers, plastic scouring pads or oven cleansers
on the control panel—they will
A 50/50”
works
solution
of vinegar
well.
Clear Groove in Stem
damage
and hot w~ter
the finish.
solution
Porcelain Enamel Cooktop
The control knobs may be removed for easier
cleaning.
a
please
knobs on
When replacing the
insure
in each side. The
The other groove is
inside
the
the
and water or a vinegar
Before
removing the knobs
note
that the knobs on the left side
the right side
are
in the proper OFF position,
knobs.
check the OFF
for
cleaning,
proper alignment. The knob stem has a
oi.
the
knob
knob
by fitting
clear groove on
groove” on one
clear
and
i.ind
the nl(~lded
the stem. Wash the
side has a spring clip.
(see illustration). Check the
the molded rib. Replace
rib inside the knob into
knobs
and hot water solution”
and
position”
but
the
groove
in
soap
to
do
not soak.
The porcelain enamel finish is sturdy but
breakable if misused. This
H{Jwcver,
any
acid f(>(~ds
:)nlato or vinegar) should not
finish
is
ticid-resistant.
spilled (such as fruit juices.
be permitted to remain
on the finish.
If acids spill on the cooktop while it is hot, use a dry
paper towel or cloth to
the
surface has
wipe it up
c(~(~led,
wash with soap and water
right away.
When
or
cleansing powders, Rinse well.
Lift-Up Cooktop
Clean the
often. Built-up soil, especially
[7reL1se, Inay catch ii re.
e
c]eun ing
cooktc)p may
supported in the up position.
LIp
tireu
eas
under the
ie[”,
the
be
lifted
cooktop Be sure
To make
entire
up
and
all
surface units are turned
off
bet.(>re
raising the
Grasp the
and 1
front
i
ft.
The surface units do
need to be removed before lifting.
After cleaning under the cooktop
with
hot,
mild
clean
cloth,
careful not
to
sides of the
soapy
lower
the
pinch
your
For other spills such as fat smatterings,
soap
and
water or cleansing
has
cooled. Rinse well.
cooktop.”
powders tifter
Polish
with a dry
SUPPOti Rods
cooktop
not
water and a
cooktop.
Be
fingers.
wash with
the
surface
clolh.
Painted Surfaces Glass Surfaces
Painted
ontr(~l panel
,Id
commercial oven cleaners, cleansing powders, steel
wool or harsh abrasives on any painted surface.
surftices
and
water or a
include
drawer
vinegar and
[he outside oven door,
I.rent.
water
~lean these
solution.
with s(}ap
Do not use
sides, To clean the outside glass finish, use a
Rinse and polish with a
water or
gltiss
cleaner to run down inside openings in
while cleaning.
dry cloth.
gluss cle:lncr.
Do not
allow the
(1’()/1[;/1//1,[/
the
11(,.\-f /)(1,s(,)
25
Page 26

Oven Light Bulb
CAm
AND
(continued)
CLEAN~G
The light bulb is located on the
back
wall of
replacing
the
oven. Before
the
bulb, disconnect
electrical power to the range at
the
panel
mtiin fuse
or
or circuit breaker
unp]ug
the
range
from the
electrical outlet. Let the bulb cool
completely
l’or
your safety, do not touch a
hot bulb with a damp
you do, the bulb will break.
before
removing it.
cioth.
If
To remove: Unscrew the cover
and remove the bulb.
To replace: Put in a new 40-watt
appliance bulb.
NOTE:
● A 40-watt appliance bulb is
smaller than a standard 40-watt
household
you use
an
no longer than 3 Y2 inches.
●
Install and tighten the cover.
● Reconnect electrical power to
the range.
Oven Vent Duct
Your range is vented through a duct located under the
right rear surface unit.
bulb.
We recommend
appliance bulb that is
NOTE: Never cover the hole in the oven vent duct
with aluminum foil or any other material. This
prevents the oven vent from working properly during
any cooking cycle.
Socket
t
o
‘<K>,~
Bulb
3<in~he~ Ma.
‘( b
s
\
Glass Cover .,-.
Length
‘\
/ ;::,;
,i~j::
m
DO NOT REMOVE SCREWS.
Broiler Pan & Rack
After broiling, remove the
broiler
Remove
pan from
the
rack
the oven.
from
the pan.
Carefully pour out the grease in the
pan into-a-proper
and
rinse the pan and rack in hot,
S():Lpy
water.
container.
Wash
Oven Shelves
Clean the shelves by hand using soap
and
wuter
or with an abrasive
cleanser. After cleaning, rinse the
shelves with clean
To remove heavy, burned-on soil,
you may use scouring pads. After
scrubbing,
rinse
tind
wash
dry.
Metal Parts
wat~r
and dry.
with soapy water,
If food has burned on, sprinkle the
rack while hot with detergent and
cover with wet paper towels or a
dishcloth. Burned-on foods
will soak loose while the
meal
is
being served.
The oven shelves may be cleaned in
the self-cleaning oven but they will
become hard to slide and
permanently discolor from the heat
and lose some luster. See the
Operating the Self-Cleaning
Oven section.
r’
Do not store a soiled broiler pan
and rack in the oven.
Do not clean in self-cleaning oven.
Do
not use steel wool, abrasives, ammonia or commercial oven
cleaners. To safely clean surfaces; wash, rinse and then dry with a
soft cloth.
26
Page 27

oven Door
The ~)ven
bu[
need
rcplilcing
lift [hc oven door
htindlc.
(r]
,
~ LISS to
door is
it is
he:tvy. YOLI m;iy
help removing
the
door.
This
can
break or
rcnlovi~ble,
and
Do not
by
the
cause
the
dalnagc t[)
the door.”
To
remove the
:1
few
inches to
stop position”
Grtisp
fir-rely on
str:light
up
NOTE: Be
hinge
tlnd the
sn:lp back and
To
replace the door,
special
stop
of
the
door
door”
slowly
door,
open it
the spe~i:il
that wi
II hold
the
door
c:lch
side
and
lift
ilnd
off the hinges,
careful not to
oven
pl:lce h;lnds
door fl-~me :ls
pinch finger-s,
m:ikc
sure
position. Position
squ~u-ely over”
iuld
evenly over both hinges at the same
the slots in the bottom
the hinges. Then lower the
time. If hinges sntip btick :lgainst
thcm b;lck
out.
Inside /
G~sket
Gasket’
\\
I
E
9“
K/””
open,
the door
between the
the hinge
tht:
hinges
the oven
Ou~side
Gasket
‘w
,/
~
“
~[)u]d
arc
in the
frame,
pull
TO
CLEAN THE DOOR:
Inside of the door:
● Because the area inside the gasket is cleaned during
the self clean cycle,
hand.
Any soap
sttiins
when the oven is heated.
● The
area
outside the
scouring
●
Do n(}t
pad.
rub or clean the door gasket—the fiberglass
material of the
resistance
oven door
to tibrasion.
g~sket
oven operation and
notice the
in
any way
gasket
or if it
you do
not need to
left
on the liner causes additional
gasket can
gasket
has an extremely low
An
is essential
good
becoming worn,
has
become displaced on the door,
be cleaned with
intact and
for
energy-efficient
baking
resutts. If
well-fitting
frayed
clean
yoLI
or
this by
damoged
you should have it replaced,
NOTE: The
bottom to
gasket
allow for
is designed with a
proper
air
circulation,
gtip at
the
Outside of the door:
● Use soap
sides and
down
well. You
glass
●
Spi
I I age of marinades, fruit juices, tomato sauces
and
and
water to thoroughly clean the top,
front
Of the oven
throu&h
openings in the top of the door. Rinse
may iilso
use a
glass
on the outside of the door.
basting materials contain
door.” Do not jet w:lter run
cleaner to
ing acids
clean
the
may cause
discoloration and should be wiped up immediately.
When
surf~lce
● Do not use oven cleaners, cleansing powders or
is cool. clean and rinse.
harsh abrasives on the outside of the door.
NOTE: Do
Any soil will burn
bake unit
spil
lover, residue, or
not
can
clean
the bake unit or the broil unit.
off when the units
be
lifted gently to clean
ilsh ticcumulate
ore
heated. The
the oven
around the
iloor. If
b:lke
unit, gently wipe around the unit with warm water.
~
Removable Storage Drawer
The
stor~lgc driiwer
to
store cookw:u-e :Ind bakeware.
Do not
stor-c pltlstics ~lnd
flanlnl~lble nl~lteri:ll
CAUTION:
pl:]stics and llanlrn~lble nl~itcri:d
must
no[ be
kept in this
Do not over-toad the
driiwer-.
If it is
‘ ip off the
tr~ick when opened.
,)cn [he dr-~lwer-. gr-:isp the
of the
h:tndlc ~u]d pul
It
rn:ly be removed
under the
range.
—.—————
is a
in the
For
your safety,
too hc:lvy.
I
for
good place
dr:lwcr.
cir:lwcr.
s[or~igc
it
may
center
str:light ou[.
clciuling
To
\(’>Guide
,.
‘.
.,/””’”
,<,;$
\
~
(
‘\.
\.
\,
?
To remove: Pull
str:light
out
and
Ii ft over the
guide stops.
To replace:
guide
stops
Lift over the
and
s]
into place.
‘top
‘\y’
the
dr~lwcr
ide
the drawer
,,,;+
..<2,5,,
“~/””’
~
To clean both the inside and
the outside: Wipe with soap
water. Rinse well. Do not use
cleaning powders or
abrasives which
may
harsh
scratch
the surface.
(( ’()/1
/;/1//<,(/ //(,.\( /)[l,q(,
tind
)
27
——
Page 28

CARE AND CLEANING
(continued)
A
●
All ranges can tip.
WARNING
I
●
Injury could result.
Q
Install the Anti-tip device
packed with the range.
. See
the
Installation
Instructions.
STABILITY DEVICE INSTALLATION INSTRUCTIONS FOR
Tools needed:
● Phillips
● 17s” open
The brackel
right
be sure
wiring or plumbing.
shorter screws that
tloorin:.
If
the bracket came with your range, it is shipped
attached to the lower range back. Remove and discard
the
shipping screw
follow the instructions below.
1. Decide whether the bracket will be installed on the
right or
2.
If the
cabinet, place the bracket against back wall and
cabinet
Ii there is no adjacent cabinet, determine where
the location
panel) will be.
edge at this location
See Figure 1.
hc~d
screwdriver
end
or adjustable wrench
attaches to
or
left rear leg
that
the
screws do not penetrate electrical
Icfl
side of the range location.
bracket side of the range is adjacent to a
as
shown in Figure 1.
of the
floor
or wall to hold either the
leveler. If fastening to the floor,
If
this cannel be determined. use
will
not penetrate through
that
holds the bracket and then
range
side (painted outside
Place
the bracket with its outside
and
against the back wall.
3. Determine whether you will
the
iloor or wall. Fasten the bracket securely with
the screws provided. The screws are
wood, plywood, particle
meta]
framing. lf attaching to masonry you can buy
suitable screws and
a masonry drill to drill
4. Using the wrench, back out
least two turns. See the Installation Instructions
more level i ng information
5. Slide the range into
leveler fully engages the slot in the bracket,
the range cannot be moved back
the rear
bracket forward as required
in the new location.
leg
leveler to enter
BRAC~.T ~T NO.
and
chip board,
tinchors
place.
at hardware stores. Use
the
required
the tour leg
bel’ore
Be sure the rear
the
and
anchor [he
bracket,
attach to
bracket to
sell’-drilling
and
holes.
levelers at
positioning
far
enough
move the
342473
in
most
for
range,
leg
If
for
the tloor
engages slot
28
Attachment to wall
Page 29

PROBI,l;M
POSSIBLE CAUSE
OVEN WILL
NOT WORK
OVEN LIGHT
DOES NOT WORK
FOOD DOES NOT
BROIL PROPERLY
FOOD DOES NOT
ROAST OR BAKE
PROPERLY
SURFACE UNITS
NOT FUNCTIONING
● The plug on the
● The circuit breaker in your house has been tripped, or a fuse has been blown.
● The oven controls
● The light bulb is loose or defective. Tighten or replace.
● The switch operating the oven light is broken. Call for service.
● The OVEN SET knob not set
● The OVEN TEMP knob not set at BROIL.
● Door not left ajar as recommended.
●
1 mproper
● Food is
● Cookware not suited
● Aluminum foil used on the broiler pan and
and
● The OVEN SET knob not set on BAKE.
●
The
● Shelf position is incorrect.
● Incorrect cookware or cookware of improper size is being used.
● A foil tent was not used when needed to slow down browning during roasting.
● The surface units are not plugged in solidly.
●
The surf’uce unit
shelf position being used. See the Broiling Guide.
being cooked
slit as recommended.
OVEN TEMP knob not set correctly.
range
is not completely inserted in the electrical outlet.
are
not properly set.
at
BROIL.
on hot pan.
for
broiling.
rack
has not been fitted properly
controls
are
not properly set.
OVEN WILL NOT
SELF-CLEAN
OVEN DOOR LATCHED
ACCIDENTALLY DURING
BAKE OR
BROIL
OVEN DOOR
WON ‘T LATCH
●
Automatic timer dials not set or not set properly. The clock must be set to time of
day
and
the STOP TIME dial must be
set
and advanced beyond the time noted
on the oven clock.
● The STOP TIME
●
Both the OVEN SET and the OVEN TEMP knobs must be set at CLEAN settings.
o
When the oven is
layer
of
ash and
●
The
door
lutch handle
“
Turn the OVEN SET knob to OFF. Allow the oven to cool until the door latch
dial
was not advanced for long enough.
SCI
f-cleaned, a thick
insulate that
not moved
area
pile
of
from further heat.
till
the way to the right.
spillover
can leave a
hetivy
handle will unlock easily. Restart operation.
● Turn the OVEN SET knob to CLEAN. The glowing oven cleaning 1
ight
after
knob is turned indicates the oven is too hot from previous use and door won’t
latch.
To
COOI
the oven, open the door wide, and allow the oven to cool,
After
the oven
has cooled, close the door and slide the latch handle to the right.
(( ’()})
/;1111(,[/ tl(,.\’l /1(/,ql,)
—.———
29
Page 30

●
●
m
PRO1;l,l{N1
“BURNING’.
OIIOR EMITTING
F’ROM
OVEN WHEN
TURN
OVEN TEMPERATURE
TO() HOT OR TOO COLD
OVEN NOT CLEAN
AFTER
Ifyoll
CI’,
800.626.2000
consllmer
E[j C)N
CLEAN CYCLE
need
Answer Center
OR
‘OILY”
more
information service
help...call,
THE
toll
PROBLEM SOLVER
(con(lnued)
POSSIBI,k;
● This is
set a self-clean cycle (see Operating the Self-Cleaning Oven
minimum
● The oven thermostat needs adjustment. See the
Adjust the Oven Thermostat section.
● The oven controls are not set properly.
.
Heavi Iy
●
Heavy spillovers
f’ree:
CAUSE
normal
in a new oven and will dissipate in time. To speed the process,
of 3 hours.
soiled ovens require 3 l/z to 4-hour clean time.
should be cleaned up before starting clean cycle.
section) lasting a
Do [t Your.self–
30
—
Page 31

We’ll Be There
With
In-Home Repair Service
80~EXARES(80M32-2737)
(
II()( I)oirrt
(
I(
I( ) 2:()()
it]sidc!
GEAnswer Center@
80~6262000
the
purchase
iced
infi)rmation
)(II (onsIInIc’r
sc>rvicc>
;~[)]}li:in(c’, s(tlcd(]led ii( ;~ I i[ne
:i)lls[llllc:l’ Sc:rvi(c’
)111( )rr( )W’,
(
)1’ ;Il )’( )111’
[).111.
iiil(l ()(] (—s()
Sii(~il(lii}s).
ofyour
new
Hotpoint
appliance, receive the assurance that if you ever
or assistance, we’ll be there. All you have to do is call—toll-free!
[)rof~ssion;il”
(’olll~)illl}’-orel’iited”
(or)venierr(c
ollr
Inos(
rct>:iirs
will
~)rovide
loCi\tiollS” ofl’el” yell
(7:()()
fi~((ol-y-(litinc{l (ccllrrici;~ns
(ii]l ht.
h:indlt>d irl,jt]st
111:11
ii. In.
exrerl rer~~ir
(onvenierr(
(()
7:()()
service on your
for you.
st:rvi(-e tod:ly
[~.
rn.
w~~kdiiys, 9:()() ir. nl.
know yolIr :lprlii+nce
1 visit.
Miirly (;k:
or
kr
Customers With
8006262000
H()(p()int
I)rorll[rr-c” 10 iiSSiSt
,.
.,,., ,,,.
“,.”.””., .., .,>., ,,....
H,
.,,,,4 .,.”.,. .,,” .,...”.,.
ON...
C,,. ,!,> .. .,,,.,
I):irriel-f’ret’
wit h
1
hesc
800.(
Service Contracts
iirrli:tn(es, and it
ki[chen for r~ers(j;ls
Iirni (Ccl
itcnls,
nlohilily.
fiec’ of” ;hargcj
j2(j.2000.
80&626-2224
Pads andAccessories
80&626-2002
in planning
‘ro ot>tiiin
call
SpecialNeeds...
(;orrsu]nc]-s wi(.h inlriiired
;tc:c:ess
to a TDD or a
call
800-TDIJ-(;EA(:”
21
information
or service.
heiiring or srt!e{h
w’tlo l)it\~’
corlvc>ntion:ll” t.c>letyrc~wri IC>r I~l:iy
(800-833-4322)” to
req~lt’st
dividuals
Ivc’ n(’(>[1(.(1 t):irls ()1-
hotnt’.
(;cllllillc’ I<t’llC’\V;lt 1’211’1 S...illl(l
VISA,
qualified to service their o- appliances
:Ic(’t’ss( )ric,s sc>nl
(
)111’
[)ill’1~
s)slC’111
I)rovi(ic>s
M21slt>r(I:lr(i
an(i
l)is(ovc>r
2111
(Iirc?(’1
:i{’(’(’ss
10 over 47,()()()
iiI’C
fill]}
~;tlds
iLrC
Iy 10 1
ht?ir
w:irr:irllcd.
ilccerted.
r:in
User maintenance instructions contained
cover procedures intended to be performed by any user.
Other servicing
service personnel. Caution must be exercised, since
improper servicing may cause unsafe operation.
generdy
should be referred to qualified
in this booklet
Page 32

YOUR HOTPOINT RANGE
WARRANTY
I
I
WHAT IS COVERED
Staple sales slip or
here. Proof of original purchase date
is needed to
I
I
FULL ONE-YEAR
For one
purchase, we will provide, free of
charge,
your home to repair or replace
pati of
of a manufacturing defect.
year
patis and sewice labor in
the range
WARRAN~
from date of original
any
that fails because
cancelled check
obtain service
under warranty.
This warranty is extended to
the original purchaser and any
succeeding owner for products
purchased for
the 48 mainland states, Hawaii and
Washington,
warranty is the same except that it is
LIMITED because you must pay to
ship the product to the
or for the service technician’s travel
costs to your home.
All warranty
provided by our
Centers or by our authorized
Customer Care” servicers during
normal working hours.
Should your appliance need
sewice,
during warranty period
or beyond, call 800-GE-CARES
(800-432-2737).
ordina~ home use in
D.C.
In Alaska the
sewic”e shop
sewice
will be
Facto~
Sewice
WHAT IS NOT COVERED
● Service trips to your home to
teach you how to use the product.
Read
your Use and Care material.
If you then have any questions
about operating the product,
please contact your dealer or our
Consumer Affairs office at the
address below, or call, toll free:
GE Answer Center
(o
800.626.2000
consumer information service
● Improper installation.
. Replacement of house fuses or
resetting of circuit breakers.
● Failure of the product if it is used
for other than its intended
purpose or used commercially.
● Damage to product caused by
accident, fire, floods or acts
of God.
WARRANTOR IS NOT
RESPONSIBLE FOR
CONSEQUENTIAL DAMAGES.
If you have an installation
problem, contact your dealer or
installer. You are responsible for
providing adequate electrical, gas,
exhausting and other connecting
facilities as described in the
Installation Instructions provided
with the product.
Some states do not allow the exclusion or limitation of incidental or consequential damages, so the above limitation or exclusion
may not apply to you. This warranty gives you specific legal rights, and you may also have other rights which vary from state to state.
know what your legal rights are in your state, consult your local or state consumer affairs office or your state’s Attorney General.
To
Warrantor: General Electric Company
If further help is needed concerning this warranty, write:
Manager—Consumer Affairs, GE Appliances, Louisville, KY 40225
3-93
CG
RR7?
. .- .
RB755.
RB756(
RB757(
Printed in LaFayette,
 Loading...