

Page 1
How
to
get
,-
b fro~n
AluminumFoil
Anti-TipBracket
ApplianceRegistration
Canning Tips
Care and Cleaning
Clock/Timer
Energy-SavingTips
Features
Installationkstructions
Leveling
Baking, Baking Guide
Broiling, Broiling Guide 18,19
ContinuousCleaning
Control Settings
Door Removal
Light BulbReplacement 20
Roasting, RoastingGuide 16,17
Thermostat Adjustment
20-24
14,15
4, 18
3,5
12
6,7
24
13
20
21
use
2
9
5
5
5
andcareof
models
‘-?, {._
VentDuct
Problem Solver
Repair Service
Safety Instructions
Surface Cooking
Control Settings
-.
)
20
25
27
3,q
8-11
8
it-
1
1
i
Page 2
It isintendedtohelpyouoperate
..————.-.—-.-..—--
andmaintainyournewrange
properly.
Keepithandyforanswersto your
questions.
Immediatelycontactthedealer(or
builder)that soldyouthe range.
Ifyoudon’tunderstandsomething
or need morehelp, write (include
yourphone number):
ConsumerAffairs
Hotpoint
ApplianceRrk
Louisville,KY40225
You’llfind them on a labe~on
thefront of the range behindthe
ovendoor.
These numbers are also on the
Consumer ProductOwnership
RegistrationCard that came with
yourrange. Beforesendinginthis
card, pIease write these numbers
here:
ModelNumber
Serial Number
Check the ProblemSolveron
page25.It lists causesofminor
operatingproblemsthatyou can
correct yourself.
Use these numbers in any
correspondence or service calls
concerning
yourrange.
Page 3
When using electricalappliances,
basicsafetyprecautions
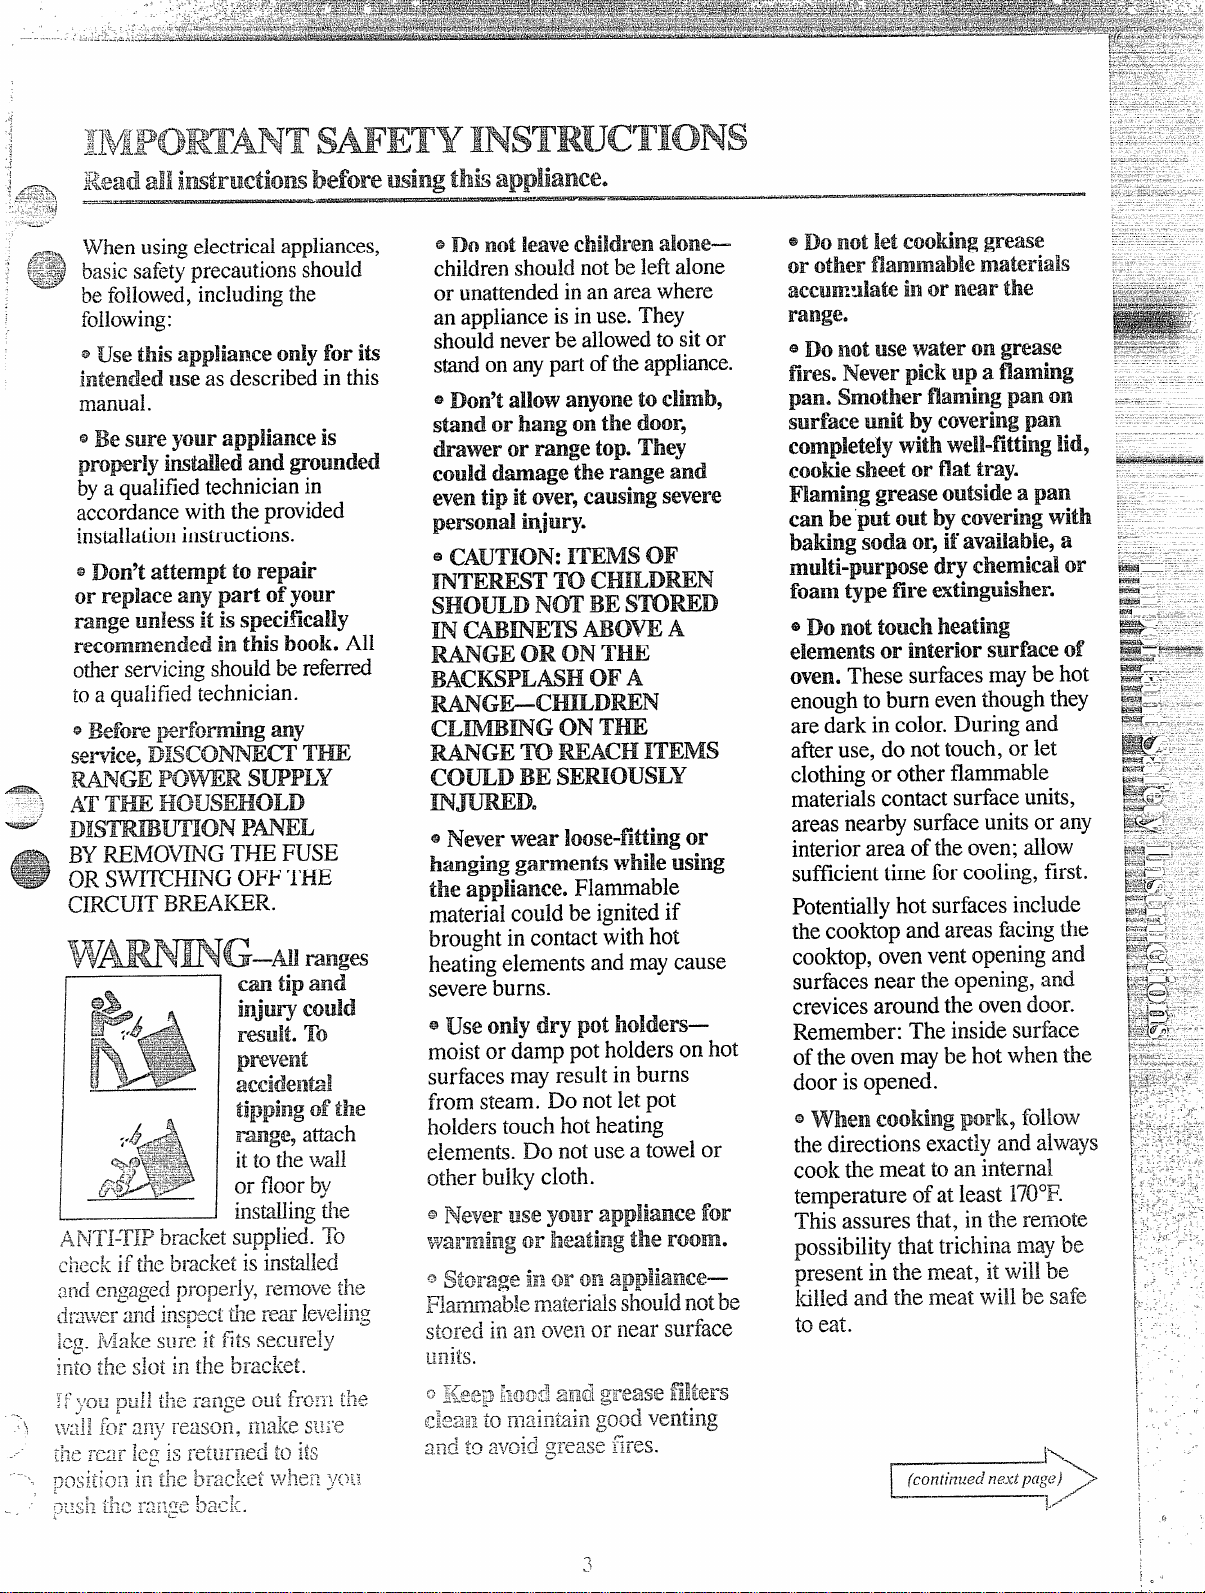
~~‘f~~~~w~~,~~c~u~~~g~~~
following:
@‘Jse this appliance only for i@
intended use as described in this
manual.
@Be sure your appliance is
pro~rly hwed md &ounded
by a qualified technician in
accordance with the provided
installation instructions.
should
@Donot let Cootinggrease
or other
aecum=ulate ill or near
range.
@
Do not use FYateron grease
fires, Never
pan. smother flamingpan on
surface Utit by coveringpan
RanRmablematerials
the
pickup a namhg
completeiJ’withwell-fittinglid9
Cootie
sheet or flattray.
Wlaminggrewe ou@idea pan
Can be ‘putout by ‘coveringwith
batingsodaor, if availabie9a
multi-purpose dry
Chemicalor
foamtype fireextin~isher.
s Do not touchheating
elemen~
oven. These surfacesmaybe hot
enoughto burn even‘thoughthey
are dark in color. During and
afieruse, do nottouch,or let
clothingor other flammable
materialscontactsurfaceunifi,
areas nearby surface unitsor any
interiorarea oftheoven;allow
sufficienttime for cooling,first.
Potentiallyhot surfacesinclude
the cooktop and areas facingtie
cooktop,ovenventopeningand
surfacesnear the opening, and
crevicesaroundthe ovendoor.
Remember: The inside surface
ofthe ovenmaybe hot when tie
door is opened.
or hterior surface of
o m~~ COO]LiHgpQYk9
fOilOW
the directions exactlyand always
cook the meat to aninternal
temperature of at least 170”F.
This assures
that, in tie remote
possibilitythat tricl~inamaybe
present in the meat, it willbe
killed and the meat v]ill be
safe
toeat.
..
Page 4

..._ ... .
--
.———.. .
!
;
..--.,
,r
\!
1
Page 5
YourBange, likemanyother
.-.—..... ... . . --- -—-.—-—-- -
ho~seholditems,isheavyand
can settleintosoft floor’coverings
suchasCmhioned vinyl or’
carpeting. When movingthe range
onthistypeofflooring,usecare,
andit is recommendedthatthese
simpleand inexpensiveinstructions
befollowed.
The range shouldbe installed on
a sheetofplywood(or similar
material)asfollows:Men
floor covering ends atthefrolzl of
#herange, the area that therange
willreston should be builtup with
plywoodto the same levelor higher
thanthe floor covering.Thiswill
allowthe rangetobe movedfor
cleaningor servicing.
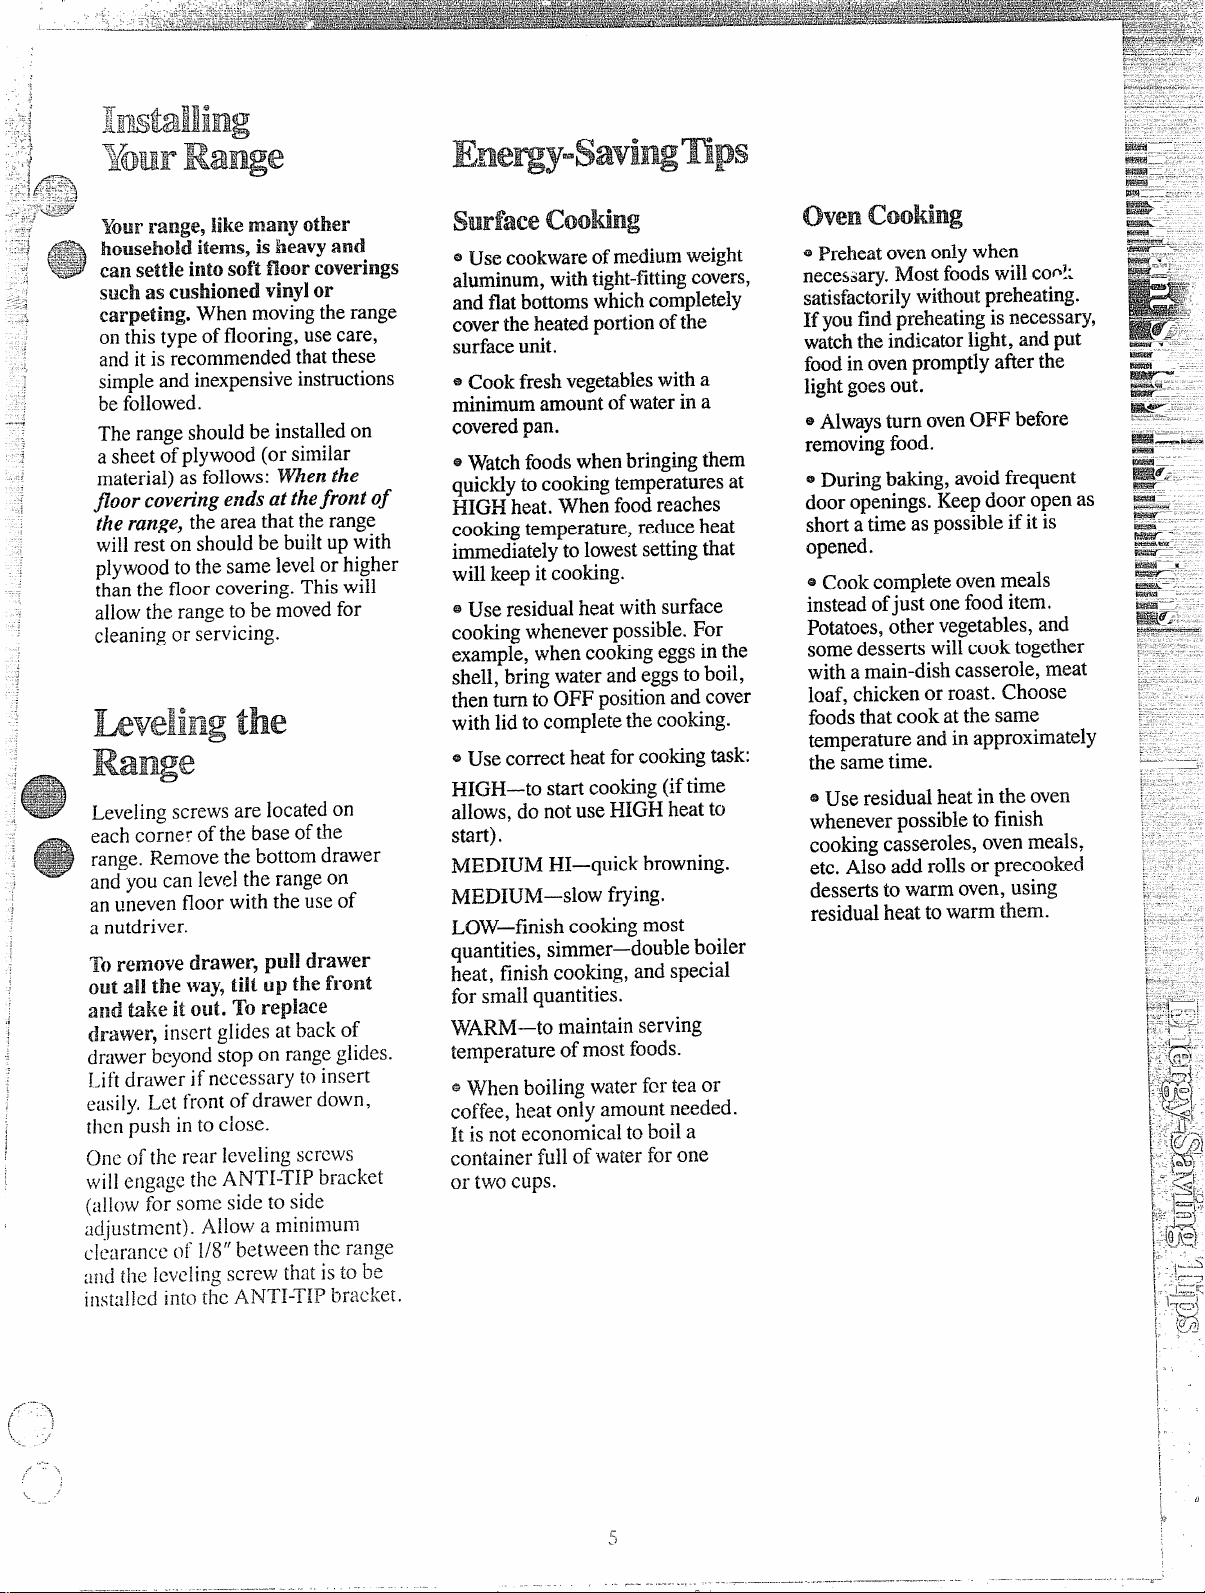
pa% iachco~ner of the base ofthe
.
.’..:,
range. Removethe bottomdrawer
z+=,.
s,.,
:&
and vou can levelthe rangeon
an u;levenfloor with the~se of
a nutdriver.
T()removedrawer, PUI1drawer
out all the way9tilt up the front
.aEldtil{e it out. Toreplace
drawer, insert glides at back of
drawerbeyondstop on rangeglides.
I.ift drawer if necessary ttvinsert
e;~sily.I.et front of drawer down,
then push in to close.
fhe
surfacecooti~lg
@Use cookwareof mediumweight
aluminum,withtight-fittingcovers,
and fiatbottoms which completely
coverthe heatedpo~lionofthe
surfaceunit.
~cook fresh Vegembleswith a
minimumamountof waterina
coveredpan.
~Watchfoodswhen bringingthem
quicMyto cookingtemperaturesat
HIGH heat. When foodreaches
cookingtemperature, reduceheat
immediatelyto lowestsettingthat
willkeep it cooking.
@Use residualheatwithsurface
cookingwheneverpossible.For
example,whencookingeggsin the
shell, bring waterandeggsto boil,
then turn to OFF positionand cover
with lid tocompletethe cooking.
@Use correct heat forcookingtask:
HIGH—tostartcooking~f time
allows,do not use HIGH heat to
start).
MEDIUM HI—quickbrowning.
MEDIUM—slow frying.
LOW—finishcookingmost
quantities, simmer—doubleboiler
heat, finishcooking, and special
for smallquantities.
WARM—tomaintain serving
temperature ofmostfoods.
@When boiling water for teaor
coffee, heat only amountneeded.
It is not economical to boil a
container fullof water for one
or two cups.
ovenCoohg
Preheatovenody when
@
necessary.Mostfoodswillcool:
satisfactorilywithoutpreheating.
If youfindpreheatingisnecessary,
watchthe indicatorlight, ad put
foodinovenpromptlyafierthe
lightgoesout.
~Mwaysturn ovenOFF before
removingfood.
@During baking, avoidfrequent
door openings.Keepdoor openas
shortatime as possibleif it is
opened.
%Cookcomplete ovenmeals
insteadofjust one food item.
Potatoes,other vegetables,and
somedessertswillcook together
with a main-dishcasserole, meat
loaf, chickenor roast. Choose
foodsthatcookatthe same
temperature and in approximately
the same time.
@Use residual heat in the oven
wheneverpossibleto finish
cookingcasseroles, oven meals,
etc. Also add rollsor precooked
dessertsto warm oven,using
residualheat to warm them.
..
..
.,
Page 6
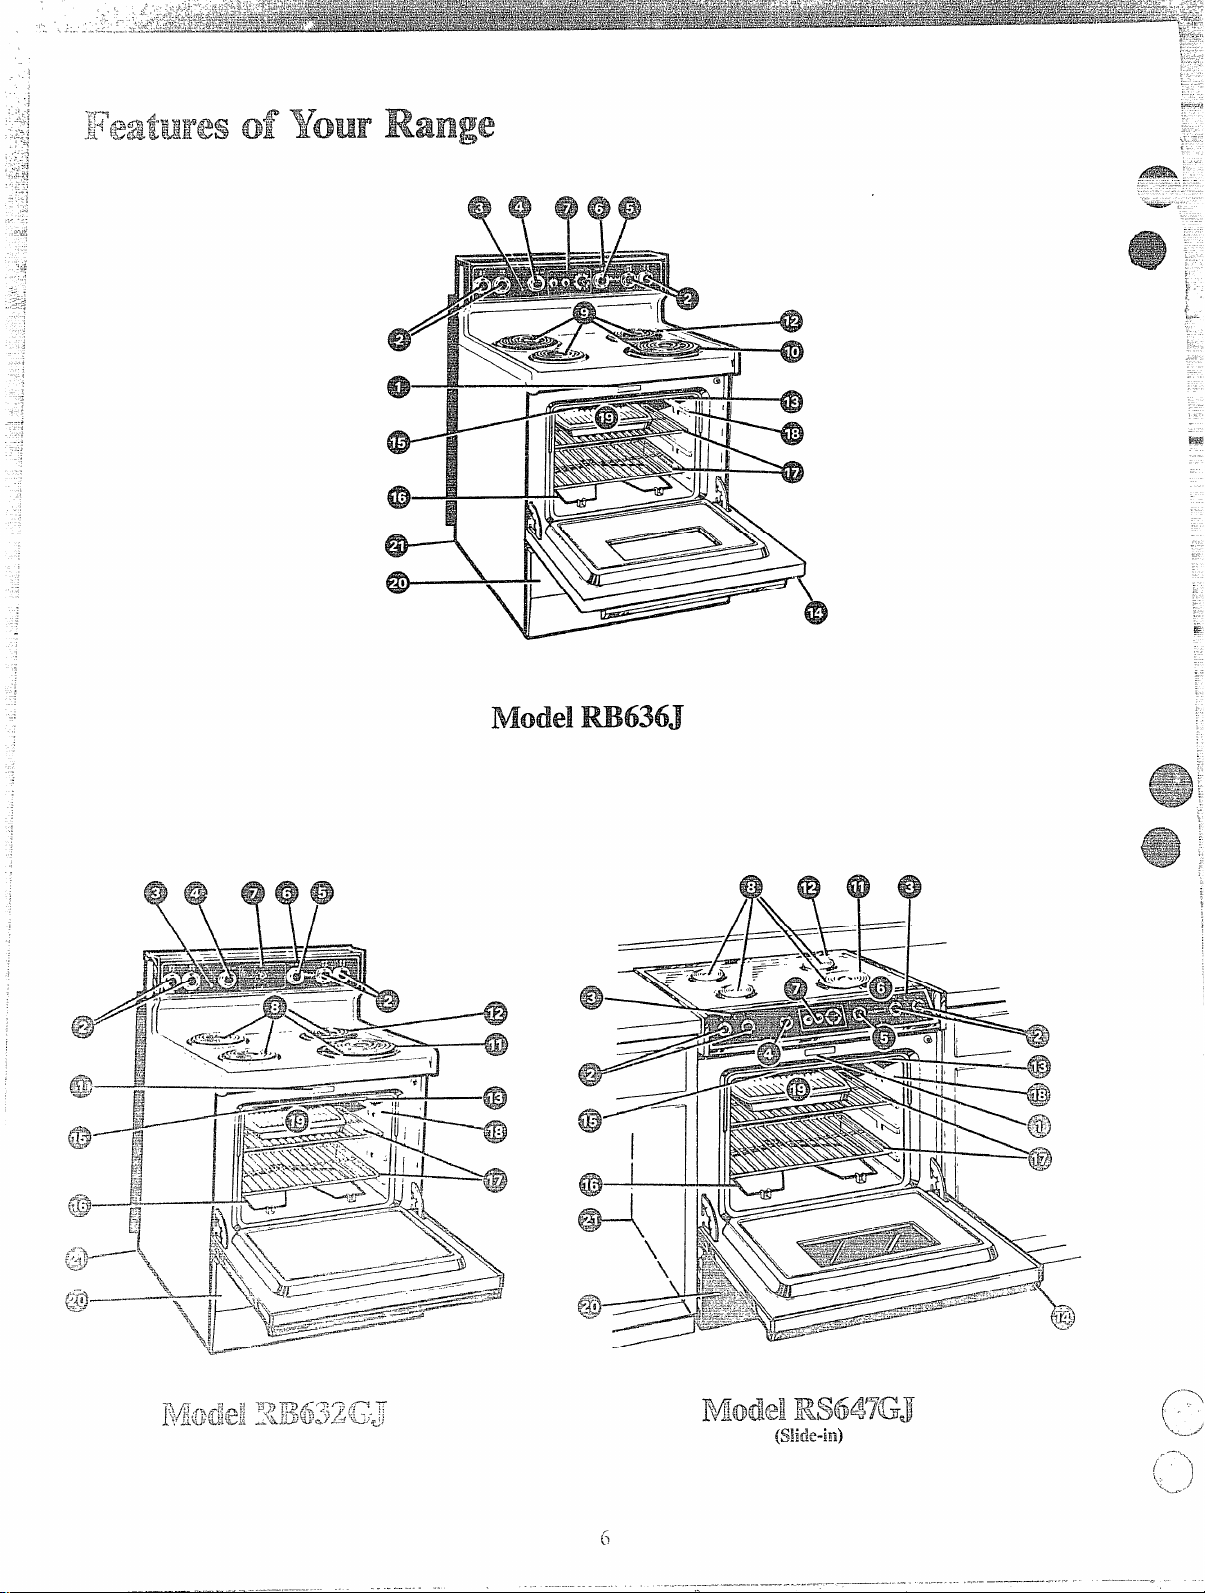
Modelm636J
----
I
r
Page 7
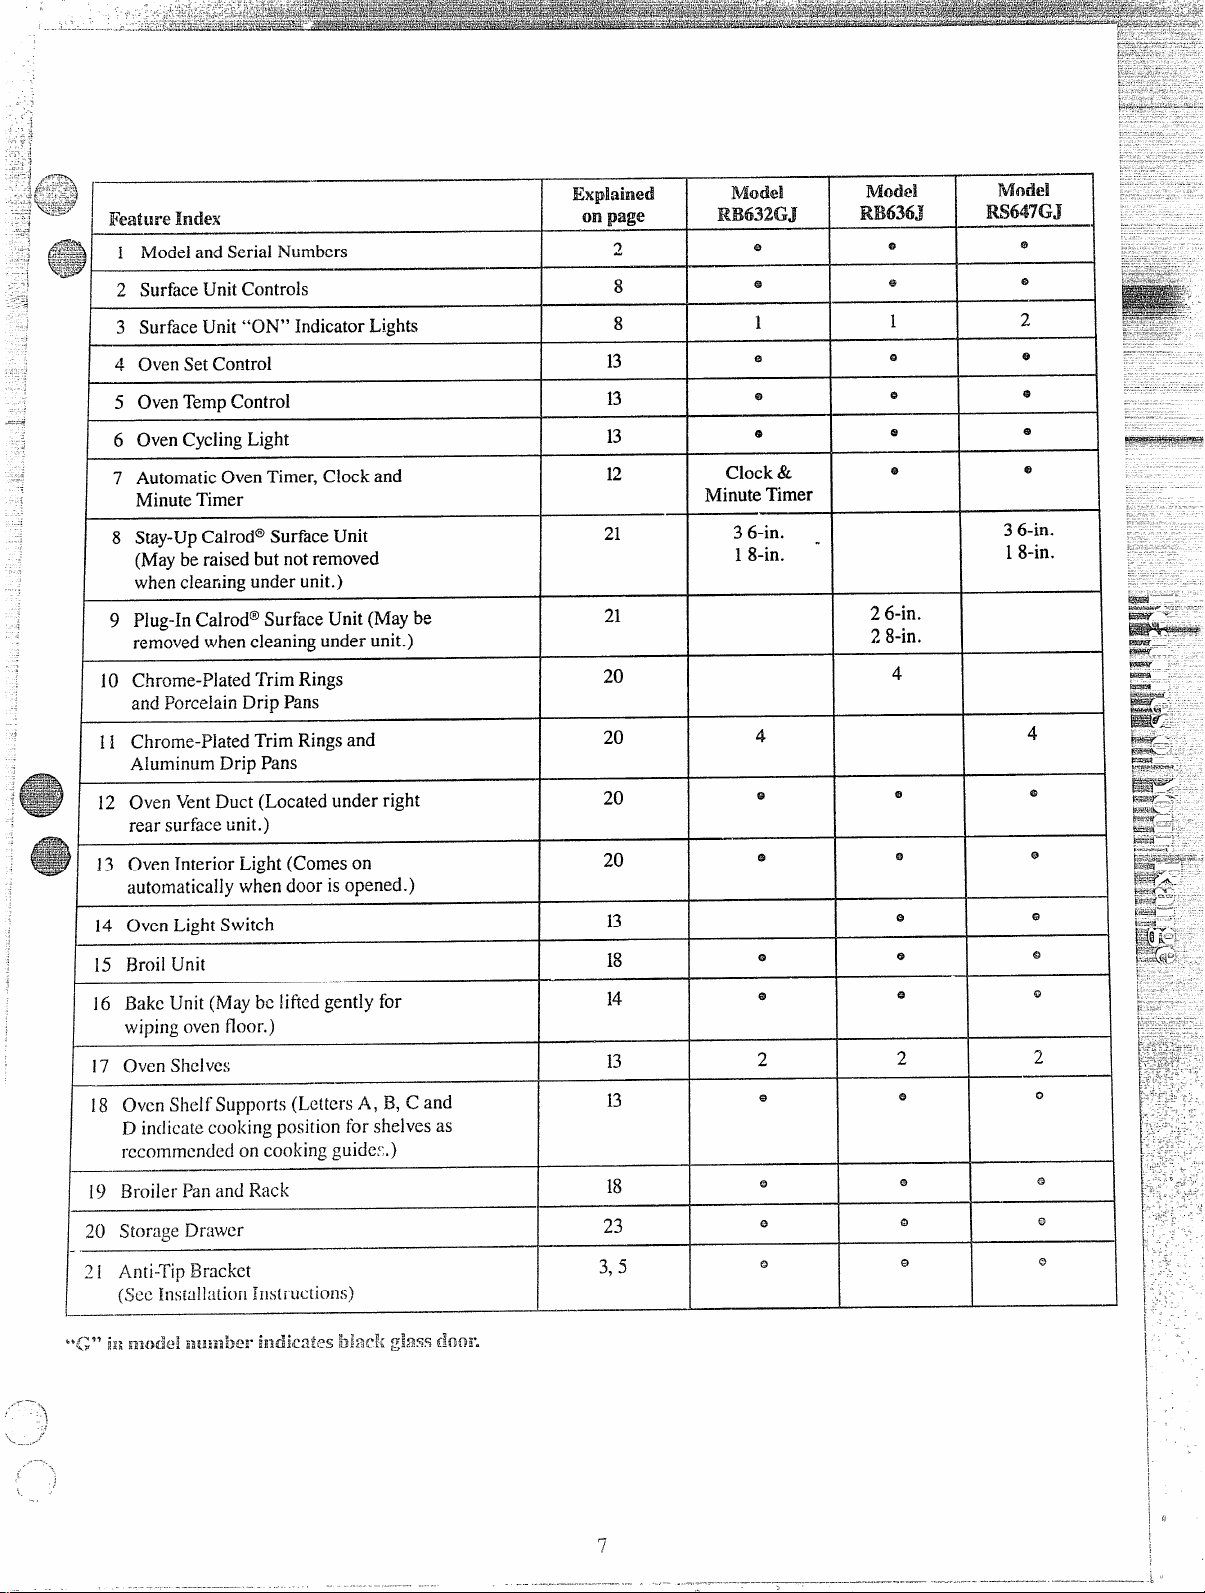
3 SurfaceUnit“ON”IndicatorLights
...
-. —-—...-—. . . . --
....
I
4 OvenSetControl
I
5 OvenTempControl
I
6 OvenCyclingLight
I
7 AutomaticOvenTimer,Clockand
MinuteTimer
I
8 Stay-UpCalrod”SurfaceUnit
(Mayberaisedbut notremoved
whencleaningunderunit.)
9 Piug-InCalrod@SurfaceUnit (Maybe
removedwhencleaningunderunit.)
10 Chrorne-P1atedTrimRings
andPorcelainDripPans
11 Chrome-PlatedTrimRingsand
AluminumDripPans
I
Explained
onpage
8
21
20
Mode!
RB632GJ
Q
I I
I I
I
Model
RB6363
---1
26-in.
28-in.
4
I
Mode]
I
I
36-in.
18-in.
4
12 OvenVentDuct(Locatedunderright
rearsurfaceunit.)
~ i3 OvenInteriorLight(Comeson
automaticallywhendoorisopened.)
14 OvenLightSwitch
15 BroilUnit
i6 BakeUnit(Maybeliftedgentlyfor
wipingovenfloor.)
OvenSheJves
17
OvenShcIfSi]p~)orts(LettersA, B,C and
18
D ir]clicatccookingpositionforshelvesas
recommendedoncool(ingg~id~~.)
19
Broiler Pdn and Rack
20 StorageDrawer
—
14
13
3,5
e
2
0
e
2
Q
.—
Q
2
0
Q
Page 8
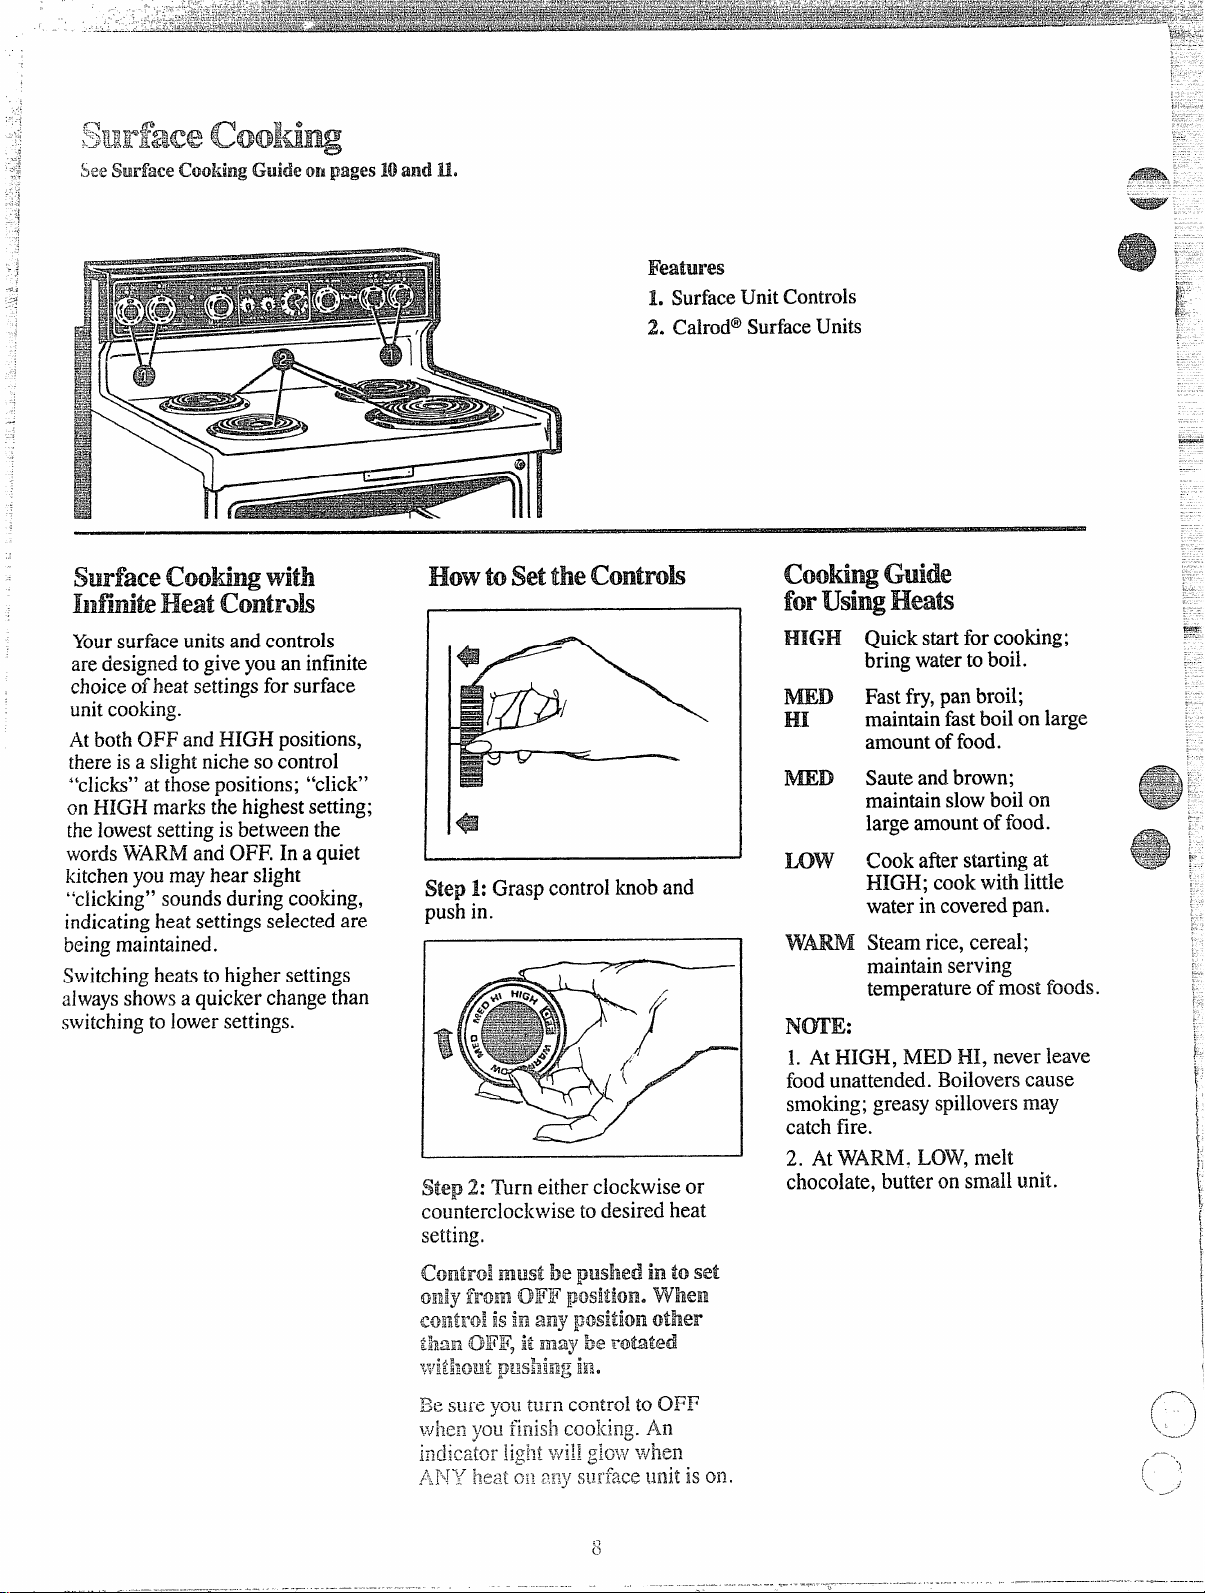
surfacecmHw with
hlrtik HeatControh
Yoursurfaceunitsandcontrols
are designedtogiveyou an infinite
choiceofheatsettingsfor surface
unitcooking.
AtbothOFF and HIGH positions,
thereisa slightniche so control
“clicks” at thosepositions; “click”
on HIGH marks the highestsetting;
thelowestsettingis between the
wordsW-ARMand OFF. In a quiet
kitchenyou mayhear slight
“clicking” soundsduring cooking,
indicatingheat settingsselected are
beingmaintained.
Switchingheats to higher settings
alwaysshowsaquicker change than
switchingto lowersettings.
Features
1. SurfaceUnit Controls
2. Calrod@SurfaceUnits
Step 1: Grasp controlknoband
push in.
mGH
m~
HI
mD
mw
WM Steam rice, cereal;
NmE:
1. At HIGH, MED HI, neverleave
foodunattended. Boiloverscause
smoking; greasy spilloversmay
catch fire.
2. A.tWARM. LOW,melt
chocolate, butter on small unit.
Quick start for cooking;
bring waterto boil.
Fastfry,pan broil;
maintainfastboil on large
amountoffood.
Sauteandbrown;
maintain slowboilon
large amountoffood.
Cook after starting at
HIGH; cook with little
water in coveredpan.
maintain serving
temperature ofmost foods.
Page 9
/%Y_.A. Yes,but only use cookware
‘Z-””
:..’s
---
-_
..-.—-. . ....—. .
—.-...—
—..
. . ..-.. r—
‘.
.
9
“: ~%~designed
-A
C.he;kthe manufack;er’;
for canningDUmOSeS.
instructionsand recipesfor
preservingfoods.Besurecanner
isflat-bottomedand fits overthe
centerofyourCalrod@unit. Since
canninggenerateslargeamountsof
steam, be careful to avoid burns
fromsteamor heat. Canningshould
onlybe done on surfaceunits.
Q. ‘canI
cover’ my drip panstith
foil?
A. No. Clean as recommendedin
CleaningGuide.
on any surface uni@?
A.
Cookwarewithoutflatsurfaces
isnotrecommended.Thelifeof
yoursurfaceunit can beshortened
andthe rangetopcanbedarnaged
fromthehighheatneededforthis
typeofcoobng.
Q. why am I
I need
frommy Unik eventhough
notgettingtheheat
I havetheknobsontheright
setting?
A. After turning surfaceunit off
and making sure it is cool, check to
make sure that yourplug-inunits
are securelyfastenedintothe
surfaceconnection.
A. Becausethe surfaceunitisnot =~--‘-‘-flat. R!akesurethatthe “feet” cn
yourCah-od@unitsare sitting ‘“ tightlyintherangetop indentation
andthe reflectorringisflatonthe =-~’
rangesurface. -
Q. why is the porcelain finish on -&:’ ‘my cookware coming Ofn
H~_,.
E*-
w=z._.:-
----
_=–. -
_.–
—,-
——
--
.—.%.
A. If you setyourCalrod@unit s-<=
higherthan required for the
cookwarematerial, and leaveit, ==
the finish may smoke, crack, pop, ~=~z.
-...
m.-–.
or burn dependingonthepotor
pan. Also, a too highheat for long [ -’---.;periods, and smallamountsofdry
food, maydamagethe finish.
—
-
In surface cooking, the use of pots
extendingmore than l-inch beyond
edgeof surface unit’strim ring is
not recommended. However,when
canningwiti water-bathor pressure
canner, larger-diameter potsmay
be used. This is because boiling
water temperatures (even under
pressure) are no!harmful to
cooktop surfaces surrounding the
surface unit.
HOWEVER, Do 140TUSE
l.ARGE DIAMETER CANNERS
OR~HER LARGEDIAMETER
pm FORF~mG OR B0itD4G
HOQDSQT13ER
Sj/KU~lor Sauce mixturcs-
hloSt
THANVJATHPa.
:~nc~:~11types 0$frying———cook fit
tem~leraturesmuch higher than
lt<]i~i~lgwater. Sl~chtem~pe~atures
(.’lo~ildevellttlallyharm Cool:top
:JLirfilcesSurroundingsurFdcL;{:llitb.
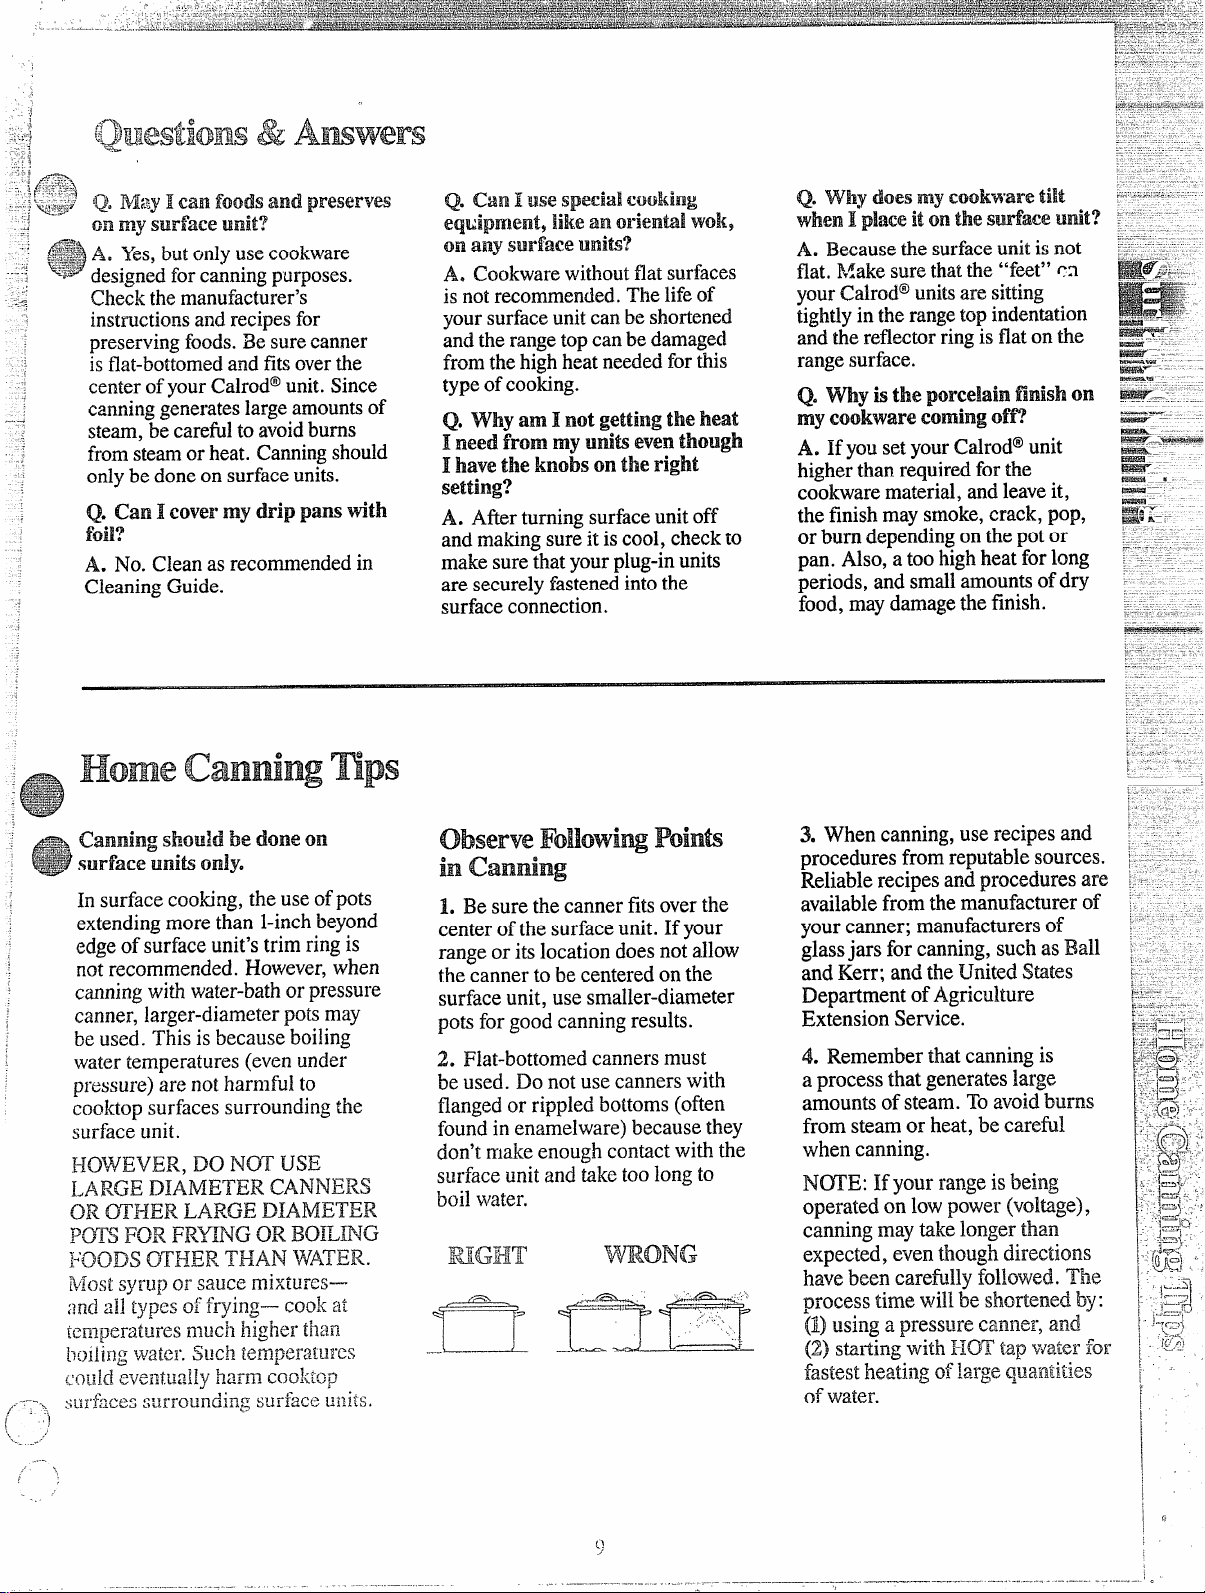
1. Be sure the canner fits overthe
center ofthe surfaceunit. If your
range or its location doesnotallow
the canner to be centered on the
surface unit, use smaller-diameter
pots for goodcanning results.
2. Flat-bottomed canners must
be used. Do not use canners with
flanged or rippled bottoms (often
found in enamelware) because they
don’tmakeenough contact with the
surface unit and take too longto
boil water.
3. Whencanning,use recipesand
proceduresfromreputablesources.
Reliablerecipesandproceduresare
availablefromthemanufacturerof
yourcanner;manufacturersof
glassjarsforcanning,suchasBall
andKerr; andtheUnited States
DepartmentofAgriculture
ExtensionService.
4. Rememberthatcanningis
aprocessthatgenerateslarge
amountsofsteam.Toavoidburns
fromsteamorheat,becarefil
whencanning.
N~E: Ifyourrangeisbeing
operatedonlowpower(vol~ge),
canningmaytakelongerthan
expected,eventhoughdirections
havebeencarefilly followed.The
processtimewillbe shortenedby:
~) usingapressurecanner,and
(z) starting
fastestheating of large qua~~titie~
of water.
with HOT tap %VaterfO~
, ..
,
!
!
Page 10

1. Use medium-or heavy-weight
.,.—
—.
.—
——.—- -. .-
... ......——
2. Toconservethe mostcooking
cookware.Aluminumcookware energy,pansshouldbe flatonthe
conducts heat faster thanother
metals.Castironand coatedcast
ironcookwareis slow to absorb
bottom,havestraight sidesandtight
fittinglids. Matchthesizeof the
saucepanto the size of the surface
heat, butgenerallycooksevenlyat unit. Apanthatextendsmorethan
LOWor MED settings.Steelpans an inch beyond the edgeofthe trim
maycookunevenlyif notcombined ringtrapsheatwhichcauses
wi~h othermetals.-
dis~olo~ationrangingfromblueto
dark gray on chrometrim rings.
3. DeepFatFrying. Do not overfill
kettlewith fattiat mayspillover
whenaddingfood.Frosty foods
bubblevigorously.Watchfo~tis
fryingatHIGH temperaturesand
keeprangeand ]~oodclean from
accumulatedgrease.
‘v
::.
..
[i
-
Food
Cereal
Cornmeal,grits,
oatmeal
‘cocoa
coffee
Eggs
Cookedinshell
Friedsunny-side-up
Poached
Scrambledoromelets
Fruits
Nieats,l~o!!itry
Br:]iscd:Potroastsof
beef,lamborveal:
porksteaksand
chops
Fon-fried:Tender
chops;[binstc:d<sup
to
S/<--iiiCh: iiliTIUtC
l)ami~urgrrs;
St~~!liS;
ffiiilkS i?ii[l s:itlsage;
Ihiil fiSh fillCt!i
____ .. . ..._ —.——-. ””...—
Cookware
Covered
Saucepan
~~cov~red
Saucepan
Percolator
Covered
Saucepan
Covered
Skillet
Uncovered
Skillet
Covered
Skillet
Uncovered
Siiillc[
Covered
Saucepan
Covered
Skillet
Uncovcrcd
Sl<ille[
DirectionsandSetting
toStart Cooking
HIGH.Incoveredpan
bringwatertoboilbefore
addingcereal.
HIGH.Stirtogetherwater
ormilk,cocoaingredients.
Bringjusttoaboil.
HIGH.Atfirstperk,
switchheattoLOW.
HIGH.Coverens with
coolwater. Coverpan,
cookuntilsteaming.
MEDHI.Meltbutter,add
eggsandcoverskillet.
HIGH.Meltbutter.Friedovereasy
HIGH.Incoveredpan
bringwatertoaboil.
HIGH.Heatbutteruntil
lightgoldenincolor.
HIGH.Incoveredpan
bringfruitandwaterto
boil,
HIGH,Meltfat,thenadd
meat,SwitchtoMEDHIto
brownmeat,Addwateror
otherliquid.
SettingtoComplete
cooking
LOWorWARM,thenadd
cereal.Finishtimingaccording
topackagedirections.
MED,tocook1or2 minutes
tocompletelyblendingredients.
LOWtomaintaingentlebut
steadyperk.
LOW.Cookonly3to4
minutesforsoftcooked;
15minutesforhardcooked.
ContinuecookingatMEDHI
untilwhitesarejustset, about
3to5moreminutes.
LOW,thenaddeggs.When
bottomsofeggshavejustset,
carefullyturnovertocook
otherside.
LOW,Carefullyaddeggs.
Cookuncoveredabout5
minutesatMEDHI.
MED.Addeggmixture.
Cook,stirringtodesired
doneness.
LOW.Stiroccasionallyand
checkforsticking.
LOW.Simmeruntilfork
tender.
MEDHIor MED.Brownand
cooktodesireddoneness,
turningoverasneeded.
comments
Cerealsbubbleandexpandas
theycook;uselargeenough
saucepantopreventboilover.
Milkboilsoverrapidly.Watchas
boilingpointapproaches.
Percolate8to 10minutesfor
8 cups,lessforfewercups.
Removecookedeggswithslotted
spoonorpancaketurner.
Eggscontinuetosetslightlyafter
cooking.Foromeletdonotstir
lastfewminutes.Whenset, fold
inhalf.
Freshfruit:Use 1/4to 1/2cup
waterperpoundoffmit.
Driedfruit:Usewateraspackage
directs.Timedependsonwhetl~er
fruithasbeenpresoaked.Ifnot,
allowmorecookingtime.
Meatcanbe seasonedandfloured
beforeitisbrowned,ifdesired.
Liquidvariationsforflavorcould
bewine,fruitor tomatojuiceor
meatbroth.
Timing:Steaks1to2-inches:1to
2hours.BeefStew:2to3 hours. .
PotRoast:21Ato4 hours.
%n fryingisbestforthinsteaks
andchops.If rareis desired,preheatskilletbeforeaddii~gmeat.
—.- —-
r---- ,
(-‘1
\<_e,./
...
.r~’
1 ‘),
.,
.
B
Page 11

!! ----
j
‘--+;~--—’=
.,,..—,-,..
.:
( .:
,.. ....
...
.-
Pood
FriedChicken
% friedbacon Uncovered
Sauteed:Lesstender
thinsteaks(chuck,
round,etc.);liver;
thickorwholefish
Simmeti orstewed
meat;chicken;cored
beefismokedpork;
stewingkfi tongue;
etc.
MeltingChoeoIa&,
butter,marshmdBows
Wm
Noodlesorspaghetti
Frozen
.1
~ ...———-
.
. ——
Covered
Skillet
Skillet
Covered
Skillet
Coved
DutchOven,
Kettle or
Large
Saucepan
Small
Uncovered
Saucepan.
Usesmall
surface unit
Skilletor
Griddle
Covered
LargeKettle
]rFot
‘ressure
:ookeror
~anner
Jncovered
iaucepan
;overed
iaucepan
:overed
aucepan
Uncovered
Skiilet
Covered
Saucci~2n
HIGH.Melt fat.Switchto
MEDHItobrownchicken.
HIGH.Incoldskillet,arrange
baconslices.Cookjust
untilstartingtosinle.
HIGH.Meltfat.Switchto
MEDtobrownslowly.
HIGH.Covermeatwithwater
andcoverpanorkettle.
Cookuntilsteaming.
wm. Allowmto15minutesto
meltthrough.Stirtosmooth.
MEDHI. HeatskilletSto
[0minutes.Greaselightly.
HGH.Incoveredkettle,bring
altedwatertoaboil, uncover
nd addpastaslowlyso
oilingdoesnotstop.
IIGH.Heatuntilfirstjiggleis
card.
[IGH.Bringjusttoboil.
[IGH.Mcasum1/2to 1inch
ater insaucepan.Add
dtandpreparedvegetable.
Incoveredsaucepanbring
[oboil,
HIGH.Measurewaterandsalt
asabove,Addfrozenblock
ofvegetable.Incovered
saucepanbringtoboil.
~IGH.Inski!letmeltfat.
SettingtoComplete
cooking
LOW.Coverskilletand
cookuntiltender.
Uncoverlastfewminutes.
MEDHI.Cook,turning
overasneeded.
LOW.Coverandcook
untiltender.
LOW,Cookuntilfork
tender.(Watershould
slowlyboil).Forverylarge
loads,mediumheatmay
beneeded.
Cook2to3tinua ~r side.
MEDHI.Cookuncovered
untiltender.Forlarge
amounts,HIGHmaybe
neededtokeepwaterat
rollingboilthroughout
entirecookingtime.
MEDHIforfoodscooking
10minutesorless.MEDfir
foodsover10minutes.
LOW.Tofinishcooking.
MED.Cook1pound10
to30 or moreminutes,
dependingontenderness
ofvegetable.
LOW.Cookaccordingto
timeonpackage.
MED.Addvegetable.
Cookuntildesired
[enderncssisreached.
WARM.Coverandcook
~ccordingtotime.
Forcrispdrychicken,coveronly
afterswitchingtoLOWfor10
ininuu.Uncoverandcook,turning
occasionally10to20minutes.
AInoreattention-freemethod
istostartandcookatMED.
Meatmaybebreadedor
marinatedinsaucebeforef~ing.
Addsaltorotherseasoning
beforecookingifmeathasnot
beensmokedorotherwise
cured.
Whenmeltingmarshmallows,add
milkorwater.
Thickbattertakesslightlylonger
time.fim overpancakeswhen
bubblesrisetosurface.
Uselargeenoughkettieto
preventboilover.Fastadoubles
insizewhencooked.
Cookershouldjiggle2 to3times
perminute.
Stirfrequentlytoprevent
sticking.
Uncoveredpanrequiresmore
waterandlongertime.
Breakuporstirasneededwhile
cooking.
firn overorstirvegetableas
necessaryforevenbrowning.
TripleinvolumeafFercooking.
~lmeat WARM.Rice:1cuprice
and2 cupswates—25minutes.
Grits:1cupgritsand4 cups
water—40minutes.
.— .—.
Page 12

Theautomatictimer andclockon
yourrangearehelptil devices that
serveseveralpu~oses. The knob
locationson somerangemodels
mayvaryand will look likeoneof
thetwo setsoftimers below.
rvlodels:RB636J, m647GJ
Tosetclock
TOSET THE CLOCK, ~US~ ~~~
c~~$~~ ~~0~
handsto thecorrect time. (The
,MinuteTimerpointer will move
also,let knob out, turn the Timer
pointerto OFF.)
To set Minute mmer
TheMinute ‘Timerhas been
combinedwith the range clock.
Useit to time allyour precise
cookingoperations. You’ll
recognizethe Minute.Timer as the
pointerwhich isdifferent in color
and shape than the clock hands.
TOSET’ THE MINUTE TIMER,
[urnthe center knob, without
pushing in, untilpointer reaches
number of minutes you wish to
time. (Minutesare marked, up to
60,in the center ring on the clock.)
.At the end of the set time, a buzzer
s~~undsto tell you time is up. Turn
knob,witl~outpnshing in, until
p~>interreaches OFF and buzzer
stops.
in and turn theclock
m~~B~k~US~S
Automaticmlmel”
UsingAutomaticTimer,youcan
TIME BAKEwiththeoven starting
immediatelyand turningoffatthe
StopTimesetor setbothDELAY
START(somemodelsmaysay
START)and S~P dialsto
automaticallystartand stop oven
at a latertime ofday.It takes the
worry outofnotbeinghome to
start or stoptheoven.
Settingthedids for TIME BAKE
isexplainedindetailon page 14.
Model B632GJ
Clock and Minute Timer
This modelhas a time ofdayclock
and minutetimer but does not have
STARTand S~P dialsneeded for
TIME BAKE function.
QuestiomaRdAmwers
Q.How can HIIsemy MintBte
mnler
b make Rmysurface
Coo]iingeasier?
A. YourMinuteTimerwillhelp
timetotalcookingwhichincludes
timetoboilfoodand change
temperatures.Do notjudgecooking
timebyvisiblesteamonly.Food
willcookin coveredconhiners
eventhoughyoucan’tsee any
steam.
Q. Must the Cloelkbe set on
correct time of day when I wish
to use the Automatic Timer for
baking?
A. Yes,ifyouwish to setthe
DELAYSTARTor STOPdialsto
turn on and off at set times during
timedfunctions.
Q. can I use the Minute Timer
during oven Cooking?
A. TheMinuteTimer can be used
during any cookingfunction. The
AutomaticTimers(DELAYSTART
and S~P dials) areused with
TIME BAKE functiononly.
Q. Can I change the clock while
I’m Time cooking in the oven?
A. No. The clockcannotbechanged
during any programthat uses the
oventimer. Youmust either stop
thoseprograms or wait untilthey
are finishedbeforechangingtime.
Page 13

... ....-.._..L-
. . .
.,
r___._.,.....--
}or~heiutomatic OvenTimerso
youunderstanditsusewiththe
controls.
2. Checkoveninterior. Lookat
theshelves.T&ea practicerun at
removingandreplachgthemproperly,
togivesure, sturdy support.
3. Read over informationandtips
that follow.
4. Keepthisbookhandysoyoucan
referto it, especiallyduringthe
firstweeksof gettingacquaintd
with yourrange.
ovenInteriorShelves
The shelves are designedwith
stop-lockssothatwhen placed
eorrwtly on the shelfsupports,
they(a)will stopbeforecoming
completelyfrom the oven, and (b)
willnot tilt when removingfood
fromor placingfoodon them.
~ MMO~ a shelf from the
oven,lifi up rear ofshelf, pull
forwardwith stop-locksalongtop
ofshelfsupports.Be certain that
shelfiscoolbeforetouching.
~ ~PLACE a shelfin oven,
insertshelfwithstop-locks resting
on shelfsupports.Push shelf
towardrear ofoven;it will fall into
place.When shelfisin proper
position, stop-lock on shelfwill
run under shelfsupportwhen shelf
ispulledforward.
—.-.
..-
.—.——-----.
.
z
—-
u]
=
Thelightcomeson automatically
whenthedoorisopened.Onmodels
withovenwbdowuseswitchtoturn
lightonandoffwhendoorisclosed.
Switchislocatedonfrontofdoor.
shelf Positiom
The ovenhas four shelf supports
marked A (bottom), B, C and D
(toQ).Shelfpositions for cooking
fod~are sug~estedon Baking,
Roastingand Broiling pages.
!
I
—_
Page 14

\Vhencookinga foodforihefirst
.,
..—..... .. .. .
~
!.
1
[
<
[
~
1
1
I
t
[
~
~
k
,
t
i
/“--’-”~
———----------...... . -.
---- .-——————-—-
tirnciliyour newoven,usetime
givenonrecipesasaguide.Oven
thermostats,overaperiodof’years,
may“drift” fromthefactorysetting
ailddifferencesintimingbetween
an old and a newovenof5to 10
mifiutesarenotunusualandyou
maybe inclinedtothink thatthe new
ovenis notperformingcorrectly.
However,yournewovenhasbeen
setcorrectly at the factory and is
moreaptto be accurate thanthe
ovenit replaced.
HowtosetYourRa@e
forBaking
Step 1: Place foodin oven,being
certain to leave about 1inchof
spacebetweenpans and wallsof
ovenforgoodcirculationofheat.
Close ovendoor. During baking,
avoidfrequent door openings to
preventundesirableresults.
Step 2: Turn OVEN SET knob to
BAKEand OVENTEMP knobto
temperature on recipe or on Baking
Guide.
Ste~Is: Check food f(]rcioneness
:~tI]]inimunltime on rccipc. Cook
longerif necessary. .Switchoff heat
:irld
removefood:;.
thatyouset. ExamplesofImmediate
Start(oventurnsonnowand you
setittoturn offautomatically)or
DelayStartandStop(settingthe
oventoturn on automatically at a
latertimeandturnoffatapreset
stoptime)will be described.
How h *t hetiak
SW” and Automatic stop
N~E: Beforebeginning,make
surethehandsoftherange clock
showthecorrect timeofday.
ImmediateStartissimplysetting
ovento startbakingnowand turning
offat a later time automatically.
Remember, foodscontinue cooking
afier controls are off.
Step 1:Toset StopTime, push in
knobon STOP dial and turn pointer
to time you want ovento turn off;
for example6:00. The DELAY
STARTdial (some models may say
START)shouldbeat the same
positionas the timeofdayon clock.
Step 1:Toset starttime, push in
knobon DELAYSTART dial(some
modelsmay saySTART)and turn
pointertotimeyouwantovento
turn on, for example3:30.
Step 2: Toset StopTime, push in
knob on STOPdial and turn pointer
to time you wantovento turn off,
for example6:00.This means your
recipecalled fortwoand one-half
hours ofbakingtime.
N~E: Time on STOP dial must
be laterthan time shownon range
clock and DELAY STARTdial.
Step 3: Turn OVEN SET knob to
TIME BAKE. Turn OVEN TEMP
knob to 250°F.or recommended
temperature.
Place food in oven, close the door
and automatically the oven will be
turned on and off atthe times you
haveset. Turn OVEN SET to OFF
and remove food from oven.
OVEN INDICATOR LIGHT(s) at
TIME BA=I<Esetting may vvork
differently than ~heydo at BA.KE
setting+Carefully recl]cc}<the ste~~s
oiven above=Ifall operations ~~e
~one as explained+oven will
operate as it sho~~ld.
*an modelseqtlip~ued~JvitYJ
~~fi~~~p~]~~e
(“l
it
=.-_-
/...
‘)
i...,’
\
i
I
}
1
“.
Page 15

results,werecommenddullbottom
..____ ——___________..-,____
.._._
surticesforc&e pansand pieplates.
browningofsomefoodscan be
achievedbypreheatingcast iron
cookware.
minutes.Forfetidwithshoti
cookingtimes,preheatinggives
bestappearanceandcrispness.
4. Opentheoven door to check
foodaslittleas possibleto prevent
u~levenheatingaridto saveenergy.
Food
Bread
Biscuits(M-in.thick)
Coffeecake
Cornbreadormuffins
Gingerbread
Muffins
?opovers
~uickloafbread
<eastbread(2loaves)
‘lainrolls
;akes
withoutshortening)
-ngelfood
Iellyroll
Sponge
:akes
3undtcakes
Zupcakes
:ruitcakes
,ayer
,ayer,chocolate
oaf
ookies
rownics
rop
;frigcrator
~llcdor sliced
‘~lits,
iher Desserk
Ikedapples
]s(ard
ddings,Rice
i Custard
,‘.
i-l
.
-lZcn
———
Container comments
ShinyCookieSheet
ShinyMetalFanwith
satin-finishbottom
CastIronorGlass
ShinyMetaiPanwith
satin-finishbottom
ShinyMetalMuffinPans
DeepGlassorCastIronCups
Metal orGlassLoafPans
MetalorGlassLoafPans
ShinyOblongorMuffinPans
ShinyOblongorMuffinPans
AluminumTubePan
MeulJellyRollPan
MetalorCeramic%n
MetalorCeramicPan
ShinyMetalMuffinPans
MetalorGlassLoafor
f’ubePan
~hinyMe~llR~nwith
;atin-finishbottom
ihinyMetalPanwith
atin-finishbottom
dctalorGlassLoafP~ns
detalorGlass%ns
;ookieSheet
CookieSheet
CookieSheet
GlassorMetzlPan
GlassCusfi?rdCupsorCasserole
(setinpanofho~water)
GlassCustardCupsor
Casseroie
Sheif
Position
B,C
B,A
B
B
A,B
B
B
A,B
A,B
B,A
A
B
A
A,B
B
A,B
B
B
B
B,C
B,C
B,C
B,C
A, B,C
B
B
A
B,.4
A. B
B
B
Oven
Temperature
400°-4750
350”-400°
400”-450”
350°
400°-4250
375°
350°-3750
375”-425°
375”-425°
350°-3750
325”-375”
375°-4000
325°-3500
325°-3500
350°-3750
275°-3000
350°-3750
350°-3750
350°
325°-3500
350°-4000
400°-4250
375°-4000
350°-4000
300°-3500
325°
400°-4250
325°-3500
4~”-4~5”
400°-4250
450°
I
mrme,
Minu&s
15-20
20-30
20-40
45-55
20-30
45-60
45-60
45-60
10-25
20-30
30-55
10-35
45-60
45-65
20-25
2-4hrs.
20-35
25-30
40-60
25-35
10-20
6-12
7-12
30-60
30-60
50-90
4.5-70
15-25
40-60
40-60
12-15
6~-90
30-60
30-75
Canned,refrigeratedbiscuitstake
2to4minuteslesstime.
Preheatcastironpanforcrispcrust.
Decreaseabout5minutesformuffin
mix,orbakeat450T.for25 minutes,
thenat350°F.for10to15minutes.
Darkmetal orglassgivedeepest
browning.
Forthinrolls,ShelfBmaybeused.
Forthinrolls.ShelfBmavbeused.
Two-piecepanisconvenient.
Linepanwithwed paper.
Paperliners producemoremoist
crusts.
Use3W”F.andShelfBforsmallor
individualcakes,
Barcookiesfrommixusesametime.
UseShelfCandincreasetemp.
25°F.to50°F,formorebrowning.
Reduceten~p.to300°F.forlarge
custard,Cookbreadorricepudding
withcustardbase80to90minutes.
Largepiesuse400”F.andincrease
time,
Toquicklybrownmeringue,use
400°F.for8m 10minutes.
Cusmrdfillingsrequirelower
temperah3re,longertime.
—,
Increasetimeforlargeamottnt
orsize.
———
————.
.. ..
-—. ......——-
1 ,,
--—. .... .
Page 16

..
————.........-—— .—.-
Iloastingiscookingbydry heat,
Tendermealorpotiltrycanbe.
roasteduncoveredin youroven.
Roastingtemperatures,which
shouidbelowandsteady,keep
spatteringtoaminimum.When
roasting,itisnotnecessary to
sear,baste,coveror addwater
toyourmeat.
Roastingisreallyabaking
procedureusedformeats.Therefore,
O},encontrolsare settoBAKEor
TIME BAKE. (Youmayheara
slightclickingsound, indicatingthe
ov~nisworkingproperly.)Roasting
iseasy;just followthese steps:
Step 1:Checkweightofmeat, and
place, fatsideup,onroastingrack
inashaIlowpan. (Broilerpanwith
rack isagood pan for this.) Line
broilerpan withaluminumfoilwhen
usingpanformarinating, cooking
with fruits, cooking heavilycured
meats,or for bastingfoodduring
cooking.Avoidspillingthese
materialsonovenliner ordoor.
Step 2: Place inovenon shelf in
Aor Bposition. No preheating is
Ilecessary.
Step 4: Mostmeatscontinueto
cook slightlywhile standing, afier
beingremovedfromtheoven.
Standingtime recommendedfor
roastsis 10to 20minutesto allow
roastto firm upandmakeiteasier
to carve. Internaltemperaturewill
riseabout5° to 10”F.;to compensate
for temperaturerise, ifdesired,
removeroastfromovenat 5°to 10”F.
lessthantemperatureonguide.
N~E: YoumaywishtouseTIME
BA=, as describedonpage 14, to
turn ovenon andoffautomatically.
Remember that food willcontinue
to cookin the hot ovenand therefore
shodd be removedwhenthedesired
internaltemperaturehasbeen
reached.
For mozen Roask
~Frozenroastsofbeef, pork,
lamb, etc., can be startedwithout
thawing,butallow 10to 25 minutes
per pound additiond time (10
minutesper pound for roasts under
5 pounds, more time forlarger
roasts).
~Thaw most frozenpoultry before
roastingto ensure evendoneness.
Some commercial frozen poultry
can be cooked successfullywithout
thawing. Follow directions given
on packer’s label.
Questiow& Answers
Q.k it necessary$0cheekfor
donenesswithanlmtthermonn@&r?
A. Checkingthe finishedinternal
temperatureat thecompletionu~
cookingtimeisrecommended.
TemperaturesareshownonRoasting
Guideonoppositepage. For roasts
over8lbs., cooked at 300”F.with
redud time,checkwiththermometer
athalf-hourintervals after half the
timehaspassed.
Q. why ismy roast crumbling
when I try to carve it?
A. Roastsare easierto sliceif
allowedto cool 10to20 minutes
afier removingfrom oven.Be sure
tocut acrossthe grainofthemeat.
Q. Do I need.to preheat my
oveneach time 1cook a roast
or poultry?
A. It is rarely necessary to preheat
your oven,only for very small
roasts, whichcook a shortlength
of time.
Q. When b~~yinga roast, are
there anyspecialtipsthatwould
help me cook it moreevenly?
A. Yes.Buya roast as even in
thicknessas possible, or buy rolled
roasts.
Q. Can I sealthe sides of my foil
‘6tent99when roasting
A. Sealingthe foil will steam the
meat. Leavingit unsealedallowsthe
air to circulate and brown the meat.
a turkey?
Page 17

1.Position ovenshelfat Bfor
,,
---- .. . .. .
srnail-size roasts (3 to 7 Ibs.) and
atA forlargerroasts.
2. Placemeatfat-sideup, orpoultry
breast-sideup, onbroilerpanor
other shallow pan with trivet. Do
notcover.Do not stuffpoultryuntil
just beforeroasting. Use meat
..
thermometerfor more accurate
doneness. (Do notplace than temperature on guide.
3. Removefatanddrippings as
necessa~y.Basteas desired.
4. Stindi~~g
timerecommendedfor
roas~is 10to20minutestoa?.lowroast
to firm up and make it easier to
carve. Internaltemperaturewillrise
about5“to 10”F.;tocompensatefor
temperaturerise, ifdesir~, remove
roast from ovenat 5°to 10”F.less
5. Rozen
conventionallyroastedbyadding
10to25minutes per pot
timethangiven
refrigeratedroa~~. ~~wiJ
perpoundforroastsund~
Defrostpoult~ beforer-.-,.....=.
roas@canbe
thermometerin stuffing.)
Oven
WP
Tern~rature Donenms
Meat
Tendercuts;rib,highqualitysirlointip, 325° Rare:
rumportopround*
Medium:
WellDone:
LambLegorbone-inshoulder*
325°
Rare:
Medium: 25-30
Well Done: 30-35
Vealshoulder,legor loin*
Porkloin,riborshoulder*
Ham,precooked
Ham,raw
325°
325°
325° ToWarm:
325°
*porbonelessro]ledroastsover6-inchesthick,add5to 10minutes
mll!try
;hickenorDuck
Zhickenpieces
~rkey
325°
375° WellDone:
325° WellDone:
Well Done: 35-45 30-40
Well Done:
Well Done:
perpoundtotimesgivenabOVe.
Well Done: 35-40 30-35
ApproximateRoostingTime,
inMinutespr Wund
3toS-lbs.
24-30
30-35
35-45
21-25
6to8-lbs.
18-22 130°-1400
22-25
28-33
20-23 130°-1400
24-28
28-33
In&rna]
Tempemture“E
150°-1600
170°-1850
150°-1600
170°-1850
170°-1800
35-45 30-40
170°-1800
10minutesperpound(anyweight) 125°-1300
Under10-Ibs.
20-30 17-20
3
to5-lbs.
10to M-lbs.
170°
Over5-lbs.
185°-1900
35-40
10to15-lbs. OverB-lbs.
20-25
15-20
185°-190°
Inttigh:
185°-190°
/- .-
-,
-... -----
\
~.- -
‘>,
,’
‘.
~
/
I
Page 18

Broilingis cookingfoodbyintense
(K-
“’
.“ -
—. —..._ .
radiantheatfromtheupperunitin
theoven. Most fishandtendercuts
of meatcanbe broiled.Followthese
stepstokeep spatteringand
smokingtoaminimum.
Step 1:lfmeat hasfat or gristlenear
edge,cutverticalslashes through
bo[habout2“apart.Ifdesired,fat
maybetrimmed, leavinglayer
about1/8”thick.
Step2:Placemeatonbroilerrack
inbroilerpanwhichcomeswith
range.Alwaysuserack sofatdrips
intobroilerpan; otherwisejuices
maybecomehotenoughtocatchfire.
S@p3:~sition shelfonrecommended
shelfpositionassu~ested inBroiling
Guideonpage 19.Mostbroilingis
doneon C position, but ifyourrange
isconnect;d to208volts,youmay
wishto usehigherposition.
II
Step 6: firn foodonlyonceduring
cooking.Timefoodsforfirstside
perBroiling Guide.
Turnfood,thenuse timesgivenfor
secondsideasaguidetopreferred
doneness.(Wheretwothicknesses
andtimesare giventogether,use
firsttimes given forthinnestfood.)
Step%TurnOVENSETknob
toOFF.Servefood immediately,
andleavepan outsideovento cool
duringmealforeasiestcleaning.
use ofAIuminumFoil
Questiom&bwers
Q.why should I leavethedoor
Closedwhen broiling chicken?
A. Chickenistheonly food
recommendedforclosed-door
broiling.Thisisbecausechickenis
relativelythickerthanotherfoods
youbroil. Closingthedoorholds
moreheat in the oven,which
allowschickentocookevenly
throughout.
Q. when broiling, is it nwwsary
to alwaysuse a rackinthe pan?
A. Yes.Using the rack suspends
the meat overthepan. Asthemeat
cooks, thejuices fallintothepan,
thuskeepingmeatdrier. Juices
are protectedbytherack and stay
cooler, thus preventingexcessive
spatierand smoking.
Q. Should 1saltthe meat before
broiling?
A. No.
and allowsthemtoevaporate.
Alwayssalt after cooking.Tum
meat with tongs;piercingmeat
with a fork also allowsjuices to
escape. When broilingpoultry
or fish, brush each sideoften
with butter.
Saltdrawsouttie juices
Siep4:Leavedoorajarafewinches
(exceptwhen broilingchicken).
Thedoorstaysopen by itself,yetthe
propertemperatureismaintaind in
theoven.
1. Ifdesired, broiler pan maybe
linedwithfoilandbroiler rack may
becoveredwith foilfor broiling.
ALWAYSBE CERTAIN~ MOLD
FOIL THOROUGHLY ~
BROILER RACK, AND SLIT
FOIL ~ CONFORM WITH
SLITSIN RACK. Broiler rack is
designedto minimize smokingand
spattering, and.tokeepdrippings
coolduring broiling. Stoppingfat
and meatjuices fromdrainingto
thebroiler -panprevents rack from
serving itspurpose, andjuices may
become hot enoughtocatchfire.
Q. why are my mea~ not turning
out as brown as they should?
A.
In someareas,thepower
(voltage)totherangemaybelow.
Inthesecases,preheatthebroil
unitfor 10minutesbeforeplacing
broilerpanwithfoodinoven.
Checkto seeifyou.areusingthe
recommendedshelfposition.Broil
forlongestperiodoftimeindicateti
intheBroilingGuide.~rn food
onlyonceduringbroiling.
Q.DoI needto grease mybroiler
mcl{mpreventmmt fmmSticl-g?
A. No. Thebroilerrack isdesigned
toreflectbroiler
the
surface cool enough to prevent
mat stickingtotie sutiace. I+owever,
sprayingthe broiler rack lightlywfil~
a vegetable coohtillgspray btifore
cooking will make cleanup easier.
l~eat, thus I<eeping
\
.,
(-
-.
L
.._
..’
0
Page 19

---
..~~...
—————.——.
_.—
...
.—.—--—..—.
1. Mways use broilerpanand.rack
‘s-mthat comeswiti youroven.It is
kc::cg:
1
k&2:
designedto tintize snlokingand
spatteringby tmppingjuices inthe
shieldedlowerpartoftie pan.
2. Ovendoor
exceptchicken;thereisa
foods
shouldbe ajarforall
specialpositionondoor which
holdsdooropencorrectly.
3. Forsteaksandchops,slashfat
evenlyaroundoutsideedgesofmeat.
Toslash, c~~tcrosswisethrough
outerfatsurfacejust to the edgeof
themeat. Usetongsto turn nleat
overto preventpiercingmeatand
losingjuices.
4. Ifdesired, marinatemeatsor
chickenbeforebroiling.Orbrush
withbarbecuesaucelast5 to 10
tirtutes only.
men arrangingfoodonpan,
5.
donotletfattyedgeshangover
sides,whichcouldsoilovenwith
fatdripping.
& If yourrangeisconnectedto
Volts,raresteaksmaybe brofld .._ ....
208
bypreheatingbroilheaterand
positioningtheovenshelfone
positionhigher.
—.--.——..
...—..
r?d
GmuBdBeef
WellDone
Wse
Rare
Medium
WellDone
Medium
Well Done
Chicken
5&e~ hduck
Bread(Toast)or
roasterPastries
Sng]ish
Muffins
Lobswr
nils
6
to8-oz.each)
l-lb.(4patties)
]~to ~-in.tick
I-inchthick
(1to1%-lbs.)
I%-in.thick
{2to2H-lbs.)
1whole
(2to2%-lbs.),
splitlengthwise
2to4slices
1pkg.(2)
2(split)
2-4
l-lb.fillets %to
~/z-in.thick
!-in.thick
SheK
Position
c
c
c
c
c
c
c
c
A
c
c
B
FimtSide
‘rime,M~ntltes
7
7
9
13
10
Is
25
35
1‘h-z
3-4
13-16
S~ond Side
Time,WUW
4-5
7
9
13
7.8
14-16
~o.25
10-15
Donot
turnover.
5
8
:ommerits
1
4rrangeinsinglelayer.
Spaceeverdy.
Upto 8pattiestakeaboutsametime.
Steakslessthan1inchcookthrough
beforebrowning.Panfryingis
reeomrnended.
Slashfat.
Reducetimesabout5to 10minutesper
sideforcut-upchicken.Brusheachside
withmeltedbutter.Broilwithskin
downfirstandbroilwithdoorclosed.
Spaceevenly.PlaceEnglishmuffins
cut-side-upandbrushwithbutter, if
desired.
Cutthroughbackofshell.Spread
open.Brushwithmeltedbutter
beforeandafterhalftime.
Handleandturnverycarefully.
Bmshwithlemonbutterbeforeand
duringcookingifdesired.Preheat
broilertoincrefi.sebrowning.
Increasetimes5to 10minutesperside
for l~A-inchthickor homecured.
2(%inch)
2(1-in.thick)
abollt1lb,
2(1inch)
~bout10to12oz.
2(1
Y2 inch)
tibot~t1lb.
—
l-lb. pkg.(10)
c
B
c
B.
10
13
10
17
10
13
4-7
10
A-6
12-14
1-2
Slashfat.
Slashfat. I
Ifdesired,splitsausagesinhalf
le~~gthwise;cutinto5 to6-inchpieces. ~ ~
1:’
I
,
-.
~
.,
{,
Page 20

Propercareand cleaningare
iwportantsoyour rangewillgive
youefficientand satisfactory
service. Followthesedirections
carefullyin caringforyourrangeto
assuresafeandproper maintenance.
The porcelainenamelcooktopis
sturdybutbreakableif misused.
This finishisacid-resistant.
However,any acid foodsspilled
(suchasfruit juices, tomatoor
vinegar)shouldnot be permitted
to remain on thefinish.
The areaunder the rangeofmodels
equippedwitha bottomdrawercan
be reached easilyfor cleaningby
removingthebottom drawer. TO
remove,pulldraweroutallthe way,
tilt up thefrontand removeit. To
rep~ace,insert glides at back of
drawerbeyondstoponrangeglides.
Lift drawer if necessary toinsert
easily.Let front ofdrawerdown,
then push into close.
Yourrangeisventedthroughaduct
locatedundertherightrear surface
unit. Clean theductoften.
,“
M
Toremove:
@Make sure unitiscool.
@Lift up rightrearsurfaceunit.
* Removedrip pan and ring.
@Lift outovenventduct.
Toreplace:
~Placethe part overthe ovenvent
locatedbelowthecooktopwith
openingofthe duct under the round
openingin the drip pan. It is
importantthat the duct is in the
correct position so moisture and
vaporsfrom the ovencan be
released during ovenuse. N~E:
Never cover the holein the oven
ventduct with aluminum foilor
any other material. This prevents
the oven vent from working
properly during any tooting cycle.
LampReplacement
CAUTION: Before replacing
your oven lamp
the
electricpower foryour range
at the mainfuseor circuit
brea~ierpsnel.Be sure to let the
lamp cover and bulb cool
completely before removing or
replacing them.
bulb,disconnect
The ovenlamp(bulb)iscovered
with a glassremovablecoverwhich
isheld~nplacewitha bail-shaped
wire.Removeovendoor,ifdesired,
to reach covereasily.
Toremove:
~Holdhandundercover so it
doesn’t fallwhen released. With
fingersofsamehand, firrrdypush
back wirebailuntilitclearscover.
Lift off cover.DO NW REMOVE
ANY SCREWS.
~Replacebulb with40-watthome
appliancebulb.
To replace cover:
~Place itintogrooveof lamp
receptacle. Pullwire bail forward
to center ofcoveruntilit snapsinto
place. When in place, wire holds
coverfirrrdy.Be certain wire bail
is in depression in centerofcover.
~Connect electric powerto range.
surface uti~
Clean the area under the drip pans
often. Built-upsoil, especially
grease, may catch fire. TO
make
cleaningeasier,stay-upunitsIifi
upandlockintheupposition,
andplug-inunitsareremovable.
caution: BeSRRreallcontrolsare
turned to Qm and surface Mniti
are coolbeforeattempting to lift
O?rremovethem.
AfierIifiingthestiy-upunitsor
removingplug-inunb~,removetile
trimringsanddrippaIIsunderthe
units andcleantl~emaccorcli.ngto
Page 21

-----
_
Youcan lifia stay-up unit upward
about6“andit will lock in the up
position.
To
repositionthe shy-up unit:
@Replace the drip pan and trim
ring into the recess in the cooktop.
Donotlift a piang-iBIunitmore
tl~an1!’Ifyoudo,itImay~Iotlie
flatonthe trim ringwhenyou
plugitbackin.
Repeated!iftiBlgof the plug-in
unitmorethan1“abovetile trim
ringcanpermanentlydamage
the reeepacle.
Terminals
Use timegiven0[] recipewhen
cookingfirsttfime.Oventhermosk~ts, =--;intime, may “drift” fromthe
factorysettinganddifferencesin :-. --timingbetweenanoldandanew
ovenof 5 to 10minutesare not
unusual.Yourovenhas been set
correctlyatthefactoryand is more
apttobeaccuratethan theoven
whichitreplaced.However,if YOU ‘-I ~‘-”.
findthatyourfoodsconsistently --browntoo littleor too much, YOU ;. -- -_ .maymakea simpleadjustmentin
the thermostat(OvenTemp)knob. ~
PULL KNOBOFF OF
SHAFT, ““ ~
LOOK ATBACKOFKNQB AND ‘-;=;-:--’_
N~E CUR~NT SETTING
BEFORE MAKINGANY
ADJUSTMENT.
Toincreasetemperature,turntoward
HI or RAISE; to decrease turn
I
towardLO or LOWER. Each notch
changestemperature 10degrees.
-.
-.
.L.-.. .“...
—
—.-..—=—..
—.-.
--
~Putthe trim ring in placeoverthe
drip pan. The drip panmust be
under the trim ring.
@Guide the surface unitintoplace
so it fitsevenlyintothe trim ring.
–
Plug-in unitscan be rcrnoved.
Lift a plug-in unit about 1“ above
~]le~rinlring-just enough
tOgrasp
it—andyou can pull it out.
=Firstplacethedrip pan, then the
trimring intothesurfaceunitcavity
foundontop ofthe cooktopsothe
unitreceptaclecan be seenthrough
the openingin the pan.
~Insertthe terminals of the plug-in
unitthroughthe openingin the drip
pan and into the receptacle.
* Guide the surface unit intoplace
so it fitsevenlyinto the trim ring.
Note: The drip pan must be under
thetrim ring.
CAUTION
@Do not attempttoclean plug-in
surface units in an automatic
dishwasher.
@Do not immerse plug-in surface
unitsin liquids of anykind.
QDo ~lotbend the plug-in unit
terminals.
GDo not attempt to clean, adjust
OFinany way repair the plug-in
receptacle.
1. Pull offknob. Loosen both
screwsonback of knob. 2. Move
pointeronenotchindesireddirection.
Tightenscrews. 3. Return knob to
range, matchingflatarea ofknob to
shaft. Recheck ovenperformance
beforemaking an additional
adjustment.
..
~.
.......
L
----
‘j
_—---
,
Page 22

PART
[’—Y
BakeUnit and
BroilUnit
MATmAM m USE
GENERALDIRECTIONS
Donotcleanthebakeunitorbroilunit.Anysoilwillburnoffwhentheunitisheated.
NOTE:Thebalceunitis hingedand canbeliftedgent}ytocleantheovenfloor.If spillo-’ar,
residue,or ashaccumulatesaroundthebakeunit,gentlywipearoundtheunitwithwarm
water.
-.
-
Dminfit, coolpanandrackslightly.(Donotletsoiledpanandrackstandinoventoml.) Spriidde
on detergent.Fillthepanwithwamlwaterandspreadclothorpapertowel
overthe rack.Letpanandrack standfora fewmim~tes.Wash;scourifnecessary.
Rinseanddry.OPTION:Thebroilerpanandrack mayalsobe cleanedina dishwasher.
Pu1loffknobs.Washgentlybut do notsoak. Dryandreturncontrolstorange,makingsureto
matchflat areaontheknob andshaft.
Washallglasswithclothdampenedinsoapywater.Rinseandpolishwitha drycloth. If
Control Knobs:
Wnge Topand Oven
Outside Glass Finish
e SoapandWater
*Soap-FilledScouringPad
e PlasticScouringPad
*Dishwasher
~MildSoapandWater
$SoapandWater
knobsare removed,donotallowwatertorun downinsidethesurfaceof glasswhilecleaning.
Metal, including
Brwhed Ctiome and
Cooktop
firceiain Enamel and
Winted Surface@
~SoapandWater
~PaperTower
~DryCloth
~SoapandWater
DON~
USEsteel wool,
abrasive5,motia, acidsor
commercial ovencleaners.
DON~ USEovencleaners,
cleansingpowdersor harsh
abrasives. Thesemight
scratchthe surface.
Wash,rinse, andthenpolishwitha drycloth.
If acidsshouldspillonthe rangewhileit ishot,useadry
papertowelor clothto wipeup rightaway.Whenthe
surfacehas cooled,washandrinse.
Forotherspills, suchas fatsmatterings,etc., washwithsoap
andwaterwhencooledandthenrinse.%Iishwitha dry cloth.
Ouhide of
OvenDoo@
SoapandWater
DO N~ USE ovencleaners,
cleansingpowdersor hamh
abrasives.
Tocleanovendoor,removebyopeningtoBROILposition
andgraspingdoorat sides. Lifidoorup andawayfrom
hinges.Usesoapandwaterto thoroughlycleanthe top,
sidesandfrontofthe ovendoor.Replacebygraspingdoor
at sidesandliningup doorwithhinges.Pushdoor firmly
intoplace.
OvenInterior and
Inside of Door*
StiffBristle NylonBrush
:001beforecleaning.
f heavysoilinghasoccurredon theporoussu&ace,removeas muchofthe soilas possible,
isinga small amountofwateranda stiff bristlenylonbrush.Use watersparinglyandchange
t frequently,keepingitasclean aspossible, andbe sureto blotitupwith papertowels,
:Ioths,or sponges.Dorlorrub orscrubwith papertowels,cloths orsponges,sincetheywill
caveunsightlylint ontheovenfinish.If waterleavesa whiteringonthefinishasitdries,
[pplywateragainandblot it witha cleansponge,startingat theedgeofthe ringandworking
owardthecenter.
1
‘~Snilla~eof marinades.fruit juices,toniatosaucesandbastingmaterialscontainingacidsmaycausediscoloration.Spilloversshouldbe wipedup (spillson
.
~~cni~tcriorshouldbe blottedup)immediately,with care beinghken to nottouchanyhotportionof theoven.
~orspecial cieaning instructions, see page 24.
Whenthe surfaceis cool, cleanandrinse.
$
\
‘... =
,,’
Page 23

I
1 .’
~’~:~,
.
:
:~j;j PART
ff:i%:::::: Foil
-.. .<Z=s
‘=yOvenBottomLirIer I
oven VentDuct @SoapandWater Removethe OvenVentDuctfoundundertherightrearsurfaceunit.Washinhot, soapywater
MATERI.4= ~ USE
@DampCloth
.— .
GENEWL DIRECTIONS
Onlya dampclothmaybeusedtocleanaluminumfoilovenbottomliner.Aluminumfoiloven
bottomIinermavbere~lacedwithheavyweightaluminumfoilcuttothe sizeoftheoriginal
I liner.Besuret~remo& this linerfrom6ven60ttombeforecleaningoven.
1
anddryandreplace.(Openingshouldmatchopeningindrippan.)
shelves
Calnd” Surface
LJnitCoiis
StorageDrawers
Chrome-Plated
~im Mngs
PorcelainEnamelor
.41uminumDrip Rns
e SoapandWater
Yourshelvescanbe cleanedbyhand,using anyandall mentionedmaterials.Rinse
thoroughlytoremoveallmaterialsaftercleaning.
IDON~ USEWhwasher to
clan the surface urdtcoils.
DON~ handle the unit
beforecompletelycooled.
DON~ immerse plug-in
Spattersandspillsburnawaywhenthecoilsare heated.At
theendof ameal, removeall utensilsfromthe Calrod8unit
andheatthe soiledunitsat H1.Letthesoilburnoffabouta
minuteandswitchtheunitsto OFF.Avoidgettingcleaning
materialsonthecoils.Wipeoffanycleaningmaterialswith
a damppapertowelbeforeheatingtheCalrod”unit.
units in any ki~ldofliquid.
e Soapand Water
Forcleaning,removedrawerbypullingit allthe wayopen,tilt upthefrontandlift out.Wipe
withdampclothor spongeandreplace.Neveruseharshabrasivesor scouringpads.
e Soapand Water Cleanas describedbelowor inthedishwasher.Wipeall ringsafter eachcookingsounnoticed
e Stiff-BristledBrush spatter willnot “burnon”nexttimeyoucook.Toremove
e Soap-FilledScouringPad
all cleaningmaterialsmentioned.Rublightlywithscouringpadtopreventscratchingofthe
“burned-on”spatters,useanyor
(Non-metallic) sufice.
@SoapandWater Coolpansslightly.Sprinkleondetergent andwashor scour panwithwarmwater.Rinseand
@Soap-FilledScouringPad
dry.In addition,pansmaybe cleanedin thedishwasher.
~PlasticScouringPad
-...-.
,
Page 24

.:,
;..
m
—
k
*
J*:@&“,
Thetop,bottom,sides,andbackof
theovenliner, and doorinnerliner
are finishedwithaspecialcoating
whichcannotbe cleanedin the
.
usualmannerwithsoap,detergents,
commercialovencleaners,coarse
abrasivepadsor coarsebrushes.
The use of suchcleanersand/orthe
useofovensprayswillcause
permanentdamage.
Thespecial
cOatingisapOrous
ceramicnmterial whichisdark in
color and feelsslightlyroughtothe
touch. If magnified,the surface
wouldappearaspeaks, valleys,and
Use the following steps when
cleaningyour Continuous-Ciean
Oven.
1. Let rangepartscoolbefore
handling.Itisrecomme~ldedthat
rubber glovesbe wornwhen
cleaningrangeparts manually.
2. Removeall cookingutensils
includingthebroilerpan andrack.
3. Removeovenshelves and clean
them manually with scouring pads
or mildabrasive.
atimeconvenientforyou.Some
slightsmokingmay occur, similar
tothatwhichmayoccur during
TimeBakecooking.
mmmE~: DUMNG THE
OPEMTION OF THE OVEN,
THE DOOR, WINDOWAND
~HER RANGE SURFACES
WLL GET H~ ENOUGH ~
CAUSEBURNS. Do N~
TOUCH. LET THE MNGE
COOI. BEFO~ ~PLACING
ALUMINUM FOIL OVEN
B~~M AND OVEN SHELVES
IF THEY WERE REMOVED.
a
--;.
~
sub-surface “tunnels:’Thisrough
finishtendstopreventgrease
spattersfromforminglittlebeads
or dropletswhichrun downthe
sidewallsof ahard-surfaceoven
liner leavingunsightlystreaks that
require hand cleaning.Instead,
when spatterhitsthe
porousfinish,
it is dispersed and is partially
absorbed. This dispersalaction
increasesthe exposure ofovensoil
to heated air, which resultsin
oxidationofsoil. This finish also
reduces the visualeffectofresidual
soil. It maynotdisappear
completely and at some timeafter
extendedusage, stains mayappear.
The
special coating works best on
small amounts of spatter.It does
not work well with larger spills,
especially sugars,
egg, or daiv
mixtures. For this reason, the oven
is equipped with a removable,
replaceable aluminum foiloven
bottom liner which protectsthe
porol~sfinish on the bottom of the
oven from spillovers.
Avoidspills
on inside surface ofthe ovendoor.
This special finish isnot used on
ovenshelves. Shelves are
rema~able and can be taken to the
sink for cleaning. See “Clea~ling
Guide”
Oil pages22 and 23 for
Cleaningdirections.
4. Removeexcessspillsand
boiloversfrom aluminum foiloven
bottomlinerbeforeremovingliner
from oven. This is to prevent
excessliquidsfrom spillingonto
the porous finish. Then remove
aluminumfoilbottomliner and
clean manually.(Beforecleaning or
removingthe aluminum foil liner,
lift bake unit outofthe way.)
5. Clean oven window. Use mild
non-scratching cleanser and damp
cloth. Avoidspilling water or
cleaner on porous surface.
6. Soil visibility maybe reduced by
operating oven at 400”F. Close
door, set oventemperature control
to 400°F. Time for at least
4 ho~~rs.
Repeated cyclesmay be necessary
before improvement in appearance
7. If a spilloveror heavy soiling
occurs on the
porous surface, as
soonas the ovenhas cooled,
removeasmuchofthe soil as
possibleusinga small amount
ofwaterand astiffbristle nylon
brush. When usingwater,use it
sparingly and change it frequently,
keepingItasclean as possible, and
be sureto blot it up with paper
towels,cloths, or sponges.Do
mb or scrub with paper towels,
not
cloths or sponges, since these will
leaveunsightlylint on the oven
finish. If waterleavesa white ring
on the finish as it dries, apply water
againandblotit with a clean
startingattheedgeofthering
sponge,
and
workingtowardthecenter.
Use care in removingand replacing
aluminum foilovenbottom liner
and shelvesand in placing and
removingdishes and food to avoid.
scratching, rubbing or otherwise
damaging
theporousjnish on the
ovenwalls and door.
Do not use soap, detergent,
commercial ovencleaner, silicone
oven sprays,coarsesteelpadsor
coarsebrusheson thePorous
surface. These produ~tswil~spot,
clog, and mar the
and reduce its ability to worl<.
porous saiface
~~y
Q.
is apparent, particularly on oven
door. For moder~te to heavy soiling
ofove~~door, use method described
in item ~~ before running 4.00°F.
cycle. The oven timer can be used
to Contfol the cycle
automatically at
Page 25

1
. . ... -
..
.. ..
.
-.
70SSIBLEcAusamD mmDY
OVEN WILL Nm WORK
OVENLIGHT
DOESNOT
Wom
FOOD DOESNm
BROIL PROPERLY
FOOD
DOESNm ROAST
OR BAKE PROPERLY
Plugon rangeisnotcompletelyinserted in the electricaloutlet,
The circuitbreaker in yourhousehasbeen tripped, or a fise has beenblown.
Ovencontrolsnot properly set.
Lightbulb isloose.
Bulbisdefective. Replace.
Switchoperating ovenlight isbroken. Call for service.
OVENSET’knobnotsetatBROIL.
OVENTEMP bob not set atBROIL.
Door notleftajar as recommended.
Improper shelfposition being usd. Check Broiling Chart.
Necessary preheatingwasnotdone.
Foodisbeingcookedon hot pan.
Utensilsare not suitedfor broiling.
Alultinum foilused on thebroilpan rack has notbeen fitted properly and slit
as recommended.
OVEN SET bob not set on BA~.
OVENTEMP knob notsetcorrectly.
Shelfpositionis incorrect. Check RoastingorBakingCha~.
Ovenshelfis notlevel.
Incorrectcootime orcookwareofimpropersizeisbeingused.
A foiltentwasnotused when needed to slowdown browning during roasting.
CALROD”
Nm FUNCTIONING
PROPERLY
I
-.. .
SURFACEUNITS
Surfaceunitsare notpluggedinsolidly.
Trim rings/drip pans are not setsecurely in the rangetop.
Surface unit controls are notproperly set.
!’ ,
I
\ {,
I
I
I
~
—- —— -
-
Page 26

1, ,
—..—.——-——-——-.—— -
. .
-L.
___.,.
--- -.
\ ..
a---
.-
.-. ...
..
it
?,
..
!,
i.
Page 27

—.
..——
... .....
——..-—....,
-—
.
YOURHOTPOlhiTRANGE
Saveproofof
original purcl~asedatesuchas your salesslip or cancelledchecktoestablishwarrantyperiod.
iwHAr isCOVERED
~NARRANTY
FULL ONE-YEARWARRANTY
Forone
purchase,wewill provide,freeof
charge,partsandservicelabor
inyour hometo repairor replace
anypa~tof the range that fails
becauseof a manufacturingdefect.
year from dateoforiginal
Thiswarrantyisextendedto
the originalpurchaser and any
succeedingownerfor products
purchasedforordinaryhomeuse
inthe 48 mainland states,Hawaii
andWashington,D.C.InAlaskathe
warrantyisthe sameexceptthat it is
LIMITEDbecause you must payto
shipthe producttothe serviceshop
orforthe servicetechnician’stravel
coststo your home.
Ail warrantyservicewill be provided
byourFactory Service Centersor
byourauthorizedCustomerCare”
servicersduring normal working
hours.
LookintheWhite or YellowPages
of yourtelephone directoryfor
HOTPOINTFACTORYSERVICE,
GENERAL ELECTRIC-HOTPOINT
FACTORYSERVICEor HOTPOINT
CUSTOMERCARE@SERVICE.
A
.&
“w
4
k
~~~~ ~~ NO~ e~v~~~~ @Service trips to yourhometo
teach youhowto usethe product.
ReadyourUseandCammaterial.
If youthen haveanyquestions
about operating the product,
please contact your dealeror our
Consumer Affairs office atthe
address below,or call, toll free:
GE Answer Center”
800.626.2000
consumer information service
~ Improper installation.
If you ilave an installation problem,
contact your dealer or installer.
Youareresponsible for providing
adequateelectrical, gas,exhausting
and other connecting facilities.
__ ....
—.
Some states do not allow the exclusion or limitation of incidental or consequential damages, so the above limitation or exclusion
may rrotapply to you. This warranty gives you specific legal rights, and you may also have other rights which vary from statetostate.
Toknow what your Iega/ rights are in your state, consult your local or state consumer affairs office or your state’sAttorney General.
~ Replacementofhousefusesor
resettingof circuit breakers.
a Failureof the product if it is used
for other than its intended purpose
or usedcommercially.
~ Damage to productcaused
byaccident, fire,floods or acts
of God.
WARRANTORISNOTRESPONSIBLE
FORCONSEQUENTIAL DAMAGES.
{
\
$
 Loading...