

GE PTD915, CW9000, PJ7000, PW9000 Owner's Manual
GEAppliances.com
Safety Instructions ........... 2,3
Operating Instructions
Control Knob ......................... 5
Crisping Stale Items .................. 7
Drawer ............................... 6
Features ............................. 4
Moisture Selector .................... 5
ON Signal Light ...................... 5
Proofing Yeast Bread
and Dough ........................... 7
Rack ................................. 6
Temperature Selection Charts ..... 7,8
Warming Serving Bowl
and Plates............................ 6
Care and Cleaning .............. 9
Installation Instructions.. to-is
PKD915
PTD915
CWgO00
P_I7000
PWgO00
0_
E
Troubleshooting Tips .......... 16
Consumer Support
Consumer Support ........ Back Cover
Product Registration ........... 19, 20
Warrantg for Customers
in Canada ........................... 23
Warrantg for Customers
in the U.SA.......................... 22
Write the model und seriul
numbers here:
Model #
Seriul #
You can find them on a label located on
the backside of the lower drawer front.
In Canada, contact us at:
www.GEAppliunces.cu
49-80507-3 01-13 GE
IMPORTANT SAFETY INFORMATION.
READ ALL INSTRUCTIONS BEFORE USING.
I,& WARNING I
Read all safetbt instructions before using the product. Failure to follow these instructions ma_t result in fire, electrical
shock, serious injurbt or death.
WARN NOi MnonranrsAFETYnor cE
All warming drawers can tip and injury could result if not properlg installed.
To prevent accidental tipping of the warming drawer, attach it to the wall with an anti-tip brace as described in the
Installation Instructions.
[A WARNING j GENERALSAFETYINSTRUCTIONS
i Use this appliance onlg for its intended purpose as
described in this Owner's Manual.
i Be sure gour appliance is properlg installed and
grounded bg a qualified installer in accordance with
the provided installation instructions.
Do not attempt to repair, replace or clean ang
part of gour warming drawer unless it is specificallg
recommended in this manual. All other servicing
should be transferred to a qualified technician.
i Before performing ang service, disconnect the
power supplg at the household distribution panel bg
removing the fuse or switching off the circuit breaker.
i Do not leave children alone-children should not
be left alone or unattended in an area where an
appliance is in use. Theg should never be allowed to
climb, sit or stand on ang part of the appliance.
A CAUTION: Do not store items of interest
to children in cabinets above a warming drawer -
children climbing on the warming drawer to reach
items could be seriouslg injured.
Use onlg drg pot holders-moist or damp pot holders
on hot surfaces mag result in burns from steam. Do
not let pot holders touch hot heating elements. Do
not use a towel or other bulkg cloth in place of pot
holders.
Do not touch the heating elements or the interior
surface of the warming drawer. These surfaces mag
be hot enough to burn even though theg are dark
in color. During and after use, do not touch, or
let clothing or other flammable materials contact
ang interior area of the warming drawer; allow
sufficient time for cooling first. Other surfaces of the
appliance mag become hot enough to cause burns.
Potentiallg hot surfaces include the warming drawer
vent opening, surfaces near the opening and crevices
around the warming drawer door.
Do not heat unopened food containers. Pressure
could build up and the container could burst, causing
an injurg.
Do not use aluminum foil to line the warming drawer
bottom. Foil can trap heat or melt, resulting in
damage to the product and a shock or fire hazard.
Avoid scratching or impacting glass doors or control
panels. Doing so mag lead to glass breakage. Do not
cook on a product with broken glass. Shock, fire or
cuts mag occur.
Cook meat and poultrg thoroughlg-meat to at least
an internal temperature of 160°F and poultrg to
at least an internal temperature of 180°F. Cooking
to these temperatures usuallg protects against
foodborne illness.
i Never use gour appliance for warming or heating the
room.
SAVE THESE INSTRUCTIONS
GEAppliances.com
IA WARNING JKEEPFLAMMABLE MATERIALSAWAY FROM THE
i m I
WARMING DRAWER
Failure to do so may result in fire or personal injury.
Do not store or use flammable materials in or near a
warming drawer, including paper, plastic, pot holders,
linens, wall coverings, curtains, drapes and gasoline
or other flammable vapors and liquids.
Never wear loose-fitting or hanging garments while
using the appliance. These garments mag ignite if
theg contact hot surfaces, causing severe burns.
Do not let cooking grease or other flammable
materials accumulate in or near the warming drawer.
Grease in the warming drawer or near the warming
drawer mag ignite.
IA WARNING JIN THEEVENT OFA FIRE,TAKETHE FOLLOWING STEPS
I
TOPREVENTINJURYAND FIRESPREADING:
Do not use water on grease fires. Never pick up a
flaming pan.
If there is a fire in the warming drawer, smother the
fire bg closing the warming drawer door and turning
the warming drawer off or bg using a multi-purpose
drg chemical or foam-tgpe fire extinguisher.
JA WARNING I WARMING DRAWER SAFETYINSTRUCTIONS
Stand awag from the warming drawer when opening
the warming drawer door. Hot air or steam which
escapes can cause burns to hands, face and/or eges.
Keep the warming drawer vent unobstructed.
Keep the warming drawer free from grease buildup.
Grease in the warming drawer mag ignite.
SAVE THESE INSTRUCTIONS
Placewarming drawer racks in desired location while
warming drawer iscool. If rack must be moved while
warming drawer is hot, do not let pot holder contact
hot heating element in warming drawer.
Do not leave items such as paper, cooking utensils or
food in the warming drawer when not in use. Items
stored in a warming drawer can ignite.
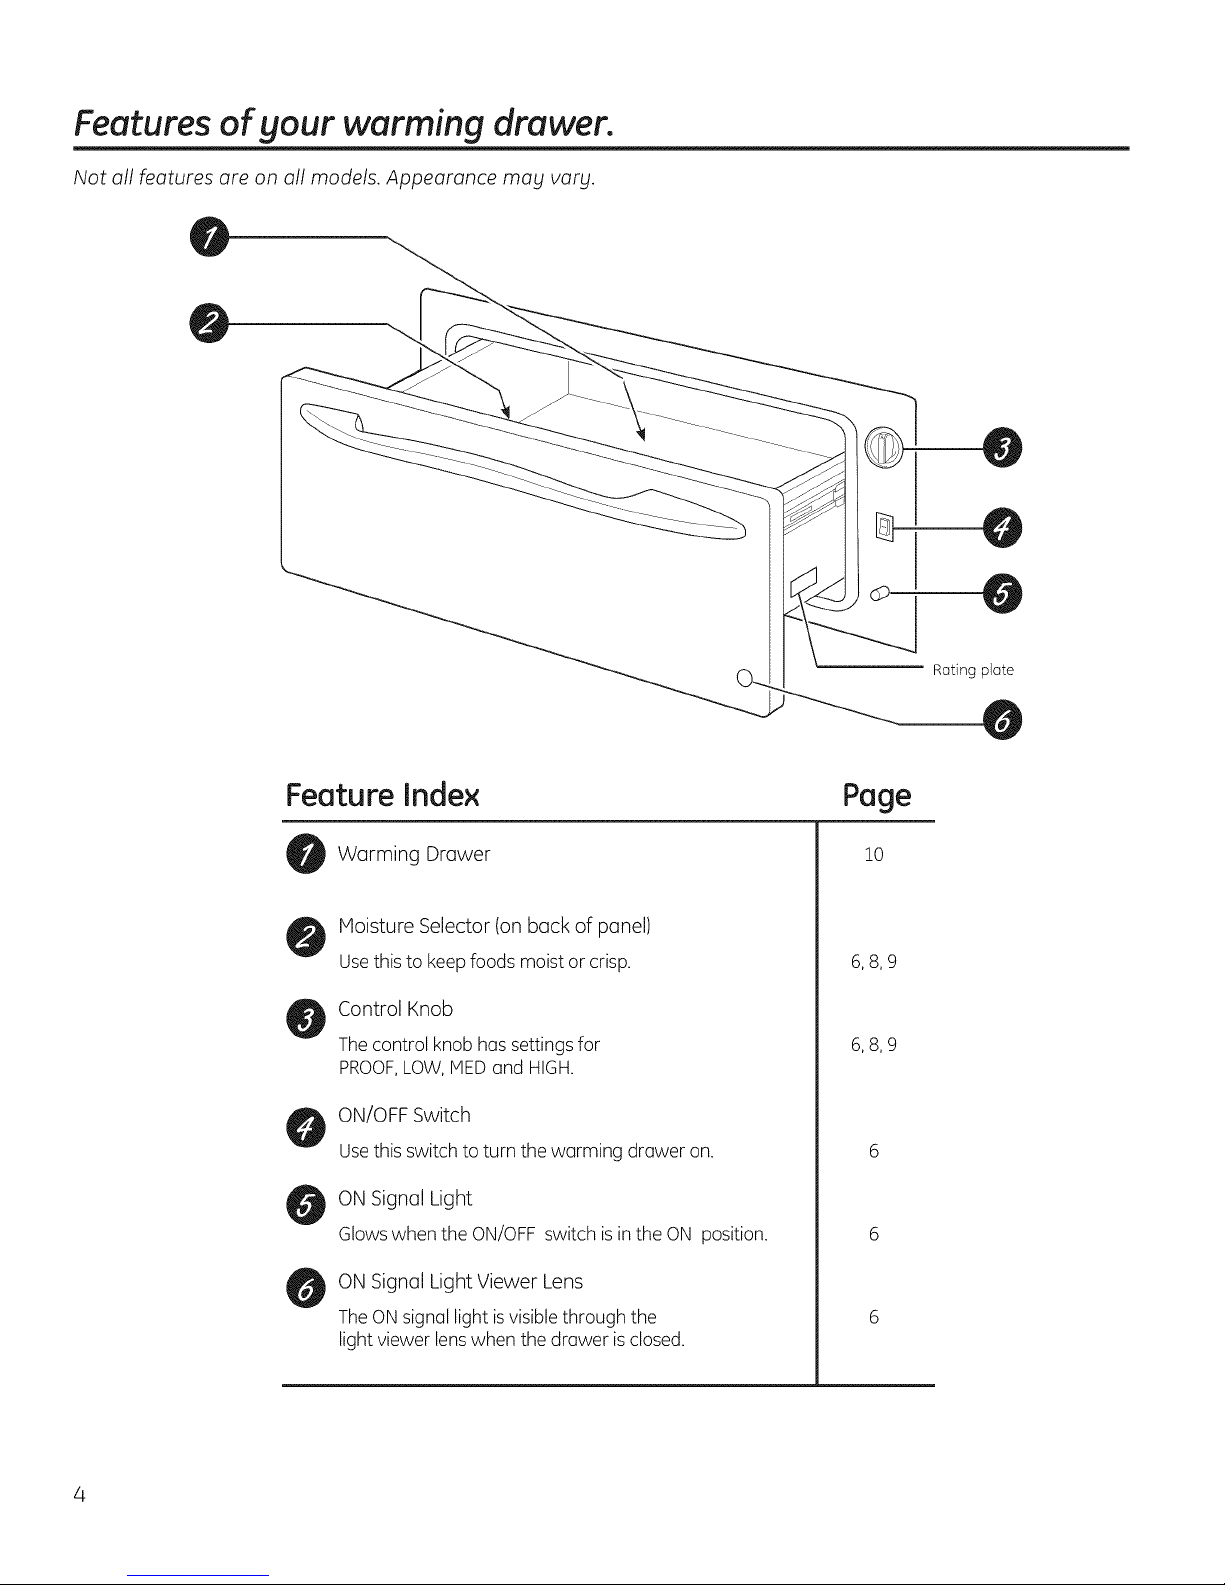
Features of gour warming drawer.
Not all features are on all models. Appearance mag varg.
Rating plate
Feature Index
Warming Drawer
Moisture Selector (on back of panel)
Usethis to keepfoods moist or crisp.
Control Knob
Thecontrol knob hassettings for
PROOF,LOW,MEDand HIGH.
ON/OFF Switch
Usethis switch to turn the warming drawer on.
ON Signal Light
Glowswhen the ON/OFF switch is in the ON position.
ON Signal Light Viewer Lens
TheONsignal light isvisible through the
light viewer lens when the drawer isclosed.
Page
10
6,8,9
6,8,9
4
Using the warming drawer. GEAppliances.com
The warming drawer will keep hot, cooked foods at serving temperature. Alwags start with hot food. Do not use to
heat cold food other than proofing yeast dough, crisping crackers, chips or drg cereal.
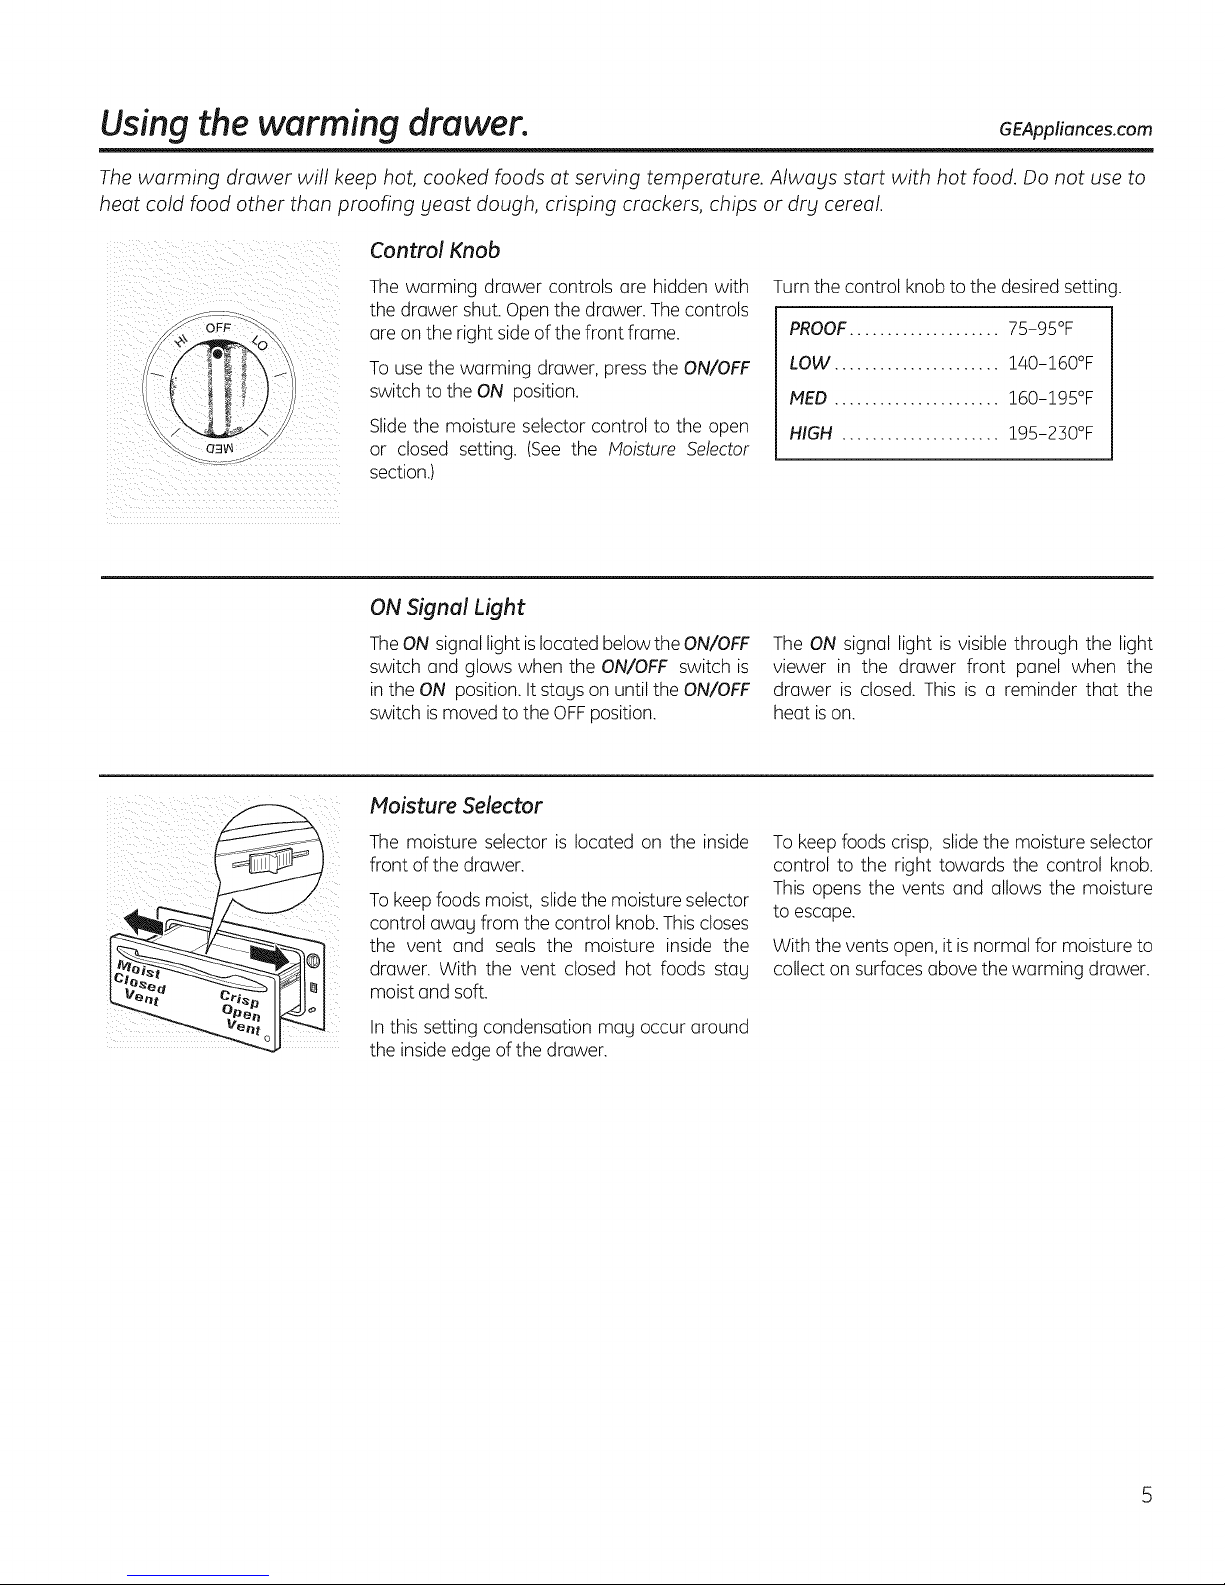
Control Knob
q3_
The warming drawer controls are hidden with
the drawer shut. Openthe drawer. The controls
are on the right side of the front frame.
To use the warming drawer, pressthe ON/OFF
switch to the ON position.
Slidethe moisture selector control to the open
or closed setting. (See the Moisture Selector
section.)
ON Signal Light
TheON signal light islocated below the ON/OFF
switch and glows when the ON/OFF switch is
in the ON position. It stags on until the ON/OFF
switch is moved to the OFFposition.
Moisture Selector
The moisture selector is located on the inside
front of the drawer.
To keepfoods moist, slidethe moisture selector
control awag from the control knob. Thiscloses
the vent and seals the moisture inside the
drawer. With the vent closed hot foods stag
moist and soft.
Turn the control knob to the desired settinc
PROOF.................... 75-95°F
LOW ...................... !40-!60°F
MED ...................... !60-!95°F
HIGH ..................... !95-230°F
The ON signal light is visible through the light
viewer in the drawer front panel when the
drawer is closed. This is a reminder that the
heat ison.
To keepfoods crisp, slidethe moisture selector
control to the right towards the control knob.
This opens the vents and allows the moisture
to escape.
With the vents open, it is normal for moisture to
collect on surfaces above the warming drawer.
Inthis setting condensation mag occur around
the insideedge of the drawer.
Using the warming drawer.
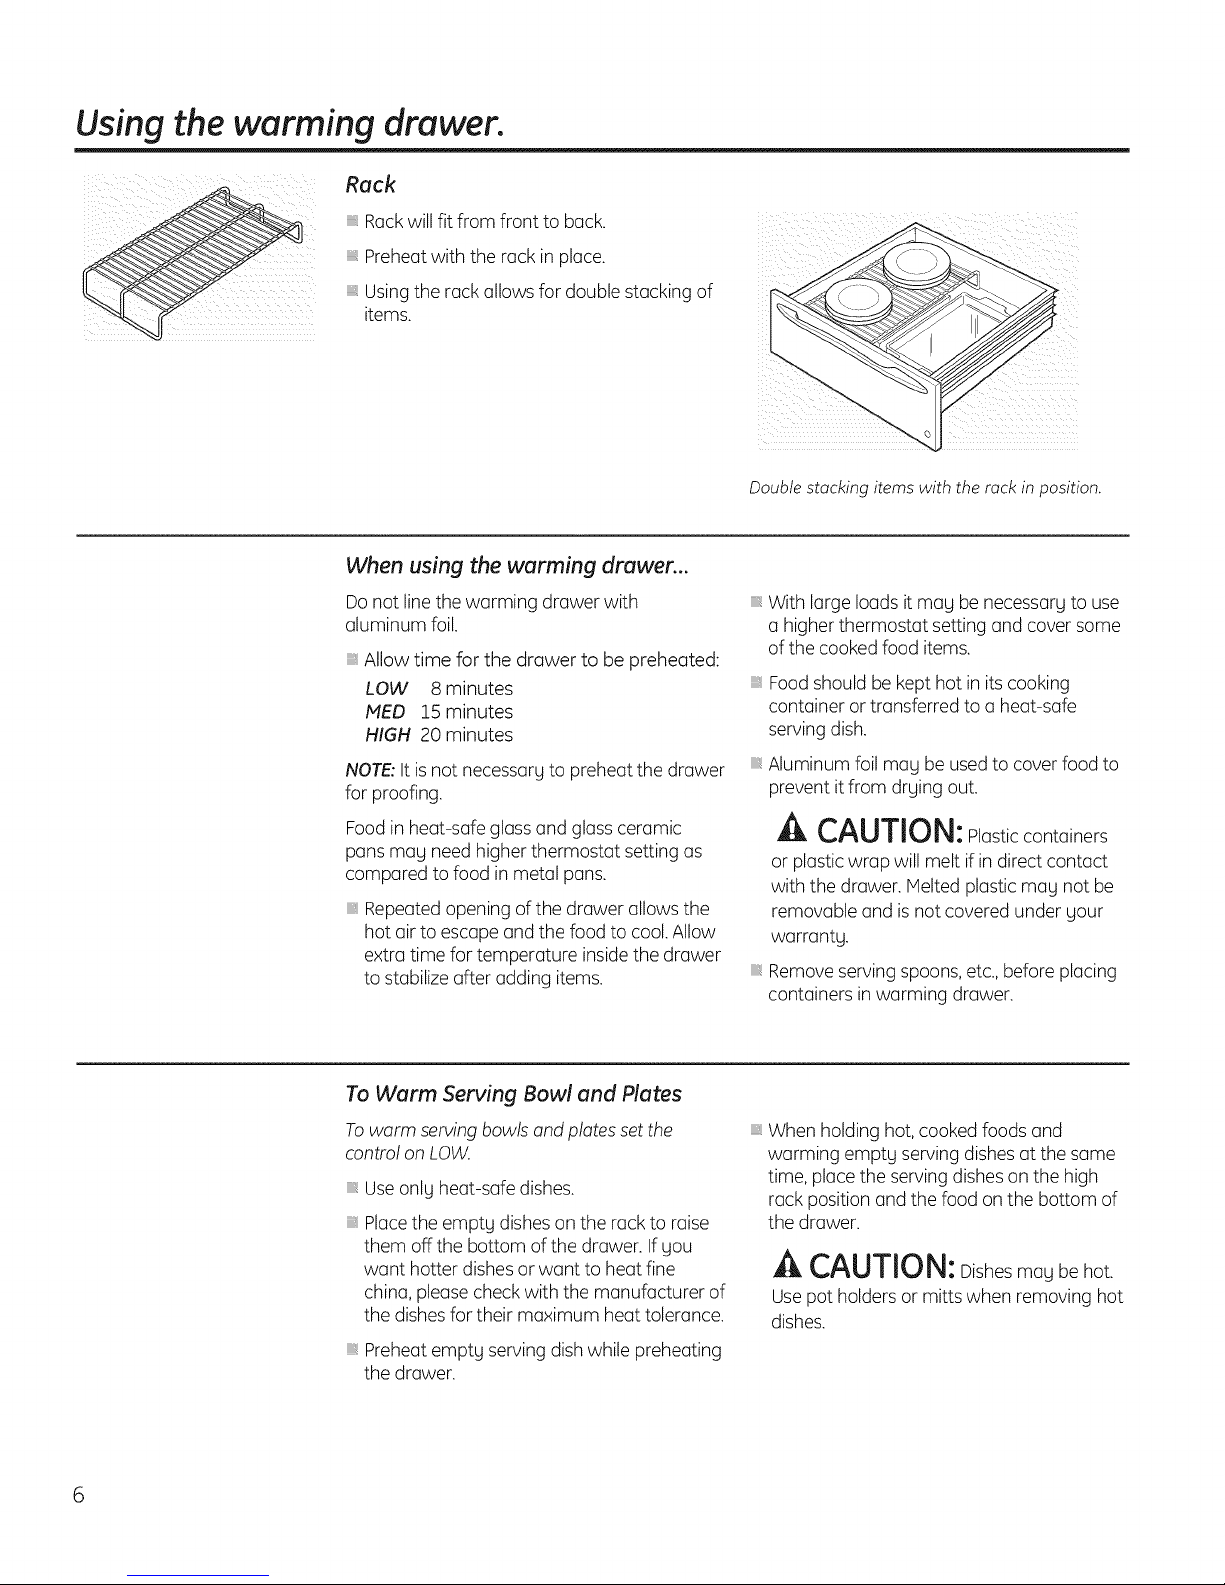
Rackwill fit from front to back.
Preheatwith the rack in place.
Usingthe rack allows for double stacking of
Rack
items.
When using the warming drawer...
Do not linethe warming drawer with
aluminum foil.
, Allow time for the drawer to be preheated:
LOW 8minutes
PIED 15 minutes
HIGH 20 minutes
NOTE:It isnot necessary to preheat the drawer
for proofing.
Foodin heat-safe glassand glass ceramic
punsmay need higher thermostat setting as
compared to food in metal pans.
, Repeatedopening of the drawer allows the
hot air to escape and the food to cool. Allow
extra time for temperature insidethe drawer
to stabilizeafter adding items.
Double stacking items with the rack in position.
, With large loads it may be necessary to use
a higher thermostat setting and cover some
of the cooked food items.
Foodshould be kept hot in its cooking
container or transferred to a heat-safe
serving dish.
Aluminum foil may be usedto cover food to
prevent it from drying out.
A CAUTION:Plasticcontainers
or plastic wrap will melt if in direct contact
with the drawer. Melted plastic may not be
removable and is not covered under your
warranty.
, Removeserving spoons,etc.,before placing
containers in warming drawer.
To Warm Serving Bowl and Plates
Towarm serving bowls and plates set the
control on LOW.
, Useonly heat-safe dishes.
, Placethe empty dishes on the rack to raise
them off the bottom of the drawer. Ifyou
want hotter dishesor want to heat fine
china, please check with the manufacturer of
the dishesfor their maximum heat tolerance.
, Preheatempty serving dish while preheating
the drawer.
, When holding hot, cooked foods and
warming empty serving dishesat the same
time, placethe serving disheson the high
rack position and the food on the bottom of
the drawer.
A CAUTION: Dishesmay be hot.
Usepot holders or mitts when removing hot
dishes.
 Loading...