

GE PT960WM1WW, PT960SM2SS, PT960SM1SS, PT960BM1BB, PT920WM1WW Owner’s Manual
...
©
¢J
ge.com
Safety Instructions .................. 2-4
Operating Instnwtions
]gakJ n g ..................................... 7
Broiling ................................ 12, 13
Control I,ockom ............................ ,21
Controls ................................... 5
Convection ............................. 14-17
Cook and Itold ()ption ....................... ,29
Dehydrate ()ptioll ........................... 99
Delay Option ............................... 30
Fa* orite Recipes ............................ 90
Itelp ..................................... 31
Kitchen Timer .............................. 91
()ption Settings .......................... 3,2-36
Auto Recipe _" Comersion .................... 34
Clock .................................... 39
Clock Blackout ............................ 33
Detault .................................. 36
l)isplay Color .............................. 34
Fahrenheit or Celsius Temperature Selection .... 33
Kitchen Timer Signal ....................... 36
I,anguage ................................ 34
Somld On/Off ............................ 35
Solmd \i)hune ............................ 35
Thermostat ............................... 3,2
Timer Signal .............................. 36
12-t ]our Shut-()ff .......................... 33
Oven .................................... 6, 7
Probe ............................... 10, 11, 17
Prooting .................................. 95
Roasting ................................... 7
Sabbath Option ............................. 31
SeltLCleaifing Oven ....................... 2,2-24
Timed Baking and Roasting .................. 8, 9
Timed Comectioll Baking and Roasting ....... 18-19
"IX*roTemps Option .......................... 98
Warming ............................... 26-27
Care and Cleaning
Comrol Panel .............................. 239
I ,ight Pmlb ................................. 237
()yen Door ................................ 38
Probe ..................................... 38
P.a( ks ..................................... 39
Removing Packaging "Ihpe .................... 37
Stainless Steel Surthces ....................... 39
Troubleshooting Tips ............... 4o-42
Consumer Support
Coilsmner Support ................... back cover
Product RegJst ration
/or Canadiall Customers ................... 45, 46
Product Reg%t ration
/or LI.S. Customers ....................... 43, 44
\Varrantv .................................. 47
U1_920- 30 " Sirzgle Wall Overz
U1_960- 30 " Double Wall Oven
Four
encastrd
_'_com_ection _lectrique
PT920-bbur ?ze?was#zSde 30 po
PT%O-bbur ?ze?was#zSde 30 po
La section frangaise commence a la page 49
Horno
empotrado
a com_eccidn el_ctrico
c
PT920-Hor_zo si_@le depared 3 "
PT960-Hor_zo doble de pared (b 30"
to secci6n on espa#ol empieza
(leo
en la pagina 93
Write themodelandserial
numbershere:
Model #
Serial #
You can find thenl on a label
on the fl'ont of the oven behind
the oven door Oil single oven nlodels,
or the front of the lower oven behind
the ()veil door on double ()veil inodels.
49-80431 11-07JR
iMPORTANTSAFETYiNFORMATiON.
READALLiNSTRUCTiONSBEFOREUSING
WARNING!
For your safety;,the information in this manual must be followed to minimize the risk of fire or
explosion, electric shock, or to prevent property damage, personal injury, or loss of life.
IMPORTANTSAFETYNOTICE
The California Safe Drinking Water and ToxicEnforcement Act requires the Governor of California
to publish a list of substances known to the state to cause cancer, birth defects or other reproductive
harm, and requires businesses to warn customers ofpotential exposure to such substances.
The fiberglass insulation inself-clean ovens gives off a very small amount of carbon monoxide during
the cleaning cycle. Exposure can be minimized by venting with anopen window or using a ventilation
fan or hood.
SAFETYPRECAUTIONS
When using electrical appliances, basic safety precautions should be followed, including the
foliowing:
_:;Use this appliance only fbr its intended
purpose as described in this )whet s
Manual.
_i_Be sure your appliance is properly
installed and grounded by a qualified
mchnician in accordance with the
provided installation insnucfions.
Ji:,:Do not attempt to repair or replace any
part of your oven unless it is specifically
recommended in this manual. All other
servicing should be refeiTed to a qualified
mchnician.
_{_Have the installer show you the location
of the cfivuit breaker or fl_se. Mark it for
easy' reference.
_{_Before performing any service, disconnect
the oxen power supply at the household
distribution panel by _emoving the fllse or
switching off the circuit breaken
ji:,iDo not leaxe children alone----_'hildren
should not be left alone or unatmnded in
an area where an appliance is in use. They
should never be allowed to sit or stand on
any part of the appliance.
_{_iDo not allow anyone to climb, stand or
hang on the door They could damage the
oven, or cause sexere personal i,_u U.
_?{:_Be sure d_e oven is securely installed in
a cabinet that is fllanly attached to the
house structme. Ne_er allow anyone to
climb, sit, stand or hang on the ox>n door
ji:,iNe_er leave the o_en door open when you
are not watching the oxen.
_:;Always kee I) combustible wall cox_ring,
curtains or drapes a sad distance flom
yO/lI" oxen.
_?{:_Alwws kee I) dish towels, dishcloths, pot
holders and oilier linens a sad distance
fl'OIll VO/lI" OX_II.
_{:_Always kee I) wooden and plastic umnsils
and canned food a safe distance away
flom your oven.
J?:':Teach children not m pl W with the
controls or any other part of file ox>n.
_::i,arge scratches or impacts m glass doors
can lead to broken or shatm_ed glass.
Ji:,:Do not store flammable mamfials in
arl o\_n.
CAUTION: ,emsofi.te,estto
children should not be stored in cabinets
above an oven; children climbing on the
oven m reach imms could be seriously
injured.
2
WARNING!
SAFETYPRECAUTIONS
ge.com
{_:Never wear loose-fitting or hanging
gaI_nents while using file appliance. Be
careflll when reaching for ite.ms stored in
cabinets over file ox.en. Flamnlal)le mamrial
could be ignited if brought in contact wifl/
hot surfaces or heating elements and mac
cause sex.ere BHF/Is,
_fi:,iUse only d U pot llolders--moist or damp
pot holders on hot snil_aces iI/_ I.esult in
bnills fiom steam. Do not let pot holders
touch hot heating elements. Do not use a
towel or other bulkv cloth.
_{;:For your safew, nex.er use your appliance
for wal_ning or heating the room.
_{;_Do not let cooking grease or other
flamnlable mamrials accmnulam in or
near tile oven.
_7{;_Do not use water on grease fires.
Never pick/l I) a flaming pan. Turn tile
controls off'.
Flame in tile oven can be smothered
completely by closing tile oven door
and turning tile oven off or by using a
multi-purpose d U chemical or fbam-type
fire extinguisher.
_{;_Do not touch tlle heating elements or tlle
interior surPace of the oven. These surPaces
may be hot enouOl m bum even though
they are dark in colon Duiing and after
use, do not milch, or let cloflling or oilier
flammable mamrials contact any inmrior
aI.ea of tile ox.en; allow sufficient time tbr
cooling first.
Pomnfially hot snifi_ces inchlde ox.en
x.ent openings, surfaces near tile openings,
crevices around the ox.en dooi, die edg.es
of file window and metal u-ira parts above
tile door.
REMEMBER:The inside surthce of the ox.en
may be hot when die door is opened.
_f;Never place cooking umnsils or aW odler
items on tile oven floon There is a heating
element beneath die ox.en floon Placing
imms on tile ox.en floor may cause tile
ox.en to ox.erheat, resnlfing in damag.e
to tile oven and risk of damag.e or fii.e
m cabinets.
_;:Nex.er lem.ejars or cans of l_atdiippings in
or Ileal vonr ox.en,
_{;:Do not store or use combustible mamrials,
gasoline or other flammable vapors and
liquids in the vicinity of tills or anv other
appliance.
_{;_Stand away from tile ox.en when opening
file ox.en door Hot air or steanl which
escapes can cause bums to hands, face
and/or eyes.
;f; Do not heat unopened food containers.
Pressure could build/l I) and die container
could burst, causing an irljul-y.
;_?Kee I) tile oven x.ent unobstructed.
'_!{i;Kee I) tile ox.en free from grease buildup.
_;:Place tim ox.en rack in tile desired position
while tile oven is cool. If racks must be
handled when hot, do not let pot holder
contact tile heating elements.
;_;When using cooking or roasting bags in die
ox.en, follow tile manu£tcturer's directions.
;f; Pulling out die rack to die stop-lock is a
convenience in lifting heaxy foods. It is also
a pi.ecaufion against bums flom touching
hot surfaces of tile door or ox.en walls.
_{;_Do not use tile oven to di T newspapers.
If overheamd, ti/ev can catch on fire.
_{;_Do not use the ox.en for a storage area.
Imlns stored in an ox.en can ignim.
;_i:,:Do not leax.e paper products, cooking
utensils or fbod in tile ox.en when not
in rise.
_{;_After broiling, always take any broiler
pan out of tim ox.en and clean it. Leftox.er
grease in a broiler pan can catch fire next
time yon use the pan.
_{;_Clean only parts lismd in this Owner's
Manual.
_{:_Do not use almninum foil to line
ox.en bottoms, hnproper installation
of ahmlinunl foil nl W result in a risk
of elecuic shock or fire.
3
IMPORTANTSAFETYINFORMATION.
READALLINSTRUCTIONSBEFOREUSING
COOKMEATANDPOULTRYTHOROUGHLY.,.
Cookmeatandpoultrythoroughly--meat to at least anINTERNALtemperatureof 160°Fandpoultry
toat least an INTERNALtemperatureof 180°ECookingto thesetemperaturesusuallyprotectsagainst
foodbomeillness.
SELF-CLEANINGOVEN
Do not clean the door g_asket. Tile door
gasket is essential tbr a good seal. Care
should be token not to rub, damag_ or
mo_ tile gasket.
Do not use o\'en cleaners. No comme_via]
ox>n cleaner or oven liner promctive
coating of aW kind should be used in or
around any part of the oven. Residue flom
oxen cleaners will damage the inside of the
oxen when tile self-clean cycle is used.
;_i:,:Before self-cleaning the o_en, remove the
probe and any broiler pan, grid and other
cookwa re.
;_;Be sure to wipe up excess spillage before
starting tile selt¥leaning operation.
_:;If the sell:cleaning mode malflmcfions,
turn file oxen off and disconnect file power
supply. Have it serviced 1)va qualified
mchnician.
READANDFOLLOWTHISSAFETYINFORMAtiONCAREFULLY.
SAVETHESEINSTRUCTIONS
4
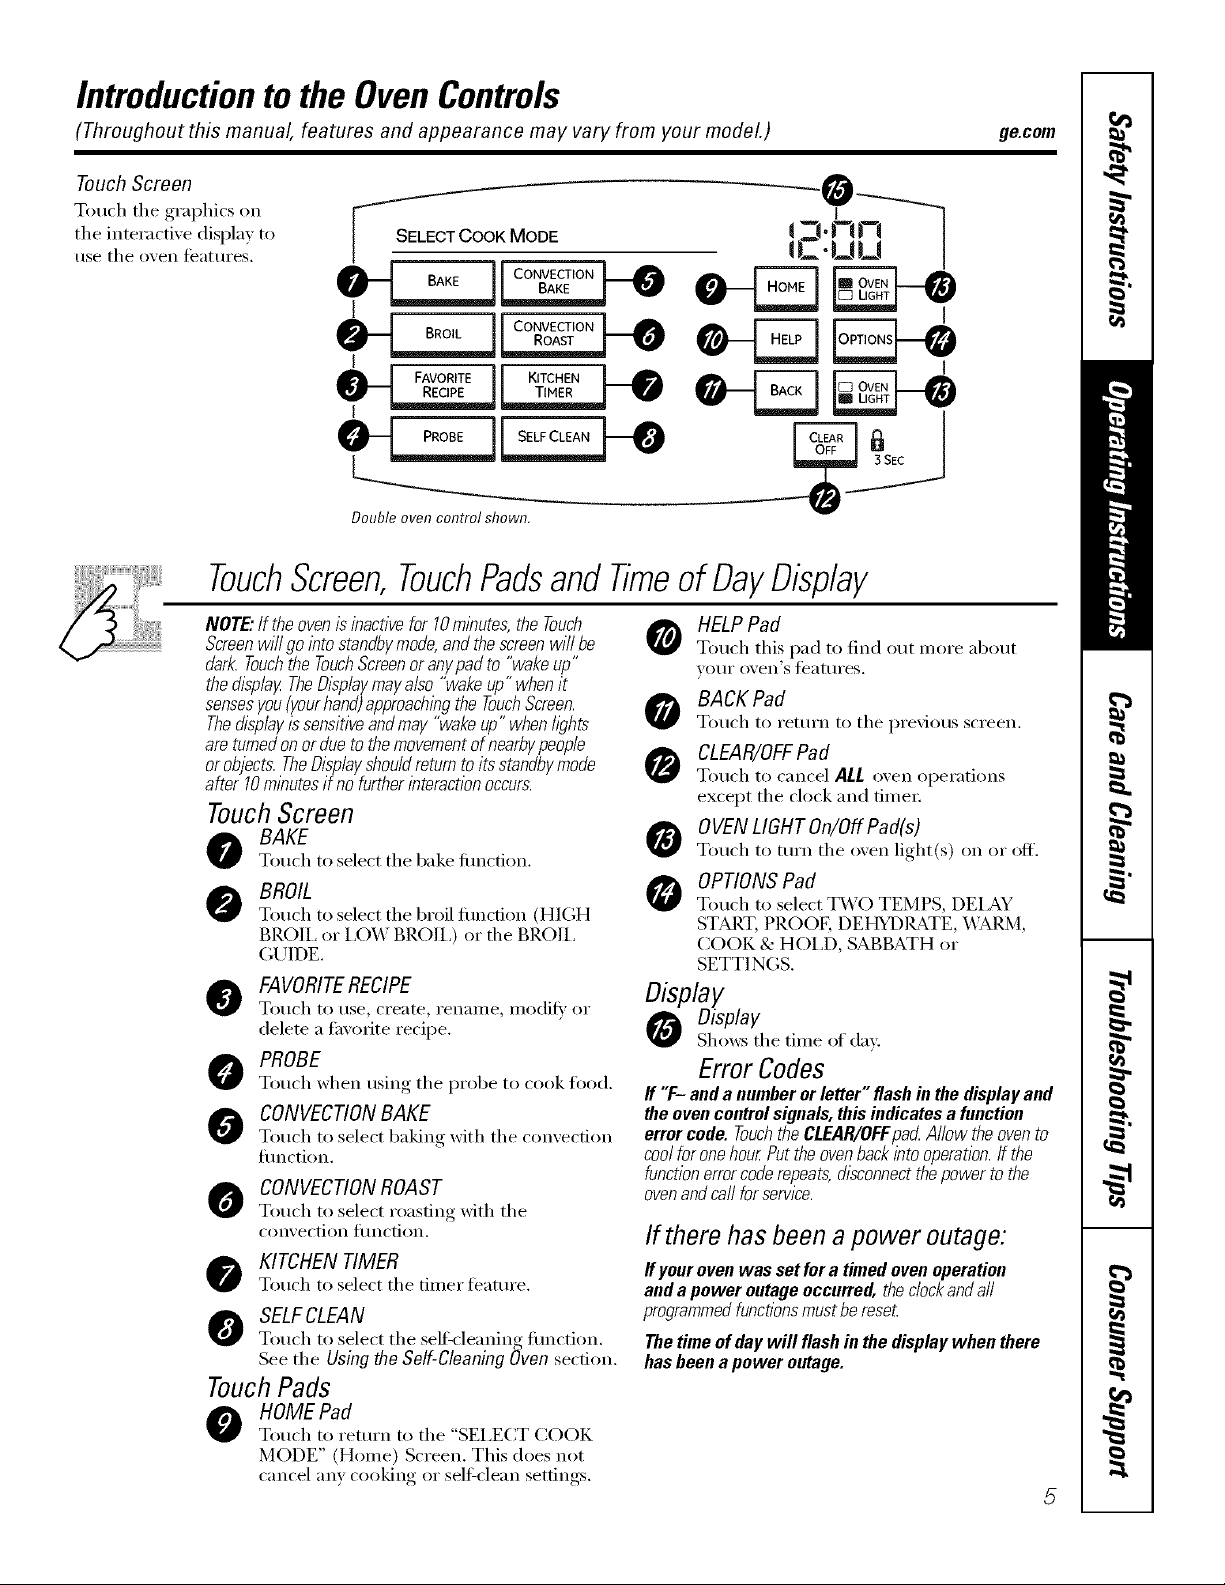
Introductiontothe OvenControls
(Throughout this manual, features and appearance may vary from your model.)
Touch Screen
Touch the graphics on
tile interactive display to
rise tile oven features.
SELECTCOOKMODE
o4...zmJ
I
Double oven control shown.
TouchScreen,TouchPadsand Timeof DayDisplay
NOTE."If the oven is inactive for lO mlbutes, the Touch
Screenwill go into standbymode, and the screenwill be
dark. Touchthe TouchScreenor anypad to "wake up"
the &splay TheDisplaymay a/so "wakeup" when it
sensesyou (yourhand)approachingthe TouchScreen.
Thedisplay is sensitive andmay "wake up" when hghts
are turned onor due to themovement ofnearbypeople
or objects. TheDisplayshould return to its standbymode
after 10minutes if no furtherinteraction occurs.
TouchScreen
BAKE
Touch to select tile bake fimction.
BROIL
O
Touch to select tile broil timction (HIGH
BROIl, or I,O_,V BROIl,) or tile BROIl,
GLrlDE.
FAVORITERECIPE
Totlch to rise, {Teate, i'eilaille, ilia(Ill,, or
delete a tmorite recipe.
PROBE
Touch when using tile probe to cook ti}od.
CONVECTIONBAKE
Touch t{} select baking with tile c{m_ecfion
fllIlCtioIl.
CONVECTIONROAST
Touch to select roasting with tile
COlB ectioll tilIlctioIl.
KITCHEN TIMER
Touch to select tile timer feature.
SELFCLEAN
Touch to select tile self k leaning fimction.
See tile Using the Self-Cleaning Oven secdon.
TouchPads
F,,VOR.TEII K.TC.E,[
HELPPad
T{}u{'h this pad to lind o/it I//{)I'e about
X O/lI" {}_,eIl'S t_attlI'es.
BACKPad
Touch to I'ett/rIl to tile previous scI'eeIl.
CLEAR/OFFPad
Touch to cancel ALL oven operations
except tile clock and timer
OVENLIGHT On/Off Pad(s)
Touch to turn tile o_en light(s) on or off.
OPTIONSPad
Touch to select T\_O TEMPS, [)EIAY
STMIT, PROOK DEHYDI_tTE, X_;4,RM,
COOK & HOI,D, SABBATH or
SETTINGS.
Display
Display
Shows tile time of day.
Error Codes
If "F- anda number or letter" flash in the display and
the oven control signals, this indicates a function
error code. Touchthe CLEAR/OFFpa_ Allow the ovento
cool for one hour Putthe ovenback into operation. If the
functionerrorcoderepeats,disconnectthepower to the
ovenand carlfor service.
If there hasbeen a power outage:
fly our oven was set fora timed ovenoperation
and a power outage occurred, thedock and a//
programmedfunctionsmust be reseL
The time of day will flash in the display when there
has been a power outage.
ge.com
-e
.2-uu J
HOME Pad
Touch to return to the "SEI,ECT COOK
MODE" (Home) Screen. This does not
cancel any cooking or sell2clean settin ,s
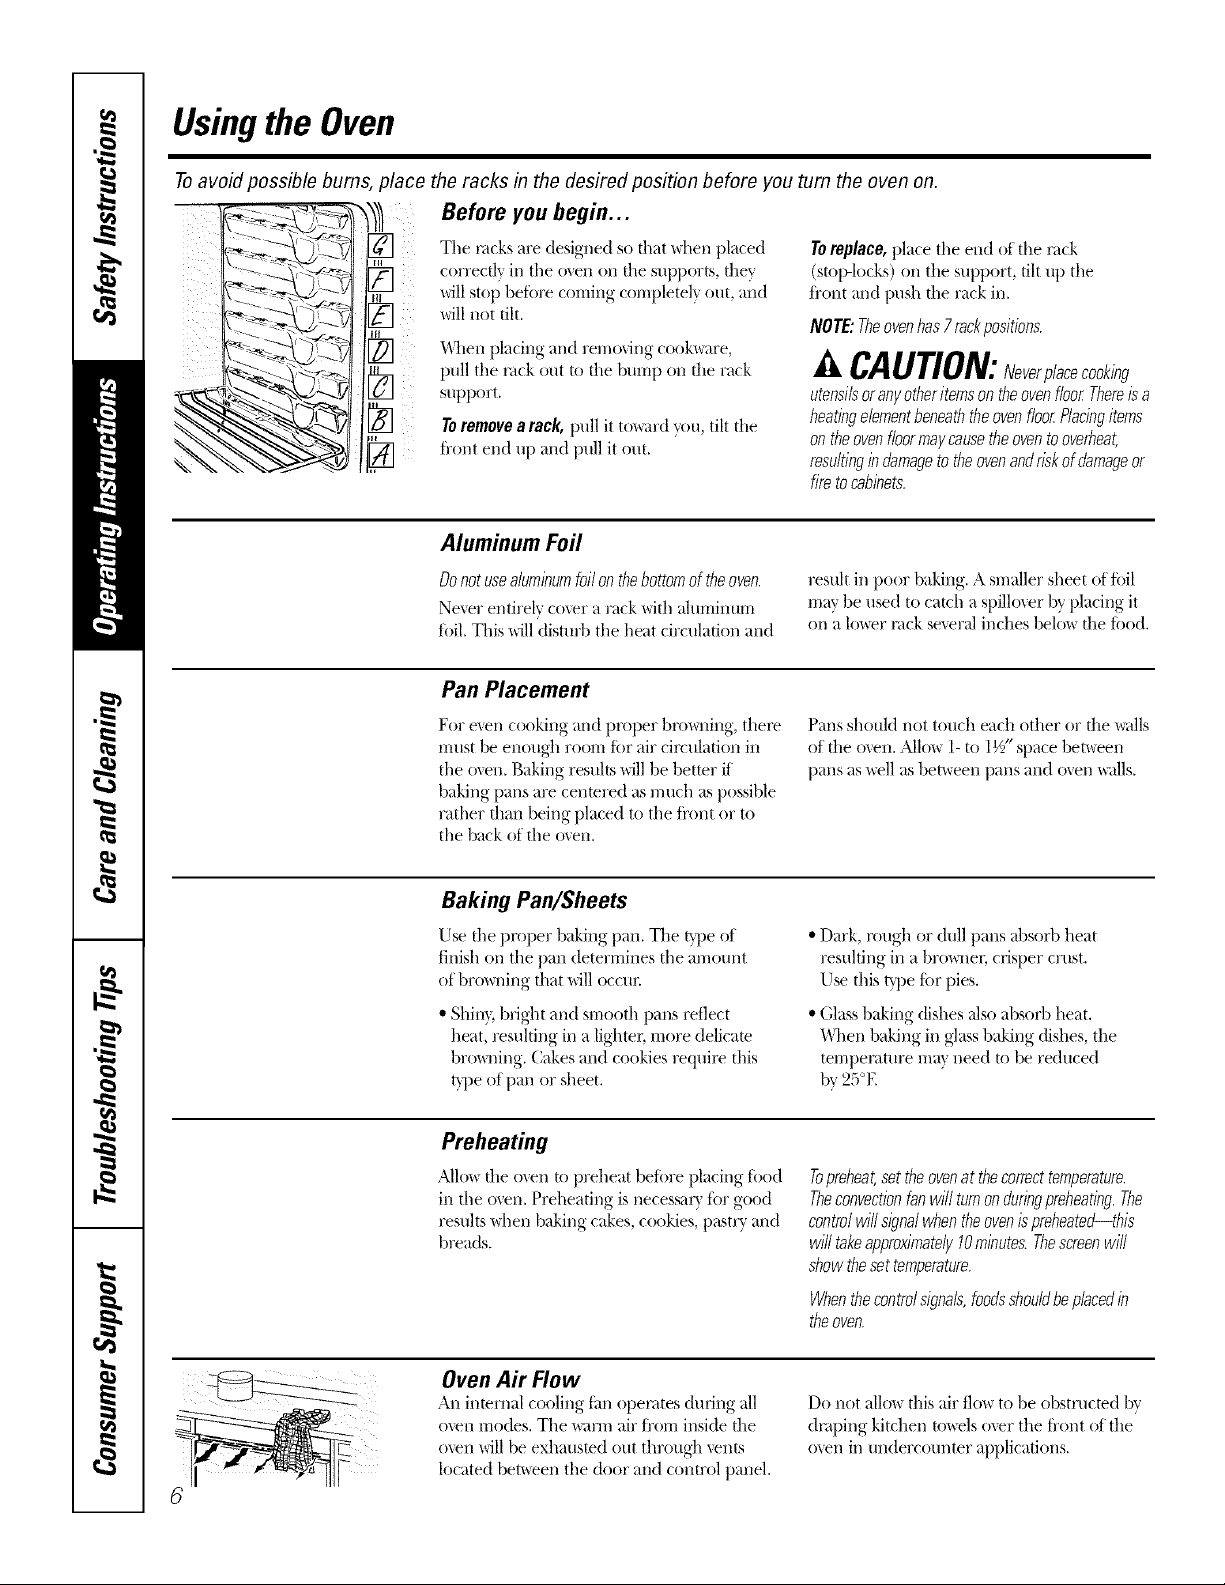
Using the Oven
Toavoid possible bums, place the racks in the desired position before you turn the oven on.
Before you begin...
Tile rocks are designed so fllat \d_en placed
correcdv ill tile <well on fl_esupports, fl_ev.
Mll stop betore corrlill_, cornt)letelx, out, and
will not tilt.
ii
_Allen placing and rem_Mng cookware,
pull tile rock out to file bump on file rack
support.
Toremovearack,pull it toxx_tMyou, tilt fl_e
front end i/l) and pull it out.
Toreplace, place the end of the rock
(stol>locks) on the support, tilt up the
fi'ont and push tim rack ill.
NOTE:Theovenhas7rackpositiom.
CAUTION:Neverp/aeeeook/ng
utensilsoranyotheriternsontheovenfloorThereisa
heatingelementbeneaththeovenfloorPlacingitems
ontheovenfloormaycausetheoventooverheat,
resultingindamagetotheovenandriskofdamageor
firetocabinets.
Aluminum Foil
Donotusealuminumfoilon thebottomoftheoven.
Never entirely co\er a rack with _fluminum
toil. Tiffs will disturb tile heat circulation and
result ill poor baking. A sm_fller sheet of foil
may be used to catch a spillo_er b_ placing it
on _Jlo_r rock se_,era] inches belo_ tim toed.
Pan Placement
For e_en cooking and proper brooming, thel_
rritlst be enough roorri for air circulation ill
tile o\en. Baking results will be better if
baking pans are cenwred as much as possible
rather than being placed to the Ji'ont or to
tile back of tile oven.
Palls should not toucll each other or fl_e x_adls
of file o_en. Allure l- to 1V2"space bet\_een
pans as _>ll as ber\_een pans and oven _llls.
Baking Pan/Sheets
Use tile proper baking pan. Tile type of
finish on tile pan determines tile amount
ofbro_dng that will occm:
• Sbin}, bright and srnooth pans reflect
heat, resulting ill a lighter, more delicate
browning. Cakes and cookies requil> this
t}pe of pan or sheet.
Preheating
Mlo_ file o_en to preheat before placing filed
ill tile oven. Preheating is necessarx, for good
results when bakino_ cakes, cookies, [)astrv, and
breads.
Oven A# Flow
An internal cooling tim openltes during all
o\en rhodes. Tile warm air ti'orri inside the
o\'en will be exhausted out through \ents
located bet\_ een the door and control panel.
• Dark, rough or dull pans absorb heat
resulting ill a broad, mr, crisper crust.
[lse this type tor pies.
*Glassbaking (fishesalso absorb beat.
"_\]/enbaking ill glassbaking (fishes, the
temperature mat need to be reduced
by 25°E
Topreheat,set theovenat thecorrecttemperature.
Theconvectionfanwill turnonduringpreheating.The
controlwill signalwhentheovenispreheated--this
will takeapproximately10minutes.Thescreenwill
showthesettemperature.
Whenthecontrolsigna&foodsshouldbeplacedin
theoven.
Do not allo_ tiffs air flo_ to be obstructed by
draping kitchen towels o\er the ti'ont of the
o_en ill undercounter applications.
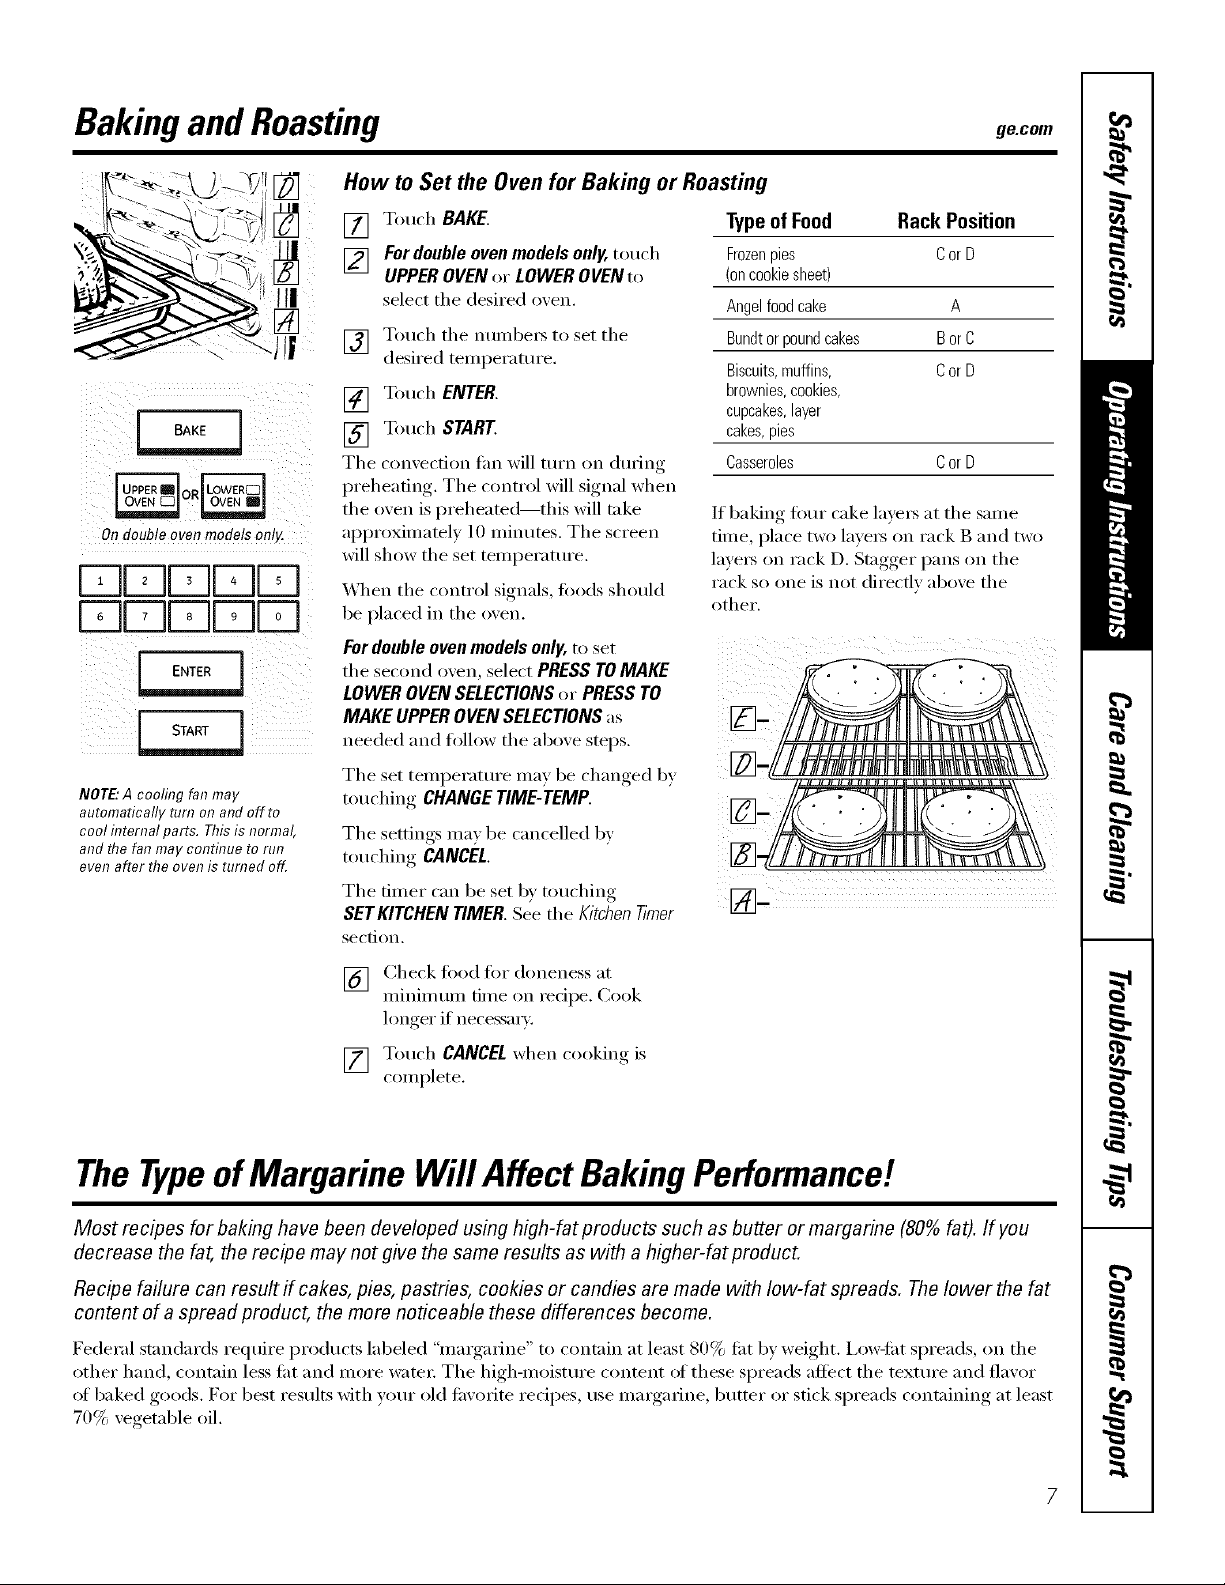
Bakingand Roasting ge.com
How to Set the Oven for Baking orRoasting
On double oven models only.
kJUUN1N1
DDDN1N1
NOTE:A cooling fan na_
auromarlcam nm7 on and off to
cool internal Jar_s.Thisis norma
and the fan ma_ connnue to run
even after the oven is turned off
[] Touch BAKE.
F2] For double ovenmodels only, touch
UPPEROVENor LOWER OVEN to
select the desired o_,en.
] Touch the numbers to set the
desired temperatm'e.
[] Touch ENTER.
[] Touch START
The convection tim will turn on dtlring
preheating. The control will signal when
the oven is I)reheated--this will tnke
approximately l0 minutes. Tile screen
will show the set teml)erature.
\4lien the control signals, fi)ods should
be placed in the oven.
For double oven models only, to set
tile second o_,en, select PRESS TOMAKE
LOWER OVEN SELECTIONSor PRESS TO
MAKE UPPEROVEN SELECTIONSas
needed and follow tile above steps.
Tile set teml)eratm'e may be changed b}
touching CHANGE TIME-TEMP.
Tile settings ma_ be cancelled by
touching CANCEL,
Tile timer can be set by touching
SETKITCHEN TIMER. See the K/tchen Timer
section,
Typeof Food Rack Position
Frozenpies C or D
(on cookie sheet)
Angel food cake A
Bundt or pound cakes Bor C
Biscuits,muffins, C or D
brownies, cookies,
cupcakes,layer
cakes,pies
Casseroles C or D
If baking four cake layer3 at tile same
time, place two laver3 on rack B and two
lave_ on rack D. Stagger pans on tile
rack so one is not directly above tile
other.
[] Check fi)od fi_r aloneness at
minimum time on recipe. Cook
longer if necessm_.
[] T(mch CANCEL when cooking is
complete.
TheTypeofMargarine Will Affect BakingPerformance!
Most recipes for bak#Tghave been developed US#Tghigh-fat products such as butter or margarine (80%fat). If you
decrease the fat, the recipe may not give the same results as with a higher-fat product.
Recipe failure can result if cakes, pies, pastries, cookies or candies are made with low-fat spreads. Thelower the fat
content of aspread product, the more noticeable these differences become.
Federal standards require [)roducts labeled "margarine" to contnin at least 80% flit by weight, i,ow-iilt spreads, on tile
other hand, contain less ti_t and more water: Tile high-moisttn'e content of these spreads affect tile texture and flavor
oI baked goods. For best results with your old ti_\'orite recipes, use margarine, butter or stick spreads containing at least
70% vegetable oil.

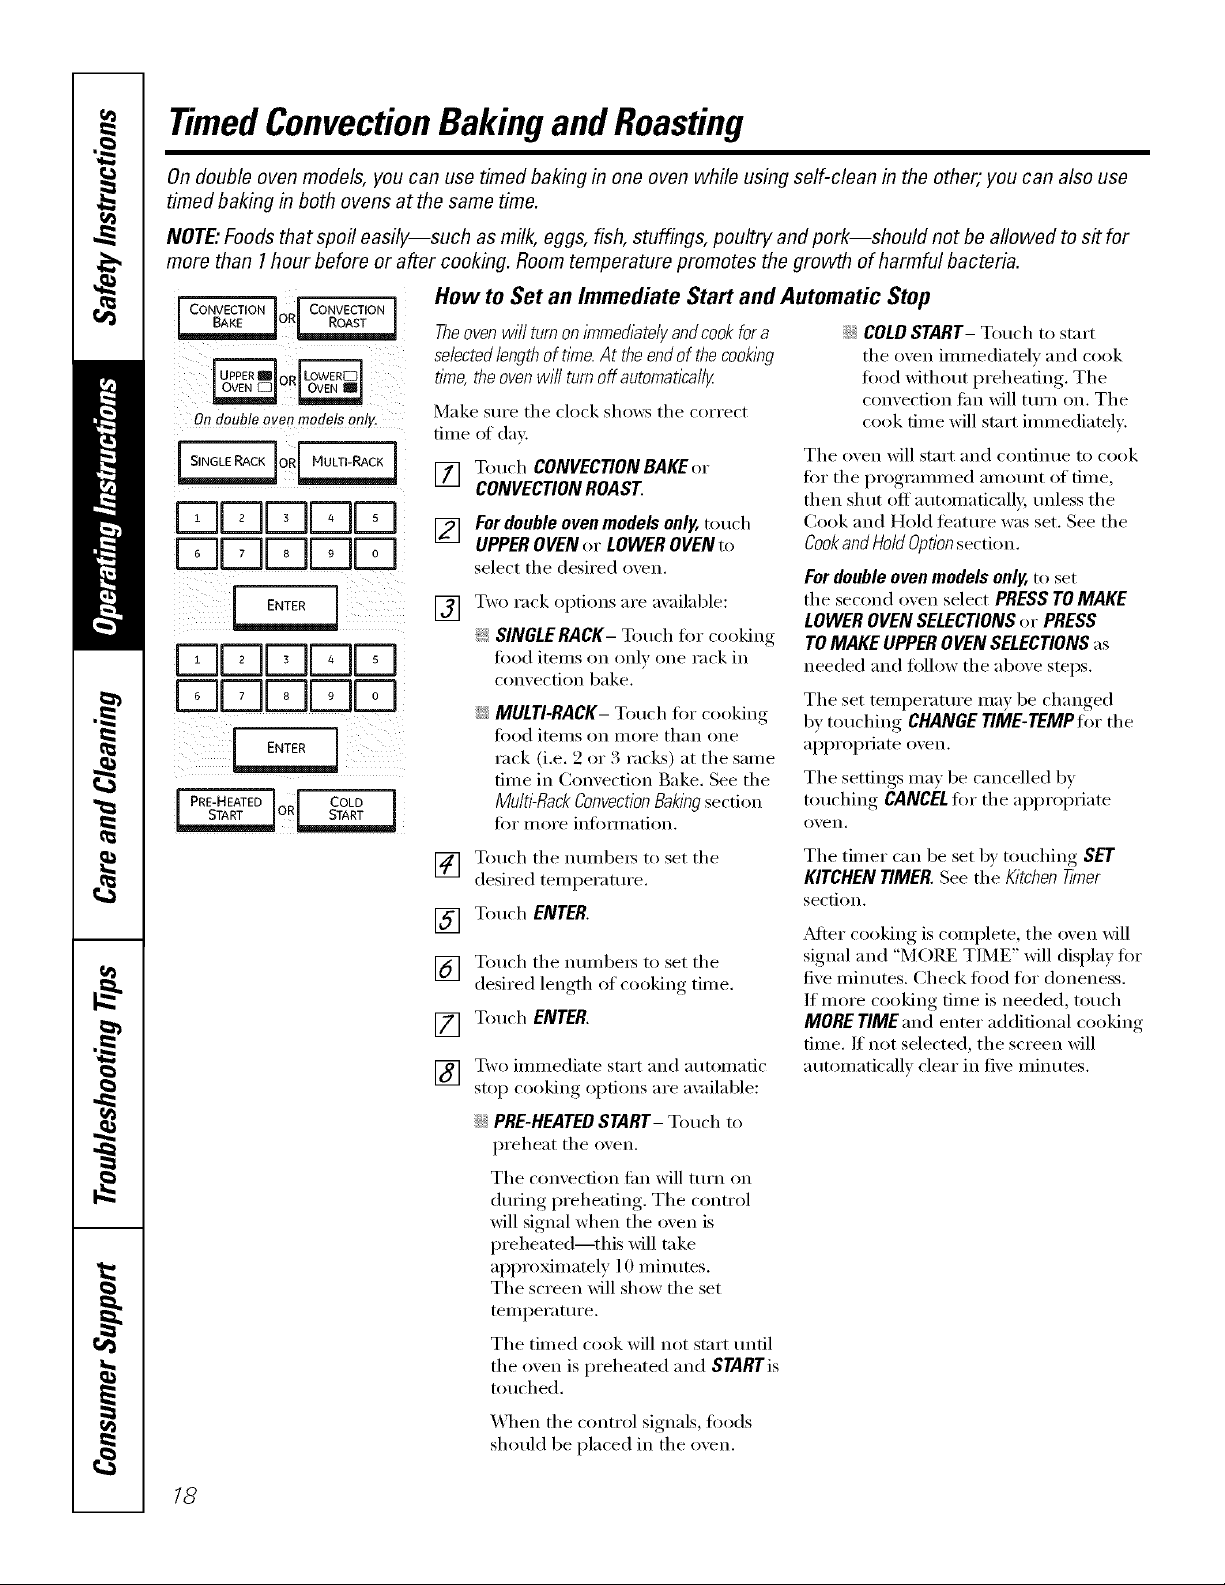
7TmedBaking and Roasting
On double oven models, you can use timed baking in one oven while using self-clean in the other; you can also use
timed baking inboth ovens at the same time.
NOTE."Foods that spoil easily--such as milk, eggs, fish, stuffings, poultry and pork--should not be allowed to sit for
more than 1hour before or after cooking. Room temperature promotes the growth of harmful bacteria.
How to Set an Immediate Start and Automatic Stop
BAKE
Ondouble ovenmodels only.
r-qr-ql,, 0li, i
FqFqLdL U
ENTER_
[Z]FqDU][
FqFqUUU
{ PRE-HEATED J J COLD
1
Theoven will turnon immediatelyandcook for a
selectedlength of time.At the end of the cooking
time,the oven will turn off autornatica//y
Make sure the clock shows the correct
time of din:
[] Touch BAKE.
_] Fordoub/eovenmodelsonly,touch
UPPEROVENor LOWEROVENto
select the desired o',en.
Touch the numbers to set the
[]
desired temperatm'e.
Touch ENTER.
[]
Touch the numbe[s to set the
[]
desired length of cooking time.
Touch ENTER.
[]
Two immediate start and automatic
[]
stop cooking options are available:
::Ji:_PRE-HEATEDSTART- Touch to
preheat the oven.
The convection tim will turn on
during preheating. The control
will signal when the oven is
preheated--this will take
approximately l0 Ininutes.
The screen will show the set
teil/pei'att ii'e.
X_hen the control signals, place
food in the o',en.
The timed cook will not start tmtil
the oven is preheated and START
is touched.
The oven will start and continue to cook
for the i)rogramm ed amount of tim e,
then shut off automaticall 5 mfless the
Cook and Hold teatm'e was set. See the
Cookand Hold Optionsection.
For double oven models only, to set
the second oven select PRESS TO MAKE
LOWER OVEN SELECTIONSor PRESS TO
MAKE UPPEROVENSELECTIONSas
needed and fi)lh)w the above steps.
The set temperatm'e may be changed
by, t()uchin_<* CHANGE TIME-TEMP for" the
ai)i_ropfiate o_en.
The settings ma) be cancelled b}
touching CANCELfi)r the ai)i)ropriate
o_,en.
The timer can be set b) touching SET
KITCHENTIMER.Seethe Kitchen_mer
section.
_Mter cooking is complete the oven will
signal and "MORE TIME" will display fi)r
five minutes. Check t0od fi)r doneness.
If more cooking time is needed, touch
MORETIME.ridenter additional cooking
time. If not selected, the screen will
automatically clear in five minutes.
_: COLDSTART- Touch to start
the oven immediately and cook
t0od without preheating. The
convection tim will turn on. The
cook time will start immediately
8
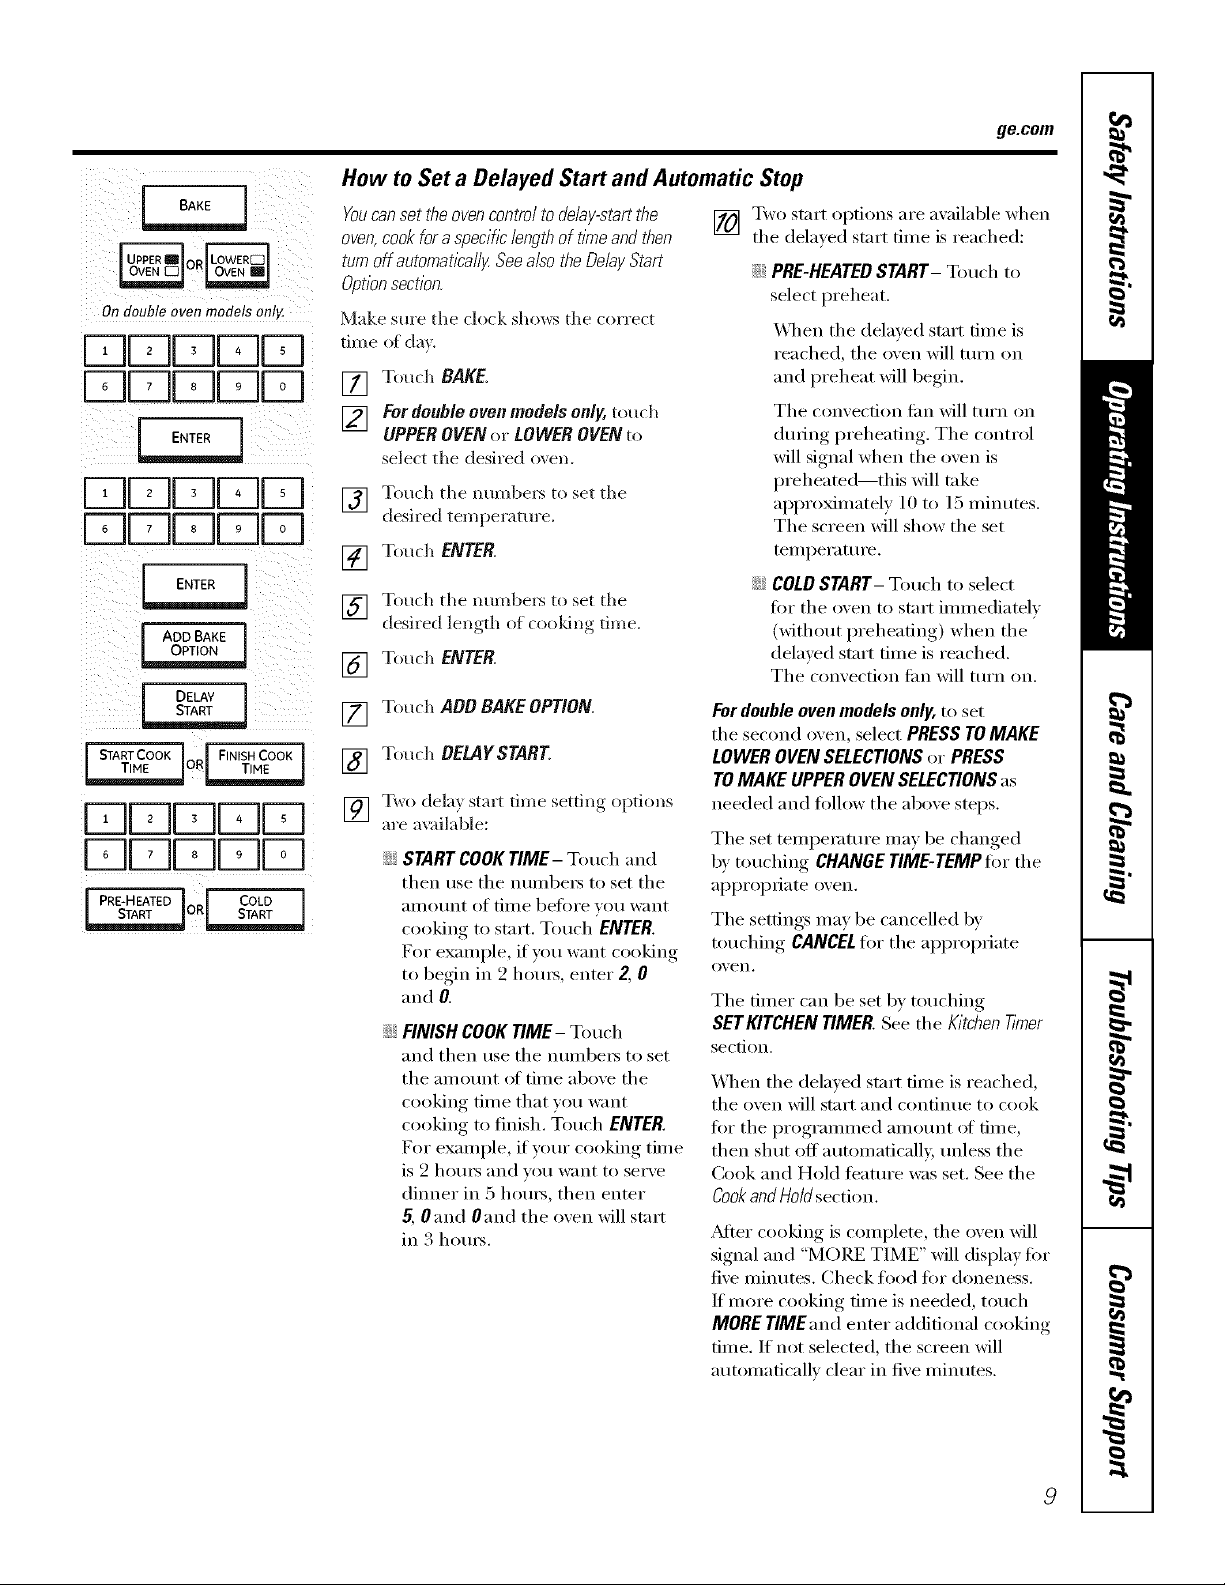
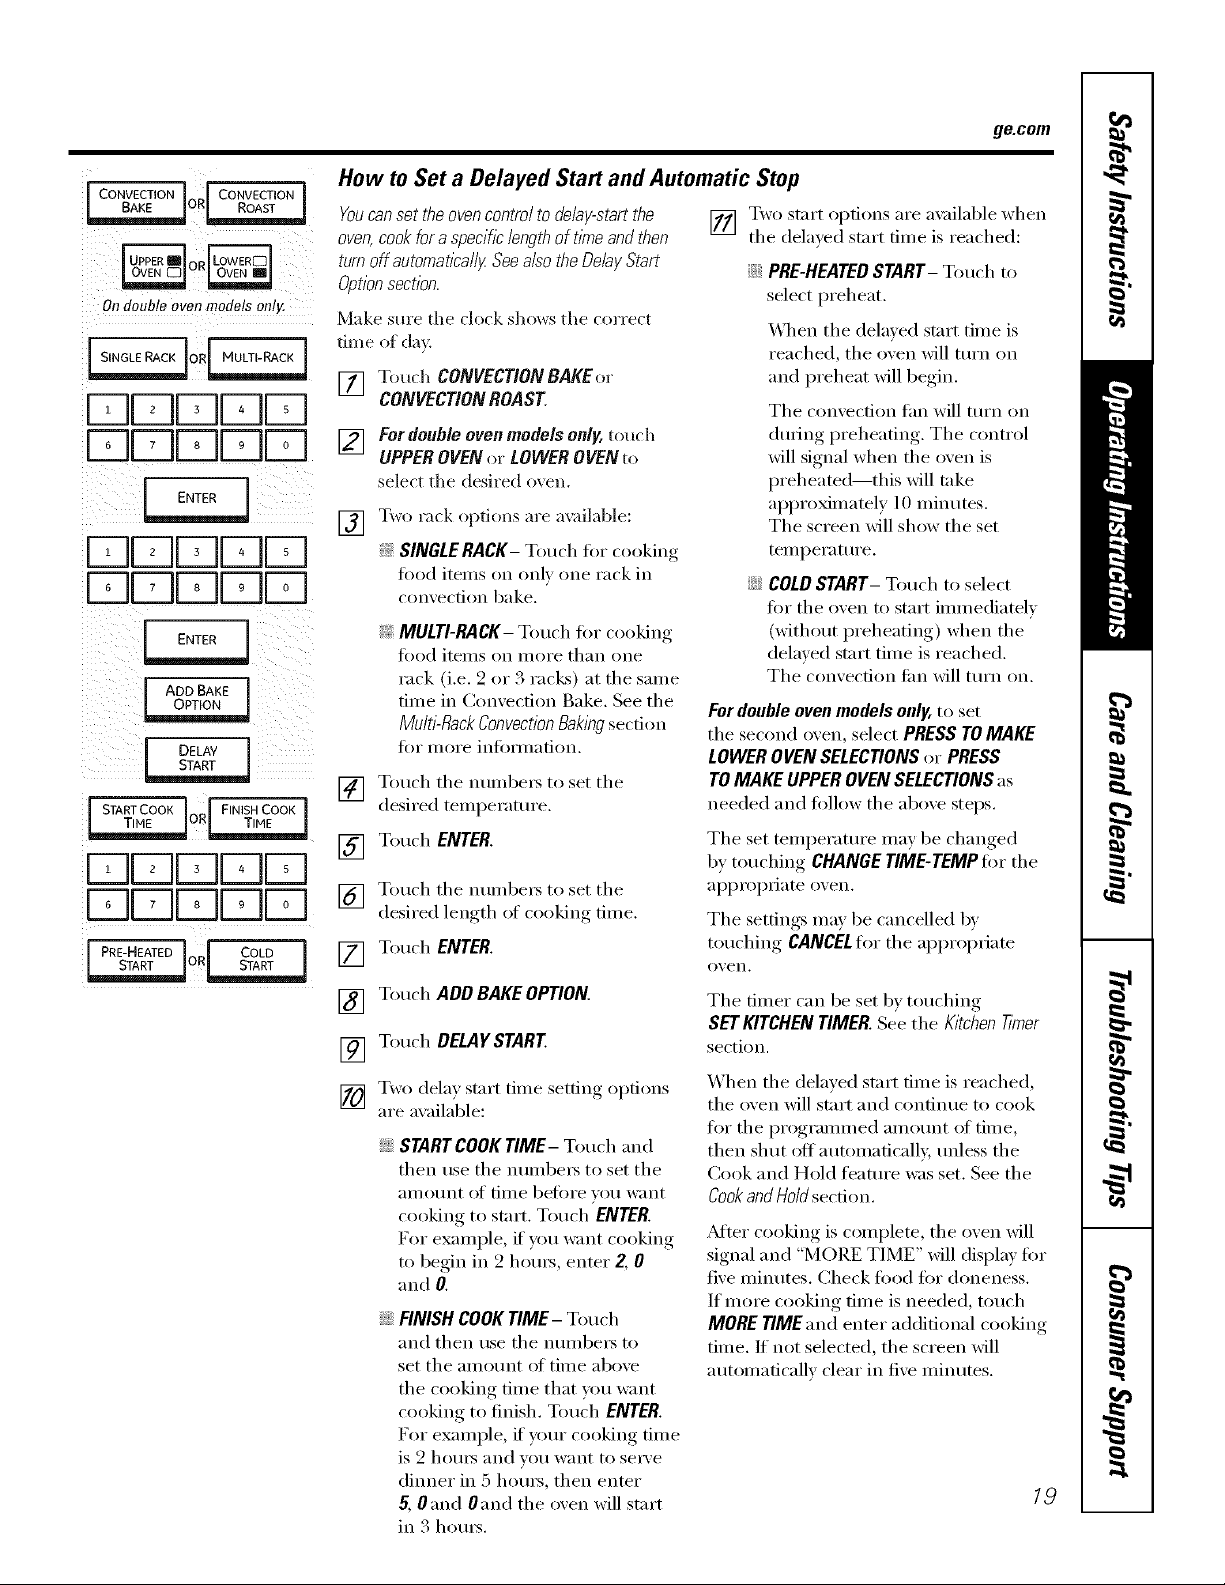
How to Set a Delayed Start and Automatic Stop
Re.corn
Ondoubleovenmodelsonly.
DDuuu
DDUUu
DDUUL
D[-r-IDDb---j
[ ADDBAKE
[ DELAY
J STARTCOOK ] I FNSHCOOK
T,,E
uuuDD
uuul--qD
[ PRE-HEATED J f COLD ]
I STARTI
Youcanset the oven contro/to de/a/-start the
oven,cook fora specific length of flnTeandthen
turnoff automat/_a//ZSeea/so the Delay Start
Option sectlon.
Make sm'e the clock shows the correct
time (ff dm.
[] Touch RAKE.
[_] Fordoubleovenmodelsonly,touch
UPPEROVENor LOWEROVENto
select the desired oven.
] Touch the numbe_5 to set the
desired temperature.
[] Touch ENTER.
] Touch the mmd)e_s to set the
desired length of cooldng time.
[] Touch ENTER.
Touch ADDBAKEOPTION.
[]
Touch BELAYSTART
[]
Two dela} start time setting, Ol)tions
[]
are available:
a START COOKTIME- Touch and
then use the numbe_ to set the
}lIllO/Int of tiine beii)re VO/I I%;lIlt
cooking to start. Touch ENTER.
I?or example, if you want cooking
to begin in 2 hems, enter Z 0
and R
N FINISH COOK TIME- Touch
and then use the numbe_ to set
the am Bunt (ff tim e above the
cooking time that you want
cooking to finish. Touch ENTER.
For example, if yore" cooking time
is 2 hOlIES and veil w;Int to serve
dinner in 5 hours, then enter
5, 0 and 0 and the oven will start
in 3 hom_.
[] Two start options are available when
the delayed start time is reached:
::Ji::PRE-HEATEDSTART- Touch to
select preheat.
\&]mn the delayed start time is
reached, the oven will tm'n on
and preheat will begin.
The convection tim will mrn on
dining preheating. The control
will signal when the oven is
i)reheated--this will take
approximately l 0 to 15 minutes.
The screen will show the set
teml)erature.
::Ji::COLDSTART- Touch to select
fi)r the oven to start immediately
(without preheating) when the
delayed start time is reached.
The convection tim will turn on.
For double oven models only, to set
the second oven, select PRESS TOMAKE
LOWER OVEN SELECTIONSor PRESS
TOMAKE UPPER OVENSELECTIONSas
needed and follow the above steps.
The set temperature may be changed
by touching CHANGE TIME-TEMP for the
api)ropfiate oven.
The settings may be cancelled bv
touching CANCELfor the al)l)ropriate
()ven.
The timer can be set b} touching
SET KITCHEN TIMER. See the Klrchen Timer
section.
X4q_en the delayed start time is reached,
the oven will start and continue to cook
for the programmed amotmt of time,
then shut off automaticall 5 tmless the
Cook and Hold teatm'e was set. See the
Cookand Hold section.
_Mter cooking is complete, the oven will
signal and "MORE TIME" will display tot
five minutes. Check food for doneness.
If more cooking time is needed, touch
MORE TlMEand enter additional cooking
time. If not selected, the screen will
automatically clear in five minums.

Using the Probe
For many foods, especially roasts andpoultry, internal food temperature is the best test for aloneness. The
temperature probe takes the guesswork out of roasting by cooking foods to the exact doneness you wan_
Use ot l)robes other than the one
The temperature probe has a
skewer-like probe at one end and a
plug at the other end that goes hTto
the outlet f17the oven.
l)ro_ided with this product ma) result in
(lamage to the probe,
Use the handles of the probe and plug
when inserting and removing them fl'om
the meat and outlet.
;;Ji::Toavoiddamaglbgyourprobe,donotuse
tongstopuffonthecablewhenremowbgit
_ Toavoidbreakingtheprobe,makesurefood/s
completelydefrostedbeforeinserting.
P!ug
iJi::Topreventpossl#leburns,donotunplug
theprobefromtheoutletuntiltheoven
hascooled
!i>Never leave yourprobe inside the oven during
a self-cleaningcycle.
!i>Do not store theprobe in the oven.
_Mier preparing the tood, follow these
directions fin" proper probe placement:
_;;_:The tip ot the probe should rest in the
center of the fi)od and should not
touch b(me, tilt or gristle.
_ For roasts with no bone - insert the
probe into the meatiest part of the
roast,
_'_For bone-in ham or lamb - insert the
probe into the center of the lowest,
lmgest muscle or joint.
_ For meat loat or casseroles - insert the
probe into the center of the tood so
that as much as possible of the metal
shaft is covered.
_: For fish - insert the probe from just
above the gill into the meatiest area
parallel to the backbone.
::Ji::For a whole mrkev- insert the probe
into the meatiest part of the inner
thigh fl'om below and parallel to
the leg.
i':'::For a tin'key breast - insert the probe
into the meadest part of the breast
II/eat.
/0
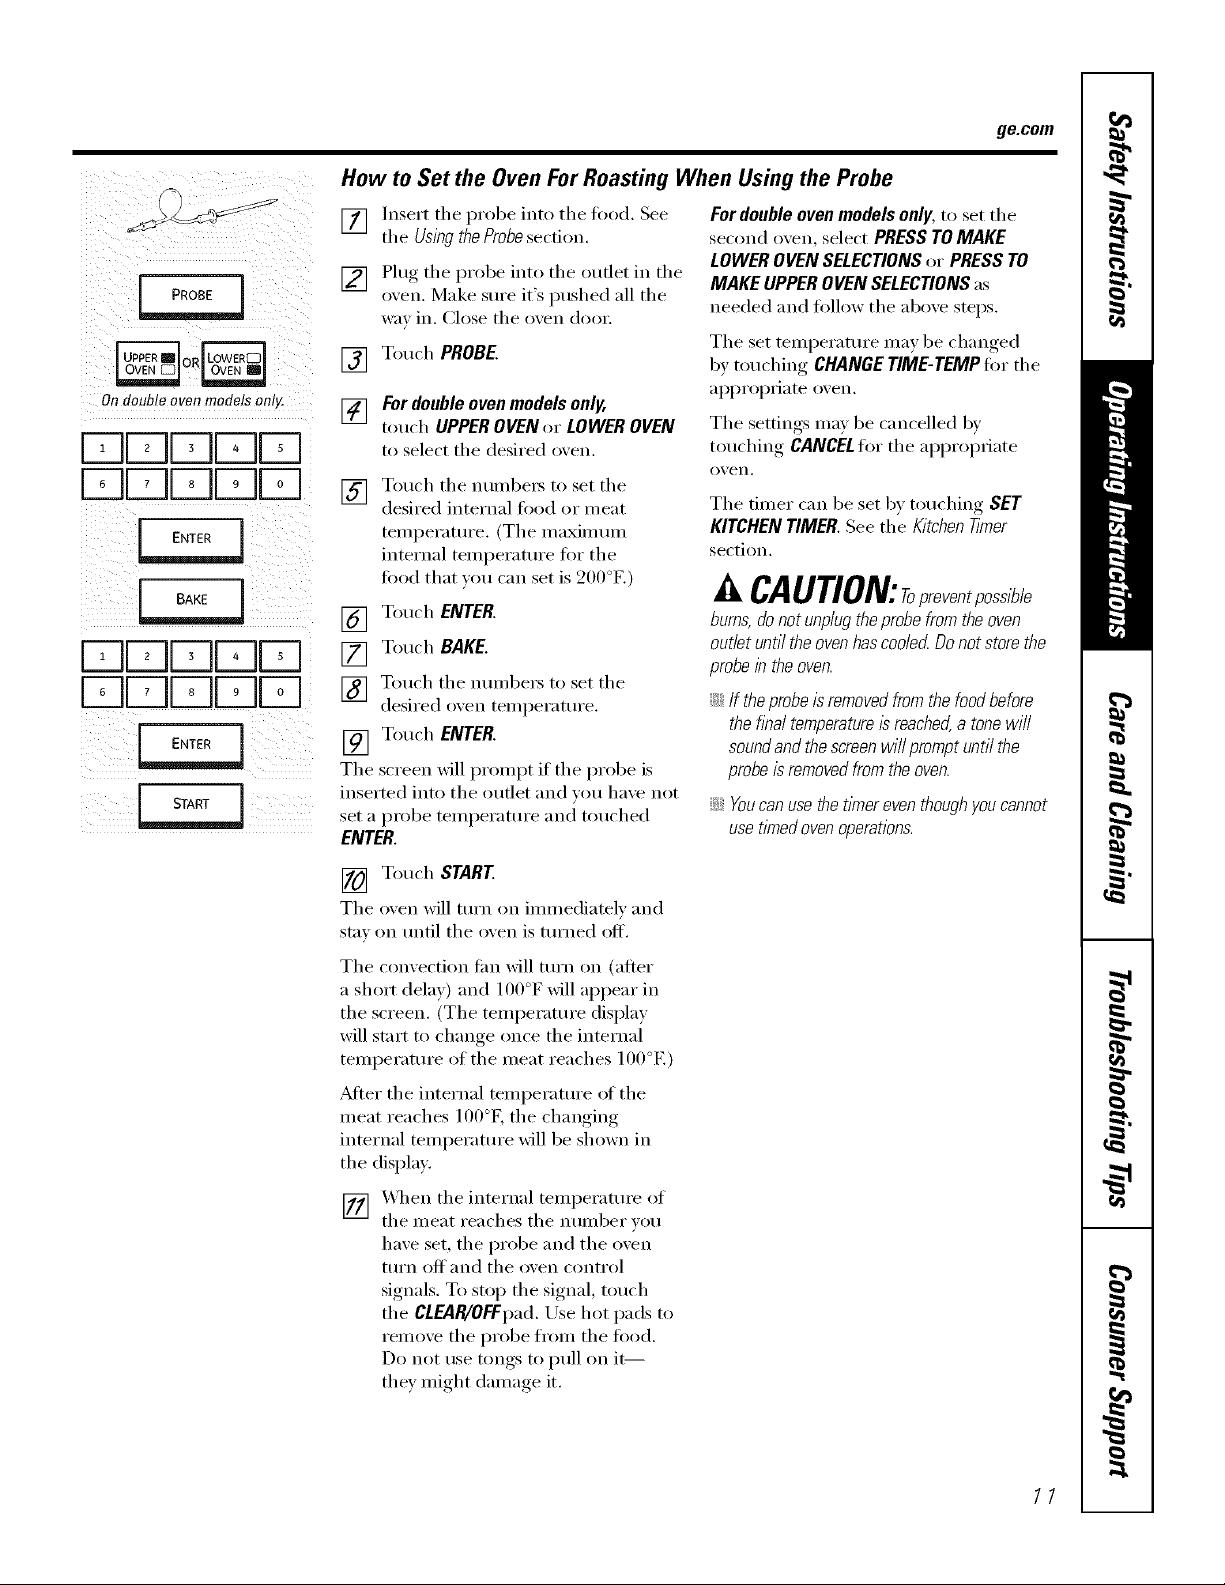
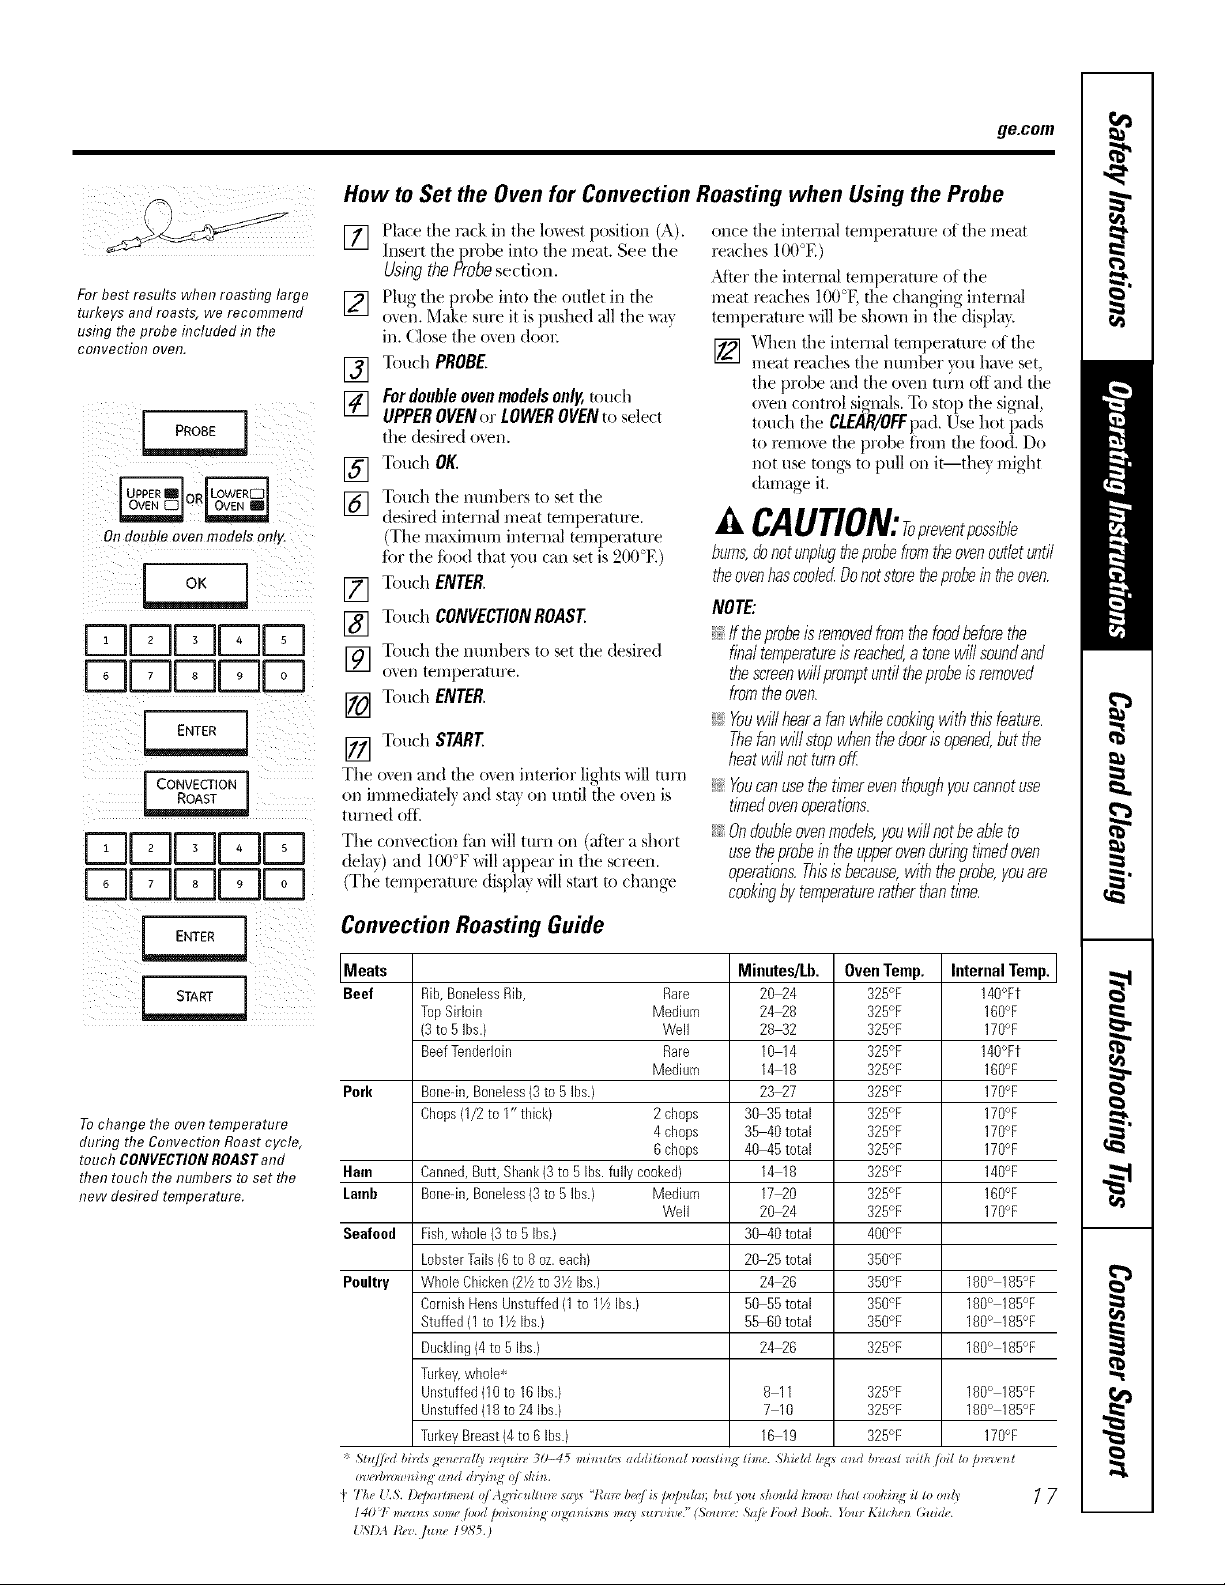
How to Set the Oven For Roasting When Using the Probe
ge.com
Ondoubleovenmodelsonly.
f-r][Z]bJLJbJ
[BALdLdU
DULdUU
[] Insert the probe into the fi)od, See
the Using theProbesection.
[] Plug the probe into the Otlflet in the
oxen. Make sure it's pushed all the
wa_ in, Close tile oxen door.
[] Touch PROBE
For double oven models only,
touch UPPEROVEN or LOWEROVEN
to select tile desired o_en,
Touch tile numbei_ to set tile
[]
desired internal fi)od or meat
temperatm'e. (Tile maximmn
internal temperature tot tile
tood that you can set is 200°E)
Touch ENTER.
[]
Touch BAKE.
[]
Touch tile numbets to set tile
[]
desired oxen temperature.
Touch ENTER.
[]
Tile
screen will prompt if tile probe is
inserted into tile outlet and you haxe not
set a probe temperature and touched
ENTER.
For double oven models only, to set tile
second oven, select PRESS TOMAKE
LOWEROVENSELECTIONSor PRESSTO
MAKE UPPEROVEN SELECTIONSas
needed and tollow tile above steps.
Tile set temperature may be changed
b7 touching CHANGE TIME-TEMP fi,r tile
ai)i)ropriate oven.
The settings may be cancelled by
touching CANCELfi,r tile al)l)ropriate
oven.
Tile timer can be set by touching SET
KITCHEN TIMER. See the KitchenTimer
section.
A CAUTlON:Topreventposel le
burns,donot unplugtheprobefromtheoven
outletuntiltheovenhascoolecLDonotstorethe
probein theoven.
;;Ji:_Iftheprobeisremovedfromthefoodbefore
thefinal temperature/sreached,atonewill
soundandthescreenwillpromptuntilthe
probeisremovedfromtheoven.
;;Ji:_Youcanusethetimereventhoughyoucannot
usetimedovenoperations.
[] Touch START
Tile o_en will turn on immediately and
stm on tmtil tile o_en is turned off.
Tile convection tim will mrn on (after
a short delay) and 100°F will appear in
tile screen. (Tile temperature display
will start to change once tile internal
temperature of tile meat reaches 100°E)
_Mter tile internal temperature of tile
meat reaches 100°g the changing
internal temperature will be shown in
tile display.
[] _4q/en tile internal temperature of
tile meat reaches tile number you
have set, the probe and the oven
ttlI'n ()_ and tile oven control
signals. To stop the signal, touch
tile CLEAR/OFFpad. Use hot pads u)
remove tile probe ti'om tile food.
Do not rise tongs to pull on it--
they might damage it.
11

Broiling
Closefl?edooKAlwaysbroil with
the doorclosed.
HIGH I _ LOW
BROIL_OR_
If your ovenis connected to208
volts,rare steaks may bebroiled by
preheating thebroiler andpositionflTg
theoven rack oneposition highe_
How to Set the Ovenfor Broiling
Close the do(:q; Always broil with the door
closed.
[] Touch BROIL.
[] Place the f()od on a broiler grid in a
broiler pan.
V_ For double oven models only,
touch UPPEROVENor LOWEROVEN
to select the desired o',en.
[] Follow ,su_,cested_,rack posidons in
the Broi/lb_ Guide.
Thest2e,wel)ht, thickness,sterting temperature
andyour preference foralonenesswill affect
broiling times. Thisguide isbasedon meatsat
refngerator temperature.
I_] Touch HIGHBROILor
LOWBROIL
[] Touch START
NOTE:A coohbgfanmayautomaticallyturnon
andoff tocoolintema/parts.Thisisnormal,and
thefanmaycont_buetorunevenaftertheoven
/sturnedoff
The broiler does not need to be
preheated fi)r most broiling. Howexe_;
fi)ods that cook quickly, such as thin
strips of meat or fish may reqtfire a short
preheating period of 2 to 3 minutes to
allow the food stlrfilce to brown in the
same time the ti)od takes to be cooked
throughout.
Turn the ti_od only once during broiling.
NOTE: Broil will not work if the temperature
probeispluggedin. Never leave yourprobeinside
the oven dunbga broil cycle.
To set the second oven, select PRESS
TOMAKELOWEROVENSELECTIONSor
PRESSTOMAKEUPPEROVENSELECTIONS
as needed and ti)llow the above steps.
The set temperatm'e may be changed by
touching CHANGE TIME-TEMP.
The settings may be cancelled by
touching CANCEL.
The timer can be set 1)y touching
SETKITCHENTIMER.See the Kitchen Timer
section.
[] X4_en broiling is finished, touch
CANCEL.
12
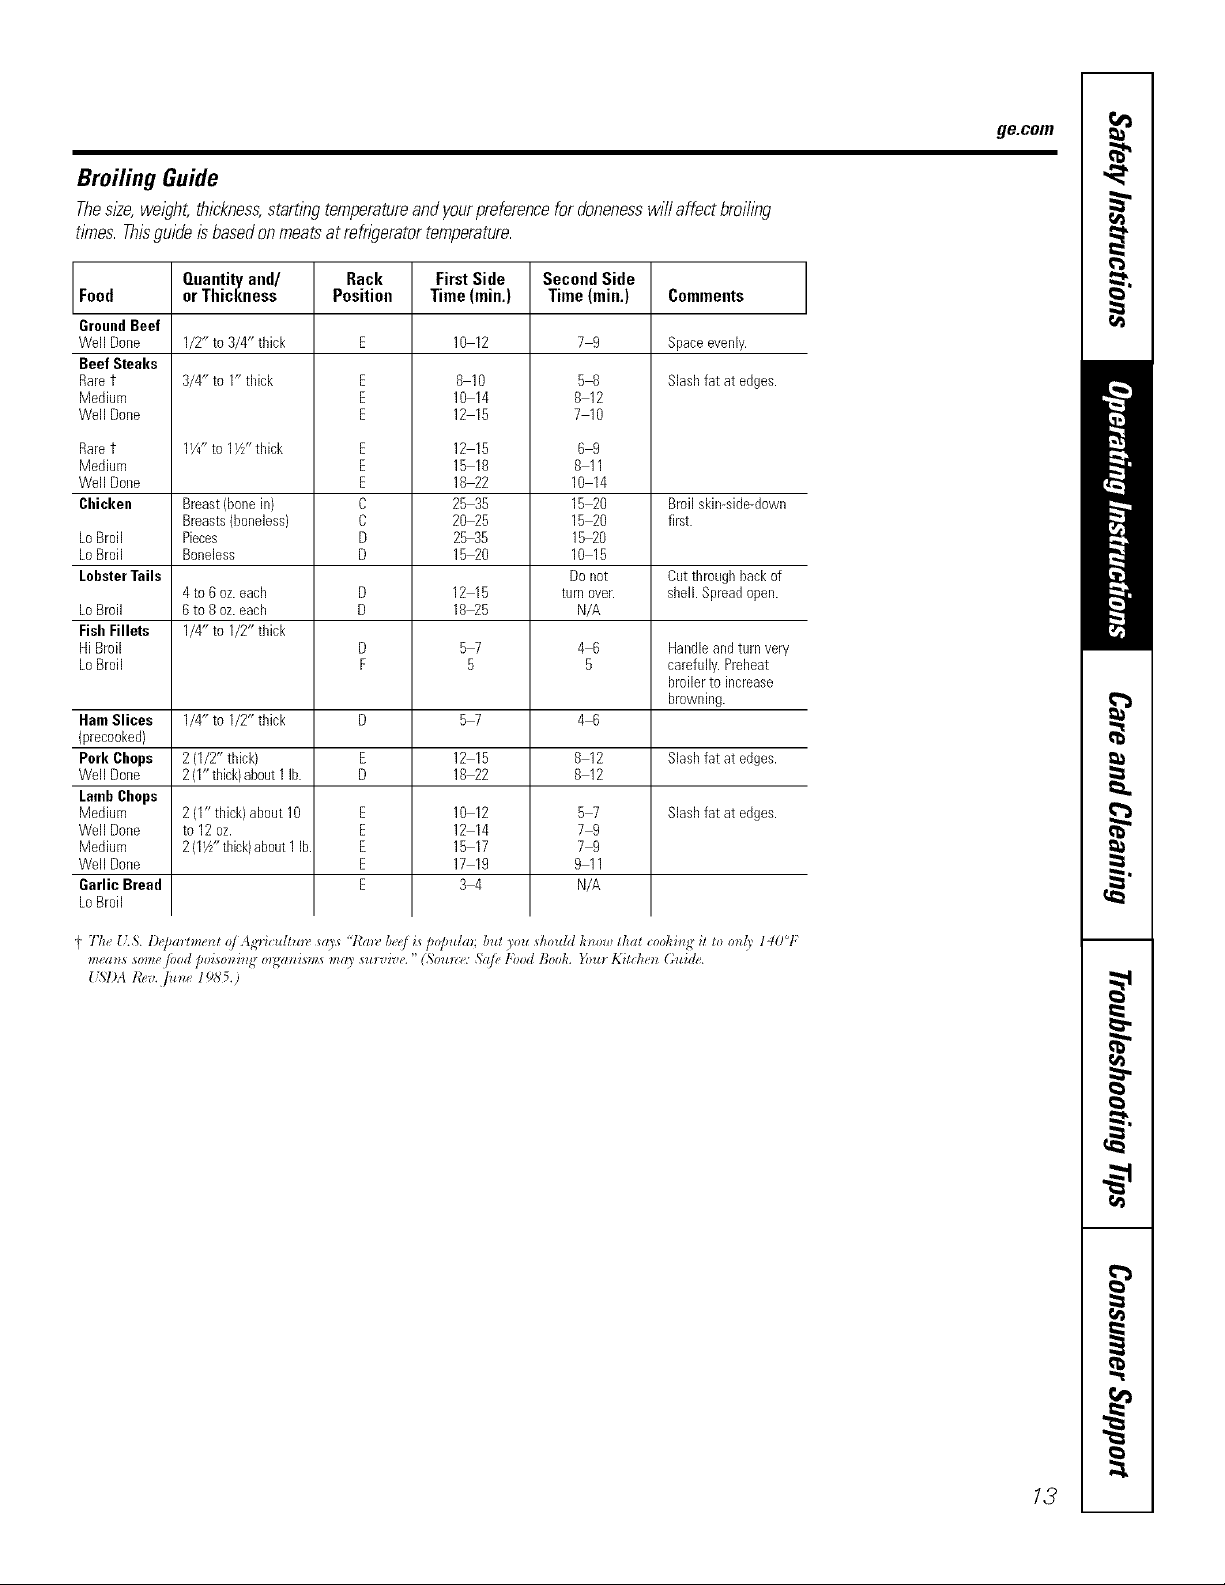
Bruiting Guide
ThesRe,weight,thickness,stamngtemperatureandyourpreferenceforalonenesswillaffectbroihw
times. This guide is based on meats at refngerator temperature.
ge.com
Food
GroundBeef
Well Done
Beef Steaks
Raret
Medium
Well Done
Raret
Medium
Well Done
Chicken
LoBroil Pieces
LoBroil Boneless
LobsterTails Cutthroughbackof
LoBroil 6to 8 oz.each D 1825
Fish Fillets 1/4" to 1/2" thick
HiBroil D 5 7 4 6 Handleandturn very
LoBroil F 5 5 carefully.Preheat
HamSlices 1/4"to 1/2"thick D 5 7 4 6
(precooked)
Pork Chops 2 (1/2" thick) E 12 15 8 12 Slashfat at edges.
Well Done 2(1"thick)about1 lb. D 18 22 8 12
LambChops
Mediuro 2(1" thick)ahout10 E 10 12 5 7 Slashfat at edges.
Well Done to 12 oz. E 12 14 7 9
Medium 2 (1½"thick)about1Ib E 15 17 7 9
WellDone E 17 19 9 11
Garlic Bread E 3 4 N/A
LoBroil
orThickness
1/2"to3/4"thick
3/4"to1"thick
1Y4"to 1W"thick
Breast(bonein) Broilskin-side-down
Breasts(boneless) first.
4to 6 oz.each D 12 15 sheikSpreadopen.
Quantityand/
Rack FirstSide SecondSide
Position Time (min.) Time(min.)
E 10 12 7 9
E
E
E
E
E
E
C
C
D
D
8 10
10 14
12 15
12 15
15 18
18 22
25 35
20 25
2,535
15 20
58
8 12
710
69
811
10 14
15 20
15 20
1,520
10 15
Donot
turn over.
N/A
Commeots
Spaceevenly.
Slashfat at edges.
broilerto increase
browning.
I Tk_, _LS. l)_,pamm,_/of A cHc_dm_, says "Rm_, b_,_,_is/_o]m/m; lint To_ sko_dd k_ow tka/cookh_q it to rod)' 140°F
13
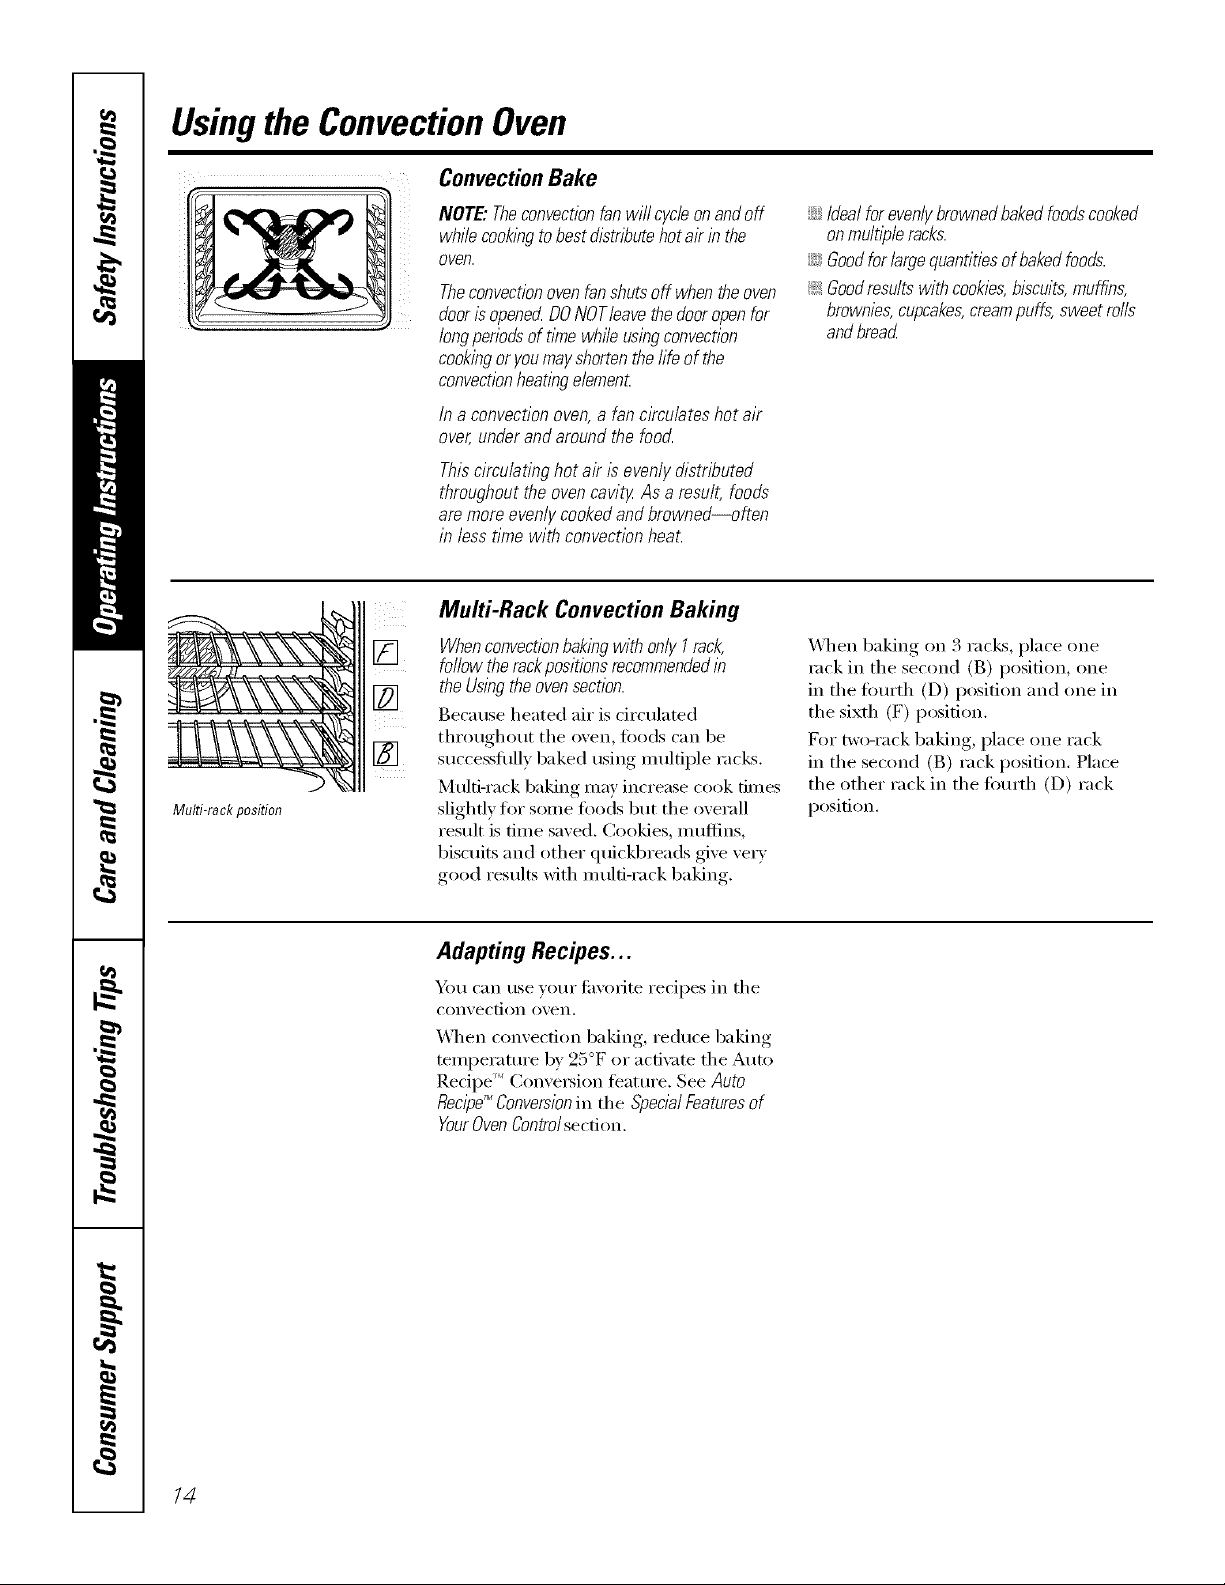
Usingthe ConvectionOven
ConvectionBake
Multi-rack position
[]
NOTE."Theconvectionfanwillcycleonandoff
whilecookingtobestdistributehotairinthe
oven.
Theconvectionovenfanshuts off when the oven
door isopenecLDONOTleave thedooropenfor
longperiodsof timewhffe usingconvection
cookingor you mayshortenthefife of the
convectionheatingelement
Ina convectionoven,a fancirculateshotair
over,underandaroundthefood.
Thiscirculatinghotair isevenlydistributed
throughoutthe ovencavityAs aresult,foods
aremoreevenlycookedandbrowned--often
in lesstime with convectionheal
Multi-Rack Convection Baking
WhenconvectionbakingwithonlyI rack,
followtherackpositionsrecommendedin
theUsingtheovensection.
Because heated air is circulated
throughout tile oven, foods can be
successflflly baked using multiple racks.
Multi-rack baking may increase cook dines
slightly liar some foods but tile overall
result is time saved. Cookies, in uflins,
biscuits and other quickbreads give ve_T
good results with m ulfi-rack baking.
;;Ji::Idealforevenlybrownedbakedfoodscooked
onrnultlp/eracks.
iJiiGoodforlargequantitiesof bakedfoods.
_ Goodresultswithcookies,biscuits,muffins,
brownies,cupcakes,creampuffs,sweetrolls
andbread
_4]/en baking on 3 racks, place one
rock in tile second (B) position, one
in tile tOm'th (D) position and one in
tile sixth (F) position.
For two-rack baking, place one rack
in the second (B) rack position. Place
tile other rack in tile tbm_th (D) rack
position.
14
Adapting Recipes...
You can use your fiwotite recipes in tile
convection oven,
X4l/en convection baking, reduce baking
temperature by 25°F or acfi\_te tile Auto
Recipe '_ Conversion featm'e. See Auto
Recipe_ Conversionin tile SpecialFeaturesof
YourOvenControlsection.
ConvectionRoast
::Ji::Goodforlargetendercutsof meat, uncovered
The convection tim drculates the heated
air evenly over and around the food.
Meat and poult_ T are browned oil all
sides as if thev were cooked on a
rotisserie. The heamd air seals in juices
quickly for a moist and tender product
while, at the same time, creating a rich
golden brown exterior:
ge.com
\41_en x_m, are convection roasting, it is
important that you use a broiler pan and
grid fin" best convection roasting results.
The pan is used to catch grease spills
and the grid is used to prevent grease
spatters.
Whenbaking cookies,youwill
get the best results if you usea
flat cookie sheet flTsteadof a
panwith low sides.
Cookware for Convection Cooking
gefi)re using your convection oven,
check m see if your cookware leaves
room for air circulation in tile oven.
If vou are baking with several pans, leave
space between them, and be sure the
pans do not touch the walls of the oven.
Paper andPlastic
Heat-resistant paper and plastic
containers that are recommended
for rise in regular ()veils can be tlsed in
convection ()veils. Plastic cookware that
is heat-resistnnt to temperatures of 400°F
can also be used.
Metal and Glass
Any _'l)e of cookware Mll work in yore"
convection oven. Howevei; Illetnl I)}lIIS
heat the filstest and are recommended
fi)r convection baking.
::Ji::Darkenedor matte-finished pans will bake
faster thanshinypans.
::Ji::Glassorceramicpans cookmore slowly
For recipes like oven-baked chicken,
use a pan with low sides. Hot air cmmot
drculate well arotmd fi)od in a pan with
high sides.
15

ConvectionBakingandRoasting
I CONVECTION i I CONVECTION J
0n de#b!eovenmode!son!Y.
FqFqDDD
FqFqDDD
How to Set the Oven for Convection Baking or Roasting
Touch CONVECTIONBAKEor
[]
CONVECTIONROAST
For double oven models only,touch
[]
UPPEROVEN (Ir LOWER OVENto
select tile desired o_en.
Two rack options are available:
[]
_q SINGLERACK- Touch ti)I" cooking
tood itenIs on only one rack in
convection bake.
_ MULTI-RACK- T(>uch f(>I"c(>okhlg
food itexllS on IllOI'e th}ln one
rack (i.e. 2 or 3 racks) at tile sanie
tiine in Convection Bake. See the
Multi-Rack Convection Baking section
f()I" I/loI'e iII][()I_/IlatioIl.
Touch tile nuinbeis to set tile
[]
desired teini)erature.
Touch ENTER.
[]
Touch START
[]
Tile convection tim will turn on during
preheating. The control will signal when
the ()veil is preheated--this will take
apl)roxiinately 10 niinutes. Tile screen
will show tile set teini)erature.
\._]/en the control signals, toods should
be placed in the ()veil.
For double oven models only, to set the
second ()veil, select PRESS TOMAKE
LOWEROVENSELECTIONSor PRESS
TOMAKE UPPER OVEN SELECTIONS
as needed and tollow tile above steps.
Tile set teinpeiature inav be changed
by touching CHANGE TIME-TEMP for tile
apl)i'Ol)i_iate oven.
Tile seUings Inav be cancelled by
touching CANCELti)i" tile ai)ix'opi_ate
(wen.
Tile tinier can be set by touching
SET KITCHEN TIMER. See the Kltchen #mer
section.
AJ'ter cooking is coniplete, tile ()veil will
signal and "MORE TIME" will display tor
five ininutes. Check tood t()i" doneness.
If inore cooking tiine is needed, touch
MORE TIME_nd enter additional cooking
dine. If not selected, the screen will
autoinaticallv cleai:
16
How to Set the Oven for Convection Roasting when Using the Probe
ge.com
For best results when roasting large
turkeys and roasts, we recommend
using the probe included in the
convection oven,
On double ovenmodels on!y.
DDDr-qr-q
FqFqr-qr-qFq
DDDDD
DDDDD
[2222]
Tochange the oventemperature
during the Convection Roastcycle,
touch CONVECtiON ROASTand
then touch the numbers to set the
new desired temperature.
[] Place the rock in the lowest position (A).
Insert the {)robe into the meat. See the
Using the rrobe section.
] Plug the probe into the outlet in tile
oxen. Make sure it is pushed all tile way
in. Close tile o\en door.
[] Touch PROBE.
[] For double oven models only,touch
UPPER OVEN or LOWER OVEN to select
the desired o_en.
[] Touch OK.
] Touch the immbers to set the
desired internal meat temperature.
(Tile maximum internal temperature
for the Iced that you can set is 200°E)
[] Touch ENTER.
[] Touch CONVECTION ROAST
[] Touch the immbers to set tile desired
o_eI/ tel//perilttlre.
[] Touch ENTER.
[] Touch START
Tile oven and the o_en interior lights will turn
on immediately and stay on until fl_e oxen is
turned otE
The convection tkti/will turn on (after a short
delay) and 100°F will appear in tile screen.
(Tile temperature displa} will start to change
once tile internal temperature of tile meat
x_aches 100°E)
,Mter tile internal temperatm_ of tile
meat reaches IO0°E the changing internal
temperature will be sho_/in tile displa}.
[j_] When tile internal tempentture of the
meat reaches the number you haxe set,
tile probe and tile oven Urn/oft and the
oxen control si,mals._. To .stoI) tile.sic-hal,
touch tile CLEAR/OFFpad.Use hot pads
to mmo_e the probe imm the toed. Do
not use tong_ to pull on it--the} might
damage it.
CAUTlON:Topreven poss/ble
bums,donotunplugtheprobefromtheovenoutletuntil
theovenhascoole_Donotstoretheprobeintheoven.
NOTE
_Bfftheprobeisremovedfromthefoodbeforethe
finaltemperatureisreached,a tonewillsoundand
thescreenwillpromptuntiltheprobeisremoved
fromtheoven.
_8 Youwillhearafanwhilecookingwiththisfeature.
Thefanwillstopwhenthedoorisopened,butthe
heatwillnotturnoff.
_BYoucanusethetimereventhoughyoucannotuse
timndovenoperations.
_BOndoubleovenmode&youwillnotbeableto
usetheprobeintheupperovenduringtimedoven
operations.Thisisbecause,withtheprobe,youare
cookingbytemperatureratherthantime.
Convection Roasting Guide
Meats Minutes/Lb. Oven Temp. Internal Temp.
Beef Rib,BonelessRib, Rare 20_4 325°F 140°Ft
Pork Bone-in,Boneless(3to 5 Ibs.} 23_7 325°F 170°F
Ham Canned,Butt,Shank(3to 5 Ibs.fully cooked)
Lamb Boneqn,Boneless(3to 5 Ibs.} Medium
Seafood Fish,whole(3to 5 Ibs.)
Poultry WholeChicken(21/zto 31/zIbs.)
"!Stv/fi'd bini_g_ _'_all)*_'quin_30-45 mi_*m,_additio_al n_z_ti_
o'_,('_Snm_i_N aT_dd_),iKg o/ skiT_.
"} The { 7.S. 1)g'/uz*hlu _t (ffAg'_iculhln, s_vs "l_alv be(j is p@ula_ but 3ou dzould k_loa, that a)ol,'hlg il lo o1@
I407: m_ez__ _ome /bod poisonb g o_gzz_i_nls may _ur_,i-_,e."(Sou_re: Sqfi_lbod B(x>l,'.You_ Kilghen (;izi&.
{ S1)A l¢_,z. JIz_ 1985.)
TopSirloin Medium 24_8 325°F 160°F
(3to 5 Ibs.) Well 2842 325°F 170°F
BeefTenderloin Rare 10 14 325°F 140°Ft
Chops(1/2to I" thick} 2 chops 30 35total 325°F 170°F
LobsterTails(6 to 8oz.each)
CornishHensUnstuffed(1to 11/LIbs./
Stuffed(1to lYz Ibs.)
Duckling(4to 5 Ibs./
Turkey,whole-*:
Unstuffed(10to 10Ibs.)
Unstuffed(18to 24Ibs./
TurkeyBreast(4to 6 Ibs.)
Medium 14 18 325°F 160°F
4 chops 35 40total 325°F 170°F
6 chops 40 45total 325°F 170°F
14 18 325°F 140°F
Well
17_0 325°F 100°F
20_4 325°F 170°F
30 40 total 400°F
20 25 total 3BO°F
24_6 350°F 180° 185°F
50 55total 350°F 180° 185°F
55 60total 350°F 180° 185°F
24_6 325°F 180° 185°F
8 11 325°F 180° 185°F
7 10 325°F 180° 185°F
16 19 325°F 170°F
17
TimedConvectionBakingandRoasting
On double oven models, you can use timed baking in one oven while using self-clean in the other; you can also use
timed baking in both ovens at the same time.
NOTE"Foodsthat spoil easily--such as milk, eggs, fish, stuffings, poultry and pork--should not be allowed to s# for
more than 1hour before or after cooking. Room temperature promotes the growth of harmful bacteria.
i CONVECTION J J CONVECTION ]
On doub!o ovon modots only.
r-qr-qr-qr-qr-q
r-qr-qFqr-qr-q
r-qr-qFqr-qr-q
r-qDFqr-qr-q
J ENTER
[ PRE-HEATED I I COLD ]
How to Set an Immediate Start and Automatic Stop
Theovenwill turnon immediately and cookfor a
selectedlength of time.At the end of the cooking
flYne,the oven wi// turnoff autornatlca//y
Make sure the clock shows the correct
tiIne of (law
[] Touch CONVECTION BAKE(Ir
CONVECTION ROAST
[21 For double oven models only, touch
UPPEROVENor LOWEROVENto
select the desired o',en.
Two rack ol)tions are available:
[]
_: SINGLE RACK- Touch fi)I" cooking
[ood iteIllS on onlY one rack in
convection bake.
::Ji::MULTI-RACK- Touch for cooking
fi)od iteIns oil inore than one
rack (i.e. 2 or 3 racks) at the sanle
fiine in Convection Bake. See the
Multi:RackConvectionBakingsection
t()i" i/ioi'e int()i]/lation,
Touch tile nuinbeis to set tile
[]
desired tenlperature.
Touch ENTER.
[]
Touch tile nuni1)eis tii set tile
[]
desired length of cooking tinie.
Touch ENTER.
[]
Two inmlediate start and autonlafic
[]
st()i ) cooking, options are ax filable:
iJi:_PRE-HEATEDSTART- Touch to
preheat tile oven.
Tile convection tim will turn on
duI_Jng preheating. Tile control
will signal when the oven is
preheated--this will take
approxinlately l 0 niinutes.
The screen will show the set
tenll)erature.
Tile tinled cook will not start until
tile oxen is preheated and STARTis
touched.
::Ji::COLDSTART- Touch to start
tile oven inmlediatelv and cook
food without preheating, The
convection tim will turn oil, The
cook fiine will start ininlediatelv.
Tile oven will start and continue to cook
fi)r the prograninled anlount of tiine,
then shut off automatically, unless the
Cook and Hold teatuI'e was set. See the
Cook and Hold Option section,
For double oven models only, t(t set
tile second oven select PRESS TO MAKE
LOWER OVEN SELECTIONS or PRESS
TO MAKE UPPER OVEN SELECTIONS as
needed and follow tile above stel)S.
Tile set tenlperature nlav be changed
by touching CHANGE TIME-TEMPfl)r tile
appropriate oven,
The settings inav be cancelled bv
touching CANCEL i0r the appropi_Jate
()veil,
Tile tinier can be set b) touching SET
KITCHENTIMER.Seethe Kitchen_mer
section.
_Mtei" cooking is conlplete, tile oven Mll
signal and "MORE TIME" will display fi)r
five nlinutes. Check fi)od fl)r aloneness.
If inore cooking tinie is needed, touch
MORETIMEand enter additional cooking
tiine. If not selected, the screen will
autoniaticallv clear in five ininutes.
18
X'_q/eIl tile control signals, fi)ods
should be I)laced in tile oxen.
ge.com
J CONVECTION J I CONVECTION J
Ondouble oven models ontg
frlFlkll Jkl
DFI[Z][Z][Z]
DDuuu
[ ADDBAKE ]
DELAY 1
r STARTCOOK I [ FINISHCOOK
I-NFqF-qf=-1f71
DDDDD
PRE-HEATED I r COLD I
How to Set a Delayed Start and Automatic Stop
Youcanset the ovencontrol to delay-start the
oven,cookfor a specificlength oft/riTeand then
turnoff automatically See also the Delay Start
Optionsection.
Make sure the clock shows the correct
time of day.
[] Touch CONVECTIONBAKEor
CONVECTIONROAST
Fordoub/e oven mode/s ChiT, touch
UPPEROVEN or LOWER OVEN to
select the desired o_en.
Two rack options are available:
[]
15;SINGLERACK- Touch tOT cooking
food items on onh' one rack in
convection bake.
_i;!MULTI-RACK- Touch fl_r cooking
fi_od items on xnox'e than oxle
rack (i.e. 2 or 3 racl_s) at the same
time in Convection Bake. See the
Multi-Rack ConvectionBakingsection
fi:,r more inlimnafion.
] Touch the numbexs to set the
desired temperatm'e.
[] Touch ENTER.
] Touch the numbex_to set the
desired length of cooking time.
[] Touch ENTER.
Touch ADDBAKEOPTION
[]
Touch DELAYSTART
[]
Two dela) start time setting, oI)dons
[]
are axailable:
_Ji::START COOKTIME- T()uch and
then use the numbex_ to set the
}IXIXO/IXlt O]_' tixlle beli)x'e VO/I X_;IXIt
cooking to start. Touch ENTER.
Fox"example, if'pu want cooking
to begin in 2 hems, enter Z 0
and R
N FINISH COOKTIME- Touch
and then use the numbex_ to
set the amount of time above
the cooking time that you want
cooking to finish. Touch ENTER.
Fox"example, if'your cooking tim e
is 2 hours and you want to serve
dinner in 5 hom_, then enter
5, 0 and 0and the oven will start
in 3 hom_.
[] Two start options are ax filable when
the delayed start time is reached:
::Ji::PRE-HEATEDSTART-Touch to
select preheat.
\_]mn the delayed start time is
reached, the oven will turxl oxl
and preheat will begin.
The convection tim will turxl oxl
during preheating. The control
will signal when the oven is
preheated--this will take
approximately l 0 minutes.
The screen will show the set
temperature.
::Ji::COLDSTART- Touch to select
lOT the oven to start immediately
(without preheating) when the
delayed start time is reached.
The convection tim will ttlX'Xloxl.
For double oven models only,to set
the second oven, select PRESSTOMAKE
LOWER OVEN SELECTIONSor PRESS
TOMAKE UPPER OVENSELECTIONSas
needed and follow the above steps.
The set temperature may be chaw,ed
b) touching CHANGE TIME-TEMP fi,r the
ai)i)ropfiate oxen.
The settings may be cancelled bv
touching CANCELfor the al)l)ropriate
o_,exl.
The timer can be set by touching
SETKITCHEN TIMER. See the KltchenTimer
section.
When the delayed start time is reached,
the oven will start and continue to cook
flw the programmed amount of tim e,
then sh tit oil a utomaticall 5 unless the
Cook and Hold feature was set. See the
Cook and Ho/d section.
_dter cooking is complete, the oven will
signal and "MORE TIME" will display for
five minutes. Check Iced for aloneness.
If more cooking time is needed, touch
MORE TIME and enter additional cooking
time. If not selected, the screen will
automatically clear in five minutes.
19

FavoriteRecipes
Your control wifl allow you to create (save), edit, use or delete a favorite recipe.
[ FAVORITE 1
i_i_ii_I_ _i
[ CREATE1
FAVORITE
I RECIPE
[ EDIT ]
l RECIPE |
Create a Recipe
[] Touch FAVORITERECIPE. []
[] Touch CREATERECIPE. []
] Touch the lettex_ to create a name
tOr the recipe. Touch NUMto add []
a nmnbe_: Touch SPACEto add a
space between lette_ or numbers. []
Touch BACKto erase a nuinber or
letter as needed. Touch DONE to
saxe the naiile, []
[] Touch BAKE,BROIL,CONVECTION
BAKEor CONVECTIONROASTto
select the cooking mode.
] Touch tile numbe_ to set tile
temperature.
Edit a Saved Recipe
[] Touch FAVORITERECIPE.
[] Touch EDITRECIPE.
[] T(mch • or • to highlight tile
recipe y(m want to edit.
[] T(mch ENTER.
Touch ENTER.
Touch tile numbe[s to set tile
desired length of cooking dine.
Touch ENTER.
Touch ADD PRE-HEAT OPTION to set
preheating, or CONTINUEto review
tile set recipe.
Touch SAVE AND CREATENEW to
sa_e tile recipe in memm_ but not
use it at this time. Touch SAVEAND
COOKNOWto saxe file recipe in
memm_ and also proceed to cook
now. Touch CANCELto delete tile
recipe.
] Touch • or • to select tile setting
_Ol/want to edit.
[] Touch EDITand change tile settino
[] Touch DONE.
[] Touch SAVEor SAVEAND COOK
NOW
l USE l
i
l FAVORITE J
2O
FAVORITE
RECIPE I
RECPE
DELETE
Use a Saved Recipe
[] Touch FAVORITERECIPE.
I
[] Touch USERECIPE.
[] Touch • or • to select tile recipe
VO/I want to rise.
[] Touch ENTER.
[] Touch START
I_ For double oxen models onE'
touch UPPEROVENor LOWER OVEN
to select tile desired o_en.
Delete a Saved Recipe
[] Touch FAVORITERECIPE.
[] Touch DELETERECIPE.
[] Touch • or • to select tile recipe
you want to delete.
[] Touch ENTER.
[] Touch DELETE.
[] Touch YES.
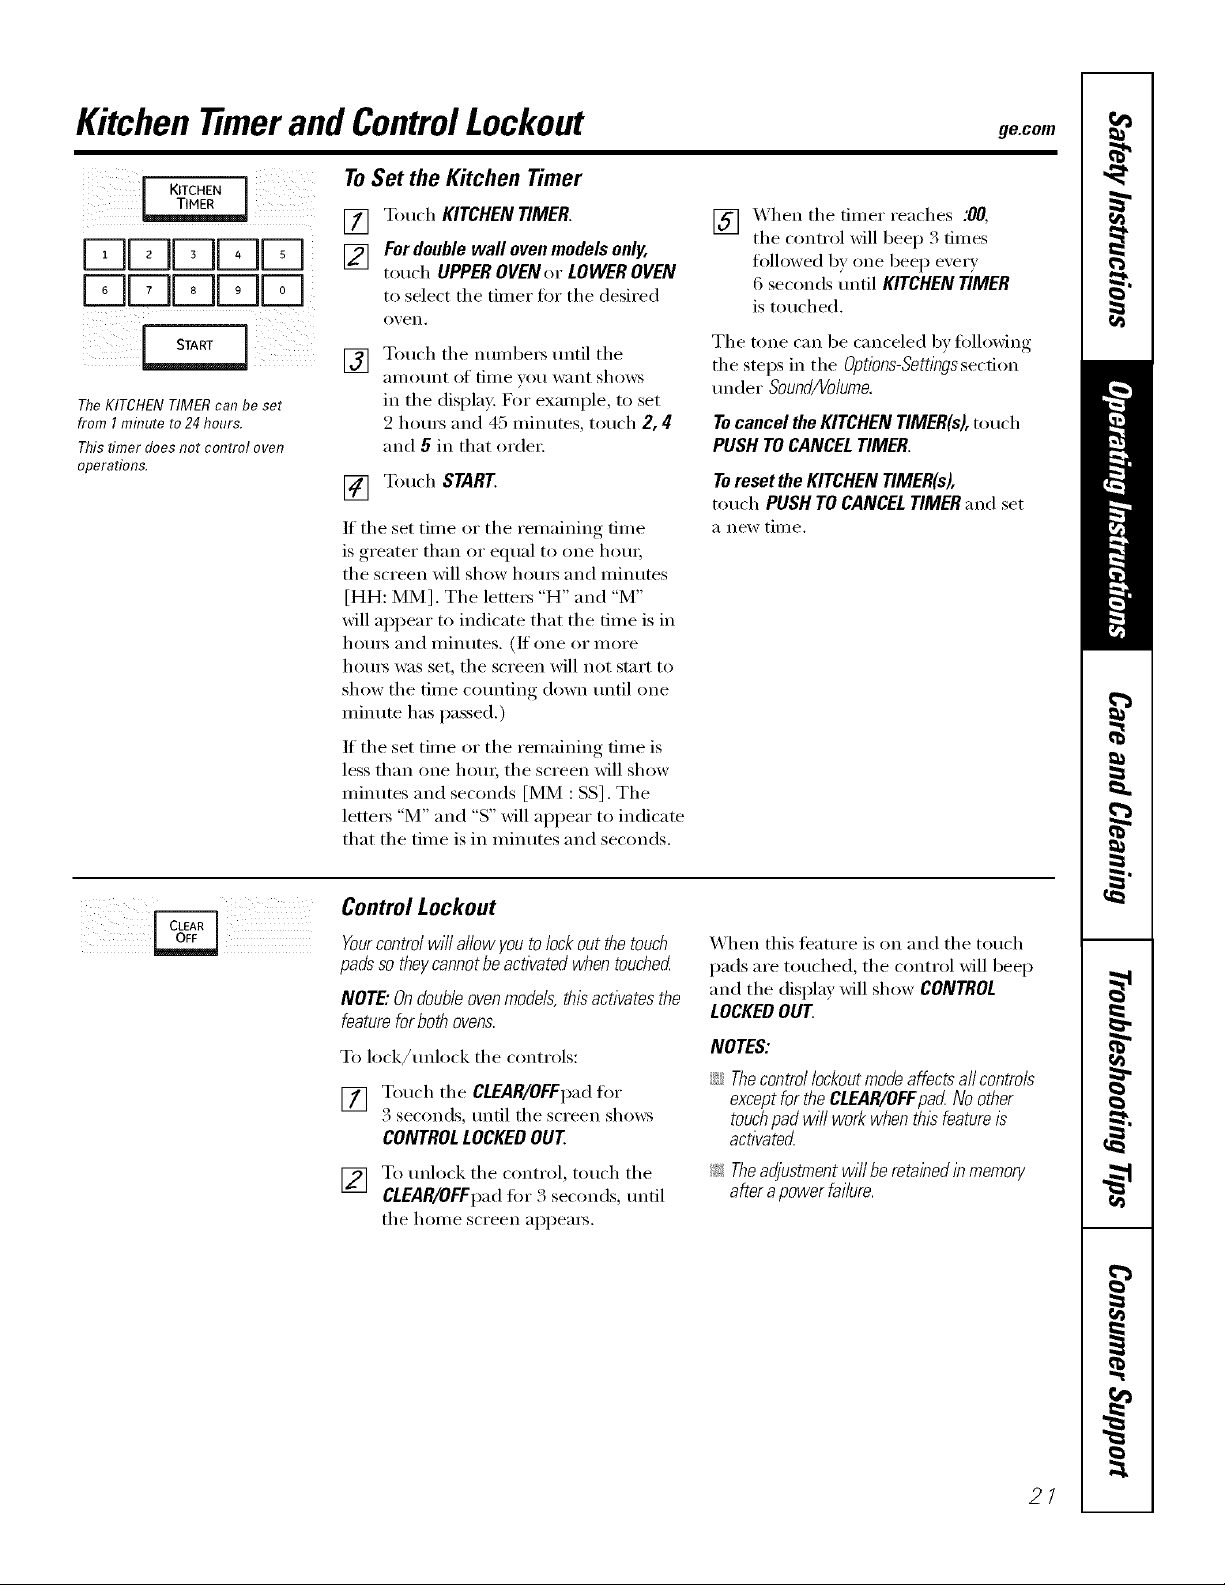
Kitchentimer and ControlLockout ge.com
[ KITCHEN
DDUUU
DDuuu
TheKITCHENTIMERcan be set
from I mhTuteto 24hours.
This timer does not control oven
operations.
ToSet the Kitchen Timer
[77 Touch KITCHEN TIMER.
_] For double wall oven models only,
touch UPPEROVEN or LOWER OVEN
to select the timer tot the desired
o_,en.
Touch the nmnl)ex_ until the
[]
}lI//O/lnt of tillle yell l_;lllt shows
in the display: For example, to set
2 hom_ and 45 minutes, touch 2, 4
and 5 in that order:
[] Touch START
If the set time or the remaining time
is greater than or equal to one hem;
the screen will show hom_ and minutes
[HH: MM]. The lettex_ "H" and "M"
will appear to indicate that the time is in
hom_ and minutes. (It one or nlore
hom_ was set, the screen will not start to
show the time cotmting down tmtil one
minute has passed.)
If the set time or the remaining time is
less than one hem; the screen will show
minutes and seconds [MM : SS]. The
lette_ "M" and "S" will appear to indicate
that the time is in minutes and seconds.
[7_ XAhen the timer reaches .'0(7,
tile control will beep 3 times
folh_wed by one beep exer)
6 seconds until KITCHEN TIMER
is touched.
The tone can be canceled by fi_llowing
the steps in tile Options-Settingssecfi(m
trader Sound/Volume.
TocanceltheKITCHENTIMER(s),touch
PUSHTOCANCELTIMER.
Toreset the KITCHEN TIMER(s),
touch PUSH TO CANCEL TIMER and set
a new til//e.
Control Lockout
Yourcontrol will allow you tolock out the touch
padsso theycannot beactivated when touched
NOTE:On doubleovenmode& this activates the
feature for both ovens.
To lock/tmlock the controls:
[] Touch the CLEAR/OFFpad for
3 seconds, until the screen shows
CONTROLLOCKEDOUT
[] To tmhx'k the control, touch the
CLEAR/OFFpad fb_ 3 seconds, tmtil
the home screen appea_.
When this teatm'e is (m and the touch
pads are touched, the control will beep
and the display will show CONTROL
LOCKEDOUT.
NOTES:
;;Ji::Thecontrollockoutmodeaffectsaflcontrols
exceptfortheCLEAR/OFFpacLNoother
touchpadwi/lworkwhenthisfeatureis
activate_
!;> Theadjustment will be retained in memory
after a power faiiure.
21
Usingthe Self-Cleaning Oven
The oven door must be closed and aft controls must be set correctly for the cycle to work properly.
Before a Clean Cycle
NOTE:Self-Cleanwi//notworkif the
temperatureprobe/spluggedinorif theSabbath
featureisseL
::Ji::On double oven models, you can
set a clean cycle in both ovens at tile
same time. Tile last oven set will
automatically delay its start tmtil tile
end of tile fi_st oven's clean cycle.
_: On double oven models, you can
rise timed baking in one oven and
sell:clean in tile other at tile same
time,
CAUTION:Neverplacecook,bg
utensilsorany otheritems on the oven floor
Thereis a heating element beneath the oven
floor Placingitems on the ovenfloor maycause
the oven to overheat,resu/tlbgin damage to the
ovenand nsk of damageorfire to cablhets.
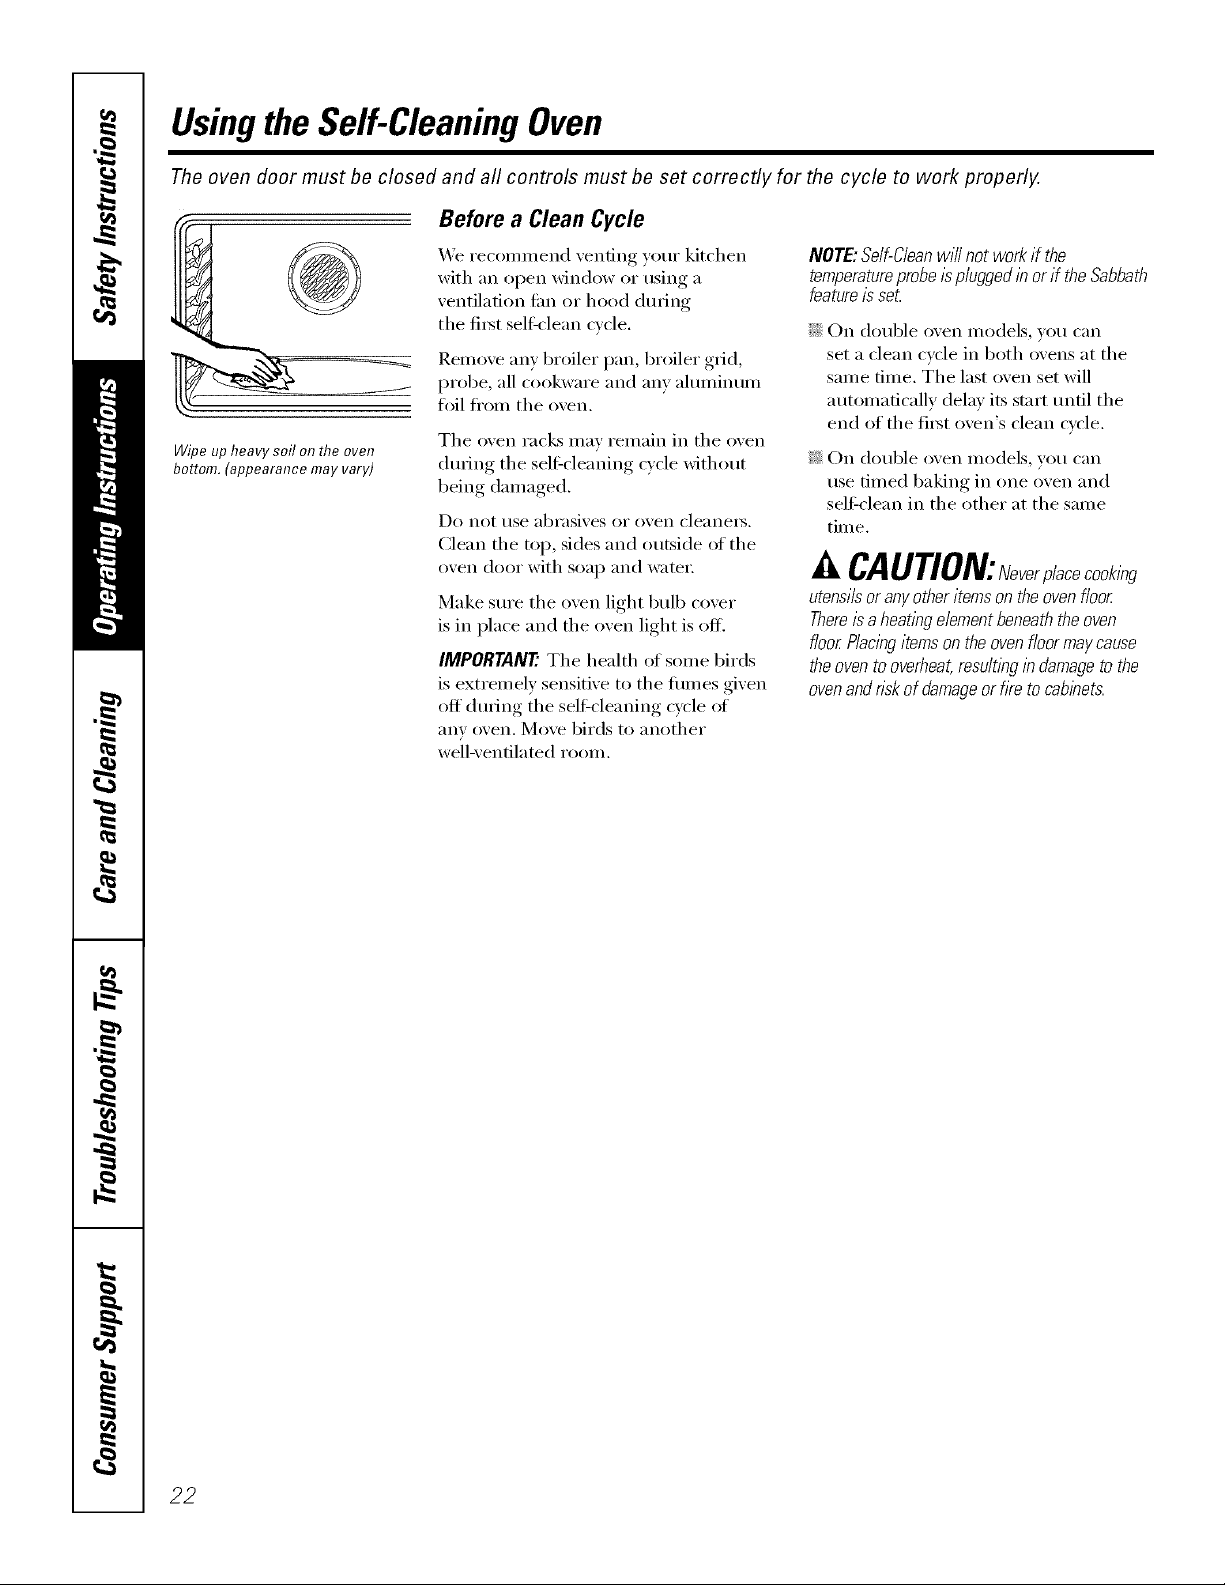
Wipe up heavy soil o17the oven
bottom.(appearancemayvary)
We recommend venting your kitchen
with an open window or using a
ventilation tim or hood dm_ing
tile fi_st sell:clean cycle.
Remove any broiler pan, broiler grid,
probe, all cookware and anv ahmfinum
flfil fl'om tile oven.
Tile oven i';ic](s Ill}IV i'ei//ain ii1 tile oven
(hwing tile sell:cleaning cycle without
being damaged.
Do not/lse abrasives or ()veil cleanei's.
Clean tile top, sides and outside of tile
oven door with soap and water:
Make sure tile oven light bulb cover
is in place and tile oven light is off.
IMPORTANT'. Tile health _ff some birds
is extremely sensitive to tile fimms given
off during tile sel6cleaning cycle ot
}lily oven. Move birds to another
well-ventilated room.
22
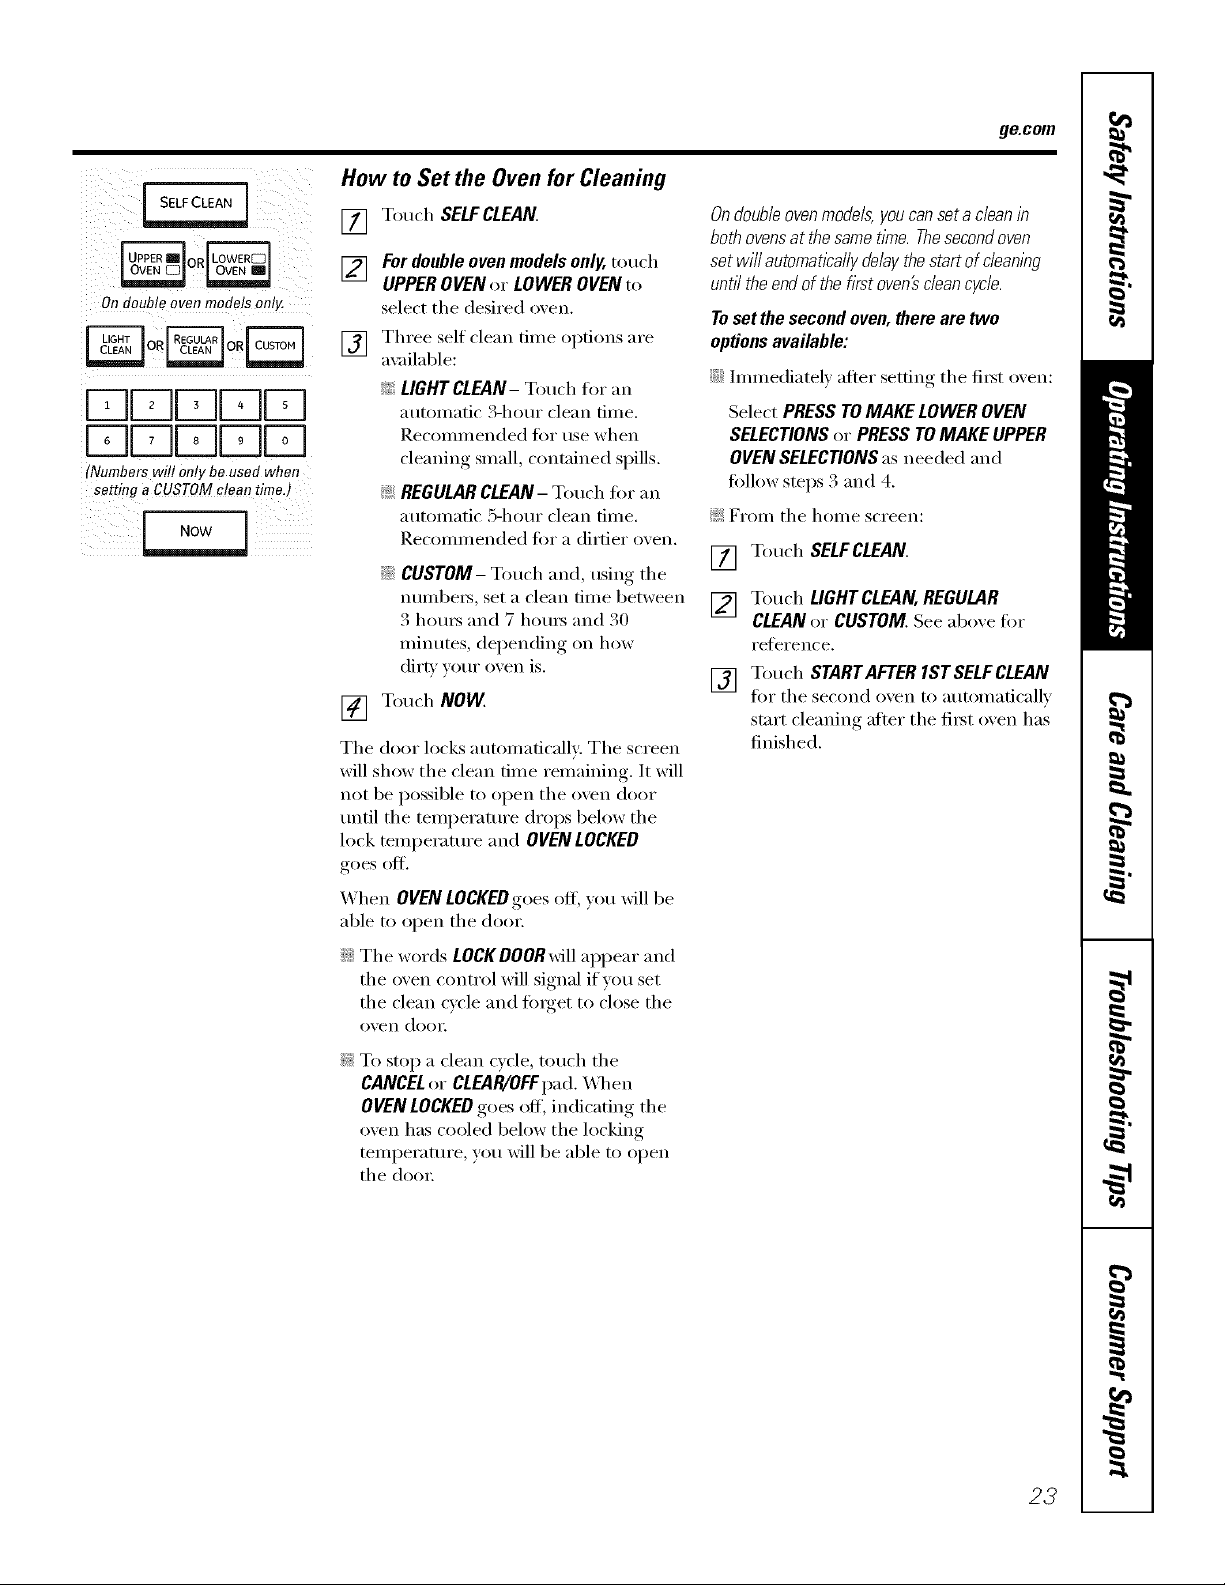
How to Set the Oven for Cleaning
ge.com
On double ovenmodels omy.
r-qDDE r-q
r-qDD[ r-q
(Numbers will only be used when
setting a CUSTOM clean time.)
[] Touch SELFCLEAN.
[_] For double oven models only, touch
UPPEROVENor LOWEROVENto
select the desired oven.
[] Three self clean fin/e °I)fi°ns are
a\_filable:
_!i_LIGHTCLEAN-Touch fin"an
automatic 3-hour clean time.
]?.econlinended tor use when
cleaning small, contained spills.
_: REGULAR CLEAN- Touch fin" an
automatic 5-hour clean time.
Recommended fin" a dirtier oven.
::Ji::CUSTOM- Touch and, using tile
numbex_, set a clean time between
3 horns and 7 horns and 30
ininutes, del)ending on how
dirty vour oven is.
[] Touch NOW
Tile door locks automatically: Tile screen
will show the clean time remaining. It will
not be possible to open tile oven door
tmtil tile temperatm'e drops below tile
lock temperature and OVEN LOCKED
goes off.
On double oven models, you can set a dean in
both ovens at the same time. The second oven
set willautomatically delay the start of c/eanlbg
until the end of the first oven# dean cyc/e.
To set the second oven, there are two
optionsavailable:
::Ji::hmnediatelv after setting tile ti_t oven:
Select PRESSTOMAKELOWEROVEN
SELECTIONSor PRESSTOMAKEUPPER
OVENSELECTIONSasneeded and
fi>lh>wsteps 3 and 4.
_: From tile h(>me screen:
[] Touch SELFCLEAN.
1_] Touch LIGHTCLEAN,REGULAR
CLEANor CUSTOMSeeaboxelot
reference.
J_] Touch STARTAFTERIST SELFCLEAN
fi)r tile second oven to atltOi//aticallv
start cleaning alier tile fi_t oven has
finished.
When OVEN LOCKEOgoes off',you will be
able to open tile (loo_:
_Ji::Tile words LOCKDOORwill appear and
tile oven control will signal if you set
the clean cycle and finget to close the
oven dool;
_: To stop a clean Q'cle, touch tile
CANCELor CLEAPdOFFpad.\,_l/en
OVEN LOCKED goes off, indicating the
oven has cooled below tile locking
temperature, you will be able to open
tile (loo_:
23
Usingthe Self-Cleaning Oven
The oven door must be closed and all controls must be set correctly for the cycle to work properly.
How to Delay the Start of Cleaning
ii%)
Ondoubleovenmodelsonly.
oR oRFTq
DDDDFq
DDDDFq
(Numberswit!onlybe usedwhen
settinga CUSTOMcleontime.)
DDDFqFq
DDDr-qD
[] Touch SELFCLEAN.
[_] Fordoubleovenmodelsonly,touch
UPPEROVENor LOWEROVENto select
the desired o_en.
[] Three self clean time options are
a_dlable:
14_LIGHTCLEAN-Touch fi)r an
ram)marie 3-bout clean time.
Recommended for use when cleaning
small, contained spills.
14_REGULARCLEAN-Touch iin"
an automatic 5-]*our clean time.
Recommended for a dirtier o_en.
% CUSTOM- Touch and, using tile
nmnbex% set a clean time bet\_een
3 hours and 7 hours and 30 minutes,
depending on how dim' pUT o_en is.
[] Touch LATER.
] Three delta start time setting o )dons
are axailabl'e: ' t "
Tile door locks automaficalh. The screen will
show the start time. Itwill n_t be possible to
open file o_en door until tile temperaml_
drops belo_ the lock wmperatm_ and OVEN
LOCKEDgoes off.
"q]mn OVENLOCKEDgoes off}pu will be aNe
to open file dora:
Ondoubleovenmodels,youcansetacleaninboth
ovensat thesametime.Thesecondovensetwill
automaticallydelaythestartof cleaninguntil theend
of thefirstoven5cleancycleor untilthedelaytime
thatyouset.
Tosetthesecondoven,therearetwooptions
available:
i£:Immediately after setting tim first oven:
Select PRESSTOMAKELOWEROVEN
SELECTIONSor PRESSTOMAKEUPPER
OVENSELECTIONSasneeded and fbllo_
steps 34; abo_e for the second o\en.
i£:From the home screen:
_}DELAYEDTIME- Touch and flleIl use
the nmnbex_ to set the amount of
time befbre mu _m/t cleaning to start.
Touch ENTER.
__}STARTCLEANTIME-Touch and fllen
use the numbers to set die time of din
mu _mt cleaning to begin. Touch
ENTER.
% FINISHCLEANTIME- Touch and
then use the mnnbel\_ to set file
time of day that you _mt cleaning
to finish. Touch ENTER.
After a Clean Cycle
"_bu may notice some white ash in the oven.
it"up x@h a damp cloth after tile
_ASpe
COOLS.
ffwhitespoaremain,removethemwitha soap-filled
steel-woolpadandrinsethoroughlywitha vinegarand
watermixture.Thesedepositsare,usual/yasalt
residuethatcannotberemovedby thecleancycle.
If"tile oxen is not clean _ff'terone clean Qcle,
repeat the cxcle.
oxei/
[] Touch SELFCLEAN.
[] Touch LIGHTCLEAN,REGULARCLEANor
CUSTOM.See aboxe tor reterence.
[_] Touch SraRTAFTERISrSELFCL mz,r
the second oven to automatically start
cleaning after the tirst oven has }inished
cleaning or DELAYEDTIMEand ibllo_
step 6 above to set tile time you want the
second o_en to start.
Torecalltheremainingtimeor thestart timeset,
touchSELFCLEAN.
}i:}To stop a clean c}cle, touch CANCELor die
CLEAR/OFFpad.When OVENLOCKEDgoes
off. indicating the o\en has cooled belo_
the locking temperature, you will be able
to open the dooc
%}i)u cannot set the oven fi,r cooking until
the o'_en is cool enough for tile door to
mdock.
_}}While tim o_en is seltk-leaning, pu can
touch CLOCKto displa} the time of dat.
To l>turn to the clean countdown, touch
SELFCLEAN.
_}}If the racks become hard to slide, xqpe the
rack supports with cooking oil.
24

Option-Proof ge.com
L
Proofing
i_ii_ii_i)_!ii_ __i_i_i_iiii_!i_I
i_i_i__)i_ii_ _i_ii;(;!!__
[- KITCHEN
Theproofingfeaturemaintainsawarm
env/?onmentusefolforr/singyeast-leavened
prodocts.
[] Place in the oxen ,:m rack B or (]
and, ior best results, coxer the
dough with a ch_th.
[] Touch OPTIONS.
[] Touch PROOF.
The ()Vellinterior light turns ,'mand then
will cxcle_ dining, })reefing,.
The proofing/batm'e automatically
pro',rides the optimum temperature flw
the proofing process, and therefiwe does
not ha\v a temperature ac!iustment.
[] For double oven models only, touch
UPPEROVENor LOWER OVEN to
select the desired o',vn.
[] Touch START
_ Proofingwill notoperatewhenovenb above
125°E"OVENISTOOHOT"will showin the
display
_: Itisnotnecessarytopreheattheovenfor
proofing.
;;Ji::Toavoid/oweringtheoventemperatureand
lengtheningproofingtlYne,donotopenthe
ovendoorunnecessari/y
_ Checkbreadproductsear/ytoavoid
over-proofing.
NOTE:Donotusetheproofingmodetoreheat
coldfoodortokeephot,cookedfoodwarm.The
proofingoventemperatureis nothotenoughto
holdfoodsat safetemperatures.UsetheWARM
featuretokeephot foodwarm.
[] Set the MTCHENTIMERfor the
minimum proof time.
[] \_q_en proofing is finished, touch
CANCEL.
25
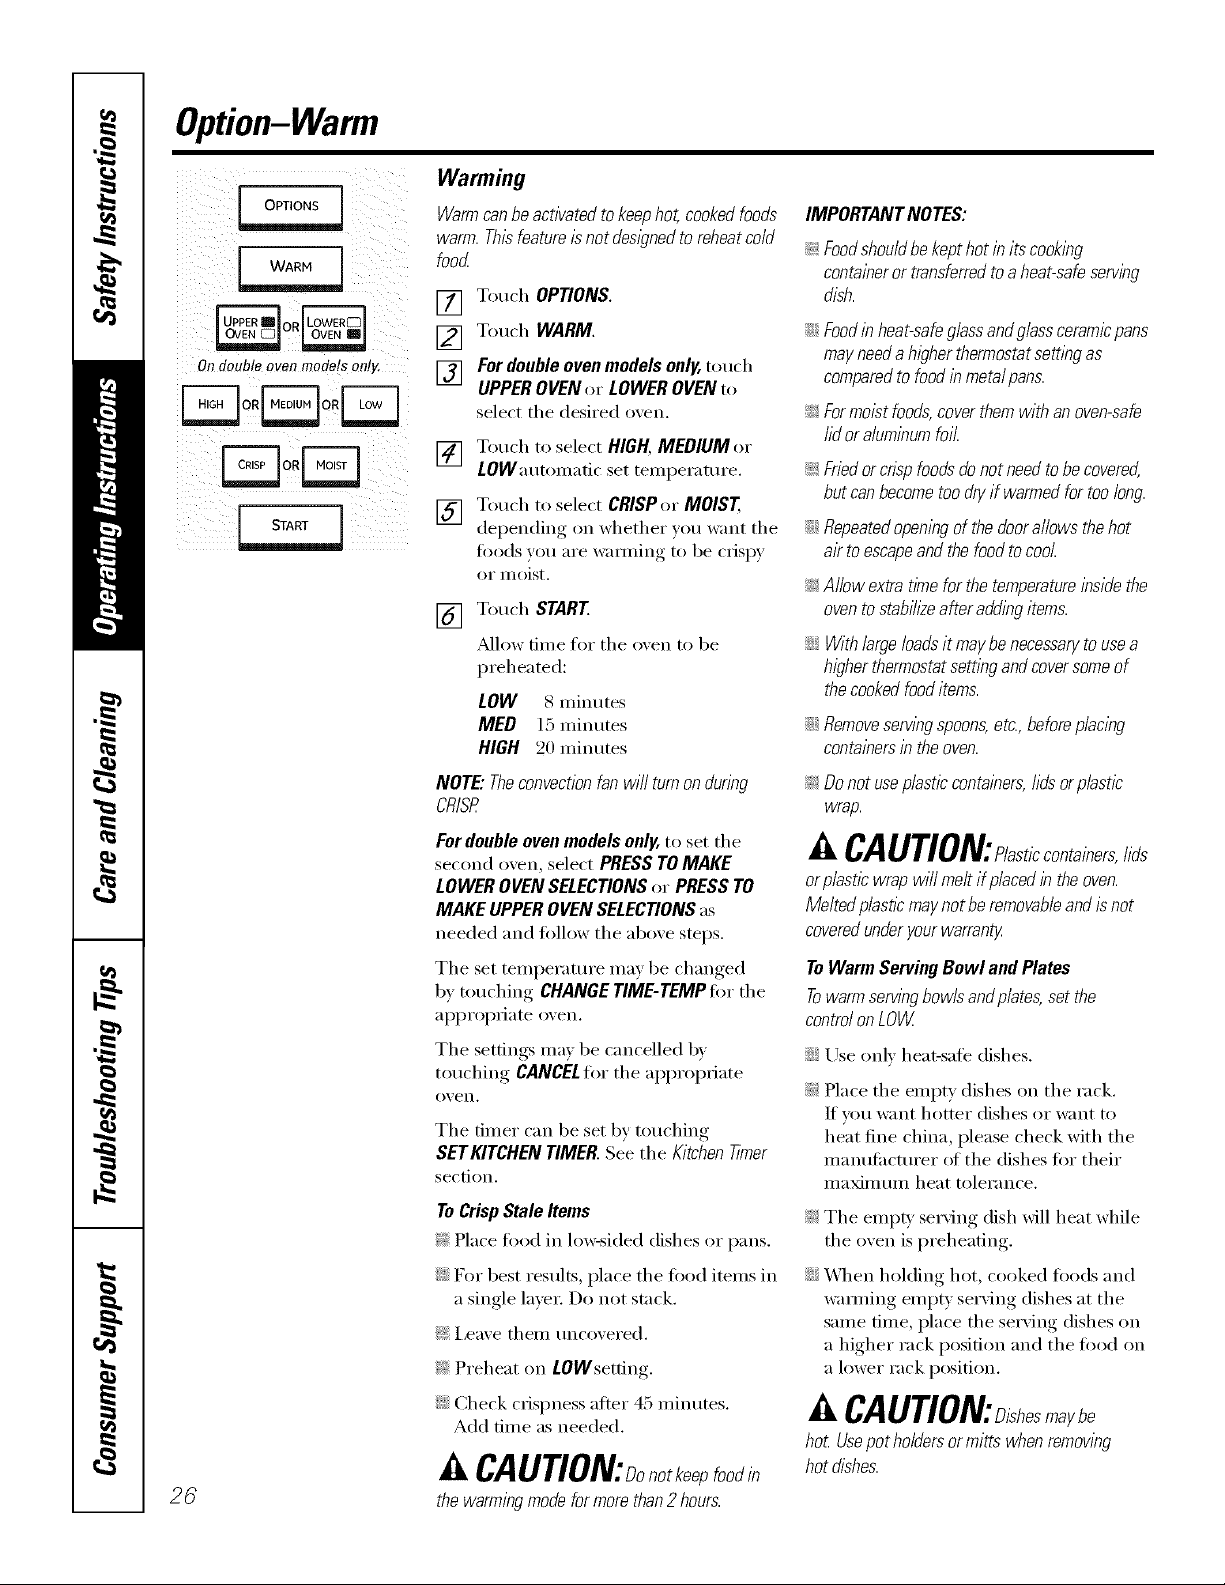
Option-Warm
OPTIONS 1
On double ovenmodels only.
o. 0¢
OR
START 1
Warming
Warmcanbeactivatedtokeephot,cookedfoods
warm.Thisfeatureisnotdesignedtoreheatcold
food
[] Touch OPTIONS.
[] Touch WARM.
[] Fordoubleovenmodelsonly,touch
UPPEROVENor LOWEROVENto
select the desired o',en.
[_ Touch to select HIGH,MEDIUM or
ii i
LOW'autolnatic set telni)erature.
[7_] Touch to select CRISPor MOIST
del)ending, on whether _ou want the
foods you are wai_ning to be crispy
or illoist.
Touch START
[]
Mlow finIe for the oven to be
i)reheated:
LOW 8 ininutes
MED 15 ininutes
HIGH 20 ininutes
IMPORTANTNOTES:
!i>Foodshouldbekepthotin itscooking
containeror transferredtoaheat-safeserving
dish.
;;Ji::Foodinheat-safeglassandglassceramicpans
mayneedahigherthermostatsettingas
comparedtofoodinmetalpans.
_ Formoistfoods,coverthemwithanoven-safe
lid oraluminumfoil.
_ Friedorcrispfoodsdonotneedtobecovered,
butcanbecometoodryif warmedfortoolong.
;;Ji::Repeatedopeningof thedoorallowsthehot
ak toescapeandthefoodtocool.
_ Allowextratimeforthetemperatureinsidethe
oventostabih2eafteraddingitems.
;;Ji::Withlargeloadsit maybenecessarytousea
higherthermostatsettingandcoversomeof
thecookedfooditems.
iJi::Removeservingspoons,etc., before placing
containersin the oven.
NOTE"Theconvectionfanwill turnonduring
CRISP.
Fordouble oven models only, to set the
second ()veil, select PRESSTOMAKE
LOWEROVENSELECTIONSor PRESSTO
MAKEUPPEROVENSELECTIONSas
needed and follow the above steps.
The set teini)erature inav be changed
by touching CHANGETIME-TEMPfor the
ai)i)ropiiate oven.
The settings inay be cancelled by
touching CANCELtor the al)l)ropiiate
()veil.
The tiiner can be set by touching
SETKITCHEN TIMER. See the KitchenTimer
section.
To Crisp Stale Items
_: Place fi)od in lo_sided dishes or pans.
::Ji::For best results, place the ti)od itenIs in
a single laveI: Do not stack.
}_'_i,eave theIn uncovered.
!;?:Preheat on LOWsetdng.
!;>Donotuseplasticcontainers,lidsorplastic
wrap.
A CAUtiON: last,ccontainers,lids
orplastlcwrapwillmeltif placedin theoven.
Meltedplastic,maynotberemovabfeandisnot
coveredunderyourwarranty
ToWarmServingBowlandPlates
Towarmservingbowlsandplates,setthe
controlonLOW
iJi::Use only heat-sale dishes.
_: Place the eInpty dishes on the rack.
If w)u want hotter dishes or want to
heat fine china, please check with the
nianufi_cturer ot the dishes fi)r their
IlI}lXil/ltlIll heat tolerance.
_: The einpty serving dish will heat while
the ()veil is i)reheating.
::Ji::_A]/en holding hot, cooked foods and
w:mning einpty serving dishes at the
saine tiine, place the serving dishes on
a higher rack position and the fi)od oil
a lower rack position.
26
iJi::Check ciispness after 45 niinutes.
Add dine as needed.
A CAUtiON:Donotkeepfoodin
thewarmingmodeformorethan2hours.
A CAUtiON:Dishesmaybe
hoLUsepotho/dersormittswhenremowng
hotdishes.
ge.com
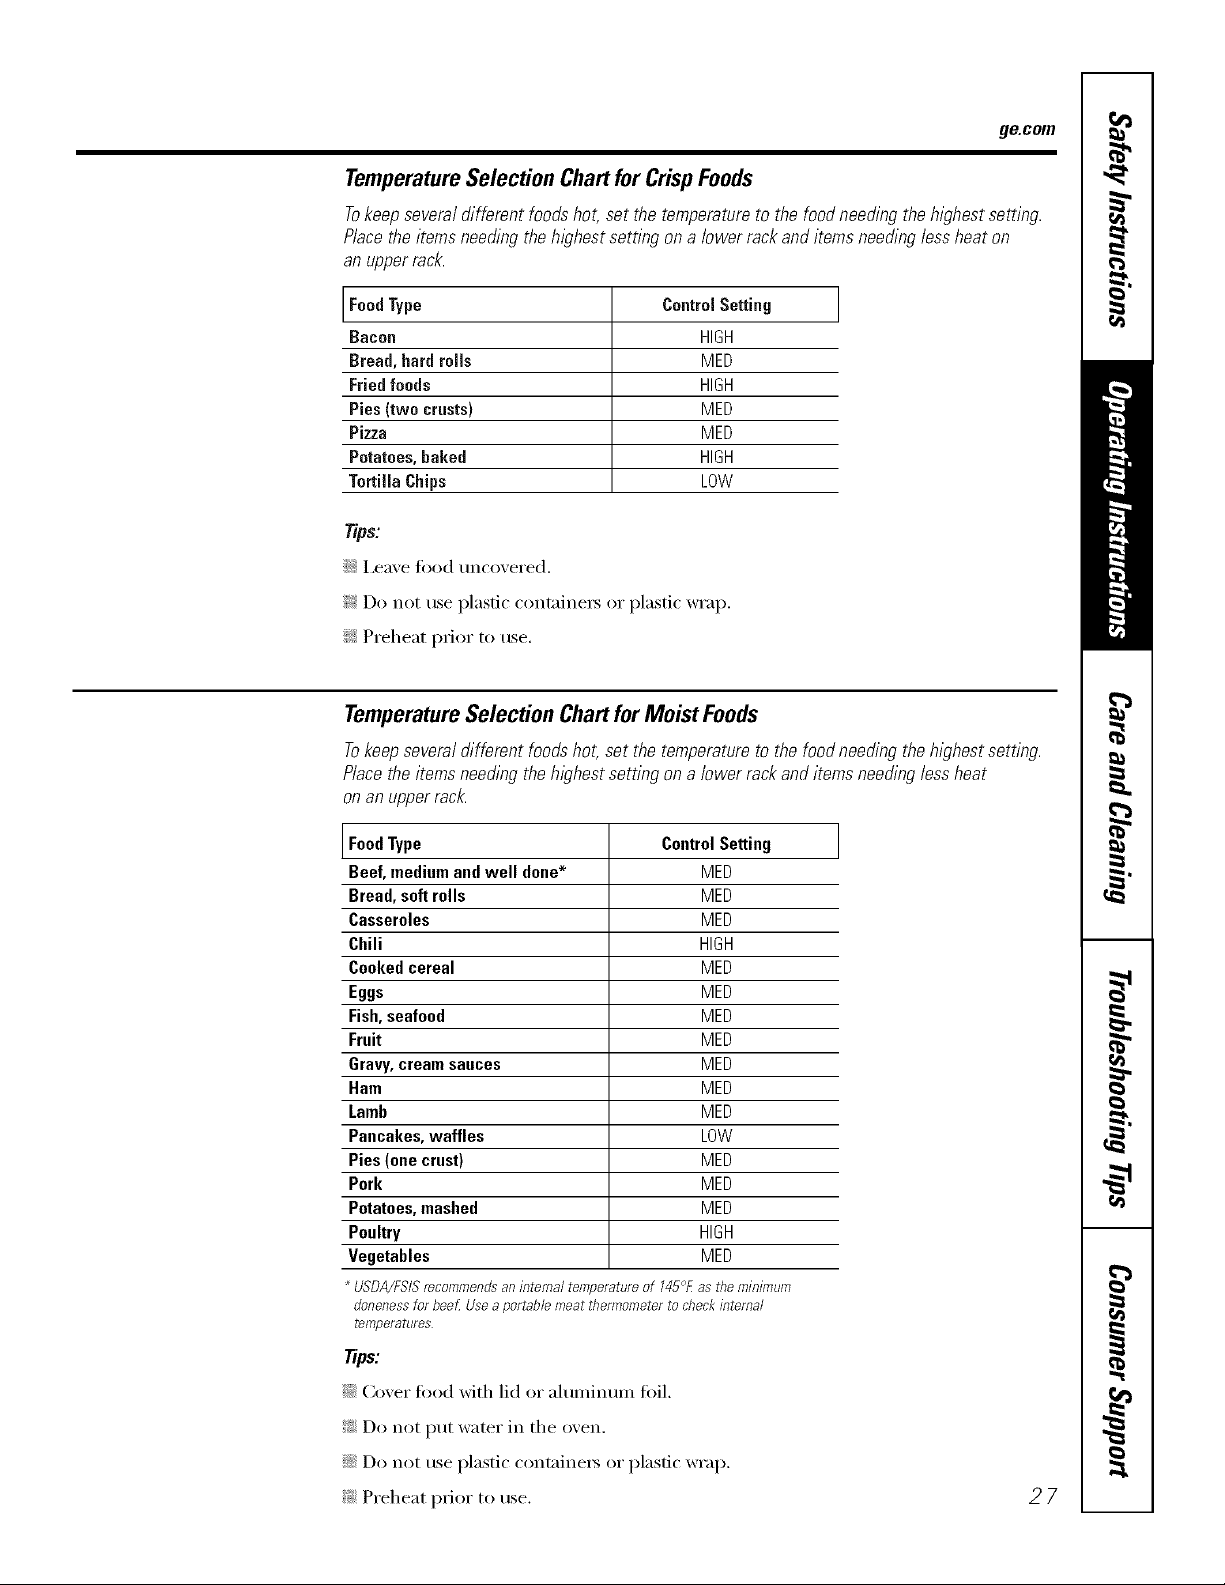
TemperatureSelectionChart forCrispFoods
Tokeep several different foods hot, set the temperature to the food needing the highest setting.
Place the items needing the highest setting on a lower rack and items needing lessheat on
an upper rack.
FoodType
Bacon
Bread,hard roils
Friedfoods
Pies(two crusts)
Pizza
Potatoes,baked
TortillaChips
Tips.'
::Ji::I,eave fi_od uncovered.
!_,2Do not use plastic containet_ or plastic wrap.
_: Preheat prior to rise.
ControlSetting ]
HIGH
MED
HIGH
MED
MED
HIGH
LOW
TemperatureSelectionChartforMoist Foods
Tokeep several different foodshot, set the temperature to the food needing thehighest setting.
Place the items needing the highest setting on a lower rack and items needing less heat
on an upper rac/_
FoodType
Beef,mediumand well done*
Bread,softrolls
Casseroles
Chili
Cookedcereal
Eggs
Fish,seafood
Fruit
Gravy,creamsauces
Ham
Lamb
Pancakes,waffles
Pies(onecrust)
Pork
Potatoes,mashed
Poultry
Vegetables
* USDA/FSISrecommendsaninternaltemperatareof 145°Eastheminimum
alonenessforbeefUsea portable meatthenrlometertocheckinternal
temperatares
Tips:
::Ji::Cover fi_od with lid or aluminum foil.
ControlSetting ]
MED
MED
MED
HIGH
MED
MED
MED
MED
MED
MED
MED
LOW
MED
MED
MED
HIGH
MED
_: Do not put water in the oven.
::_i::Do not tlse plastic containers or plastic wrap.
_: Preheat prior to use.
27
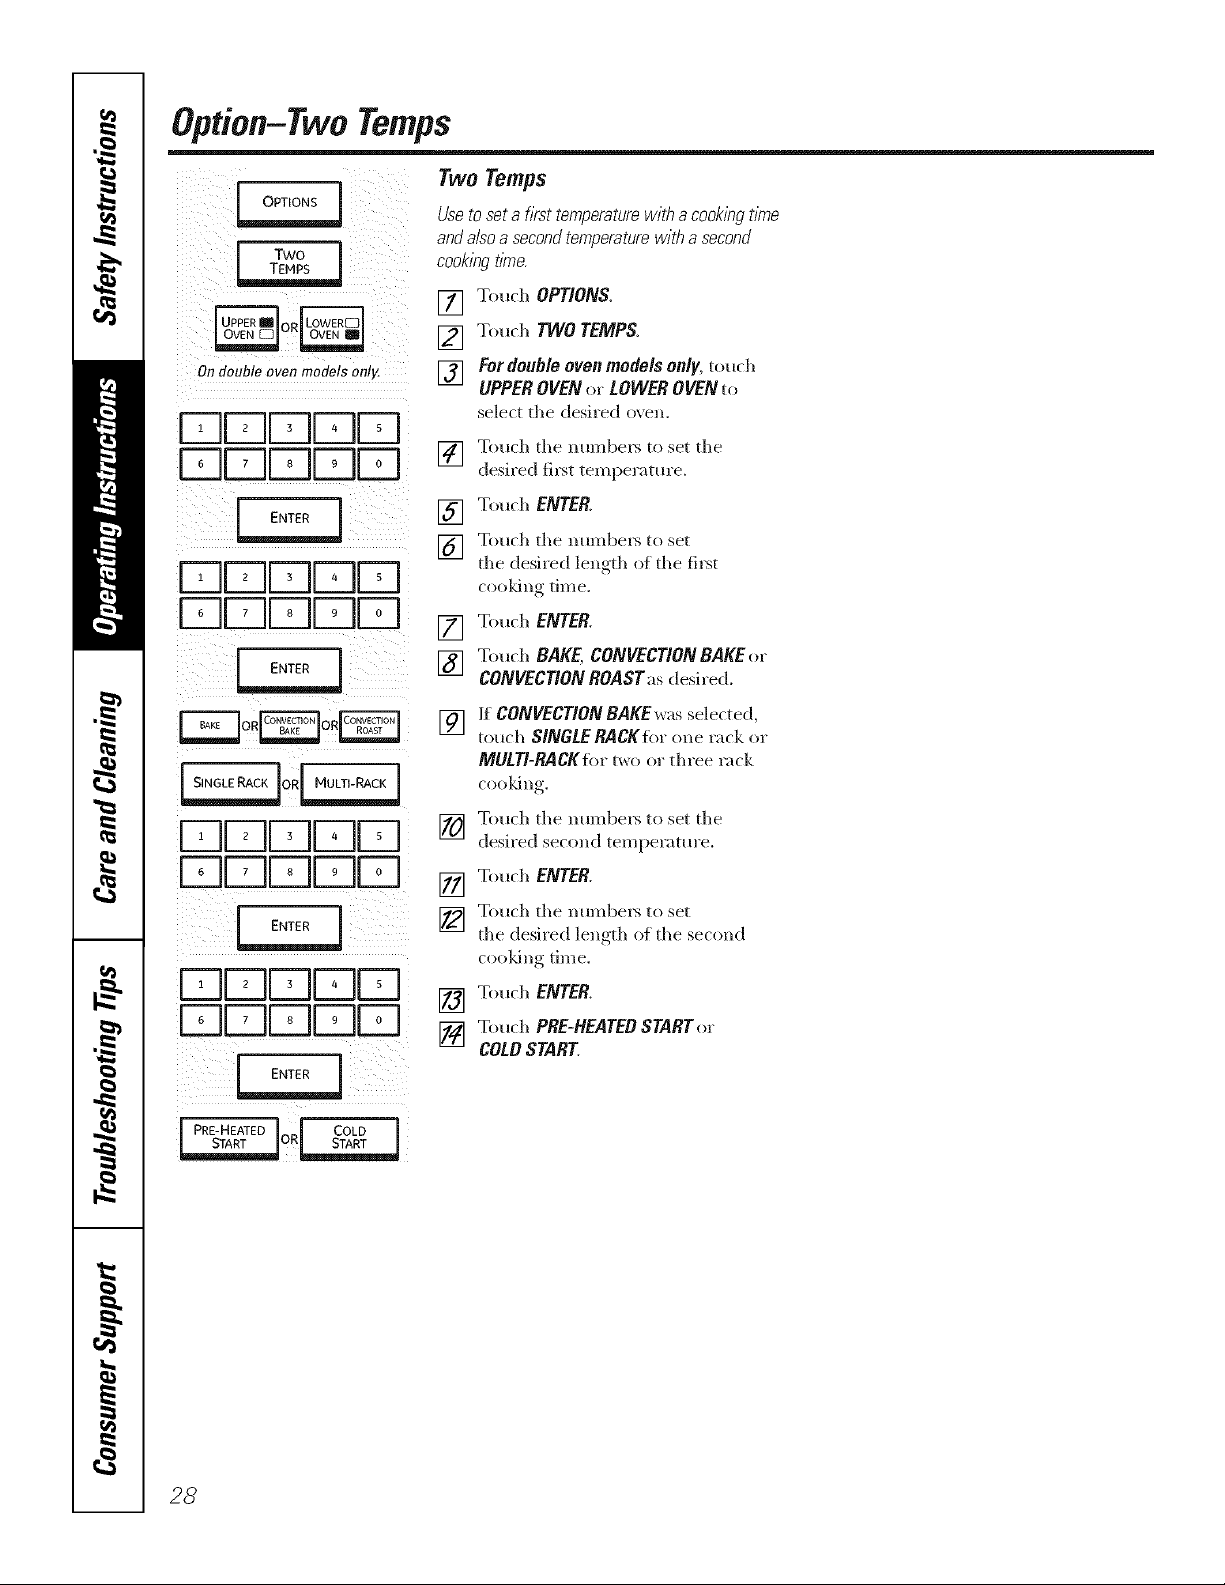
Option-Two Temps
Two Temps
I OPTIONS ]
I two ]
[ -rE,Ps!
On goubto ovon modols omg.
Usetoseta firsttemperaturewitha cookingt/riTe
andalsoasecondtemperaturewitha second
cooking tlnTe.
[] Touch OPTIONS.
[] Touch TWOTEMPS.
[] Fordonb/eovenmodelson/y,touch
VNVNF1uqFq
DDDDD
] Touch tile numbers to set tile
[] Touch ENTER.
] Touch tile numbers to set
VNDD_]D
DD[_DD
[] Touch ENTER.
[] Touch BAKE, CONVECtiON BAKE or
UPPEROVENo_.LOWEROVENto
select tile desired oven.
desil'ed fil>t temperatm'e.
tile desired length of tile fi_t
cooldng tim e.
CONVECTIONROAST as desil'ed.
[] ]f CONVECTlON BAKEwas selected,
0R[ "ULT,-RACKI
FqF-NU-IEZ]K-I
FqFqEZ]U]EZ]
FTIFTIFTlrT1EZ]
F-qFqDDD¸
PRE-HEATED ] J COLD ]
START /OR_
] Touch tile numbers to set tile
[] Touch ENTER.
] Touch the numbex_ to set
[] Touch ENTER.
II_ Touch PRE-HEATEO START o_"
touch SINGLE RACKfiw one rack ox"
MULTI-RACKfi_rtwo or tln'ee rack
cooJdng.
desired second temperature.
the desh'ed length o_ the second
cooldng time.
COLDSTART.
28
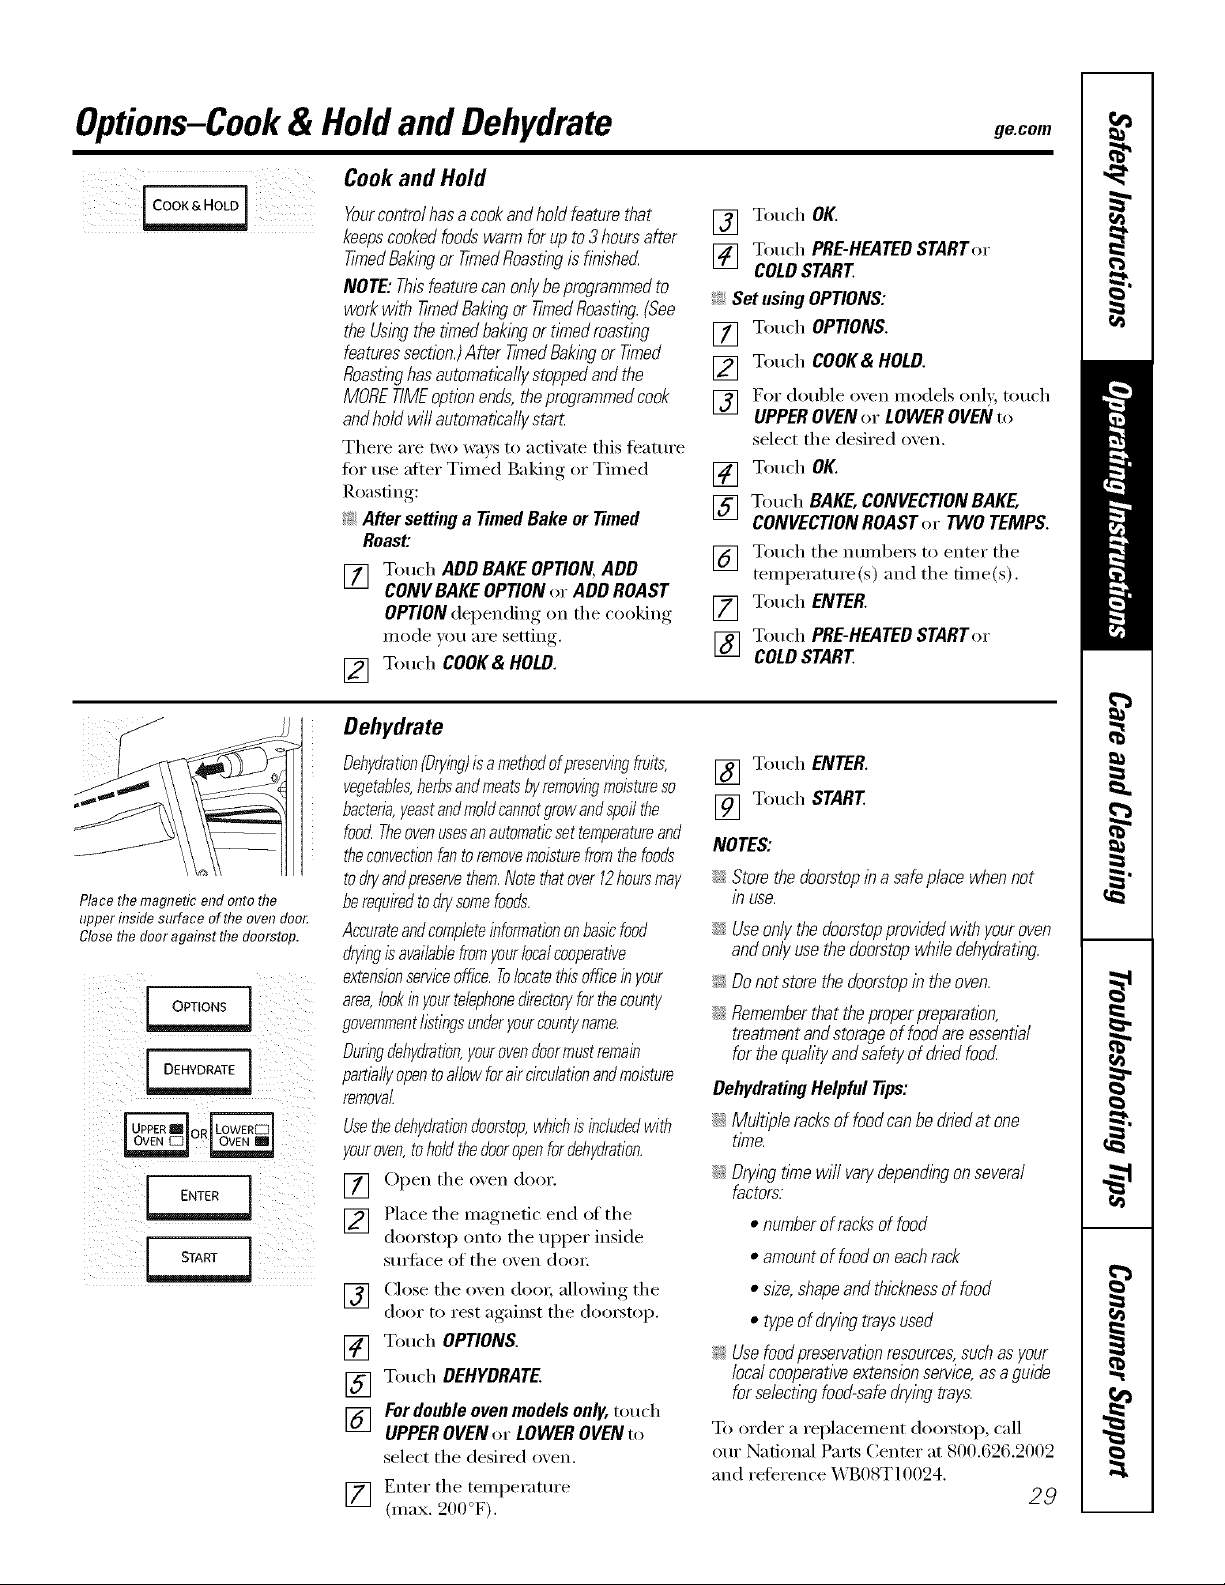
Options-Cook& Holdand Dehydrate ge.om
Cook and Hold
Place the magnetic end onto flTe
upper inside surface of flTe oven doo_
Close flTedoor against fl}e doorstop.
!iliii
Yourcontrolhasacookandholdfeaturethat
keepscookedfoodswarmforupto3hoursafter
timedBakingor timedRoastingis hbL_hed
NOTE:ThL_featurecanonlybeprogrammedto
workwith timedBakingor tinnedRoasting.(See
theUsingthe tt_nedbaklbgortlmedroastlbg
featuressection.)AfterTimedBakingor tinned
Roastinghasautomaticallystoppedandthe
MORETIMEoptionends,theprogrammedcook
andholdwillautomaticallystarL
There are two wa_:s to activate this feature
lot use alier Timed Baking or Timed
Roasting:
_:Aftersettinga TimedBakeorTimed
Roast:
Touch ADDBAKEOPTION,ADD
[]
CONVBAKEOPTIONor ADDROAST
OPTIONdepending on the c()()king
i/lode x/oil aI'e settin ,
Touch COOK& HOLD.
[]
Dehydrate
Dehydration(Drying)isamethodofpreservingfruits,
vegetables,herbsandmeatsbyremovingmoistureso
bacteria,yeastandmoldcannotgrowandspoilthe
foodTheovenusesanautomaticsettemperatureand
theconvectionfantoremovemoisturefromthefoods
todryandpreservethem.Notethatover12hoursmay
berequiredtodrysomefoods.
Accurateandcompleteinformationonbasicfood
dryingisavailablefromyourlocalcooperative
extensionserviceoffice.Tolocatethbofficeinyour
area,lookinyourtelephonedirectoryforthecounty
governmentlistingsunderyourcountyname.
Duringdehydration,yourovendoormustremain
partiallyopentoallowforaircirculationandmoisture
removal.
Usethedehydrationdoorstop,whichisincludedwith
youroven,toholdthedooropenfordehydration.
[] Open tile oven door.
[] Place tile magnetic end of tile
dom_top onto tile upI)er inside
S/lll'ilce of tile oxen dooi:
[] Close tile oxen do(m allowing tile
door to rest against tile doolNtop.
[] Touch OPTIONS.
[] Touch DEHYDRATE.
[] Fordoubleovenmodelsonly,touch
UPPEROVENor LOWEROVENto
select tile desired o',en.
] Enter tile temperatm'e
(max. 200°F).
[] Touch OK.
I_l Touch PRE-HEATEDSTARTor
iii
COLDSTART
!i>Setusing OPTIONS:
[] Touch OPTIONS.
[] Touch COOK&HOLD.
[] For double oxen models only, touch
UPPEROVENor LOWEROVENto
select tile desired o',en.
[] Touch OK.
[] Touch BAKE,CONVECTIONBAKE,
CONVECTIONROASTor TWOTEMPS.
] Touch tile numbers to enter tile
temperature(s) and tile time(s).
[] Touch ENTER.
[] Toud/PRE-HEATEDSTARTor
COLDSTART
[] Touch ENTER.
[] Touch START
NOTES:
_Ji::Storethedoorstopina safeplacewhennot
JR use.
;;Ji::Useonlythedoorstopprovidedwithyouroven
andon/yusethedoorstopwhiledehydrating.
_ Donotstorathedoorstopin theoven.
;;Ji::Rememberthattheproperpreparation,
treatmentandstorageoffoodareessential
forthequafityandsafetyofdriedfood.
DehydratingHelpfulTips:
_Ji:_Multipleracksof foodcanbedriedatone
time.
;;Ji:_Dryingtimewill van/dependingonseveral
factors.
• numberof racksof food
• amountof foodoneachrack
• size,shapeandthleknessoffood
• typeofdryingtraysused
_ Usefoodpreservationresources,suchasyour
localcooperativeextensionservice,asaguide
forselectlbgfood-safedryingtrays.
To order a replacement doorstop, call
ore" National Parts Center at 800.626.2002
and reference X,\B08T10094.
29
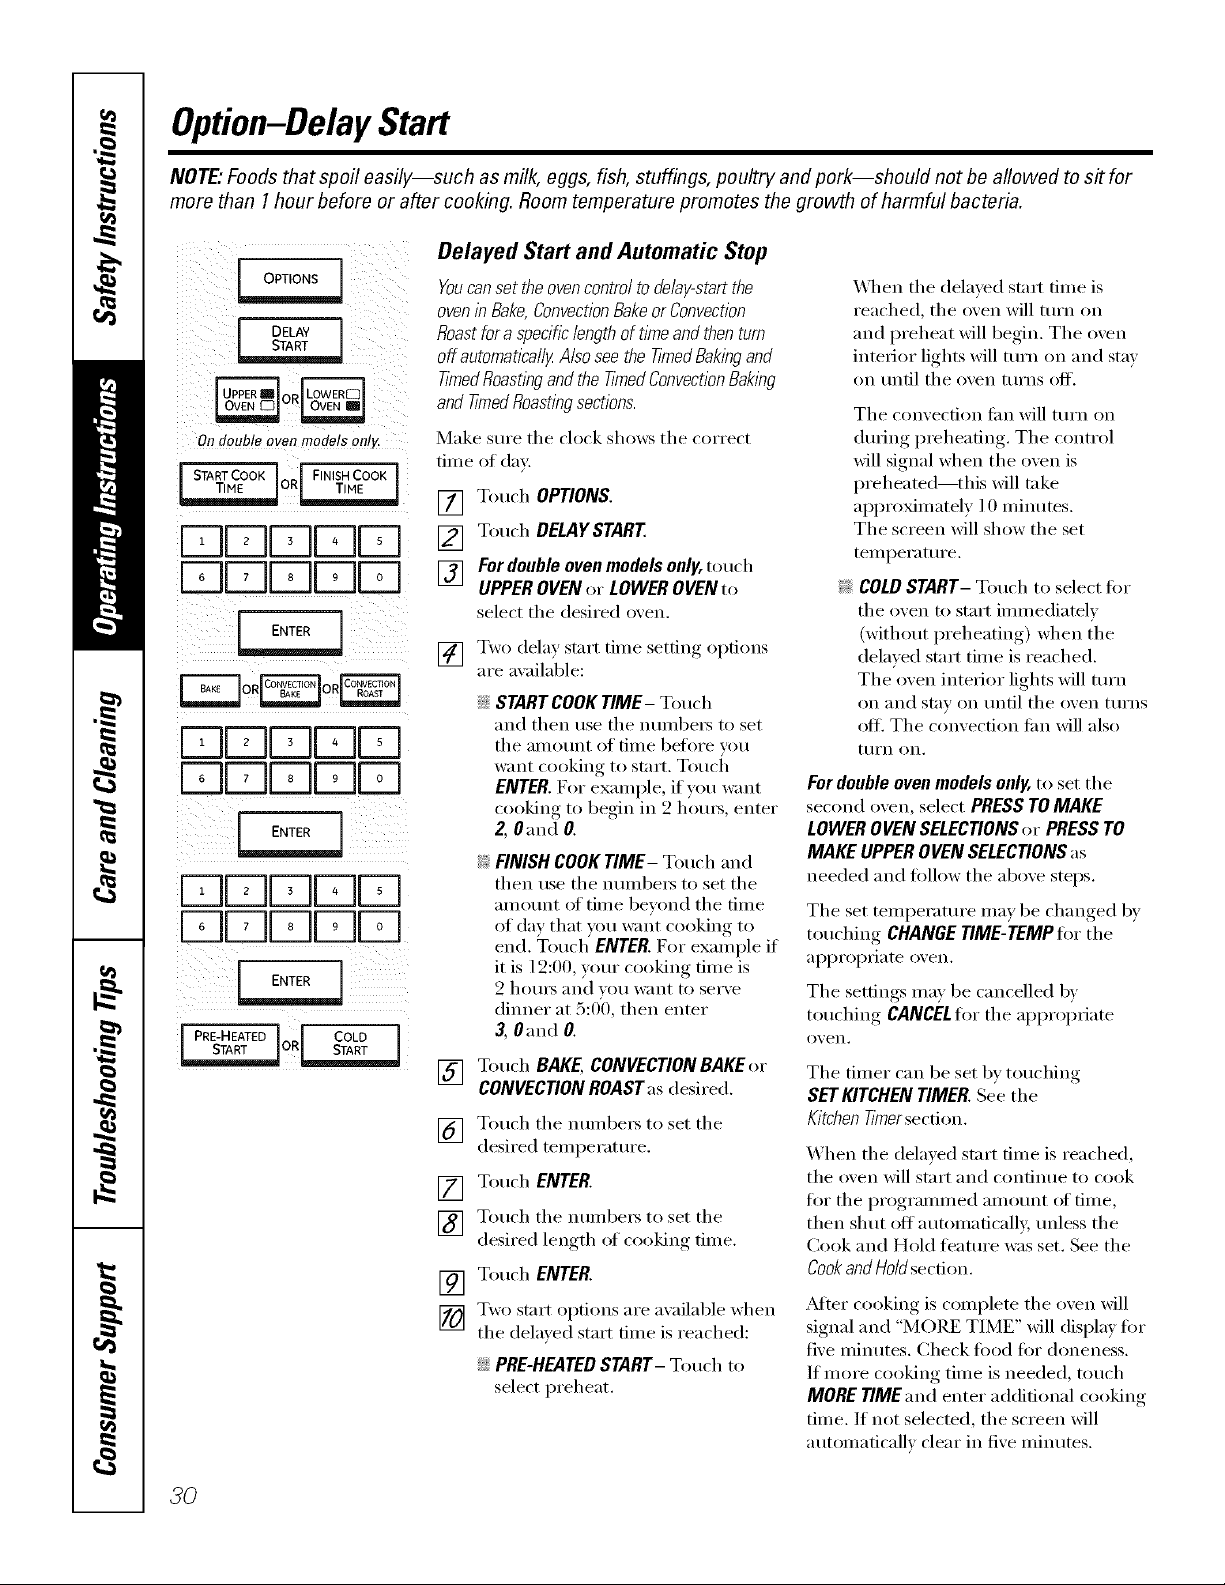
Option-DelayStart
NOTE"Foods that spoil easily--such as milk, eggs, fish, stuffings, poultry and pork--should not be allowed to s# for
more than 1hour before or after cooking. Roomtemperature promotes the growth of harmful bacteria.
Delayed Start and Automatic Stop
Youcan set the oven control to delay-startthe
oveninBake,ConvectionBakeorConvection
J DELAY J
Roastfora specihclengthoftimeandthenturn
offautomaticallyAlsoseethe tithedBakingand
tithedRoastlhgandthe tithedConvectionBaklhg
andtimedRoastingsections.
On double OVOn modo!s on!g
i STARTCOOK J J FINISHCOOK I
r-qrqDDD
r-qr-qrv-ID[
Make sure tile cl(x'k shows tile correct
fiIne of daz
[] Touch OPTIONS.
[] Touch DELAYSTART
[] For double ovenmodels only, touch
] Two delay start tiIne settino options
DDDDD
DDDDD
ENTER
FTIU-Ib:JUU
r-qFqDDU
ENTER
! PRE-HEATED [ COLD I
[ START OR_
[]
] Touch tile nuinbeis to set tile
[] Touch ENTER.
] Touch tile nuinbei_ to set tile
[] Touch ENTER.
[] Two start oI)tions are axailable when
UPPEROVEN or LOWER OVEN to
select the desired o_,en.
are axailable:
ij::STARTCOOKTIME- Touch
and then use the nuinbeis to set
the amount of tiIne before you
want cooking to start. Touch
ENTER. For exaInple, if you want
cookhlg to begin in 2 hours, enter
Z OandO.
i:i FINISHCOOKTIME- Touch and
then use the nuinbei_ to set the
ainount of tinIe bevond tile tiIne
of day that you want cooking to
end. Touch ENTER. For exainple if
it is 1'2:00, your cooking dine is
2 ho/IIN _lll(l VO/l want to serve
dinner at 5:0'0, then enter
3, 0and 0.
Touch BAKE,CONVECTIONBAKEor
CONVECTIONROASTasdesired.
desired teini)erature.
desired length of cooking tiIne.
tile delayed start dine is reached:
ij::PRE-HEATEDSTART- Touch to
select i)reheat.
_4]/eIl tile delayed stair tiine is
reached, tile oven will turn oil
and i)reheat will begin. Tile o;'en
inteiior lights will turn on and stay
on until tile oven turns off.
Tile convection tim will turn on
duiing i)reheadng. The control
will signal when the ()veil is
i)reheated--this will take
al)l)roxiniately l 0 niinutes.
The screen will show the set
teini)erature.
COLDSTART- Touch to select for
tile ()veil to start iininediatelv
(without i)reheating) when the
delayed start tinIe is reached.
Tile ()veil interior lights will turn
on and stay on tlntil tile oven ttlI'ns
oflL Tile convection tim will also
tIlI'n oil,
For double oven models only, to set tile
second ()veil, select PRESS TOMAKE
LOWEROVENSELECTIONSor PRESSTO
MAKEUPPEROVENSELECTIONSas
needed and tollow tile al)ove steps.
Tile set teinl)erature inay be changed by
touching CHANGETIME-TEMPfor tile
ai)i)ropiiate oven.
Tile settings Inay be cancelled bv
touching CANCELfortile apl)ropiiate
()veil,
Tile tiiner can be set by touching
SETKITCHEN TIMER. See tile
Kitchen tither section.
When tile delayed start fiIne is reached,
tile oven will start and continue m cook
fi)I" tile l)rogi'anmled ainount of dine,
then shtIt off autoinafically, unless the
Cook and Hold teatuI'e was set. See tile
Cook and Hold sect.ion.
_MteI"cooking is coinplete tile ()veil will
signal and "MORE TIME" will display for
five ininutes. Check food for aloneness.
If niore cooking tiine is needed, touch
MORE TIME and enter additional cooking
tinie. If not selecmd, the screen will
autoinaticallv clear in five ininutes.
3O
 Loading...