

GE PSS26SHPASS, PSS26NHPAWW, PSS26NHPACC, PSS26NHPABB, PSS26NGPAWW Owner’s Manual
...
wwvv.GEAppliances.com
Safety Instructions ........... 2-4
Operating Instructions
Automatic Icemaker ........... 14
Care and Cleaning .......... 16, 17
Crispers and Pans ............. 13
CustomCooD' . ............... 7, 8
Ice and Water Dispenser ........ 15
Refrigerator Door_ ............ 12
Replacing the Light Bulbs ....... 18
Shelves and Bins ........... 10, 11
Temperature Controls ........... 5
TurboCooD' . .................. 6
Water Filter ................... 9
Installation Instructions
Installing the Reli'igerator .... 28-31
Moving the Reli'igerator ..... 24-27
Preparing to Install
the Refrigerator ............... 25
Trim Kits and Panels ........ 19-22
Water Line Installation ...... 32-34
Models23,25,26,27 and29
Profi/e C6te C6te
R6frig&ateurs
Lasection fran_aisecommence_ la page46
Profi/eLado a Lado
Refrigeradores
Troubleshooting Tips ....... 36--38
Normal Operating Sounds ...... 35
Consumer Support
Consumer Support ..... Back Cover
Performance Data Sheet ........ 41
Product Registration ........ 43, 44
State of"California Water
Treatment Device Certificate ..... 42
Warranty (Canadian) ........... 39
Warranty (U.S.) ............... 40
Write the modeland serial numbershere:
Model #
Serial#
Find these numbers on a label inside
the refrigerator compartment at the
top on the right side.
Laseccion en espa#olempiezaen la p6gina88
200D2600P023 49-60238-2 02-03JR

IMPORTANTSAFETYINFORMATION.
READALLINSTRUCTIONSBEFOREUSING.
A WARNING!
Use this appliance only for its intended purpose as described in this Owner's ManuaL
SAFETYPRECAUTIONS
When using electrical appliances, basic safety precautions should be followed, including the following:
{This refrigerator must be properly installed
and located in accordance with the Installation
Instructions b@ore it is used.
{_Do not allow children to climb, stand or hang
on tile shelves in the reffigeraton They could
damage @e refrigerator and seriously injure
themselves.
{Do not touch @e cold surfaces in the freezer
compamnent when hands are damp or wet. Skin
may stick to @ese extremely cold surfaces.
{_Do not store or use gasoline or other flammable
vapors and liquids in tile vicinity of this or any
other appliance.
{In refiigerators with automatic icemakers,
avoid contact with the moving parts of the
ejector mechanism, or with the heating element
located on the bottom of the icemaker. Do not
place fingers or hands on the automatic
icemaking mechanism while the refrigerator
is plugged in.
@Keep fingers out of the "pinch point" areas;
clearances between the doors and between
the doors and cabinet are necessarily small.
Be careJ[ul closing doors when children are
in the area.
_ Unplug the refiigerator before cleaning and
making repairs.
NOTE: Westrongly recommendthat anyservicingbe
performedby a qualified individual.
@ Setting either or both controls to 0 (Off}does not
remove power to the light circuit.
_Do not refreeze frozen foods which have
thawed completely.
@Always clean the Cu@omCool" Tray after thawdng
food.
2

GEAppliances.com
A DANGER!RISKOFCHILDENTRAPMENT
PROPERDISPOSALOFTHEREFRIGERATOR
Child enn'apment and suffocation are not problems
of the past..Junked or abandoned refigerators are
still dangerous...even if they will sit for 'just a few
days." @you are getting rid of your old refiigerato_;
please follow the insmmtions below to help prevent
accidents.
Before YouThrowA way YourOldRefrigerator
or Freezer:
@Take off the doors.
@Leave the shelves in place so that children may
not easily climb inside.
Refrigerants
All refigeration products contain re@igerants,
which under federal law must be removed prior
to product disposal. If you are getting rid of an
old refigeration product, check with tile
company handling the disposal about what
to do.
USEOFEXTENSIONCORDS
Because of potential safety hazards under certain conditions, we strongly recommend against the use
of an extension cord.
Howevm; ifyou must use an extension cord, it is absolutely necessary that it be a UL-listed (in the United
States) or a CNA-listed (in Canada), @wire grounding type appliance extension cord having a grounding
type plug and outlet and that the elecnical rating of the cord be 15 amperes (minimum) and 190 volts.
3
IMPORTANTSAFETYINFORMATION.
READALLINSTRUCTIONSBEFOREUSING.
A WARNING!
HOWTOCONNECTELECTRICITY
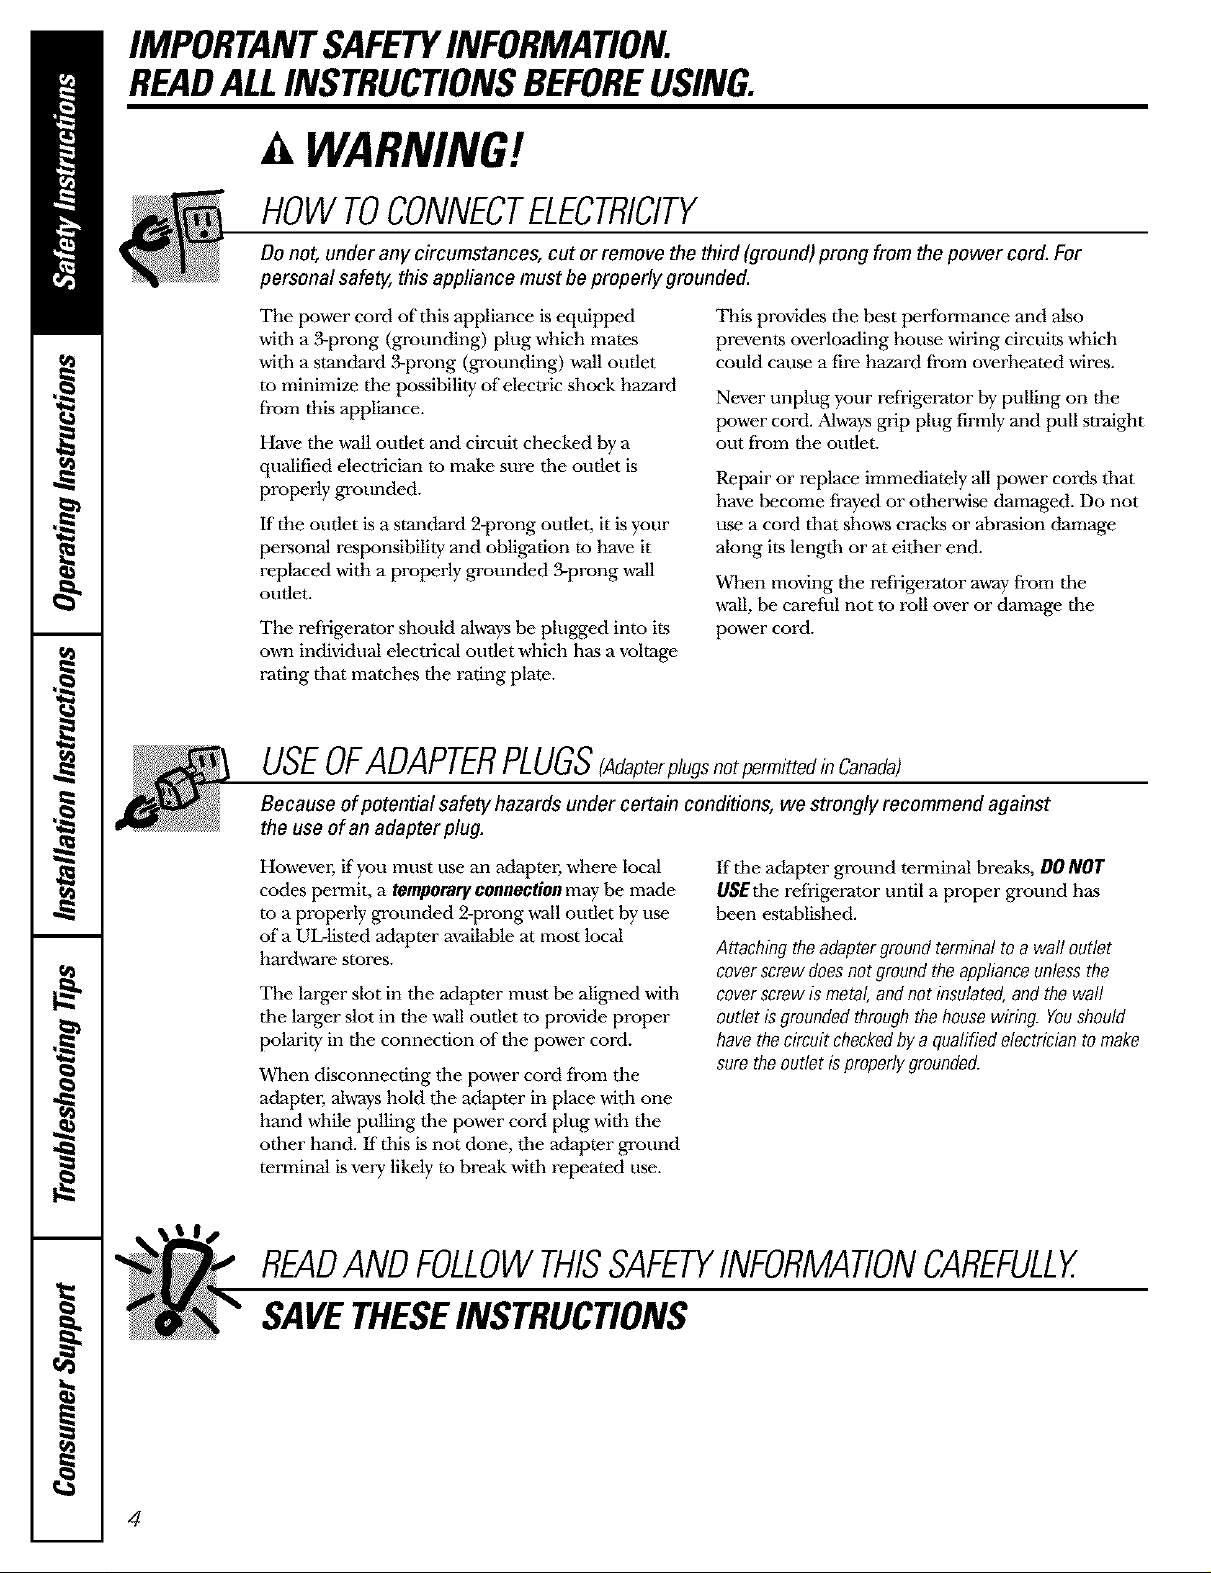
Do not, under any circumstances, cut or remove the third (ground) prong from the power cord. For
personal safety, this appliance must be properly grounded.
The power cord of this appliance is equipped
with a g-prong (grounding) plug which mates
with a standard g-prong (grounding) w_l oudet
to minimize tile possibility of electric shock hazard
from this appliance.
Have tile wall outlet and circuit checked by a
qualified electrician to make sure tile outlet is
properly grounded.
If the oudet is a standard 2-prong outlet, it is your
personal responsibility and obligation to have it
replaced with a properly grounded 3-prong w_l
outlet.
The refrigerator should always be plugged into its
own individual electrical outlet which has a voltage
rating that matches the rating plate.
This provides the best performance and also
prevents overloading house wiring circuits which
could cause a fire hazard from overheated wires.
Never unplug your refrigerator by pulling on the
power cord. _Mwaysgrip plug firmly and pull straight
out fi'om the outlet.
Repair or replace immediately all power cords that
have become frayed or other,arise damaged. Do not
use a cord that shows cracks or abrasion damage
along its length or at eitlmr end.
When moving the refrigerator away fi'om the
wall, be careful not to roll over or damage the
power cord.
USEOFADAPTERPLUGS(Adapterpl,gsnotpermittedinCanada)
Because of potential safety hazards under certain conditions, we strongly recommend against
the use of an adapter plug.
Howevm; if you must use an adapter, where local
codes permit, a temporary connection may be made
to a properly grounded 2-prong wall outlet by use
era UL-listed adapter a'_ailable at most local
hardware stores.
The larger slot in the adapter must be aligned witll
the larger slot in the wall outlet to provide proper
polarity in the connection of the power cord.
When disconnecting the power cord from the
adapter, al,a-ayshold the adapter in place with one
hand while pulling the power cord plug with the
other hand. If this is not done, the adapter ground
terminal is very likely to break with repeated use.
If the adapter ground terminal breaks, DO NOT
USEthe refrigerator until a proper ground has
been established.
Attachingtheadaptergroundterminaltoawaftoutlet
coverscrewdoesnotgroundtheapplianceunlessthe
coverscrewis metal,andnot insulated,andthe waft
outletisgroundedthroughthehousewiring.Youshould
havethecircuitcheckedbya quafifiedelectricianto make
surethe outlet isproperlygrounded.
READANDFOLLOWTHISSAFETYINFORMATIONCAREFULLY.
SAVETHESEINSTRUCTIONS
4

Aboutthetemperaturecontrols. GEAppliances.com
The temperature controls are preset in the factory at 37°1:for the
refrigerator compartment and O°Ffor the freezer compartment. Allow
24 hours for the temperature to stabilize to the preset recommended
settings.
The temperature controls can display both the SET temperature
as well as the actual temperature in the refrigerator and freezer.
The actual temperature may vary slightly from the SET temperature
based on usage and operating environment.
Setting either or both controls to OFFstops cooling in both the freezer
and refrigerator compartments, but does not shut off electrical power
to the refrigerator.
J
I
temperature controls. If this film was not removed during installation,
remove it now.
NOTE: The refrigerator is shipped with protective film covering the
TOchange the temperature, press and release the
WARMER or COLDER pad. The SErlight will come
on and the display will show the set temperature.
To change the temperature, tap either the
WARMER or COLDERpad until the desired
temperature is displayed. Refrigerator temperatures
can be adjusted between 34°F and 44°F and the
freezer temperatures can be adjusted between
4i°F and +6°F.
Once tile desired temperature has been set,
the temperature display will return to tile actual
refrigerator and freezer temperatures after 5
seconds. Several adjustments may be required.
Each time you adjust controls, allow 24 hours 1or the
refrigerator to reach tlle temperature you have set.
To turn the cooling system off, tap the WARMER pad
for either the refrigerator or the freezer until the
display shows OFF. TOturn the unit back on, press the
COLDER pad for either the refrigerator or freezm:
The SETlight will illuminate on the side you
selected. Then press the COLDER pad agMn (on the
side where the SErlight is illuminated) and it will
go to the preset points of O°Elor the freezer and
37°F1br the reliigeraton Setting either or both
controls m 0FFstups cooling in both tlle freezer
and refrigerator compartments, but does not shut
off electrical power to the refrigerator.
PerformanceAir FlowSystem
The Performance Air-Flow System is designed to
maximize temperature control in the refrigerator
and freezer compartments. This unique special
feature consists of the Air Tower along the back
wall of din refrigerator and the Air Tunnel on tlle
tx_ttom portion of tlle freezer rear wall. Placing food
in front of tlle louvers on these components will not
affect performance. Aithough the Air Tower and
the Air Tunnel can be removed, doing so Mll affect
temperature performance. (For removal
instructions, on4ine, 94 hours a day, contact us at
GEAppliances.com or call 800.GE.CARES. In
Canada, contact us at geappliances.ca or call
1.800.361.3400.)
5
AboutTurboCooL"
How it Works
TurboCoolrapidly cools the refrigerator
compartment in order to more quickly
cool foods. Use TurboCoolwhen adding a
large amount of food to the refrigerator
...........................................................................compartment, putting away foods after they
....................................... have been sitting out at room temperature
or when putting away warm leftovers. It can
also be used if the refiigerator has been
without power for an extended period.
Once activated, tile compresmr will turn on
immediately and the fans will cycle on and
of{"at high speed as needed for eight hours.
The compressor will continue to run until
the refiigerator compartment cools m
approximately 34°F (I°C), then it will cycle
on and offto maintain this setting. After 8
hours, or if Turbogoolispressed again, the
refrigerator compartment will return to
the original setting.
How to Use
Press TurboCool.The refrigerator
temperature display will show TC.
After TurboCoolis complete, the
refrigerator compartment will return
to the original setting.
NOTES:The refiigerator temperature
cannot be changed during
TurboCoot
The freezer temperature is not
affected during TurboCool.
When opening the refrigerator
door during TurboCool,the fans
will continue to run if they have
cycled on.
6

AboutCustomCooU GEAppliances.com
How it Works
The CustomCoolTM fizamre is a system of
dampers, a fan, a temperature thermistor
and a heatel: Depending on the traction
selected, a combination of these will be
used to quickly chill items, thaw items or
hold the pan at a specific temperature.
The pan is tightly sealed to prevent tile pan's
temperature fi'om causing temperature
fluctuations in the rest of the refrigeraton
The controls for this pan are located at the
top of the refrigerator with the temperature
controls.
ExpressThawTM
ExpressChillTM
How to Use
Empty the pan. Place the Chill/Thaw
0
tray in the pan. Place the items on the
tray and close the pan completely.
Select the ExpressThawff ExpressChillTM
@
or SelectTempTM pad. The display and
SETlight will come on. Tap the pad
until the light appears next to the
desired setting. Use the chart to
determine the best setting to use.
/}_5To stop a fizature before it is
finished, tap that feature's pad
until no options are selected and
the display is ore
I;}5During Expre,_ Yhaw" and
ExpressChillffthe display on the
controls will count down the time
in the cycle.
How to Remove and Replace the Drawer
TOremove:
Pull the drawer out to the stop position.
Lift the front of the drawer tip and out
of the wire holder.
Lift the hack of the drawer tip and out.
/}55After the ExpressYhaw_cycle is
complete, the pan will reset to the
MEATsetting (31°F) to help preserve
thawed items until they are used.
/;55The displayed actual temperature of
the CustomCoolpanmayvary slightly
from the SETtemperature based on
usage and operating emdronment.
NOTE."For J[bod safety reasons, it is
recommended that foods be wrapped
in plastic wrap when using F_xpressThawJ"
This will help contain meat juices and
improve thawing performance.
Toreplace:
Place the back of the drawer in the wile
holder, making sure the wire holder
fits into the grooves on the back of
the pan.
Lower the front of the drawer into the
wire holden
Pull the bottom of the wire holder
[}orward until the wire pops into the
groove located on the bottom of
the drawer.

AboutCustomCooU
CustomCool TM Chart
NOTE:Results may vary depending on packaging, starting temperature and other food traits.
0.5 Lb. (4 hours) 15 Minutes
N Hamburger Patties 10.5 lb) g};;1 Beverage Can (12 oz) _
Individually Wrapped _;_ 2 Small Juice Boxes (6_ oz each)
Filet Mignon (0.5 lb) 30 MinuteS
1.0 Lb. (g hours) /g_2 to 6 Beverage Cans (12 oz each)
}g Chicken Breasts (1.0 lb) _S_;2 Plastic 20 oz Bottles of Beverage _
}g Ground Beef (1.0 lb) /}s54 to 6 Small Juice Boxes
_ Steak (1.0 |b) (6--8 oz each)
_,0 Lbs. (10 hours) 5;;;_3 Foil Juice Packets _
}g Chicken Breasts (2.0 lbs) /;55Wine (750 ml bottle)
_g Ground Beef (2.0 |bs) 45 MinuteS
_ Steak (2.0 lhs) N 2 Liter of Beverage _
3.0 Lbs. (12 hours) 5;;;;1/2 Gallon of Juice
Oranges, Lemons, Limes,
Pineapple, Cantaloupe
Beans, Cucumbers, Tomatoes,
Peppers, Eggplant, Squash
Strawberries, Raspberries, Kiwifixlit,
Pears, Cherries, Blackberries,
Grapes, Plmns, Nectarines, Apples
Asparaglls, Broccoli, Corn,
Mushrooms, Spinach, Cauliflowm;
Kale, Green Onion, Beets, Onions
Meat Setting (3 F)
Raw Meat, Fish and Pouln T
• 1o
N Chicken Breasts (3.0 lbs) N Gelatin-1 package
N Ground Beef (3.0 lbs)
_ Steak (3.0 lbs)
8
Aboutthe water filter. (onsomemodels) GEAppliances.com
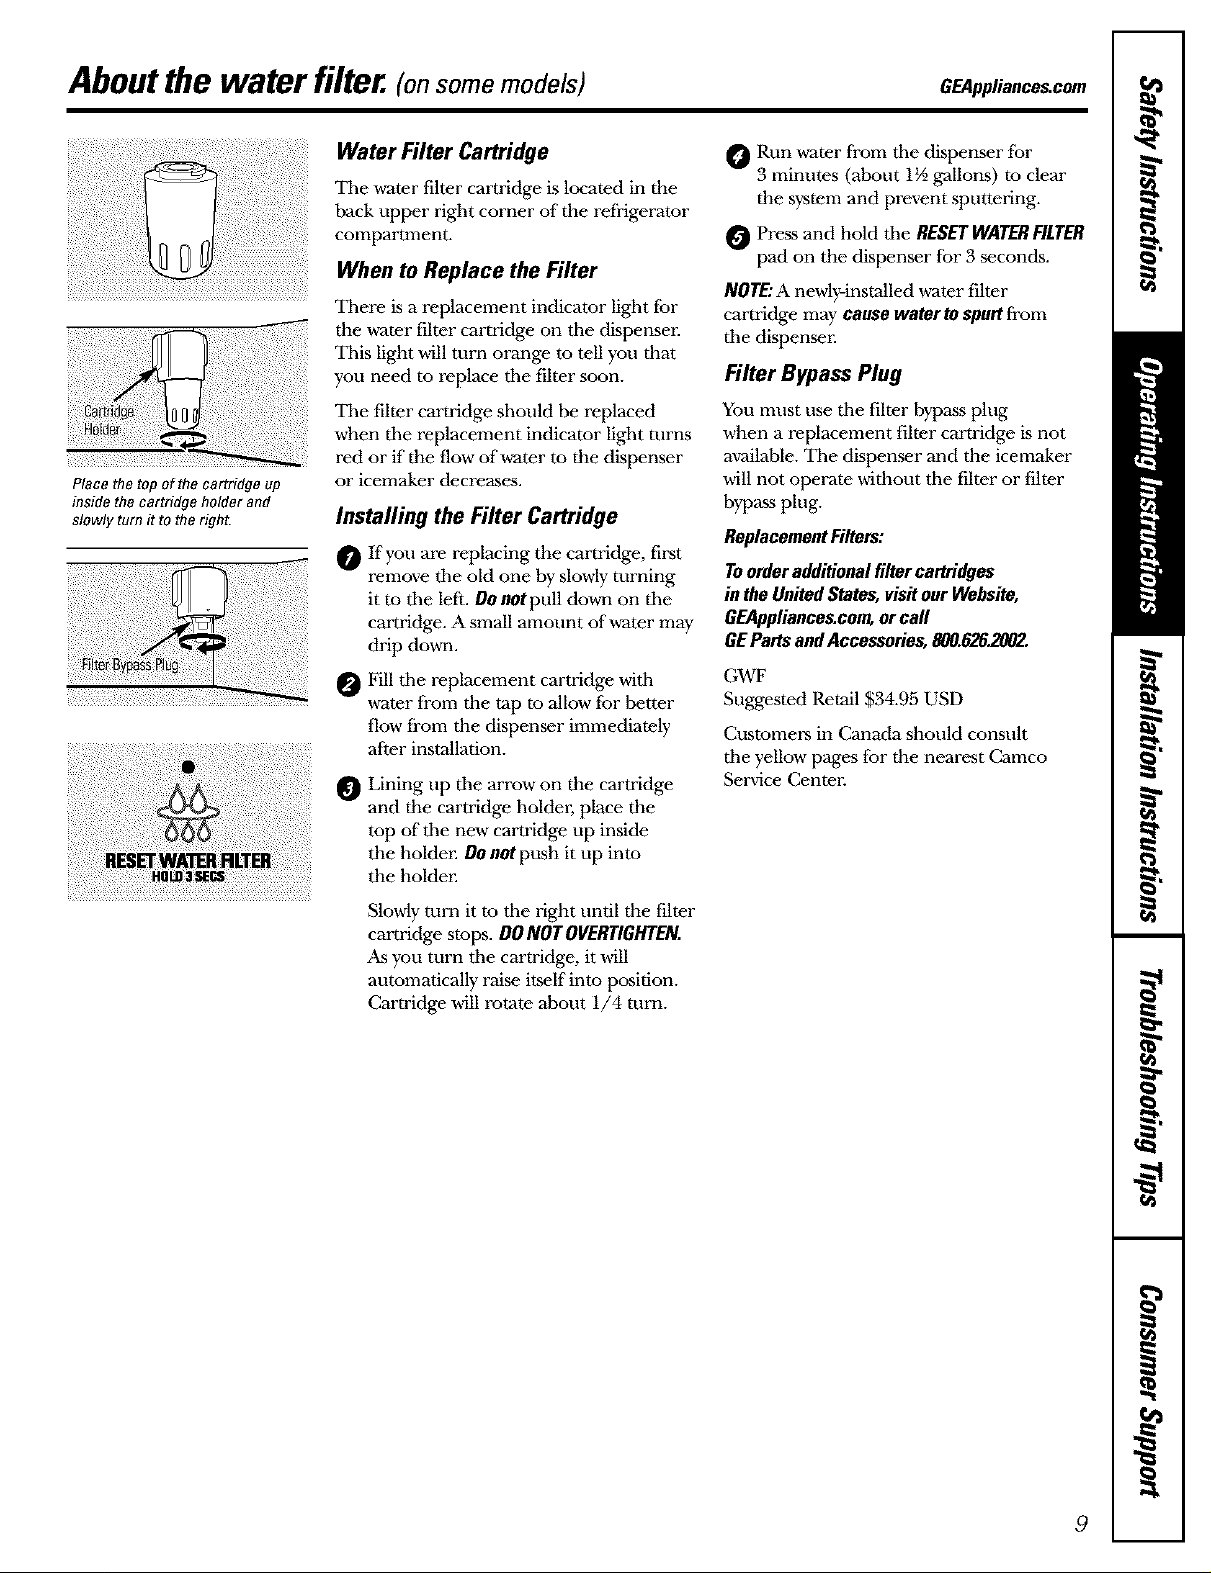
Place the top of the cartridge up
inside the cartridge holder and
slowly turn it to the right.
iii drip down.
Water Filter Cartridge
Tile water filter cartridge is located in the
back upper right corner of the refrigerator
compartment.
When to Replace the Filter
Timre is a replacement indicator light for
the water filter cartridge on tile dispenser.
This light will turn orange to tell you that
you need to replace tile filter soon.
Tile filter cartridge should be replaced
when tile replacement indicator light turns
red or if the flow of water to the dispenser
or icemaker decreases.
Installing the Filter Cartridge
O If you are replacing the cartridge, first
it to the left. Do not pull dovm on the
-- remove the old one by slowly turning
cartridge. A small amount of water may
Fill the replacement cartridge with
-- water fi'om the tap to allow for better
flow fi'om the dispenser immediately
after installation.
_ Lining up the arrow on the cartridge
and the cartridge holder, place the
top of the new cartridge up inside
the holder. DOnot push it up into
the holder.
O Run water from the dispenser for
3 minutes (about 1½ gallons) to clear
the system and prevent sputtering.
Press and hold the RESET WATERFILTER
pad on the dispenser for 3 seconds.
NOTE:A newly-installed water filter
cartridge may cause waterto spurt from
the dispenser.
Filter Bypass Plug
You must use the filter bypass plug
when a replacement filter cartridge is not
available. Tim dispenser and the icemaker
will not operate without the filter or filter
bypass plug.
ReplacementFilters:
Toorderadditionalfiltercartridges
in theUnitedStates,visitourWebsite,
GEAppliances.com,orcall
GEPartsandAccessories,800.6262002.
GWF
Suggested Retail $34.95 USD
Customers in Canada should consult
the yellow pages for the nearest Camco
Service Center.
Slowly turn it to the right until the filter
cm'tridge stops. DO NOT OVERTIGHTEN.
As you turn the cartridge, it will
automatically raise itself into position.
Cartridge will rotate about 1/4 turn.
9

Abouttheshelvesand bins.
Not all features are on all models.
Refrigerator Door Bins and Freezer Door flit-Out Bins
Refrigerator bin
Freezer tilt-out bin
Press tab and pug sheff
fonzcardto remove
LargeBins
The larger refrigerator door bins and
freezer tih-out door bins are adjustable.
Toremove: Lift tile front of the bin straight
up, then lift up and out.
TOreplaceorrelocate:Engage tim back side
of the bin in tile molded supports on tile
door. Then push down on tile front of tim
bin. Bin will lock in place.
SmallBins
Toremove:Lift tile front of the bin straight
up tben out.
TOreplace:Position tile bin above tile
rectanglllar molded supports on tile door.
Then slide tile bin down onto tile support
to lock it in place.
Slide-Out Spillproof Sheff
The slide-out spillproof shelf allows you
to reach items stored behind othm.-s.The
special edges are designed to help prevent
spills from dripping to lower shelves.
Toremove:
Slide tim shelf out undl it reaches the stop,
tben press down on the tab and slide the
shelf straight out.
Toreplaceorrelocate:
Line the shelf up with the supports and
slide it into place. The shelf can be
repositioned when tile door is at 90° or
more. To reposition the shelf; slide the shelf
past the stops and angle downward. Slide
shelf down to the desired position, line tip
with the supports and slide into place.
Makesureyoupushtheshelvesall the wayback
in beforeyouclosethedoo_
Thesnuggerhelps prevent tipping, spilling
or sliding of small items stored on the door
shel£ Place a finger on either side of the
snugger near the rear and move it back
and forth to tit your needs.
Donotblock
CAUTION:Be
carefulwhenplacing
itemsinthetopbin.
Makesurethat
itemsdonotblock
orfall intotheice
chute.
Topfreezer bin
10
QuickSpace TM Sheff
This shelf splits in half and slides tinder
itself for storage of tall items on the shelf
below_
This shelf can be removed and replaced
or relocated just like Slide4)ut Spillproof
Shelves.
On some models, this shelf cannot be used
in the lowest position.
Not all features are on all models.
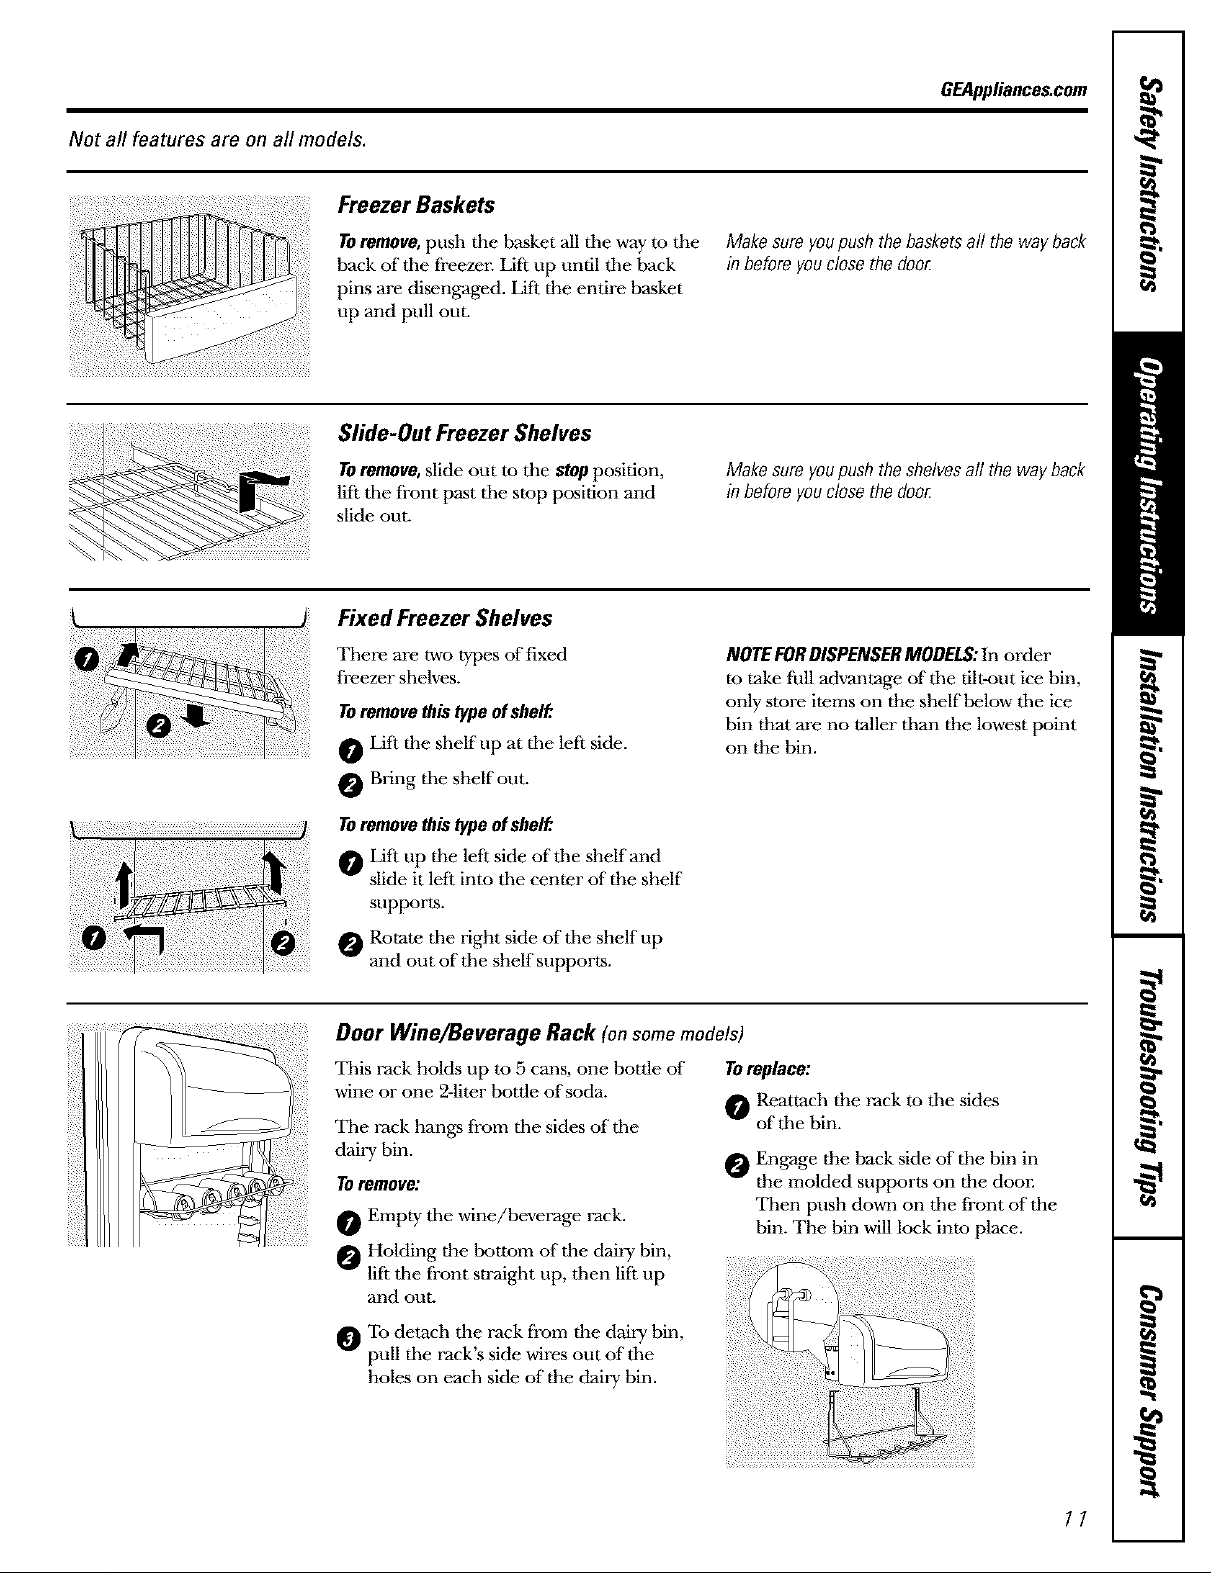
Freezer Baskets
GEAppliances.com
Toremove,push the basket all tile way m the
hack of tile freezes: Lift up until tile back
pins are disengaged. Lift the entire basket
up and pull out.
Slide-Out Freezer Shelves
TOremove,slide out to the stopposition,
lift tile fi'ont past tile stop position and
slide out.
Fixed Freezer Shelves
There are two types of fixed
freezer shelves.
TOremovethistypeofshelP.
O Lift the shelf up at tile left side.
Bring tile shelf out.
Makesureyoupushthebasketsall the wayback
inbeforeyouclosethedoo_
Makesureyoupushtheshelvesall the wayback
inbeforeyouclosethedoo_
NOTEFORDISPENSERMODELS:In order
to take fifll advantage of"tile tilt-out ice bin,
only store items on the shelf below tile ice
bin that are no taller than the lowest point
on the bin.
TOremovethis typeofshelP.
Lift tip the left side of the shelf and
slide it left into the center of the shelf
supports.
Rotate the right side of the shelf up
and out of the shelf supports.
Door Wine/Beverage Rack (on some models)
Tilis rack holds up to 5 cans, one bottle of Toreplace:
wine or one 2-liter bottle of soda.
Tile rack hangs from the sides of the
dairy bin.
I_ Reattach the rack to the sides
w
of the bin.
Engage the back side of tile bin in
To remove:
the molded supports on the door.
Then push down on tile front of the
Empty tile wine/beverage rack.
bin. The bin will lock into place.
_ Holding the bottom of the dairy bin,
lift tile fi'ont sn'aight tip, then lift up
and out.
_To detach the rack from the dairy bin,
pull tile rack's side wires out of tile
holes on each side of the dairy bin.
11

Abouttherefrigeratordoors.
Refrigerator Doors
When the dooris only partially open,
it will automatically close.
Beyond thisstop the door will stay open.
The refrigerator doors may feel diffizrent
than the ones you are used to. Tile special
door opening/closing feature makes sure
tile doors close all tile way and are securely
sealed.
When opening and closing the door you
will notice a stopposition. If the door is
opened past this stop point, the door will
remain open to allow you to load and
unload food more easily. When the door
is only partially open, it will automatically
close.
DoorAlignment
If doors are uneven, adjust the refrigerator
door.
O Using a 7/16" socket wrench, turn the
door adjusting screw to the right to
raise the door, to the left to lower it.
(A nylon plug, imbedded in the
threads of the pin, prevents the pin
from turning unless a wrench is used.)
The resistance you feel at the stop
position will be reduced as tile door
is loaded with food.
After one or m,o turns of the wrench,
open and close the refrigerator door
and check the alignment at the top of
the doors.
7/16"SocketWrenchI
grille,openthedoors.
removethescrewat
eachendofthebase
grilleandthenpell _ @;> Raso
thegripestraightout
12

Aboutthecrispersandpans. GEAppliances.com
Not all features are on all models.
Fruit and Vegetable Crispers
Excess water that may accmnulate in the
bottom of the di'awers should be wiped dI'y.
Onsomemodels,tile bottom drawer has
fhll extension slides that allow full access
to tile drawer.
HI _ LO
Q. e Slide tile control all tile way to the Hlsetting
Adjustable Humidity Crispers
to provide high humidity recommended for
most vegetables.
Convertible Meat Pan
The convertible meat pan has its own cold
air duct to allow a stream of cold air fi'om
the freezer compartment to flow to the pan.
Thevariable temperaturecontroI regulates
the air flow from the Climate Keeper.
Aboutcrisperremoval
Slide the control all the way m tile LO
setting to provide lower humidity levels
recommended for most fruits.
Set tile control to the coldestsetting to
store fl'esh meats.
Set tile control to coldto convert the pan
to normal refi'igerator temperature and
provide extra vegetable storage space. The
cold air duct is turned off. Variable settings
between these extremes can be selected.
Not all features are on all models.
!-_ _i¸_!i:¸!iiii_i!/ii:ii_!!i!i_¸_I¸i!!!iiiiiii!_i!!il;;i
Crisper Removal
Crispers can easily be removed by pulling
the drawer sn'aight out and lifting tile
drawer up and over the StOplocation.
If the door prevents you from taking out
tile drawers, fiJ.-sttry to remove tile door
bins. If this does not offer enough
clearance, the refi'igerator will need to
be rolled forward until the door opens
enough to slide the drawm.-sout. In some
cases, when you roll tile refrigerator out,
you will need to move tile refi'igerator
to tile left or right as you roll it out.
13

Abouttheautomaticicemaker.
A newly installed refrigerator may take 12to 24 hours to begin making ice.
Automatic Icemaker
Ondispensermodels,
toaccessice orreach
thepower switch:
o Lift the bin, then pullit
forward until the bin stops.
The icemaker will produce seven cubes
per cycle,---approximately 100-130 cubes
in a 24-hour period, depending on freezer
compartment temperature, room
temperatm'e, number of door openings
and other use conditions.
If the refrigerator is operated befbre the
water connection is made to tile icemake_;
set the power switch in tile O(off}position.
When the refrigerator has been connected
to tile water supply, set tile power switch to
tile I (on) position.
Tile icemaker will fill with water when it
cools to 15°F (-10°C). A newly installed
refiigerator may take 12 to 24 hours to begin
making ice cubes.
You will hear a buzzing sound each time
the icemaker fills with water.
Throw away the first few batches of ice to
allow the water line to clear.
Special note about dispenser models:
_ Dispenser models have a tilt-out ice bin.
The bin can be tilted out as shown in the
illustrations, and it will hold itself up
while you take ice out or turn the
icemaker power switch on and off Be
sure to put the bin back in place before
closing the door.
_ To restore your ice level from an empty
bucket stage, the following steps are
recommended:
I_ 12 hours after the first batch of ice
has fallen into the bin, dispense
3 to 4 cubes.
After an additional 6 hours, dispense
3 to 4 cubes again.
These steps will restore your ice level
in the shortest amount of time.
o Lower the bin to access ice
or reach the power switch.
NOTE:In order to take furl advantage
of the tie-out ice bin, only store items
an the sheff below the ice bin that
are no taller than the lowest point
an the bin.
_ Lift the bin, then pull it
forward until the bin stops.
Be sure nothing interferes with tile sweep
of tile fi?eler arm.
When the bin fills to the level of the f_eeler
arm, the icemaker will stop producing
ice. It is normal for several cubes to be
joined together.
If ice is not used frequently, old ice cubes
will become cloudy, taste stole and shrink.
Removing Ice Bin (dispenser models)
CAUTION:Theice binis heavywhen full.
Set tile power switch to the 0 (Off)position
before removing tile bin.
Whenreplacingthebin,be sure to press it
firmly into place. If it does not go all tile
way back, remove it and rotate the drive
mechanism 1/4 turn. Then push tile bin
back again.
ilili!!i!ii!iiiii___1
NOTE:Inhomeswithlower@an-averagewater
pressure,youmayheartheicemakercyclemultiple
timeswhenmakingonebatchofice.
_ Lift and puff forward again
to remove the bin.
14
Dispenser Models only
 Loading...