

GE PSS29NGNAWW, PSS29NGNACC, PSS29NGNABB, PSS27SHNABS, PSS25NGNAWW Owner’s Manual
...
GEAppliances.com
Safety Instructions ........... 2-4
Operating Instructions
Additional Features ............ 12
Automatic lcemaker ........... 14
Care and Cleaning .......... 16, 17
Crispers and Pmis ............. 13
CustomCool _" • ............... 7, 8
Ice and Water Dispenser ..... 15, 16
Refrigerator Doors ............ 12
Replacing the Light Bulbs ....... 18
Shelves and Bins ........... 10, 11
Temperature Conu'ols ........... 5
TurboCoor" . .................. 6
Water Filter ................... 9
Instagation Instructions
Preparing to Install
the Refrigerator ............ 24, 25
Removing and
Replacing Doors .............. 23
Trim Kits and Panels ........ 19-22
Water Line Installation ...... 26-30
Models23,25,26,27 and29
ProfileC6te _.C6te
Rdfrig6mteurs
Lasectionfra_aise commence_la page
Prof!/e Lado a Lado
Refrigeradores
Troubleshooting Tips ....... 32-34
Normal Operating Sounds ...... 31
Consumer Support
Consumer Support ..... Back Cover
Performance Data Sheet ........ 37
Product Registration ........ 39, 40
State of California Water
Treatment Device Certificate ..... 38
Warranty (Canadian) ........... 35
Warranty (U.S.) ............... 36
Write the model and serial numbers hate:
Model #
Serial #
Find these mmlbers on a label inside
the refrigerator compartment at the
top on the right side.
Lasnccidnanespa_nlnmpiezaenInp_gina78
200D2600POI8 4,9-60195 02-02 JR

IMPORTANTSAFETYINFORMATION.
READALLINSTRUCTIONSBEFOREUSING.
A WARNING!
Usethisapplianceon/},forits intendedpurpose asdescribedin this Owner'sManual
SAFETYPRECAUTIONS
Whenusingelectrical appliances,basicsafetyprecautionsshouldbe followed,includingthefollowing:
tyTlaksrefrigerator must be properly imtalled
and located in accordance with the Imtalhtion
Instructions before it is used.
tyDo not allow children to climb, stand or hang
on the shelves in the refrigerator. They could
damage the refrigerator and _riot_sly injure
themselves.
viDo not touch the cold surfaces in the freezer
compartment when hands are damp or wet. Skin
may stick to these extremely cold surfaces.
tyDo nut store or ttse gasoline or other flammable
vapors and fiquids in the vicinity of this or any
other appliance.
ty In refrigerators with atztomafic icemakc_rs,
avoid contact with the moving parts eft the
ejector mechanism, or with the heating element
located on the bottom of the icemaker. Do not
place fingers or hands on the automatic
icemaking mechanism while the rtyvigerator
is plugged in.
ty Keep fingers out of the "pinch point" area.s;
clearances between the doors and between
the doors and cabinet axe nec_ly small.
Be carevifl closing doors when children axe
in the area.
tyUnplug the reviigemtor before cleaning and
making repairs.
NOTE:We suong/yrecommendthatanysotvicingbe
#odmtrmdbya qoalifi_ indivtyual.
vi,Setting either or both controls to 0 {off)does not
reluove power to the light circxfit.
viDo not refreeze frozen foods which have
thawed completely.
viAlwaysclean file C_Cool TM Tray after thawing
food.
2

GF.Appliance_com
A DANGER!RISKOFCHILDENTRAPMENT
PROPERDISPOSALOFTHEREFRIGERATOR
Child entrapment and sttffo_ation are not problems
of the pasL Junked or abandoned refrigerators are
still dangerous...even if they will sit for _jttst a few
days." ffyou are getting rid of your old refrigerator,
ple&se follow the itxstrucdons below to help prevent
accidents.
BeforeYouThrowAway YourOldRefrigerator
or Freezer.
st Take offthe doors.
st Leave the shek, t_ in place so star children may
not tya.sllyclimb inside.
CFCDisposal
Your old refrig'erator may have a cooling ,systmn
that ttsed CFCs (chlorofluorocarbons). CFC*are
believed to harm stratospheric ozone.
Ify(m are throwing away your old refrigerator, make
sure the CFC refrigerant ksremoved for proper
disposal by a qualified servicer. If you intentionally
relemse this CFC refrigerant yon can be subject to
fraes madimprisonment uuder proxf.sionsof
emqronmental legislation.
USEOFEXTENSIONCORDS
Because of potentialsafetyhazardsundercertainconditions,we stJ'onglyrecommendagainstthe use
ofan extension cord.
Hov,xocer,if you must use an extension cord, it is absolutely necessary that it be a L_-listed (in the United
States) or a C,SA-listed (in Canada), 3-wire grotrading type appliance extension cord having a grounding
type plug and outlet mad dxat the electrical rating of the cord be 15 amperes (mininram) mad 120 volts.
3

IMPORTANTSAFETYINFORMATION.
READALLINSTRUCTIONSBEFOREUSING.
A WARNING!
HOWTOCONNECTELECTRICITY
Do not,underanycircumstances,cut orremove thethird (ground)prongfromthe powercord.For
personalsafe_, this appliancemustbe properly grounded.
The power cord cffthis appliance is equipped
with a _prong (gmtmding) plug which mates
with a standard 3-prong (grounding) wall outlet
to minimize the possibility of electric shock hazard
from this appliance.
Have the v-an outlet and circuit checked by a
qualified electrician to nmke sure the oudet is
properly" grounded.
If the outlet is a standard 2-prong outlet, it is your
personal responsibility and obligation to have it
replaced with a properly grounded 3--prong _mll
outlet.
The refrigerator should always be plugged into its
own individual electrical oudet wtlich h_ a voltage
rating that matches the rating plate.
This provides the best performance and also
pro,'en ts overloading hoose wiring circuits whidx
could cause a fire hazard from overheated wires.
Never tmplug your retiigemtor by pulling on the
power cord. Alvws grip phkg firmly and Dill straight
out from the ontieL
Repair or replace immediately all lxr_er cords that
have become frayed or othevwi,se damaged. Do not
use a cord that show cracks or abrasion damage
along its length or at either end.
V_nen mo-,iug the refrigerator away from the
wall, be carefifl not to roll over or damage the
power cord.
USEOFADAPTERPLUGS(Adapterplugsnotpermitted in Canada)
Because of potential safe_ hazards under certain conditions, we strongly recommend against
the use of an adapter plug.
However, if you must use an adapter, where local
codes permit, a t_apo_F comw_ianmay be made
to a properly grounded 2-prong wan ontlet by u_
of a UL-listed adapter available at most local
lxarchcare stores,
The larger flot in the adapter must be aligned with
the larger slot in the wall outlet to provide proper
polarity in the connection of the power cord.
When disconnecting the power cord from the
adapter, always hold the adapter in place with one
hand while pnlling the power cord plug with the
other hand. ff this is not done, the adapter ground
terminal is very likely to break with repeated use.
If the adapter ground terminal breaks, DO NOT
OSEthe refrigerat_r until a proper ground has
been established.
Attachingtheadaptergroundterminaltoawalloutlet
coverscrewdoesnotgroundtheapplianceunlessthe
coverscrewismetal,andnotinsulated,andthewaft
outletisgroundedthroughthehousewiring.Youshould
havethecircuitcheckedbya qualifiedelectriciantomake
suretheoutletisproperlygrounded.
READANDFOLLOWTHISSAFETYINFORMATIONCAREFULLY.
SAVETHESEINSTRUCTIONS
4

About the temperaturecontrols.
The temperature controls are preset in the factory at 37°1: for the
refrigerator compartment and O°Ffor the freezer compartment. Allow
24 hours for the temperature to stabilize to the preset recommended
settings.
The temperature controls can display both the SET temperature
as well as the actual temperature in the refrigerator and freezer.
The actual temperature may vary slightly from the SET temperature
based on usage and operating environment.
Settingeither orboth controlsto OFFstopscoolinginboth the freezer
and refrigerator compartments, but doesnotshutoff electrical power
to the refrigerator.
NOTE: The refrigerator is shipped with protective film covering the
temperature controls. If this film was not removed during installation,
remove it now.
TochatPge _ tem_tature, press and release the
WARMERor COI.tiERpad. The SETlight will come
on and the dLsplay will show the set temperatme,.
To chmlge the tempe, retiree, tap either the
WARMERor COLDERpad mltil the desired
temperature is displayed. Refrigerator temperatures
can be adjusted between _°I." and 44°F mid the
freezer tranperatur¢_, can be adjusted between
--6_F and +6°E
Once the desined temperature has been set,
the temperature disphy will return to the actual
refrigerator and freezer temperatures ",d_er5
seconds. S¢.weral adjustments may be ix'quired.
Each time you adjust controls, all_v24 hours for the
rt_'rigerator to reach the temperatra'e you have set.
PerformanceAirFlowSystem
The Performance Air-Flow System is designed to
maximize temperattu:e control in the refiigerator
and freezer compartments. This tmiq_te special
feature cousists of the Air Tower along the back
wall of the refrigerator and the Air Tnnnel on the
bottom portion of the freezer rear wall. Placing food
in front of the louvers on these components will not
Toturnthe coolingsystemoff, tap the WARMERpad
for either the refrigerator or the freezer until the
ff_play shows 0/:E.To tam the _it back on, press the
COLDERpad for either tile refrigerator or freezer.
The SETlight will ilkuninate on file side you
selected. Then pros file COLBERpwd again (on the
side where the SB'light is illmniuated) and it ,Mll
go m the pr_-aetpoints of 0°Ffor the freezer and
37°E for the refrigerator. Setting either or both
controls m OR:stops coormg in both the freezer
and refrigerator compartments, but do_s not shrzt
offelectrical power to the refrigerator.
affect performance. Although the Air Tower and
the Air Tunnel can be removed, doing so will affect
temperature performance. (For removal
instrtmfious, on-line, 94 hours a day,contact us at
GEAppliances.com or call 800.GE.CARES. In
Canada, contact us at geappliances._ or call
1.800.361.3400.)
5
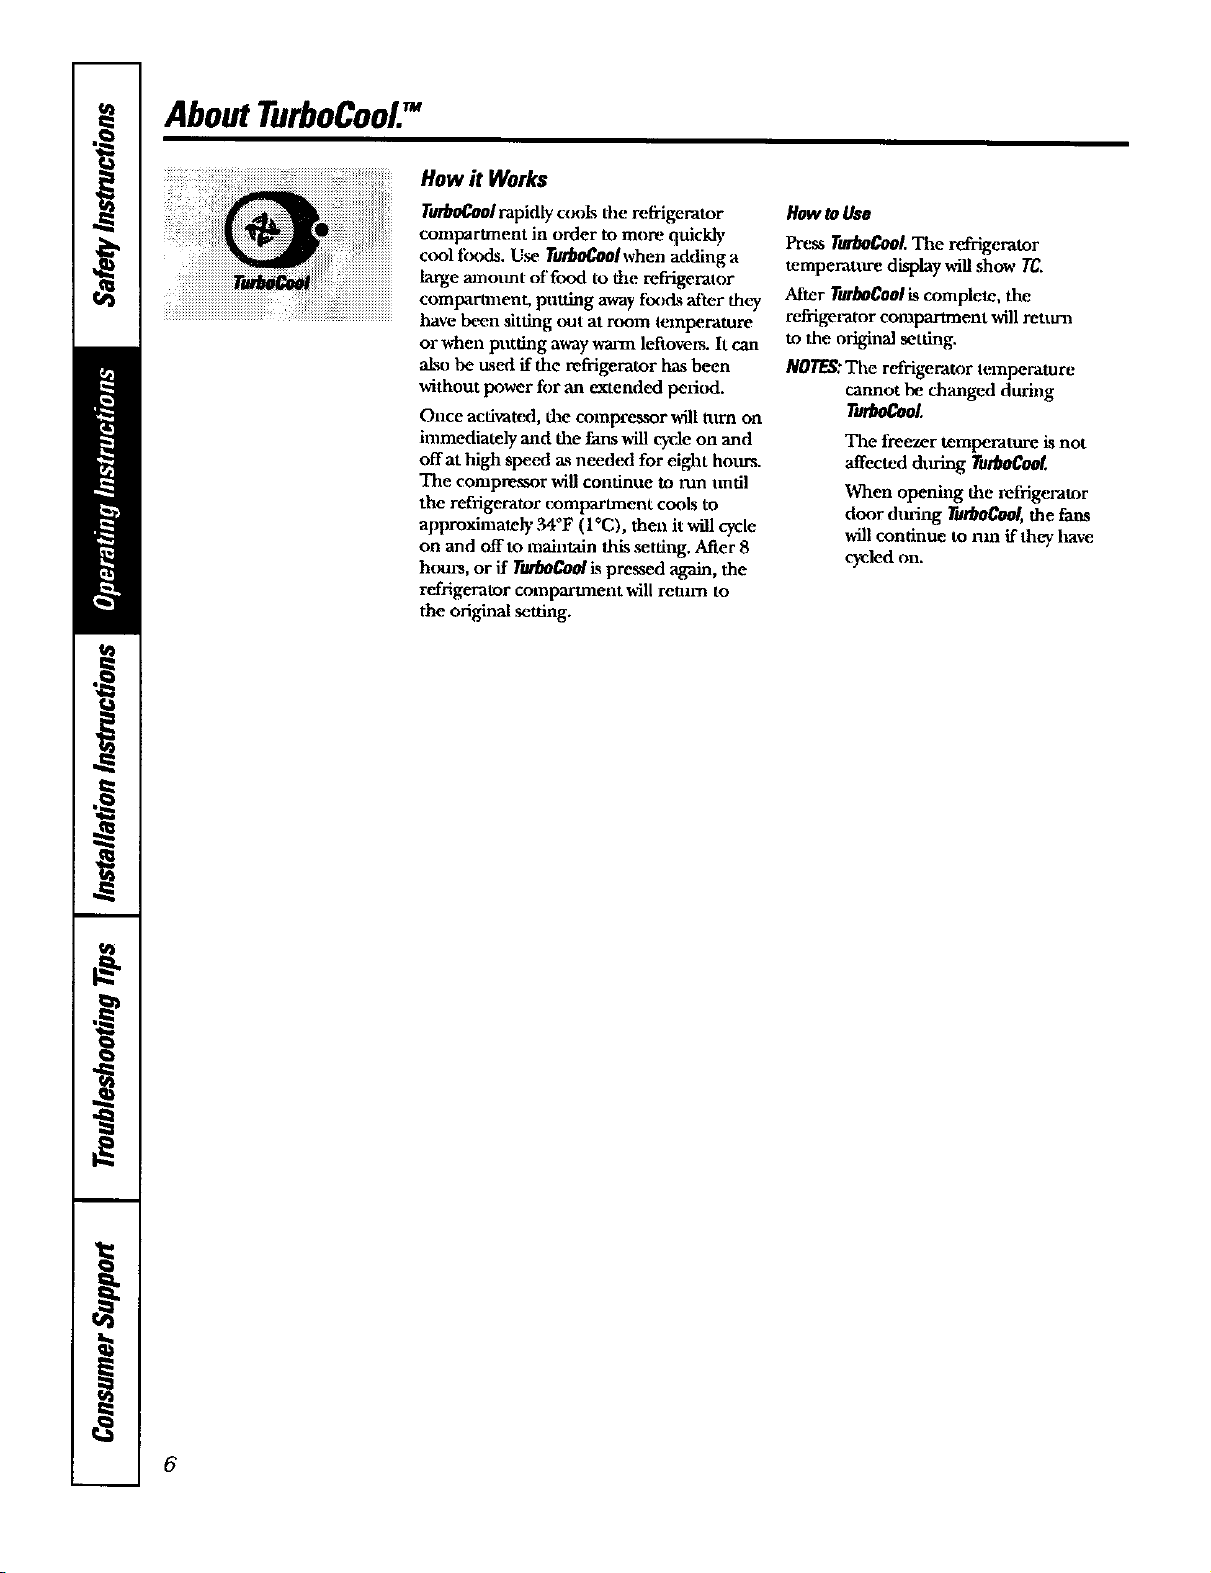
AboutTurboCool.TM
iiiii_iiiiiiiiiiiiiiiiiiiiiiiiiiiiiiiiiiiiiiiiiiiiiiiiiiiiiiiiiiiiiiiiillTM_i_ii
How it Works
TurboCoolvapidly ccK)ls flze lx_frigemtor
compartment in order to more quickly
cool ff×xts. Use TurboCool when adding a
large mnotmt of food to the refrigerator
comparmmnt, putting away fix_cis after they
have been sitting out at room teraperatum
or when pntdng away warm leftovers. It can
also be used ff the refrigerator has been
without power for an extended period.
Once activatorl, the compressor will turn on
immediately and the fans win cyvJe on and
offat high speed a.s needed for eight horn's.
The compressor will continue to run until
the refrigerator compartment cools to
approximately 34°F (IOC), then it will cycle
on and offto maintain this setting. After 8
hours, or if YlmboCoolis pressed again, the
refrigerator compartment will return to
the original setting.
How to Use
Press TurboCool.The refrigerator
temperature display wnl show TC.
After TurboCoo/iscomplete, the
refrigerator compartment will rettuaa
to the original setting.
NOTES."The refrigerator temperature
cannot he changed during
TutboCooI.
The tieezer temperature is not
"affecteddm'ing TurboCool.
When opening the refrigerator
door dining TurboCool,the fans
will continue to run if they have
cycled on.
6

AboutCustomCool7 OrAm == o.
How it Works
The Cust0mCo01= feature Lsa s)_tem of
dampers, a fan, a temperature thermistor
and a heater. Depending on the ftmctiml
,selected, a combination of these will be
used to quickly chill itmns, thaw items or
hold the pan at a specific temperaalre.
How to Use
The pan is tightly sealed to prcwen t the van's
temperature from _osing temperatttre
fluctuations in tile rest of the rtffrigera tor.
Tile controls for this pan are located at the
top of the refrigerator with the temperature
controls.
ExpressThavvTM
ExpressChillTM
0 Emptythe pan, Place the Oaill/Thaw
tray in the pan with the metal plate
facing down to chill and store items, or
with the metal plate facing up to thaw
items. P"lacethe items on the tray and
close the pan completely.
Select. the Expresslbaw,TM F_xptessChill"
or SelectTemp'pad. The display and
SETlight will come on. Tap the pad
until the light appears next to the
desirtxt setting. Use the chart to
determine the best setting to use.
To stop a featllre before it is
finished, eap that feature's pad
zmtil no options are selected and
the display is off.
During Expnl_Tlmw_"and
FdcpressChilt"the display on die
controls will count down the time
in the cycle.
After the E_te_Thew" cycleLs
complete, the pan willreset to the
MEATsetting (31¢F) to helppr_erve
thawed itenxs until they are used.
The display_l acu_l temperature of
the CuMomCoolpanmay s-ary slightly
from the SET temperature based ma
usage and operating emJronment,
NOTE.'Fortood safety reasons, it is
recommended that foods lse "m"apped
in pl,xstic wrap when using Expre_Thaw."
This will help cmUain meat juices and
ilnprove thawing performmace.
7

AboutCustomCool7
CustomCool TM Chart
NOTE:Resultsmayvarydependingonpackaging,startingtemperatureandotherfoodtraits.
Z_Zm.ut_
•Hamburger Patties (0.5 lb)
la had2.idu',diy Wrappexl_
_ilet Migalon (0.5 lb)
1.0 Lb. (6 hours)
la Ch2.kel_ B_-'as_s (12. lh)
2. Ground Beef (1.0 lb)
k_ Steak (1.0 lb)
Chicken Brea.sts (2.0 lbs)
Grotmd Beef (2.0 lbs)
la Steak (2.0 lbs)
Chicken Breasts (3.0 lbs)
Grotmd Beef (3.0 II'xs)
Steak (3.0 [[xs)
la 1 Be,,_ra_ Can (12 oz)
2 S_lJuice Box_ (6--8 oz trach)
2 to 6 Beverage Cans (12 oz each)
2 Plastic20 oz Bottles of Beverage
la 4 to 6 Small Juice Boxes
(6--8c/zeach)
3FoilJuice Packets
la Wine (750 ml bottle)
2Liter of Beverage
la 1/2 Gallon ofJuice
2.laatin-1 package
m Oranges, Lemons, I.imm,
Pineapple, Cantaloupe
t_ Beans, Cucumbers, Tomatoes,
Peppers, Eggplant, S_luash
Swawberri_s, Raspberries, Kiwlfmit,
Pears, Cherrie_s, Bladd_erries,
Crapes, Plu_% Nectarines, Apples
la &_paragus, Broccoli, Corn,
Mushrooms, .Spinach, Gau[iflower,
Kale, Green Onion, Beets, Onions
Raw Meat, lrtsh and Potdtry
Disassemblingthe
Chill/Thaw tray
8
Aboutthe CustomCool"Pan Rackand Tray
Toclean Me Chill/Thaw tray, dL_assemble the
metal tray"from file pl_t2, st'mad by,lightly
pttshing in on the haudlas of the plastic
stand and removing the metal tra_ Both
the metal tray and file pl_tic stand are
dL_w_her ,mfe.
Torea_emble thetray, place the plastic
stand ulxside down (handles on l_ottom) on
a solid mwface, Place the metal plate on top
of the stand matching up the CtLrved ,side of
the plate with the curved ,side of the stand.
Irkqertone side of the plate into the notches
on fl_,estand. Ps._h in on t2.e hltndla on the
uther side of the stand wh'fle pushing that
end of the plate dcmal and into place. You
sh(nfld hear the plate "click" into place.
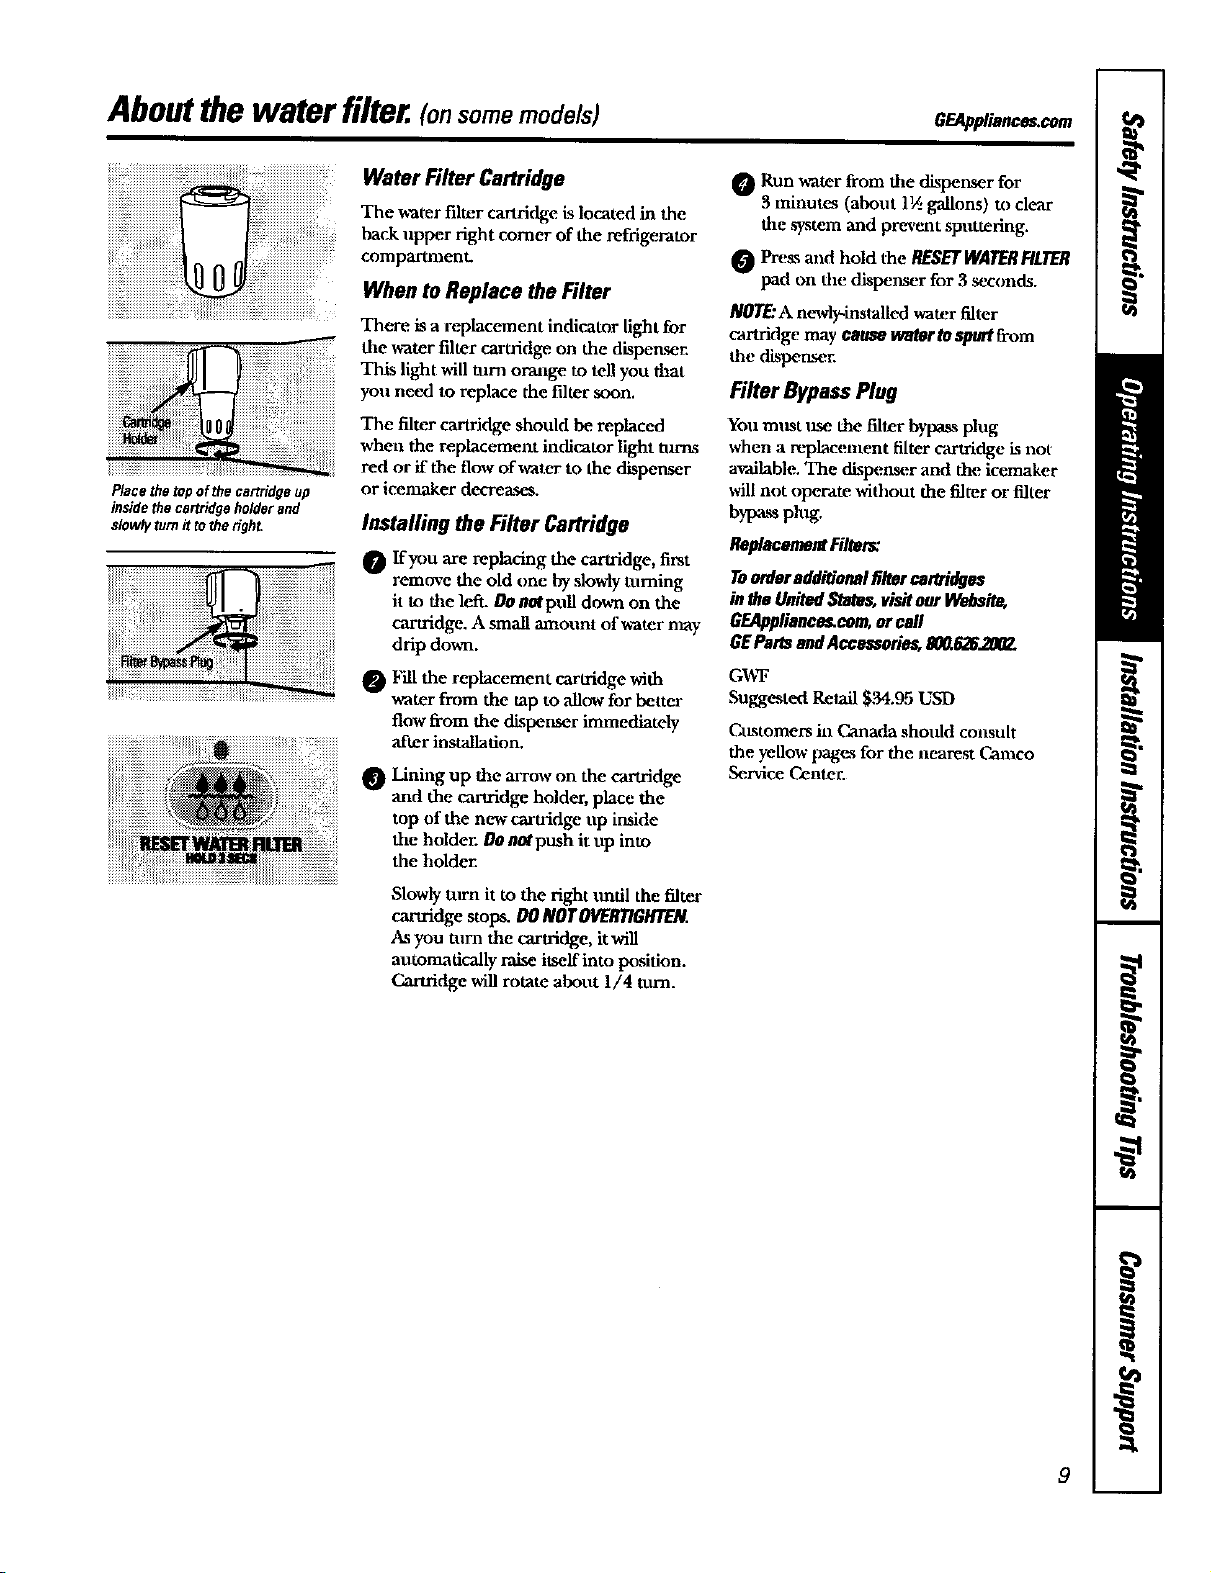
Aboutthewater filter.(onsomemodels) GF-Applianccs.cam
iiiiiiiiiiiiiiiiiiiiiiiiiiiiiiiiiiiiiiiiiiiiiiiii_i_¸ _ ......:_i_ii_iiiiiiiiiiiiiiiiiii
Placethe topof thecartridgeup
insidethecartridgehomerand
slowlytom it tothe right.
Water Filter Cartridge
The water filter cartridge, is located in the
back upper fight corner of the refrigerator
compartmenL
When to Replace the Filter
There is a replacement indicator light for
the water filter cartridge on the dispenser,
This light will turn orange m tell you that
you need 1.oreplace the filter soon.
The filter cartridge should be. replaced
when the replacement indicator light mrm
red or if the flow of water to the dispenser
or icemaker decreases.
Installing the Filter Cartridge
0 ffyou are replacing the cartridge, first
remove the old one bysloMy taming
it to the left. DOnntpull down on the
cartridge. A small amount of water may
drip down.
Fill the replacement cartridge with
water from the tap to allow fi)r better
flow from the dispemer immediately
after installation.
Lining up the arrow on the camidge
@
and the cartridge holder, place the
top of the new cartridge tap inside
the holder. Oannt push it up into
the holder.
Run water from the dispenser for
3 minutes (about l_ gallons) to clear
the system and prevent sputtering.
Press and hold the BESET WATERRLTER
pad on the dispenser for 3 seCol|ds.
NOTE:A newly-installed water filter
cartridge may cause waWr to spurtfrom
the di,_ttser.
Filter Bypass Plug
You must lxse the filter bypass plug
when a replacenaent filter cartridge is not
available. The dispenser and the, icemaker
will not operate without the filter or filter
bypass plug.
ReplacementFiltet_"
Toorderadditionalfiltercartridges
inIheUnitedStates,visitourWebsite,
GEAppliance_cam,orcall
GEPartsandAccessories,BO_6262M2.
G_TY
Suggested Retail $34.95 USD
CaLstomers in Cana(la shoafld consult
the yenow pages for the nearest Camco
Service Center.
Slowlyturn it to the right tmdl the filter
cartridge stops. DONOTOVERTIGHTEN.
A.syou turn the cartridge, itwfil
atttomadcally raise itself into position.
Cartridge will rotate about 1/4 tram.
9
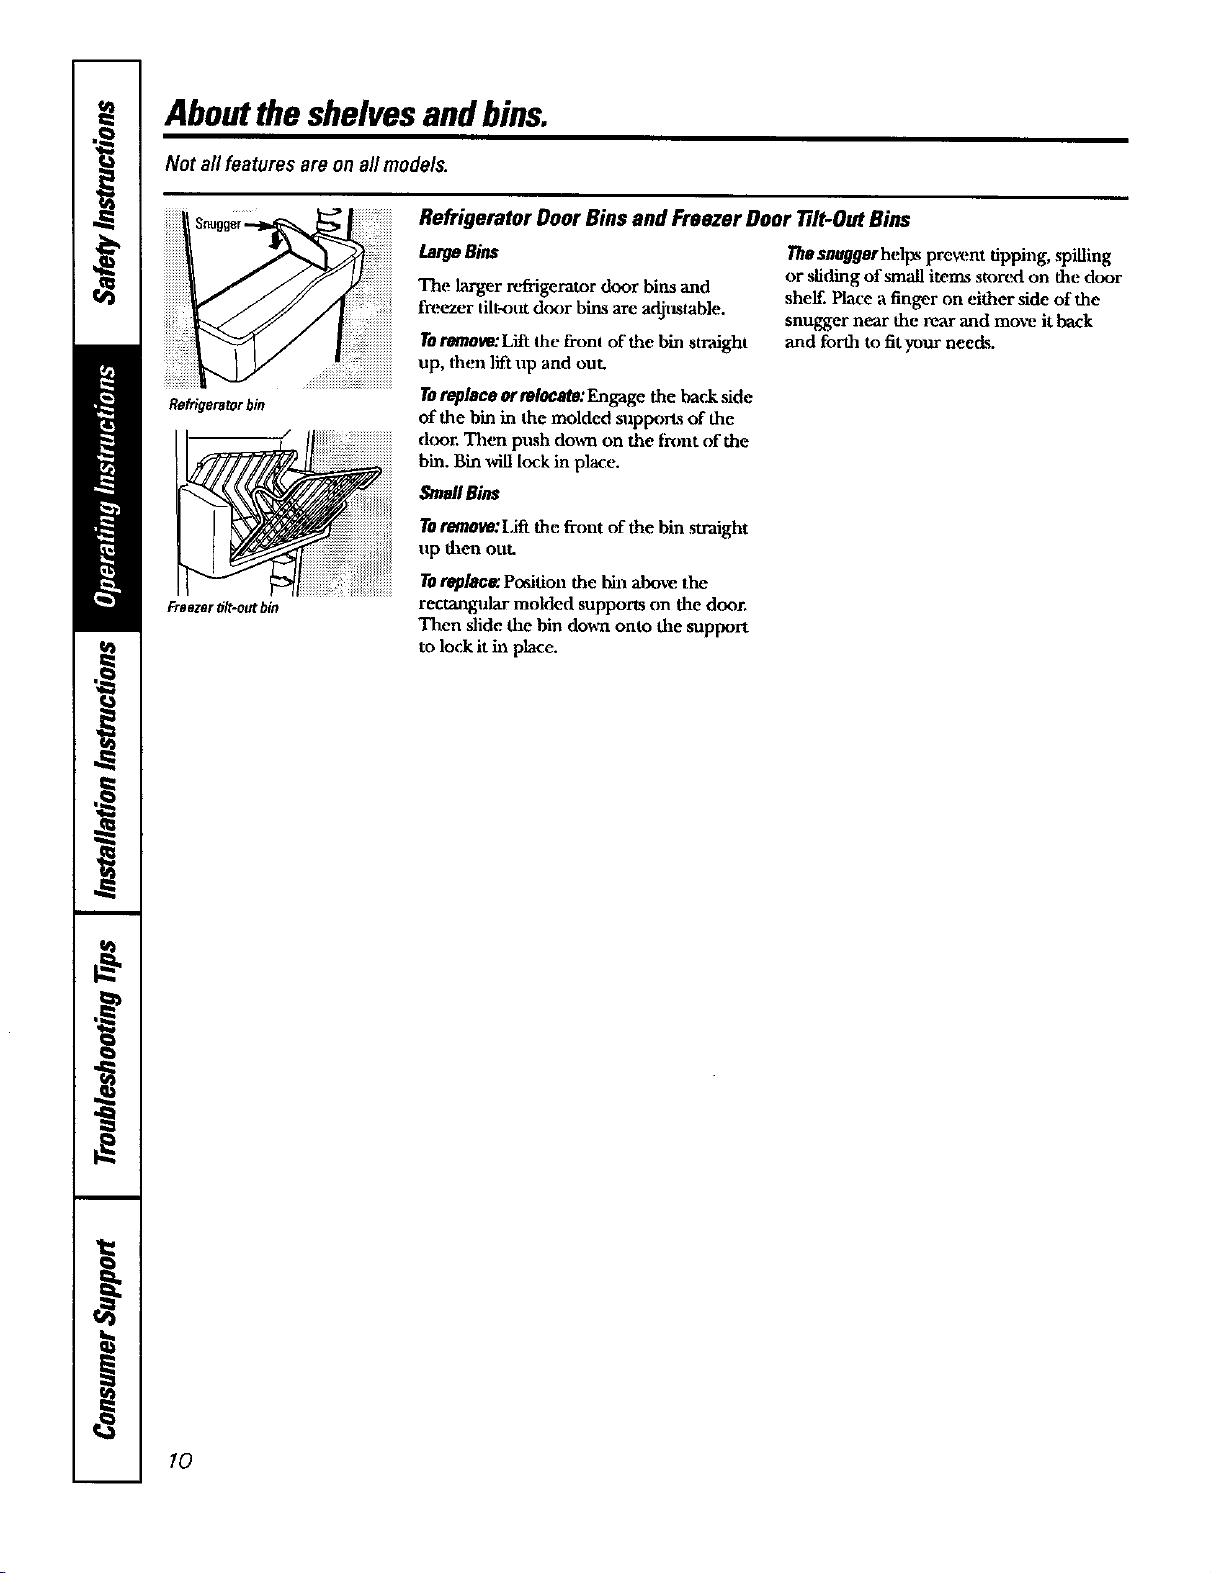
Abouttheshelvesandbins.
Not all features are on all models.
Refrigerator Door Bins and Freezer Door 77It-Out Bins
LargeBins
The larger _'f'rigemtor door bins and
freezer tilt-out door bins are adjustable.
Toremove:Lift the from of the bin straight
up, then lift up and out.
Refrigeratorbin
_/
Freezertilt-outbin
Toreplace orrelocate:Engage the back side
of the bin in the molded salpports of the
door. Them pz_sh doom on file fixmt of the
bin. Bin will [ock in place.
Small Bins
Tor_nove:Lifi the front of the bin straight
up theta ouL
Tor_l_ Position the bin abo_e the
rectangaflar moMed supports on the door.
Then slide the bin down onto the support
to lock it in place.
Thesnuggorhe]pspre_m tipping, spilling
or sfiding of small items stort_-i on the door
shelf. Place a finger on either side of the
snugger near the rear and move it back
and forth to fit your neecis.
tO

Not all features are on all models.
Slide-Out Spillproof Shelf
The slide-ont spillpr(xffsheLf allows, you
to re/:achitems stored behind others. The
special edges are designed to help prevent
spills fYom dripping to lower shelves.
Presstabandpullshelf
forwardtoremove
Toremove:
Slide the sheLf ont until it reaches the stop,
then p_ dram on the tab and slide the
sheLf straight onL
Toreplace or relocate:
I,ine the shelf up with the suplx)m and
slide it into place. The shelf can be
reposidoned when the door is at 90 ° or
more. To reposidon the shelf, slide the sheLf
past the st_)ps and angle downvrart'L Slide
shelf d(van to the desired position, line up
with the snpports and slide into place.
Make sure youpushthe shelvesall the way back
in before youclose the door.
GEAppliance_eom
QuickSpace TM Sheff
Tiffs shelf splits in haLf and slides under
itself for storage of tall items on the shelf
below.
This shelf can be removed and replaced
or relocated jest like Slide-Out Spillproof
Shelves.
Freezer Baskets
Toremove,push die basket all the way to the
back of the freezer. Lii_ up tmtll the back
pins are disengaged. Lilt file entire basket
up and pull out.
The dividercan be used to organize food
packages. For large packages, simply fold
down the divider.
Slide-OutFreezezShelves
Toremove, slide oaat to the stop position,
lift the ti-ont past the stop position, and
slide OUL
On some models, this shelf can not be t_sed
in the lowest position.
Makesureyoupushthebasketsallthewayback
in beforeyouclosethedoor.
Makesureyoupushtheshelvesallthewayback
inbeforeyouclosethedoor.
) Fixed Freezer Shelves
and then bring the shelf(mL
Toremove,lift the sheLf up at the left side
11
Abouttheadditionalfeatures.
Not a// features are on a/I models.
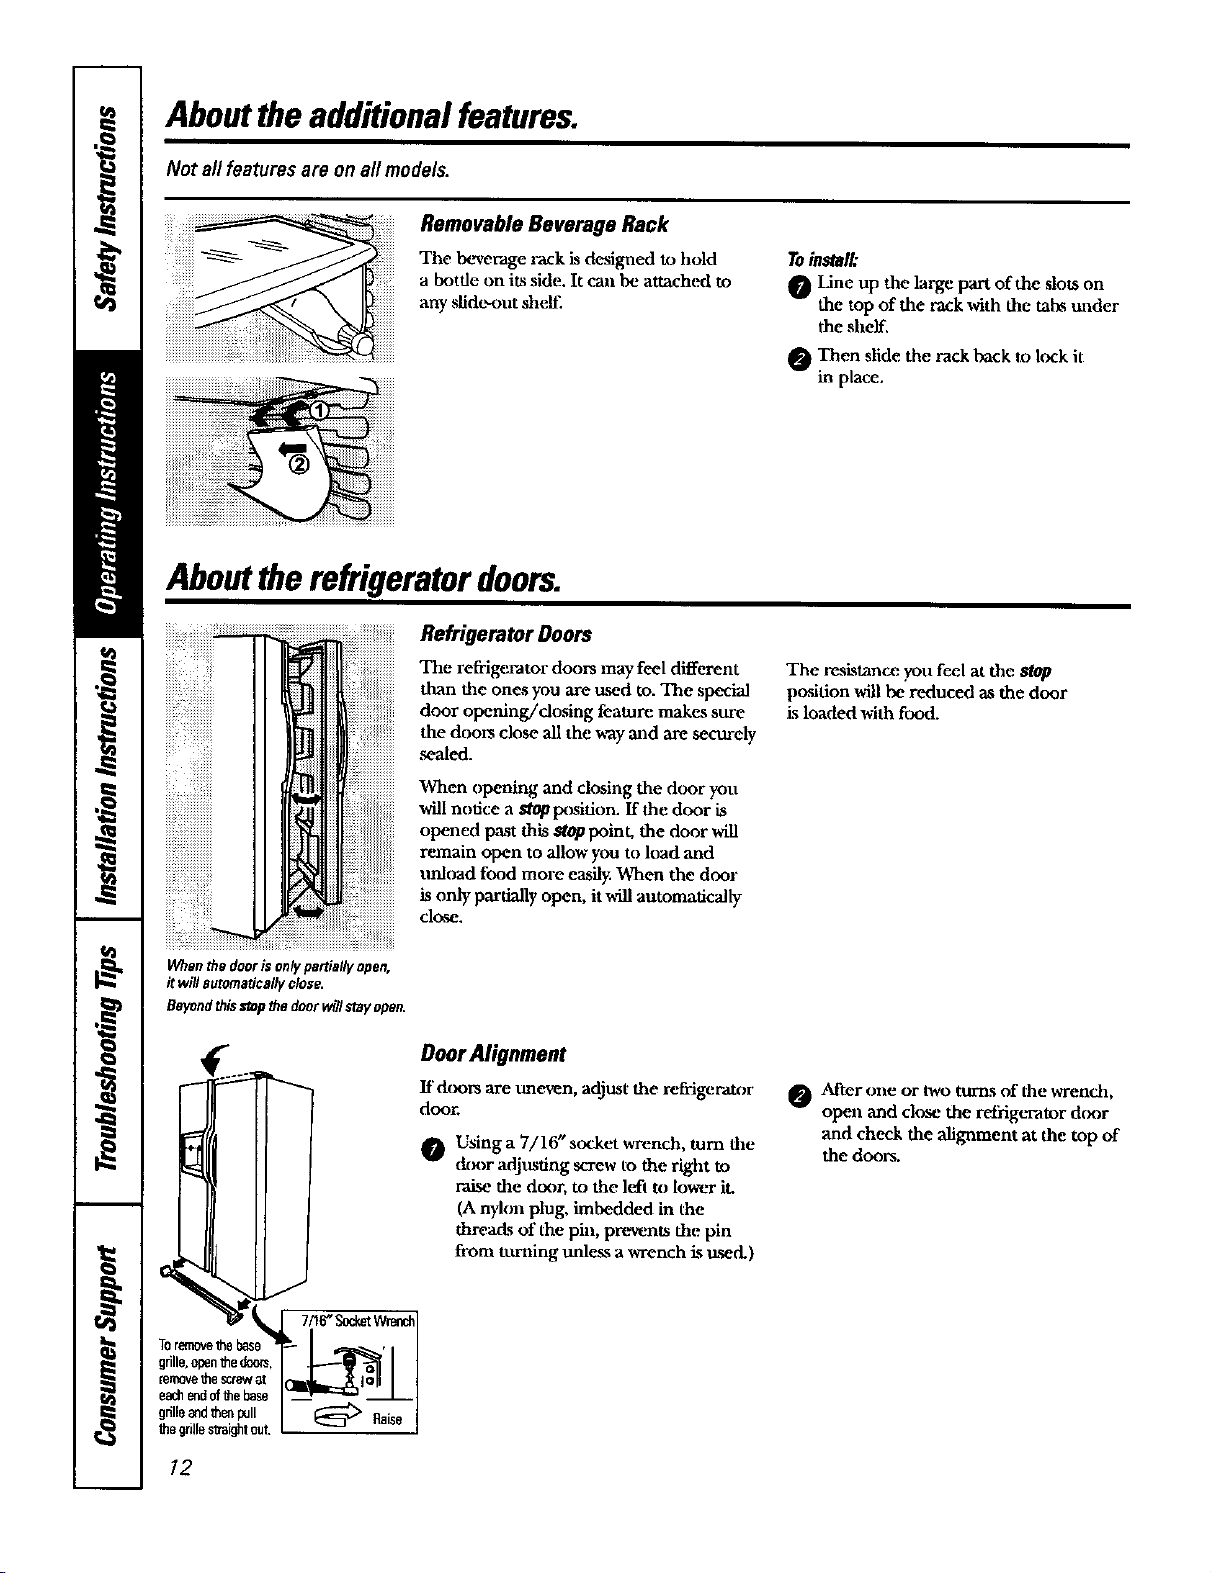
Removable Beverage Rack
Tile beverage rack is designed to hold
a botde on its side. It call be attached to
azly slide-oot shell"
Abouttherefrigeratordoors.
Refrigerator Doors
The refrigerator doors may feel different
than tile ones you are used to. The special
door opening/dosing feature makes sure
the doors close all the way mid are securely
,sealed.
Toinstal/:
O Line up the large part of the slots on
the top of tile rack with the tabs under
the shelf.
Then slide the rack back to lock it
in place.
The resistance you feel at the Stop
position will be reduced as the door
is loaded with food.
Whenthedoorison/),partiallyopen,
it wifl automaticallyclose.
BeyondthisMopthedoorwillstayopen.
Toranovethe base
grille,openthedoocs,
te_e _le screw_t
eat_ end0fthe tmso __
grilleandthenpull @ Raise
fi_egrillestraightout.
When opening and closing the door you
will notice a Stop Ix-_sifion. ffthe door is
opened past this stop point, the door will
remain open to allow you to load and
unload food more easily. When the door
is only partially open, it will automatically
close.
DoorAlignment
If'doors are uneven, adjust the refi-igeeator
door.
Using a 7/16" socket wrench, turn the
&_)r adjllsting screw to the right to
zaise the door, to the left to lower it.
(A n),lon plug, imbedded in the
threads of the pin, prevents the pin
from tttming unless a wrench ksuse&)
_ After one or two turns of tile wrench,
open and dose the retkigerator door
and checkthealignmentatthetopof
thedoors.
12
 Loading...