

GE PSS25MGMABB, PSS25MGMBWW, PSS25MGMBCC, PSS25MGMBBB, PSS25MGMAWW Owner’s Manual
...
°_
o_
www.GEAppliance&com
Safety h_ormation
Adapter Plugs ................... 4
Connect Electricity ............... 4
Extension Cords ................. 3
Proper Disposal ................. 3
Safety Precautions ............... 2
Operating Instructions
Additional Features .............. 9
Automatic Icemaker ............ 11
(;are and (;leaning ........... 13, 14
Ice and Water Dispenser ......... 12
Retiigerator Doors ............... 9
Replacing the I,ight gull)s ....... 15
Shelves and gins ............... 7, 8
Storage Drawers ................ 10
Temperature Conwols ........... 5
Water and FreshSaver TM Filters .... 6
Mo_125
C6te 5_C6te
R6frig6rateurs
La section frangaise commence a la page 34
Lado a Lado
Installation Instructions
Preparing to Install
the Refiigerator ............. 16, 17
Removing and Replacing Doors .. 18
Water IJne Installation ....... 19-21
Troubleshooting Tips
Before You (;all For Service ...23-25
Normal Operating Sounds ....... 22
Consumer Support
Consumer Support ...... Back (;over
Perfbrmance Data Sheet ......... 28
Product Regiswation ......... 31, 32
State of California Water
Treatment Device Certificate ..... 29
Warranty (Canadian) ........... 26
Warranty (U.S.) ................ 27
Refrigeradores
La secci6n en espafiol empieza en la pagina 62
Write the model and serial numbers here:
Model #
Serial #
Find these numbers on a lal)el inside
the refligerator (ompartment at the
top on the right side,
200D2600PO03 49-60117 01-01JR

IMPORTANTSAFETYINFORMATION.
READALLINSTRUCTIONSBEFOREUSING.
A WARNING!
Use this appliance only for its intended purpose as described in this Owner's Manual
SAFETYPRECAUTIONS
When using electrical appliances, basic safety precaufions should be followed, including the following:
This refrigerator must be properly installed
and lo(ated in a((ordan(e xfith tile Installation
Instructions beti)re it is used,
_>Do not allow children to climb, stand or hang
on the shelves in tlle refiigerator. They could
damage tlle retiigerator and seriously injure
thelilselves.
Do not touch the cold surihces in tile fieezer
( omparmmnt when hands are damp or wet. Skin
may stick to these extremely cold sudilces.
Do not store or use gasoline or other flamnlable
vapors and liquids in the xd(inity of this or any
other appliance,
_,':_In retiigerators with automatic icemakers,
avoid contact with tile m()ving parts of the
ejector mechanism, or with the heating element
that releases the (ubes. Do not place fingers or
hands on the automatic icemaking mechanism
while the retiigevator is plugged in.
Keet) fingers out of tile "pinch point" areas;
clemances between tile doors and between
tile doors and (abinet are necessarily small.
Be carethl {losing doors when children are
in tile area.
_,'_Unplug the refligerau)r betore cleaning and
making repairs.
NOTE"Westronglyrecommendthatanyservicingbe
performedbyaquafifiedindividual
_'_'Setting either or both conuols to 0does not
remove power to tile light circuit.
_>1)o not refleeze fiozen foods which have
thawed completely.
2
vvvvw.GEAppliances.com
DANGER!RISKOFCHILDENTRAPMENT
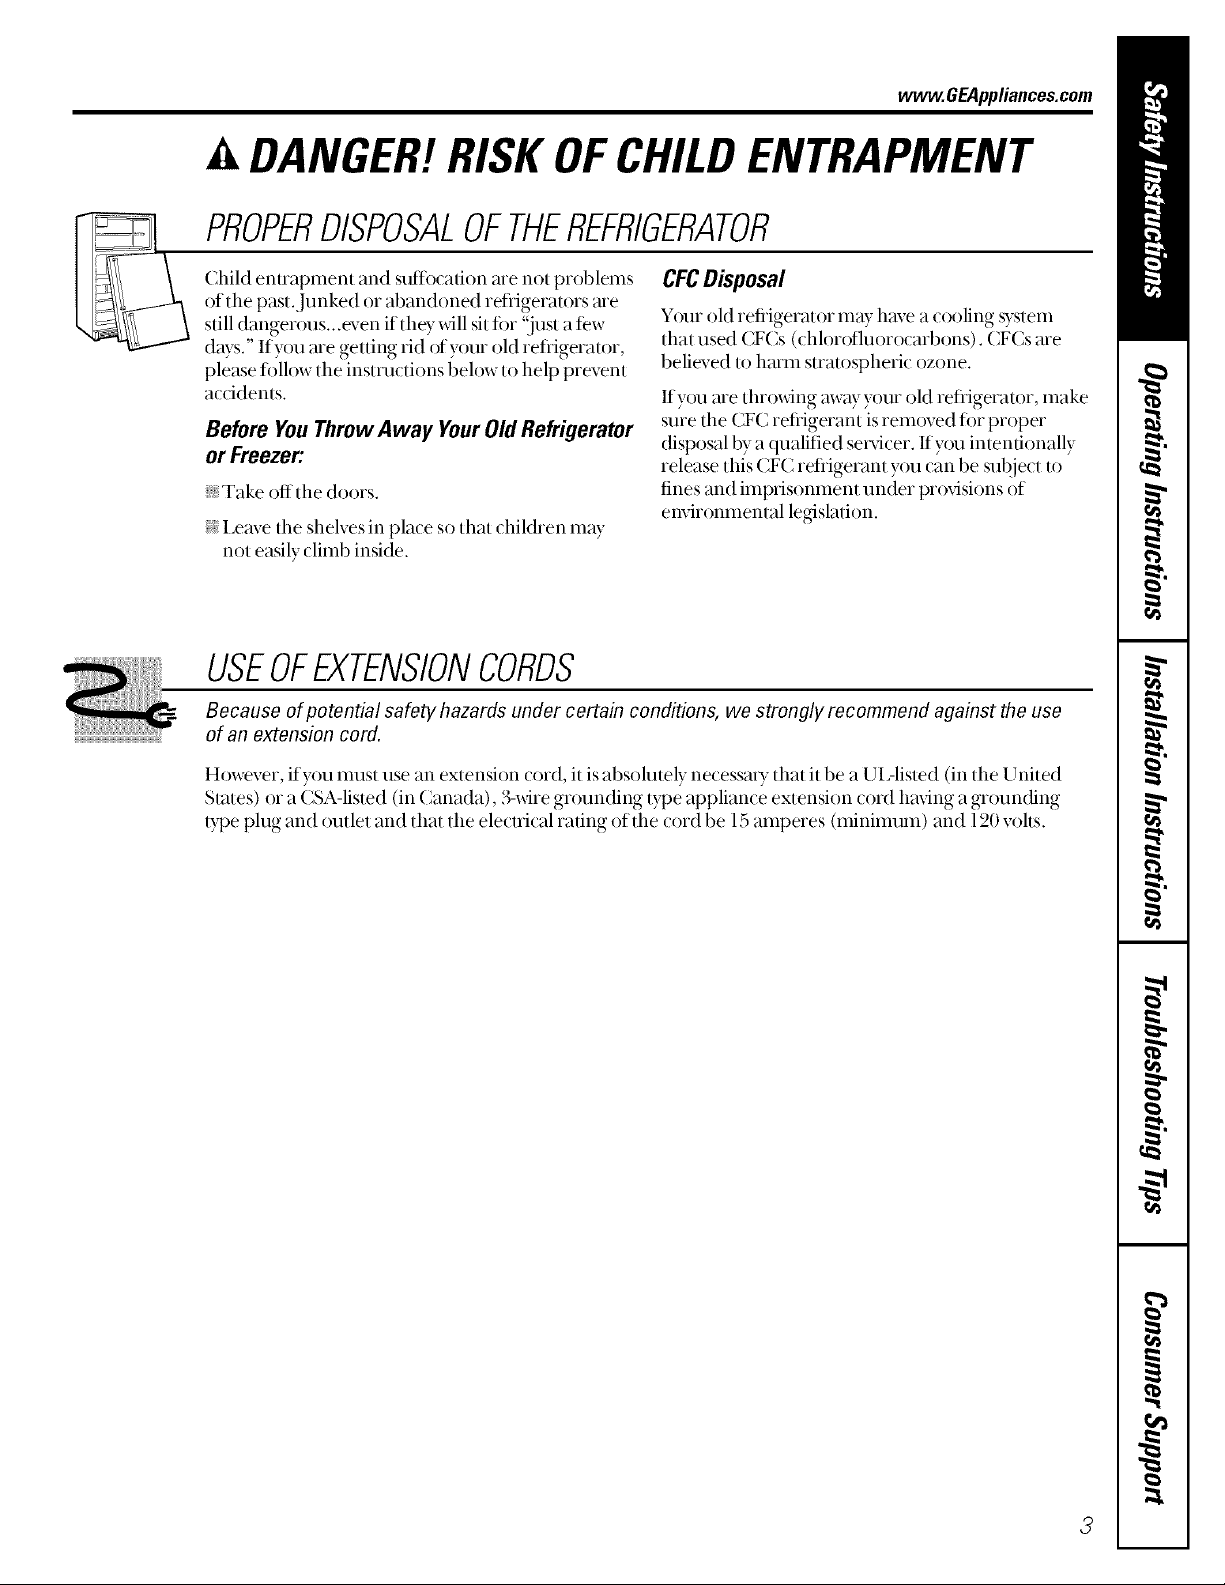
PROPERDISPOSALOFTHEREFRIGERATOR
(hild enuapmem and suttbcafion are not problems
of the past.Junked or abandoned reiiigerators are
still dangerous...even iftile) _dll sittot "just a tew
days." If you are getting rid of your old refrigerator,
please ti)lh)w the instructions below to help prevent
acdden/s.
Before YouThrowAway YourOldRefrigerator
or Freezer:
i_YTake offthe doors.
>_I,eave the shelves in place so that children may
not easily dimb inside.
CFCOisposal
Your old refrigerator may have a cooling system
that used (FCs ((hlorofluoro(arbons). (F(s are
believed to harm suatospheri_ ozone.
If you me throwing away your old refrigerator, make
sure the CFC refiigerant is rem{)ved fin proper
disposal by a qualified servicer. If you intentionally
release this CFC retiigerant you can be subject to
fines and imprisonment under pr_Msions of
environmental legislation.
USEOFEXTENSIONCORDS
Because ofpotential safety hazards under certain conditions, we strongly recommend against the use
of an extension cord.
However, if you must use an extension cord, it is absolutely necessa U that it be a UI Aisted (in the United
States) or a CSA-listed (in (_anada), 3-x_ate gtoundmg type apphan_ e extensum _ot d haxdng a grounding
type plug and outlet and that the ele_ uk al rating of the _ord be 15 amperes (minimum) and 120 vohs.

IMPORTANTSAFETYINFORMATION.
READALLINSTRUCTIONSBEFOREUSING.
A WARNING!
HOWTOCONNECTELECTRICITY
Do not, under any circumstances, cut or remove the third (ground) prong from the power cord. For
personal safety this appliance must be properly grounded.
The pc)wer cord of this appliance is equipped xfith
a 3-prong (grounding) plug which mates _dth a
standard 3-prong (grounding) wall outlet to
minimize the possibility of elecuic shock hazard
fiom this appliance.
Have the wall outlet and circuit checked by a
qualified ele(trician to make sure the outlet is
properly grounded.
If tile oudet is a standard 2-prong oudet, it isyour
personal responsibility and obligation to have it
repla(ed _dth a properly grounded 3-prong wall
outlet.
The refrigerator shouM always be plugged into its
own indMdual electrical outlet which has a vohage
rating that matches tlle rating plate.
This provides the best performance and also
prevents overh)ading house wiring cir(uits whidl
could cause a tire hazard flom overheated wires.
Never unplug your reffigervUor by pulling on tlle
power (ord. Ahvays grip plug firmly and pull suaight
out fiom the outlet.
Repair or replace immediately all power cords that
have become fiayed or otherwise dmnaged. Do not
use a cord that shows cracks or abrasion dmnage
along its length or at either end.
When moving tile refrigerator away flom the
wall, be (mefhl not to roll over or damage the
power cord.
USEOFADAPTERPLUGS(Ad_pte_plug_notpe_mittedinC_,_d_)
Because ofpotential safety hazards under certain conditions, we strongly recommend against
the use of an adapter plug.
H{rwever, if you must use an adapter, where local
codes permit, a temporaryconnectionmay be made
to a properly gn nmded 2-prong wzdloutlet by use
ofa UI Aisted adapter available at most local
hardware stores.
The larger slot in the adapter must be aligned with
the larger sh)t in the wall outlet to proxdde proper
polarity in the cr)nnection of the power cor'd.
When disconnecting the power cord fl'om the
a&lpter, always hold the adapter in place with one
hand while pulling the power cord plug with the
other hand. If this is not done, the adapter gr(rund
terminal is very likely to break with repeamd use.
If the adapter ground terminal breaks, DONOT
USEthe refrigerator until a proper ground has
been established.
Attaching the adapter ground terminal to a waft outlet
cover screw does not ground the appliance unless the
cover screw is meta/, and not lesu/ated, and the waft
outlet is grounded through the house wiring. Youshou/d
have the circuit checkedby a qualified electric&n to make
sure the outlet is proper/y grounde_
READANDFOLLOWTHISSAFETYINFORMATIONCAREFULLY.
SAVETHESEINSTRUCTIONS
4
Aboutthe temperaturecontrols, vvvvw.GEAppliances.com
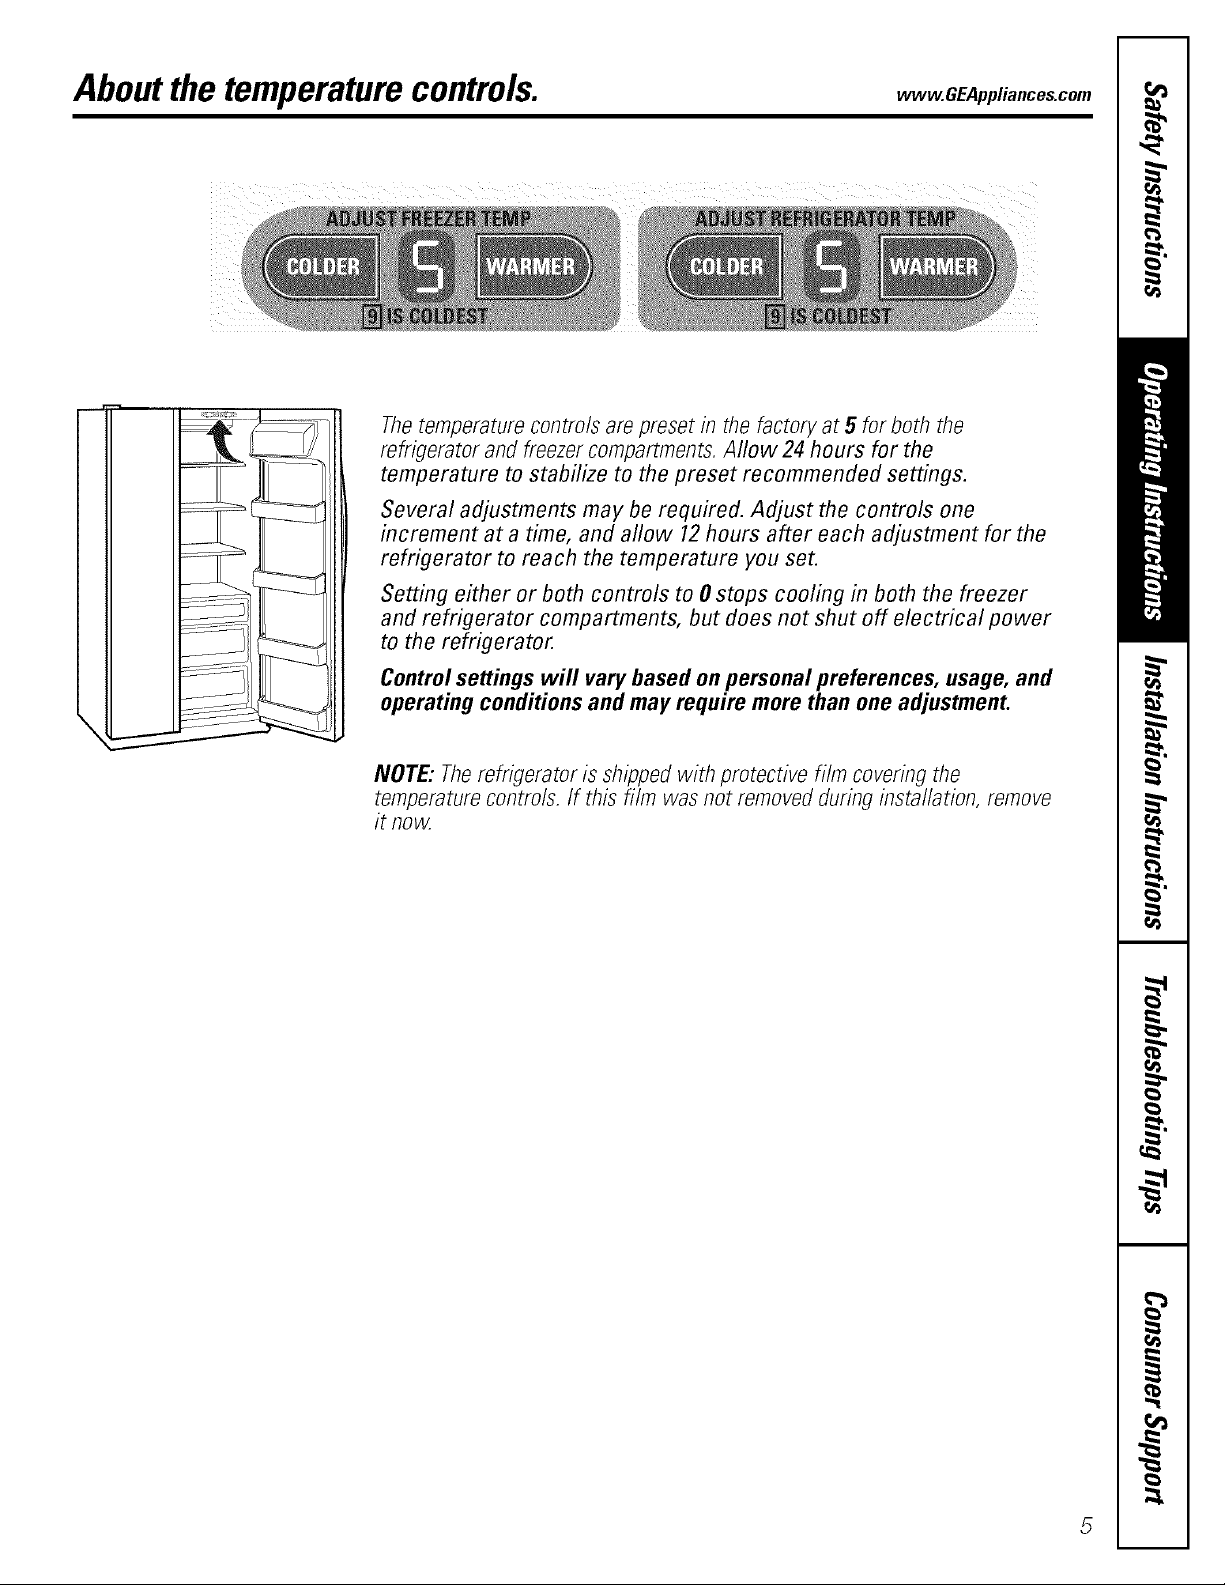
The temperature controls are preset in the factory at 5 for both the
refrigerator and freezer compartments. Allow 24 hours for the
temperature to stabilize to the preset recommended settings.
Several adjustments may be required. Adjust the controls one
increment at a time, and allow 12hours after each adjustment for the
refrigerator to reach the temperature you set.
Setting either or both controls to 0 stops cooling in both the freezer
and refrigerator compartments, but does not shut off electrical power
to the refrigerator.
Controlsettings will vary based on personal preferences, usage, and
operating conditions and may require more than one adjustment.
I
I
NOTE: Therefrigerator is shippedwith protective film covering the
temperaturecontro/s./f this fi/m was not removedduring insta//ation, remove
it now.

Aboutthe water andFreshSaverTM filters.
On some models
,I
Place the top of the cartridge up
inside the cartridge holder and
slowly turn it to theright.
RESETWATERFILTER
HOLD3 SECS
Water Filter Cartridge
The water fiher cartridge is located in tile
ba(k upper right (orner of the refligerator
(ompartment.
When to Replace the Filter
There is a replacement indicator light fi)r
the water tiher caruidge on the (fispenser.
This light will turn orange to tell you that
you need to replace the fiher soon,
The tiher c_uuidge should be replaced
when the repla(ement indicator light turns
red or if the flow of water to the dispenser or
i(emaker de(reases.
Installing the Filter Cartridge
If)_m are replacing the caruidge, first
remove the old one by slowly turning it
to the left. Donotpull down on the
caruidge. A small amount of water mW
drip (htx_11.
Fill the replacement caruidge xdth water
O
from the tap to allow fi)r better flow
from the dispenser immediately after
installation.
I Jning up the rerow on the caruidge
O
and the c_utridge holder, place the
top of the new cmtridge up inside
the holder. Do notpush it up into
the holder.
Run water flom the dispenser t_r 3
minutes (about one and a half gallons)
to cleat the system and prevent
sputtering.
Press and hold the RESETWATERFILTER
pad on the dispenser for 3seconds.
NOTE:A newly-installed water fiher
caruidge inay causewatertospurtfiotn
the dispenser.
Filter Bypass Plug
Y{tumust use the fiher bypass plug
when a replacement fiher caruidge is not
available. The dispenser and the icemaker
will not operate without the fiher or fillet
bypass plug.
Replacement Filters:
Toorderadditionalfiltercartridgesin
theUnitedStates,vis#ourWebsite,
www.GEAppliances.com,orcall
GEPartsandAccessories,800-826-2002.
(;WF
Suggested Retail $34.95
Customers in Canada should consuh the
yellow pages ti)r the nearest Camco Sevvice
Center.
REPLACEFreshSaver FILTER
RESETWREN LIT
Slowly turn it to the right until the fiher
@
caruidge stops. DONOTOVERTIGHTEN.
As y_)u turn the cartridge, itwill
automatically raise itself into position.
Caruidge will rotate about 1/4 turn.
FreshSaver TM Filter (onsome models)
This fiher is located inside the fiesh
produce (hawer and helps fruits and
vegetables staytiesh.
The fiher should last approximately six
inonths.
Toorder additional filters in the United States,
visit our Website, www.GEAppliances.com, or
call GEParts and Accessories, 800-626-2002.
Customers in Canada should consuh the
yellow pages ti)r the nearest Camco Sere'ice
(enter.
When to Replace the Filter
There is a replacement indicator light tbr
the FreshSaver fiher on the temperature
control panel. This light will turn orange
to tell you that you will need to replace the
filter soon. When the indicator light turns
red, it is time to replace the filter. When
putting in a newfiher, first remove the
plastic covering, then insert the new filter
into the holder. After installing the new
fiher, press and hold the RESET
pad on the temperature control panel
fi)r 3 seconds.

Abouttheshelvesandbins. www.GEAppliances.com
Not all features are on all models.
Snugger_ I
Refrigerator bin
Freezer bin
Refrigerator Door Bins and Freezer Door Tilt-Out Bins
i
LargeBins Thesnuggerhelps prevent tip[ring, spilling
The larger refiigerator door bins and
fieezer tilt-out door bins are adjustable, shelf. Pla(e a finger on eiflmr side of tile
Toremove: I,ifi tim fiont of the bin straight and forth to fit your needs.
up, then lift up and out.
Toreplaceorrelocate:Engage the back side
of the bin in the inolded supports of the
door. Then push down on the fiont of the
bin. Bin will lock in place.
SmallBms
Toremove:I,ifi tile fiont of tile bin straight
up then out.
Toreplace:Position the bin above the
reclangulm rooMed supports on the door.
Then slide the bin down onto the support
to lock it in place.
• snugger near tile rear and move it back
or sliding of Slnallitems stored on tile door
Freezer tilt-out bin
Press tab andpull shelf
forward toremove
Slide-Out Spillproof Shelf
The slide-out spillproof sh elf allows y{)u to
reach items stored behind others. The
spedal edges are designed to help prevent
spills flom &ipping to lower shelves.
Toremove:
Slide the shelf out until it reaches the stop,
then press d()_11 on the tab and slide the
shelf suaight out.
Toreplace orrelocate:
I,ine the sheffup with the supports and slide
it into place. The shelf can be reposifioned
when the door is at 90 ° or more. To
reposition the shelf, slide the shelf past the
stops and angle do_l_wm(l. Slide shelf down
to the desired position, line up with the
supports and slide imo place.
Makesureyoupushtheshelvesaftthewayback
in beforeyoudosethedoor
7

Abouttheshelvesandbins.
Not all features are on all models.
This shelf spli/s in haffand slides under
itseltfor storage of tall itelns on the shelf
below.
OuickSpace TM Shelf (on some models)
This sheff can be removed and replaced
or relocated just like Slide-Out Spillproof
Shelves.
Freezer Baskets
Toremove, slide out to the stop position, lift
the flont past the stop position, and slide
n_tflom rib.
Slide-Out Freezer Shelves
Toremove,slide out to the stopposition, lift
the flont past the stop position, and slide
n_tflom rib.
On some models, this shelf can not be used
in the lowest position.
Makesureyoupushthe basketsall the wayback
in beforeyouclosethedoor
Makesureyoupushthe shelvesallthe wayback
in beforeyouclosethedoor
Fixed Freezer Shelves
Toremove,lilt the shelf up at the left side
and then bring the shelf out.
8

Aboutthe refrigeratordoors, wvvw.GEAppliances.com
Refrigerator Doors
When the door is only partially open
it will automatically close.
Beyond this stop the door will
stay open.
Tile retiigerator doors may teel different
than the ones you are used to. Tile spedal
door opening/closing teauue makes sure
the doors close all the way and me securely
sealed.
When opening and closing the door y{)u
_dll notice a stop position. If the door is
opened past this stop point, the door will
remain open to allow you m load and
unload tood more easily. When tile door is
only partially open it will automatically
close.
The resistance you teel at the stop
position xfillbe reduced as tile door
is loaded xdth tood.

Aboutthestoragedrawers.
Not all features are on all models.
Storage Drawers
Excess water that may arcumulate in tile
bottom of tile drawers sh(mid be xdped (hT.
On some models the bottom (hvlwer has
a cover that slides back as the (h'awer is
opened, This all()ws fifll access to the
!!_i_
drawer, As the (hmver is closed, the o)ver
xdll slide tinward into its ori_nal position.
HI _ LO
0
Adjustable Humidity Drawers
Slide tile conuol all the way to the HIsetting
to pr(Mde high humidity re(ommended fin
most vegetables.
About storage drawer removal
Not all features are on all models.
Drawer Removal
Drawers caneasily be removed by pulling
the drawer straight out and lifting the
drawer up and over the stoplocation,
Slide tile conuol all tile way to tile LO
setting to provide lower humidity levels
recommended for most fi'uits.
If the door prevems y()u fi'om taking out
dm drawers, first u7 to remove fl_e door
bins. If tiffs does not offer enough
(learance, dm refligerator xxill need to
be rolled tbnvard until tl_e door opens
enough to slide tl_e drawers out. In some
cases, when you roll file refligerator ouL
you will need to re(lye the refligerator
to tl_e left or fight as you roll it ore.
10

Aboutthe automaticicemaker, vvvvw.GEAppliances.com
A newly-installed refrigerator may take 12 to 24 hours to begin making ice.
Powerswitch Automatic/cemaker It is normal fi)r se',eral cubes 1obejoined
I [ogedmr.
Power
light :eelerarm
The icemaker xdll produ( e seven cubes per
(3'de-approximately 100-130 cubes in a
24-hoHi period, depending on Deezer
compatment [emperamre, room
temperature, number of door openings
and odmr use condidons.
If din refligerator is operated befi ne the
wa{er connection is made to the icemaker,
sel [l,e power switch in [l,e OFFposition.
When tile retiigeralor has been connected
[o tile ,,ater supply, se[ [l_e power swi[ch [o
ll_e ONposilion.
The icemaker will fillxddl water when it cools
to fieezing A newly-installed refiigeraun
may take 12 to 24 hours to begin making
i(e (ubes.
Throw away die first iexxbat( hes ofi(e to
alh)w tlle water line to (lear.
Ifi(e is not used fiequendy, old ice cubes
xdll be( ome (h)udy, Iasle stole and shrink
There is an upper freezer shelf
above the icemaker that can be
used for storage.
Be sure nodfing inlefferes wid_ llle sweep of
dm feeler arm.
When tlle bin fills to tlle lexel of din teeler
rem, tlle i( emaker will stop produ(ing i(e.
Ice Storage Drawer
iI iii
Toaccess ice, pull the drawer fi)m:ud.
Toremove the drawer, pull it straight ()tat and
lift it past the stop lo('a/ion.
11
Aboutthe ice and water dispenser.
On some models
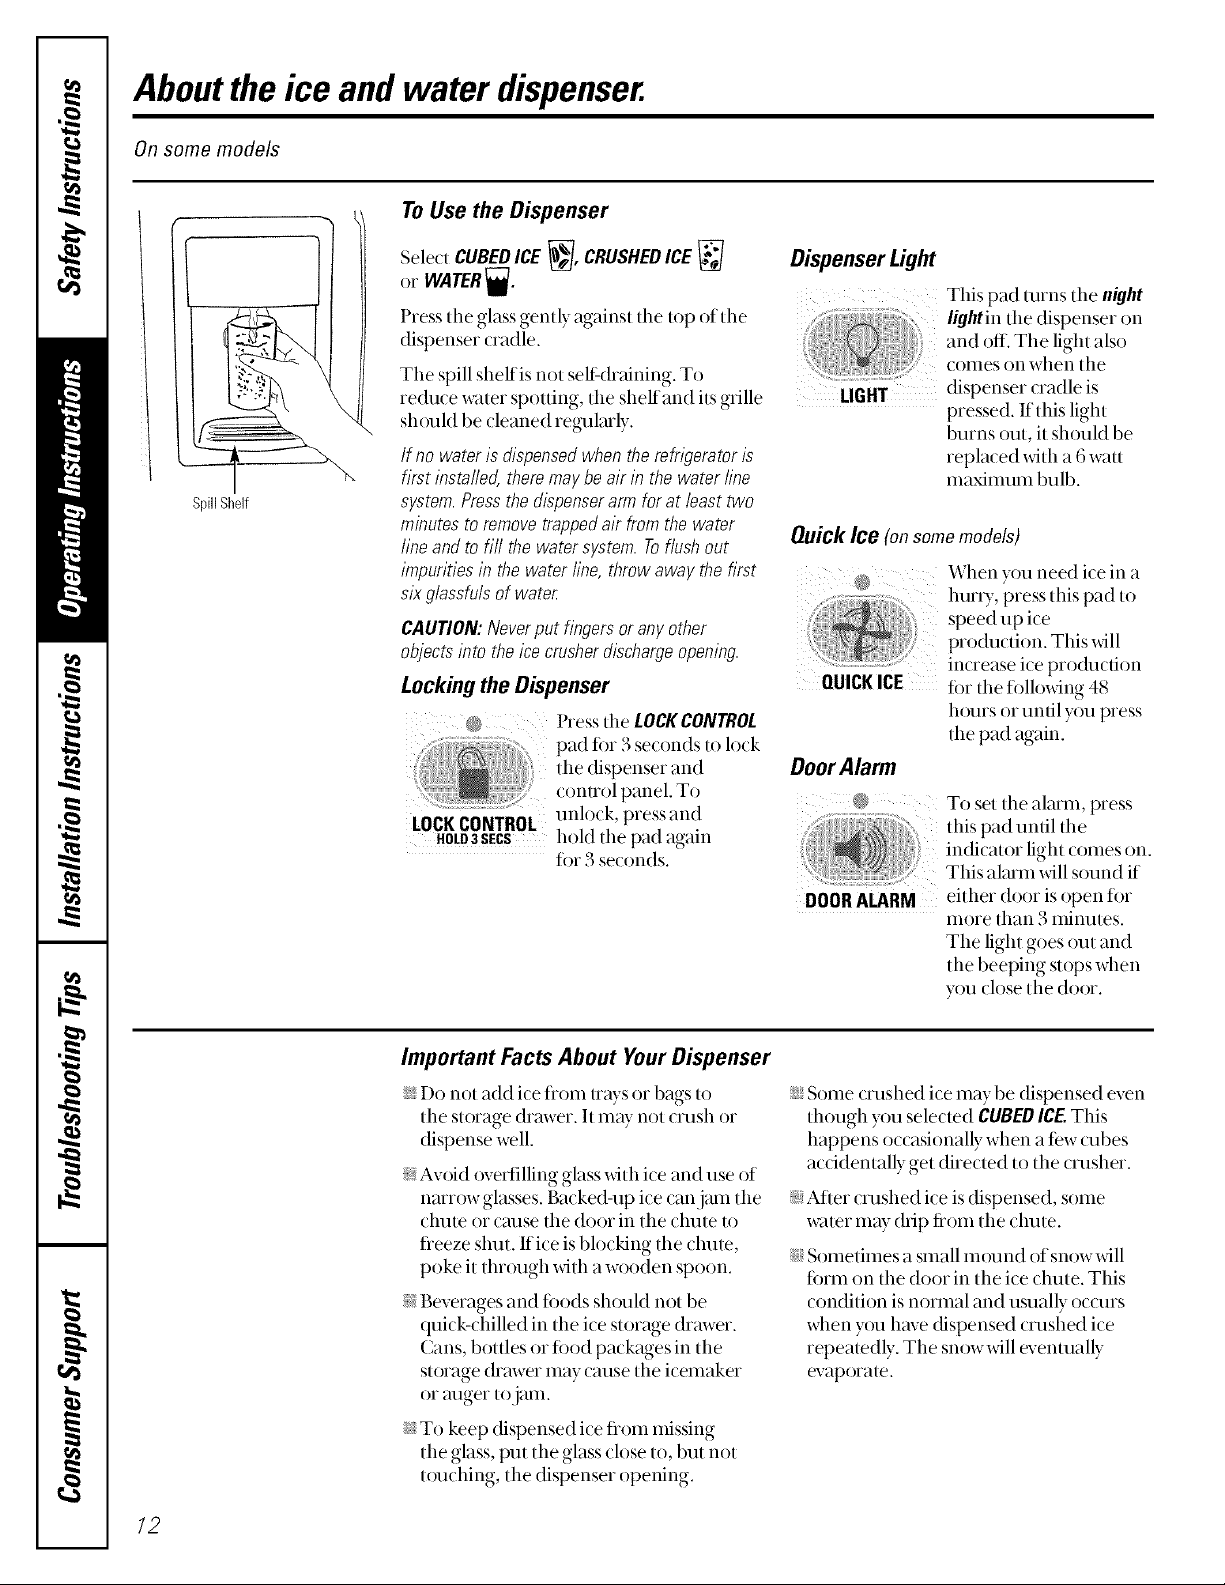
To Use the Dispenser
Select CUBEDICE _, CRUSHEDICE
or WATER_.
Press the glass gently against the top ofthe
dispenser cradle.
The spill shelf is not selt<haining. To
redu( e water spotting, tile shelf and its grille
shouM be cleaned regulmly.
If no water is dispensed when the refrigerator is
first instafled, there may be air in the water fine
system. Pressthe dispenser arm for at/east two
minutes to remove trapped air from the water
fine and to fi// the water system. Toflush out
impurities in the water fine, throw away the first
six glassfuls of water
CAUTION: Never put fingers orany other
objects into the ice crusher discharge opening.
for 3 seconds.
Dispenser Light
This pad mrns the night
and off. The light also
comes on when tile
dispenser cradle is
pressed, If this light
burns out, it should be
replaced with a 6 watt
maximum bulb.
QuickIce (onsomemodels)
When you need ice in a
huny, press this pad to
speed up ice
pro(hlction. This will
QUICKICE
Door Alarm
@
DOOR ALARM
increase ice pro(hlcfion
fin the fi)lloxdng 48
h_)ursor until you press
tile pad again.
To set tile aimm, press
this pad until tile
indicator light comes on.
This almm xdll s_)und if
either door is open fin.
more than 3 minutes.
The light goes out and
the beeping stops when
you close the door.
Important Facts About Your Dispenser
i_YDo not add ice flom Uaysor bags to
tile storage drawer. It may not (rush or
dispense well.
>:Avoid ovefiilling glass with ice and use of
nmr{)w glasses. Backed-up ice can jmn the
chute or cruise tile door in tile chute to
fieeze shut. If ice is blocking the chute,
poke it tln'_)ugh _dth a wooden spoon.
>:Beverages and fi)ods sh{)uM not be
quick-chilled in the ice storage drawer,
(ans, bottles or tbod packages in the
storage drawer may cause the icemaker
or auger to jmn,
i;YSome crashed ice may be dispensed even
the)ugh you selected CUBEDICEThis
happens occasionally when a tew cubes
acddentally get directed to the crasher.
>_After crashed ice is dispensed, some
water may drip fiom tile chute.
i_YSometimes a small mound of snow will
form on the door in the ice chute. This
condition is normal and usually occurs
when y_)uhave (fispensed crashed ice
repeatedly. Tile sm)w xdll eventually
evaporate.
i_YTo keep dispensed ice fi'om missing
tile glass, put tile glass close to, but not
toudling, tlle dispenser opening.
/2

Ice Storage Drawer on
Dispenser Models
Toremove:
Set the icemaker power s_dtch to the OFF
position. Pull the drawer straight out and
then lift past the stopposition.
Toreplace:
When replacing the drawer, be sure to press
it firmly into place. If it does not go all the
way back, rem_)ve itand retain the drive
mechanism 1/4 turn. Then push the
&awer back again.
Careand cleaning ofthe refrigerator.
www.GEAppliances.com
Dispenser drip area.
Cleaning the Outside
Thedispenser drip area, (on some models)
beneath the grille, sh{)uMbe wiped (by. Wamr
left in this mea mW leave deposits. Rem_)ve
the deposi/s byadding undiluted vinegm to
the well. Soak until the deposits disappem
or become loose enough to rinse away.
Thedispenser cradle (on some models).
Betore cleaning, lock the dispenser by
pressing and hoMing the LOCKCONTROL
pad fin 3 seconds. Clean with warm
water and baking soda solution-about
a tablespoon (15 ml) of baking soda to
a qumt (l liter) of water. Rinse thoroughly
and wipe chy.
Cleaning the Inside
Tohelppreventodors,leave an open box of
baking sodain tile fiesh fi)od and lieezer
colnparmmnts.
Unplugtherefrigeratorbeforecleaning.If this
is not practical, wring excess moisture out
of sponge or cloth when cleaning mtnmd
sxdwhes, lights or conuols.
Use wam_ water and baking soda solu/ion-
about a tablespoon (15 ml) of baking soda
to a quart (1 liter) of water. This both cleans
and neutralizes odors. Rinse and wipe (hT.
Thedoorhandlesandtrim.Clean xdth a
(h)th dampened with soapy water. DU
xdth a soft ch)th.
Keep theoutsideclean.Wipe with a clean
cloth lightly dmnpened with kitchen
appliance wax or miM liquid dish detexgent.
DU and polish with a clean, soft cloth.
Donot wipe therefrigeratorwith a soileddish
cloth orwet towel Thesemayleavea residue
that canerodethepaint.Donot usescounng
pads,powderedcleaners,bleachorcleaners
containingbleachbecausetheseproductscan
scratchand weakenthepaint fbish.
Use ofa W cleaning solution other than that
which is recommended, especially those
that contain peuoleum distillates, can crack
or dmnage the interior of the refiigerator.
Avoidcleaningco/c/glassshelveswith hotwater
becausethe extremetemperaturedifference
maycausethemtobreak.Handleglassshelves
carefullg Bumpingtemperedglasscancause
it toshatter
Donot washanyplasticrefrigeratorpartsin the
dishwasher
13

Careand cleaningof therefrigerator.
Condenser
There is no need fin routine condenser
cleanings in normal home operating
enxironmems. However, in enxironments
that mW be pmti(ularly dusty or greasy, tile
condenser should be cleaned periodically
fin eflident refiigerator operation.
Behind the Refrigerator
Cleaningthecondenser:
Tile condenser is located inside tile back
of the refligerator. To access it, rem()ve the
cover. The condenser is on the right side.
Fox best resuhs, use a brash specially
designed fi)r cleaning condensers.
They are available at most appliance
part stores.
Be cmefifl when moving tile refiigerator
a_vayfiOlIl tile wall. All types of floor
coverings can be damaged, particulmly
cushioned o)verings and those with
embossed surtimes.
l'ull tile refiigerator straight out and return
it to position by pushing it suaight in.
M_)vingthe refligerator in a side direction
may result in (hmage to the floor c(_vering
or refligerator.
Preparing for Vacation
For long vacations or absences, remove
fixed and unplug the refligerator. Clean the
interior with a baking soda solution of one
tablespoon (15 ml) of baking so&xto one
qumt (1 liter) of water. Leave the doors
open.
Set tile icemaker power switch to tile OFF
position and shut offtim water supply to
tlle refligerator.
When pushing the refngerator back, make sure
you don't roll over the power cord or icemaker
supply line (on some models).
If tile temperaUlre can (hop below fleezing,
have a qualified servicer drain tile water
supply s)_smm (on some models) to prevent
seri(xus property dmnage (hie to tittering.
14
Preparing to Move
Secure all h)ose items such as shelves and
drawers by taping them securely in place
to prevent damage.
When using a hand track 1om(xvetile
refligerator, do not rest the flont or back of
the refligera/or against the hand track. This
couM dmnage the refiigerator. Handle only
fiom the sides of the retiigermor.
Be sure the refrigerator stays in an upnght
position during moving.

Replacingthelight bulbs, vvvvw.GEAppliances.com
Setting either or both controls to 0does not remove power to the light circuit.
Refrigerator Compartment--Upper Light
O Unplug tile refrigerator.
The bulbs me locamd at the top of the
compartment, inside the light shieM.
Rem{)ve the screw at the fiont of the
light shieM.
To remove tile light shieM, press in on
the tabs on the sides of the shield and
slide fox,yard and out.
Refrigerator Compartment--Lower Light
Thislightis locatedabovethe topdrawe_
Unplug tile refrigerator.
I.fit tile light shieM up and pull it out.
Freezer Compartment
@
Unplug tile refrigerator.
Remove the sheltjust above the light
@
shieM. (The shelf will be easier to
remove if it is emptied first.) Remove
tile screw at tile top of tile light shieM.
To remove tile light shieM, press in on
tile sides, and lift up and out.
After replacing the bulb with an
appliance bulb of the same or lower
wattage, replace the light shieM and
screw. When repladng the light shieM,
make sure that the labs at the back of
the shieM fit into the slots at the back of
the light shieM h{)using.
Plug tlle refrigerator back in.
After replacing tlle bulb xdth an
appliance bulb oftim same or h)wer
wattage, repla(e tlle shieM.
Plug the refligerator back in.
0
Replace the bulb with an appliance
bulb of tile same or lower wattage,
and reinstall the light shield. When
reinstalling the light shield, make
sure the top tabs snap securely
into place. Replace the screw.
Reinstall the shelf and plug the
0
refligerator back in.
Dispenser
Unplug tile refrigerator.
Tile bulb is located on tlle dispenser
under the (onuol panel.
Remove the light bulb by turning
it(ounter( hx kxfise.
Replace tile bulb with a bulb of the
saitle size and wattage.
Plug the refligerator back in.
/5

Preparingto installtherefrigerator.
Read these instructionscompletely and carefully.
Water Supply to the Icemaker
The i(emaker xdll have to be (onne(ted to a (old
water line.
RefrigeratorLocation
Do not install the refligerator where the
temperature will go below 60°F (16°()
becmlse itwill not run often era)ugh to maintain
proper temperatures.
Clearances
Allow the folloxdng clearances fi)r ease of
installation, proper air dr(ulation and
plumbing and ele(tri(al _onne_ tions:
Sides 1/8"(4mm)
Top 1"(25mm)
Back 1"(25mm)
You can order a GE water supply kit (containing
robing, shutoflv:dve, fittings and instructions) by
visiting our Website at nnN_GEAppliances.com or
flom Parts and Accessories, 800-626-2002.
Install it on a floor strong enough to support it
fhlly loaded.
Rollers
The milers have 3 purposes:
Rollers a(!just so die door closes easilywhen
opened about halfivay. [Raise the fiont about
5/8" (15 Inln) fi'Olnthe floor.]
Rollers adjust so the refiigerator isfirmly
positioned on the floor and does not wobble.
Rollers alh)w you to move the refiigerat or away
fi'om the wall for (leaning.
Final leveling a(!iustments should be made after the
refiigerator has been installed.
Toadjust the milers:
Turn the roller adjusting screws clockwisetoraise
the refiigerator, counterclockwise to Iowerit. Use a
3/8" hex so{ket or x_en{ h, or an a(!justable x_aen(11.
Roller adjusting screw
/6

Door Alignment
After leveling, m_/ke sure I1_/I doors are e_en al d_e rap.
Tomare the doors even, a_!just the iiesh tbod door. Using a 7/16" sockel wrench, mrn tl_e door a_!jusdng
screw to die right to r_dse tl_e door, to d_e leti to l()-werit. (A nylon plug, imbedded in the threads tff the pin,
prevents d_e pin flom turning unless a wrench isused.) At/er one or two turns of d_e wrench, open and close
d_e Desh ibod door and check d_e alignment at d_e top of d_e doors.
Toremovethebasegrille,
openthedoom,remove
thescrewateachendof
thebasegrilleandthen
pullthegdliestraigl_tout.
"_ [ 7/16"SocketWrench ,
17

Removingendreplacingthedoors.
When installing or moving the refrigerator, the doors may need to be removed in order to fit the refrigerator
through a doorway.
Removing the Doors
Make sure the doors are closed and the refrigerator is
unplugged.
0 Disconnectwaterlineandwiringharness.
Near the lower hinge on the fleezer side,push in on the
('ollm's at ea(h end of the (oupling, andpull tile water
line nlbing flom the coupling. Also, disconnect _dring
harness. Pull the water line and the harness through tile
lower rail.
Removethehingecoversandthe hinges.
In order to access tile hinges, the hinge covers need to be
rem()ved. Rem_)ve the o)ver by grasping it on tile sides,
near the back of the cover, l'ush back on the cover and
lift up at the back, then the fiont.
NOTE:DONOTuseascrewdrivertoremovethecoverBECAREFUL
nottobreaktherearretainingtabonthehingecoverRemovethe
hlhgesusinga TorxT-20.
Removethedoors.
Cmeflflly rotate the door to 90 ? Guiding the disconnected
water line and wiring harness, lifttile door smdght up.
NOTE:Notriftingthedoorstrelghtupmaydamagethebottomhlbge.
P/acedoorsonaprotectedsurface.
NOTE:Becarefulnottopinchthewatertubingandthewireharness
at thebottomof thedoor
NOTE:Donotallow theconnectortocontactthefloorHardcontact
candamagetheconnectorSee"ReplacingtheDoors."
_ HingeCover
Replacing the Doors
Placedoom onbottomhinges.
With the door at90° lower tile door straight down onto
the bottom hinge. Carefiflly (h)se the door.
NOTE:Notloweringthedoorstretghtdownontothebottomhlbge
maydamagethehinge.
NOTE:Donotallow theconnectortocontactthefloorHardcontact
candamagetheconnector
Replacetophingesandhingecovers.
O
Reinstall the top hinges using a Torx T-20. Replace the
hinge (°vers" If tim deers are n°t level' adjust the b°tt°m
right hinge wifll a 7/16" open ended x_Tench.
@
Reconnectwater line andwiring harness.
Insert water robing ba(k into (oupling, making sure tile
robing is pushed flu enough into tile coupling so fllat you
no hmger see the mark on the robing. Reconnect the
wiring harness.
Turnon thewatersupplyandplugtherefrigeratorbackin.
I ' j Door
_-_l HingePin
C011nect0r
/8
Installingthewater line.
Read these instructions completely and carefully.
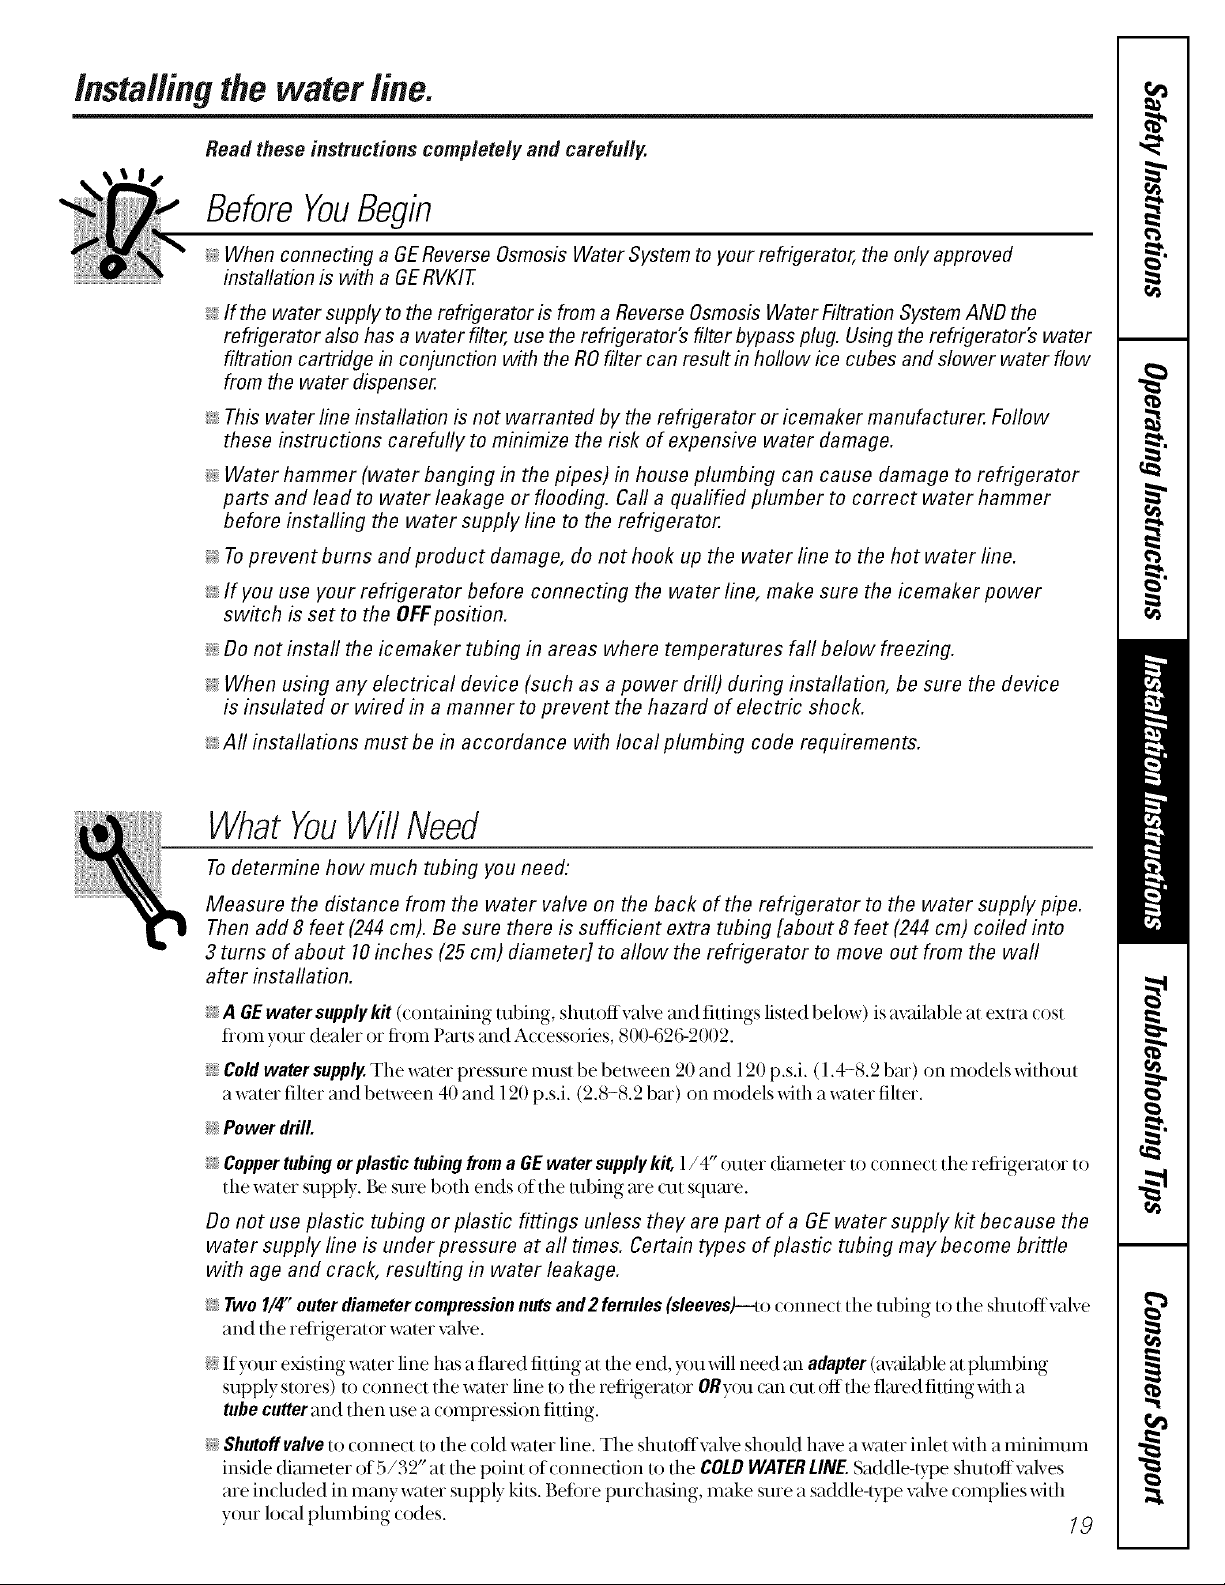
BeforeYouBegin
i;__When connecting aGEReverse Osmosis Water System to your refrigerator, the only approved
instaflation is with a GERVKIT.
>: If the water supply to the refrigerator is from a Reverse Osmosis Water Filtration System AND the
refrigerator also has a water filter, use the refrigerator's filter bypass plug. Using the refrigerator's water
filtration cartridge in conjunction with the ROfilter can result in hollow ice cubes and slower water flow
from the water dispenser.
i;:__This water line installation is not warranted by the refrigerator or icemaker manufacturer. Follow
these instructions carefufly to minimize the risk of expensive water damage.
i::_;Water hammer (water banging in the pipes) in house plumbing can cause damage to refrigerator
parts and lead to water leakage or flooding. Call a quafified plumber to correct water hammer
before instafling the water supply line to the refrigerator.
>: To prevent bums and product damage, do not hook up the water line to the hot water line.
i;:__If you use your refrigerator before connecting the water line, make sure the icemaker power
switch is set to the OFFposition.
i;:__Do not install the icemaker tubing in areas where temperatures fall below freezing.
>: When using any electrical device (such as a power drill) during installation, be sure the device
is insulated or wired in a manner to prevent the hazard of electric shock.
i;:__All installations must be in accordance with local plumbing code requirements.
WhatYouWillNeed
Todetermine how much tubing you need:
Measure the distance from the water valve on the back of the refrigerator to the water supply pipe.
Then add 8 feet (244 cm). Be sure there is sufficient extra tubing [about 8 feet (244 cm) coiled into
3 turns of about 10inches (25 cm) diameter] to allow the refrigerator to move out from the waft
after installation.
i__AGE water supply kit (containing tubing, shutoffvalve and fittings listed beh)w) is available at exua cost
fiom y{)ur dealer or fiom Parts and Accessories, 800-626-2002.
i_:_;Cold water supply. The water pressure must be between 20 and 120 p.s.i. (1.4-8.2 bar) on models without
a water fiher and between 40 and 120 p.s.i. (2.8-8.2 bin) on models _dth a water fiher.
i_:Powerdrill.
i__Copper tubing orplastic tubing from a GEwater supply kit, 1/4" outer (fiameter to connect the refiigerator to
the water supply. Be sure both ends of the tubing are cut square.
Do not use plastic tubing or plastic fittings unless they are part of a GEwater supply kit because the
water supply line is under pressure at all times. Certain types of plastic tubing may become brittle
with age and crack, resulting in water leakage.
i__Two I/4' outer diameter compressionnuts and 2 ferrules (sleeves)--_o connect the robing to the shutoffvalve
and the retiigerator water valve.
;i_If your existing water line has a flmed fitting at the end, you will need m_adapter(avzdlable at plumbing
supply stores) to connect the water line to the refiigeramr OByou can cut offthe flmedfitfing with a
tube cutterand then use a compression fitting.
i;__Shutoffvalveto connect/o the cold water line. The shutoffvalve should have a water inlet with a mininmm
inside dimneter of 5/32" at the point of connection m the COLDWATERUN£ Saddle4ype shutoffvalves
are included in manywater supply kfis. Beiore purchasing, make sure a saddle-bpe valvecomplies with
your h)(al plumbing (odes. 19
Installingthe water line.
ShutOff theMain WaterSupply
Turn on the nearest fau(et long enough to dear tile line of water.
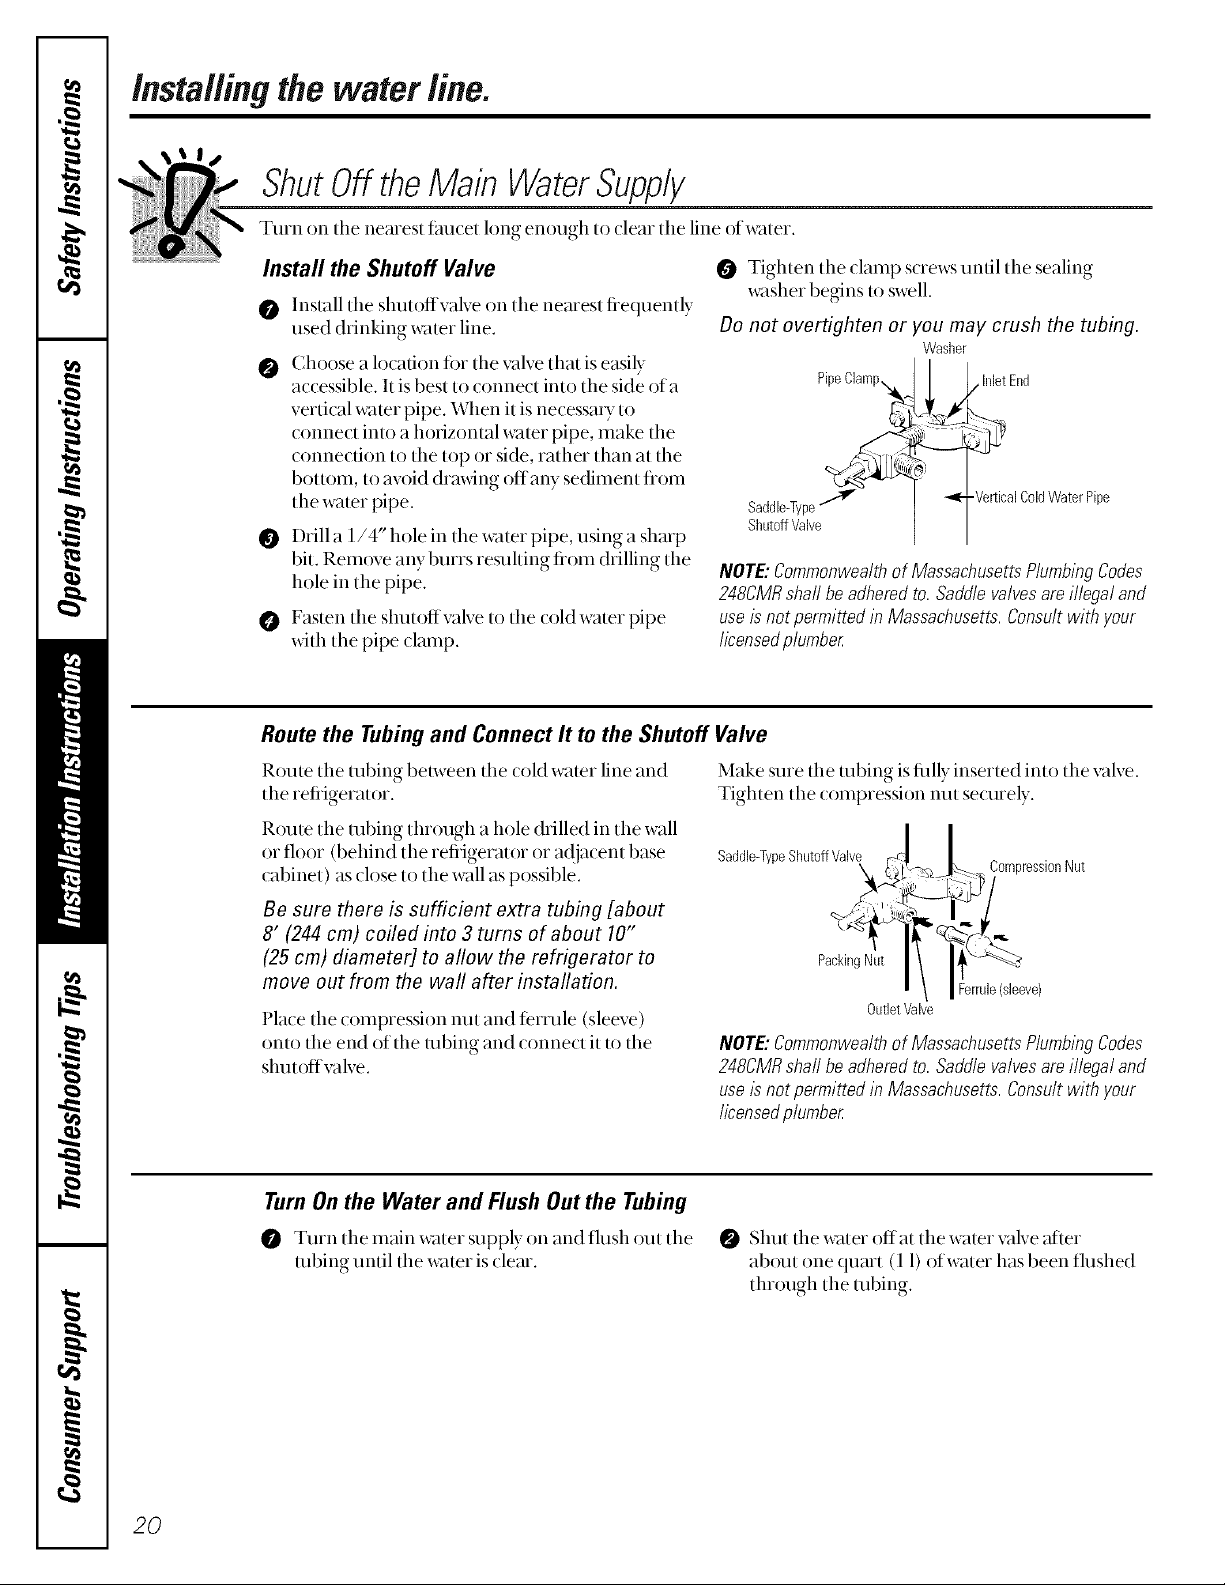
Install the Shutoff Valve
Install tile shutoffvalve on tile nearest fiequently
@
used drinking water line.
Choose a location ti)r the valve that is easily
@
accessible. It is best to connect into the side of a
vertical water pipe. When itis necessa U to
connect into a horizontal water pipe, make the
connection to the top or side, rather than at the
bottom, to av_)id drawing off aW sediment flom
the water pipe.
@
Drill a 1/4" hole in tile water pipe, using a sharp
bit. Remove any burrs resuhing fiom drilling tile
hole in tlle pipe.
Fasten tile shutoffvalve to tile cold water pipe
@
with the pipe damp.
Route the Tubingand ConnectIt to the Shutoff
Route the robing between tile cold water line and
the refiigerator.
Route the tubing through a hole drilled in tile wall
or floor (belfind tlle retiigerator or a(!ja(ent base
(abinet) as close to tlle wall as possible.
Be sure there is sufficient extra tubing [about
8' (244 cm) coiled into 3 turns of about 10"
(25 cm) diameter] to aflow the refrigerator to
move out from the waft after instaflafion.
Place tile compression nut and ferrule (sleeve)
onto tile end oftim robing and connect it to tile
shutoffvalve.
Tighten tim clamp screws until tim sealing
washer begins to swell.
Do not overfighten or you may crush the tubing.
Washer
PipeCiamp_
inletEnd
J
Saddle-Type
Shutoff Valve
NOTE:Commonwealthof MassachusettsPlumbingCodes
248CMRshaftbeadheredto.Saddlevalvesareillegaland
useis notpermittedin Massachusetts.Consultwith your
licensedplumber
Valve
Make sure tile tubing is fillly inserted into the valve.
Tighten tile compression nut securely.
PackingNut
OutletValve
NOTE:Commonwealthof MassachusettsPlumbingCodes
248CMRshaftbeadheredto.Saddlevalvesareillegaland
use/snot permittedinMassachusetts.Consultwith your
licensedplumber
-VerticalColdWaterPipe
,_._ _ Compression
_2
errule (sleeve)
Nut
20
TurnOnthe Water and Flush Out the Tubing
Turn tim main water supply on and flush out file
robing until the water is clear.
Shut the water offat tim water valve after
about one quart (11) ofwater has been flushed
fluough tlle robing.

Read these instructions completely and carefully.
Connect the Tubing to the Refrigerator
Before making the connection to the
refrigerator, be sure the refrigerator power
cord is not plugged into the wall outlet.
Theillustrationbelowwi// looklike theconnectiononyour
refngerator
If your refiigerator does not have a water filter, we
recommend installing one if your water supply has
sand or particles that could clog the screen of the
Tubing
Clamp
refrigerator's wamr valve, lnslall it in tile water line
near the retiigerator.
O Relilove access cover.
Remove the plastic flexible cap fiom the water
valve (refrigerator (onne(tion).
Place tile compression nut and ferrule (sleeve)
onto tile end of the robing as sho_l.
1/4"
Nut
Ferrule
(sleeve)
Connection
Insert tile end of tile robing into tile water valve
refrigerator connection as flu as possible. While
holding tile robing, tighten tile fitting.
RemoveCover "-\
_e
Fasten tile robing into tile clamp provided to
hold it in position. You may need to PU open
the clamp.
Replace access covei.
Turn the Water Onat the Shutoff Valve
Tighten any (onne(tions dial leak. Replace tile access covei and sciews (on soiile
models).
1/4"Tubing
Plug In the Refrigerator
Artvmge tile coil oftubing so that it does not vibrate
against tile back of tile refrigerator or against tile
wall.
Start the Icemaker
Set tile icemaker power switch to tile ONposifion.
Tile icemaker will not begin to operate until it
reaches its operating temperature of 15°F (-9°C) or
beh)w. It will then begin operation mltomafically if
the icemaker power switch is in the ONposifion.
Push tile refiigerator back to tile wall.
NOTE: In lower water pressure conditions, the
water valve may turn on up to 3 times to make
sure enough water reaches the icemaker.
21
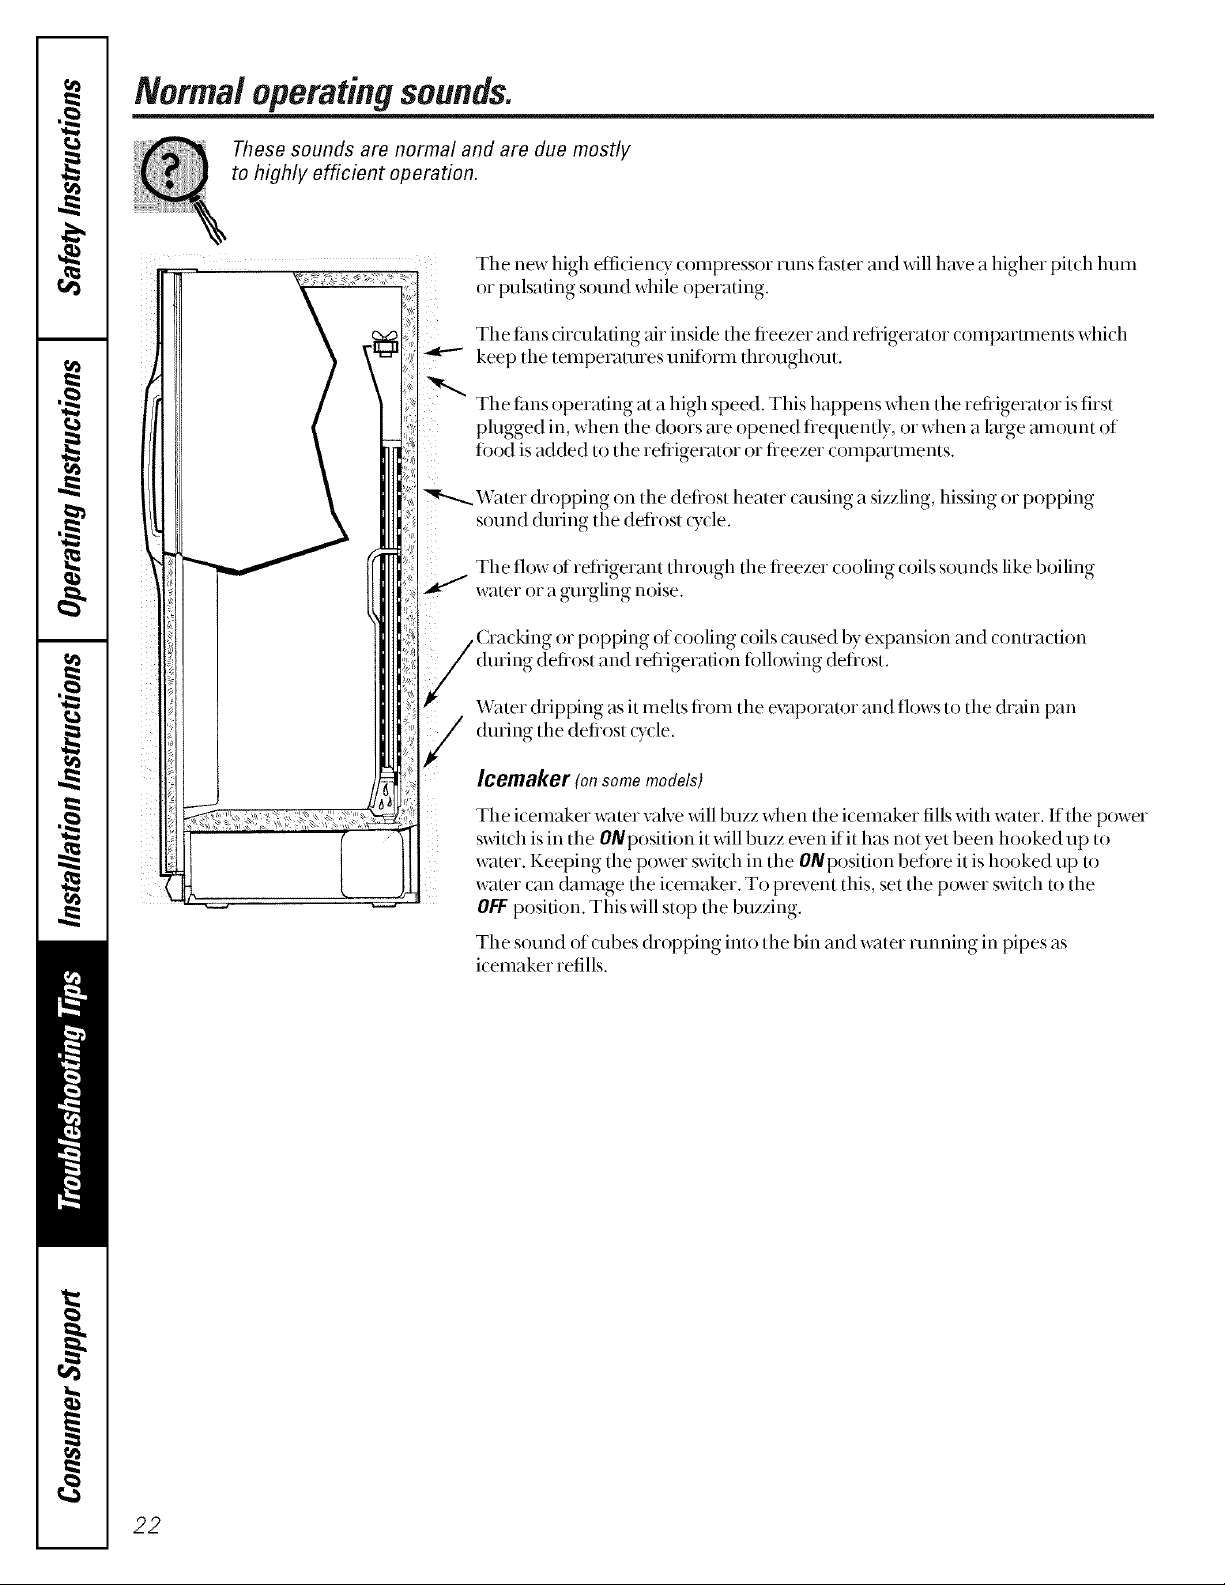
Normaloperatingsounds.
These sounds are normal and are due mostly
to highly efficient operation.
Tile new high eflicien(), compressor runs titster and xdll have a higher pitch hum
/i
or pulsating sound while operating.
Tile fans circulating air inside tile fieezer and refiigerator comparmlents which
keep tile temperatures uniform throughout.
Tile tiros operating at a high speed. This happens when tile refiigerator is first
plugged in, when tile doors are opened fiequendy, or when a large _/tllotln[ of
food is added to tile refiigerator or fieezer comparmlents.
_r".--...Water dropping on tile defiost heater causing a sizzling, hissing or popping
sound during the deflost ()_(le.
Tile flow of refrigerant through tile fieezer tooling (oils sounds like boiling
water or a gurgling noise.
. Cracking or popping of_ ooling (oils _aused bv expansion and _ontra_ tion
/ during (]efiost and t!efiigerati(_n following det]ost.
_f ,,Valet dripping as it itlelLs f_t)iil tile evapolatof and flows to tile dlain pan
during the defiost _)_cle.
Icemaker (onsomemodels)
Tile icemaker water xvdvewill buzz when tile icemaker fills with water. If tile power
switch is in tile 0Nposition it will buzz even ifit has not yet been hooked up to
water. Keeping the power switch in tile 0N position betore it is hooked up to
water can damage tile icemaker. To prevent this, set the power switch to tile
OFFposition. This will stop the buzzing.
Tile sound of cubes dropping into tile bin and water running in pipes as
i(emaker refills,
22
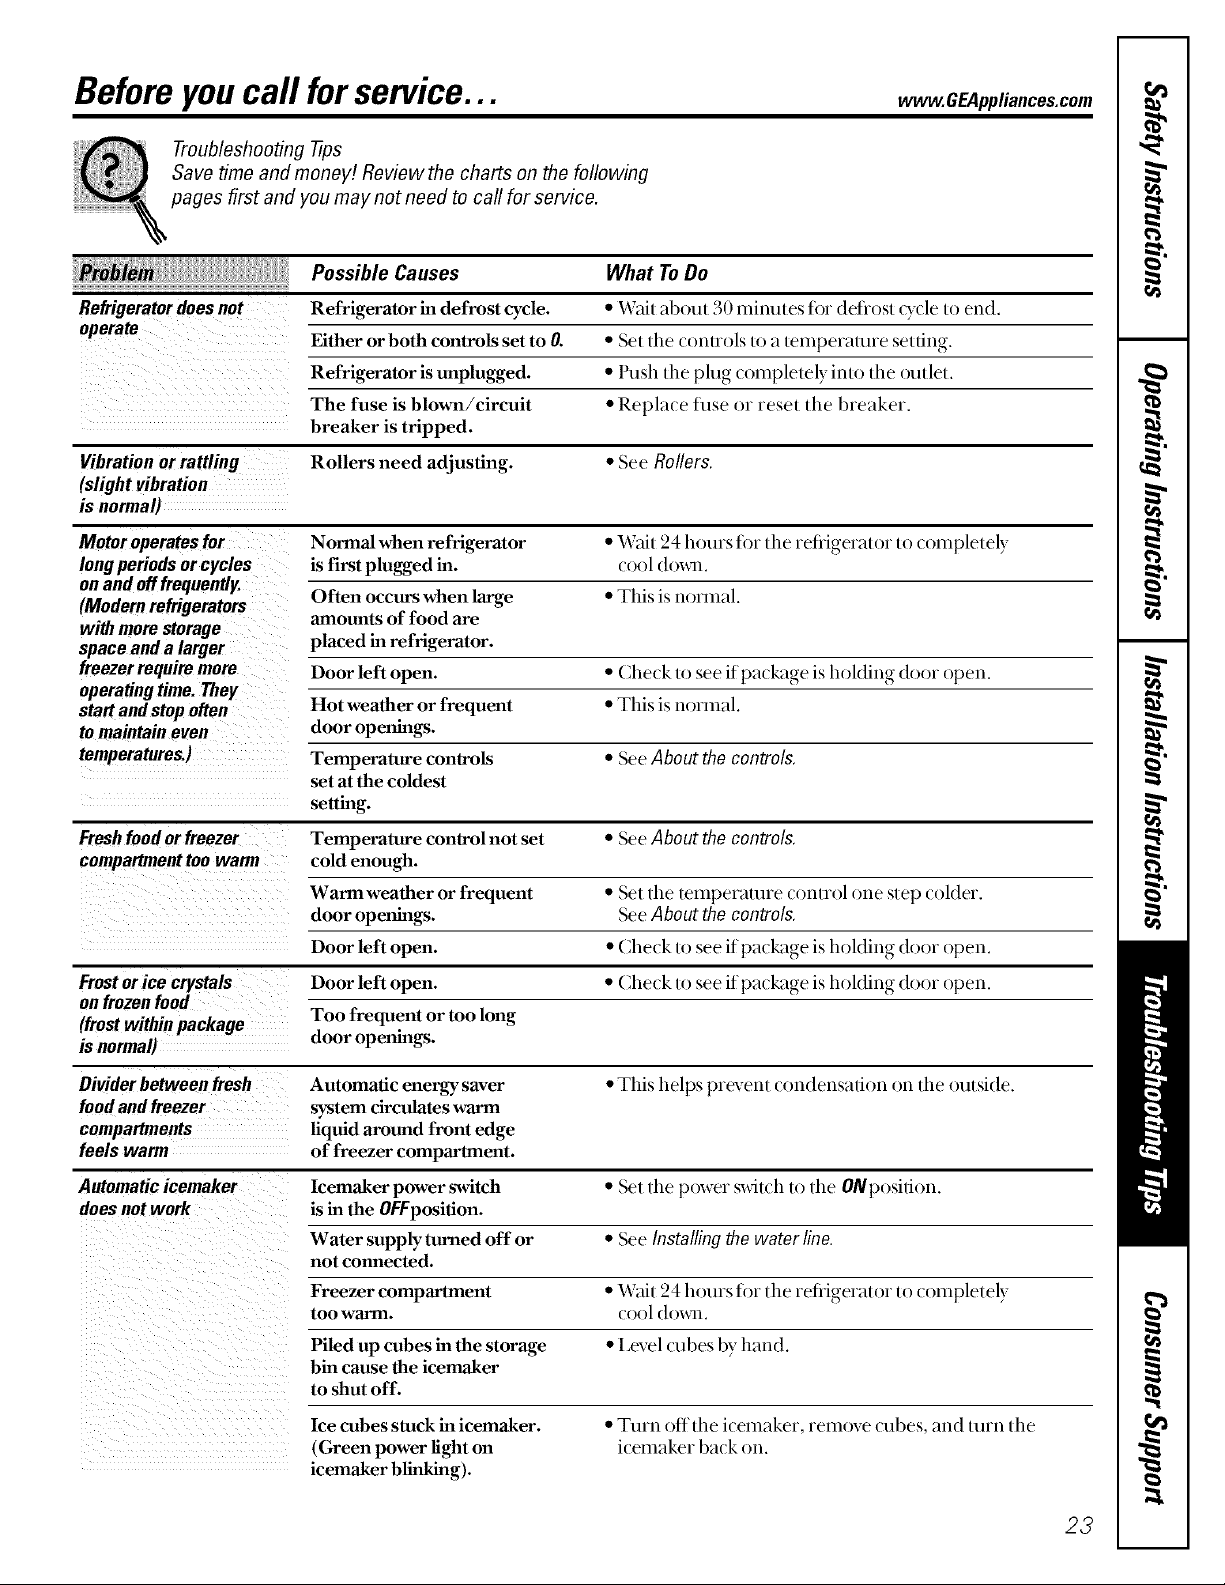
Beforeyoucall forservice...
Troubleshooting -tips
Save time and money! Review the charts on the following
pages first and you may not need to call for service.
Possible Causes What To Do
Refrigerator doesnot Refrigerator in defrost cycle. * Wait about 30 minutes for detiost Q_(le to end.
operate
Vibration or rattling Rollers need adjusting. * See Rollers
(slight vibration
is normal)
Motor operates for Normal when refrigerator * Wait 24 hours fi)r file refiigerator to ( Droplet ely
long periods or cycles isfirst plugged in. (ool (lo_al.
on and offfrequently.
(Modern refrigerators Often occurs when large • This is normal.
with more storage
space anda larger placed in refrigerator.
freezer require more Door left open. * (he(k to see ifpa( kage is holding door open.
operating time. They
start and stop often Hot weather or frequent * Tlfis is noI'I_l_ll.
to maintain even door openings.
temperatures.) Temperature controls * See About the controls
Fresh food or freezer Temperature controlnot set * See About the controls,
compartment toowarm cold enough.
Frost or ice crystals Door left open. • (_he(k to see if pa(l<age is holding door open.
on frozen food
(frost within package Too frequent or too long
is normal) door openings.
Either or both controls set to O. * Set the (ontrols to a temperature setting.
Refrigerator is unplugged. * Push tile plug completely into tile outlet.
The fuse is blown/circuit • Repla( e fuse or reset tile breaker.
breaker is tripped.
amounts of food are
set at the coldest
setting.
Warm weather or frequent * Set the temperature control one step (older.
door openings. See About the controls.
Door left open. • Che(k to see if pa( l_lge is holding door open.
vvwvv.GEAppliances.com
Divider between fresh Automatic energy saver * This helps prevent (ondensafi,)n ,)n file outside.
food and freezer system circulates warm
compartments liquid around front edge
feels warm of freezer compartment.
Automatic icemaker Icemaker power switch • Set tile power swit(h to tile ON position.
does not work is in the OFFposition.
Water supply turned off or * See lnstallingthe waterline.not connected.
Freezer compartment * Wait 24 hours fi)r the refiigerator to (onlpletely
too warm. (ool (lox_al.
Piled up cubes in the storage * I_evel (ubes by hand.
bin cause the icemaker
5¸¸¸¸¸¸¸ji)))
ii_i _ i ! i ii ii ii ii ii ii ii ii ii
ii i i i i i i i
to shut off.
Ice cubes stuck in icemaker.
(Green power light on
icemaker blinking).
• TuI'n offflle i(emaker, iei_love (ubes, _lll(l [uI'n tile
i(:emaker ba(:k on.
23
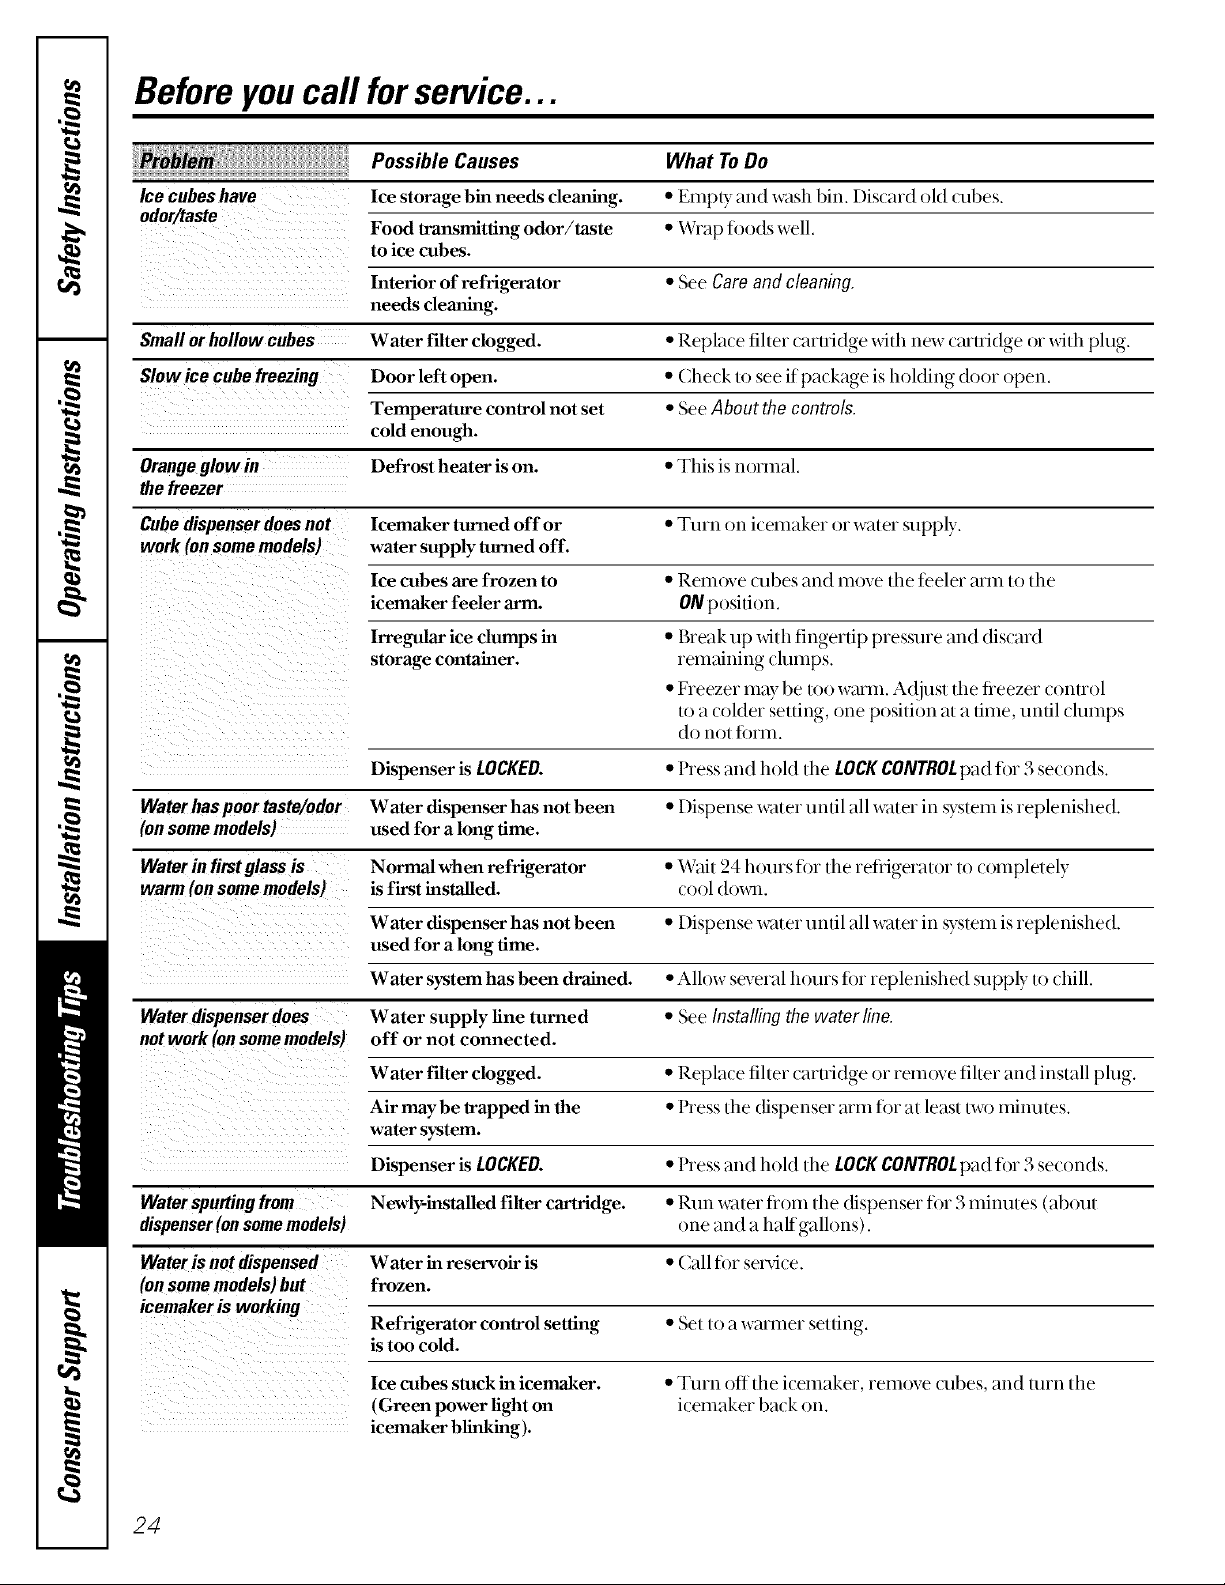
Beforeyoucall forservice...
Possible Causes What To Do
Ice cubes have Ice storage bin needs cleaning. • Empty and wash bin. Dis(ard old (ubes.
odor/taste Food transmitting odor/taste • Wrap fi)ods well.
to ice cubes.
Interior of refrigerator * See Care and cleaning.
needs cleaning.
Small or hollow cubes Water filter clogged. * Repla( e fiher (artridge with new (artridge or with plug.
Slow ice cube freezing Door left open. * Che(k to see ifpa(kage is holding door open.
Temperature control not set * See About the controls
cold enough.
Orange glow in Defrost heater is on. * This is normal.
the freezer
Cube dispenser does not Icemaker turned off or * Turn on i( emaker or water supply.
work (on some models) water supply turned off.
Ice cubes are frozen to "Remove (ubes and move the teeler arm to file
icemaker feeler arm. ON position.
Irregular ice clumps in * Break tap xdth fingertip pressure and dis(ard
storage container, remaining clumps.
• Freezer may be too warm. A(!iust the freezer ( ontrol
to a colder setting, one position at a time, until clumps
do not fi)I'I_l.
Dispenser is LOCKED. • Press and hold file LOCK CONTROLpad for 3 se(onds.
Water has poor taste/odor Water dispenser has not been • Dispense water until ;all water ill system is replenished.
(on some models) used for a long time.
Water in firstglass is Normal when re frlgerator • Wait 24 hours fi)r the refiigerator to (ompletely
is first installed. (ool (h)x_al.
Water dispenser has not been • Dispense water until all water ill system is replenished.
nsed for a long time.
Water system has been drained. • Alh)w several hours for replenished supply to (hill.
Water dispenser does Water supply fine turned • See Installing the waterline.
not work (on some models) off or not connected.
Water filter clogged. • Repla(e fiher (artridge or rem,,ve fiber and install phag.
Air may be trapped in the • Press tile dispenser arm fi)r at least two minutes.
water system.
Dispenser is LOCKED. • Press and hold tile LOCK CONTROL pad for 3 seconds.
Water spurting from Newly-installed filter cartridge. • Run water flOln tile (fispenser fi)r 3 ininutes (about
dispenser(on somemodels) one and a half gallons).
Water is oot dispensed Water in reservoir is • Call fi)r sev_4(e.
(onsome models) but frozen.
icemaker is working
i ¸
ii i i i i i i i
Refrigerator control setting • Set to a warmer setting.
is too cold.
Ice cubes stuck in icemaker. • Turn off tile i(emaker, remove (ubes, and turn tile
(Green power fight on icemaker 1)ack on.
icemaker blinking).
24
vvww.GEAppliances.com
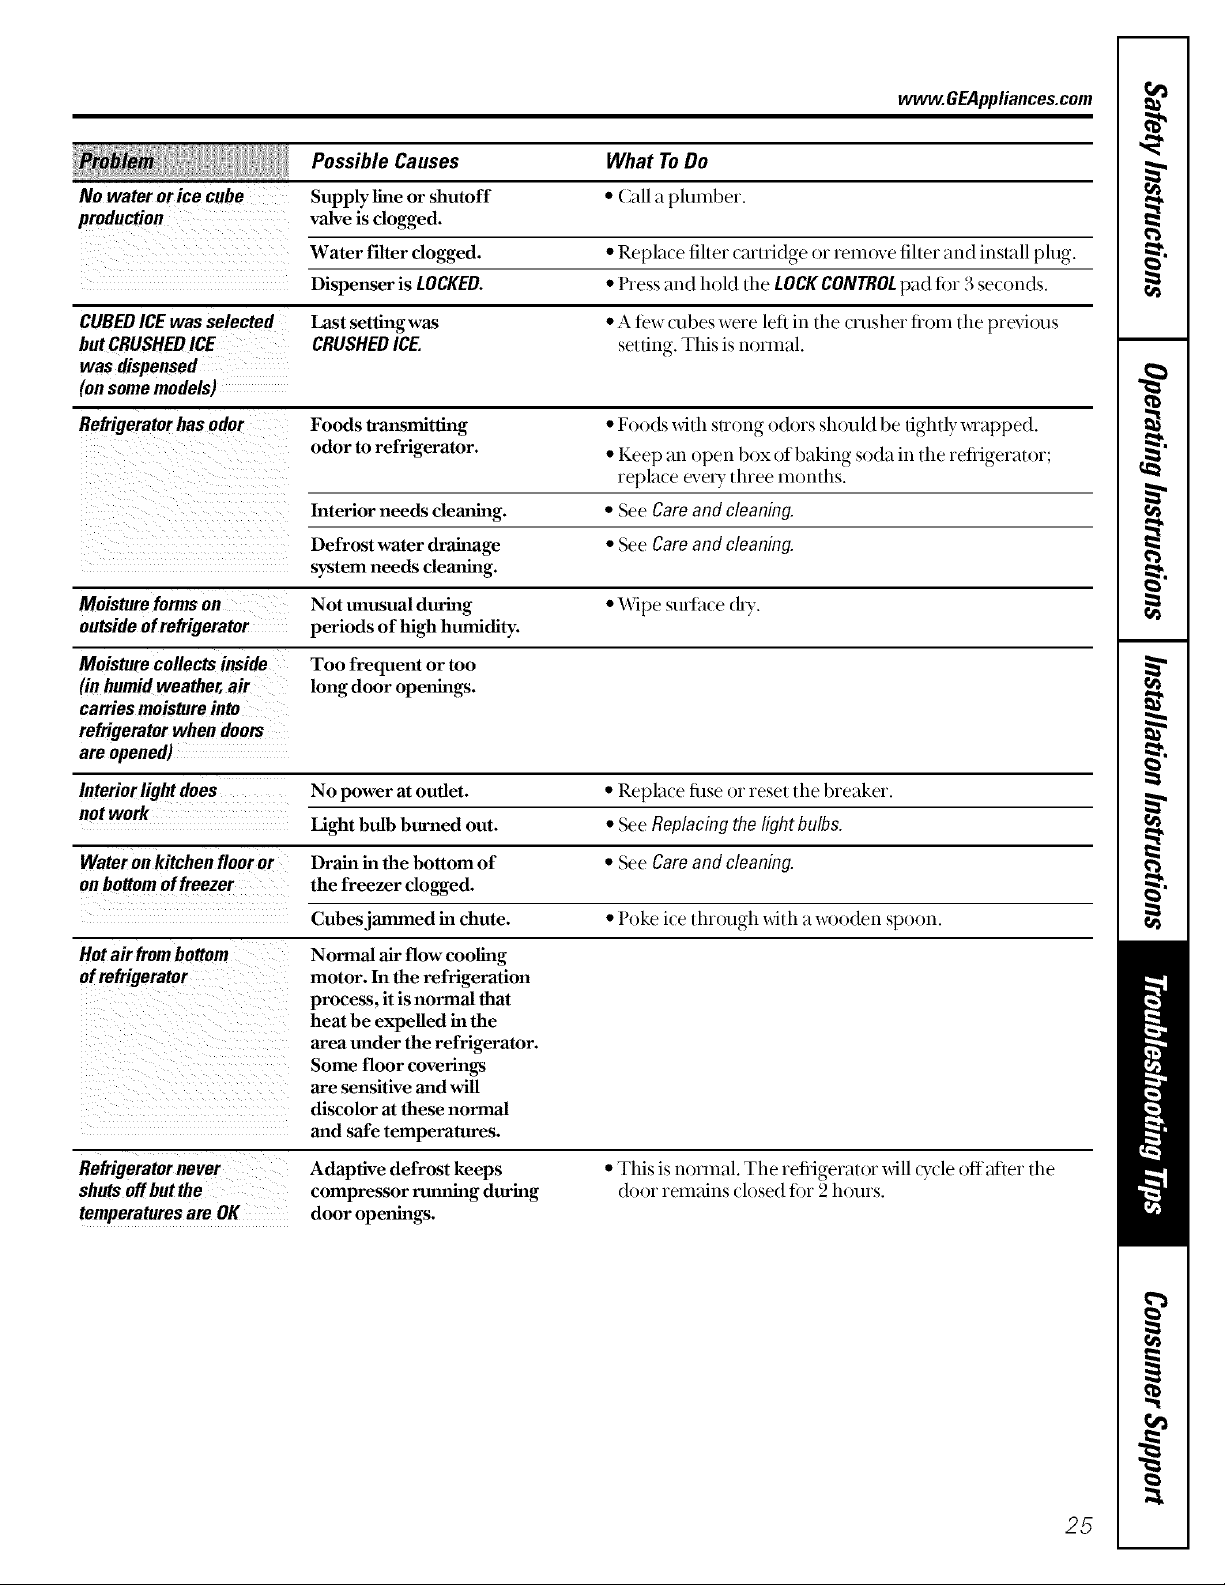
Possible Causes What To Do
No water or ice cube Supply llne or shutoff * Call a plumber.
production valve is clogged.
Water filter clogged. * Repkwe fiher (ar/ridge or remove filler mM iuslzdl plug.
Dispenser is LOCKED. * l'ress aim hold the LOCKCONTROL pad fi_r 3 se('ouds.
CUBED ICEwas selected Last settingwas * A tew (ubes were left in tile (rasher fiom the previous
but CRUSHEDICE CRUSHEDICE. selring. This is u()mlaL
was dispensed
(on some models)
Refrigerator has odor Foods transmitting * Foods widl sU'oug odors should be/iglnly _m/ppe(l.
odor to refrigerator. * Keep ,m open box of baking soda in tlle reiiiger,//or;
replace evel) _dnee momhs.
Interior needs cleaning. * See Cam and cleaning
Defrost water drainage * See Care and cleaning
system needs cleaning.
Moisture forms on Not unusual during * Wipe sul_h('e (h)'.
outside ofrefrigerator periods of high humidity.
Moisture collects inside Too frequent or too
(in humid weather, air long door openings.
carries moisture into
refrigerator when doom
are opened)
Interior light does No power at outlet. * Repl;l('e fi_se (_r rese/tile bre;&er.
not work
Water on Mtchen floor or Drain in the bottom of * See Care and cleaning.
on bottom of freezer the freezer clogged.
Hot ak from bottom Normal air flow cooling
Refrigeratornever
shutsoffbutthe
temperaturesareOK
Light bulb burned out. * See Replacing the light bulbs.
Cubes jammed in chute. * l'oke ice tlu'()ugh xdth ;l wooden spoon.
motor. In the refrigeration
process, it is normal that
heat be expelled in the
area under the refrigerator.
Some floor coverings
are sensitive and will
discolor at these normal
and safe temperatures.
Adaptive defrost keeps
compressor running during
door openings.
• This is hernial. The refrigerator x_4ll(5_(:leoffafler tile
door remains (h)sed for 2 hours,
25

CONSUMER WARRANTY
(for customers in Canada)
Your refrigerator is warranted to be free of defects in material and workmanship.
What is covered How Long Warranted Parts Labour
(From Date of Sale) Repair or Replace
at Camco's Option
Compressor Ten (10) Years Ten (10) Years Ten (10) Years
Sealed System (including Five (5) Years Five (5) Years Five (5) Years
evaporator, condenser
tubing and refrigerant)
All Other Parts One (1) Year One (1) Year One (1) Year
TERMS AND CONDITIONS:
This warranty applies only for single
family domestic use in Canada when the
Refrigerator has been properly installed
according to the instructions supplied by
Camco and is connected to an adequate
and proper utility service.
Damage due to abuse, accident, commercial
use, and alteration or defacing of the serial
plate cancels all obligations of this warranty.
Service during this warranty must be performed
by an Authorized Camco Service Agent.
Neither Camco nor the Dealer is liable for any
claims or damages resulting from any failure
of the Refrigerator or from service delays
beyond their reasonable control.
To obtain warranty service, purchaser must
present the original bill of sale. Components
repaired or replaced are warranted through the
remainder of the original warranty period only.
This warranty is in addition to any statutory
warranty.
IMPORTANT
Keep this warranty and your bill of sale as proof of original purchase and purchase date.
WHAT IS NOT COVERED:
• Service trips to your home to teach you how
to use the product.
• Damage to finish after delivery.
• Improper installation--proper installation
includes adequate air circulation to the
refrigeration system, adequate electrical,
plumbing and other connecting facilities.
• Replacement of house fuses or resetting of
circuit breakers.
• Replacement of light bulbs.
• Damage to product caused by accident, fire,
floods or acts of God.
• Loss of food due to spoilage.
• Proper use and care of product as listed
in the owner's manual, proper setting of
controls.
• WARRANTOR IS NOT RESPONSIBLE
FOR CONSEQUENTIAL DAMAGES.
26
Camco Service is available coast to coast.
If further help is needed concerning this warranty, contact:
Manager, Consumer Relations, Camco Inc.,
Suite 310, 1 Factory Lane, Moncton, N.B. ElC 9M3
Staple your receipt here.
Proof of the original purchase
date is needed to obtain service
under the warrant}4

RefrigeratorWarranty. (Forcustomers in the United States)
Aft warranty service provided by our Factory Service Centers,
or an authorized Customer Care®technician. Toschedule service,
on-line, 24 hours a day, contact us at www.GEAppliances.com, or
call 800-GE-CARES.
GEWill Replace:
Anypart (ffthe refiigerator which fails due to a defe(t in materials or worl_nanship.
Fromthedate of the
originalpurchase
Five }tears
From the date of the
origina! purchase
_i::Service trips to your home to teach you how to use the _i::
product.
i;_?Improper installation.
;i::Failure of the product if it is abused, misused, or used for
other than the intended purpose or used commercially.
ii: Loss of food due to spoilage.
_i;Replacement of house fuses or resetting of circuit _i._i_
breakers.
I)uring tiffs full one-year warranty, (;E _dll also proxdde, free of charge, all labor and
in-home ser_4(e to repla(e tile dete(tive part.
Any part ofthe sealed refrigerating system (tile compressor, condenser, evaporator
and all connecting robing) which fifth due to a detect in materials or w_)rkananship.
During this additional four-year limited warranty, GE _dll also prodde, free of charge, all
labor and in-home service to repla( e tile (lefective part in tile sealed refiigerafing system.
Staple your receipt here.
Proofof the original purchase
date is needed to obtain service
under the warrant_
Replacement of the water filter cartridge due to water
pressure that is outside the specified operating range or
due to excessive sediment in the water supply.
Replacement of the water filter cartridge after its
expected useful fife.
Damage to the product caused by accident, fire, floods or
acts of God.
Incidental or consequential damage caused by possible
defects with this appliance.
This warranty is extended to the original purchaser and any succeeding owner for products purchased for home
use within the USA. In Alaska, the warranty excludes the cost of shipping or service calls to your home.
Some states do not allow the exclusion or limitation of incidental or consequential damages. This warranty gives
you specific legal rights, and you may also have other rights which vary from state to state. To know what your
legal rights are, consult your local or state consumer affairs office or your state's Attorney General.
Warrantor: General Electric Company. Louisville, KY 40225
27

Performance Data Sheet
GESmartWater Filtration System
GWF06 Cartridge
Health Claim Performance Certified by NSF/ANSI*
100%safety factors built in for unmetered usage)
Standard No. 42: Aesthetic Effects
Parameter
( hlorine
T&O
Pmfioflate** 200,000
Parame_r
Turbidi/y
Cys/s
I,ead at PH 6.5
I,ead at pH 8.5
IJndane
Auazine
2,4-D
Asbestos
Tested ushTga flow rate of 0.5gpm; pressure of 120psig; pH of Z 5+_O.&temp. of 20+_25C
** Measurement inparticles/ml
*** NTU = Nephelemetric Units
USEPA
MCL
USEPA
MCL
1NTU***
9{!.95% Reduction
15 ppb
15 ppb
0.0002 ppm
0.003ppm
0.100 ppin
99%
Influent
Challenge
1.9 ppm
Standard No. 53: Health Effects
Influent Effluent
Challenge
24.3 NTU
105,750
160 ppb
150 ppb
0.00062 ppm
0.0084 ppm
0.272 ppm
690 MFI !ml
Average
0.02 ppm
Average
0.07 NTU
0.00005 ppm
0.002 ppm
0.0264 ppm
0.32 MFL/ml
3,978
26
1ppb
1.8 ppb
Effluent
Maximum
0.05 ppm
7,800
Maximum
0.1 NTU
55
1ppb
4.3 ppb
0.00005 ppm
0.003 ppm
0.080 ppm
1.2 MFL/ml
% Reduction
Average Minimum
98.90% 97.37%
98.00% 96.10%
% Reduction
Average
99.71%
99.97%
9{1.37%
98.8O%
91.{)3%
76.1{)%
90.29%
99.95%
Minimum
{!{!.5{!%
99.95%
99.37%
97.13%
91.93%
64.28%
70.58%
{)9.82%
Operating Specifications
i_ ( apa(i/y: certified ti)r up to 500 galhms (1895 l)
i2 Pressure requirement: 40-120 psi (2.8-8.2 bar), non-shock
>_Temperature: 33-100 F (0.6-38 C)
_i:_Flow rate: 0.5 gpm (1.9 lpm)
General Installation/Operation/Maintenance Requirements
i2 Flush new cartridge at tull flow tot 3 mim_tes to purge out trapped air.
;i:_Replace cartridge when flow becomes tot) slow; at least every six mouths.
Special Notices
i_;:Installation instructions; parts and service availability; and standard warranty are included with the product when shipped.
>_This drinking water system must be maintained according to mamflhc/urer's instructions, including replacement of
fiher cartridges.
N Do uot use with water that is microbiologically uusafe or of unknown quality without adequate disinte(tiou before or after
the system. Systems certified ti)r cyst reduction may be used on disinfected water that may contain fiherable cysts.
i¢_The contaminants or other substances removed or reduced by this water treatment system are not necessarily in your water.
N Check ti)r compliance with the state and local laws and regulations.
S?slcm Tested and Cer/ificd by NSF lnternad(mal against ANSI/NSF
Standard 42 & 53 fin Ihe reduction ()f:
Standard No. 42: Aesthetic Effects
Chemical knit
Taste and ()dot Reducti(m
Chlorine Reduction, (lass 1
Mechanical l,ihration It nit
Particulate Reducd()n, (lass I
Standard No. 53: Health Effects
Chemical Rcdncti(m [ nit
lvad and Au'azine Reduction
IJndane and 2,41) Reduction
Mechanical l,ihration It'nit
Turbidity Reduction
Cysl and Asbesu)s Rcducti(m
Manulhcmred ti)r: General Electric ( ompaw, I,(misville, KY 40225
28
 Loading...