

Page 1

PSI23SCL—GE Profile Arctica™22.7 Cu. Ft. CustomStyle™Side-by-Side Refrigerator
Specification Revised 3/01
TM
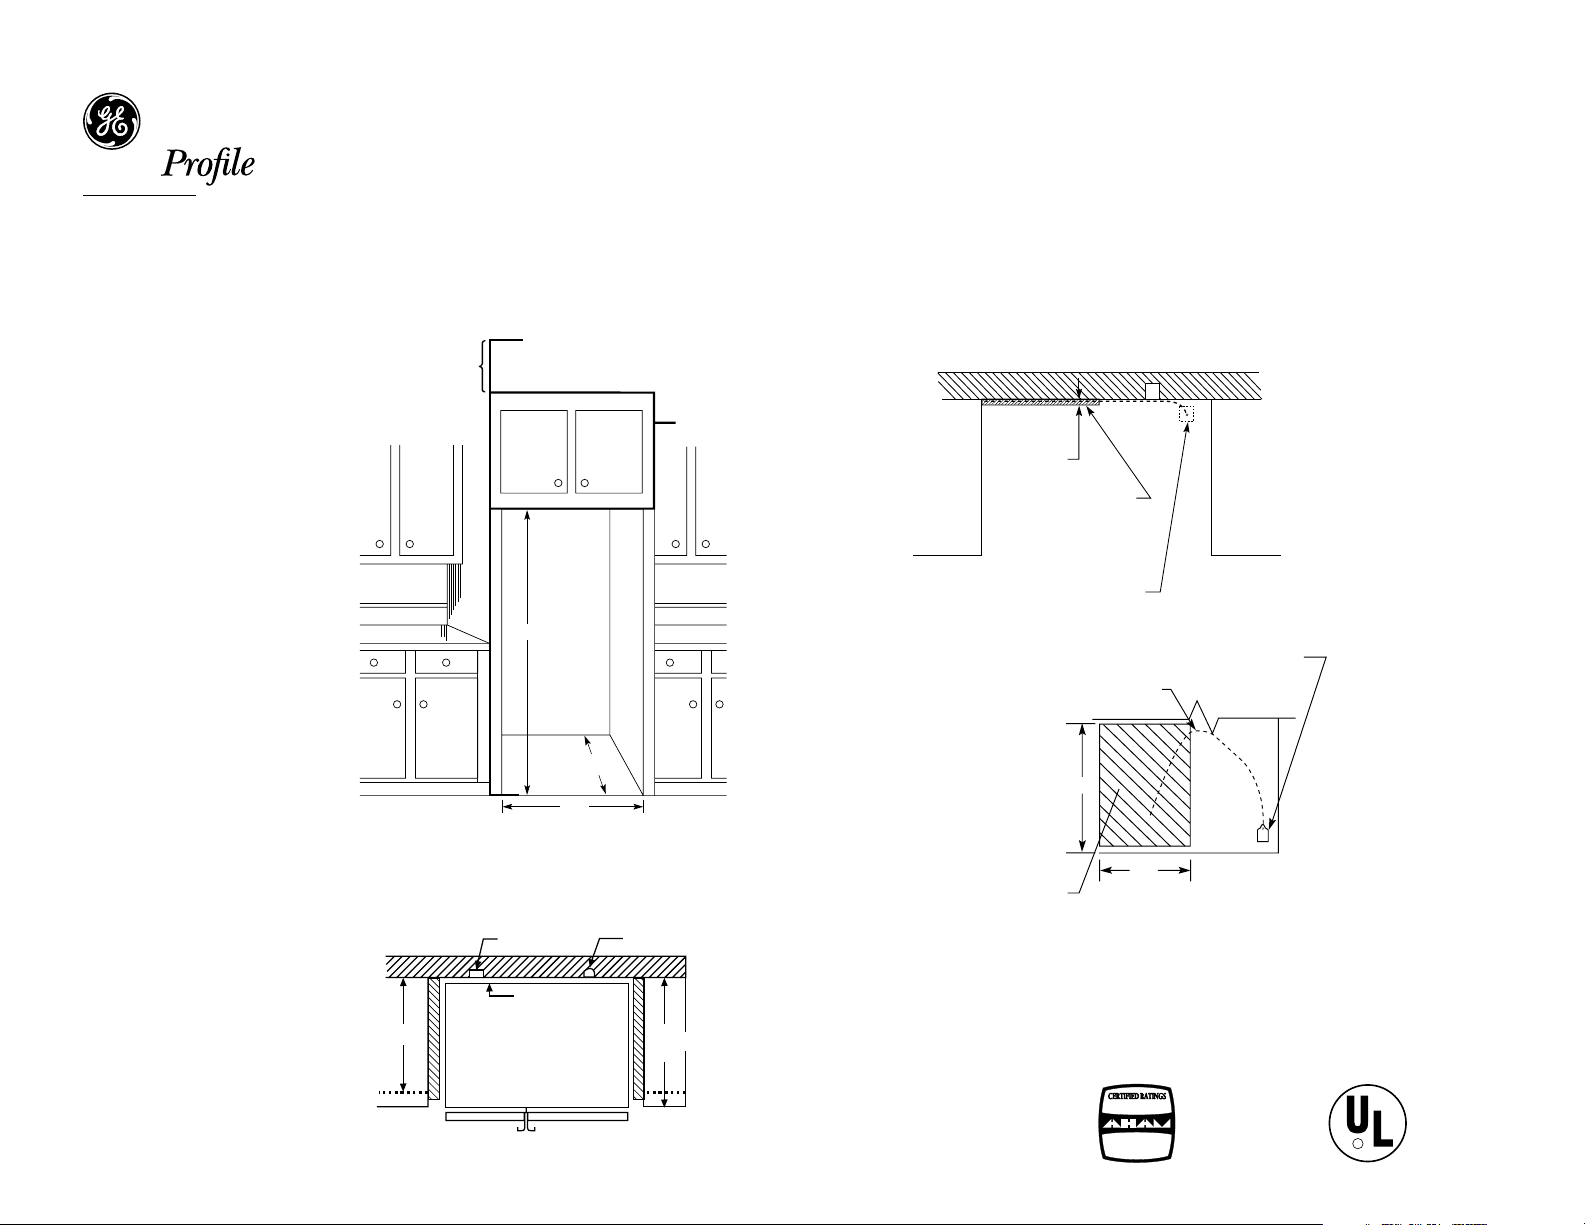
Case Dimensions (in inches/cm.)
1''
(2.54 cm.)
A
B
C
F
D
E
Side View
Front View
69-1/4
68-3/4
28-5/16
26-3/4
23-7/8
69-1/4
Manufacturer Certified to
ASSOCIATION OF HOME
APPLIANCE MANUFACTURERS
ANSI/AHAN HRF-1-1979
VOLUME and
SHELF AREA
R
Total volume and shelf
area are calculated by the
Association of Home
Appliance Manufacturers’
standards.
Listed by
Underwriters
Laboratories
I
H
G
J
Top View
35-3/4
45-9/16
37-5/16
For answers to your Monogram,®GE Profile™or
GE appliance questions, visit our website at
WWW.GEAppliances.com or call
GE Answer Center®service, 800.626.2000.
Page 2
PSI23SCL—GE Profile Arctica™22.7 Cu. Ft. CustomStyle™Side-by-Side Refrigerator
Specification Revised 3/01
TM
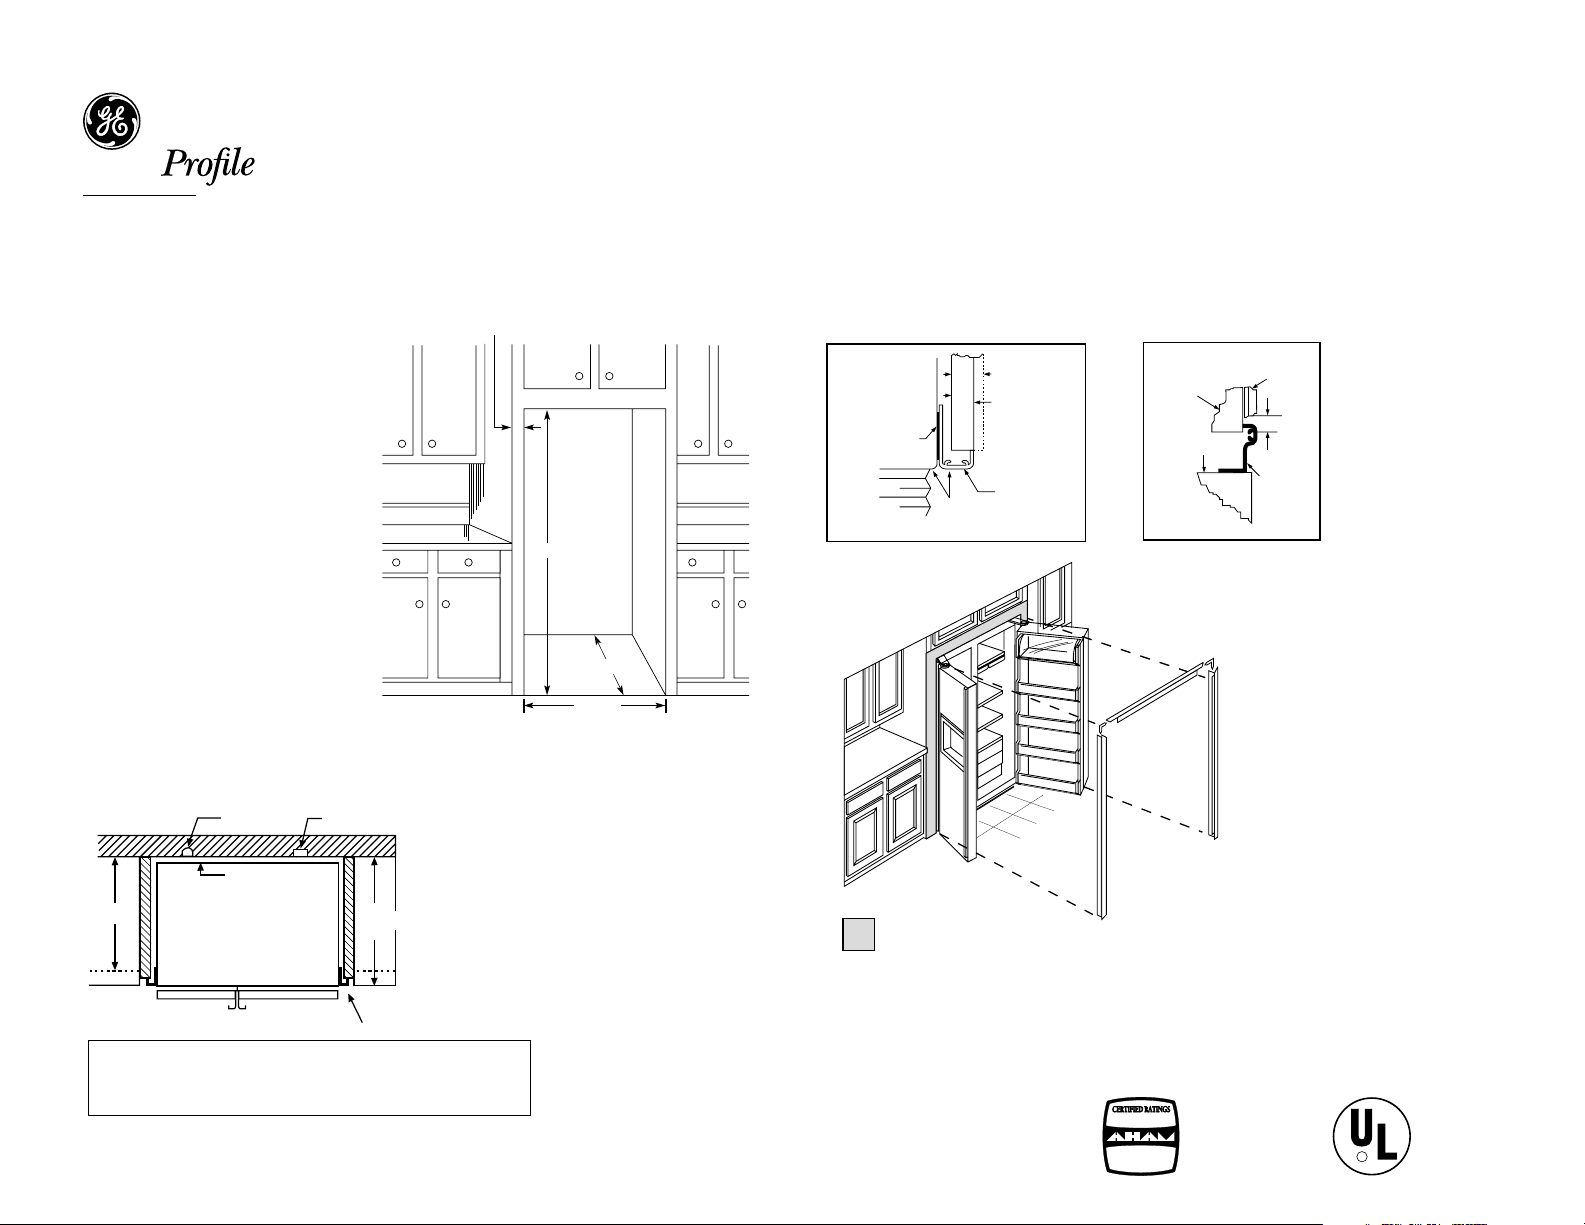
Standard, New Construction
and Replacement Installation
Rough-In Dimensions
• All wall/floor molding should
be removed prior to installation.
• Water recess on rear wall
recommended to prevent water
line damage. 48" minimum
length 1/4" diameter water line
tubing recommended.
• When possible, recess both
copper water line and electrical
outlet. (See local codes)
• Front and rear leveling legs are
adjustable for the built-in look.
(See owner’s manual)
• If optional collar trim kit is to be
used or anticipated, see collar
trim installation on next page for
different rough-in dimensions.
Installation Tips to
Maximize the Built-In Look
8' Ceiling
13" to 14"
Cabinet
12"
Soffit
70-1/4"*
36"
24"
*The rough-in dimension of 70-1/4" is minimum and is measured from the
finished floor to top of opening (or the underside of the overhead cabinets).
For Models with Trim Kit: If frameless style cabinets are planned for above the
refrigerator, you may need to consider adding a maximum of 1/4" (70-1/2") to
height of opening to allow additional clearance between cabinet doors and
top of refrigerator trim when cabinet doors are in open position.
25"
Counter
Top
Electrical Water
3/4" Airspace
(1/2" Gap + 1/4"
Wall Plates)
24"
Cabinet
Recommended water line
location using recess
in rear wall
Recommended single loop
of 1/4" copper water line
Water hook-up
on the refrigerator
Rear Wall View
18"
24"
Allow 48" minimum water
line to enable refrigerator
to be pulled forward
Installation of Water and Electrical Outlets
Alternate
water
line location
through floor
1/2"
Water hook-up
on the refrigerator
Top View
Manufacturer Certified to
ASSOCIATION OF HOME
APPLIANCE MANUFACTURERS
ANSI/AHAN HRF-1-1979
VOLUME and
SHELF AREA
R
Total volume and shelf
area are calculated by the
Association of Home
Appliance Manufacturers’
standards.
Listed by
Underwriters
Laboratories
For answers to your Monogram,®GE Profile™or
GE appliance questions, visit our website at
WWW.GEAppliances.com or call
GE Answer Center®service, 800.626.2000.
Page 3
TM
PSI23SCL—GE Profile Arctica™22.7 Cu. Ft. CustomStyle™Side-by-Side Refrigerator
Specification Revised 3/01
An enclosure is required to match
up to the trim, see Typical
Installation. To obtain the most
integrated look, the cabinet or soffit
above the refrigerator should extend
out to the same depth as the side
panels. The refrigerator opening
must have minimum dimensions
of 70-1/4" high x 36-1/8" wide x
24-1/2" deep as shown at right. If
there is an overhead cabinet, allow
1" for cabinet door clearance with
the top trim piece so the cabinet
doors can be opened without hitting
the top trim. If 1/2" side panels are
used, then side trim and panel will
be even. If 3/4" side panels are used,
then some of the side panel will
extend beyond the trim and must
be finished.
Collar Trim Installation
25"
Counter
Top
ElectricalWater
Trim
3/4" Airspace
(1/2" Gap + 1/4"
Wall Plates)
24"
Cabinet
Typical Installation
Shaded areas represent front surfaces of
side panels and overhead cabinet or soffit that contacts trim.
Overhead
Cabinet
Cabinet
Door
Top Trim
Case
1"
Magnetic
Tape
3/4" Cabinet
Side Panel
1/2" Cabinet
Side Panel
Side trim must be installed
flush with the gasket contact
surface on the case.
Refrigerator
Case
Side TrimDoor Gasket
IMPORTANT: Before finalizing specifications for your GE Profile
™
CustomStyle™Refrigerator, please NOTE:
• A minimum of 36-1/8" is required for refrigerator installation with collar
• Be sure to allow for 1/2" or 3/4" side panels in addition to the 36-1/8" minimum
70-1/4"*
36-1/8"
24-1/2"*
1/2" minimum
*The rough-in dimension of 70-1/4" is minimum and is measured from the
finished floor to top of opening (or the underside of the overhead cabinets).
For Models with Trim Kit: If frameless style cabinets are planned for above the
refrigerator, you may need to consider adding a maximum of 1/4" (70-1/2") to
height of opening to allow additional clearance between cabinet doors and
top of refrigerator trim when cabinet doors are in open position.
Manufacturer Certified to
ASSOCIATION OF HOME
APPLIANCE MANUFACTURERS
ANSI/AHAN HRF-1-1979
VOLUME and
SHELF AREA
R
Total volume and shelf
area are calculated by the
Association of Home
Appliance Manufacturers’
standards.
Listed by
Underwriters
Laboratories
For answers to your Monogram,®GE Profile™or
GE appliance questions, visit our website at
WWW.GEAppliances.com or call
GE Answer Center®service, 800.626.2000.
Page 4
TM
Specification Revised 3/01
PSI23SCL—GE Profile Arctica™22.7 Cu. Ft. CustomStyle™Side-by-Side Refrigerator
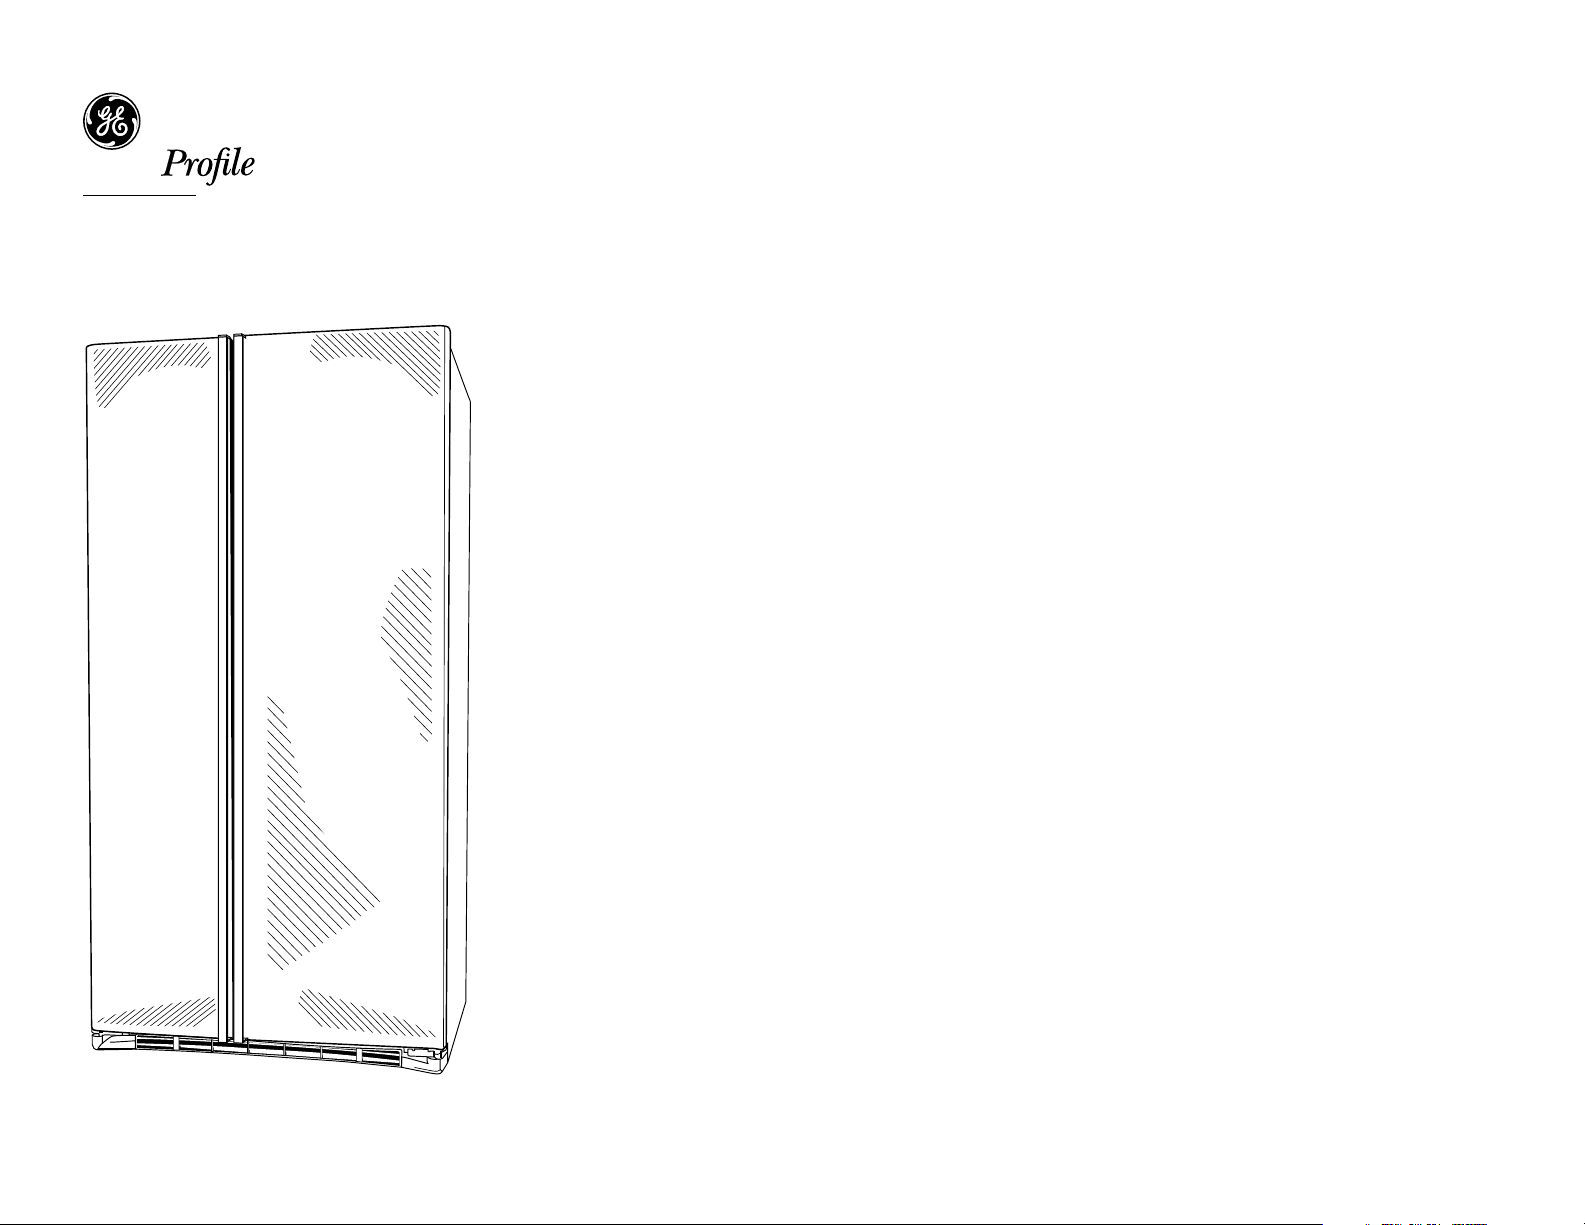
Features and Benefits
• 22.7 cu. ft. Capacity (Fresh Food 14.38 cu ft / Freezer 8.28 cu ft)
• ClimateKeeper
™
System
• Upfront Electronic Digital Display Temperature Control
• Integrated Shelf Support System
• FrostGuard
™
Technology
• 4 Wire Tilt-Out Storage Bins (3 Adjustable)
• 4 ClearLook
™
Modular Fresh Food Door Shelves (2 Adjustable)
• QuickSpace
™
Shelf
• 3 Adjustable Glass Fresh Food Cabinet Shelves (2 Slide-Out, Spill-Proof)
• Electronic Icemaker
• Premium Quiet Design
• Model PSI23SCLBS–Stainless steel
 Loading...