

Page 1
Installation
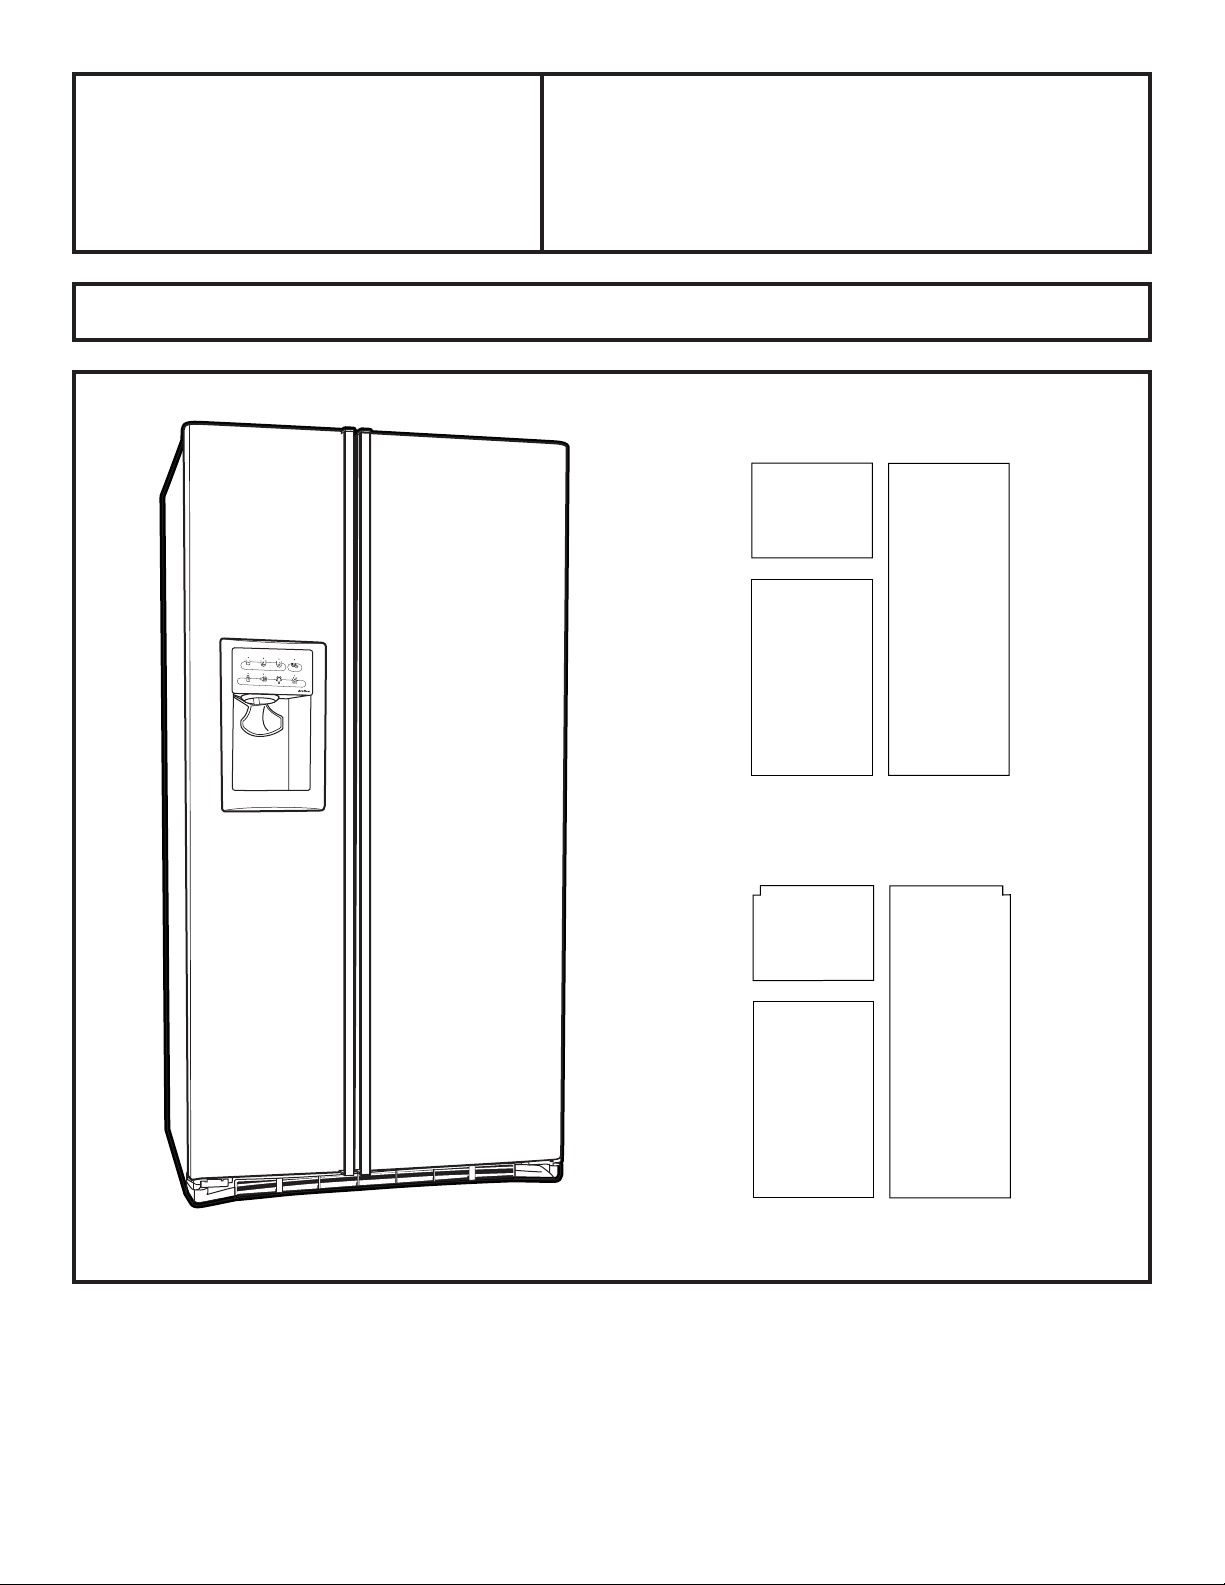
DECORATOR PANEL KIT
PSPK25D (WW, BB, CC, SS)
Instructions
If you have questions, call 800.GE.CARES (800.432.2737) or visit our website at: www.ge.com
W
A
T
E
R
C
R
U
S
H
E
D
C
U
B
E
D
Q
U
I
C
K
I
C
E
L
O
C
K
C
O
N
T
R
O
L
D
O
O
R
A
L
A
R
M
L
I
G
H
T
R
E
S
E
T
W
A
T
E
R
F
I
L
T
E
R
USE WITH: GE Models PSH25MG, PSH25NG and PSH25PG
PSPK25DM
3 Corrugated Panels
3 Decorator Panels
Page 2
INSTALLING DECORATOR PANEL KIT
The following instructions outline the procedure to install
Decorator Panel Kit PSPK25D on your refrigerator models:
PSH25MG, PSH25NG and PSH25PG. Read each step
thoroughly before proceeding.
The procedure below describes installation on models
equipped with a dispenser.
• When installing panels less than 1/4" (6 mm), you must insert
a filler panel behind the decorator panel for proper fit. The
combined thickness of the decorator panels and filler panels
must total 1/4" (6 mm). This plastic panel kit comes with
corrugated filler panels.
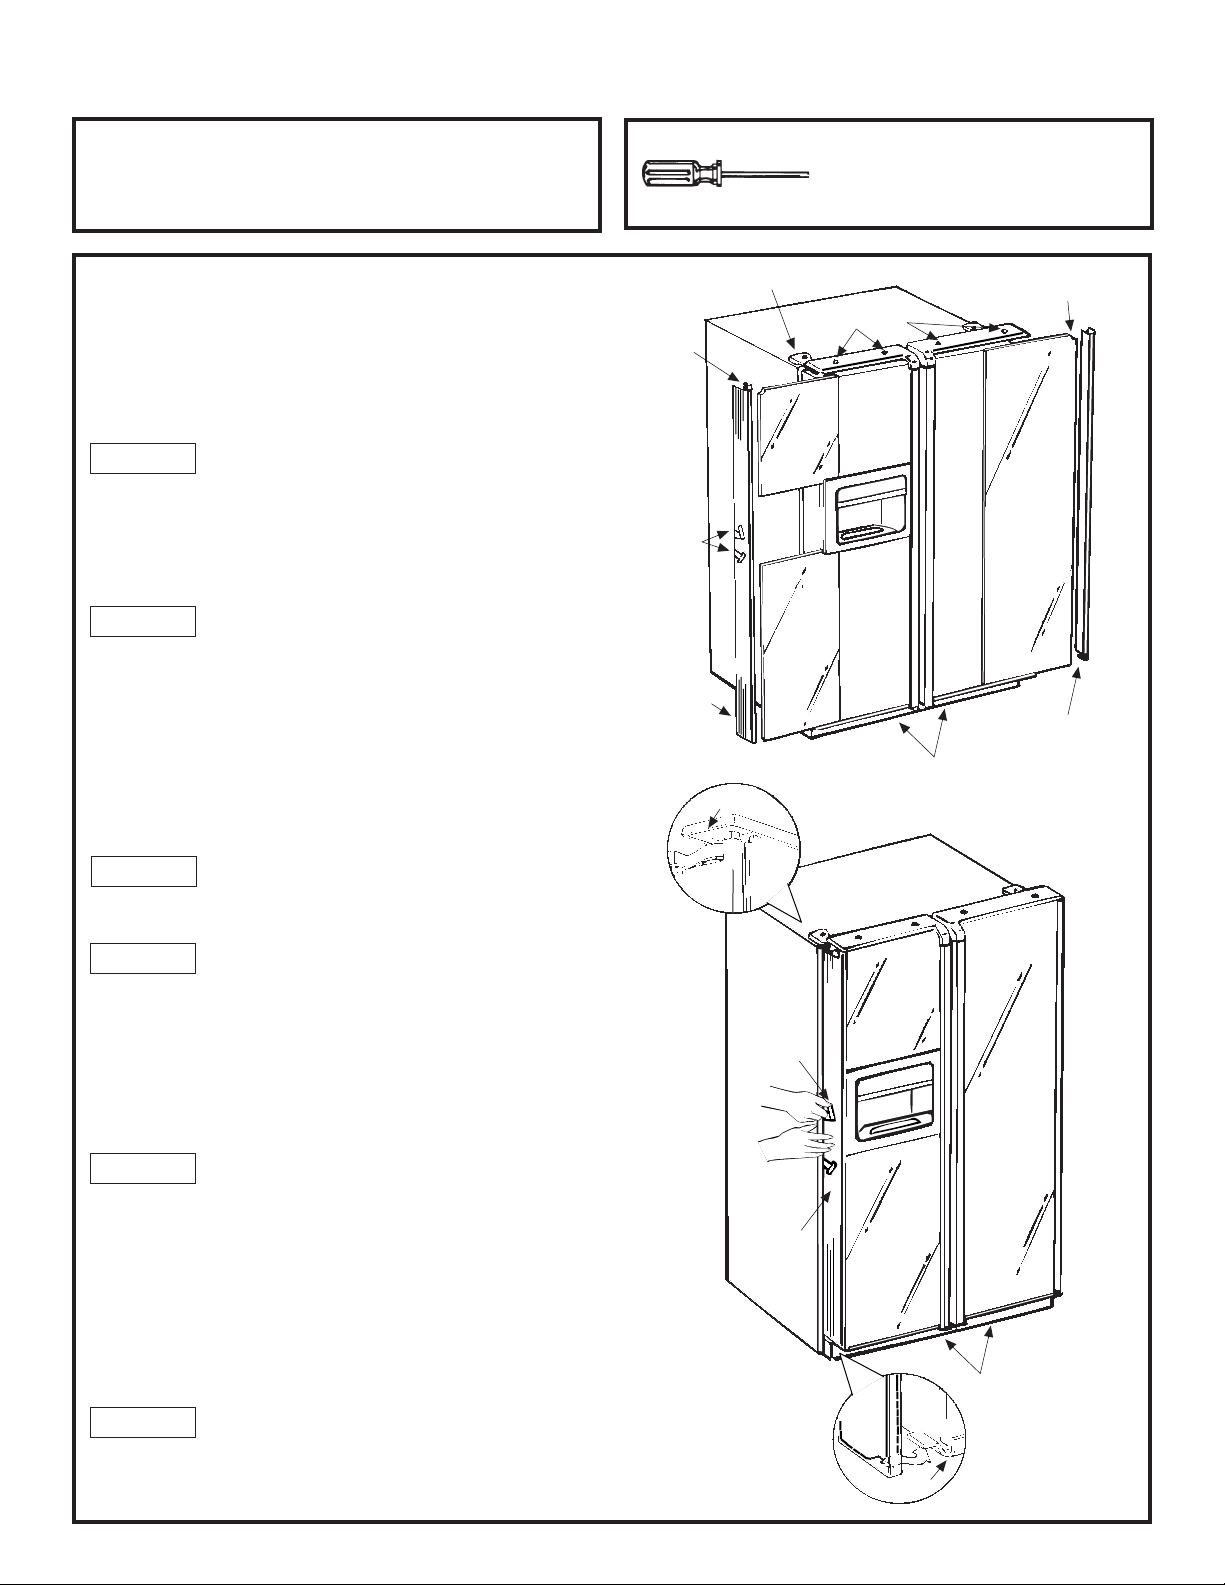
STEP 1: LOOSEN THE TOP TRIM
ON THE FREEZER AND FRESH
FOOD DOORS.
• Using a T-20 Torx driver, loosen the 2 screws attaching the top
trim about 1/4" (6 mm) for each door.
STEP 2: INSERT THE PANELS.
(REMOVE THE PROTECTIVE FILM FROM THE
PANELS BEFORE INSERTION.)
Top Freezer Panel and Fresh Food Panel
• Lift the top trim up 1/4" and carefully push the panel in until it
slides into the slot behind the door handle.
Bottom Freezer Panel
• Carefully push the panel in until it slides into the slot behind
the door handle.
Tools Needed For Installation:
T-20 Torx Driver
Hinge Cover Screw
Top Trim
Screws
Cut-Out
Blue
Tape
Trim
Bottom
Freezer
Panel
Side
Trim
Top Trim
Hinge Cover
Screw
Cut-Out
Fresh
Food
Panel
Side
Trim
Bottom
Trim
STEP 3: TIGHTEN THE 2 SCREWS ON
THE TOP TRIM.
(EACH DOOR)
STEP 4: INSTALL THE SIDE TRIM.
Do not remove the protective film on the outside of the side trim
until the side trim is installed.
• Fit the bottom of the side trim under the bottom trim as
illustrated.
• Hold the side trim against the front face of the panels and fit
the side trim under the top trim. Make sure the side trim is
fitted correctly before pulling the blue tape liner.
STEP 5: SECURE THE SIDE TRIM.
• Place one hand between the 2 blue pieces of tape liner and
hold the side trim firmly against the panels and the side of the
door.
• Pull the top blue tape liner up about 3" (76 mm), pressing the
trim with your hand as the adhesive is exposed. Then pull the
bottom blue tape liner down about 3" (76 mm). Follow the tape
with your hand, pressing the trim adhesive against the door.
• Continue pulling the tape liner loose, alternating between the
top and bottom and pressing the side trim against the door.
STEP 6: REMOVE THE PROTECTIVE
FILM FROM THE OUTSIDE OF THE
SIDE TRIM.
Side
Trim
Blue Tape
Liner
Blue Tape
Liner
Side
Trim
Bottom Trim
Bottom
Trim
Page 3
INSTALLING AND REMOVING PREVIOUSLY INSTALLED GE DECORATOR PANELS
In order to remove the decorator panels and replace with new
panels, you need to remove the handles. A T-20 Torx driver is
needed.
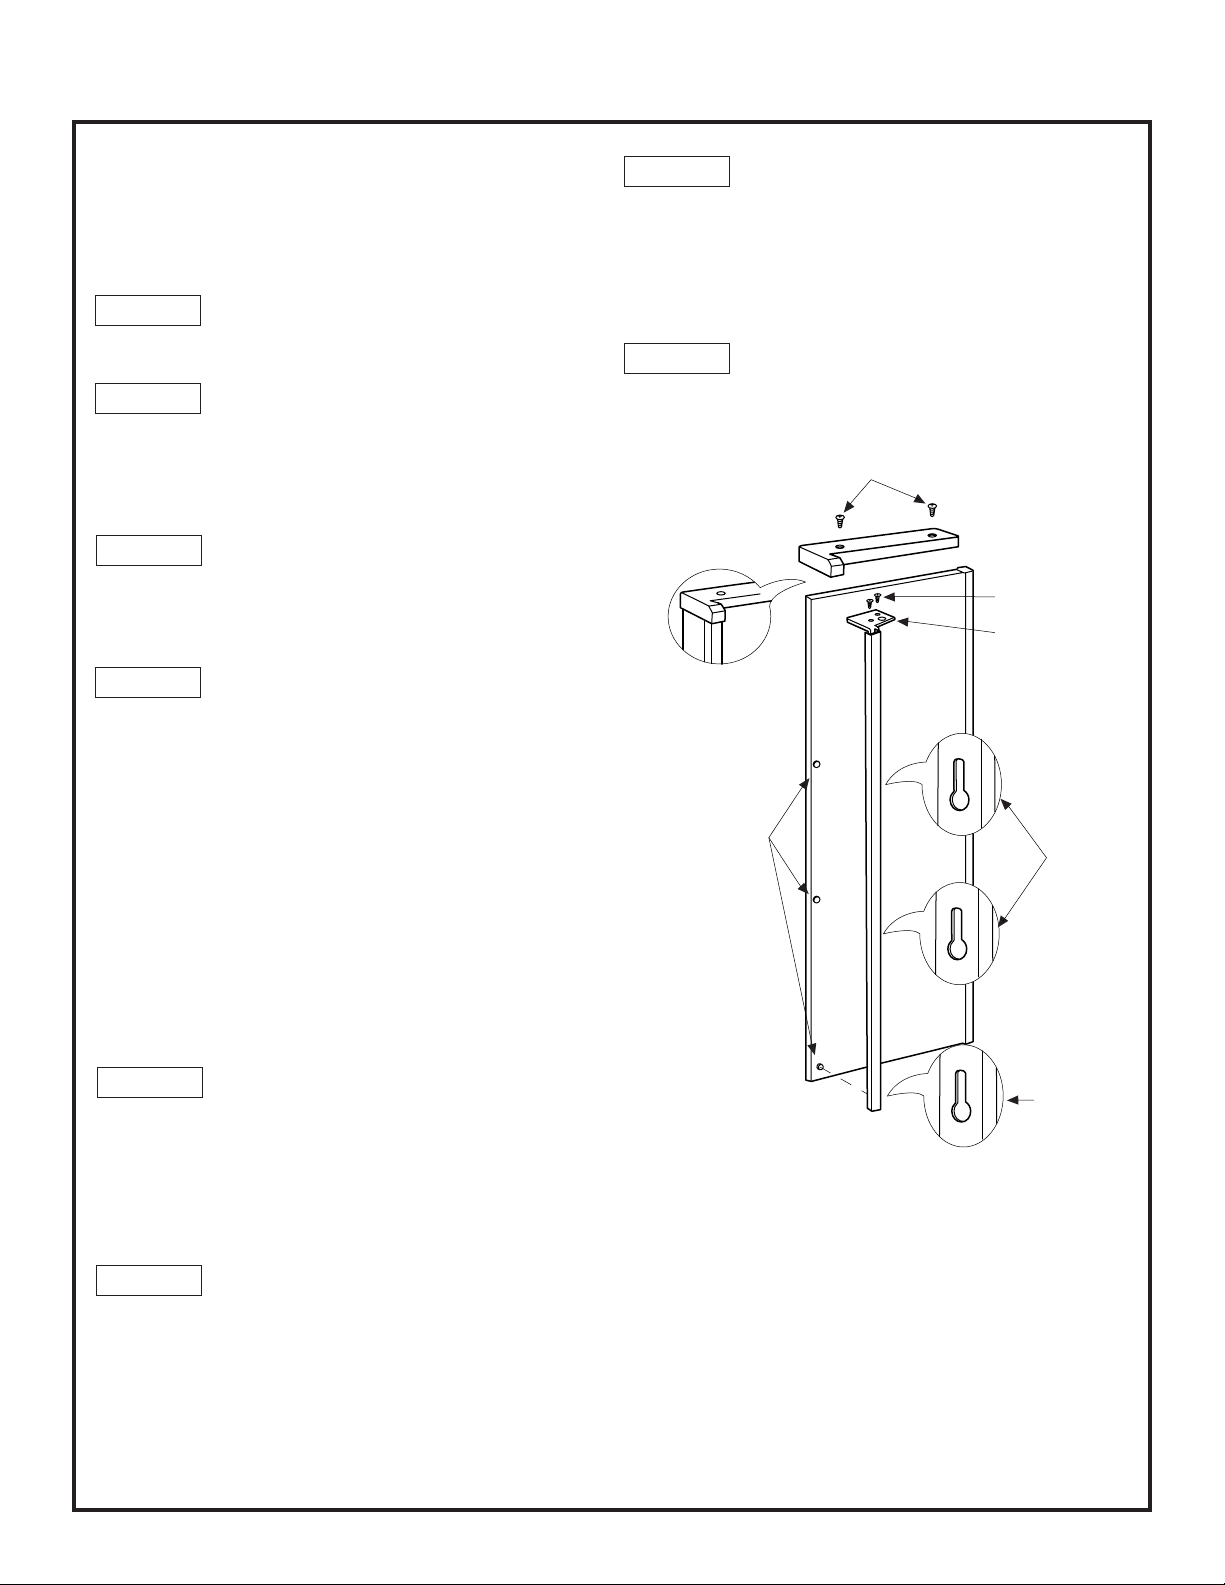
REMOVING THE HANDLES:
STEP 1: LOOSEN AND REMOVE THE
2 SCREWS IN THE TOP TRIM.
STEP 2: LOOSEN AND REMOVE THE
2 SCREWS IN THE BRACKET THAT
ATTACHES THE HANDLE TO THE
TOP OF THE DOOR.
STEP 3: GRIP THE HANDLE FIRMLY
AND SLIDE UPWARDS.
The keyhole slots on the Handle slide off the buttons on the
door.
STEP 4: OPEN THE DOOR AND SLIDE
OUT THE DECORATOR PANELS.
STEP 3: REPLACE THE TOP TRIM,
MAKING SURE IT FITS OVER THE
SIDE TRIM AND THAT THE LOCATING
TABS FIT THE INSIDE OF THE
HANDLE PROFILE.
STEP 4: REPLACE THE TOP TRIM
SCREWS AND TIGHTEN TO 30 IN-LBS
TORQUE.
Top Trim Screws
Bracket Screws
Bracket
INSERTING THE DOOR PANELS:
Before inserting the decorator panels, make sure they have
been routed out in the proper areas as shown in the Use &
Care Guide. Slide in the panels to perform a trial fit before
fastening down the Handle and Top Trim.
INSTALLING THE HANDLES:
Once the panels are fitted properly, install the Handle and
Top Trim.
STEP 1: SLIDE THE KEYHOLE SLOTS
ON THE HANDLE DOWN ONTO THE
BUTTONS MOUNTED TO THE FACE
OF THE DOOR.
Slide the Handle downward until the bracket at the top of the
Handle fits flush on the top of the door.
STEP 2: REPLACE THE 2 SCREWS IN
THE BRACKET THAT ATTACHES THE
HANDLE TO THE TOP OF THE DOOR
AND TIGHTEN THE SCREWS TO 45
IN-LBS TORQUE.
Buttons
Slots
Slot
CARE OF PANELS:
Clean using anti-static acrylic cleaner or a mild detergent (3%
in lukewarm water). Rinse thoroughly and blot dry with a
clean, damp cloth or chamois. (Paper towels should not be
used to wash or dry panels.) Typically-available cleaners
contain solvents, such as ammonia, that can damage or distort
the panels. Do not use!
For stainless steel panels, stainless steel cleaner is recommended for cleaning purposes. Using a soft cloth, wipe the
cleaner vertically following the grain of the steel.
Page 4
WARNING
STABILITY PRECAUTION
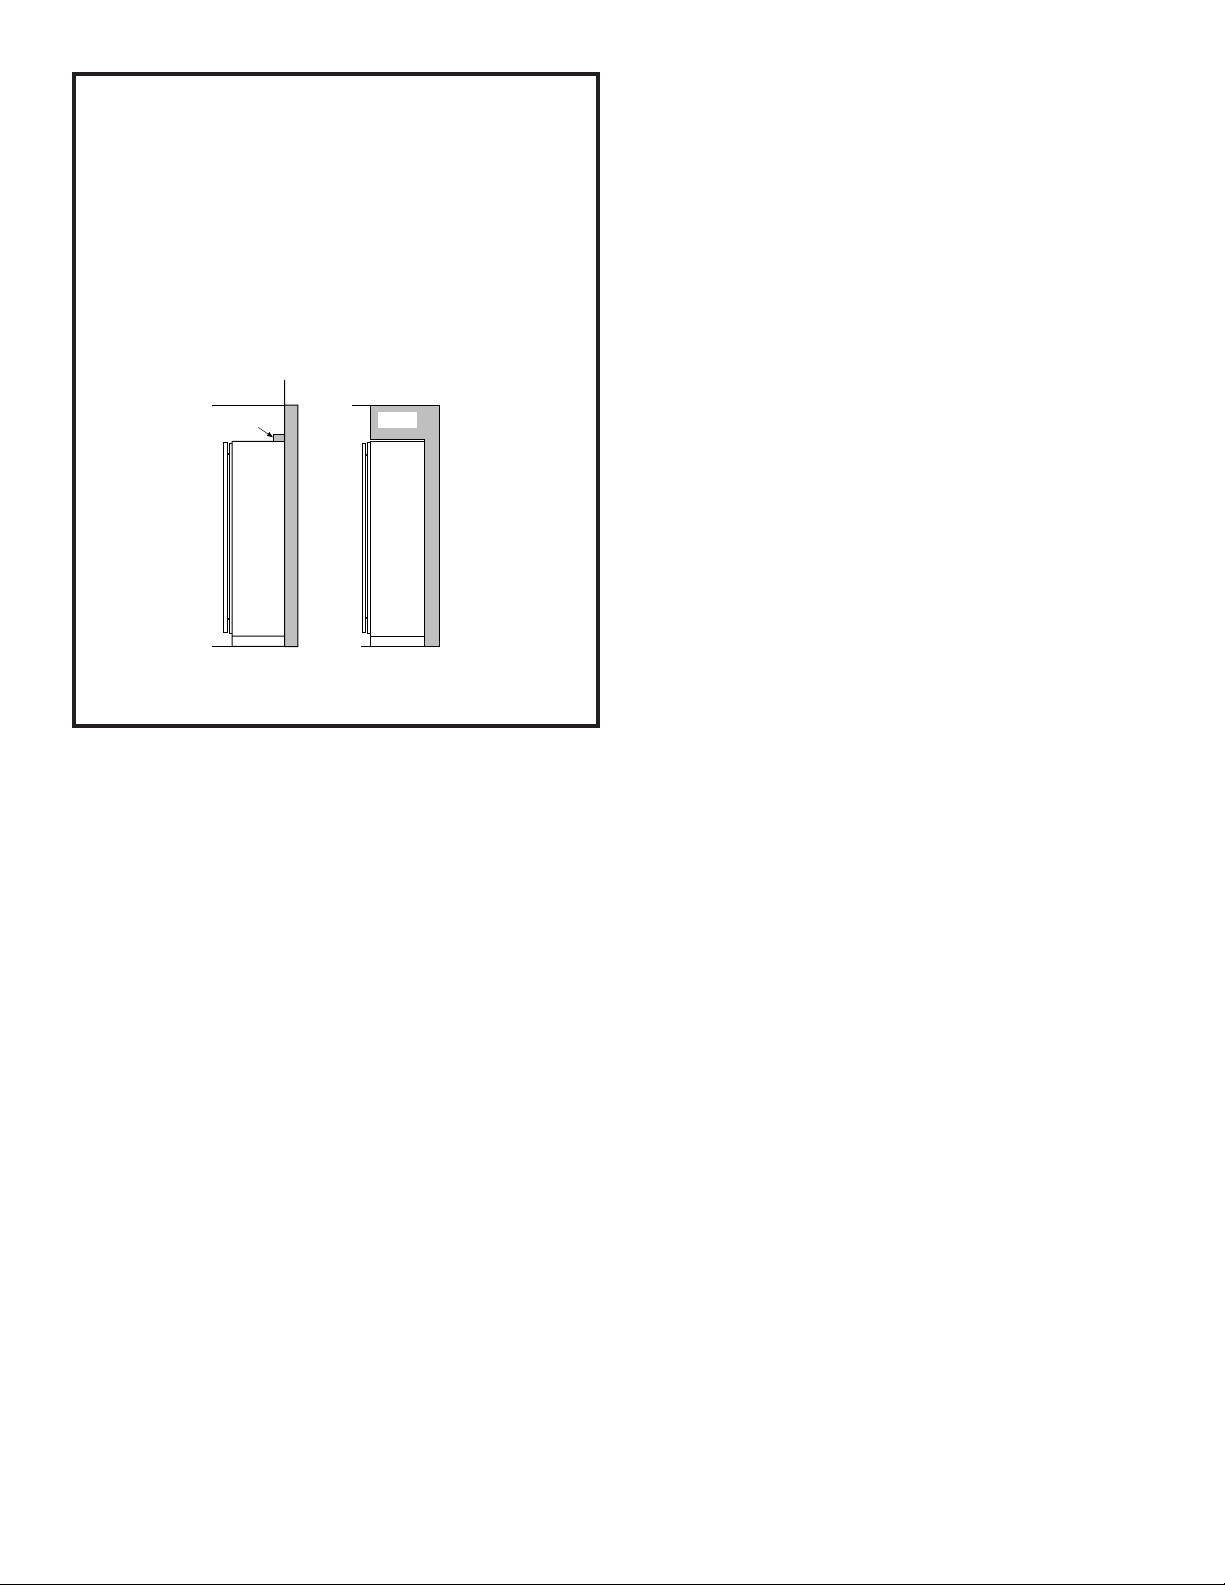
The refrigerator is much heavier with decorator door panels.
To prevent the refrigerator from tipping over, you must do
one of the following:
■■ Install the refrigerator in an alcove or wall recess with a
soffit height of 72-1/4” (1835 mm).
■■ Install a 2” x 4” wood block, the full width of the refrig-
erator. Secure the block with a minimum of three (3)
wood screws penetrating at least 3/4” (19 mm) into wall
studs.
Block
Side View
Soffit
Side View
Part No. 200D3397P002
Pub. No. 31-46066
Printed in U.S.A.
N.D. 923-45-04
 Loading...