

Page 1

GEAppliances.com
Advantium
Cooking controls ..................................... 12
Getting to know the Advantium .........10
Oven features ...........................................11
Safety ........................................................2–9
Speedcooking
Cooking tips .............................................. 14
GE Profile
®
Custom speedcook ................................ 17
My Recipes ........................................17- 19
Power level ................................................16
Repeat last .................................................17
Resume feature .......................................17
Speedcook cookware ...........................14
Speedcook-safe cookware ...................7
Oven
Things that are normal ........................ 13
Using the pre-set
speedcook menu ....................................15
Other Cooking Functions
Broiling and toasting ............................21
Convection baking .................................20
Warming .....................................................22
Proofing .......................................................22
Microwaving
Cook by time .............................................24
Cooking tips .............................................. 23
Defrost by food type .............................26
Defrost by time ........................................ 25
Defrosting tips ..........................................25
Add 30 Sec .................................................25
My Recipes .................................................25
Microwave power level(s) ...................24
Microwave-safe cookware ...................8
Precautions to avoid possible
exposure to excessive
microwave energy ....................................2
Sensor cooking ................................27, 28
Things that are normal ........................ 23
Using pre-set
microwave selections ...........................24
Other Features
Automatic fan ..........................................31
Automatic Night Light ..........................30
Auto Conversion...................................... 29
Beeper volume......................................... 29
Control lockout ........................................31
Clock .............................................................29
Cooking complete ..................................28
Delay Start .................................................30
Display On/Off ..........................................29
Help ...............................................................31
Reminder ....................................................29
Surface Light ............................................32
Temperature Units ................................. 30
Timer On/Off .............................................31
Turntable On/Off .....................................29
Vent Fan ......................................................32
Care and Cleaning
Cleaning the inside ........................32, 34
Cleaning the outside ............................. 34
Cooking trays and wire oven rack .33
Removable turntable ............................33
Replacing the cavity light ...................35
Replacing the surface light ................35
Troubleshooting
Problem Solver .................................37, 38
Consumer Support
Consumer Support .............. Back Cover
Warranty ....................................................39
Owner’s Manual
PSA9240
Write the model and serial numbers here:
Model # ___________________________
Serial # ___________________________
Advantium
Find these numbers on a label inside the
oven.
MFL38211622 49-40678-1 06-13 GE
Page 2
IMPORTANT SAFETY INSTRUCTIONS
READ ALL INSTRUCTIONS BEFORE USING
Advantium Oven
When using electrical appliances basic safety precautions should be followed, including the following:
WARNING:
microwave energy:
To reduce the risk of burns, electric shock, fire, injury to persons, or exposure to excessive
PRECAUTIONS TO AVOID POSSIBLE EXPOSURE TO
EXCESSIVE MICROWAVE ENERGY
(a) Do Not Attempt to operate this oven with the
door open since open-door operation can result
in harmful exposure to microwave energy. It
is important not to defeat or tamper with the
safety interlocks.
(b) Do Not Place any object between the oven
front face and the door or allow soil or cleaner
residue to accumulate on sealing surfaces.
Read all instructions before using this
appliance. When using electrical appliances,
basic safety precautions should be followed,
including the following:
Read and follow the specific precautions in the
Precautions to Avoid Possible Exposure to Excessive
Microwave Energy section above.
This appliance must be grounded. Connect only
to a properly grounded outlet. See the Grounding
Instructions section on page 8.
This microwave oven is UL listed for installation over
both gas (less than 60,000BTU) and electric ranges.
This over-the-range oven is designed for use over
ranges no wider than 36.s It may be installed over
both gas and electric cooking equipment.
Do not operate this appliance if it has a damaged
power cord or plug, if it is not working properly, or if
it has been damaged or dropped. If the power cord
is damaged, it must be replaced by General Electric
Service or an authorized service agent using a power
cord available from General Electric.
(c) Do Not Operate the oven if it is damaged. It is
particularly important that the oven door close
properly and that there is no damage to the:
(1) door (bent),
(2) hinges and latches (broken or loosened),
(3) door seals and sealing surfaces.
(d) The Oven Should Not be adjusted or repaired
by anyone except properly qualified service
personnel.
To reduce the risk of fire in the oven cavity:
³'RQRWRYHUFRRNIRRG&DUHIXOO\DWWHQGDSSOLDQFH
when paper, plastic or other combustible materials
are placed inside the oven while cooking.
³5HPRYHZLUHWZLVWWLHVDQGPHWDOKDQGOHVIURP
paper or plastic containers before placing them in
the oven.
³'RQRWXVHWKHRYHQIRUVWRUDJHSXUSRVHV'RQRW
leave paper products, cooking utensils or food in the
oven when not in use.
³'RQRWSRSSRSFRUQLQ\RXUPLFURZDYHRYHQXQOHVV
in a special microwave popcorn accessory or unless
you use popcorn labeled for use in microwave ovens.
³,IPDWHULDOVLQVLGHWKHRYHQLJQLWHNHHSWKHRYHQGRRU
closed, turn the oven off and disconnect the power
cord, or shut off power at the fuse or circuit breaker
panel. If the door is opened, the fire may spread.
³'RQRWXVHWKH6HQVRU)HDWXUHVWZLFHLQVXFFHVVLRQ
on the same food portion. If food is undercooked
after the first countdown, use COOK BY TIME for
additional cooking time.
³'RQRWXVHWKHRYHQWRGU\QHZVSDSHU
SAVE THESE INSTRUCTIONS
2
Page 3

IMPORTANT SAFETY INSTRUCTIONS
READ ALL INSTRUCTIONS BEFORE USING
IMPORTANT SAFETY INSTRUCTIONS
Advantium Oven
Be sure your appliance is properly installed
and grounded by a qualified technician in
accordance with the provided installation
instructions.
Install or locate this appliance only in
accordance with the provided installation
instructions.
Some products such as whole eggs and
VHDOHGFRQWDLQHUV³IRUH[DPSOHFORVHG
MDUV³DUHDEOHWRH[SORGHDQGVKRXOGQRWEH
heated in this oven. Such use of the oven
could result in injury.
Do not mount this appliance over a sink.
This oven is not approved or tested for
marine use.
This oven is UL listed for standard wall
installation above 36 inches.
Do not operate this appliance if it has been
damaged or dropped.
As with any appliance, close supervision is
necessary when used by children.
This appliance must only be serviced by
qualified service personnel. Contact nearest
authorized service facility for examination,
repair or adjustment.
Do not cover or block any openings on the
appliance.
Do not store this appliance outdoors.
'RQRWXVHWKLVSURGXFWQHDUZDWHU³IRU
example, in a wet basement, near a
swimming pool, near a sink or in similar
locations.
See door surface cleaning instructions in
the Care and Cleaning of the Oven section
of this manual.
If materials inside the oven ignite, keep the
oven door closed, turn the oven off and
shut off power at the fuse or circuit breaker
panel. If the door is opened, the fire may
spread.
The wire oven rack should not be used
for speedcook or microwave cooking to
prevent arcing.
Use this appliance only for its intended use
as described in this manual.
Do not use corrosive chemicals or vapors in
this appliance.
This oven is specifically designed to heat,
dry or cook food, and is not intended for
laboratory or industrial use.
Do not cover racks or any other part of
the oven with metal foil. This will cause
overheating of the oven.
Oversized foods or oversized metal utensils
should not be used in oven as they may
create a fire or risk of electric shock.
Do not use paper products when
appliances is operated in modes other than
microwave.
SAVE THESE INSTRUCTIONS
3
Page 4

IMPORTANT SAFETY INSTRUCTIONS
READ ALL INSTRUCTIONS BEFORE USING
IMPORTANT SAFETY INSTRUCTIONS
Advantium Oven
7KHUPRPHWHU³'RQRWXVHUHJXODU
cooking or oven thermometers when
cooking by microwave. The metal and
mercury in these thermometers could
cause arcing and possible damage to
the oven. Do not use a thermometer
in food you are microwaving unless
the thermometer is designed or
recommended for use in the microwave
oven.
Do not clean with metal scouring pads.
Pieces can burn off the pad and touch
electrical parts involving risk of electric
shock.
Do not store any materials, other than our
recommended accessories, in this oven
when not in use.
Do not let cord hang over edge of table or
counter.
Keep power cord away from heated
surfaces.
Do not immerse power cord or plug in
water.
Do not operate the oven without the
turntable in place. The turntable must
be unrestricted so it can turn.
During and after use, do not touch,
or let clothing or other flammable
materials contact any interior area
of the oven; allow sufficient time for
cooling first.
Potentially hot surfaces include the
oven door, floor, walls, oven rack and
turntable.
It is important to keep the area clean
where the door seals against the
microwave. Use only mild, non-abrasive
detergents applied with a clean sponge or
soft cloth. Rinse well.
Do not store anything directly on top of
the microwave oven surface when the
microwave oven is in operation.
Keep the oven free from grease buildup.
Per USDA, cook meat to an INTERNAL
temperature of at least 160°F, and
poultry to an INTERNAL temperature
of at least 180°F. Cooking to these
temperatures usually protects
against foodborne illness. For more
information, see www.foodsafety.gov.
ARCING
Do not store rack in
microwave. Rack is
ONLY to be used for
Convection Bake,
Warm and Proof.
4
Arcing can occur during both speedcooking and microwave cooking. If you see arcing,
press the Cancel/Off pad and correct the problem.
Arcing is the microwave term for sparks in
the oven. Arcing is caused by:
Metal or foil touching the side of the
oven.
Foil not molded to food (upturned edges
act like antennas).
Use foil only as recommended in this
manual.
Metal, such as twist-ties, poultry pins, or
gold-rimmed dishes, in the oven.
Metal cookware or the wire oven
rack used during either speedcook or
microwave cooking (except for the pans
provided with the oven).
Recycled paper towels containing small
metal pieces being used in the oven.
SAVE THESE INSTRUCTIONS
Page 5

IMPORTANT SAFETY INSTRUCTIONS
READ ALL INSTRUCTIONS BEFORE USING
Advantium Oven
FOODS
When microwaving, place all foods and
containers on the clear glass tray.
Do not pop popcorn in your oven unless in
a special microwave popcorn accessory or
unless you use popcorn labeled for use in
microwave ovens.
Do not boil eggs in this oven. Pressure will
build up inside egg yolk and will cause it to
burst, possibly resulting in injury.
Do not operate oven without food inside.
This may cause damage to the oven. It
increases the heat around the magnetron
and can shorten the life of the oven.
Foods with unbroken outer “skin” such as
potatoes, hot dogs, sausages, tomatoes,
apples, chicken livers and other giblets,
and egg yolks should be pierced to allow
steam to escape during cooking.
Don’t defrost frozen beverages in
narrow-necked bottles (especially
carbonated beverages). Even if the
container is open, pressure can build up.
This can cause the container to burst,
possibly resulting in injury.
Foods cooked in liquids (such as pasta)
may tend to boil more rapidly than
foods containing less moisture. Should
this occur, refer to the Care
and Cleaning of the Oven section for
instructions on how to clean the inside
of the oven.
Hot foods and steam can cause burns.
Be careful when opening any containers
of hot food, including popcorn bags,
cooking pouches and boxes. To prevent
possible injury, direct steam away from
hands and face.
Do not overcook potatoes. They could
dehydrate and catch fire, causing
damage to your oven.
Avoid heating baby food in glass jars,
even with the lid off. Make sure all infant
food is thoroughly cooked. Stir food to
distribute the heat evenly. Be careful
to prevent scalding when warming
formula. The container may feel cooler
than the formula really is. Always test
the formula before feeding the baby.
Do not attempt to deep fry in the oven.
SUPERHEATED WATER
Liquids, such as water, coffee or tea, are
able to be overheated beyond the boiling
point without appearing to be boiling. Visible
bubbling or boiling when the container is
removed from the microwave oven is not
always present. THIS COULD RESULT IN VERY
HOT LIQUIDS SUDDENLY BOILING OVER
WHEN THE CONTAINER IS DISTURBED OR A
SPOON OR OTHER UTENSIL IS INSERTED INTO
THE LIQUID.
To reduce the risk of injury to persons:
³'RQRWRYHUKHDWWKHOLTXLG
³6WLUWKHOLTXLGERWKEHIRUHDQG
halfway through heating it.
³'RQRWXVHVWUDLJKWVLGHGFRQWDLQHUV
with narrow necks.
³$IWHUKHDWLQJDOORZWKHFRQWDLQHU
to stand in the microwave oven for
a short time before removing the
container.
³8VHH[WUHPHFDUHZKHQLQVHUWLQJ
a spoon or other utensil into the
containe
r.
SAVE THESE INSTRUCTIONS
5
Page 6
IMPORTANT SAFETY INSTRUCTIONS
READ ALL INSTRUCTIONS BEFORE USING
Advantium Oven
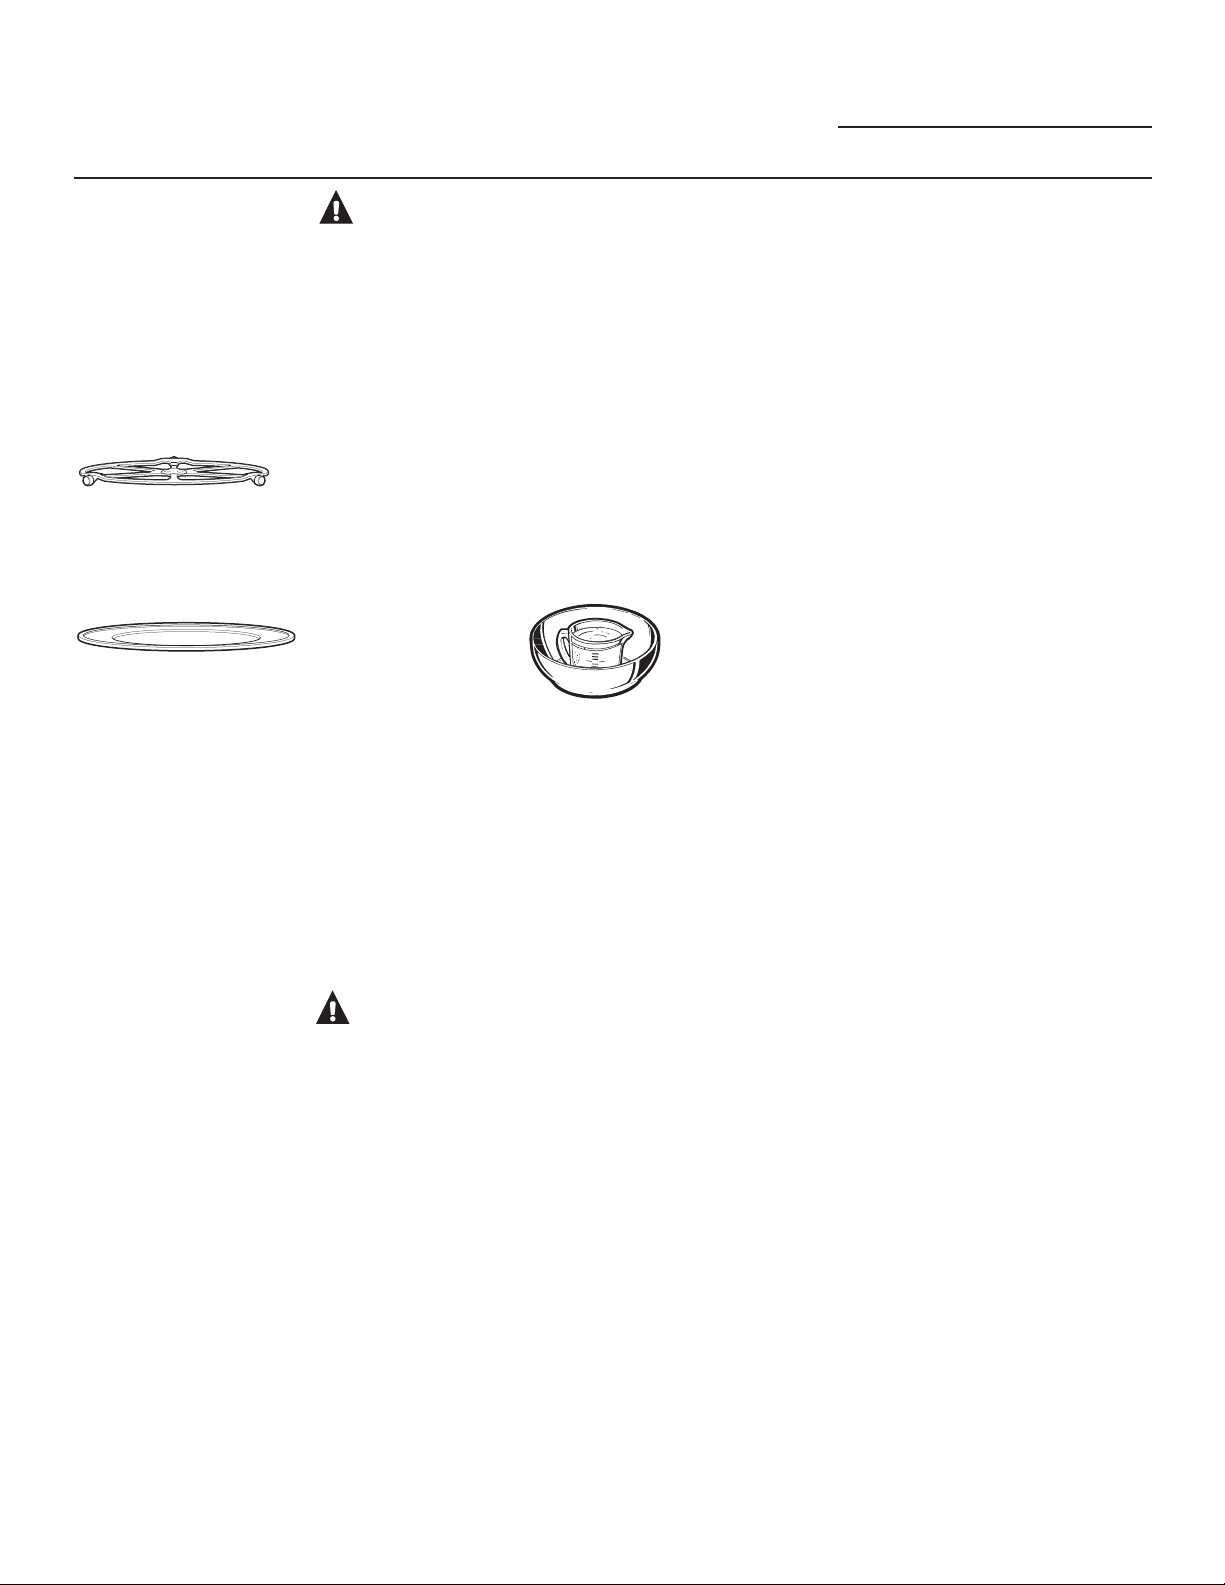
Microwavesafe
cookware
The turntable must
always be in place when
using the oven.
The clear glass tray
should always be in place
when microwaving.
WARNING!
Make sure to use suitable cookware during microwave cooking. Most glass casseroles,
cooking dishes, measuring cups, custard cups, pottery or china dinnerware which does not
have metallic trim or glaze with a metallic sheen can be used. Some cookware is labeled
“suitable for microwaving.”
Do not use the wire oven rack for
microwave.
Place food or microwavable container
directly on the clear glass tray to cook
your food.
Use of a metal tray during microwave
cooking will result in inferior cooking
performance.
If you are not
sure if a dish
is microwavesafe, use this
test: Place both
the dish you are
testing and a
glass measuring
cup filled with 1
cup of water in
the oven. Set the measuring cup either
in or next to the dish. Microwave 30-45
seconds at high. If the dish heats, it
should not be used for microwaving.
If the dish remains cool and only the
water in the cup heats, then the dish
is microwave-safe.
How to test for a
microwave-safe dish.
CAUTION: Burn Risk
Cookware may become hot because
of heat transferred from the heated food.
Oven mitts may be needed to handle the
cookware.
Use foil only as directed in this manual.
When using foil in the oven, keep the foil
at least 1” away from the sides of the
oven.
If you use a meat thermometer while
cooking, make sure it is safe for use
in microwave ovens.
Some foam trays (like those that meat
is packaged on) have a thin strip of
metal embedded in the bottom. When
microwaved, the metal can burn the floor
of the oven or ignite a paper towel.
Do not use recycled paper products.
Recycled paper towels, napkins and
waxed paper can contain metal flecks
which may cause arcing or ignite.
Paper products containing nylon or nylon
filaments should be avoided,
as they may also ignite.
Paper towels, waxed paper and plastic
wrap can be used to cover dishes in
order to retain moisture and prevent
spattering. Be sure to vent plastic wrap
so steam can escape.
Not all plastic wrap is suitable for use
in microwave ovens. Check the package
for proper use.
“Boilable” cooking pouches and tightly
closed plastic bags should be slit, pierced
or vented as directed by package
instructions. If they are not, plastic
could burst during or immediately after
cooking, possibly resulting in injury. Also,
plastic storage containers should be at
least partially uncovered because they
form a tight seal. When cooking with
containers tightly covered with plastic
wrap, remove covering carefully and
direct steam away from hands and face.
3ODVWLFFRRNZDUH³3ODVWLFFRRNZDUH
designed for microwave cooking is very
useful, but should be used carefully. Even
microwave-safe plastic may not be as
tolerant of overcooking conditions
as glass or ceramic materials. Plastic
may soften or char if subjected to
short periods of overcooking. In longer
exposures to overcooking, the food
and cookware could ignite.
Follow these guidelines:
1. Use microwave-safe plastics only,
and use them in strict compliance
with the cookware manufacturer’s
recommendations.
2. Do not microwave empty containers.
3. Do not permit children to use plastic
cookware without adult supervision.
6
SAVE THESE INSTRUCTIONS
Page 7
IMPORTANT SAFETY INSTRUCTIONS
READ ALL INSTRUCTIONS BEFORE USING
Advantium Oven
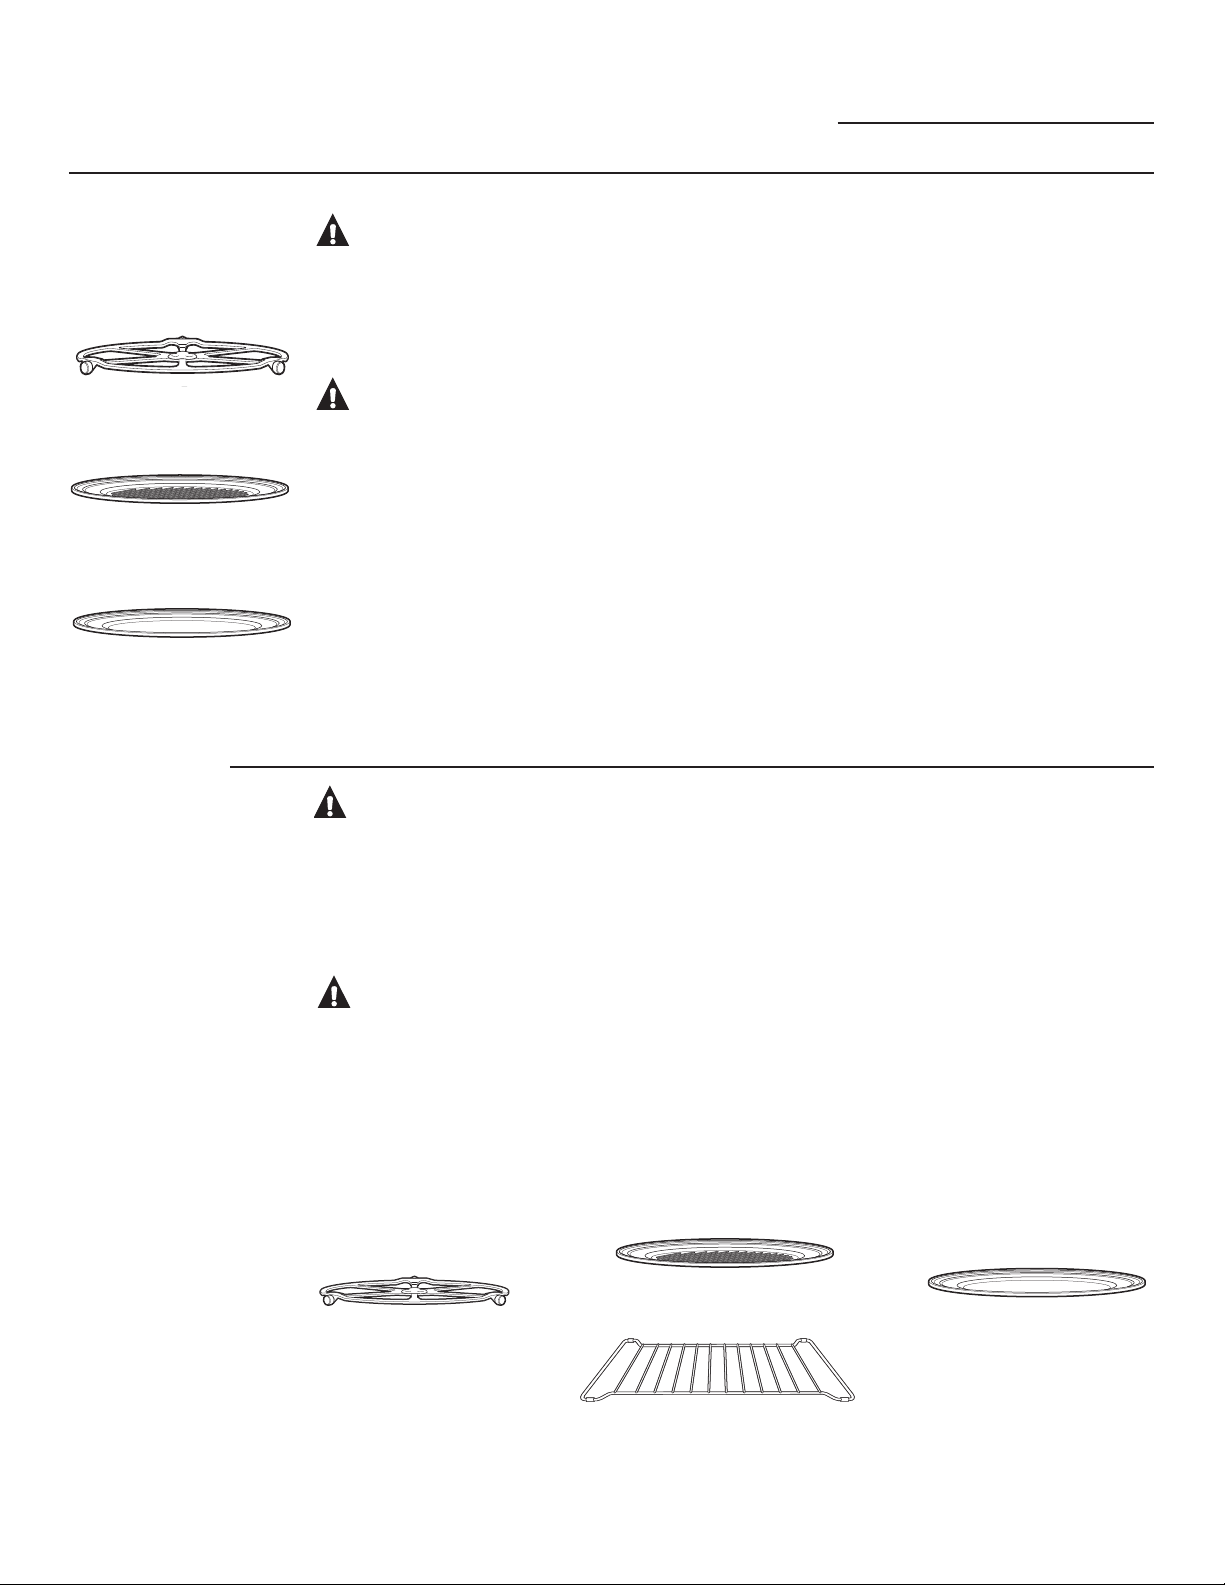
Oven-safe
cookware for
Speedcooking
The turntable must
always be in place
when using the oven.
Put food directly on
the metal grill tray to
speedcook.
Put food directly on the
metal tray to speedcook,
convection bake, warm or
toast.
CAUTION: Burn Risk
The oven and door will get very hot
when speedcooking.
Cookware will become hot. Oven mitts
will be needed to handle the cookware.
WARNING: Fire Risk
Do not use coverings, containers
or cooking/roasting bags made
of foil, plastic, wax or paper when
speedcooking.
Do not cover the turntable, metal trays or
any part of the oven with metal foil. This
will cause arcing in the oven.
Use the metal tray in the same way
you would use a shallow baking pan or
baking tray.
Do not use the wire oven rack for
speedcook.
Place food directly on the metal trays
when cooking unless prompted by the
oven to do otherwise.
Any non-metal oven-safe dish can be
used in your oven. Place them directly on
the trays.
Use of the clear glass tray when
speedcooking will result in inferior
cooking performance and possible
cracking of the glass tray.
Use only the metal trays specified for use
with this oven. Other metal trays are not
designed for use with this oven and will
result in inferior cooking performance.
Oven-safe
cookware
for
Convection
Baking,
Broiling,
Warming,
Proofing &
Toasting
CAUTION: Burn Risk
The oven and door will get very hot when
convection baking, broiling, warming or
toasting.
Cookware will become hot. Oven mitts
will be needed to handle the cookware.
WARNING: Fire Risk
Do not cover dishes or use plastic
containers, plastic cooking/roasting
bags, plastic wrap, wax paper or paper
when broiling or toasting.
Use the metal tray in the same way
you would use a shallow baking pan
or baking tray.
Put food directly on the
The turntable must
always be in place when
using the oven.
Put food directly on the metal tray or in the
appropriate dish and place on wire oven
metal grill tray as required
to broil.
rack when baking or warming.
Use the wire oven rack when convection
baking or warming.
Place food directly on the metal trays
when cooking unless the recipe requires
a dish.
Any oven-safe dish can be used in
your oven. Place them directly
on the trays.
Use of the clear glass tray when
convection baking, broiling, warming
or toasting will result in inferior cooking
performance.
Put food or oven-safe
cookware directly on the
metal tray to convection
bake, warm or toast.
SAVE THESE INSTRUCTIONS
7
Page 8
IMPORTANT SAFETY INSTRUCTIONS
READ ALL INSTRUCTIONS BEFORE USING
Advantium Oven
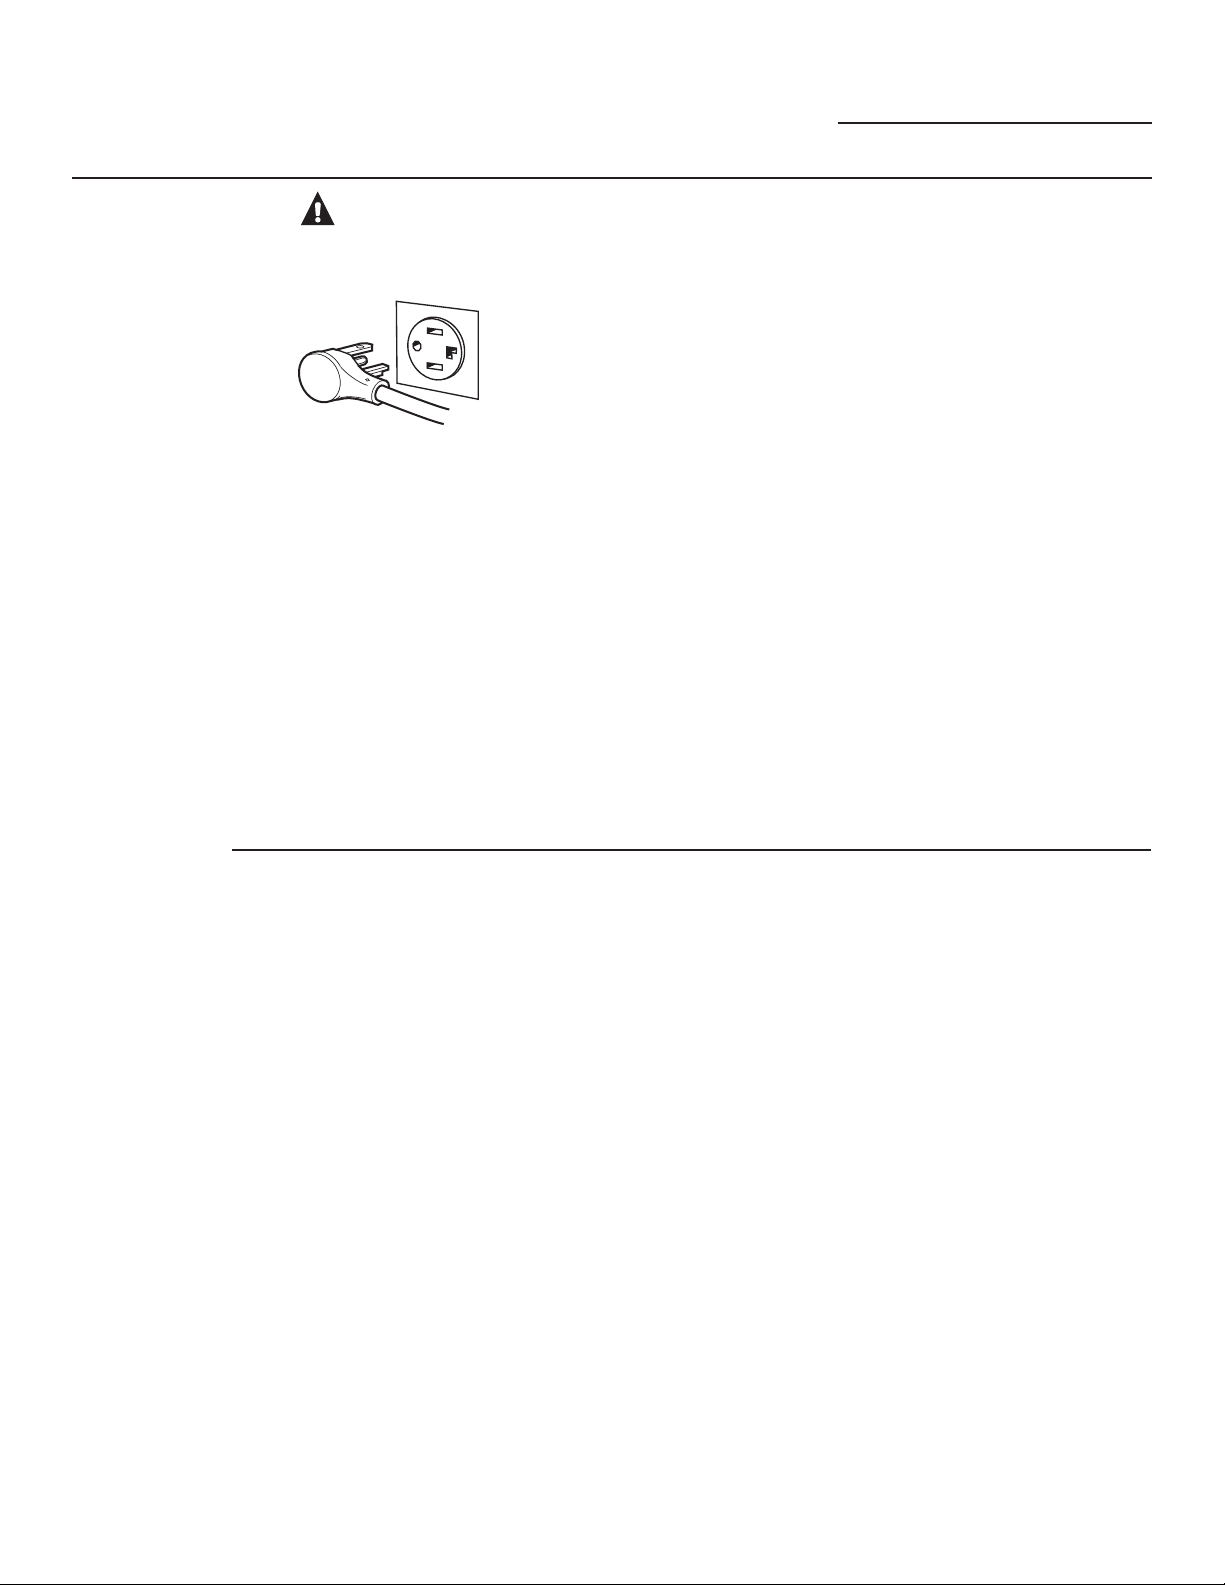
Grounding
Instructions
WARNING!
Improper use of the grounding plug can result in a risk of electric shock.
This appliance must
be grounded. In the
event of an electrical
short circuit,
grounding reduces
the risk of electric
Ensure proper ground
exists before use.
This appliance is equipped with a power cord
having a grounding wire with a grounding
plug.
The plug must be plugged into an outlet that is
properly installed and grounded.
Consult a qualified electrician or service
technician if the grounding instructions are not
completely understood, or if doubt exists as to
whether the appliance is properly grounded.
If the outlet is a standard 3-prong wall outlet,
it is your personal responsibility and obligation
to have it replaced with a properly grounded
30 ampere, 4-prong wall outlet.
shock by providing
an escape wire for
the electric current.
Do not under any circumstances cut or remove
the ground prong from the power cord.
Do not use an adapter plug with this appliance.
Do not use an extension cord with this
appliance. If the power cord is too short, have
a qualified electrician or service technician
install an outlet near the appliance.
For best operation, plug this appliance into its
own electrical circuit to prevent flickering of
lights, blowing of fuse or tripping of circuit
breaker.
The Vent Fan
The fan will operate automatically under
certain conditions (see Vent Fan section). Take
care to prevent the starting and spreading of
accidental cooking fires while the vent fan is in
use.
Clean the underside of the Advantium often.
Do not allow grease to build up on the
Advantium or the fan filters.
In the event of a grease fire on the surface
units below the Advantium, smother a
flaming pan on the surface unit by covering
the pan completely with a lid, a cookie sheet
or a flat tray.
Use care when cleaning the vent fan filters.
Corrosive cleaning agents, such as lyebased oven cleaners, may damage the
filters.
When preparing flaming foods under the
Advantium, turn the fan on.
Never leave surface units beneath your
Advantium unattended at high heat
settings. Boilovers cause smoking and
greasy spillovers that may ignite and spread
if the Advantium vent fan is operating. To
minimize automatic fan operation, use
adequate sized cookware and use high heat
on surface units only when necessary.
8
SAVE THESE INSTRUCTIONS
Page 9

IMPORTANT SAFETY INSTRUCTIONS
READ ALL INSTRUCTIONS BEFORE USING
Advantium Oven
WARNING
PACEMAKERS
Most pacemakers are shielded from interference from electronic products, including microwaves.
However, patients with pacemakers may wish to consult their physicians if they have concerns.
READ AND FOLLOW THIS SAFETY INFORMATION CAREFULLY.
SAVE THESE INSTRUCTIONS
Optional kits
Available at extra cost from your GE supplier.
Filler Panel Kits
-;:+³:KLWH
-;%/³%ODFN
When replacing a 36” range hood, filler
panel kits fill in the additional width to
provide a custom built-in appearance.
For installation between cabinets only;
not for end-of-cabinet installation.
Each kit contains two 3” wide filler
panels.
Filter Kits
-;'³5HFLUFXODWLQJ&KDUFRDO
Filter Kit
Filter kits are used when the oven
cannot be vented to
the outside.
See back cover to order by phone or
at ge.com.
9
Page 10
Getting to Know the Advantium
Advantium Oven
Getting to know
the Advantium
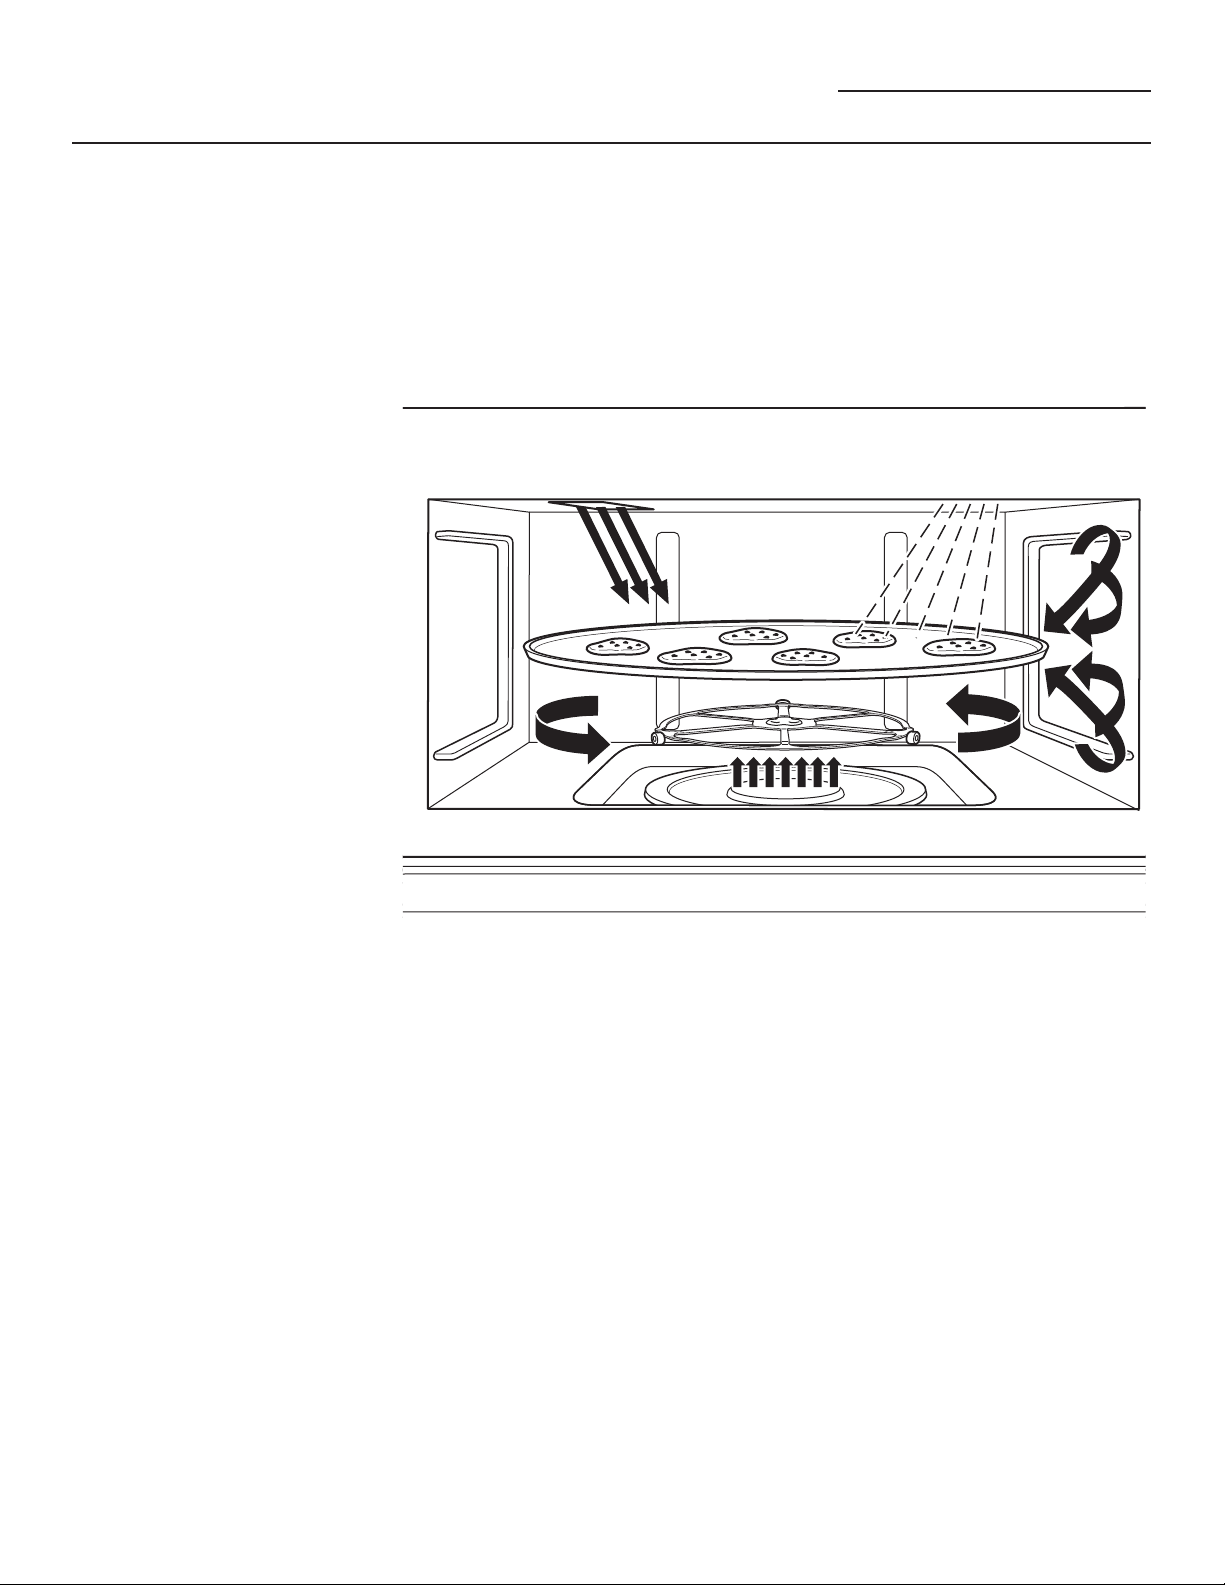
The Advantium oven uses
breakthrough Speedcook technology
to harness the power of light. The
Advantium oven cooks the outside
of foods much like conventional
radiant heat, while also penetrating
the surface so the inside cooks
simultaneously.
While halogen light is the primary
source of power, a convection system
and ceramic heater assist in the
cooking, with a “microwave boost”
added in some cooking algorithms.
Food cooks evenly and fast, retaining
its natural moisture.
10
The Advantium oven is capable of
speedcooking, convection baking,
broiling, toasting, warming, proofing
and microwaving. The Speedcook
feature is the biggest benefit of the
Advantium oven.
No preheating is required to
speedcook. Place the food in the oven
and start cooking immediately. Time
is saved because there is no preheat
and because speedcook cooks faster.
Page 11
Oven Features
Advantium Oven
Oven
features
Throughout this manual, features and appearance may vary from your model.
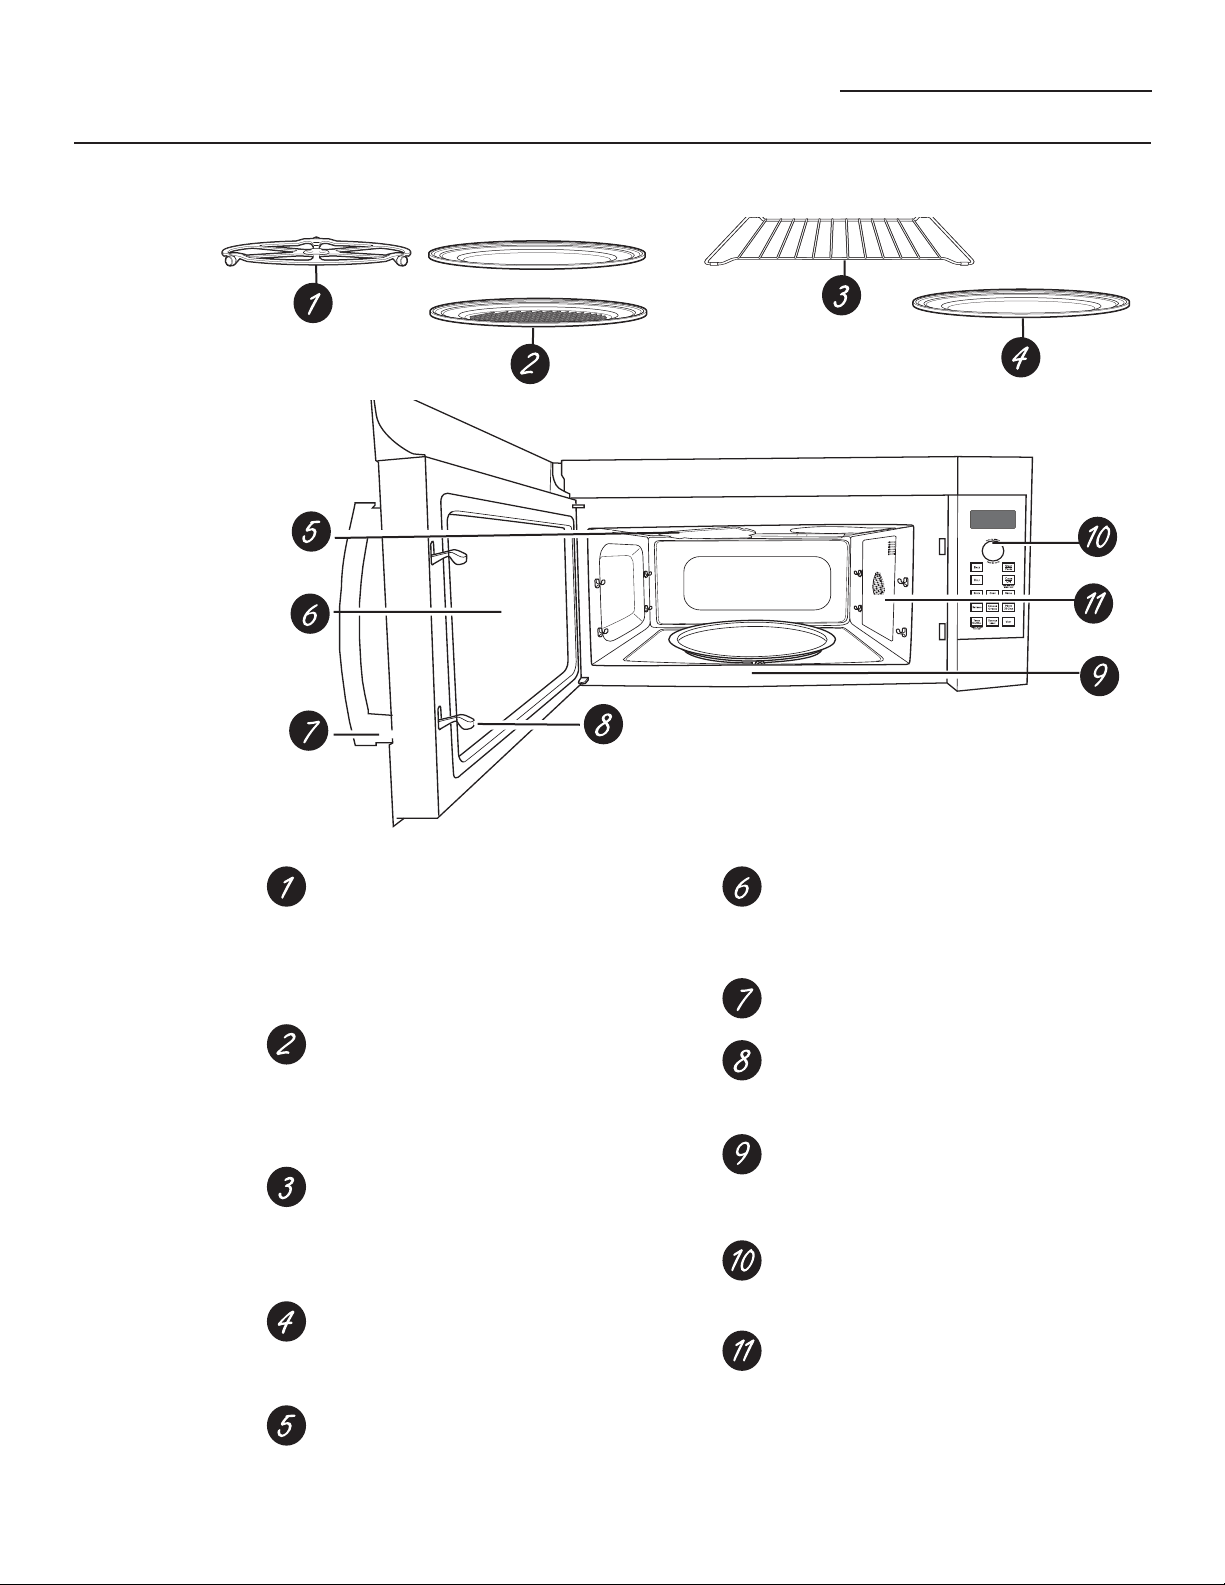
Turntable
The turntable must always be in place,
on the oven floor, for all cooking. Be
sure the turntable is seated securely
over the spindlein the center of the
oven.
Metal Tray or Metal Grill Tray
Put food directly on the metal tray
or metal grill tray and place on the
turntable when using the speedcook,
broil, and toast.
Wire Oven Rack
Put food directly on a metal tray or in
an oven-safe dish on the wire oven
rack only when convection baking or
warming.
Clear Glass Tray
Place on turntable when using microwave
features. Place food or microwave-safe
cookware directly on tray.
Upper Halogen Lamps
Two 1200W halogen lamps cook food
from above in speedcook, broil and toast.
Window
Allows cooking to be viewed while
keeping microwaves confined in the
oven.
Door Handle
Pull to open the door.
Door Latches
The door must be securely latched for
the oven to operate.
Lower Ceramic Heater
One 500W ceramic heater cooks food
from the bottom in speedcook, broil
and toast.
Control Panel
The pads used to operate the oven are
located on the control panel.
Convection System
One 1550W heating element cooks
food with a convection fan circulating
the hot air throughout the cavity in
speedcook, broil, convection bake,
toast and warm.
11
Page 12
Controls
Advantium Oven
Cooking
controls
With your Advantium oven, you can cook with high-intensity halogen lights, ceramic heaters, convection
heating element, and/or conventional microwave energy.
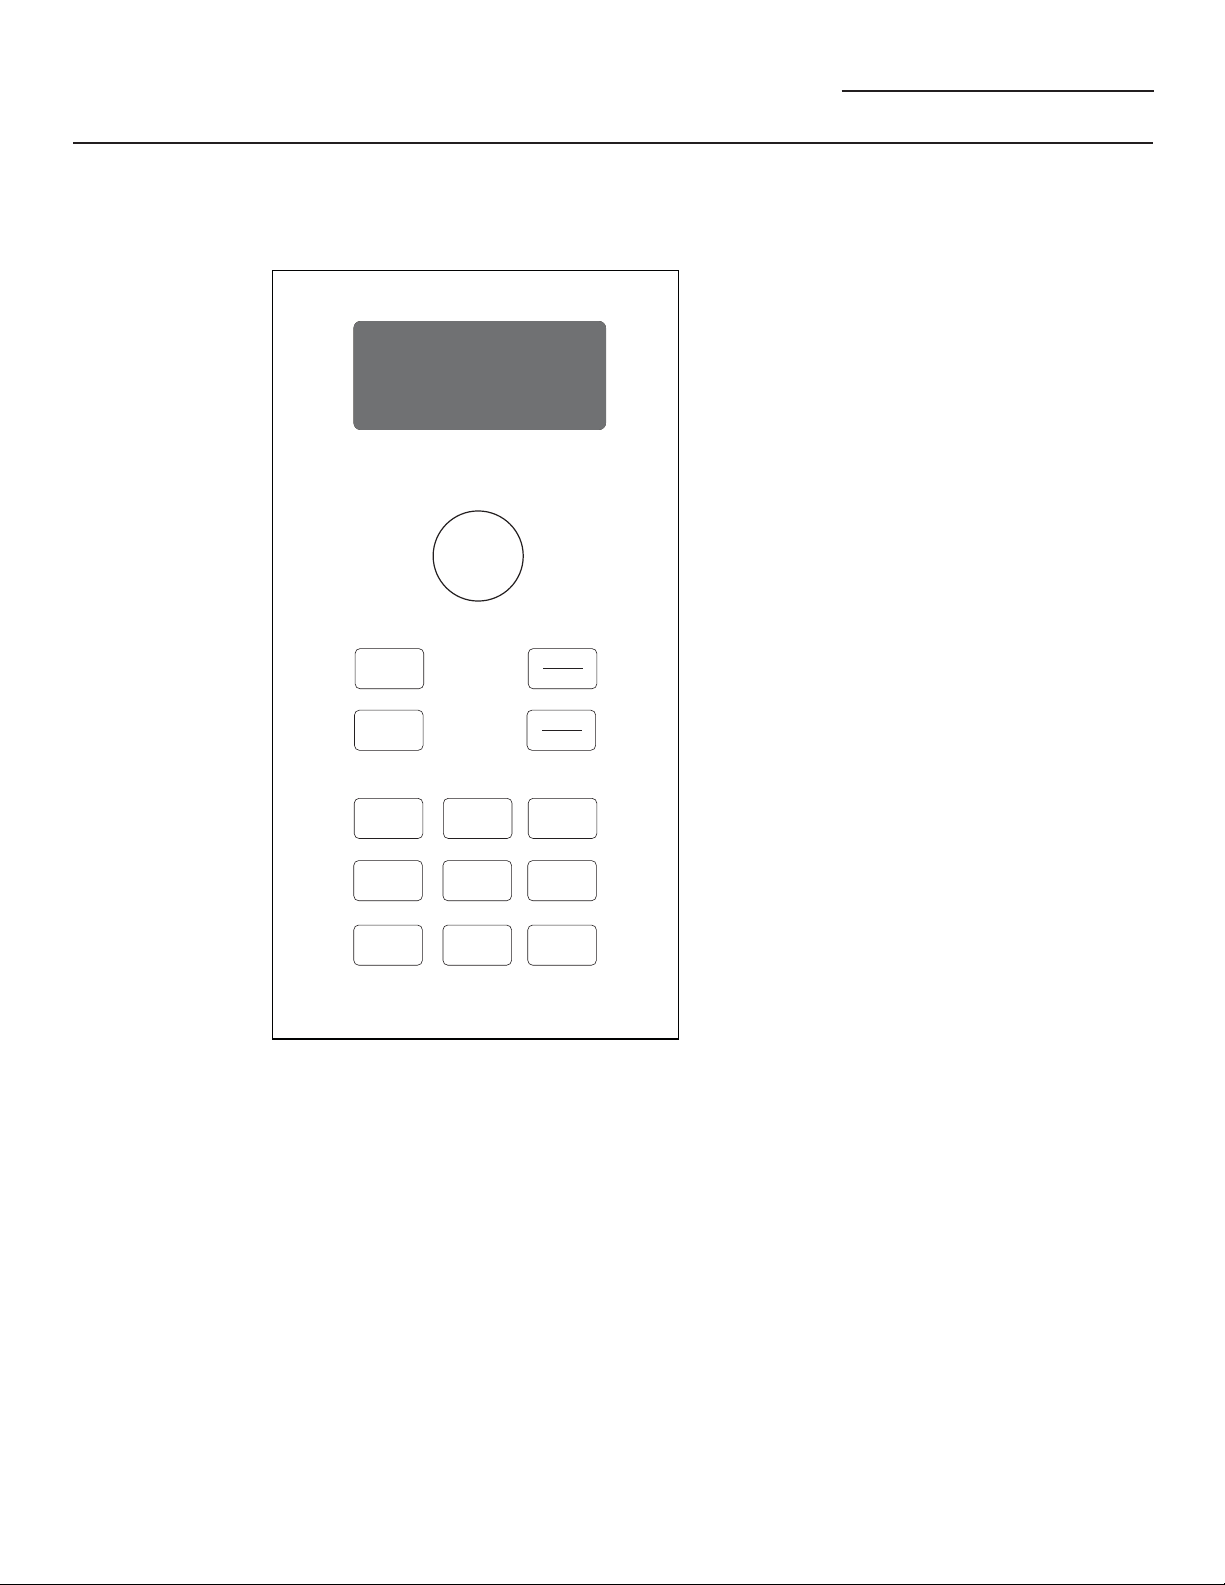
DISPLAY
Shows feature selections and information
about the oven when in use.
Start/Pause
Press this pad to start or pause any cooking
function.
Cancel/Off
Press this pad to cancel ALL oven programs
S
o
e
t
l
e
n
c
r
u
T
t
except clock, auto night light, timer, vent fan,
and surface light.
Speed Cook
P
r
e
s
r
e
t
n
s
E
t
o
Press this pad to access the pre-set
speedcook menu or to set your own
speedcook program.
Back
Start
Pause
Convection Bake
Press this pad to use convection bake.
Help
Cancel
Off
Lock Controls
Hold 3 Sec
Microwave
Press this pad to access the microwave
menu or to set your own microwave
Speed
Cook
Convection
Bake
Micro
wave
program.
Settings
Settings Options
Timer
On/Off
Surface
Light
Add
30 Sec
Vent Fan
Press this pad to set the clock and access
Turntable On/Off, Auto Conversion, Auto
Nightlight, Beeper Volume, Display On/Off,
Reminder, and Temperature Units.
12
SELECTOR DIAL
Turn to select. Press to enter. Turn to select
food, power level, or temperature selections.
Also use the dial to increase (turn clockwise)
or decrease (turn counterclockwise) time.
Simply press the button to enter the
selection.
Back
Press this pad to step back one or more
levels in the programming process.
Help
Press this pad to find out more about your
oven’s features.
Options
Press this pad to access Repeat Last, Broil,
Proof, Toast, Warm and Delay Start.
Add 30 Sec
Starts the microwave for 30 seconds of
cooking time. An additional 30 seconds is
added to the remaining cooking time each
time the pad is pressed.
Timer On/Off
Press this pad to set a minute and seconds
timer.
Surface Light
Press this pad to turn the cooktop light on
and off.
Vent Fan
Press this pad to turn the vent fan on and off.
Page 13
Speedcooking
Advantium Oven
Using
speedcook
features
Things that
are normal
CAUTION: Burn Risk
When using speedcook programs, remember that the oven, door and dishes will be very
hot!
Prior to the first use of your oven, the clock must be set. See the Clock section.
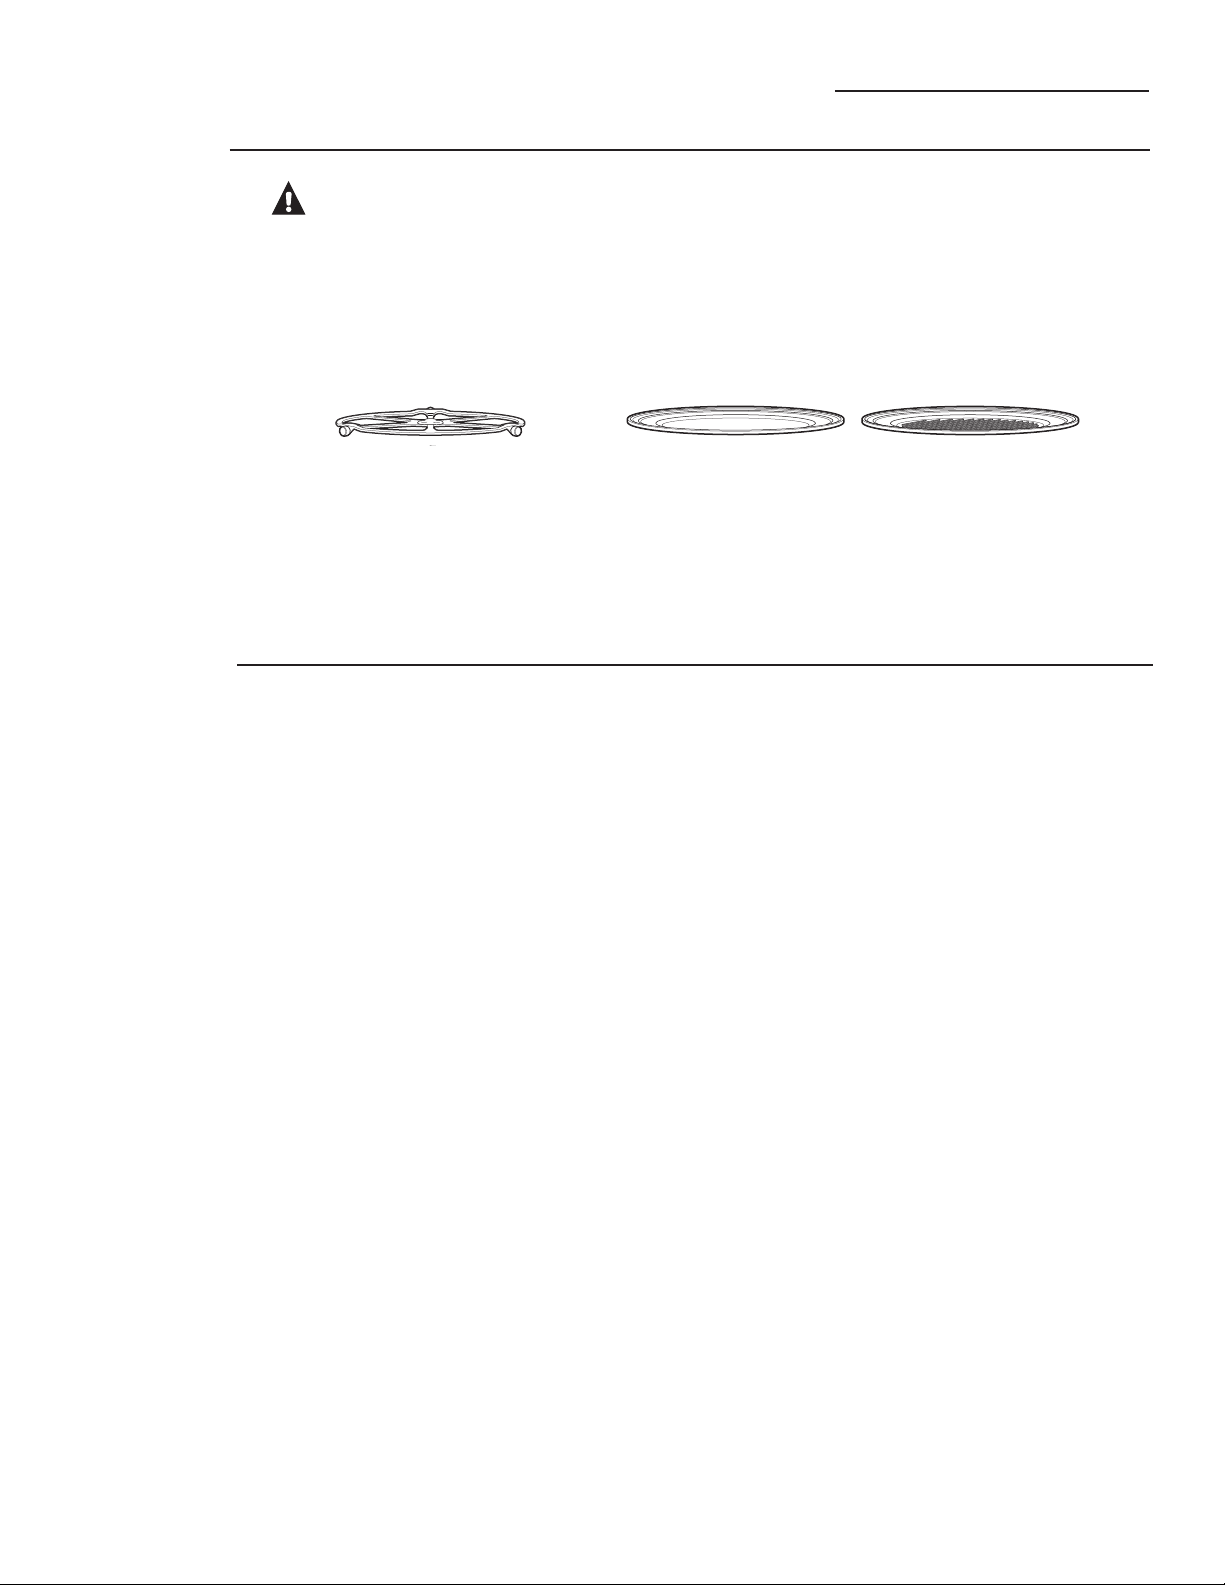
Before you begin, make sure the turntable is in place. Use the metal tray or metal grill tray
and your own glass or ceramic cookware, if needed.
The turntable must always be in
place when using the oven.
If the door is opened during cooking, the
oven will stop and PAUSE will appear in the
display. Close the door and press the Start/
Pause pad to resume cooking.
At any time during cooking you can change
time or power levels by selecting EDIT.
Put food directly on the metal tray or metal grill tray to speedcook.
Cooking Times
When speedcooking pre-set menu foods,
you may see OPTIMIZING COOK TIME in
the display several seconds after you
press Start/Pause. The oven automatically
senses the electrical voltage level in your
home and adjusts the cooking time up or
down for proper cooking.
Cooling Fans
The fans will be on during cooking. At the
end of cooking, the fans may continue
to run for a short time to cool internal
components. The fans will automatically
shut off when the internal parts of the
oven have cooled. The screen will display
“Oven is Cooling”.
The oven vent will emit warm air while the
oven is on.
The exhaust fan may come on
automatically if the oven becomes hot. See
Automatic Fan section.
Lights
When the oven is on, light may be visible
around the door or outer case.
The halogen lights will dim and cycle
on and off during a speedcook cycle,
sometimes even at full power levels. This
is normal. The oven senses the heat level
and adjusts automatically.
Speedcooking meats in the oven may
produce smoke.
To cook for additional time after a cooking
cycle has been completed, use the Resume
feature as instructed on the display.
Oven Heat
No preheating time is required during
speedcook cycles. The oven begins
cooking immediately.
The door and inside of the oven will be
very hot. Use caution when opening the
door and removing food. Be cautious of
steam or vapor that may escape from
around the door.
Do not use cookware or coverings made of
paper, plastic, or foil when speedcooking.
When cooking for an extended period
of time, the oven may automatically
reduce the power levels to maintain the
appropriate level of oven heat.
Sounds
Clicks and a fan blowing are normal
sounds during cooking. The electronic
control is turning components on and off.
Interference
TV/radio interference might be noticed
while using the microwave, similar to
the interference caused by other small
appliances. It does not indicate a problem
with the microwave. Move the radio or
TV as far away from the microwave as
possible, or check the position of the TV/
radio antenna.
13
Page 14
Speedcooking
Advantium Oven
Cooking
tips for best
results
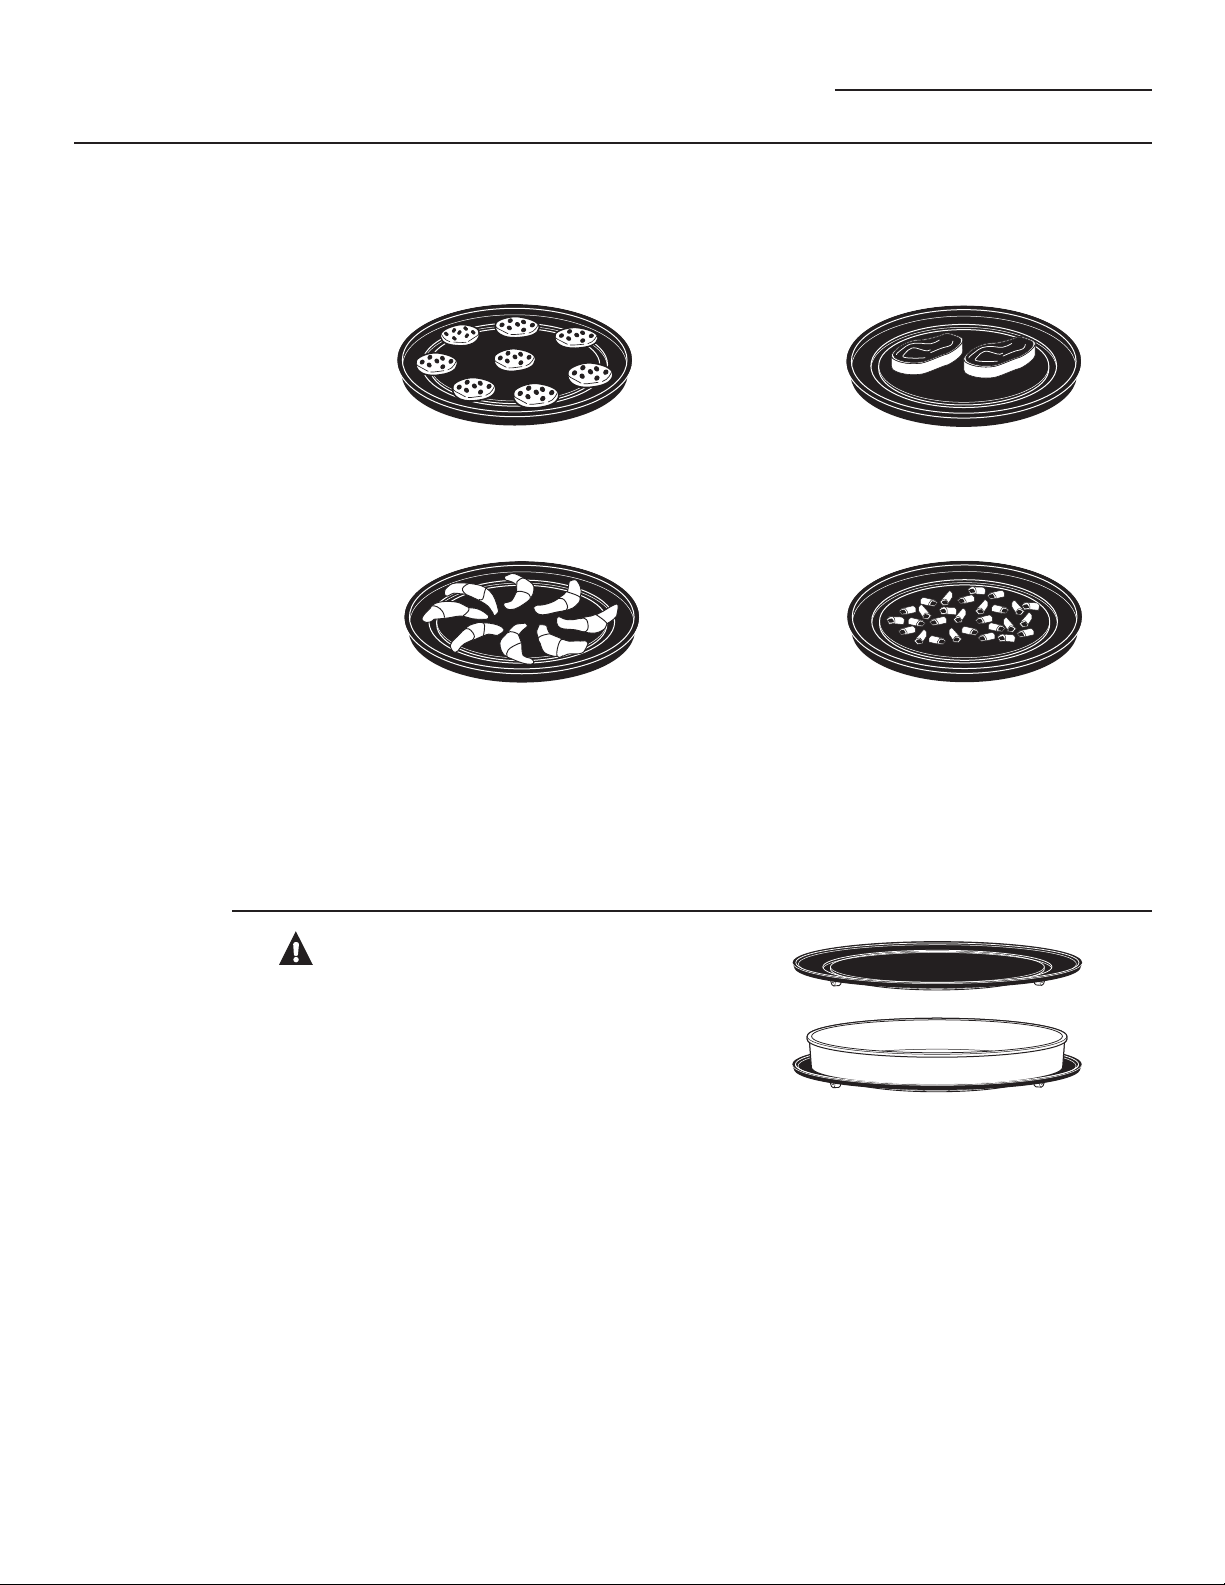
Arrange food on the metal trays as shown to
ensure consistent and even browning.
Circular pattern
(Example: biscuits, cookies)
Spoke pattern
(Example: crescent rolls, breadsticks)
Foods can touch but should not overlap.
Side by side pattern
(Example: meats and poultry)
Single layer
(Example: appetizers)
Speedcook
cookware
Fresh meat, chicken, fish or seafood that has been frozen should be thawed before cooking.
(The microwave defrost feature can be used.) For other frozen prepackaged foods, follow
package directions.
CAUTION: Burn Risk
Cookware will become hot. Oven mitts will
be needed to handle the cookware.
Follow cookware suggestions on the oven
display or in the cookbook.
Place food directly on the metal tray or
metal grill tray when cooking, unless
prompted by the oven to do otherwise.
Use the metal tray in the same way you
would use a shallow baking pan or baking
tray.
In addition to the cookware provided, you
can use non-metal casserole dishes, pie
plates and other heat-safe cookware.
Place them directly on the metal tray.
Be sure to select a size that will rotate
easily.
Place the metal tray or metal grill tray
on the turntable. Place glass or ceramic
cookware on the tray.
Do not use cookware or coverings made
of paper, plastic, or foil when cooking
during a speedcook cycle.
14
Page 15
Speedcooking
Advantium Oven
Using the preset speedcook
menu
S
o
e
t
l
e
n
c
r
t
u
T
r
P
e
r
t
e
s
n
s
E
t
o
Convection
Bake
Surface
Light
Start
Pause
Cancel
Off
Lock Controls
Hold 3 Sec
Micro
wave
Add
30 Sec
Vent Fan
Back
Help
Speed
Cook
Settings Options
Timer
On/Off
Pre-set
speedcook
menu selections
The Advantium is already pre-set to
cook over 175 popular foods.
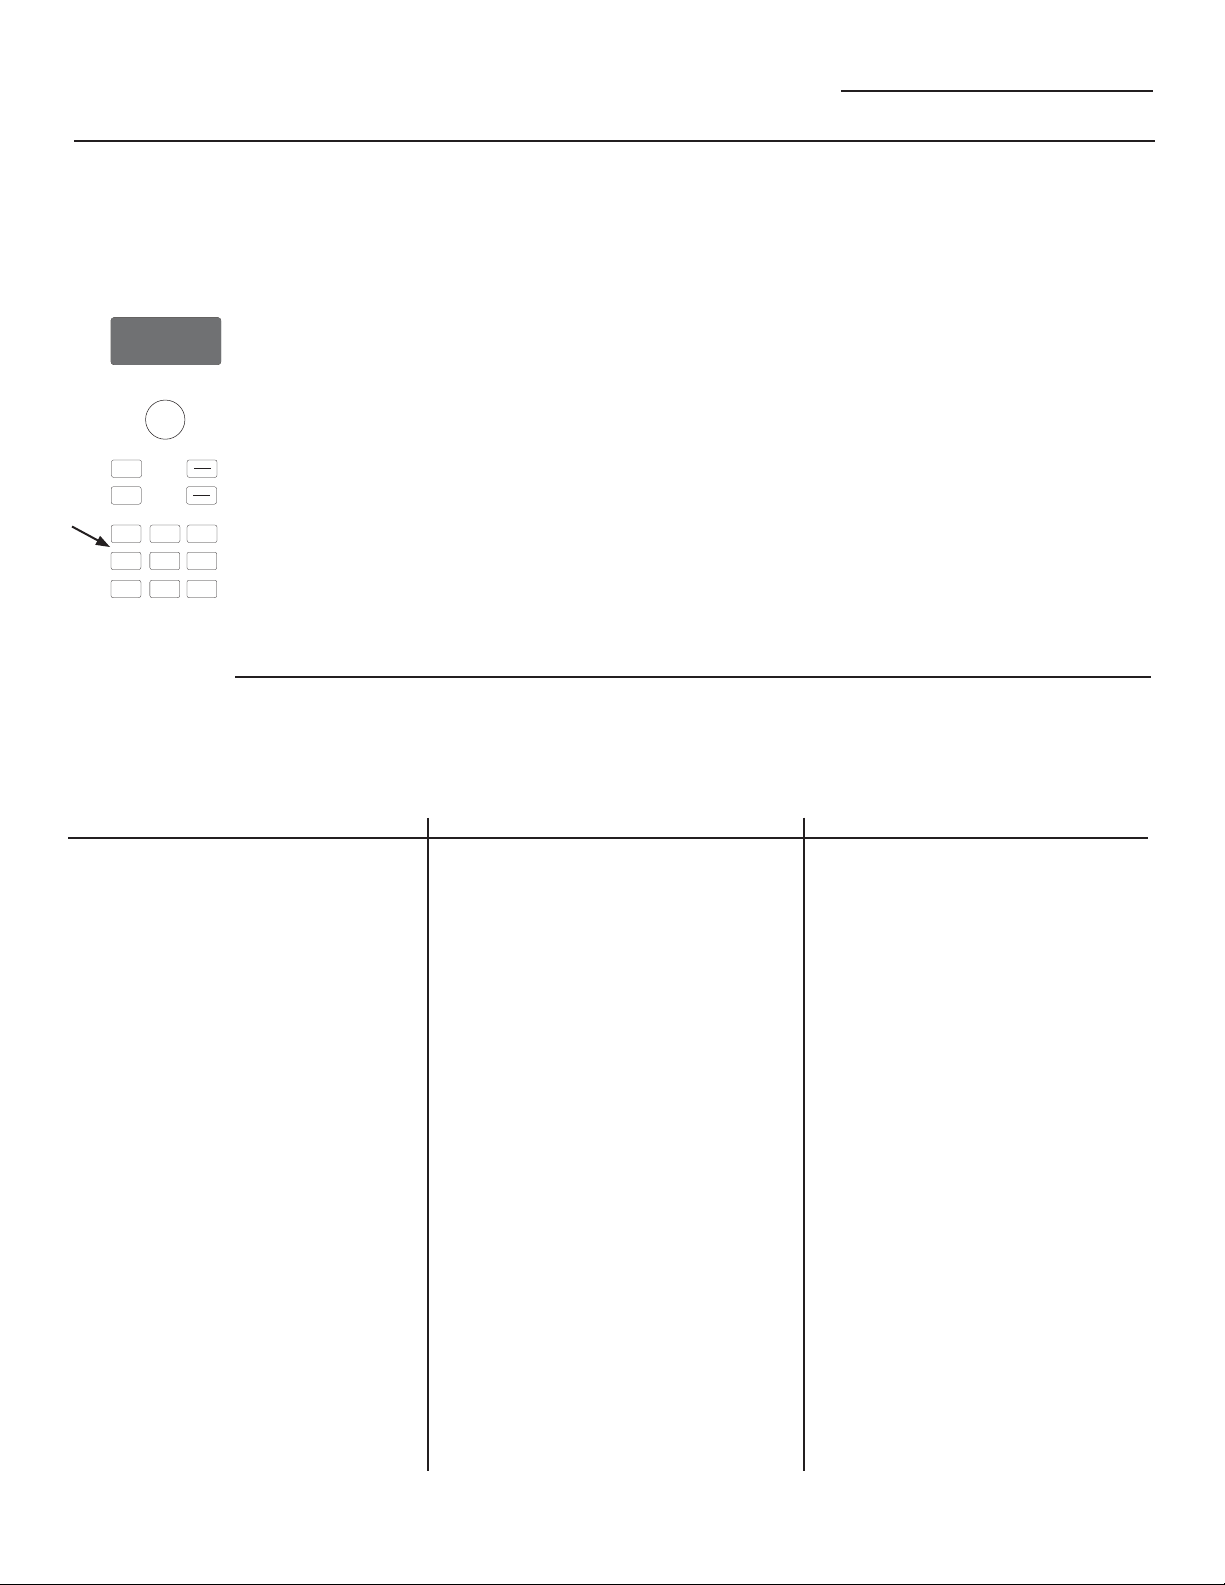
1. Press the Speed Cook pad.
If no selection is made within 15
seconds, the display will revert
back to the time of day.
2. Turn the selector dial to select the
type of food category you want.
Press the dial to enter.
3. Turn the selector dial to select
the specific food (menu selection).
Press the dial to enter.
4. Turn the selector dial to select
amount, size and/or doneness
(if required, the oven will prompt
you). Press the dial after each
selection.
5. Once the display shows:
EDIT, SAVE or START press the
Start/Pause pad or the selector
dial to start cooking.
Turn the food over when the oven
signals TURN FOOD OVER (for certain
foods).
When the oven signals CHECK for
DONENESS, check to see if your food
is done to your liking (for certain
foods).
To review settings during cooking,
press the selector dial.
If you enter an undesired selection at
any time, simply press the Back pad
and re-enter the desired selections.
Speedcooking meats in the oven may
produce smoke.
Per USDA Guidelines, cook meat to an INTERNAL temperature of at least 160°F,
and poultry to an INTERNAL temperature of at least 180°F. Cooking to these
temperatures usually protects against foodborne illness. For more information,
see www.foodsafety.gov.
Food Category Menu Selection
Food Category Menu Selection
Appetizers Bagel Bites
Cheese Sticks
Egg Rolls (Frozen)
Jalapeño Poppers
Meat Balls (Frozen)
Nachos
Nuts, Roasted
Onion Rings
Pizza Rolls
Soft Pretzels (frozen)
Taquitos (frozen)
Breads Biscuits
Bread Sticks
Cheese Bread
Crescent Rolls
Dinner Rolls
Garlic Bread
Texas Toast
Breakfast Belgian Waffles
Breakfast Pizza
French Toast
Hashbrown Patties
Pancakes (frozen)
Rolls (refrigerated)
Sausage Biscuit
Sausage Links
Sausage Patties
Strudel (frozen)
Turnovers
Waffles (frozen)
Chicken Bone-In
Boneless
Fillet (frozen)
Finger (frozen)
Fried (frozen)
Nugget (frozen)
Patty (frozen)
Tender (frozen)
Wings (frozen)
Whole
Desserts Brownie Mix
Cookies
Pie (fresh fruit)
Pie Crust
Rolls (refrigerated)
Turnovers
Entree Egg Rolls (frozen)
Meatloaf (9x5)
Taquitos (frozen)
Meats Filet Mignon
Hamburger
Lamb Chops
Pork Chops
Ribeye Steak
Sirloin Steak
Strip Steak
T-Bone Steak
Tenderloin
Pizza Deli/Fresh
Frozen Pizza
Use Precooked Crust
Potatoes Baked Potato
Hashbrown Patties
Frozen Fries
Frozen Nugget
Sweet Potato/Yam
Food Category Menu Selection
Sandwich Corn Dog (frozen)
Crescent Roll Hot Dog
Grilled Sandwich
Pocket Sandwich
Seafood Cod Fillets
Fish Sticks (frozen)
Frozen Breaded
Orange Roughy Fillet
Salmon
Shellfish
Swordfish Steak (1”)
Talapia
Tuna Steaks
Whitefish/Cod
Side Dish Casserole
Refried Beans (16 oz)
Roasted Asparagus
Roasted Bell Pepper
Roasted Chilies (3-6)
Roasted Corn (1-4)
Roasted Garlic
Roasted Mixed Vegetables
Scalloped Potatoes
15
Page 16
Speedcooking
Advantium Oven
Speedcook
power level
S
o
e
t
l
e
n
c
r
t
u
T
r
P
e
r
t
e
s
n
s
E
t
o
Convection
Bake
Surface
Light
Start
Pause
Cancel
Off
Lock Controls
Hold 3 Sec
Micro
wave
Add
30 Sec
Vent Fan
Back
Help
Speed
Cook
Settings Options
Timer
On/Off
The Advantium uses power from
high intensity halogen lamps, a
ceramic heater, a convection system
and microwaves to cook food
from the top, bottom and interior
simultaneously to seal in moisture
and flavor.
When using the pre-set menu foods,
the power levels are already selected
for you. However, power levels can
be adjusted when using pre-set
menu foods and MY RECIPE.
Each power level gives you halogen
lamp or ceramic heater power and
microwave energy for a certain
percentage of the time or provides
heating from the convection system.
For example:
U–07 Upper halogen lamp on 70%
of the time.
L–07 Lower ceramic heater on
70% of the time.
M–05 Microwave on 50% of the
time.
C–07 Convection element heats
oven to 350ºF.
Note: Be careful when adjusting
power levels so you do not overcook
or undercook food.
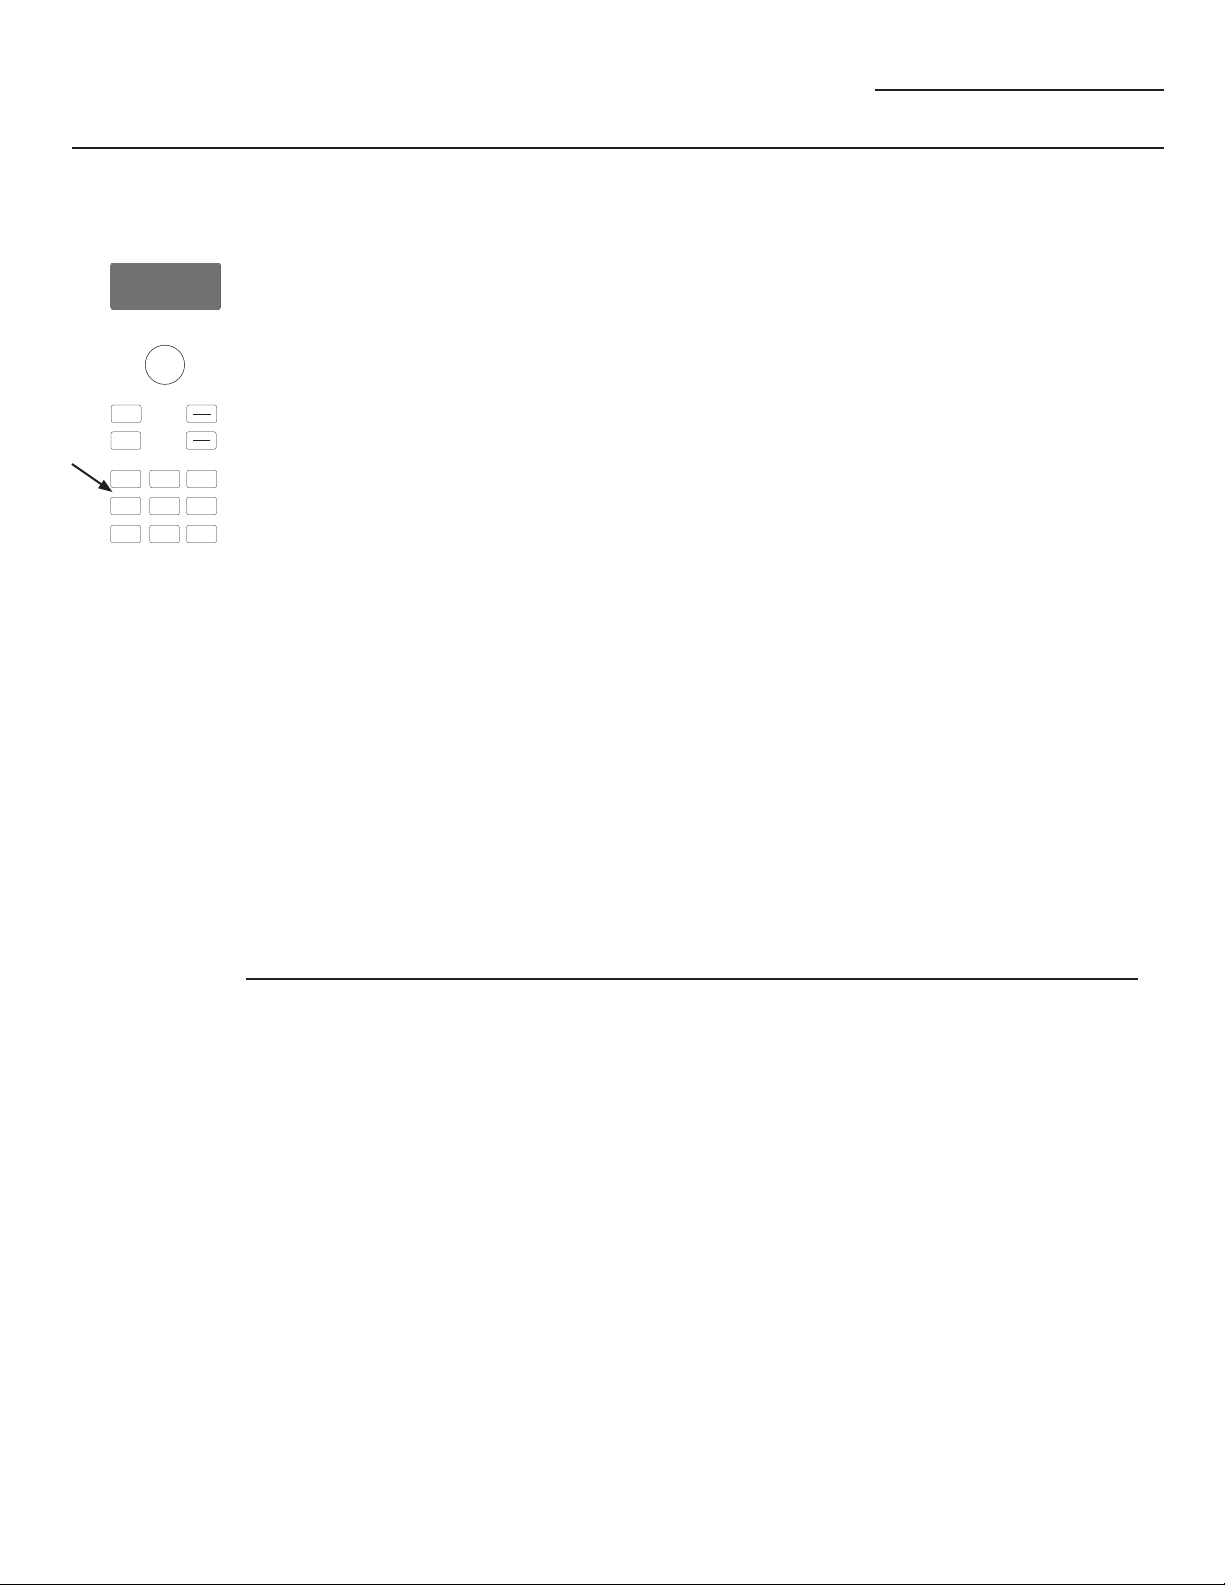
1. Press the Speed Cook pad
and select your food (follow
instructions from Using the preset speedcook menu).
2. When display shows EDIT, SAVE or
START, turn the dial to select EDIT.
If you do not want to change one
of the settings, just press the dial
to move to the next selection.
3. Press the dial if you do not want
to adjust cooking time.
4. Turn the dial clockwise to
increase or counterclockwise to
decrease the upper power level.
Press the dial to enter.
5. Turn the dial to change the lower
power level. Press the dial to
enter.
6. Turn the dial to change the
microwave power level. Press the
dial to enter.
7. Turn the dial to change the
convection power level. Press the
dial to enter.
8.
Press the Start/Pause
pad
or
the selector dial to start cooking.
16
Follow these general guidelines when selecting the best U=, L=, M= and C=
settings for your favorite recipes:
U = Select a higher setting for thin
foods requiring a golden brown
top (example: fish fillets, toast,
boneless chicken breasts). Select
a lower setting for thicker foods
and foods with high sugar or
fat content (example: muffins,
roasts, casseroles) or that require
a longer cook time.
L = Select a higher setting for thick or
dense foods that may not cook
quickly in the center (example:
steaks, casseroles). Select a lower
setting for thin foods (example:
cookies).
M = Select a higher setting to shorten
cooking time for dense or heavy
foods (example: casseroles,
whole chicken). Select a lower
setting for delicate foods
(example: breads) or foods
requiring longer cook times for
tender results (example: stew,
pot roast).
C = Select a lower setting for more
delicate foods that cook at lower
temperatures. Select a higher
setting (7 or above) for more
robust foods or foods that cook
at temperatures above 350ºF.
Page 17
Speedcooking
Advantium Oven
Repeat last
t
n
r
u
T
P
r
e
s
s
Back
Help
Speed
Convection
Bake
Cook
Settings Options
Timer
Surface
On/Off
Light
S
o
e
l
e
c
t
r
e
t
n
E
t
o
Start
Pause
Cancel
Off
Lock Controls
Hold 3 Sec
Micro
wave
Add
30 Sec
Vent Fan
Resume
feature
S
o
e
t
l
e
n
c
r
t
u
T
r
P
e
r
t
e
s
n
s
E
t
o
Convection
Bake
Surface
Light
Start
Pause
Cancel
Off
Lock Controls
Hold 3 Sec
Micro
wave
Add
30 Sec
Vent Fan
Back
Help
Speed
Cook
Settings Options
Timer
On/Off
Use this time saving feature for
cooking repetitive items like cookies or
appetizers.
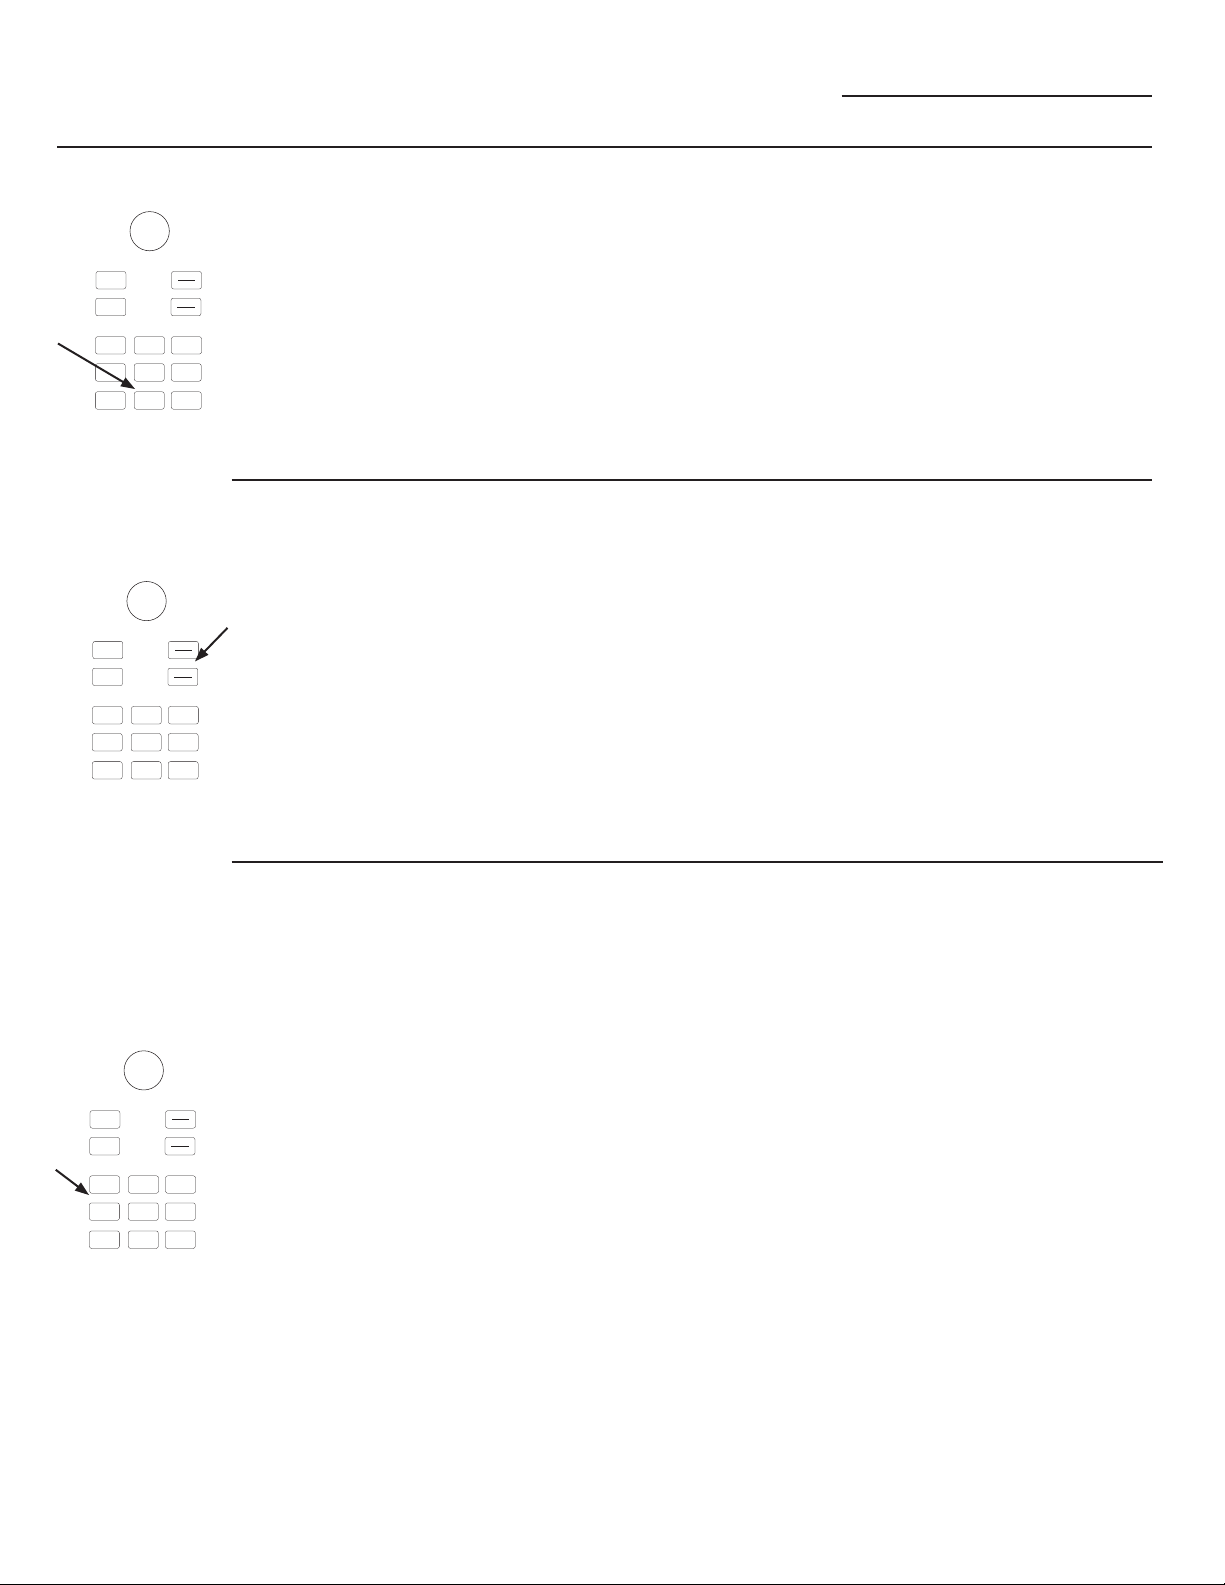
1. Press Options and select REPEAT
LAST.
2. The last pre-set food will be
displayed.
1. If your food needs to cook a bit
longer, you can restart the oven by
pressing the Start/Pause pad or
selector dial.
2. RESUME COOKING will be
displayed and the oven will restart
immediately at 10% of the original
time.
Note: The last program used is stored
for two hours.
3. Press the Start/Pause pad or the
selector dial to start cooking.
The program stays in memory for 5
minutes. After that you will need to
begin the program again. See Using
the pre-set speedcook menu section.
My Recipe Custom
speedcooking
S
o
e
t
l
e
n
c
r
t
u
T
r
P
e
r
t
e
s
n
s
E
t
o
Convection
Bake
Surface
Light
Start
Pause
Cancel
Off
Lock Controls
Hold 3 Sec
Micro
wave
Add
30 Sec
Vent Fan
Back
Help
Speed
Cook
Settings Options
Timer
On/Off
The Advantium gives you the flexibility
to cook your favorite dishes.
If you want to cook a food item that is
not among the pre-set selections, use
My Recipe to custom speedcook.
1. Press the Speed Cook pad and
select MY RECIPE. Press the dial to
enter. Select NEW RECIPE.
If no entries are made within 15
seconds, the display will revert back
to the time of day.
2. Turn the selector dial to select
the cooking time. Press the dial to
enter.
The display will prompt you to
select the power level(s).
3. Turn the dial to select the upper
power level. Turn the dial clockwise
to increase or counterclockwise to
decrease the upper power level.
Press the dial to enter.
4. Turn the dial to select the lower
power level. Press the dial to enter.
5. Turn the dial to select the
microwave power level. Press the
dial to enter.
6. Turn the dial to select the
convection power level. Press the
dial to enter.
7. Press the Start/Pause pad or press
the selector dial to start cooking.
For power level and cooking time
suggestions, use your cooking guide,
cookbook and the pre-set speedcook
menu selections.
17
Page 18
Speedcooking
Advantium Oven
0\5HFLSH³
to enter and
save
S
o
e
t
l
e
n
c
r
t
u
T
r
P
e
r
t
e
s
n
s
E
t
o
Convection
Bake
Surface
Light
Start
Pause
Cancel
Off
Lock Controls
Hold 3 Sec
Micro
wave
Add
30 Sec
Vent Fan
Back
Help
Speed
Cook
Settings Options
Timer
On/Off
0\5HFLSH³
to find and
use
Add and save up to 30 of your own
Speedcook or microwave recipes, or
pre-set Speedcook menu recipes as
a favorite recipe. Once it’s done, you
can quickly recall your favorite so
that your food cooks just the way you
want it every time!
1. Press the Speed Cook or
Microwave pad.
2. Turn the dial to select MY RECIPE.
Press the dial to enter.
3. Turn the dial until NEW RECIPE
appears. Press the dial to enter.
4. ENTER COOK TIME appears. Turn
the dial to select the cooking time.
Press the dial to enter.
The display will prompt you to
select the power level(s).
To find and use stored recipes:
1. Press the Speed Cook or
Microwave pad.
2. Turn the dial to select MY RECIPE.
5. Turn the dial clockwise to increase
or counterclockwise to decrease
the power level(s). Press the dial to
enter.
For power level and cooking time
suggestions, use your cooking guide
or cookbook.
6. Select SAVE from the summary
screen.
7. SPELL THE FOOD NAME appears.
Turn the dial to the first letter of
your food description and press the
dial to enter. Continue this process
to spell the rest of the food name.
Press the Start/Pause pad to save
the recipe and its name.
3. The recipe names you entered will
appear.
4.
Turn dial until the recipe you want
is displayed and press the dial to
enter.
t
n
r
u
T
P
r
e
s
s
Back
Help
Speed
Convection
Cook
Bake
Settings Options
Timer
Surface
On/Off
Light
5. Press the Start/Pause pad or
S
o
e
l
e
c
t
press the selector dial to start
cooking.
r
e
t
n
E
t
o
Start
Pause
Cancel
Off
Lock Controls
Hold 3 Sec
Micro
wave
Add
30 Sec
Vent Fan
18
Page 19

Speedcooking
Advantium Oven
0\5HFLSH³
to adjust or
change
S
o
e
t
l
e
n
c
r
t
u
T
r
P
e
r
t
e
s
n
s
E
t
o
Convection
Bake
Surface
Light
Start
Pause
Cancel
Off
Lock Controls
Hold 3 Sec
Micro
wave
Add
30 Sec
Vent Fan
Back
Help
Speed
Cook
Settings Options
Timer
On/Off
0\5HFLSH³
to delete
S
o
e
t
l
e
n
c
r
t
u
T
r
P
e
r
t
e
s
n
s
E
t
o
Convection
Bake
Surface
Light
Start
Pause
Cancel
Off
Lock Controls
Hold 3 Sec
Micro
wave
Add
30 Sec
Vent Fan
Back
Help
Speed
Cook
Settings Options
Timer
On/Off
To adjust or change stored recipes:
1. Press the Speed Cook or
Microwave pad.
2. Turn the dial to select MY RECIPE.
3. Turn the dial to the recipe you
want to change. Press the dial to
enter. Current settings appear.
4. Select EDIT.
5. Turn the dial to adjust the cooking
time and press the dial to enter.
6. Turn the dial to change the power
level(s) and press the dial to enter
each power level.
To delete stored recipes:
1. Press the Speed Cook or
Microwave pad.
2. Turn the dial to select MY RECIPE.
3. Select the recipe you would like to
delete.
Turn the dial to select DELETE.
4.
7. Turn the dial to change the recipe
name. Press the dial to enter
each letter change.
8. Press the Start/Pause pad to save
the revised recipe.
For power level and cooking time
suggestions, use your cooking guide or
cookbook.
19
Page 20
Convection
Baking
Convection baking allows you to cook foods
the same way as a conventional oven, using an
element to heat the air inside the oven. Any oven
temperature from 250°F to 450°F may be set.
A fan gently circulates heated air throughout the
oven, over and around the food. Because the
heated air is kept constantly moving, some foods
cook slightly faster than in regular oven cooking.
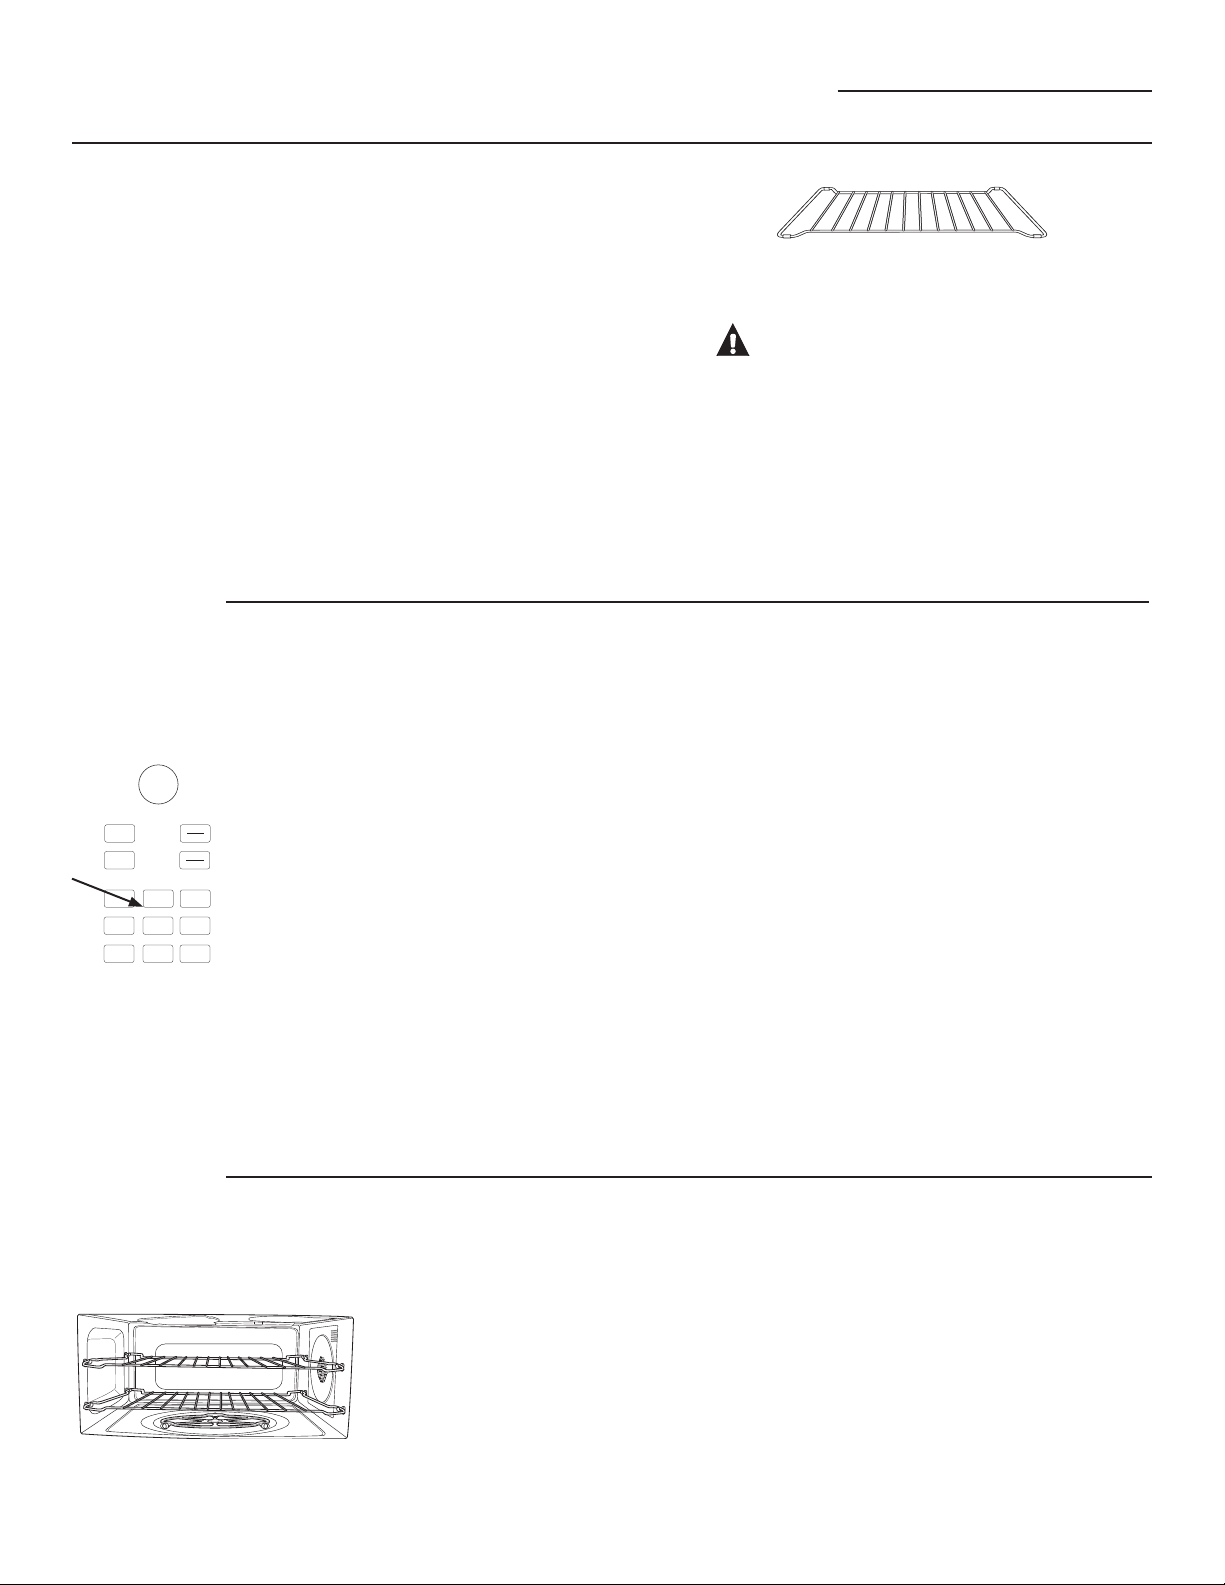
Before you begin, make sure the metal rack is
in place. Both racks may be used for two level
cooking.
Convection baking
Advantium Oven
Put food directly on the metal tray or in the
appropriate dish and place on wire oven rack
when baking or warming.
CAUTION: Burn Risk
When baking, remember that the oven, door and
dishes will be very hot!
Per USDA Guidelines, cook meat to an
INTERNAL temperature of at least 160°F, and
poultry to an INTERNAL temperature of at least
180°F. Cooking to these temperatures usually
protects against foodborne illness. For more
information, see www.foodsafety.gov.
How to
Convection
Bake
S
o
e
t
l
e
n
c
r
t
u
T
r
P
e
r
t
e
s
n
s
E
t
o
Convection
Bake
Surface
Light
Start
Pause
Cancel
Off
Lock Controls
Hold 3 Sec
Micro
wave
Add
30 Sec
Vent Fan
Back
Help
Speed
Cook
Settings Options
Timer
On/Off
1. Press Convection Bake pad.
2. Turn the dial to set the temperature
and press the dial to enter.
3. Press the dial to enter and confirm
the selection.
To start immediately without setting
a cook time, select START or press the
Start/Pause pad:
To set a cook time:
1. Turn the dial and select COOK TIME.
2. Turn the dial to set the cook time
and press the dial to enter.
3. To start the cook time immediately,
place the food in the oven and select
START COOK TIME. Then press the
dial or the Start/Pause pad to start.
The cook time will immediately start
to count down.
To start cook time after preheat, select
START PREHEAT. The oven will signal
once the oven reaches the cooking
temperature. Place the food in the oven
and press the Start/Pause pad. The cook
time will begin to count down.
If the oven door is opened during
cooking, “Pause” will appear in the
display. Close the door and press Start/
Pause pad.
Cook times are shown in hours and
minutes and can be set to a maximum
of 2 hours 59 minutes. Time can be
changed during cooking by turning the
dial.
Cooking Tips
for Convection
Baking
20
Metal pans are recommended
for all types of baked products,
but especially where browning is
important.
Dark or dull finish metal pans are
best for breads and pies because
they absorb heat and produce
crisper crust.
Shiny aluminum pans are better
for cakes, cookies or muffins
because they reflect heat and help
produce a light tender crust.
Glass or glass-ceramic casserole
or baking dishes are best suited
for egg and cheese recipes due to
the cleanability of glass.
When baking on one level, use the
lower level. The top clips are to
only be used in two level baking.
Page 21
Broiling and Toasting
Advantium Oven
Broiling
and
Toasting
How to
Broil
n
r
u
T
P
r
e
s
s
Back
Help
Speed
Convection
Cook
Bake
Settings Options
Timer
Surface
On/Off
Light
S
o
t
t
o
Broil and toast use the upper lamps, lower
heater and convection system to broil or toast
food similar to a conventional oven.
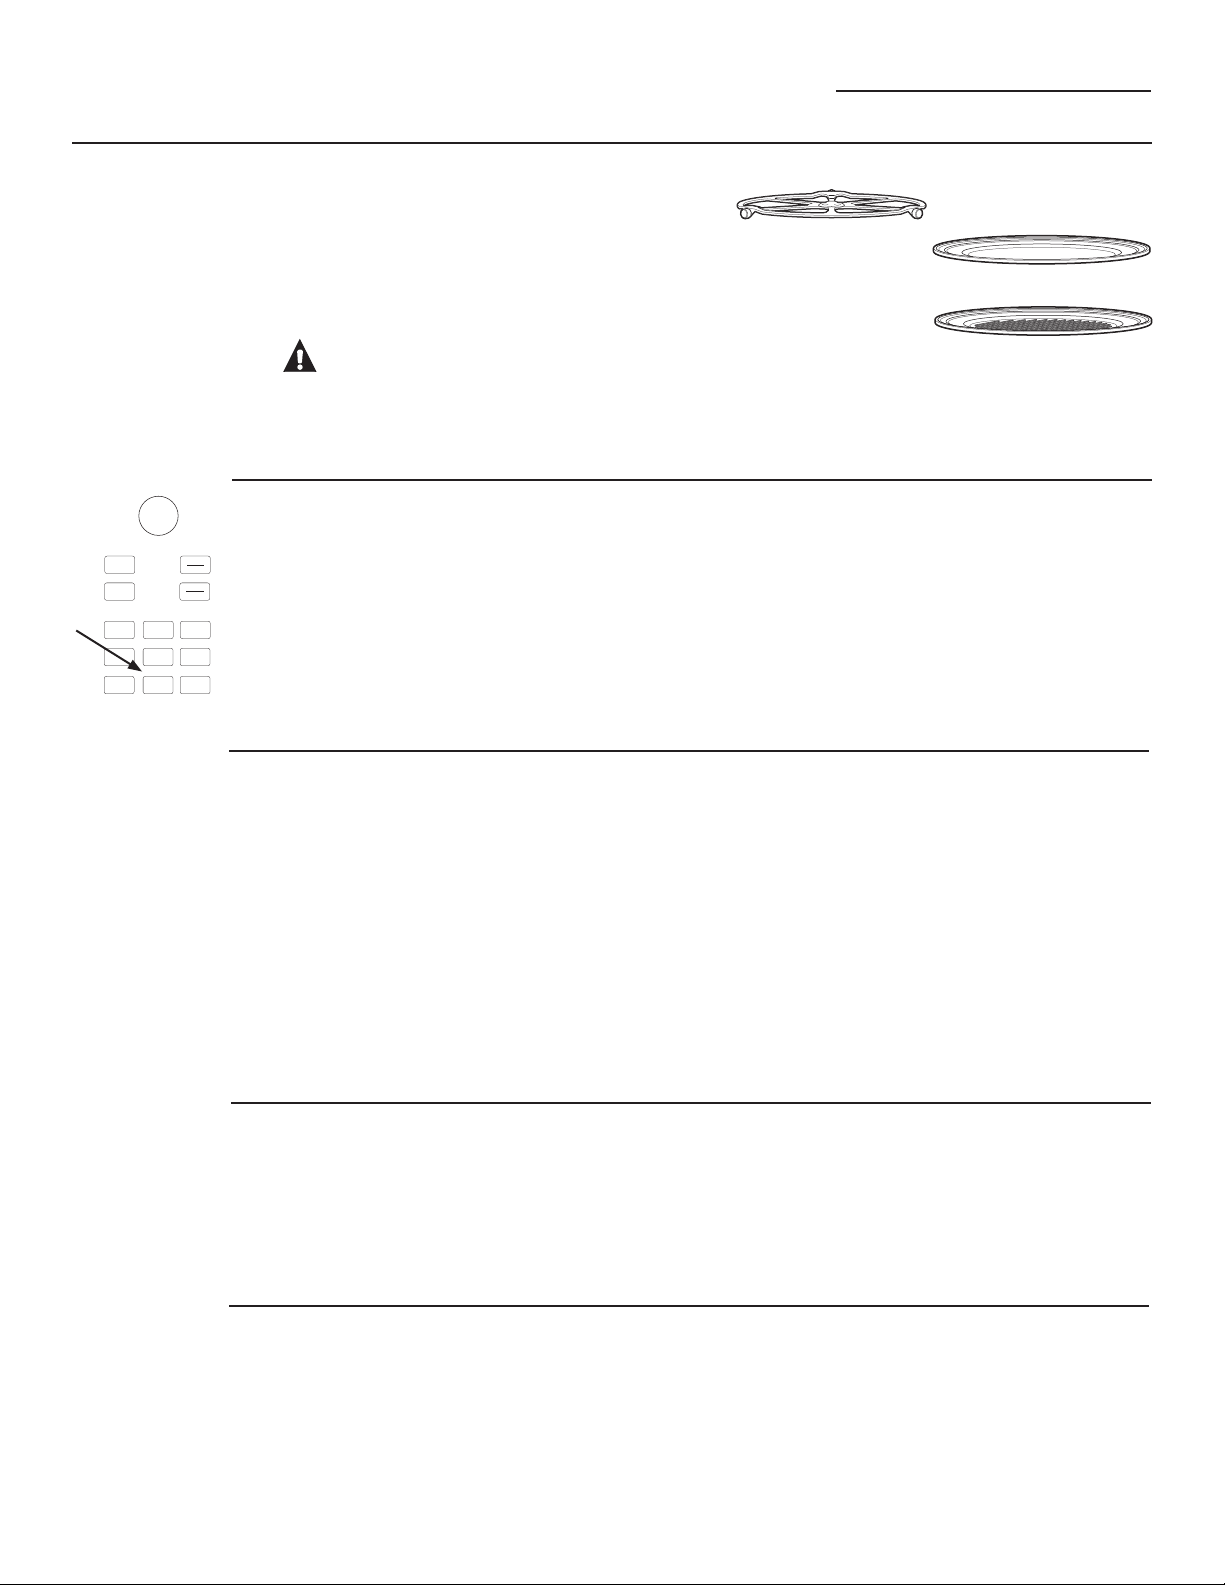
Before you begin, make sure the turntable is in
place. Use the metal tray when toasting and
the metal tray or metal grill tray when broiling.
CAUTION: Burn Risk
When broiling or toasting, remember that the
The turntable must
always be in place when
using the oven.
Put food directly on the metal
tray or the metal grill tray.
oven cavity, the oven door and dishes will be
very hot!
e
l
e
c
t
r
e
t
n
E
Start
Pause
Cancel
Off
Lock Controls
Hold 3 Sec
Micro
wave
Add
30 Sec
Vent Fan
1. Press the Options pad.
2. Turn the dial to BROIL and press to
enter.
3. Place the food in the oven and select
START or press the Start/Pause pad
to start.
If the oven door is opened during cooking,
“Pause” will appear in the display. Close
the door and press the Start/Pause pad.
Cooking
Tips for
Broiling
How to
Toast
Cooking
Tips for
Toasting
Broiling times may be shorter in
the Advantium oven because of
the use of halogen lamps. Make
sure to monitor food closely to get
the desired results.
For best results when broiling,
place food directly on the metal
grill tray.
Broiling meats in the oven may
produce smoke.
1. Press the Options pad.
2. Turn the dial to TOAST and press to
enter.
3. Turn the dial to set the toast time,
place the food in the oven and select
START or press the Start/Pause pad
to start.
For best results when toasting, use
the metal tray.
No turning is necessary for most
foods.
When toasting nuts, stir halfway
through the cooking time.
If preheating the oven to broil
meat, preheat with the metal grill
tray in the oven and place food on
the hot metal tray for best searing
of meat.
For best performance, preheat the
oven for 5 minutes when broiling
meat. Chicken performs best with
no preheating.
Foods should be turned halfway
through broiling time.
Remove thinner pieces as needed
to prevent overcooking and drying.
If the oven door is opened during cooking,
“Pause” will appear in the display. Close
the door and press the Start/Pause pad.
Toast thicker pieces a longer time,
thinner pieces a shorter time.
21
Page 22
Warming and Proofing
Advantium Oven
Warming
S
o
e
t
l
e
n
c
r
t
u
T
r
P
e
r
t
e
s
n
s
E
t
o
Convection
Bake
Surface
Light
Start
Pause
Cancel
Off
Lock Controls
Hold 3 Sec
Micro
wave
Add
30 Sec
Vent Fan
Back
Help
Speed
Cook
Settings Options
Timer
On/Off
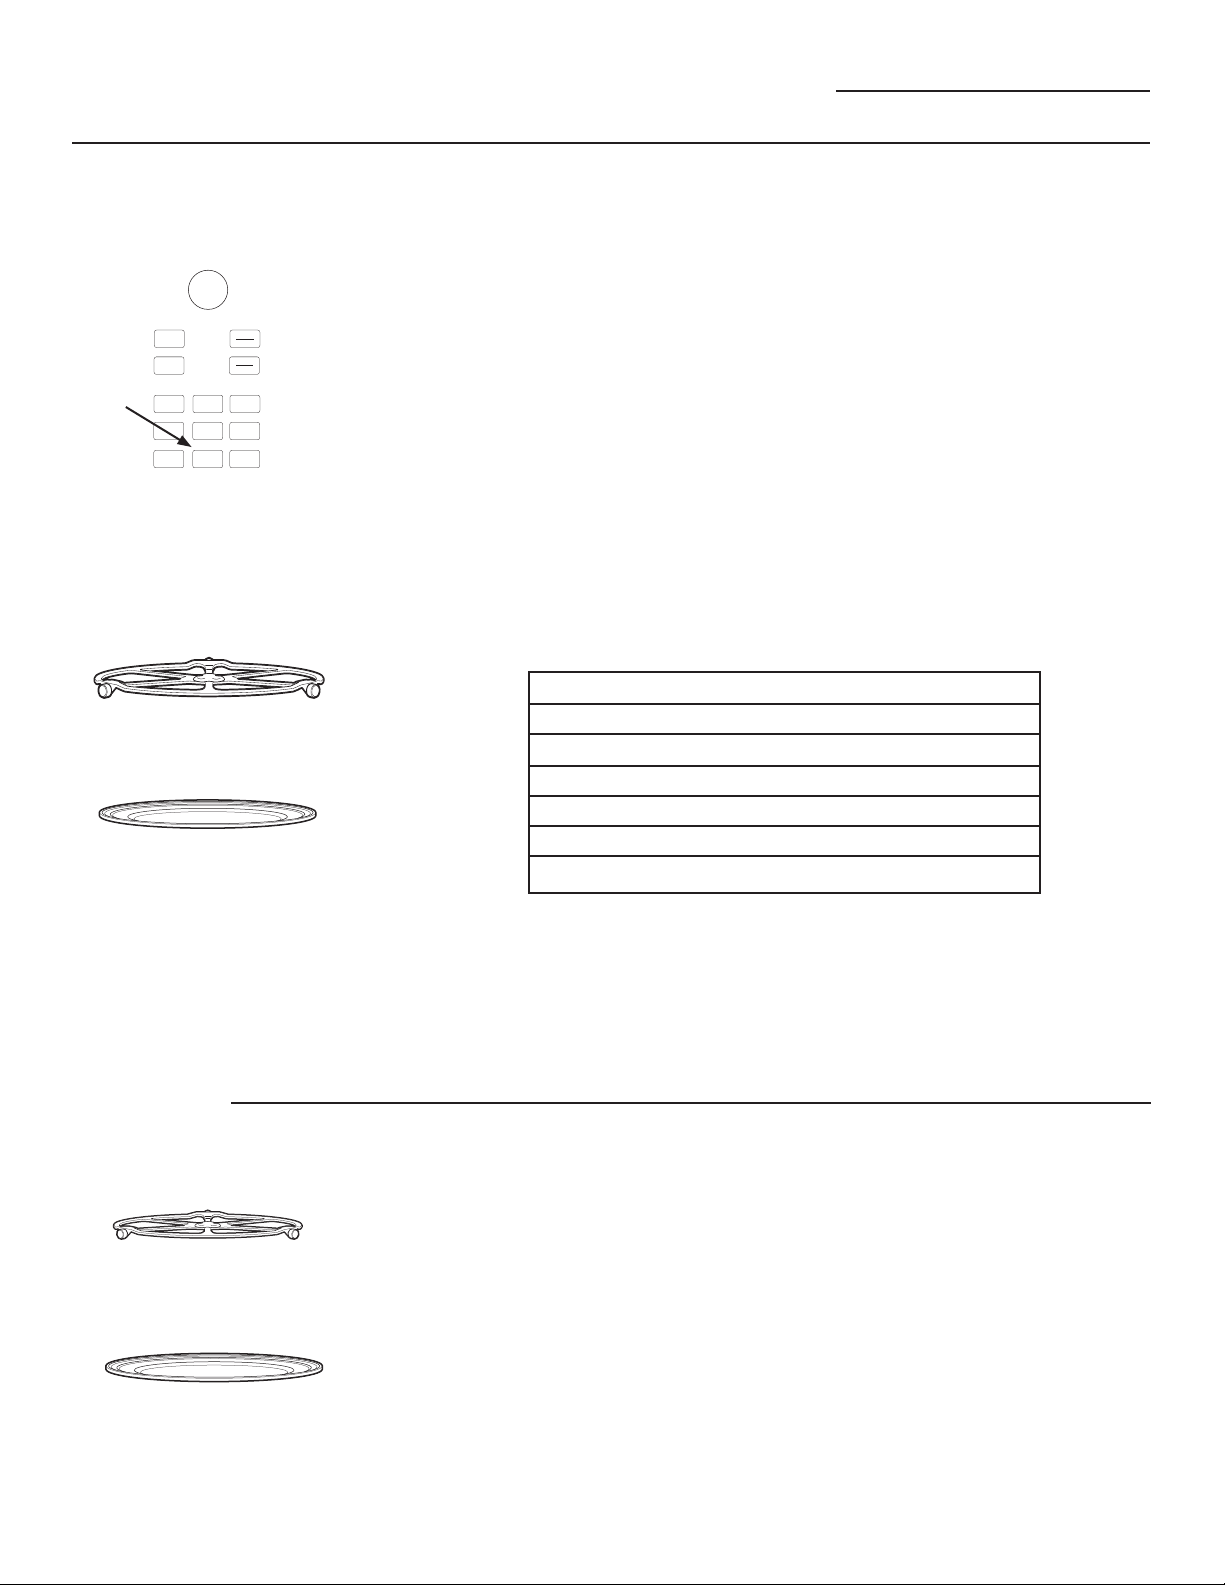
The turntable must always be in place
when using the oven.
Put food or oven-safe cookware directly
on the metal tray to warm.
The WARM feature will keep hot,
cooked foods at serving temperature.
Always start with hot food. Use
cookware and utensils that can
withstand temperatures up to 230°F.
1. Press the Options pad.
2. Turn the dial to select WARM. Press
the dial to enter.
3. Turn the dial to select the level of
moisture you want. See the chart
and tips below. Press the dial to
enter.
4. Select START or press the Start/
Pause pad to start. The oven starts
warming immediately and shows
the amount of warming time to
complete.
Temperature and Moisture Selection Chart
Food Type Moisture Setting
Casseroles MOIST
Chili/Soup MOIST
Pancakes, waffles MOIST
Pizza CRISP
Potatoes, baked CRISP
Chips/Crackers CRISP
If the oven door is opened during
warming, “Pause” will appear in the
display. Close the door and press the
Start/Pause pad.
To Crisp Stale Items:
Select the CRISP setting. Preheat
the oven for 10 minutes.
Note: Only preheat when crisping
stale items.
Place food or dishes directly on the
metal tray.
Check crispness after 45 minutes.
Add time as needed.
Proofing
The turntable must always be
in place when using the oven.
Put bread dough in a bowl/bread pan
and place on the metal tray to proof.
22
Tips for Crisp Foods:
Leave food uncovered.
Do not use plastic containers
or plastic wrap.
Preheating is not necessary
except for crisping stale items.
(See To Crisp Stale Items.)
The proofing feature automatically
provides an appropriate temperature
for the proofing process, and therefore
does not have a temperature
adjustment.
1.
Press the Options pad.
2. Turn the dial to select PROOF and
press to enter.
3. Select START or press the Start/
Pause pad to start. The oven
starts proofing immediately and
shows the amount of proofing
time to complete.
Check bread products early to
avoid over-proofing.
Tips for Moist Foods:
Cover food with lid or aluminum
foil.
Do not use plastic containers or
plastic wrap.
Preheating is not necessary.
To avoid lowering the oven
temperature and lengthening
proofing time, do not open the
oven door unnecessarily.
NOTES:
Do not use the proofing mode for
warming food or keeping food hot.
The proofing oven temperature is
not hot enough to hold foods at
safe temperatures. Use the WARM
feature to keep food warm.
Proofing will not operate if the oven
is too hot. Allow the oven to cool
before proofing.
Page 23

Microwaving
Advantium Oven
Using the
microwave
features
Make sure the turntable is in place. Use the clear glass tray.
Place food or microwavable container directly on the clear glass tray to cook your food.
The turntable must always be in place
when using the oven.
The clear glass tray should always be
in place when microwaving.
Cookware
Make sure that cookware is suitable for
microwaving.
MICROWAVE PRE-SET SELECTIONS
Cook
–By Food Type
–By Time
–By Time 1 & 2
Defrost
-1.0 lb Quick
-By Time
-By Food Type
-By Weight
-Melt
-Soften
Beverage
-Water (8 oz)
-Coffee (8 oz)
-Tea (8 oz)
-Milk (8 oz)
-Hot Cocoa (8 oz)
Popcorn
(2.9 or 3.5 oz)
Melt
-Butter
-Caramel
-Cheese
-Chocolate Chips
-Marshmallow
Simmer
Soften
-Butter
-Cream Cheese
-Frosting (16 oz)
-Ice Cream
Reheat
–Beverage
–Casserole
–Chicken
–Pasta
–Pizza
–Plate of Food
–Rice
–Soup
–Steaks/Chops
–Vegetables
Things that
are normal
Cooking
tips
Interference
TV/radio interference might be noticed
while using the microwave, similar to
the interference caused by other small
appliances. It does not indicate a problem
with the microwave. Move the radio or
TV as far away from the microwave as
possible, or check the position of the TV/
radio antenna.
When cooking bacon, layer strips on a
plate. Cover each layer with a paper towel.
When cooking vegetables, use a
microwave-safe casserole or bowl. Cover
with a microwave-safe lid or vented plastic
wrap.
Oven Heat
Cookware may become hot because of
heat transferred from the heated food.
Oven mitts may be needed to handle the
cookware.
Steam or vapor may escape from around
the door.
For frozen vegetables, follow the package
instructions for adding water.
For fresh vegetables, add 2 tablespoons of
water for each serving.
23
Page 24
Microwaving
Advantium Oven
Microwave
power
level(s)
S
o
e
t
l
e
n
c
r
t
u
T
r
P
e
r
t
e
s
n
s
E
t
o
Convection
Bake
Surface
Light
Start
Pause
Cancel
Off
Lock Controls
Hold 3 Sec
Micro
wave
Add
30 Sec
Vent Fan
Back
Help
Speed
Cook
Settings Options
Timer
On/Off
How to
use pre-set
microwave
selections
S
o
e
t
l
e
n
c
r
t
u
T
r
P
e
r
t
e
s
n
s
E
t
o
Convection
Bake
Surface
Light
Start
Pause
Cancel
Lock Controls
Hold 3 Sec
Micro
wave
Add
30 Sec
Vent Fan
Back
Help
Speed
Cook
Settings Options
Timer
On/Off
The microwave power level is
automatically set on all microwave
features but you can change it for
COOK BY TIME, COOK BY TIME 1&2,
Add 30 Sec, and DEFROST BY TIME.
1. First, follow directions for COOK BY
TIME, COOK BY TIME 1 & 2, Add 30
Here are some examples of uses for
various power levels:
High 10: Fish, bacon, vegetables,
boiling liquids.
Med-High 7: Gentle cooking of meat
and poultry; baking casseroles and
reheating.
Sec, or DEFROST BY TIME.
Medium 5: Slow cooking and
2. Select START or press the Start/
Pause pad to start.
3. Press EDIT to change the cooking
time and then the microwave
tenderizing for stews and less tender
cuts of meat.
Low 2 or 3: Defrosting; simmering;
delicate sauces.
power level. Press the dial to enter
cooking time and power level
changes.
1. Press the Microwave pad.
If no selection is made within 15
seconds, the display will revert back
to the time of day.
2. Turn the dial to select COOK,
DEFROST, BEVERAGE, POPCORN,
MELT, REHEAT, SIMMER and
SOFTEN.
Off
3. Turn the dial to find the food you
want to cook, defrost or reheat.
Press the dial to enter.
4. Turn the selector dial to select the
Warm 1: Keeping food warm;
softening butter.
5.
Press the dial or the Start/Pause
pad to start cooking.
To review settings during cooking,
press the selector dial.
If the door is opened during cooking,
the oven will stop and PAUSE will
appear in the display. Close the door
and press Start/ Pause to resume
cooking.
If you enter an undesired selection at
any time, simply press the Back pad
and re-enter the desired selections.
type, amount, weight and/or size
as prompted by the oven. Press the
dial after each selection.
Cook By Time
Cook By Time
1 & 2
24
Use COOK BY TIME to microwave food
that is not in the pre-set microwave
selections.
1. Press the Microwave pad.
2. Turn the dial to select COOK BY
TIME and press the dial to enter.
3. Turn the dial to set the cook time
and press the dial to enter.
Use COOK BY TIME 1 & 2 to microwave
food that requires two different times
and power levels.
1. Press the Microwave pad.
2. Turn the dial to select COOK and
press the dial to enter.
3. Turn the dial to select COOK BY
TIME 1 & 2 and press the dial to
enter.
4. Turn the dial to set the power level
and press the dial to enter.
5. Press the dial or the Start/ Pause
pad to start cooking.
You may open the door during COOK
BY TIME to check the food. Close
the door and press Start/Pause to
resume cooking.
4. Turn the dial to set the first time
and press the dial to enter. Repeat
for the first power level, the second
time, and the second power level.
5. Press the dial or the Start/Pause
pad to start cooking.
Page 25
Microwaving
Advantium Oven
Add 30 Sec
My
Recipes
Defrosting
tips
Press Add 30 Sec repeatedly for 30
second increments of microwave
cooking time. Oven starts immediately.
See the MY RECIPE sections in the
Speedcook section of this book for
instructions on how to save, use,
change or delete a microwave custom
recipe.
Use DEFROST BY FOOD TYPE for meat,
poultry, fish, and bread.
Use DEFROST
BY TIME for most other frozen foods.
Foods frozen in paper or plastic
can be defrosted in the
package
when using DEFROST BY TIME. Meats
should be taken out of the package
when using
. Closed packages should be
TYPE
DEFROST BY FOOD
slit, pierced or vented after food has
partially defrosted. Plastic storage
containers should be partially
uncovered.
Family-size, prepackaged frozen
dinners can be defrosted and
microwaved. If the food is in a
foil container, transfer it to a
microwave-safe dish.
The power level is automatically set at
high, but you can change it for more
flexibility. See Microwave power levels
section for instructions.
Foods that spoil easily should not
be allowed to sit out for more than
one hour after defrosting. Room
temperature promotes the growth
of harmful bacteria.
When defrosted, food should be
cool but softened in all areas. If still
slightly icy, return to the microwave
very briefly, or let it stand a few
minutes.
When defrosting 3 or more pounds
of ground or cubed meat, remove
defrosted portions at the turn
signals.
Defrost by
time
S
o
e
t
l
e
n
c
r
t
u
T
r
P
e
r
t
e
s
n
s
E
t
o
Back
Help
Speed
Cook
Settings Options
Timer
On/Off
Convection
Bake
Surface
Light
Pause
Cancel
Lock Controls
Hold 3 Sec
30 Sec
Vent Fan
Use DEFROST BY TIME to defrost for a
selected length of time.
1. Press the Microwave pad.
Power level is automatically set at 3,
but can be changed. To change the
power levels, see Microwave power
levels for instructions.
2. Turn the selector dial to DEFROST.
Start
Off
Micro
wave
Add
Press the dial to enter.
3. Turn the dial to DEFROST BY TIME.
Press the dial to enter.
4. Turn the dial to select the time you
want. Press the dial to enter.
5. Press the dial or Start/Pause pad
to start defrosting.
6. Turn the food over when the oven
You can defrost small items quickly by
raising the power level after entering
the time. Power level 7 cuts the total
defrosting time in about half; power
level 10 cuts the total time to about
1/3. When defrosting at high power
levels, food will need more frequent
attention than usual and may have
some cooking.
signals TURN FOOD OVER.
25
Page 26
Microwaving
Advantium Oven
Defrost by
food type
S
o
e
t
l
e
n
c
r
t
u
T
r
P
e
r
t
e
s
n
s
E
t
o
Back
Help
Speed
Cook
Settings Options
Timer
On/Off
Convection
Bake
Surface
Light
Lock Controls
Start
Pause
Cancel
Off
Hold 3 Sec
Micro
wave
Add
30 Sec
Vent Fan
DEFROST BY FOOD TYPE automatically
sets the defrosting times and power
levels to give even defrosting results
for meats, poultry and fish weighing
up to 6 pounds.
1. Remove meat from the package
and place it on a microwave-safe
dish. Bread should be left in the
package with any metal twist-ties
removed.
2. Press the Microwave pad.
3. Turn the dial to DEFROST. Press the
dial to enter.
4. Turn the dial to DEFROST BY FOOD
TYPE. Press the dial to enter.
5. Turn the dial to select food type.
Press the dial to enter.
6. Turn the dial to the food weight,
using the Conversion Guide at right.
For example, dial 1.2 for 1.2 pounds
(1 pound, 3 oz.). Press the dial to
enter.
7. Press the dial or Start/Pause pad
to start defrosting.
Remove defrosted meat or shield
warm areas with small pieces of
foil for even defrosting.
After defrosting, most meats need
to stand 5 minutes to complete
defrosting. Large roasts should
stand for about 30 minutes.
Conversion Guide
If the weight of food is stated in pounds
and ounces, the ounces must be
converted to tenths (.1) of a pound.
Weight of Food Enter Food Weight
in Ounces (tenths of a pound)
1–2 .1
3 .2
4–5 .3
6–7 .4
8 .5
9–10 .6
11 .7
12–13 .8
14–15 .9
8. Turn the food over when the oven
signals TURN FOOD OVER.
26
Page 27
Microwave
sensor
cooking tips
The Advantium’s microwave mode
features sensor cooking and
reheating. The oven automatically
senses when food is done and shuts
LWVHOIRII³HOLPLQDWLQJWKHQHHGWR
program cook times and power levels.
The sensor feature detects the
increasing humidity released during
cooking. The oven automatically
adjusts the cooking time to various
types and amounts of food.
WARNING:
Microwaving
Advantium Oven
Covered
Fire Risk
Do not use the sensor features twice in
VXFFHVVLRQRQWKHVDPHIRRGSRUWLRQ³
it may result in severely overcooked or
burnt food. If food is undercooked after
the first countdown, use COOK BY TIME
for additional cooking time.
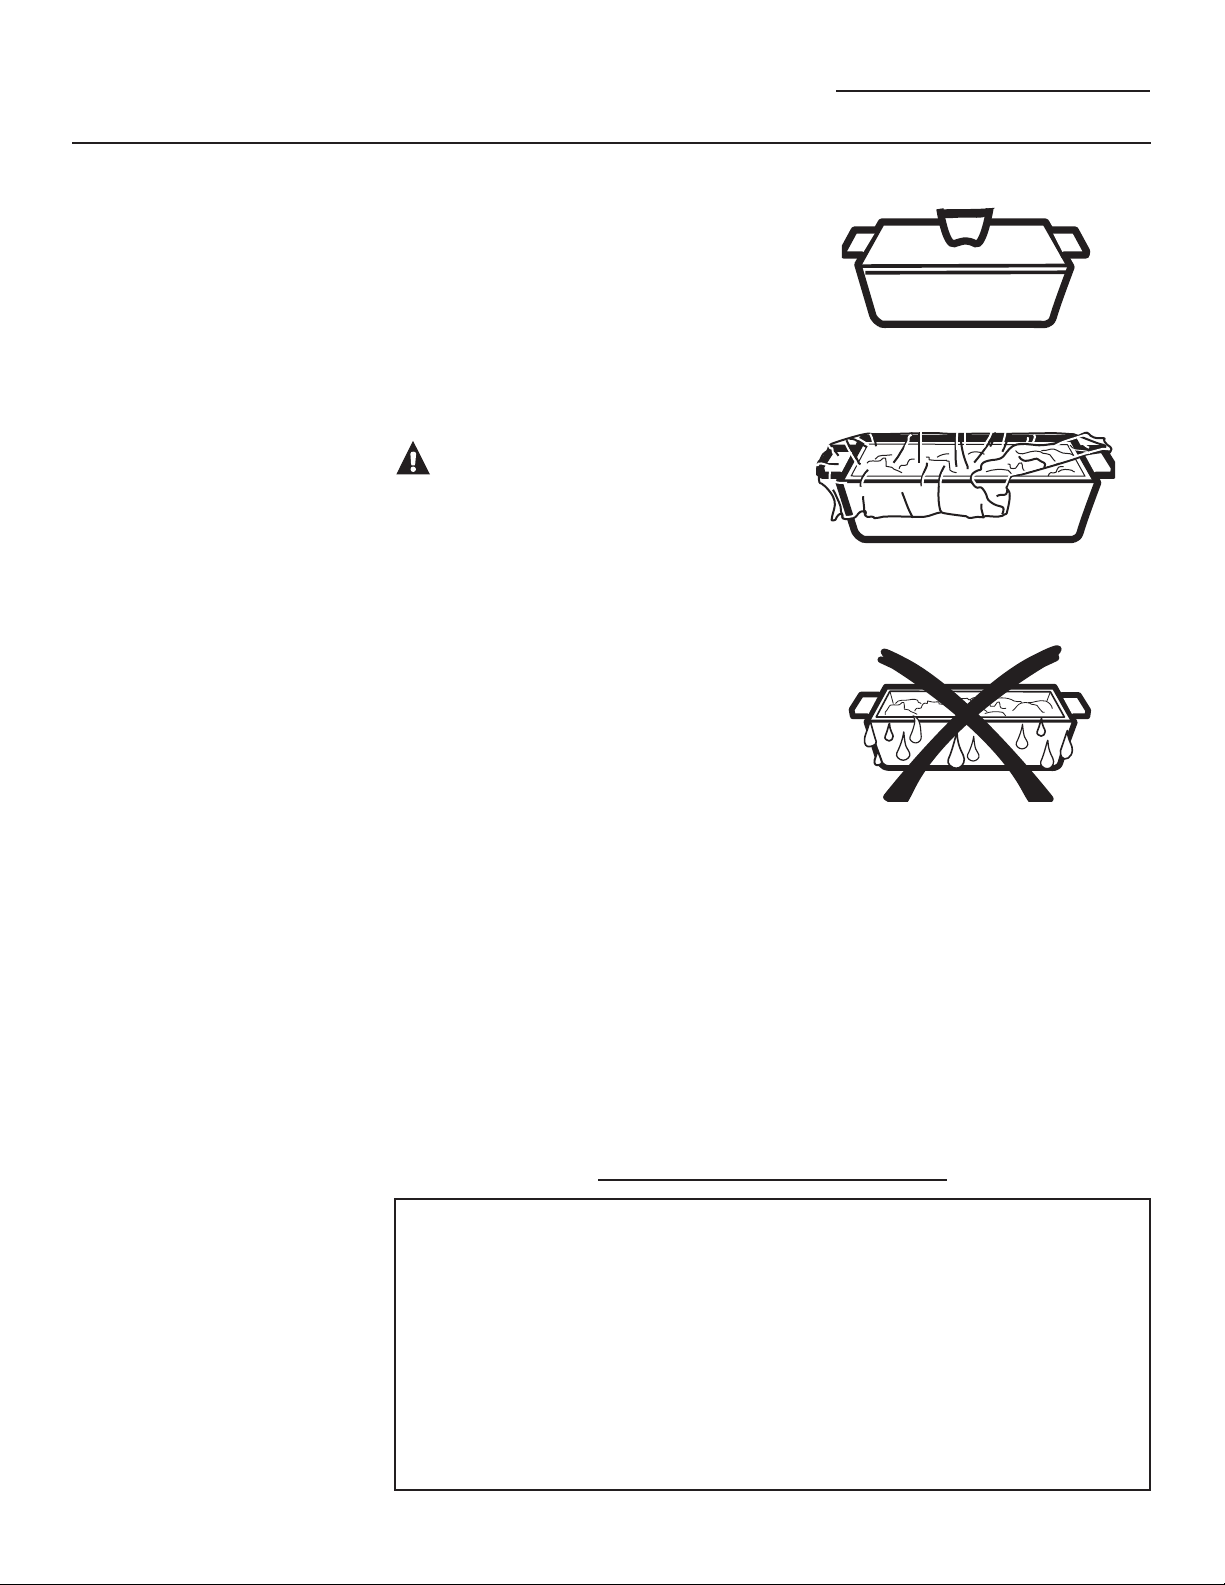
The proper containers and covers
are essential for best sensor
cooking.
Always use microwave-safe
containers and cover them with lids
or vented plastic wrap. Never use
WLJKWVHDOLQJSODVWLFFRQWDLQHUV³
they can prevent steam from
escaping and cause food to
overcook.
Be sure the outside of the cooking
containers and the inside of the
oven are dry before placing food in
the oven. Beads of moisture turning
into steam can mislead the sensor.
Vented
Dry off dishes so they don’t
mislead the sensor.
Popcorn and Potatoes are best
heated uncovered.
MICROWAVE SENSOR PROGRAMS
Ground Meat
Popcorn
(Prepackaged microwave
popcorn, 2.9 oz. to 3.5 oz.)
Potato
Rice
Soup
Vegetables (Canned, Fresh,
Frozen)
Chicken Reheat
Pasta Reheat
Plate of Food Reheat
Soup Reheat
Vegetable Reheat
Simmer
27
Page 28
Microwaving and Other Advantium Features
Advantium Oven
To use all
sensor
programs
S
o
e
t
l
e
n
c
r
u
T
P
r
e
s
n
s
E
t
o
Back
Help
Speed
Convection
Cook
Bake
Settings Options
Timer
Surface
On/Off
Light
t
e
t
r
Lock Controls
Hold 3 Sec
Vent Fan
Pause
Cancel
30 Sec
To use the sensor features:
1. Press the Microwave pad.
2.
Turn the dial to select COOK BY FOOD
(located under COOK), REHEAT, or SIMMER.
3.
For COOK BY FOOD and REHEAT, select
a food and press the dial to enter. For
SIMMER, set the time to simmer after the
Start
Off
Micro
wave
Add
soup, sauce or stew has come to a boil.
4. Press the dial or press the Start/ Pause
pad to start cooking.
Do not open the oven door until time is
counting down on the display. If you open
the door while sensor cooking, “Sensor Error
- Close door and press START” will appear.
Close the door immediately and press the
Start/Pause pad to begin again.
Notes about the Reheat program:
Reheated foods may have wide variations in
temperature. Some areas may be extremely
hot.
It is best to use COOK BY TIME and not
REHEAT for these foods:
Bread products
Food that must be reheated uncovered
Foods that need to be stirred or turned
Foods calling for a dry look or crisp
surface after reheating
How to adjust the oven’s automatic COOK
BY FOOD and REHEAT settings for a shorter
or longer cook time (not available for all food
types):
To reduce the automatic cooking times:
WARNING:
Fire Risk
Do not use a sensor feature twice in
VXFFHVVLRQRQWKHVDPHIRRGSRUWLRQ³LWPD\
result in severely overcooked or burnt food. If
the food is not done enough at the end of the
sensor cook time, use COOK BY TIME in the
microwave selector to cook for more time.
If you have been cooking and the oven is
hot, it may indicate that it is too hot for
sensor cooking. In that case, the oven will
automatically change to time cooking and
may prompt for weights or amounts of
Right after the oven starts, turn the dial
counterclockwise until a minus (“-“) sign
or a double minus (“--“) sign appears and
press the dial to enter. A minus (“-“) sign
is a 10% reduction of cooking time and a
double minus (“--“) sign is a 20% reduction of
cooking time.
To increase the automatic cooking times:
Right after the oven starts, turn the dial
clockwise until a plus (“+“) sign or a double
plus (“++“) sign appears and press the dial to
enter. A plus (“+“) sign is a 10% increase of
cooking time and a double plus (“++“) sign is
a 20% increase of cooking time.
food.
To shorten or lengthen the cook time,
wait until the time countdown shows in
the display. Then turn the dial to add or
subtract time.
Cooking
Complete
Repeat last
S
o
e
t
l
e
n
c
r
t
u
T
r
P
e
r
t
e
s
n
s
E
t
o
Back
Help
Speed
Convection
Bake
Cook
Settings Options
Timer
Surface
On/Off
Light
28
Start
Pause
Cancel
Off
Lock Controls
Hold 3 Sec
Micro
wave
Add
30 Sec
Vent Fan
To remind you that you have food in the
oven, the oven will display the cooking mode
and COOKING COMPLETE and beep once a
Use this time saving feature for cooking
repetitive items like cookies or appetizers. This
feature will repeat the last cooking cycle used,
including time, temperature, power levels, and
turntable settings
1. Press Options and select REPEAT LAST.
2. The last cooking cycle will be displayed.
minute until you either open the oven door or
press the Cancel/Off pad.
Note: The last program used is stored for two
hours.
3. Press the Start/Pause pad or the selector
dial to start cooking.
Page 29
Other Advantium Features
Advantium Oven
Resume
feature
S
o
e
t
l
e
n
c
r
t
u
T
r
P
e
r
t
e
s
n
s
E
t
o
Convection
Bake
Surface
Light
Start
Pause
Cancel
Off
Lock Controls
Hold 3 Sec
Micro
wave
Add
30 Sec
Vent Fan
Back
Help
Speed
Cook
Settings Options
Timer
On/Off
Clock
Auto
Conversion
1. If your food needs to cook a bit longer,
you can restart the oven by pressing the
Start/Pause pad or selector dial.
2. RESUME COOKING will be displayed and
the oven will restart immediately at 10%
of the original time.
The clock must be set before you can use
your oven for the first time. When setting the
clock time for the first time go directly to step
two.
Auto conversion automatically reduces the
convection baking temperature. You still
input the recipe temperature and the oven
control does the rest.
The program stays in memory for 5 minutes.
After that you will need to begin the
program again.
1. To change the clock time, press the
Settings pad and turn the dial to CLOCK
SETTINGS. Select SET TIME.
2. Turn the dial to set hours. Press the dial to
enter. Note: Setting hours sets AM/PM.
3. Turn the dial to set minutes. Press the dial
to enter.
To change the setting, press the Settings pad
and turn the dial to AUTO CONVERSION. Press
the dial to enter. Turn the dial to change the
setting to CONVERSION ON or CONVERSION
OFF. Press the dial to enter.
Display
On/Off
Beeper
Volume
Reminder
Use this feature to turn your clock display on
or off.
Use this feature to adjust the volume of the
beeper. You can even turn it off.
Use this feature to set an alarm beep to
sound at a specific time of day.
1. Press the Settings pad, turn the dial to select
REMINDER and press the dial to enter.
2. Select SET REMINDER and press the dial to
enter.
3. Turn the dial to set the time hour and
minutes, press the dial to enter.
Note: Setting the hours set AM/PM.
Press the Settings pad, turn the dial to select
DISPLAY ON/OFF. Turn the dial to select
CLOCK DISPLAY ON or CLOCK DISPLAY OFF.
Press the dial to enter.
Press the Settings pad, turn the dial to select
BEEPER VOLUME, press the dial to enter.
Select the beeper volume, press the dial to
enter.
To turn off the Reminder, press the Settings
pad, turn the dial to select REMINDER and
press the dial to enter. Turn the dial to select
CLEAR REMINDER and press the dial to enter.
To check the Reminder time, press the
Settings pad, turn the dial to select
REMINDER and press the dial to enter. Turn
the dial to select REVIEW REMINDER and
press the dial to enter. The display will show
the Reminder time.
29
Page 30

Other Advantium Features
Advantium Oven
Turntable
On/OFF
Auto Night
Light
Use this feature to keep the turntable from
turning when using a dish is too large to
rotate in the cavity.
TURNTABLE ON/OFF is not a permanent
setting.
Press the Settings pad, turn the dial to select
TURNTABLE ON/OFF and press the dial to
enter. Turn the dial to select TURNTABLE ON
or TURNTABLE OFF, press the dial to enter.
Use this feature to set the surface light to
come on and go off at a certain time.
1. Press the Settings pad, turn the dial to
select AUTO NIGHT LIGHT and press the
dial to enter.
2. Select SET ON TIME and press the dial to
enter.
3. Turn the dial to set on time hour and
minutes, press the dial to enter. Turn the
dial to set off time hour and minutes, press
the dial to enter. Note: Setting the hours
sets AM/PM.
Note:
7KHWXUQWDEOHZLOOQRWWXUQRIILQ6SHHGFRRN
Broil, Toast, or Microwave Sensor modes.
$FRRNLQJF\FOHPXVWEHVWDUWHGZLWKLQ
minutes of turning the turnable off, or the
turntable will reset to the on setting.
7KHWXUQWDEOHZLOODOVRUHPDLQRIIIRU
cooking cycles started within 5 minutes of
the end of any cooking cycle for which the
turntable was off.
To check the Auto Night Light on and off
times, press the Settings pad, turn the dial to
select AUTO NIGHT LIGHT and press the dial
to enter. Turn the dial to select REVIEW ON/
OFF TIMES and press the dial to enter. The
display will show the on and off time for the
Auto Night light.
Note:
$XWR1LJKW/LJKWZLOOWXUQRQWKHVXUIDFH
light to the night setting, when the clock
time matches the Auto Night Light on time,
even if the surface light is on the bright
setting.
Temperature
Units
Delay Start
30
To disable the Auto Night Light feature, press
the Settings pad, turn the dial to select AUTO
NIGHT LIGHT and press the dial to enter.
Turn the dial to select DEACTIVATE and press
the dial to enter.
To change temperature units, press the
Settings pad and select TEMPERATURE UNITS.
Turn the dial to select F or C and press the
dial to enter.
Use this feature to delay when the oven will
start cooking in CONV BAKE, COOK BY TIME,
COOK BY TIME 1&2, DEFROST BY TIME, or
DEFROST BY WEIGHT.
1. Press the Options pad.
2. Turn the dial to select DELAY START and
press the dial to enter.
$XWR1LJKW/LJKWZLOODOZD\VWXUQWKH
surface light off when the clock time
matches the Auto Night Light off time if the
surface light is turned on.
3. Turn the dial to set the start time hour and
minutes, press the dial to enter.
Note: Setting the hours sets AM/PM.
4. Set the cooking mode.
The oven will start the programmed cooking
mode when the clock time and the delay
start time are the same.
Page 31
Other Advantium Features
Advantium Oven
Help
Use this feature to find out more about
your oven and its features.
1. Press the Help pad.
2. Turn the dial to select the feature
name. Press the dial to enter.
Features found in the Help function.
Adding Time
Auto Conversion
Auto Night Light
Back
Beeper Volume
Beverage
Broil
Cancel/Off
Clock
Control Lockout
Convection Bake
Cook by Food Type
Cook by Time
Cook by Time 1 & 2
Options
Defrost
Defrost by Food
Defrost by Time
Defrost by Weight
Delay Start
Display On/Off
Edit
Help
Melt
Add 30 Sec
Microwave
My Recipes
Proof
Reheat
Reminder
The display will show a description
for the program you have chosen.
Use the dial to scroll up or down to
read the description.
Repeat Last
Resume
Sensor Cooking
Simmer
Soften
Speed Cook
Start/Pause
Temperature Units
Timer On/Off
Turntable On/Off
Toast
Warm
Control
lock-out
Timer On/Off
Automatic
fans
You may lock the control panel
to prevent the oven from being
accidentally started during cleaning or
being used by children.
Press and hold Cancel/Off for
3 seconds to lock and unlock.
Use this feature anytime you need a
general purpose timer. It can even be
used while cooking in the oven.
1. Press the Timer pad.
2. Turn the dial to select the minutes.
Press the dial to enter.
Cooling fans automatically turn on
as required to keep the internal
oven components and control from
overheating.
When the control panel is locked,
CONTROL IS LOCKED will be displayed
briefly anytime a pad or dial is
pressed.
3. Turn the dial to select the seconds.
Press the dial to enter.
To cancel, press the Timer pad.
The vent fan may come on
automatically if the oven gets too hot,
even if the oven isn’t running. The
screen will display: “Normal Operation.
Fan is on due to high heat. Fan will
shut off automatically.”
31
Page 32
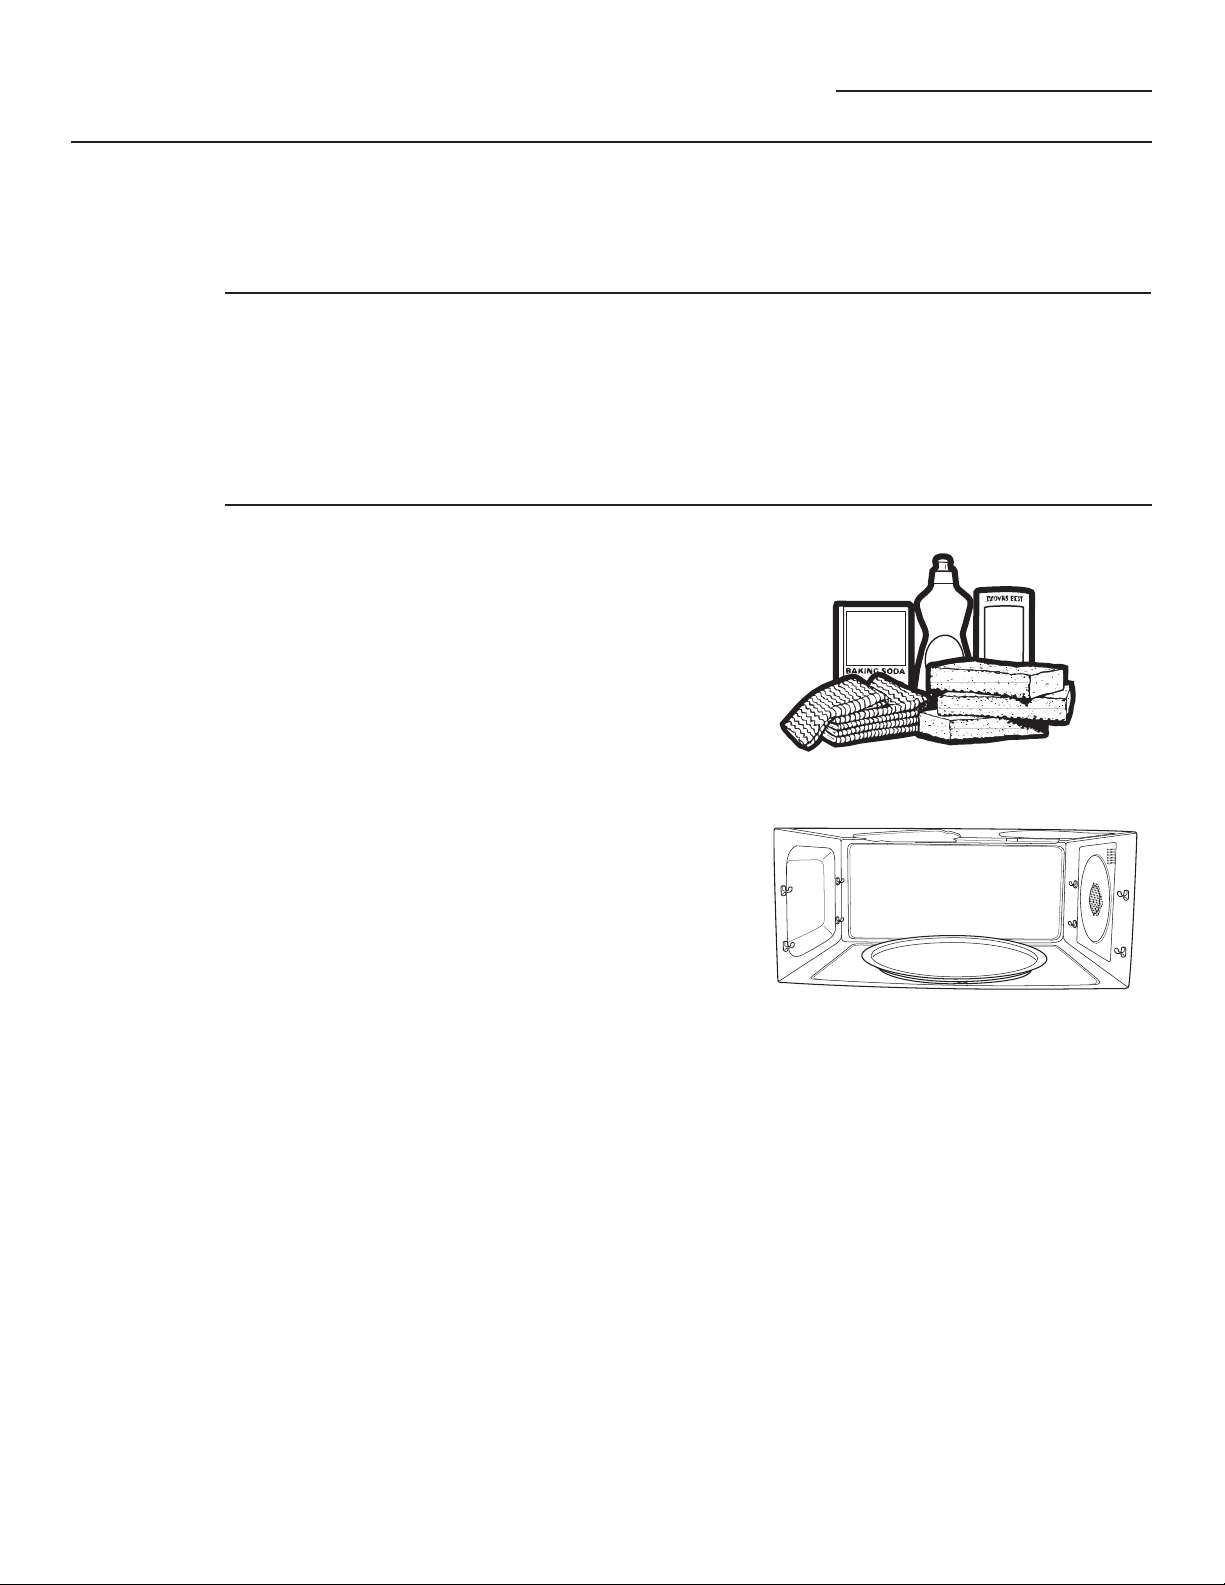
Care and Cleaning
Advantium Oven
Surface
Light
Vent Fan
How to clean
the inside of
the oven
Use to light your cooktop.
Press the Surface Light pad to change
from bright to night to off.
The vent fan removes steam and
other vapors from surface cooking.
Press the Vent Fan pad to change
from high to medium to low to off.
Be certain the oven control is turned
off and the oven is warm or cool to
the touch before cleaning any part of
this oven.
Clean the inside of the oven often for
proper heating performance.
Some spatters can be removed with
a paper towel, others may require a
warm soapy cloth. Remove greasy
spatters with a sudsy cloth, then rinse
with a damp cloth.
The vent fan may come on
automatically if the oven gets too hot,
even if the oven isn’t running. The
screen will display: “Normal Operation.
Fan is on due to high heat. Fan will
shut off automatically.”
If the dirt and spatter do not come off
easily with a warm sudsy cloth, place a
medium sized bowl full of water in the
unit on the metal tray and press the
Speed Cook pad. Select MY RECIPE and
set for 10 minutes at U=10, L=10, M=7,
C=10. This should loosen the dirt in the
oven so that it can be removed with a
warm sudsy cloth.
If you notice yellowing on the metal
inside the oven that cannot be
removed with a warm sudsy cloth, use
a stainless steel cleaner that removes
heat discoloration and/or tarnishing.
You can then clean the inside of the
oven as you normally do.
Do not use abrasive cleaners or sharp
utensils on oven walls.
Never use a commercial oven cleaner
on any part of your oven.
Do not clean the inside of the oven with
metal scouring pads. Pieces can break
off the pad inside the oven, causing
electrical shock as well as damaging
the inside surface finish of the oven.
32
Page 33
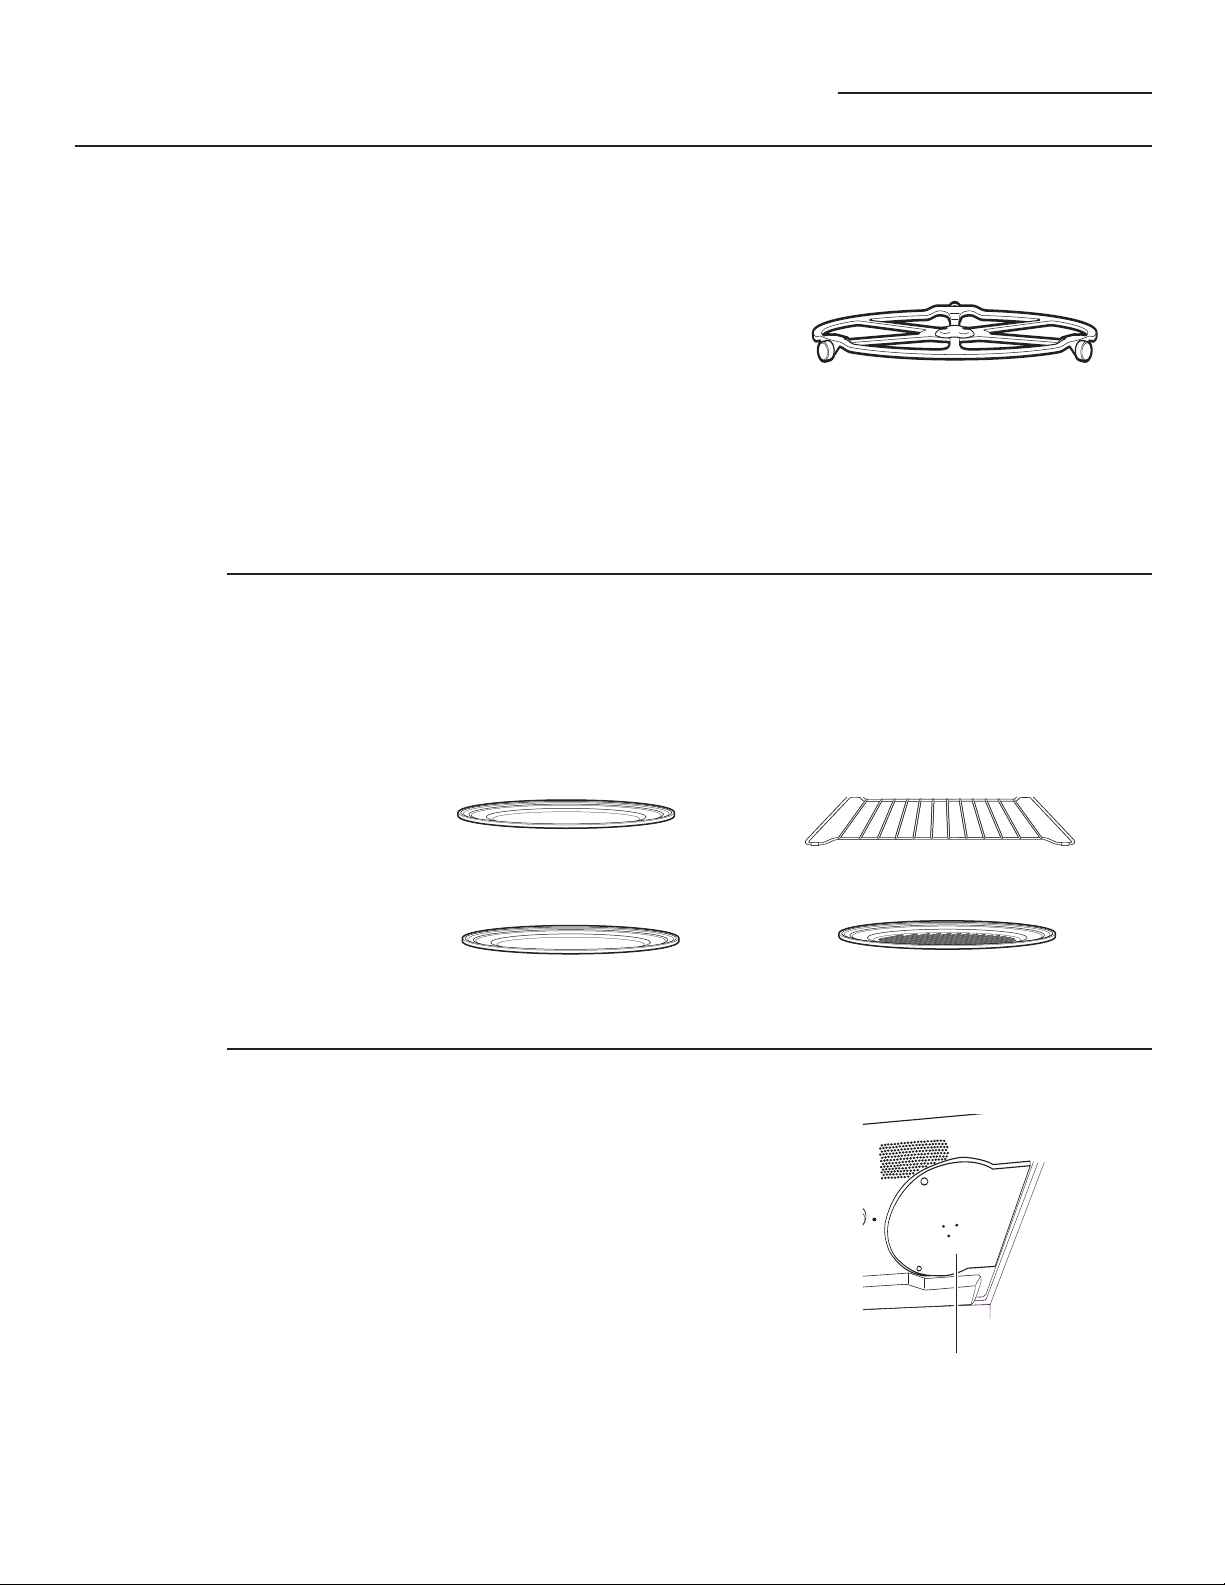
Care and Cleaning
Advantium Oven
Removable
turntable
Cooking trays
and wire
oven rack
The area underneath the turntable should
be cleaned frequently to avoid odors and
smoking during a cooking cycle.
The turntable can be broken if dropped.
Wash carefully in warm, sudsy water.
Dry completely and replace.
To replace the turntable, place its
center over the spindle in the center of
the oven and turn it until it seats into
place.
To prevent breakage, allow the trays to
cool completely before cleaning. Wash
carefully in hot, sudsy water or in the
dishwasher.
Turntable
Do not use the oven without the
turntable in place.
Do not use abrasives to clean the glass
tray or wire oven rack, as they may
damage the finish.
A plastic scrubbing pad may be used
to clean the metal trays.
Mica sheet
Clear glass tray
Metal tray
Do not remove the mica sheet.
To clean the mica sheet: Allow the
oven to cool completely. Wipe clean
with a warm soapy cloth.
Wire oven rack
Metal grill tray
Mica Sheet
33
Page 34
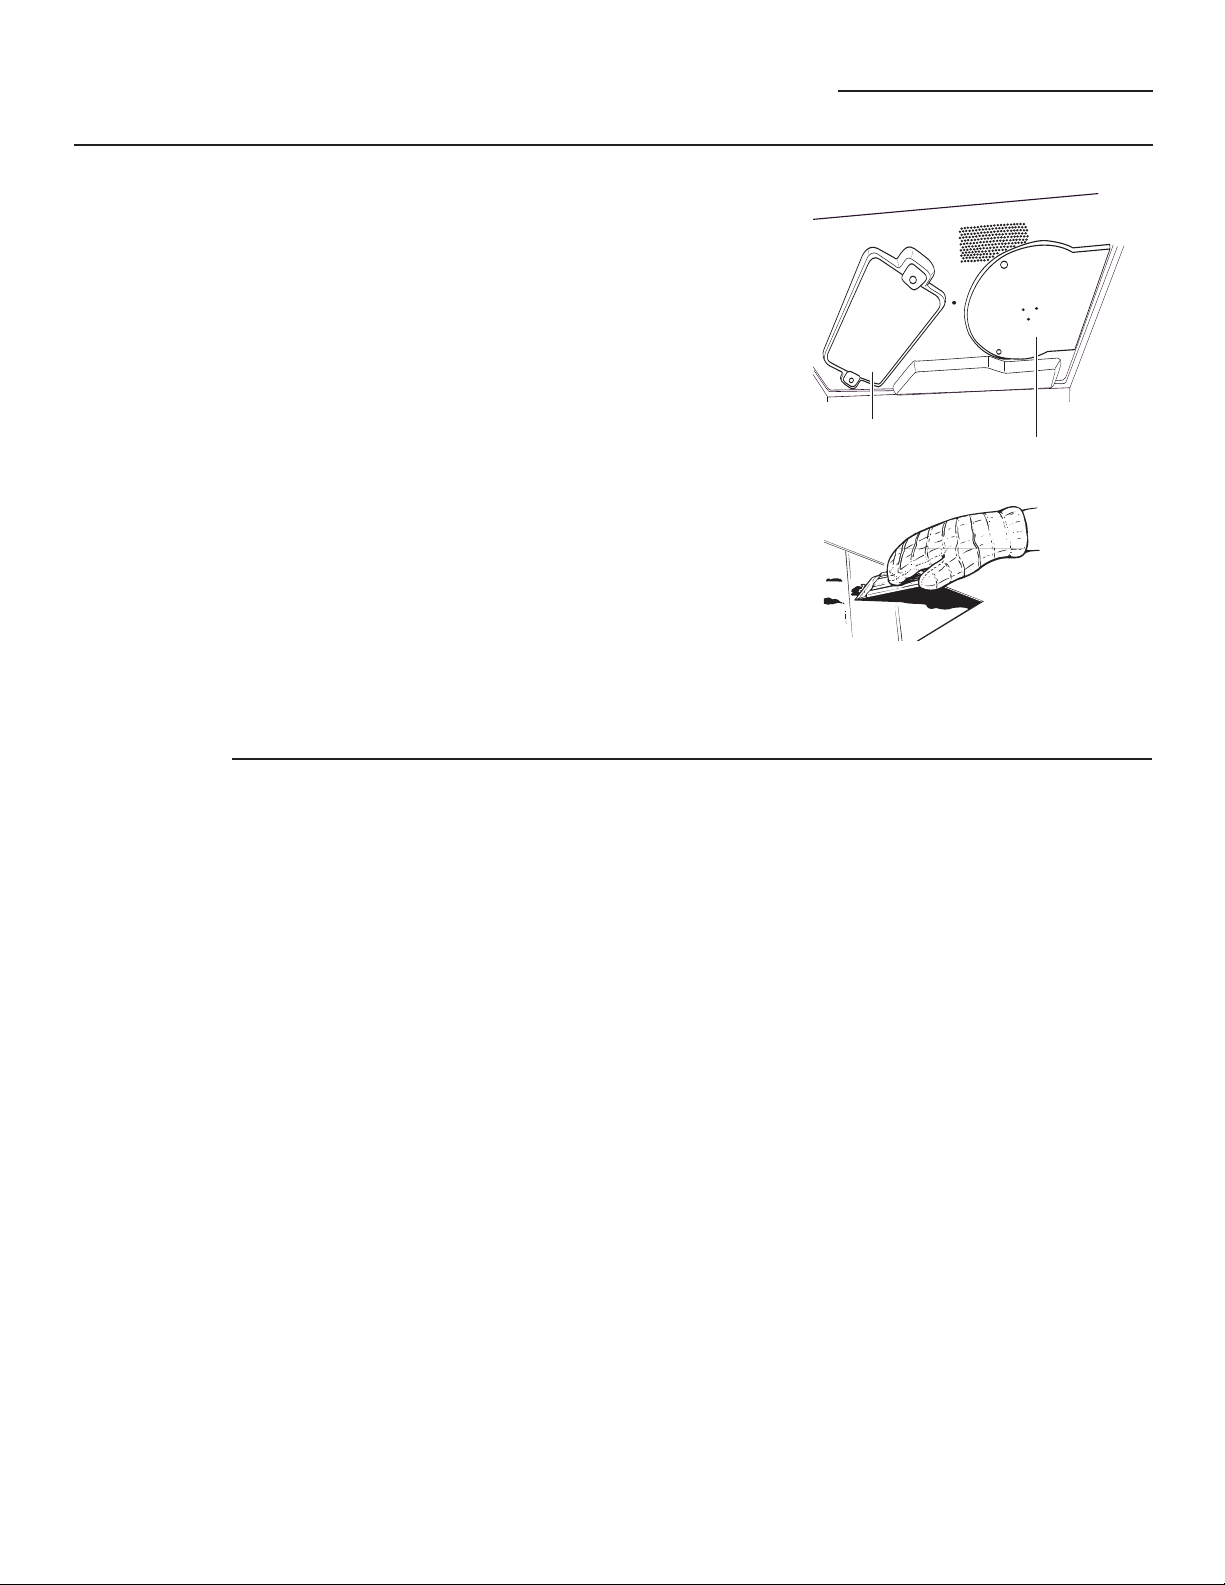
Care and Cleaning
Advantium Oven
Halogen
lamp cover
and mica
sheet
Do not remove the halogen lamp
glass cover or the mica sheet.
The upper halogen lamp cover
must be kept free of grease and
food spatterings in order to operate
effectively.
Clean the lamp glass cover and mica
sheet often to avoid excess smoking
and decreased cooking power.
To clean the upper lamp cover: Allow
the oven and glass cover to cool
completely. Wipe clean with a warm
soapy cloth or plastic scrubbie.
For heavy burned on soil, a cleaning
scraper may be used to clean the
halogen lamp cover. Hold the cleaning
scraper at a 30° angle. Scrape the
glass clean and wipe up excess soil.
To clean the mica sheet: Allow the
oven to cool completely. Wipe clean
with a warm soapy cloth.
Upper halogen
lamp cover
For heavy or burned on soil
Mica Sheet
How to clean
the outside of
the oven
We recommend against using
cleaners with ammonia or alcohol,
as they can damage the appearance
of the oven. If you choose to use a
common household cleaner, first
apply the cleaner directly to a clean
cloth, then wipe the soiled area.
Case
Clean the outside of the microwave
with a sudsy cloth. Rinse and then dry.
Wipe the window clean with a damp
cloth.
Control Panel
Wipe with a damp cloth. Dry
thoroughly. Do not use cleaning
sprays, large amounts of soap and
water, abrasives or sharp objects on
the panel - they can damage it. Some
paper towels can also scratch the
control panel.
Stainless Steel Surfaces
(on some models)
The stainless steel panel can be
cleaned with Stainless Steel Magic or
a similar product using a clean, soft
cloth. Apply stainless cleaner carefully,
avoiding the surrounding plastic or
glass parts. Do not use appliance wax,
polish, bleach or products containing
chlorine on stainless steel.
Plastic Color Panels
(on some models)
Use a clean, soft, lightly dampened
cloth, then dry thoroughly.
Door Seal
It’s important to keep the area clean
where the door seals against the oven.
Use only mild, non-abrasive detergents
applied with a clean sponge or soft
cloth. Rinse well.
Bottom
Clean off the grease and dust on the
bottom often. Use a solution of warm
water and detergent.
34
Page 35
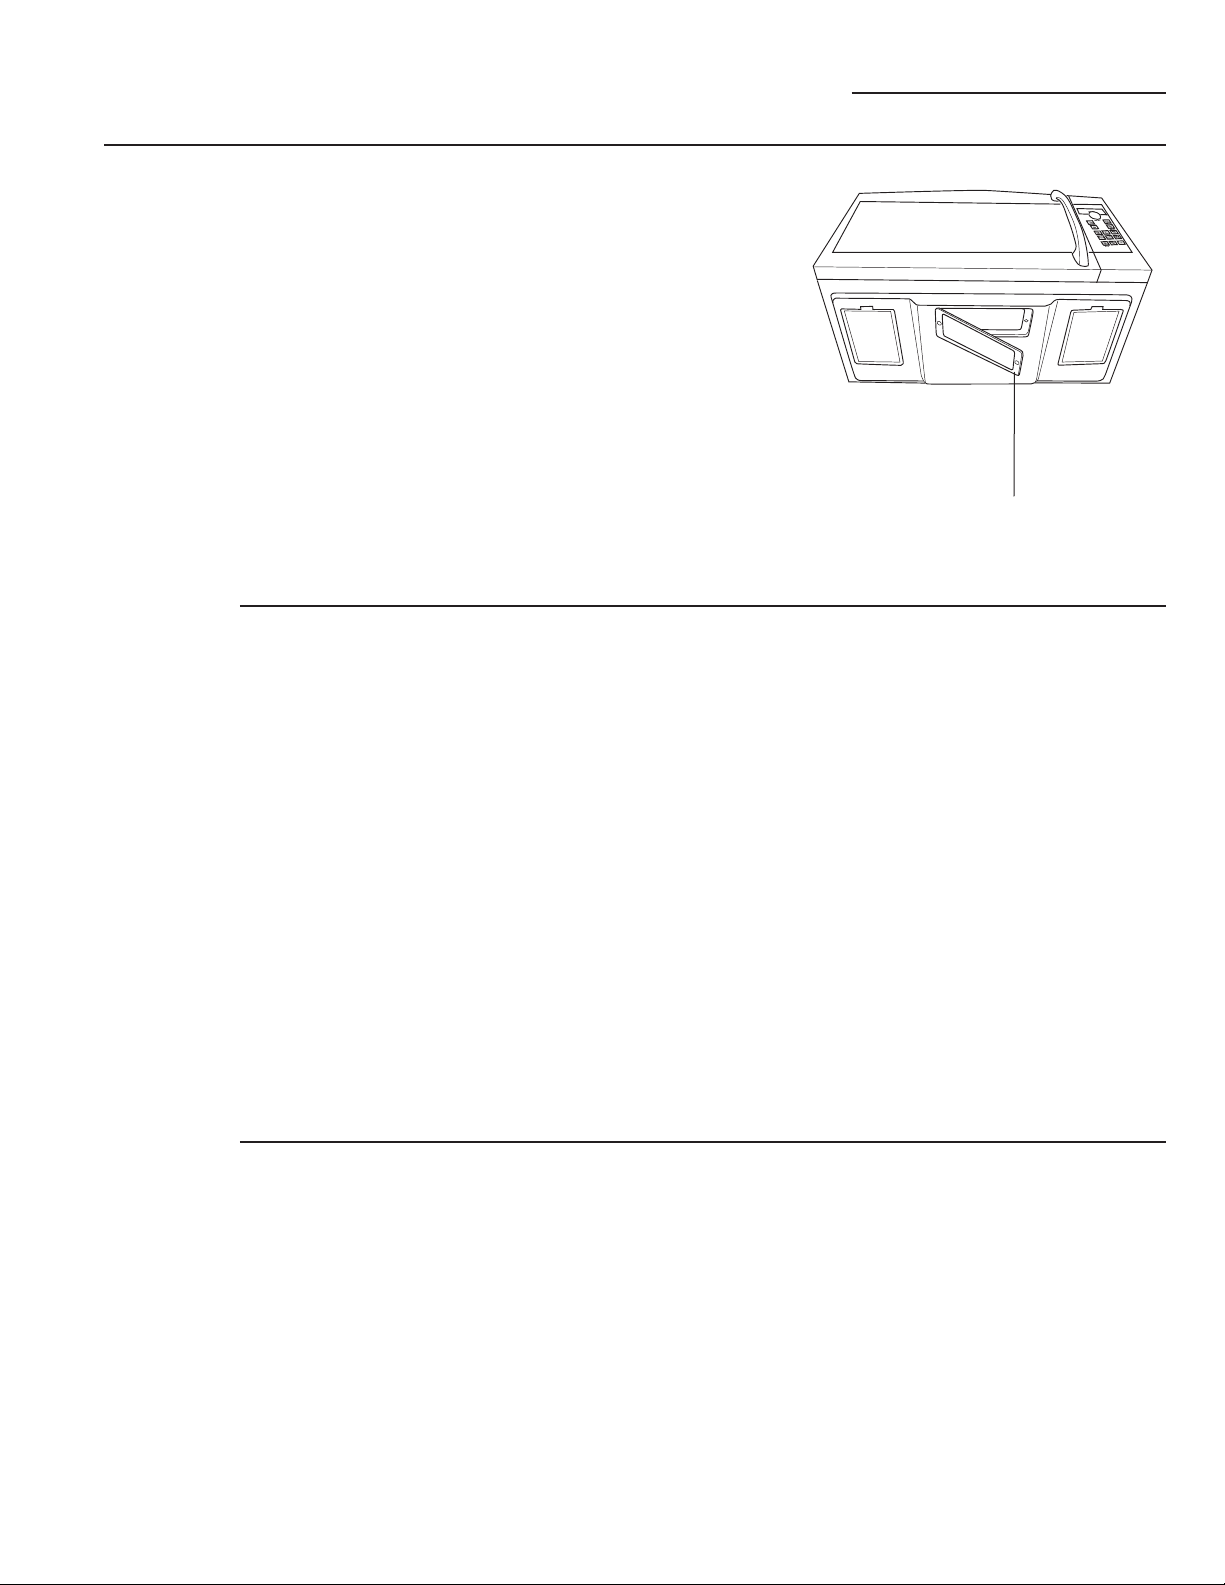
Care and Cleaning
Advantium Oven
Replacing the
surface light
Removing
and cleaning
the filters
1. To replace the surface light, first
disconnect the power at the main
fuse or circuit breaker panel.
2. Remove the screw from the side of
the light compartment cover and
lower the cover until it stops.
3. Be sure the bulb to be replaced is
cool before removing. Gently pull
the bulb from the receptacle.
Replace with a 130 volt, 50-watt
halogen bulb. Order WB08X10051
from your GE supplier.
4. Raise the light cover and replace
the screw. Connect electrical power
to the oven.
1. The metal filters trap grease
released by foods on the cooktop.
They also prevent flames from
foods on the cooktop from
damaging the inside of the oven.
2. For this reason, the filters must
always be in place when the hood
is used. The vent filters should
be cleaned once a month, or as
needed.
Remove screw
5. Rinse, shake and let dry before
replacing.
6. To replace, slide the filters into the
frame slots on the back of each
opening. Press up and to the front
to lock into place.
Replacing the
oven cavity
lamp
3. To remove, slide them to the rear
using the tabs. Pull down and out.
4. To clean the vent filters, soak them
and then swish around in hot water
and detergent. Don’t use ammonia
or ammonia products because
they will darken the metal. Light
brushing can be used to remove
embedded dirt.
1. Disconnect power at the main fuse
or circuit breaker panel.
2. Remove the top grill by removing
the two screws that hold it in place.
3. Remove charcoal filter if present.
Slide the filter toward the left and
pull toward the front to remove.
Note: Charcoal filter is an optional
kit, you may not have one.
4. Remove the screw holding the lamp
shield in place.
5. Pull the lamp shield out. Pull the
light bulb out and replace with the
120V-130V, 20W halogen bulb.
Order WB25X10019 from your GE
supplier.
6. Return the lamp and lamp shield to
original position and replace screw
and charcoal filter.
7. Replace the grill and 2 screws.
Reconnect power to the oven.
35
Page 36
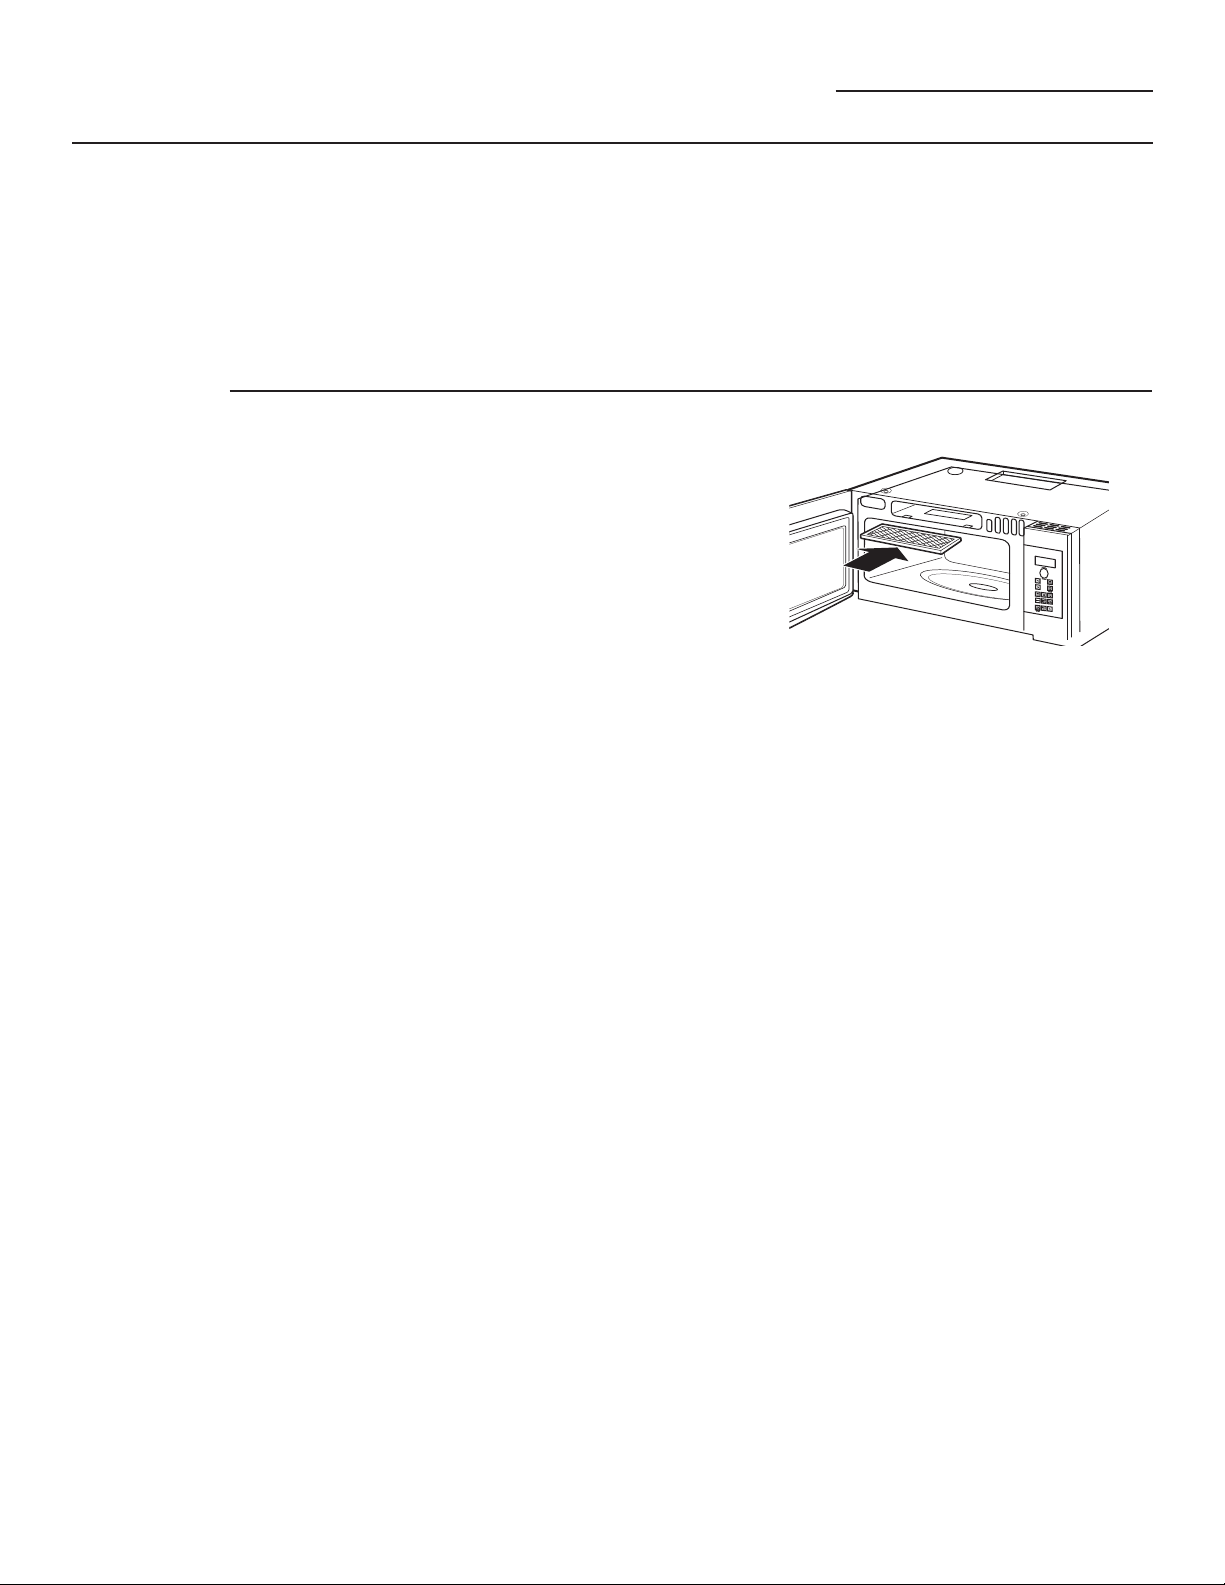
Care and Cleaning
Advantium Oven
Charcoal
filter (JX81D optional kit)
To install
the charcoal
filter
If the model is not vented to the
outside, the air will be recirculated
through a disposable charcoal filter
that helps remove smoke and odors.
The charcoal filter cannot be cleaned.
It must be replaced. Order Part No.
JX81D - WB02X10943 from your GE
supplier.
To install a new filter:
1. Remove plastic and other outer
wrapping from the new filter.
2. Remove the top grill by removing
the two screws that hold it in place.
3. Insert the filter into the top opening
of the oven as shown.
4. It will rest at an angle on two back
support tabs and in front by two
tabs.
5. Replace the grill and two screws.
To remove the filter, repeat step 2
above, remove the filter and repeat
step 5.
The charcoal filter should be
replaced when it is noticeably dirty
or discolored (usually after 6 to 12
months, depending on usage).
36
Page 37

Troubleshooting
Advantium Oven
Questions?
Use this
problem
solver
Problem Possible Causes What to Do/Explanation
LIGHTS
Light during a speedcook cycle
dims and cycles on and off, even
at full power levels.
Light visible around the door and
outer case while speedcooking.
FAN
Fan continues to run cooking
stops.
Oven vent emits warm air while
oven is on.
Vent fan comes on automatically
when oven not in use.
Fan comes on automatically
when using the microwave.
The oven makes unusual sounds
while cooking.
Fan sound changes while
cooking.
COOKING
Smoke comes out of oven when
the door is opened.
Food is not fully cooked or
browned at the end of a cooking
program.
Oven has turned off in Warm,
Proof, or Convection Bake
This is normal. Power level has
been automatically reduced
because the oven is hot.
This is normal. When the oven is on, light may be
The oven is cooling. The fan will automatically shout
This is normal.
This is normal. If the cooktop or oven gets hot
This is normal. If the microwave is used after
Clicks and fans blowing are
normal. The relay board is turning
the components on and off.
This is normal. Fan may turn on or off during
Food is high in fat content.
Aerosol spray used on the pans.
Programmed times may not
match the size or amount of food
you are cooking.
The maximum cooking time of
179 minutes has been reached.
A cooking time was set for
Convection Bake to start after
preheat and the door was not
opened at the end of preheat.
This is normal. The oven senses
the heat level and adjusts
automatically.
visible around the door and outer
case.
off when the internal parts of the
oven have cooled.
enough the vent fan comes on.
(see Automatic Fan section.)
speedcook and the oven senses
that it is too hot, the vent fan
comes on to cool the oven.
These sounds are normal.
cooking to maintain cooking
temperature.
Smoke is normal when cooking
high-the fat foods. Use vegetable
oil or olive oil on the meat itself
instead of coating the entire pan.
Increase or decrease time for
doneness or adjust the upper or
lower lamps for browning.
This is normal. The control will
automatically turn off the oven
and indicate that cooking time is
reached. The cooking time is not
always displayed.
This is normal The control will
automatically turn off the oven
after one hour and indicate that
cooking is complete if the door is
not opened.
37
Page 38

Troubleshooting
Advantium Oven
Questions?
Use this
problem
solver
Problem Possible Causes What to Do/Explanation
DISPLAY
The display is blank. The display has been turned off. Check the Settings menu for
clock display settings. Turn the
display on.
“Control Panel LOCKED” appears
in display.
Control display is lighted yet oven
will not start.
OTHER PROBLEMS
The door and inside of the oven
feels hot.
Floor of the oven is warm, even
when the oven has not been
used.
Oven will not start. A fuse in your home may be
Glass microwave tray does not
lock into center hub.
The control has been locked. Press and hold Cancel/Off for
about 3 seconds to unlock the
control. See Other Features
Section.
Clock is not set. Follow prompts to set the clock.
Door not securely closed. Open the door and close securely.
Start/Pause pad not pressed
after entering cooking selection.
Delay Start was accidentally set. Press Cancel/Off and reset.
Oven is in DEMO Mode. Unplug the oven for 1 minute,
Cancel/Off was pressed
accidentally.
The oven produces intense heat
in a small space.
The cooktop light is located below
the oven floor. When the light
is on, the heat it produces may
make the oven floor get warm.
blown or the circuit breaker
tripped.
Power surge. Unplug the oven, then plug it
Plug not fully inserted into wall
outlet.
Follow prompts.
then plug the oven back into the
wall. DO NOT set the oven clock;
press and hold the Help and
Start/Pause pads for 3 seconds.
The control should exit DEMO
mode. Set clock and continue.
Reset cooking program and press
Start/Pause.
This is normal.
Use oven mitts to remove food
when ready.
This is normal.
Replace fuse or reset circuit
breaker.
back in.
Make sure the plug on the oven is
fully inserted into wall outlet.
Align the protrusions on the
bottom of the glass microwave
tray with the indentation in the
turntable. This fit is not tight,
some movement is normal.
38
Page 39
Advantium Oven Warranty
Advantium Oven
All warranty service provided by our Factory Service Centers,
or an authorized Customer Care
®
technician.
To schedule service, online, contact us at GEAppliances.com,
or call 800.GE.CARES (800.432.2737). Please have serial and
model numbers availa ble when calling for service.
For the Period of: GE Will Replace:
One Year
From the date of the original purchase
Any part of the oven which fails due to a defect in materials
or workmanship. During this limited one-year warranty, GE
will also provide, free of charge, all labor and related service
costs to replace the defective part.
What GE Will Not Cover:
Service trips to your home to teach you how to
use the product.
Improper installation, delivery or maintenance.
Replacement of house fuses or resetting of
circuit breakers.
Replacement of the cooktop light bulbs.
Staple your receipt here.
Proof of the original
purchase date is needed
to obtain service under
the warranty.
Product not accessible to provide required
service.
Failure of the product or damage to the
product if it is abused, misused (for example,
cavity arcing from wire rack or metal/foil), or
used for other than the intended purpose or
used commercially.
Damage to the product caused by accident,
fire, floods or acts of God.
Incidental or consequential damage caused
by possible defects with this appliance.
Damage caused after delivery.
(;&/86,212),03/,(':$55$17,(6³<RXUVROHDQGH[FOXVLYHUHPHG\LVSURGXFWUHSDLU
as provided in this Limited Warranty. Any implied warranties, including the implied
warranties of merchantability or fitness for a particular purpose, are limited to one year
or the shortest period allowed by law.
This warranty is extended to the original purchaser and any succeeding owner for products
purchased for home use within the USA. If the product is located in an area where service by
a GE Authorized Servicer is not available, you may be responsible for a trip charge or you may
be required to bring the product to an Authorized GE Service Location for service. In Alaska, the
warranty excludes the service calls to your home.
Some states do not allow the exclusion or limitation of incidental or consequential damages. This
warranty gives you specific legal rights, and you may also have other rights which vary from
state to state. To know what your legal rights are, consult your local or state consumer affairs
office or your state’s Attorney General.
Warrantor: General Electric Company. Louisville, KY 40225
39
Page 40

Consumer Support
GE Appliances Web site GEAppliances.com
Have a question or need assistance with your appliance? Try the GE Appliances Web site any day of the year!
For greater convenience and faster service, you can now download Owner’s Manuals, order parts or even
schedule service on-line.
Schedule Service GEAppliances.com
Expert GE repair service is only one step away from your door. Get on-line and schedule your service at
your convenience any day of the year! Or call 800.GE.CARES (800.432.2737) during normal business hours.
Real Life Design Studio GEAppliances.com
*(VXSSRUWVWKH8QLYHUVDO'HVLJQFRQFHSW³SURGXFWVVHUYLFHVDQGHQYLURQPHQWVWKDWFDQEHXVHGE\
people of all ages, sizes, and capabilities. We recognize the need to design for a wide range of physical and
mental abilities and impairments. For details of GE’s Universal Design applications, including kitchen design
ideas for people with disabilities, check out our Web site today. For the hearing impaired, please
call 800.TDD.GEAC (800.833.4322).
Extended Warranties GEAppliances.com
Purchase a GE extended warranty and learn about special discounts that are available while your warranty
is still in effect. You can purchase it on-line anytime or call 800.626.2224 during normal business hours.
GE Consumer Home Services will still be there after your warranty expires.
Parts and Accessories GEAppliances.com
Individuals qualified to service their own appliances can have parts or accessories sent directly to their homes
(VISA, MasterCard, and Discover cards are accepted). Order on-line today, 24 hours every day, or by phone at
800.626.2002 during normal business hours.
Instructions contained in this manual cover procedures to be performed by any user. Other servicing
JHQHUDOO\VKRXOGEHUHIHUUHGWRTXDOLILHGVHUYLFHSHUVRQQHO&DXWLRQPXVWEHH[HUFLVHGVLQFHLPSURSHU
servicing may cause unsafe operation.
Contact Us GEAppliances.com
If you are not satisfied with the service you receive from GE, contact us on our Web site with all the details,
including your phone number, or write to: General Manager, Customer Relations
GE Appliances, Appliance Park
Louisville, KY 40225
Register Your Appliance GEAppliances.com
5HJLVWHU\RXUQHZDSSOLDQFHRQOLQH³DW\RXUFRQYHQLHQFH7LPHO\SURGXFWUHJLVWUDWLRQZLOODOORZIRUHQKDQFHG
communication and prompt service under the terms of your warranty, should the need arise. You may also mail
in the preprinted registration card included in the packing material.
Printed in Korea
Page 41

GEAppliances.com
Advantium
Controles de Cocimiento ...................12
Conociendo su Horno Advantium .....10
Características del Horno ...................11
Seguridad ................................................2–9
Cocimiento Rápido
Consejos de Cocimiento......................14
GE Profile
Cocimiento rápido personalizado ..17
Mis Recetas ..........................................1719
Nivel de Potencia .................................. 16
Repite la última función ......................17
Reanuda la función ...............................17
Recipientes para cocimiento rápido 14
Recipientes seguros
paracocimiento rápido ...........................8
Lo que es normal ....................................13
Uso del menú predeterminadode
cocimiento rápido ..................................15
Otras funciones de
cocimiento
Asar y tostar ............................................. 21
Hornear con convecció .......................20
Calentar ......................................................22
Fermetar .....................................................22
Cocinar en el Microonda
Cocinar con tiempo ............................... 24
Consejos de cocimiento ......................23
Descongelar por tipo de comida ....26
Descongelar con tiempo .................... 25
Consejos de descongelación ............25
Agregar 30 segundos ........................... 25
Mis Recetas ...............................................25
Niveles de potencia de microonda 24
Precauciones para evitar
unaposible exposición a
excesivaenergía de microonda . ........2
Cocimiento con sensor ...............27, 28
Lo que es normal ....................................23
Uso de selecciones predeter
minadas de microonda . ..................... 24
Otras características
Ventilador automático .........................31
Luz nocturna automática ................. 30
Conversión automática ......................29
Volumen del pito .....................................29
Bloqueo del control ...............................31
Reloj ..............................................................29
Cocimiento completo ...........................28
Inicio retardado .......................................30
Pantalla On/Off ........................................29
Ayuda ...........................................................31
Recordatorio .............................................29
Luz de la superficie ................................32
Cronómetro On/Off ............................... 31
Plato giratorio On/Off ...........................29
Ventilador del respirador .................... 32
Unidades de temperatura ..................30
Cuidado y Limpieza
Limpieza del interior.............................. 32
Limpieza del exterior ............................ 34
Bandejas de cocimiento
y parrilla de alambre del horno .......33
Plato giratorio removible ....................33
Cómo reemplazar la luz de
la cavidad ...................................................35
Cómo reemplazar la luz
de superficie ............................................34
Búsqueda de Problemas
Solucionador de Problemas ......36, 37
Soporte para el Cliente
Soporte para
el cliente ........................ Cubierta Trasera
Garantía ......................................................39
Manual del
Usuario
PSA9240
Anote aquí el número de modelo y serie:
Modelo # __________________________
Serie # ___________________________
Encontrará estos números en la
etiquetaadentro del horno.
Horno Advantium®
MFL38211622 49-40678-1 06-13 GE
Page 42
INSTRUCCIONES IMPORTANTES DE SEGURIDAD
LEA TODAS LAS INSTRUCCIONES ANTES DE USAR
Horno Advantium
Cuando se usen aparatos eléctricos, siempre deben seguirse precauciones básicas de seguridad, incluyendo las
siguientes:
ADVERTENCIA: Para reducir el riesgo de quemaduras, descargas eléctricas, incendio, lesiones a
personas o una exposición excesiva a energía de microondas:
PRECAUCIONES QUE DEBE TENER PARA EVITAR UNAPOSIBLE
EXPOSICIÓN A UNA EXCESIVA ENERGÍA DEMICROONDA
(a) No trate de operar este horno con la puerta
abierta, ya que el funcionamiento con la puerta
abierta puede resultar en una exposición
dañina de energía de microonda. Es importante
que nadie altere ni juegue con los cierres de
seguridad.
(b) No coloque ningún objeto entre la parte frontal
del horno y la puerta, tampoco permita que se
acumulen en las superficies de sello residuos de
sucio o de limpiadores.
Lea todas las instrucciones antes de utilizar
este aparato. Al utilizar aparatos eléctricos,
se deben seguir precauciones básicas de
seguridad, incluyendo las siguientes:
Lea y siga las precauciones específicas de la sección
Precauciones para evitar una posible exposición a
excesiva energía de microondas.
Este aparato debe contar con una conexión a tierra.
Conecte sólo a un tomacorriente con adecuada
conexión a tierra. Ver la sección Instrucciones de
conexión a tierra de la página 8.
Este horno de microondas se encuentra aprobado
por UL para la instalación sobre cocinas a gas
(menos de 60,000BTU) y eléctricas.
(c) No opere el horno si está dañado. Es
particularmente importante que la puerta del
horno cierre adecuadamente y que no exista
daño en:
(1) La puerta (doblada)
(2) Bisagras y aldabas (quebradas o flojas),
(3) Sellos de la puerta y superficies de sello.
(d) El horno no debe ser ajustado o reparado por
cualquier persona a excepción del personal de
servicio calificado.
³1RFRFLQHGHPiVORVDOLPHQWRV3UHVWHDWHQFLyQDO
aparato cuando se coloquen papel, plástico u otros
materiales combustibles dentro del horno durante la
cocción.
³4XLWHORVJDQFKLWRVGHDODPEUH\ODVPDQLMDVGH
metal de los recipientes de papel o de plástico antes
de colocarlos en el horno.
³1RXWLOLFHHOKRUQRSDUDDOPDFHQDUHOHPHQWRV1R
deje productos de papel, utensilios de cocina o
alimentos en el horno cuando no lo esté usando.
³1RFRFLQHSDORPLWDVGHPDt]HQHOKRUQRGH
microondas a menos que cuente con un accesorio
especial para microondas o que utilice palomitas de
maíz especiales para hornos de microondas.
Este horno para usar sobre la estufa está diseñado
para usarse sobre estufas de un ancho no superior
a 36”. Puede instalarse sobre equipamientos de
cocción a gas y eléctricos.
No utilice este aparato si tiene el cable eléctrico o el
enchufe dañados, si no funciona bien o si ha sufrido
una avería o una caída. Si se daña el cable eléctrico,
debe reemplazarlo el Servicio Técnico de General
Electric o un agente de servicio autorizado utilizando
un cable eléctrico de General Electric.
Para reducir el riesgo de incendio en la cavidad del
horno:
GUARDE ESTAS INSTRUCCIONES
2
³6LORVPDWHULDOHVXELFDGRVGHQWURGHOKRUQRVH
prenden fuego, mantenga cerrada la puerta del
horno, apáguelo y desconecte el cable eléctrico,
o corte la energía desde el panel de fusibles o del
interruptor de circuitos. Si se abre la puerta, el fuego
puede propagarse.
³1RXWLOLFHODVIXQFLRQHVGHOVHQVRUGRVYHFHV
seguidas en la misma porción de comida. Si los
alimentos no se cocinaron después de la primera
cuenta regresiva, utilice COOK BY TIME (cocinar por
tiempo) para obtener tiempo de cocción adicional.
³1RXVHHOKRUQRSDUDVHFDUSHULyGLFRV
Page 43

INSTRUCCIONES IMPORTANTES DE SEGURIDAD
LEA TODAS LAS INSTRUCCIONES ANTES DE USAR
PRECAUCIONES DE SEGURIDAD
Horno Advantium
Asegúrese que su aparato esté
debidamente instalado y puesto a tierra por
un técnico calificado de acuerdo con las
instrucciones de instalación suministradas.
Instale y coloque este aparato de acuerdo
con las Instrucciones de Instalación
suministradas.
Algunos productos como huevos enteros
yrecipientes sellados – por ejemplo, botes
sellados – pueden explotar y no deben
calentarse en este horno. Si lo utiliza de esta
manera puede resultar en una lesión.
No monte este aparato arriba del fregadero.
Este horno no está aprobado ni probado
parauso marino.
Este horno está aprobado UL para una
instalación de pared estándar, arriba de 36
pulg.
No opere este aparato si está dañado o si lo
han dejado caer.
Como con cualquier otro aparato, se
requiere una cercana supervisión cuando
seautilizado por niños.
Utilice este aparato sólo para los fines
descritos en este manual.
No utilice químicos corrosivos o vapores en
este aparato.
Este horno está específicamente diseñado
para calentar, deshidratar y cocinar
alimentos, no se diseñó para uso en
laboratorios o para uso industrial.
Este aparato sólo debe ser reparado por
personal de servicio calificado. Contacte
a la empresa de servicio autorizada para
la revisión, reparación o ajuste de este
aparato.
No cubra ni bloquee ninguna abertura
delaparato.
No guarde este aparato en el exterior. No
loutilice cerca del agua – por ejemplo, en un
sótano mojado, cerca de una piscina, cerca
de un grifo o en ubicaciones similares.
Vea las instrucciones de limpieza de la
superficie de la puerta en la sección de
Cuidado y Limpieza del Horno, en este
manual.
Si agarran fuego los materiales adentro
del horno, mantenga la puerta del horno
cerrada, apague el horno y apague el
fusible o interruptor automático del panel. Si
abre la puerta, el fuego se puede propagar.
Para evitar chispas no se debe utilizar
la parrilla de alambre del horno para
el cocimiento rápido o cocimiento con
microonda.
No cubra las parrillas u otra parte del
horno con papel metálico. Esto puede
sobrecalentar el horno.
No deben utilizarse alimentos o utensilios
metálicos de grandes dimensiones en este
horno porque pueden crear un incendio o
un riesgo de descarga eléctrica.
No utilice productos de papel cuando el
aparato se utiliza en modos diferentes al
microondas.
GUARDE ESTAS INSTRUCCIONES
3
Page 44

INSTRUCCIONES IMPORTANTES DE SEGURIDAD
LEA TODAS LAS INSTRUCCIONES ANTES DE USAR
PRECAUCIONES DE SEGURIDAD
Horno Advantium
7HUPyPHWUR³1RXWLOLFHWHUPyPHWURV
comunes de cocina u horno cuando
cocine mediante el microondas. El
metal y mercurio de estos termómetros
pueden provocar una formación de arco
eléctrico y generar posibles daños al
horno. No utilice un termómetro en los
alimentos que coloca en el microondas a
menos que el termómetro esté diseñado
o recomendado para usarse en el horno
de microondas.
No limpie con esponjillas de metal.
Pueden desprenderse pedazos de la
esponjilla y tocar partes eléctricas,
provocando un riesgo de descarga
eléctrica.
No almacene materiales que no sean
nuestros accesorios recomendados en
este horno cuando no se encuentre en
uso.
No permita que el cable eléctrico
cuelgue sobre el borde de la mesa o del
mostrador de encimera.
Mantenga el cable alejado de superficies
calientes.
No sumerja el cable eléctrico o el
enchufe en agua.
No haga funcionar el horno sin el plato
giratorio en su lugar. El plato giratorio
no debe tener ninguna clase de bloqueo
para que pueda girar.
Durante y después del uso, no toque
o deje que su vestimenta u otros
materiales inflamables entren en
contacto con cualquier área interior del
horno; deje pasar un tiempo prudencial
para que se enfríen.
Las potenciales superficies calientes
incluyen la puerta, el piso, las paredes y
la parrilla del horno y el plato giratorio.
Es importante mantener limpia el
área donde la puerta se sella contra
el microondas. Sólo use detergentes
suaves no abrasivos aplicados con
una esponja limpia o un paño suave.
Enjuague bien.
No almacene ningún elemento
directamente sobre la superficie del
horno de microondas cuando éste se
encuentre en funcionamiento.
Mantenga el horno libre de
acumulaciones de grasa.
En cumplimiento con USDA, cocine
la carne de res hasta alcanzar una
temperatura INTERNA de por lo menos
160°F y las carnes de ave a una
temperatura INTERNA de por lo menos
180°F. La cocción a estas temperaturas
generalmente protege de enfermedades
transmitidas por los alimentos. Para más
información, consulte www.foodsafety.
gov.
FORMACIÓNDE
ARCO
No guarde la parrilla
enel microonda.
La parrilla SÓLO
debe utilizarsepara
Hornear con
Convección, Calentar
y Fermentar.
4
El arco puede ocurrir durante el cocimiento rápido y el de microondas. Si observa
chispas,presione la tecla Cancel/Off y corrija el problema.
Formación de arco, es el término de
microondas, utilizado para chispas en el
horno. Las chispas pueden ser causadas
por:
Contacto de metal o aluminio en los
lados del horno.
Aluminio no moldeado al alimento (las
orillas que no están dobladas actúan
como antenas).
Utilice el aluminio de la manera en quese
recomienda en este manual.
Metales, como amarres, grapas en aves
o platos con orillas de oro colocados en
el horno.
Los recipientes de metal o la parrilla de
alambre del horno utilizada durante el
cocimientorápido o el de microonda (con
excepciónde las panas suministradas
con el horno).
Toallas de papel recicladas que
contengan pequeños pedazos de metal
utilizados en el horno.
GUARDE ESTAS INSTRUCCIONES
Page 45

INSTRUCCIONES IMPORTANTES DE SEGURIDAD
LEA TODAS LAS INSTRUCCIONES ANTES DE USAR
Horno Advantium
ALIMENTOS
Al cocinar con microonda, coloque los
alimentos y recipientes sobre la bandeja
devidrio claro.
No haga palomitas de maíz en el horno
microonda a menos de que utilice un
accesorio especial para hacerlo o que
utilice uno marcado para horno microonda.
No hierva huevos en este horno. La presión
que se acumula adentro de la yema del
huevo hará que explote, resultando en una
posible lesión.
No opere el horno sin alimentos adentro,
yaque lo puede dañar. Incrementa el calor
alrededor del magnetrón y acorta la vida
del horno.
Alimentos con la piel externa intacta
como las papas, salchichas, embutidos,
tomates,manzanas, hígados de pollo y
otros menudos y las yemas de huevo
deben ser pinchadas para permitir que el
vapor salga durante el cocimiento.
No descongele bebidas congeladas
concuellos de botellas estrechos
(especialmente bebidas carbonatadas).
Aunque el recipiente esté abierto, la
presión se puede acumular. Esto puede
causar que el recipiente explote, dando
como resultado una posible lesión.
Los alimentos que se cocinan en
líquido(como la pasta) tienden a hervir
más rápido que los alimentos que
contienenmenos humedad. Si esto
ocurre, vea lasección de Cuidado
y Limpieza del Horno para ver las
instrucciones de cómo limpiar el interior
del horno.
Los alimentos calientes y el vapor
pueden causar quemaduras. Tenga
cuidado al abrir cualquier recipiente de
comida caliente, incluyendo bolsas de
palomitas de maíz, bolsas de cocimiento
y cajas. Para evitar una posible lesión,
dirija el vapor lejos de sus manos y cara.
No cocine demasiado las papas. Se
pueden deshidratar y agarrar fuego,
causando daño al horno.
Evite calentar alimentos para bebés
en botes de vidrio, aunque estén
destapados. Asegúrese que toda comida
para bebé se cocine por completo.
Mezcle la comida para distribuir el
calor de forma pareja. Sea cuidadoso y
evite hervir la formula al momento de
calentarla. El recipiente se puede sentir
más frío de lo que la formula realmente
está. Siempre pruebe la formula antes de
alimentar al bebé.
No trate de freir en el horno.
AGUA SOBRECALENTADA
Los líquidos, como el agua, café o té pueden
calentarse arriba del punto de hervor sin que
aparenten que están hirviendo. No siempre
existen burbujas visibles o hervor cuando retira
el recipiente del horno microonda. ESTO PUEDE
RESULTAR EN LÍQUIDOS MUY CALIENTES
QUE HIERVEN REPENTINAMENTE CUANDO
SE MUEVE EL RECIPIENTE O INTRODUCE UNA
CUCHARA U OTRO UTENSILIO EN EL LÍQUIDO.
Para reducir el riesgo de una lesión
personal:
³1RVREUHFDOLHQWHHOOtTXLGR
³0XHYDHOOtTXLGRDQWHV\DODPLWDGGHO
calentamiento.
³1RXWLOLFHUHFLSLHQWHVUHFWRVFRQ
cuellos angostos.
³'HVSXpVGHFDOHQWDUSHUPLWDTXH
el recipiente descanse en el horno
microonda por un período corto de
tiempo, antes de retirar el recipiente.
³7HQJDPXFKRFXLGDGRFXDQGRLQVHUWH
una cuchara u otro utensilio adentro
del recipiente.
GUARDE ESTAS INSTRUCCIONES
5
Page 46
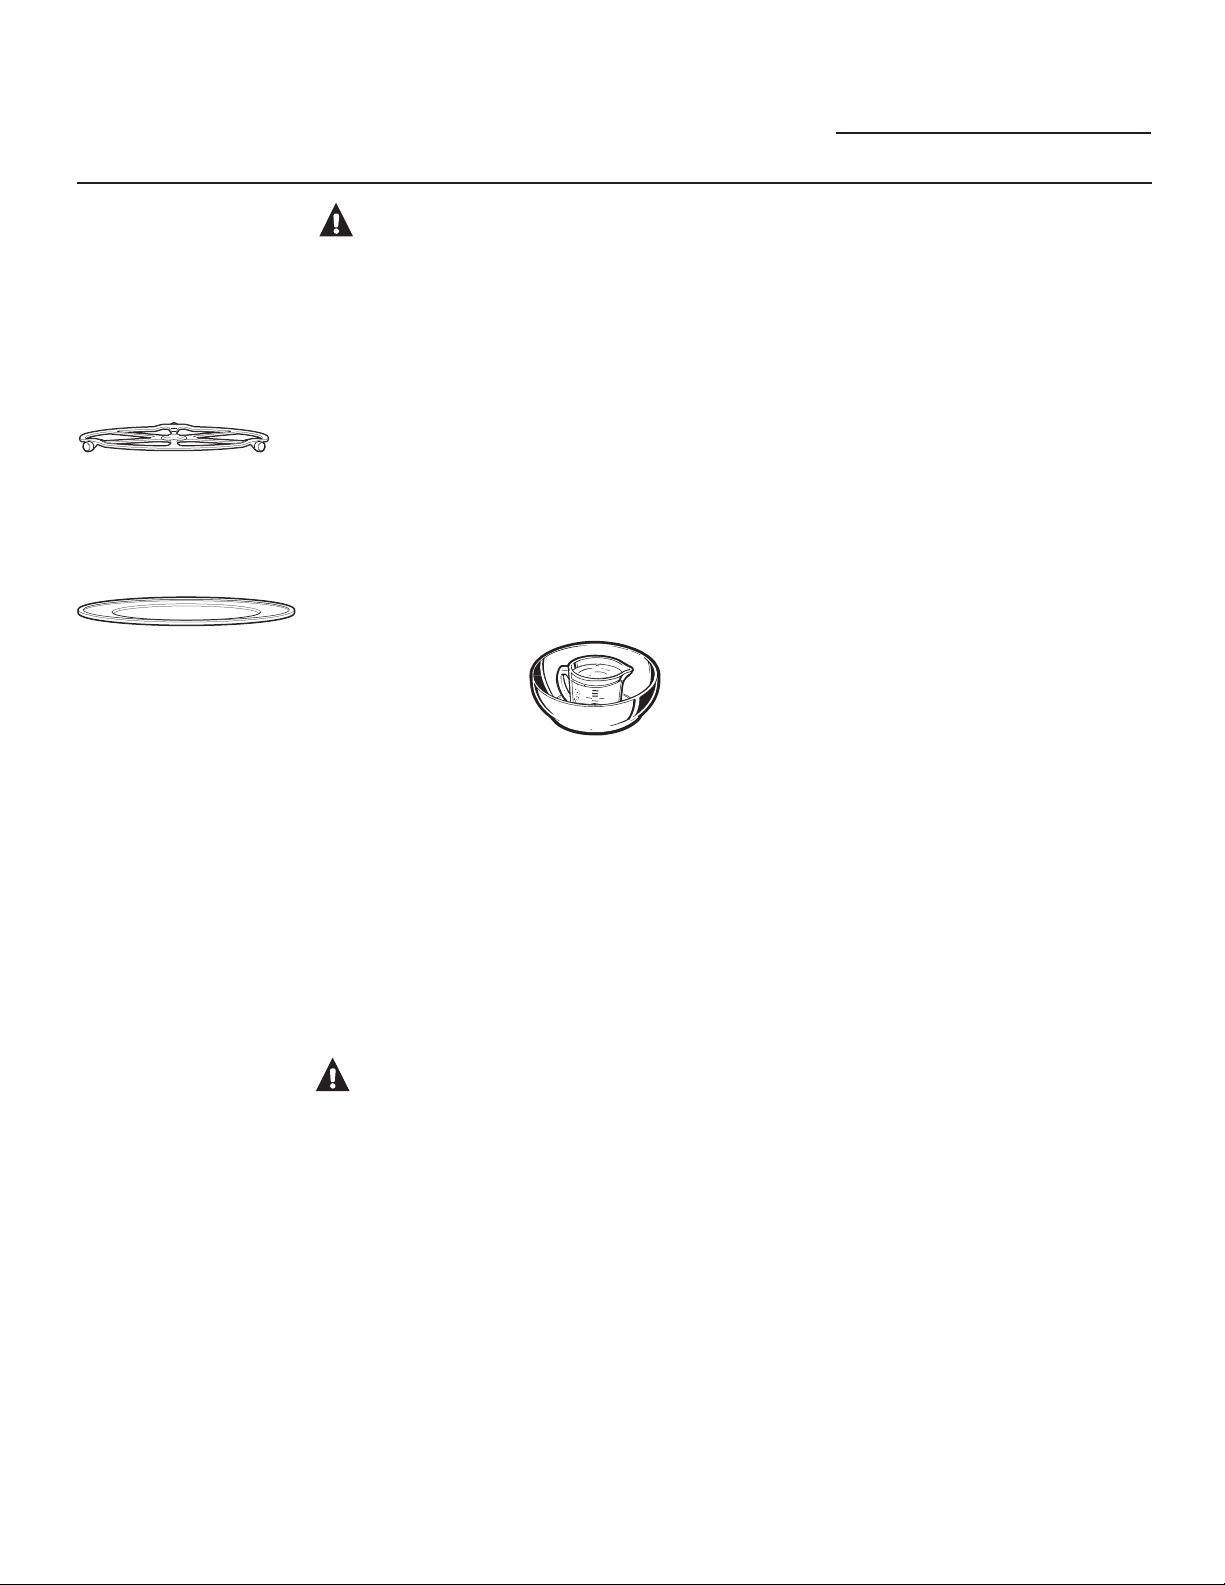
INSTRUCCIONES IMPORTANTES DE SEGURIDAD
LEA TODAS LAS INSTRUCCIONES ANTES DE USAR
Horno Advantium
Recipientes
de cocina
seguros para
el microonda
Cuando utilice el hornoel
plato giratoriosiempre
debe estarcolocado en
su lugar.
Cuando cocine
en elmicroonda la
bandejade vidrio claro
siempredebe estar
colocadaen su lugar.
¡ADVERTENCIA!
Cuando cocine en el microonda ssegúrese que todos los recipientes sean convenientes para dicho
uso. Puede utilizar la mayoría de las cacerolas de vidrio, platos de cocimiento, tazas medidoras, tazas
para natillas, platos de cerámica o de china que no tengan bordes de metal o de vidrio con un brillo
metálico. Algunos recipientes están marcadas “apropiado para microonda”
No utilice la parrilla de alambre del
hornopara cocinar con microonda.
Para cocinar sus alimentos coloque el
recipiente para microonda directamente
sobre la bandeja de vidrio claro.
El uso de la bandeja de metal durante
elcocimiento con microonda dará como
resultado un rendimiento de cocimiento
inferior.
Si no está seguro que el plato es
seguro para
el microonda,
realice la
siguiente
prueba: Coloque
en el horno el
plato que desea
probar y una
taza medidora
de vidrio llena
de agua. Coloquela taza medidora
encima o cerca del plato. Cocine en el
microondas de 3045 segundos en high
(alto). Si el plato se calienta, éste no debe
usarse en el microonda.
Si el plato se mantiene frío y sólo se
calienta el agua de la taza, entonces el
plato puede usarse en el microonda.
Cómo probar si elplato
es seguro parael
microondas.
PRECAUCIÓN:
Riesgo de fuego
Los recipientes se pueden calentar
debido al calor transferido por los
alimentos calientes. Debe utilizar
guantes para manipular los recipientes.
Utilícelo como se indica en este manual,
al utilizarlo en el horno, manténgalo a 1”
de distancia de los lados del horno.
Si utiliza un termómetro para carne al
cocinar, asegúrese que sea seguro para
uso en el microonda.
Algunas bandejas de espuma de
poliestireno (como los que se utilizan para
empacar carne) tienen una capa fina de
metal incrustada en la parte de abajo. Al
utilizarlas en el microonda, el metal puede
quemar el piso del horno o incendiarel
papel toalla.
No utilice productos de papel reciclados.
Las toallas de papel, servilletas y papel
encerado reciclados pueden contener
pedazos de metal que generen chispas
y se enciendan. Se debe evitar utilizar
productos de papel que contengan nylon
o filamentos de nylon, ya que se pueden
encender.
Se puede utilizar papel toalla, papel
encerado o envoltorio plástico para
cubrir los platos y así retener la humedad
y evitar salpicaduras. Asegúrese de
ventilar la envoltura plástica para que
pueda escapar el vapor.
No todas las envolturas plásticas son
convenientes para el horno microonda.
Reviseel empaque para utilizarlo
adecuadamente.
Las bolsas de cocimiento para hervir
y las bolsas plásticas herméticas
deben cortarse, pincharse o ventilarse
siguiendo las instrucciones del paquete.
Si no se hace, el plástico puede
explotar durante o inmediatamente
después del cocimiento, resultando
en una posible lesión. Así mismo, los
recipientes de plástico deben estar
parcialmente abiertos, ya que forman
un sello hermético. Cuando cocine con
recipientes que estén herméticamente
sellados por una cubierta de plástico,
retire cuidadosamente la cubierta y dirija
el vapor lejos de sus manos y cara.
GUARDE ESTAS INSTRUCCIONES
6
Page 47
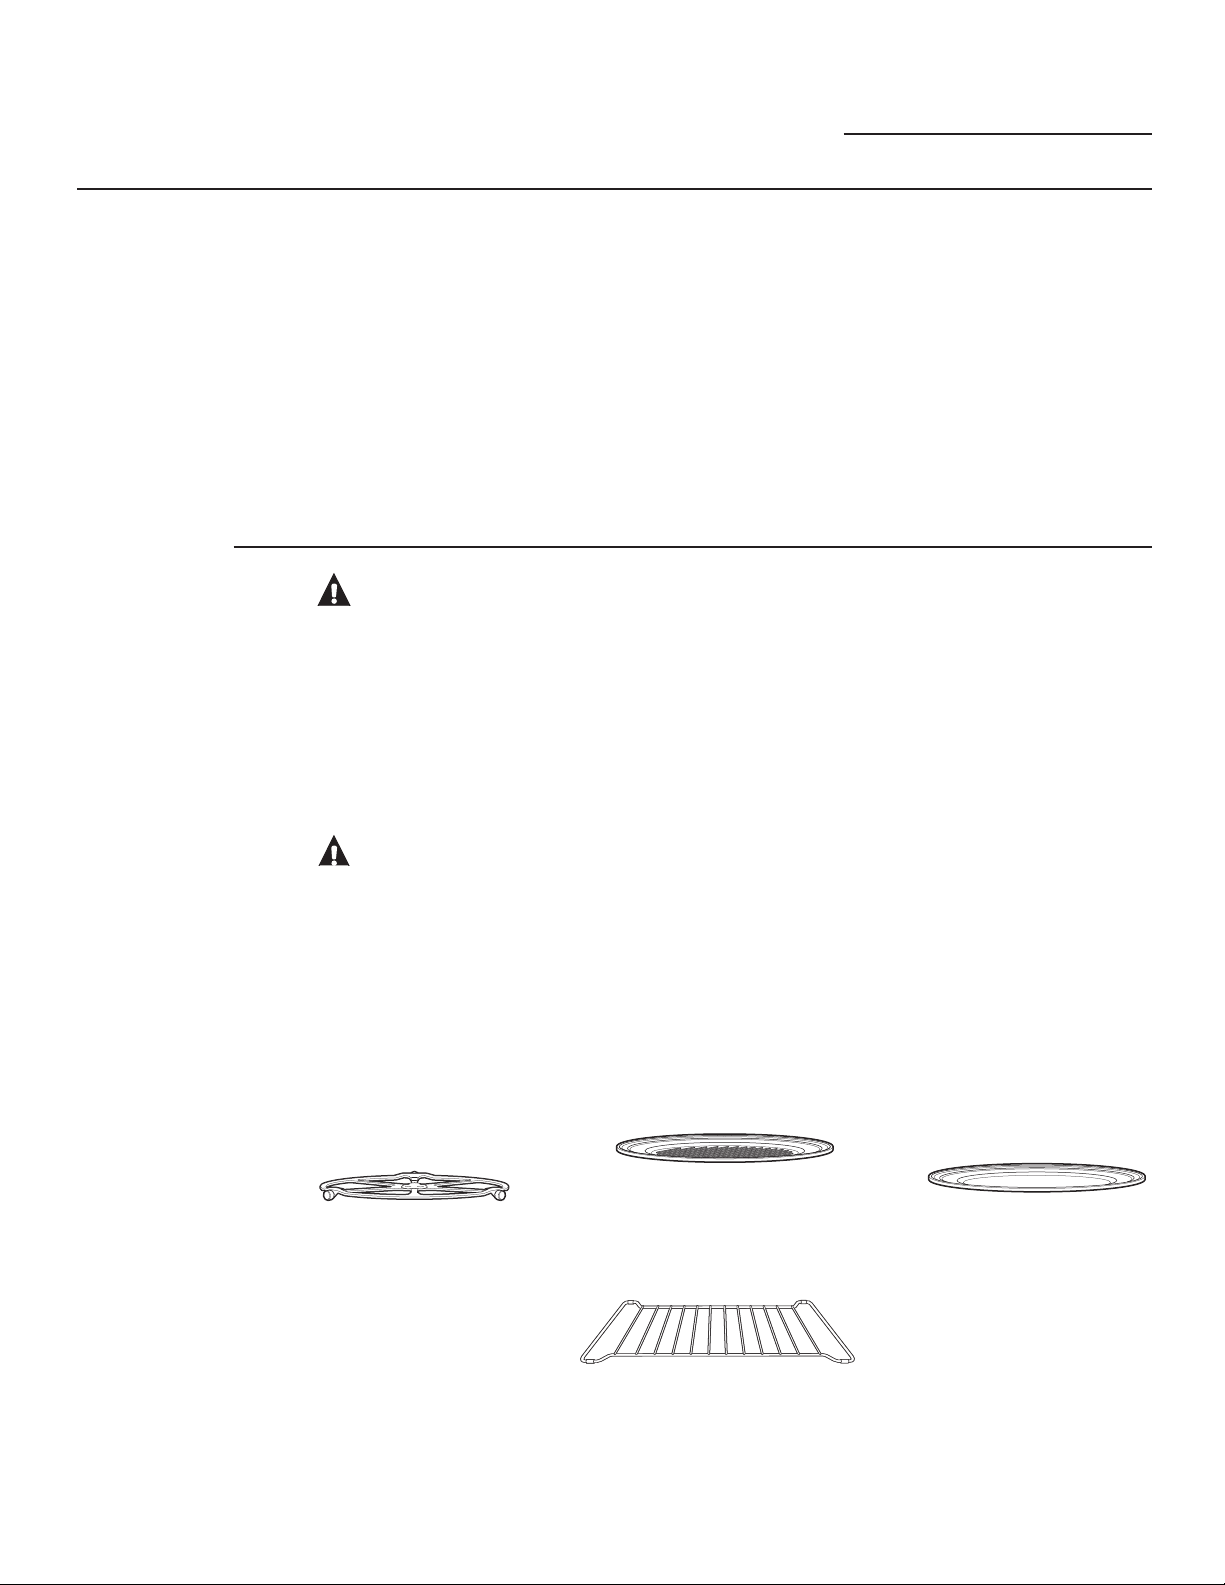
INSTRUCCIONES IMPORTANTES DE SEGURIDAD
LEA TODAS LAS INSTRUCCIONES ANTES DE USAR
Horno Advantium
Recipientes
de cocina
seguros para
el microonda
(continuación)
Recipientes
seguros
para el
horno, para
Hornear con
Convección,
Asar,
Calentar,
Fermentar y
Tostar
Recipientes plásticos – Los recipientes
plásticos diseñados para microonda son
muy útiles, pero deben ser utilizados
cuidadosamente. Aun los recipientes
plásticos que son seguros para el
microonda pueden no ser tan tolerantes
a condiciones de sobre cocimiento
como el vidrio o materiales de cerámica
y se pueden ablandar o carbonizar si
se someten a períodos cortos de sobre
cocimiento. En exposiciones más largas
de sobre cocimiento, se puede incendiar
la comida y el recipiente.
PRECAUCIÓN:
Riesgo de quemaduras
El horno y la puerta se calentarán al
hornear con convección, asar, calentar
otostar.
Los recipientes se calentarán.
Necesitará guantes para manipular los
recipientes.
PRECAUCIÓN:
Riesgo de fuego
Al asar o tostar no cubra los platos ni
los recipientes plásticos, bolsas plásticas
para cocinar/rostizar, envolturas
plásticas, papel encerado ni papel.
Siga los siguientes consejos:
1. Solamente utilice plásticos seguros
para el microonda y utilícelos en
estricto cumplimiento con las
recomendaciones del fabricante del
recipiente.
2. No cocine en el microonda con los
recipientes vacíos.
3. No permita que los niños utilicen
recipientesplásticos sin la supervisión
de un adulto.
Utilice la parilla de alambre del horno
cuando hornee con convección o para
calentar.
Cuando cocine coloque la comida
directamente sobre las bandejas de
metal a menos de que la receta requiera
un plato.
En este horno puede utilizar
cualquierplato seguro para el horno.
Colóquelodirectamente sobre las
bandejas.
Si utiliza la bandeja de vidrio claro
cuando hornee con convección, ase,
caliente otoste obtendrá resultados
inferiores en elrendimiento de cocimiento.
Utilice la bandeja de metal de la misma
manera en que usaría una pana
parahornear baja o una bandeja para
hornear.
Para asar coloque la
Cuando utilice el hornoel
plato giratorio siempre
debe estar colocado en su
lugar.
Para niveles de hornear o calentar coloque
la comida directamente sobre la bandeja de
metal o en el plato apropiado y colóquelo
comida directamente en
la bandeja de metal para
en la parrilla de alambre del horno.
GUARDE ESTAS INSTRUCCIONES
asar.
Para hornear con
convección, calentar o
tostar coloquela comida
directamenteen la bandeja
de metal.
7
Page 48
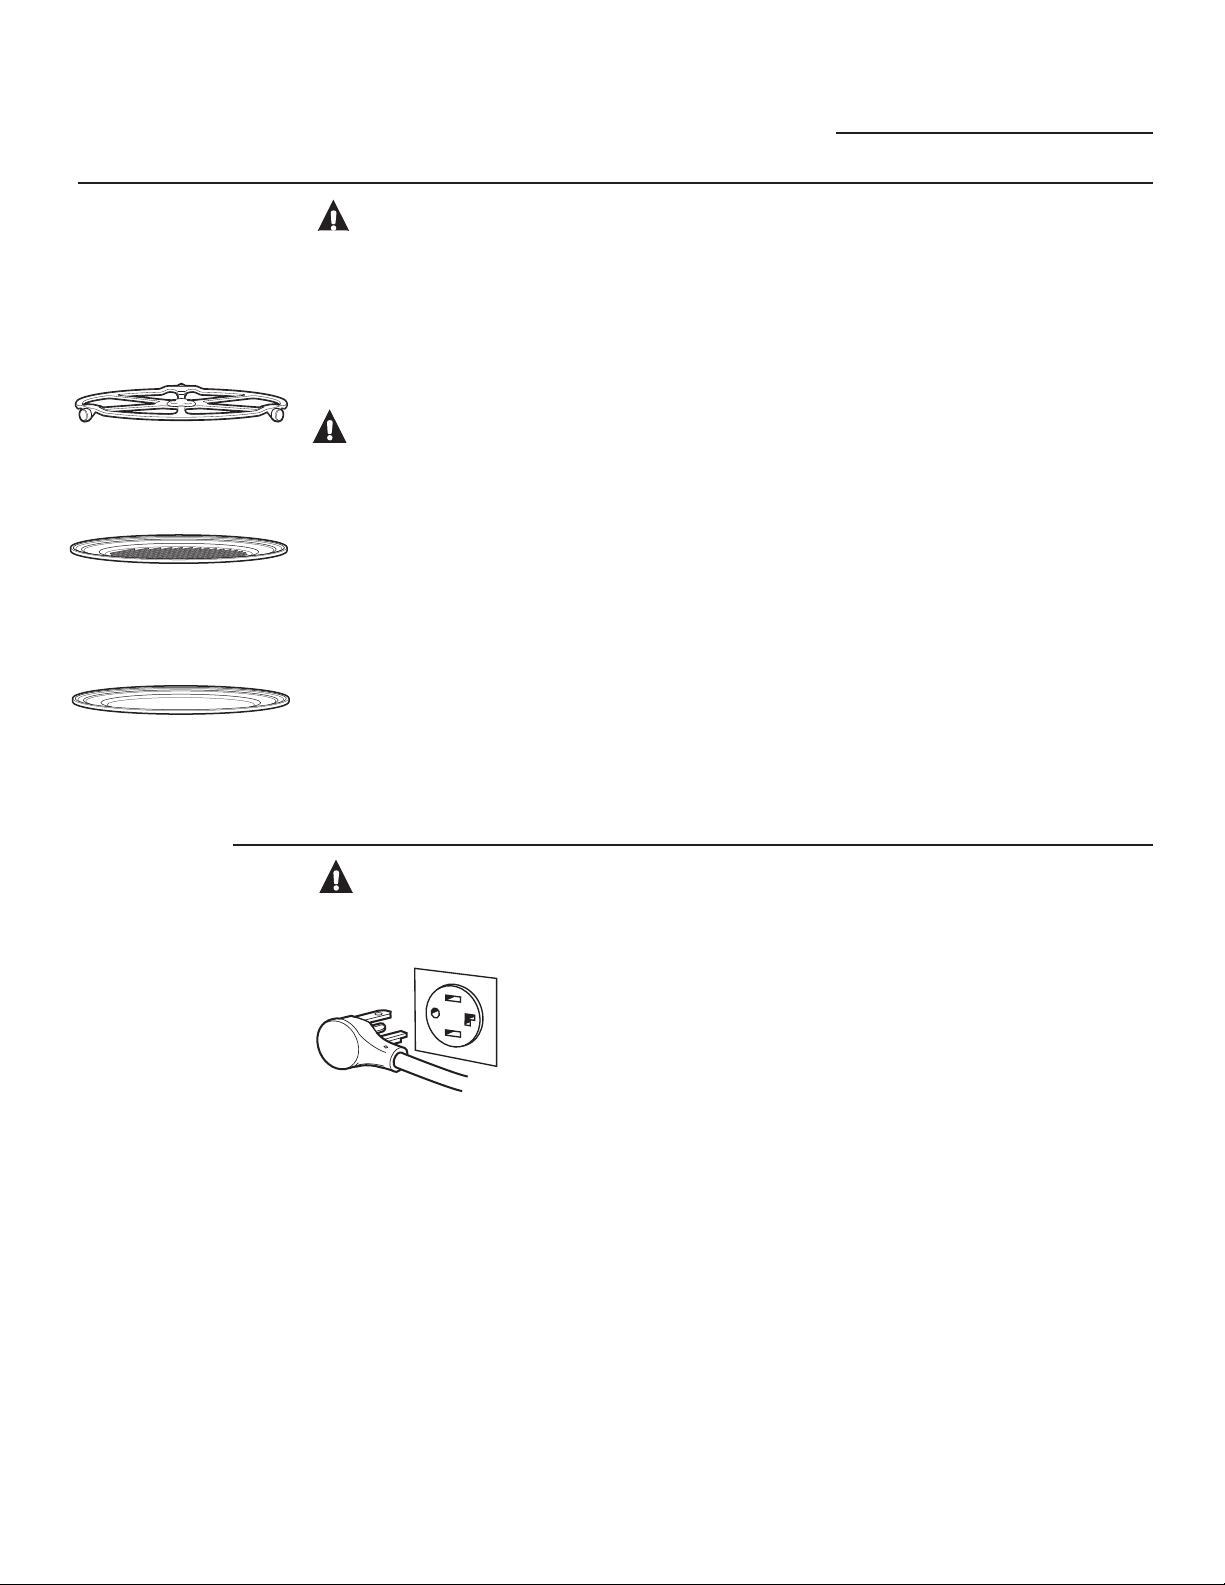
INSTRUCCIONES IMPORTANTES DE SEGURIDAD
LEA TODAS LAS INSTRUCCIONES ANTES DE USAR
Horno Advantium
Recipientos
seguros para
el horno, para
cocimiento
rápido
Cuando utilice el hornoel
plato giratoriosiempre
debe estarcolocado en
su lugar.
Para cocimiento rápido
coloque la comida
directamente en la
bandeja de metal para
asar.
Para cocinar
rápido,convección,
hornear, calentar o
tostar coloquela comida
directamenteen la
bandeja de metal.
PRECAUCIÓN:
Riesgo de quemaduras
El horno y la puerta se calentarán
cuando utiliza el cocimiento rápido.
Los recipientes se calentarán.
Necesitará guantes para manipularlos.
PRECAUCIÓN:
Riesgo de fuego
Cuando cocine rápido no utilice cubiertas,
recipientes o bolsas para cocinar/rostizar
fabricadas de aluminio, plástico, cera o
papel
No cubra con aluminio el plato giratorio,
las bandejas de metal ni ninguna parte
del horno. Esto causará chispas en
elhorno.
Utilice la bandeja de metal de la
mismamanera en que utilizaría una pana
parahornear plana o una bandeja para
hornear.
No utilice la rejilla de alambre del
hornopara cocinar rápido.
Cuando cocine coloque la comida
directamente en las bandejas de metal a
menosque el horno le indique que haga
lo contrario.
Puede utilizar en su horno cualquier
platoque no sea de metal y que
sea seguro enel horno. Colóquelos
directamente sobrelas bandejas.
Si utiliza la bandeja de vidrio claro
cuandococine rápido obtendrá resultados
de cocimiento inferiores y posiblemente
rajará la bandeja de vidrio.
Utilice las bandejas de metal
especificadaspara uso en este horno.
Las otras bandejas de metal no están
diseñadas para este horno y darán
resultados de cocimiento inferiores.
Instrucciones
de conexión a
tierra
¡ADVERTENCIA!
El uso inadecuado del enchufe de conexión a tierra puede provocar un riesgo de descarga
eléctrica.
Tste aparato debe
contar con una
conexión a tierra.
En caso de un
cortocircuito, la
Verifique que haya una
conexión a tierra adecuada
antes del uso
un cable de escape para la corriente eléctrica.
Este aparato se encuentra equipado con
un cable eléctrico que contiene un cable de
conexión a tierra con un enchufe de conexión
a tierra. El enchufe debe conectarse en un
tomacorriente con adecuada instalación y
conexión a tierra.
Consulte a un electricista o técnico
calificado si no comprende por completo las
instrucciones de conexión a tierra, o si no
sabe si el aparato cuenta con una adecuada
conexión a tierra.
conexión a tierra
reduce el riesgo
de una descarga
eléctrica al brindar
Para el uso de este aparato, es su
responsabilidad y obligación cambiar un
tomacorriente de pared estándar de 3 clavijas
por uno de 4 clavijas y 30 amperios con
adecuada conexión a tierra.
Bajo ninguna circunstancia corte o quite la
clavija a tierra del cable eléctrico.
No utilice un enchufe adaptador con este
aparato.
No utilice un cable de extensión con este
aparato. Si el cable eléctrico es demasiado
corto, solicite a un electricista o técnico
calificado la instalación de un tomacorriente
cerca del aparato.
Para un mejor funcionamiento, enchufe este
aparato en su propio circuito eléctrico para
evitar que las luces parpadeen, que el fusible
se queme o que el interruptor de circuitos
salte.
8
GUARDE ESTAS INSTRUCCIONES
Page 49
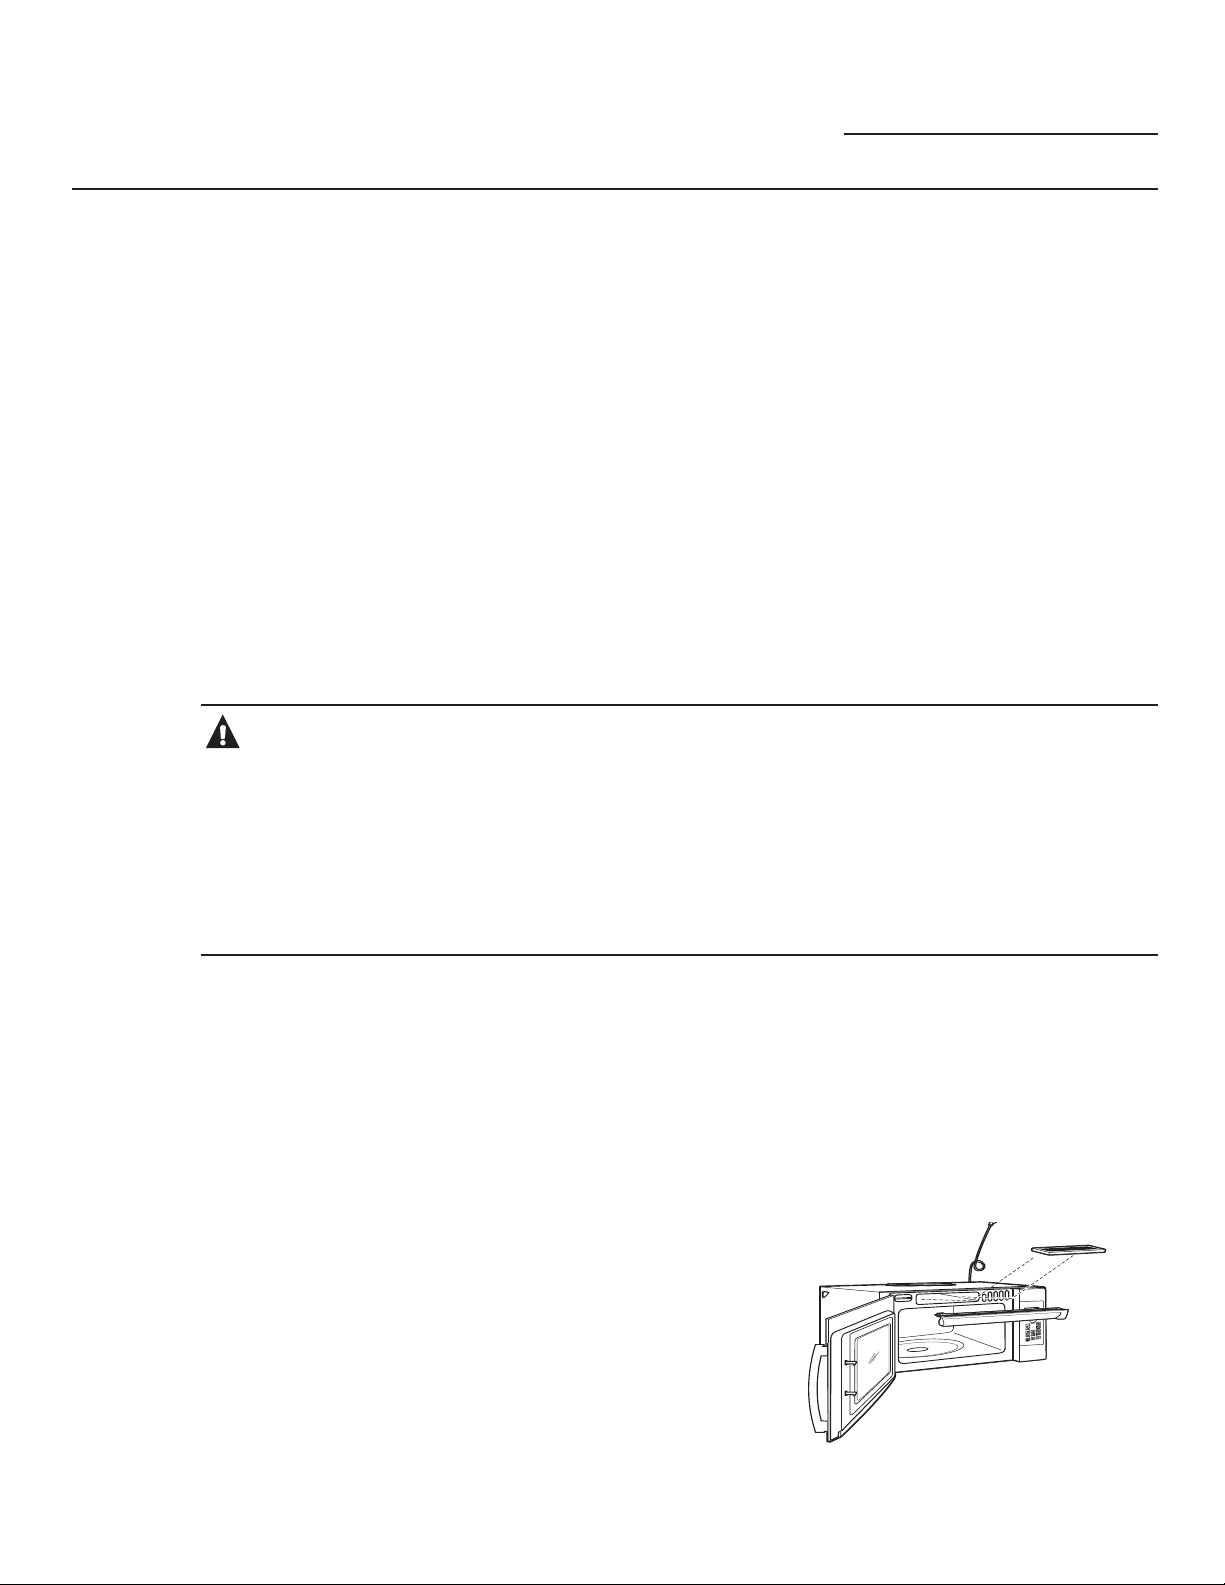
INSTRUCCIONES IMPORTANTES DE SEGURIDAD
LEA TODAS LAS INSTRUCCIONES ANTES DE USAR
Horno Advantium
El ventilador
MARCA PASOS
La mayoría de loas marca pasos están protegidos contra la interferencia de aparatos electrónicos,
incluyendo los microondas. Sin embargo, cuando tengan alguna duda, los pacientes con marca
pasos deben consutar con su médico.
El ventilador funciona automáticamente en
ciertas condiciones (ver la sección Ventilador).
Evite el inicio y propagación de incendios
accidentales de cocción mientras el ventilador
se encuentra en uso
Limpie a menudo la parte inferior del
Advantium. No permita que la grasa se
acumule en el Advantium o en los filtros del
ventilador.
En caso de un incendio de grasa en
las unidades de superficie debajo del
Advantium, apague el recipiente en llamas
sobre la unidad de superficie cubriendo el
recipiente por completo con una tapa, una
plancha para galletas o una bandeja plana.
Tenga cuidado al limpiar los filtros del
ventilador. Los agentes de limpieza
corrosivos, como los limpiadores de horno
basados en lejía, pueden dañar los filtros.
ADVERTENCIA
Tenga cuidado al limpiar los filtros del
ventilador. Los agentes de limpieza
corrosivos, como los limpiadores de horno
basados en lejía, pueden dañar los filtros.
Si flambea alimentos debajo del Advantium,
encienda el ventilador
Nunca deje unidades de superficie
desatendidas debajo de su Advantium
en configuraciones de calor altas. Los
alimentos que hierven y se derraman
pueden provocar humo y derrames
grasosos que pueden prenderse fuego y
propagarse si el ventilador del Advantium
se encuentra en funcionamiento. Para
minimizar el funcionamiento del ventilador
automático, utilice recipientes de cocción
del tamaño adecuado y use calor alto en
las unidades de superficie sólo cuando sea
necesario.
.LWVRSFLRQDOHV
LEA Y SIGA ESTAS INSTRUCCIONES DE SEGURIDAD CUIDADOSAMENTE.
Disponible en su distribuidor GE, a un costo adicional:
Kits de paneles de relleno:
-;:+³%ODQFR
-;%/³1HJUR
Al colocar un extractor de estufa
de 36”,los kits de paneles rellenan
el ancho adicional para darle una
apariencia empotrada personalizada.
Solamente para una instalación
entre los gabinetes; no son para
instalaciones al final de los gabinetes.
Cada kit contiene: dos paneles de
relleno de 3” de ancho
.
Kits de Filtros
-;'³.LWGH)LOWURGH&DUEyQSDUD
Recirculaciónt
Los kits de filtros son utilizados cuando
el horno no puede ser ventilado hacia
el exterior.
Vea la cubierta trasera para ordenar
por teléfono o en GEAppliances.com.
GUARDE ESTAS INSTRUCCIONES
9
Page 50
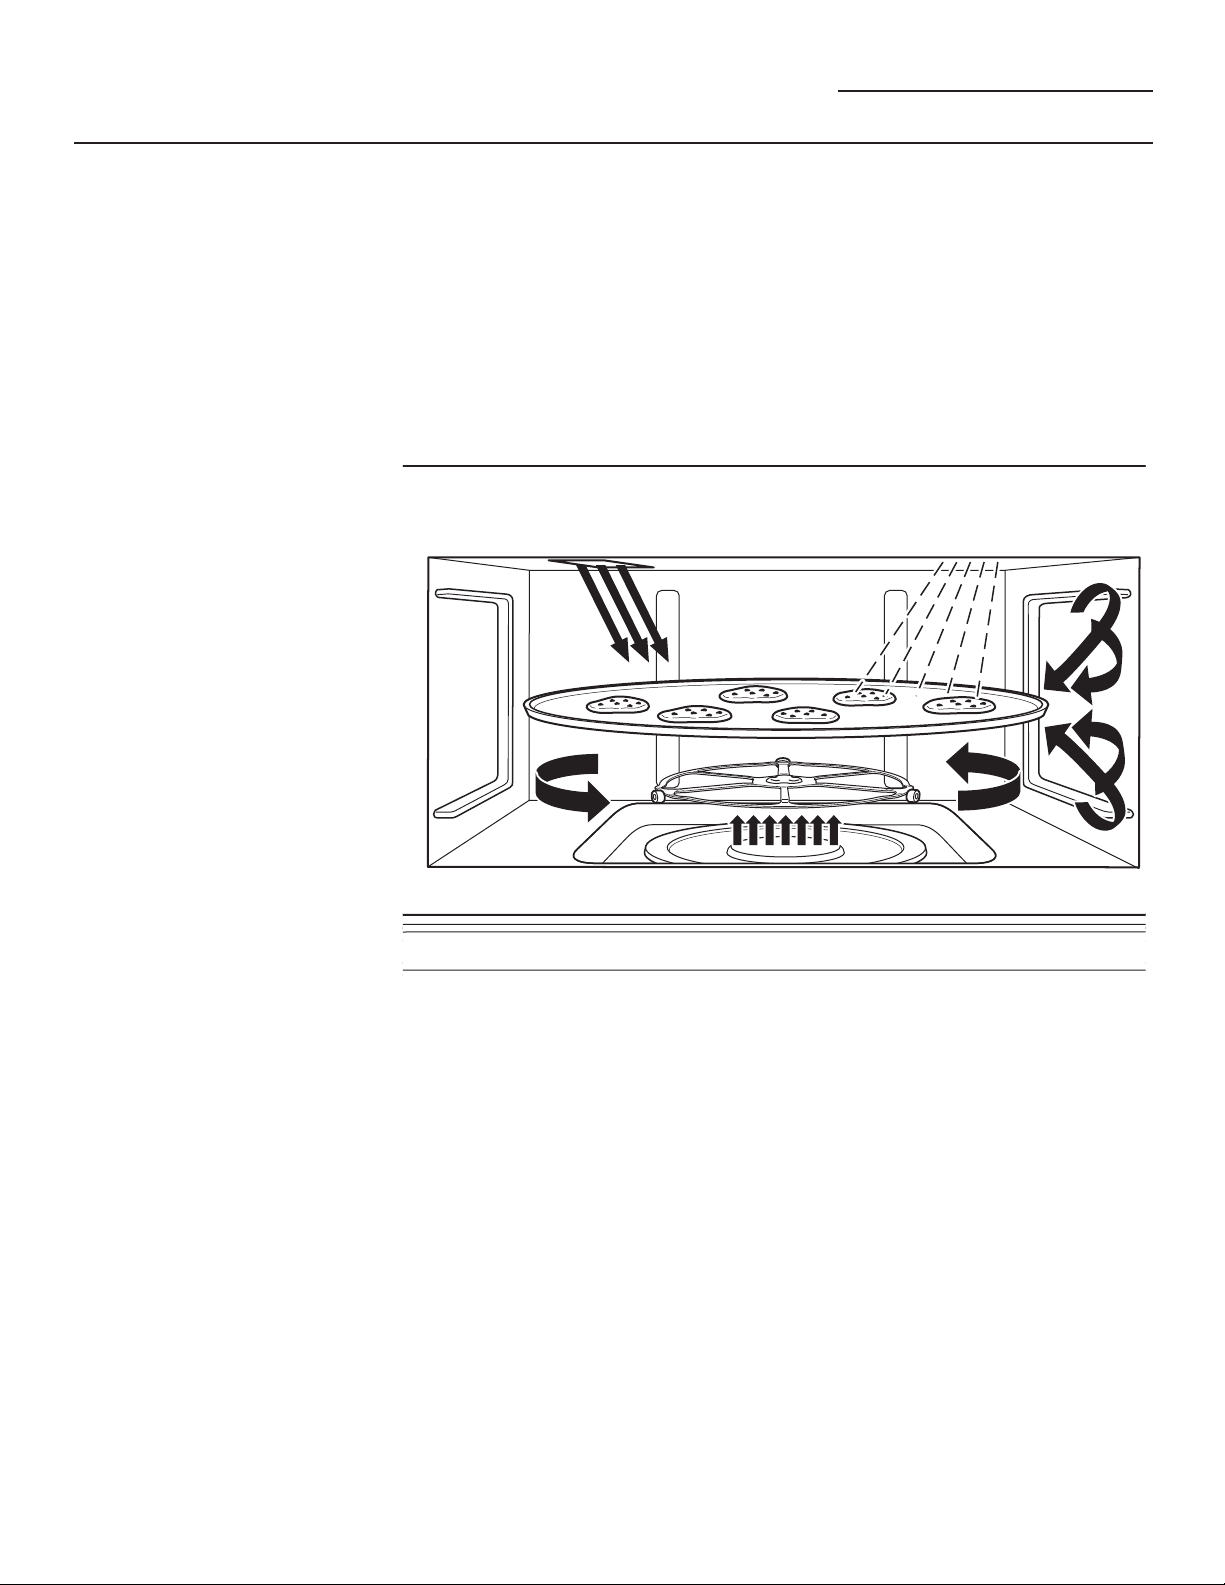
Conociendo su Horno Advantium
Horno Advantium
Conociendo su
horno Advantium
El horno Advantium utiliza
tecnologíaavanzada de Cocimiento
rápido paraaprovechar la energía de
la luz. Elhorno Advantium cocina el
exterior delos alimentos muy parecido
al calor radiante convencional, al
mismo tiempoen que penetra la
superficie para cocinar el interior
simultáneamente.
La luz halógena es la fuente
primariade energía, un sistema
de conveccióny un calentador de
cerámica ayudan alcocimiento, con
un “refuerzo de microonda” agregado
en algunos algoritmosde cocimiento.
Los alimentos se cocinan parejos
y rápido, al mismo tiempoen que
retienen su humedad natural.
10
El horno Advantium es capaz
de cocinar rápido, hornear con
convección, asar, tostar, calentar,
fermentar y cocinar con microonda.
La función de cocimiento rápido es el
mayor beneficio del horno Advantium.
Para cocinar rápido no se requiere
precalentar. Coloque los alimentos
en elhorno y comience a cocinar
inmediatamente. Se ahorra tiempo ya
que noprecalienta y debido a que éste
cocinamás rápido.
Page 51
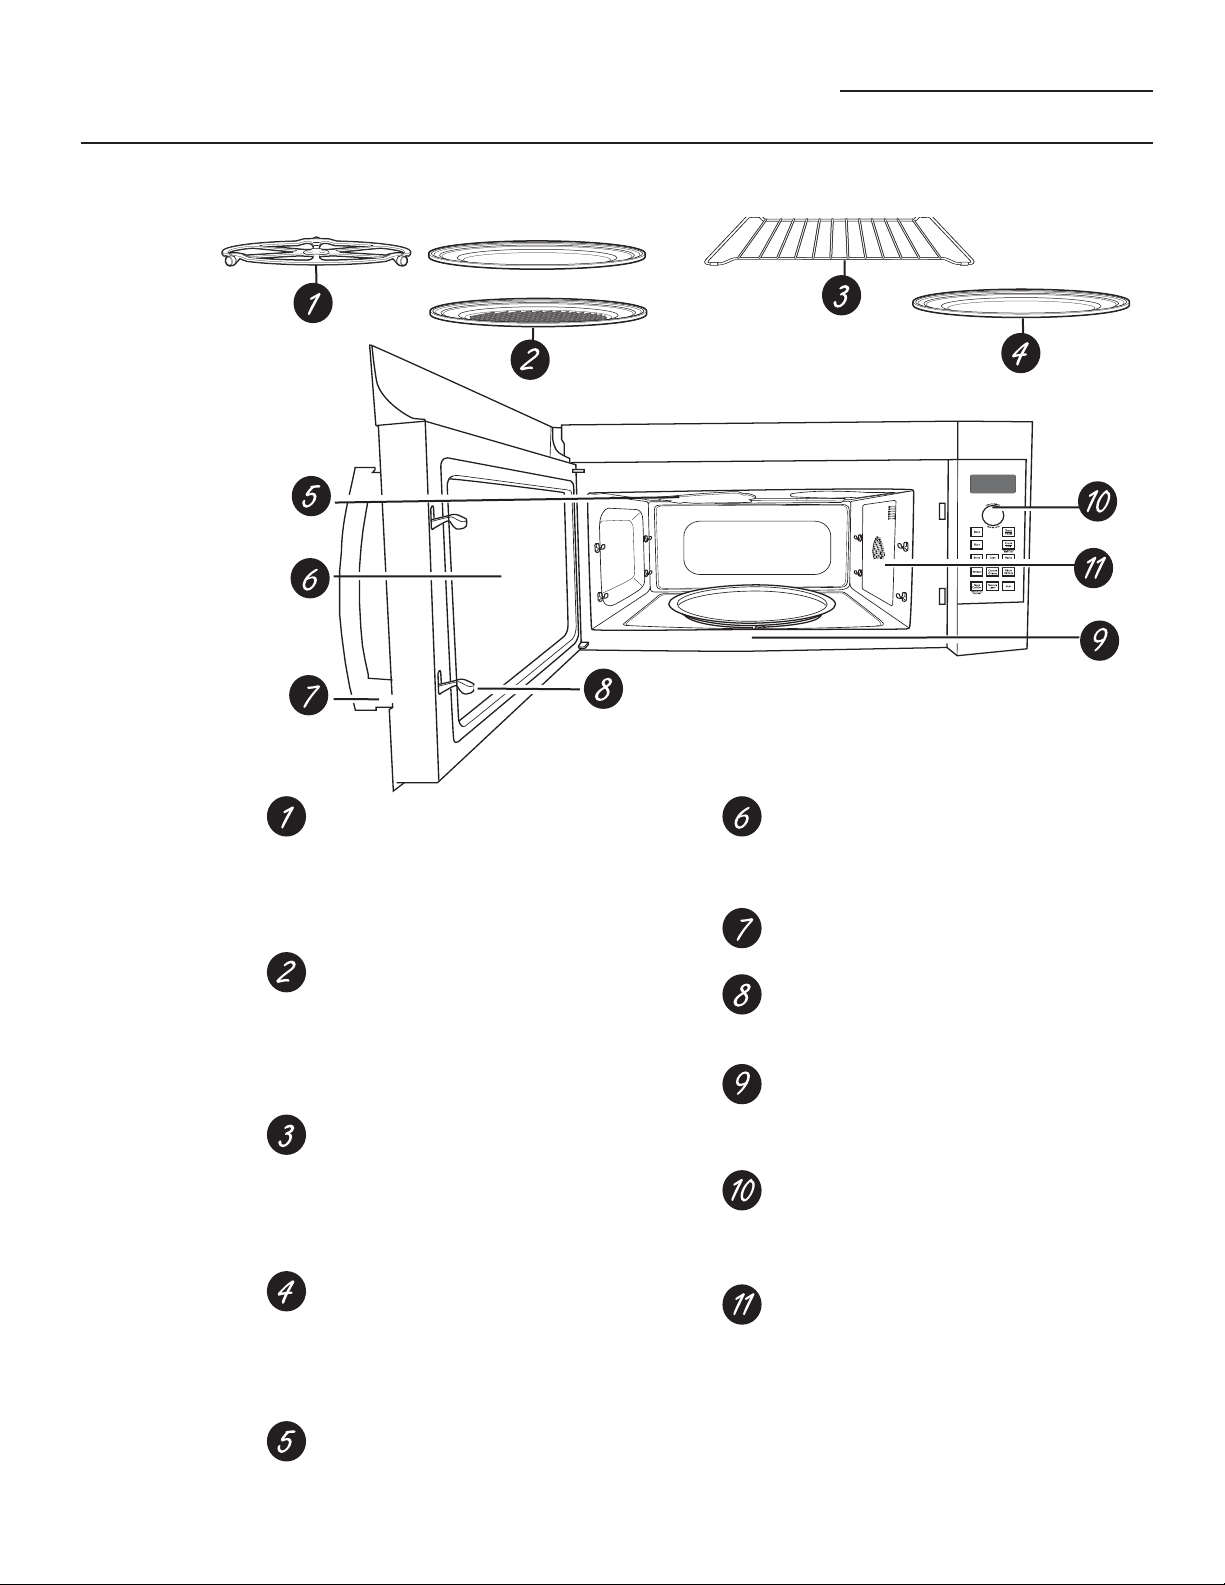
Características del Horno
Horno Advantium
Caracerísticas
del horno
A través de este manual, las características y apariencia pueden variar de las de su modelo.
Plato Giratorio
Para todos los tipos de cocimiento
el plato giratorio siempre debe estar
en su lugar, en el piso del horno.
Asegúresede que esté colocado seguro
sobre eleje en el centro del horno.
%DQGHMDGH0HWDOR%DQGHMDGH
Metal para Asar
Al cocinar rápido, asar y tostar coloque
los alimentos directamente en la
bandeja de metal o bandeja de metal
para asar y coloque el plato giratorio.
Parrilla de Alambre del Horno
Al hornear con convección o calentar
coloque los alimentos directamente en
labandeja de metal o plato seguro para
elhorno sobre la parilla de alambre del
horno.
%DQGHMDGH9LGULR&ODUR
Coloque el plato giratorio cuando utilice
las funciones de microonda. Coloque
los alimentos o el recipiente seguro
paramicroondas directamente en la
bandeja.
Lámparas Halógenas Superiores
Al cocinar rápido, asar y tostar, dos
lámparas halógenas de 1200” cocinan
losalimentos.
Ventana
Permite ver el cocmiento, al mismo
tiempo en que mantiene confinadas las
microondas adentro del horno.
Manilleta de la Puerta
Hale para abrir la puerta.
Aldabas de la Puerta
Para que el horno funcione la puerta
debe estar cerrada con la aldaba.
Calentador de Cerámica Inferior
Un calentador de cerámica de 500W
cocina los alimentos por la parte
deabajo, al cocinar rápido, asar otostar.
Panel de Control
Las teclas utilizadas para operar
elhorno están ubicadas en el panel
decontrol.
Sistema de Convección
Un elemento de calentamiento
de 1550W cocina los alimentos
con unventilador de convección
haciendocircular el aire caliente
a través dela cavidad para
cocinar rápido, asar,hornear con
convección, tostar y calentar.
11
Page 52
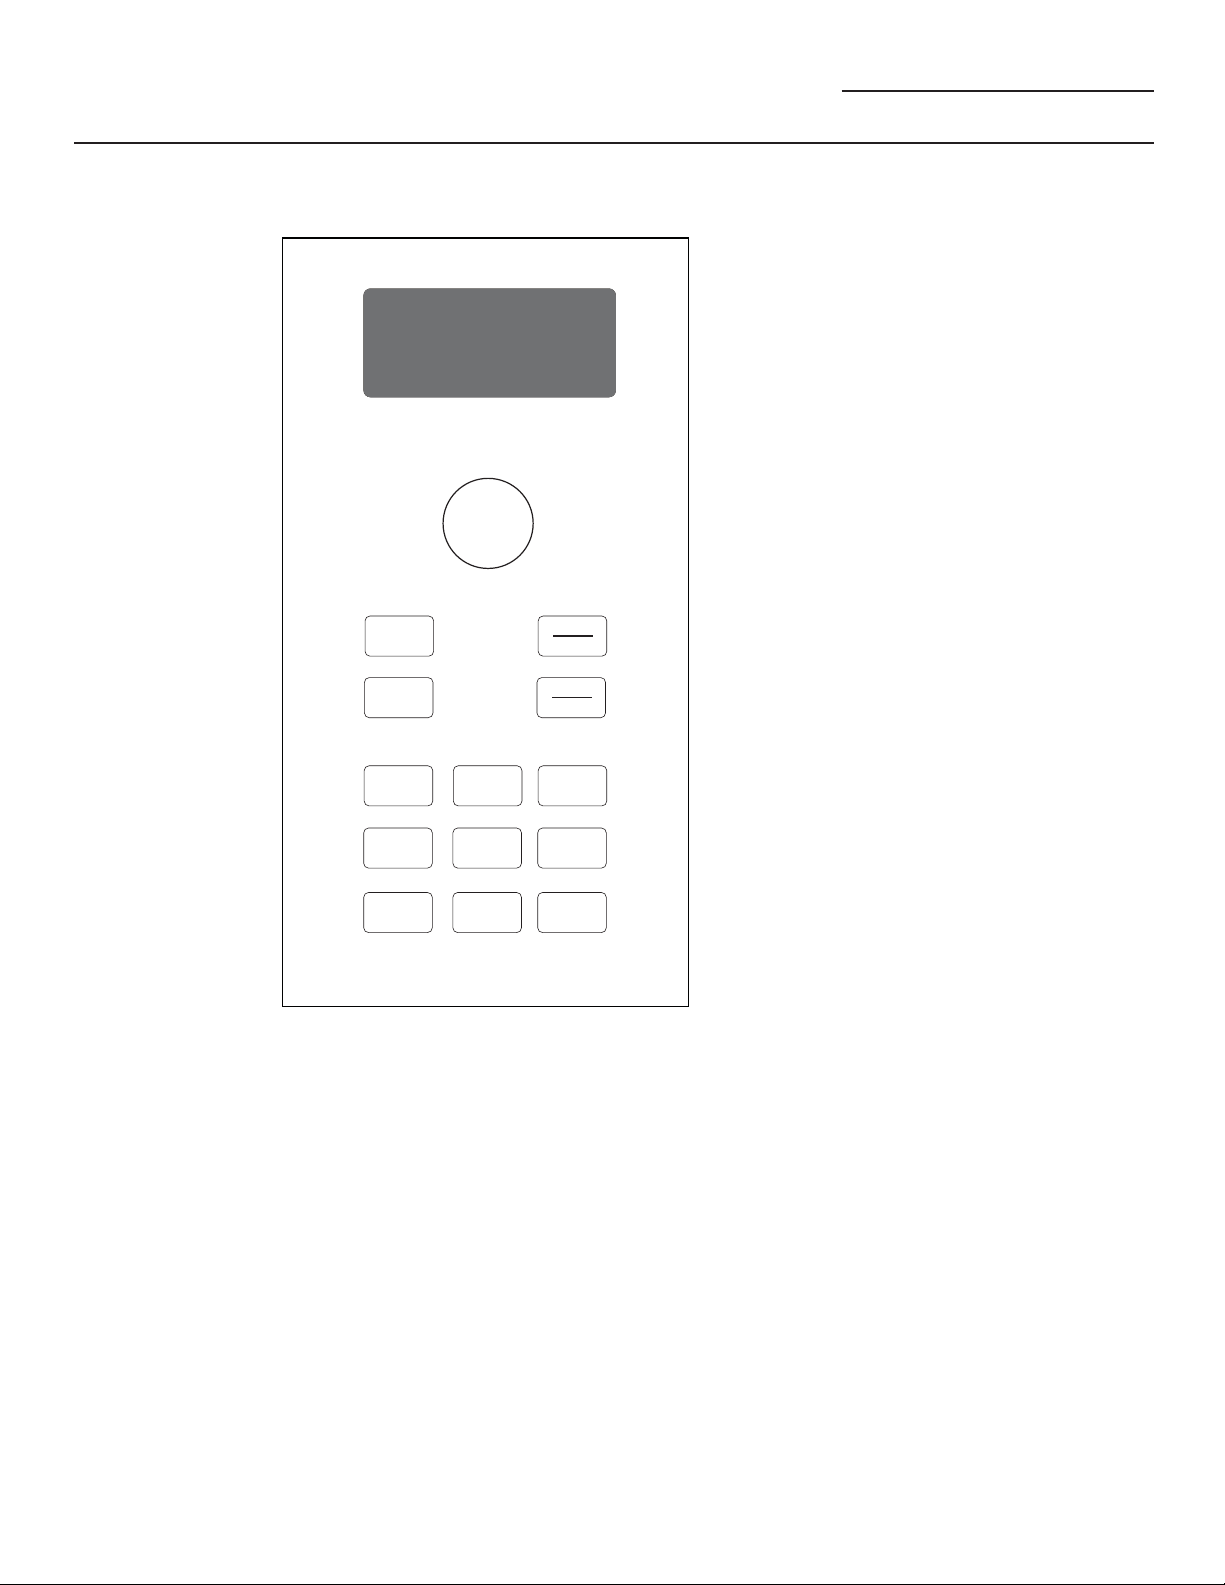
Controles
Horno Advantium
Controles de
Cocimiento
Con su horno advantium usted podrá cocinar con luces halógenas de altaintensidad, calentadores de
cerámica, elemento de calentamiento de convección y/o con energía de microonda convencional.
DISPLAY (pantalla)
Muestra las selecciones de las funciones
e información sobre el horno cuando se
encuentra en uso.
Start/Pause (inicio/pausa)
Presione esta tecla para iniciar o detener
cualquier función de cocimiento.
Cancel/Off (borrar/apagar)
Presione esta tecla para cancelar TODOS
S
o
e
t
l
e
n
c
r
u
T
t
losprogramas del horno, con excepción
del reloj,la luz automática nocturna, el
cronómetro, elventilador del respirador y la
P
r
e
s
r
e
t
n
s
E
t
o
luz de superficie.
Speed Cook (cocimiento rápido)
Presione este botón para acceder al menú
Back
Help
Start
Pause
Cancel
Off
Lock Controls
Hold 3 Sec
predeterminado de cocción rápida o para
configurar su propio programa de cocción
Convection Bake (hornear con convección)
Presione esta tecla para hornear con
convección.
Microwave (microonda)
Speed
Cook
Settings Options
Convection
Bake
Micro
wave
Add
30 Sec
Presione esta tecla para accesar el menú
delmicroonda o para ajustar su propio
programade microonda.
Settings (ajustes)
Presione esta tecla para programar el
Timer
On/Off
Surface
Light
Vent Fan
reloj yaccesar al plato giratorio on/off,
conversión automática, luz nocturna
automática, volumendel pito, pantalla on/off,
recordatorio y unidadesde temperatura.
12
SELECTOR DIAL (dial selector)
Girepara seleccionar. Presione para
ingresar. Gire para seleccionar alimentos,
nivel de energía o selecciones de
temperatura. También utilice el dial para
aumentar (gire en sentido de las agujas del
reloj) o disminuir (gire en sentido contrario a
las agujas del reloj) el tiempo. Simplemente
presione el botón para ingresar la selección.
Back (regreso)
Presione este botón para retroceder uno o
más niveles del proceso de programación.
Help (ayuda)
Presione este botón para averiguar más
sobre las funciones del horno.
Options (opciones de coc.)
Presione este botón para acceder a repetir el
último, asar, leudar, tostar, calentar e inicio
retardado.
Add 30 Sec (agregar 30 segundos)
Inicia el microondas durante 30 segundos
de cocción. Se agregan 30 segundos
adicionales al tiempo de cocción restante
cada vez que se presiona el botón.
Timer On/Off (cronómetro on/off)
Presione esta tecla para programar el
cronómetro para minutos y segundos.
Surface Light (luz de la superficie)
Presione esta tecla para encender y
apagarla luz de la plancha.
Vent Fan (ventilador)
Presione esta tecla para encender y
apagarel ventilador del respirador.
Page 53
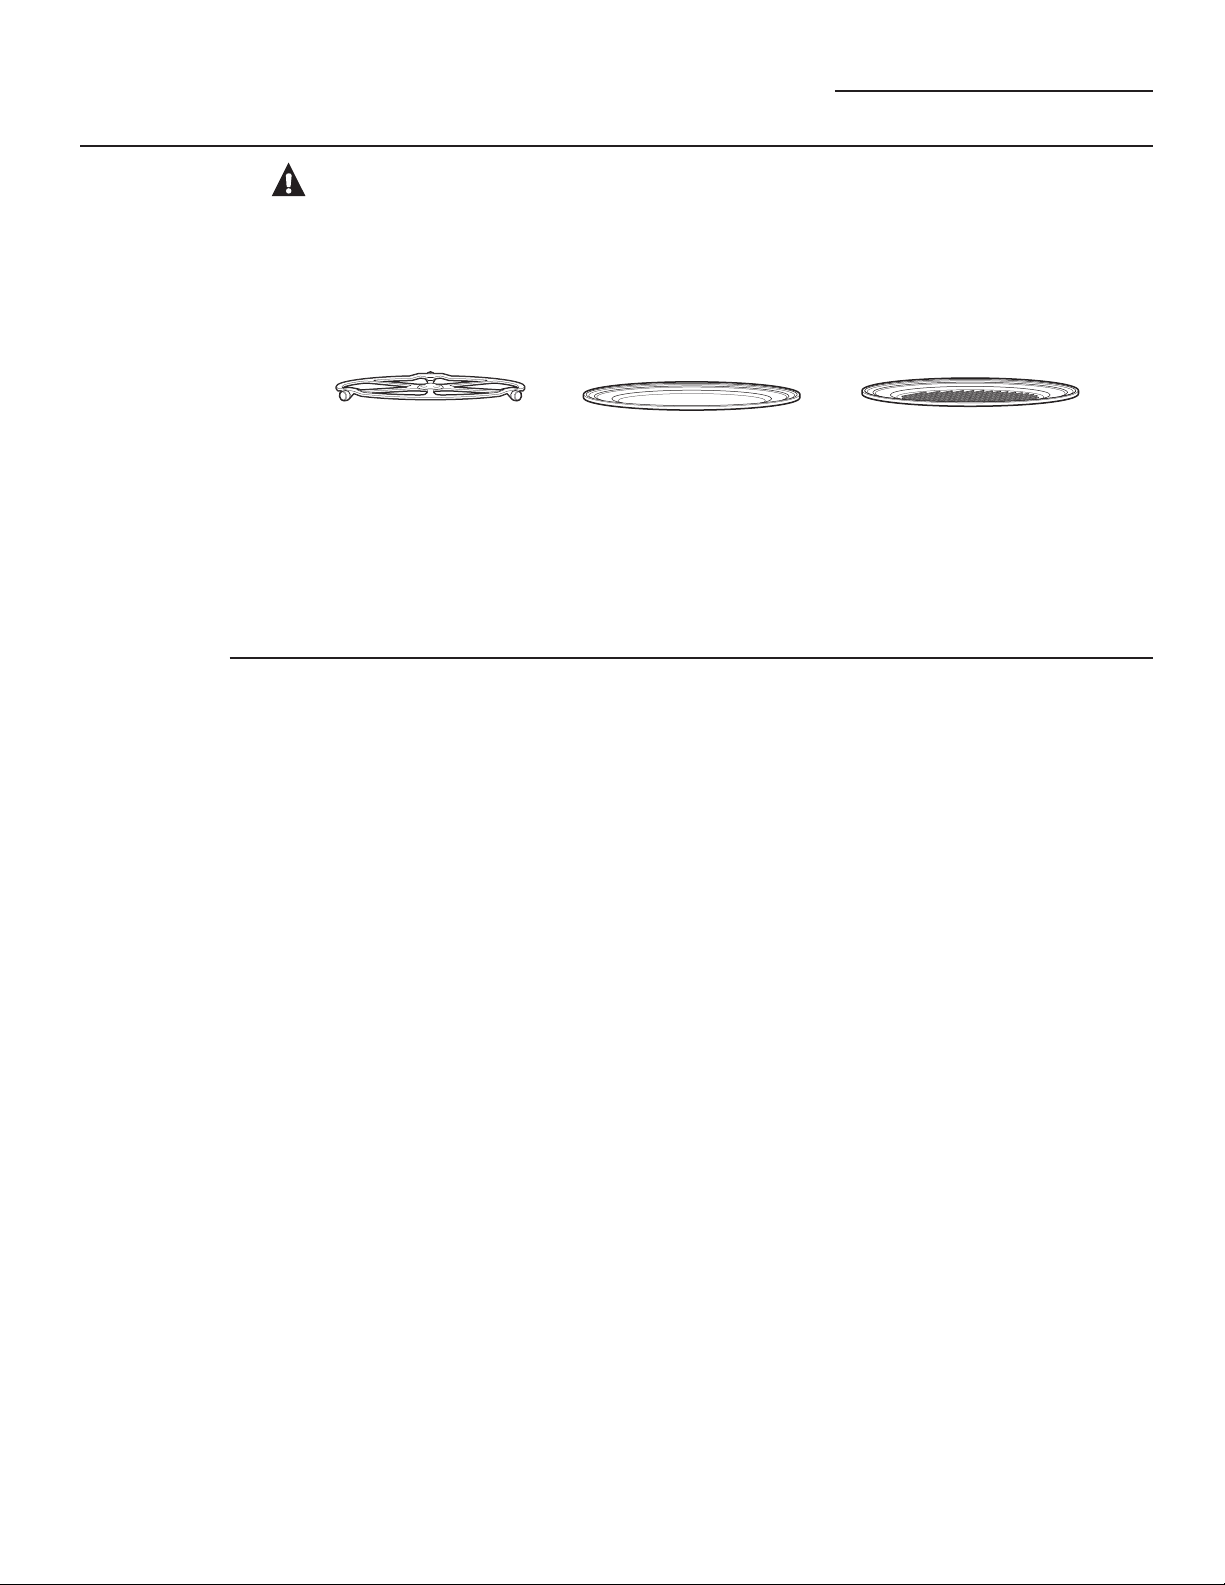
Cocimiento Rápido
Horno Advantium
Uso de
lasfunciones
de
cocimiento
rápido
Lo que es
normal
PRECAUCIÓN: Riesgo de quemaduras
Cuando utilice los programas de cocimiento rápido, recuerde que el horno, la puerta y los
platos estarán muy calientes.
Debe programar el reloj antes de utilizar su horno por primera vez. Vea la sección Reloj.
Antes de comenzar, asegúrese que el plato giratorio esté en su lugar. Utilice la bandeja
de metal o la bandeja de metal para asar y su propio recipiente de vidrio o cerámica, si es
necesario.
El horno se detendrá si abre la puerta
durante el cocimiento y aparecerá PAUSE
enla pantalla. Para reanudar el cocimiento
cierre la puerte y presione Start/Pause.
Seleccione EDIT para cambiar el tiempo olos
niveles de potencia en cualquier momento
durante el cocimiento.
Tiempos de cocimiento
Al cocinar rápido con el menú
predeterminadode alimentos, podrá ver
en la pantalla OPTIMIZING COOK TIME
(optimizando el tiempo de cocimiento)
varios segundos después de presionar
Start/Pause. El horno detecta
automáticamente el nivel del voltaje
eléctrico de su casa y ajusta el tiempo de
cocimiento hacia arriba o hacia abajo para
un cocimiento adecuado.
Ventiladores de Enfriamiento
Los ventiladores se encenderán durante
elcocimiento. Al final, éstos continuarán
durante un tiempo corto para enfriar los
componentes internos. Los ventiladores
se apagarán automáticamente cuando
las piezas internas del horno estén frías.
Lapantalla mostrará “Oven is Cooling” (el
horno se está enfriando).
Mientras el horno esté encendido el
respirador emitirá un aire caliente.
Cuando el horno está caliente el ventilador
de escape se enciende automáticamente.
Vea la sección del Ventilador Automático.
Luces
Cuando el horno está encendido, la luz
estará visible alrededor de la puerta o de
lacaja exterior.
Las luces halógenas se opacarán y se
encenderán y apagarán durante el ciclo de
cocimiento rápido, algunas veces a niveles
de potencia completa. Esto es normal. El
hornodetecta el nivel de calor y se ajusta
automáticamente.
El plato giratorio debe estar
colocadoen su lugar siempre que
utiliza el horno.
Para cocinar ràpido coloque los alimentos directamente en la bandeja
de metal o en la bandeja de metal para asar.
Se produce humo al cocinar rápido carnes
en el horno.
Para cocinar un tiempo adicional después
deque terminó el ciclo de cocimiento, utilice
lafunción para Reanudar, como se le indica
enla pantalla.
Calor del Horno
Los ciclos de cocimiento rápido no
requieren un tiempo de precalentamiento.
El horno comienzaa cocinar
inmediatamente.
La puerta y el interior del horno estarán
muy calientes. Tenga cuidado al abrir
la puerta y retirarlos alimentos. Tenga
cuidado del vapor quese puede salir
alrededor de la puerta.
Cuando cocine rápido no utilice recipientes
ni cubiertas hechas de papel, plástico o
aluminio.
Cuando cocine por un perído largo
de tiempo,el horno puede reducir
automáticamente los niveles de potencia
para mantener el nivelapropiado de calor
en el horno.
Sonidos
Es normal escuchar durante el cocimiento
chasquidos y el soplador del ventilador. El
controlelectrónico enciende y apaga los
componentes.
Interferencia
Se puede observar interferencia de TV/
radiocuando utiliza el microonda, similar a
la interferencia causada por otros aparatos
pequeños.Esto no indica un problema con el
microonda.Mueva el radio o la TV lo más lejos
posible delmicroonda o revise la posición de
la antena dela TV/radio.
13
Page 54
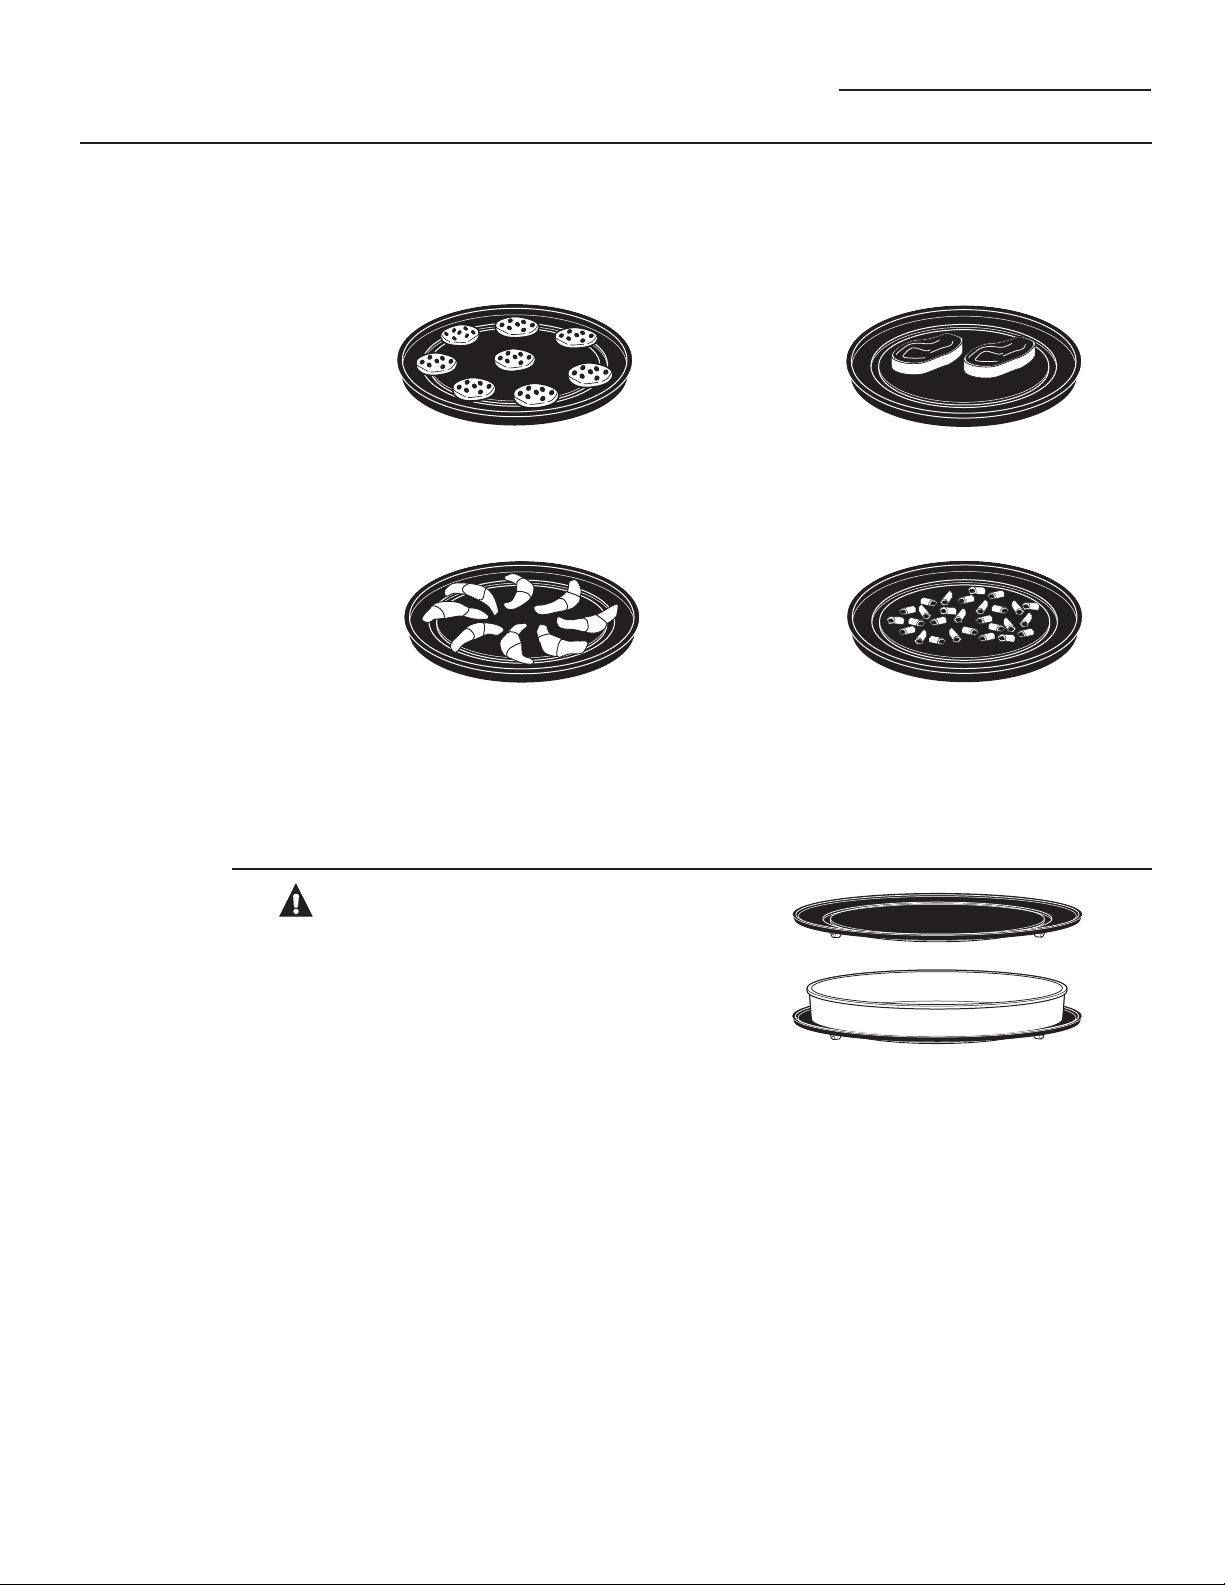
Cocimiento Rápido
Horno Advantium
Consejos
para mejores
resultados de
cocimiento
rápido
Disponga los alimentos sobre las bandejas
metálicas como se indica para asegurar un
dorado consistente y parejo.
Patrón circular
(Ejemplo, biscochos, galletas)
Patrón de rayo
(Ejemplo, croissants, palitos de pan)
Los alimentos pueden tocarse pero no deben
estar montados unos sobre otros.
Patrón lado a lado
(Ejemplo, carnes y pollos)
Una capa
(Ejemplo, aperitivos)
Recipientos
para
cocimiento
rápido
La carne, pollo, pescado o mariscos frescos que están congelados deben descongelarse
antesde cocinarlos. (Puede utilizar la función de descongelación del microonda). Siga las
instruccionesdel paquete para otros alimentos congelados empacados.
PRECAUCIÓN:
Riesgode quemaduras
Los recipients se calentarán.
Necesitaráguantes para manipular los
recipientes.
Siga las sugerencias para el recipienteque
aparecen en la pantalla del horno oen el
Libro de Recetas.
Cuando cocine coloque los alimentos
directamente en la bandeja de metal o en
la bandeja de metal para asar, a menos
de que el horno le indique lo contrario.
Utilice la bandeja de metal de la misma
manera en que utilizaría una pana
parahornear baja o una bandeja para
hornear.
Asegúrese de seleccionar un tamaño
querote fácilmente.
Coloque la bandeja de metal o la
bandeja de metal para asar en el plato
giratorio. Coloque el recipiente de vidrio o
cerámicaen la bandeja.
Cuando cocine rápido no utilice
recipientes ni cubiertas hechas de papel,
plástico o aluminio.
14
Ademas de los utensilios
suministrados,usted puede utilizar platos
de cacerolasque no sean de metal, platos
para tartasy otros recipientes seguros
para el calor.Colóquelos directamente en
la bandejade metal.
Page 55
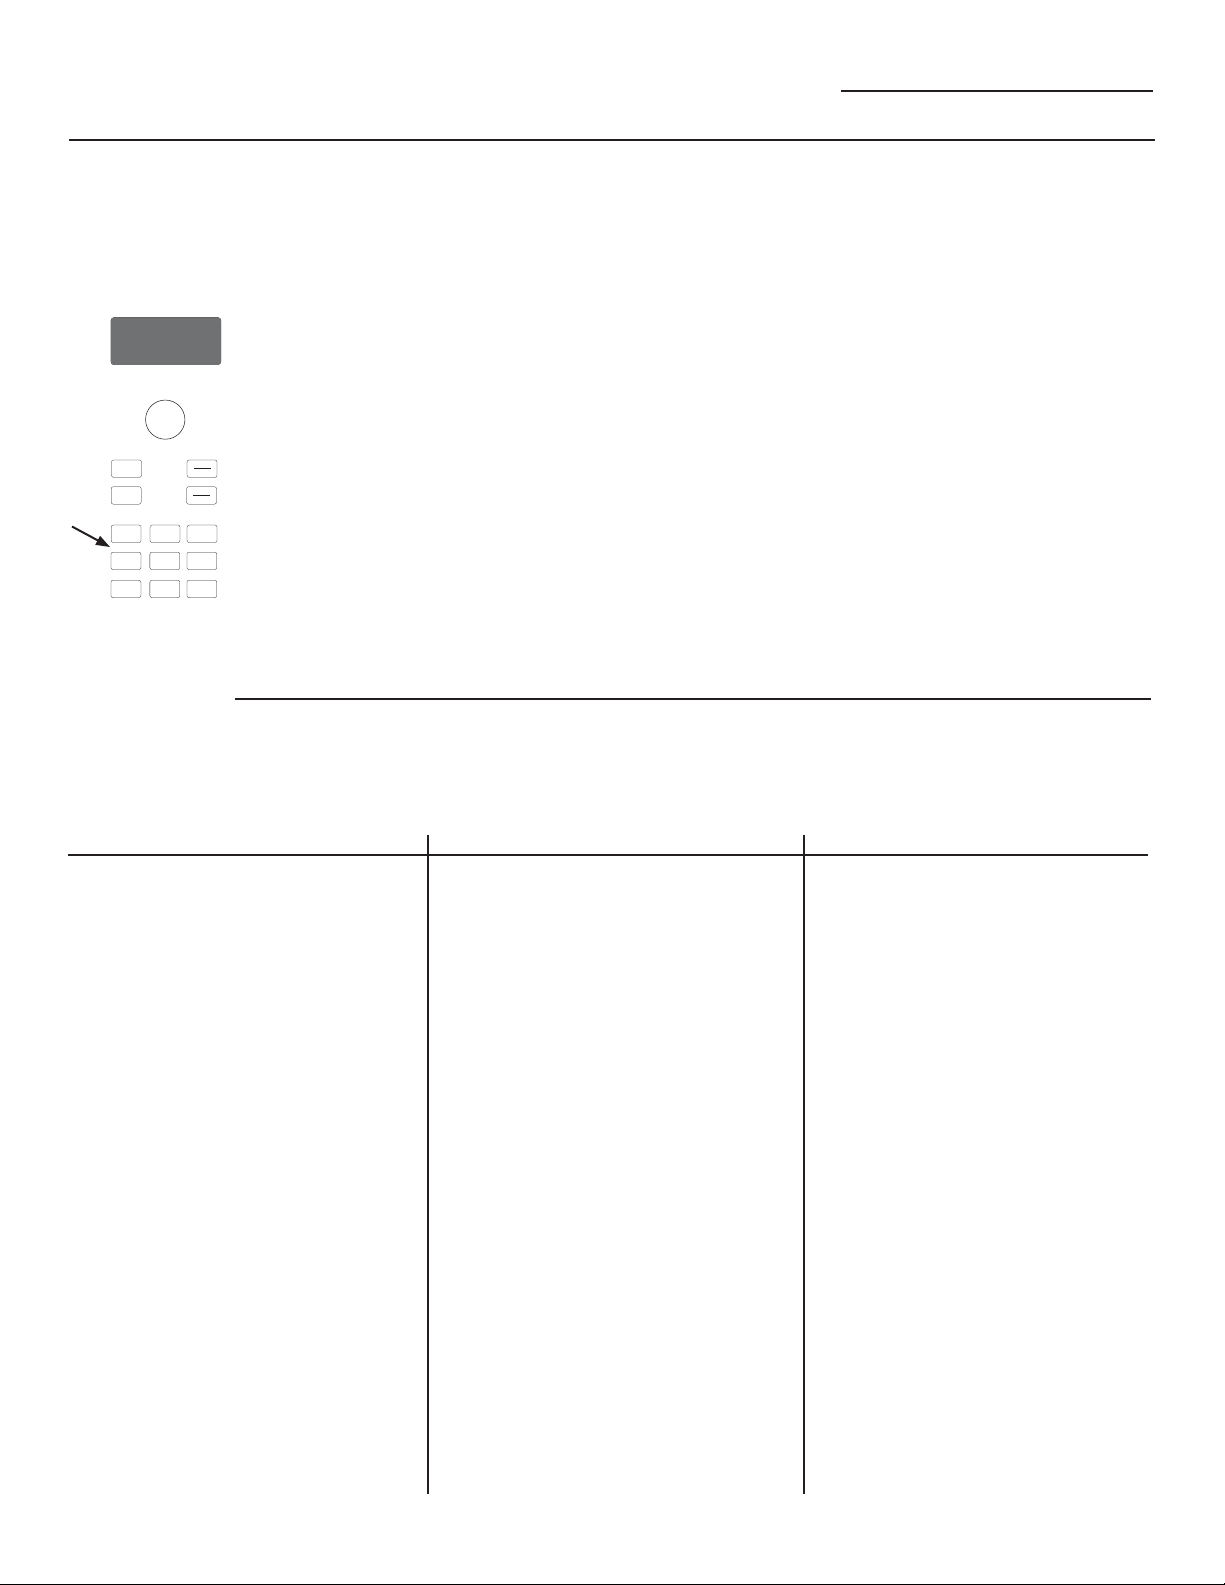
Cocimiento Rápido
Horno Advantium
Utilice el menú
predeterminado
de cocimiento
rápido
S
o
e
t
l
e
n
c
r
t
u
T
r
P
e
r
t
e
s
n
s
E
t
o
Convection
Bake
Surface
Light
Start
Pause
Cancel
Off
Lock Controls
Hold 3 Sec
Micro
wave
Add
30 Sec
Vent Fan
Back
Help
Speed
Cook
Settings Options
Timer
On/Off
Selecciones
del menú
predeterminado de
cocimiento rápido
El Advantium está preconfigurado
para cocinar más de 175 comidas
populares.
1. Presione la tecla Speed Cook.
Si no se hace ninguna selecciónen
15 segundos, la pantalla regresará
a la hora del día.
2. Gire el dial selector para
seleccionar la categoría del tipo
de alimento que desea. Presione
eldial para seleccionar.
3. Gire el dial selector para
seleccionar el alimento específico
(selecciónde menú). Presione el
dial paraseleccionar.
4. Gire el dial selector para
seleccionar la cantidad, tamaño
y/o cocimiento (si lo requiere, el
horno leindicará). Presione el dial
despuésde cada selección.
5. Una vez que la pantalla muestre:
EDIT (editar), SAVE (guardar) o
START (iniciar), presione la tecla
Start/Pause o el dial selector para
comenzar a cocinar.
Voltee la comida cuando el horno
OHLQGLTXH7851)22'29(5SDUD
ciertotipo de comida).
&XDQGRHOKRUQRLQGLTXH&+(&.
for DONENESS, revise para ver si la
comida está cocinada a su gusto
SDUDFLHUWRVDOLPHQWRV
Si desea revisar los ajustes durante el
cocomiento presione el dial selector.
Si entró una selección no deseada,
simplemente presione en cualquier
momento latecla Back y vuelva a
entrar las selecciones deseadas.
Se puede producir humo cuando
cocinarápido carne en el horno.
De acuerdo con la Guía de la USDA, se debe cocinar la carne a una temperatura
INTERNA de por lo menos 160ºF y el pollo a una tempreatura INTERNA de por
lo menos 180ºF. Cocinar a estas temperaturas generalmente protege contra
enfermedades producidas por los alimentos. Para más información visite la
página www.foodsafety.gov.
Categoría Alimento Selección del Menú
Categoría Alimento Selección del Menú
Aperitivos Bocadillos de Bagel
3DOLWRVGH4XHVR
Rollos (congelados)
Jalapeño Poppers
Bolitas de Carne (cong.)
Nachos
Nueces, Rostizadas
Aros de Cebolla
Rollos de Pizza
Pretzels Suaves (cong.)
Taquitos (congelados)
Panes Biscochos
Palitos de Pan
3DQGH4XHVR
Rollos
Rollos para la cena
Pan de ajo
Tostadas Texanas
Desayumo Waffles Belgas
Pizza de Desayuno
Tostadas a la Francesa
Tortitas de Papa
Panqueques (congelados)
Rollos (refrigerados)
Biscocho con Salchicha
Chorizos
Tortitas de Salchicha
Strudel (congelados)
Empanadas
Waffles (congelados)
Pollo Con hueso
Sin Hueso
Filete (congelado)
Dedos (congelado)
Frito (congelado)
Nugget (congelado)
Tortita (congelado)
Tierno (congelado)
Alas (congelado)
Entero
Postres Mezcla de Brownie
Galletas
Tartas (fruta fresca)
Cubierta para Tartas
Rollos (refrigerados)
Empanadas
Entradas Rollos (congelados)
Pan de carne (9x5)
Taquitos (congelados)
Carnes Filet Mignon
Hamburguesas
Chuletas de Cordero
Chuletas de Cerdo
Ribeye Steak
Sirloin Steak
Strip Steak
TBone Steak
Tenderloin
Pizza Deli/Fresca
Pizza Congelada
Utilice corteza precocida
Papas Papa horneada
Tortitas de papa
Papas congeladas
Nugetts congelados
Camote/Jícama
Categoría Alimento Selección del Menú
Sandwich Banderillas (congelados)
Rollo de Hot Dog
Sandwich a la Parrilla
Sandwich relleno
Mariscos Filetes de Bacalao
Palitos de pescado (cong.)
Empanizado congelado
Filete de pescado reloj
Salmón
Mariscos
Talapia
Steaks de Atún
Pescado blanco/Bacalao
Guarnición Cacerola
Frijoles Fritos (16 oz)
Espárragos rostizados
Pimentón rostizado
Chiles rostizados (36)
Maíz rostizado (14)
Ajo rostizado
Escalopas de papas
Steak de Pescado Espada (1”)
Vegetales mixtos rostizados
15
Page 56
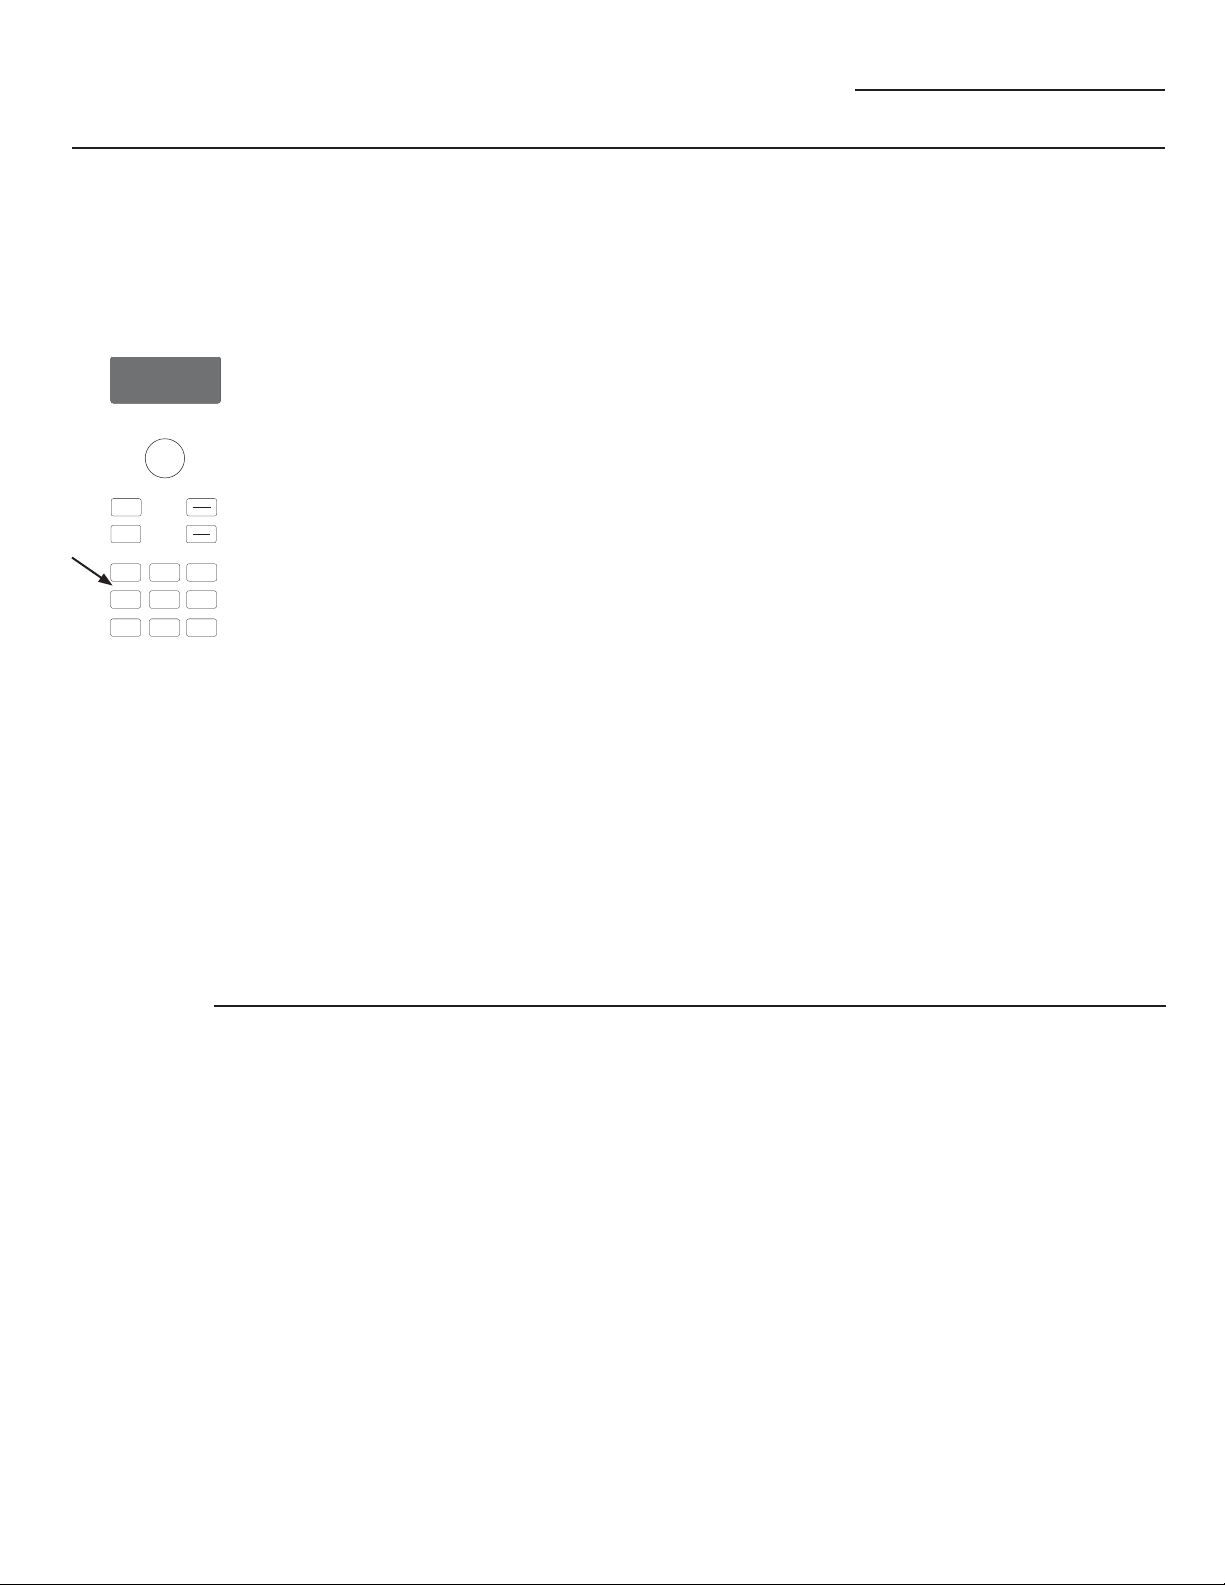
Cocimiento Rápido
Horno Advantium
Niveles de
potencia de
cocimiento
rápido
S
o
e
t
l
e
n
c
r
t
u
T
r
P
e
r
t
e
s
n
s
E
t
o
Convection
Bake
Surface
Light
Start
Pause
Cancel
Off
Lock Controls
Hold 3 Sec
Micro
wave
Add
30 Sec
Vent Fan
Back
Help
Speed
Cook
Settings Options
Timer
On/Off
El Advantium utiliza energía de las
lámparas halógenas de alta intensidad,
delcalentador de cerámica, del sistema
deconvección y de microondas para
cocinar simultáneamente los alimentos
porarriba, abajo y en el interior, y sellar
lahumedad y el sabor.
Cuando utilice el menú predeterminado
dealimentos, los niveles de potencia
yaestán seleccionados para usted. Sin
embargo, estos se pueden ajustar al
utilizar el menú predeterminado de
alimentosy MY RECIPE (mi receta).
Cada nivel de potencia le ofrece
energíade la lámpara halógena o del
calentadorde cerámica y de microonda
durante cierto porcentaje de tiempo o le
ofrece calentamiento para el sistema de
convección.
Por ejemplo:
U–07 Lámpara halógena superior
encendida el 70% del tiempo.
L–07 Calentador de cerámica
inferiorencendido el 70% del
tiempo.
M–05 Microonda encendido el 50%
del tiempo.
C–07 Elemento de convección
calienta el horno a 350ºF.
NOTA: Tenga cuidado al ajustar los
niveles de potencia de manera que no
cocinelos alimentos demasiado o muy
poco.
1. Presione la tecla Speed Cook y
seleccione su comida (siga las
instrucciones de uso del menú
predeterminado de cocimiento rápido).
2. Cuando la pantalla muestre EDIT,SAVE
o START, gire el dial paraseleccionar
EDIT (editar).
Si no desea cambiar ninguno de
losajustes, simplemente presione
eldial y pase a la siguiente selección.
3. Presione el dial si no desea ajustar el
tiempo de cocimiento.
4. Gire el dial en dirección de las
manecillas de reloj para aumentar o
al contrario para disminuir el nivelde
potencia superior. Presione eldial para
seleccionar.
5. Gire el dial para cambiar el nivel
depotencia inferior. Presione el dial
para seleccionar.
6. Gire el dial para cambiar el nivel
depotencia de microonda. Presioneel
dial para seleccionar.
7. Gire el dial para cambiar el nivel
depotencia de convección. Presioneel
dial para seleccionar.
8.
Presione la tecla Start/Pause o
el dial selector para comenzara
cocinar.
16
Siga estas guías generales cuando seleccione los mejores ajustes de U=, L=, M= y
C= para sus recetas favoritas.
U = Seleccione un ajuste más alto
paraalimentos delgados que
requierenun café dorado en la
parte de arriba(por ejemplo: filetes
de pescado, tostadas, pechugas
de pollo deshuesadas). Seleccione
un ajuste más bajopara alimentos
gruesos o con muchocontenido
de azúcar o grasa (porejemplo:
muffins, rostizados, cacerolas)
o que requieran un tiempo
decocimiento más largo.
L = Seleccione un ajuste más alto
paraalimentos gruesos o densos
que norequieren un cocimiento
rápido en elcentro (por ejemplo:
steaks, cacerolas). Seleccione un
ajuste más bajopara alimentos
delgados (por ejemplo:galletas).
M = Seleccione un ajuste más
alto paraacortar el tiempo de
cocimiento para alimentos densos
o pesados (porejemplo: cacerolas,
pollos enteros). Seleccione un
ajuste más bajo para alimentos
delicados (por ejemplo:panes)
o alimentos que requierenun
período de cocimiento más
largopara obtener resultados
suaves (por ejemplo: steaks, carne
para asar).
C = Seleccione un ajuste más bajo
paraalimentos más delicados que
se cocinan a temperaturas más
bajas. Seleccione un ajuste más
alto (7 o mayor) para alimentos
robustos o quese cocinan a
temperaturas arriba de350ºF.
Page 57
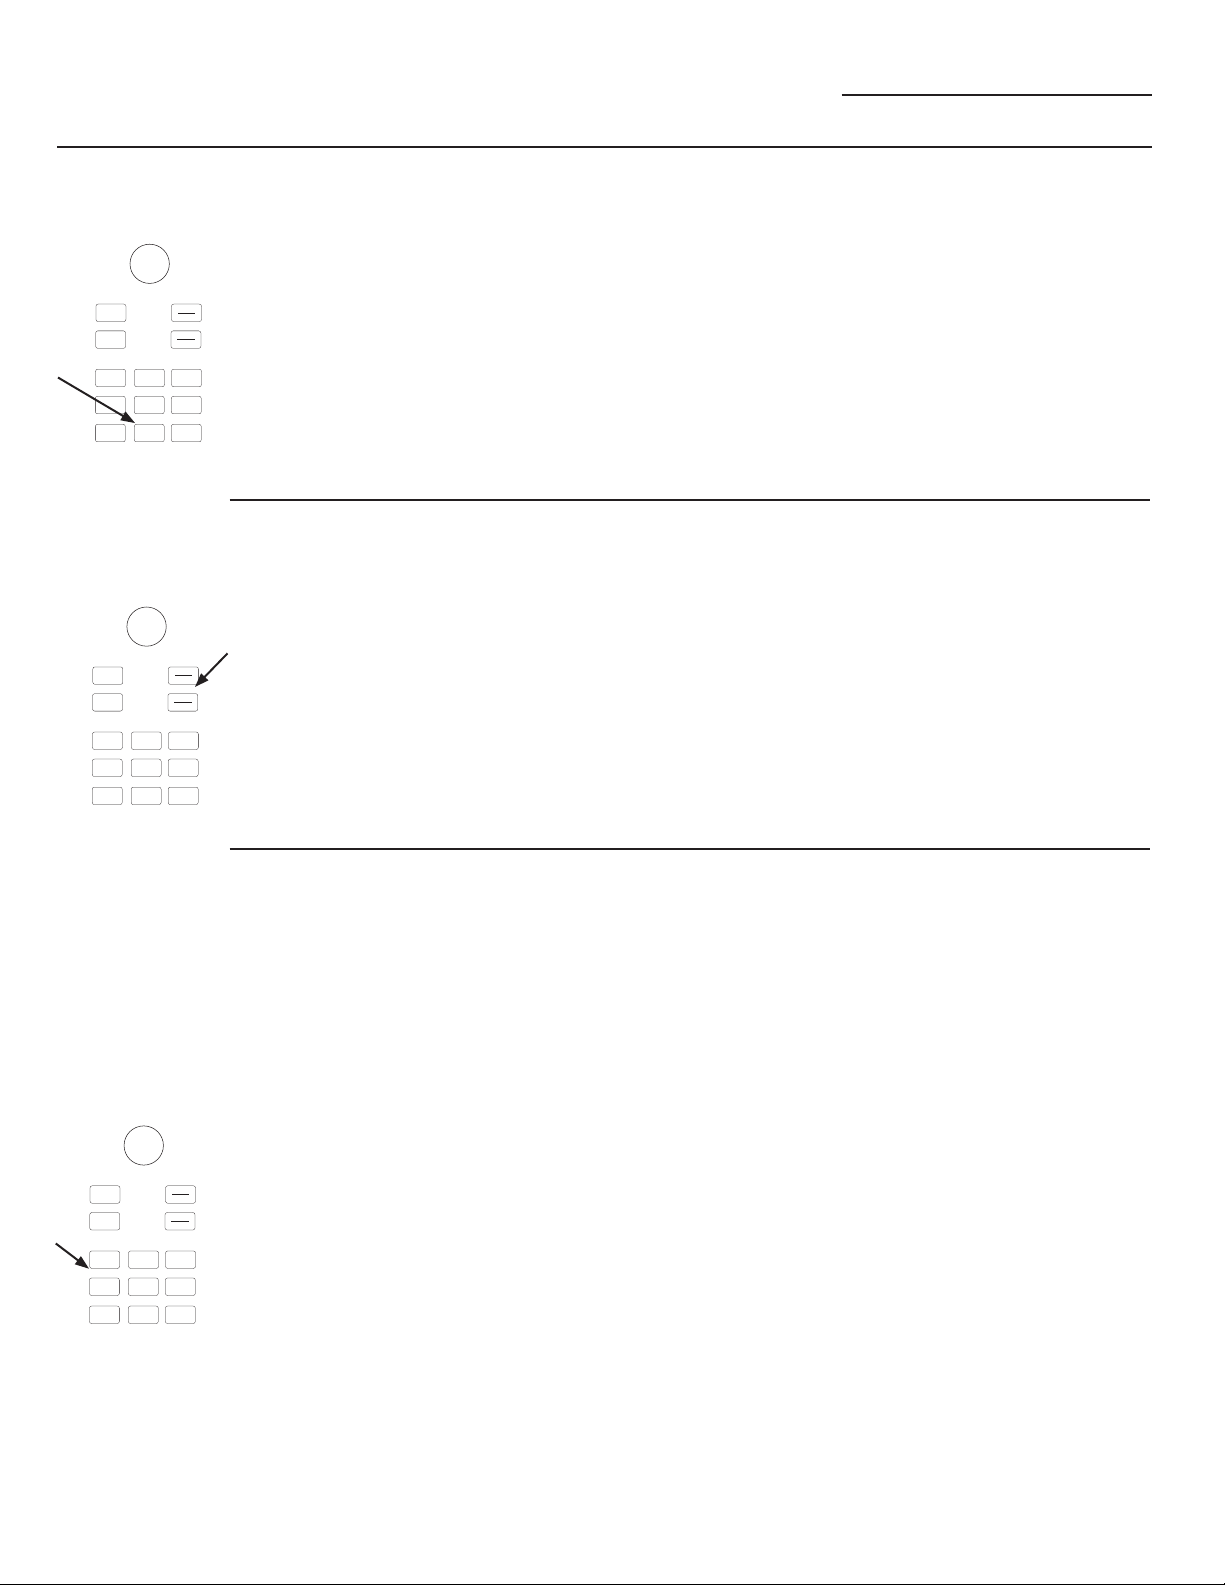
Cocimiento Rápido
Horno Advantium
Repita la última
función
S
o
e
t
l
e
n
c
r
t
u
T
r
P
e
r
t
e
s
n
s
E
t
o
Convection
Bake
Surface
Light
Start
Pause
Cancel
Off
Lock Controls
Hold 3 Sec
Micro
wave
Add
30 Sec
Vent Fan
Back
Help
Speed
Cook
Settings Options
Timer
On/Off
Función para
Reanudar
S
o
e
t
l
e
n
c
r
t
u
T
r
P
e
r
t
e
s
n
s
E
t
o
Convection
Bake
Surface
Light
Start
Pause
Cancel
Off
Lock Controls
Hold 3 Sec
Micro
wave
Add
30 Sec
Vent Fan
Back
Help
Speed
Cook
Settings Options
Timer
On/Off
Utilice esta función para ahorrar
tiempopara alimentos que cocina
repetidas veces, como galletas y
aperitivos.
1. Presione Options (opciones) y
seleccione REPEAT LAST (repita el
último).
2. La pantalla mostrará el último
alimento que preajustó.
1. Si necesita cocinar la comida
pormás tiempo, usted puede
reiniciarel horno al presionar la
tecla Start/Pause o el dial selector.
2. La pantalla mostrará RESUME
COOKING (reanudar el cocimiento)
y el horno volverá a iniciar
automáticamente al 10% del
tiempo original.
NOTA: El último programa que
utilizóse guarda durante dos horas.
3. Presione la tecla Start/Pause o
el dial selector para comenzar
acocinar.
El programa permanece en memoria
durante 5 minutos. Después
necesitaráprogramar de nuevo.
Vea la sección deUso del menú
predeterminado de cocimiento rápido.
Mi Receta
cocimiento
rápido
personalizado
S
o
e
t
l
e
n
c
r
t
u
T
r
P
e
r
t
e
s
n
s
E
t
o
Convection
Bake
Surface
Light
Start
Pause
Cancel
Off
Lock Controls
Hold 3 Sec
Micro
wave
Add
30 Sec
Vent Fan
Back
Help
Speed
Cook
Settings Options
Timer
On/Off
El Advantium le ofrece flexibilidad
alcocinar sus platos favoritos.
Si desea cocinar una comida que nose
encuentra entre nuestras selecciones
predeterminada, utilice My Recipepara
personalizar el cocimiento rápido.
1. Presione la tecla Speed Cook
yseleccione MY RECIPE (mi receta).
Luego presione el dial para seleccionar.
Seleccione NEW RECIPE (receta nueva).
Si no realiza ninguna entrada durante
15 segundos, la pantalla regresará a la
hora del día.
2. Gire el dial selector para seleccionar el
tiempo de cocimiento. Presione el dial
para seleccionar.
La pantalla le indicará que debe
seleccionar el nivel o niveles de
potencia.
3. Gire el dial para seleccionar el
nivelde potencia superior. Gire el dial
en dirección de las manecillas del
relojpara aumentar o en dirección
contrariapara disminuir el nivel de
potencia superior. Presione el dial para
seleccionar.
4. Gire el dial para seleccionar el nivel
depotencia inferior. Presione para
seleccionar.
5. Gire el dial para seleccionar el nivel
depotencia de microonda. Presione
paraseleccionar.
6. Gire el dial para seleccionar el nivel
depotencia de convección. Presione
paraseleccionar.
7. Presione la tecla Start/Pause
o presione el dial selector para
comenzara cocinar.
Para sugerencias sobre el nivel de
potencia o tiempo de cocimiento, utilice la
guíade cocimiento, libro de recetas o las
selecciones del menú predeterminado de
cocimiento rápido.
17
Page 58
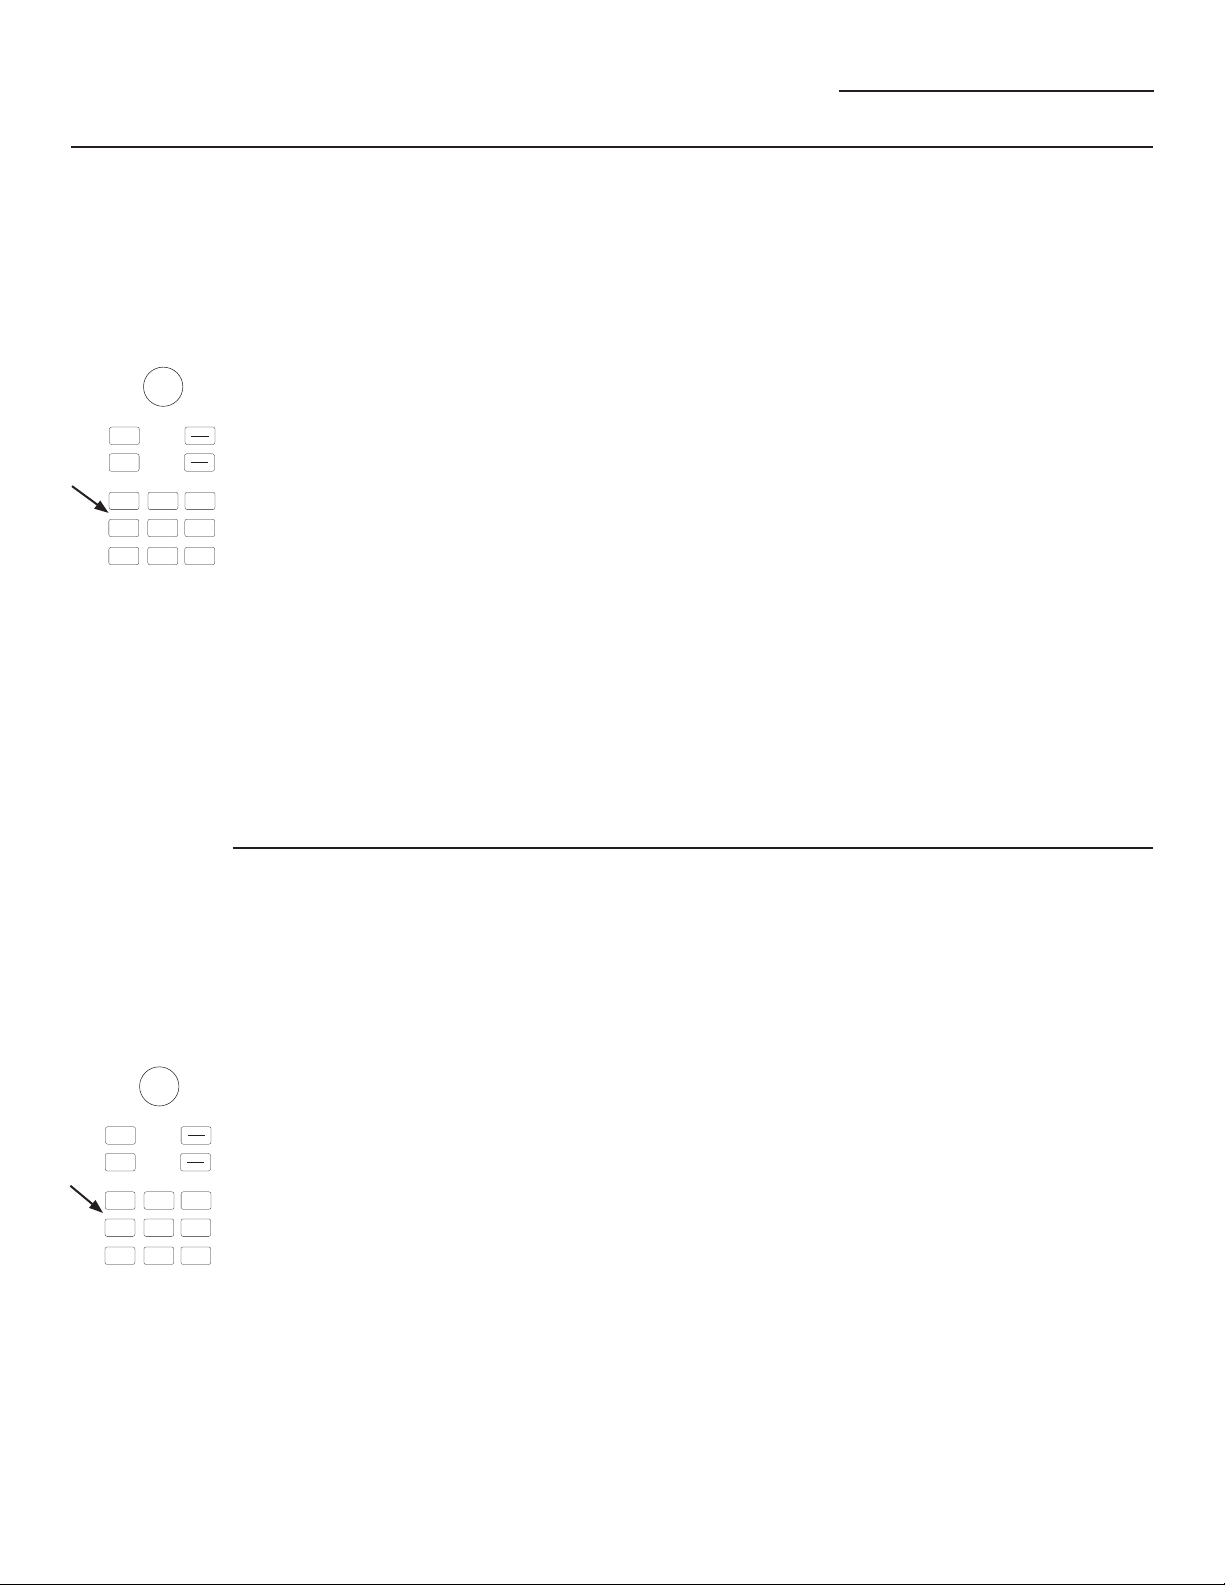
Cocimiento Rápido
Horno Advantium
Mi Receta
para entrar
y salvar
S
o
e
t
l
e
n
c
r
t
u
T
r
P
e
r
t
e
s
n
s
E
t
o
Convection
Bake
Surface
Light
Start
Pause
Cancel
Off
Lock Controls
Hold 3 Sec
Micro
wave
Add
30 Sec
Vent Fan
Back
Help
Speed
Cook
Settings Options
Timer
On/Off
Agrega y guarda hasta 30 de sus
recetas para cocimiento rápido o
microonda, o las recetas del menú
predeterminado de cocimiento rápido
como una receta favorita. Una vez
realizada, puedellamar rápidamente
y en cualquier momento su receta
favorita para cocinar la comida como
a usted le gusta!
1. Presione la tecla Speed Cook o
Microwave.
2. Gire el dial para seleccionar MY
RECIPE (mi receta). Presione el dial
para seleccionar.
3. Gire el dial hasta que aparezca
NEW RECIPE (nueva receta).
Presione el dial para seleccionar.
4. Aparecerá ENTER COOK TIME(entre
el tiempo de cocimiento).Gire el
dial para escoger eltiempo de
cocimiento. Presione el dial para
seleccionar.
La pantalla le indicará que debe
seleccionar los niveles de potencia.
5. Gire el dial en dirección de las
manecillas de reloj para aumentar
o al contrario para disminuir
el nivel de potencia superior.
Presione el dial para seleccionar.
Utilice la guía de cocimiento o libro
de recetas para ver sugerencias del
nivel de potencia y del tiempo de
cocimiento.
6. Seleccione SAVE (guardar) del
resumen de la pantalla.
7. Aparecerá SPELL THE FOOD
NAME(deletree el nombre de
la comida).Gire el dial hasta la
primera letra dela descripción
de su comida y presioneel dial
para seleccionar. Continúeeste
proceso hasta deletrear el
restodel nombre. Presione la
tecla Start/Pause para guardar la
receta y sunombre.
Mi Receta
encontrar y
utilizar
S
o
e
t
l
e
n
c
r
t
u
T
r
P
e
r
t
e
s
n
s
E
t
o
Convection
Bake
Surface
Light
Start
Pause
Cancel
Off
Lock Controls
Hold 3 Sec
Micro
wave
Add
30 Sec
Vent Fan
Back
Help
Speed
Cook
Settings Options
Timer
On/Off
Para encontrar y utilizar las recetas
guardadas:
1. Presione la tecla Speed Cook o
Microwave.
2. Gire el dial para seleccionar MY
RECIPE (mi receta).
3. Aparecerán en la pantalla los
nombresde las recetas que ha
guardado.
4. Gire el dial hasta que aparezca
lareceta que desea y presione el
dialpara seleccionar.
5. Presione la tecla Start/Pause oel
dial selector para comenzar el
cocimiento.
18
Page 59
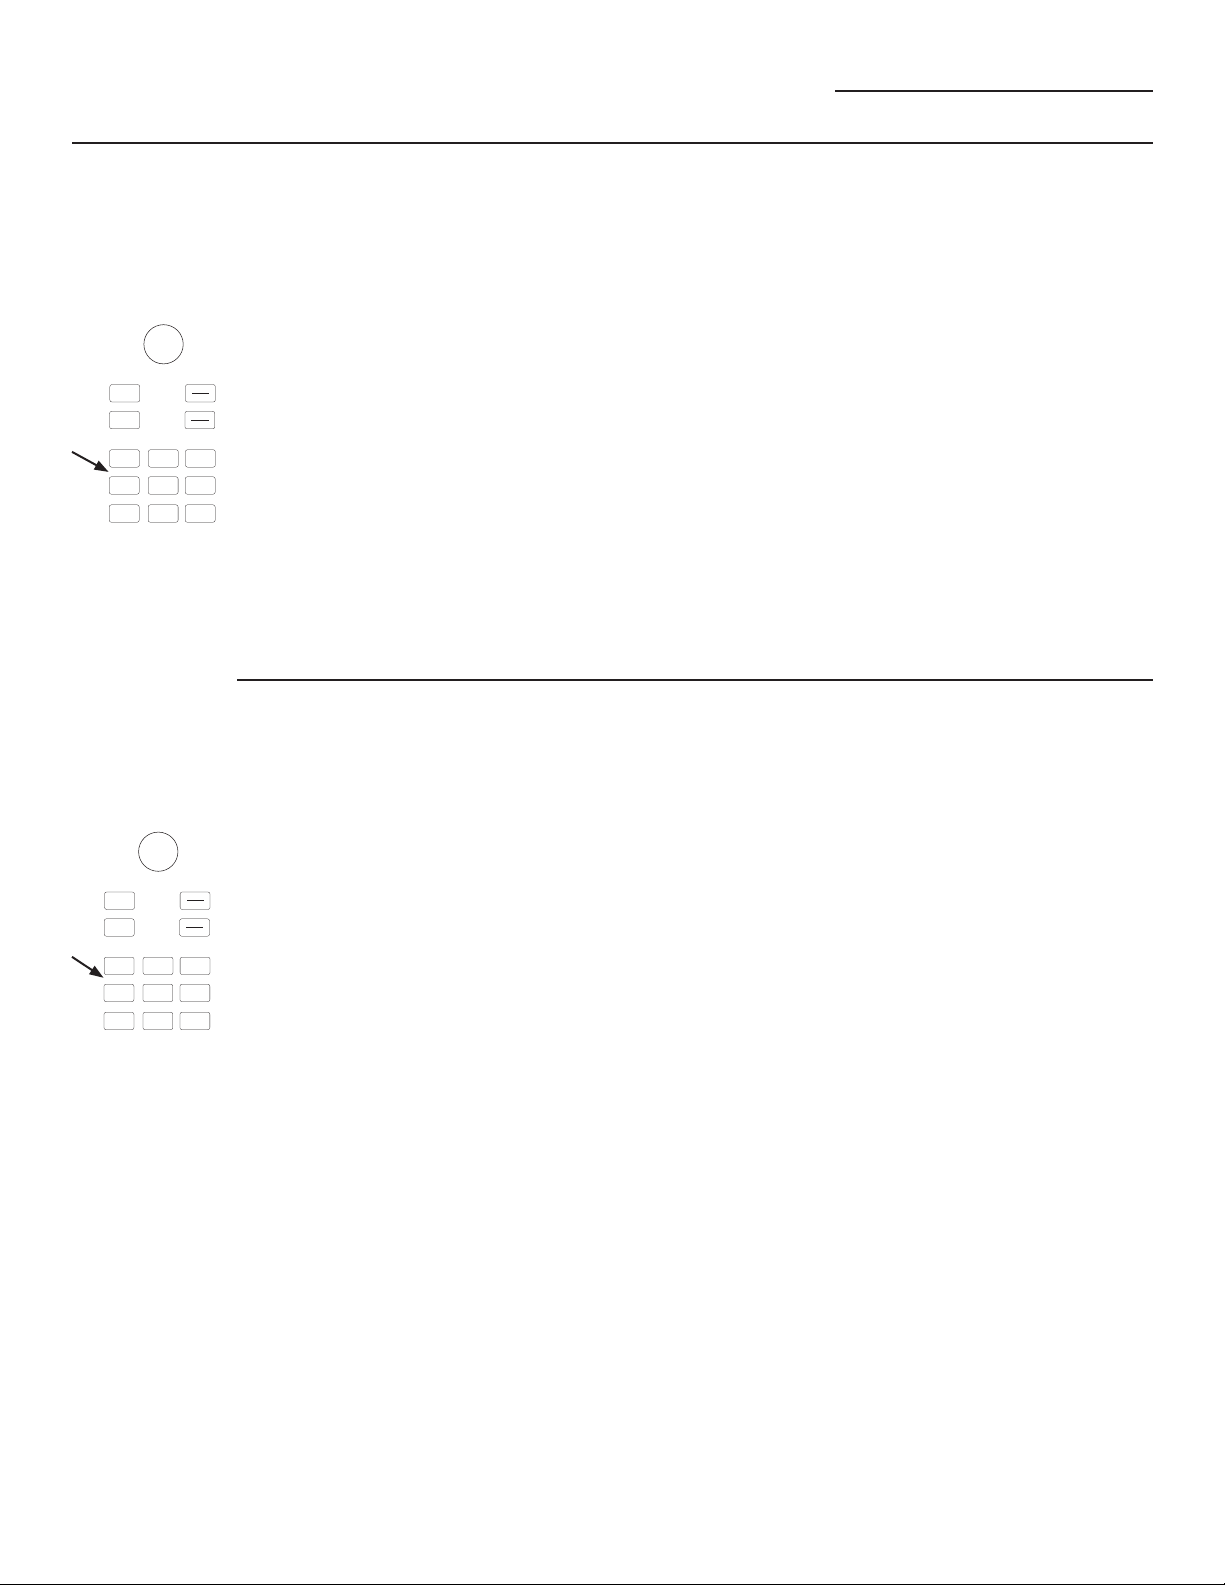
Cocimiento Rápido
Horno Advantium
Mi Receta
para ajustar
o cambiar
S
o
e
t
l
e
n
c
r
t
u
T
r
P
e
r
t
e
s
n
s
E
t
o
Convection
Bake
Surface
Light
Start
Pause
Cancel
Off
Lock Controls
Hold 3 Sec
Micro
wave
Add
30 Sec
Vent Fan
Back
Help
Speed
Cook
Settings Options
Timer
On/Off
Mi Receta
para
eliminar
S
o
e
t
l
e
n
c
r
t
u
T
r
P
e
r
t
e
s
n
s
E
t
o
Convection
Bake
Surface
Light
Start
Pause
Cancel
Off
Lock Controls
Hold 3 Sec
Micro
wave
Add
30 Sec
Vent Fan
Back
Help
Speed
Cook
Settings Options
Timer
On/Off
Para ajustar o cambiar las recetas
guardadas:
1. Presione los botones Speed Cook
(cocción rápida) o Microwave
(microondas).
2. Gire el dial para seleccionar MY
RECIPE (mi receta).
3. Gire el dial hasta la receta que
desea cambiar. Presione el dial
para ingresar. Aparecerán las
configuraciones actuales.
4. Elija EDIT (editar).
5. Gire el dial para ajustar el tiempo
de cocción y presione el dial para
ingresar.
Para eliminar las recetas guardadas:
1. Presione la tecla Speed Cook o
Microwave.
2. Gire el dial para seleccionar MY
RECIPE (mi receta).
3. Seleccione la receta que desea
eliminar.
4. Gire el dial para seleccionar
DELETE (eliminar).
6. Gire el dial para cambiar los
niveles de energía y presione el
dial para ingresar cada nivel de
energía.
7. Gire el dial para cambiar el
nombre de la receta. Presione el
dial para ingresar cada cambio de
letra
8. Presione el botón Start/Pause
(iniciar/pausa) para guardar la
receta modificada.
Para nivel de energía y sugerencias de
tiempo de cocción, utilice su guía de
cocción o recetario.
19
Page 60
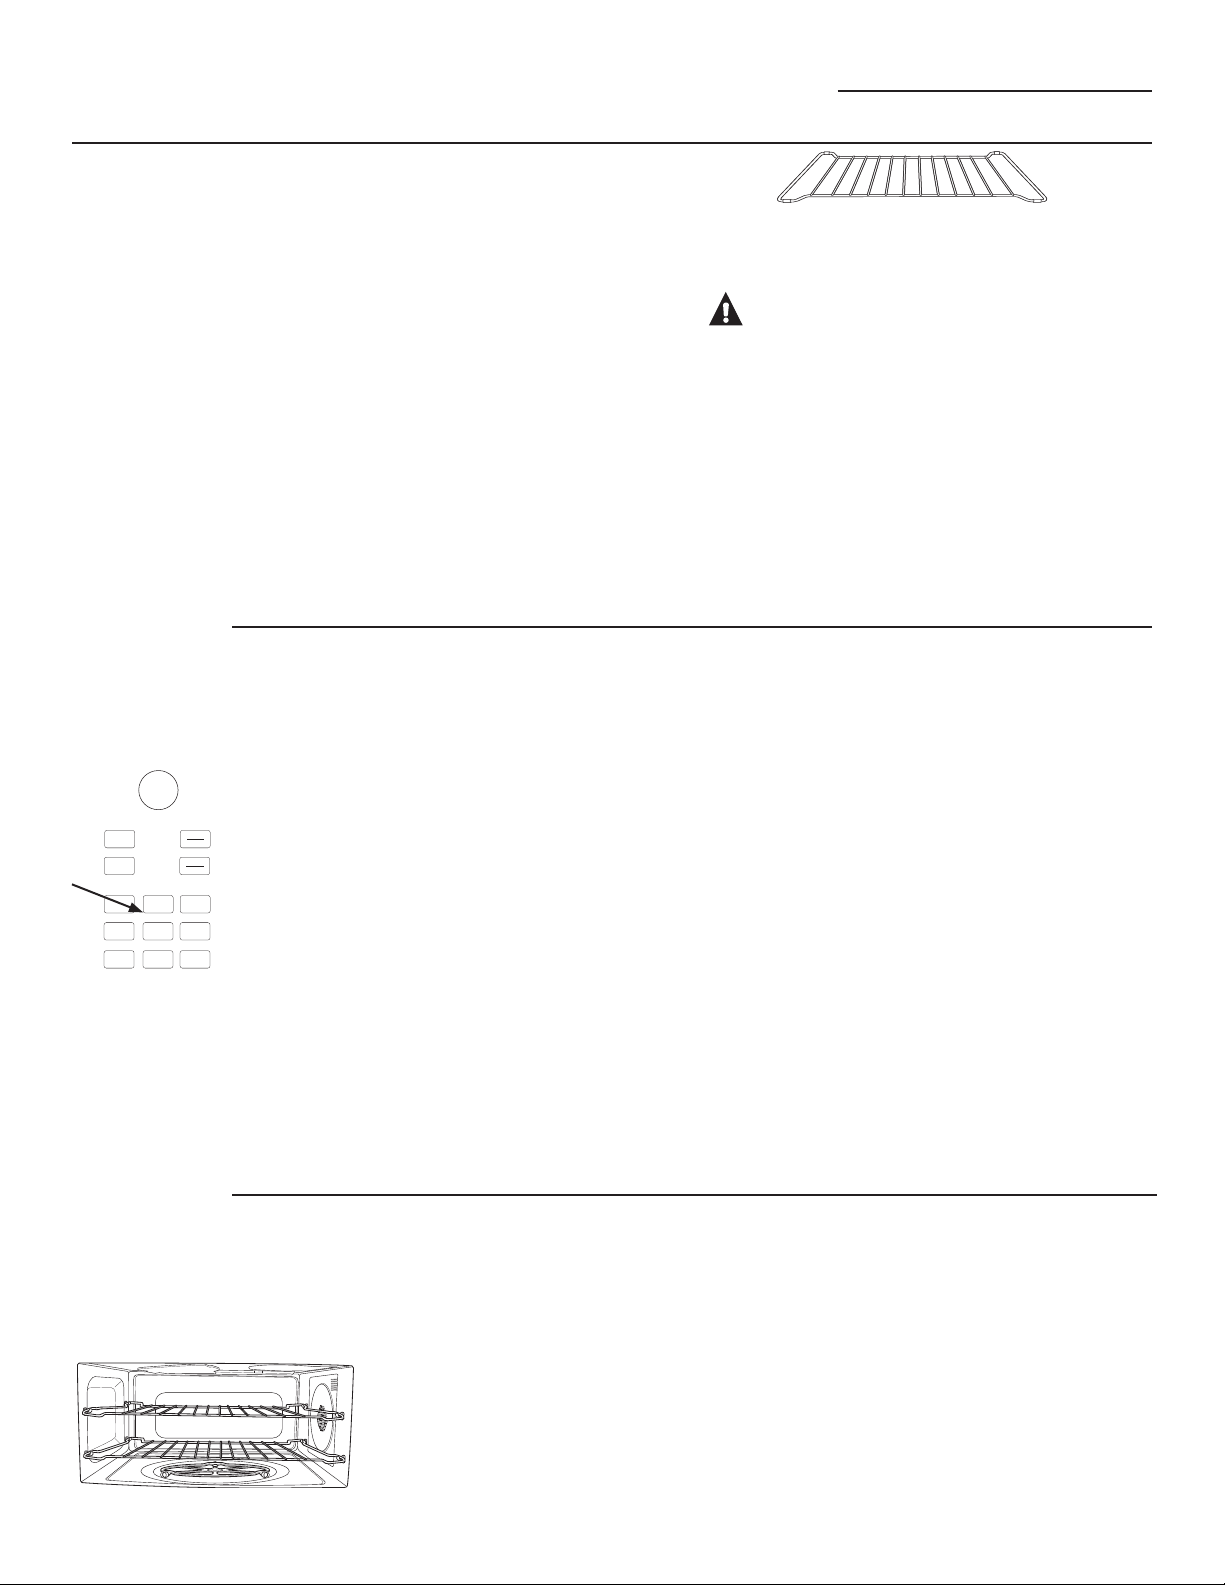
Hornear con Convección
Horno Advantium
Hornear
con
Convección
Cómo se
Hornea con
Convección
S
o
e
t
l
e
n
c
r
t
u
T
r
P
e
r
t
e
s
n
s
E
t
o
Convection
Bake
Surface
Light
Start
Pause
Cancel
Off
Lock Controls
Hold 3 Sec
Micro
wave
Add
30 Sec
Vent Fan
Back
Help
Speed
Cook
Settings Options
Timer
On/Off
Hornear con convección le permite cocinar los
alimentos de la misma manera que un horno
convencional, utiliza un elemento para calentar
el aire adentro del horno. Se puede programar
cualquier temperatura entre 250ºF a 450ºF.
El ventilador circula suavemente el aire caliente
a través del horno, sobre y alrededor de los
alimentos. Debido a que el aire caliente se
mantiene en constante movimiento, algunos
alimentos se cocinan un poco más rápido, a
diferencia de los hornos de cocimiento regular.
Antes de comenzar, asegúrese que la parrilla
de metal esté en su lugar. Se pueden
utilizar ambas parrillas en los dos niveles de
cocimiento.
1. Presione el botón Convection Bake (hornear
por convección).
2. Gire el dial para configurar la temperatura y
presione el dial para ingresar
3. Presione el dial para ingresar y confirmar la
selección.
Para iniciar de inmediato sin configurar un tiempo
de cocción, seleccione START (iniciar) o presione el
botón Start/Pause (iniciar/pausa).
Para configurar un tiempo de cocción:
1. Gire el dial y seleccione COOK TIME (tiempo de
cocción).
2. Gire el dial para configurar el tiempo de
cocción y presione el dial para ingresar.
3. Para iniciar el tiempo de cocción de
inmediato, coloque los alimentos en el horno
y seleccione START COOK TIME (iniciar tiempo
de cocción). Luego presione el dial o el botón
Start/Pause (iniciar/pausa) para iniciar. El
tiempo de cocción iniciará de inmediato la
cuenta regresiva.
Cuando hornee o caliente en los dos niveles
coloque el alimento en la bandeja de metal o en
elplato apropiado y colóquelo sobre la parrilla
dealambre del horno.
PRECAUCIÓN:
RIESGODE QUEMADURAS
Cuando hornee, recuerde que el horno, la puerta y
losplatos están muy calientes.
De acuerdo con la USDA, cocine la carne a una
temperatura INTERNA de por lo menos 160ºF, el pollo
a una tempreatura INTERNA de por lo menos 180ºF.
Cocinar a estas temperaturas generalmente protege
contra enfermedades producidas por los alimentos.
Para más información visite la página www.foodsafety.
gov.
Para iniciar el tiempo de cocción después del
precalentamiento, seleccione START PREHEAT
(iniciar precalentamiento). El horno emitirá una
señal cuando alcance la temperatura de cocción.
Coloque los alimentos en el horno y presione el
botón Start/Pause (iniciar/pausa). El tiempo de
cocción iniciará la cuenta regresiva.
Si la puerta del horno se abre durante la cocción,
“Pause” (pausa) aparecerá en la pantalla. Cierre
la puerta y presione el botón Start/Pause (iniciar/
pausa).
Los tiempos de cocción se muestran en horas
y minutos y pueden configurarse hasta un
máximo de 2 horas 59 minutos. El tiempo puede
cambiarse durante la cocción girando el dial.
Consejos de
cocimiento para
hornear con
convección
20
Se recomiendan panas de metal
para todos los tipos de productos
horneados, pero especialmente
cuando es importante dorar.
Las panas de metal oscuras o
con acabado mate son mejores
para panes y tartaletas, ya que
absorben el calor y producen
cortezas más crujientes.
Las panas de aluminio brillante
son mejores para pasteles,
galletas o muffins, ya que reflejan
el calor y ayudan a producir una
corteza ligeramente suave.
Las cacerolas de vidrio o de
aleación de cerámica y vidrio o los
platos para hornear son mejores
para recetas con huevo y queso
debido a la fácil limpieza del vidrio.
Al hornear en un solo nivel,
utilice el inferior. Los sujetadores
superiores sólo deben utilizarse
para hornear en los dos niveles.
Page 61
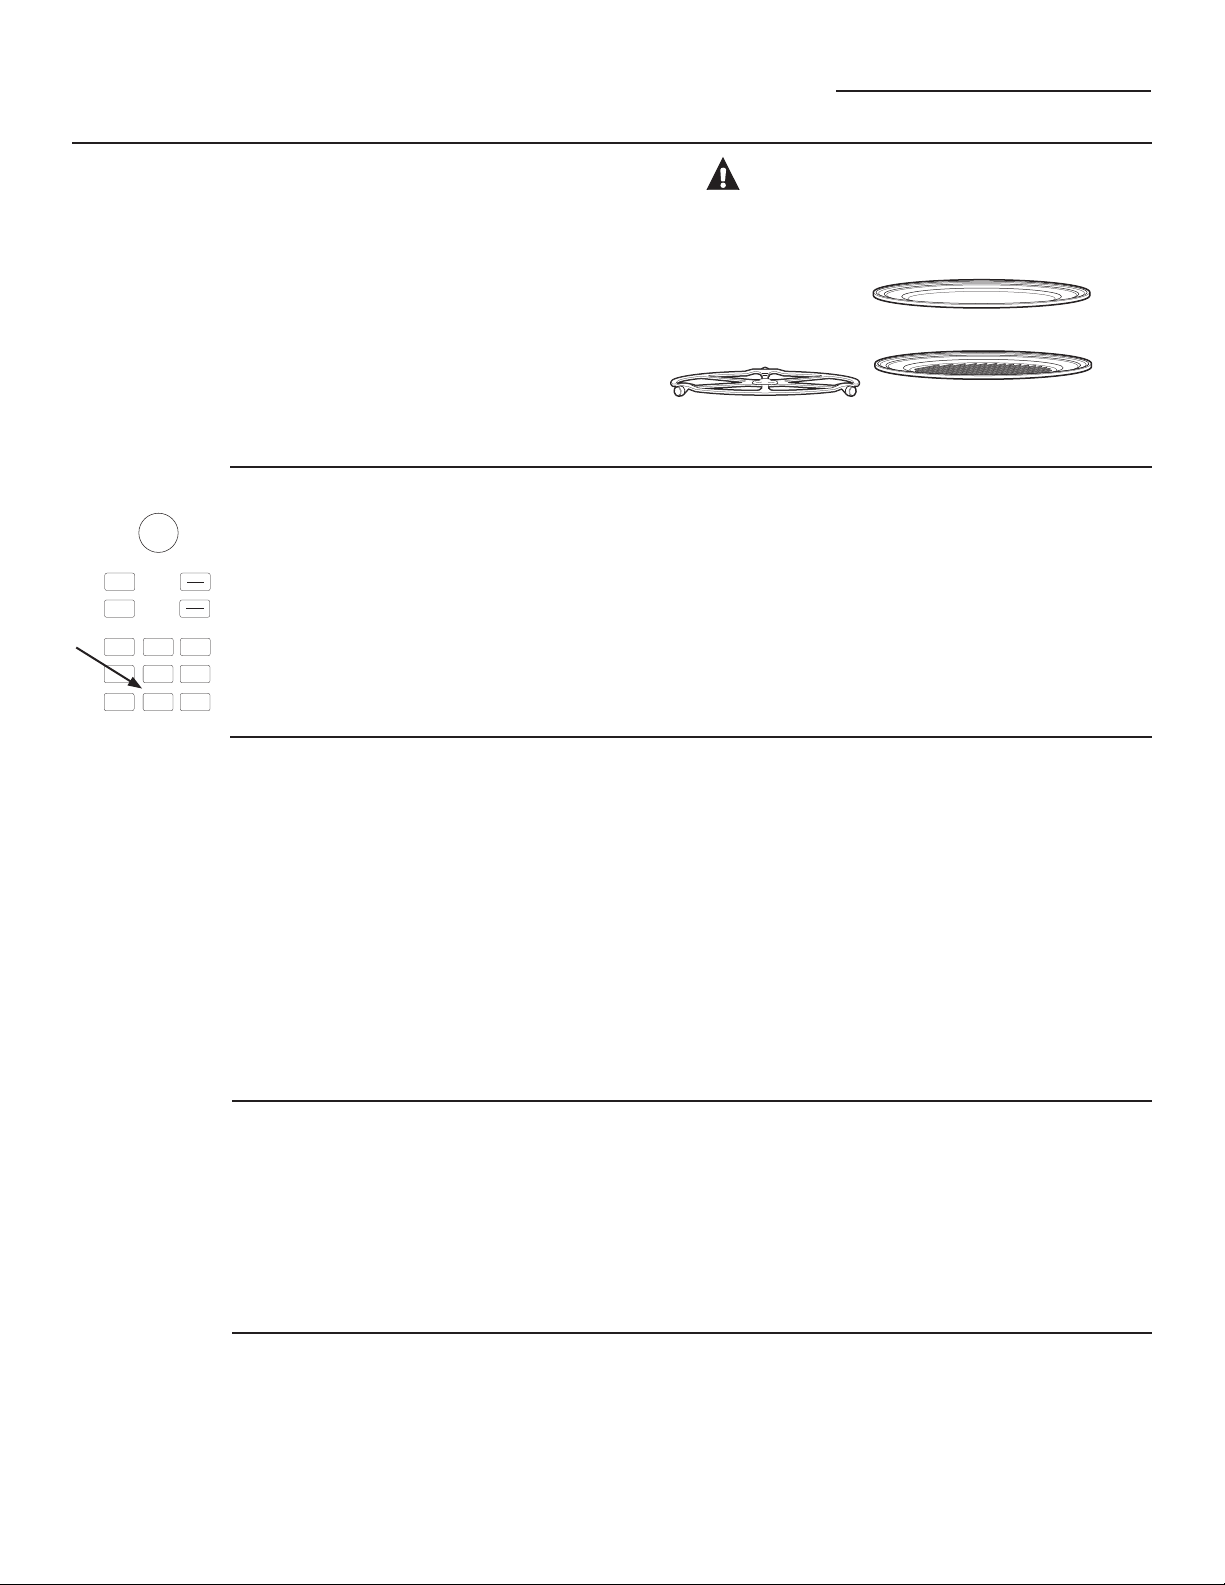
Asar y Tostar
Horno Advantium
Asar y
Tostar
Cómo asar
S
o
e
t
l
e
n
c
r
t
u
T
r
P
e
r
t
e
s
n
s
E
t
o
Back
Help
Speed
Cook
Settings Options
Timer
On/Off
Convection
Bake
Surface
Light
Lock Controls
Hold 3 Sec
Vent Fan
Asar y tostar utilizan las lámparas superiores,
el calentador inferior y el sistema de
convección, para asar o tostar los alimentos
similar al horno convencional.
Antes de comenzar asegúrese que el plato
giratorio esté en su lugar. Al tostar utilice la
bandeja de metal y al asar utilice la bandeja
de metal o la bandejade metal para asar.
1. Presione el botón Options (opciones).
2. Gire el dial a BROIL (asar) y presione
para ingresar.
3. Coloque los alimentos en el horno y
seleccione START (iniciar) o presione
el botón Start/Pause (iniciar/pausa)
para iniciar.
Cancel
Pause
Micro
wave
30 Sec
Start
Off
Add
PRECAUCIÓN:
Riesgo de quemaduras
Al asar o tostar, recuerde que el horno, la puerta y
los platos estarán muy calientes.
Cuando utilice el horno el
plato giratorio debeestar
siempre ensu lugar.
Si la puerta del horno se abre durante la
cocción, “Pause” (pausa) aparecerá en
la pantalla. Cierre la puerta y presione el
botón Start/Pause (iniciar/pausa).
Coloque los alimentos directamente
en la bandeja de metal o en la
bandeja de metal para asar.
Consejos de
cocimiento
para asar
Cómo
tostar
Los tiempos de asar pueden ser
máscortos en el horno Advantium
ya queutiliza lámparas halógenas.
Asegúrese de monitorear de cerca
los alimentos para obtener los
resultados deseados.
Para mejores resultados al
asar, coloque los alimentos
directamente en la bandeja de
metal para asar.
Se produce humo al asar carne en
elhorno.
Si precalienta el horno para asar
carne, precaliente con la bandeja
1. Presione el botón Options (opciones).
2. Gire el dial a TOAST (tostar) y presione
para ingresar.
3. Gire el dial para configurar el tiempo
de tostado, coloque los alimentos en
el horno y seleccione START (iniciar)
o presione el botón Start/Pause
(iniciar/pausa) para iniciar.
de metal para asar en el horno
y para una mejor brasa en la
carne colóquela sobre la bandeja
caliente.
Para un mejor rendimiento,
cuandoase carne precaliente
el horno durante 5 minutos. El
pollo tiene mejores resultados sin
precalentar el horno.
Se deben voltear los alimentos a
lamitad del tiempo de asado.
Retire las piezas más finas, para
evitar que se cocinen demasiado y
que se sequen.
Si la puerta del horno se abre durante la
cocción, “Pause” (pausa) aparecerá en
la pantalla. Cierre la puerta y presione el
botón Start/Pause (iniciar/pausa).
Consejos de
cocimiento
para tostar
Utilice la bandeja de metal para
mejores resultados al tostar.
No necesita darle vuelta a la
mayoría de los alimentoss.
Al tostar nueves, múevalos a la
mitad del tiempo de cocimiento.
Tueste las piezas más gruesas por
más tiempo, las piezas delgadas
menos tiempo.
21
Page 62
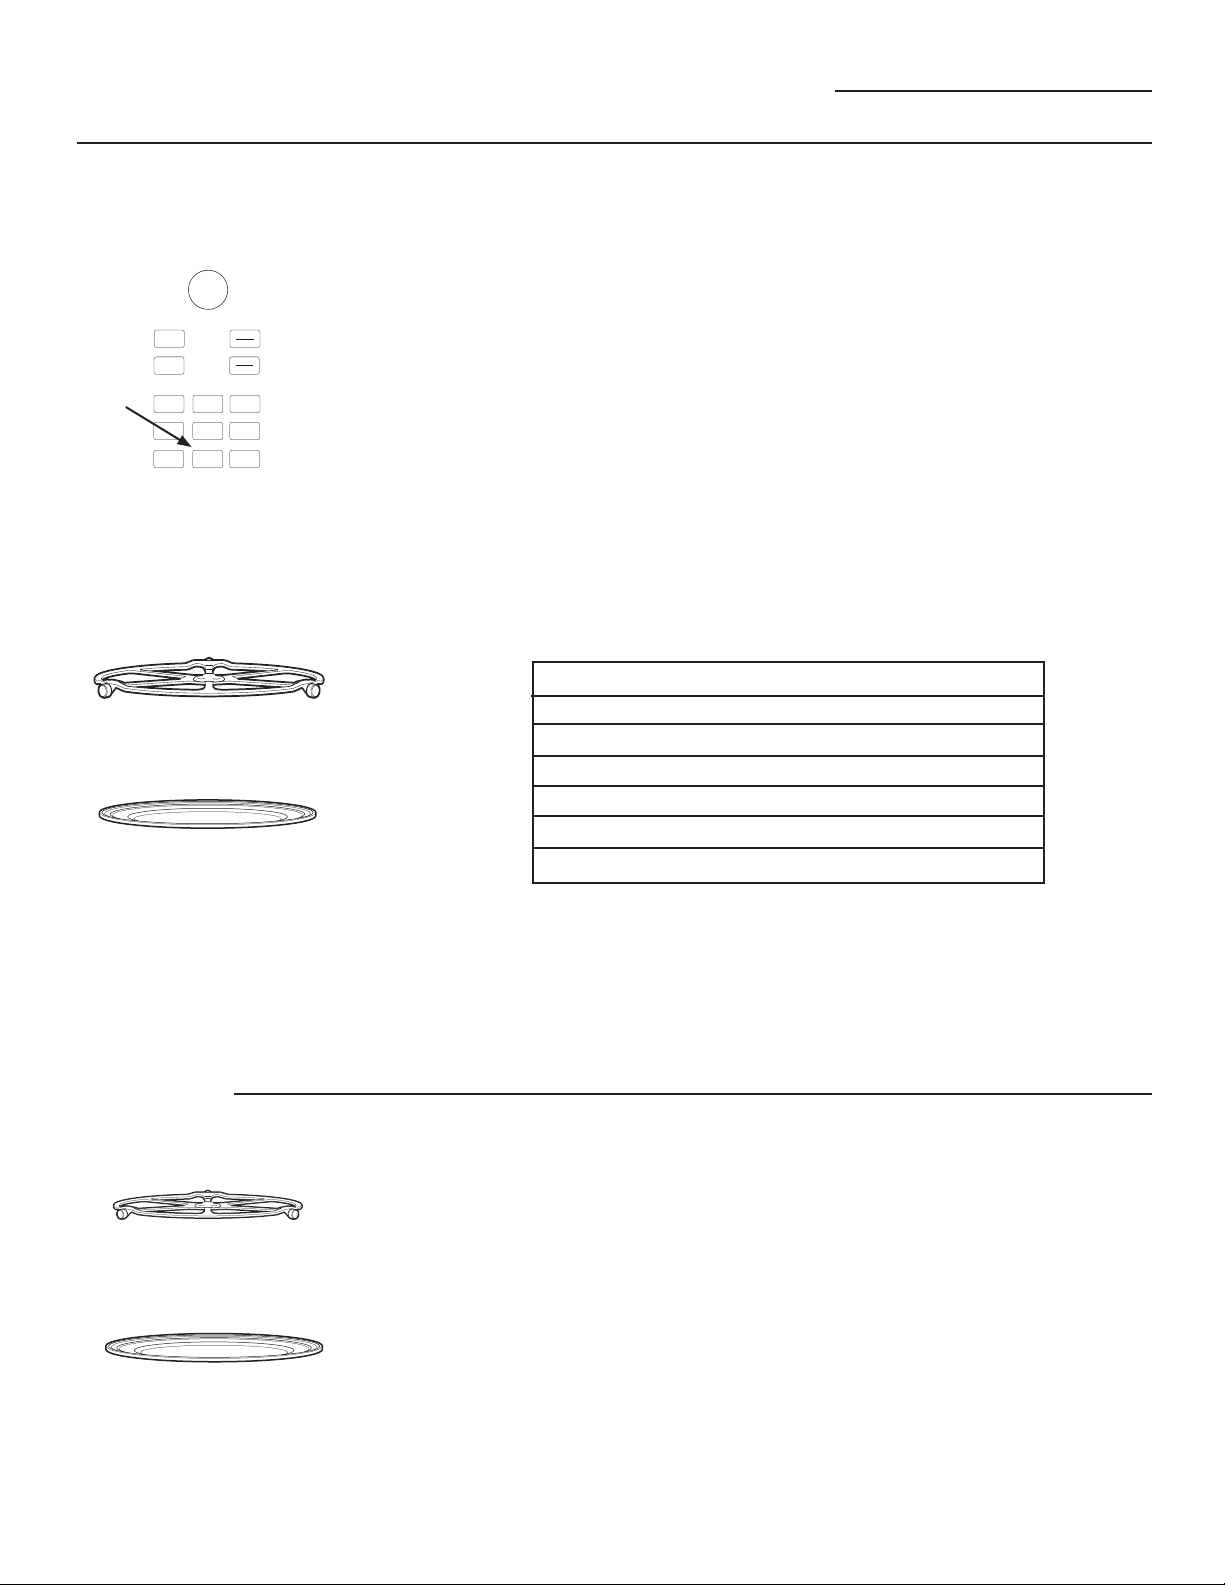
Calentar y Fermentar
Horno Advantium
Calentar
S
o
e
t
l
e
n
c
r
t
u
T
r
P
e
r
t
e
s
n
s
E
t
o
Convection
Bake
Surface
Light
Start
Pause
Cancel
Off
Lock Controls
Hold 3 Sec
Micro
wave
Add
30 Sec
Vent Fan
Back
Help
Speed
Cook
Settings Options
Timer
On/Off
Cuando utilice el horno el plato giratorio
debe estar siempre en su lugar.
Para calentar coloque los alimentos
o el recipiente seguro para el horno
directamente en la bandeja de metal.
La función WARM mantendrá
calientelas comidas cocinadas a
temperaturas de servicio. Siempre
comience con la comida caliente.
Utilice recipientes y utensilios que
puedan soportar temperaturas hasta
230ºF.
1. Presione la opción Options
(opciones).
2. Gire el dial para seleccionar WARM.
Presione el dial para seleccionar.
3. Gire el dial para seleccionar el nivel
de humedad que desea. Vea el
cuadro y consejos a continuación.
Presione el dial para seleccionar.
4. Seleccione START (iniciar) o presione
el botón Start/Pause (iniciar/
pausa) para iniciar. El horno
comienza a calentar de inmediato
e indica la cantidad de tiempo
de calentamiento que se debe
completar.
Cuadro de Selección de Temperatura y Humedad
Tipo de Comida Ajuste de Humedad
Cacerolas Húmedo
Chili/Sopa Húmedo
Panqueques, waffles Húmedo
Pizza Crujiente
Papas, horneadas Crujiente
Papalinas/Galletas Crujiente
Consejos para alimentos crujientes:
No cubra los alimentos.
No utilice recipientes plásticos ni
envoltorios plásticos.
No es necesario precalentar a menos
que desee hacer crujiente alimentos
viejos. (Vea Hacer crujiente los
alimentos viejos))
Si la puerta del horno se abre durante
el calentamiento, “Pause” (pausa)
aparecerá en la pantalla. Cierre la
puerta y presione el botón Start/Pause
(iniciar/pausa).
Para hacer crujiente los alimentos
viejos:
Seleccione el ajuste de CRISP.
Precaliente el horno durante 10
minutos.
NOTA: Sólo precaliente cuando
desee hacer crujiente los alimentos
viejos.
Coloque la comida o los platos
directamente en la bandeja de
metal.
Revise para ver si está crujiente
después de 45 minutos. Si es
necesario, agregue más tiempo.
Consejos para alimentos húmedos:
Cubra los alimentos con una tapa o
con papel de aluminio.
No utilice recipientes plásticos ni
envoltorios plásticos.
No es necesario precalentar
.
Fermentar
Cuando utilice el horno el plato giratorio
debe estar siempre en su lugar.
Para fermentar coloque la masa en un
tazón/pana para pan y colóquela en la
bandeja de metal.
22
La función para fermentar suministra
automáticamente la temperatura
apropiada para el proceso de
fermentación,por lo tanto, no necesita
ajustar la temperatura.
1. Presione la opción Options
(opciones)
2. Gire el dial para seleccionar PROOF
(leudar) y presione para ingresar.
3. Seleccione START (iniciar) o presione
el botón Start/Pause (iniciar/pausa)
para iniciar. El horno comienza
a leudar de inmediato e indica la
cantidad de tiempo de leudado que
se debe completar.
Para evitar bajar la temperatura
del horno y prolongar el tiempo de
fermentación, no abra la puerta del
horno sin necesidad.
Revise los productos de pan antes,
para evitar sobrefermentarlos.
NOTAS:
No utilice el modo de fermentación
para calentar alimentos o para
mantener caliente la comida. La
temperatura de fermentación no
es lo suficientemente caliente para
mantener la comida a temperaturas
seguras. Utilice la función WARM
para mantener la comida caliente.
La función de fermentación no
operará si el horno está demasiado
caliente. Permita que el horno se
enfríe antes de fermentar.
Page 63
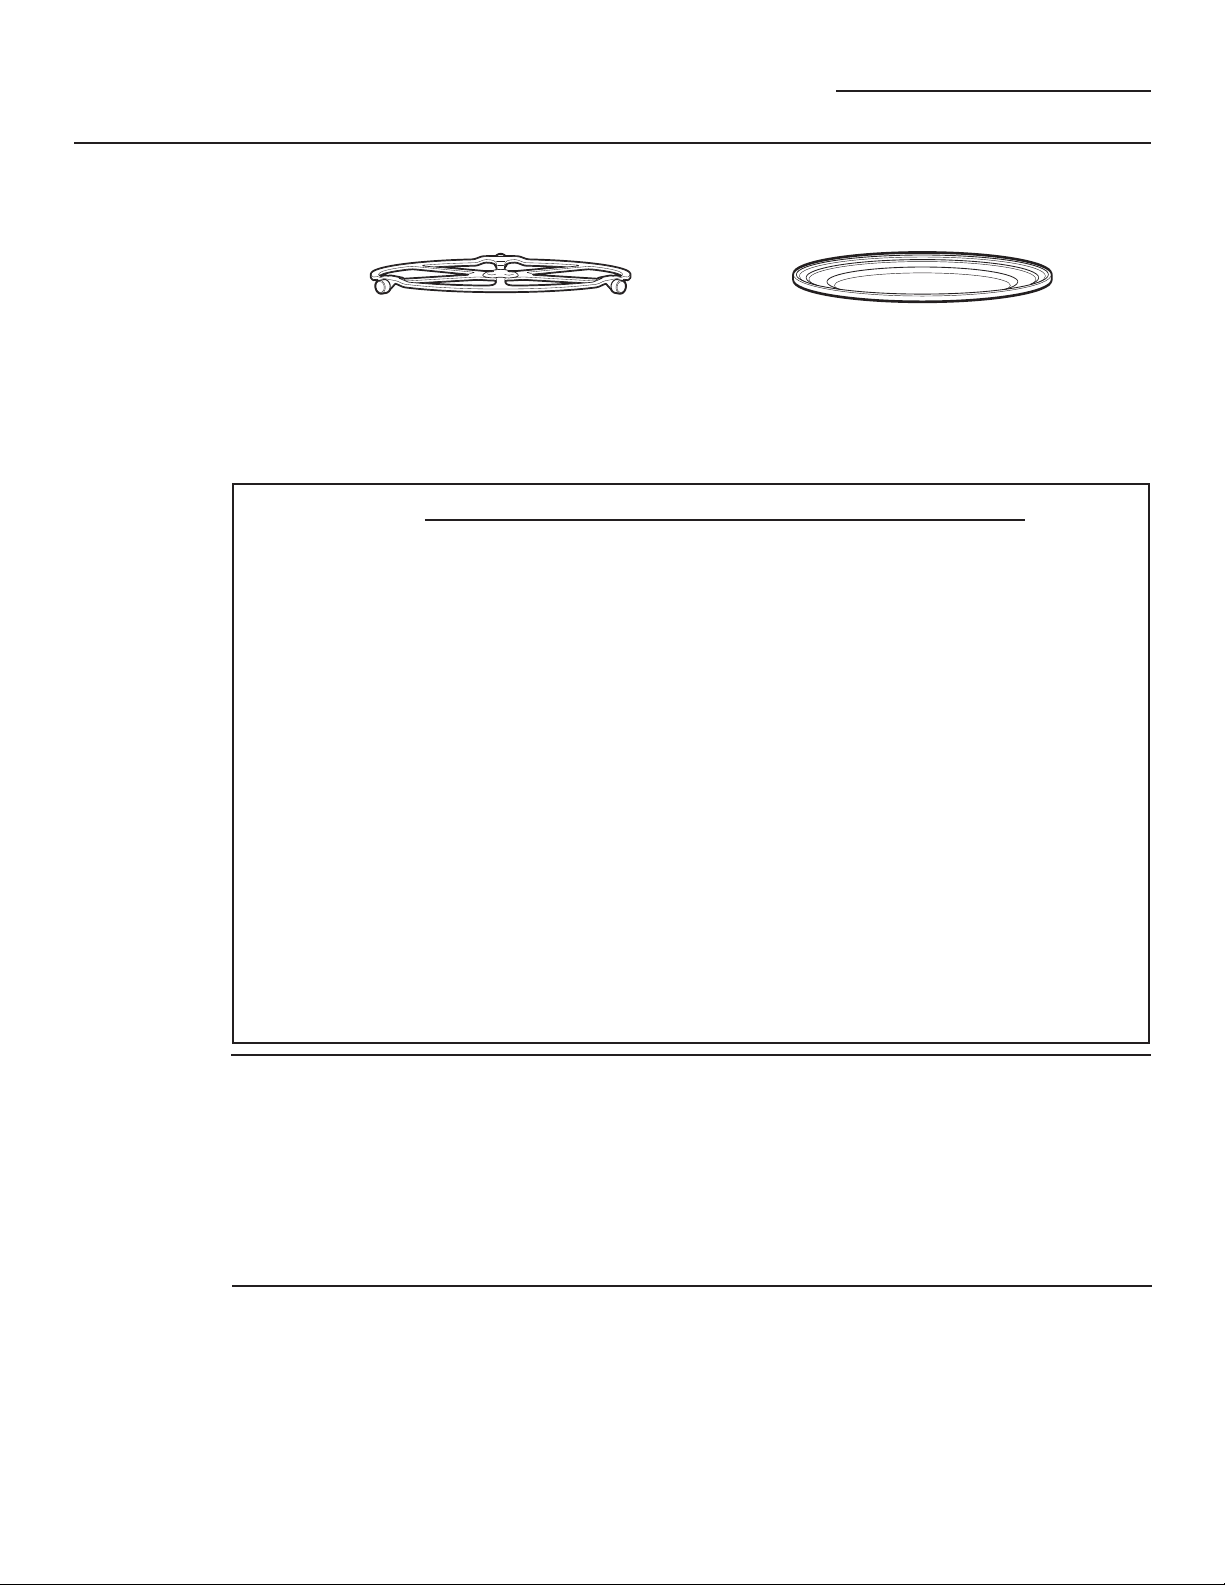
Cocinando en el Microonda
Horno Advantium
Uso de las
funciones de
microonda
Asegúrese que el plato giratorio esté en su lugar. Utilice la bandeja de vidrio claro.
Coloque los alimentos o el recipiente para microondas directamente en la bandeja
devidrio claro, para cocinar los alimentos.
Cuando utilice el horno el plato giratorio
debe estar siempre en su lugar.
Cuando cocine en el microondas la bandejade
vidrio claro siempre debe estaren su lugar.
Recipientes de cocimiento
Asegúrese que todos los recipientes sean
adecuados para cocinar en microondas.
SELECCIONES PREDETERMINADAS PARA EL MICROONDAS
Cocimiento
–Por tipo de comida
–Por tiempo
–Por tiempo 1 y 2
Descongelación
1.0 lb rápido
Por tiempo
Por tipo de comida
Por peso
Derretir
Ablandar
Bebidas
Agua (8 oz)
Café (8 oz)
Té (8 oz)
Leche (8 oz)
Cocoa caliente (8 oz)
Palomitas de Maíz
(2.9 a 3.5 oz)
Derrettir
Mantequilla
Caramelo
4XHVR
Chispas de
Chocolate
Malavaviscos
Cocimiento Lento
Ablandar
Mantequilla
4XHVR&UHPD
Glaseados (16 oz)
Helado
Recalentar
–Bebidas
–Cacerolas
–Pollo
–Pasta
–Pizza
–Plato de comida
–Arroz
–Sopa
–Filetes/Chuletas
–Vegetales
Lo que es
normal
Consejos
de
cocimiento
Interferencia
Se puede observar interferencia de TV/
radio cuando utiliza el microonda, similar a
la interferencia causada por otros aparatos
pequeños. Esto no indica un problema con
el microonda. Mueva el radio o la TV lo
más lejos posible del microonda o revise la
posición de la antena de la TV/radio.
Cuando cocine tocino, coloque la tiras en
capas sobre el plato. Cubra cada capa
con papel toalla.
Cuando cocine vegetales, utilice
una cacerola o tazón seguro para el
microondas. Cúbralos con una tapa seguro
para el microondas o con un envoltorio
plástico ventilado.
Calor del Horno
Los recipientes se pueden calentar
debidoa la transferencia de calor de los
alimentoscalientes. Utilice guantes para
manipularlos.
El vapor se puede salir alrededor de la
puerta.
Para vegetales congelados, agregue agua
de acuerdo con las instrucciones del
paquete
Para vegetales frescos, agréguele 2
cucharadas de agua a cada porción
23
Page 64
Cocinando en el Microonda
Horno Advantium
Niveles de
potencia de
microonda
S
o
e
t
l
e
n
c
r
t
u
T
r
P
e
r
t
e
s
n
s
E
t
o
Convection
Bake
Surface
Light
Start
Pause
Cancel
Off
Lock Controls
Hold 3 Sec
Micro
wave
Add
30 Sec
Vent Fan
Back
Help
Speed
Cook
Settings Options
Timer
On/Off
Cómo utilizar
lasselecciones
predetermi
nadas de
microonda
S
o
e
t
l
e
n
c
r
t
u
T
r
P
e
r
t
e
s
n
s
E
t
o
Convection
Bake
Surface
Light
Start
Pause
Cancel
Off
Lock Controls
Hold 3 Sec
Micro
wave
Add
30 Sec
Vent Fan
Back
Help
Speed
Cook
Settings Options
Timer
On/Off
El nivel de energía del microondas se
configura automáticamente en todas
las funciones del microondas pero usted
SXHGHFDPELDUORSRU&22.%<7,0(
FRFLQDUSRUWLHPSR&22.%<7,0(
FRFLQDUSRUWLHPSRAdd 30 Sec
agregar 30 segundos\'()5267%<
7,0(GHVFRQJHODUSRUWLHPSR
1. Primero, siga las instrucciones para
COOK BY TIME (cocinar por tiempo),
COOK BY TIME 1&2 (cocinar por
tiempo 1&2), Add 30 Sec (agregar
30 segundos), y DEFROST B Y TIME
(descongelar por tiempo).
2. Seleccione START (iniciar) o presione
el botón Start/Pause (iniciar/pausa)
para iniciar.
3. Presione EDIT (editar) para cambiar
el tiempo de cocción y luego el nivel
1. Presione la tecla Microwave
Si no hace ninguna selección en 15
segundos, la pantalla regresará a la
hora del día.
2. Gire el dial para seleccionar COOK
(cocinar), DEFROST (descongelar),
BEVERAGE (bebida), POPCORN
(palomitas de maíz), MELT (derretir),
REHEAT (recalentar), SIMMER (fuego
lento) y SOFTEN (ablandar).
3. Gire el dial para encontrar la comida
que desea cocinar, descongelar
o recalentar. Presione el dial para
seleccionar
4. Gire el dial selector para seleccionar el
tipo, cantidad, peso y/o tamaño, como
de energía del microondas. Presione
el dial para ingresar el tiempo de
cocción y los cambios al nivel de
energía.
Los siguientes son algunos ejemplos
de diferentes niveles de energía
High (alto) 10: Pescado, tocino,
vegetales, líquidos en hervor.
MedHigh (medalto) 7: Cocción suave
de carne de res y de ave; horneado de
estofados y recalentamiento.
Medium (medio) 5: Para cocción lenta
y para tiernizar estofados y cortes de
carne menos tiernos.
Low (abajo) 2 ó 3: Descongelar, hervir
a fuego lento, salsas delicadas.
Warm (tibio) 1: Mantener alimentos
calientes; ablandar mantequilla.
le indique el horno. Presione el dial
después de cada selección.
5. Presione el dial o el botón Start/Pause
(iniciar/pausa) para iniciar la cocción.
Presione el dial selector para revisar los
ajustes durante el cocimiento.
Si abre la puerta durante el cocimiento,
el horno se detendrá y la pantalla
mostrará PAUSE. Cierre la puerta y
presione Start/Pause para reanudar
elcocimiento.
Si entró una selección no deseada
simplemente presione en cualquier
momento la tecla Back y vuelta a
introducir lasselecciones deseadas.
Cocimiento
con tiempo
Cocimiento con
tiempo 1 y 2
24
Utilice COCINAR CON TIEMPO para
cocinar en el microonda alimentos que
no se encuentran en las selecciones
predeterminadas del microondas.
1. Presione la tecla Microwave.
2. Presione el dial para seleccionar
COCINAR CON TIEMPO y luego
presiónelo para seleccionar.
3.
Gire el dial para ajustar el tiempo de
cocimiento y luego presiónelo para
seleccionar.
8WLOLFH&22.%<7,0(&2&,1$5
CON TIEMPO 1 Y 2) para cocinar con
microonda los alimentos que requieren
dos diferentes tiemposy niveles de
potencia.
1. Presione la tecla Microwave.
2. Gire el dial para seleccionar COOK y
presiónelo para seleccionar.
3. Gire el dial para seleccionar el COOK
4. Gire el dial para ajustar el nivel de
potencia luego presiónelo para
seleccionar.
5. Presione el dial o la tecla Start/Pause
para comenzar a cocinar.
Puede abrir la puerta durante el
COCIMIENTO CON TIEMPO para revisar la
comida. Cierre la puerta y presione Start/
Pause para reanudar el cocimiento.
BY TIME 1&2 (Cocimiento con tiempo
1 y 2) y presiónelo para seleccionar
Gire el dial para ajustar el
1er tiempo ypresiónelo para
seleccionar. Repitapara el 1er
nivel de potencia, el 2dotiempo
y el 2do nivel de potencia.
5. Presione el dial o la tecla Start/Pause
para comenzar a cocinar.
4.
Page 65

Cocinando en el Microond
Horno Advantium
Agregar 30
segundos
Mis Recetas
Consejos para
descongelar
Presione
para incrementar 30 segundos el
tiempo de cocimiento en el microondas.
El horno arranca inmediatamente
Vea las secciones de MY RECIPE (Mis
Recetas) en la sección de Cocimiento
Rápido de este libro para ver las
instrucciones de cómo guardar,
usar, cambiar o eliminar una receta
personalizada del microonda
Utilice DESCONGELAR POR TIPO DE
COMIDA para carne, pollo, pescado y pan.
Utilice DESCONGELAR CON TIEMPO para
la mayoría de las comidas congeladas.
Add 30 Sec
Las comidas congeladas en papel
o plástico pueden descongelarse
en el empaque cuando utiliza
DESCONGELACIÓN CON TIEMPO.
Cuando utiliza DESCONGELACIÓN
POR TIPO DE COMIDA deber retirar la
carne del empaque. Los empaques
cerrados deben ranurarse,
pincharse o ventilarse después de
que la comida esté parcialmente
descongelada.Los recipientes
plásticos deben estarparcialmente
destapados.
Las cenas familiaras congeladas
preempacadas pueden
descongelarse y cocinarse en el
microondas. Si lacomida está en un
recipiente de aluminio, transfiérala a
un plato seguro para el micoondas.
repetídamente
El nivel de potencia se ajusta
automáticamente en alto, pero lo puede
cambiar para mayor flexibilidad. Vea las
instrucciones en la sección Niveles de
Potencia del Microondas
Las comidas que se arruinan
fácilmente no deben permanecer
afuera por más de una hora,
despues de descongelarla. La
temperatura ambiente promueve el
crecimiento de bacterías dañinas.
Al descongelarse, la comida debe
estar fría pero suave en todas las
áreas.Si todavía tiene un poco de
hielo, regrésela brevemente al
microondas odéjela descansar un
par de minutos.
Al descongelar 3 o más libras de
carne molida o en cubos, retire las
porciones descongeladas, cuando
se le indique que debe voltearlo.
.
Descogelación
con tiempo
Utilice la DESCONGELACIÓN CON
TIEMPO para descongelar durante
untiempo seleccionado.
1. Presione la tecla Microwave.
2. Gire el dial selector a DEFROST.
Presione el dial para seleccionar.
3. Gire el dial selector a DEFROST
BY TIME. Presione el dial para
seleccionar.
4. Gire el dial selector para
seleccionar el tiempo que desea.
Presioneel dial para seleccionar.
5. Presione el dial o la tecla
Start/Pause para comenzar a
descongelar.
6. Voltee la comida cuando el horno
le indique TURN FOOD OVER.
El nivel de potencia se ajuste
automáticamente en 3, pero lo puede
cambiar. Para cambiar los niveles
de potencia, vea las instrucciones de
Niveles de Potencia del Microonda.
Usted puede descongelar rápidamente
pequeñas cantidades de alimentos
al elevar el nivel de potencia después
de entrar el tiempo. El nivel de
potencia 7 acorta el tiempo total de
descongelacióna la mitad; el nivel de
potencia 10 acortael tiempo total en
aproximadamente 1/3.Al descongelar en
niveles de potenciaaltos, los aliment os
necesitarán una frecuente atención, más
de la usual y éstos se pueden cocinar un
poco.
25
Page 66
Cocinando en el Microonda
Horno Advantium
Descongelar por
tipo de comida
S
o
e
t
l
e
n
c
r
t
u
T
r
P
e
r
t
e
s
n
s
E
t
o
Convection
Bake
Surface
Light
Start
Pause
Cancel
Off
Lock Controls
Hold 3 Sec
Micro
wave
Add
30 Sec
Vent Fan
Back
Help
Speed
Cook
Settings Options
Timer
On/Off
DESCONGELAR POR TIPO DE
COMIDA ajusta automáticamente
los tiempos y niveles de potencia de
descongelación, para dar resultados
más parejosa las carnes, pollo y
pescado que pesanhasta 6 libras.
1. Retire la carne del empaque y
colóquela en un plato seguro
para el microondas. El pan debe
permanecer en el empaque, pero
retire los amarres de metal.
2. Presione la tecla Microwave.
3. Gire el dial a DEFROST. Presione el
dial para seleccionar.
4. Gire el dial para DESCONGELAR
POR TIPO DE COMIDA. Presione el
dial para seleccionar.
5. Presione el dial para escogerr el
tipo de comida. Presione el dial
para seleccionar.
6. Gire el dial al peso de la comida,
utilice la Guía de Conversión de
la derecha. Por ejemplo, dial 1.2
para 1.2 libras (1 libra, 3 onzas).
Presione el dial para seleccionar.
Para una descongelación pareja
retire la carne descongelada o
forre las áreas tibias con pequeños
pedazosde aluminio.
Después de descongelar, la mayoría
de las carnes necesitan descansar
5 minutos para completar la
descongelación. Los rostizados
grandes deben descansar
aproxidamente 30 minutos.
Guía de Conversión
Si el peso de la comida está en libras y
onzas, las onzas deben ser convertidas
DODGpFLPDSDUWHGHXQDOLEUD
Weight of Food Enter Food Weight
in Ounces (tenths of a pound)
1–2 .1
3 .2
4–5 .3
6–7 .4
8 .5
9–10 .6
11 .7
12–13 .8
14–15 .9
26
7. Presione el dial o la tecla
Start/Pause para comenzar a
descongelar.
8. Voltee la comida cuando el horno
le indique TURN FOOD OVER.
Page 67
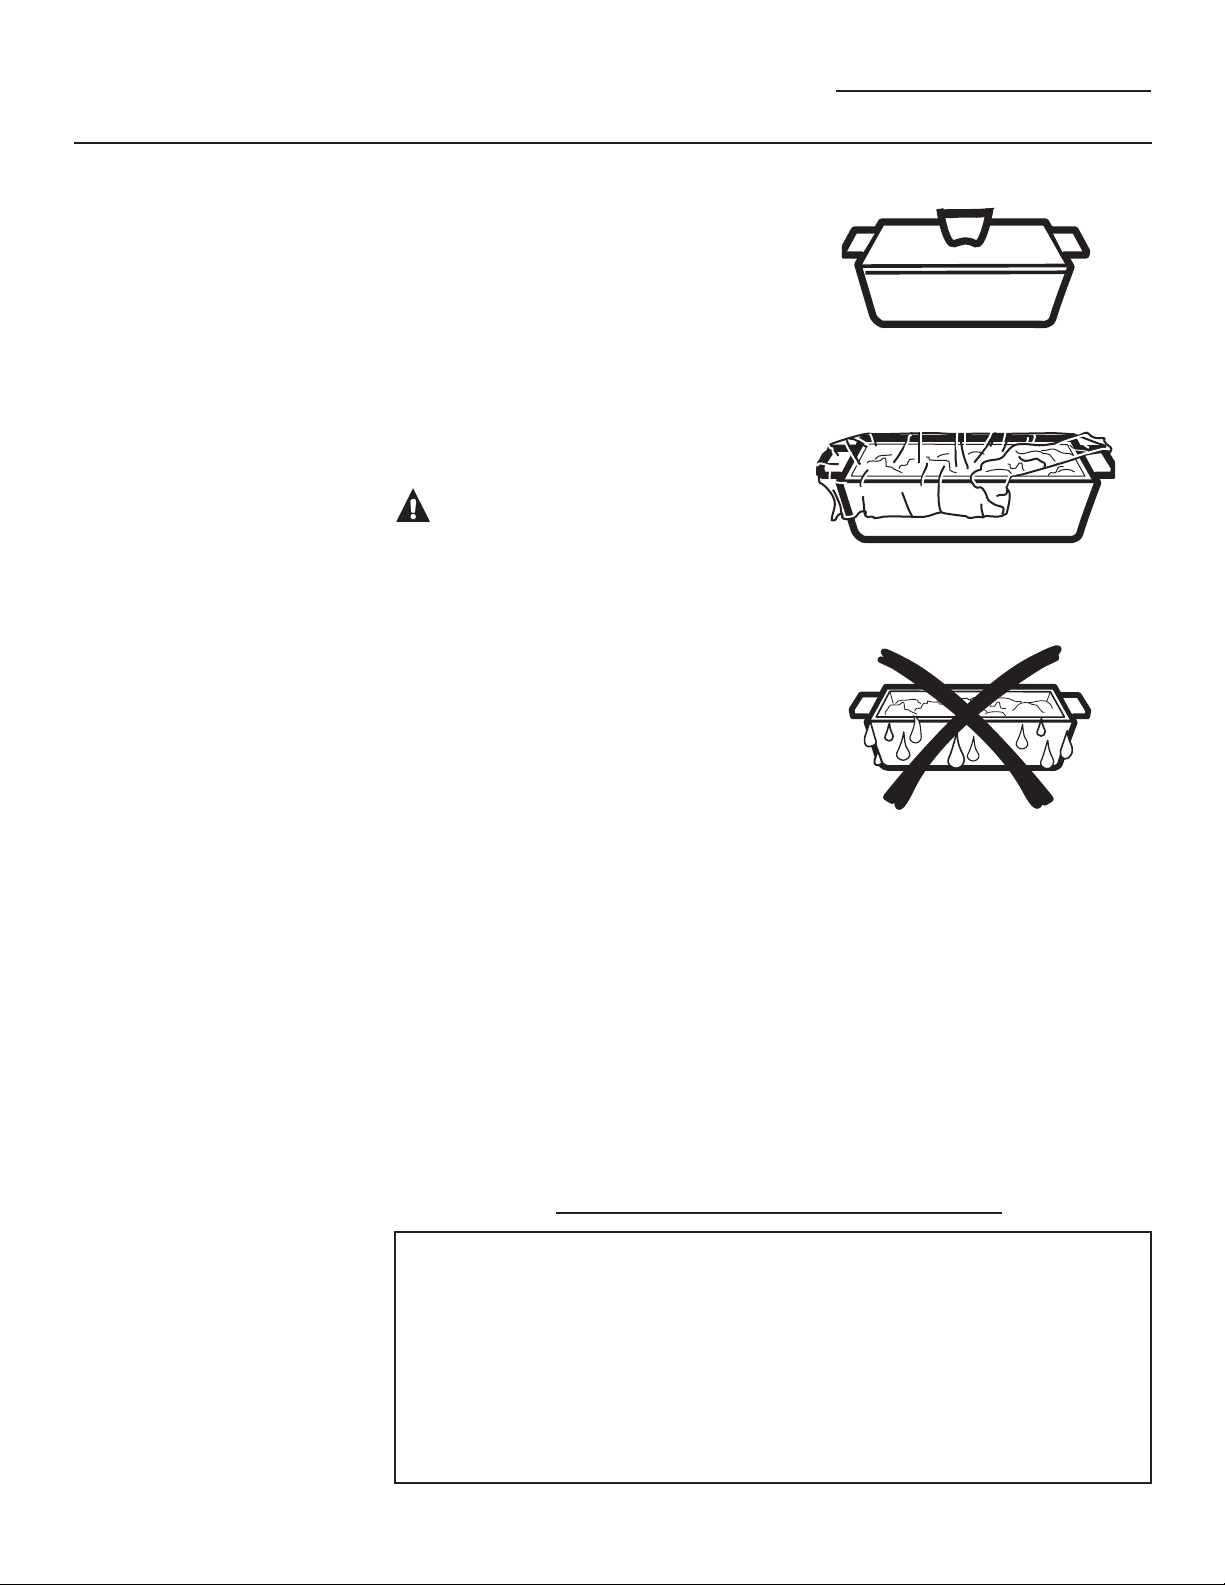
Cocinando en el Microonda
Horno Advantium
Consejos para
el cocimiento
con sensor del
microonda
El modo de microonda del horno
Advantium tiene un sensor de
cocimiento y recalentamiento. El horno
detecta automáticamente si la comida
está cocinada y se apaga el solo
eliminando la necesidad de programar
tiempos de cocimiento y niveles de
potencia.
Las funciones con sensor detectan
la humedad creciente liberada
durante el cocimiento. El horno
ajusta automáticamente el tiempo
de cocimiento para varios tipos y
cantidades de comida.
ADVERTENCIA:
Riesgo de fuego
No utilice las funciones con sensor dos
veces consecutivas en la misma porción
de comida – se puede sobre cocinar o
quemar. Si la comida está cruda después
de terminar el primer tiempo, utilice
7,0(&22.FRFLPLHQWRFRQWLHPSRSDUD
agregar tiempo adicional de cocimiento.
Los recipientes y cubiertas adecuadas
son esenciales para un mejor
cocimiento con sensor.
Siempre utilice recipientes seguros
para el microondas y cúbralos con
tapaderas o envoltura plástica
ventilada. Nunca utilice cubiertas
plásticas herméticas – ya que evitan
que la humedad salga y se puede
sobrecocinar la comida.
Antes de colocar la comida adentro
delhorno asegúrese de que el exterior
de los recipientes y que el interior
del horno estén secos. Las gotas de
humedad que se convierten en vapor
pueden engañar al sensor.
Cubierta
Ventilada
Seque los platos para que
no seequivoque el sensor.
Las palomitas de maíz y las papas
se calientan mejor destapadas.
PROGRAMAS DE SENSOR DEL MICROONDA
Carne molida
Palomitas de Maíz
(Palomitas de maíz en paquete para
el microondas, 2.9 oz. a 3.5 oz.)
Sopa
Arroz
Vegetales (enlatados, frescos,
congelados)
Recalentar pollo
Recalentar pasta
Recalentar un plato de comida
Recalentar sopa
Recalentar vegetales
Recalentar vegetales
Cocimiento lento
27
Page 68
Cocinando en el Microonda y Otras Funciones Advantium
Horno Advantium
Para usar todos
los programas
con sensor
S
o
e
t
l
e
n
c
r
t
u
T
r
P
e
r
t
e
s
n
s
E
t
o
Convection
Bake
Surface
Light
Start
Pause
Cancel
Off
Lock Controls
Hold 3 Sec
Micro
wave
Add
30 Sec
Vent Fan
Back
Help
Speed
Cook
Settings Options
Timer
On/Off
Para usar todas las funciones con
sensor:
1. Presione el botón Microwave
(microondas).
2.
Gire el dial para seleccionar COOK
BY FOOD (cocinar por alimento)
(ubicado debajo de COOK), REHEAT
(recalentar), o SIMMER (fuego lento).
3.
Gara COOK BY FOOD (cocinar por
alimento) y REHEAT (recalentar),
seleccione un alimento y presione
el dial para ingresar. Para SIMMER
(fuego lento), configure el tiempo
para cocción a fuego lento después
de que la sopa, salsa o estofado
haya alcanzado el hervor.
4. Presione el dial o el botón Start/
Pause (iniciar/pausa) para iniciar la
cocción.
No abra la puerta del horno hasta
que comience la cuenta regresiva en
la pantalla. Si usted abre la puerta
mientras se realiza la cocción por sensor,
aparecerá en la pantalla “Sensor Error
Close door and press START” (Error de
sensor – Cierre la puerta y presione
START). Cierre la puerta de inmediato y
presione el botón Start/Pause (iniciar/
pausa) para recomenzar.
ADVERTENCIA:
Riesgo de Fuego
No utlice la functión con sensor dos
veces consecutivas en la misma porción
de comida la comida puede resultar
seriamente cocinada o quemada. Si le
falta cocimiento a la comida al final del
tiempo de cocimiento con sensor utlice
COOK BY TIME (cocimiento con tiempo) en
el selector del microonda para cocinarla
más tiempo.
Si usted ha estado cocinando y el
horno está caliente, puede indicar
que se encuentra muy caliente para
cocinar por sensor. En ese caso, el
horno cambiará automáticamente
a cocción por tiempo y puede
preguntar sobre el peso o la
cantidad de alimentos.
Para acortar o prolongar el tiempo
de cocción, espere a que la cuenta
regresiva aparezca en la pantalla.
Luego gire el dial para agregar o
restar tiempo.
Notas sobre el programa Reheat
(recalentar):
Los alimentos recalentados pueden
tener amplias variaciones de
temperatura. Algunas áreas pueden
estar extremadamente calientes.
Es mejor utilizar COOK BY TIME (cocinar
por tiempo) y no REHEAT (recalentar)
con estos alimentos:
Productos panificados.
Alimentos que deben recalentarse
sin tapa.
Alimentos que deben mezclarse o
girarse.
Alimentos que deben quedar con
aspecto o superficies crujientes
después de recalentarse.
Cómo ajustar las configuraciones
automáticas del horno COOK BY
FOOD (cocinar por alimento) y REHEAT
(recalentar) para obtener un tiempo de
cocción mayor o menor (no disponible
en todos los tipos de alimentos):
Para reducir los tiempos de cocción
automáticos: Después de que el horno
se acciona, gire el dial en sentido
contrario a las agujas del reloj hasta
que aparezca un signo menos (““) o un
signo menos doble (“ “) y presione el dial
para ingresar. Un signo menos (““) es
una reducción del 10% del tiempo de
cocción y un signo menos doble (““) es
una reducción del 20% del tiempo de
cocción.
Para aumentar los tiempos de cocción
automáticos: Después de que el horno
se acciona, gire el dial en sentido de las
agujas del reloj hasta que aparezca un
signo más (“+“) o un signo más doble
(“++“) y presione el dial para ingresar. Un
signo más (“+“) es un aumento del 10%
del tiempo de cocción y un signo más
doble (“++“) es un aumento del 20% del
tiempo de
cocción.
Cocimiento
completo
28
Para recordarle que hay alimentos
en el horno, en la pantalla podrá
verse el modo de cocción y COOKING
COMPLETE (cocción completa) y se oirá
un pitido una vez por minuto hasta
que se abra la puerta del horno o se
presione el botón Cancel/Off (borrar/
apagado).
Page 69

Otras Funciones Advantium
Horno Advantium
Repita la
última
función
Función
para
Reanudar
Clock
(reloj)
Utilice esta función para ahorrar tiempopara
alimentos que cocina repetidas veces, como
galletas y aperitivos.
NOTA: El último programa que utilizóse guarda
durante dos horas.
1. Presione Options (opciones) y
seleccioneREPEAT LAST (repita el último).
1. Si necesita cocinar la comida pormás tiempo,
usted puede reiniciarel horno al presionar la
tecla Start/Pause o el dial selector.
2. La pantalla mostrará RESUMECOOKING
(reanudar el cocimiento)y el horno volverá a
iniciar automáticamente al 10% del tiempo
original.
Debe programar el reloj antes de utilizar elhorno
por primera vez. Cuando programe elreloj por
primera vez vaya directamente alpaso dos.
1.
Para cambiar la hora del reloj, presione la tecla
Settings y gire el dial a CLOCK SETTINGS (ajustes
del reloj). Seleccione SET TIME (la hora)
2. La pantalla mostrará el último alimento que
preajustó.
3. Presione la tecla Start/Pause o el dial selector
para comenzar acocinar.
El programa permanece en memoria durante
5 minutos. Después necesitaráprogramar
de nuevo. Vea la sección deUso del menú
predeterminado de cocimiento rápido.
2. Gire el dial para ajustar la hora. Presióne
lopara seleccionar. Nota: Se programa AM/
PM.
3. Gire el dial para ajustar los minutos. Presione
el dial para seleccionar.
Auto
Conversion
(conversión
automática)
Display
On/Off
(pantalla
On/Off)
Beeper
Volume
(voumen del
pito)
Reminder
(recordatorio)
La conversión automática reduce
automáticamente la temperatura de hornear
con convección. Siempre debe introducir la
temperatura de la receta y el horno hará el resto.
Utilice esta función para encender o apagarla
pantalla del reloj.
Utilice esta característica para ajustar el volumen
del pitido. Usted también puede desactivarla.
Utilice esta función para configurar el
accionamiento del sonido de una alarma en un
momento específico del día.
1. Presione el botón Settings (configuraciones), gire
el dial para seleccionar REMINDER (recordatorio) y
presione el dial para ingresar.
2. Seleccione SE T REMINDER (configurar
recordatorio) y presione el dial para ingresar.
3. Gire el dial para configurar la hora y minutos
y presione el dial para ingresar. NOTA: La
configuración de hora se hace en AM/PM.
Para cambiar el ajuste, presióne la tecla Settings
y gire el dial a AUTO CONVERSION.Presione el dial
para seleccionar. Gire el dial para cambiar los
ajustes a CONVERSION ON or CONVERSION OFF
(Conversión encendido oapagado). Presione el
dial para seleccionar.
Presione la tecla Settings, gire el dial para
seleccionar DISPLAY ON/OFF (pantalla encendida/
apagada). Gire el dial para seleccionar CLOCK
DISPLAY ON or CLOCK DISPLAY OF (el relojde la
pantalla encendido o apagado). Presioneel dial
para seleccionar
Presione el botón Settings (configuraciones),
gire el dial para seleccionar BEEPER VOLUME
(volumen del pitido), presione el dial para
ingresar. Seleccione el volumen del pitido,
presione el dial para ingresar.
Para desactivar el recordatorio, presione el botón
Settings (configuraciones), gire el dial para seleccionar
REMINDER (recordatorio) y presione el dial para
ingresar. Gire el dial para seleccionar CLEAR REMINDER
(borrar recordatorio) y presione el dial para ingresar.
Para desactivar la hora del recordatorio, presione
el botón Settings (configuraciones), gire el dial para
seleccionar REMINDER (recordatorio) y presione el dial
para ingresar. Gire el dial para seleccionar REVIEW
REMINDER (revisar recordatorio) y presione el dial para
ingresar. La pantalla mostrará.
.
29
Page 70

Otras Funciones Advantium
Horno Advantium
Turntable
On/OFF
(plato
giratorio On/
Off)
Auto Night
Light
(luz nocturna
automática)
Utilice esta función para evitar que el plato
giratorio gire cuando usa un plato demasiado
grande para poder girar en la cavidad.
Presione el botón Settings (configuraciones),
gire el dial para seleccionar TURNTABLE ON/OFF
(plato giratorio encendido/apagado) y presione
el dial para ingresar. Gire el dial para seleccionar
TURNTABLE ON (plato giratorio encendido) o
TURNTABLE OFF (plato giratorio apagado) y luego
presione el dial para ingresar.
NOTA:
(OSODWRJLUDWRULRQRVHGHVDFWLYDHQORVPRGRV
cocción rápida, asar, tostar o sensor de
microondas.
Utilice esta función para configurar que la luz
de superficie se encienda y apague a una hora
determinada.
1. Presione el botón Settings (configuraciones),
gire el dial para seleccionar AUTO NIGHT LIGHT
(luz nocturna automática) y presione el dial
para ingresar.
2. Seleccione SET ON TIME (configurar para hora)
y presione el dial para ingresar.
3. Gire el dial para configurar la hora y minutos
y presione el dial para ingresar. Gire el dial
para desactivar la configuración de hora y
minutos y presione el dial para ingresar. Nota:
La configuración de hora se hace en AM/PM.
Para desactivar la luz nocturna automática en
forma permanente, presione el botón Settings
(configuraciones), gire el dial para seleccionar
AUTO NIGHT LIGHT (luz nocturna automática) y
presione el dial para ingresar. Gire el dial para
seleccionar DEACTIVATE (desactivar) y presione el
dial para ingresar.
Para desactivar la luz nocturna automática en
forma permanente, presione el botón Settings
(configuraciones), gire el dial para seleccionar
6LVHVHOHFFLRQD78517$%/(2))SODWRJLUDWRULR
apagado) durante la cocción, el plato giratorio
se desactivará hasta el final de este ciclo de
cocción. El plato giratorio volverá a funcionar
en el próximo ciclo de cocción y si se utiliza la
función RESUME (reanudar).
6LVHVHOHFFLRQD78517$%/(2))SODWRJLUDWRULR
apagado) antes de comenzar a cocinar, el
plato giratorio permanecerá desactivado
para cualquier cocción que se inicie en los
próximos 5 minutos. Después de los 5 minutos,
el plato giratorio volverá automáticamente a
TURNTABLE ON (plato giratorio encendido).
AUTO NIGHT LIGHT (luz nocturna automática) y
presione el dial para ingresar. Gire el dial para
seleccionar REVIEW ON/OFF TIMES (revisar
hora encendido/apagado) y presione el dial
para ingresar. La pantalla mostrará la hora
de encendido y apagado de la luz nocturna
automática.
Nota:
Si se presiona el botón Surface Light (luz de
superficie) mientras se encuentra encendida la
luz nocturna automática, la luz de superficie se
quita de la luz nocturna automática por esa vez.
El botón Surface Light (luz de superficie) debe
presionarse para apagar la luz de superficie. La
luz nocturna automática se encenderá de nuevo
en el próximo horario programado.
Si la luz de superficie ya se encuentra encendida
cuando la luz nocturna automática se encuentra
programada para encenderse, la luz de superficie
no utilizará las configuraciones de la luz nocturna
automática. El botón Surface Light (luz de
superficie) debe presionarse para apagar la
luz de superficie. La luz nocturna automática
se encenderá de nuevo en el próximo horario
programado.
Temperature
Units
(unidades de
temperatura)
Delay Start
(inicio
retardado)
30
Para cambiar las unidades de temperatura,
presione el botón Settings (configuraciones) y
seleccione TEMPERATURE UNITS (unidades de
temperatura). Gire el dial para seleccionar F o C y
presione el dial para ingresar.
Utilice esta función de retardo cuando el horno
comienza a cocinar en Convection Bake (hornear
por convección), COOK BY TIME (cocinar por
tiempo), COOK BY TIME 1&2 (cocinar por tiempo
1&2), DEFROST BY TIME (descongelar por tiempo),
o DEFROST BY WEIGHT (descongelar por peso).
1. Presione el botón Options (opciones).
2. Gire el dial para seleccionar DELAY START
retardado) y presione el dial para ingresar.
(inicio
3. Gire el dial para configurar la hora y minutos
de la hora de inicio y presione el dial para
ingresar. NOTA: La configuración de hora se
hace en AM/PM.
4. Configure el modo de cocción.
El horno comenzará el modo de cocción
programado cuando la hora actual y la hora de
inicio retardado sean la misma.
Page 71
Otras Funciones Advantium
Horno Advantium
Help
(ayuda)
Utilice esta función para saber más
acerca de su horno y sus funciones.
1. Presione la tecla Help.
2. Gire el dial para escoger el
nombrede la función. Presione el
dial paraseleccionar.
Características que encontrará en la función Help (ayuda).
Agregar tiempo
Conversión Automática
Luz Nocturna Automática
Regresso
Volumen del Pito
Bebidas
Asar
Borrar/Apagar
Reloj
Bloqueo del Control
Hornear con Convección
Cocinar
Cocinar por Tipo de
Comida
Cocinar con Tiempo
Cocinar con Tiempo 1 y 2
Opciones
Descongelación
Descong. por Comida
Descong. con Tiempo
Descong. por Peso
Inicio demorado
Pantalla On/Off
Editar
Ayuda
Derretir
Agregar 30 Segs
Microonda
Mis Recetas
Fermentar
Recalentar
Recordatorio
La pantalla le mostrará una
descripcióndel programa que
seleccionó.
Repetir el último
Reanudar
Cocimiento con sensor
Cocimiento lento
Ablandar
Cocimiento rápido
Inicio/Pausa
Unidades de temperatura
Cronómetro On/Off
Tostar
Plato Giratorio On/Off
Calentar
Control
lockout
(bloqueo
del control)
Timer On/Off
(temporizador
de encendido /
apagado)
Automatic fans
(ventiladores
automáticos)
Puede bloquear el panel de control
para evitar que enciendan el horno
accidentalmente durante la limpieza o
paraque no lo utilicen los niños.
Presione y sostenga durante 3
segundoa la tecla Cancel/Off para
bloqueary desbloquear.
Utilice esta función cada vez que
necesite un cronómetro. La puede
utilizar mientras cocina en el horno.
1. Presione la tecla Timer.
2. Gire el dial para escoger los
Los ventiladores de enfriamiento se
encienden automáticamente para
evitar elsobrecalentamiento de los
componentesinternos del horno y del
control.
Los ventiladores se apagarán
automáticamente cuando se enfríen
las piezasinternas. Uno o más pueden
permanecer encendidos durante 5
minutos o más, después de que el
control del horno se haya apagado.
Cuando el panel de control está
bloqueado, cada vez que presiona
una tecla o eldial se mostrará en la
pantalla CONTROL IS LOCKED (control
está bloqueado).
minutos. Presiónelo para
seleccionar.
3. Gire el dial para escoger los
segundos. Presiónelo para
seleccionar.
El ventilador del respirador se puede
encender automáticamente si el
horno secalienta demasiado, aún
cuando no estéfuncionando. La
pantalla mostrará: “Normal Operation:
Fan is on due to high heat.Fan will
shut off automatically.” (Operación
Normal. El ventilador está encendido
debido al calor alto. El ventilador se
apagará automáticamente.)
31
Page 72
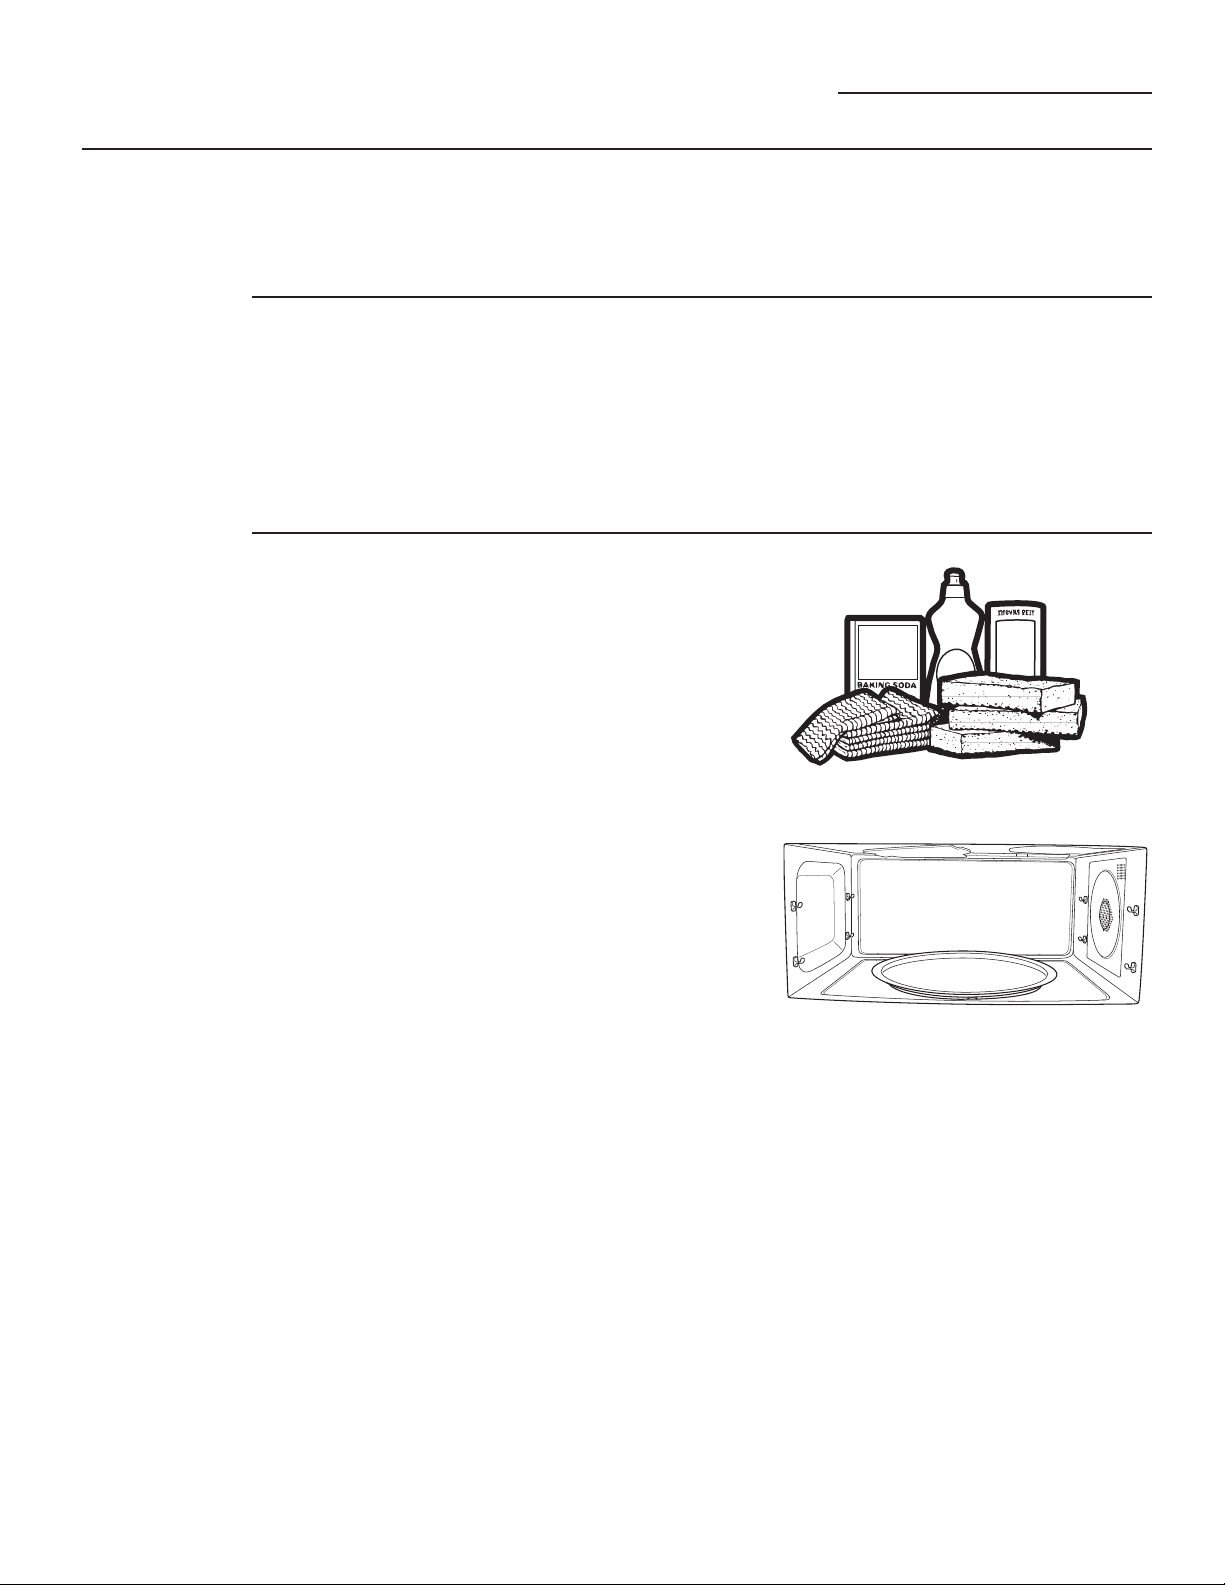
Cuidado y Limpieza
Horno Advantium
Surface Light
(luz de superficie)
Vent Fan
(ventilador del
respirador)
Cómo limpiar
el interior del
horno
Se utiliza para iluminar la plancha.
Presione la tecla Surface Light (luz
de superficie) para cambiar deluz
nocturna a luz apagada.
El respirador del ventilador retira
los vapores de la superficie de
cocimiento.
Presione la tecla Vent Fan para
cambiar de alto, a medio, a bajo,
aapagado.
El ventilador del respirador se puede
encender automáticamente si el
Antes de limpiar cualquier parte
delhorno asegúrese que el control del
horno esté apagado y que esté frío o
tibio al tacto.
Limpie el interior del horno
frecuentemente para que pueda
calentar adecuadamente.
Algunas salpicaduras pueden ser
removidas con papel toalla, otras
requieren un paño tibio jabonoso.
Remueva las salpicaduras de
grasacon un paño jabonoso, luego
enjuague con un paño húmedo.
Si el sucio y las salpicaduras no
salenfácilmente con un paño tibio
jabonoso, coloque un tazón mediano
lleno de agua adentro de la unidad,
sobre la bandeja de metal y presionela
tecla Speed Cook. Seleccione MY
RECIPES y ajuste 10 minutos aU=10,
L=10, M=7, C=10. Esto debeaflojar el
sucio adentro del horno demanera
que lo pueda remover conun paño
tibio jabonoso.
Si observa un amarillentamiento
enel metal adentro del horno que no
puede ser removido con un pañotibio
jabonoso, utilice un limpiadorpara
acero inoxidable que remuevela
decoloración por calor y/o manchas.
Puede limpiar el interior del horno
como lo haría normalmente.
No utilice limpiadores abrasivos
niutensilios filosos en las paredes
delhorno.
horno secalienta demasiado, aún
cuando no estéfuncionando. La
pantalla mostrará: “Normal Operation:
Fan is on due to high heat. Fan will
shut off automatically.” (Operación
Normal. El ventilador está encendido
debido al calor alto. El ventilador se
apagará automáticamente.)
Nunca utilice limpiadores
comerciales para hornos en ninguna
parte de suhorno.
No limpie el interior del horno con
estropajos de metal. Se pueden
quebrar pedazos del estropajo adentro
del horno,causando un toque eléctrico,
así comodaño al acabado de la
superficie interiordel horno.
32
Page 73
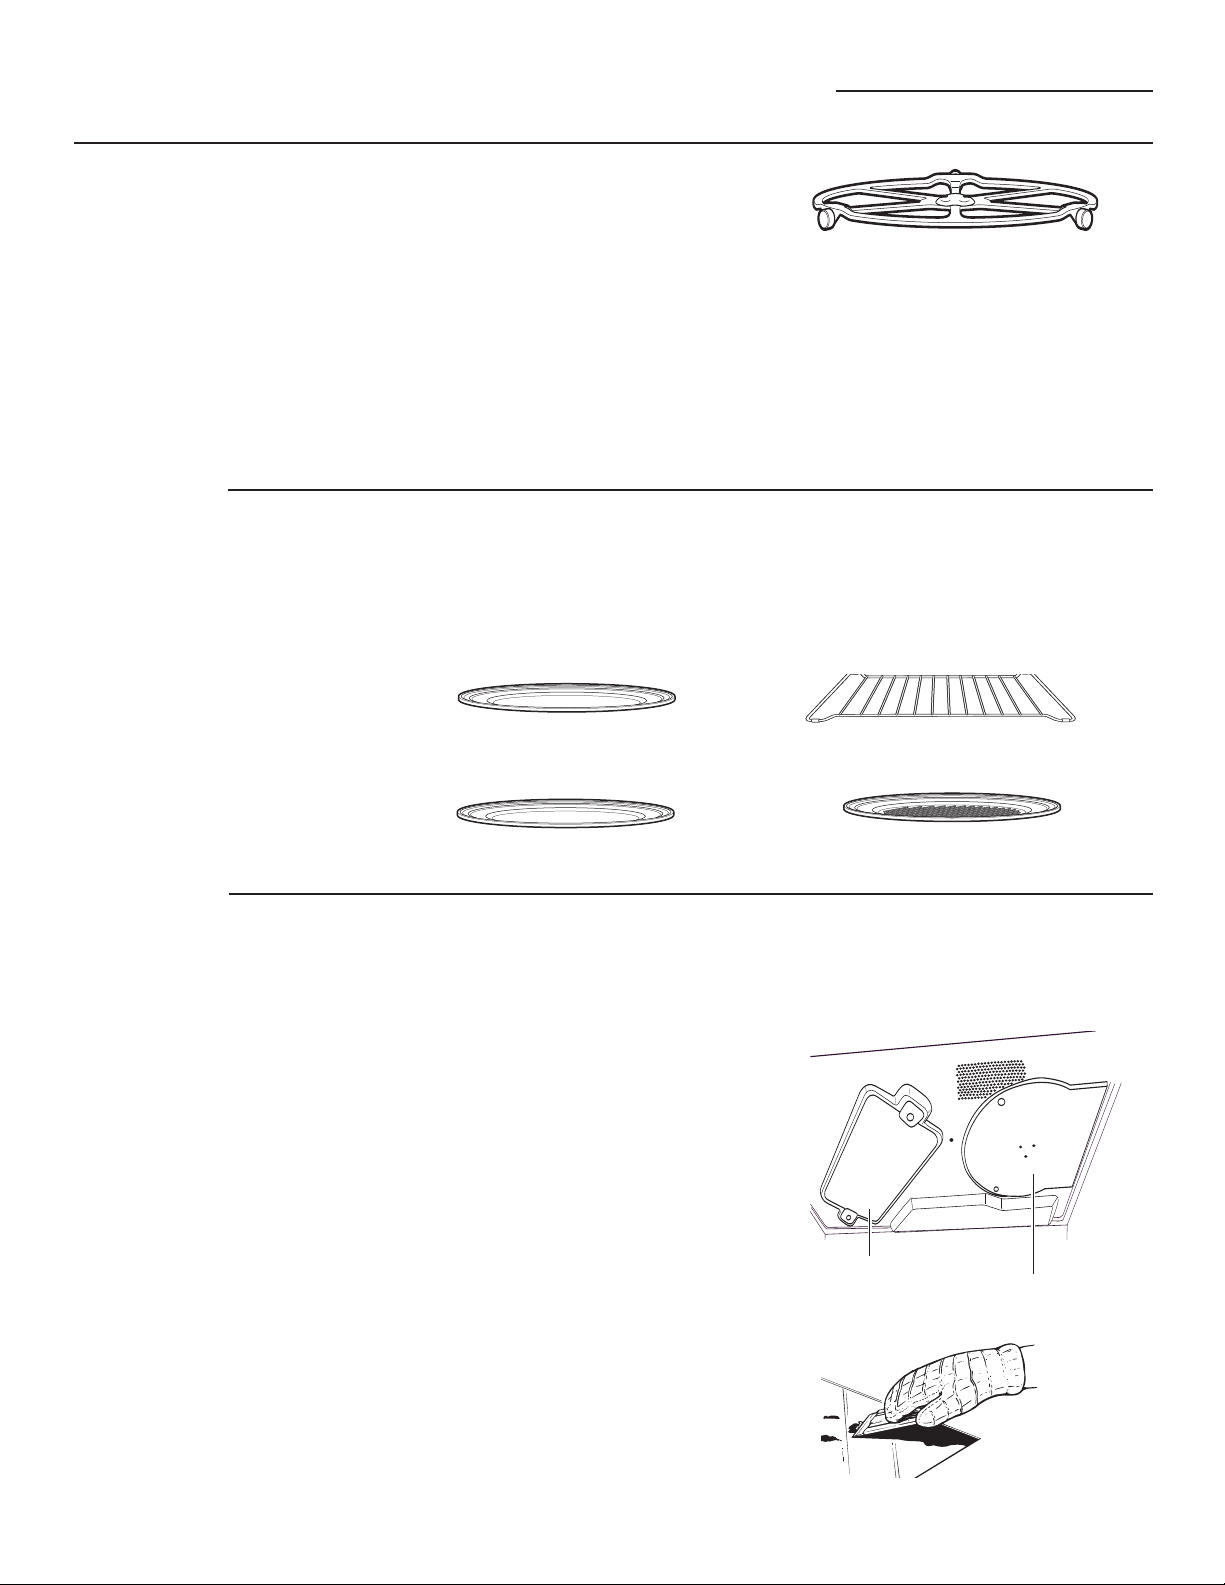
Cuidado y Limpieza
Horno Advantium
Plato giratorio
removible
Bandejas de
cocimiento y
parrilla de alambre
del horno
El área debajo del plato giratorio debe
limpiarse frecuentemente para evitar
oloros y humo durante el ciclo de
cocimiento.
El plato giratorio se puede quebrar si
lodeja caer. Lávelo con cuidado en
aguatibia y jabonosa. Séquelo bien y
colóquelo en su lugar.
Para colocar el plato giratorio, coloque
elcentro sobre el eje en el centro del
hornoy gírelo hasta que esté colocado
en sulugar.
Para evitar que se quiebren,
permitaque las bandejas se enfríen
completamente antes de limpiarlas.
Lave concuidado en agua caliente
jabonosa oen la lavadora de platos.
Bandeja de vidrio claro
Plato giratorio
No utilice el horno sin el
platogiratorio en su lugar.
No utilice abrasivos para limpiar la
bandeja de vidrio ni la parrilla de
alambre delhorno, ya que se puede
dañar el acabado.
Se debe utilizar un estropajo plástico
paralimpiar las bandejas de metal.
Parrilla de alambre del horno
Cubierta de la
lámpara halógena
y lámina de mica
Bandeja de metal
No retire la cubierta de vidrio de la
lámpara halógena ni la lámina de
mica.
La cubierta de la lámpara halógena
superior debe estar libre de grasa o
desalpicaduras de alimentos, para
quepueda funcionar efectivamente.
Limpie la cubierta de vidrio de
la lámpara y la lamina de mica
frecuentementa para evitar el exceso
de humo y la disminución de la
potencia de cocimiento.
Para limpiar la cubierta de la
lámparasuperior: Permita que el
horno y lacubierta de vidrio se enfríen
completamente. Límpiela con un
paño tibipjabonoso o con un estropajo
plástico.
Para sucio quemado, puede utilizar
un raspador para limpiar la cubierta
de lalámpara halógena. Sostenga el
raspador a un ángulo de 30º. Raspe el
vidriopara limpiarlo y limpie el exceso
desucio.
Bandeja de metal para asar
Para limpiar la lámina de mica:
Permitaque el horno se enfríe
completamente.Limpie con un paño
tibio jabonoso.
Upper halogen
lamp cover
For heavy or burned on soil
Mica Sheet
33
Page 74
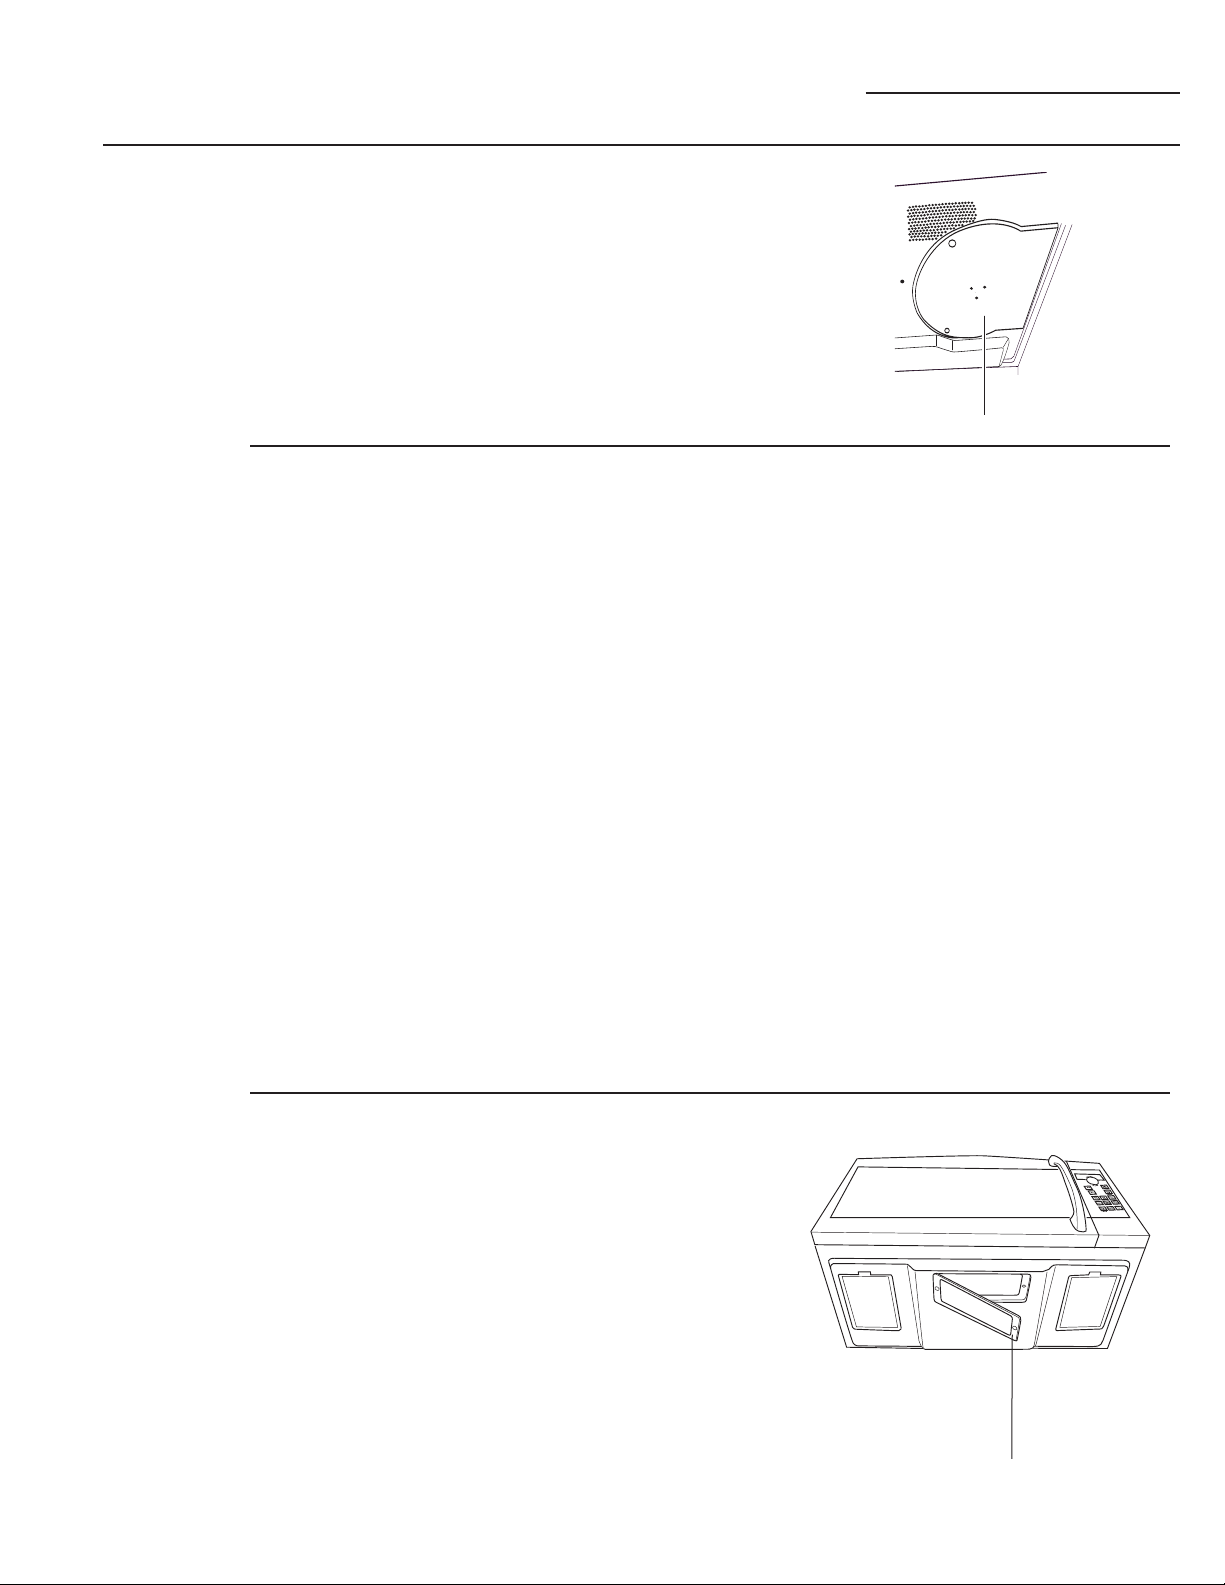
Cuidado y Limpieza
Horno Advantium
Lámina de mica
Cómo limpiar el
exterior del horno
Para limpiar la lámina de mica:
Permitaque el horno se enfríe
completamente. Limpie con un paño
tibio jabonoso.
No recomendamos el uso de
limpiadores con amoníaco o alcohol,
ya que pueden dañar la apariencia
del horno. Si escoge utilizar un
limpiador casero común, aplique
primero el limpiador directamente
en el pañode limpieza, luego limpie el
área sucia.
Caja
Limpie el exterior del microonda con
un paño jabonoso. Enjuague y seque.
Limpie el vidrio con un paño húmeda.
Panel de Control
Limpie con un paño húmedo. Seque
completamente. No utilice limpiadores
en espray, grandes cantidades de
jabón y agua, abrasivos u objetos
filosos en el panel estos lo pueden
dañar. Algunos tipos de papel toalla
también pueden rayar el panel de
control.
Superficies de Acero Inoxidable
(en algunos modelos)
Puede limpiar el panel de acero
Mica Sheet
inoxidable con Stainless Steel Magic
o un producto similar, con un paño
limpio y suave. Aplique con cuidado
el limpiador de acero inoxidable,
evite las piezas plásticas y de
vidrio de alrededor. No utilice en el
aceroinoxidable cera para aparatos,
pastas, blanqueadores o productos
que contengan cloro.
Paneles Plásticos de Color
(en algunos modelos)
Utilice un paño limpio, suave,
ligeramente humedecido, luego seque
completamente.
Sello de la Puerta
Es importante mantener limpia el
área donde sella la puerta con el
horno. Utilice detergentes suaves,
noabrasivos aplicados con un paño o
esponja. Enjuague bien.
Parte Inferior
Limpie regularmente la grasa y el
polvo de la parte de abajo. Utilice una
solución de agua tibia con detergente.
Cómo
reemplazar
la luz de
superficie
34
1. Para cambiar la luz de superficie,
primero desconecte la energia
en el fusible principal o panel del
interruptor automático.
2. Retire el tornillo del interior de la
cubierta del compartimiento de la
luz y bájela hasta que se detenga.
3. Antes de retirar el bombillo que va
acambiar, asegúrese que esté frío.
Hálelo suavemente del receptáculo
Cámbielo por un bombillo halógeno
de 130 voltios, 50watts. Ordene
HOERPELOOR:%;GHVX
distribuidor GE.
4. Levante la cubierta y coloque el
tornillo. Conecte la electricidad al
horno.
Retire el tornillo
Page 75
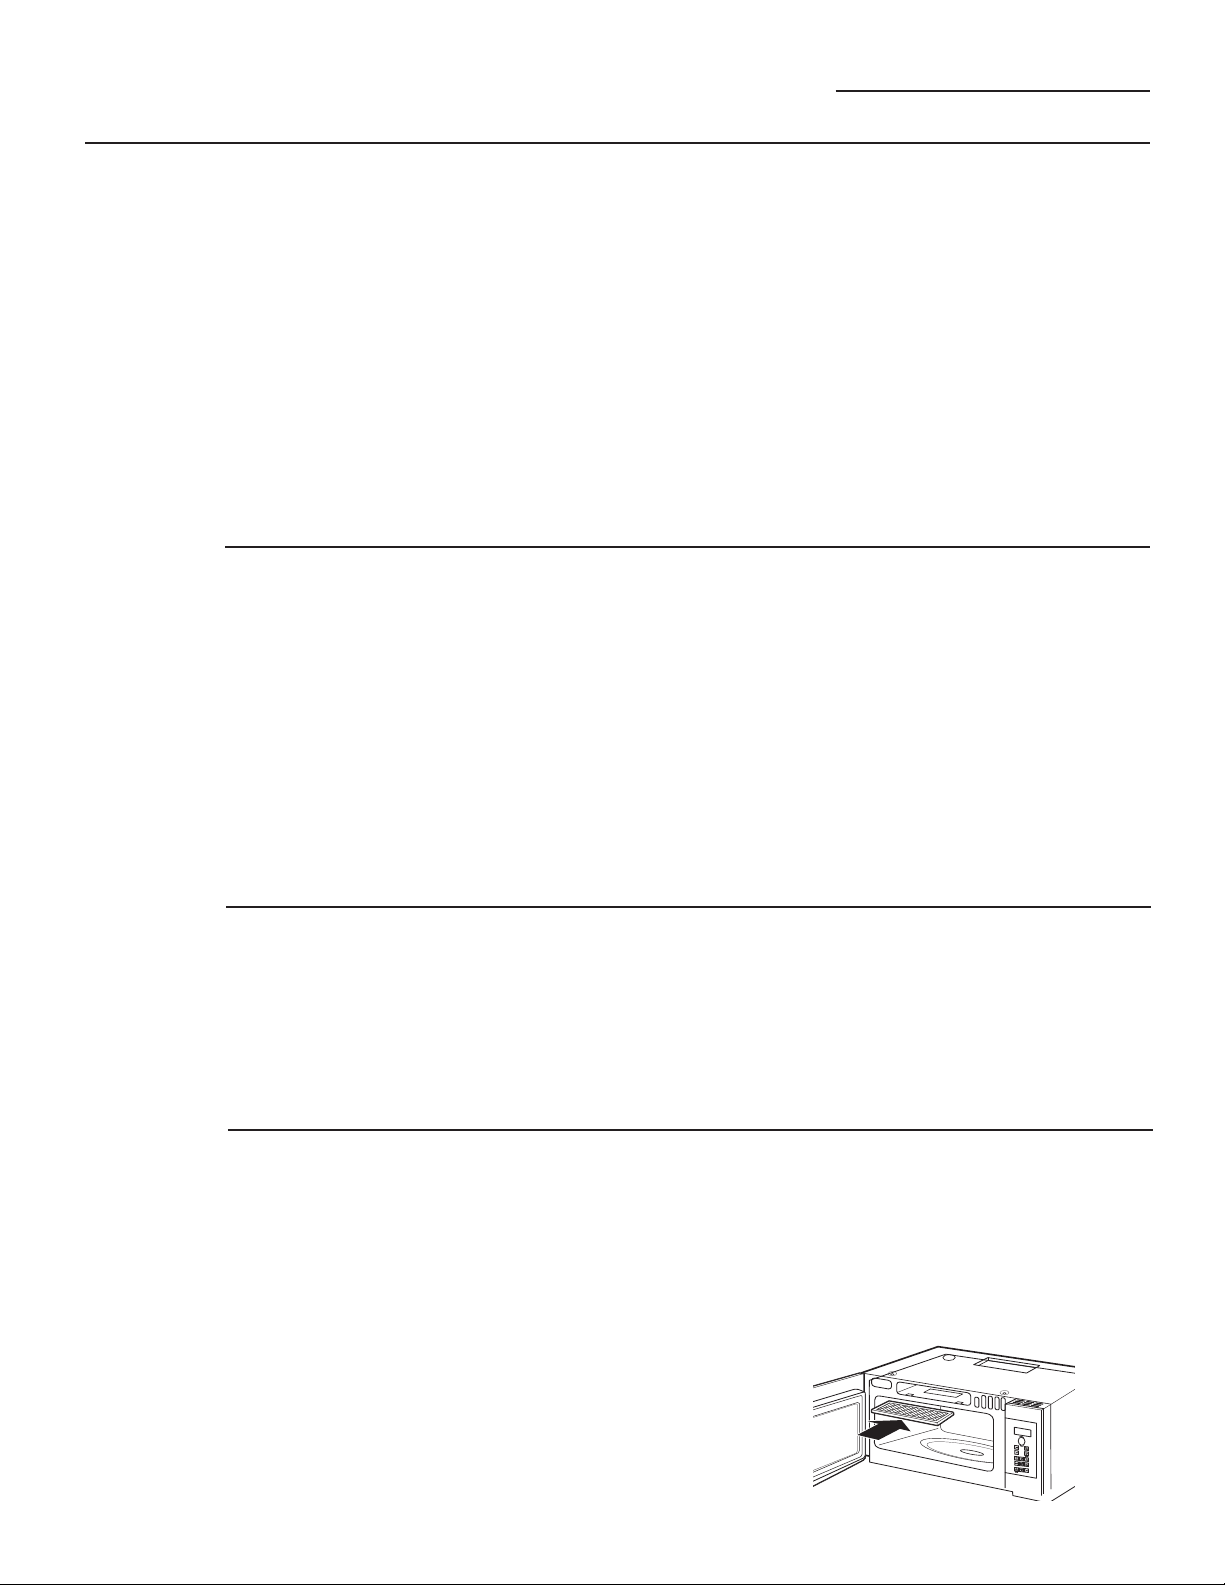
Cuidado y Limpieza
Horno Advantium
Retiro y
limpieza de
los filtros
Cómo
reemplazar
la luz de la
cavidad
1. Los filtros de metal atrapan la grasa
que sueltan los alimentos en la
plancha. También evitan que las
llamas de los alimentos en la plancha
dañen el interior del horno.
2. Por esta razón, los filtros deben estar
colocados en su lugar siempre que
utiliza el extractor. Los filtros del
respirador deben limpiarse una vez al
meso cuando sea necesario.
3. Para retirarlos, utilice las orejetas para
deslizarlos hacia la parte de atrás.
Hale hacia abajo y hacia afuera.
1. Desconecte la energía en el fusible
principal o panel del interruptor
automático.
2. Retire la parrilla superior, retire los dos
tornillos que la sostienen en su lugar.
3. Retire el filtro de carbón, si lo tiene.
Deslícelo hacia la izquierda y hálelo
hacia el frente para retirarlo. NOTA: El
filtro de carbón es un kit opcional, no
es necesario tenerlo.
4. Para limpiar los filtros del respirador,
remójelos y luego sacúdalos en agua
caliente y jabón. No utilice amoníaco
ni productos con amoníaco ya que
pueden oscurecer el metal. Lo puede
cepillar suavemente para remover
elsucio pegado.
5. Antes de colocarlos enjuáguelos,
sacúdalos y déjelos secar.
6. Para colocarlos, deslice los filtros
adentro de las ranuras del marco en
la parte de atrás de cada abertura.
Presione hacia arriba y hacia el frente
para cerrarlos en su lugar.
5. Saque el protector de la lámpara.
Hale el bombillo afuera y cámbielo
por una lámpara de horno de
120V130V, 20W. Ordene el bombillo
WB25X10019 de su distribuidor GE.
6. Regrese la lámpara y el protector a su
posición original y coloque el tornillo y
el filtro de carbón.
7. Coloque la parrilla y los 2 tornillos.
Reconecte la energía al horno.
Filtro de carbón
(JX81D kit
opcional)
Para instalar el
filtro de carbón
4. Retire el tornillo que sostiene el
protector de la lámpara en su lugar.
Si el modelo no está ventilado hacia el
exterior, el aire recirculará a través del
filtro de carbón desechable, el cual ayuda
a retirar el humo y los olores.
El filtro de carbón no se puede limpiar,
debe ser cambiado. Ordene la Pieza No.
-;':%;GHVXGLVWULEXLGRU
GE.
Para instalar un filtro nuevo:
1. Retire del filtro nuevo el plástico y el
otro envoltorio exterior.
2. Retire la parrilla superior, para eso
debe retirar los dos tornillos que la
sostienen en su lugar.
3. Inserte el filtro adentro de la
abertura superior del horno, como se
muestra.
El filtro de carbón debe cambiarse
cuando lo vea sucio o decolorado
(generalmente de 6 a 12 meses,
dependiendodel uso).
4. Descansará en un ángulo sobre las
dos orejetas de soporte traseras y por
el frente por dos orejetas.
5. Coloque la parrilla y los dos tornillos.
Para retirar el filtro, repita el paso 2
anterior, retire el filtro y repita el paso
5.step 5.
35
Page 76

Consejos para la Solución de Problemas
Horno Advantium
¿Preguntas?
Utilice este
solucionador
de problemas
Problema Causas Possible Qué se debe hacer/Explicación
LUCES
Se opaca la luz durante un
circlo de cocimiento rapido y se
enciende y apaga, aún en niveles
de potencio completa.
Luz visible alrededor de la puerta
y de la caja exterior al cocinar
ráppido.
VENTILADOR
El ventilador continúa
funcionando despué de terminar
de cocinar.
El respirador del horno emite un
aire caliente mientras el horno
está encendido.
El ventilador del respirador se
enciende automáticamente
cuando el horno no está en uso.
El ventilador se enciende
automáticamente cuando se
utiliza el microonda.
El horno hace sonidos inusuales
al cocinar.
El sonido del ventilador cambia al
cocinar.
COCIMIENTO
Sale humo del horno cuando se
abre la puerta.
Al final del programa de
cocimento la comida no está
completamente cocida ni dorada.
Esto es normal. El nivel de
potencia ha sido reducido
automáticamente ya que el horno
está caliente.
Esto es normal. Cuando el horno está encendido,
El horno se está enfriando. El ventilador se apagará
Esto es normal. Si la plancha o el horno se
Esto es normal.
Esto es normal. Si se utiliza el horno despúes
Chasquido y el ventilador
soplando son sonidos normales.
El relé del tablero está
encendiendo y apagando los
componenetes.
Esto es normal. El ventilador se enciende y apaga
La comida tiene alto contenido
de grasa. Se utilizó espray en las
panas.
Los tiempos programados no
cocnierdan con el tamaño ni la
cantidad de comida que va a
cocinar.
Esto es normal. El horno detecta
el nivel de calor y se ajusta
automáticamente.
hay una luz visible alrededor de la
puerta y de la caja exterior.
automáticamente cuando las
piezas internos del horno se
hayan enfriado.
calientan, el ventilador del
respirador se enciende. (Vea la
sección Ventilador Automático)
de cocimiento rápido, el horno
detectará que está demasiado
caliente, el ventilador del
respirador se encenderá para
enfriar el horno.
Esto sonidos son normales.
durante el cocimento para
mantener la temperatura.
El humo es normal al cocinar
comidas con mucha grasa. Utilice
aceite vegetal o de oliva en la
carne, en lugar de cubrir toda la
pana.
Aumente o disminuya el tiempo
para cocinar o ajuste las
lámparas superior e inferior para
dorar.
36
Page 77

Horno Advantium
¿Preguntas?
Utilice este
solucionador
de problemas
Problema Causas Posibles Qué se debe hacer / Explicación
El horno se apagó en
Warm (Caliente), Proof
(Prueba), o Convection
Bake (Honeado por
Convección)
La pantalla
delcontrol está
encendida pero el
horno no arranca.
El tiempo máximo de cocción
de 179 minutos fue alcanzado.
Se configuró un tiempo de
cocción para que Convection
Bake (Horneado por
Convección) comience luego
del precalentamiento y la
puerta no se abrió al finalizar el
precalentamiento.
Esto es normal. El control apagará de forma
automática el horno e indicará que el tiempo de
cocción fue alcanzado. El tiempo de cocción no
siempre es exhibido.
Esto es normal. El control apagará el horno de
forma automática luego de una hora e indicará
que la cocción está completa si la puerta no está
abierta.
DISPLAY
/DSDQWDOODHVWiHQ /DSDQWDOODHVWiDSDJDGD 5HYLVHHOPHQ~GH6(77,1*6SDUDORV
blanco. ajustes del reloj. Encienda la pantalla.
$SDUHFHHQODSDQWDOOD (OFRQWUROHVWiEORTXHDGR
Panel
durante 3 segundos para desbloquear
Presione y sostenga Cancel/Off “Control
LOCKED” el control. Vea la sección Otras
Funciones.
(OUHORMQRHVWiSURJUDPDGR 6LJDODVLQVWUXFFLRQHVSDUDSURJUDPDU
el reloj.
/DSXHUWDQRHVWiFHUUDGD $EUDODSXHUWD\FLpUUHODVHJXUD
1RVHSUHVLRQyODWHFOD 6LJDODVLQVWUXFFLRQHV
Start/Pause después de
seleccionar el cocimiento.
Se seleccionó accidentalmente
3UHVLRQHCancel/Off y vuelva a
mente el Inicio Demorado. ajustar.
(OKRUQRHVWiHQHOPRGR 'HVHQFKXIHHOKRUQRSRUPLQXWROXHJR
de demostración. enchúfelo en la pared. NO programe el
reloj. Presione y sostenga durante 3
segundos las teclas Help y Start/Pause.
El control debe salir del modo de
demonstración. Programe el reloj y
continúe.
6HSUHVLRQyDFFLGHQWDOPHQWH 5HDMXVWHHOSURJUDPDGHFRFLPLHQWR
Cancel/Off y presione Start/Pause.
37
Page 78

Consejos para la Solución de Problemas
Horno Advantium
¿Preguntas?
Utilice este
solucionador
de problemas
Problema Causas Posibles Qué se debe hacer / Explicación
OTROS PROBLEMAS
/DSXHUWD\HOLQWHULRU (OKRUQRSURGXFHXQFDORU (VWRHVQRUPDO
GHOKRUQRVHVLHQWHQ LQWHQVRHQHVSDFLRV &XDQGRODFRPLGDHVWpOLVWDXWLOLFH
caliente. pequeños. guantes para retirarla.
(OSLVRGHOKRUQRHVWi /DOX]GHODSODQFKDHVWi (VWRHVQRUPDO
tibio, aún cuando no ubicada debajo del piso
ha sido utilizado. del horno. Cuando se en
ciende, el calor que produce
puede calentar el piso del
horno.
(OKRUQRQRDUUDQFD 6HSXGRKDEHUTXHPDGR &DPELHHOIXVLEOHRUHDMXVWHHOLQWHUUXSWRU
un fusible o disparado el automático.
interruptor automático de
su casa.
6REUHYROWDMH 'HVHQFKXIHHOKRUQR\HQFK~IHORGH
nuevo.
(OHQFKXIHQRHVWi $VHJ~UHVHTXHHOHQFKXIHGHOKRUQR
completamente insertado esté completamente insertado en el
en el en chufe de la pared. enchufe de la pared.
/DEDQGHMDGHYLGULR $OLQHHORVVDOLHQWHVHQODSDUWHGHDEDMR
del microonda no se de la bandeja de vidrio para el microoda
traba en el eje central. con las indentaciones en el plato
giratorio. Este ajuste no queda
apretado, es normal algo de movimiento.
38
Page 79
Garantía del Horno Advantium
Horno Advantium
Todo el servicio de garantía se suministra por medio de
QXHVWURV&HQWURVGH6HUYLFLRGH)iEULFDRXQWpFQLFRDXWRUL]DGR
porCustomer Care® . Para programar un servicio, enlínea,
visítenosen GEAppliances.com o llame a 800.GE.CARES
&XDQGRVROLFLWHVHUYLFLRSRUIDYRUWHQJD
disponible el número de serie y modelo.
Engrape aquí su recibo.
Para que la garantía cubra
losservicios se necesita
elcomprobante original de
lafecha de compra.
Para el Período de: GE Cambiará:
Un Año Cualquier pieza del horno que falle debido a defectos en los materiales
De la fecha de la o en la fabricación. Durante esta garantía limitada de un año, GE tam
compra original bién suministrará, sin costo alguno, toda mano de obra y servicios rela
cionados con el cambio de la pieza defectuosa.
Lo que GE no cubre:
Viajes de servicio a su casa para enseñarle a
utilizar el producto.
Instalación, entrega o mantenimiento
inadecuados.
Producto no accesible para darle el servicio
requerido.
Falla en el producto si éste es maltratado,
mal usado (por ejemplo, chispas en la
cavidad de la parrilla de alambre o metal/
aluminio), o si es utilizado para otro fin
que no sea el pretendido o si se utiliza
comercialmente.
Cambio de los fusibles de la casa o
reajuste del interruptor automático.
Cambio de los bombillos de la plancha.
Daño al producto causado por accidente,
fuego, inundaciones o caso fortuito.
Daño incidental o consecuente causado
por posibles defectos con este aparato.
Daño causado después de la entrega.
(;&/86,Ï1'(*$5$17Ë$6,03/Ë&,7$6³6X~QLFR\H[FOXVLYRGHUHFKRHVUHSDUDUHO
producto como se establece en esta Garantía Limitada. Cualquier garantía implícita,
incluyendo las garantías implícitas de comercialización o adecuación para un
propósito específico, está limitada a un año o el período más corto que permite la
ley.
Esta garantía se extiende al comprador original y cualquier dueño posterior para productos
comprados para uso doméstico dentro de los EUA. Si el producto se encuentra en una región
donde no hay Servicio Técnico autorizado de GE, usted será responsable del costo del viaje
o se le solicitará que lleve el producto a un Servicio Técnico Autorizado de GE. En Alaska, la
garantía excluye el costo de envío o visitas de servicio en su hogar.
Algunos estados no permiten la exclusión o limitación de daños incidentales o consecuentes.
Esta garantía le otorga derechos legales específicos y también puede contar con otros
derechos que varían de estado a estado. Para conocer sus derechos legales, consulte a la
RILFLQDORFDOGHOFRQVXPLGRURGHVXHVWDGRRDO)LVFDO*HQHUDOGHVXHVWDGR
Garante: General Electric Company. Louisville, KY 40225
39
Page 80

Soporte al consumidor.
Página Web de GE Appliances
¿Tiene alguna pregunta sobre su electrodoméstico? ¡Pruebe la página Web de GE Appliances 24 horas al día,
cualquier día del año! Para mayor conveniencia y servicio más rápido, ya puede descargar los Manuales de los
Propietarios, pedir piezas o incluso hacer una cita en línea para que vengan a realizar una reparación.
GEAppliances.com
Solicite una reparación GEAppliances.com
El servicio de expertos GE está a tan sólo un paso de su puerta. ¡Entre en línea y solicite su reparación cuando
le venga bien 24 horas al día cualquier día del año! O llame al 800.GE.CARES (800.432.2737) durante horas
normales de oficina.
Real Life Design Studio (Estudio de diseño para la vida real)
GEAppliances.com
*(DSR\DHOFRQFHSWRGH'LVHxR8QLYHUVDO³SURGXFWRVVHUYLFLRV\DPELHQWHVTXHSXHGHQXVDUJHQWHGHWRGDV
las edades, tamaños y capacidades. Reconocemos la necesidad de diseñar para una gran gama de habilidades
y dificultades físicas y mentales. Para más detalles cobre las aplicaciones de GE Diseño Universal, incluyendo
ideas de diseño para la cocina para personas con discapacidades, mire nuestra página Web hoy mismo. Para
personas con dificultades auditivas, favor de llamar al 800.TDD.GEAC (800.833.4322).
Garantías ampliadas GEAppliances.com
Compre una garantía ampliada y obtenga detalles sobre descuentos especiales disponibles mientras su garantía
está aún activa. Puede comprarla en línea en cualquier momento, o llamar al (800.626.2224) durante horas
normales de oficina. GE Consumer Home Services estará aún ahí cuando su garantía termine.
Piezas y accesorios GEAppliances.com
Aquellos individuos con la calificación necesaria para reparar sus propios electrodomésticos pueden
pedir que se les manden las piezas o accesorios directamente a sus hogares (aceptamos las tarjetas
VISA, MasterCard y Discover). Haga su pedido en línea hoy, 24 horas cada día o llamar por teléfono
al 800.626.2002 durante horas normales de oficina.
Las instrucciones descritas en este manual cubren los procedimientos a seguir por cualquier usuario. Cualquier
otra reparación debería, por regla general, referirse a personal calificado autorizado. Debe ejercerse precaución
ya que las reparaciones incorrectas pueden causar condiciones de funcionamiento inseguras.
Póngase en contacto con nosotros GEAppliances.com
Si no está satisfecho con el servicio que recibe de GE, póngase en contacto con nosotros en nuestra página
Web indicando todos los detalles así como su número de teléfono o escríbanos a:
General Manager, Customer Relations
GE Appliances, Appliance Park
Louisville, KY 40225
Registre su electrodoméstico GEAppliances.com
£5HJLVWUHVXQXHYRHOHFWURGRPpVWLFRHQOtQHD³FXDQGRXVWHGSUHILHUD(OUHJLVWUDUVXSURGXFWRDWLHPSROH
proporcionará, si surgiera la necesidad, una mejor comunicación y un servicio más rápido bajo los términos de
su garantía. También puede enviar su tarjeta de registro preimpresa que se incluye en el material
de embalaje.
Printed in Korea
 Loading...