

GE Profile GXCF25FBS Owner's Manual
ge, com
GEProf!ld Tri-Temperamre Water
@ ® ®
Dispenser with Refreshment Chiller
Safety Instruaions .................. 2, 3
Using the Water Dispenser
Child Safeguard ..................... 4
Cold _'_ater and Coml)artn/ent
Features and Parts List ................ 4
Loading the Dispenser . ............... 4
Specifications ....................... 8
Care and Cleaning ................. 5-8
_l}'oubleshooting Tips ............... 8, 9
Consumer Support
Ctmsumer Support ........... Back Cover
X'_hrranty ................... Back Cover
Franqais
In_brmations en matibre
de s&_tHt_ ..................... l O, l l
Utilisation du dislributeur d'eau
Caract&'istiques et liste de pi&es ...... 12
Carm t&'istiques techniques ........... l 6
Chargement du distributem" . ......... 12
Sauvegarde pour la protection
des enfimts ........................ 12
Entretien et nettoyage . ............ 13-16
Conseils de d_pannage . ........... 16, 17
Soutien au eonsommateur
(;armatie .......................... 18
Soutien au consommateur . ........... 18
GX(I;2 5FBS
Distributeur d'eau de GE Profilg M
it trois tempdratures avec
rdffigdrant de rafraichissements
La section francaise commence h la page 10
Dispensador de agua de
GEProfilgMde tres temperaturas
con enfriador de refrescos
La seeeion en espa#ol empieza en la pagina 19
Espa_ol
In_brmaci6n de segmqdad .......... 19, 20
C6mo utilizar el dispensador de a_ta
Cdmo cargar el dispensador , .......... 21
Especificaciones .................... 25
Lista de l)artes y caracterfsticas ......... 21
Seguro contra nifios ................. 22
Cuidado y [impieza ................ 29-25
Solucionar problemas ............... 25, 26
Apoyo al consumidor
Garantfa .......................... 27
Apoyo al consmnidor , ............... 27
215C1002P035 49-50173 1705 Jfl
iMPORTANTSAFETYiNFORMATiON.
READALLiNSTRUCtiONSBEFOREUSING.
WARNING!
Usethis appliance onlyfor its intendedpurposeas describedin this Owner'sManual
SAFETYPRECAUTIONS
Whenusing electrical appliances,basicsafetyprecautions shouldbe followed,includingthe following."
_:This "wa|er dispenser must be t)roperly inslalled
and lo(aled in a((ordan(e wiih Ihese insu'u( lions
tlcti)l'(_ i! is us(_d.
::_'_[)o not allow children to climt/, stand or hang
on the outside of the dist)ensel; or on the shelves
inside the storage c_binet (on some models).
I'h() could tip the dispenser over and damage
it and seriously iI!iure then/selves.
i):?Do not store or use gasoline or other tlamnlat/le
vapors _md liquids ill the vi(init) of this or ally
other appliance.
::NUnplug the water dispenser beli)re cleaning or
making ret)airs.
NOTE: GEdoes not support any servicing of the
dispense_ We strongly recommend that you do not
attempt to service the dispenser yourself.
::U_Do not rise this dispenser to dispense _mything
other than water.
i_:Wipe up any water spills immediatel} after loading
or tmloading water boules.
i):?Children should be supervised by a parent when
using this product.
WARNING:Do uot use with water that is
microbinlogically unsafe or of unknown quality.
;:CAUtiON:The dispenser beats water
to a temperature of approxhnately 194°F (90°C).
Water temperatures above 125°F (52°C) era1 cause
severe bunls or death from scalding. Clfildren,
the disabled mad the elderly are at highest risk
of beh_ scalded.
NOTICE:'_+,s product is intended solely for
use hi cllillit_g cmmed mid boxed beverages, mid
packaged nouperishables.
}_+l)o not t)lug ill the power (ord (n" turn on die
t)(>wel" S'Wi|( hes when lhe _va|er dispenser is en/t)l }
PROPERINSTALLATIONANDLOCATION
::_:i_\llo\\ r at least 1" (2.5 cm) of space between tile
back of ttle water dispenser and the wall to allow
lbr t)roper air circulation.
!+;:Do not install tile water dispenser where the
temperature will go bel(+w 50°F (10°C) or
above 100'F (38°(;).
!+;:Install the water dispenser on a level floor strong
enl)ugh to support it when fidly loaded. Do not
install where it will be subject to direct sunlight,
heat or moisture.
2
6ROUNDINGINSTRUCTIONS
WARNING:Improper use of the grounding plug can result in a risk of electric shock.
Tlfis apl)liall(e lllUSl be grounded. Ill die evelll ot an
ele(tl](al short (ircuil, grounding reduces the risk of
ele( I:_( sho(k.
This appliance is equipped with a power cord having
a gmmlding wire with a grounding phlg. The phlg
must be plugged into all outlet that is properl?
installed and grounded.
Consuh a qualified electrician if the grounding
ins:rim:ions are not completely understood, or if
doubt exists as to whether the appliance is properly
grounded.
If the outlet is a standard 2-prong wall outlet, it is
your personal responsibility and obligation to have
it replaced with a t)roperl} grounded 3-prong
wall outlet.
Do not tinder ai/y circllll:Stalices gilt or relllO\_' tile
third (ground) prong fi'om tile t)ower cord.
Do :lOt use all adapter plug with this appliance.
Do :lOt use all extension cord Mth this appliance,
If the power cord is u)o short, have a qualified
electrician install all outlet near the appliance.
For best operation, plug the appliance into its own
electrical outlet on a dedicated circuit to pre_Vllt
flickering of lights, blowing of fl:se or tripping of
circuit breake::
PROPERDISPOSALOFTHEWATERDISPENSER
Refrigerant Disposal
reti'igerant ill its (()()ling s) stem. These reti'igerants
are t)elie_vd to harm stratospheric ozone, If you are
throwing ;{_r_{}your old dispenseJ, make sure the
reli'igerant is removed and recovered lot proper
disposal by all El{\-certiJied technician. If you
intentionally release this reli'igerant, y_u Call be
sul_iect to thles and imprisom:lent raider provisions
of environmental legislation.
READANDFOLLOWTHISSAFETYINFORMATIONCAREFULLY.
SAVETHESEINSTRUCTIONS
Using the water dispenser.
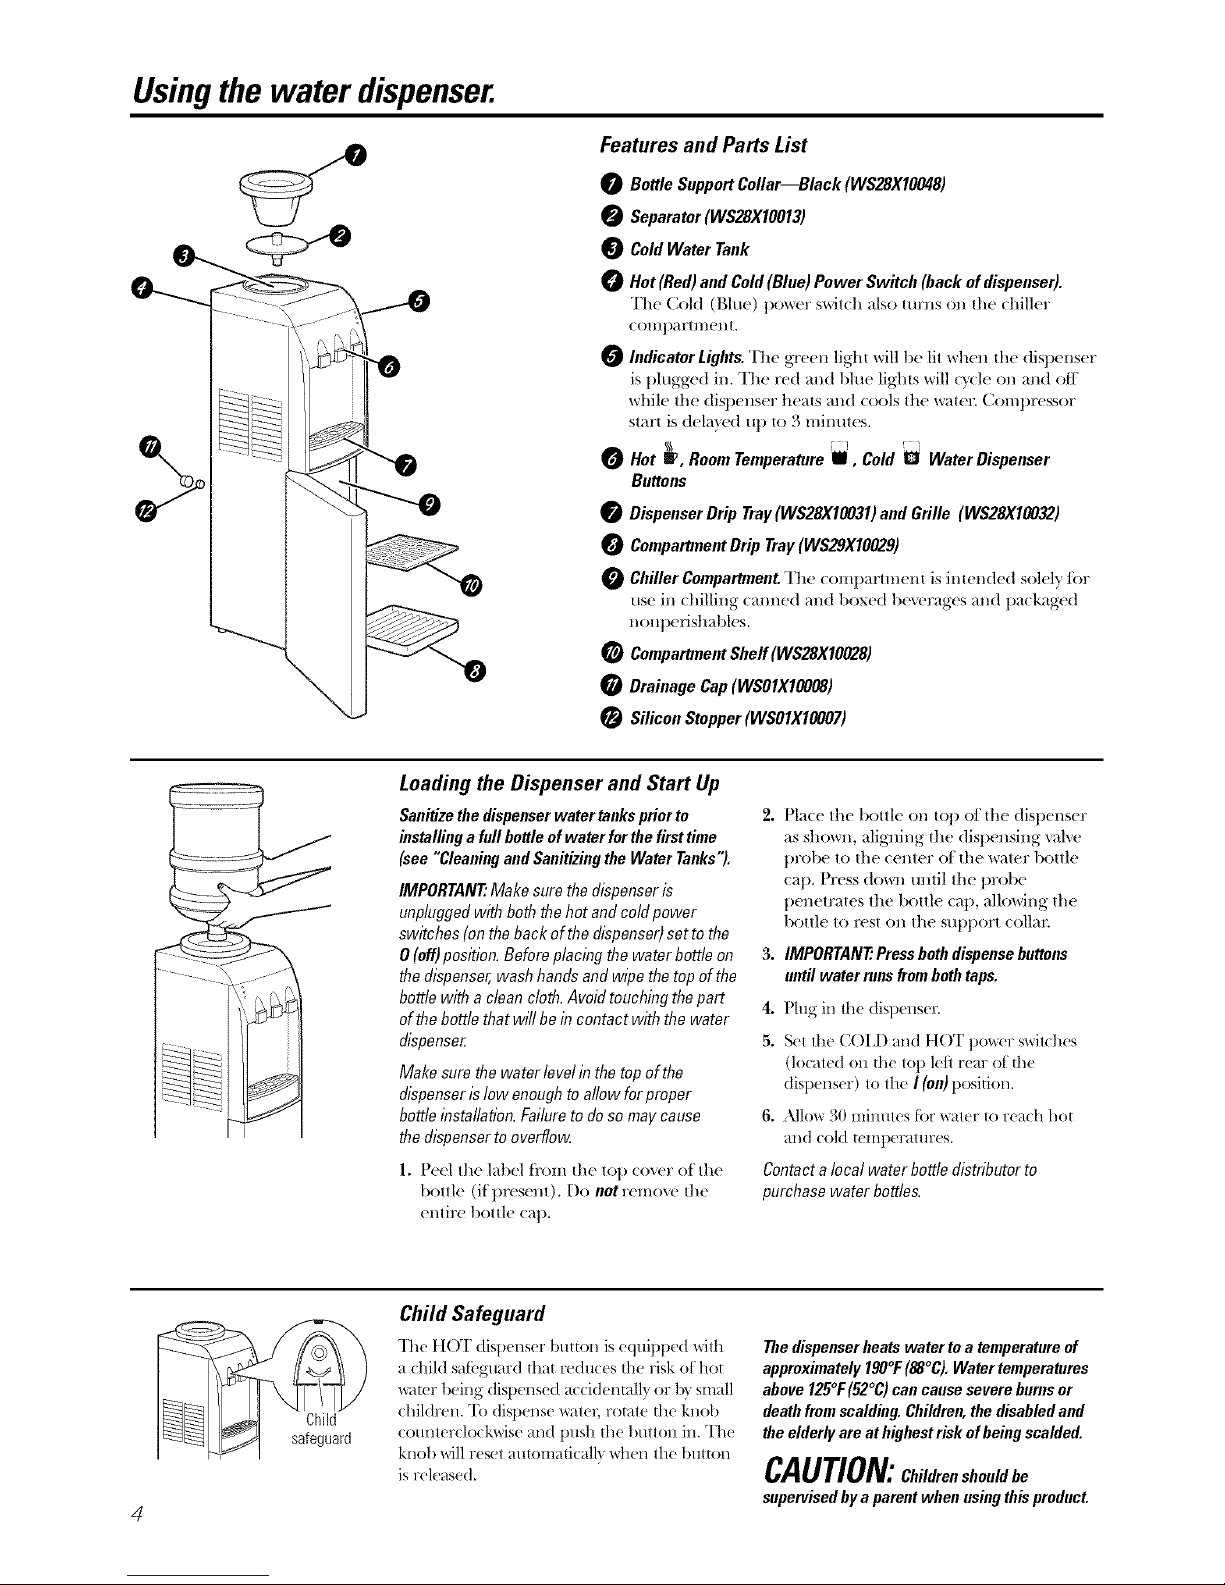
Features and Parts List
0 Bottle Support Collar--Black (WS28X10048)
Separator (WS28X10013)
Cold Water Tank
Hot (Red) and Cold (Blue) Power Switch (back of dispenser).
The CoM (Blue) t)oxver sxvi|ch also ItlrllS Ol/Ihe dliller
(omparHnenu
Indicator Lights. 'Ille green liglu will be li! x_r}_:l__1_(:dispenser
is t)lugged in. The red and l)lue lighls will (}cle on and off
while lilt? (tisl)ens( r heals alld cools lhe waler. Comt)ressor
slarl is delayed u t) lo 3 mimnes,
Hot _ , Romn Temperature B, Cold I_ Water Dispenser
Buttons
Dispenser Drip Tray(WS28X10031) and Grille (WS28X10032)
O Cmnpartment Drip Tray (WS29X10029)
_Chiller Compartment. The (omt)arlmenl is imended solel) for
use ill (hilling tanned and boxed l)exerages and packaged
nont)erishables.
Cmnpartment Shelf (WS28X10028)
Drainage Cap (WSOIXIO008)
Silicon Stopper (WSOIXIO007)
-----iiiiii\ _ _......
\' (\[,i
Loading the Dispenser and Start Up
Sanitize the dispenser water tanks prior to
installing a full bottle of water for the first time
(see "Cleaning and Sanitizing the Water Tanks").
IMPORTANT"Make sure the dispenser is
unplugged with both the hot and cold power
switches (on the back of the dispenser) set to the
0 (off) position. Before placing the water bottle on
the dispenser, wash hands and wipe the top of the
bottle with a clean cloth. Avoid touching the part
of the bottle that will be in contact with the water
dispenser.
Make sure the water /evel in the top of the
dispenser is low enough to allow for proper
bottle installation. Failure to do so may cause
the dispenser to overflow
1. Peel the label lh)m the top cover of the
bottle (i[prusent). Do notremove the
entire 1)otth, cap.
2. Place the bottle on top of tile dist)enser
as shown, aligning the dispensing valve
t)robe to tile center of tile water bottle
cap. Press down umil the probe
t)enetrates the bottle cap, allowing the
bottle to rust on the sut)port collar:
3. IMPORTANT:Press both dispense buttm)s
m#il water runsfromboth taps.
4. Plug ill the dispense):
5. Set the COI,D and t lOT t)ower s_itches
(located on the top le/i rein" of the
dispenser) to the I (ml) position.
6. _llow 30 minutes fbr water to reach hot
and coM mmperatures.
Contact a local water bottle distributor to
purchase water bottles,
4
Child Safeguard
"Ihe tt()T disl)ens('r btlttOI/is equipped _dth
a chiM satbguard tl_at reduces die risk of hot
_;_mr being dispensed accidentally or t)} small
children. 'Ib dispense ware1; rotate the knob
com/terclockwise and push tl/e button ill. The
knoll will reset amomadcallx when the button
is released.
The dispenserheats water to a temperature of
approximately 190°F(88°C). Water temperatures
above 125°F(52°C) can cause severe bures or
death from scalding. Children, thedisabled and
the elderly are at highest riskof being scalded.
CAUTION:Cbildre,lsbouldbe
supervised bya parent when using this product.
Camandcleaningofthedispenser.
Cleaning the Outside Cabinet and Storage/Chiller Compartment
IMPORTANT: Set both power switches (on the
back of the dispenser) in the 0 (off) position and
unplug the water dispenser before cleaning,
"File cabin(t _lnd compartm(nt ot th(
disp(nser can b( washed wit]l mild soap and
wat_ r. Rinse thorot/gh]_ _Jth ;lear wat_ 1: Nex_r
use com//l(rcial cl(aners or abrasi e scouring
])owders.
Sweep ;IW;l_or _at:tuu/l ;ut_ dI/st ]}'ore the
conde*/s(r coils on the back of II*(/mit. Fo_
best resi/lts, use a brilsh sp( cially desigl/(d l_)r
this imrpos(. It is available at most applial_c(
s[<)l'eS.
Cleaning the Inside of the Chiller Compartment
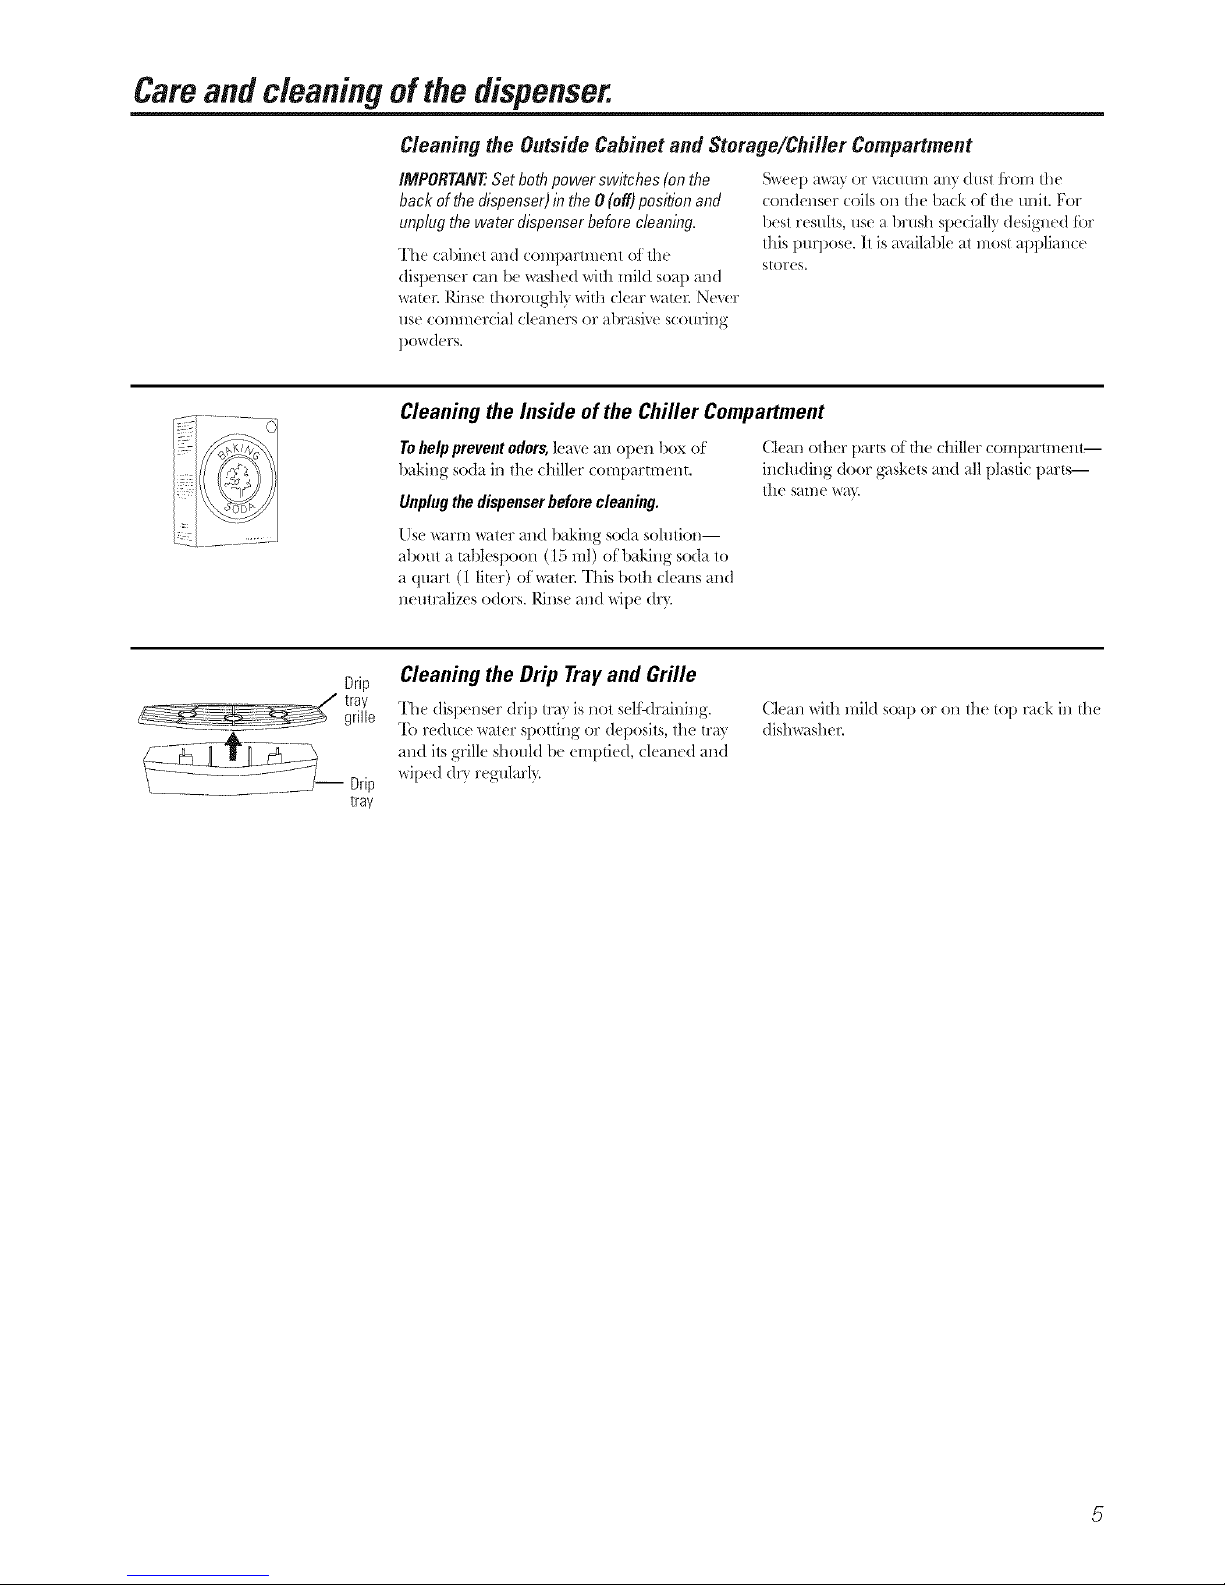
To helpprevent odors,]ea',,e a_l open box of
baki_g soda in 1he (hillel (omt)artment.
Unplug the dispenser before cleanhlg.
Clean olher parts of" the clliller compaltmenl--
ill(ludit_g door gaskets al*d all l)lasli( parts--
1he Sall/e _,_1}
Use _;irm _;iter m_(1 baki_lg soda solntion--
all()ut a t_,blespooH (1:, ml) of l)_ki_g so(t_ to
a quart (1 liter) of _v_ter. This both (learns _md
neHtralizes odors. Rinse a_(] wipe (]ry.
Drip
traygrille
Drip
tray
Cleaning the Drip Tray and Grille
The disp(_s(r drip tra} is not selJ:-(lr_dni*lg.
To re(luc( water spotting or deposits, tl_( tr;_
and its grille should l)( emplied, (:lean(d ai/d
wil)((1 (lr} r(gularl}.
(:1(a_ _i111mild so_l) or OHlh(1<)1)rack iH the
dis]lwas]ler.
Careand cleaningofthedispenser.
Draining the Dispenser
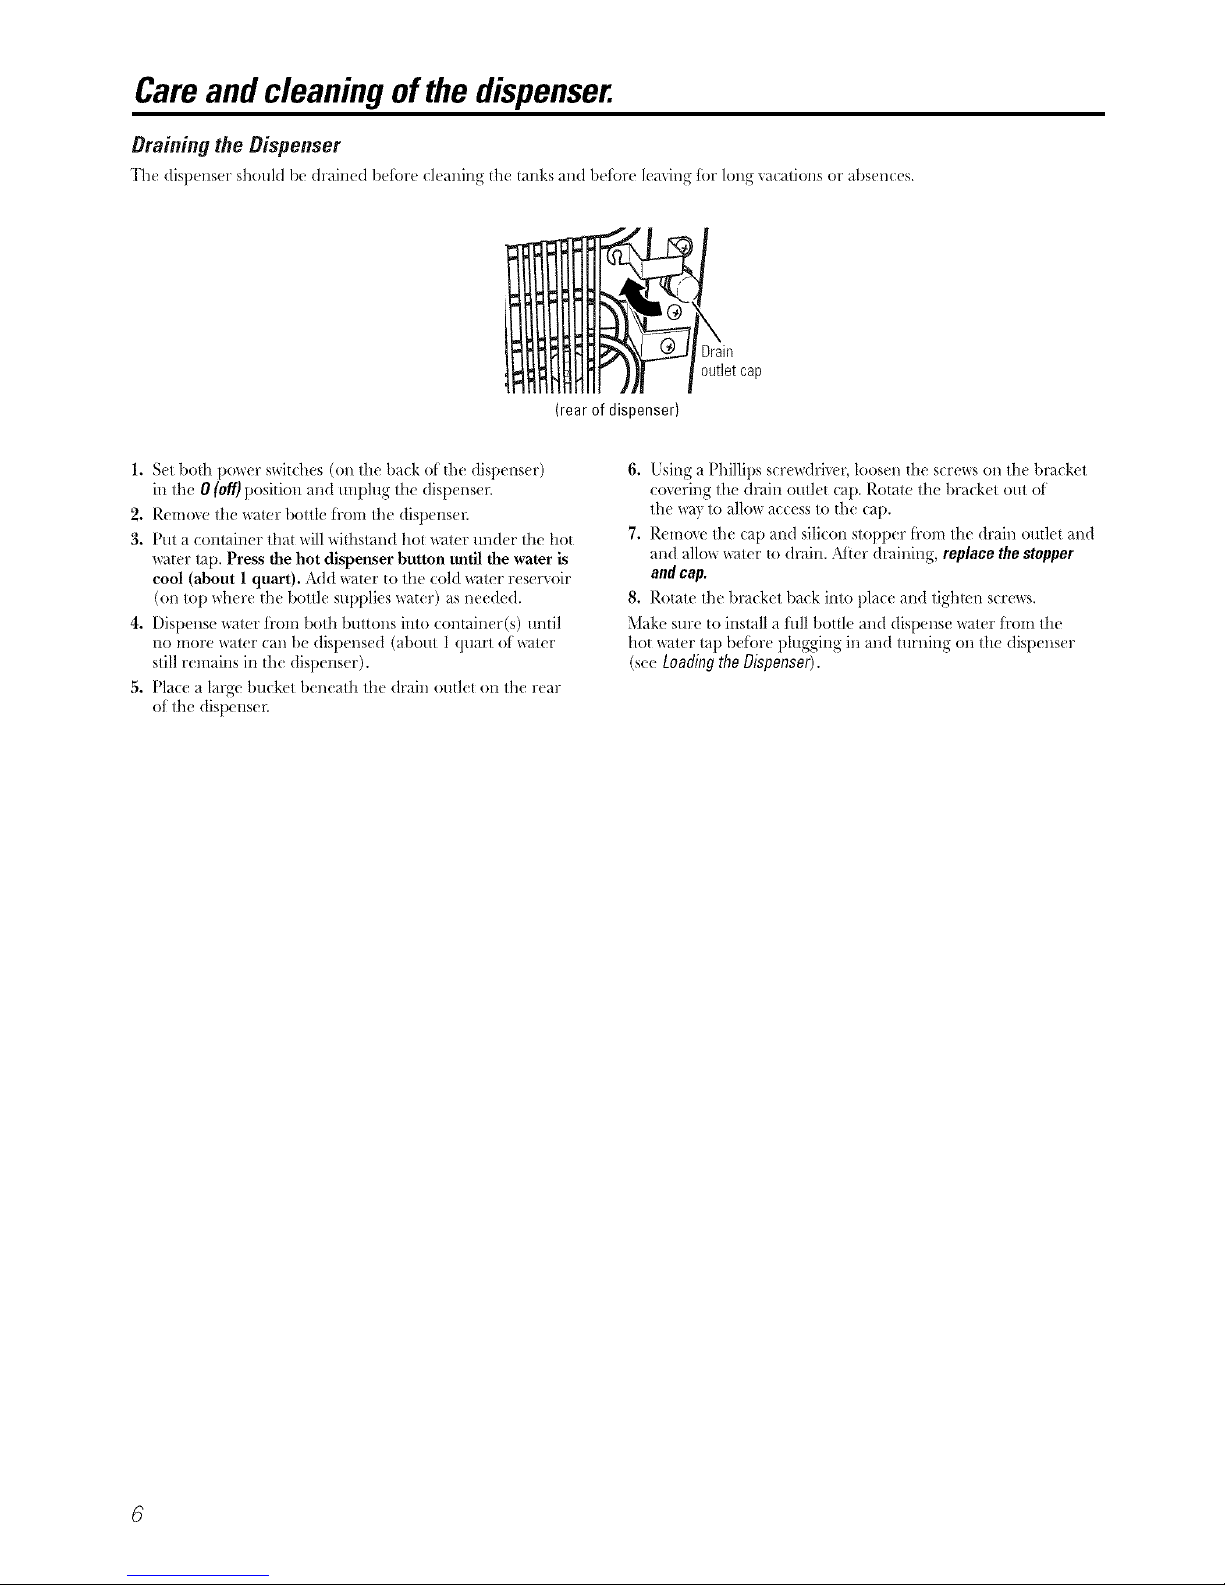
"ll/c dispens,.+rshouM bt+dr;6ued btdbr,.+*lem/iug the tanks and betbre lea i_:,gtbr long v;uations or abst'_:,*,.'s.
(rear of dispenser)
Drain
outlet cap
1. Set both pox_er switches (on tile back of the dispenser)
in tilt: 0 (off)position and unplug tilt: dispenser.
2. Remoxe tile water bottle t>om the dispensel:
3. Ptlt a container that will withstand hot water under the hot
_ater rap. Press the hot disperser button mltil the water is
cool (about 1quart). Add water to tile _old water reservoir
(on top Mlere tilt: bottle supplies _ater) as needed.
4. Dispense _ater ti'om both buttons into container(s) until
no more water (Tailbe disllensed (about I quart of _ttet"
still remains in the dispenser).
5. Place a large bucket b,.:rl,.:athtile drain outlet on the rear
of the dispenser.
6. Using a Phillips scre_driwr, loosen tile screws on tile bracket
covering tile drain outlet cap. Rotate tile bracket out of
tile _a) to allow access to tilt: cap.
7. Remo_e tilt: cap and silicon stopper f?romtile drain outlet and
and allow _ater to drain. :\[_er draining, replacethestopper
andcap.
8. Rotate the lmu ket l/a_k into pla_e and tighwn s_re_s.
Make sure to install a tull bottle and dispense water Ji'om tile
hot _ater tap befbre plugging in and turning on tile dispenser
(see I_oadingtho Disponsor).
6
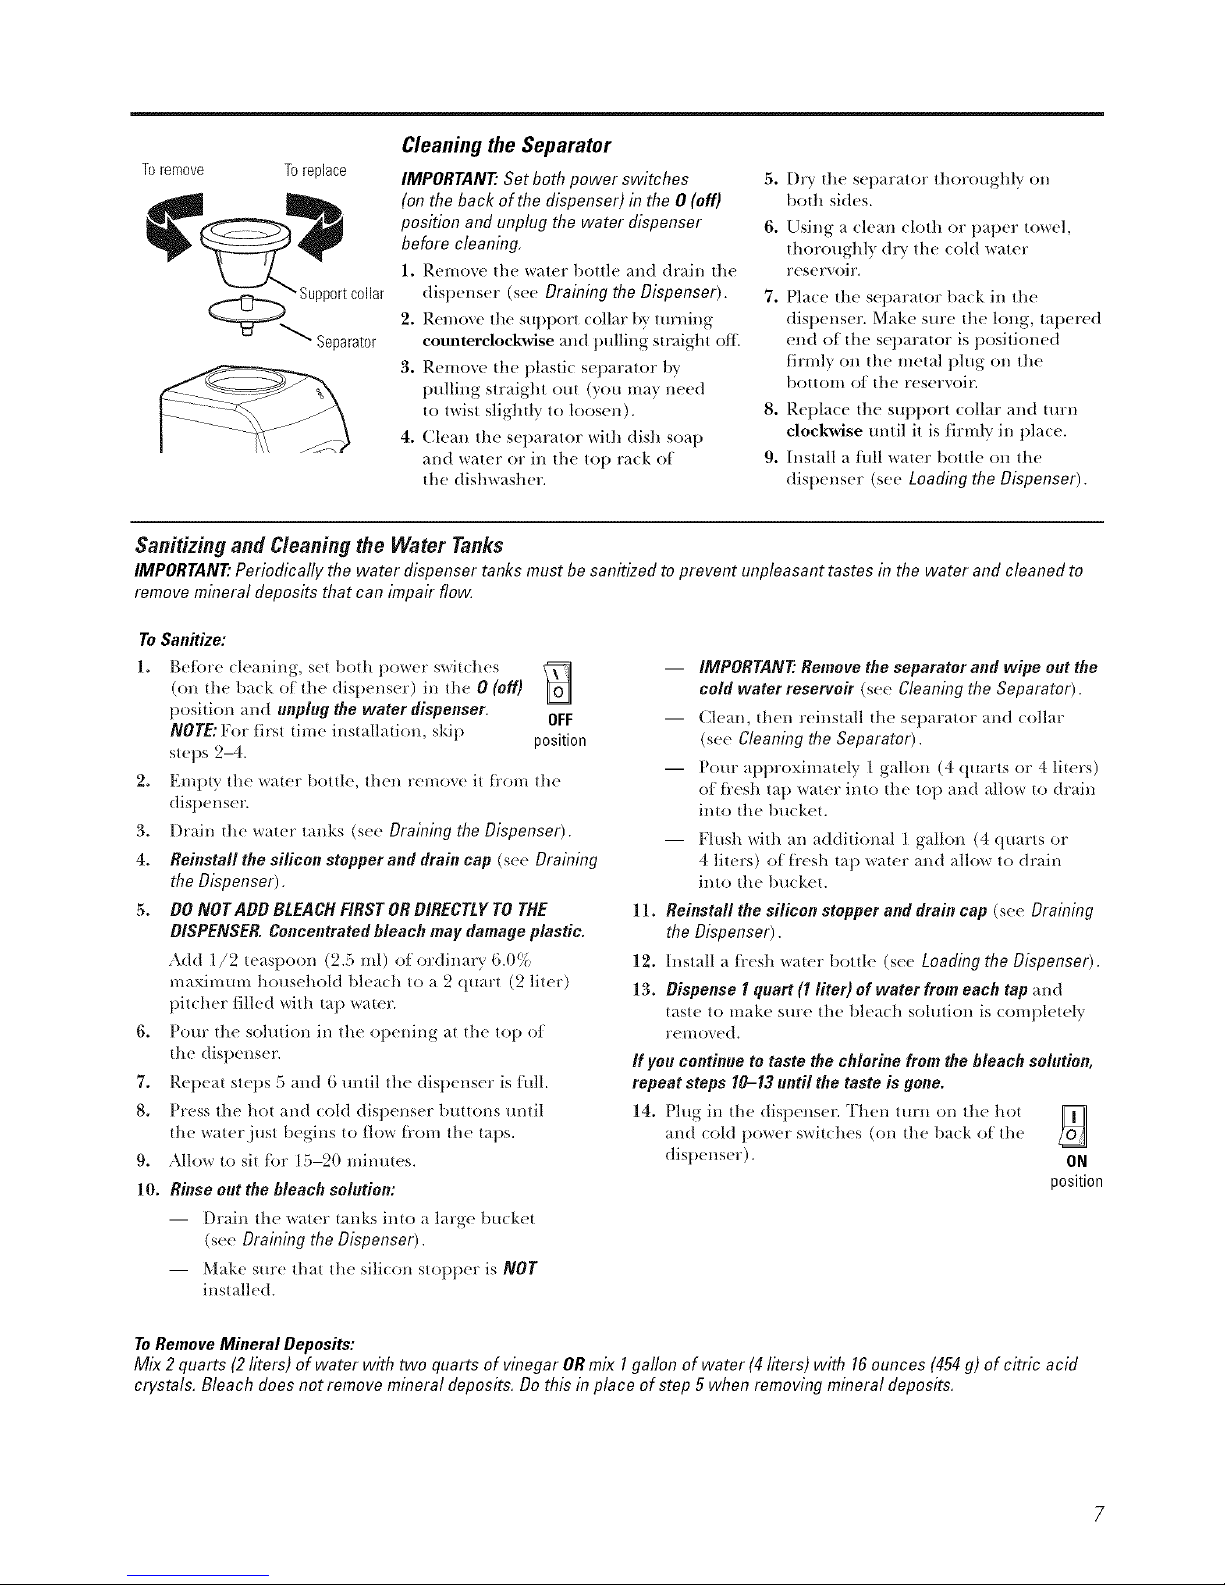
Toremove Toreplace
1°
(_ Supportcollar
Separator 2.
3.
Cleaning the Separator
IMPORTANT: Set both power switches 5.
(on the back of the dispenser) in the 0 (off)
position and unplug the water dispenser 6.
before cleaning,
I_eIllOV(' the water t/ottle 21rid drain [lie
dispenser (see Draining the Dispenser). 7.
Remove the Stlllt/ort (ollar by tllrI/illg
counterclockwise and trolling straig-]lt olt_
Remove tile plastic separator t)y
pulling straight out (you may need
t() twist slightly to loosen), 8.
4. Clean the separator with dish soap
and water or ill the top rack of 9.
the dishwasher.
D] T the separator thoroughly on
both sides.
Using a clean cloth or paper towel,
thoroughly dr} tile cold water
r(,servoir,
Place the separator back ill the
dispenser. Make sure tlle long, tapered
end of the separator is positioned
tirnfly on tile metal tllug on the
bottom of tile reservoil:
Replace the supt)ort collar and turn
clockwise mltil it is firmly ill place.
Install a flfll water bottle on the
dispenser see Loading the Dispenser).
Sanitizing and Cleaning the Water Tanks
IMPORTANT." Periodically the water dispenser tanks must be sanitized to prevent unpleasant tastes m the water and cleaned to
remove mineral de )osits that can hnpair flow
ToSanitize:
gelore cleaning, set both power switches
(on the back of the dispenser) ill tile 0 (off)
position and unplug the water dispenser.
NOTE: For lirst time instal]_tion, skip
steps 2-4.
OFF
position
2o Emply the water bottle, then remov( it l}'om tile
dispenser.
3. Drain the water tanks (see Draining the Dispenser).
4. Reinstall the silicon stopper and drain cap (see Draining
the Dispenser).
5. DO NOT ADO BLEACH FIRST ORDIRECTLY TO THE
DISPENSER. Concentrated bleach may damage plastic.
Add 1/2 teasp()()I/ (2.5 ml) elordinary' 6.0%
maximlml h/)_lsehold blea( h to a 2/]lmrt (2 liter)
I/it( her/illed with tap waIer.
6. I)our tile si)lution ii/ the oi)ening at th( top of
the dispenser.
7, Reileat steps 5 and 6 mltil the disilenser is filll.
8, ])ross the hot and cold dispenser butIons imtil
th( water just llegins to flow l]'oln tile taps.
9. Allow to sit/br 15-20 nlinutes.
10. Rinse out the bleach solution:
-- Drain the Wat(T tanks into a larg{' lm(ket
(see Draining the Dispenser).
-- Make sm'e that tile silicon stoI)p('r is NOT
installed.
-- IMPORTANT: Remove the separator and wipe out the
cold water reserve# (see Cleaning the Separator).
-- Clean, then reinstall the separator and (ollar
(s(w Cleaning the Separator).
-- Pore" aill)rilximat{'ly' 1 gallon (4 qllarts or 4 lit{'rs)
of fi'esh tail water into th_ top and allow to drain
inlo tile lmcket.
-- Fh/sh with all additional 1 gallon (4 qmu'ts or
4 lilers) ofli'esh tap water and allow to drain
into th( l/uck_ t.
11. Reinstall No silicon stopper and drain cap (see Draining
the Dispenser).
12, Install a ti'esh wa[er botth' (see Loading the Dispenser).
13. Dispense 1 quart (1 fiter) of water ffmn each tap and
tast( to mak{' sur{' the bh'a( h solmion is (om/)h'tely'
r{'lllOV{'(1,
If you continue to taste the chlorine from the bleach solution,
repeat steps 10-13 until the taste is gone.
14. Plug ill lhe dispens(r. Then Illrn oil |he ha| [_
and told I)(}_A'(r swiIches (on |he lla(k of Ill(
disI}enser)" ON
position
To Remove Mineral Deposits:
Mix 2 quarts (2 liters) of water with two quarts of vinegar OR mix I gallon of water (4 liters) with 16 ounces (454 g) of citric acid
crystals, Bleach does not remove mineral deposits, Do this in place of step 5 when removing mineral deposits,
Careand cleaningofthedispenser.
Defrosting
Defrost whenever frost on the waft of the chiller uompartrneet becomes
excessive.Never use a sharp or metallic instrument to remove frost
as it may damage the liner. Wereuornroendusiega plastic"scraper
Donot use anyekctrical device ie defroskTg yourchiller compartroent
To defrost:
iJi:P,i,movc iwms ti'om the (omparmIent.
>: Turn till' CoM (Bhu') Power swiwh tit oil and uIIplug
the (lJspenser.
ij):Put several towels iII the 1)ottom of the compartnIem
to collect waWr.
Deti'osfiIIg usually takes a tow hours, To defl'ost li_ster
keep the door open,
After defrosting:
Yi::RelII(We the wet towels and wipe tip any reniaiiiing water.
_i::Wit)e the compartnIent with a dl) cloth.
Yi::PhIg hi the unit and turn on the Cold (Blue) power switch.
Return items to the unit.
Preparing for Vacation
For long va(atioiis or abs('iI( ('s, s('[ b//th p/)w('r s_i_ch(s
(on the balk of the dispenser) to the O (off) position.
1. Unplug the water dispens(r.
2. R1mo_(' the *a;iter bottle.
3. [)rain the water tanks (so( Braining the Dispenser).
4. DU the separator th//roughly on both the top and t)//tt//m
(se_ Cleaningthe Separator).
5. I,eaxv the door of th( chiller coniparmiei_t open.
After returning from vacatio< make sure tosanitize the water
tanks before usingthe dispenser (seeCleaningand Sanitizing
the Water Tank).
Specifications
Chilling Rate: approx. 0.5 gallons (2 hwr:) l)er hol u"
Heating Rate: aItItrox. 0.8 gallons (3 lile*_) per holtr
Troubleshootingtips.
Capacity: 3 or 5 gallon boule
Power Consumption:}leaIiI/g: _0 "_'r_l_llS IllaX,
Cooling: 125 %}1|1S III}IX.
PossibleCauses What ToDo
Water has poor taste Separator needs clemfing. • See Cleaning the Separator:
or odor
Uoit needs to be smfilized. "St,(, Cleaning and Sanitizing the Water Tanks.
Water not hot enough Dispenser is tmplugged. "Ptlsh |lie ])ltlg (-Oll/t)hqel } lille 1lie otlllel.
or cold eoough The fuse is blmm/dreuit * P.eplace house ti_se or resel lit(" hi)use cJrcuil breaker:
breaker is tripped. • It 1oo man) iwms ;it'(- plugged bile a single circuil,
I/love ,q()tl/e ileitis lo a difl('I'enl circuh.
All the water in the water tank "_ai! _40rain tiles R)r wawr lo heal or cool,
has been used.
Temperature limiter tripped. "Sol lhe hol and toM power swilches (on lhe back of lhe
dispenser) lo the 0 (off)position. Wail lix(' minuws; lhcn set
lhe switches lo lhe I (on) posJtio/l, _'aJl 240///J/ltlleS /ill" walcr
lo heal or cool,
Water dispenser does Empty water bottle. "P, eplace _dl]t a I/('_'_rbollle (/I_Ara|('r.
not work--No water flow
Mineral deposits dogging tanks. • See Care and Cleaning.
Cold water button C_liller door has been left open. "(:lose chiller do/)r.
does ootdispense Ice buildup blocking water flow. • Turn off toM NOW(q"swilch overllJgh| alt0 flip 1)a(-k Oil
in lhe morning,
Waterdispenserleaks (_ack or phi hole ha bottle. "Replace wilh a l/CW botlle of water.
from the outside
Compressor does not Normal Operation---Compressor "Wail tor tip l/) 3 minules lor lit(" conq)ressor l/) slarl.
start when coldpower start is delayed by up to 3 minute.s
switch/blue light is on to prolong die compressor life.
8
Possible Causes What ToDo
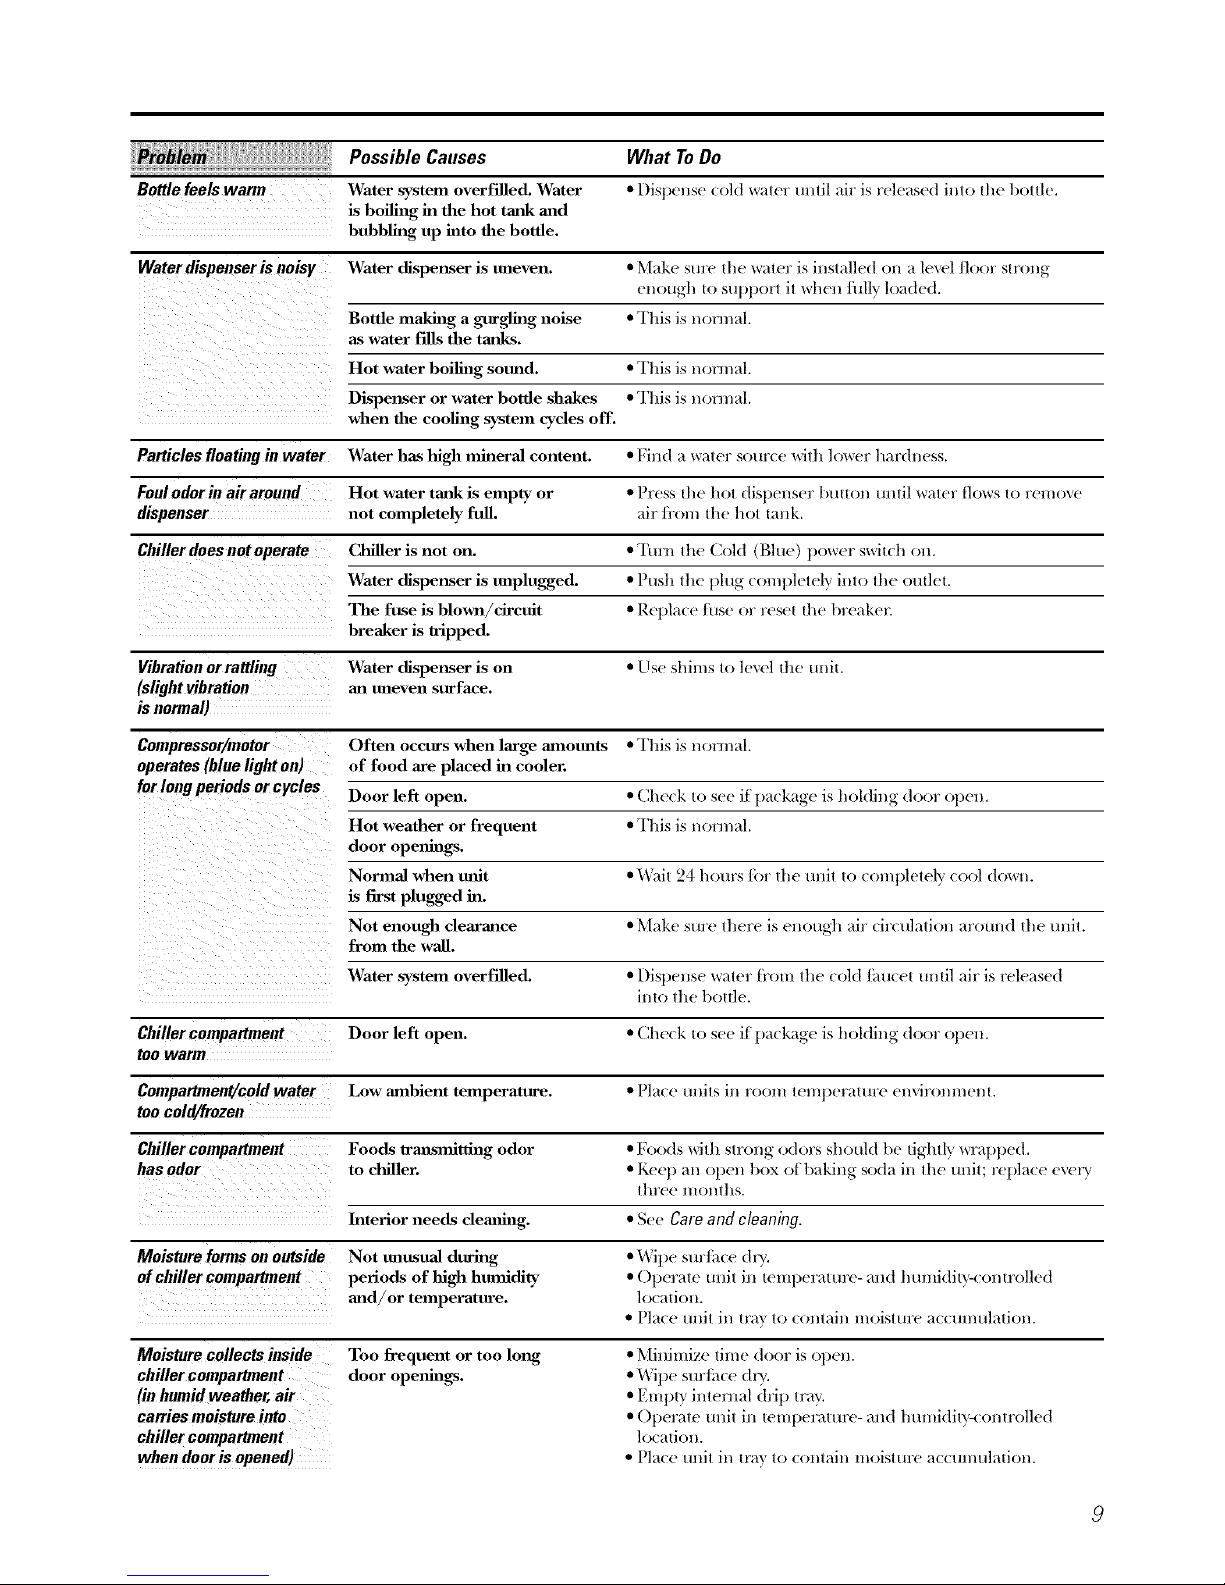
Bottle feels warm Water system overf'flled. Water • I)ist)ellse (old x,'¢_||e]("mllil air is released iallo the 1)oltlc,
is boiling in the hot tmlk and
bubbling up hlto the bottle.
Water dispenser is noisy Water dispex_ser is tmeven. • Make sm'c tlae x_r_l_l_is h_slallcd on a kvel tloor strong
cnotlgh to siq)porl il _vhell ttflly loaded.
Botde makhlg a gurgling noise •This is normal.
as water fills the tatfl(s.
Hot water boiling sound. • T}fis is normal.
Dispeuser or water bottle shakes •This is normal,
when die cooling system cycles off.
Particles floating in water Water has high mineral content. • Fiald a vca|el _SO[]F(C_vJ|h ]ov_rCFhardness,
Foul odorin airaroued Hot water tmlk is empty or • Press the hol dispenser btmon tmfil wa|cl" t]()_rs t() ['_]_()V_
dispenser not completely full. air flora the hol Iaalk.
Chiller does not operate CaViller is not on. • _I![]]'l) |he (',old (t_hle) po_rel" swil(h o11.
Water dispenser is unplugged. • Push lhe plug complclely iron lhe outlet.
The fuse is blown/circuit • Ret)la(c hlsc or reset the lweakc_:
breaker is o*ipped.
Vibration or rattling Water dispenser is on • List shims 1(_,love] lhc tlnil.
(slight vibration an nneven surface.
is normal)
Compressor/motor Often occurs when large amounts •This is normal.
operates (blue light on) of food are placed hi cooler.
forlongperiods orcycles Door left open. • (_he(:k to scc i["package is hol(lJI_g door ot)eJL
Hot weather or frequent • _I'hJs iS nol'lnal,
door openhlgs.
is first plugged hi.
Not enough clearance • Make sure lherc is ellotlgh air circtflafi(m arotm(l the tUlJl.
from die wall.
Water system overf'flled. • I)ist)cllse _r_" _i'()_l 1]_ ( ()1(t t_t]( _t tmfil air is released
into lhc l)olflc.
Chillercompartment Door left open. • Check to scc i[ package is holdh_g door ot)elL
tOO warm
Compartment/cold water Low ambient temperature. • Place IlllJls ill l'OOlll lelnpcl'alul'e cnvil'onl//cnl.
too cold/frozen
Chiller compartment Foods lrmasmitdng odor • Foods _vi|h S|FOng o(loFs sho k be Jgh 13 _%rl"_t t _(
basodor to chiller. • Keep zm ot)eal box ofl)akialg soda in lhe IlllJl; replace cvery
lhree monlhs.
Interior needs clemlhlg. • See Care and cleaning.
Moisture forms on outside Not unusual durh_g •l_Jpc surthce dry.
of chiller compartmen t periods of lfigh hmnidity • ()t)eralc tnlil ill Ieml)crature-mid htmfidib'_ (mlrollcd
mid/or temperature. ]o(afiolL
• Place mill in tr_9 lo (:(ml_fin Inoisltu'c _lc(:tu//tflatJon.
Moisture collects inside
chiller compartment
(in humid weather, air
carries moisture into
chiller compartment
when door is opened)
Too frequent or too long,
door openhl_.
• Minimize time door is open.
• Wipe surlhce dry,
• Empl? internal drip truly,
• Operate tmfi ill tempcramru-and Immidil}-(ontrollcd
location.
• Pla(e unit in tr_} to (ontaJn moisture a(( umuladon.
 Loading...