

GE Profile Arctica CustomStyle PSW26PSRSS, Profile Arctica PSW26MSR, Profile Arctica PSW26MSRSS Dimension Manual
TM
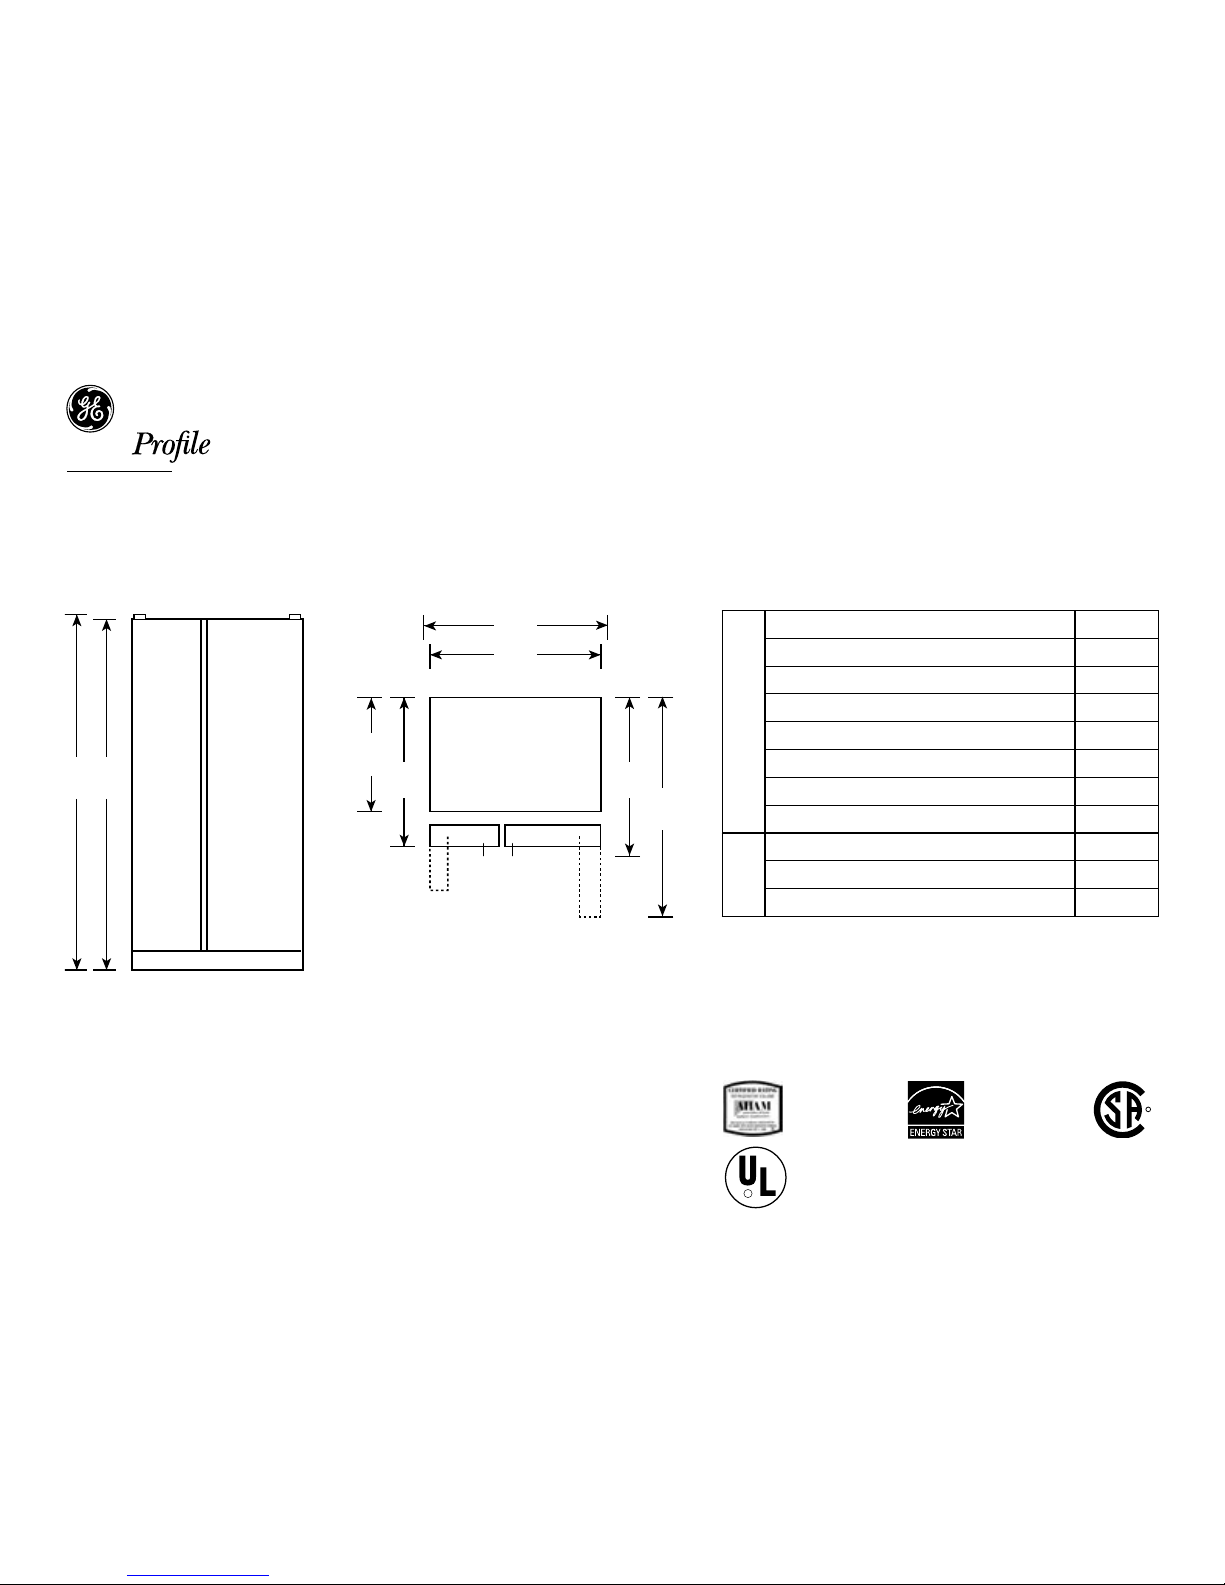
Dimensions (in inches)
"94 SxS Refer
A
Top View
G
D
C
F
B
E
H
**When cap is removed: 69-1/4".
**Width including caps is 36-3/16".
† Water hook-up fits in back air clearance when calculating installation depth.
If installed against a wall, allow clearance of 14-3/16" on freezer side to
remove ice bin.
To remove fresh food pans, remove door bins.
Clearance required to remove fresh food full-size pan without disassembling:
18-15/16".
Plus, allow additional space for any necessary leveling adjustments.
Overall
Dimensions
Height to top of hinge (in.) A
70-3/4*
Height to top of case (in.) B
68-3/4
Case depth without door (in.) C
†
28
Case depth less door handle (in.) D
†
32-1/4
Case depth with door handle (in.) E
†
34-11/16
Depth with fresh food door open 90° (in.) F
†
50-4/7
Width (in.) G
36**
Width with door open 90° with door handle (in.) H
36-1/4
Air
Clearances
Each side (in.)
1/8
Top (in.)
1
Back (in.)
1
R
Listed by
Underwriters
Laboratories
For answers to your Monogram,® GE Profile™ or
GE® appliance questions, visit our website at
GEAppliances.com or call
GE Answer Center® service, 800.626.2000.
R
Total volume and shelf
area are calculated by
the Association of Home
Appliance Manufacturers’
standards.
As an ENERGY STAR®
partner, GE has determined
that this product meets the
ENERGY STAR guidelines
for energy efficiency.
PSW26MSR – GE Profile Arctica® ENERGY STAR® 25.6 Cu. Ft. Stainless-Wrapped
Side-By-Side Refrigerator with Dispenser
Specification Revised 7/05
210399
TM
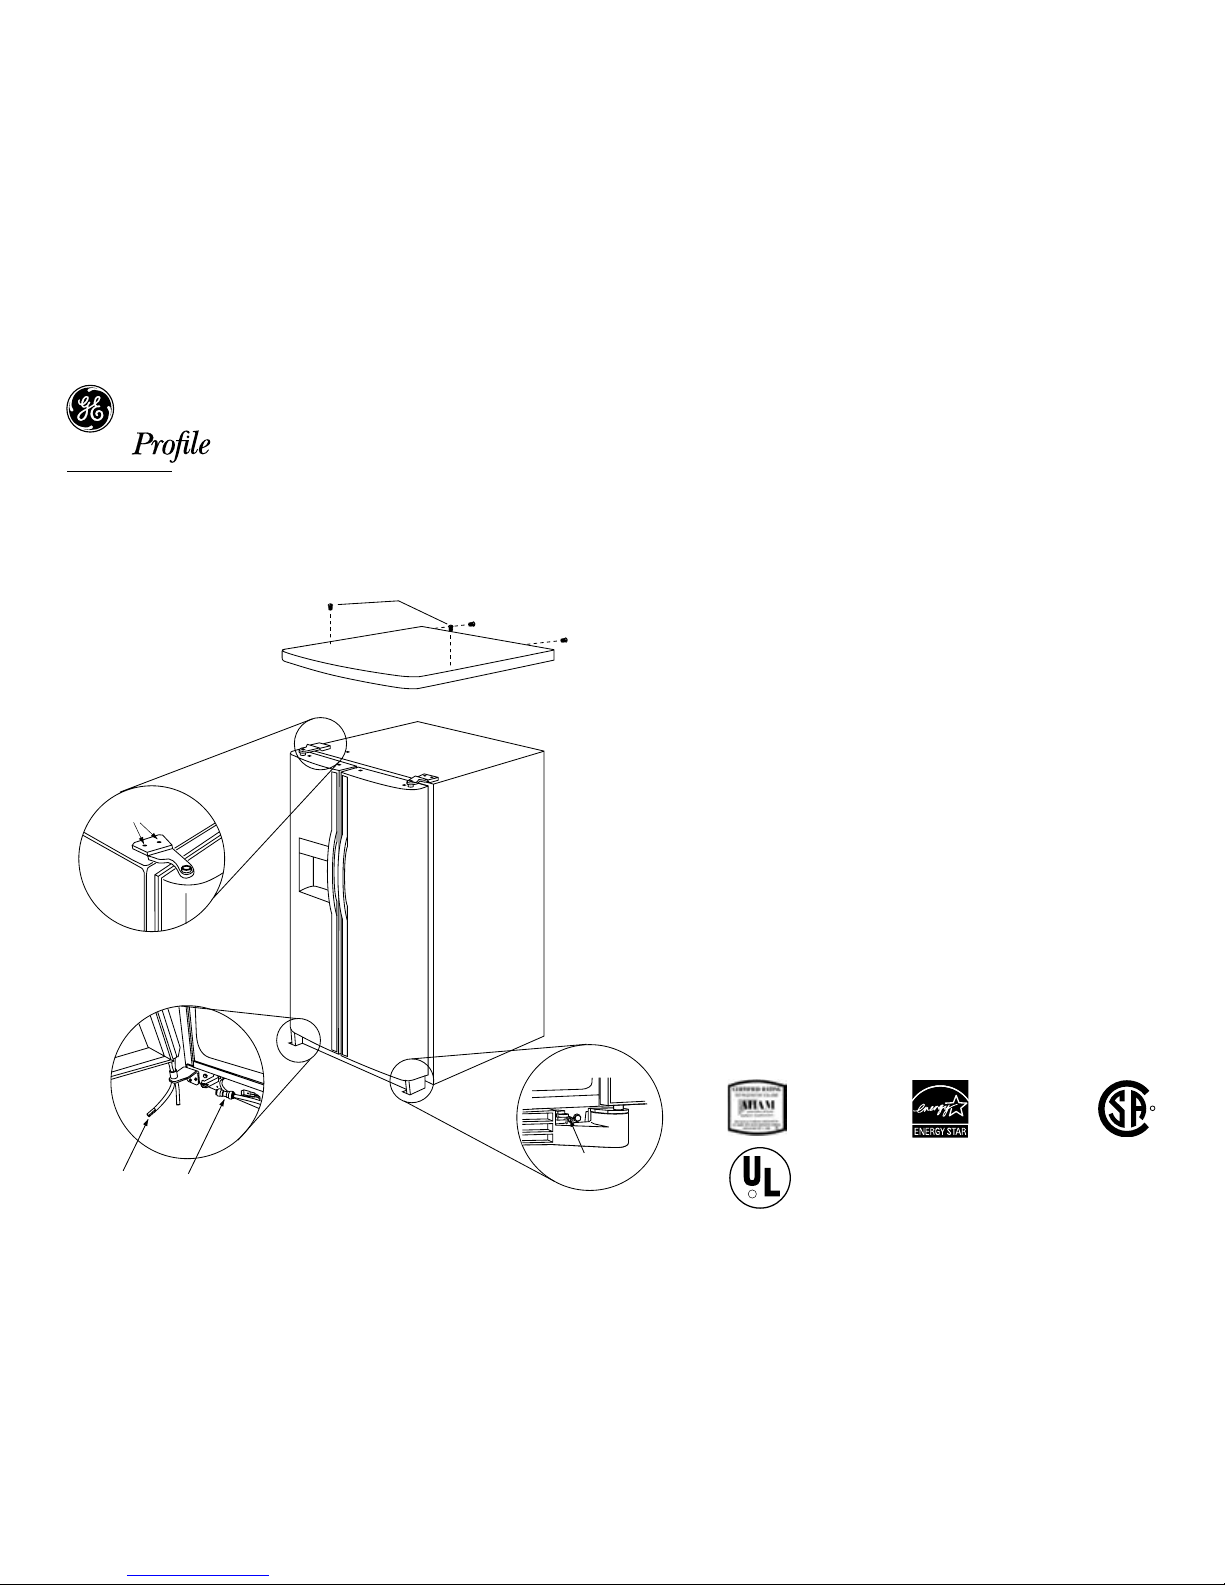
Water Line Coupler
1.
Hinge Screws
Wire Harness
Toekick Screw
4.
3.
2.
To Remove Top Cap and Doors on PSW26MSR
Step 1: Locate and remove two Phillips head screws on the top of
the refrigerator. Remove two screws, one on each side at
the rear of the top cap. Lif t off and remove top cap.
Step 2 : Open both doors. Remove one screw on each side of the
toekick. Pull for ward to remove toekick.
Step 3 : On the freezer door, disconnect water line coupler by
pushing against the collar on the lef t side. Disconnect
wire harness.
Step 4 : Use a Torx T-20 screwdriver to remove 2 screws holding the
top hinge. Carefully remove hinge while supporting door.
Lif t door up and off bottom hinge. Remove fresh food door in
the same manner. Note: Do not remove bottom hinges ! Door
alignment will be dif ficult if bottom hinges areremoved.
Step 5 : Place refrigerator onto a hand truck, upright and against one
side. Move refrigerator to the installation location.
Reinstall Doors, Top Cap
Step 6 : Carefully lower doors onto bot tom hinges. Be sure to route
the tubing and electrical connector through the bottom
hinge. Reinstall top hinges.
Step 7: Place cap over the top of the refrigerator. Reinstall the
original screws in the top and back of the cap.
Step 8 : Reconnect the wiring harness and waterline.
R
Listed by
Underwriters
Laboratories
For answers to your Monogram,® GE Profile™ or
GE® appliance questions, visit our website at
GEAppliances.com or call
GE Answer Center® service, 800.626.2000.
R
Total volume and shelf
area are calculated by
the Association of Home
Appliance Manufacturers’
standards.
As an ENERGY STAR®
partner, GE has determined
that this product meets the
ENERGY STAR guidelines
for energy efficiency.
PSW26MSR – GE Profile Arctica® ENERGY STAR® 25.6 Cu. Ft. Stainless-Wrapped
Side-By-Side Refrigerator with Dispenser
Specification Revised 7/05
210399
 Loading...