

GE PT956WM3WW, PT956SM4SS, PT956CM3CC, PT956BM3BB, PT916WM2WW Owner’s Manual
...
GEPpp/iances.com
Safety Instructions ......... 2-4
©
"m
©
Operating Instructions
Clock and Timer .............. 8
Control i,ockout .............. 8
Controls ..................... 5
Convection .............. 12-15
Oven ..................... 6, 7
Probe ................... 10, 14
Proofing .................... 11
Sabbath Feature ............. 21
Self:Cleaning Oven ........ 17, 18
Special Features .......... 19, 20
Thermostat ................. 16
Timed Baking
and Roasting .............. 9, 15
Warming ................... 11
Care and Cleaning
Cleaning Oven Door ......... 23
Control Panel ............... 24
Lift-Off Oven Door ........... 23
Light Bulb .................. 22
Probe ...................... 23
Racks ...................... 24
Removing Packaging Tape ..... 22
Stainless Steel Surfaces ........ 24
PK916-2 7" Single Wa,ll Oven
PK956-2 7" Double Wall Oven
PT916-30" Single Wall Oven
PT956-30" Double Wall Oven
Troubleshooting Tips ..... 25-27
Accessories ................. 28
Consumer Support
Consumer Support ........... 32
Warranty ................... 31
Writethemodelandserial
numbershere:
Model #
Serial #
You can find them on a label
on the flont of the oven behind
the oven door on single oven models,
or the flont of the lower oven behind
the oven door on double oven models.
Printedon
RecycledPaper
49-80599 08-09Jfl
IMPORTANTSAFETYINFORMATION.
READALLINSTRUCTIONSBEFOREUSING.
ttL '!
For your safety, the information in this manual must be foflowed to minimize the risk of fire
or explosion, electric shock, or to prevent property damage, personal injury, or loss of life.
IMPORTANTSAFETYNOtiCE
The California Safe Drinking Water and Toxic Enforcement Act requires the Governor of California
topublish a list of substances known to the state to cause cancer, birth defects or other reproductive
harm, and requires businesses to warn customers ofpotential exposure to such substances.
Thefiberglass insulation in self-clean ovens gives off a very smafi amount of carbon monoxide during
the cleaning cycle. Exposure can be minimized by venting with an open window or using a ventilation
fan or hood.
SAFETYPRECAUtiONS
When using electrical appliances, basic safety precautions should be followed, including the
following:
}} Use this appliance only fbr its intended
purpose as described in this Owner's
Manual.
Be sure your appliance is properly
installed and grounded by a qualified
technician in accordance with the
prox,ided installation instructions.
iii}i}}li_
Do not attempt to repair or replace any
part of your oven unless it is specifically
recommended in this manual. All other
ser_,icing should be referred to a qualified
technician.
_:_Be sure the oven is securely installed
in a cabinet that is firmly attached to the
house structure. Never allow anyone m
climb, sit, stand or hang on the oven door.
}}Never leave the oven door open when you
are not watching the oven.
}}Always keep combustible wall covering,
curtains or drapes a sate distance from
your oven.
}}Always keep dish towels, dishcloths, pot
holders and other linens a s_e distance
flom your oven.
iii}i}i
Have the installer show you the location
of the circuit breaker or rise. Mark it for
easy reference.
iii}i}}li_
Befbre perfbrming any ser_;ice, disconnect
the oven power supply at the household
distribution panel by remox,ing the filse
or switching off the circuit breaker.
iii}i}}li_
Do not leave children alone--children
should not be left alone or unattended
in an area where an appliance is in use.
They should never be allowed to sit or
stand on any part of the appliance.
iii}i}}li_
Do not allow anyone to climb, stand
or hang on the door. They could damage
the oven, or cause severe personal in,jury.
2
}}Always keep wooden and plastic utensils
and canned fbod a s_e distance away
flom your oven.
}} Teach children not to play with the
controls or any other part of the oven.
}}Large scratches or impacts to glass doors
(:anlead to broken or shattered glass.
}}Do not store flammable materials in
an oven.
ZiLCAUTION: temsofinterestto
iii}i}i
children should not be stored in cabinets
above an oven; children climbing on the
oven to reach items could be seriously
injured.
,A I
SAFETYPRECAUTIONS
6EPpp/iances.com
iiiil}i
Never wear loose-.fitting or han_ng
garments while using the appliance. Be
careful when reaching for items stored in
cabinets over the oven. Flammable material
could be ignited if brought in contact with
hot surfhces or heating elements and may
cause severe burns.
iii}i}i
Use only dry pot holders--moist or damp
pot holders on hot surfaces may result in
bums from smam. Do not let pot holders
much hot heating elements. Do not use
a towel or other bulky cloth.
iii}i}}li_
For your s_ety, never use your appliance
fbr warming or heating the room.
iii}i}}li_
Do not let cooking g,ease or other
flammable materials accumulate in or
near the oven.
}}Do not use water on grease fires.
Never pick tip a flaming pan. Turn
the controls ore
Flame in the oven can be smothered }}
completely by closing the oven door
and turning the oven off or by using a
multi-purpose dry chemical or fbam-type
fire extinguisher.
iii}i}i
Do not touch the heating elements or the
interior surfhce of the oven. These surfhces
may be hot enough to burn even though
they are dark in color. During and after
use, do not touch, or let clothing or other }}
flammable materials contact any interior
area of the oven; allow sutJ{icient time R)r
cooling first.
Pomntially hot surfaces include oven
vent openings, surfaces near the openings,
crevices around the oven door, the edges
of the _dndow and metal trim parts above
the door.
REMEMBER:The inside surface of the oven
may be hot when the door is opened.
iii}i}}li_
Never place cooking utensils or any other
items on the oven floor. There is a heating
element beneath the oven floor. Placing
items on the oven floor may cause the
oven to overheat, resulting in damage
u) the oven and risk of damage or fire
to cabinets.
iii}i}}li_
Never lemre,jars or cans of fat drippings in
or near your oven.
iii}i}}li_
Do not store or use combustible materials,
gasoline or other flammable vapors and
liquids in the x,icinity of this or any other
appliance.
iii}i}}li_
Stand away from the oven when opening
the oven door. Hot air or steam which
escapes can cruise burns to hands, face
and/or eyes.
iii}i}}li_
Do not heat unopened fbod containers.
Pressure could build tip and the container
could burst, causing an in.jury.
iii}i}i
Keep the oven vent unobstructed.
iii}i}i
Keep the oven flee flom grease buildup.
iii}i}i
Place the oven rack in the desired position
while the oven is cool. If racks must be
handled when hot, do not let pot holder
contact the heating elements.
When using cooking or roasting bags in the
oven, fbllow the manufhcmrer's directions.
}}
Pulling out the rack to the stop-lock is a
convenience in lifting heaxT foods. It is also
a precaution against burns flom touching
hot surfhces of the door or oven walls.
}}
Do not use the oven to dry newspapers.
R overheated, they can catch on fire.
Do not use the oven for a storage area.
Items stored in an oven can ignite.
}}{
Do not leave paper products, cooking
utensils or fbod in the oven when not
in use.
iii}i}i
After broiling, always take any broiler
pan out of the oven and clean it. i_eftover
g,ease in a broiler pan can catch fire next
time you use the pan.
iii}i}}li_
Clean only parts listed in this Owner's
Manual.
iii}i}}li_
Do not use aluminum fbil to line
oven bottoms, except as suggested in this
manual. Improper installation of
aluminum foil may result in a risk of
electric shock
or fire.
3
IMPORTANTSAFETYINFORMATION.
READALLINSTRUCTIONSBEFOREUSING.
COOKMEATANDPOULTRYTHOROUGHLY...
Cookmeatandpoultrythoroughly--meat to at leastanINTERNALtemperatureof 160°Fandpoultry
toat least an INTERNALtemperatureof 180°ECookingto thesetemperaturesusuallyprotectsagainst
foodbomeillness.
SELF-CLEANINGOVEN
_:_Do not clean the door gasket. The door
gasket is essential for a good seal. Care
should be taken not m rob, damage or
move the gasket.
_:_Do not use oven cleaners. No commercial
oven cleaner or oven liner protective
coating of any kind should be used in
or around any part of the oven. Resi&m
flom oven cleaners will damage the inside
of the oven when the self:clean cycle is
used.
}} Before self:cleaning the oven, remove
the probe and any broiler pan, grid and
other cookware.
[} Be sure to wipe up excess spillage before
starting the selfk:leaning operation.
}} If the self:cleaning mode malfimctions,
turn the oven off and disconnect the power
supply. Have it ser_,iced by a qualified
technician.
READANDFOLLOWTHISSAFETYINFORMATIONCAREFULLY.
SAVETHESEINSTRUCTIONS
4

Usingtheovencontrols.
(Throughout this manual, features and appearance may vary from your model,) GEApp/iances.com
" r-qr-qr-qEZ]Fq
Double oven control shown,
OvenControl,ClockandTimerFeaturesandSettings
Bake Pad 0
Press to select die bake fimcdon.
BroilHi/LoPad
Press to select file broil fimcdon.
Convection Bake Pad @
Press to select baking with the convection
flmcfion.
O Convection Roast Pad
Press to select roasting with the convection
flmcdon.
Start Pad
Must be pressed to start any cooking
or cleaning flmcfion.
0 Display
Shows file time of day, oven temperatme,
whefller file oven is in file bake, broil or
selfZcleaning mode and the times set ffw
file timer or automatic oven operations.
If "F- and a numberor letter"flashinthedisplay
and theevencontrol signals, thisindicatesa function
errorcode.PresstheC/ear/Offpad,Allowtheoven
tocoolforonehourPuttheovenbackintooperation.
If thefunctionerrorcoderepeats,disconnectthepower
totheovenandcarlforservice.
If yourovenwasset fora timed ovenoperation
andapower outageoccurred, theclockandall
programmedfunctionsmustbereset.
Thetime of day will flashin the display whenthere
hasbeena power outage.
Serf Clean Std/Low Pad
Press to select self=cleaning fimcfion.
See the Usingtheself-cleaningoven section.
Delay Start Pad
Use akmg with CookingTimeor Self Clean
Std/Low pads to set the oven to start and
stop automatically at a time you set.
Cooking -time Pad
Press and then press the number pads to set
file amount of time you want your food to
cook. The oven will shut off automatically
when file cooking time has run out, unless
file Cook and Hold feature was set.
0ear/OffPad
Press to cancel ALL oven operations except
the clock and time_:
Clock Pad
Press before setting the clock.
Number Pads
0
Use to set any fimcdon requiring numbe_
such as the time of day on the clock, the
fime_; the oven mmperamre, the internal
food temperature, the start time and
length of operation for timed baking
and self cleaning.
Kitchen timer On/Off Pad
0
Press to select the timer featme.
Probe Pad
0
Press when using the probe to cook food.
Warm Pad
0
Press to keep hot, cooked foods warm.
Proof Pad
0
Press to select a warn1 environment useflfl
for rising yeast-leavened products.
OvenLight On/Off Pad
Press to turn the oven light on or off_
5
Usingtheoven.
Toavoid possible bums
NOTE:A cooling fan may
automatically turn on and off to
cool internal parts, This is normal
and the fan may continue to run
even after the oven is turned off
placetheracks in the desiredpositionbeforeyouturn theovenon.
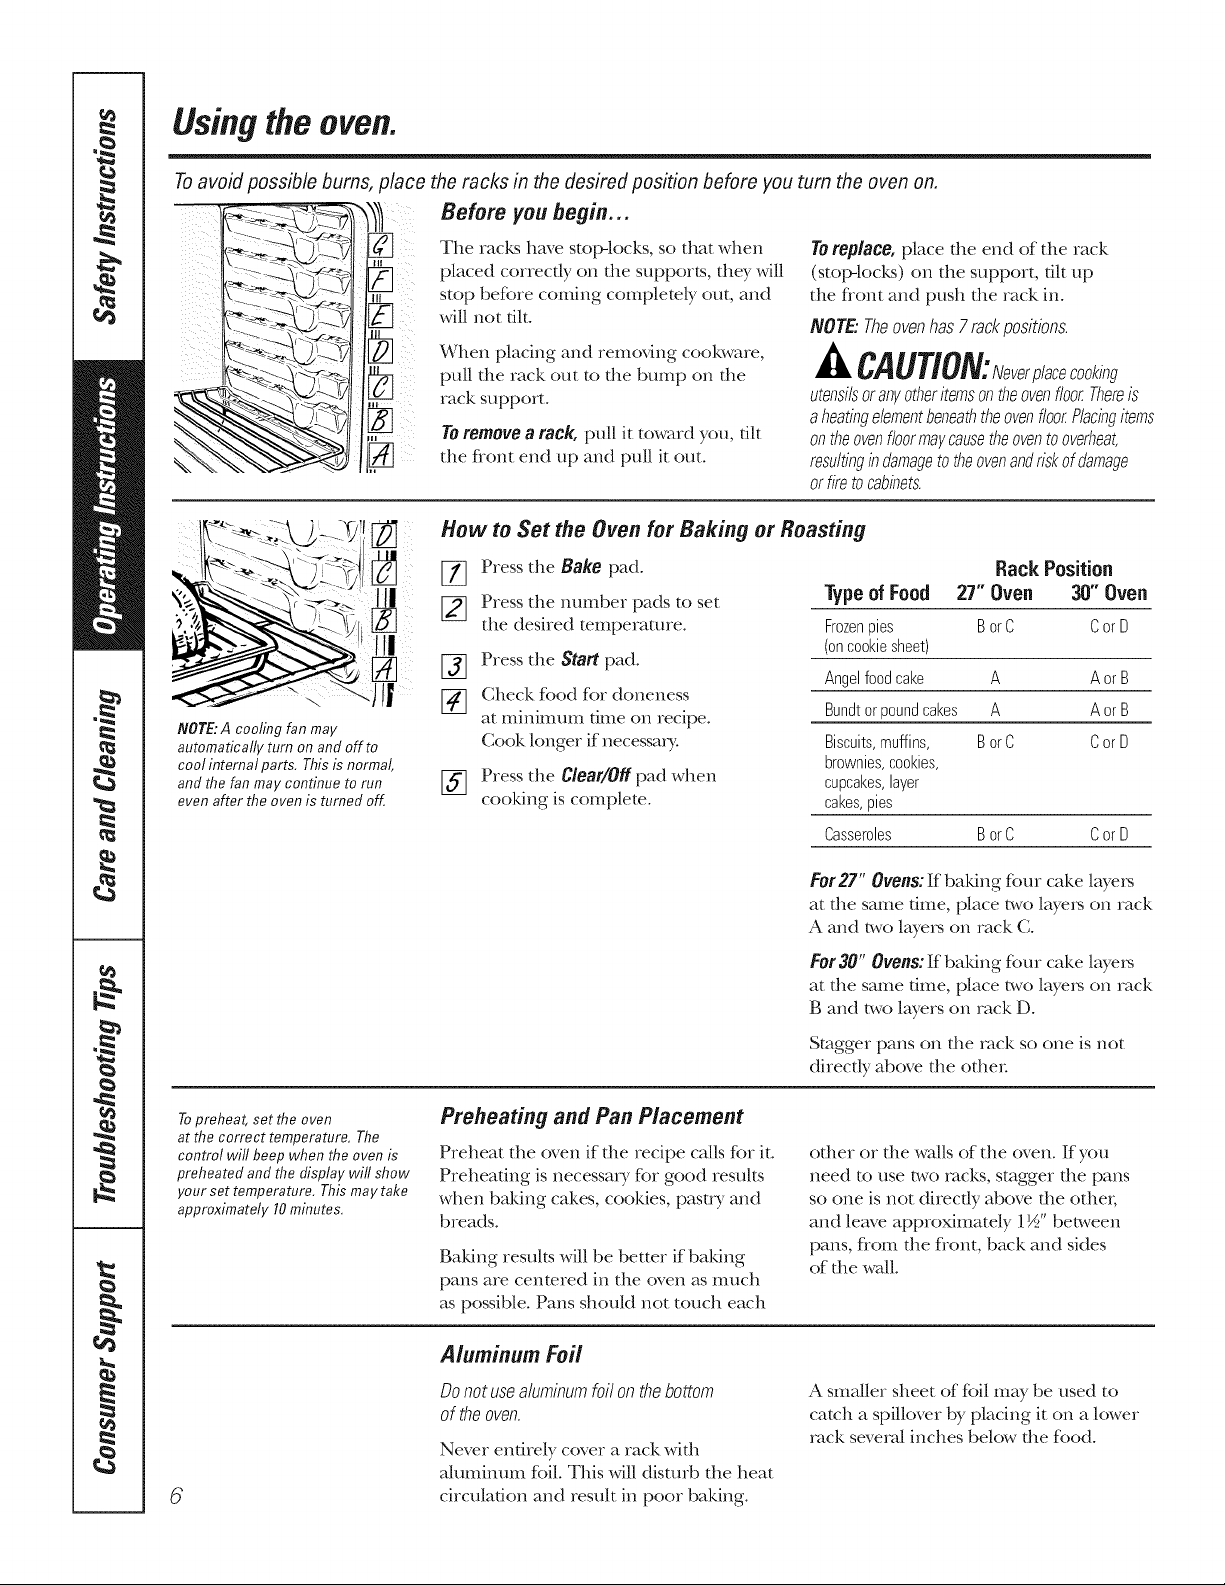
Before you begin,.,
The racks have stop-locks, so that when
fl
placed correctly on die supports, d]ey will
stop before coming completely out, and
will not flit.
When placing and removing cookware,
pull the rack out to the bump on the
rack support.
Toremove a rack, pull it toward you, flit
the flont end up and pull it out.
Toreplace, place die end of the rack
(stoi>locks) on the support, flit up
the f]ont and push the rock in.
NOTE"Theovenhas7rackpositions
CAUTlON:Never,lacecooking
utensilsoranyotheritemsontheovenfloorThereis
aheatingelementbeneaththeovenfloorPlacingitems
ontheovenfloormaycausetheoventooverheat,
resultingindamagetotheovenandriskofdamage
orfiretocabinets.
How to Set the Oven for Baking or Roasting
[_ Press the Bake pad.
[_ Press tlle number pads to set
the desired temperature.
_] Press the Start pad.
Check food for doneness
at minimum flme on recipe.
Cook longer if i]ecessai),:
[_ Press the Clear/Off pad when
cooking is complete.
TypeofFood 27" Oven 30"Oven
Frozenpies BorC CorD
(oncookiesheet)
Angelfoodcake A Aor B
Bundtorpoundcakes A Aor B
Biscuits,muffins, BorC CorU
brownies,cookies,
cupcakes,layer
cakes,pies
Casseroles BorC CorD
Rack Position
Topreheat, set the oven
at the correct temperature, The
control wifl beep when the oven is
preheated and the display wifl show
your set temperature, This may take
approximately 10minutes.
6
Preheating and Pan Placement
Preheat the oven if die recipe calls for it.
Preheaflng is necessa_y for good results
when baking cakes, cookies, pasu T and
breads.
Baking results will be better if baking
pans are centered in the oven as much
as possible. Pans shoukt not touch each
Aluminum Foil
Donot usealuminumfoil on the bottom
of the oven
Never entirely cover a rack wid]
aluminum foil. This will disturb the heat
circulaflon and result in poor baking.
For27" Ovens: If baking four cake layet_
at the same flme, place two laye,_ on rack
A and two laye_ on rack C.
For30" Ovens: If baldng four cake layet_
at die same flme, place two laye,_ on rack
B and two layers on rack D.
Stagger pans on the rack so one is not
direcdy above the other
odler or die wallsof the oven. If you
need to use two racks, stagger tlle pans
so one is not directly above the othe_;
and leave approximately 1½"between
pans, fiom the f?ont, back and sides
of the waU.
A smaller sheet of foil may be used to
catch a spillover by placing it on a lower
rack several inches below the food.
GEApp/iances.com
_2
ii_iiiii
Closethe door,Alwaysbroil with
the doorclosed,
If your oven is connected to 208
volts, rare steaks maybe broiled by
preheating the broiler and positioning
the ovenrack oneposition higher,
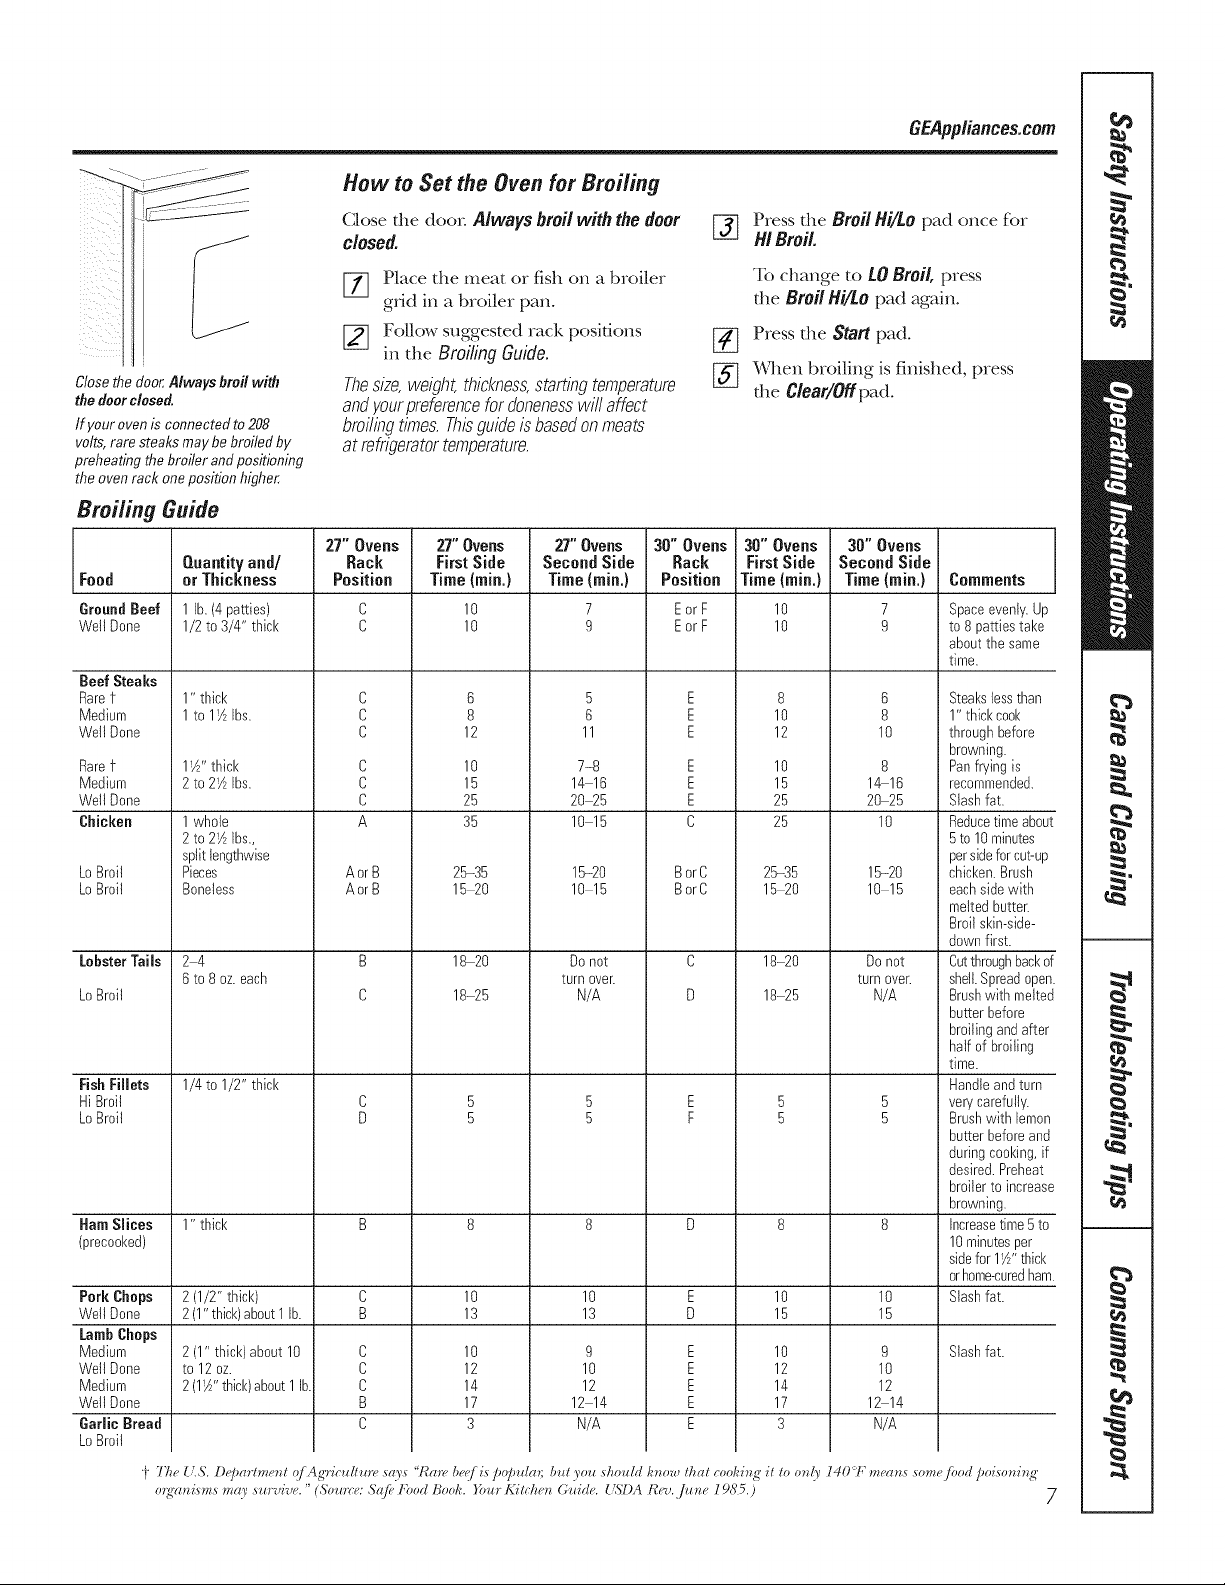
How to Set the Oven for Broiling
Close the doo_: Always broil with the door []
closed.
[77 Place the meat or fish on a broiler
grid in a broiler pan.
[_ Follow suggested rack positions [_
in the Broiling Guide.
Thesize,weight,thickness,startingtemperature
andyourpreferencefordonenesswill affect
broilingtimes.Thisguideisbasedonmeats
atrefrigeratortemperature.
Press the Broil Hi/Lo pad once for
MI Broil.
To change to tO Broil, press
the Broil Hi/Lo pad again.
Press the Start pad.
[_ When broiling is finished, press
the C/ear/Off pad.
Broiling Guide
27" Ovens 27" Ovens 27" Ovens 30" Ovens 30" Ovens 30" Ovens
JFood or Thickness Position Time {rain.) Time{rain.) Position Time{rain.) Time {rain.) Comments
GroundBeef 1 lb.(4 patties) C 10 7 Eor F 10 7 Spaceeveniy.Up
Well Done 1/2 to 3/4" thick C 10 9 Eor F 10 9 to 8 patties take
Beef Steaks
Rare1-
Medium
Well Done
Rare1-
Medium
Welt Done
Chicken
LoBroil
LoBroil
LobsterTails
LoBroil
FishFillets
Hi Broil
LoBroil
Ham Slices 1" thick B 8 8 D 8 8
(precooked)
Pork Chops 2(1/2" thick) C 10 10 E 10 10
Well Done 2 (l" thicl<)about1lb. B 13 13 D 15 15
LambChops
Medium 2(1" thick)about 10 C 10 9 E 10 9 Slashfat.
Well Done to 12 oz. C 12 10 E 12 10
Medium 2(I_A"thicl<)about1 lb. C 14 12 E 14 12
Welt Done B 17 12 14 E 17 12 14
Garlic Bread C 3 N/A E 3 N/A
LoBroil
Quantity and/ Rack First Side Second Side Rack First Side Second Side
aboutthe same
time.
1" thick
1to lY2 Ibs.
11A"thick
2to 2_AIbs.
1whole
2to 21AIbs.,
splitlengthwise
Pieces
Boneless
24
6to 8 oz.each
1/4to 1/2" thick
')" 77_e U.S'. l)e/)arh_*etzl qf Agric*_fl*m, sa2s "Rat(, be([. is/)o/)_da); b_d .Y(m sko*_ld ktww lkal cookitzg il 1ootzl)_ 140 7; meatzs..... some flood/)oiwtzitzg',
o_g'atzisms ma), s_vive." (5"omre: Sqfb Food Book. Yore Kiick etz (;_dde. US"t)A t_ev../_tze 19(95.) 7
C
C
C
C
C
C
A
AorB
AorB
B
C
6
8
12
10
15
25
35
25-35
15 20
18-20
18-25
5
6
11
7-8
14 16
20q5
10 15
15-20
10 15
Donot
turn over.
N/A
E
E
E
E
E
E
C
BorC
BorC
C
U
8
10
12
10
15
25
25
25-35
15 20
18-20
18-25
6
8
10
8
1_16
20 25
10
15-20
10 15
Donot
turn over.
N/A
Steakstessthan
1" thickcool<
throughbefore
browning.
Panfryingis
recommended.
Slashfat.
Reducetimeabou
5to 10minutes
persideforcut-up
chicken.Brush
eachsidewith
meltedbutter.
Broilskin-side-
downfirst.
Cutthroughbacko
shell.Spreadoper
Brushwithmelte_
butterbefore
broilingandafter
half of broiling
time.
Handleandturn
verycarefully.
Brushwith lemon
butterbeforeand
duringcooking,if
desired.Preheat
broilerto increaa
browning.
Increasetime5to
10minutesper
sidefor 1_" thick
orhome-curedhat
Slashfat.
Usingthe clock, timerand controllockout.
..... To Set the Clock
Tiledock..,s_bese__odieco,,ec_
time of day for tile autonm0c oven timing
flmc0ons to work properly: Tile 0me of
Make sure the clock is set day cannot be changed during a timed
to the correct time of flag, baldng or self cleaning cycle.
To Set the Timer
i _i_i__iiii!_ _il_i_i_ii_!_i iiiiiii_i_
ON/OFF
Thetimer/s a minute timer only.
Thetimer does not control oven
operations, Themaximum setting on
the timer is 9 hours and 59minutes.
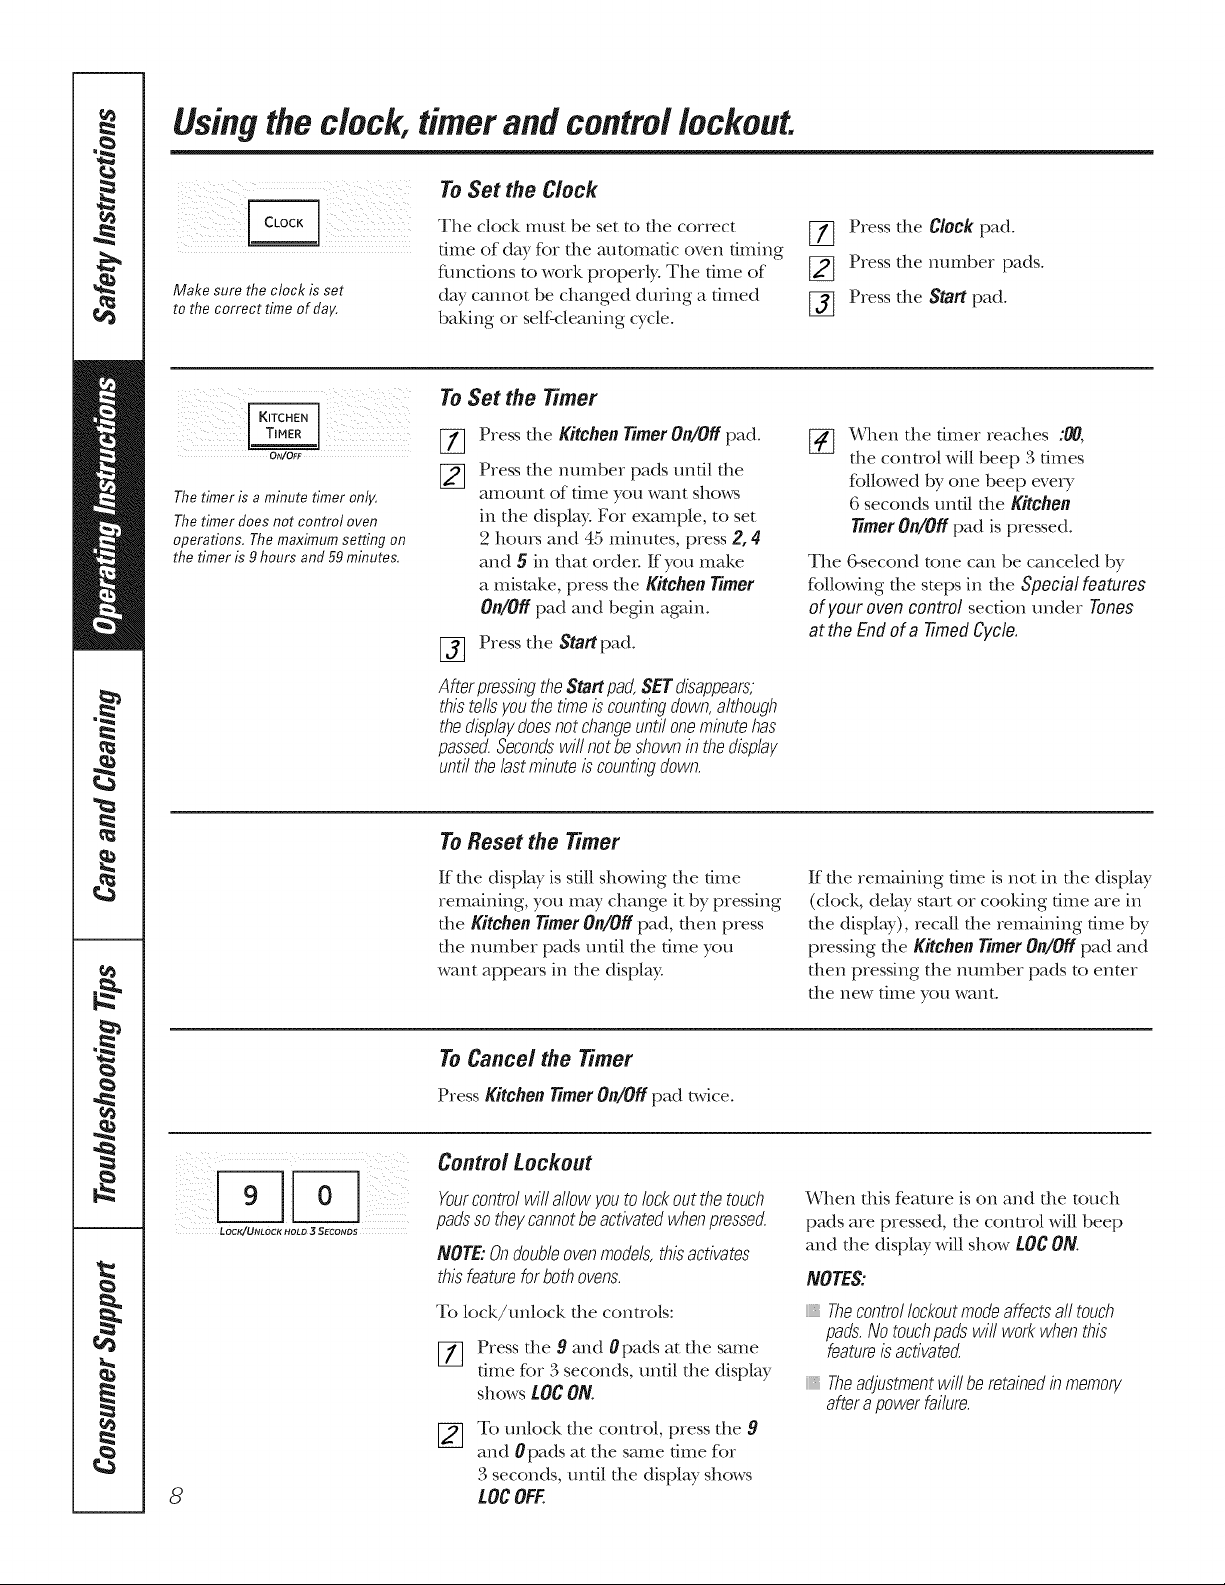
Press tile KitchenTimerOn/Offpad.
%
Press die number pads unO1die
[]
_t[nount of tiIne }_OL, want sho_,vs
in tile display. For example, to set
2 ]louis and 45 minums, press 2, 4
and 5 in that order If you mal<e
a mistake, press the Kitchen Timer
0n/0ff pad and begin again.
_] Press tile Startpad.
AfterpressingtheStartpad,SETdisappears,
thistellsyouthetimeiscountingdown,although
thedisplaydoesnotchangeuntiloneminutehas
passed.Secondswiflnotbeshowninthedisplay
untilthelastminuteiscountingdown.
[77 Press tile Clockpad.
[_] Press tile number pads.
_] Press tile Start pad.
[_ When tile 0Iiler reaches :00,
tile control will beep 3 dines
followed t)y one beep eve_T
6 seconds unOl tile Kitchen
timer On/Off pad is pressed.
Tile 6-second tone can be canceled by
following die steps in die Special features
of your oven control secdon under Tones
at the End of a -timed Cycle.
LOCK/UNLOCK HOLD 3 SECONDS
8
_-]:i ii
ToReset the Timer
If die display is still showing die time
remaining, you may change it by pressing
the KitchenTimerOn/Offpad, then press
the nmnber pads unO1the dine you
want appears in tile display.
To Cancel the Timer
Press Kitchen timer On/Off pad twice.
Control Lockout
Yourcontrolwillallowyoutolockoutthe touch
padssotheycannotbeactivatedwhenpressed.
NOTE:Ondoubleovenmodels,thisactivates
thisfeatureforbothovens.
To lock/unlock tile controls:
[77 Press tile 9 and 0 pads at tile same
time for 3 seconds, un01 tile display
shows LOC ON.
To unlock tile control, press tile 9
and 0pads at tile same time for
3 seconds, unO1tile display shows
LOCOFF.
If die remaining time is not in die display
(clock, delay start or cooldng time are in
tile display), recall tile remaining time by
pressing tile Kitchen Timer On/Off pad and
then pressing tile number pads to enmr
tile new time you want.
When dlis featme is on and die touch
pads are pressed, die conUol will beep
and the display will show LOCON.
NOTES:
Thecontre/lockoutmodeaffectsalltouch
pads.Notouchpadswiflworkwhenthis
featureisactivated
_,Theadjustmentwillberetainedinmemory
afterapowerfailure.
Usingthe timedbakingand mastingfeatures, somemo /sjCEApp,ance .com
On double oven models, you can use timed baking in one oven while using self-clean in the other; you can also use
timed baking in both ovens at the same time,
NOTE:Foods that spoil easily--such as milk, eggs, fish, stuffings, poultry and pork--should not be aflowed to sit for
more than I hour before or after cooking. Room temperature promotes the growth of harmful bacteria, Be sure that
the oven light is off because heat from the bulb will speed harmful bacteria growth,
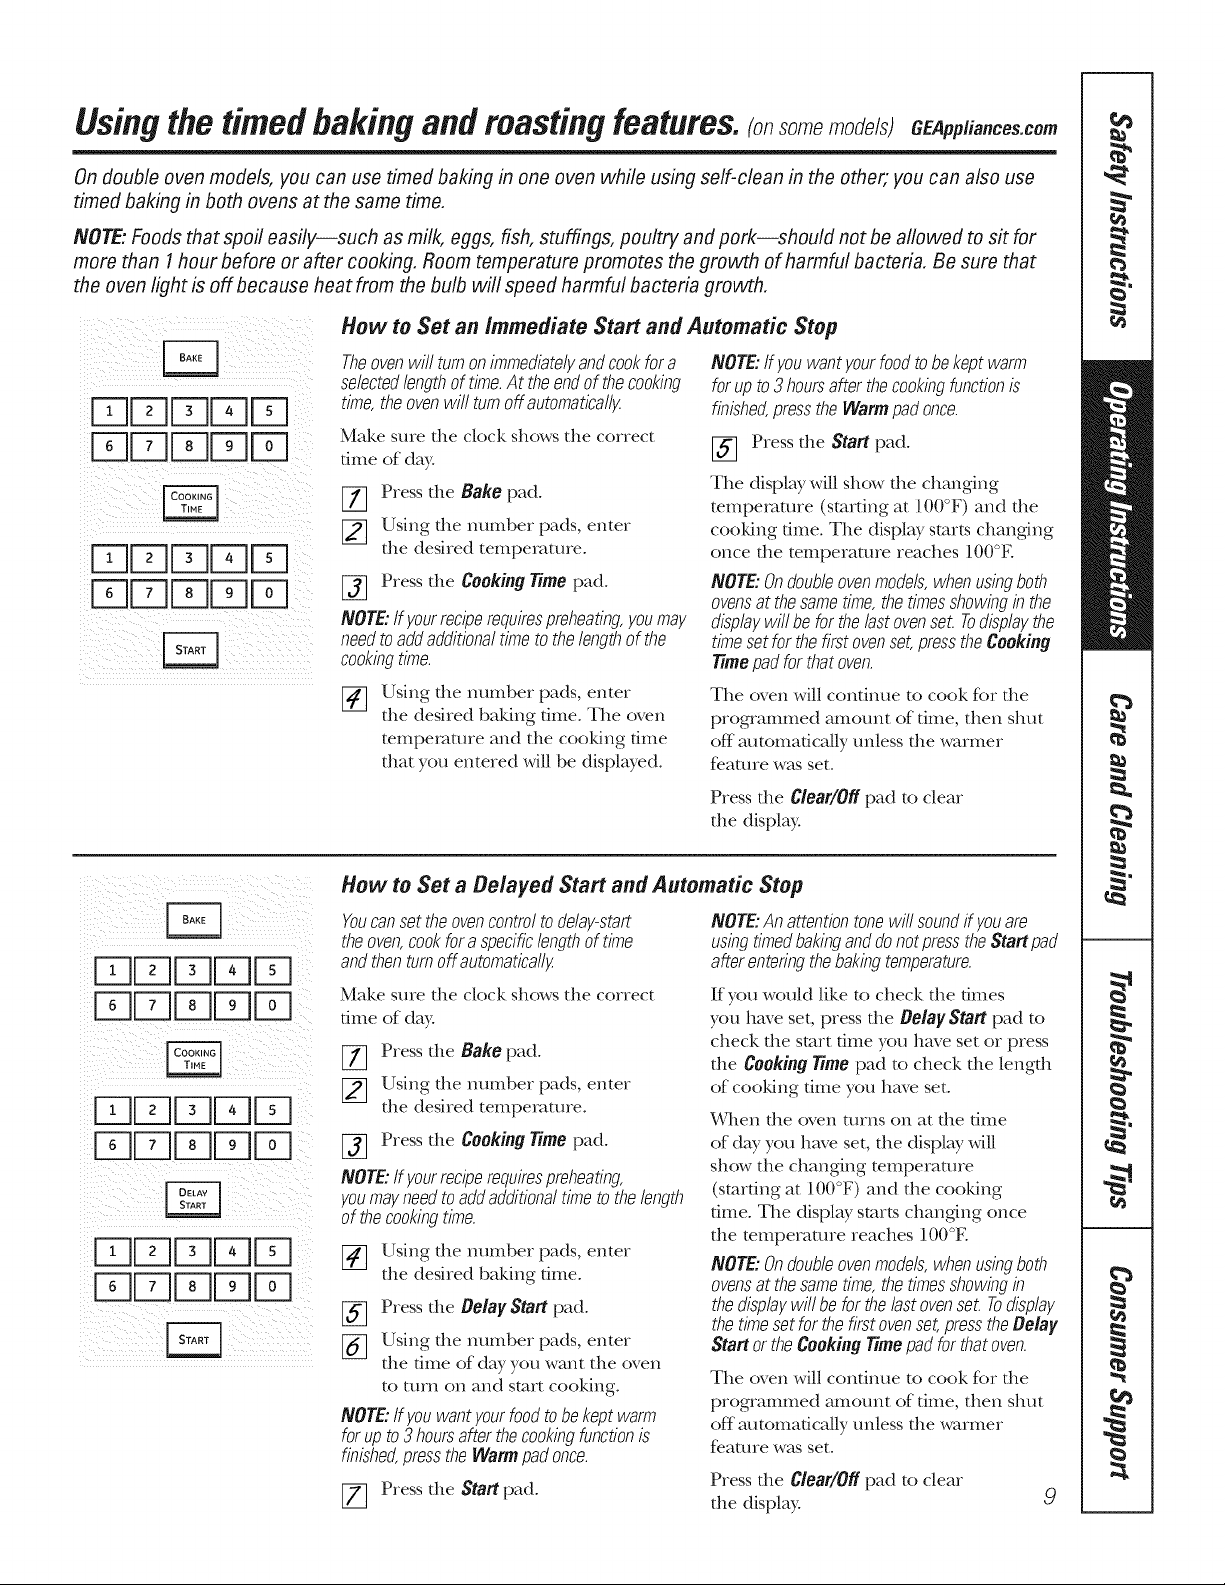
How to Set an immediate Start and Automatic Stop
i i iii ii
ii TJDF;q !I
i i i i
iiiTJDDDFq £
_ F _ii_ _i _ _:_!i i_i__i_i_
_iii)!_ii!_iI _ _ !i_iii_i__!_
!i(5 ii!iliii[-27-]?iiiiii/iiiilli;
Theovenwillturnonimmediatelyandcookfora
selectedlengthoftime.At theendof thecooking
time,theovenwillturnoffautomaticall#
Make sure file clock shows the correct
time of day.
[-_ Press the Bake pad.
[_ Using the number pads, enter
the desired temperature.
[_ Press the CookingTime pad.
NOTE:Ifyourreciperequirespreheating,youmay
needtoaddadditionaltimetothelengthof the
cookingtime.
Using the number pads, enter
FT1
the desired baking dine. The oven
temperature and the cooMng time
that you entered will be displayed.
NOTE:ff youwantyourfoodtobekeptwarm
forupto3hoursafterthecookingfunctionis
finished,presstheWarmpadonce.
[_ Press the Startpad.
The display will show the changing
mmperamre (stuffing at 100°F) and the
cooMng time. The display starts changing
once the temperature reaches 100°E
NOTE:Ondoubleovenmodels,whenusingboth
ovensat thesametime,thetimesshowingin the
displaywillbeforthelastovensol Todisplaythe
timesetforthefirstovenset,presstheCooking
Timepadforthatoven.
The oven will condnue to cook fbr file
progqammed amount of time, then shut
off automatically unless the warmer
fe.ature was set.
Press the Clear/Offpad to clear
the display.
How to Set a Delayed Start and Automatic Stop
Youcansettheovencontroltodelay-start
theoven,cookfora specificlengthoftime
andthenturnoffautomaticall;_
Make sure the clock shows the correct
time of day.
[_ Press the Bakepad.
[_ Using the number pads, enter
the desired temperature.
[-_ Press the CookingTime pad.
NOTE:If Fourreciperequirespreheating,
youmayneedto addadditionaltimetothelength
of thecookingtime.
[_] Using the number pads, enter
the desired baking time.
[_ Press the Belay Start pad.
[_ Using the number pads, enter
the time of day you want the oven
to mrn on and start cooking.
NOTE:If youwantyourfoodtobekeptwarm
forupto3hoursafterthecookingfunctionis
finished,presstheWarmpadonce.
[77 Press the Startpad. 9
NOTE:Anattentiontonewillsoundif youare
usingtimedbakinganddonotpresstheStartpad
afterenteringthebakingtemperature.
If you would like 1o check file dines
you have set, press file Be/ayStart pad to
check the start time you have set or press
the Cooking Timepad to check tlle length
of cooldng time you have set.
When the oven anns on at the time
of dW you have set, the displ W will
show the changing mmperamre
(stuffing at 100°F) and the cooking
time. The displ W starts changing once
the mmperamre reaches 100°E
NOTE:Ondoubleovenmodels,whenusingboth
ovensat thesametime,thetimesshowingin
thedisplaywillbeforthelastovensol Todisplay
thetimesetforthefirst ovenset,presstheBelay
Start ortheCookingTimepadforthatoven.
The oven will condnue to cook fbr file
programmed amount of time, then shut
off automatically unless the warmer
feature was set.
Press the Clear/Offpad to clear
the display.
Usingtheprobe.
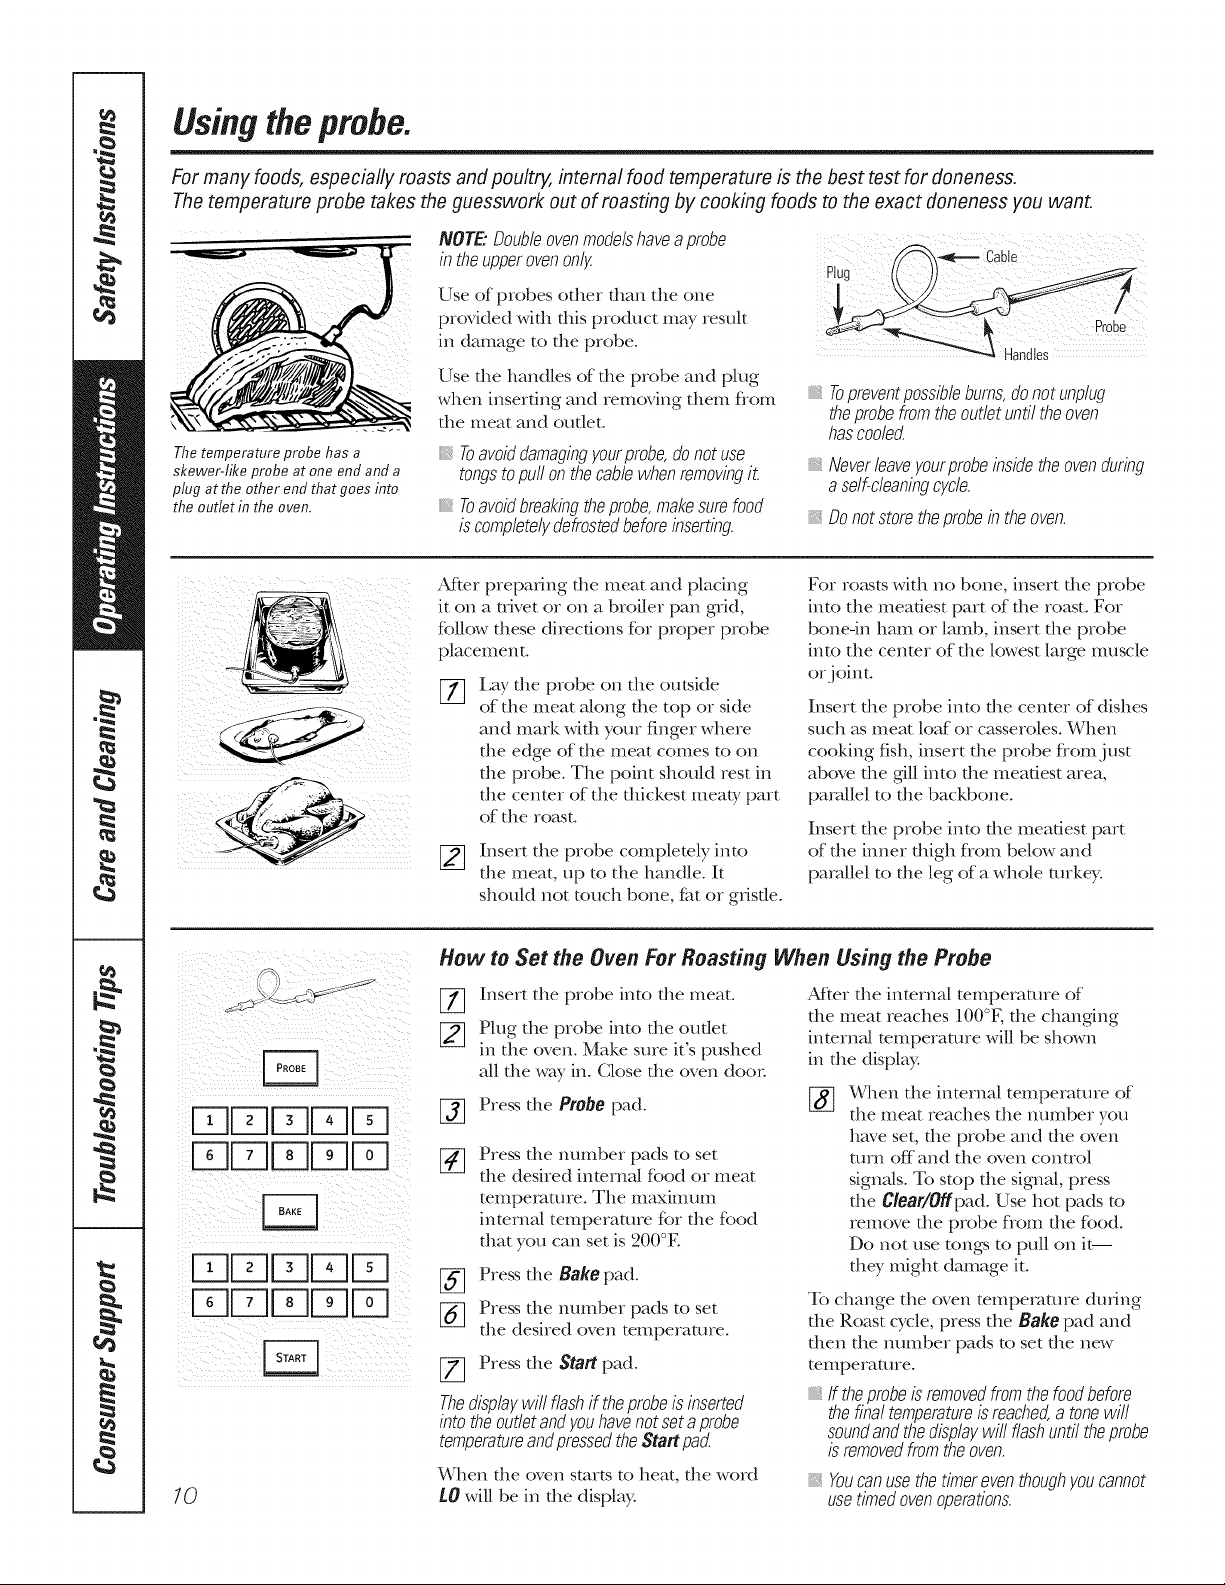
For many foods, especially roasts and poultry, internal food temperature is the best test for aloneness.
The temperature probe takes the guesswork out of roasting by cooking foods to the exact doneness you want.
Thetemperature probe has a
skewer-like probe at one end and a
plug at the other end that goes into
the outlet in the oven,
NOTE."Doubleovenmodelshaveaprobe
in the upper ovenonly
Use of probes other than the one
provided with this product may result
in damage to the probe.
Use the handles of the probe and plug
when inserting and removing them flom
the meat and outlet°
Toavoiddamagingyourprobe,donotuse
tongstopull onthecablewhenremovingit
Toavoidbreakingtheprobe,makesurefood
iscompletelydefrostedbeforeinserting.
After preparing file meat and placing
it on a uJvet or on a broiler pan grid,
follow these directions for proper probe
placement°
Lay the probe on the outside
of the meat along the top or side
and mark with your finger where
the edge of the meat comes to on
the probe° The point should rest in
the center of the thickest meaty part
of the roast.
_] Insert the probe completely into
the meat, up to the handle° It
should not touch bone, f_t or gristle°
Cable
Plug (())
_,Topreventpossiblebums,donotunplug
theprobefromtheoutletuntiltheoven
hascoole_
Neverleaveyourprobeinsidetheovenduring
aself-cleaningcycle.
Donot store the probein the oven.
For ro_ksts with no bone, insert file probe
into the meatiest part of the roast. For
bone-in ham or lamb, insert the probe
into the cenmr of the lowest large muscle
or joint.
Insert file probe into file center of dishes
such as meat loaf or casseroles° When
cooking fish, insert the probe fiom just
above the gill into the meatiest area,
parallel to the backbone.
Insert the probe into the meatiest part
of the inner thigh fiom below and
parallel to the leg of a whole turkey.
ii_ _ii iI _i_I _ _ iiii_i i _
i i/i ii !iiiii i !ii(ii
10
How to Set the Oven For Roasting When Using the Probe
Insert the probe into the meat.
%
Plug the probe into the outlet
in the oven. Make sme it's pushed
all the way in. Close the oven door
Press the Probe pad.
Press the number pads to set
the desired internal food or meat
mmpemmre. The maximum
inmrnN temperature for the food
that you can set is 200°E
Press the Bake pad.
Press the number pads to set
the desired oven temperature.
Press the Start pad.
Thedisplaywill flashif theprobeisinserted
intotheoutletandyouhavenotsetaprobe
temperatureandpressedtheStartpact
When the oven starts to ]teat, the word
LO will be in the display.
After file internM temperature of
file meat reaches 100°K die changing
inmrna/temperature will be shown
in the display.
[_ ¼,qlen the internal temperature of
the meat reaches the mm_ber you
have set, the probe and the oven
turn off and the oven control
signals. To stop the signal, press
the Clear/Offpad. Use hot pads to
remove the probe fiom the food.
Do not use tongs to pull on it--
they might damage it.
To change the oven temperature during
file Roast cycle, press the Bake pad and
then the number pads to set the new
temperature.
If theprobeisremovedfromthefoodbefore
thefinaltemperatureisreached,a tonewill
soundandthedisplaywillflashuntiltheprobe
isremovedfromtheoven.
Youcanusethetimereventhoughyoucannot
usetimedovenoperations.
Usingtheproofingandwarming features. CEApplia,ces.com
Theproofing feature maintains a warm environment useful for rising yeast-leavened products,
(Available in the upper oven only.)
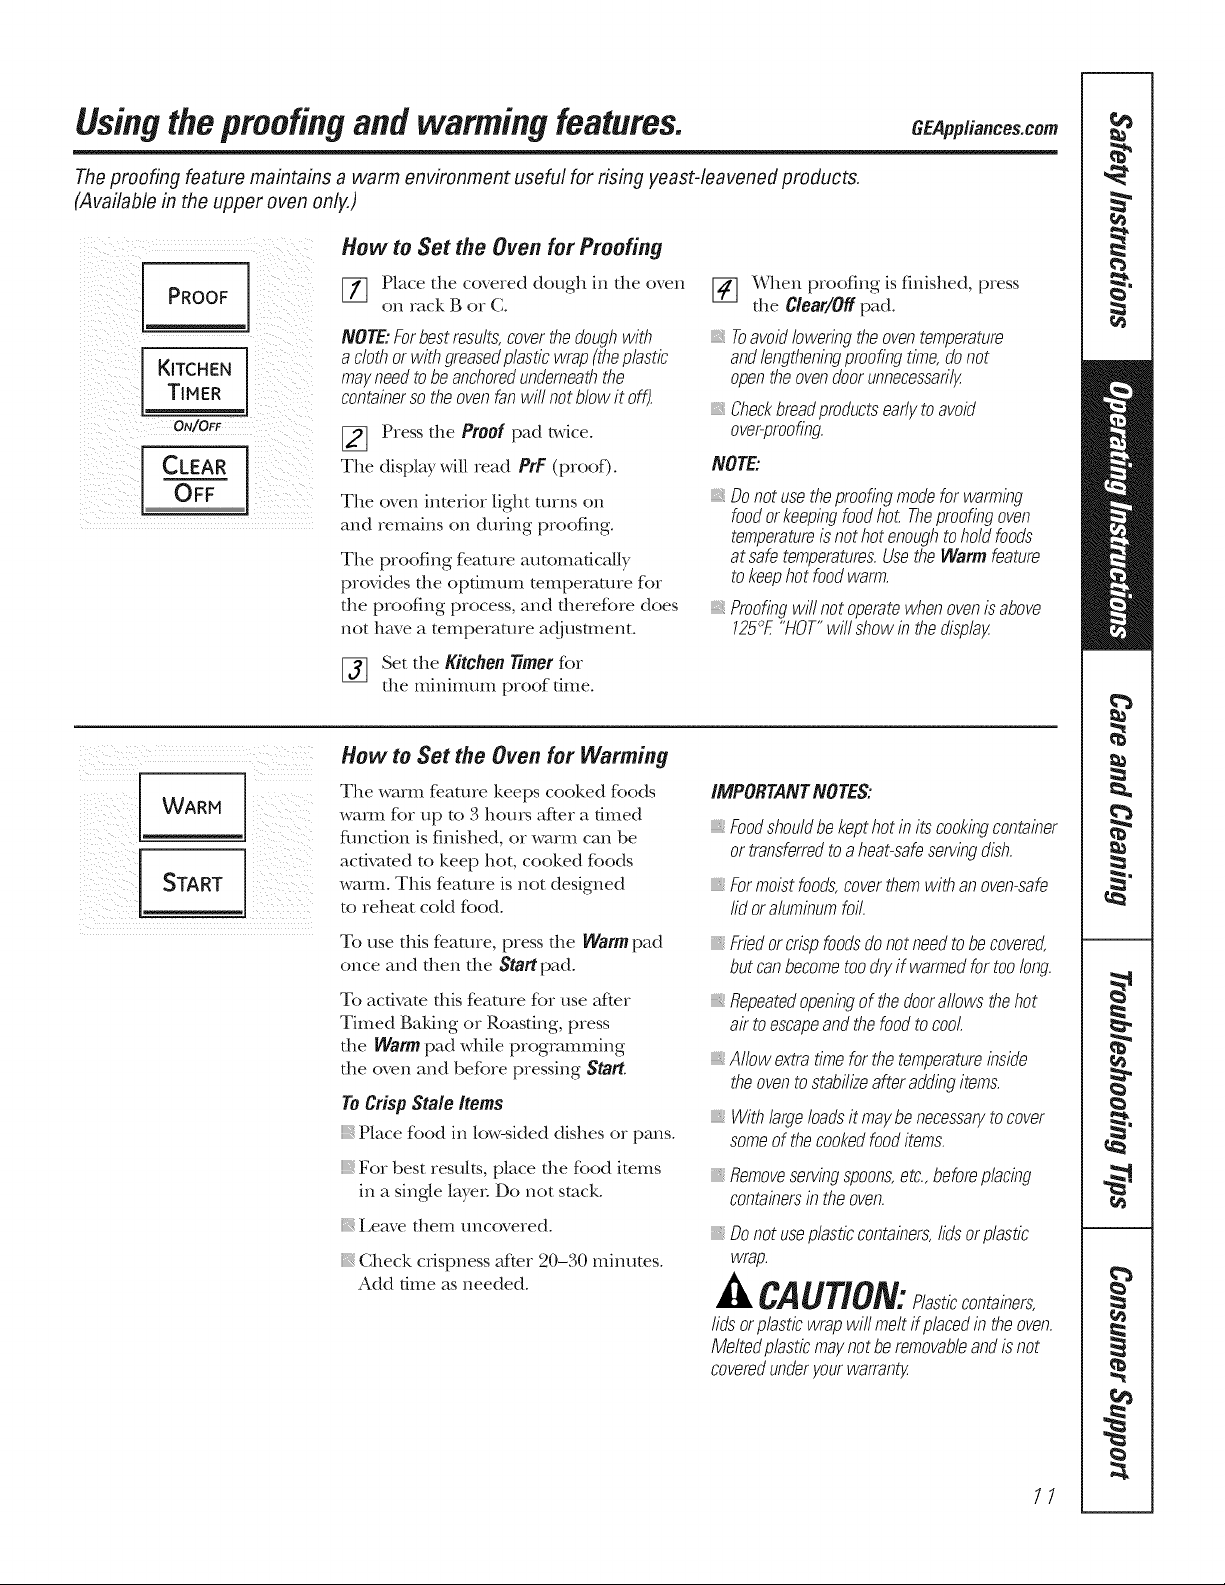
How to Set the Oven for Proofing
PROOF
KITCHEN
TIMER
ON/OFF
WARM
[_] Place the covered dough in the oven
on rack g or C.
NOTE:Forbestresults,coverthedoughwith
a clothorwithgroasedp/asticwrap(theplastic
mayneedtobeanchoredunderneaththe
containersotheovenfanwill notblowit off).
[_ Press the Proof pad _vice.
The display will read PrF (proof)°
The oven inwdor light turns on
and remains on during proofing.
The proofing feature automatically
provides the opdmum temperatme for
the proofing process, and therefore does
not have a temperature adjustment.
[_[] Set the Kitchen 77met fbr
the minimum proof dme.
How to Set the Oven for Warming
The warm feature keeps cooked foods
warn1 for up to ,1 hou>'s after a timed
fimction is finished, or warm can be
activated to keep hot, cooked foods
wamL This feature is not designed
to reheat cold food.
[_] When proofing is finished, press
the Clear/Offpad.
Toavoidloweringtheoventemperature
andlengtheningproofingtime,donot
opentheovendoorunnecessarily.
Checkbroadproductsearlytoavoid
over-proofing.
NOTE:
Donotusetheproofingmodeforwarming
foodorkeepingfoodhot Theproofingoven
temperatureis nothotenoughtoholdfoods
atsafetemperaturos.Usethe Warmfeature
tokeephot foodwarm.
Proofingwi//notoperatewhenovenis above
125°£"HOT"willshowin thedispla;_
IMPORTANTNOTES:
iii}iil;ii:_
Foodshouldbekepthotinitscookingcontainer
ortransferredtoaheat-safeservingdish.
iii}i}}ii_
Formoistfoods,coverthemwithanoven-safe
lidoraluminumfoil.
To use this feature, press the Warmpad
once and then the Startpad.
To activate this feature for use after
Timed galdng or Roasting, press
the Warmpad while programming
the oven and before pressing Start.
ToCrispStale Items
} Place food in low-sided dishes or pans.
}i,For best results, place the food items
in a single layer Do not stuck.
} Leave them uncovered.
Check crispness after 20-30 minutes.
Add time as needed.
Friedorcrispfoodsdonot needtobecovered,
butcanbecometoodryif warmedfortoolong.
Repeatedopeningofthedoorallowsthehot
air toescapeandthefoodtocool.
Allowextratimeforthe temperatureinside
theoventostabilizeafteraddingitems.
Withlargeloadsitmaybenecessarytocover
someof thecookedfooditems.
Removeservingspoons,etc., beforeplacing
containersin the oven.
Donot useplasticcontainers,lidsorplastic
wrap.
CAUTION:Plasticcontainers,
lidsorplasticwrapwillmeltifplacodintheoven.
Meltedplasticmaynotberemovableandisnot
coveredunderyourwarrant;_
11
Usingtheconvectionoven.
Convection Bake
Multi-rackposition
NOTE."Theconvectionfanwill cycleonandoff
whilecookingtobestdistributehotairin
theoven.
Theconvectionovenfanshutsoffwhentheoven
doorisopene_DONOTleavethedooropenfor
longperiodsof timewhileusingconvection
cookingoryoumayshortenthefifeofthe
convectionheatingelement
in a convectionoven,a fancirculateshot air
over,underandaroundthefood.
Thiscirculatinghotair isevenlydistributed
throughouttheovencavit#As a result,foods
areevenlycookedandbrowne_often in less
time with convectionheal
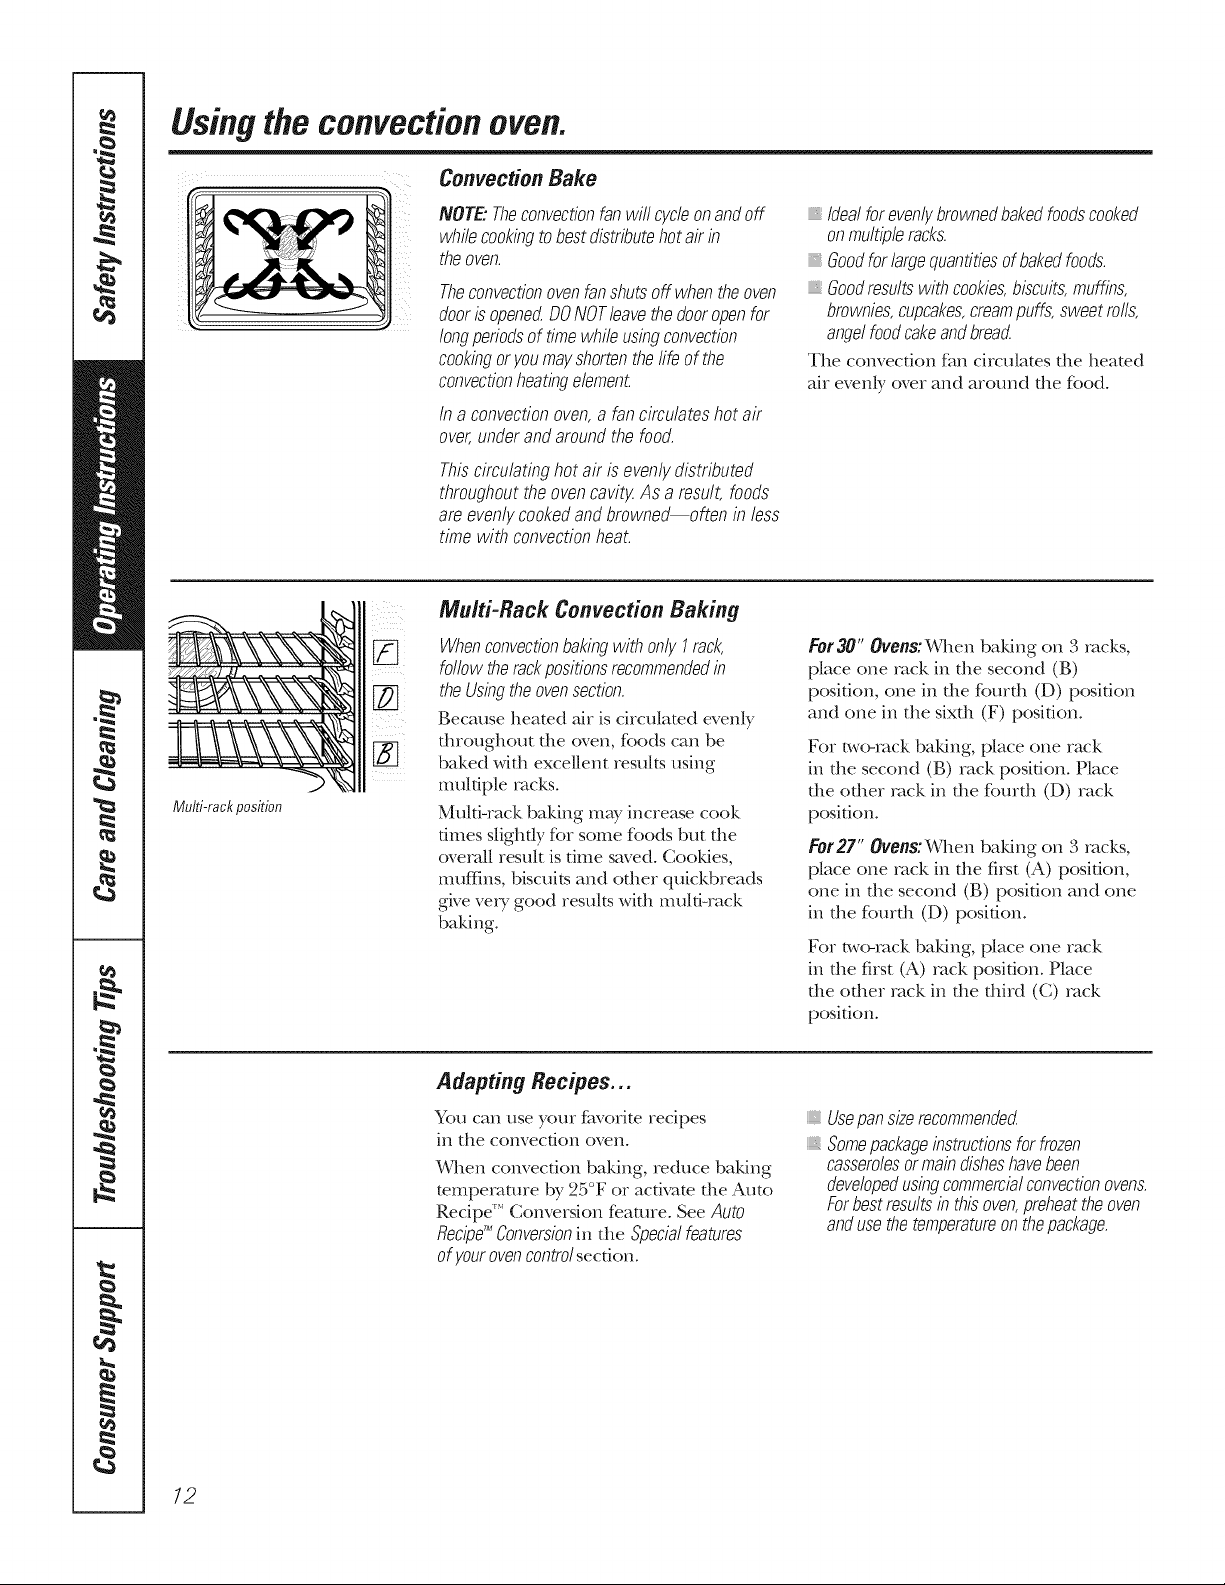
Multi-Rack Convection Baking
[] WhenconvectionbakingwithonlyI rack,
[_ theUsingtheovensection.
followtherackpositionsrecommendedin
Because heated air is circulated evenly
throughout tile oven, foods can be
baked with excellent results using
multiple racks.
Multi-rack baking may increase cook
times slighdy for some foods but the
overall result is firne saved. CooMes,
IIlttf_ins, biscuits and other quickbreads
gNe vetT good results with multi-rack
baking.
Idealforevenlybrownedbakedfoodscooked
onmultipleracks.
Goodforlargequantitiesof bakedfoods.
Goodresultswithcookies,biscuits,muffins,
brownies,cupcakes,creampuffs,sweetmils,
angelfoodcakeandbrea_
Tile convection lira circulates the heated
air evenly over and around tile food.
Eer30" Ovens:When baldng on 3 racks,
place one rack in tile second (B)
position, one in tile fourth (D) position
and one in tile sixth (F) position.
For two-tack baking, place one rack
in die second (B) rack position. Place
tile other tack in tile fourth (D) tack
position.
For27" Ovens: When baking on 3 tacks,
place one rack in the first (A) position,
one in the second (B) position and one
in the fourth (D) position.
For two-tack baldng, place one rack
in the first (A) tack position. Place
the adler tack in the third (C) tack
position.
12
Adapting Recipes...
You can use your f_worite recipes
in tile convection oven.
When convection baking, reduce baking
mmpetaatre by 25°F or acdvam tile Auto
Recipe _''Conversion feaatre. See Auto
Recipg_Conversionin tlle Specialfeatures
of yourovencontrol section.
Usepansizemcommende_
Somepackageinstructionsforfrozen
casserolesormaindisheshavebeen
developedusingcommercialconvectionovens.
Forbestresultsinthisoven,preheattheoven
andusethetemperatureonthepackage.
GEPpp/iances.com
Grid
Whenbaking cookies,you will
get thebest results ff youuse
a flat cookie sheet instead
of a pan with low sides.
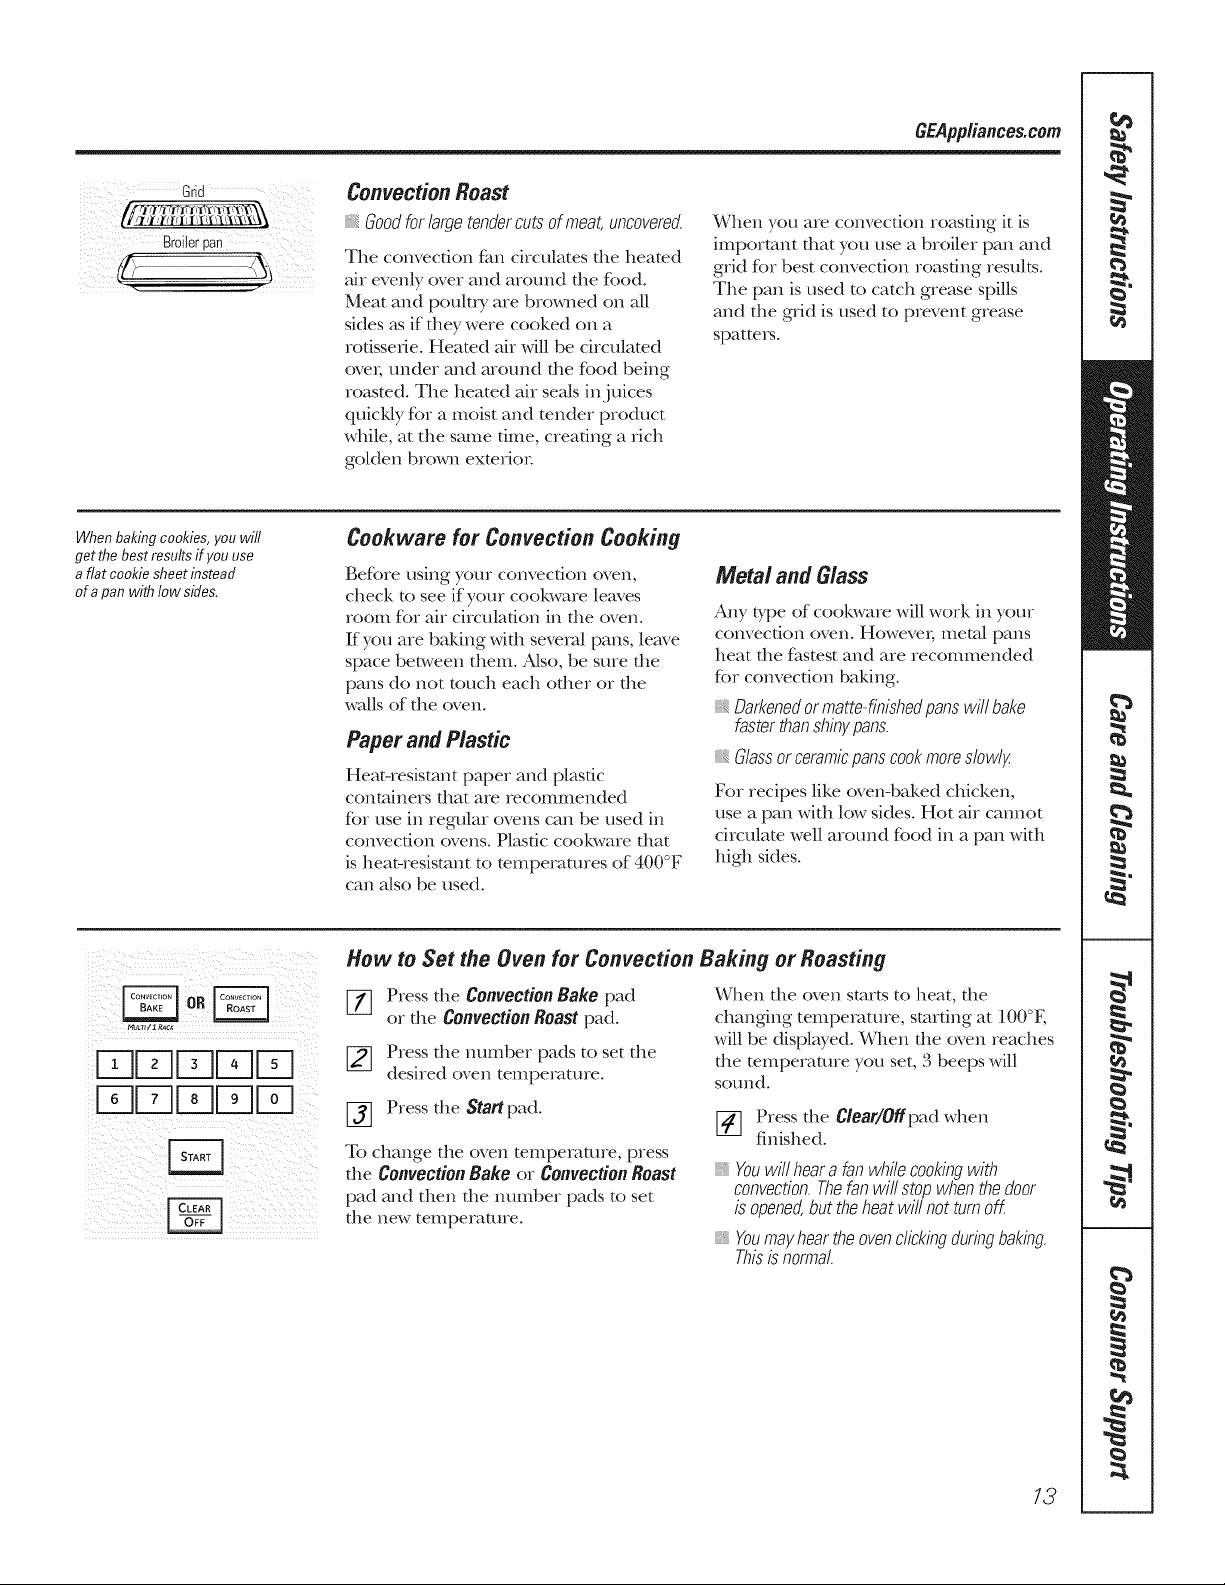
Convection Roast
Goodforlargetendercutsofmeat,uncovered.
The convection tim circulates die heated
ah evenly over and around file food.
Meat and poultry are browned on all
sides _ksif they were cooked on a
rotisserie. Heated ah will be circulamd
ovei, under and around the food being
roasmd. The heated ah seals inj uices
quicMy for a moist and milder product
while, at the same time, creating a rich
golden brown exmrior
Cookware for Convection Cooking
Before using your convection oven,
check to see if your cool<ware leaves
room for ah ciIvulafion in the oven.
If you are baking with several pans, leave
space bel_,veen them. Also, be sure the
pans do not touch each other or the
walls of the oven.
Paper and Plastic
Heat-resistant paper and plastic
containers dlat are recommended
for use in regular ovens can be used in
convection ovens. Plasdc cool<ware that
is heat-resistant to mmperatures of 400°F
can a/so be used.
When you are convection roasting it is
important that you use a broiler pail and
grid for best convection roasting results.
The pan is used to catch grease spills
and the grid is used to prevent grease
spatteIs.
Metal and Glass
Any tTpe of cool<ware will work in your
convection oven. Howevei; Illeta[ pails
heat the fitstest and are recommended
for convection baking.
Darkenedormatte-finishedpanswillbake
fasterthanshinypans.
glassorceramicpanscookmoreslowl;_
For recipes like oven-baked chicken,
use a pan with low sides. Hot ah cannot
ciIvulate well around food in a pail with
high sides.
FqDDr-qD
Dr-qDDD
How to Set the Oven for Convection Baking orRoasting
[_] Press the Convection Bake pad
or the Convection Roast pad.
[_ Press the number pads to set the
desired oven temperature.
[_] Press the Start pad.
To change the oven temperature, press
the ConvectionBake or Convection Roast
pad and then the immber pads to set
the new temperature.
When die oven starts to beat, die
changing temperature, smrdng at 100°K
will be displayed. _&,qlenthe oven reaches
the mmperamre you set, 3 beeps will
sound.
_-] Press the Clear/Offpad when
finished.
Youwillhearafanwhilecookingwith
convection.Thefanwill stopwhenthedoor
isopened,but theheatwill not turnoff
Youmayheartheovenclickingduringbaking.
Thisisnormal.
13
Usingtheconvectionoven.
How to Set the Oven for Convection Roasting when Using the Probe
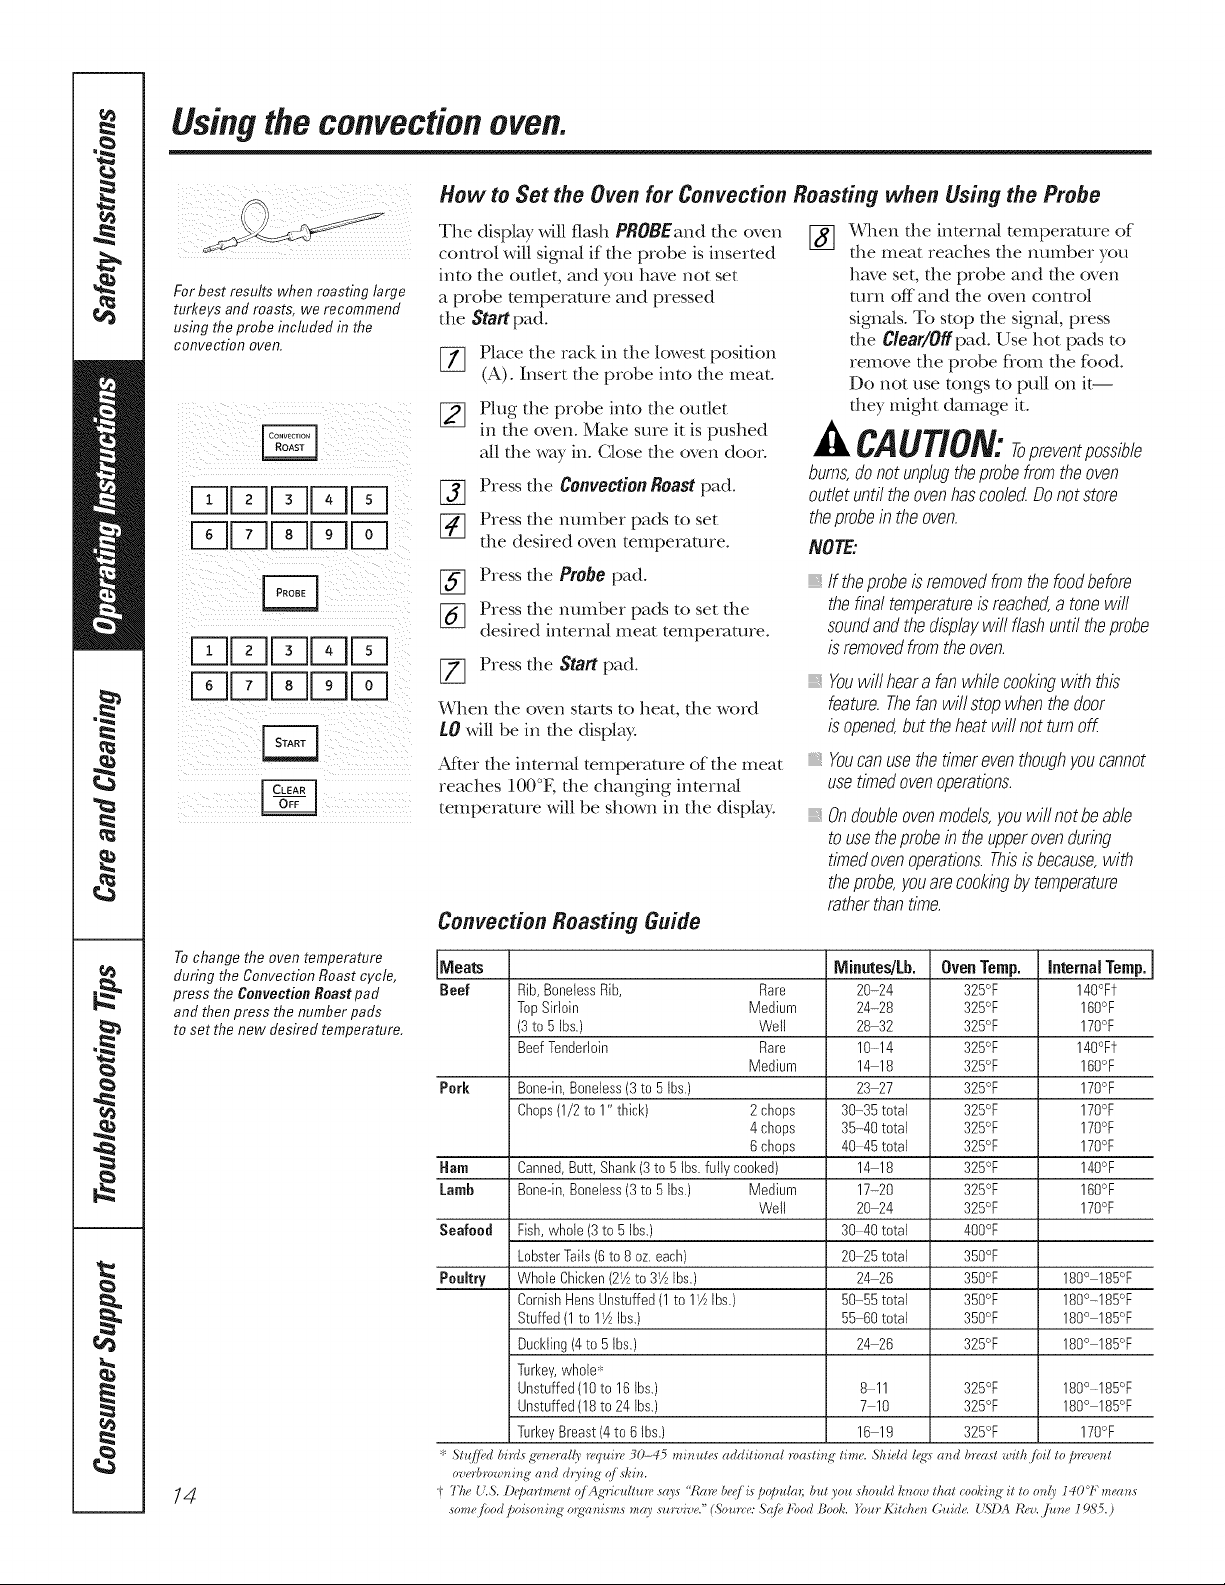
for best results when masting large
turkeys and masts, we recommend
using the probe included in the
convection oven.
ULdUUf-q
L I, II U]Fq
LdLdULdf-q
b6JL,I [Z]Fq
To change the oven temperature
during the Convection Roast cycle,
press the Convection Roast pad
and then press the number pads
to set the new desired temperature.
The display will fl_Lsll PROBEand die oven
conuol will signal if file probe is inserted
into file outlet, and you have not set
a p_obe tempe_atme and pressed
the Start pad.
[_ Place the iack in the lowest position
(A). Insert the probe into the meat°
[_ Plug the probe into the oudet
in the oven. Make sure it is pushed
all the way in. Close the oven door°
[_] P_ess the Convection Roast pad.
[_ Press [lie number pads 1o set
the desired oven temperature°
[_ Press the Probe pad.
[_ Press the number pads 1o set tile
desired inten_a| meat temperature.
[77 Press the Start pad.
When the oven starts to heat, the word
tO will be in the display.
After the inten_a[ tempetatme of the meat
reaches 100°K the changing inten_a[
temperatme will be shown in the display°
Convection Roasting Guide
Meats
Beef
Pork
Ham
Lamb
Seafood
Poultry
Rib,BonelessRib, Rare
TopSirloin Medium
(3to 5 Ibs.) Well
BeefTenderloin Rare
Medium
Bone-in,Boneless(3 to 5Ibs.)
Chops(1/2to 1" thick) 2 chops
4 chops
6 chops
Canned,Butt,Shank(3to 5 Ibs.fully cooked)
Bone-in,Boneless(3 to 5Ibs.) Medium
Fish,whole(3to 5 Ibs.)
LobsterTails(6to 8oz.each)
Whole Chicken(2_Ato3_AIbs.)
CornishHensUnstuffed(1to I_AIbs.)
Stuffed (1to I_AIbs.)
Duckling(4to 5 Ibs.)
Turkey,whole_;
Unstuffed(10 to 16 lbs.)
Unstuffed(18 to 24 Ibs.)
TurkeyBreast(4to 6 Ibs.)
[_] ¼,qlen the intenla/tempe_atme of
the meat ieaches the number you
have set, the probe and the oven
tmn off and file oven conuol
sigma/s. To stop the signal, pxess
the Clear/Offpad. Use hot pads to
,emove the probe flom the food.
Do not use tongs to pull on it--
they might damage it.
CAUTION:Topreventpossible
burns,donotunplugtheprobefromtheoven
outletuntiltheovenhascoole_Donotstore
theprobeinthe oven.
NOTE:
If theprobeisremovedfromthefoodbefore
thefinaltemperatureisreached,a tonewill
soundandthedisplaywillflashuntiltheprobe
isremovedfromtheoven.
Youwill heara fanwhilecookingwiththis
feature.Thefanwill stopwhenthedoor
isopened,but theheatwill not turnoff
Youcanusethetimereventhoughyoucannot
usetimedovenoperations.
Ondoubleovenmodels,youwill notbeable
tousetheprobeintheupperovenduring
timedovenoperations.Thisisbecause,with
theprobe,youarecookingbytemperature
ratherthantime.
Well
Minutes/Lb.
20-24
24-28
28-32
10-14
14 18
23 27
30-35 total
35-40 total
40 45total
14 18
17-20
20 24
30 40total
20 25total
24 26
50-55 total
55-60 total
24 26
8-11
7 10
16 19
Oven Temp.
325°F
325°F
325°F
325°F
325°F
325°F
325°F
325°F
325°F
325°F
325°F
325°F
400°F
350°F
350°F
350°F
350°F
325°F
325°F
325°F
325°F
Internal Temp.
140°FT
160°F
170°F
140°FT
160°F
170°F
170°F
170°F
170°F
140°F
160°F
170°F
180° 185°F
180°-185°F
180° 185°F
180° 185°F
180°-185°F
180° 185°F
170°F
14
Usingthe timedfeaturesforconvectioncooking. CEApp.a,cescom
On double oven models, you can use timed baking or roasting in one oven while using self-clean in the other;
you can also use timed baking or roasting in both ovens at the same time,
Youwill hear a fan while cooking with these features, The fan will stop when the door is opened, but the heat will not
turn off
NOTE Foods that spoil easily--such as milk, eggs, fish, stuffings, poultry and pork--should not be stowed to sit
for more than I hour before or after cooking, Room temperature promotes the growth of harmful bacteria, Besure
that the oven light is off because heat from the bulb will speed harmful bacteria growth,
How to Set an Immediate Start and Automatic Stop>eovenwilltumonimmediatelyandcookfora NOTE:lfyouwantyourfoodtobekeptwarm
........... selectedlengthoftime.At theendofthecookingtime, forupto3 hoursafterthecookingfunctionis
i ! 7i i(iiiiiii !
theovenwi//turnoffautomatica//y
Makesme the clock sh(m:sthe correct time
of da}:
[77 Press the ConvectionBakeor
ConvectionRoastpad.
[_ Press the numher pads to set the desired
o_n tempecaUue.
[_] Press the CookingTimepad.
NOTE"Ifyourreciperequirespreheatinglieumay
needtoaddadditlenaltimetothelengthofthe
cookingtime.
[_ Press the nmnher pads to set the desired
length of cooking time. The mininmm
cooking time you can set is 1 minum.
The oxen temi)ecamre that you set and
the cooking time that you enmred will
be in the display.
finished,presstheWarmpadonce.
[_ Press the Startpad.
The displaywillshow the changing
mmpecauue (starting at 100°F) and the
cooking time. The displaystarts changing
once the mmpecautre reaches 100°E
NOTE"Ondoubleovenmodels,whenusingbothovens
atthesametime,thetimesshowinginthedisplaywill
beforthelastovenset.Todisplaythetimesetforthe
firstovenset,presstheCookingtimepadforthatoven.
The o_vn willcontinue/o cook R)r
the programmed amount of time, then shut
offautomaficall},unless the p,vttiner fieau/re
,_vtsset.
Press the Clear/Offpad to cleat the
%
display if necessary. Remove the %od
hom the oxen. Remembeh ex_n though
the oxen shuts off atm)maficall), food left
in the oxen will ccmdnue cooking after
the o_n turns off.
How to Set a Be/eyed Start and Automatic Stop
Youcansettheovencontroltodelay-starttheoven,
cookforaspecificlengthoftimeandthenturnoff
automatically
Makesure the clockshcm:sthe correct time
of da}:
[_ Press the ConvectionBakeor
ConvectionRoastpad.
Press the number pads to set the desired
o_n mmpetanue.
[_ Press the CookingTimepad.
NOTE"Ifyourreciperequirespreheatingyoumayneed
toaddadditionaltimetothelengthofthecookingtime.
[_] Press the numher pads to set the desired
cooking time.
[_ Press the BelayStartpad.
[_] Press the number pads to set the time
ofde} you want the oven to turn on
and s/art cooking.
NOTE:If youwantyourfoodtobekeptwarm
forupto3hoursafterthecookingfunctionis
finished,presstheWarmpadonce.
Ifyouwouldliketocheckthetimesyouhaveset,
[77 Press the Startpad.
NOTE"Anattentiontonewill soundff youareusing
timedbakingormastinganddonotpresstheStartpad
afterenteringthebakingormastingtemperature.
When the o_n turns on at the time of day
you haw set, the display will show the
changing mmpetamre (starting at IO0°F) and
the cooking lime. The display starts changing
once the mmpetautre reaches IO0°E
NOTE"Ondoubleovenmodels,whenusingboth
ovensat thesametime,thetimesshowingin the
displaywill beforthelastovenset.Todisplaythe
timesetfor thefirst ovenset,presstheBelay Start
orCooking Timepadfor thatoven.
The ox>n will continue to cook for the
programmed amount of time, then shut
off automadcall}, unless the ,xvtrnler fieau/re
,xvtsset.
Press the Clear/Offpad to cleat the
display if necessa U. Remove the food
hom the oxen. Remember; ex_n though
the oxvn shuts off automaticall}, food
left in the o_n will ccmfinue cooking
after the o_n turns oft_
presstheBelayStartpadtocheckthestarttimeyou
haveset,orpresstheCookingTimepadtocheck
thelengthofcookingtimeyouhaveset.
15
Adjustthe oventhermostat--Do it yourself!
Youmay find that your new oven cooks differently than the one it replaced. Use your new oven for a few weeks
to become more familiar with it. If you still think your new oven is too hot or too cold, you can adjust the
thermostat yourself,
Do not use thermometers, such as those found in grocery stores, to check the temperature setting of your oven.
These thermometers may vary 20-40 degrees.
NOTE: This adjustment will only affect baking and roasting temperatures; it does not affect broiling or self-cleaning
temperatures. The adjustment will be retained in memory after a power failure.
ToAdjust the Thermostat
The oven temperature can be
adjusted up to (+) 35°F hotter or (-)
35°F cooler Press the number pads
the same way you read them.
For example, to change the oven
mmperamre 15°K press I and 5.
When you have made the
adjustment, press the Startpad to go
back to the time of day display. Use
your oven as you would nomlally:
FqFqFqFqFq
FqFqSqDFq
Press the Bake and Broil Hi/to pads f-_
at the same time for 3 seconds undl
the display shows SF.
Press the Bake pad fbr the oven
[]
which you want to use. A l_,vo-digit
number shows in the display°
Press Bake again to alternate
bet_,veen increasing and decreasing
the oven temperature.
Thetypeofmargarinewi// affectbakingperformance!
Most recipes for baking have been developed using high-fat products such as butter or margarine (80% fat).
If you decrease the fat, the recipe may not give the same results as with a higher-fat product
Recipe failure can result if cakes, pies, pastries, cookies or candies are made with low-fat spreads. The lower the fat
content of a spread product, the more noticeable these differences become.
Federal standards require products labeled "margarine" to contain at least 80% flit by weight. Low-flit spreads, on die
other band, contain less flit and more water The lfigh-moismre content of these spreads affe.ct the texture and flavor
of baked goods. For best results with your old fl_vo_imrecipes, use margarine, butter or sdck spreads containing at least
70% vegetable oil.
16
Using the self-cleaning oven. CEApp.a.ce com
The oven door must be c/osefl and a// controls must be set correctly for the cycle to work properly.
Before a Clean Cycle
iii}iiiiii:_
On double oven models, you can
set a clean cycle in both ovens at
the same time. The last oven set
will automatically delay its start until
tlle end of tlle firs[ (wen's clean cycle.
On double oven models, you can
use timed baking in one oven and
self clean the other at the same time.
CAUTION:Never lacecooking
utensilsor an}/other items on the ovenfloor
Thereisa heating element beneaththe oven
floor Placingitems on the ovenfloor ma}/cause
the oven to overheat,resulting in damageto
the ovenand risk ofdamageor fire tocabinets.
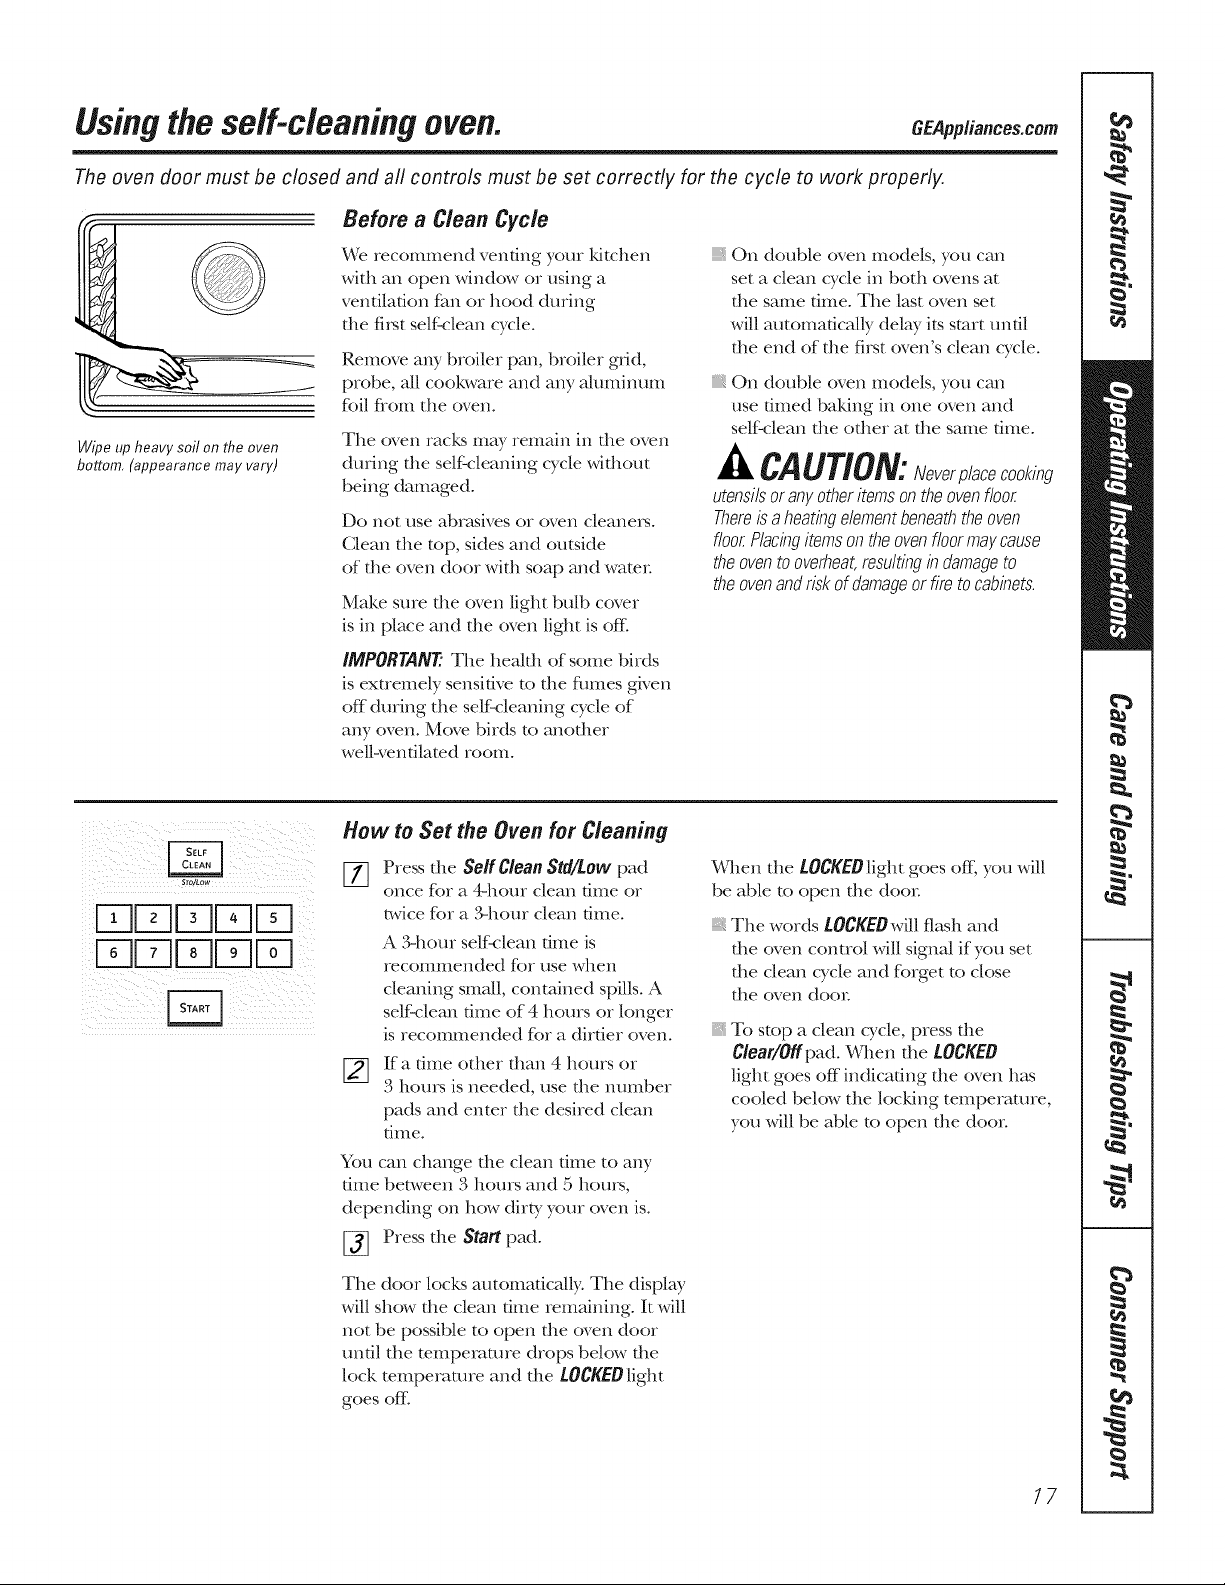
Wipe up heavy soil on the oven
bottom, (appearance may vary)
We recommend venting your kitchen
with an open window or using a
ventilation tim or hood during
tlle fi_t self clean cycle.
Remove any broiler pan, broiler grid,
probe, all cool<ware and any aluminum
foil flom the oven.
The oven racks may remain in the oven
dininK the self cleaning cycle wifllout
being damaged.
Do no[ use abr_ksives or oven cleaneis.
Clean file top, sides and otKside
of the oven door with soap and water:
Make sme the oven light bulb cover
is in place and the oven light is off
IMPORTANT'. The health of some birds
is extremely sensitive to tlle flmles given
off during the self cleaning cycle of
any oven. Move birds to another
wellwenfilamd room.
Sm/Low
ii!!E [ E EE]Fq /
iiii_i!i_i_iiI i_iiii _ _:_ii
Hew to Set the Oven for Cleaning
[77 Press the Self Clean Std/tow pad
once for a 4-hour clean dine or
lwice for a ,_hour clean dixie.
A 341our selfk:lean dine is
recommended for use when
cleaning small, contained spills. A
self clean fillle of 4 hours or longer
is recommended for a dirtier oven.
If a time other than 4 hours or
3 hom_ is needed, use the number
pads and enter the desired clean
{ilIle.
You can change the clean time to any
time between 3 hours and 5 hom_,
depending on how dir b, your oven is.
[_ Press file Start pad.
The door locks automatically: The display
will show the clean time remaining. It will
not be possible to open the oven door
until the mmpemmre drops below the
lock temperature and file LOCKEDlight
goes off
When the LOCKEOlight goes off; you will
be able to open the doo_;
iii}iiiiii_The words tOCKEOwill flash and
die oven control will signal if you set
the clean cycle and fbrget to close
the oven door
iii}i}iiii_,
To stop a clean cycle, press die
Clear/OIf pad. _,qlen the LOCKED
light goes oft indicadng file oven has
cooled below die locking temperature,
you will be able to open the door.
17

Usingtheself-cleaning oven.
The oven door must be dosed and aft controls must be set correctly for the cycle to work properly.
How to Belay the Start of Cleaning
iii¸i()) }
Sly/Low
EE]EE]r-qE]EE]¸
iiU-]DE]r-qEE]E i
_ _ _(i_) _ i _ IF I
ii!iE [5 FqC C;E](
[_ Press the Self Clean Std/Low pad
once for a 4-hour clean dine or
twice for a ,_hom clean time.
A 3qlom self:<lean dine is
recommended for use when
cleaning small, contained spills. A
self'clean filIle of 4 hours or longer
is recommended for a dirtier oven.
If a time other than 4 hours or
3 hom_ is needed, use the number
pads and enter the deshed clean
tilIle.
You can change the clean time to any
time between 3 hours and 5 hom_,
depending on how dirt}, your oven is.
[_ Press [lle Delay Start pad.
[_ Using [lie number pads, enter tile
dine of day you want tile clean cycle
to start.
The door locks automadcNly: The display
will show the start time. It will not be
possible to open the (wen door until
the mmperamre drops below the lock
mmpemmre and the LOCKEDlight
goes ore
When the LOCKEDlight goes off, you will
be able to open die doo_:
NOTE:Ondoubleovenmodels,youcanseta
delaycleaninbothovensat thesametime.
Thesecondovensetwill automaticallydelay
thestartofcleaninguntiltheendof thefirst
oven'scleancycle.
Torecallthestarttimeofthesecondovenset,
presstheDelayStartpadonthecontrolsfor
thesecondoven.
Press the Startpad.
After a Clean Cycle
You may nodce some white ash
in the oven. Wipe it up with a damp
cloth after the oven cools.
If whitespotsremain,removethemwitha
soap-filledsteel-woolpadandrinsethoroughly
witha vinegarandwatermixture.
These deposits are usually a salt residue
that cannot be removed t)y the clean
cycle.
If the oven is not clean after one clean
cycle, repeat the cycle.
}i_You cannot set the oven for cooking
until the oven is cool enough for
the door to unlock.
While die oven is self cleaning, you
can press die Clock pad to display
the dine of day. To reunn to the
clean countdown, press the Self
Clean Std/Lew pad.
}_If the racks become hard to slide, wipe
the rack supports with cooldng oil.
18

Special features of your oven centre/. CEApp.ance .com
Yournew touch pad control has additional features that you may choose to use. The foflowing are the features
and how you may activate them.
Thespecial feature modes can only be activated while the display is showing the time of day. They remain in
the control's memory until the steps are repeated.
When the display shows your choice, press the Start pad. Thespecial features will remain in memory after
a power failure, except for the Sabbath feature, which will have to be reset.
12-Hour Shutoff
HI/to
!iD:D ii!:i
HI/LO
With thisfeature, shouldyou forget andleave
the oven on, the control will automatically turnoff
the oven after 12hoursduringbakingfunctions
or after 3 hoursduringa broil function.
If you wish to mrn OFF dlis feature, fbllow
[lle steps below.
[-_ Press the Bake and Broil Hi/to
pads (on double oven models, use
the upper oven controls) at the same
time for 3 seconds, until the display
shows SE
f2-Hour, 24-Hour or Clock Blackout
Yourcontrol is set to usea 12-hourclock.
If you would prefer to have a 24-hour
milimi T dine clock or black out the clock
display, follow the steps below.
Press the Bake and Broil Hi/to
pads (on double oven models, use
the upper oven controls) at the same
time for 3 seconds, until the disphy
shows SE
Press the Clock pad once. The
display will show 12hr. If tiffs is
the choice you want, press the
Start pad.
[_ Press the Belay Start pad undl
no shdn (no shutoff) appears in
the display.
[_] Press the Start pad to activate
the no slmtoff and leave the control
set in this special features mode.
NOTE: Ondoubleoven models,this activates
this specialfeature for both ovens.
Press the Clock pad again [o change
to die 24-hour milim_ 7 dine clock°
The display will show 24 hr. If this
is the choice you want, press the
Start pad.
Press the Clock pad again to black
out die clock display. The display
will show OFF. If this is the choice
you want, press the Start pad.
NOTE:If theclock is in theblack-out mode,you
will not be able to usethe Delay Start function.
HI/to
Fahrenheit or Celsius Temperature Selection
YourovencontrolissettousetheFahrenheit
temperatureselections,butyoumaychange
thistousetheCelsiusselections.
Press the Bake and Broil Hi/to
pads (on double oven models, use
the upper oven controls) at the same
time for 3 seconds, until the display
shows SE
[_ Press the Broil Hi/to and Cooking
Timepads at the same time. The
display will show F (Faluenheit).
[_ Press the Broil Hi/to and Cooking
Timepads again at the same dineo
The display will show C (Celsius)°
[_ Press the Startpad.
NOTE:Ondoubleovenmodels,thenewsetting
willbedisplayedforbothovens.
19
Special features of your oven control
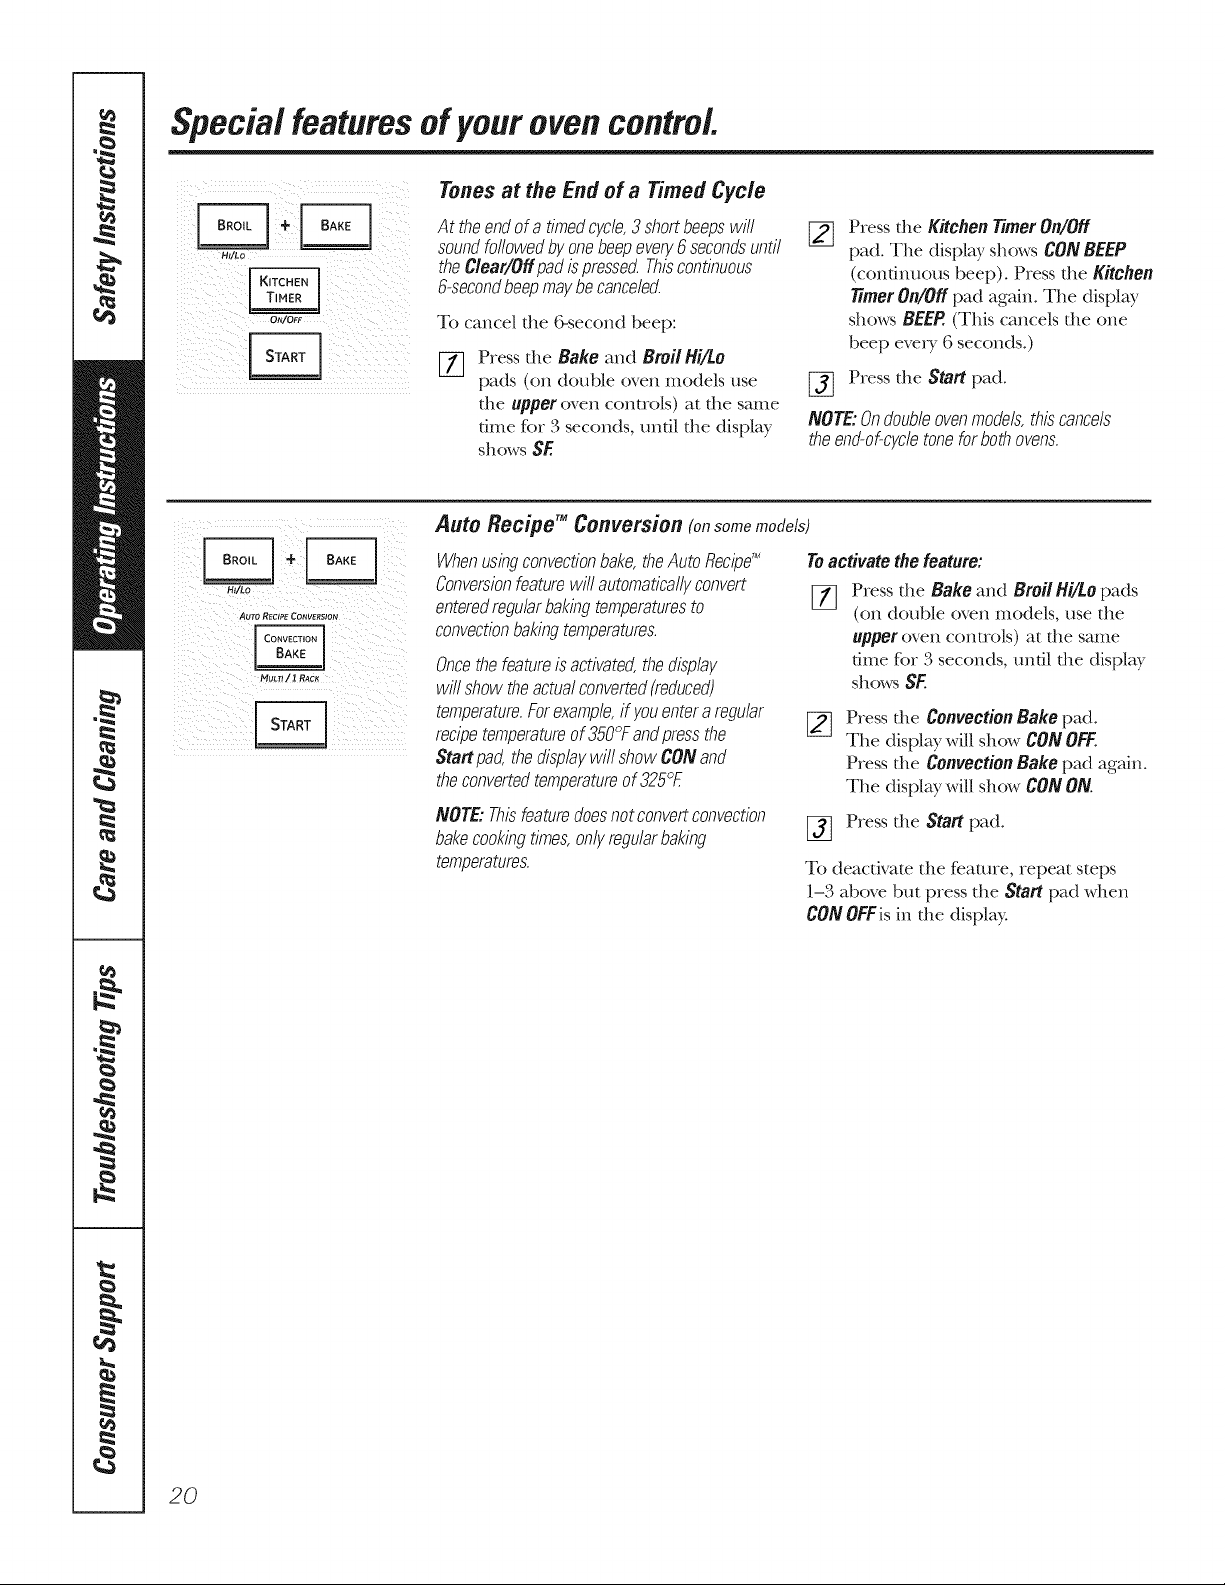
Tones at the End of a Timed Cycle
At the end of a timedcycle,3 shortbeepswill
sound followedby onebeepevery6secondsuntil
the Clear/Off pad is pressed. Thiscontinuous
i_i_iilI/ i_i_I_ i _ii i i _i
i_IIIi_iiIi_II_ !_i_!iiiiii _iI_I_I
Ht/Lo
,£_UTO RECIPE CONVERSION
HULrl/ ! RAC_
6-secondbeepmaybe canceled.
To cancel the 6-second beep:
Press the Bake and Broil Hi/to
%
pads (on double oven models use
tile upper oven controls) at tile same
time for 3 seconds, until tile display
showsSE
Auto Recipe TM Conversion (onsomemodels)
Whenusingconvectionbake,theAutoRecipe'_
Conversionfeaturewill automaticallyconvert
enteredregularbakingtemperaturesto
convectionbakingtemperatures.
Oncethefeatureisactivated,thedisplay
willshowtheactualconverted(reduced)
temperature.Forexample,if youenteraregular
recipetemperatureof350°Fandpressthe
Startpad,thedisplaywill showCONand
theconvertedtemperatureof325°E
NOTE: Thisfeaturedoes not convertconvection
bakecookingtimes, onlyregularbaking
temperatures.
Press tile Kitchen Timer On/Off
[]
pad. Tile display shows CON BEEP
(contim_ous beep). Press tile Kitchen
timer On/Off pad again. Tile display
shows BEER (This cancels file ()lie
beep every 6 seconds°)
[_ Presstile Start pad.
NOTE:Ondoubleovenmodels,thiscancels
theend-of-cycletoneforbothovens.
Toactivate the feature:
[] Press tile Bake and Broil Hi/to pads
(on double oven models, use tile
upper oven conUols) at file saQle
time K)r 3 seconds, until file display
shows SF.
Press tile Convection Bake pad.
[]
Tile display will show CON OFF.
Press tile Convection Bake pad again.
Tile display will show CON ON
[_] Press tile Start pad.
To deactivate tile realme, repeat steps
1-3 above but press tile Startpad when
CONOFFisin tile display.
20
 Loading...