How it Works
Log In / Sign Up
Buy Points
How it Works
FAQ
Contact Us
Questions and Suggestions
Users
GE
Loading...
P
PHP900SMSS
6
PHP9030
3
PHP9030BM
PHP9030BMTS
4
PHP9030DJ
PHP9030DJ1BB
2
PHP9030DJ2BB
2
PHP9030DJBB
PHP9030SJ
2
PHP9030SJ1SS
2
PHP9030SJ2SS
2
PHP9030SJSS
3
PHP9036
2
PHP9036BM
PHP9036BMTS
2
PHP9036DJ
PHP9036DJ1BB
2
PHP9036DJ2BB
2
PHP9036DJBB
2
PHP9036SJ
PHP9036SJ1SS
2
PHP9036SJ2SS
PHP9036SJSS
2
PHP960
8
PHP960DM
2
PHP960DM1BB
2
PHP960DM2BB
2
PHP960DM3BB
2
PHP960DMBB
6
PHP960SM
PHP960SM1SS
2
PHP960SM2SS
2
PHP960SMSS
6
PHS920
2
PHS920SF1SS
3
PHS920SF2SS
2
PHS920SFSS
5
PHS925ST1SS
4
PHS925ST2SS
3
PHS925ST3SS
PHS925STSS
4
PHS930
3
PHS930BLTS
PHS930BP
PHS930FLDS
2
PHS930SL3SS
PHS930SL4SS
PHS930SLSS
PHS930YP
PHS930YPFS
2
PHS93X
PHS93XYP
PI-450-950
PI6000 - Sentrol Motion Detector
PiBass-240
PIP70SS
PIT23SCRCSV
2
PIT23SGRCSV
2
PJ1
28
PJ7000
3
PJ7000PW9000
PJ7000SF
PJ7000SF1SS
PJ7000SFSS
2
PJV Series
PK-2
PK7000
6
PK7000BL6TS
2
PK7000BLTS
PK7000DF
PK7000DF1BB
2
PK7000DF1WW
3
PK7000DF2BB
3
PK7000DF2WW
3
PK7000DF3BB
2
PK7000DF3WW
2
PK7000DF4BB
2
PK7000DF4WW
2
PK7000DF6BB
2
PK7000DF6WW
2
PK7000DFBB
3
PK7000DFWW
3
PK7000EJ1ES
2
PK7000EJ4ES
2
PK7000EJ6ES
2
PK7000EJES
2
PK7000FMDS
PK7000SF
2
PK7000SF1SS
2
PK7000SF2SS
3
PK7000SF3SS
2
PK7000SF4SS
2
PK7000SF6SS
2
PK7000SFSS
5
PK7500
6
PK7500BL6TS
2
PK7500BLTS
2
PK7500DF
PK7500DF1BB
3
PK7500DF1WW
3
Loading...
Loading...
Nothing found
PHS93X
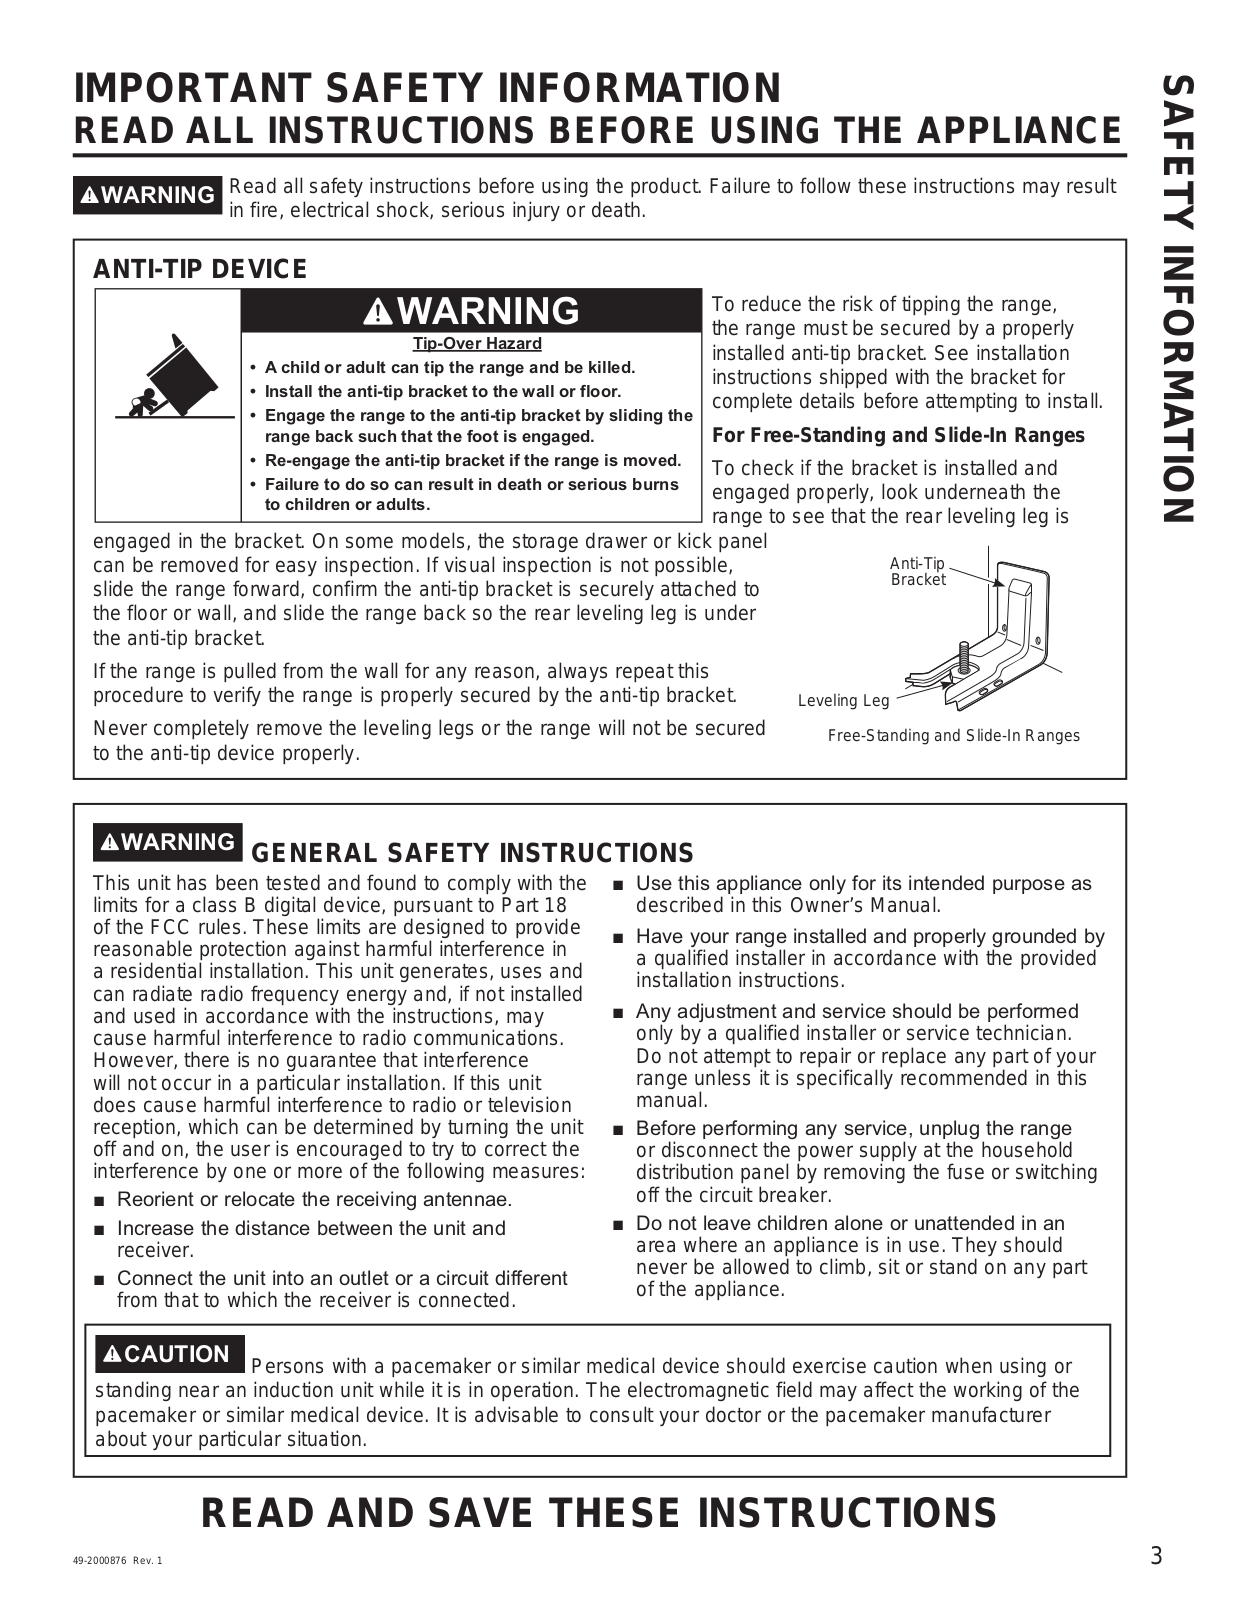
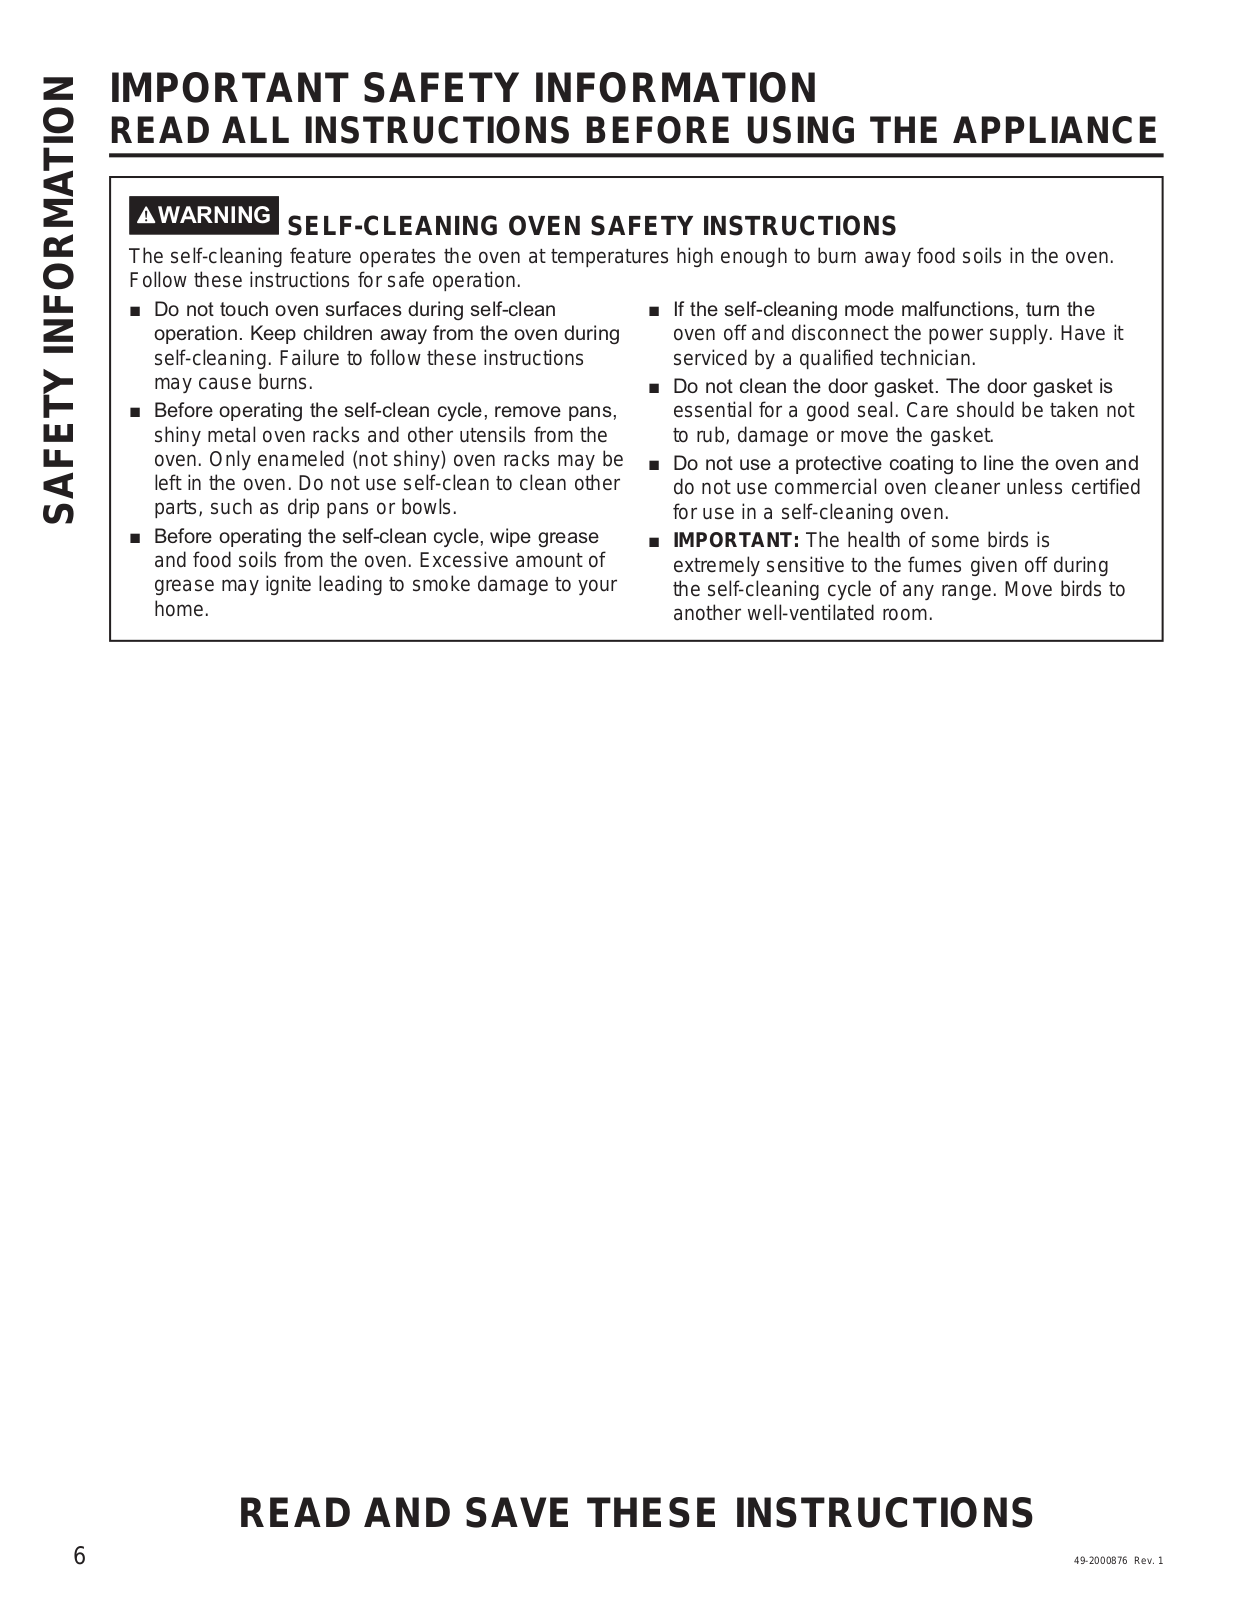
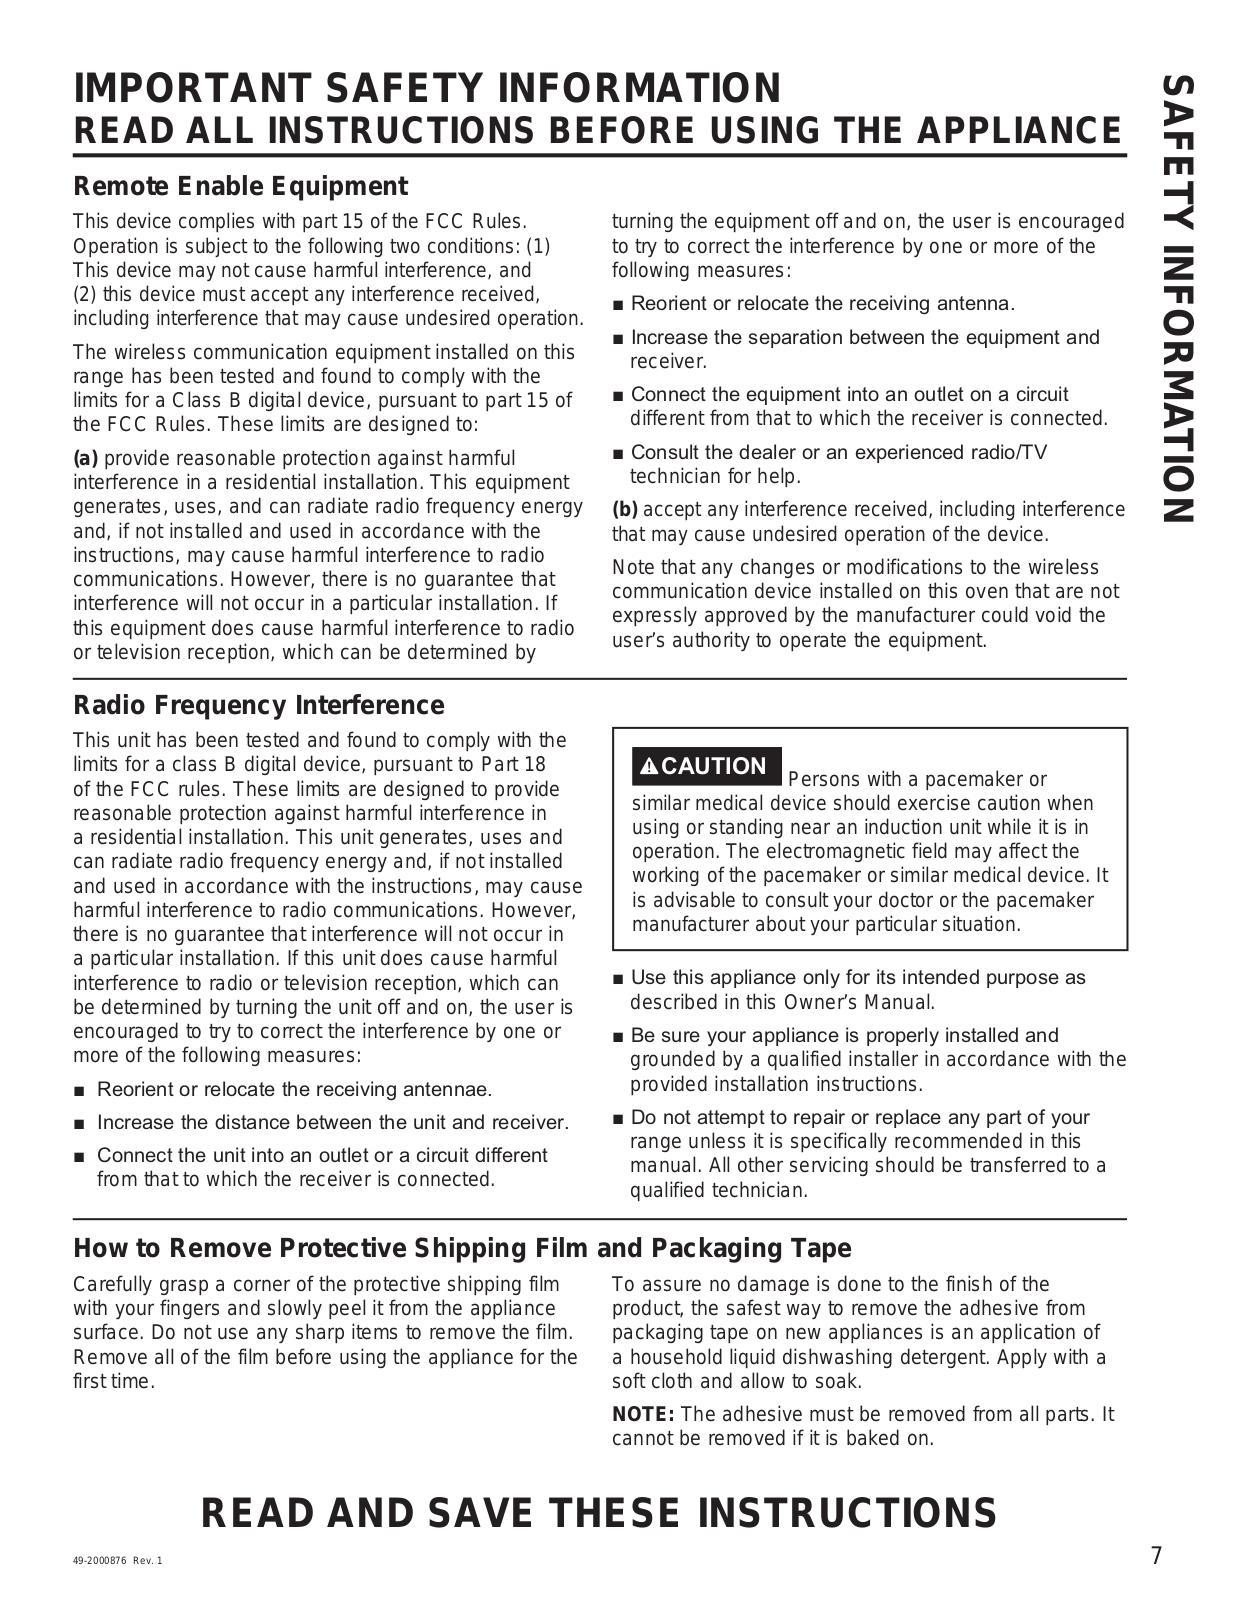
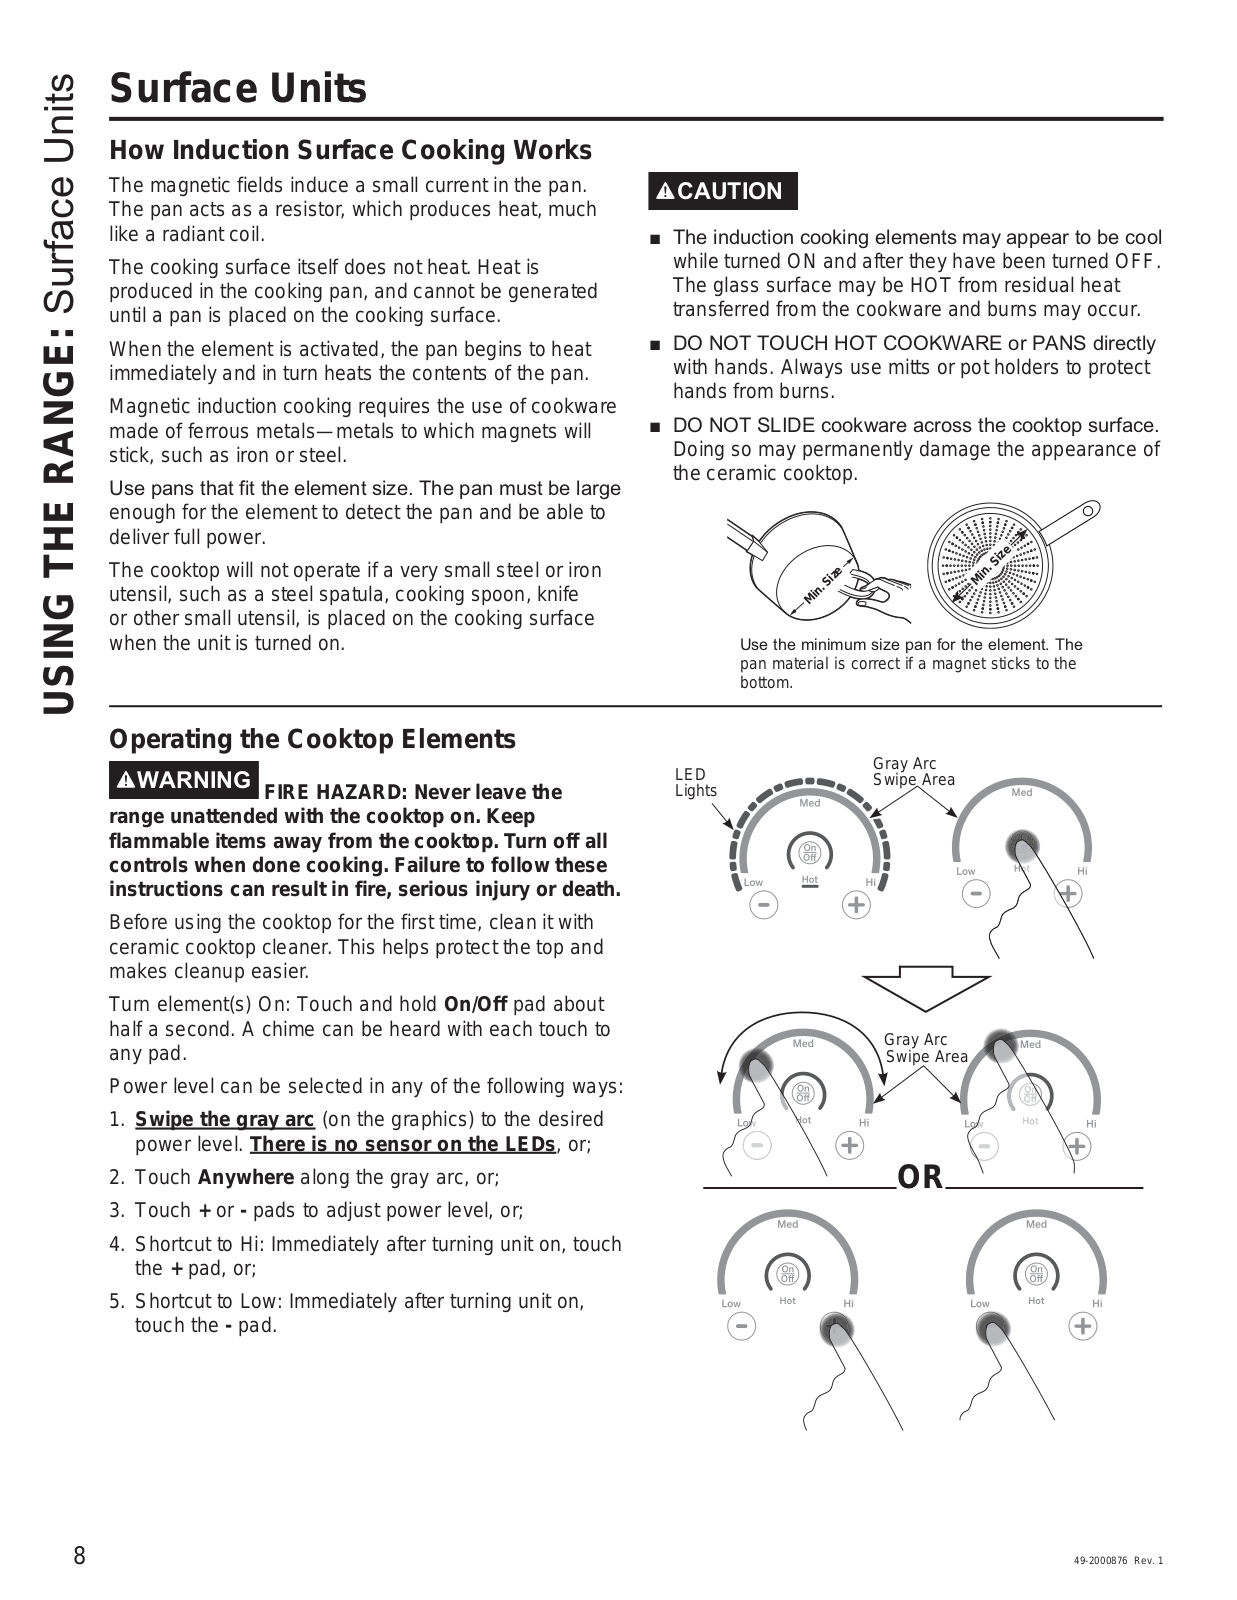
Owner’s Manual
80 pgs
1.16 Mb
0
Table of contents
Loading...
GE PHS93X Owner’s Manual
...
GE Owner’s Manual
Download
Specifications and Main Features
Frequently Asked Questions
User Manual
Download
Loading...
+
56
hidden pages
Unhide
You need points to download manuals.
1 point = 1 manual.
You can buy points or you can get point for every manual you upload.
Buy points
Upload your manuals
 Loading...