

GE PGS975WEM4WW, PGS975SEP1SS, PGS975SEM4SS, PGS975DEP1BB, PGS975BEM4BB Owner’s Manual
...
ge.com(U.S.)
www.GEPppliances.ca(Canada)
Safety Instructions ............. 2-7
|
"z3
oe,,_
U3
©
Operating Instructions
Baking or P,oasfing .............. 12
Broiling, Broiling Guide .......... 15
Clock and Timer ................ 16
Control i,ock-Out ............... 17
Convection .................. 20-24
Cookware ....................... 9
Oven ....................... 10-32
Probe .......................... 19
Proofing ....................... 25
Range ix)ck-Out ................ 17
Sabbath Feature ................. 32
Self'Cleaning ................ 27, 28
Special Features .............. 29-31
Surface Burners ............... 8, 9
Thermostat ..................... 26
Timed Baking & Roasting ........ 18
Warming ....................... 25
Care and Cleaning
Burner Caps and Heads ......... 33
Burner Grates and
Vent Grille ..................... 34
Control Panel .................. 37
Cookmp Surface ................ 34
Door .......................... 36
Floor .......................... 36
F_obs ......................... 34
PG5 908
PG5 975
i_ift-()ff Oven Door .............. 36
Light Bulbs ..................... 35
Packa_ng Tape ................. 33
Painted Surfaces ................ 37
Racks .......................... 35
Stainless Steel Surfaces ........... 37
Storage Drawer ................. 37
Vent ....................... 34, 37
Troubleshooting Tips ....... 38-41
Accessories .................... 47
Consumer Support
Consumer Support ...... Back Cover
Product Re_stration
(Canada) ................... 45, 46
ProNlct Re_stration
(U.S.A.) .................... 43, 44
Warranty tbr Customers
in Canada ...................... 49
Warranty tbr Customers
in the U.S.A .................... 48
Write the model and serial
numbers here:
Model #
Serial #
You can find them on a label
behind the open oven door
on the lower leR corner of the
range fiame.
49-80527-1 06-08 JR
IMPORTANTSAFETYINFORMATION.
READALLINSTRUCTIONSBEFOREUSING.
WARNING:if theinformation
in this manual is not followed exactly,
a fire or explosion may result causing
property damage, personal injury
or death.
-- Do not store or use gasoline or other
flammable vapors and liquids in the
vicinity of this or any other appliance.
- WHATTODOIF YOU
SMELLGAS
Do not try to light any appliance.
Do not touch any electrical switch;
do not use any phone in your building.
Immediately call your gas supplier
from a neighbor's phone. Follow the
gas supplier's instructions.
If you cannot reach your gas supplier,
call the fire department.
-- Installation and service must be
performed by a qualified installer,
service agency or the gas supplier.
GAS-FIRED
C
US
LISTED
2
ge.com(U.S.)
www.GEAppliances.ca (Canada)
WARNING!
For your safety, the information in this manual must be followed tominimize the risk of fire or
explosion, electric shock, or to prevent property damage, personal injury, or loss of fife.
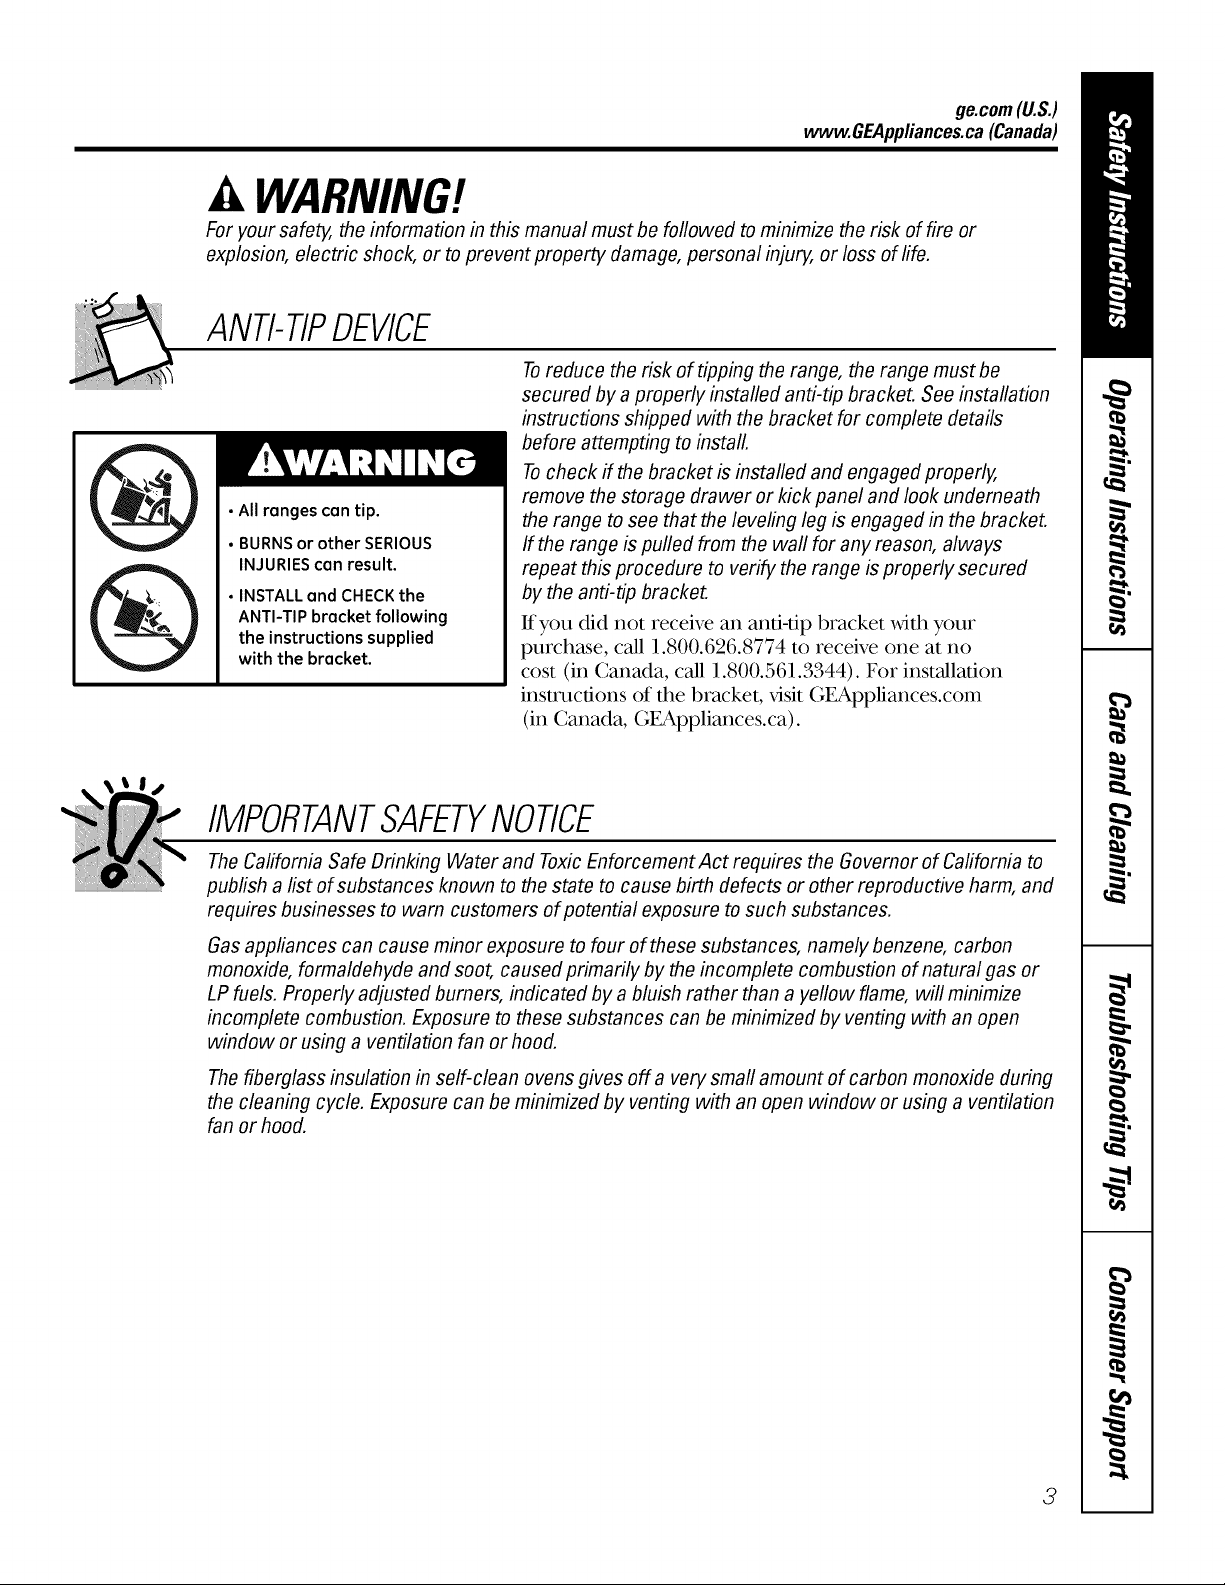
ANti-TIPDEVICE
Toreduce the risk of tipping the range, the range must be
secured by a properly installed anti-tip bracket. See installation
instructions shipped with the bracket for complete details
before attempting to install.
Tocheck ff the bracket is installed and engaged properly,
• Allranges can tip.
• BURNSor other SERIOUS
INJURIEScan result.
• INSTALLand CHECKthe
ANTI-TIP bracket following
the instructions supplied
with the bracket.
remove the storage drawer or kick panel and look underneath
the range to see that the leveling leg is engaged in the bracket.
If the range is pulled from the wall for any reason, always
repeat this procedure to verify the range is properly secured
by the anti-tip bracket.
l£you did not receive an anti-tip bracket with your
purchase, call 1.800.626.8774 to receive one at no
cost (in Canada, call 1.800.561.3344). For insrallation
instructions of the bracket, x,isit GEAppliances.com
(in Canada, GEAppliances.ca).
IMPORTANTSAFETYNOtiCE
TheCalifornia Safe Drinking Water and ToxicEnforcement Act requires the Governor of Cafifornia to
publish a list of substances known to the state to cause birth defects or other reproductive harm, and
requires businesses to warn customers of potential exposure to such substances.
Gas appliances can cause minor exposure to four of these substances, namely benzene, carbon
monoxide, formaldehyde and soot, caused primarily by the incomplete combustion of natural gas or
LP fuels. Properly adjusted burners, indicated by a bluish rather than a yellow flame, will minimize
incomplete combustion. Exposure to these substances can be minimized by venting with an open
window or using a ventilation fan or hood.
Thefiberglass insulation in self-clean ovens gives off a very small amount of carbon monoxide during
the cleaning cycle. Exposure can be minimized by venting with an open window or using a ventilation
fan or hood.
3
IMPORTANTSAFETYINFORMATION.
READALLINSTRUCTIONSBEFOREUSING.
WARNING!
SAFETYPRECAUTIONS
When using electrical appliances, basic safety precautions should be followed, including the
following:
Use this appliance only fbr its intended
purpose as described in this Owner's
Manual.
Be sure your appliance is properly installed
and grounded by a qualified technician in
accordance xdth the prox,ided installation
instructions.
Before performing any ser_,ice, disconnect
the range power supply at the household
distribution panel by remo\,ing the fuse or
switching off the circuit breaker
Have the installer show you the location of
the circuit breaker or fuse. Mark it for easy
reference.
Do not leave children alone---children
should not be left alone or unattended in
an area where an appliance is in use. They
should never be allowed to sit or stand on
any part of the appliance.
Have the installer show you the location
of the range gas shut-off valve and how to
shut it off if necessa U.
Have your range installed and properly
_ounded by a qualified installe_, in
accordance with the Installation
Instructions. Any adjustment and ser\,ice
should be performed only by qualified gas
range installers or serx@e mchnicians.
i_ocate the range out of kitchen tratIic path
and out of drafty locations to prevent poor
air circulation.
Be sure all packa_ng materials are
removed flom the range befbre operating
it m prevent fire or smoke damage should
the packa_ng material i_dte.
Do not leave children alone or unattended
where a range is hot or in operation. They
could be seriously burned.
Do not attempt to repair or replace any
part of your range unless it is specifically
recommended in this manual. All other
ser\,ice should be referred to a qualified
technician.
.....Be sure your range is correctly adjusted
by a qualified ser\,ice technician or installer
fbr the type of gas (natural or LP) that is
m be used. Your range can be converted
fbr use with either type of gas. See the
Installation Instructions packed with
the range.
.....Plug your range into a 120=voh grounded
outlet only. Do not remove the round
grounding prong flom the plug. If in
doubt about the grounding of the home
electrical sysmm, it is your personal
responsibility and obligation m have
an un_ounded outlet replaced with a
properly _ounded, three-prong outlet in
accordance with the National Electrical
Code (U.S.). Do not use an extension cord
with this appliance.
must be made by a qualified service
technician in accordance with the
manufacturer's instructions and all codes
and requirements of the authority having
jurisdiction. Failure to follow these
instructions could result in serious injury or
property damage. The qualified agency
performing this work assumes
responsibility for the conversion.
Keep the hood and grease filters clean to
maintain good venting and to avoid grease
fires.
Teach children not to play xdth the
controls or any other part of the range.
Always keep dish towels, dish cloths, pot
holders and other linens a s'ate distance
flom your range.
WARNING:Theseadjustments
4
SAFETYPRECAUTIONS
ge.com(U.S.)
wvvvv.GEAppliances.ca(Canada)
.....Always keep wooden and plastic umnsils
and canned f_)od a safe distance flom your
range.
.....Always keep combustible wall coverings,
curtains or drapes a s'ate distance flom
your range.
.....Do not clean the range with flammable or
volatile cleaning fuids.
.....After prolonged use of a range, high floor
temperatures may result and many floor
coverings will not withstand this kind of
use. Never install the range over x,inyl die
or linoleum that cannot withstand such
type of use. Never install it directly over
interior kitchen carpeting.
.....Avoid scratching the cooktop with sharp
instruments, or with rings and other
jeweh T.
.....Do not allow anyone to climb, stand or
hang on the oven door; storage drawer or
cooktop. They could damage the range
and even tip it over; causing severe
persorral in,ju U.
A CAUTION:Itemso interestt0children
shouldnot bestored#7cabinetsabovearangeor
on thebacksplashof a range--children climbing
on therangeto reachitemscouldbeseriously
injured.
material could be i_ited if brought in
contact with flame or hot oven surfaces
and may cause severe burns.
.....Do not store flammable materials in an
oven, a range storage drawer or near a
cooktop.
.....Do not store or use combustible materials,
gasoline or other flammable vapors and
liquids in the \,icinity of this or any other
appliance.
.....Do not let cooking _ease or other
flammable mamfials accumulate in or
near the range.
.....Do not use water on grease fires. Never
pick up a flaming pan. Turn the controls
ore Smother a flaming pan on a surface
burner by covering the pan completely
with a well-fitting lid, cookie sheet or flat
tray. Use a multi-propose dr T chemical or
f_)am-type fire extinguisher
Flaming grease outside a pan can be put
out by coveting it with baking soda or;
if available, by using a multi-purpose dU
chemical or foam-type fire extinguisher.
Flame in the oven can be smothered
completely by closing the oven door and
turning the control to off or by using a
multi-propose drT chemical or fk_am-type
fire extinguisher.
WARNING:NEVERusethis
appliance as a space heater to heat or
warm the room. Doing so may result
in carbon monoxide poisoning and
overheating of the cooktop or oven.
.....For your safety, never use your appliance
for warming or heating the room.
.....i,arge scratches or impacts to glass doors
can lead to broken or shatmred glass.
.....Do not clean the range when the appliance
is in use.
.....Never wear loose-fitting or han_ng
garments while using the appliance.
Be careful when reaching f_)r imms stored
in cabinets over the range. Flammable
.....Let the burner _ates and other surfaces
cool befbre touching them or lea:\,ing
them where children can reach them.
.....Never block the vents (air openings) of
the range. They prox,ide the air inlet and
outlet that are necessar T for the range to
operate properly with correct combustion.
Air openings are located at the rear of the
cooktop, at the top and bottom of the
oven dooc and at the bottom of the range
under the storage drawer or kick panel.
.....Do not lift the cooktop. Lifting the
cooktop can lead to damage and improper
operation of the range.
5
IMPORTANTSAFETYINFORMATION.
READALLINSTRUCTIONSBEFOREUSING.
WARNING'!
SURFACEBURNERS
Useproperpansize--avoid pans thatare unstableor easilytipped.Selectcookware having flatbottomslarge
enoughto coverburnergrates. Toavoid spillovers,makesurecookwareis largeenoughto containthefood
properly.Thiswill bothsavecleaningtimeandpreventhazardousaccumulationsof food,sinceheavyspattering
orspilloversleft onrange canignite.Usepanswithhandlesthatcan beeasilygraspedandremaincool
Always use tile LITEposition when igniting
tile top burners and make sure tile burners
have ignited.
Never leave tile surface burners unattended
at high flame settings. Boilovers cause
smoking and greasy spillovers that may
catch on fire.
A(!just tile top burner flame size so it does
not extend beyond tile edge of tile cookware.
Excessive flame is hazardous.
Use only dU pot hoMers--moist or damp pot
hoMers on hot surfaces may result in bums
flom steam. Do not let pot hoMers come
near ()pen flames when lifting cookware. Do
not use a towel or ()tiler bulky cloth in place
of a pot holdei:
h_len using glass cookware, make sure it
is desi_md fbr top-of range cooking.
To minimize tile possibility of bums, ignition
of flammable materials and spillage, mm
cookware handles toward tile side or back of
tile range _ithout extending over adjacent
bum ers.
Carefidly watch fbods being flied at a high
flame setting.
Always heat fat slowly, and watch as it heats.
Do not leave any items on tile cooktop. Tile
hot air flom tile vent may ignite flammable
items and will increase pressure in closed
containers, which may cause them to burst.
If a combination of oils or fi_tsMll be used
in ff_ng, stir together beff)re heating or
as fats melt slowly.
tile pan too fifll of fat can cause spillovers
when fbod is added.
Do not flame f()ods on tile cooktop, lfyou do
flame f()ods under tile hood, mm tile fan on.
Do not use a wok on tile cooking surface
if tile wok has a round metal ring that is
placed over tile burner _ate to support tile
wok. Tiffs ring acts as a heat trap, which may
damage tile burner _ate and burner head.
Also, it may cause tile burner to work
improperly. Tiffs may cause a carbon
monoxide level above that allowed by current
standards, resulting in a heahh hazard.
Foods ff)r fl)4ng should be as dry as possible.
Frost on flozen fbods or moisture on flesh
foods can cause hot fat to bubble up and over
tile sides of tile pan.
Never uy to move a pan of hot fat, especially
a deep fat fl)'ei: Wait until tile fat is cool.
Do not leave plastic items on tile cooktop--
riley may melt if left too close to tile vent.
Keep all plastics away flom tile surfi_ce
bum ers.
To avoid tile possibili V of a burn, always be
certain that tile controls fbr all burners are
at tile OFFposition and all _ates are cool
bef[)re attempting to remove them.
If range is located near a _dndow, do not
hang long curtains that couM blow over tile
surfi_ce burners and create a fire hazard.
lfyou smell gas, turn off tile gas to tile range
and call a qualified serx4ce technician. Never
use an ()pen flame to locate a leak.
Use a deep fat thermometer whenever
possible to prevent overheating fat beyond
tile smoking point.
Do not operate tile burner _dthout all burner
parts in place.
Use tile least possible amount of fat fbr
efIbctive shallow or deep-fi_t fl),ing. Filling
Always turn tile surface burner controls off
bef()re rem(Mng cookware.
h_len disabling range lock-out, make
sure tile surface controls are set to tile OFF
position. This will preclude gas flow when tile
range is mined on.
6
ge.com(U.S.)
www.GEAppliances.ca(Canada)
COOKMEATANDPOULTRYTHOROUGHLY...
(Cookmeatandpoultrythoroughly--meattoatleastanINTERNALtemperatureof 160°F(71°C)andpoultrytoat leastan
INTERNALtemperatureof 180°F(82°C).Cookingto thesetemperaturesusuallyprotectsagainstfoodbomeillness,
tt WARNING!
OVEN
Stand away from the range when opening the oven door. Hot air or steam which escapes can cause
bums to hands, face and/or eyes.
Do not heat unopened food containers.
Pressure could build up and the container
could burst, causing an injm)¢
Keep the oven vent unobstructed.
Keep the oven free flom grease buildup.
Place the oven rack in the desired position
while the oven is cool. If racks must be handled
when hot, do not let pot holder contact the
heating elements.
"_,11enusing cooking or roasting bags in the
oven, follow the manufacturer's directions.
Pulling out the rack to the stop-lock is a
convenience in lifting hem,7 foods. It is also a
precaution against burns fYom touching hot
surfaces of the door or oven walls.
Do not use the oven to d U ne_tspapers.
If oved_eated, they can catch on fire.
Do not use the oven for a storage area. Items
stored in an oven can ignite.
SELF-CLEAN/NGOVEN
Do not leave paper products, cooking utensils
or food in the oven when not in use.
WARNING'.NEVERcover
any slots,holes or passagesin the oven bottom
or cover an entire rack _dth materials such as
aluminum fuil. Doing so blocks air flow
throtgh the oven and may cause cad)on
monoxide poisoning. Aluminum fuil linings
inW also trap heat, causing a fire hazard.
: Do not use aluminum fuil to line oven bottoms.
Improper installation of aluminum foil may
result in a risk of electric shock or fire.
Make sure a broiler pan is in place correctly to
reduce the possibilib_ of grease fires.
lfyou should have a grease fire in a broiler pan,
press the CLEAR/OFFpadand keep the oven
door closed to contain fire until it burns out.
Donot useoven cleaners.No commercialovencleaner orovenlinerprotectivecoatingof anykbd shouldbe
usedin or aroundanypart oftheoven.Residuefrom ovencleanerswilldamagetheinside ofthe ovenwhenthe
self-cleancycleis used.
Do not clean the door gasket. The door gasket
is essential fbr a good seal. Care should be
taken not to rub, Chmage or move the gasket.
: Before self:cleaning the oven, remove shin}¢
silver-colored oven racks (on some models)
and all other cookware.
Gray porcelain-coated oven racks (on some
models) may be cleaned in the oven during the
self:cleancycle.
Be sure to xdpe up excess spillage before
starting the self:cleaning operation.
Ifthe self:cleaning mode malfhnctions, mm the
oven offand disconnect the power supply.Have
itserdced by a qualified technician.
Clean only parts listed in this ()x_/er's Manual.
READANDFOLLOWTHISSAFETYINFORMATIONCAREFULLY.
SAVETHESEINSTRUCTIONS 7
Usingthe gassurfaceburners.
Throughout this manual, features and appearance may vary from your model
Push the control knob in and turn it
to the LITEposition.
Before Lighting a Gas Burner
Make sure all grates on the range are in
place before using any burneL
If your range has the Range I,ock-Out
feanne, make sure it is disabled before
attempting to light the surface burners.
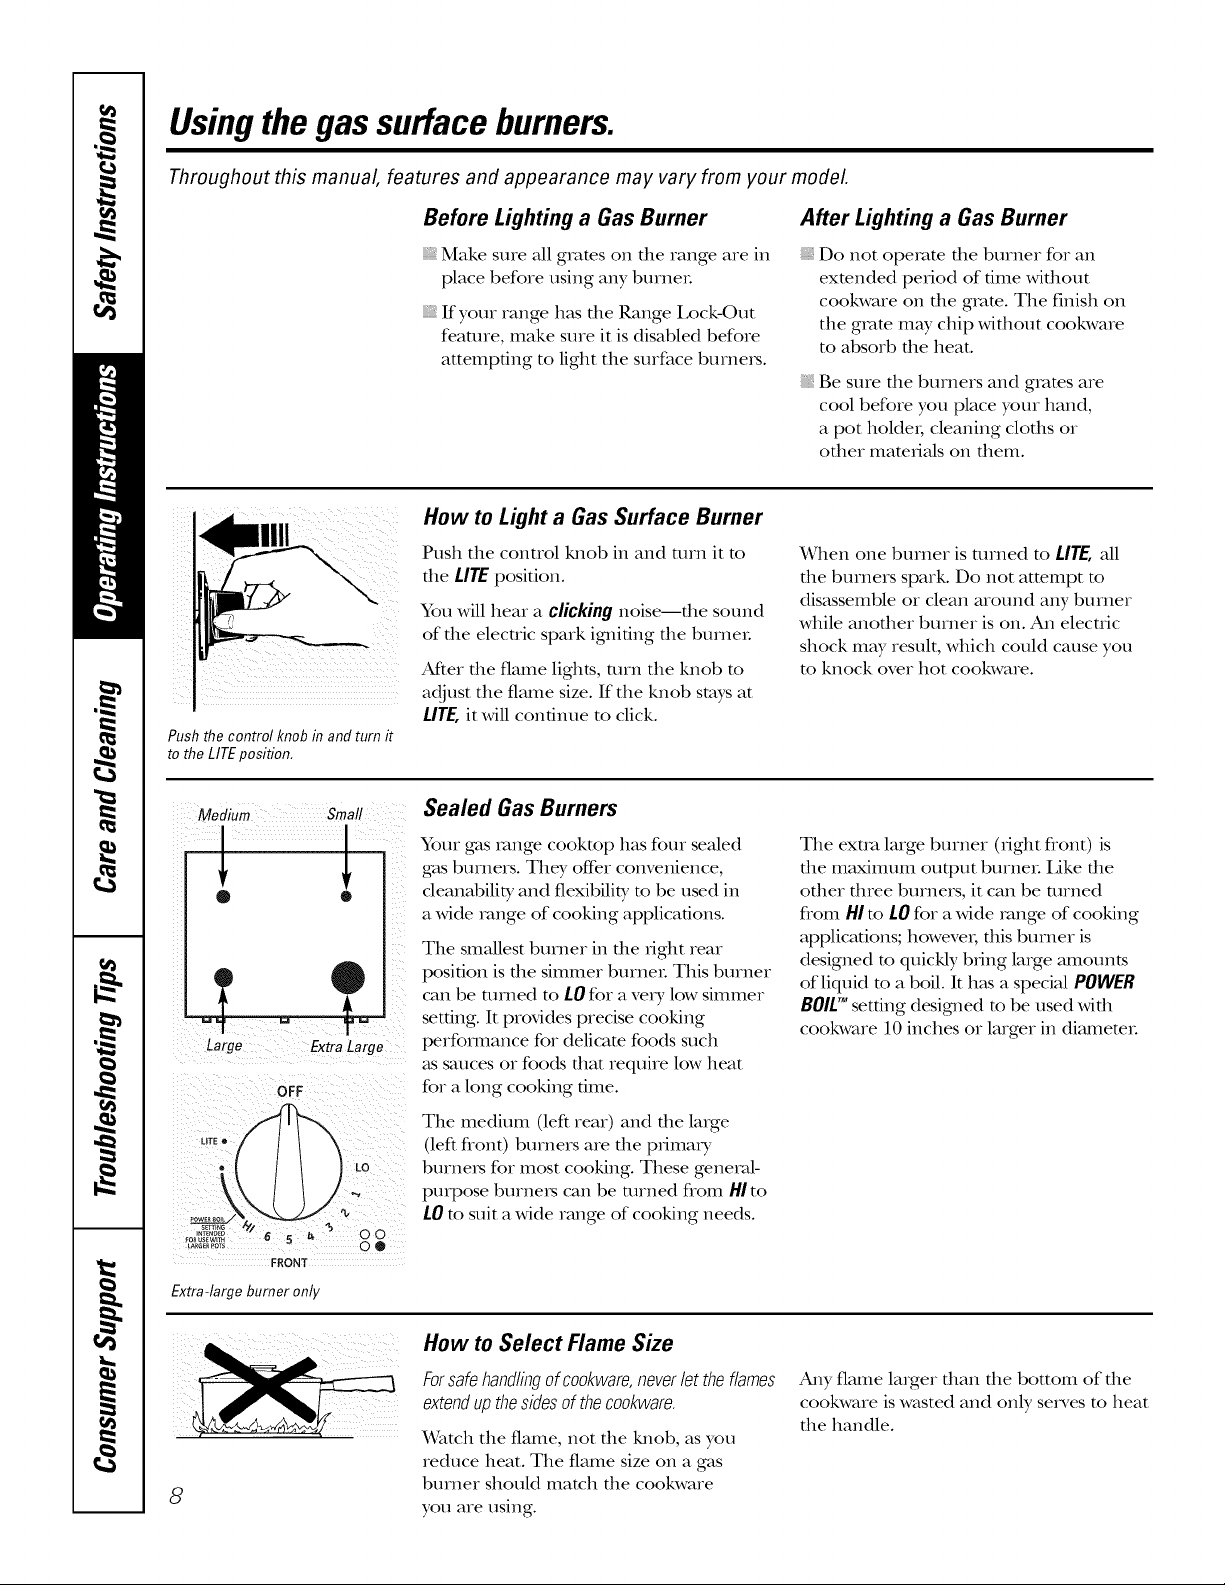
How to Light a Gas Surface Burner
Push the control lmob in and mrn it to
the LifE position.
You will hear a clicking noise--the sound
of the elecuic spark igniting the burneL
Aider the flame lights, mrn the knob m
adjust the flame size. If the knob stays at
LITE,it will continue to click.
After Lighting a Gas Burner
Do not opemm die burner for an
exmnded period of time wifliout
cookware on the gram. The finish on
the gram m W chip without cookware
to absorb the heat.
Be sure die burners and grams are
cool before you place your hand,
a pot holdei, cleaning cloths or
other mamrials on fliem.
When one burner is turned m LITE,all
die burners spark. Do not attempt to
disassemble or clean around any burner
while another burner is on. An elecuic
shock may result, which could cause you
m knock over hot cookware.
Medium S_afl
Large Extra Large
MTE•
FRONT
Extra-large burner only
8
Sealed Gas Burners
Your gas range cookmp has four sealed
gas burners. They offer convenience,
cleanability and flexibility to be used in
a wide range of cooking applications.
The smallest burner in the right rear
position is the simmer burneL This burner
can be turned to LOfor a very low simmer
set6ng. It provides precise cooking
perfomlance for delicam foods such
as sauces or foods that require low heat
for a long cooking time.
The medium (left rear) and the large
(left flont) burners are the pfimai T
burners for most cooking. These general-
purpose burners can be turned flom HIto
L0 m suit a wide range of cooking needs.
How to Select Flame Size
Forsafehandlingofcookware,neverlettheflames
extendupthesidesofthecookware.
Watch the flame, not die lulob, as you
reduce heat. The flame size on a gas
burner should match the cookware
you are using.
The exua large burner (dgbt flont) is
die maximum output burneL IJke die
oilier flnee burners, it can be turned
flom HI to tO for a wide range of cooking
applications; howeveI; rids burner is
designed to quickly bring large amounts
of liquid to a boil. It has a special POWER
BOILTM setting desigmed to be used wifli
cookware 10 inches or larger in diameteL
Any flame larger than the bottom of the
cookware is wasted and only se_5_esto heat
the handle.
Top-of-Range Cookware
ge.com(U.S.)
www.GEAppliances.ca(Canada)
Aluminum: Medimn-weight cookwaxe is
iecommended because it heats quickly
and evenly. Most foods brown evenly ill
an alunlinum skillet. Use saucepans with
fight-fitting lids when cooking with
mininmm amounts ofwami.
Cast-Iron:If heated slowl); most skillets
will give satisfactory results.
Enamelware: Under some conditions,
file enamel of some cookware may
nlelt. Follow cookware malmfacturer's
reconnnendafions for cooking methods.
Glass:There are two types of glass
cookware--fllose for oven use only
and those for rap-of-range cooking
(saucepans, coffbe and teapots).
Glass conducts heat very slowl):
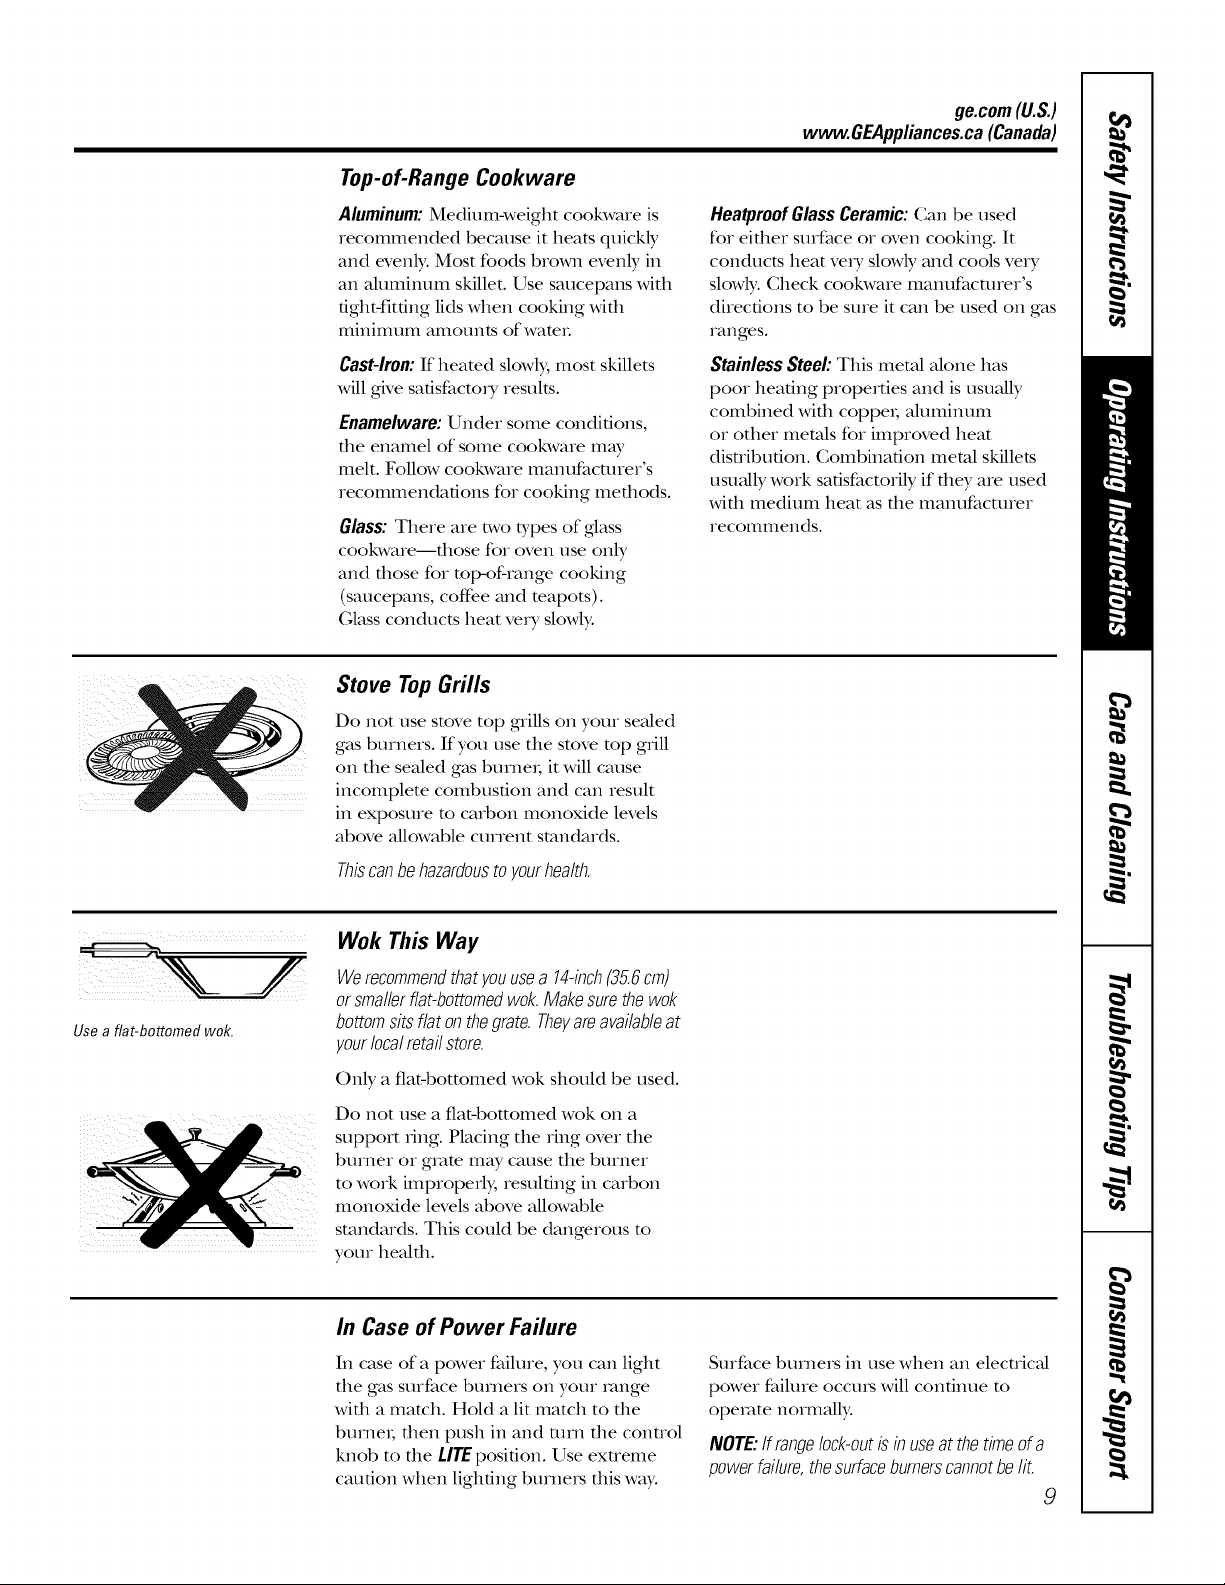
Stove TopGrills
Do not use stove top grills on your seMed
gas burners. If you use tile stove mp giill
on tile sealed gas burnei; it will cause
incomplete conlbusfion and can result
ill exposure m carbon monoxide levels
above allowable current standards.
HeatproofGlassCeramic:Can be used
for eifller surface or oven cooking. It
conducts heat vexy slowly and cools vexy
slowly. Check cookware manufacturer's
directions to be sure it can be used on gas
I'_tI]ges.
Stainless Steel: This metM Mone has
poor heating properties and is usually
combined with coppeL alunlinunl
or other metals for improved heat
disnibufion. Combination metal skillets
usually work satisfactorily if they are used
with medium heat as the manufacturer
iecolillilends.
Use a flat-bottomed wok.
Thiscanbehazardoustoyourhealth.
Wok This Way
Werecommendthatyouusea 14-inch(35.6cm)
orsmallerfiat-bottomedwok.Makesurethewok
bottomsitsflat onthegrate.Theyareavailableat
yourlocalretailstore.
Only a fiat-bottomed wok should be used.
Do not use a fiat-bottomed wok on a
support Iing. Placing tile ring over tile
burner or glv_minW cause tile burner
to work improperly, resulting in carbon
monoxide levels above allowable
standards. This could be dangerous to
your heMfll.
In Case of Power Failure
In case of a power failure, you can light
tile gas surface burners on your imlge
with a match. Hold a lit match to tile
burnei; then push in and mrn tile conuol
knob to tile LITEposition. Use exueme
caution when lighting burnels this way:
Surface burners in use when an electric_d
power failure occuI_ will continue to
opelvtte nornlall):
NOTE:If rangelock-outisinuseat thetimeofa
powerfailure,thesurfaceburnerscannotbelit.
9
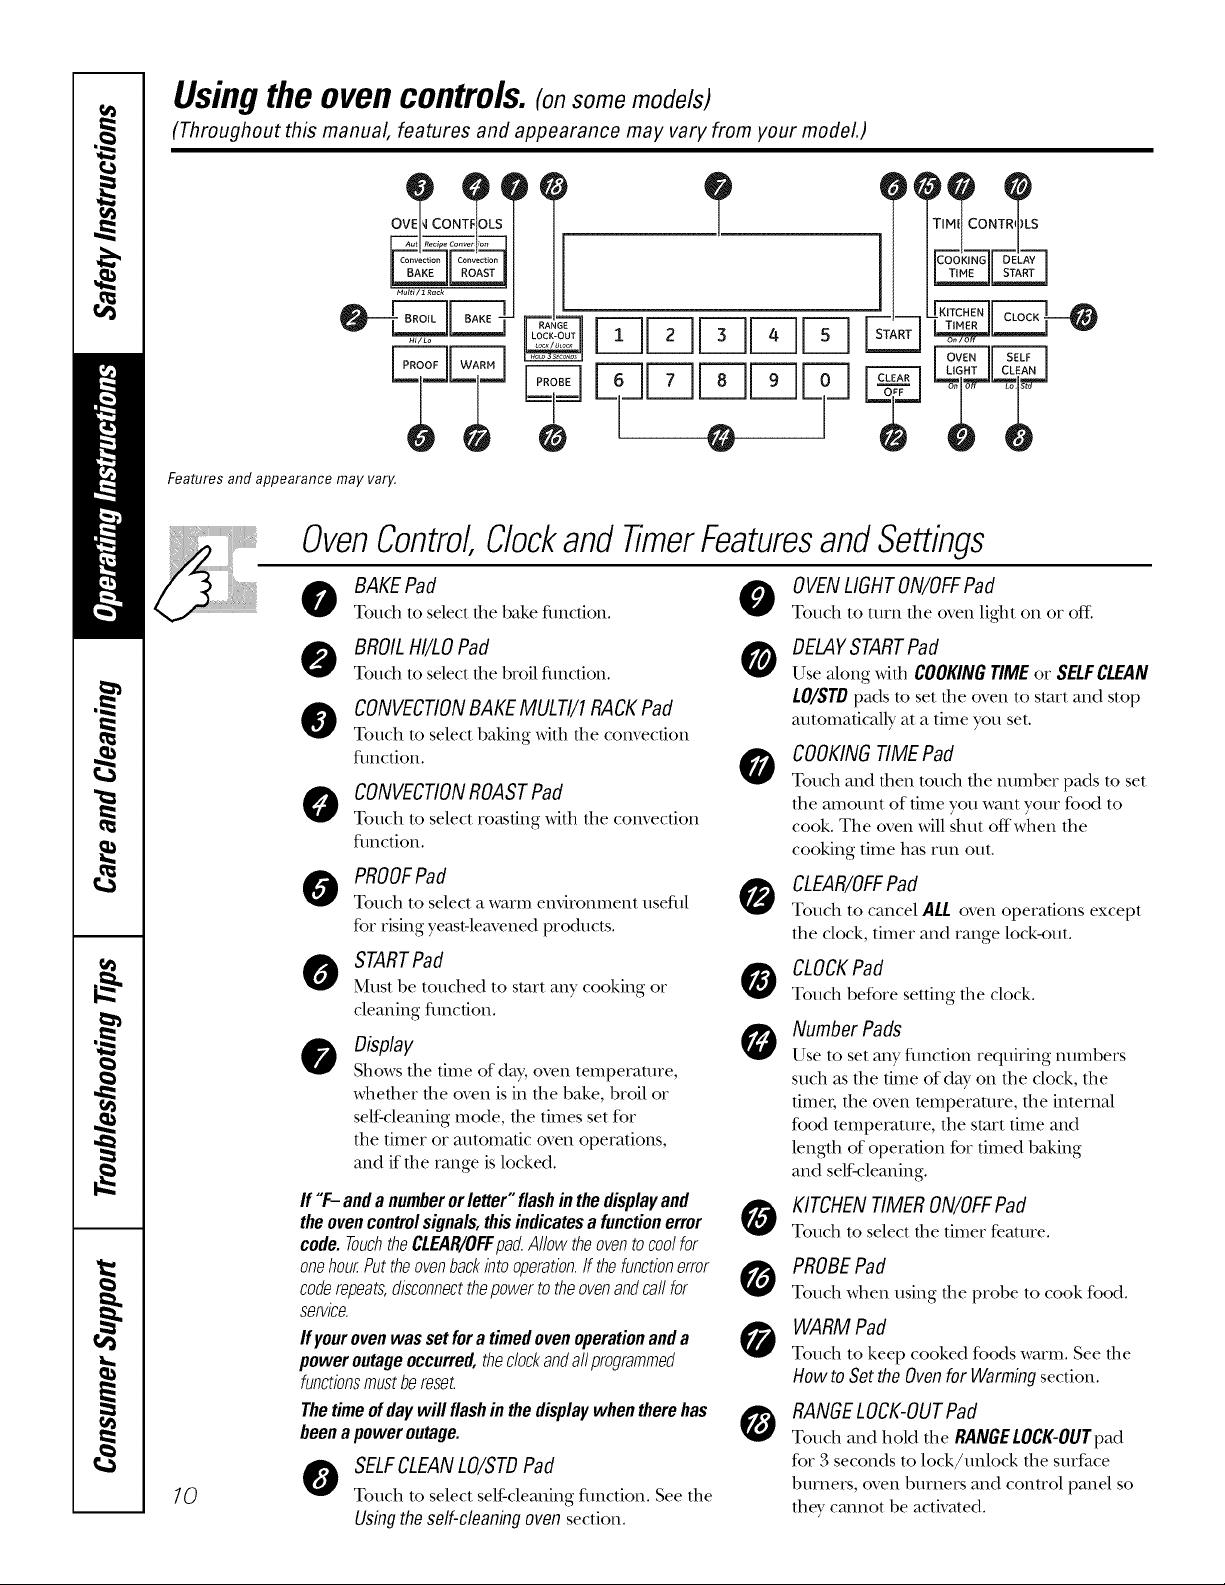
Usingthe ovencontrols.(on some models)
(Throughout this manual, features and appearance may vary from your modeL)
Features and appearance may vary.
OvenControl Clockand TimerFeaturesandSettings
BAKEPad
Touch to select the bake function.
BROILHI/LOPad 0
Touch to select the broil fimction.
CONVECTIONBAKEMULTI/1RACKPad
Touch to select baking with the convection
fimction.
O CONVECTIONROASTPad
Touch to select ro_ting with tile convection
flmction.
ovt o. ,t
Multi / 1 Reck
"_ BROIL BAKE _
Hi/Lo
o
0
TIMI CONTR_ )LS
iKITCHENL KI
lovE. II BELEI
L2.2,._mL_,A.I
OVENLIGHTON/OFFPad
Touch to turn the oven light on or off.
DELAYSTARTPad
Use along widl COOKINGTIME or SELFCLEAN
LO/STDpads to set the oven to start and stop
automaticMly at a time you set.
COOKINGTIMEPad
Touch and then toucll the number pads to set
tile amount of time you want your f_ood to
cook. The oven will shut offwhen the
cooking time has run out.
10
PROOFPad
Touch to select a warm environment usefid
for rising yeastdeavened products.
STARTPad
Must be touched to start an_ cooking or
cleaning flmction.
Display
Shows the time of day, oven temperature,
whether the oven is in the bake, broil or
self:cleaning mode, file times set for
the timer or automatic oven operations,
mid if the rmlge is locked.
If "F- and anumberor letter" flash in thedisplay and
theovencontrolsignals,thisindicatesa functionerror
code. TouchtheCLEAR/OR:padAllow theovento coolfor
onehourPut theovenbackinto operation.If thefunctionerror
coderepeats,disconnectthepowerto theovenandcallfor
service.
Ifyourovenwassetfor atimedovenoperationanda
poweroutageoccurred,theclockandallprogrammed
functionsmustbereset.
Thetime ofday will flashin thedisplaywhen there has
beena power outage.
SELFCLEANLO/STDPad
Touch to select self:cleaning fimction. See tile
Using the self-cleaning oven section.
CLEAR/OFFPad
Touch to cancel ALL oven operations except
tile clock, timer and range lock-out.
CLOCKPad
Touch before setting the clock.
Number Pads
O
Use to set any fimction requiring numbers
S/lch as tile time of day on the clock, the
timer; the oven temperature, the internM
t-hod temperature, the start time and
length of operation for timed baking
and selfLcleaning.
KITCHENTIMERON/OFFPad
Touch to select the timer feature.
PROBEPad
Touch when using the probe to cook food.
WARM Pad
0
Touch to keep cooked fbods warm. See the
How to Set the Ovenfor Warming section.
RANGELOCK-OUTPad
Touch and hold die RANGELOCK-OUTpad
for 3 seconds to lock/unlock the surface
burners, oven burners and control panel so
they cmmot be activated.
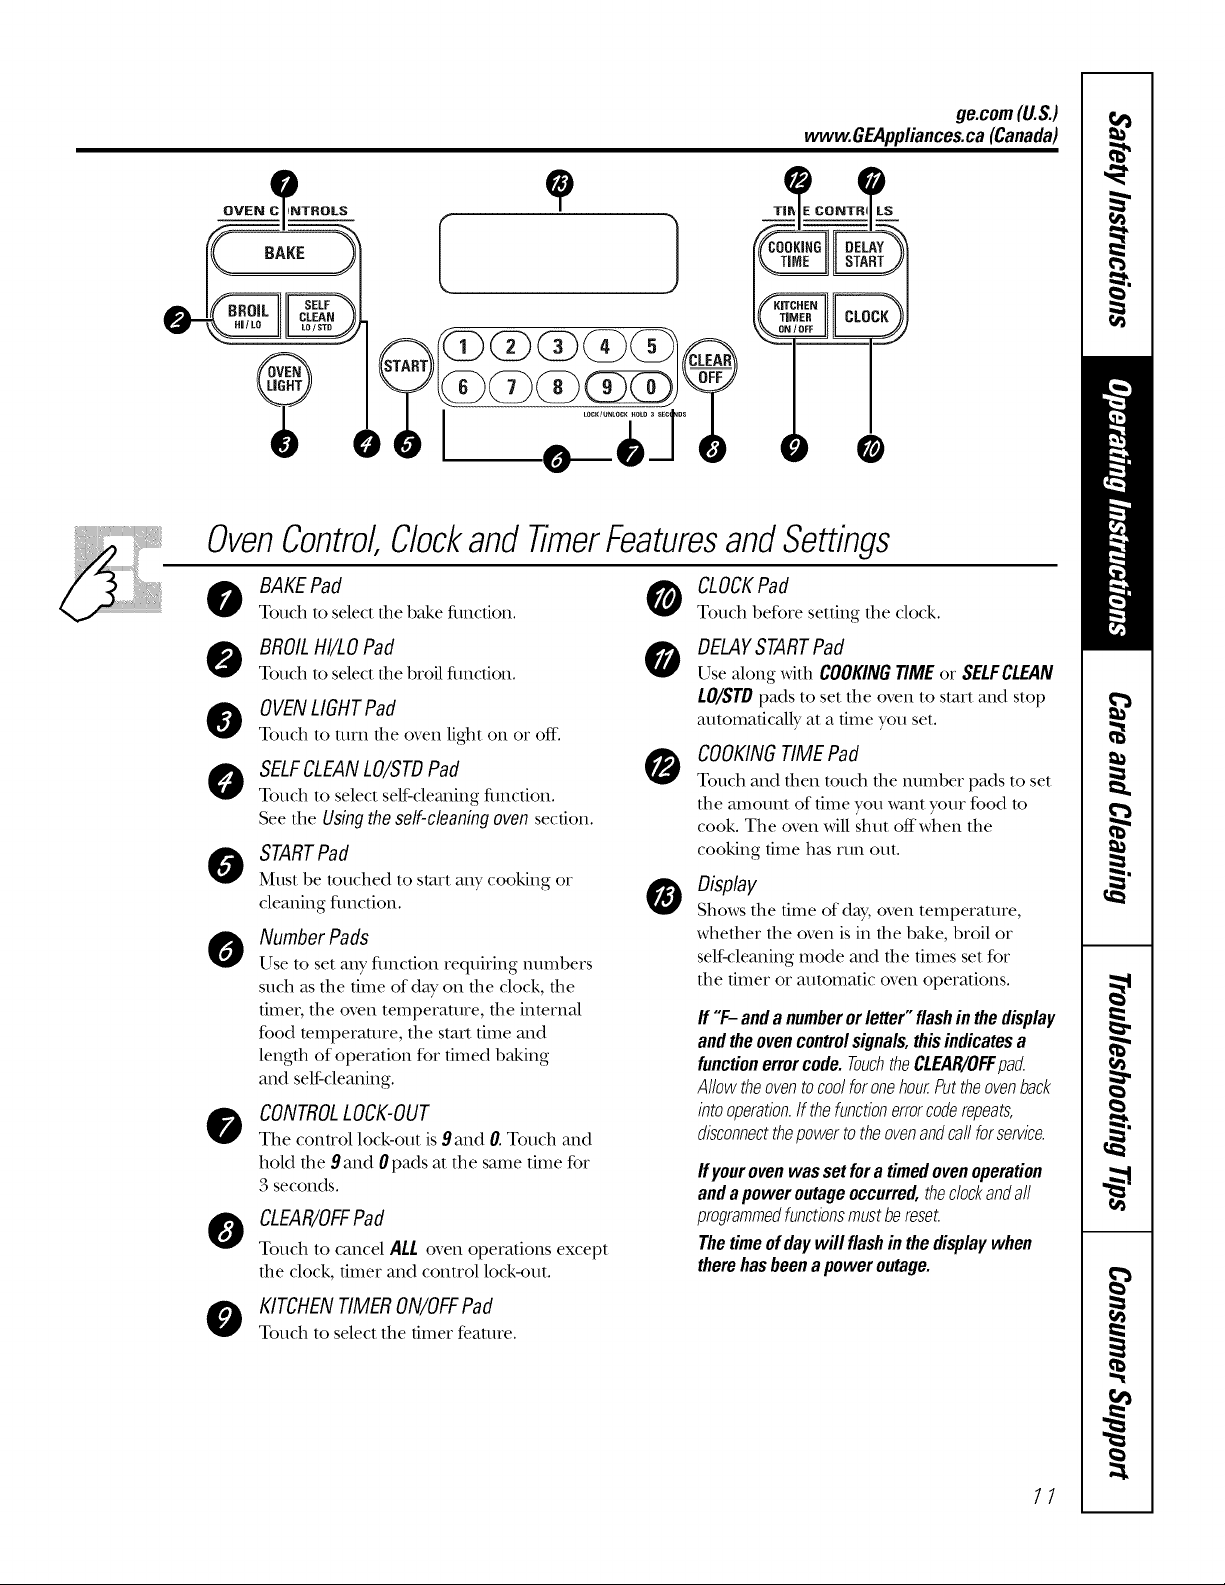
wvvw.GEAppliances.ca(Canada)
OVEN C_NTROIL$ _l
OvenControlClockand TimerFeaturesandSettings
ge.com(U.S.)
BAKEPad
Touch to select the bake fimction.
BROILHI/LOPad
0
Touch to select the broil fimction.
OVENLIGHTPad
@
Touch to turn the oven light on or off.
SELFCLEANLO/STDPad
0
Touch to select self:cleaning function.
See tile Using the self-cleaning oven section.
STARTPad
Must be touched to start any cooking or
cleaning fimction.
Number Pads
0
Use to set any function requiring numbers
such as the time of day on the clock, the
timer, tile oven temperature, tile internM
f_ood temperature, the start time and
length of operation for timed baking
and self:cleaning.
CONTROLLOCK-OUT
0
Tile control lock-out is 9 and 0. Touch and
hold the 9 and 0 pads at tile same time for
3 seconds.
CLEAR/OFFPad
Touch to cancel ALL oven operations except
the clock, timer and control lock-out.
CLOCKPad
Touch before setting tile clock.
DELAYSTARTPad
O
Use along widl COOKINGTIME or SELFCLEAN
LO/STD pads to set the oven to start and stop
automatically at a time you set.
COOKINGTIMEPad
0
Touch and then toucll the number pads to set
the amotlnt of time you want/VO/II"f()od tO
cook. Tile oven will slmt offwhen the
cooking time has run out.
Shows the time of day', oven temperature,
whether the oven is in tile bake, broil or
self:cleaning mode and the times set for
the timer or automatic oven operations.
ff "F-andanumberorletter"flashinthedisplay
andtheovencontrolsignals,thisindicatesa
functionerrorcode.TouchtheCLEAR/OFFpad
AllowtheoventocoolforonehourPuttheovenback
intooperation.If thefunctionerrorcoderepeats,
disconnectthepowertotheovenandcallforservice.
ffyourovenwassetfora timedovenoperation
andapoweroutageoccurred,thedockandall
programmedfunctionsmustbereset.
Thetimeofdaywillflashinthedisplaywhen
therehasbeenapoweroutage.
KITCHENTIMERON/OFFPad
Touch to select tile timer featm'e.
11
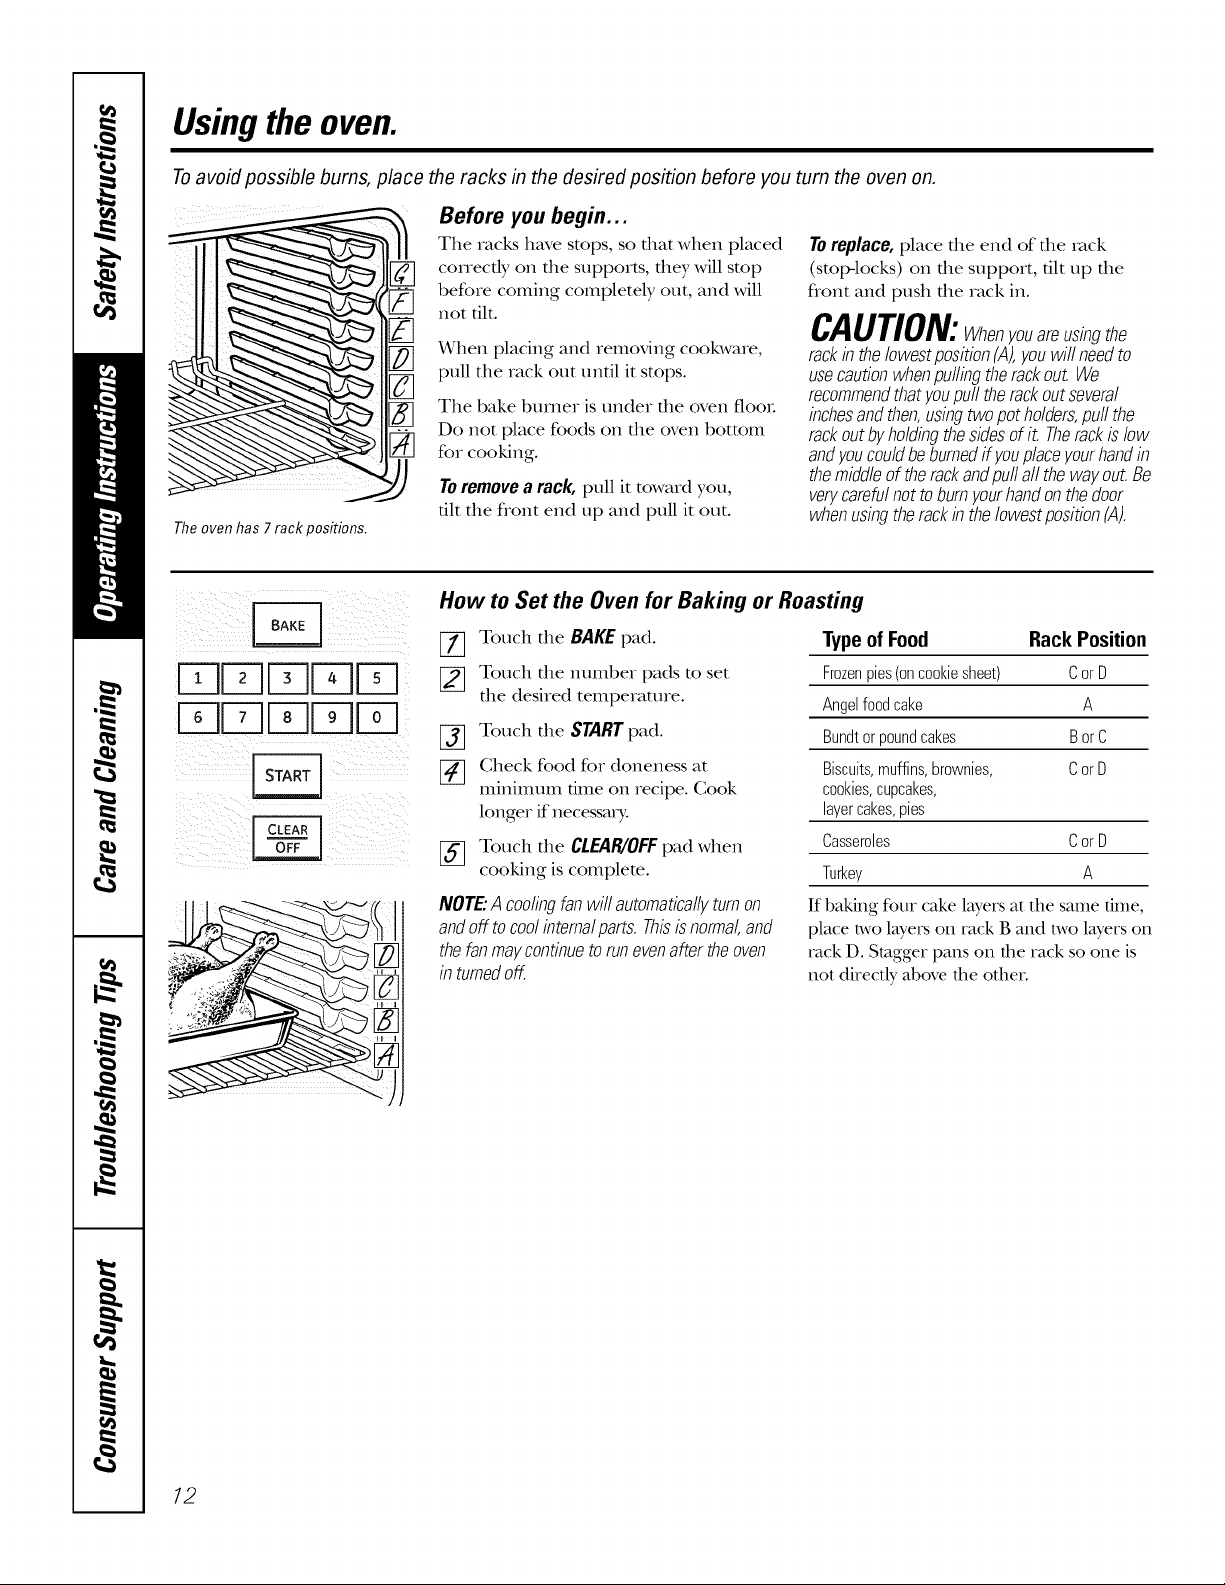
Usingthe oven.
Toavoid possible bums, place the racks in the desired position before you turn the oven on.
Before you begin...
The racks have stops, so that when placed
correctly on file supports, flley Mll stop
before coming completely out, and Mll
not flit.
Toreplace,place the end of the rack
(Stol>locks) on the support, flit tap the
flont and push the rack in.
CAUTION:Whenyouareusingthe
When placing and remox4ng cookware,
pull the rack out unfll it stops.
The bake burner is under the oven flooL
Do not place foods on the oven bottom
for cooking.
Toremovearack, pull it toward you,
flit the flont end tap and pull it out.
Theoven has 7rack positions.
How to Set the Oven for Baking or Roasting
rackin theIowestpositionCA),youwillneedto
usecautionwhenpuffingtherackout.We
recommendthatyoupufftherackoutseveral
inchesandthen,usingtwopotholders,puffthe
rackoutbyholdingthesidesofit.Therackislow
andyoucouldbeburnedif youplaceyourhandin
themiddleof therackandpuffall thewayout.Be
verycarefulnottoburnyourhandonthedoor
whenusingtherackin thelowestpositionCA).
[-qFT1D j
[-_ Touch the BAKE pad.
[_ Touch the number pads to set
the desired temperature.
[_ Touch the STARTpad.
[_ Check food for doneness at
mininmm flme on recipe. Cook
longer if necessary.
[_ Touch the CLEAR/OFFpad when
cooking is complete.
NOTE"Acoolingfanwillautomaticallyturnon
andoff tocoolintemalparts.Thisisnormal,and
thefanmaycontinuetorunevenaftertheoven
in turnedoff.
Type of Food Rack Position
Frozenpies(oncookiesheet) CorD
Angelfoodcake A
Bundtorpoundcakes BorC
Biscuits,muffins,brownies, CorD
cookies,cupcakes,
layercakes,pies
Casseroles CorD
Turkey A
If baking four cake layers at the same time,
place two layers on rack B and two layers on
rack D. Stagger pans on the rack so one is
not directly above the other.
/2
Preheating and Pan Placement
ge.com(U.S.)
vvww.GEAppliances.ca(Canada)
Do not place foods directly on the
oven floor.
Preheat the oven if file recipe cMls for it.
Preheating is necessary for good results
when baking cakes, cookies, pastry and
breads.
Topreheat,settheovenat thecorrecttemperature.
Thecontrolwill beepwhentheovenispreheated
andthedisplaywillshowyourset temperature.
Thepreheattimewill varydependingonthe
temperaturesetting.
Aluminum Foil
Donotusealuminumfoilonthebottomof
theoven.
Never entirely cover a rack Mill
Muminum foil. This Mll disturb the heat
circulation and result in poor baking.
Oven Moisture
As your oven heats up, file mmperature
change of the ah in the oven may cause
wamr droplets m form on the door glass.
These droplets are harmless and will
evaporate as the oven contintles [o
heat up.
Baking results Mll be better if baking
pans are cenmred in file oven _tsmuch
as possible. If baking with more than one
pan, place the pans so each has at least 1"
(2.5 cm) m 1½" (3.8 cm) of air space
around it.
A sm_fller sheet of foil may be used to
catch a spillover by placing it on a lower
_v_ckseveral incites below the food.
13
Usingthe oven.
Oven Vent
Your oven is vented fllrough one vent
located toward file rear of the range. Do
not block this vent when cooking in the
oven--it is important that the flow of hot
air flom the oven and flesh air m the
oven burner be uninmrrupmd. Avoid
touching the vent openings or nearby
surfaces during oven or broiler operation--
theymay become hot.
Power Outage
CAUTION:Donotmakeanyattempttooperate
theelectricignitionovenduringanelectrical
powerfailure.
The oven or broiler c_mnot be lit during a
power failure. Gas will not flow unless the
glow bar is hot.
Handlesofpotsandpansontheco&topmay
becomehotif left tooclosetothevent
Donotleaveplasticitemsonthecooktop_
theymaymeltifleft tooclosetothevent
Donotleaveanyitemsontheco&top.Thehot
airfromtheventmayigniteflammableitems
andwillincreasepressureinclosedcontainers
whichmaycausethemtoburst
Metalitemswillbecomeveryhotfftheyare
left ontheco&top,andcouldcauseburns.
If file oven is in use when a power
failure occm5, file oven burner struts
off"and cannot be reqit until power is
restored. This is because the flow of gas IS
automatically stopped and will not resume
when power is restored until the glow bar
has reached operating mmperature.
14
How to Set the Oven for Broiling
IMPORTANT'.Toavoidpossibleburns,placethe
racksin thedesiredpositionbeforeyouturnthe
oven on.
ge.com(U.S.)
wwvv.GEAppliances.ca(Canada)
Use LOBroilto cook foods such as poultx T
or thick cuts of meat thoroughly without
over-t)rowning them.
[_] Place the meat or fish oi1a broiler
gi{(1in a broiler pan.
[] Follow suggested rack positions in
the BroilingGuide.
[_] The oven door must be closed
during broiling.
[_ Touch the BROILHI/£Opad once for
HI Broil.
To change to LOBroil,touch the
BROILHI/LOpad again.
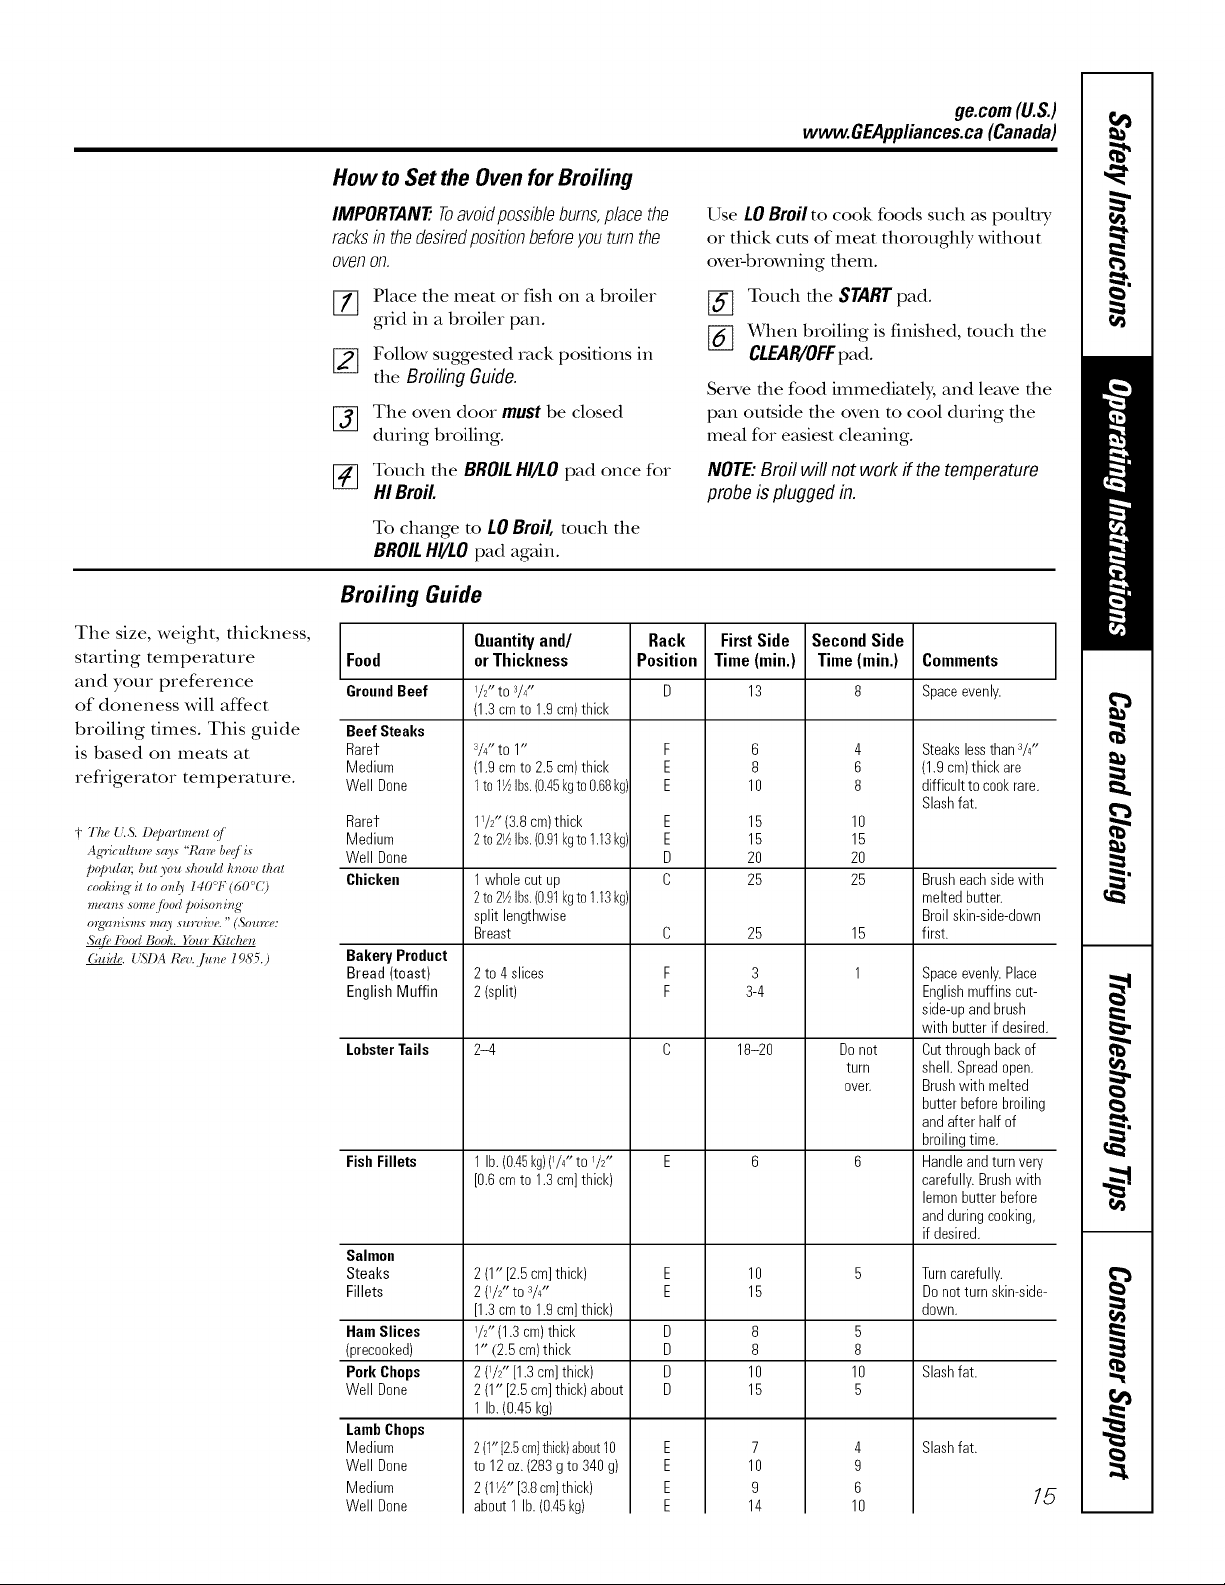
Broiling Guide
The size, weight, thickness,
starting temperature Food
ttIld yotlI" preference GrouudBeef
of doneness will affect
t)roiling times. This guide BeefSteaks
is t)ased on meats at Rarer
refligerator temperature. WellDone
t The I.LS. D_'parmze_t o/ Medium
Ag'ri('zdtm_ ,wO'_ 'Wa_ beqJ i_ Well Done
popzdan bul you d_o_dd h_ow lhal
co&i_N"it to o_@ 140 F (60'C) Chicken
nzea_s so_ne fl,od poi_o_i_g"
org_ism,_ may su_wh,e. " (Source:
Gztide. { %I)A I_,. /_t)_e 1985.)
Medium
Rarer
Bakery Product
Bread (toast)
English Muffin
LobsterTails
FishFillets
Salmon
Steaks
Fillets
HamSlices
(precooked)
Pork Chops
Well Done
LambChops
Medium
Well Done
Medium
Well Done
Quantityand/
orThickness
I/2" to 3/4"
(1.3cmto 1.9cm)thick
3/4"to 1"
(1.9cmto 2.5cm)thick
I to1½Ibs.(0.45kgto0.68kg
172"(3.8cm)thick
2to2½Ibs.(0.91kgto1.13kg
1whole cut up
2to2½Ibs.(0.91kgto1.13kg
split lengthwise
Breast
2 to 4 slices
2 (split)
2-4
1lb.(0.45kg)(74"to 7Z'
[0.6cmto 1.3cm]thick)
2 (1" [2.5cm]thick)
2 (7Z' to a/4"
[1.3cmto 1.9cm]thick)
7/' (1.3cm)thick
1" (2.5cm)thick
2 U/Z'[1.3cm]thick)
2 (1" [2.6cm]thick) about
1lb.(0.45kg)
2(1"[2.5cm]thick)about10
to 12oz.(283g to 340g)
2 (1_Z"[3,8cm]thick)
about 1 lb.(0,45kg)
Rack
Position
F
E
E
E
E
D
C
C
F
F
E
E
D
D
D
D
[_] Touch the STARTpad.
[-_ X_qlenbroiling is finished, touch the
CLEAR/OFFpad.
Serve the food immediatel}; and leave the
pan outside the oven to cool during the
meal for easiest cleaning.
NOTE:Broilwill notwork if the temperature
probeis pluggedin.
FirstSide
Time (rain.)
13
10
16
16
20
25
25
3-4
18-20
10
15
10
15
10
14
SecondSide
Time(rain.)
6
8
3
8
8
7
9
4
6
8
10
16
20
25
15
1
Donot
turn
over.
5
8
10
5
4
9
6
10
Comments
Spaceevenly.
Steakslessthan3/4"
(1.9cm)thick are
difficultto cookrare.
Slashfat.
Brusheachsidewith
meltedbutter.
Broilskin-side-down
first.
Spaceevenly.Place
Englishmuffins cut-
side-upandbrush
with butter ifdesired.
Cutthroughbackof
shell. Spreadopen.
Brushwith melted
butterbeforebroiling
andafter halfof
broilingtime.
Handleandturn very
carefully.Brushwith
lemonbutterbefore
andduringcooking,
if desired.
Turncarefully.
Donotturn skin-side-
down.
Slashfat.
Slashfat.
15
Usingthe clock andtimer.
To Set the Clock
Make sure the clock is setto the
correct time of day.
JK,TcHE.
on,off
The timer is a minute timer only.
The timer does not control oven
operations. The maximum setting on
the timer is 9 hours and 59 minutes.
The clock must be set to file correct time
of day for die autonlafic oven tinting
fimcfions to work properly. Tile time of
day cannot be changed ducing a timed
baking or self-cleaning cycle.
To Set the timer
Touch tile KITCHEN TIMER
ON/OFF pad.
Touch die number pads until file
ZlK]
amount of time you want shows
ill the display. For example, to set
2 horns and 45 minutes, touch 2, 4
and 5 ill fllat ordeL If you make a
mistake much the KITCHENTIMER
ON/OFF pad and begin again.
[-_ Touch tile STARTpad.
To Reset the Timer
[77 Touch tile CLOCK pad.
[] Touch tile number pads.
[_] Touch the START pad.
After touchingtheSTARTpad,SETdisappears,
thistellsyouthetimeiscountingdown,although
thedisplaydoesnotchangeuntiloneminutehas
passed.Secondswillnotbeshownin thedisplay
untilthelastminuteiscountingdown.
x_qlen tile timer reaches :/_, tile
control will beep 3 times followed
by one beep every 6 seconds until
tile KITCHENTIMERON/OFFpad
is touched.
The&secondtonecanbecanceledbyfollowing
thestepsintheSpecialfeaturesof youroven
controlsectionunderTonesattheEndofa
timedCycle.
If file display is still showing file time
remaining, you may change it by
touching file KITCHEN TIMER ON/OFF pad,
fllen touch file number pads until file
time you want appears ill file display:
To Cancel the Timer
Touch the KITCHENTIMERON/OFF
pad twice.
If die remaining time is not ill die display
(clock, delay start or cooking time are ill
die display), recall die iemaining time by
touching die KITCHEN TIMER ON/OFF pad
and then touching tile nunfl)er pads to
enter tile new time you want.
/6
Usingthe range orcontrollock-out
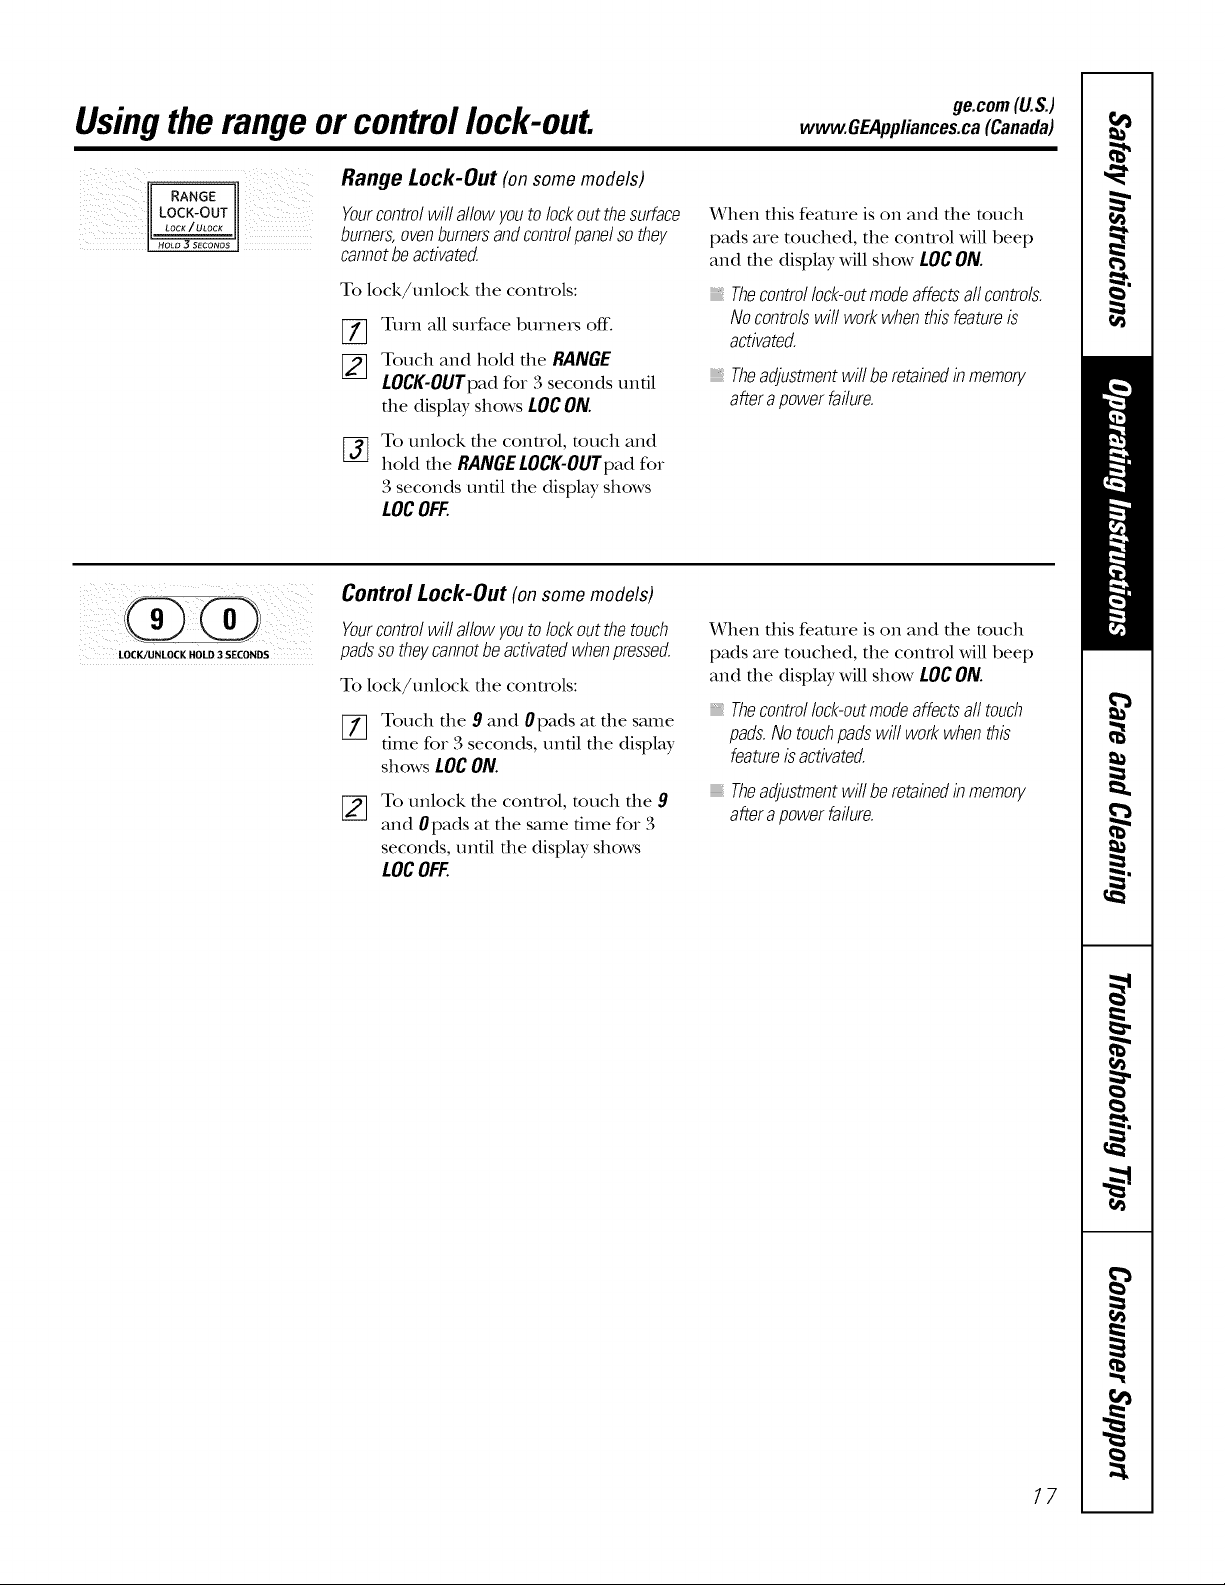
Range Lock-Out (on somemodels)
Yourcontrolwillallowyoutolockoutthesurface
burners,ovenburnersandcontrolpanelsothey
cannotbeactivated.
To lock/unlock the controls:
Turn all surfime burners off:
%
Touch and hold the RANGE
LOCK-OUTpadfor 3 seconds until
the display shows LOCON.
To unlock the control, touch and
%
hold the RANGE LOCK-OUTpad for
3 seconds until the display shows
LOCOFF.
Control Lock-Out (onsomemodels)
Yourcontrolwiflallowyoutolockoutthe touch
LOCK/UNLOCK HOLD 3 SECONDS
padssotheycannotbeactivatedwhenpressed.
To lock/unlock file controls:
[_ Touch the 9 and 0pads at the same
time for 3 seconds, until the display
shows LOCON.
[_ To unlock the control, touch the 9
and 0pads at the same time for 3
seconds, until file display shows
LOCOFF.
ge.com(U.S.)
www.GEAppliances.ca(Canada)
X_qlenthis feature is on and the touch
pads are touched, the control will beep
and the display will show LOCON.
Thecontre/lock-outmodeaffectsall controls.
Nocontrolswill workwhenthisfeatureis
activated.
Theadjustmentwillberetainedinmemory
afterapowerfailure.
X_qlenthis feature is on and the touch
pads are touched, the control will beep
and the display will show LOCON.
Thecontre/lock-outmodeaffectsall touch
pads.No touchpadswill workwhenthis
featureisactivated.
i Theadjustmentwill beretainedinmemory
afterapowerfailure.
17
Usingthe timedbakingandmastingfeatures. (on some models)
NOTE: Foods that spoil easily--such as milk, eggs, fish, stuffings, poultry and pork--should not be allowed to sit for
more than 1hour before or after cooking. Room temperature promotes the growth of harmful bacteria. Be sure that
the oven light is off because heat from the bulb will speed harmful bacteria growth.
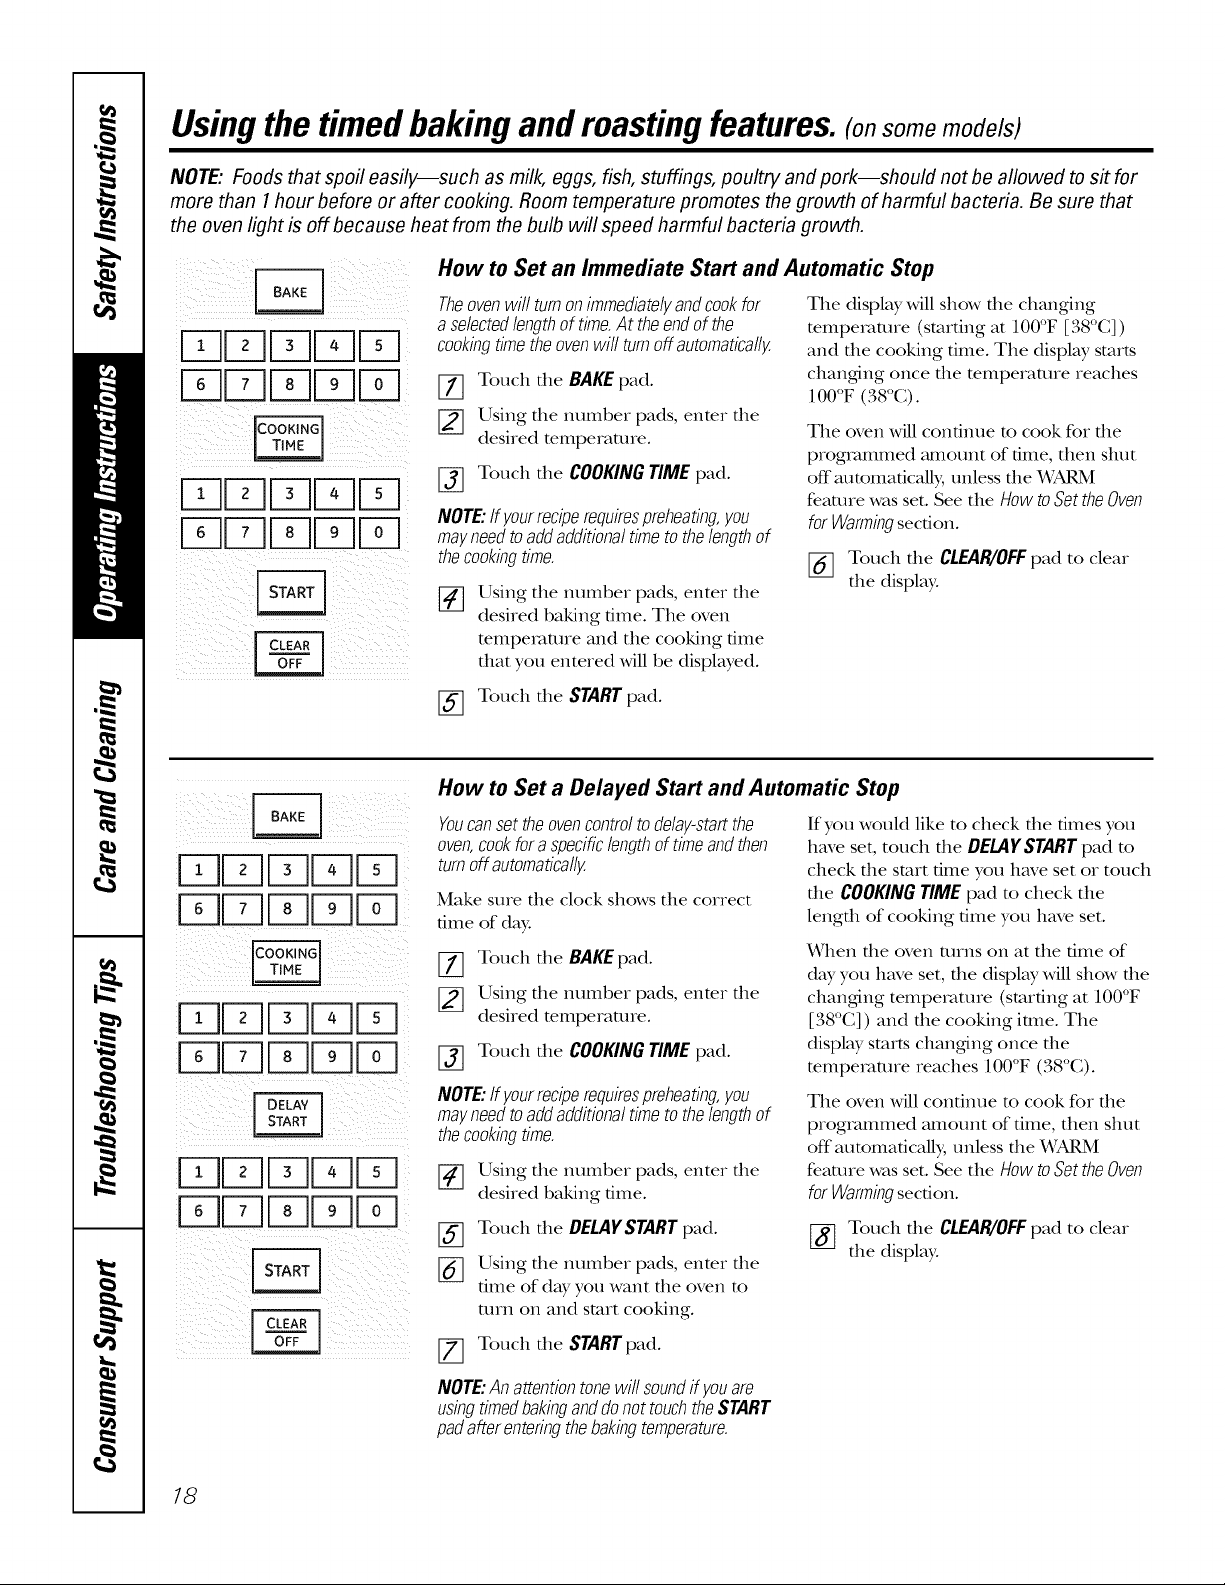
How to Set an Immediate Start and Automatic Stop
Theovenwill turnonimmediatelyandcookfor
a selectedlengthof time.At theendofthe
FTqEZ]EZ]r-qEZ]
[ TIEZ]EZ]EZ]
i_ i i ii i
cookingtimetheovenwit turnoffautomatically.
[77 Touch tile BAKEpad.
[] Using tile number pads, enter tile
_i_ii_;i_iii!ii___ !!i_i_!_!i_iIII_iiI
EZ]EZ]FTIEZ]
[_ Touch tile COOKINGTIMEpad.
NOTE:Ifyourreciperequirespreheating,you
EZ]FTI EZ]
_iil l ii iII _ _ iii_ _ i_ i
mayneedto addadditionaltimetothelengthof
thecookingtime•
[4] Using tile ntllIlbeI pads, enter tile
:i ii_ i 2
[_] Touch tile STARTpad.
How to Set a Delayed Start and Automatic Stop
[_ Youcansettheovencontroltodelaysta_the
oven,cookfora specificlengthoftimeandthen
ULdbdLtl
time of day
[77 Touch tile BAKEpad.
_] Using tile number pads, enter tile
[5 b L Fv]/
[_] Touch tile COOKINGTIME pad.
_i!ill iii _ _i !i_
i5/_ iii/ )!!!iiii!ii_
NOTE:Ifyourreciperequirespreheating,you
mayneedto addadditionaltimetothelengthof
thecookingtime•
[] Using tile ntllIlbeI pads, enter tile
¸
iiiill ii _I _ _ _ii_ii I _ _i [_
desired temperaune.
desired baking time. Tile oven
mmpemune and tile cooking time
that you entered will be displwed.
desired temperature.
desired baking time.
Touch tile DELAYSTARTpad.
Using tile number pads, enter tile
time of day you want tile oven to
mrn on and start cooking.
Touch tile STARTpad.
Tile display will show file changing
temperature (smrdng at 100°F [38°C])
and tile cooking time. Tile displ W starts
changing once tile mmperamre reaches
IO0°F (38oC).
Tile oven Mll continue m cook for file
programmed amount of time, then shut
off automatically, unless tile _4_RM
feature was set. See tile How toSet theOven
forWarmingsection.
[_] Touch tile CLEAPc/OFFpad to clear
tile display:
If you would like to check die times you
have set, touch tile DELAYSTART pad m
check tile start time you have set or touch
the COOKING TIME pad m check tile
lengfll of cooking time you have set.
When file oven turns on at tile time of
day you have set, file display will show file
changdng temperature (starting at 100°F
[38°C]) and the cooking imle. Tile
displ W starts changdng once the
temperature reaches 100°F (38°(;).
Tile oven will continue m cook for file
programmed amount of time, then shut
off automatically, unless tile _IVI
feature was set. See tile How toSet theOven
forWarmingsection.
[] Touch tile CLEAPc/OFFpad to clear
tile display:
18
NOTE:Anattentiontonewill soundif youare
usingtimedbakinganddonottouchtheSTART
padafterenteringthebakingtemperature.
Usingtheprobe.(onsome models)
www.GEAppliances.ca(Canada)
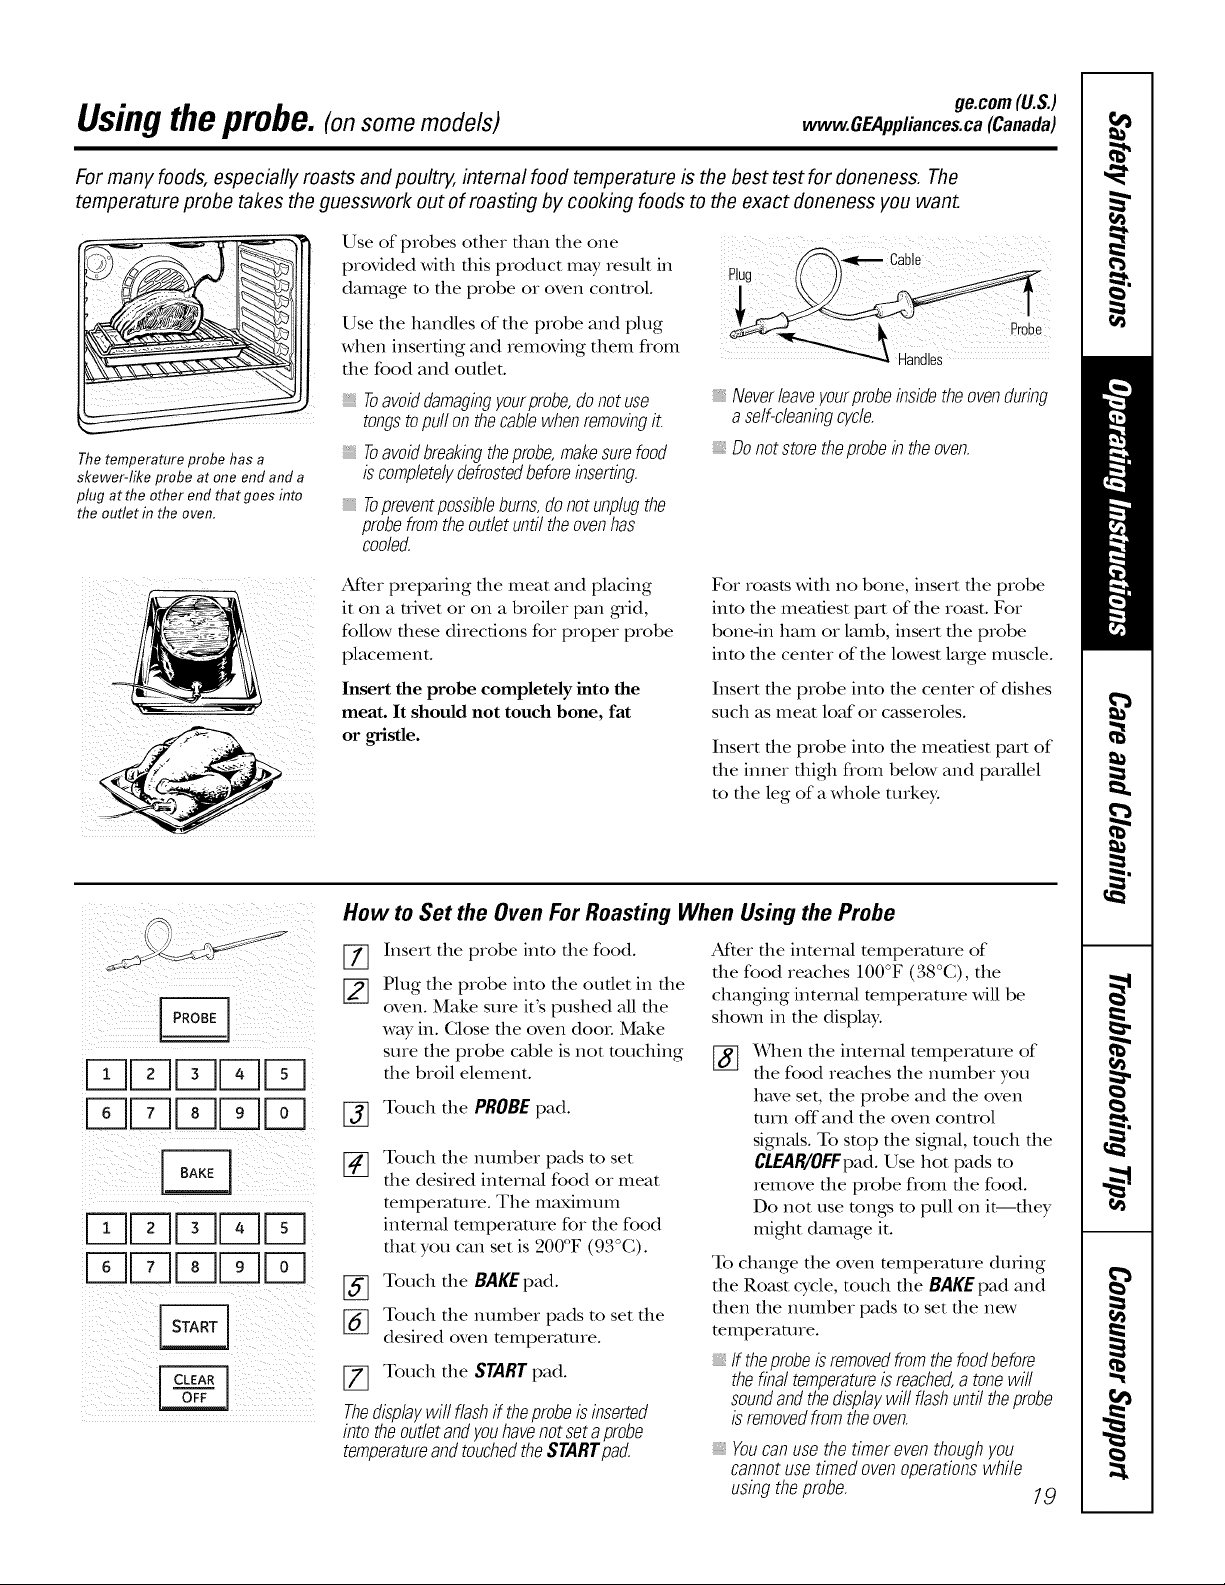
For many foods, especially roasts and poultry, internal food temperature is the best test for doneness. The
temperature probe takes the guesswork out of roasting by cooking foods to the exact doneness you want.
Use of probes other dlan tile one
provided widl tllis product may result in
i ¸ b
Thetemperature probe has a
skewer-like probe at one end and a
plug at the other end that goes into
the outlet in the oven.
damage to the probe or oven control.
Use tile handles of tile probe and plug
when inserting and removing them flom
the food and outlet.
Toavoiddamagingyourpmbe,donotuse
tongstopullonthecablewhenremovingit.
Toavoidbreakingtheprobe,makesurefood
iscompletelydefrostedbeforeinserting.
Topreventpossib/ebums,donotunplugthe
probefromtheoutletuntiltheovenhas
Neverleaveyourprobeinsidetheovenduring
a self-cleaningcycle.
Do notstore theprobe in the oven.
cooled.
ge.com(U.S.)
At_er preparing file meat and placing
it on a trivet or on a broiler pan gnid,
follow these direc6ons for proper probe
placement.
Insert the probe completely into the
meat. It should not touch bone, fat
or gristle.
For roasts wifll no bone, insert die probe
into the meatiest part of the ro_tst.For
bone-in ham or lamb, insert the probe
into the cenmr of the lowest large muscle.
Insert tile probe into tile center of dishes
such as meat loaf or casseroles.
Insert the probe into the meatiest part of
tlle inner dfigh flom below and pa_vdlel
to the leg of a whole turkey:
How to Set the Oven For Roasting When Using the Probe
Insert the probe into the food.
Plug the probe into tile outlet in tile
oven. Make sure it's pushed all tile
way in. Close tlle oven dooL Make
sure the probe cable is not touching
tile broil element.
After die inmrnM mmperamre of
file food reaches 100°F (38°C), the
changing internal tempe_mre will be
shown in the displw:
X_qlenthe internal temperature of
tile food reaches tlle number you
have set, the probe and the oven
[_ Touch tile PROBEpad.
turn off"and the oven control
signals. To stop the sigmal, touch tile
Touch the numl)er pads to set
the desired internal food or meat
temperature. The maxinmm
internal temperature for the food
ttlat you can set is 200°F (93°(;).
CLEAR/0FFpad. Use hot pads m
remove the probe fiom tile food.
Do not use rungs m pull on it--they
might dmnage it.
To change tile oven mmpe_m_re during
Touch tile BAKEpad.
Touch the number pads to set the
%
desired oven temperature.
the Roast cycle, touch tile BAKEpad and
then the number pads to set the new
temperature.
If theprobeisremovedfromthefoodbefore
[7] Touch tile STARTpad.
Thedisplaywill flashif theprobeisinserted
thefinal temperatureisreached,a tonewill
soundandthedisplaywill flashuntiltheprobe
isremovedfromtheoven.
intotheoutletandyouhavenotsetaprobe
temperatureandtouchedtheSTARTpad.
Youcanusethetimereventhoughyou
cannotusetimedovenoperationswhile
usingtheprobe. 19
Usingthe convectionoven.(onsome models)
Convection Fan
Multi-ra ck position.
i[] ¸
Ina convectionoven,a fancirculateshotair
over,underandaroundthefood.
Thiscirculatinghotairis evenlydistributed
throughouttheovencavity.Asaresult,foods
areevenlycookedandbrowned--often inless
timewithconvectionheat.
1-Rack Convection Baking
The convection fan circulates the heated
air evenly over and around the food.
WhenconvectionbakingwithonlyI rack,
usetherackpositionsrecommendedintheUsing
theovensection.
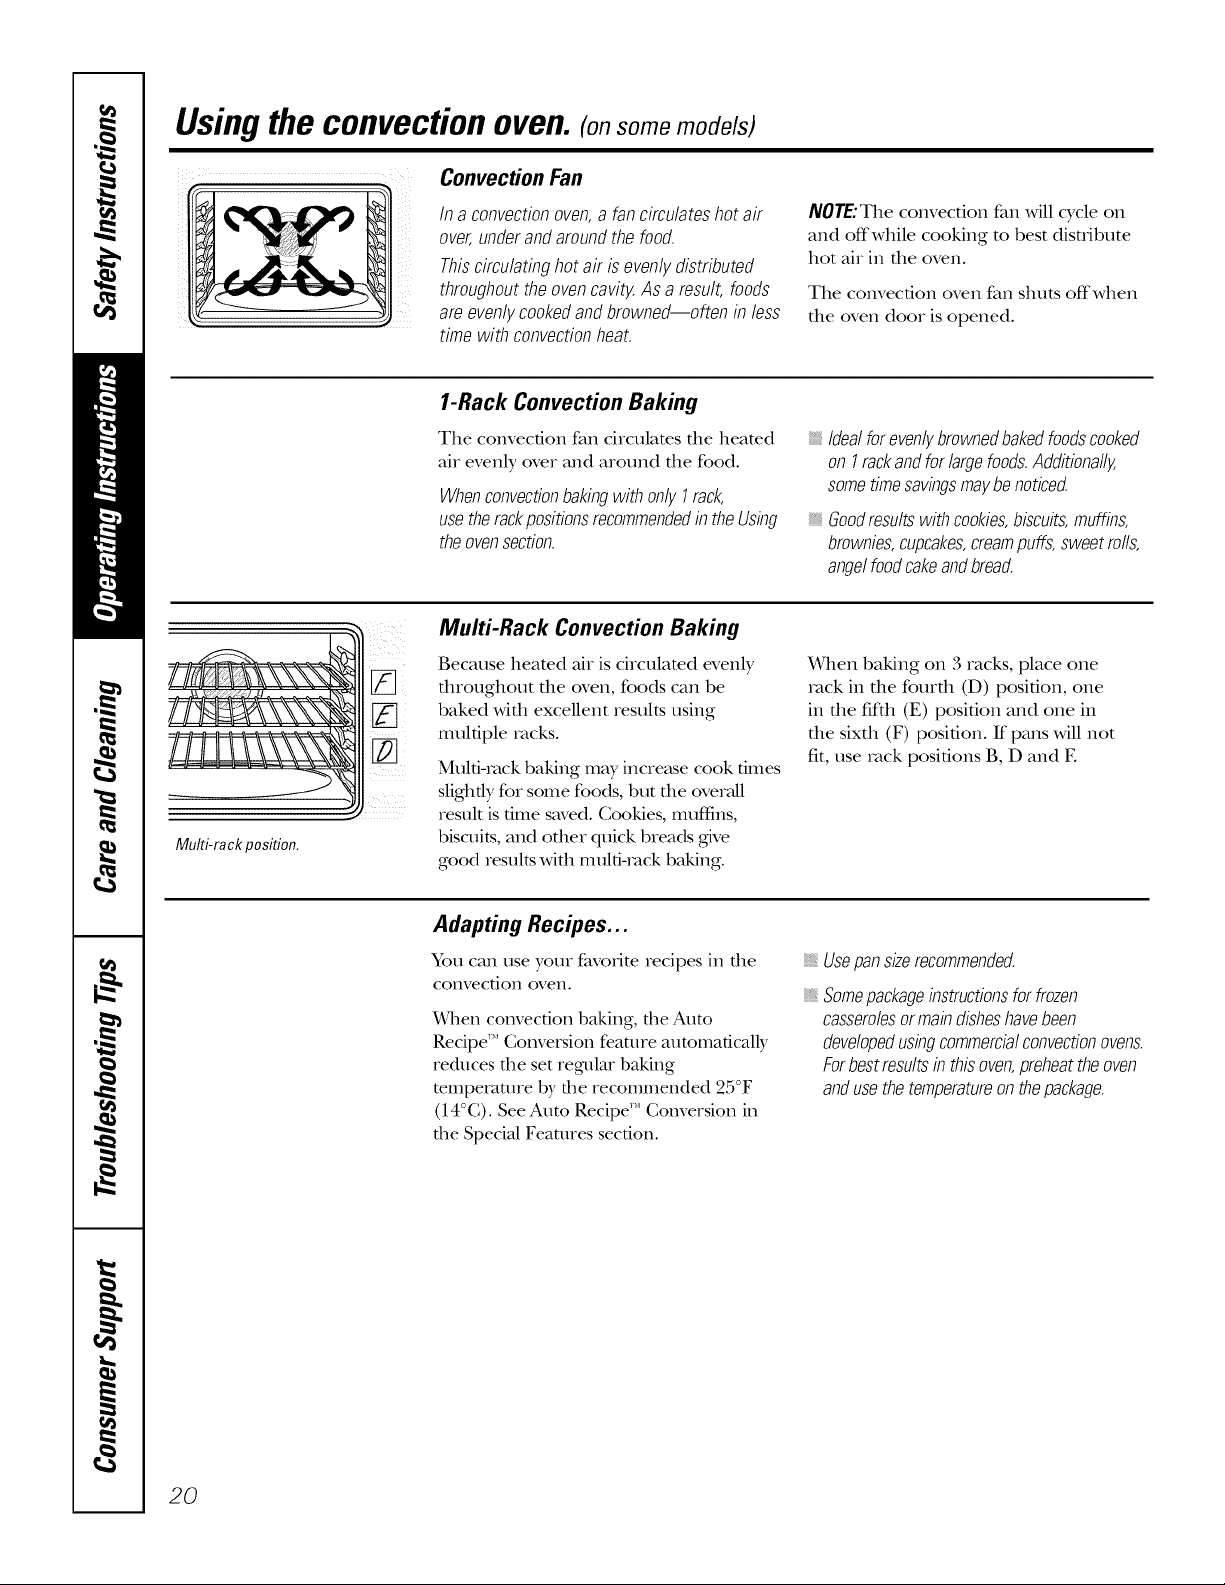
Multi-Rack Convection Baking
Because heamd air is circulamd evenly
fll_oughout file oven, foods can be
baked with excellent results using
multiple _v_cks.
Muld-Iack baking may increase cook times
slightly foi some foods, but the overaU
_esult is time saved. Cookies, muffins,
biscuits, and other quick breads give
good _esults with multi-_v_ck baking.
NOTE: The convection fan will cycle on
and offwhile cooking to best disuibute
hot air in the oven.
The convection oven fan shuts offwhen
the oven doo_ is opened.
Idealforevenlybrownedbakedfoodscooked
on Irackandforlargefoods.Additionally,
sometimesavingsmaybenoticed.
Goodresultswithcookies,biscuits,muffins,
brownies,cupcakes,creampuffs,sweetro//s,
ange/foodcakeandbread.
When baking on 3 racks, place one
_ack in die fored1 (D) position, one
in the fifth (E) position and one in
the sixth (F) position. If"pans will not
fit, use _v_ckpositions B, D and E
20
Adapting Recipes...
You can use your favorite _ecipes in the
convec[ion oven.
¼]len convection baking, the Auto
Recipe'" Conversion feature automaficalb,
reduces the set regular baking
temperature by the recommended 25°F
(14 °C). See Auto Recipe'" Conversion in
the Special Features section.
Usepan sizerecommended.
Somepackageinstructionsfor frozen
casserolesormaindisheshavebeen
developedusingcommercialconvectionovens.
Forbestresultsinthisoven,preheattheoven
andusethetemperatureonthepackage.
ge.com(U.S.)
www.GEAppliances.ca(Canada)
Whenbakingcookies,you will
get thebest resultsifyou usea
flat cookiesheet insteadof a
pan with low sides.
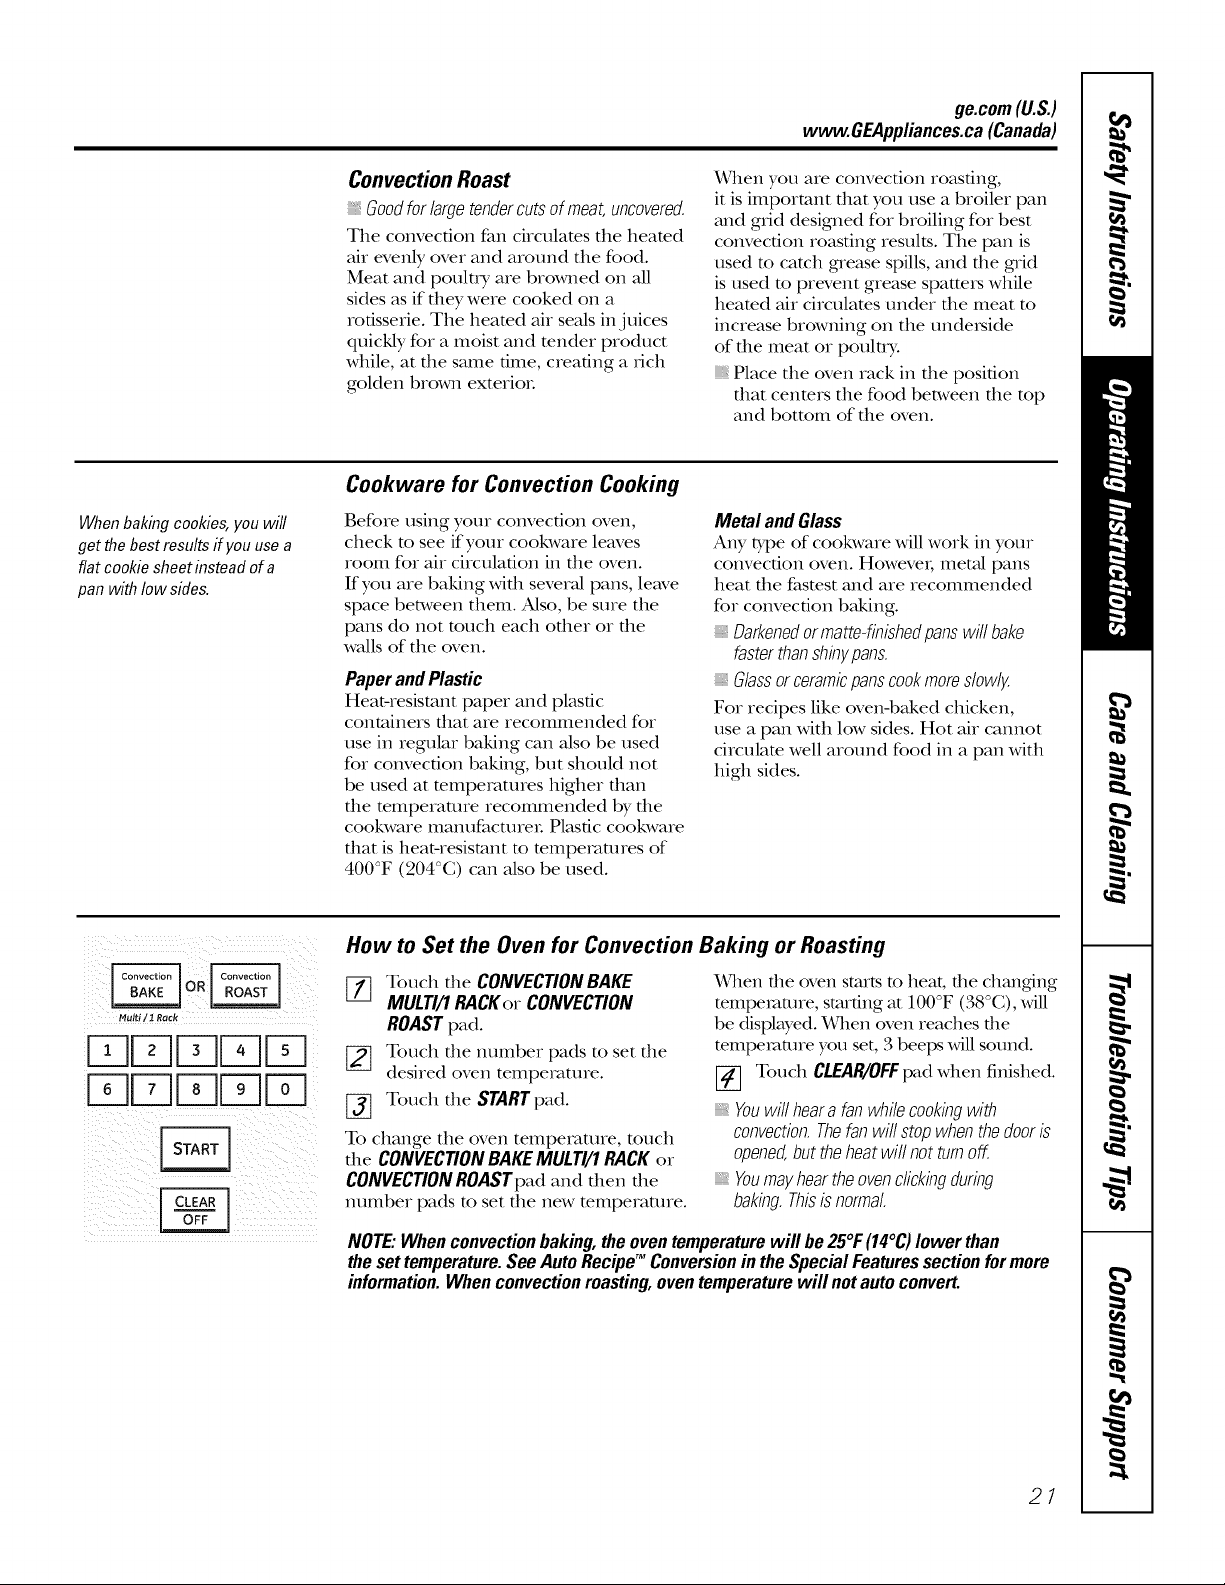
Convection Roast
Goodforlargetendercutsofmeat,uncovered.
The convection fan circulates the heated
air evenly over and around the food.
Meat and poult_T are browned on all
sides as if they were cooked on a
rotisserie. The heated air seals in juices
quickly for a moist and render product
while, at the same time, creating a rich
golden brown exterioL
Cookware for Convection Cooking
Before using your convection oven,
check m see if your cookware leaves
room for air circulation in the oven.
If you are baking Mill severn pans, leave
space between them. Also, be sure the
pans do not touch each ofl_er or fl_e
walls of the oven.
PaperandPlastic
Heat-resistant paper and plastic
containers that are recommended for
use in regular baking can also be used
for convection baking, but should not
be used at mmpemmres higher than
the mmperamre recommended by the
cookware manufacmreL Plastic cookware
that is heabresistant to temperatures of
400°F (204°(;) can also be used.
When you are convection roasting,
it is important flint you use a broiler pan
and grid designed for broiling for best
convection roasting results. The pan is
used m catch grease spills, and the grid
is used m prevent grease spatte_ while
heamd air circulams under the meat m
increase browning on the underside
of the meat or pouln T.
Place the oven rack in the position
that cenmrs the food between the mp
and bottom of the oven.
Metal andGlass
Any type of cookware will work in your
convection oven. Howevei; meted pans
heat the fastest and are recommended
for convection baking.
Darkenedor matte-finishedpans will bake
faster thanshinypans.
G/assor ceramicpans cookmoreslowly.
For recipes like oven-baked chicken,
use a pan with low sides. Hot air cannot
circulate well around food in a pan with
high sides.
Multi/1 Reck
UUFqFq
UFqFqFq
How to Set the Oven for Convection Baking or Roasting
[77 Touch the CONVECTION BAKE
MULTI/1 RACKor CONVECTION
ROAST pad.
[_ Touch the number pads to set the
desired oven tempemtme.
[_ Touch the STARTpad.
To change the oven temperature, touch
the CONVECTIONBAKEMULTI/I RACK or
CONVECTIONROASrpad and then the
number pads m set the new mmperamre.
When file oven starts to beat, file changdng
temperature, starting at 100°F (38°C), Mll
be displayed. When oven reaches file
temperature you set, 3 beeps Mll sound.
V_ Touch CLEAR/OFFpad when finished.
Youwill heara fanwhile cookingwith
convection.Thefan will stop whenthe dooris
opened,butthe heat wifl not turnoff.
Youmayhearthe ovenclickingduring
baking. Thisis normal
NOTE:Whenconvectionbaking,theoventemperaturewill be25°t:(14°C)lowerthan
thesettemperature.SeeAutoRecipeTM Conversioninthe SpecialFeaturessectionformore
information.Whenconvectionroasting,oventemperaturewill notautoconvert.
21
Usingthe timedfeaturesfor convectioncooking.(on some models)
Youwill hear a fan while cooking with these features. Thefan will stop when the door is opened, but the heat
will not turn off.
NOTE:Foods that spoil easily--such as milk, eggs, fish, stuffings, poultry and pork--should not be allowed to
s# for more than 1hour before or after cooking. Room temperature promotes the growth of harmful bacteria.
Be sure that the oven light is off because heat from the bulb will speed harmful bacteria growth.
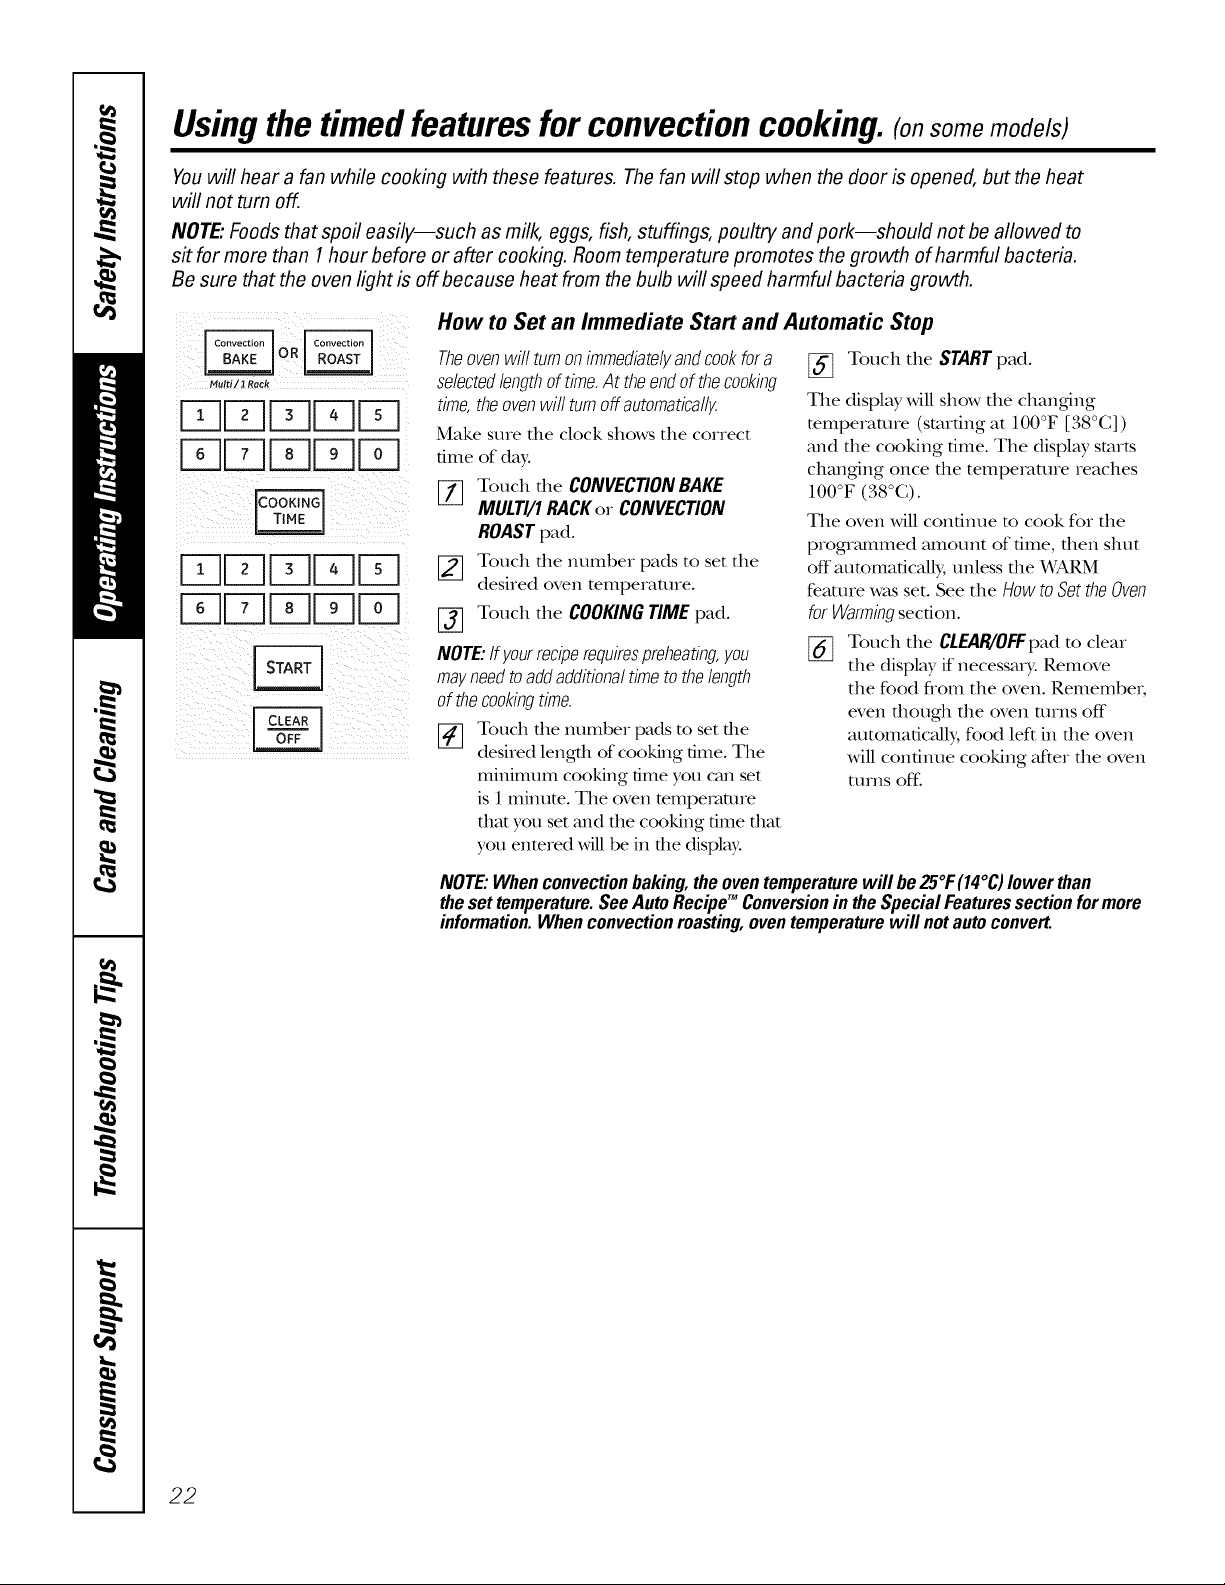
How to Set an Immediate Start and Automatic Stop
Multi ! JRock
Q r-qFqFq
Fq Fq
Theovenwillturnonimmediatelyandcookfora
selectedlengthoftime.At theendof thecooking
time,theovenwiflturnoffautomatically.
Make sure the clock shows the correct
time of day.
[_ Touch the CONVECTIONBAKE
MULTI/1RACKor CONVECTION
ROASTpad.
[_ Touch the number pads to set the
desired oven temperature.
[_ Touch the COOKINGTIMEpad.
NOTE:If yourreciperequirespreheating,you
mayneedto addadditionaltimeto thelength
of thecookingtime.
[_ Tottch the nttlllber pads to set the
desired length of cooking time. The
minimum cooking time you can set
is 1 minum. The oven mmperanne
that you set and the cooking time that
you entered will be in the display.
[_ Touch the STARTpad.
The displ Wwill show the changing
temperaune (smrdng at 100°F [38°C])
and the cooking time. The displ W starts
changing once the temperature reaches
lO0°V (38oc).
The oven will continue to cook for the
programmed amount of time, fllen shut
off attmmafically, unless the X_J2M
feature was set. See the How to get the Oven
forWarmingsection.
[_ Touch the CLEAR/OFFpad to cleat
the display if necessary: Remove
the food flom the oven. Remember;
even though the oven ntrns off
atttomadcally, food left in the oven
will continue cooking after the oven
turns of£
NOTE:Whenconvectionbaking,theoventemperaturewill be25°1:(14°C)lower than
theset temperature.SeeAutoRecipeTM ConversionintheSpecialFeaturessection formore
information.Whenconvectionroasting,oventemperaturewill notautoconvert.
22
Multi/1 Rack
uD
uuuLq
up p UE]
UkUU
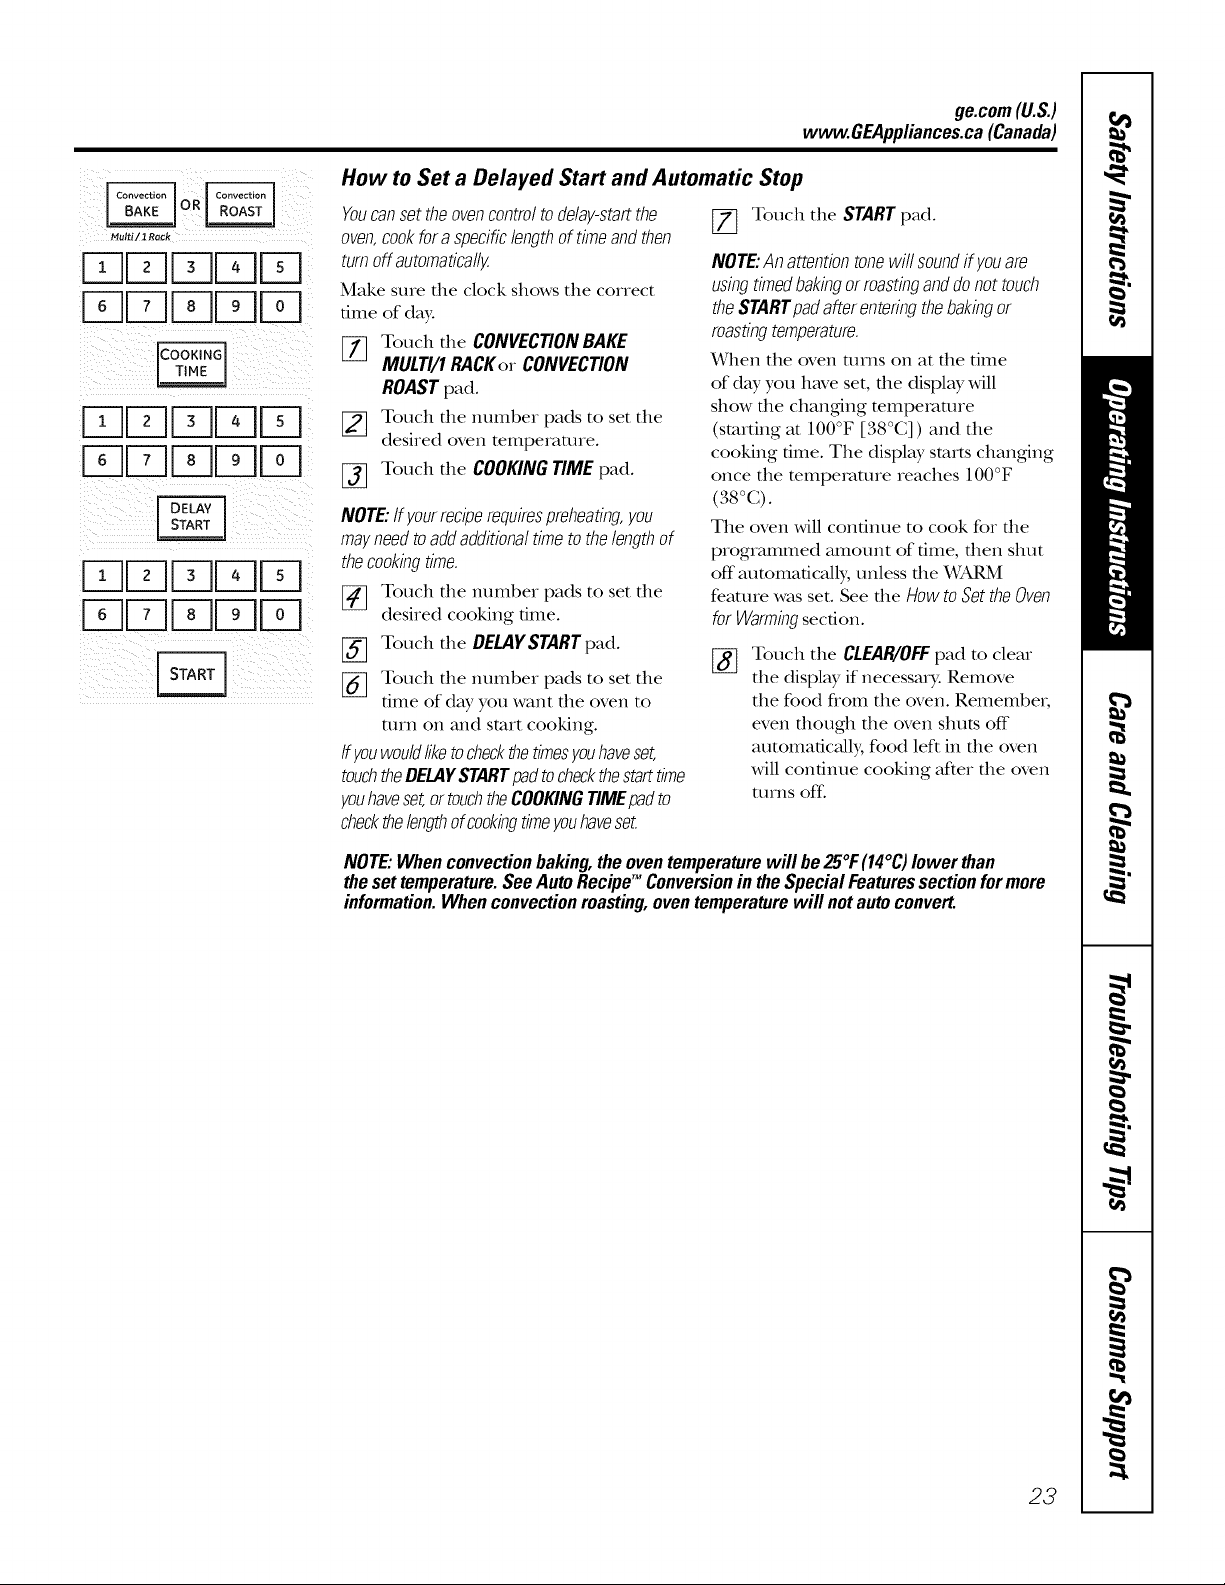
How to Set a Delayed Start and Automatic Stop
Youcansettheovencontroltode@y-startthe
oven,cookfora specificlengthoftimeandthen
turnoffautomatically
Make sure the clock shows the correct
time of day.
I-_ Touch the CONVECTIONBAKE
MULTI/1RACKer CONVECTION
ROAST pad.
_] Touch the number pads to set the
desired oven temperature.
[] Touch the COOKING TIME pad.
NOTE:ff yourreciperequirespreheating,you
mayneed to addadditional time to the lengthof
the cooking time.
[_ Touch the number pads to set the
desired cooking time.
Touch the DELAYSTART pad.
Touch the number pads to set the
%
time of day you want the oven to
mrn on and start cooking.
ffyouwouldliketocheckthetimesyouhaveset,
touchtheDELAYSTARTpadtocheckthestarttime
youhaveset,ortouchtheCOOKINGTIMEpadto
checkthelengthofcookingtimeyouhaveset.
I71 Touch the START pad.
NOTE:Anattentiontonewiflsoundifyouare
usingtimedbakingorroastinganddonottouch
theSTARTpadafterenteringthebakingor
roastingtemperature.
_rhen the oven utrns on at the time
of day you have set, the display will
show the changing mmpetaatre
(starting at 100°F [38°C]) and the
cooking time. The displ W starts changing
once the mmpemutre reaches 100°F
(:_8°C).
The oven will continue to cook for rite
programmed amount of time, then shut
off automatically, unless the X&_M
feature was set. See the How to Set the Oven
forWarmingsection.
Touch the CLEAN/OFF pad to cleat
%
the display if necessary: Remove
the food from the oven. Remember;
even though the oven shuts off
atttomafically, food left in rite oven
will continue cooking after the oven
turns off.
ge.com(U.S.)
wvvw.GEAppliances.ca(Canada)
NOTE:Whenconvectionbaking,theoventemperaturewill be25°t:(14°C)lowerthan
thesettemperature.SeeAutoRecipeTM ConversionintheSpecialFeaturessectionformore
information.Whenconvectionroasting,oventemperaturewill notautoconvert.
23
Usingthe convectionoven.(onsome models)
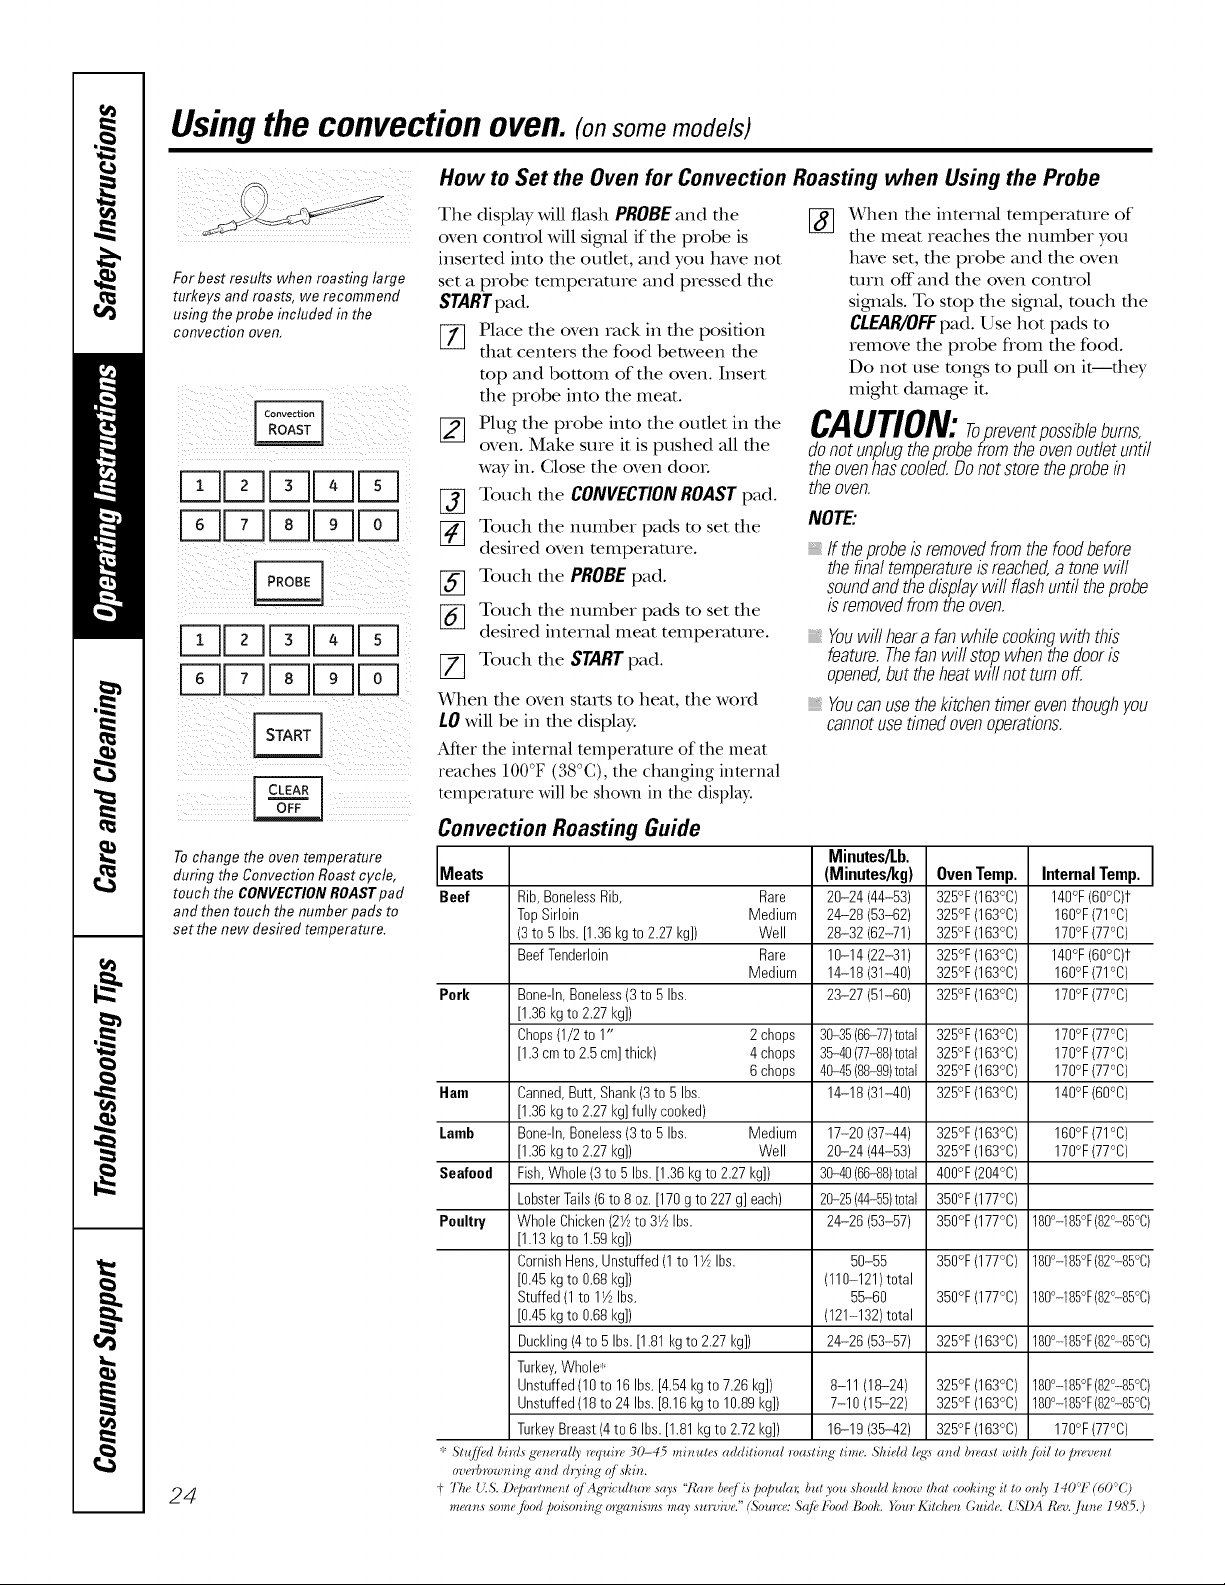
How to Set the Oven for Convection Roasting when Using the Probe
For best results when roasting large
turkeys and roasts, we recommend
using theprobe included in the
convection oven,
FqEZ] Fq
FqFq FqEZ]
F-q[z]EZ]
The display will flash PROBE and die
oven conuol will sigmal if file probe is
inserted into the outer, and you have not
set a probe temperature and pressed the
SrARr pad.
[_ Place the oven rack in the position
that centers the food between the
mp and bottom of the oven. Insert
tile probe into the meat.
[_ Plug the probe into the outer in the
oven. Make sure it is pushed aU the
way in. Close the oven doo_.
Touch the CONVECTIONROAST pad.
%
Touch the number pads to set the
[]
desired oven temperature.
Touch the PROBE pad.
%
Touch tile number pads to set the
%
desired internal meat temperature.
Touch the START pad.
[]
When file oven starts to heat, die word
LO will be in die display.
After the internal temperature of the meat
reaches 100°F (38°C), the changing internal
temperature will be shown in the display.
[_ X_qlen tile internM temperature of
tile meat reaches the number you
have set, the probe and the oven
mrn off" and the oven control
sigmals. To stop the signal, much the
CLEAR/OFF pad. Use hot pads m
remove the probe from the food.
Do not use rungs to pull on it--they
might damage it.
CAUTION:re prevent possibleburns,
do not unplugtheprobe from theovenoutlet until
the ovenhas cooled.Donot store the probein
the oven.
NOTE:
{{{iiiiiiili
If theprobeisremovedfromthefoodbefore
thefinal temperatureisreached,a tonewill
soundandthedisplaywit flashuntiltheprobe
isremovedfromtheoven.
{{{iiiiiiili
Youwillhearafanwhilecookingwith this
feature.Thefanwillstopwhenthedooris
opened,buttheheatwill notturnoff.
{{{iiiiiiili
Youcanusethekitchentimereventhoughyou
cannotusetimedovenoperations.
To change the oven temperature
during the Convection Roast cycle,
touch the CONVECTION ROAST pad
and then touch the number pads to
set the new desired temperature.
24
Convection Roasting Guide
Minutes/Lb.
Meats (Minutes/kg) Oven Temp. Internal Temp.
Beef Rib,BonelessRib, Rare 20-24 (44-53) 325°F(163°C) 140°F(60°C)1-
TopSirloin Medium 24-28 (53-62) 325°F(163°C) 160°F(71°C)
(3to 5 Ibs.[1.36kgto 2.27kg]) Well 28-32 (62-71) 325°F(163°C) 170°F(77°C)
BeefTenderloin Rare 10-14 (22-31) 325°F(163°C) 140°F(60°C)f
Medium 14-18 (31-40) 325°F(163°C) 160°F(71°C)
Perk Bone-In,Boneless(3to 5Ibs. 23-27 (51-60) 325°F(163°C) 170°F(77°C)
[1.36kgto 2.27kg])
Chops(1/2to 1" 2 chops 30-35(66-77)total 325°F(163°C) 170°F(77°C)
[1.3cmto 2.5 cm]thick) 4 chops 35-40(77-88)total 325°F(163°C) 170°F(77°C)
6 chops 40-45(88-99)total 325°F(163°C) 170°F(77°C)
Ham Canned,Butt,Shank(3to 5 Ibs. 14-18 (31-40) 325°F(163°C) 140°F(60°C)
[1.36kgto 2.27kg]fully cooked)
Lamb Bone-In,Boneless(3to 5 Ibs. Medium 17-20 (37-44) 325°F(163°C) 160°F(71°C)
[1.36kgto 2.27kg]) Well 20-24 (44-53) 325°F(163°C) 170°F(77°C)
Seafood Fish,Whole(3to 5 Ibs.[1.36 kgto 2.27kg]) 30-40(66-88)total 400°F(204°C)
LobsterTails(6to 8oz.[170 g to 227g/each) 20-25(44-55)total 350°F(177°C)
Poultry Whole Chicken(2_/_to31/_Ibs. 24-26 (53-57) 350°F(177°C) 180°-185°F(82°-85°C)
[1.13kgto 1.59kg])
CornishHens,Unstuffed(1to 1_/_Ibs. 50-55 350°F(177°C) 180°-185°F(82°-85°C)
[0.45kgto 0.68kg]) (110-121)total
Stuffed (1to 1_/2Ibs. 55-60 350°F(177°C) 180°-185°F(82°-85°C)
[0.45kgto 0.68kg]) (121-132)total
Duckling(4to 5 Ibs.[1.81kgto 2.27 kg]) 24-26 (53-57) 325°F(163°C) 180°-185°F(82°-85°C)
Turkey,Whole*
Unstuffed(10to 16Ibs.[4.54kgto 7.26 kg]) 8-11 (18-24) 325°F(163°C) 180°-185°F(82°-85°C)
Unstuffed(18to 24 Ibs.[8.16kgto 10.89kg]) 7-10 (15-22) 325°F(163°C) 180°-185°F(82°-85°C)
TurkeyBreast(4to 6 Ibs.[1.81kgto 2.72kg]) 16-19 (35-42) 325°F(163°C) 170°F(77°C)
* Stz{[/},d bin& gv#eral('v 7vqain_ 30-45 mi)_ute_ additio)_al masti)_g time. Shidd 5g:_ a)_d b_vast _ithfi_il to p_vve#t
overb)w,ming a_d do'i_N"q/ ski_.
t' The {'.S. Deparhn_ nt q/ Agricaflur(' ,says "Ibm, bg,('/is p@aho; but yea ,should h)mw that coohi)N"it to o)@' 140'1" (60°C)
mr'arts ,smne/bod poisrmi) N orgzmism,s ma)' sm"_Jiv(<"(&,arc(,: Sqfi" I'bod Booh. }bar Kitche, (;Did(< {:SI)A I¢_J..tithe 19S5.)
Usingtheproofing
and warming features.(onsomemodels)
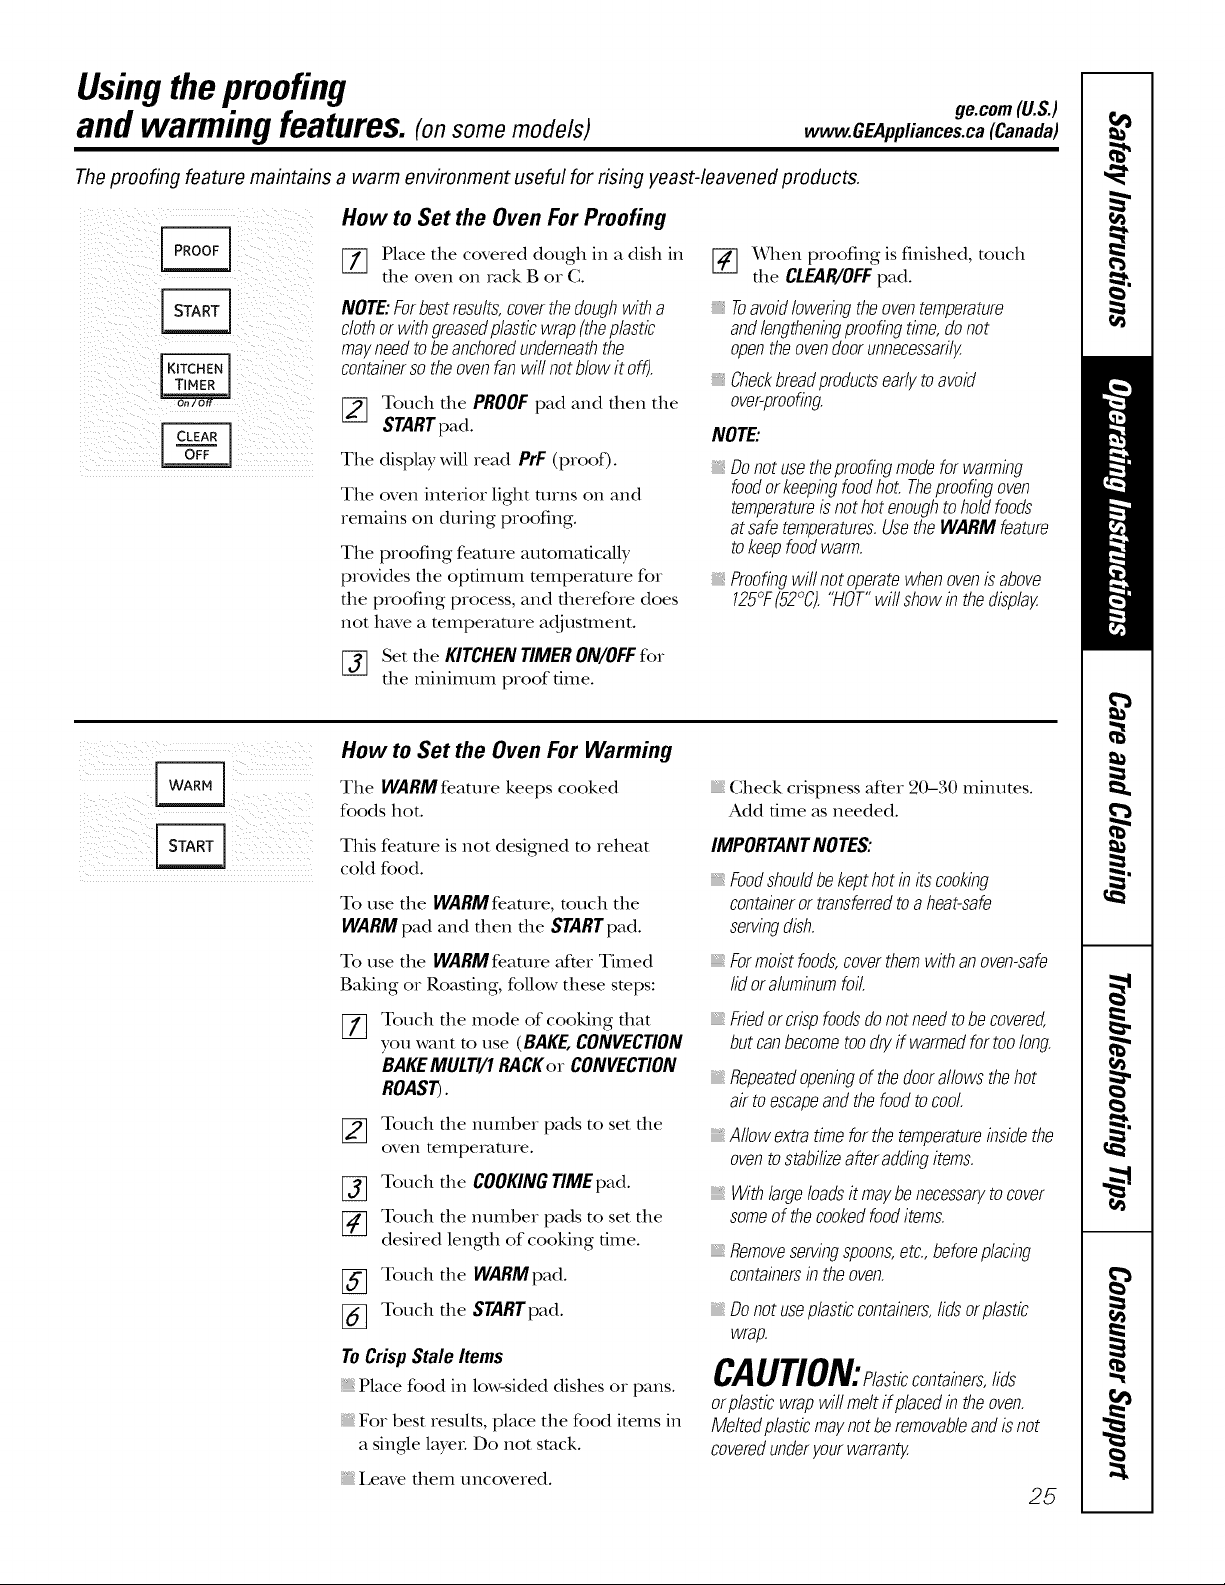
Theproofing feature maintains a warm environment useful for rising yeast-leavened products.
How to Set the Oven For Proofing
www.GEAppliances.ca(Canada)
ge.com(U.S.)
¸7¸¸¸¸¸¸
i ii
iiiiiiill ! iiiiiiiiiilliii
[77 Place the covered dough in a dish in
the oven on rock B or C.
NOTE:Forbestresults,coverthedoughwitha
clothorwithgreasedp/asticwrap(thep/astic
mayneedto beanchoredunderneaththe
containersotheovenfanwill notblowit off).
[_ Touch the PROOFpad and then the
STARTpad.
The display will read PrF (proof).
The oven inmfior light unns on and
remains on during proofing.
Tile proofing feature automatically
provides tile optimum mmperamre for
the proofing process, and therefore does
not have a mmperamre adjustment.
[] Set tile KITCHENTIMERON/OFFfor
tile minimum proof time.
How to Set the Oven For Warming
Tile WARMfeature keeps cooked
foods hot.
This feature is not designed to reheat
coM food.
To use tile WARMfeature, much tile
WARMpad and then tile STARTpad.
To use tile WARMfeature after Timed
Baking or Roasting, follow these stops:
[77 Touch tile mode of cooking that
you want m use (BAKE,CONVECTION
BAKEMULTI/1RACKor CONVECTION
ROAST).
[_ Touch tile number pads to set tile
oven texllpeI_tt/lIe.
[_] Touch the COOKINGTIMEpad.
[_ Touch tile number pads to set tile
desired length of cooking time.
[_ Touch the WARMpad.
[_ Touch tile SrARrpad.
To Crisp Stale Items
Place food in low-sided dishes or pans.
Fox best results, place tile food items in
a single layeL Do not stuck.
I,eave them uncovered.
[_ x_qlen proofing is finished, touch
tile CLEAR/OFFpad.
Toavoidloweringtheoventemperature
andlengtheningproofingtime,donot
opentheovendoorunnecessarily.
Checkbreadproductsearlytoavoid
over-proofing
NOTE:
Donotusetheproofingmodeforwarming
foodorkeepingfoodhot.Theproofingoven
temperatureis nothotenoughto holdfoods
atsafetemperatures.UsetheWARMfeature
tokeepfoodwarm.
Proofingwillnot operatewhenovenis above
125°F(52°C)."HOT"will showinthedisplay.
Check crispness after 20-30 minutes.
Add time as needed.
IMPORTANTNOTES:
{{{iiiiiii;i
Foodshouldbekepthotinitscooking
containerortransferredtoaheat-safe
servingdish.
{{{iiiiiii;i
Formoistfoods,coverthemwithanoven-safe
lidoraluminumfoil
; Friedorcrispfoodsdonotneedtobecovered,
butcanbecometoodryif warmedfor toolong.
; Repeatedopeningofthedoorallowsthehot
air toescapeandthefoodtocool.
; Allowextratimeforthetemperatureinsidethe
oventostabilizeafieraddingitems.
; WiD largeloadsitmaybenecessaryto cover
someof thecookedfooditems.
; Removeservingspoons,etc.,beforeplacing
containersin theoven.
; Donot useplasticcontainers,lidsorplastic
wrap.
CAUTION:Plasticcontainerslids
orp/asticwrapwill meltifplacedin theoven.
Me/tedp/asticmaynotberemovableandis not
coveredunderyourwarranty.
25
Adjust the oven thermostat--Do it yourself!
Youmay find that your new oven cooks differently than the one it replaced. Use your new oven for a few weeks to
become more familiar with it. If you still think your new oven is too hot or too cold, you can adjust the thermostat
yourself.
Do not use thermometers, such as those found ingrocery stores, to check the temperature setting of your oven.
These thermometers may vary 20-40 degrees F(11-22 degrees C).
NOTE: Thisadjustment will only affect baking, convection baking (on some models) and convection roasting
(on some models) temperatures; it will not affect broiling or self-cleaning temperatures. The adjustment will be
retained in memory after a power failure.
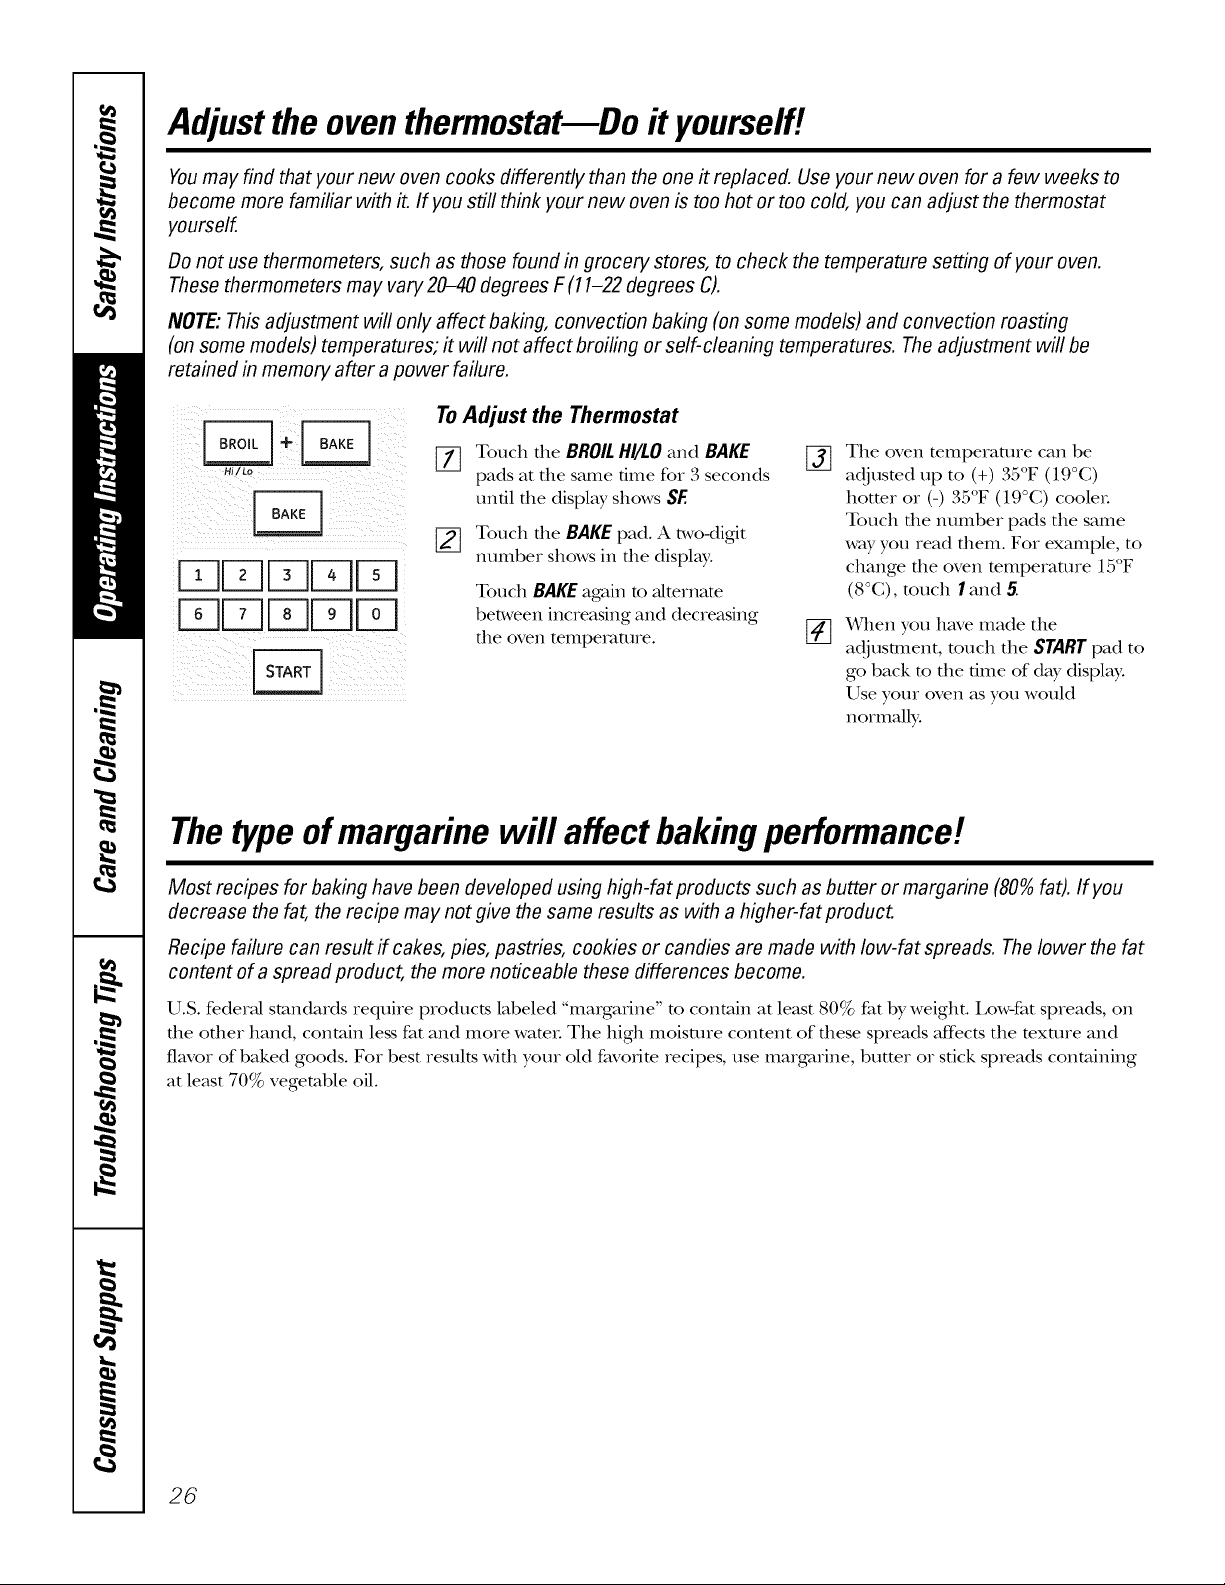
ToAdjust the Thermostat
Hi/Le
UUUUFq
UUFqFqFq
[] Touch the BROIL HI/LO and BAKE []
pads at the same time for 3 seconds
unO1 the display shows SF.
[_] Touch the BAKEpad. A two-digit
number shows in the display:
Touch BAKEagain m alternate
between increasing and decreasing
the oven temperature. [4]
The oven temperature can be
adjusted up to (+) , a r
hotter or (-) 35°F (19°(:) cooleL
Touch the number pads the same
way you read them. Fox example, to
change the oven mmperamre 15°F
(8°C), much I and 5.
x_qlen you have made the
adjusunent, touch the STARTpad to
go back to the dine of day display:
Use your oven as you would
normalb,.
3.... (19oc)
Thetype ofmargarinewill affect bakingperformance!
Most recipes for baking have been developed using high-fat products such as butter or margarine (80%fat). Ifyou
decrease the fat, the recipe may not give the same results as with a higher-fat product.
Recipe failure can result if cakes, pies, pastries, cookies or candies are made with low-fat spreads. The lower the fat
content of a spread product, the more noticeable these differences become.
U.S. federal standards require products labeled "margarine" m contain at least 80% fat by weight. I,ow-fat spreads, on
the other hand, contain less fat and more WamL The high moisture content of these spreads affects the mxture and
flavor of baked goods. Fox best results with your old favofim recipes, use margarine, butter or stick spreads containing
at least 70% vegetable oil.
26

Usingthe self-cleaning oven.
www.GEAppliances.ca(Canada)
The oven door must be closed and all controls set correctly for the cycle to work properly.
Before a Clean Cycle
Scrubq Rinse well with clean water
and dry:
Do not clean file gasket. Tile fiberglass
materiM of file oven door g_tsket cannot
withstand abr_tsion. It is essential for tile
gasket to remain intact. If you notice it
becoming worn or flwed, replace it.
Wipe up any heaxTspillove_s on tile oven
bottom.
Make sure tile oven light bulb cover is in
place and tile oven light is off:
IMPORTANT'.Tile healfll of some birds
is exuemely sensitive m tile flmles gdven
off during file self-cleaning cycle of any
xvmge. Move birds to another well-
ventilated room.
Wipe up heavy soil on the oven
bottom.
Remove broiler pan, broiler grid, all
cookware, probe and any Muminum foil
flom the oven--they cannot withstand
tile high cleaning mmperaunes.
NOTE:
Tile shiny, silver4:olored oven racks
(on some models) can be self-cleaned,
but file), Mll darken, lose flleir luster
and become hard to slide.
If your oven is equipped Mill g_y
porcelMn_oamd oven racks, they may
be left in file oven duling file self-clean
cycle.
Soil on file flont flame of file range
and outside file gasket on file door will
need m be cleaned by hand. Clean these
areas with hot wami; soap-filled or plastic
scouting pads or cleansers such as Soft
ge.com(U.S.)
ill
ii i i
How to Set the Oven for Cleaning
[-_ Turn all of tile surface burnels off.
Touch file SELFCLEANLO/STDpad
once for a 4-hour (3-hour on some
models) clean time or twice for a
3-hour (4-hour on some models)
clean time.
A .%hour self-clean time is
recommended for use when
cleaning small, contained spills. A
self-clean time of 4 hours or longer
is recommended for a dirtier oven.
Ifa time other than 4 horns or
%
3 horns is needed, use tile number
pads and enter tile desired clean
tilne.
You call change tile clean time m any
time between 3 horns (2½ hours on some
models) and 5 horns, depending on how
dirty your oven is.
[_ Touch tile STARTpad.
Tile door locks automatically: Tile display
Mll show die clean time remaining. It Mll
not be possible to open file oven door
until file temperature drops below tile
lock tempe_mlre and die LOCKEDlight
goes off:
When tile LOCKEDlight goes off; you Mll
be able m open file dooL
[_ On models with Range I,ock,Out,
touch and hold tile RANGELOCK-
OIJTpad for 3 seconds to mrn it off:
Tile word LOCKEDwill flash and the
oven control will sigmMif you set tile
clean cycle and forget m close the
oven dooL
To stop a clean cycle, touch file
CLEAR/OFFpad. When the LOCKEDlight
goes off indicating the oven has cooled
below tile locking temperature, you
will be able to open tile dooL
27
Usingthe self-cleaning oven.
The oven door must be closed and all controls must be set correctly for the cycle to work properly.
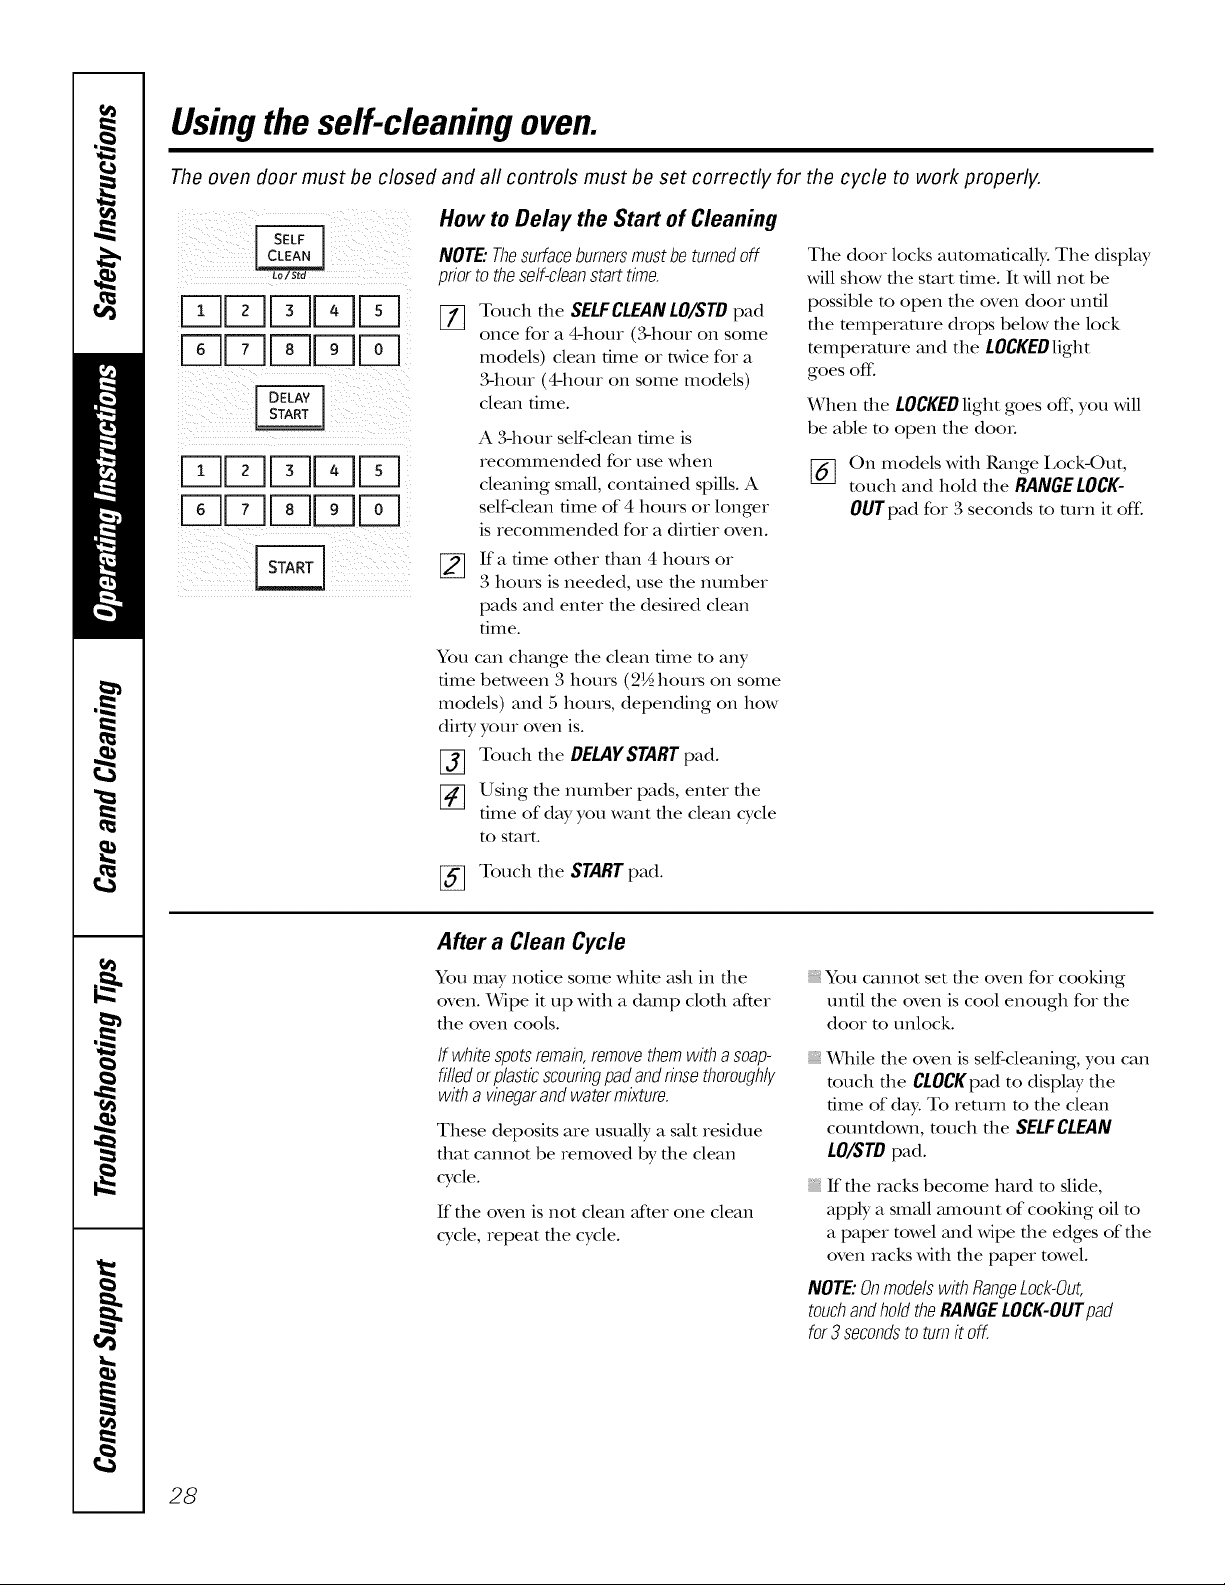
How to Delay the Start of Cleaning
NOTE:Thesurfaceburnersmustbeturnedoff
priortotheself-cleanstarttime.
FqFq
[]
YqFq D
/-q FqFqFq
)i ¸¸¸ (?ii IZ]
You can change file clean time to any
time between 3 hours (2½ houI5 on some
models) and 5 hours, depending on how
dirty your oven is.
Touch file SELFCLEANLO/STD pad
once for a 4-hour (?,-hour on some
models) clean time or t_,vice for a
3-hour (4-hour on some models)
clean time.
A 3-hour self-dean dine is
recommended for use when
cleaning small, conmhled spills. A
self-clean time of 4 hours or longer
is recommended for a dirtier oven.
If a dine odler dmn 4 houIs or
3 hours is needed, use die number
pads and enter the desired clean
time.
The door locks automatically. The display
will show file start time. It will not be
possible m open the oven door until
the mmperamre drops below the lock
mmpemmre and the LOCKEOlight
goes off:
When the LOCKEDlight goes off; you will
be able to open the doox.
[_ On models with Range I,ock,Out,
touch and hold the RANGELOCK-
OUTpad for 3 secondsto turn it off'.
[_] Touch the DELAYSTARTpad.
[_] Using the number pads, enter the
dine of day you want the clean cycle
to start.
[_ Touch the STARTpad.
After a Clean Cycle
You may notice some white ash in the
oven. _qpe it up with a damp cloth after
the oven cools.
If whitespotsremain,removethemwithasoap-
filledorplasticscouringpadandrinsethoroughly
withavinegarandwatermixture.
These deposits are usually a salt residue
that cannot be removed by the clean
cycle.
If the oven is not clean meterone clean
cycle, repeat the cycle.
You cannot set the oven for cooking
until the oven is cool enough for the
door to unlock.
While file oven is self-cleaning, you can
much the CLOCKpadto display the
time of dW. To return m the clean
countdown, much the SELFCLEAN
LO/STDpad.
If die racks become hard m slide,
apply a sm_dl mnount of cooking oil m
a paper towel and wipe the edges of the
oven rocks with the paper towel.
NOTE:Onmodelswith RangeLock-Out,
touchandholdtheRANGELOCK-OUTpad
for3secondstoturnit off.
28
ge.com(U.S.)
Special features ofyourovencontrol
www.GEAppliances.ca(Canada)
Yournew touch pad control has additional features that you may choose to use. Thefollowing are the features
and how you may activate them.
Thespecial feature modes can only be activated while the display is showing the time of day. They remain
in the control's memory until the steps are repeated.
When the display shows your choice, touch the STARTpad. The special features will remain in memory after
a power failure, except for the Sabbath feature, which will have to be reset.
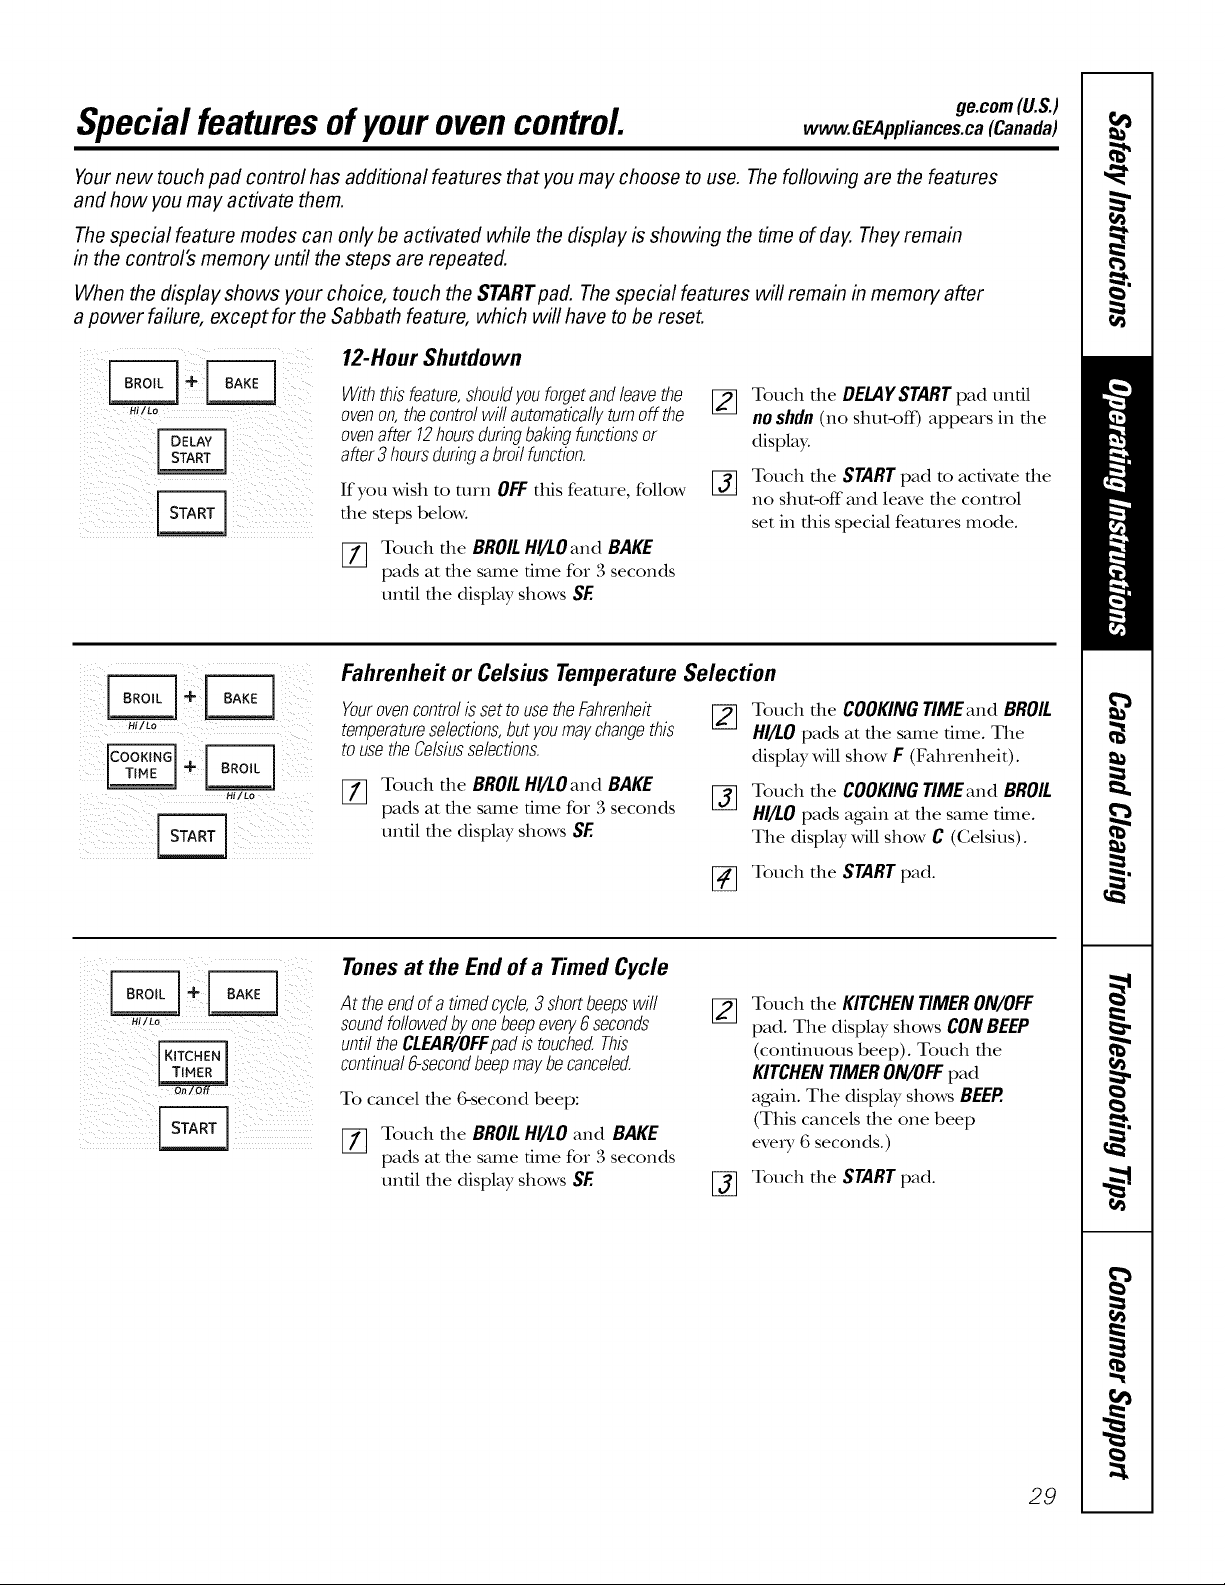
12-Hour Shutdown
Hi/Lo
i i /(
Withthisfeature,shouldyouforgetandleavethe
ovenon,thecontrolwill automaticallyturnoffthe
ovenafter 12hoursduringbakingfunctionsor
after3 hoursduringabroilfunction.
If you wish to turn OFF this feature, follow
the steps below.
[] Touch the BROIL HI/LOand BAKE
pads at the _mle time for 3 seconds
until the display shows SE
Touch the DELAYSTARTpad until
[]
noshdn(no shut-off) appears in the
display.
Touch the START pad to activate the
%
no shut-off and leave the control
set in this special features mode.
iiii i
Fahrenheit or Celsius Temperature Selection
YourovencontrolissettousetheFahrenheit _]
temperatureselections,butyoumaychangethis
tousetheCelsiusselections.
Touch the BROILHI/LOandBAKE
pads at the same time for 3 seconds [_
until the display shows SE
Touch the COOKING TIME and BROIL
HI/LO pads at the same time. The
display will show F (Fahrenheit).
Touch the COOKING TIME and BROIL
HI/LO pads again at the same time.
The display will show C (Celsius).
Hi/Lo
Tones at the End of a Timed Cycle
At theendofa timedcycle,3shortbeepswill
soundfollowedbyonebeepevery6 seconds
untiltheCLEAR/OFFpadistouched.This
continual6-secondbeepmaybecanceled.
To cancel the 6-second beep:
[77 Touch the BROILHI/LOand BAKE
pads at the same time for 3 seconds
until the display shows SE
[_ Touch the STARTpad.
Touch the KITCHENTIMERON/OFF
pad. The display shows CONBEEP
(continuous beep). Touch the
KITCHENTIMERON/OFFpad
again. The display shows BEEP.
(This cancels the one beep
eve_T 6 seconds.)
[_] Touch the STARTpad.
29
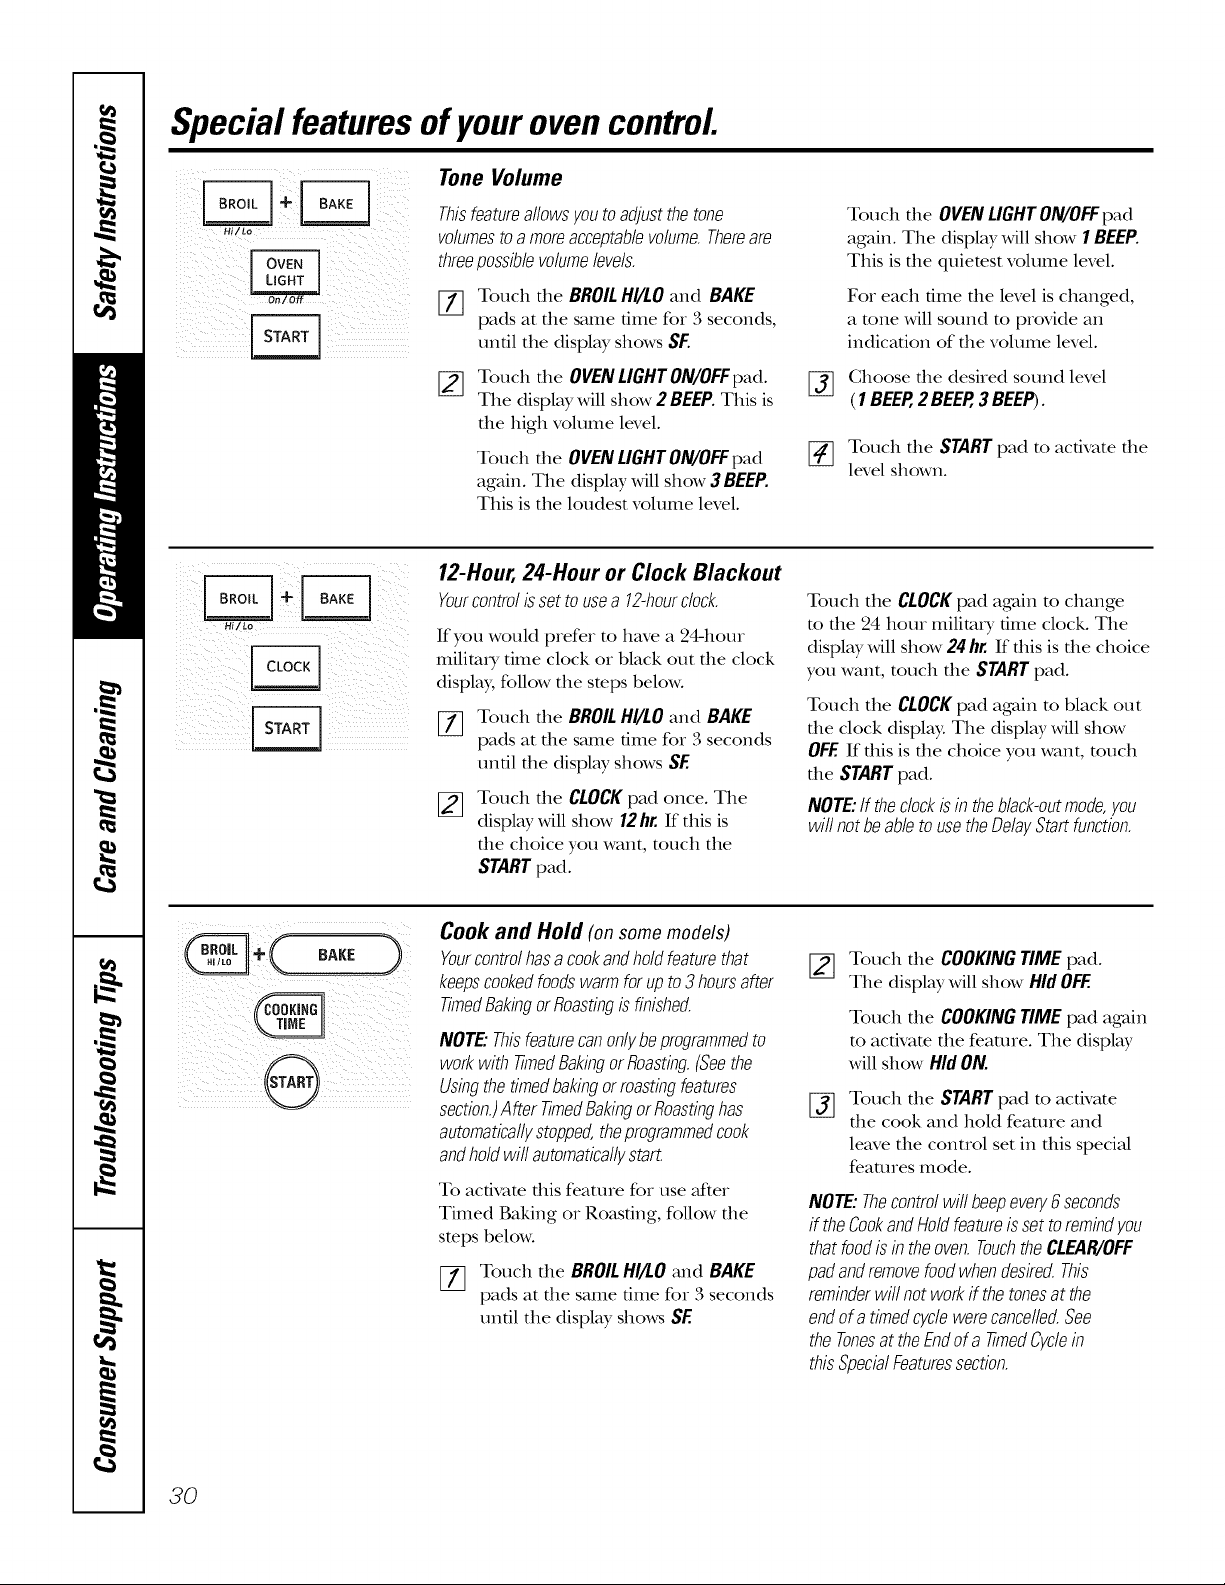
Special features ofyourovencontrol
Tone Volume
i ii!ii i !IIiliiii!
Thisfeatureallowsyoutoadjustthetone
volumestoamoreacceptablevolume.Thereare
threepossiblevolumelevels.
[_ Touch the BROILHI/LO and BAKE
pads at the same time for 3 seconds,
until the display shows SF.
[_ Touch the OVEN LIGHT ON/OFFpad.
The display will show 2 BEEP. This is
the high volume level.
Touch the OVEN LIGHTON/OFFpad
again. The display will show 3 BEEP.
This is the loudest volume level.
12-Hour,24-Hour or Clock Blackout
Yourcontrolis setto usea 12-hourclock.
If you would prefer to have a 24-hour
militm T time clock or black out the clock
display, follow the steps below.
[_ Touch the BROIL HI/LO and BAKE
pads at the same time for 3 seconds
until the display shows SF.
Touch the CLOCKpad once. The
display will show 12hr. If tiffs is
the choice you want, touch the
STARTpad.
Touch the OVENLIGHTON/OFFpad
again. The display will show 1BEEP.
This is the quietest volume level.
For each time the level is changed,
a tone will sound to provide an
indication of the volume level.
[_ Choose the desired sound level
(1BEEP,2 BEEP,a BEEP).
[_ Touch the STARTpad to activate the
level shown.
Touch the CLOCKpad again m change
m file 24 hour milimi y time clock. The
display will show 24 hr. If this is the choice
you want, touch the STARTpad.
Touch the CLOCKpad again m black out
file clock display. The display Mll show
OFF.If this is the choice you want, much
the STARTpad.
NOTE:If theclockisintheblack-outmode,you
wit notbeableto usetheDelayStartfunction.
30
Cook and Hold (on some models)
Yourcontrolhasa cookandholdfeaturethat
keepscookedfoodswarmforupto3hoursafter
TimedBakingorRoastingisfinished.
NOTE."Thisfeaturecan only beprogrammed to
work with timed Bakingor Roasting.(Seethe
Usingthe timed bakingormasting features
section.)After TimedBaking orRoastinghas
automaticallystopped,the programmedcook
andhold wit automaticallystart.
To activate tiffs feature for use _ffter
Timed Baking or Roasting, follow the
steps below.
[y] Touch the BROILHI/LO and BAKE
pads at the same time for 3 seconds
until the display shows SF.
[_ Touch the COOKINGTIMEpad.
The display will show HidOFF.
Touch the COOKINGTIMEpad again
to activate the feature. The display
will show Hid ON.
Touch the STARTpad to activate
%
tim cook and hold feature and
leave the control set in tiffs special
features mode.
NOTE:Thecontrolwillbeepevery6seconds
if theCookandHoUfeatureissettoremindyou
thatfoodisin theoven.TouchtheCLEAR/OFF
padandremovefoodwhendesired.This
reminderwill notworkif thetonesat the
endofatimedcyclewerecancelled.See
theTonesattheEndofa timedCyclein
thisSpecialFeaturessection.
 Loading...