

Page 1
ge.com(U.$3
www,6EAp#iances.ca(Canada)
Saf!_ Im_uctions ............ 2-7
Operating Ind:rucdor_
Baking cw Roasfi ng .............. l2
BIoiling, Bioiling Guide ......... l:5
Clock and TimeI . .............. 16
Con uol I,ock-Ou t ............... l 7
Comwctkm ................. 2(}-24
Cookwai> ...................... 9
O_en ...................... l(t-o2
Piobe ........................ 19
Proofi_g ...................... 25
RaI_ge I £_ck-Out ............... l 7
Sabbath Feam_e ................ 32
Self<_leaning ............... 27, 28
Special _'eatm>s ............. 29-31
Smfi_ce Bumeis .............. 8, 9
Them_ostat .................... 26
Timed Bakh_g & Roasfii_g ........ 18
_ilm_ing ...................... 25
Care and Cleaning
BtlmeI Caps and Heads ......... oo
Bm_ei Giates a_d
Vent (,Tflle .................... a4
Comml Pane] o_................. o/
Cooktop Smfi_(e ............... 34
DooT . ........................ o(_°-
FlooI" ° "
Kl_obs ........................ 04
o¢
oo
o
!
PG S 908
PGS975
ISfl-Off (3_eI_ DooI . ........... .a6°-
Light Bulbs .................... 35
ac a D e ................ o,9
P k gi g Tap oo
Painted Smfi_ces ............... .a°_/
Racks ........................ 35
Stainless Steel Smfi_ces ......... .a/°_
Stoiage DIa_er . ...............
Veto 04,...................... o/
Troubleshoodng Tips ....... 38-41
Accessories" . .................. 47
Consumer Suppor_
Co_sm_e_ Support ..... Back Cover
P_oduct Regist_ation
(Canada) .................. 4:5, 46
P_odt_ct Regist;atio_
(U.S.A.) ................... 43, 44
'Wailamy f},)TCt_stomeTs
i_ Canada .................... 49
'Wailamy fi)T CustomeTs
i_ the I/.S.A ................... 48
37
Write the model and serial
numbers here:
Model #
Serial #
You can lind them on a label
behind the open oven door
on the lower left corner of the
range fl'ame.
03-07 Jfl
Page 2

IMPORTANTSAFETYINFORMATION.
READALLINSTRUCTIONSBEFOREUSING.
A WARNING!
ANTI-TIPDEVICE
, ALLRANGESCAN TIP
INJURY TOPERSONS
COULDRESULT
INSTALLANTI-TIP
DEVICESPACKEDWITH
RANGE
SEEINSTALLATION
INSTRUCTIONS
A WARNING:If the information
in this manual is not followed exactly,
a fire or explosion may result causing
property damage, personal injury
or death.
-- Do not store or use gasoline or other
flammable vapors and liquids in the
vicinity of this or any other appliance.
- WHATTODOIF YOU
SMELLGAS
Do not try to light any appliance.
Do not touch any electrical switch;
do not use any phone in your building.
Immediately call your gas supplier
from a neighbor's phone. Follow the
gas supplier's instructions.
If you cannot reach your gas supplier,
call the fire department.
-- Installation and service must be
performed by a qualified installer,
service agency or the gas supplier.
0(
2
Page 3
ge.com(U.S.)
vvvvw.GEAppliances.ca(Canada)
WARNING!
For your safety, the information in this manual must be followed to minimize the risk of fire or
explosion, electric shock, or to prevent property damage, personal injury, or loss of life.
ANTI-TIPDEVICE
All rangescan tip and injury could result.
Toprevent accidental tipping of the range, attach it to the wall or floor by installing the Anti--tip device
supplied.
If the Anti--tip device supplied with the range does not fit this application, use the universal Anti--17p
device WB2X7909.
Tocheck if the device is instafled and engaged properly, remove the storage drawer and inspect the
rear leveling leg. Make sure #fits securely into the slot.
If you I)ull the range otlt from the wall for any reason, make sure the device is properly
engaged when you push the rang_ back against fl)e wall. If it is not, there is a possible risk of
the rang_ tipping oxer and causing illjtl]_] if YOUor a child stand, sit or lean on an open door
Please refer m the And-Tip device infonnafion in fills manual. Failure m take fills precaution
could iesult in tipping of the rang_ and i,)jm>
IMPORTANTSAFETYNOTICE
The Californb Safe Drinking Water and ToxicEnforcement Act requires the Governor of Californb to
publish a list of substances known to the state to cause birth defects or other reproductive harm, and
requires businesses to warn customers of potential exposure to such substances.
Gas appliances can cause minor exposure to four of these substances, namely benzene, carbon
monoxide, formaldehyde and soot, caused primarily by the incomplete combustion of natural gas or
LP fuels. Properly adjusted burners, indicated by a bluish rather than a yellow flame, will minimize
incomplete combustion. Exposure to these substances can be minimized by venting with an open
window or using a ventilation fan or hood.
The fiberglass insulation in self-clean ovens gives off a very small amount of carbon monoxide during
the cleaning cycle. Exposure can be minimized by venting with an open window or using a ventilation
fan or hood.
3
Page 4

IMPORTANTSAFETYINFORMATION.
READALLINSTRUCTIONSBEFOREUSING.
WARNING!
SAFETYPRECAUflONS
When using electrical appfiances, basic safety precautions should be foflowed, including the
following:
Use this appliance only tbr its intended
purpose as described ill tim )wner s
Mannal.
Be sure your appliance is properly installed
and grounded by a qualified technician in
accordance with the proxqded installation
instructions.
Before performing any service, disconnect
the range power supply at the household
disuibufion panel by removing the fl_se or
switching off the circuit breaken
Haxe the installer show you tile location of
tile circuit 1)reaker or fl_se. Mark it for easy
reference.
Do not leme children alone---<'hildren
should not be left alone or nnattended in
all area where all appliance is ill use. They
should nexer be allowed to sit or stand on
ally part of the appliance.
Haxe the installer show you the location
of tile range gas shut-offxahe and how to
shut it off if necessa U.
Hax.e your rang.e installed and properly
grounded by a qualified installei; in
accordance with tile Installation
Instructions. Any adjusunent and service
should be perfomled only 1)yqualified gas
rang.e installers or se_wice mchnicians.
i,ocate the range out of kitchen tral_c path
and out of drafty locations to prexent poor
air circulation.
Be snre all packaging materials are
remox.ed from file rang.e before operating
it to pre\.ent fire or smoke damag.e should
the packaging material ignite.
Do not leme children alone or unattended
where a rang.e is hot or in operation. They
could be seriously burned.
Do not attempt to repair or replace ally
part of your range unless it is specifically
recommended in this manual. All other
service should be refened to a qualified
technician.
Be sure your rang.e is con-ecfly adjusmd
by a qualified se_Mce mchnician or installer
for tile type of gas (natural or I,P) that is
to be used. Your range call be corn.erred
for use with either type of gas. See tile
Installation Instructions packed with
the rang.e.
Plug your range into a 190;\_lt grounded
outlet only. Do not remove tile round
gTounding prong flom file plug. If in
doubt about rite grounding of file home
elecuical system, it is your persona]
responsibility and obligation to hax.e
all ungrounded outlet replaced with a
properly gTonnded, th_.ee-prong onflet ill
accordance with flae National Electrical
(',ode (U.S.). Do not use all exmnsion cord
with this appliance.
_Zl,WARNING:>eseadjustments
must be made by a qualified service
technbian in accordance with the
manufacturer's instructions and aft codes
and requirements of the authority having
jurisdiction. Failure to follow these
instructions could result in serious injury or
property damage. The qualified agency
performing this work assumes
responsibility for the conversion.
Kee I) the hood and grease fhers clean to
maintain good xenting and to mold grease
fires.
Teach children not to play with tile
controls or ally other part of the rang.e.
Always kee I) dish towels, dish cloths, pot
holders and other linens a satb distance
fronl vonr rang.e.
4
Page 5
SAFETYPRECAUTIONS
ge.com(U.S.)
wvvw.GEAppliances.ca(Canada)
Always kee I) wooden and plastic utensils
and canned food a safe distance fiom your
rang.e.
Always kee I) combusdhle wall cox.etings,
curtains or d,apes a safe distance fiom
yon*" rang.e.
Do ,lot clean tile rang_ with flammable or
x_latile cleaning fluids.
After prolong.ed use of a range, high floor
mmperauues may result and many floor
cox.elings will *lot withstand this kind of
use. Nex.er install tile tang.e ox.er vitvl tile
or linoleum that cannot wifllsmnd such
type of use. Nexer install it directly over {{
inmtior Mtchen carpeting.
Avoid scratching die cooktop with sharp
instrmnents, or wiflt rings and oflter
jeweh T.
Do not allow anyone to climb, stand or
hang on dte ox.en door; storag.e drawer or
cooktop. They could damag.e the rang.e
and even tip it ox.el; causing sex.ere
personal iiIjm T.
CAUTION:Itemsinteresttochildren
shouldnot be storedin cabinetsabovea rangeor
on the backsplashof a range--children climbing
on the rangeto reachitems could beseriously
injured.
mamdal could be ignimd if brought in
contact with flame or hot ox.en sur/aaces
and may cause sex.ere bums.
Do ,lot store fla,nmable materials in an
oven, a rang.e storag.e drawer or near a
cooktop.
Do ,lot store or use combustible mamrials,
gasoline or other flammable vapors and
liquids in the viciniw of this or any other
appliance.
Do ,lot let cooking grease or other
flammable mamrials accunmlam in or
near the rang.e.
Do not use wamr on grease fires. Never
pick up a flaming pan. Turn dm conuols
off: Smother a flaming pan on a surthce
humer 1)5' cox.elqng tile pan complemly
wiflt a well-fitting lid, cooMe sheet or fiat
trW. Use a multi-pml)ose di T chemical or
foam-type rite exdnguishe,:
Flaming grease outside a pan can be put
out by coveting it with baking soda or;
if available, 1)5' using a multi-pm])ose dU
chemical or foam-type fire extinguisher.
Flame in dte ox.en can be smodtered
completely by closing the ox.en door and
mining tile control to off or by using a
nntlti-purpose d U chemical or foam-type
fire extinguisher
WARNIN&NEVERusethis
appliance as a space heater to heat or
warm file room, Doing so may result
in carbon monoxide poisoning and
ox.erheating of the cooktop or ox.en,
For your safety, never use your appliance
for wmlning or heating the room.
Larg.e scratches or impacts to glass doors
can lead to broken or shatmred glass.
Do not clean dte rang.e when the appliance
is in use.
Nex.er wear loose-fitting or hanging
garments while using the appliance.
Be carefltl when reaching for items stored
in cabinets ox.er the rang.e. Flammable
Let tile bui_ler g_ates and other surthces
cool before touching them or leaving
them where children can reach them.
Never block die x.ents (air openings) of
the range. They provide die air inlet and
outlet fllat are necessat T for the rang.e to
operam properly with COtTect combustion.
'Air openings at.e located at rite ,.ear of the
cooktop, at tile top and bottom of file
ox.en door; and at tile 1)oUom of the rang.e
under rite smrag.e drawer or kick panel.
Do ,lot lift tile cooktop, iJfting the
cooktop can lead to damag.e and improper
operation of the rang.e.
Page 6
IMPORTANTSAFETYINFORMATION.
READALLINSTRUCTIONSBEFOREUSING.
WARNING!
SURFACEBURNERS
Useproperpan size--avoid pansthat are unstableor easilytipped.Selectcookwarehavingflat bottomslarge
enoughto coverburnergrates. Toavoidspillovers,makesurecookwareis largeenoughto containthefood
properly, Thiswill both save cleaningtimeandprevent hazardousaccumulationsof food,sinceheaw spattering
or spilloversleft on rangecan ignite.Usepans with handlesthat canbe easilygraspedand remaincooL
Ahvays use dm/./TE position when igniting
tim top burners and make sure tim burners
have ig_fimd.
Ne\er lea\_ tim surface burners unattended
at high flame settings. Boilo\>rs cm_se
smoking and greasy spillo\>rs that mW
catch on fire.
, Adjust tim top burner flame size so it does
not exmnd beyond the edge of tim cookware.
Excessive flame is hazardous.
Use only dry pot holders--moist or damp pot
holders on hot surPaces may resuh in burns
flom smam. Do not let pot holders come
near open flames when lifting cookware. Do
not use a towel or other bulky cloth in place
of a pot holde_:
When using glass cookware, make sure it
is desig_md for top-ofqange cooking.
To minimize dm possibili b' of bums, ignition
of flammable materials and spillag>, mm
cookware handles toward the side or back of
tim range without extending over adjacent
btlI'IleI's.
Careflflly watch foods being flied at a high
flame setting.
Ahvays heat fat slowly, and watch as it beats.
Do not lea\> any imms on tim cooktop. Tim
hot air flom tim vent may ig_im flammable
imms and will increase pressure in closed
containers, which may cm_se them m burst.
ff a coml)ination of oils or _lts will be used
in flying, sdr togedmr be%re beating or
as Pats meh slowly.
tim pan too flfll of _t can cm_se spillo\>rs
when food is added.
Do not flame foods on tim cooktop. If you do
flame foods under tim hood, turn tim Pan on.
Do not use a wok on dm cooking sur£1ce
h"tim wok has a round metal ring fl_at is
placed o\er the burner gram m support the
wok. This ring acts as a heat m_p, which mW
damage the burner g_v_mand N_rner bead.
Also, it m W cm_se tim N_mer m work
improperly. This may came a cad)on
monoxide level above that allowed by cunent
standards, resulting in a heahh hazard.
Foods for flwing should be as dry as possible.
Frost on flozen foods or moisture on flesh
foods can cm_se hot l_lt m bubl)le up and o\er
the sides of the pan.
Ne\>r uy to mo\e a pan of hot Pat, especially
a deep _lt flyer. X'\hit until the _lt is cool.
Do not leave plastic imms on tim cooktop--
they may meh h"left too close to tim \>nt.
Kee I) all plasucs away flom tim mrPace
buI'Ile I'S.
To avoid tim possibility of a burn, always be
certain that tim conuols for all burners are
at the OFFposition and all grates are cool
before attempdng to remo\> them.
If _m_ge is locamd near a window, do not
hang long cmmins that could blow o\er the
surface burners and cream a fire hazard.
If you smell gas, turn off tim g_s to tim range
and call a qualified service mchnician. Ne\>r
use an open flame m locam a leak.
Use a deep £_t thermomemr whene\>r
possible m pre\ent o\_flmating l_lt beyond
the smoking point.
Do not operam tim burner wifl_out all burner
parts in place.
[_lse tim least possible amount of £_t for
efl>cdve shallow or deep-_lt flwing. Filling
Always mrn tim suiJ_lce burner conuols off
before removing cookware.
When disabling range lock-out, make
sure tim mrJ%e conuols are set to tim OFF
position. This will preclude gas flow when the
range is turned on.
Page 7
vvww.GEAppliances.ca(Canada)
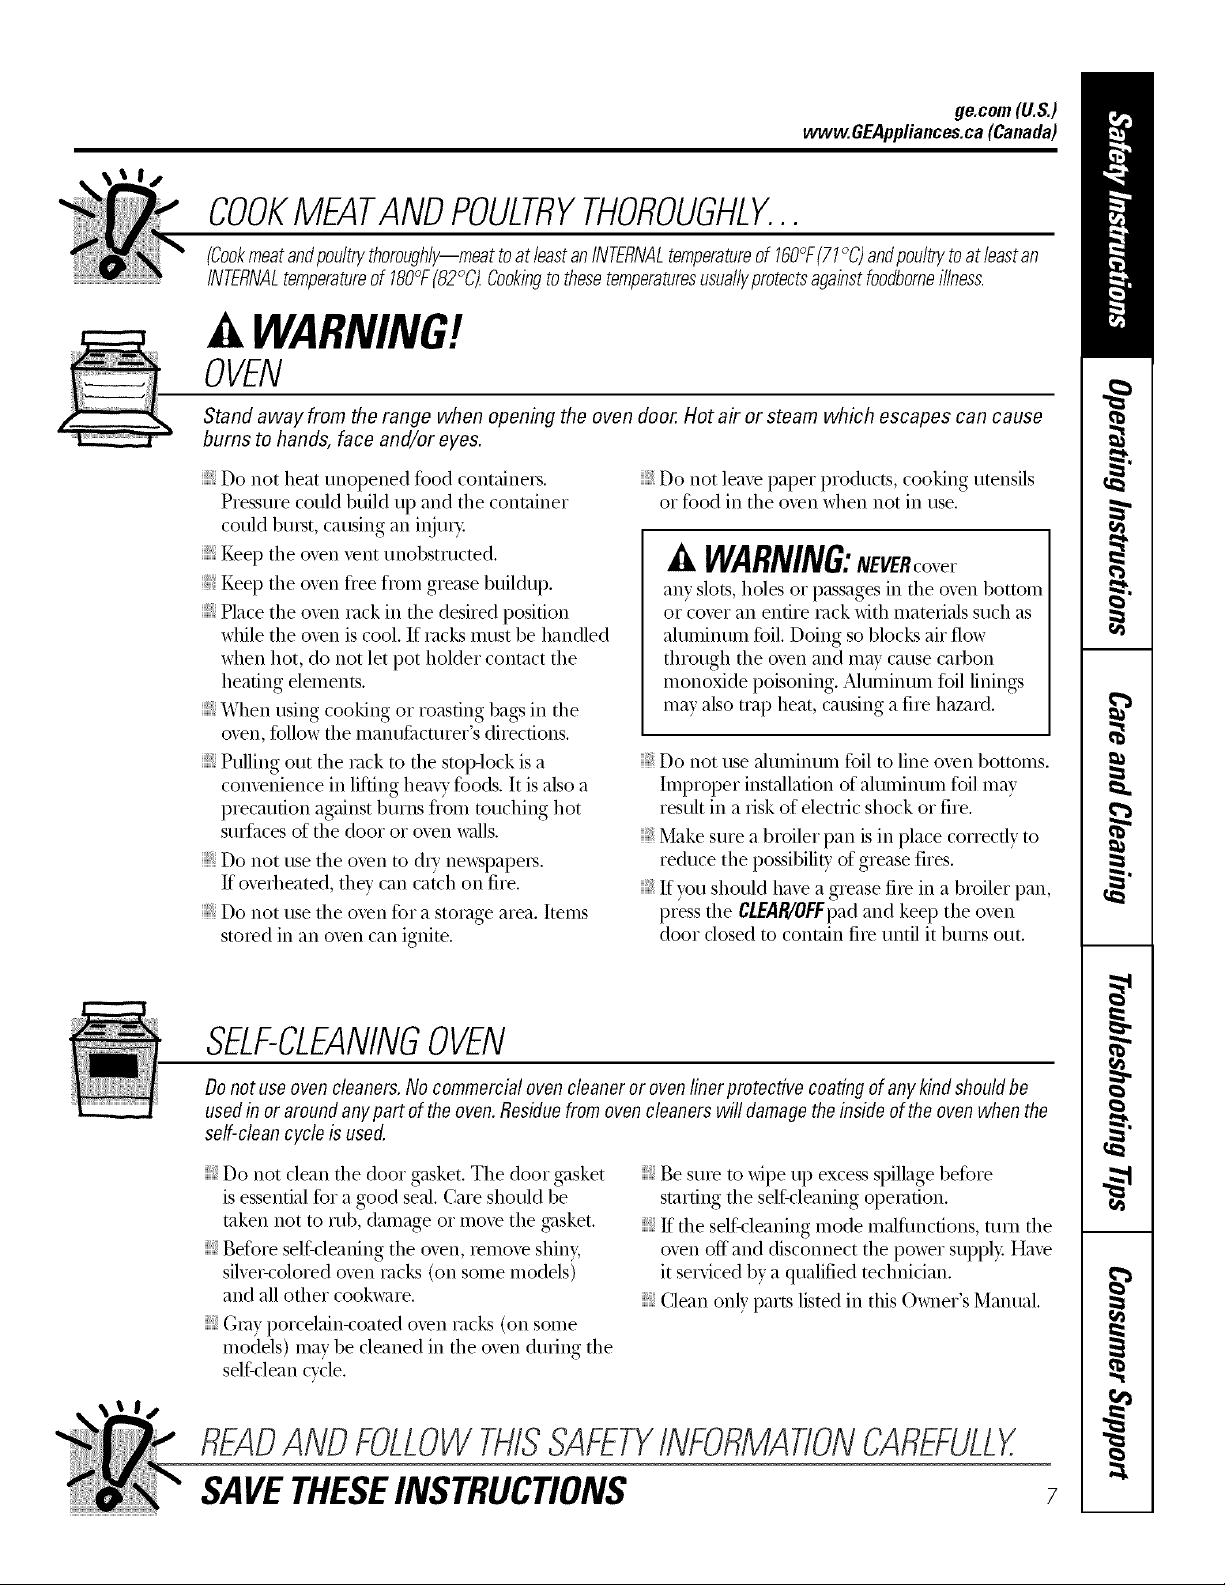
COOKMEATANDPOULTRYTHOROUGHLY...
ge.com(U.S.)
(Cookmeatandpoultrythoroughly--meattoatleastanINTERNALtemperatureof 160°F(71°C)andpoultrytoatleastan
INTERNALtemperatureof 180F(82 C_Cookingtothesetemperaturesusuallyprotectsagainstfoodborneillness.
0 0
WARNING!
OVEN
Stand awayfrom the range when opening the oven door. Hot air or steam which escapes can cause
bums to hands, face and/or eyes.
Do not heat unopened food containers.
Pressure could build up and the container
could buL'st,causing an injm>
KeeI) the oven vent unobstructed.
KeeI)the oven flee flom grease buildup.
Place the oven rock in the desired position
while the oven is cool. If vac!<smust be handled
when hot, do not let pot holder contact the
heating elements.
When using cooking or roasting bags in the
oven, fbllow the manufilcturer's directions.
Pulling out the rack to the stop-lock is a
convenience in lifting heaxy fbods. It is also a
precaution against burns flom touching hot
surfilces of the door or oven walls.
Do not use the oven to dU newspapers.
If overheated, they can catch on fire.
Do not use the oven fbr a storage area. Items
sto_ed in an oven can ignite.
Do not leave paper products, cooking utensils
or fbod in the oven when not in use.
A WARNING:NEVERcove1
any slots, holes or passages in the oven bottom
or cover an entire rock with mateiials such as
aluminum foil. Doing so blocks air flow
through the oven and may cause carbon
inonoxide poisoning. Aluminum foil linings
may also map heat, causing a fire hazard.
Do not use aluminum foil to line oven bottoms.
hnproper installation of aluminum foil ma_
result in a risk of electric shock or fire.
Make sure a broiler pan is in place correctly to
reduce the possibility of grease fires.
If you should have a grease fi_e in a broiler pan,
press the C/.£-AR/0FFpadand kee I) the oven
door closed to contain fire until it burns out.
SELF-CLEANINGOVEN
Donotuseovencleaners.No commercialoven cleaner or ovenliner protectivecoatingof any kind shouldbe
usedin or aroundanypartof theoven.Residuefrom ovencleanerswill damagetheinsideoftheovenwhenthe
self-cleancycleisused.
Do not clean the door gasket. The door gasket
is essential fbr a good seal. Care should be
taken not to rub, damage or move the gasket.
Befbre selfZcleaning the oven, iemove shiny,
silver-colored oxen mc_ (on some models)
and all other cookware.
} Gray porcelain-coated oven _,'acLs(on some
models) ma} be cleaned in the oven during the
selfklean cxcle.
¢
Be sure to wipe up excess spillage be%re
starting the selfk'leaning opeiation.
If the selfk'leaning mode malflmctions, turn the
oven off and disconnect the power supply Have
it serviced bv a qualified technician.
Clean only parts listed in this Owner's Manual.
READANDFOLLOWTHISSAFETYINFORMATIONCAREFULLY.
SAVETHESEINSTRUCTIONS 7
Page 8
Usingthegas surfaceburners.
Throughout this manual, features and appearance may vary from
Before Lighting a GasBurner
Make sure all grates (m the range are m
place befi)re usino._ am, burnei:
{ If your range has the Range I,ock-Out
ligature, make sure it is disabled before
attemi)ring, to light the surfilce burnei_.
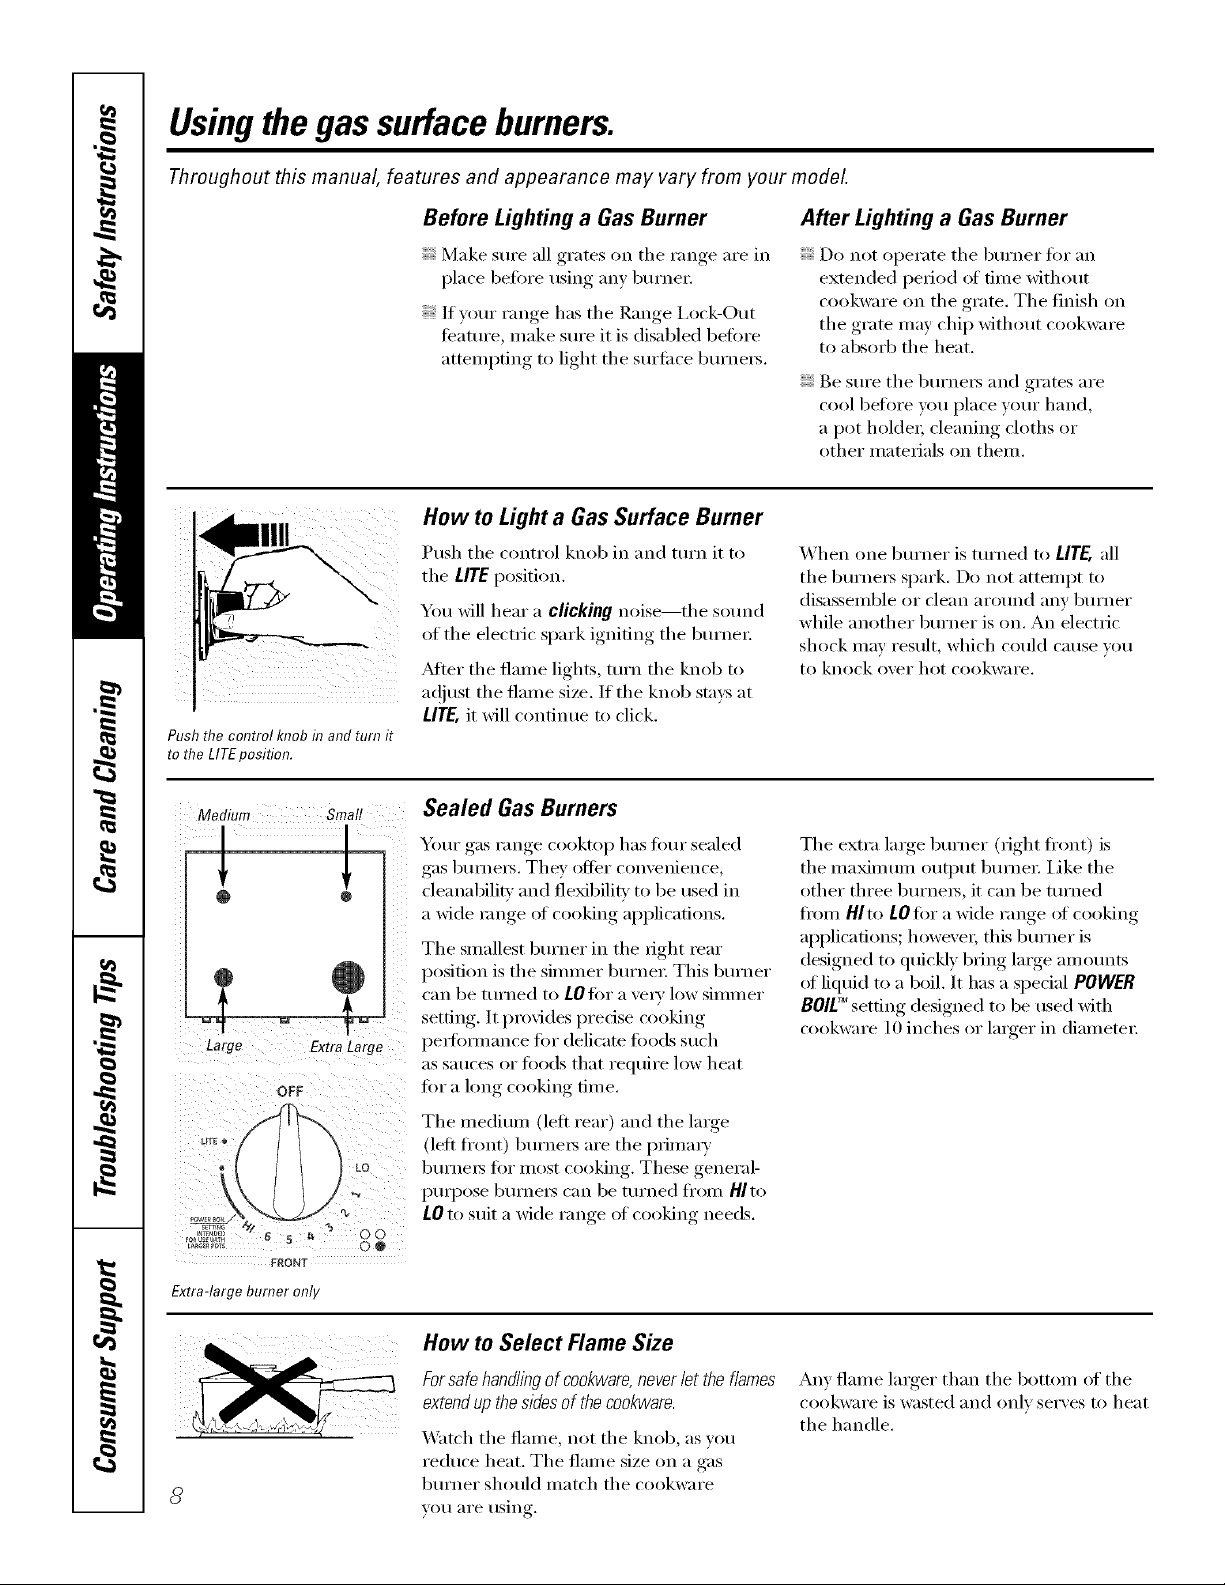
How to Light a Gas Surface Burner
Push the control knob in and turn it to
the LITE position.
You will hear a clicking noise--the sound
of the electric spark ignidng the burnei:
_Mter the flame lights, turn the knob to
a(!itlst the flanle size. If tile knob stms at
LITE,it will continue to click.
Push the control knob in and turn it
to the LITEposifion.
/our model.
After Lighting a Gas Burner
Do not operate the burner fi)r an
extended period of time without
cookware on the grate. The finish on
the grate ma,v chip without cookware
to absorb the heat.
Be sure the burneis and grates are
cool before you place your hand,
a pot holdei; cleaning cloths or
other materials oil then/.
When one burner is turned to LITE, all
the burnei_ spark. Do not attempt to
disasselnble or clean around any burner
while another burner is oil. An electric
shock may result, which could cause you
to knock over hot cookware.
Medium Small
Large ExtraLarge
OFF
FRONT
Extra-largeburneronly
8
Sealed Gas Burners
Your gas range cooktop has four sealed
gas bumeis. They oilier convenience,
cleanabilitv and fleMbilitv to be used in
a Mde range of cooking applications.
The smallest burner in the fight rear
position is the simmer burnei; This burner
can be turned to LOfor a vei T low simmer
setting. It provides predse cooking
peil'ommnce for delicate foods such
;:IS Satlces or fi)o(ls that reqtlire low heat
flit a long cooking time.
The mediun/ (left rear) and the lmge
(left ti'ont) burneis are the i)rimar) '
burneis for most cooking. These general-
puq)ose bumei_ can be turned fl'om Hlto
L0 to suit a wide range of cooking needs.
How to Select Flame Size
Forsafe handling of cookware,never let theflames
extendup the sidesof thecookware.
_'at('h the flame, not the knob, as you
reduce heat. The flame size oil a gas
burner should match the cookware
you are using.
The extra lmge burner (right front) is
the nmMnmm output bunlei: Like tile
other three burneis, it can be turned
from HI to LO for a wide range of cooking
applications; howevei; this burner is
designed to quickly bring large amounts
of liquid to a boil. It has a special POWER
BOlL TM setting designed to be used with
cookware 10 inches or larger in diam etei:
Any flame larger than the bottom of the
cookware is wasted and only ser\ es to heat
the handle.
Page 9
Top-of-Range Cookware
ge.com(U.S.)
www.GEAppliances.ca(Canada)
Aluminum: Medium-weight cookware is
recommended because it heats quickly
and evenly: Most fi)o(ls brown evenly in
an almninum skillet. Use saucepans with
tight-fitting lids when cooking with
IllinillltlI// alllO/ints el _;_tei:
Cast-#on: If heated slowly, most skillets
will give satisti_cto_ T results.
Enamelware: Under some conditions,
tile enaillel of SOllle cookware may
Illelt. Follow cookware illanttIiiCttli'eY's
recommendations fin" cooking methods.
Glass: There are two t)pes of glass
cookware--those tot o;'en/lse only
and those tot top-of:range cooking
(saucepans, coffee and teapots).
Glass conducts heat ve_w slowly.
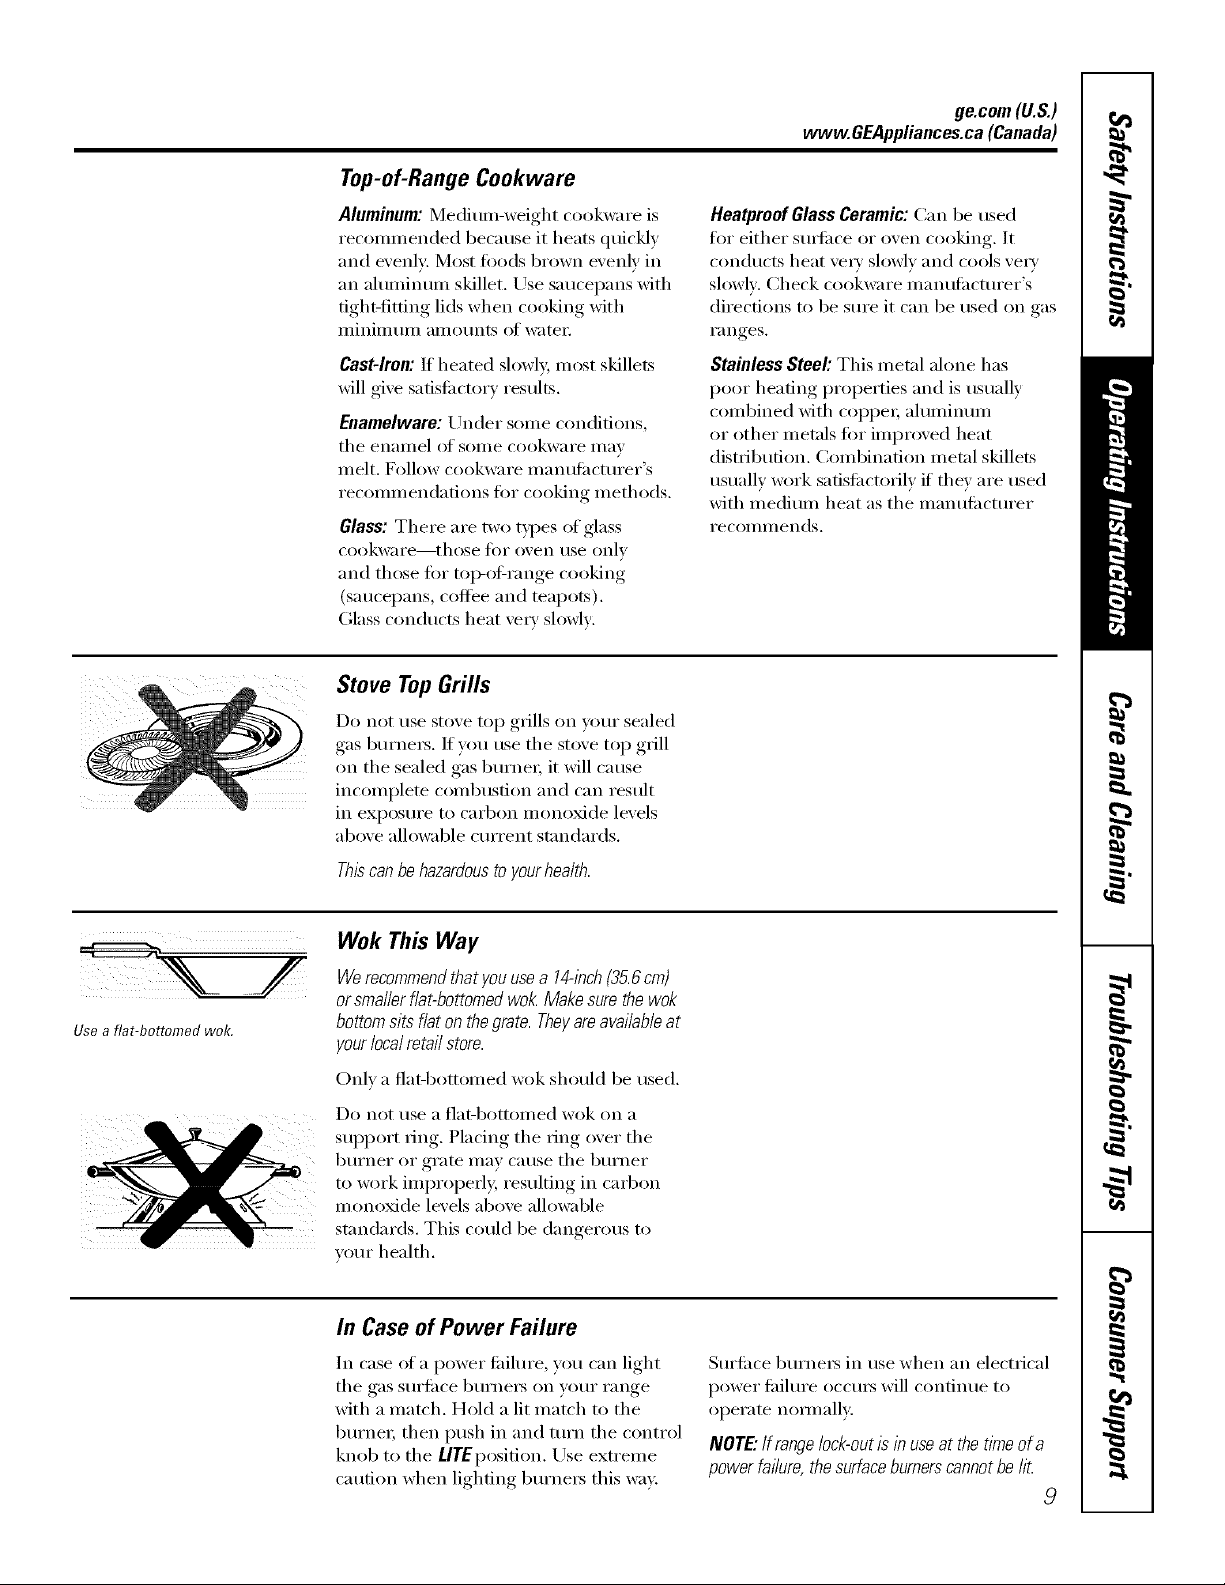
Stove Top Grills
Do not use stove top grills on your sealed
gas burnei_. If you use tile stove top grill
on the sealed gas bm'ne_; it will cause
incomplete combustion and can result
in exposure to carbon monoxide levels
above allowable current standards.
Heatproof Glass Ceramic: Can be used
fi)r either sm_i_ce or oven cooking. It
conducts heat \'e_w sh)wlv and cools very
slowly. Check coofcware inanufi_cturer's
directions to be sure it can be used on gas
i'anges,
Stainless Steel'. This metal ahme has
poor heating properties and is usually
combined with COl)pe_; aluminmn
or other metals fin" improved heat
distribution. Combination metal skillets
usually work safisfi_ctofilv if they are used
with medium heat as tile manufi_cmrer
i'ecoi/liilends,
Usea fiat-bottomed wok.
q
Thiscanbehazardoustoyourhealth.
Wok This Way
Werecommendthat you usea 14qbch{35.6cm)
orsmaller fiat-bottomed wok Make sure thewok
bottom sits fiat on thegrate. Theyare available at
yourlocalretailstore.
Only a fiat-bottomed wok should be used.
Do not rise a _]at-bottoil/ed wok OIl a
support ring. Placing the ring over the
burner or gram may cause tile burner
to work ililpi'opei'ly, resulting in cai'bon
monoxide levels above allowable
standards. This could be dangerous to
vom" health,
In Case of Power Failure
In case ot a power tifilm'e, you can light
tile gas surli_ce burnei_ on your range
with a match. Hold a lit match to tile
bm'nei; then push in and tm'n tile control
knob to tile UTEl)osition. Use extreme
caution when lighting bm'ne_ this way
Sm'fl_ce burners in use when an electrical
power tifilure ()ccui_ will continue to
operate nora/all>
NOTE."If range lock-out is in use at the time of a
power failure,the surfaceburnerscannotbe li_
9
Page 10

Usingtheovencontrols.(on some models)
(Throughout this manual, features and appearance may vary from your model.)
0 ON S
_ult_ /1 Rac_
Features and appearance may var,¢
OvenControl,ClockandTimerFeaturesandSettings
10
BAKEPad 0
Touch to select tile b;&e fimction.
@ BROILHI/LOPad 0
Touch to select tile broil function,
CONVECTIONBAKEMULTI/1RACKPad
Touch to select baking with the comection
function,
CONVECTIONROASTPad
Touch to select roasting with tile comection
function,
PROOFPad
Touch to select a warm en'dronnlent u_ful
fi)r rising,, yeast-lea\ened,.... [)roducts,,
STARTPad
Must be touched to start any cooking or
cleaning function.
Display
Sho_,_stile time of da); oxvn telllperattlre,
whether the oven is in the bake, broil or
seli:vleafing mode, the times set for
the timer or automatic o_en opeiafions,
and if the Iange is locked.
ff "F- and a number orletter" flashin thedisplay and
theoven controlsignals, thisindicates a functimterror
code. Touchthe CLEAR/OFFpad Allow the oventocoolfor
onehour.Putthe ovenbackintooperation,ifthe functionerror
coderepeats,disconnectthepowerto theovenandcarlfor
service.
ffyour ovenwas set for a timed ovenoperationand a
power outage occurred, theclockandall programmed
functionsmustberese_
Thetime of daywill flash #1thedisplay when therehas
beena power outage.
SELFCLEANLO/STDPad
Touch t() select selik-leaning fimction. See tile
Usingthe self-cleaning oven section.
OVENLIGHTON/OFFPad
Touch to tm'n tile o_en light on or oftl
DELAYSTARTPad
Else ahmg with COOKINGTIME or SELFCLEAN
LO/STD pads to set the o_vn to start and stop
automatical b at a time you set.
COOKINGTIMEPad
0
Touch and then touch the munber pads to set
the amount of time you want your food to
cook. Tile ()veil will shut off when tile
cooking time has run out.
CLEAR/OFFPad
Touch to cancel ALL o_en operations except
tile clock, timer and range lock<)ut.
CLOCKPad
Touch before setting the clock.
Number Pads
Else to set all) fhnction requiring nmnbers
such as tile time of da) on tile clock, tile
time_; the oxen temperatm'e, the internal
fi)od temIlerature, the start time and
length of opeiation fi)r timed baking
and sellqleaning.
KITCHENTIMERON/OFFPad
Touch to select file timer featm'e.
PROBEPad
Touch when using the probe to cook fi)od.
WARM Pad
Touch to keep cooked ti)ods warm. See tile
How to Set the Ovenfor Warming section,
RANGELOCK-OUTPad
Touch and hoM tile RANGELOCK-OUTpad
for 14seconds to lock/unlock tile sm'filce
btlI'neI_, o_,_n btlI'neI_ and conm)l panel so
the) cannot be acfivamd.
Page 11
www.GEAppliances.ca(Canada)
OVE:N C_NTROLS
o o_+21+6
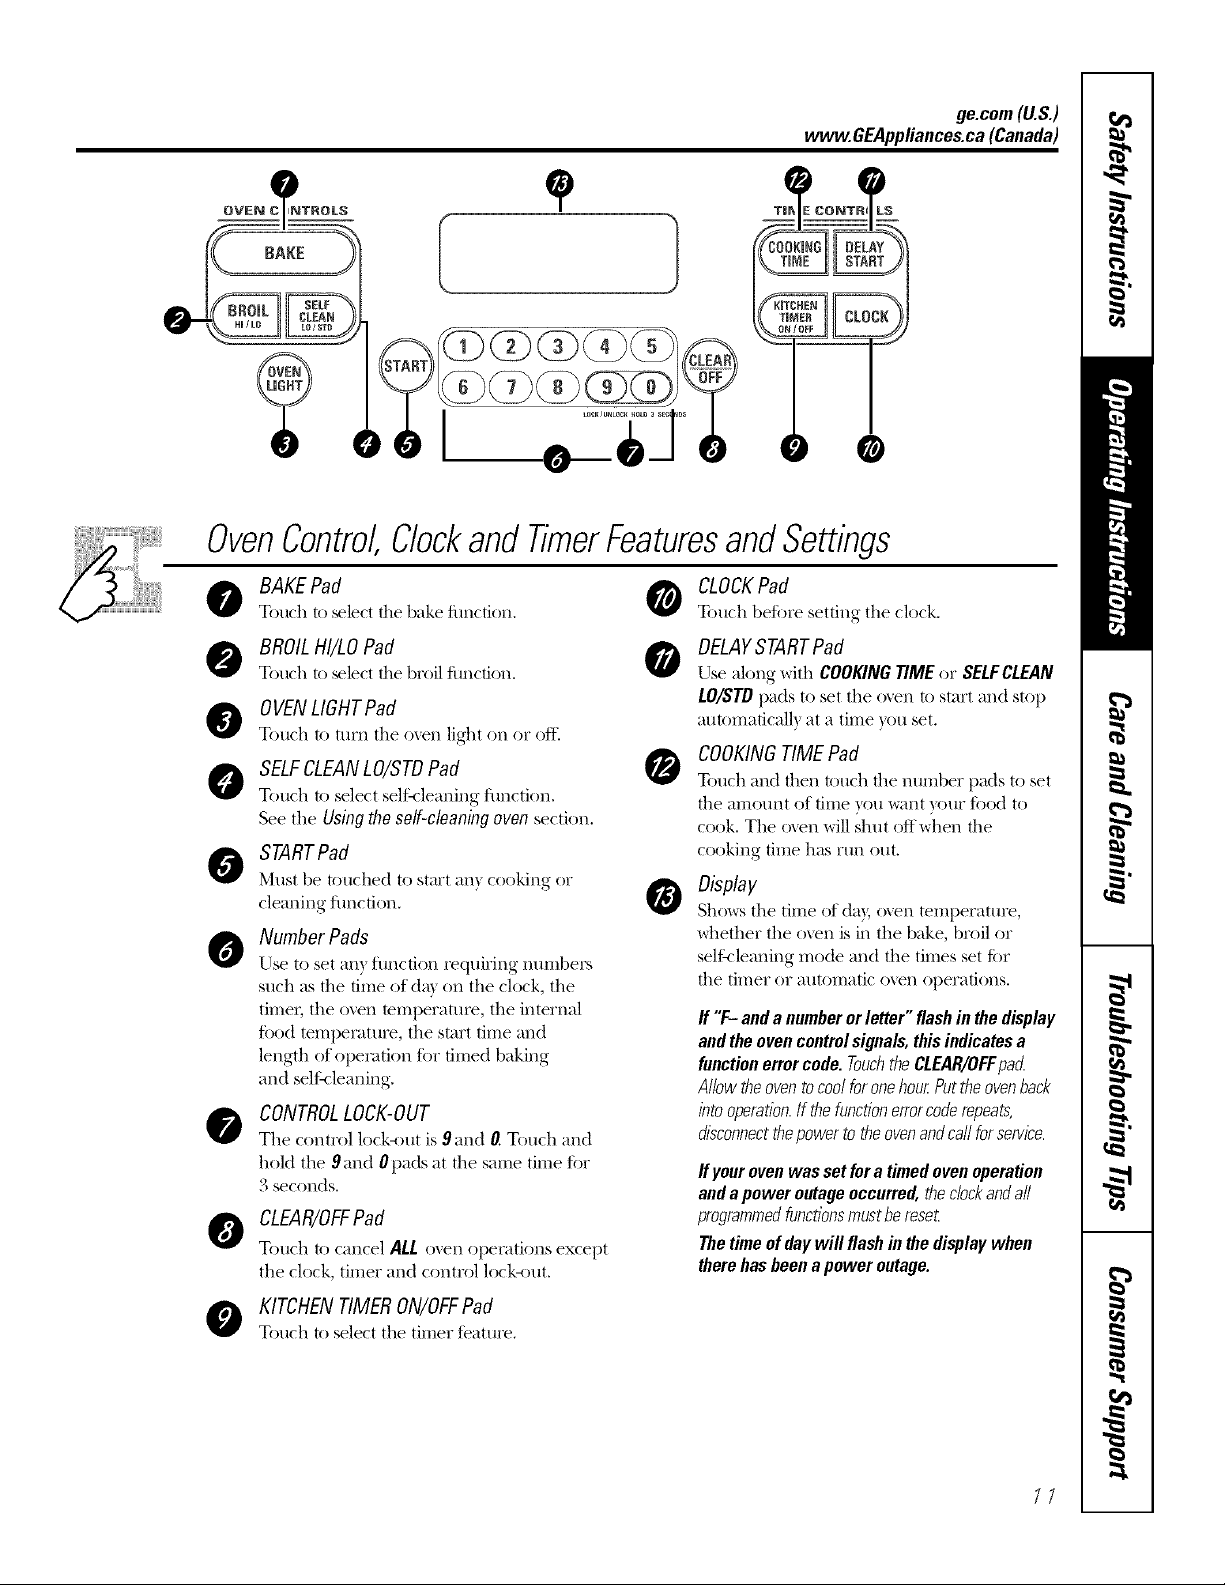
OvenControl,Clockand TimerFeaturesandSettings
ge.com(U.S.)
BAKE Pad
Touch to Elect the bake fimction.
BROILHI/tO Pad
Touch to +le{t the broil fimction.
0VENLIGHTPad
Touch to tm'n the o_en light on or {)It
SELFCLEANLO/STDPad
Touch to select selfk-leaning" function.
See the Using theself-cleaning oven section+
STARTPad
Must be touched to start an} cooking or
cleaning flmcfion+
Number Pads
Use to set any function requiring" numbers
such as the time of da} on the clock, the
time_; the oven temperatm'e, the internal
filed tempemtt_re, the start time and
length of operation fi)r timed baking
and sdtMeaning.
CONTROLLOCK-OUT
The control lock-out is 9 and 0. Touch and
hold the 9and Opads at the same time fi)r
3 seconds+
CLEAR/OFFPad
Touch to cancel ALL oxen operations except
the clock, timer and control lock<rut.
CLOCKPad
Touch before setting the clock.
DELAYSTARTPad
Use along with COOKINGTIME or SELFCLEAN
LO/STD I)ads to set the o_en to start and stop
at_t(tmaticall} at a time you set.
COOKINGTIMEPad
Touch and then touch the number pads to set
the amount of time you want your filed to
cook+ The <}_enwill shut oft when the
cooking time has Ytln ()Kit+
Display
Shows the time of day, o_en tetllperattlre,
whether the oxvn is in the bake, broil or
selt:_leaning mode and the times set tar
the timer or automatic oxvn operations.
ff "F- anda numberorletter"flashinthedisplay
andtheovencm#rolsignals,thisindicatesa
functionerrorcode.TouchtheCLEAR/OFFpad
AllowtheoventocoolforonehourPuttheovenback
intooperation.Ifthefunctionerrorcoderepeats,
disconnectthepowertotheovenandca//forservice.
ff your oven was setfor a timedoven operation
and a power outageoccurred, theclockanda//
programmedfunctionsmustberese_
Thetime of day will flash#1the displaywhen
therehas beenapower outage.
KITCHENTIMERON/OFFPad
Touch to select the timer feature+
1/
Page 12
Usingthe oven.
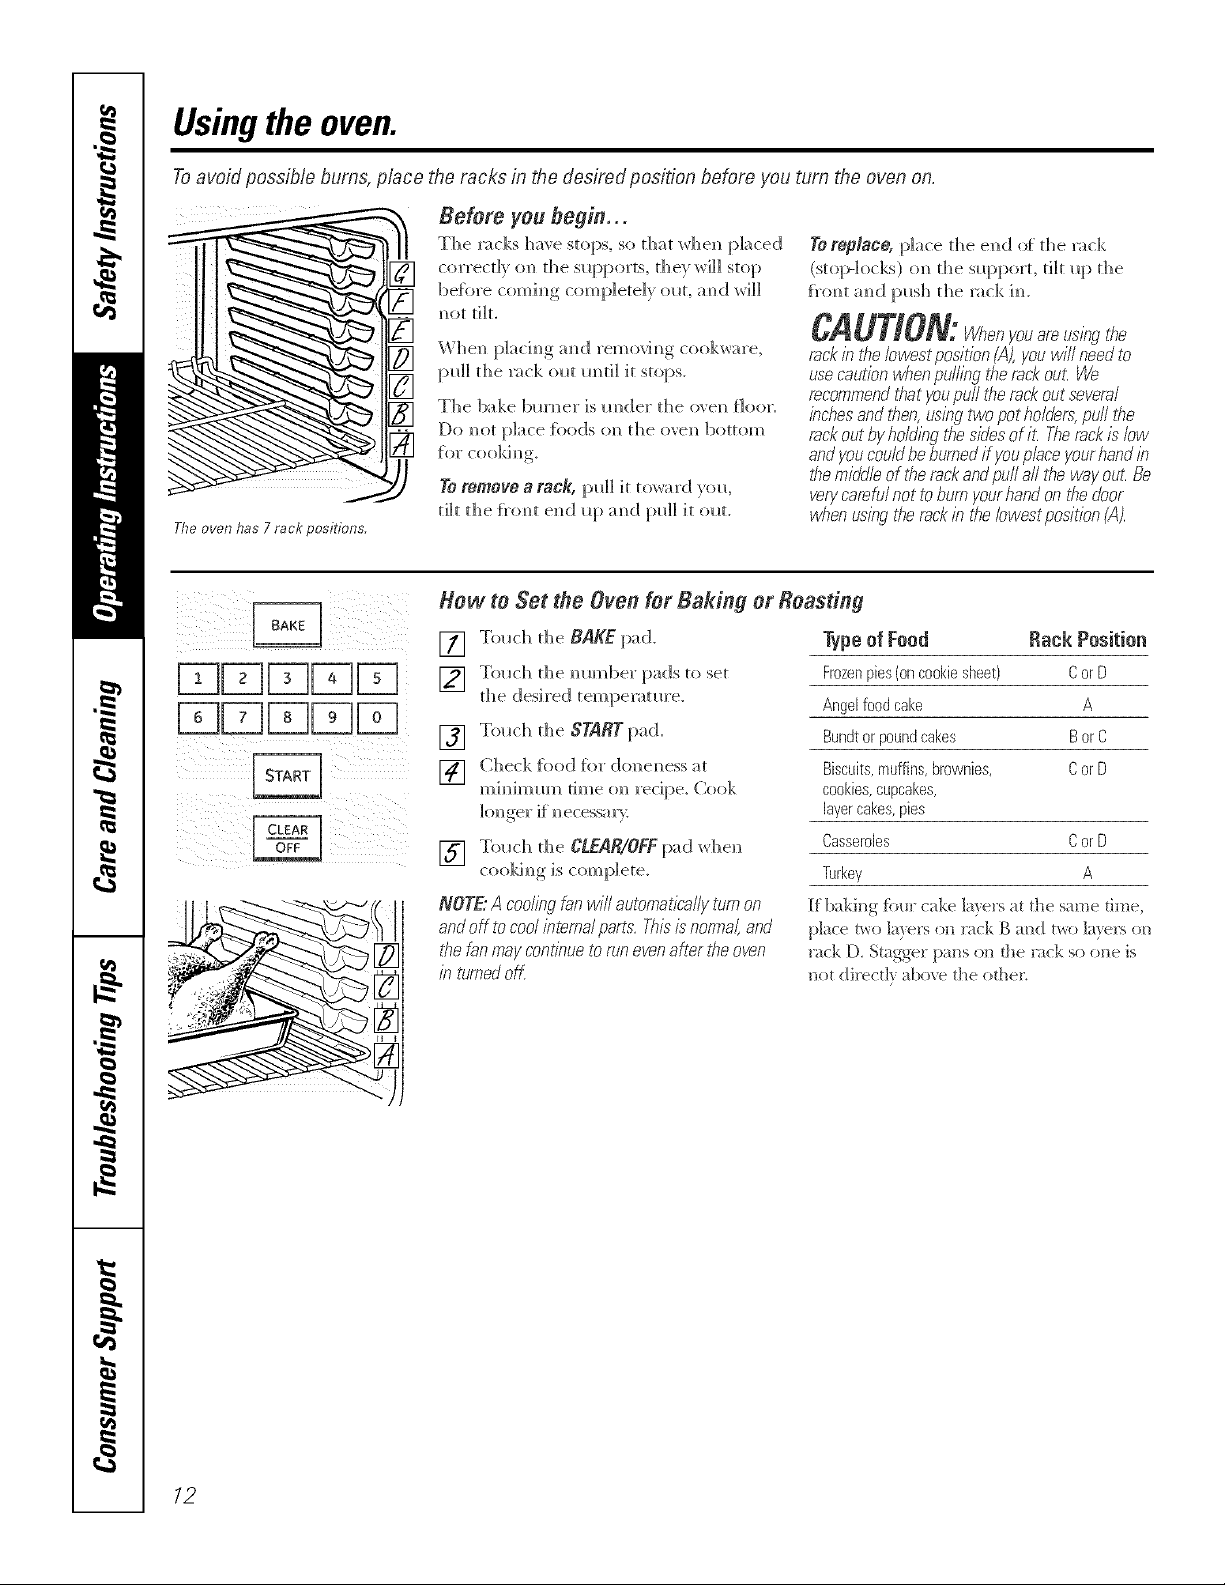
Toavoid possible bums, place the racks in the desired posifion before you turn the oven on.
Befere Feu begin°..
The racks have stops, so that _,vhei/ placed
correct]} on the slq)ports, they _i]] stop
be{kn'e comh/g completely ollt, amid wi]]
m/ot tilt.
To taplace, place the end <d the x_ck
(stop-locks) oil the sl_pport, tilt i_p the
f_'on/t amid [)llsl] the rack hi.
CAUTION:V:henyouare
Whel/p]ach/g mid removim/g cookware,
pill] the _ck ollt m/ti] it stops.
The bake bm'ner is raider the oven floor.
Do m/ot})]ace {oods oN/the ovei/ bottom
To remove a rack, pu]] it toward }ol_
tilt the f_xmt e]/d I_[_ mid pu]] it ol_t.
Theoven has 7 rack positions.
Xew te Set the Oven for Baking er Roasting
rackin rite Iowest pos/tTon (A), you will need to
usecaution_¢TenpullingtiTerackout We
recommendthatyoupurltilerackoutseveral
bchesandtflen,usingtwopotholders,pull the
rackoutbyho/d/7_gtilesidesofiL Therackislow
andyoucouldbeburnedif youplaceyourhandb
themiddleof therackandpuffaftthewayouLBe
verycarehdnottobumyourhandonthedoor
when using be rack b be bwest podfion (A).
! ii iiii
i/i iii ii iiI/i
[] Touch the BAKE pad. Type ef Feed
Touch the m/m_/ber pads to set
[]
the desired tempe]_mre.
Touch the START pad.
[]
Check f_od tilt don era/ess a t
[]
[] Touch the CLEAR/OFFpad _yheH
cooMm/g is complete,
NOTE"A cooling fan will automatically turnon
andoff tocool btemal parts. Thisis"normal,and
t¢_efan may mnt/nue torun evenafter theoven
b turnedoK
time on recipe. Cook
Frozenpies{on cookiesheet) Cor D
Angel food cake A
Bundt or pound cakes Bor C
Biscuits,muffins, brownies, Cor D
cookies,cupcakes,
layer cakes,pies
Casseroles Cor D
Turkey A
If baking fbur cake la}ers at the same tit-13e,
p]ace a_o la}ers (m _ck g and t_o la}ers on
rack D, Stagger pans on tile r_ck so one is
not directl} above tile other,
Rack Position
12
Page 13

Preheating and Pan Placement
ge.com(U.S.)
www.GEAppliances.ca(Canada)
Donotplacefoodsdirectlyonthe
over floor,
Preheat the oven if the redpe calls tot it,
Preheating is necessary t_n" good results
when baking cakes, cookies, past_ T and
breads.
Topreheat,set theovenat thecorrecttemperature.
Thecontrol will beepwhen the ovenis preheated
andthe display will show yourset temperature.
Thepreheat tlknewill van/depending on the
temperaturesetting.
Aluminum Foil
Do not use aluminum foil on the bottom of
the oven.
Never entirely cover a rack with
aluminum f_il. This will disturb the heat
circulation and result in poor baking.
Oven Moisture
_&syour oven heats uI), the temi)eratm'e
change of the air in the oven may catlse
water droplets to fOm_ on the door glass.
These droplets are hamdess and will
evaporate as the oven continues to
heat up.
Baking results will be better if baking
pans are centered in the oven as much
as possible. If baking with more than one
pan, place the pans so each has at least 1"
(2.5 cm) to 1½" (3.8 cm) of air space
around it.
A smaller sheet of toil may be used to
catch a spillover by placing it on a lower
rack several inches below the food.
12
Page 14
Usingthe oven.
Oven Vent
Yollr ove]/is veto/re(i[ [hroll_h o]/e veil[
located ronsard the rear of the _mge. Do
m_ot block d]is veldt whel_ cookiN_g h_ d_e
o_ el]--k is impormm_t dmt d_e fio_ ot hot
air f}_om the ove]_ amid {_'esh air to d_e
o_ e]_ bm'N]er be m_interrupted_ Avoid
touching the vent openings er nearby
surlsoes duringevener bre#er operation=
they may heceme bet.
Power Outage
CAUTION:Donotmakeanyattempttooperate
be ebctric ignitionovenduringanebctTicsl
powerfailure.
The o_e_ or broiler cmmot be lit dm'im_g a
po_er fid]m'e, Gas _rH]] _]()t _]{)W m]]ess the
g]o_ bar is hot.
Handlesofpotsandpansonthecooktopmay
becomehotif left toodosetothevent
Donotleave,p/sstlcitemsonthecooktop_
theymaymeltifleft tooclosetothevent
Donotleaveanyitemsonthecooktop.Thehot
air fromtheventmayignitef/smmsb/eitems
andwillincreasepressureinclosedcontainers,
whichmaycausethemtoburst.
Metalitemswillbecomeveryhotif theyare
leftonthecooktop,andcouldcauseburns.
If the ovem] is ]m_ilse where] a p(}_,_rel "
fifil ure occms, the ove_] ]bm'N]er shuts
(}f_ a_ d ca __ ot be re-lit _ _ d] p{_ er is
restored. This is because the f]o',_ otgas is
amomatica]]y stopped a_d wi]] _ot res_m_e
whe_ power is restored m_ti] the glow bar
has reached opex_ti_g temperature.
14
Page 15
How to Set the Oven for Broiling
ge.com(U.S.)
vvww.GEAppliances.ca(Canada)
IMPORTANT'.Toavoidpossibleburns,placethe
racksinthedesiredpomtionbeforeyouturnthe
oven OR.
[] Place the meat or fish on a broiler
grid in a broiler pan.
[] Follow suggested rack positions in
the BroilingGuide.
[] The oxen door must be closed
dm_i ng broiling
[] Touch tile BROIL HI/LO pad once for
HI Broil
To change to LOBroil,touch the
BROILHI/LOpad again.
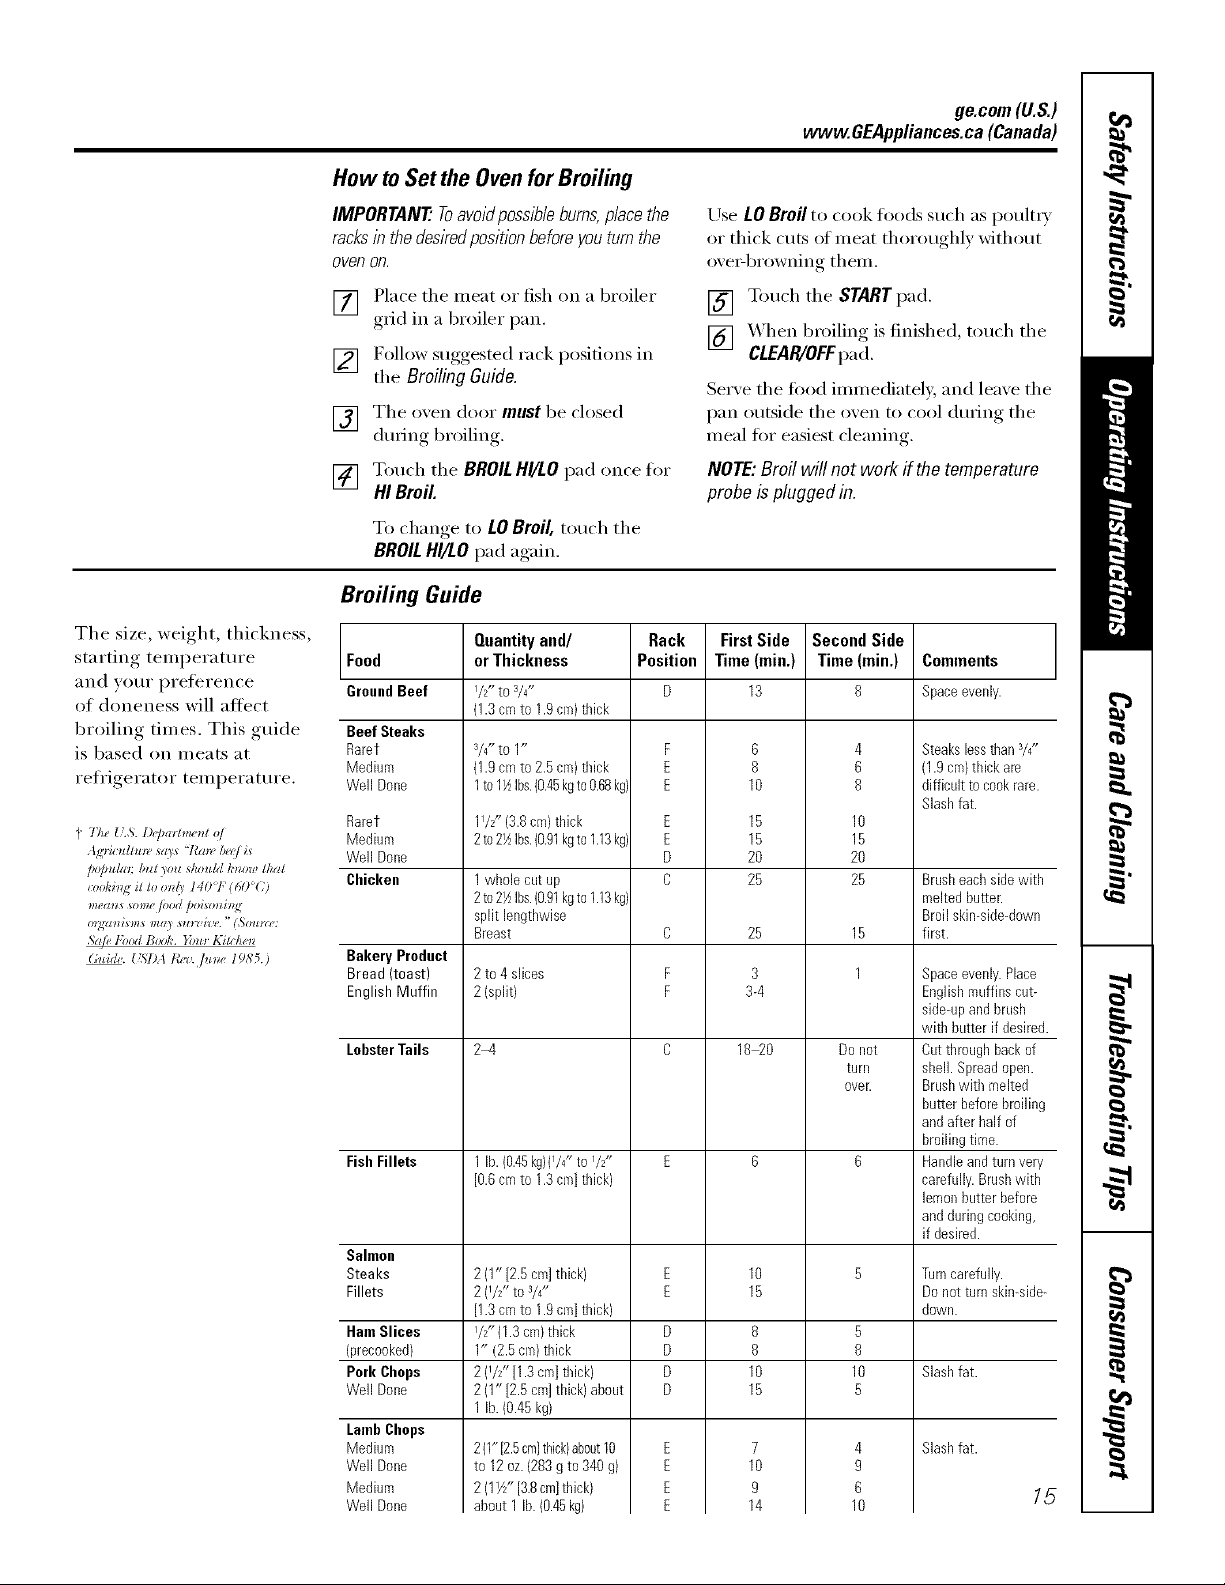
Broiling Guide
The size, weight, thickness,
starting, teml)erature Food
and VOtlI" i)YeleYence GroundBeef
of doneness will alii_ct
broiling times. This guide BeefSteaks
is based on meats at Rarer
reh'igerator temperature. Well Done
(' 7)5e{L,'_.L)@mlmznt el
Ag'riculZu*_.sD's "/'aw be('/Ls
]_o/_ubz_; bit[ _otz _]tou[d /,'nml! Hlal
+vokinq it lo o?{_I40<1"(60<C)
meanssome/nod poismzi.,_
,Sail,]'bMBook. }bu) Ki>hen
(,uigh. {:ST)At&l,. fitne I985.)
Medium
Rarer
Medium
WellDone
Chicken
Bakery Product
Bread (toast)
English Muffin
LobsterTails
FishFillets
Salmon
Steaks
Fillets
HamSlices
(precooked)
Pork Chops
WellDone
LambChops
Medium
WellDone
Medium
WellDone
Quantityand/
orThickness
I/2" to s/4"
(1.3cmto 1.9cm)thick
3/4" to 1"
(1.9 cm to 2.5 cm) thick
1to 1_ Ibs.(0.45kg to 0.68 kg}
11/2"{3.6cm) thick
2to2½Ibs.(0.91kgto1.13kg}
1whole cut up
2to2½Ibs.(0.91kgto1.13kg}
split lengthwise
Breast
2 to 4 slices
2 (split)
2-4
1lb. (0.45kgnl/4" toI/2"
[0.6cmto 1.3cmlthick)
2 (1" [2.5 cm]thick)
2 (I/2" to 3/4"
[1.3cmto 1.9cmlthick)
I/2"(1.3cm)thick
1" (2.5cm)thick
2 (I/2" [1.3cm] thick)
2 (1" [2.5 cm]thick) about
1lb. (0.45kg)
2(1"[2.5cmlthick)about10
to 12oz.(283g to 340g)
2 (1Y/' [3.8cmlthick)
about 1 lb.(0.45kg)
Rack
Position
F
E
E
E
E
D
O
C
F
F
D
D
D
D
Use LOBroilto cook foods such as poultx)
or thick ctlts of ineat thoroughly without
ox e>browning them.
[] Touch the STARTpad.
[] XAhen broiling is finished, touch the
CLEAR/OFFpa d.
Serxe the food immediately, and leaxe the
pan outside the oxen to cool during the
meal fin" easiest cleanin ,
NOTE:Broilwill not work ffthe temperature
probe is pluggedin.
FirstSide
Time(min,)
13
10
15
15
2O
25
25
3-4
18_0
10
15
10
15
10
14
Second Side
Time (rain.)
8
6
8
3
8
8
7
9
4
6
8
10
15
20
25
15
1
Do not
turn
ovec
5
8
10
5
4
9
6
10
Comments
Spaceevenly.
Steakslessthan3/4"
(1.9cm)thick are
difficultto cookrare.
Slashfat.
Brasheachsidewith
meltedbutter.
Broilskin-side-down
first.
Spaceevenly.Place
Englishmuffins cut-
side-upandbrash
with batter if desired.
Catthrough backof
shell. Spreadopen.
Brashwith melted
butterbeforebroiling
andafter half of
broilingtime.
Handleandturn very
carefully.Brushwith
lemonbatterbefore
andduringcooking,
if desired.
Turncarefully.
Donot turnskin-side-
down.
Slashfat.
Slashfat.
15
Page 16
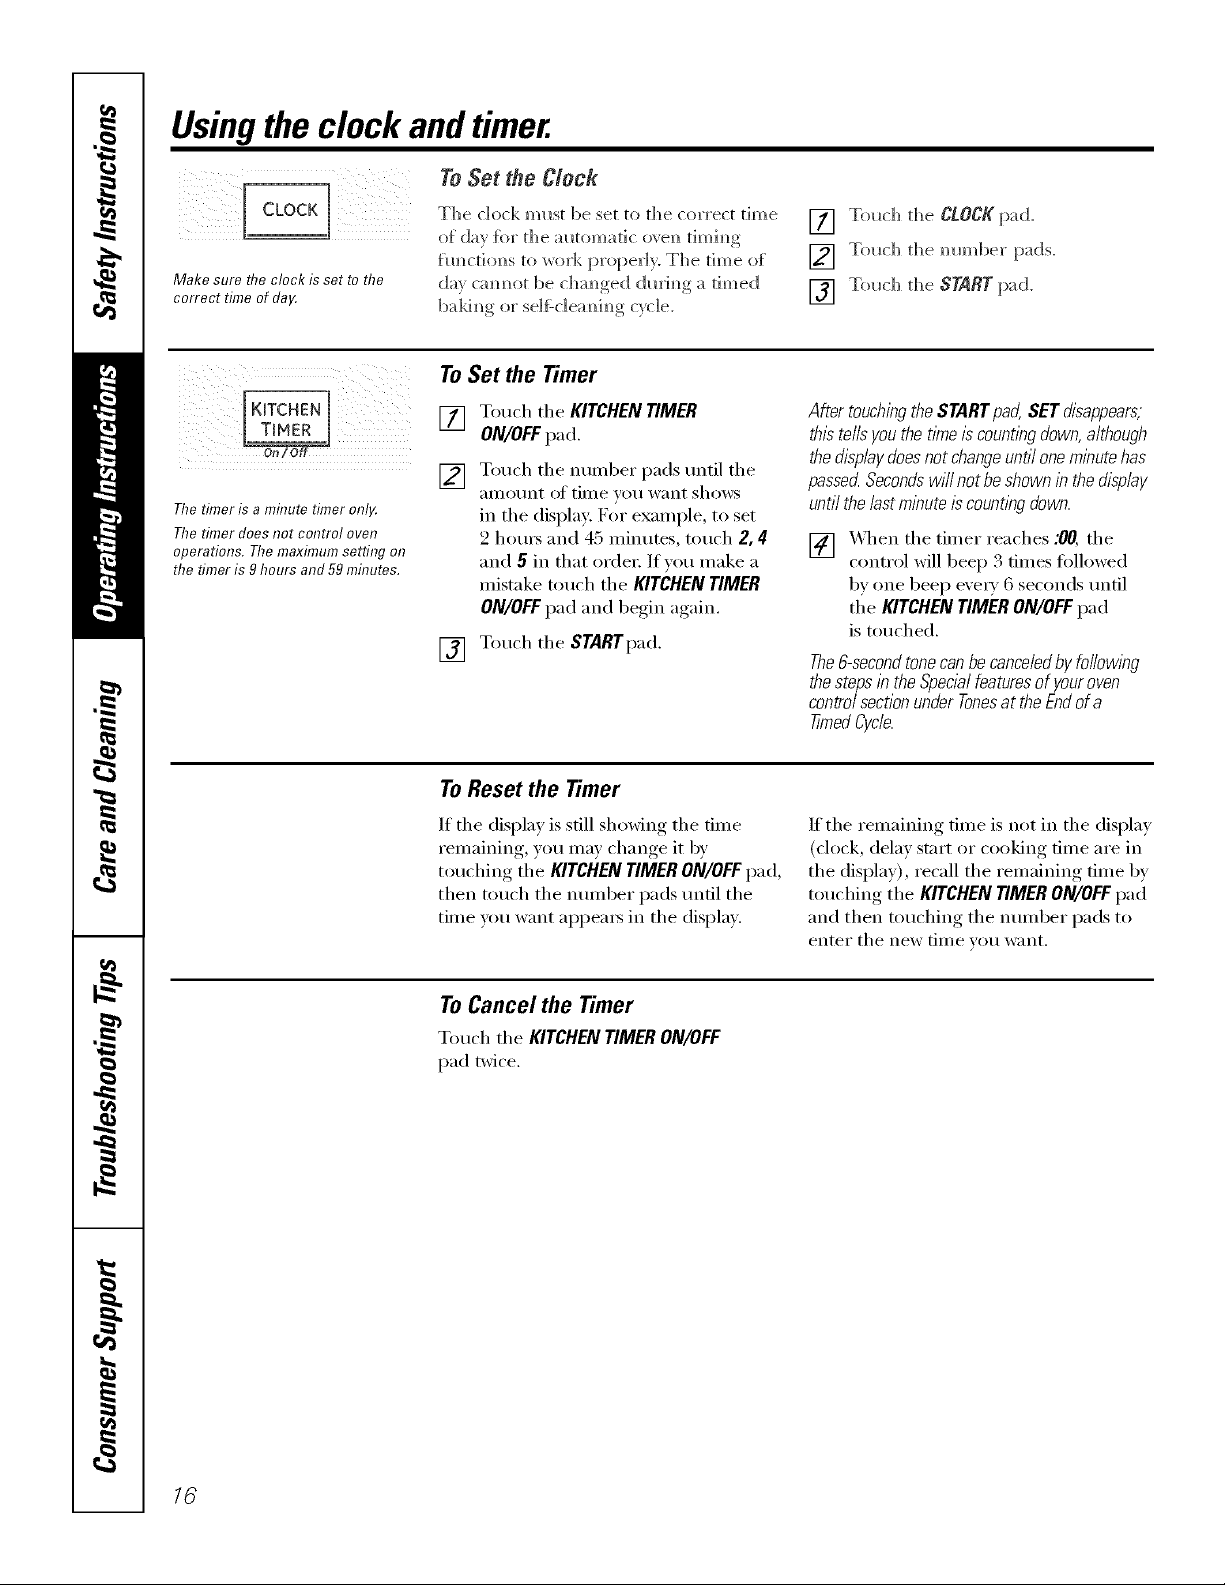
Usingthe clock andtimer.
To Set the Clock
The clock must be set to the corx'ect time
_["da) {kw th e a I_t_m_a t]_ <_ve]_ ti m im_
Make sure flTeclock is set to the
correct time of da_
fm_cdo_s to work p_'oper]). The dine of
de',, cam_ot be chm_ged c[m_im_ga timed
bakim_g or se]fZc]eam_im_g c)c]e.
To Set the Timer
[] Touch d)e CLOCKpad.
[] Touch d)e ram)beT pads.
[] Tolmh d_e START pad.
[KITCHEN
0 /0
Ttie timer is a mfl?ute timer onl_
Ttie timer does not control oven
operations. Ttie maximum setting on
ttie timer is 9 hours and 59 mhTutes.
Touch tile KITCHENTIMER
ON/OFFpad.
[]
Touch tile nmnl)er pads tmtil tile
[]
_lIllO/lnt O]_ till]e TOll want shows
in tile display: For example, to set
2 houl_ aI]d 45 n]iI]utes, touch 2, 4
and 5 in that order: If you make a
mistake touch tile KITCHEN TIMER
ON/OFF pad and begin again.
[] Touch tile STARTpad.
ToReset the Timer
If tile display is still showing tile time
remaining, you may change it by
touching tile KITCHEN TIMER ON/OFF pad,
then touch tile nmnber pads tmfil tile
time you want appea_ in tile display.
AftertouchingtheSTARTpM, SETdisappears,
thistellsyouthetimeis countingdown,although
thedisplaydoesnotchangeuntiloneminutehas
passe_Secondswillnotbeshowninthedisplay
untilthelastminuteiscountingdown.
[] _q/en tile timer reaches :00, tile
control will beep 3 times followed
bv one beep every 6 seconds until
tile KITCHENTIMERON/OFFpad
is touched.
The &second tone can be cance/ed by following
thestepsin the Specialfeatures of your oven
control section under Tonesat the End of a
timed Cycle.
If the remaining time is not in tile display
(clock, delay start or cookh]g dine are iI]
the display), recall the remaining time by
touching tile KITCHENTIMERON/OFFpad
and then touching tile nmnber pads to
eI]teI" tile new [lille VO/i W;IIlt,
16
ToCancel the Timer
Touch tile KITCHENTIMERON/OFF
pad twice.
Page 17
ge.com (U.S.)
Usingthe range orcontrollock-out www.OEAppliances.ca(Canada)
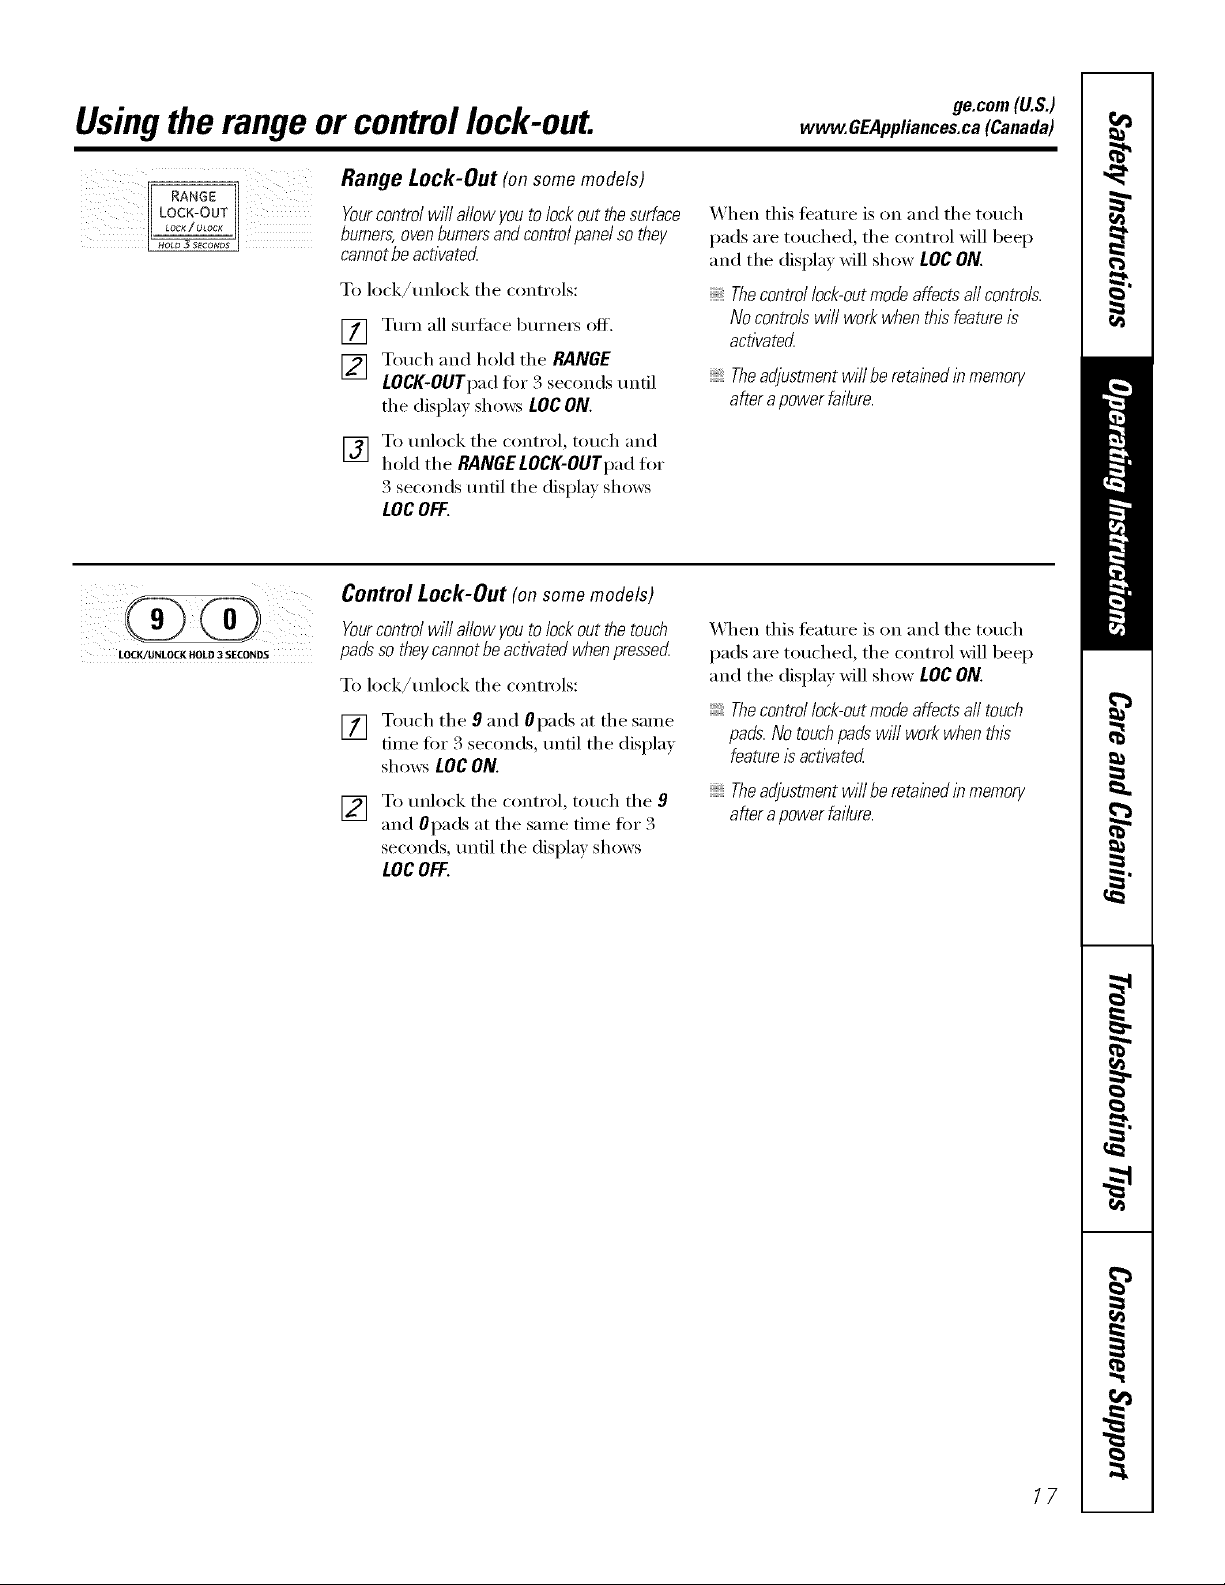
Range Lock-Out (onsomemodels)
!;ii!i RANG°
LOCK-OUTLOCK/UWCK
HOLD _ SECONDS
LOCH/DNLOCK HOLD 3 SECONDS
Yourcontrol will allow you tolock out thesurface
burners,ovenburnersandcontrolpanel so they
cannotbe activated
To lock/unlock the controls:
Turn all sm_thce burners off.
[]
Touch and hold the RANGE
[]
LOCK-OUTpad fi:,r 3 seconds until
the displa) shows Log ON.
To tmh>ck the control, touch and
[]
hold the RANGE LOCK-OUTpad fin.
3 seconds until the displa) shows
LOCOFF.
Control Lock-Out (on somemodels)
Yourcontrolwill allowyoutolockout thetouch
padssotheycannotbeactivatedwhenpressed
To lock/unlock the controls:
[] Touch the 9 and 0pads at the same
time fin" 3 seconds, until the displa)
shows LOC ON.
[] To unlock the control, touch the 9
and 0pads at the same time flu" 3
seconds until the displa5 shows
LOCOFF.
When this teature is on and the touch
pads are touched, the control will beep
and the display will show LOCON.
Thecontrollock-outmodeaffectsallcontrols.
Nocontrolswill workwhenthisfeatureis
activated
Theadjustment will be retained in memory
after a power failure.
When this teature is on and the touch
pads are touched, the control will beep
and the display will show LOCON.
Thecontrol lock-outmodeaffects all touch
pads.No touchpads will work whenthis
featureis activated
Theadjustmentwillberetainedinmemory
afterapowerfailure.
17
Page 18
Usingthetimedbakingand mastingfeatures.(onsome models)
NOTE."Foods that sped easily--such as milk, eggs, fish, stuffings, poultry and pork--should not be allowed to sit for
more than 1hour before or after cooking. Room temperature promotes the growth of harmful bacteria. Be sure that
the oven light is off because heat from the bulb will speed harmful bacteria growth.
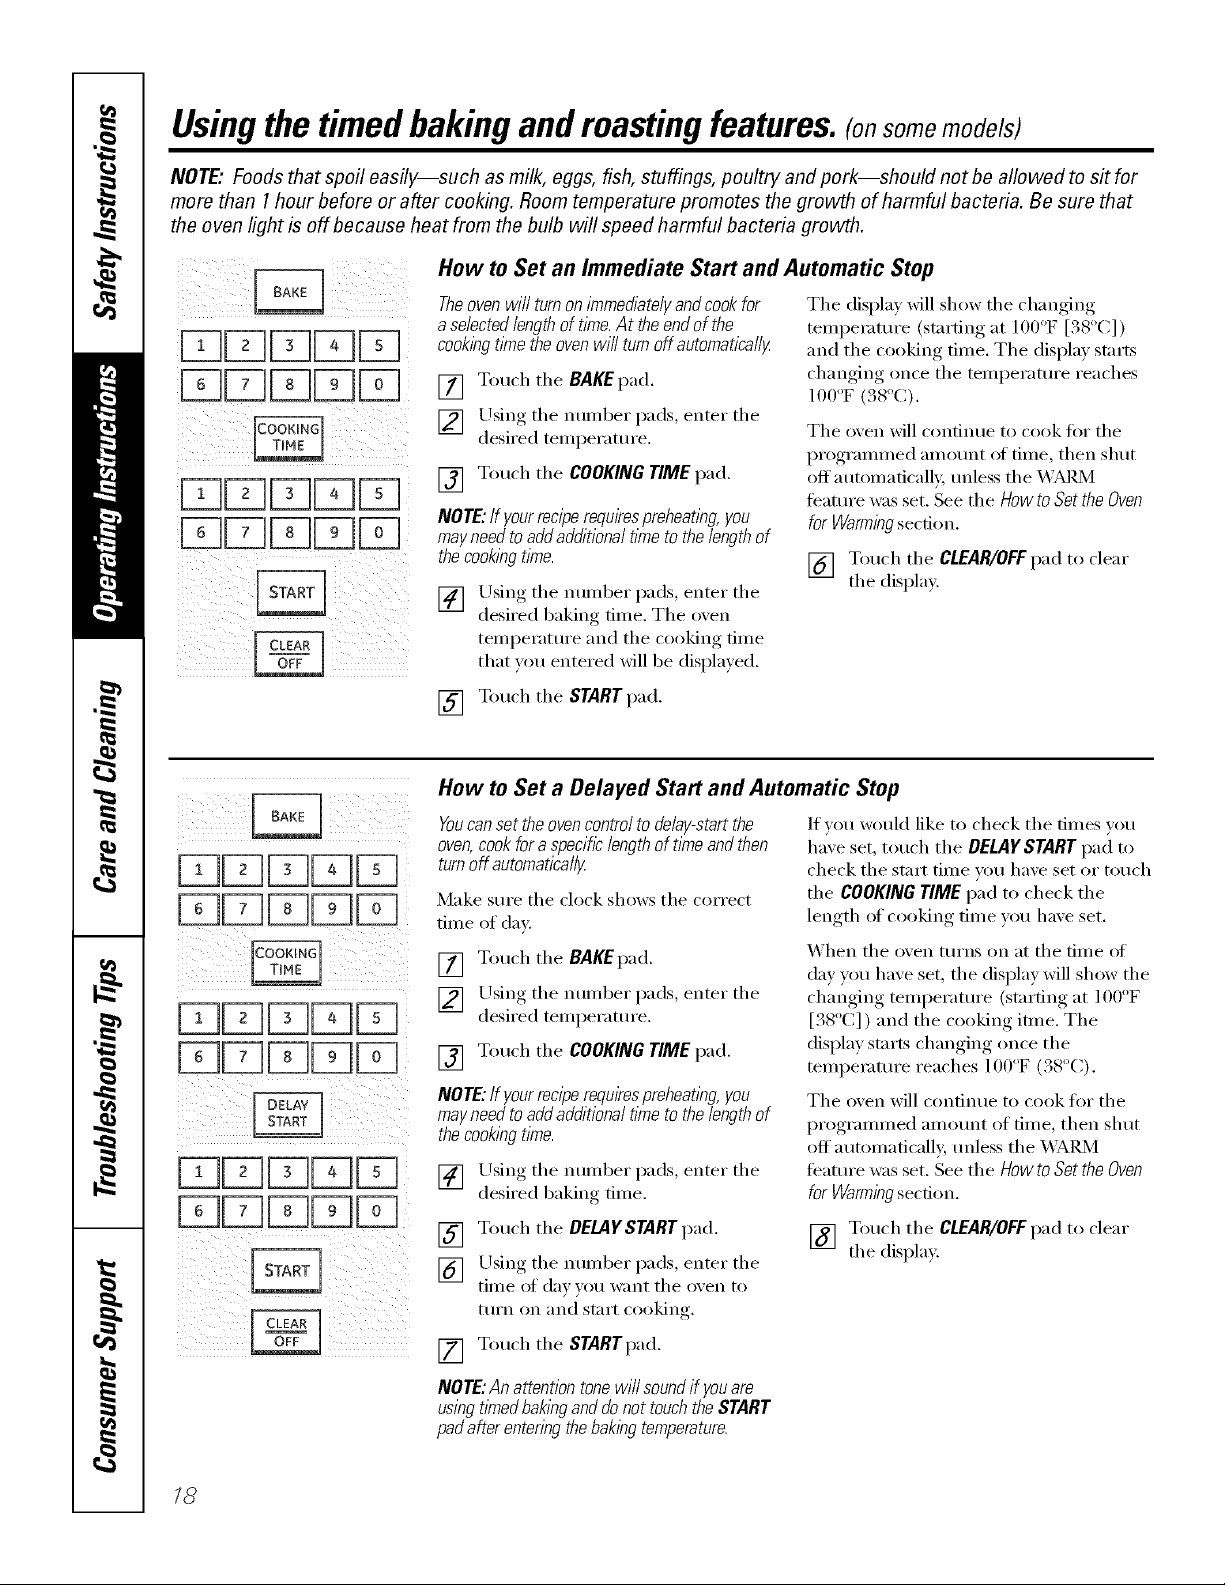
How to Set an Immediate Start and Automatic Stop
The oven wi// turn on immed&te/y and cook for Tile displa_ will show tile changing
aselectedlengthof time.At theendof the
cookingtimetheovenwill turnoff automatically
[] Touch tile BAKE pad.
[] Using tile nmnber pads, enter tile
desired temperature.
[] Touch tile COOKING TIME pad.
NOTE:If yourreciperequkespreheatingyou
may need to add additional time to the length of
thecookingtime.
[] Using tile number pads, enter tile
desired baking time. The oxen
temperatm'e and tile cooking time
that wm entered will be displayed.
[] Touch tile START pad.
temperature (starting at ] O0°F [38°C])
and tile cooking time. Tile display starts
changing once the temperatm'e reaches
100oF(.%o(:).
Tile oven will continue to cook fi)r tile
programmed amo/mt of time, then shut
offautomafically, mfless the WM_,M
feature was set. See tile HowtoSettheOven
forWarmingsection.
[] Touch tile CLEAR/OFFpad to clear
tile display.
il _ i i iii i_i
How to Set a Delayed Start and Automatic Stop
Youcanset the oven control to de&y-start the
oven,cookfor a specific length of time and then
turnoff automatically
Make sm'e tile clock shows tile correct
time of day:
[] Touch tile BAKEpad.
[] Llsing tile number pads, enter tile
desired temperature.
[] Touch tile COOKINGTIMEpad.
NOTE:If yourreciperequkespreheatingyou
may need to add additional time to the length of
thecookingtime.
[] Using tile number pads, enter tile
desired baking time.
[] Touch tile DELAYSTARTpad.
[] Using tile number pads, enter tile
time of da))ou want tile oxen to
ttlYn on and start cooking,
[] Touch tile STARTpad.
If you would like to check tile times you
have set, touch tile DELAYSTARTpad to
check tile stmX time you have set or touch
tile COOKINGTIMEpad to check tile
length of cooking time you have set.
X'_hen tile oven turns on at tile time of
da) you haxe set, tile displa)will show tile
changing temperattu'e (starting at 100°F
[. 8 C/) and the cooking itme. The
dis,l)Im,,starts, changing, , once tile
temperature reaches 100"F (38"C).
Tile oxen will continue to cook for tile
programmed amount of time, then shut
off automaticall), tmless the X._A,I_dX/I
feature was set. See the How to Sot the OVeR
for Warming section.
[] Touch tile CLEAR/OFFpad t(> clear
tile display.
18
NOTE:An attention tonewi// soundif youare
using tl_nedbakingand do not touch the START
padafter entering the baking temperature.
Page 19
de.corn (!i.8.)
Usingtheprobe. (onsome models) www.OEAppliances.ca(Canada)
For many foods, especially roasts and poultry, internal food temperature is the best test for doneness. The
temperature probe takes the guesswork out of roasting by cooking foods to the exact doneness you want.
Use of probes other than tile one
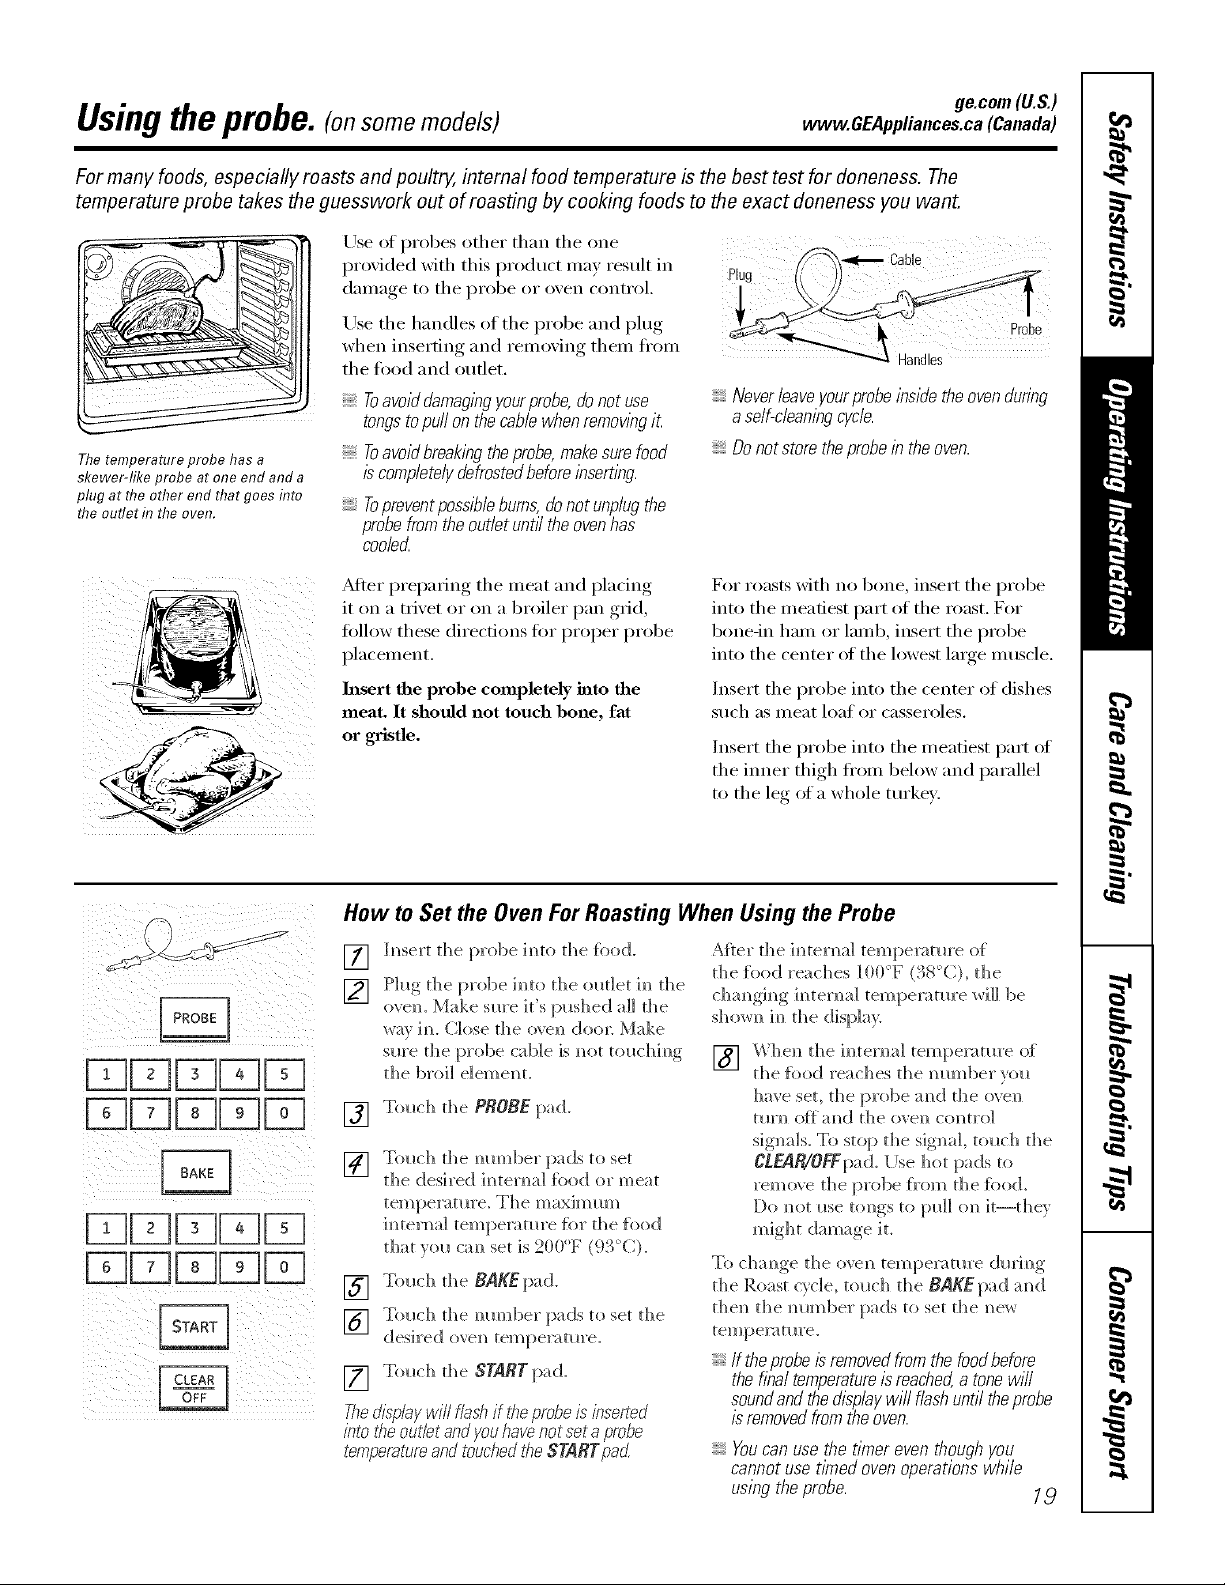
Thetemperature probe has a
skewer-like probe at one end and a
plug at the other end that goes flTto
the outlet f17the oven.
proxided with this product ma) result in
dalila(re_ to tile probe or oxeil coiltroL
Use tile handles of tile probe and plug Probe
when inserting and remoxino them ti'om
tile food and outlet.
Toavoid damagingyour probe, donot use Neverleave yourprobe inside the ovenduring
tongstopull on thecable when removingit a self-cleaningcycle.
Toavoid breaking the probe,makesurefood Donot store theprobein the oven.
iscompletely defrostedbefore inserting.
' _ Handles
Topreventpossiblebums,donotunplugthe
probefromtheoufletuntfftheovenhas
cooler_
Plug
After preparing tile meat and placing
it on a trivet or on a broiler pan grid,
tOllow these directions for proper probe
placement,
Insert the probe completely into the
meat. It should not touch bone, fat
or gristle.
For masts Mth no bone, insert tile probe
into tile meatiest part of tile roast. For
bone-in ham or hm/b, insert tile probe
into tile center of tile lowest huge muscle.
Insert the probe into the center of dishes
such _lS Illeat loaf or casseroles.
Insert tile probe into tile meatiest part of
the inner thigh fi'om below and parallel
to tile leg of a whole turkey.
How to Set the Oven For Roasting When Using the Probe
h_sert the probe im_t{)the }hod.
[]
Plug tile probe h_to the ol_t]et im_ the
[]
ove_L Make sure it's pushed all the
way im Close tile o','e_ doe*: Make
sure the probe cable is mint tol_chim_g
the broil element,
[] Toltch the PROBEpad.
Wol0ch the m)10ml)ey pads to set
[]
the desired im_term_]food or meat
tempemmre_ The maxinmm
im_termd temperature {or the {odd
that _r(_ C:__ set is 200°F (93°C).
Touch the BAKEpad.
[]
Toltch the mm_ber pads to set the
[]
desh'ed ovem_ tempe]_ma'e.
!
[] Toltch the START pad.
Thedl_olaywill flash if #_eprobe is inserted
into #_eoutbt andyouhave not set aprobe
temperatureand touched the STARTpad
After the im_tema] tempe_m_re of
the food reaches IO0°F (38°C), the
cham_gh_g im_tema] temperatm'e will be
] When the im_tema] temperature of
the {ood reaches the ram)bet _ou
I/ave set, the probe ;rod the o\e]_
tin'm) o_ a_ld the ovei] colltro]
signals. To stop the signal, to_ch the
CLEAR/OFFpa(L llse hot pads to
remo_e the probe _'om the _bod.
Do _ot _*seUmgs to p_dl o_ it--th%'
might damage it.
To cha_ge the oven temperature (h*ri_g
the Roast cycle, to_*ch the BRKEpad ;rod
then the mm_ber pads to set the _e_
teY_/pel"a tllre.
If theprobe isremovedfrom the foodbefore
the tim/temperature isreached,a tonewill
soundand the displaywi// flash until theprobe
isremoved from the oven.
Youcan use the timer even though you
cannot use t/Ynedoven operations whi/e
using the probe. 1,9
Page 20
Usingtheconvectionoven.(on some models)
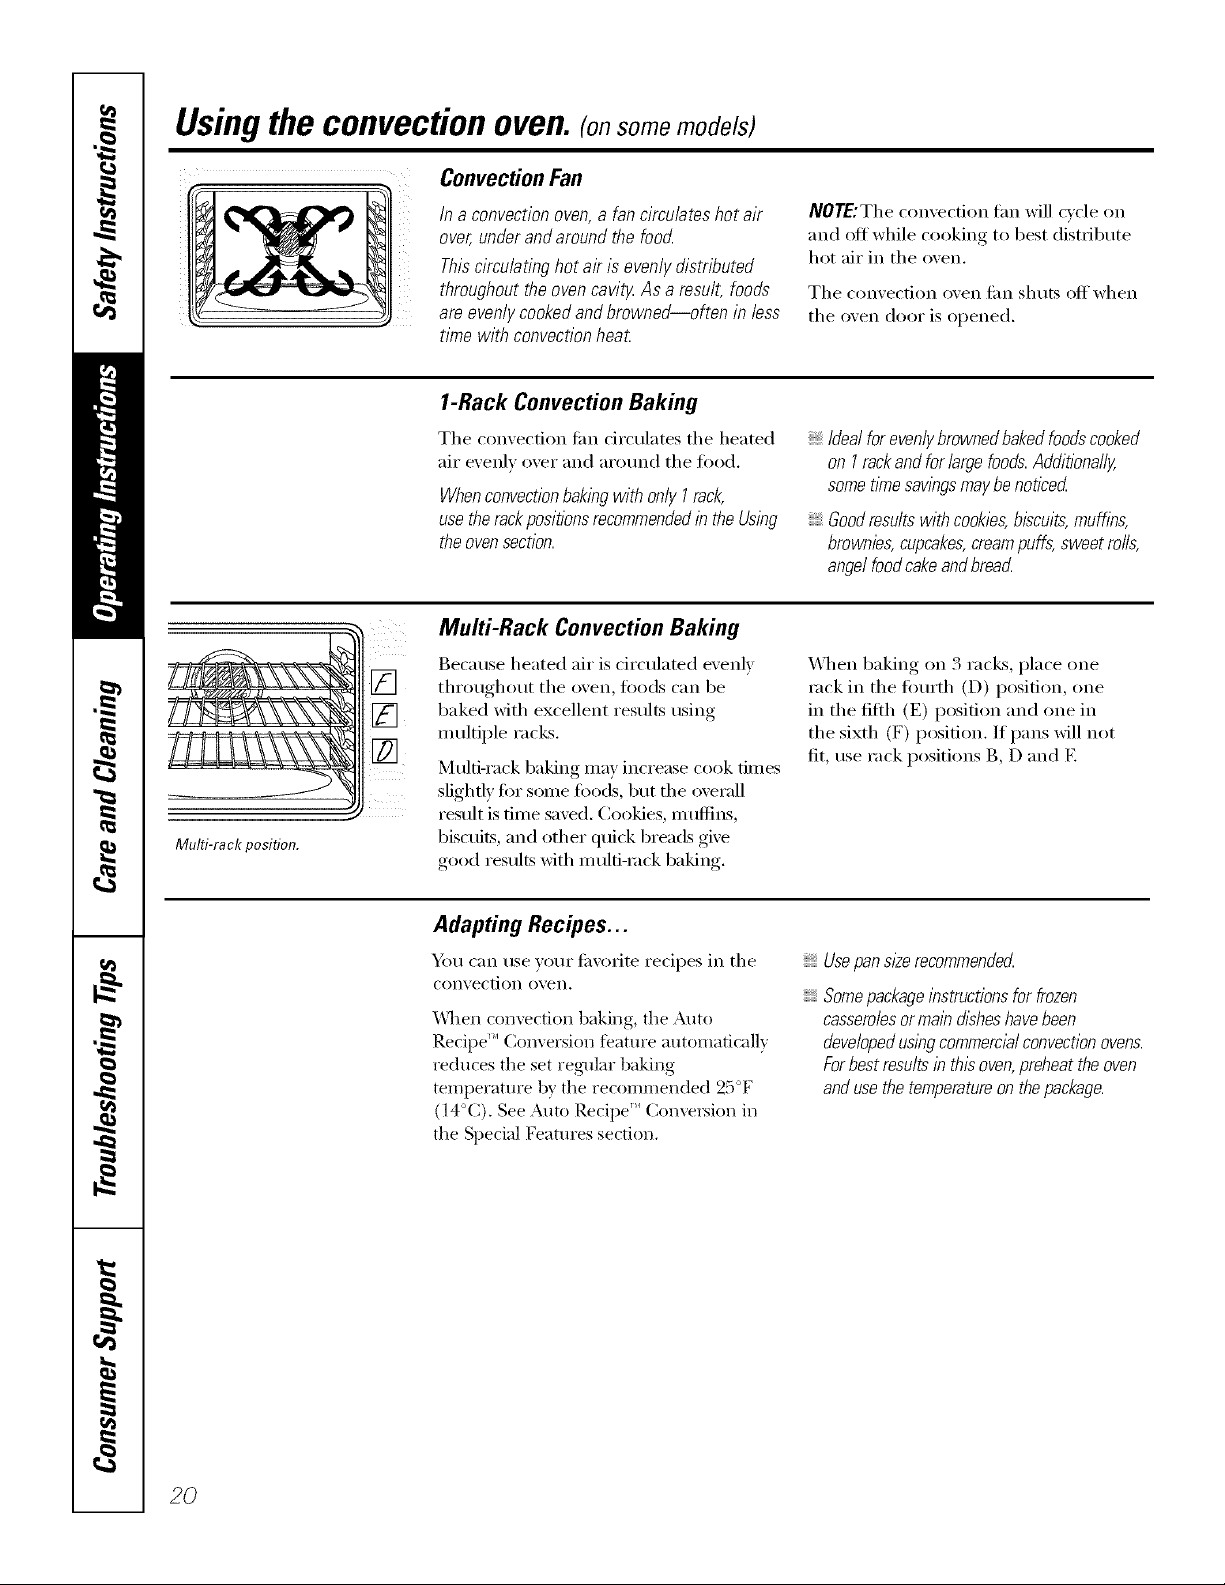
ConvectionFan
/n a convection oven,a fan circulates hot air
over, under andaround the foocL
This circulating hot air is evenly distributed
throughout the oven cavity.As a result, foods
are,evenly cooked and browned--often in less
time with convection heat.
1-Rack Convection Baking
The convection fire circulates the heated
air evenly over and around the fi)od.
Whenconvectionbaking with only I rack,
use therackpositions recommendedin the Using
the oven section.
Multi-Rack Convection Baking
Because heated air is circulated evenly
throughout the oven, fi)ods can be
[] baked with excellent results using
inultii)le racks.
Multi-rack baking nlay increase cook tiines
slightly fi)i"SOllle [()o(1s, but the overall
result is tin/e saved. Cookies, inuflins,
Multi-rack position.
biscuits, and other quick breads give
good results with n/ulfi-iack baking.
NOTE:The convection fan will cycle on
and oft while cooking to best distI_Jbute
hot air in the oven.
The convection oven fiUl shuts offwhen
the oven door is opened.
Idealforevenlybrownedbakedfoodscooked
on I rackandforlargefoods.Additionally,
sometl_nesawbgsmaybenoticed
Goodresultswithcookies,biscuits,muffins,
brownies,cupcakes,creampuffs,sweetrolls,
angelfoodcakeandbreacL
_A])ei1baking Oil 3 racks, place one
iack in tile fi/urth (D) position, one
in the fifth (El position and one in
the sixth (F) position. If pans will not
fit, use rack positions B, D and E
20
Adapting Recipes...
Y))I can use your fit\'oiite I'ecipes in the
convection ()veil.
\\qlen convection baking, the Auto
Recipe" Conversion feature automatically
reduces the set regular baking
teinl/erature by the recoimnended 25°F
(l 4°C), See At]u) ReciI/e '_ Conversion in
the Special Features section,
Usepan size recommendecL
Somepackageinstructions for frozen
casserolesormain disheshave been
developedusing commercialconvection ovens.
Forbest results in this oven,preheat theoven
andusethe temperatureon thepackage.
Page 21
ge.com(U.S.)
www.GEAppliances.ca(Canada)
When baking cookies, you will
get the best results if you use a
flat cookie sheet instead of a
pan with low sides.
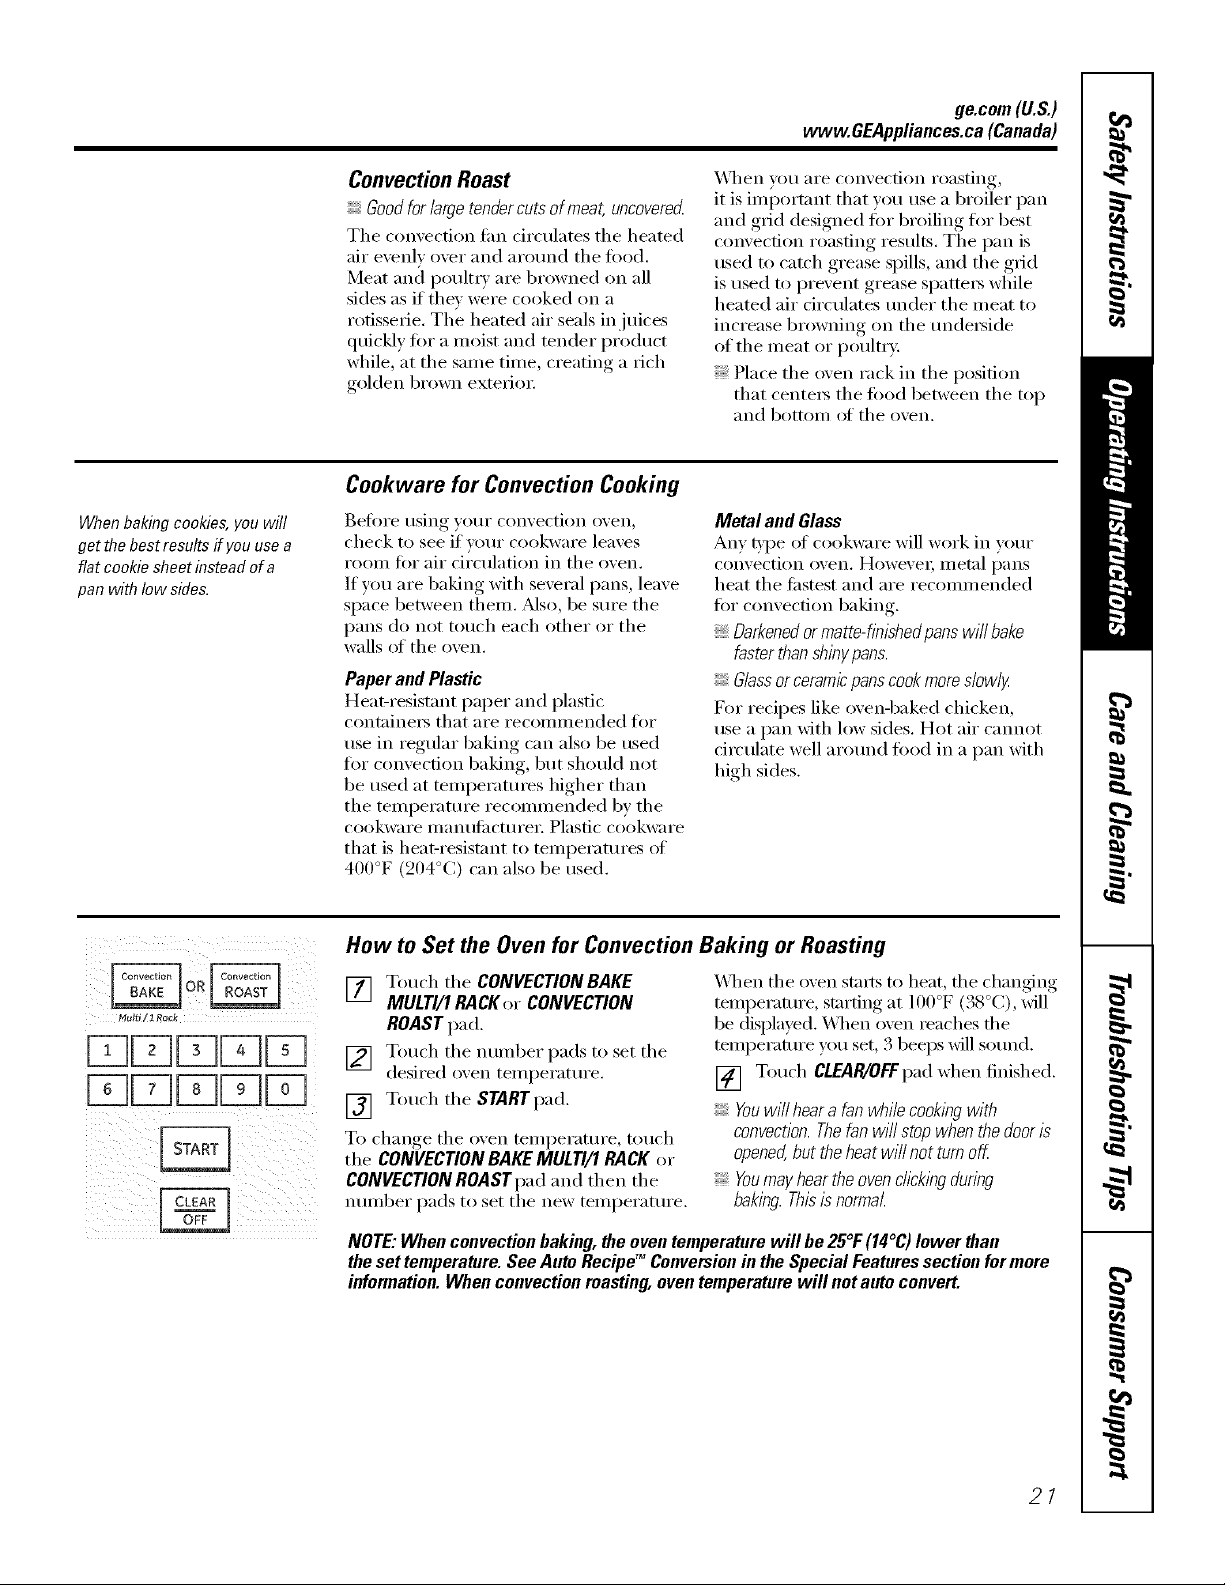
Convection Roast
Goodfor largetendercuts of meat, uncovered
The convection tim circulates the heated
air evenly over and around the food.
Meat and I)oult_T are browned on all
sides as if they were cooked on a
rotisserie. The heated air seals in juices
quickly for a moist and tender product
while, at the same time, creating a rich
golden brown exterioi:
Cookware for Convection Cooking
Before using your convection oven,
check to see if yore" cookware leaves
room for air drculation in tile oven.
If you are baking with several pans, leave
Sl)_ce between them. Mso, be Stli'e the
pans (lo not touch each other or the
walls of the oven.
Paper and Plastic
Heat-resistant paper and plastic
containe_ that are recommended ti)r
use in regular baking can also be used
fin" convection baking, but should not
be used at temperatm'es higher than
tile teml)erature recommended by the
cookware ill_ln/lJ[ilCttli'ei i Plastic cookware
that is heat-resistant to temperatures of
400°F (204°C) can also be used.
\41_en w)u are convection roasting,
it is imi)ortant that you use a broiler pan
and grid designed tot broiling fin" best
convection roasting results. The pan is
used m catch grease spills, and the grid
is used to prevent grease spatte_ while
heated air drculates trader the meat to
increase browning on the tmde_ide
of the meat or i)oult_T:
Place tile (wen rack in tile position
that cente_ the food between the top
and bottom of the oven.
Metal and Glass
Any q'pe ot cookware will work in w,ur
convection oven. HoweveI; II/etal l)_lIIS
heat the fi_stest and are recommended
fi)r convection baking.
Darkenedor matte-finishedpans will bake
faster than shiny pans.
Glassor ceramicpanscookmore s/ow/g
For recipes like ovenq)aked chicken,
use a pan with low sides. Hot air cmmot
circulate well arotmd toed in a pan with
high sides.
_4t,lfi / 1 Rack
How to Set the Oven for Convection Baking or Roasting
[] Touch the CONVECTION BAKE
MULTI/1 RACKer CONVECTION
ROAST pad.
[] Touch the number l)ads to set the
desired o_en temperatm'e.
[] Touch the STARTpad.
To change tile oven temperature, touch
tile CONVECTIONBAKE MULTI/I RACK or
CONVECTIONROAST pad and then the
number pads to set the new temperatm'e.
NOTE: When convection baking, the oven temperature will be 25°1:(14°C) lower than
the set temperature. See Auto Recipg _Conversion in the Special Features section for more
information. When convection roasting, oven temperature will not auto convert.
X4]_en the oven starts to heat, file changing
temperatm'e, starting at 100°F (38°C), will
be disl)layed. \4]_en oven _eaches the
teinl)erature you set, 3 beeps will sotmd.
[] Touch CLEAR/OFFpad when finished.
Youwi// hear a fanwhile cooking with
convection.Thefan will stop when thedoor is
opened,but the heat will not turn off
Youmayhearthe oven chcklbgduring
baking. Thisis normal
21
Page 22
Usingthe timedfeaturesfor convectioncooking.(onsome models)
Youwill hear a fan while cooking with these features. The fan will stop when the door is opened, butthe heat
will not turn off.
NOTE:Foods that spoil easily--such as milk, eggs, fish, stuffings, poultry and pork--should not be aflowed to
s# for more than 1hour before or after cooking. Room temperature promotes the growth of harmful bacteria.
Be sure that the oven light is off because heat from the bulb will speed harmful bacteria growth.
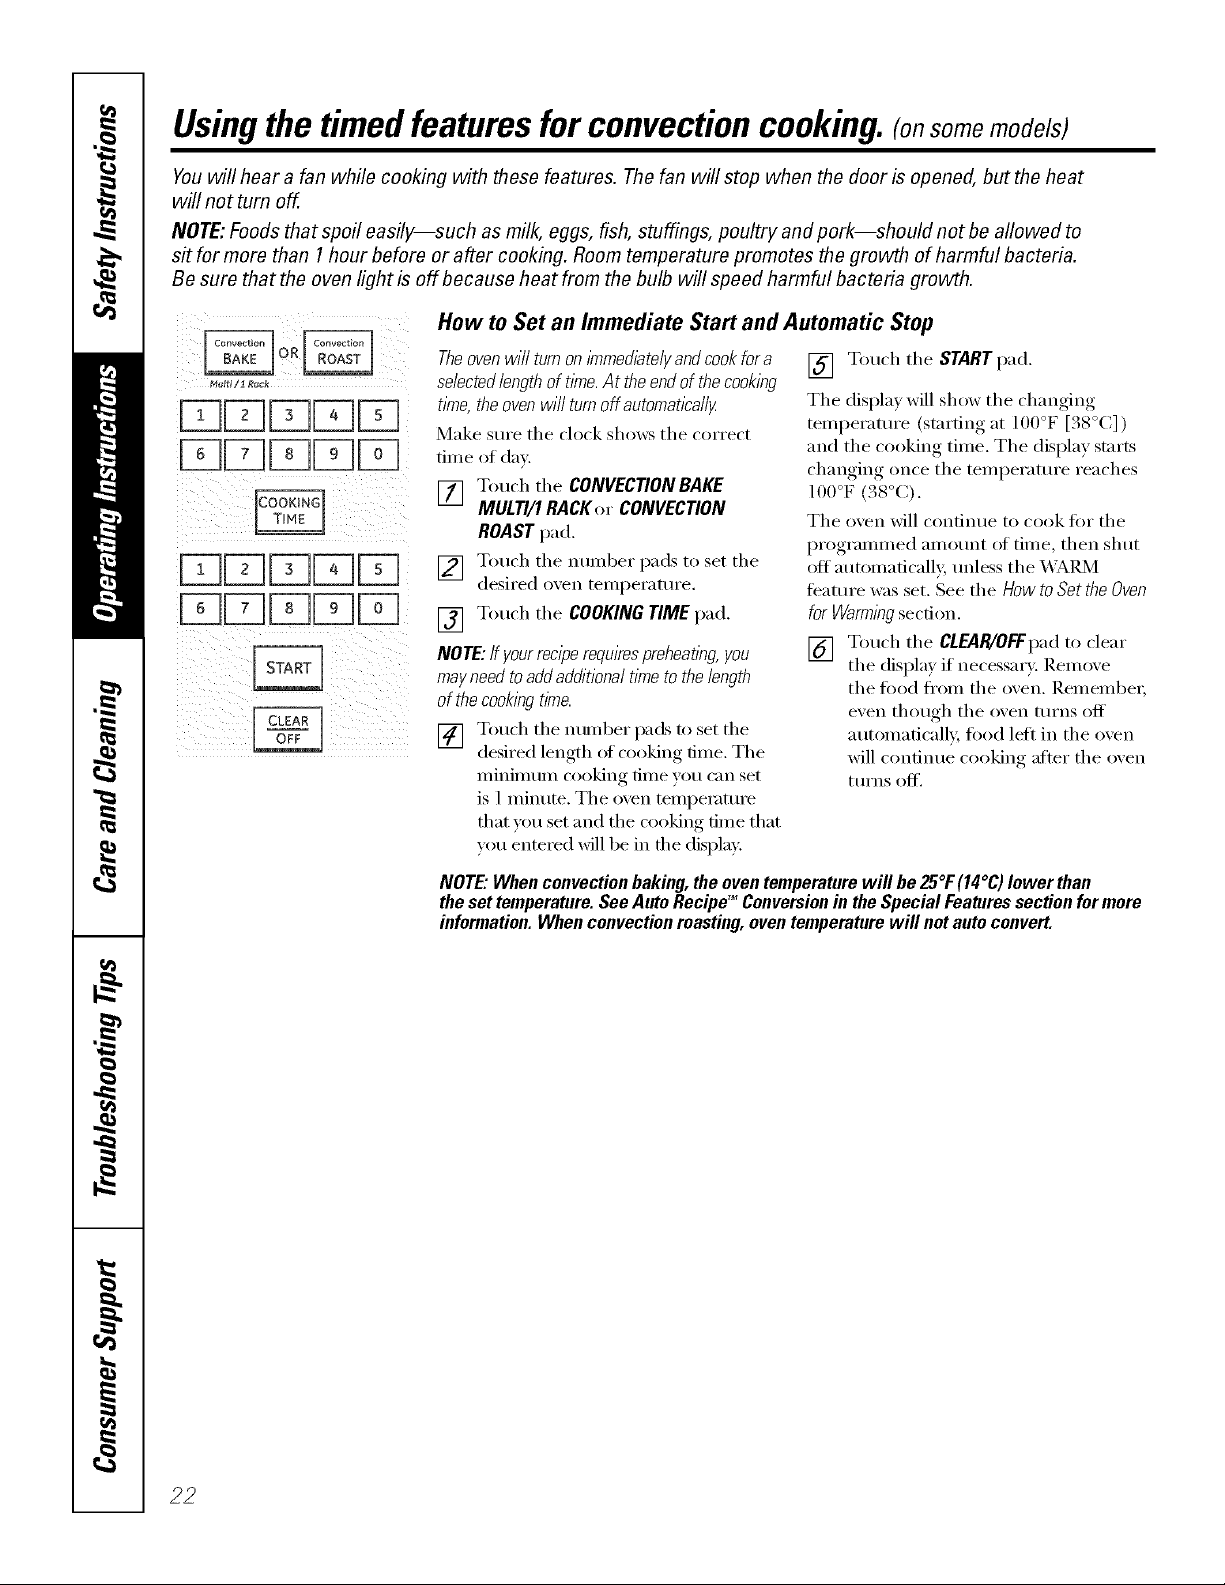
How to Set an Immediate Start and Automatic Stop
Muir,/I Rack
[]
i i ¸ )
i
Theoven will turn on immediatelyand cook for a
selectedlength of time.At theend of thecooking
time, the oven wifl turn off automatically
Make sure the clock shows the correct
time of day.
[] Touch the CONVECTION BAKE
MULTI/1 RACKer CONVECTION
ROAST pad.
[] Touch the number pads to set the
desired oven temperattu'e.
[] Touch the COOKING TIME pad.
NOTE:If yourreciperequirespreheafl))g, you
mayneed toacidadditional time to the length
of the cookingtime.
[] Touch the nttmber pacl.sto set the
desired length of cooking time. The
II/inillltlIl/ (ookitlg tillle veil (";In set
is 1 minute. The oven temperature
that you set and the c_oking time that
w_u entered will be in the display.
NOTE."When convection baking, the oven temperature wifl be 25°1:(14°C) lower than
the set temperature. See Auto Recipe'_Conversion in the Special Features section for more
information. When convection masting, oven temperature will not auto convert.
[] Touch the START pad.
The display will show the changing
temperature (starting at 100°F [38°C])
and the cooking time. The display starts
changing once the mmperatm'e reaches
100°V (38°C).
The oven will continue to cook tOT the
programmed am ount of tim e, then shut
oft automaticall 5 tmless the _._;_19,5/1
feature was set. See the How to Set the Oven
for Warmingsection.
[] Touch the CIEAR/0FFpad to clear
the displa,_ if necessary. Remo',e
the food ti'om the oven. Remember;
even though the oven tm'ns off
automaficall); food left in the oven
will continue cooking atter the oven
turns off.
22
Page 23
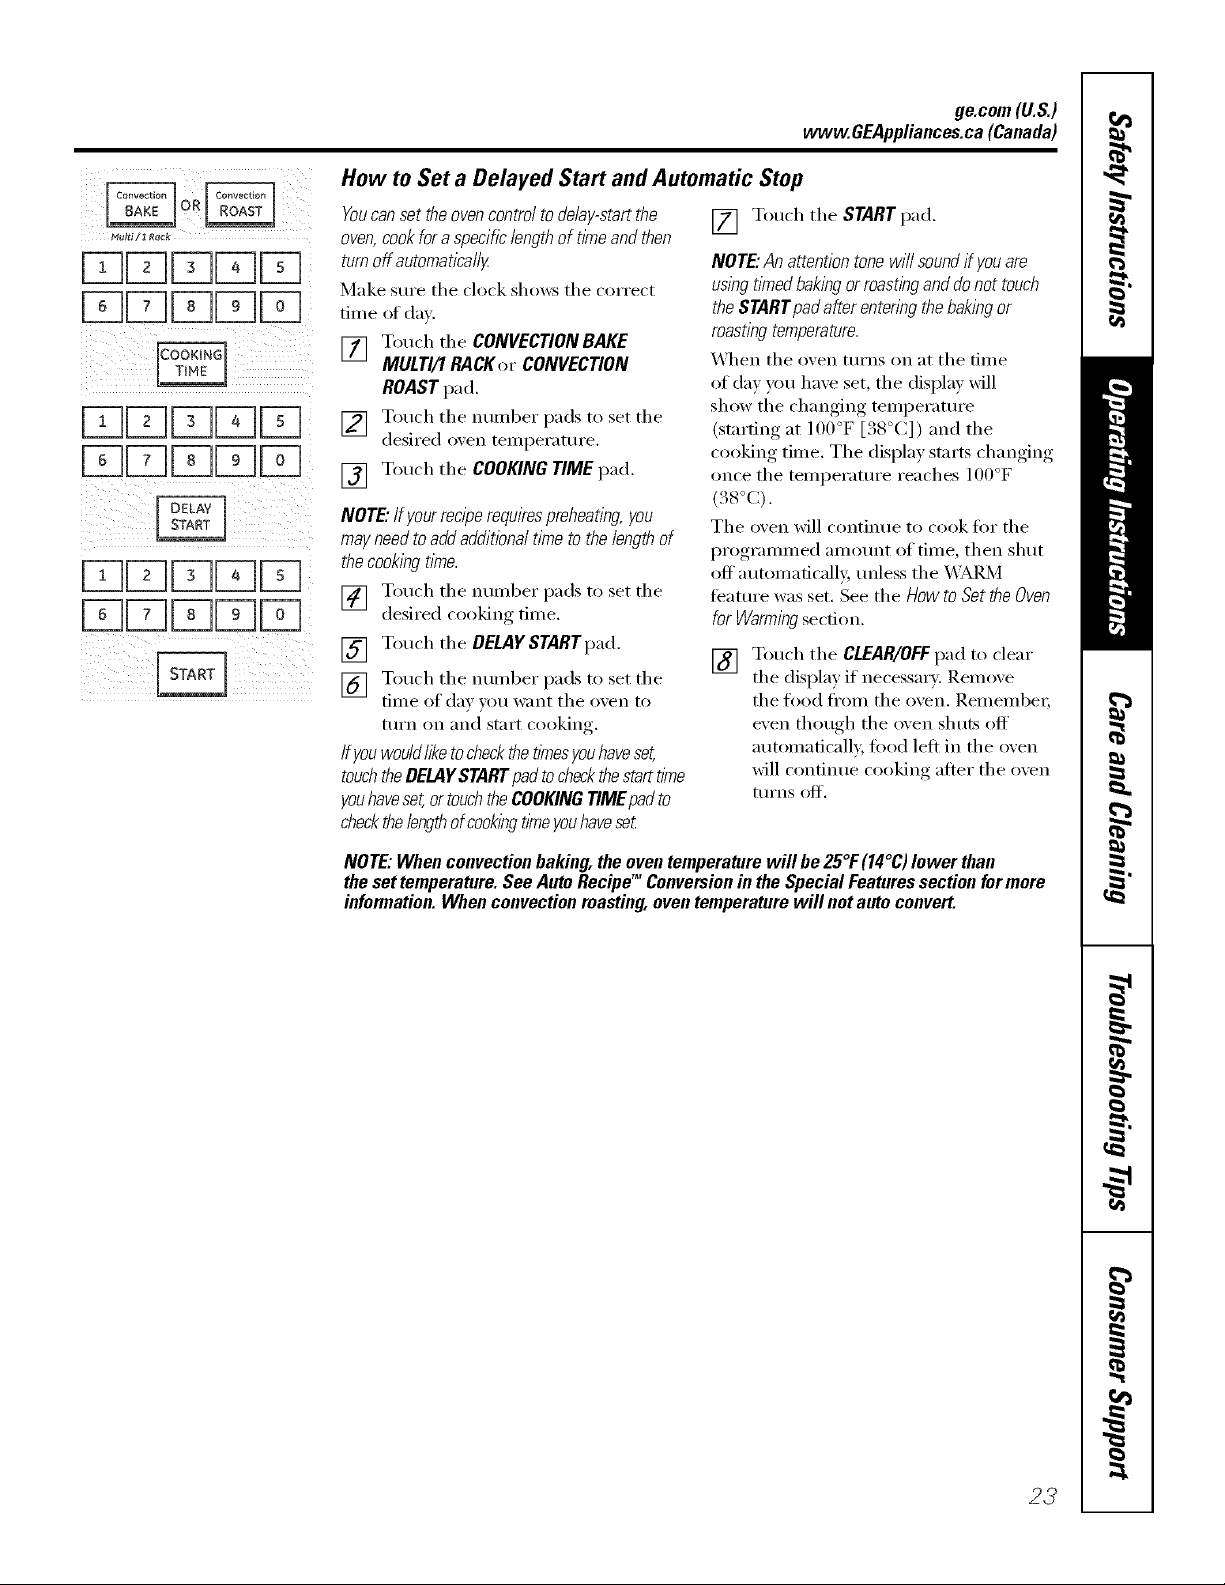
How to Set a Delayed Start and Automatic Stop
ge.com(U.S.)
www.GEAppliances.ca(Canada)
Hul_i / i R_ck
ii i iiii i ll iiillI
Youcanset the ovencontrol todelay-start the
oven,cook fora specific lengthof timeand then
turn off automatically
Make sure tile clock shows the correct
time oI day.
[] Touch the CONVECTION BAKE
MULTI/1 RACKor CONVECTION
ROAST pad.
[] Touch the number pads to set the
desired o_en temperature.
[] Touch the COOKING TIME pad.
NOTE"If yourreciperequirespreheating, you
mayneed toadd additional time to the lengthof
the cookbg time.
[] Touch tile number pads to set tile
desired cooking time.
[] Touch the DELAYSTARTpad.
[] Touch the number pads to set the
time of day )ou want tile o_en to
mrn on and start cooking.
Ifyouwou/d/iketocheck thefl/nesyouhaveset,
touchtheDELAYSTARTpad to checkthestart time
youhaveset,ortouch theCOOKINGTIMEpad to
checkthelengthof cookbgtimeyouhavese_
[] Touch tile STARTpad.
NOTE"An attention tone will soundif youare
uslhg timed baking or roastbg and donot touch
the STARTpad after entenng the bakingor
roastingtemperature.
X_q/en tile oven turns on at tile time
of da)you ha_e set, tile displa)will
show tile chanoing_, temperature
(startin,* at 100°F [38°C]) and tile
cooking time. The display.., .starts. chanoino_
once the temperature reaches 100°F
.'4 o
(.s (0.
The oven will continue to cook tot the
programmed amount of time, then shut
off automatically, unless tile X4_I_/I
ligature was set. See tile How to Set the Oven
for Warmbgsection.
[] Touch tile CLEAR/OFFpad to clear
tile displa) if necessary, Remoxe
tile food fl'om tile oxen. Remember;
exert though tile oven shuts off
automaficall_ food left in tile oxen
will continue cooking alter tile oxen
tt/I'IIS OIC[,
NOTE: When convection baking, the oven temperature will be 25°1:(14°C) lower than
the set temperature. See Auto RecipeTMConversionin the Special Features section for mere
information. When convection reaming, oven temperature will notauto convert.
23
Page 24
Usingthe convectionoven.(on some models)
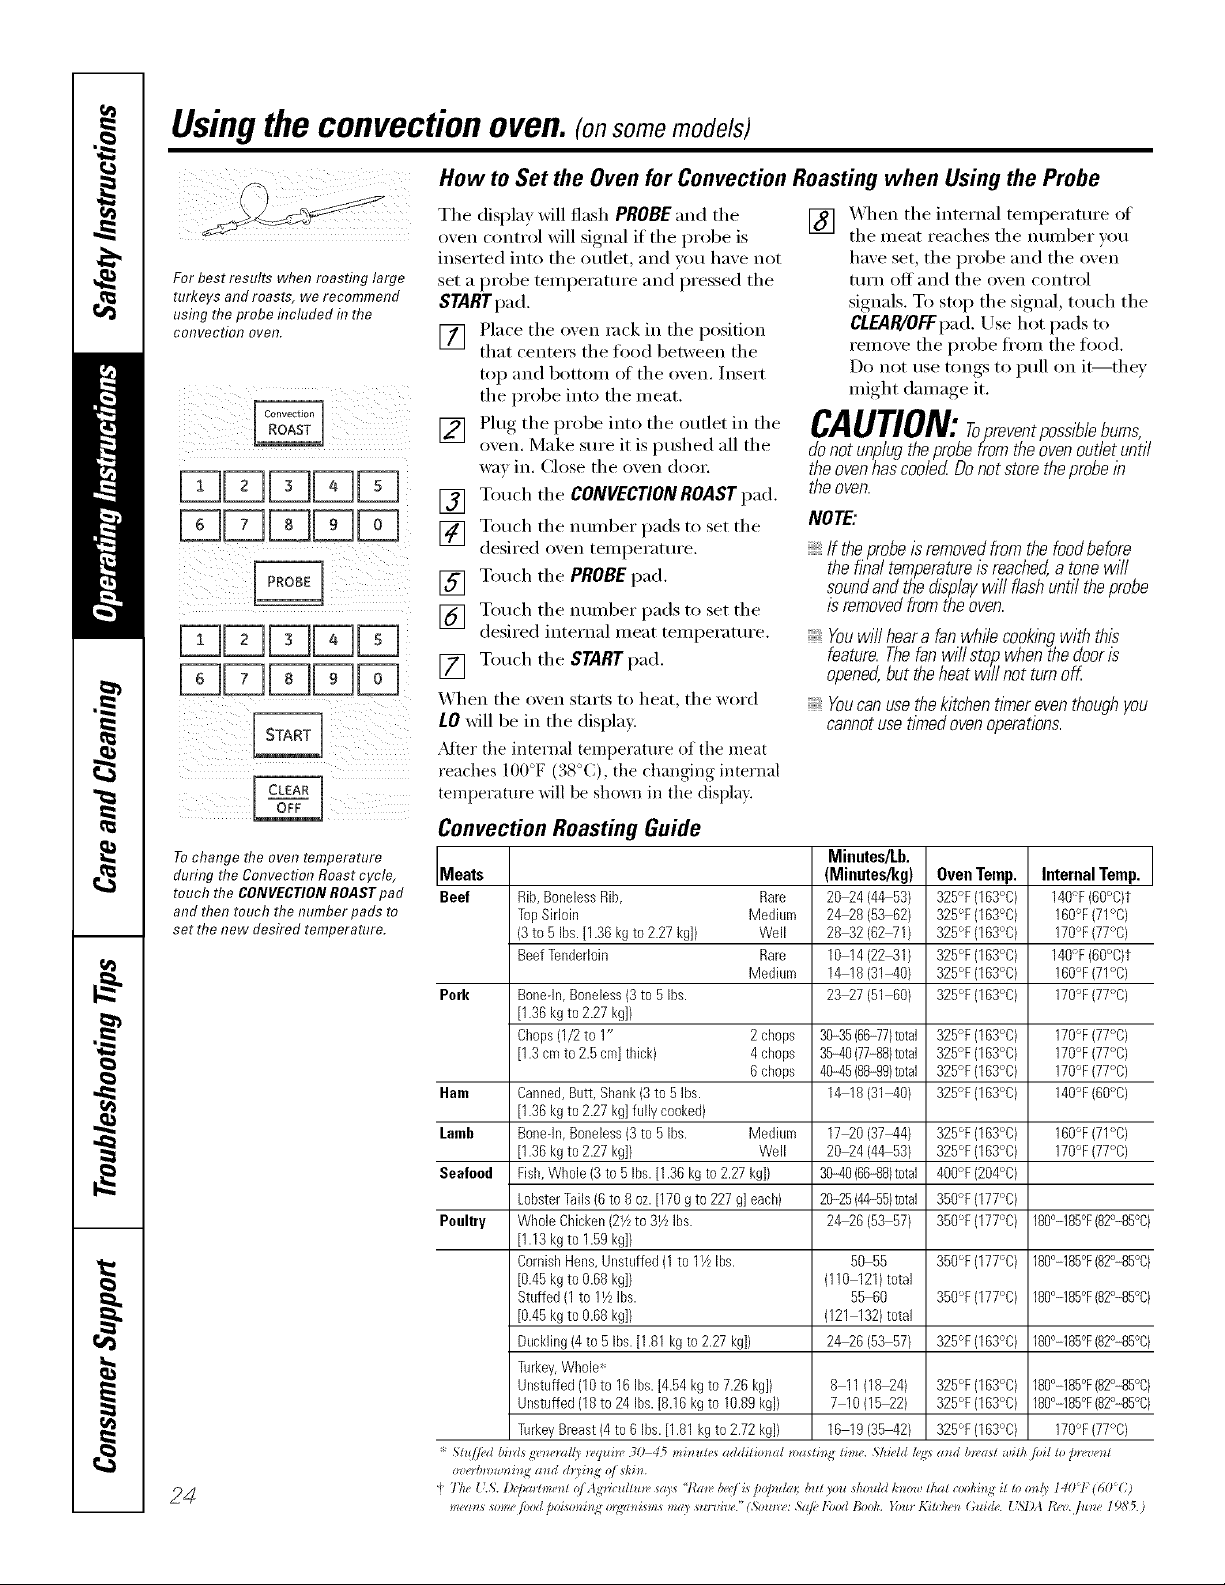
How to Set the Oven for Convection Roasting when Using the Probe
The display will flash PROBE and the [] _,_q_en the internal temperature of
oxen control will signal if the probe is the meat reaches the number _,ou
For best results when roasting large
turkeys and roasts, we recommend
usflTg the probe flTcluded f17the
colTvectiol7 oveR.
[]
inserted into tile outlet, and you have not
set a probe temperature and pressed tile
STARTpad.
[] Place tile oven _;_('k in tile position
that cente_ tile food between tile
top and bottom ot tile oven. Insert
tile probe into tile meat.
[] Plug the probe into the outlet in the
oxen, Make sure it is pushed all the
way in. (;lose tile oven (loo_:
[] Touch tile CONVECTIONROAST pad.
[] Touch tile number pads to set tile
desired oxen temperature.
[] Touch tile PROBEpad.
[] Touch tile number pads to set tile
desired internal meat temperature.
[] Touch tile STARTpad.
[]
When tile oven starts to heat, tile word
LO will be in tile display.
_Mter the internal temperature of the meat
reaches 100°F (38°C), the changing internal
temperature will be sho_al in the displa).
have set, tile probe and tile oven
ttlI'II Off }lll(l tile ovell COllti'ol
signals. To stop the signal, touch the
CLEAR/OFFpad. Use hot pads to
remove tile probe ti'om tile too(l.
Do not use tongs to pull on it--they
might damage it.
CAUTION:ropreventpossibfebums,
donotunplugtheprobefromtheovenoutletuntil
the oven has cooled Do not store the probe/b
the oven.
NOTE:
If theprobe isremovedfrom the foodbefore
the flbal temperature/s reached,a tone will
soundand the displaywill flashuntil theprobe
is removedfrom the oven.
Youwi//heara fanwfeTecookingwith this
feature.Thefenwillsto/_whenthedooris
opened,buttheheatwill notturnoff
Youcanusethekitchentl_nereventhoughyou
cannotusetimedovenoperations.
Tochange the oven temperature
during the Convection Roast cycle,
touch the CONVECTIONROASTpad
and then touch thenumber pads to
set the new desired temperature.
Convection Roasting Guide
Minutes/Lb.
Meats (Mieutes/kg) Oven Temp. Internal Temp.
Beef Rib,BonelessRib, Rare 20_4 (44 53) 325°F (163°C) 140"F(50°C)t
TopSirloin Medium 24_8 (53 62) 325°F(163°C) 160°F(71°C)
(3to 5 Ibs.[1.36kg to2.27 kg]) Well 28_2 (62WI[ 325°F (153°C) 170°F(77°C)
BeefTenderloin Rare 10 14(2241) 325°F(163°C) 140°F(50°C)t
Medium 14 18(31-40) 325°F(153°C) 150°F(71°C)
Pork Bonedn,Boneless(3to 5Ibs. 23_7 (51 BO) 325°F(163°C) 170'_F(77°C)
[1.36kgto 2.27kg])
Chops(1/2to 1" 2 chops 3035 (66-77)total 325°F (163°C) 170'_F(77°C)
[1.3cmto 2.5cm]thick) 4 chops 35-40(77-88)total 325°F(163°C) 170'_F(77°C)
6 chops 40-45(88-99)total 325°F (163°C) 170'_F(77°C)
Ham Canned,Butt,Shank(3to 5 Ibs. 14 18(31-40[ 325°F (163°C) 140'_F(60°C)
[1.36kgto 2.27kg]fully cooked)
Lamb Bonedn,Boneless(3to 5Ibs. Medium 17_0 (37-44) 325°F(163°C) 160°F(71°C)
[1.36kgto 2.27kg]) Well 20_4 (44 53) 325% (163°C) 170°F(77°C)
Seateed Fish,Whole(3 to 5 Ibs.[1.36 kgto 2.27kg]) 30-48(86-88)total 400% (204°C)
LobsterTails(5 to 8oz.[170 gto 227g] each) 2028 (44-55)total 350% (177°C)
Poultry WholeChicken(2Yzto 31/LIhs. 24_6 (53 57) 350°F(177°C) 188°-185°F(82°-85%)
[1.13kgto 1.59kg]/
CornishHens,Unstuffed(1to 11/LIhs. 50 55 350°F (177°C) 180°-188°F(82°-88%)
[0.45kgto 0.68kg]) (110 121)total
Stuffed(1 to 11/zIhs. 55 50 350°F (177°C) 180°-188°F(82°-88%)
[0.45kgto 0.68kg]/ (121 132)total
Buckling(4to 5 Ibs.[1.81kg to 2.27kg]) 24_6 (53 57) 325% (163°C) 180°-185°F(82°-85%)
Turkey,Whole*
Unstuffed(10to 16Ibs.[4.54kgto 7.25 kg]) 8 11(18_4) 325°F (163°C) 180°-185°F(82°-85%)
Unstuffed(18to 24 Ibs.[8.16 kgto 10.89kg]} 7 10(15_2) 325°F(163°C) 180°-185°F(82°-85%)
TurkeyBreast(4to 6 Ibs.[1.81kg to2.72 kg]) 15 19(35-42[ 325% (163°C) 170°F(77°C)
24
Page 25
Usingtheproofing
and warming features.(onsomemode/s)
Theproofing feature maintains a warm environment useful for rising yeast-leavened products.
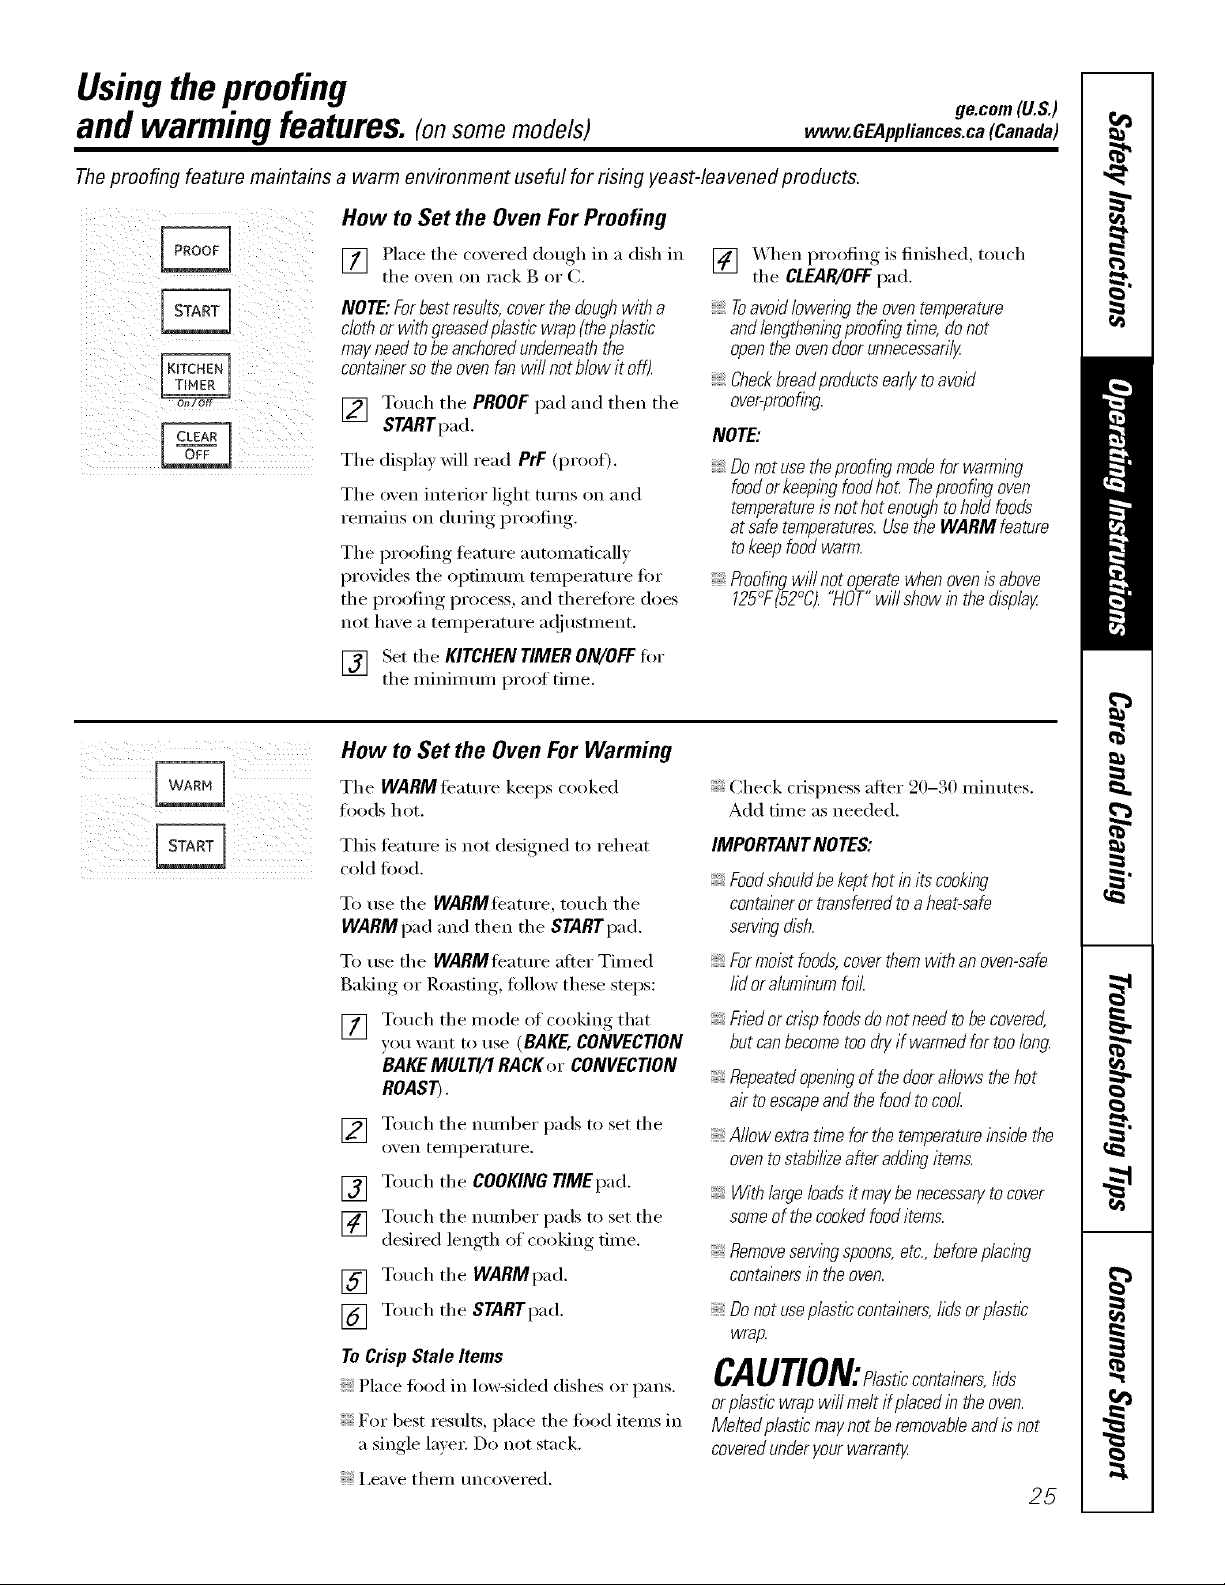
How to Set the OvenFor Proofing
vvvvw.GEAppliances.ca(Canada)
ge.com(U.S.)
[] Place the coxered dough in a dish in
the oxen on rack g or C.
NOTE:Forbest rasults,coverthe doughwith a
cloth or with graasedp/astic wrap(theplastic,
may needto beanchoredunderneath the
containerso the ovenfan will notMow it off).
[] Touch the PROOF pad and then the
STARTpad.
The displa) will read PrF (proof).
The oven interior light turns on and
remains on dm_ing proofing.
The proofing teature automatically
provides the optimum temperature t0r
the proofing process, and therefore does
not have a temperatm'e ac!justment.
[] Set the KITCHENTIMERON/OFFfi,r
the minim um proof time.
How to Set the Oven For Warming
Tile WARMli_ature keeps cooked
foods hot.
This teatm'e is not designed to reheat
cold food.
To use the WARMleatm'e, touch the
WARMpad and then the STARTpad.
To use the WARMfeature after Timed
Baking or Roasting, follow these steps:
[] Touch the mode of cooking that
you want to use (BAKE, CONVECTION
BAKEMULTI/1 RACKer CONVECTION
ROAST).
[] Touch the number pads to set the
(),,'ell telllpeI';Kt II'e.
[] Touch the COOKING 77MEpad.
[] Touch the nunlber pads to set the
desired length of cooking time.
[] Touch the WARMpad.
[] Touch the STARTpad.
To Crisp Stale Items
Place toed in lo_sided dishes or pans.
For best results, place the toed items in
a single lavex: Do not stuck.
; i,eave theil/ tlncovered.
[] "_&hen proofing is finished, touch
the CLEAR/OFFpad.
Toavoid lowering the oven temperature
andfengtheningproofing tlYne,donot
openthe ovendoor unnecessarily
Checkbraadproducts early to avoid
over-proofing
NOTE:
Donot use the proofingmode for warming
foodor keepingfood hot Theproofing oven
temperatureisnot hot enough tohold foods
at safe temperatures.Usethe WARM feature
tokeep food warm.
Proofingwi//not operatewhenovenis above
125°F(52°C)."HOT"will showinthedisplay
Check crispness after 90-30 minutes.
Add time as needed.
IMPORTANTNOTES:
Foodshouldbekepthotin itscooking
containeror transferredtoaheat-safe
servingdish.
Formoistfoods,coverthemwithanoven-safe
lid oraluminumfoil.
Friedor crisp foodsdo not need tobe covered,
but canbecometoo dry if warmed for too long.
Repeatedopening of the doorallows the hot
air to escapeand thefood tocool.
Allow extratlrne forthe temperatureinside the
oventostabih2eafter adding items.
With large loadsit maybe necessaryto cover
someof thecookedfood items.
Removeservingspoons,etc.,beforeplacing
containersin theoven.
Do not use plastic containers,hdsor p/asflc
wrap.
CAUTION: /aetlCCOntainers,lids
or plastic wrap will meltif placed in theoven.
Melted p/astlc may not be removableand is not
coveredunder your warranty
25
Page 26
Adjust the oven thermostat--Do it yourself!
Youmay find that your new oven cooks differently than the one it replaced. Use your new oven for a few weeks to
become more familiar with it. If you still think your new oven is too hot or too cold, you can adjust the thermostat
yourself.
Donot use thermometers, such as those found in grocery stores, to check the temperature setting of your oven.
These thermometers may vary 20-40 degrees F(11-22 degrees C).
NOTE,"This adjustment will only affect baking, convection baking (on some models) and convection roasting
(on some models) temperatures; # will not affect broiling or self-cleaning temperatures. Theadjustment will be
retained in memory after a power failure.
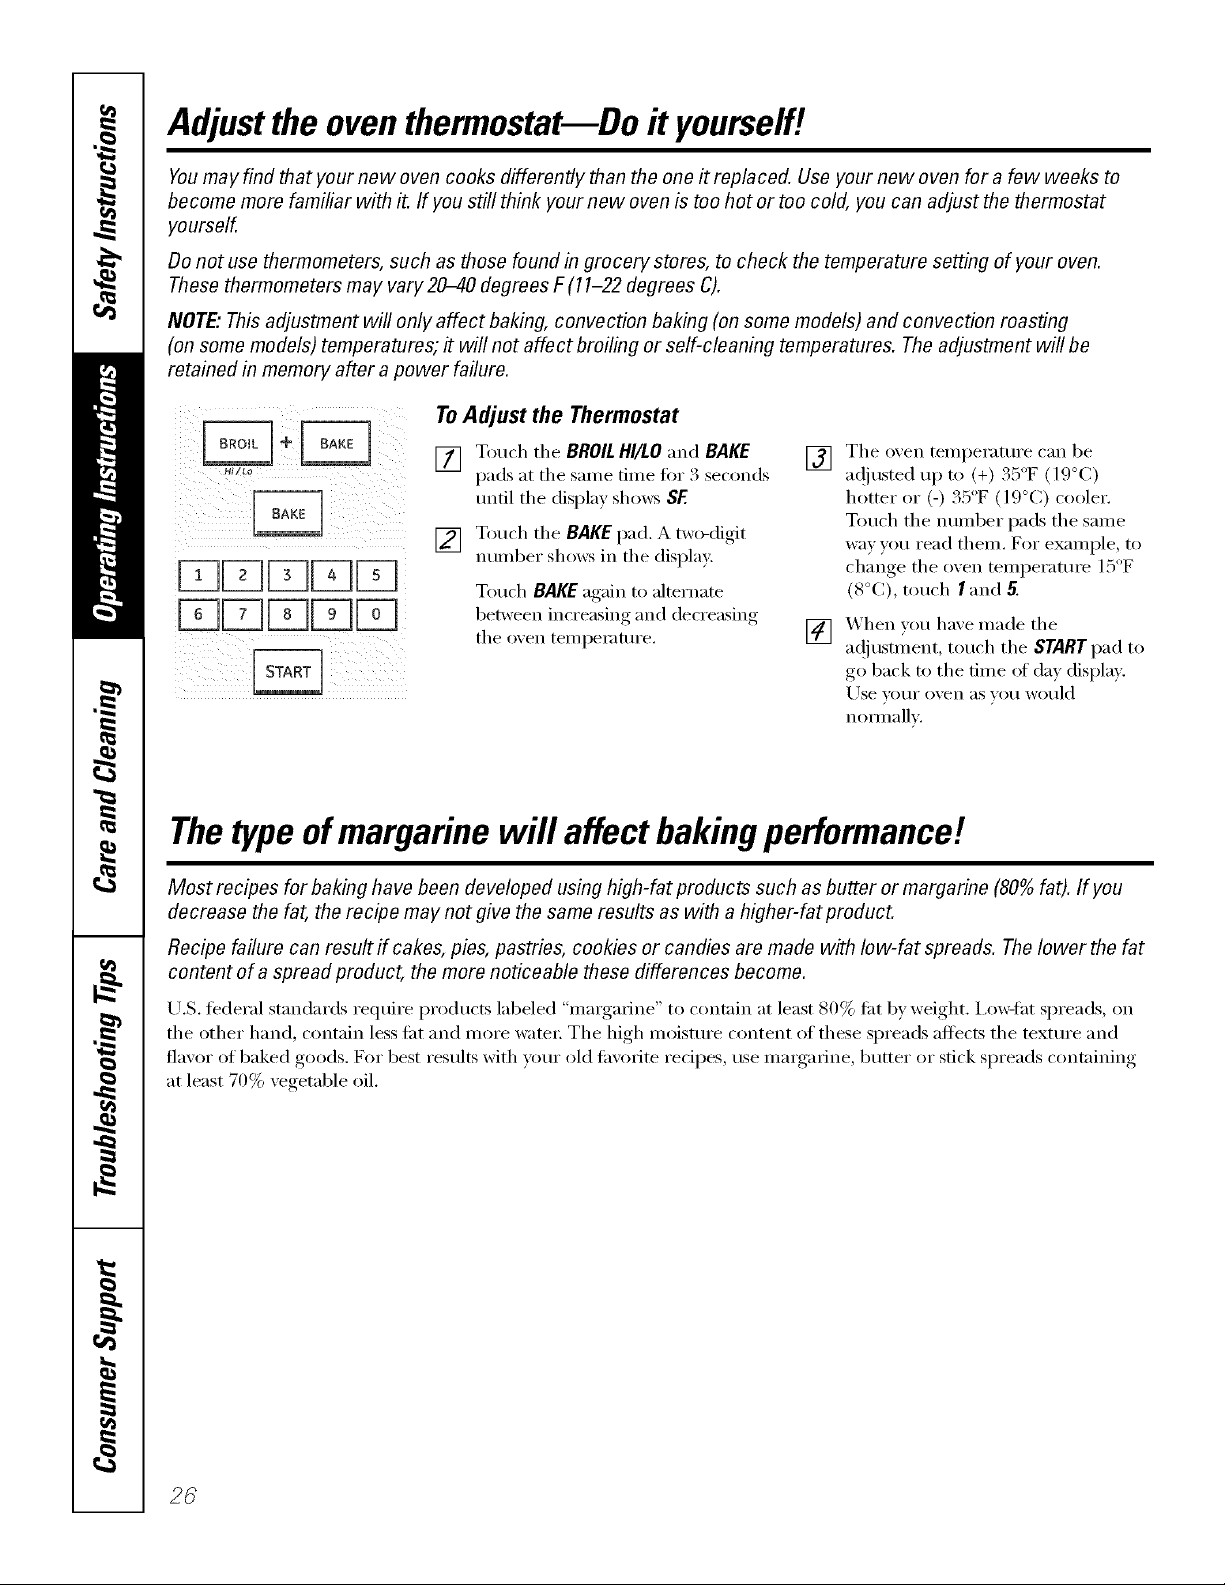
ToAdjust the Thermostat
[] Touch tile BROILHI/LO and BAKE
pads at tile same 6me fb_ 24seconds
until tile display shows SF.
[] Touch the BAKE pad. A two-digit
nunlber shows in tile display.
Touch BAKEagain to alternate
between increasing and decreasing
the oven temperature.
[] The men temperatm'e can be
a(!justed up to (+) 35°F (19°C)
hotter or (-) . : F (l: C) cooler.
Touch the number pads the same
wa) you read them. For example, to
change the o_en temperature 1: F
(8°C), touch I and 5.
[] _,_hen _ou haxe made the
35° O0
a(!jllstment, touch the STARTpad to
go back to the time ot da_ display.
Use VOIII" o_en _ls VOtl would
nOF/ll_lllv,
Thetypeofmargarine will affect bakingperformance!
Most recipes for baking have been developed using high-fat products such as butter or margarine (80% fat). If you
decrease the fat, the recipe may not give the same results as with a higher-fat product.
Recipe failure can result if cakes, pies, pastries, cookies or candies are made with low-fat spreads. Thelower the fat
content of aspread product, the more noticeable these differences become.
U.S. federal standards reqtlire prodtlctS labeled "margarine" to contnin at least 80% lilt by weight. Ixm_lht spreads, on
tile other hand, contain less tilt and more water: Tile high moisture content of these spreads affects tile textm'e and
flavor of baked goods. For best results with u)m" old tm'orite recipes, use mmgarine, butter or stick spreads contnining
at least 70% vegetable oil.
2C
Page 27
ge.com (U.S.)
Usingtheself-cleaning oven. vvvvw.OEAppliances.ca(Canada)
The oven door must be closed and aft controls set correctly for the cycle to work properly.
Before a Clean Cycle
Scrub _Rinse well with clean water
and dry.
Do not clean the gasket. The fibeiglass
inaterial ot the ()veil door gasket cannot
withstand abrasion. It is essential t0r the
gasket to renlain intact. If w)u notice it
beconling worn or fl'ayed, i'eplace it.
Wipe up any hea\y spillovei_ on the oven
go[[Dill.
Make sure the oven light bulb cover is in
place and the oven light is off.
IMPORTANT'. The health of soine biMs
is extreinelv sensitive to the flunes given
off during the sel6cleaning cycle of any
range. Move biMs to another well-
ventilated rooni.
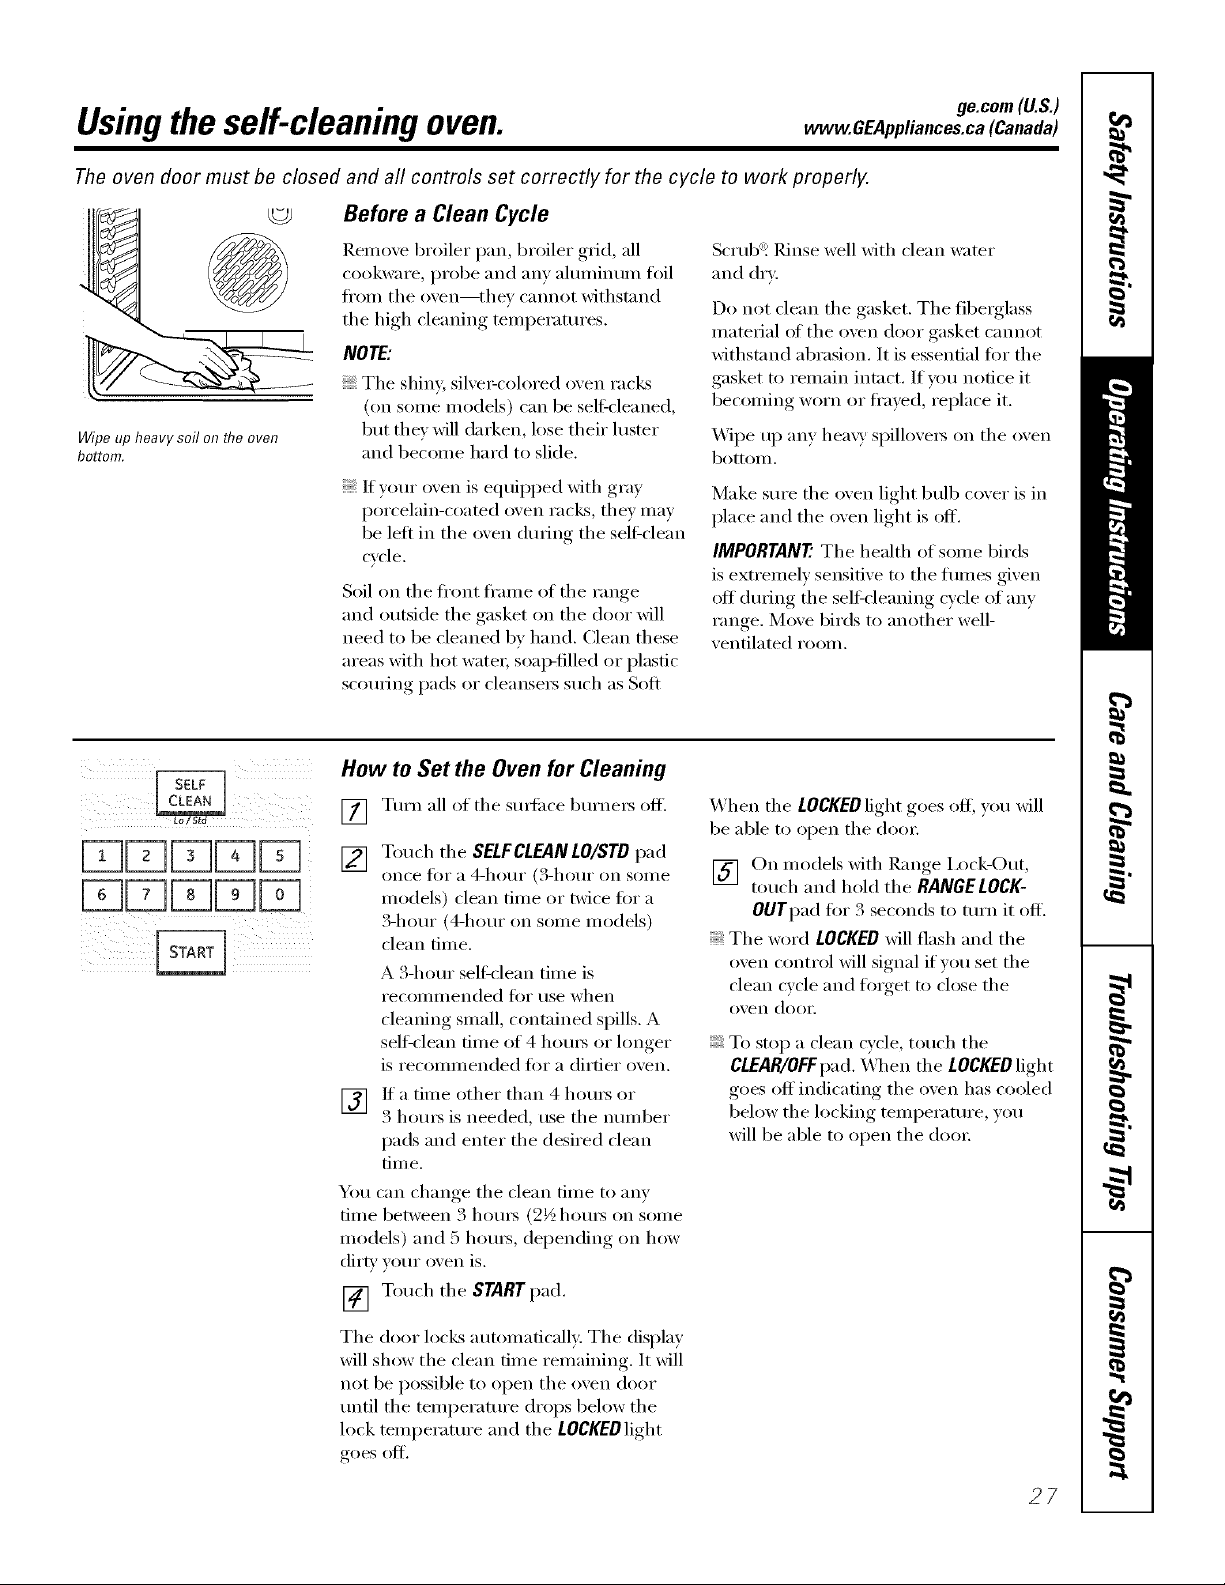
Wipeupheavysoilontheoven
bottom.
Renlove broiler pan, broiler grid, all
ciiokware, probe and anv ahuninun/foil
fl'oin the oven--they cannot withstand
the high cleaning tenii)eratures.
NOTE'.
The shin> silvei=colored oven racks
(on some nlodels) can be self:cleaned,
but they Mll darken, lose their hister
and beconle hard to slide.
If your oven is equipped Mth gray
I)orcelain-coated oven i'acl<% they nlav
be left in the oven during the sel6clean
cycle.
Soil Oil the fl'ont fl'anle of the range
and outside the gasket Oil the door will
need to be cleaned bv hand. Clean these
areas with hot watei; soap-filled or plastic
scouring pads or cleansei_ such as Soft
!iiii ii !ii:i
How to Set the Oven for Cleaning
[] Turnall ofthesui_fi_ceburnei_ofl_
[] Touch tile SELFCLEANLO/STD pad
once iLk)i" a 4-hotli" ([4-hotli on SOllle
Inodels) clean tiine or twice fi)r a
3-hour (4-hour on sonle nIodels)
clean tiine.
A 3-hour sel6clean tiine is
i'ecoi/lillended 10r rise when
cleaning snlall, contained spills. A
self,lean fiine of 4 houi_ or longer
is reconnnended for a dirtier ()veil.
V_ If a tiine other than 4 houi_ or
3 houI_ is needed, use the nuniber
pads and enter the desired clean
[Jill e.
You can change the clean tiine to any
tiIne between 3 houi_ (2½ houi_ on sonie
Inodels) and 5 houI_, dei)ending on how
dirty vour oven is.
[] Touch the STARTpad.
The door locks autonlaticallv. The display
will show the clean tiine renlaining. It will
not be possible to open the oven door
until the mini)erature drops below the
lock tenlperamre and the LOCKEDlight
goes off.
When the LOCKEDlight goes off; you will
be able to open the dooI:
[] Oil niodels with Range i,ock-Out,
touch and hoM the RANGE LOCK-
OUTpad fi)r 3 seconds to turn it off.
The word LOCKED will flash and the
()veil control will signal if you set the
clean cycle and fl)rget to close the
()veil dooi:
To stop a clean cycle, touch the
CLEAR/OFFpad. X,_]_ei1the LOCKED light
goes off indicating the ()veil has cooled
below the locking teini)erature , you
will be able to open the dooi;
27
Page 28
Usingthe self-cleaning oven.
The oven door must be closed and all controls must be set correctly for the cycle to work properly.
How to Delay the Start of Cleaning
iii!ii(; / i !i!:
[][][]
[][][][]
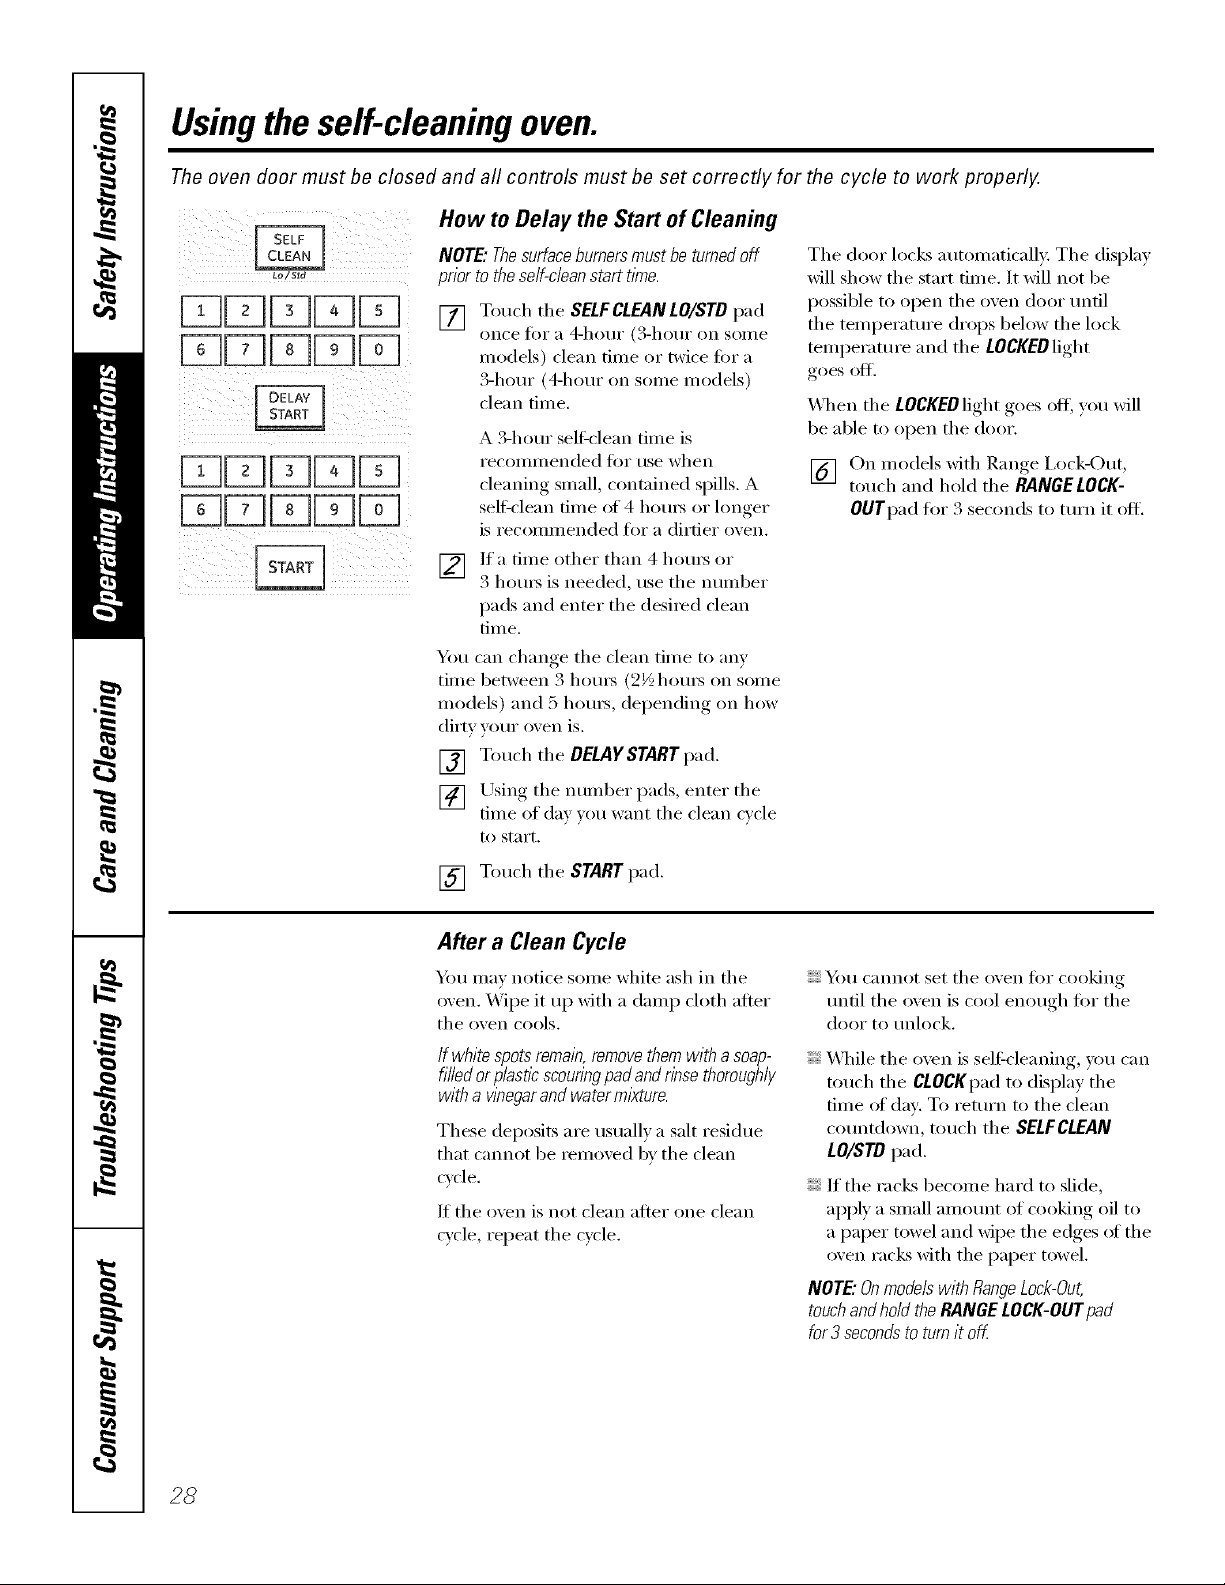
NOTE"Thesurfaceburnersmustbe turnedoff
prior to the serf-deanstart time.
[] Toud_ the SELFCLEANLO/STD pad
once fi)I a zPhouI (3-houI on son/e
nlodels) clean tiine or twice for a
3-h(IuI (4-hour on seine nIodels)
clean tinle.
A 3-hour sel6clean tiine is
reconnnended t0r use when
cleaning sinall, contained spills. A
self=clean dine of 4 houi_ or longer
is reconnnended fin" a dirtier ()veil.
[] If a tinle other than 4 houi_ or
3 houI_ is needed, use tile nuinber
pads and enter the desiied clean
tiine.
You can change the clean tinie to anv
tiine between 3 houi_ (2_ houi_ oil sonle
Inodels) and 5 houI_, dei)ending on how
dirty your oven is.
Tile door locks autoniatically: Tile display
will show the start tinie. It will not be
possible to open tile oven door until
the teini)eramre drops below the lock
teini)erature and tile LOCKEDlight
goes off.
_'_l/eIl tile tOCgEOlight goes off; you will
be able to open tile door.
[] Oil niodels with Range i,ock-Out,
touch and hold tile RANGELOCK-
OUTpad for 3 seconds to turn it off.
[] Touch tile DELAYSTART pad.
[] Using tile nunlber pads, enter tile
tiIne of day _ou want tile clean c_cle
to start.
[] Touch tile STARTpad.
After a Clean Cycle
Y)u nIav notice sonIe white ash in tile
oven. _,\]pe it up with a daInp cloth alter
tile ()veil cools.
If white spots remain,removethem with asoap-
filledor plastic scouringpad and rinse thoroughly
with a wbegarand watermiXture.
These deposits are usually a salt residue
that cannot be renloved bv tile clean
cycle.
If the oven is not clean after one clean
wcle, i'epeat the cycle.
Y_)u cannot set tile ()veil fin" cooking
until tile oxen is cool en(Iugh t0r tile
door to t/nlock.
X4]/ile tile oven is selfXcleaning, you can
touch the C£OCKpad to display the
tiIne of day: To return to tile clean
countdown, touch tile SELFCLEAN
LO/STD pad.
If tile racks beconle hard to slide,
apply a snlall anlount of c()oking oil to
a paper towel and wipe tile edges of tile
oven racks with tile paper towel.
NOTE."Onmodelswith RangeLock-Out,
touchand ho/d theRANGE LOCK-OUTpad
for3 secondsto turnit off.
28
Page 29

ge.com(U.S.)
Special featuresofyourovencontrol www.OEAppliances.ca(Canada)
Yournew touch pad control has additional features that you may choose to use. The following are the features
and how you may activate them.
The special feature modes can only be activated while the display is showing the time of day. They remain
in the control's memory until the steps are repeated.
When the display shows your choice, touch the STARTpad. The special features will remain in memory after
a power failure, except for the Sabbath feature, which will have to be reset.
12-Hour Shutdown
HilLo
i!i!i)i!iliiii!i iiiiiliii ill
_th thisfeature,shouldyouforgetandleavethe
ovenon,thecontrolwillautomaticallyturnoff the
ovenafter 12hoursduringbaklhgfunctionsor
after3hoursduringa broilfunction.
If }ou wish to mrn OFF this teature, follow
the steps below.
[] Touch the BROIL HI/LOand BAKE
pads at the sanle time fin" 3 seconds
until tile displa} shows SF
Fahrenheit or Celsius Temperature Selection
Yourovencontrolisset tousetheFahrenheit [] Touch the COOKINGTIME'andBROIL
temperatureselections,butyoumaychangethis HI/ZOpadsat the sametime. The
tousetheCelsiusselectlbns, display will show F (Fahrenheit).
[] Touch tile BROILHI/LOand BAKE
pads at tile same time fin"3 seconds [] Touch tile COOKINGTIME'andBROIL
until the displa) shows SF. The display will show C (Celsius).
[] Touch the DELAYSTARTpad Imfil
noshdn(no shut-oil) appeax_ in the
display.
[] Touch the STARTpad to acfix Ite the
no shut-offand leaxe tile control
set in this special teatures mode.
HI/LO pads again at tile same time.
[] Touch tile STARTpad.
Tonesat the End of a Timed Cycle
Attheendofa timedcycle,3shortbeepswill
soundfollowedbyonebeepevery6seconds
untiltheCLEAR/OFFpafllstouchedThis
contlbual6-secondbeepmaybecanceled
To cancel the 6-second beep:
[] Touch the BROILHI/LO "and BAKE
pads at the sanle time fin" 3 seconds
until the display shows SF.
Touch the KITCHENTIMERON/OFF
[]
pad. Tile displa)shows CONBEEP
(continuous beep). Touch the
KITCHENTIMERON/OFFpad
again. The display shows BEER
(This cancels the one beep
every 6 seconds.)
Touch the STARTpad.
[]
29
Page 30
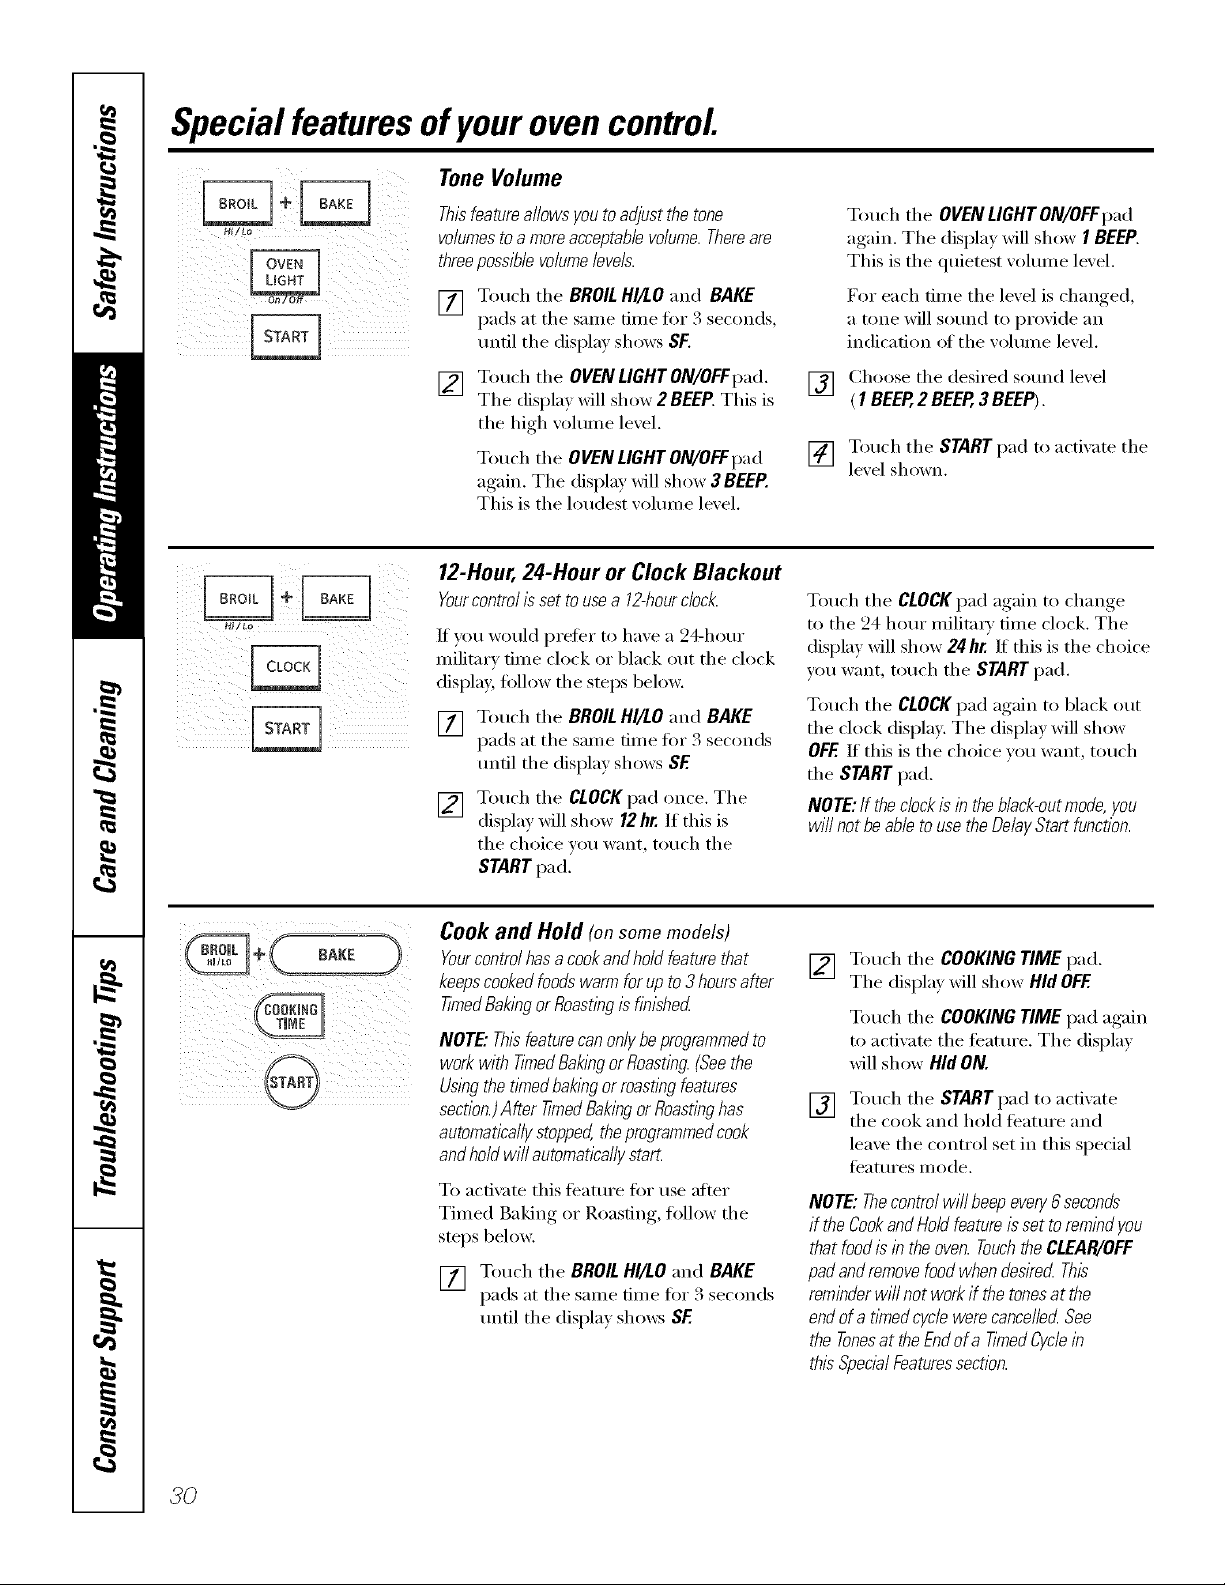
Special featuresof yourovencontrol.
Tone Volume
Hi/Le
iii!iii_Iiiiiiii!I_ il_II_iii(iiii!ilil
i)iii!!iiij i!il_ i!ii(jiii(iii!
Thisfeatureallows you toadjust the tone
volumesto amore acceptablevolume.Thereare
threepossible volumeleveb.
[77 Touch the BROILHI/LO and BAKE
pads at the sanle time fin" 3 seconds,
until the display shows SF.
[] Touch the OVEN LIGHTON/OFFpad.
The displa_ will show 2 BEEP. This is
the high w)lume level.
Touch the OVEN LIGHTON/OFFpad
again. The display will show 3 BEEP.
This is the loudest volume level.
12-Hour, 24-Hour or Clock Blackout
Yourcontrolis settousea 12-hourdock.
If you would l)reler to have a 24-hour
military time clock or black ()titthe clock
displa> follow the steps belong:
[] Touch the BROILHI/LOand BAKE
pads at the same time fin" 3 seconds
until the display shows SF.
[] Touch the CLOCKpad once. The
display will show 12hr. If this is
tile choice you want, touch the
STARTpad.
Touch the OVENLIGHT ON/OFFpad
again. The display will show I BEEP.
This is the quietest volume level.
For each fiIne the level is changed,
a tone will sound to provide an
indication ot the w)lume level.
Choose tile desired sound le'_el
[]
(1 BEEP,2 BEEP,3BEEP).
Touch the STARTpad to actixate the
[]
le'_el shown.
Touch the CLOCKpad again to change
to the 24 hour militax_' time clock. The
display will show 24hr If this is the choice
you want, touch the START pad.
Touch the CLOCKpad again to black out
the clock displa> The display will show
OFF.If this is the choice you want, touch
the STARTpad.
NOTE:If thec/ookisintheb/ack-outmode,you
wi//notbeabletousetheDelayStartfunction.
30
+ CookanOHolOsomemode,s;
keepscookedfoodswarmforupto3hoursafter
timedBaking0rR0astingisfin,shed
NOTE"Thlsbaturecanonlybeprogrammedto
workwith tiYnedBakingorRoasting.(Seethe
_TAR_ Usingthet/_nedbakingorroastingfeatures
_ section.)After timedBakingorRoastinghas
automaticallystopped,theprogrammedcook
andholdwillautomaticallystart.
To acfix _te this feature fin" use after
Timed Baking or Roasting, follow the
steps below.
[] Touch the BROILHI/LO and BAKE
pads at the same time fin 3 seconds
until the displa) shows SF.
Touch the COOKINGTIME pad.
[]
The displa_ xdll show Hid OFF.
Touch the COOKINGTIME pad again
to activate the feature. The displa)
will show Hid ON.
[] Touch the START I);1(1to activate
the cook and hold ti_ature and
leaxe the control set in this special
features m ode.
NOTE:Thecontrolwillbeepeve_/6seconds
if theCookandHoldfeatureissettoremindyou
thatfoodisin theoven.TouchtheCLEAR/OFF
padandremovefoodwhendesiredThis
reminderwi//not workif thetonesat the
endofa tl_nedcyc/ewerecancelledSee
theTonesat theEndofa tinnedCyclein
thisSpecb/Featuressection.
Page 31

Using Auto Recipe TM Conversion (on some models)
Whenusingconvectionbake, theAuto Recipe_
Conversionfeaturewill automatically convert
enteredregularbaklbg temperaturesto
convectionbaklbgtemperatures.
Thedisplaywill show theactual converted
(reduced)temperature.Forexample, if you entera
regularrecipe temperatureof350C_F(177_C)and
touchthe START pad, the display will show
CON andthe convertedtemperatureof 325°F
(763%
NOTE."Thisfeatureonlyconvertscooklbg
temperatures,not cookingtlYnes.When
convectionroast_bg,the oven temperature
wi// not autoconvert
Toturn off this feature:
Touch the BROILHI/LO "and BAKE
[]
pads at the same time f'o_ 3 seconds
until the display shows SF.
Touch the CONVECTIONBAKE
[]
MULTI/1 RACKpad. The displa_
will show CON ON. Touch the
CONVECTION BAKEMULTI/1 RACK
pad again. The display will show
CON OFF.
[] Touch the START pad.
To turn on this teature, repeat steps 1-3
abo'_e but touch the STARTpad when
CON ON is in the display.
ge.com(U.S.)
www.GEAppliances.ca(Canada)
3/
Page 32

UsingtheSabbathFeature.
(Designed for use on the Jewish Sabbath and Holidays.)
TheSabbathfeature canbe usedfor baking/roastingonlg It cannotbe usedfor convection,broiling,self-cleaningor
DelayStart cooking.
NOTE:Theovenlightcomesonautomaticallywhenthedooris openedandgoesoffwhenflTedooris closed.Thebulbmayberemoved.SeetheOven
LightReplacementsection.Onmodelswithalightswitchonthecontrolpanel,theovenlightmaybeturnedonandlefton.
How to Set for Regular Baking/Roasting
Usi]/g Ill(! lllll//tter t]ads, ellter the
desired temltemmre 1)etw( el/ I / ) 1_
(77°(:) and 550°17 (288°(:). No signed or
temlterattlre ++viiil)e gixen.
"[buch the STARTpad.
[]
After a rand(m/delay t]eriod of
[]
attltroximatel _ 30 seconds to 1 min/]te,
D G ++,+rillaltl]ear in tilt' display
indi(ating that the oven is baking!
roasting. If D C doesn't altt]ear in the
dist]lay, start again at Stet) 4.
"Ib a(!iust tile o\en teml]eramre, touch the
BAKEI]a(I, enter tile new temt]el_mn:e using
the number t)ads and touch tile STARTpad.
NOTE:The CLEAR/OFFand COOKING TIME ttads
++rilltimt tion dining tilt' Sabbath lbature.
When the display shows D the
oven is seth7 Sabbath. When the
display shows D C the oven is
bak&g/roasting.
Make sure the clockshows thecorrect time of day and F_]
theoven is off
f_l Tou(h and hold both die BROIL HI/LO
Ill
and BAKE l/ads, atthe same time, until
the dist)lay s]lows SE
NOTE:I( bake or broil al)llears in the
display, tile BROIL HI/LO and BAKEpads
were not tou(hed at die same time.
"Ibuch tilt' CLEAR/OFFtmd and 1)eg{n
again.
[_] Tall the DELAYSTART pad until SAb bAtH
i¢..- i
attt)ears ill the dist)lay.
] Tou++h the START pad and D will at]treaT
in the disl]la _.
] "]'ou++h the BAKElind.No sig_lal will
be _,4_eu.
When the display shows D the
oven is seth7 Sabbath. When the
display shows D C the oven is
bakflTg/roasting.
How to Set for Timed Baking/Roasting - Immediate Start and Automatic Stop
Make sure the clockshows thecorrect time of day and Touch the START t]ad.
theoven is off []
"lbu++h and hold both the BROIL HI/LO and
[]
BAKE t/a(ts, at thesame time, tmtil the
display shows SE
NOTE:If bake or ttroil al]ltears in tile
display, tile BROIL HI/LOandBAKEltads
were not touched at the same time.
"Ibuch tile CLEAR/OFFI]ad and 1)egJn
again.
Tall the OELAYSTART t]ad until SAb bAtH
[]
attl]ears ill the disl]la _.
"Ibu++h the START pad and D ++'+'illat]treaT
[]
in the (list]la }.
"Ibuch tile COOKING TIME ttad.
[]
"Ibuch the numl]er ltads to set the
[]
desired length oI ((>(>king time t)etwe_?ll
1 min/ue au(t 9 ho/n:s and 99 min/]tes.
The ((>(>king tll//e that y(H] e]lter(f(t ++,,'ill
be disttlayed.
] "['ot]ch the BAKE pad. No signal ++++'ill1)e
_Jve] I.
] Using the numl>er pads, enter the
desired wmt]eramre. No sigl/al or
wmtteramre ++'+'ill1)e gixen.
] "['ot](h the START t)ad.
] ,\fler a ran(h>n/delay t]eriod of
attttroximatel" _ 30 se((mds to 1 minute,
D C ++,+rillaltltear ill tilt' (tispla} indicating
that the oven is baking/roasting. If D C
doesn't at]peru: in the dist]lay, start agvdn
at Step 7.
To a(!iust tile (>,+ell teml]emmre, touch tile
BAKEI]ad, enter the new temltemture using
the number t)ads and touch the STARTllad.
When cooking is tinishe(I, th( disl)lay ++,+'ill
change/i:om D C to D and 0:_0will appear
indicating that the oven has turned OFFbut is
still set in Sal)bath. P,emove the cooked/i)od.
How to Exit the Sabbath Feature
i ii iii! ii(i
S_
[] "['O/]ch the CLEAR/OFFttad.
] I1"the oven is cooking, wait for a rim(lore
delay t]eriod of at]l]roxin/ately 30
se(onds to 1 mintue, m/til only D
is in the disttla" _
[] Touch and hold both the BROIL HI/tO
and BAKE ltads, atthe same time,tmtil
the disl]lay shows SF.
[] "[+at>the DELAYSTART ttad until 12shdn
or no shdn attt]ears in the disl]lav.
] (_hoose 12shdn, indicating that the oxen
++'+rillmuomati(alh' ttlrn oIt"a/+ter 12 hours
or no shdn, indi(ating that dw o'_en ++,,rill
not auton/ati( alh' turn off after 12 hours.
] "lbuch the STARTt]ad ++_hen the ot]tion
that _(>u want is in the disltla } (12shdn or
no shdn).
NOTE:II a l/ovvrer outage ot (urred uhih'
tl/e (>,+ell was in Sattbad/, the o_en will
a/ltOl/latiCa]]V ttlrll ott' }++I/(t St}IV ott e,+ el/
when tile t)ower rettlr]/s. The oven
control lilt]St be reset.
Page 33

ge.com (U.S.)
Careand cleaning of therange, www.OEAppliances.ca(Canada)
Be sure all controls are off and all surfaces are cool before cleaning any part of the range.
If your range is removed for cleaning, servicing or any reason, be sure the anti-tip
device is reengaged properly when the range is replaced. Failure to take this
precaution could result in tipping of the range and cause injury.
How toRemoveProtectiveShippingFilm and Packaging Tape
Carefully grasp a corner of the protective
shipping film with yore" finge_ and slowly
peel it fl'om the appliance suHi_ce. Do
not use any sha_]) items to remove the
fihn. Remove all of the fihn beiore using
the appliance for the fit,st time.
To aSStlre no dai/lage is done to the
finish of the product, tile safest way to
remove the adhesive ti'om packaging tape
on new appliances is an application of a
household liquid dishwashing demIgent.
Apply with a soft cloth and allow to soak.
NOTE" The adhesive must be removed from all
parts.It cannot be removed if it is baked on.
Frontrgn[ Burnerionsomemoaels
Burnercau
Burnerhead
Burnerbase_x_._j__
Make sure me holemthe burner
headIs oositionedoverthe electrode
andthat the burner head is Fullj
inserted inside thebL _nerbase.
A small gapbetween the base
andhead is normal
Frontrgn[Burner3nsortieRlooels Front
eftI:Jrner.DaCKngntBurneranubackleft
Stab' Iv"_'_ _ ! Useasewing
cnamDel neealec
Burnerbase"Electrode nea_.
Make sure the slot m me burner
neaa/spositioned overthe e_ectrode.
Theburner cap hasthree to Foutpins.
Whenreplacing the cap, makesure
none ofthe pflTssitsin the stabiliB"
CAUTION:DO NOT OPERATETHE
BURNERWlTHOUTALL BURNER
PARTSIN PLACE
burner
) unaogme
smallhoiein
chambe_
_VJS[-IIB _[0
ne burner
Burner Caps and Heads
The burner assemblies should be washed
regularly and, of comse, after spillovei_.
Turnall controlsoff beforeremowngburnerparts.
The burner grates, burner heads and
btlrnei" c}lps C}li1 be rei//oved _'i)i" easv
cleaning.
The electrode of the spark ignitor is
exposed be)ond the smti_ce of the
burner base. _._q_en cleaning the cooktop,
be careflll not to snag the electrode of
tile si)ark igniter, with your, cleanim*
cloth. Dama_m_ to the igniter could occm:
Toavoidsnagginga clothonthespark
igniter, leave the burner heads in place
when cleaning the cooktop.
Be careful not to push ill any cooktop
controls while cleaning the cooktop.
A slight electrical shock might result
which could cause you to knock over
hot cookware.
Wash burner parts with an alli)uq)ose
non-;ibr;isive cleaner and W;lllll wateI:
Soak stubborn soil. DIw thenl with a
cloth--<lo not reassemble while wet.
To reassemble, replace the burner head
fii_t, then the burner cap and finally the
burner grate.
Make sure that the heads and caps are
replaced ill the correct locations. There
is one small, one mediunl, one laIge
and one extra lmge burner head
and cap.
i k ¸ /
Mediumburner Smallburner
healand cap headandcap
_t
, ,
headandcap o so _ odes
Extra large burner
head and cap
33
Page 34

Careandcleaningoftherange.
BurnerGrates and VentGrille
Porcelain enamel burner grates and the
vent grille should be washed regularly
and, of CO/lINe, after spillovei_.
The grates may be washed either in the
dishwasher or you may wash them in hot
soai/)' water and rinse with clean watei;
_l_)/l Ill,IV _IIso tlse abrasive cleaners and
scamping pads to clean bm'ner grates and
the vent grille. D_' the grates and grille
with a cloth--<lon't put them back on the
cooktop wet.
To get rid of burned-on food, place the
grates and grille in a covered containei:
Add 1/4 cup (59 mi,) ammonia and let
them soak several hom_ or overnight.
XM_sl/,rinse well and dry.
_Mthough they're din'able, the grates
and grille will gradually lose their shine,
regardless at tile best care vou can give
theln. This is due to their continual
exposure to high temi)eratures.
Do not operate a burner for an extended
period of tilne without cookware on tile
grate. Tile finish on tile grate Inay chip
without cookware to absorb tile heat.
_dteI" cleaning, replace tile center vent
grille fii_t. Replace the side grates so that
tile center extensions are oriented toward
the center of the cooktop. The rear
center extensions should slightly overlap
the vent grille. Make sure the grates are
positioned securely over tile burnei_ and
that they are stable and level,
Rubber Grate Feet
F(:,r stability, yam" cooktop has rubber
feet on tile burner grates. If any of these
rubber feet should becolne dalnaged or
lost, replace them immediately.
To order replacement rubber gram feet,
please call our toll-ti'ee nulnber:
National Parts
Center ............... 800.626.2002(U.S.)
800.661.1616(Canada)
ge.com (U.S.)
www. GEAppliances.ca (Canada)
Rubber Grate Feet ....... #WBO2T10101
Cooktop Surface
To avoid dan/aging tile porcelain enamel
sm_i_ce (ff tile cooktop and to prevent it
fl'oln becolning dull, clean up spills right
away. Foods with a lot (ff acid (tolnatoes,
sauerkraut, fl'uitjuices, etc.) or ti)o(ls with
high sugar content could cause a dull
spot if allowed to set.
X4]/en the sm_hce has cooled, wash
and rinse. For other spills such as tat
spatterings, etc., wash with soap and water
once tile surfilce has cooled. Then rinse
and polish with a dry cloth.
Control Knobs
Thecontrol knobsmaVbe removedfor easier
cleaning.
Make sm'e tile knobs are in tile OFF
positions and pull theln straight off tile
stems for cleaning.
NOTE:Donotstoreflammablematerialsin
anoven,drawerornearthecooktop.Donot
storeorusecombustl#/ematerials,gaso/ine
orotherflammab/evaporsand/iquidsinthe
wcinityof thisoranyotherappflance.
NOTE:Do not rift thecooktop. Lifting the cooktop
can lead todamageand improper operationof the
range.
NOTE:Forstain/essstee/cooktops,refertothe
Stainlessstee/surfacessection.
Tile knobs can be cleaned in a
dishwasher or they may also be washed
with soap and wateI: Make sure tile insides
of tile knobs are dry before rei)lacing.
Replace tile knobs ill tile OFFposition
to ensure proper i)lacelnent.
.?4
Page 35

ge.com(U.S.)
www.GEAppliances.ca(Canada)
Ovenrack
Socket
Oven Racks
M1 oven i'acLs Inay be cleaned by hand
with an abrasive cleaner or steel wool.
Mter cleaning, rinse tile racks with clean
water and d_' with a clean cloth. Gray
porcelain-coated oven racks iilav i'elilain
in the oven dtwing the seltkleaning cycle
without being damaged. Tile shiny, silve>
colored oven racks may remain in tile
oven dtwing the self-cleaning cycle, but
they will lose their luster and become
hard to slide,
Oven Light Bulbs
NOTE"Theglass cover should be
removed only when cold. Wearing latex
gloves may offer a better grip.
CAUTION.Beforereplacing your
oven light bulb, disconnect the electrical
power to the oven at the main fuse or
circu# breaker panel
It Mll be necessax T to grease all oven
rack side edges with a light coating of
vegetable oil alter cleaning them by hand
or in tile oven, This will help maint;fin
the ease of sliding the rocks in and
()tit (It tile oven.
Receptacle
]]ass cover
Be S/lI'e to let the light cover and bulb
cool completely.
For yore" safi_t} ', do not touch a hot bulb
with bare hands or a damp cloth.
Toremove:
[] Turn tile glass coxer
co/mterclockwise l/4 mrn/mtil tile
tabs ot tile glass cover clear tile
grooves of tile socket.
[] Using gloxes or a dry cloth, remoxe
tile bulb b} pulling it straight out.
To replace:
[] Use a new 130-volt halogen bulb,
not to exceed 50 watts.
[] Using gloxes or a dry cloth remoxe
tile bulb from its packaging. Do not
touch the bulb with bare finge_s.
[] Push tile bulb straight into tile
receptacle all the way:
[] Place the tabs of the glass coxer into
tile grooxes of tile socket. Tm'n tile
glass cover clockwise 1/4 mm to
engage.
For improved lighting inside
the oven, clean the glass cover
fl'equenfly using a wet cloth. This
should be done when the oven is
completely cool.
[] P,econnect electrical power to
tile oxen.
35
Page 36

Careand cleaningof therange.
Cleaning the Oven Door
To clean the inside of the door:
{{}Because tile area inside tile gasket is
cleaned durhlg tile selt_'lean c'_cle you
do not need to clean this b_ hand.
Donot rub or cleanthedoor gasket--
it hasanextremelylow resistanceto
abrasion.
Ifyou noticethegasketbecomingworn,
frayed ordamagedinany wayor if it has
becomedisplacedonthe door,youshould
haveit replaced.
Tile area outside tile gasket and
tile door liner can be cleaned with a
soap-filled or plastic scouting pad,
hot water and detergent. Rinse well
with a vinegar and water solution.
Toclean the outside of the door:
Use soap and water to thoroughly
clean the top, sides and fl'ont of the
oven dooi: Rinse well. You may also
use a glass cleaner to clean the glass
Lift-Off Oven Door
on tile outside of tile do(n: Do not let
water drip into tile xent openings.
If an)stain on tile door vent trim is
persistent, t/se a soli abrasixe cleaner
S ( _" S
and a ,_p m_e-,;crubber for best results
Spillage of marinades, fl'uitj uices,
tomato sauces and basting materials
cont;fining acids may cause
discoloration and should be wiped
up immediately. \_]/en surti_ce is cool,
clean and rinse.
Do not rise o_en cleanei_, cleanino
powde_ or hm_h abrasixes on tile
outside of tile doo_:
Slot
Pull hinge locks down to unlock.
Removalposition
Thedoorisveryheavy.Becarefulwhen
removingandlifting thedoor.
Donotlift thedoorbythehandle.
Toremovethedoor."
Fully open tile dora:
[]
Pull tile hinge locks down toward
[]
tile door fl'ame, to tile tmlocked
position. A tool, such as a small
flat-blade screwdfixe_, may be
required.
Fimllv _m_s,) both sides of tile door
[]
at the top.
Close door to tile door removal
[]
position, which is hallwm between
tile broil stop position m_d flflly
dosed,
[] I,ifl door up and out tmfil tile hinge
aml is clear of the slot.
Toreplacethedoor:
[] Fimllv,_oraso. t both sides of tile door
at tile top.
With tile Bottom
[]
door at tile edge
same angle as 0fsi0t
tile reinowfl
position, seat tile
indentation of
tile hinge am/
into tile bottom
edge of tile hinge
slot. Tile notch in tile hinge am/
must be flfllv seated into tile bottom
of tile slot.
Fully open the dora: If the door will
[]
not flfll) open, the indentation is
not seated correctly in tile bottom
edge ot the slot.
Push tile hinge, locks uI ) aoainst_ tile
[]
front fl'ame of tile oxen cavity to tile
locked position.
Hing
Pushhinge locks up to lock.
N
Hinge arm
.,€
36
Removable Oven Floor
roremovetheo on.oortoro.sier
cleaning:
Remove die ovem) door usi w* die
[]
mstru_ t,o_)s ira) the Lift-OffOvenDoor
sec[iol).
[] (;_:_sp ove_) floor slots o_) each side
mM pull it out,
[] Close tile oven door
[7_ C]eal_ the ove_) floor with warm
soap_, water:
IMPORTANT: ¢iwa?s replace the
removable floor be{ore d_e m_extuse.
Page 37

Stainless Steel Surfaces (onsomemodels)
ge.com(U.S.)
www.GEAppliances.ca(Canada)
Do notuse a steel wool pad; it will scratch
the surface.
To clean tile stainless steel smti_ce,
use warn/sudsy water or a stainless steel
cleaner or polish. Mways wipe tile stwfi_ce
in the direction ot the grain. Follow the
cleaner instructions fi)r cleaning tile
stainless steel sm'ti_ce.
Painted Surfaces
Painted surfi_ces include tile top and
sides _ff tile dora; and tile drawer fl'ont.
Clean these _fl/soap and water or
a \'inegar and water solution.
Ovenvent
,, Tile oxen is xented throu,d/an opening
9 in tile cooktop trader tile grille
Centq_vent_er@ _ .... _ * '
@
Nexer coxer the opening with aluminum
Cooktop foil or any other material. This would
To inquire about i)urchasing stainless
steel appliance cleaner or polish, or to
find tile location of a dealer or Mabe
Parts Store nearest you, please call ore"
toll-free nmnber:
NationalPartsCenter 1.800.626.2002(U.S.)
1.800.661.1616(Canada)
ge.com(U.S.)
www.GEAppliances.ca(Canada)
Do not rise COillillei'cial o_,en cleanels,
cleanino_ i)owde_, steel wool or hm_h
abrasixes on any painted sm'li_ce.
pi'ex ent tile o_,en xent J[l'Olll woi'king
I) roI)erly.
I St@guide
Control Panel
If desired,the touchpadsmaybe turnedoff
beforecieanlbg.
Seethe RangeLock-Outer Control
Lock-Outsecdon.
Clean up splatte_ with a damp cloth.
Storage Drawer Removal
To remove the drawer:
[] Pull tile drawer out tmfil it stops.
[] I,ifl tile front of tile drawer tmtil tile
stops clear tile guides.
[] Remoxe tile (h'awe_:
Ym may also use a glass cleane_:
Remove heavier soil with warn/soapy
water: Do not use abrasives of any kind.
Turnon the touchpads after cleanlbg.
To replace the drawer:
[] Place tile drawer rails on tile guides.
[] Push tile drawer back/mtil it stoi)s.
[] I,ifl tile front of tile drawer and
push back/mfil tile stops clear tile
guides.
[] I,ower tile fl'ont of tile drawer and
push back tmtil it closes.
37
Page 38

Beforeyoucall forservice..°
Troubleshooting -tips
Save time and money/.Review the charts on the following
pages first and you may not need to call for service.
Possible Causes
Burners have yellow or The combustion quality of
yellow-tipped flames bmamr flmnes needs to be
determhmd visually.
ii
What To De
• Use the illustrations below to detemfine ifvour burner
flanles are nomml. If burner flames look like A, call for
service. Nomml burner flames should look like B or C,
depending on tile t3,l)e of gas you use. With I,P gas, some
yellow tipping on OtlteY cones is nOlillal.
A-Yellow flames B-Yellow tips C-Softblueflames
Callfor service onoutercones Normalfor natural
Normalfor LPgas gas
Controlknobs Knob isn't pushed down. * To turn from tile OFFposition, push tile knob in and
will notturn then ttu'n.
Burners do no t light Ravage Lock-Out feature is • _Mlow tile range to cool down and touch and hold tile
activated. RANGELOCK-OUTpad (on some models) tot 3 seconds
until the disi)la_ shows LOCOFF.
Plug on rm_ge is not * Make sm'e electrical I)lug, is I)lugged,, into a lixe, properl)
completely inserted in the grounded outlet.
electrical outlet.
Gas supply not cmmected * See tile Installation Instructions that came with xom"
or tunmd on. range
A fuse h_ your home may be • Rei)lace the filse or reset the circuit breaker:
blown or the circuit breaker
tripped.
Burner parts not replaced • See tile Care and cleaningof the range section.
correctly.
Range Lock-Out or • It LOCONappears in tile display, tile range, control is
ControlLock-Outfeature locked. Turn this feature off to use the ran ,e See tile
is activated RangeLock-Outor Control Lock-Out section.
Ticking sound ofspark Control knob is still * Tm'n tile knob out of tile LifE position to tile desired
igniterpersistsafter in the LITEposition, settin,
• Tm'n tile burner off and relight. If ticking is still
present, call fi)r serxice.
Burner flames very hnproper air to gas ratio. • If range is connected to I,P gas, check all steps
large oryelloW in tile Installation ]nsti uctions that came with
_O/IY Y[In re
Ovenlightdoes Light bulb is loose or defective. • Tighten or rel)lace the bulb.
not Switch operating • Call for set\ice.
light is broken.
Oven will not work Plug on range is not completely • Make sure electrical l)lug, is l)lugged,, into a lixe, properly
hlserted in the electrical outlet, grounded outlet.
A fuse h_your home may be • ]_el)lace the tilse or reset the circuit breakei:
blown or the circuit
breaker tripped.
3_ Oven controls improperly set. • See tile Using the oven section.
Page 39

www.GEAppliances.ca(Canada)
Possible Causes What ToDo
Food does not bake Oven conlrols improperly set. * See the Using the oven section.
orroastproperly
Rack position is incorrect * See the Usingthe oven section.
or the rack is not level.
Incorrect cookware or * See tile Using the oven section.
cookware of hnproper
size being used.
Oven thermostat needs * See tile Adjust the oventhermostat - Doit yourself!
adjustment, sectiou.
Fooddoes not Oven consols improperly set. * Make sure you t(>uch the BROILHI/LOpad.
broilproperly
hnproper rack position * See tile Broiling Guide.
being used.
Cookware not suited * For best results, use a pan designed fi)r broiling.
for broiling.
The probe is plugged into the * Unplug and remove the prr)be from the oven.
outlet in the oven.
ge.com(U.S.)
In some areas the power • Preheat the broil element fin" 10 minutes.
(voltage) may be low.
Set convection
bakingtemperature
automaticallyreduces
by25°F(14°C)
Oven temperature
too hot or too cold
Ovendooris crooked
Storage drawer Rear drawer support is
is crooked on top of the guide rail.
Storagedrawer
won'tclose
The Auto Recipe '_'Conversion
feature is on to automatically
reduce the set regular ba_khlg
temperature by the
recommended 25 °F (14 °C)
for convection baJ_h_g.
Oven thermostat
needs adjustment.
The door is out of position.
Power cord may be
obstructing drawer
in the lower back
of the rmlge.
Rear drawer support is
on top of the guide rail.
• Broil fin" tire longest period of time recommended in
tire Broiling Guide.
• See Auto Recipe ''_ Conversion in the Special Features
section fi)r i/it)re inlk)rulatir)n.
• See the Adjust the oventhermostat- Do it yourself!
section.
• Because the oven dr)r)r is removable, it sometimes
gets out r)f position dm'ing installation. Remove and
replace the oven dr)or. See the Lift-Off OvenDoor
section.
• Reposition the drawer. See tile Storage Drawer
Removalinstmctions in the Care and cleaning of your
range section.
• Repr)sifion the drawer and pr)wer cr)rd. See tile
Storage Drawer Removal instrtlctions ill the Care and
cleaning of your range se('tirm.
• Reposition the drawer. See tile Storage Drawer
Removal instructions in the Care and cleaning of
your range section.
39
Page 40

Beforeyoucall forservice...
Troubleshooting tips
Possible Causes What ToDo
Oven racks are
difficult to slide
Clockand timerdo Plug on range is not completely * Make sure electrical l/lug, is I)lugged,, into a live, l/rol/erly
not work inserted ha the electrical outlet, grounded outlet.
Ovenwill notself-clean Surface burner is on. • Turn all surtilce l)urne_ off.
The shiny, silver-colored racks
(if so equipped) were cleaned
in a self-clean cycle. The gray
porcelaha-coated racks
* Apply a small amount of vegetable (ill to a paper
towel and wipe the edges of the oven racks with
the paper towel. Do not spray with Pare '_ or other
lubricant sprays.
(if so equipped) were
improperly cleaned.
A fuse ha your home * Replace the fl/se or reset the circuit breakel;
may be blown or the
circuit breaker tripped.
Oven controls improperly set. * See the Using the clock and timer section.
The oven temperature is * _Mlow the range to cool and reset the controls.
too high to set a self-clema
operation.
Oven controls improperly set. * See the Using the self-cleaning oven section.
The probe is plugged into • Reinove the l/robe fl'om the oven.
the outlet in the oven.
"Crackling" or This is the sound of the * This is normal.
"popping" sound metal heating and cooling
during both the cooking and
cleaning functions.
Excessive smoking Excessive soil. * Touch the CLEAR/OFFpad. Open tile windows to
during a clean cycle rid tile room of smoke. _'ait until the LOCKED light
goes off. _'il/e till the excess soil and reset the clean
cvcle,
Oven door will not Oven too hot. * Allow tile oven to cool below locking, teIul_erature.
openaftera cleancycle
Oven not clean after a Oven controls not properly set. * See the Using the self-cleaning oven section.
clean cycle
Oven was heavily soiled. • (]leau Up heavy sllillovers before startiug the cleau
cycle. Heavily soiled ovens may need to sellXcleau
again or fi)r a lon,_er_ lleriod of time.
"LOCKED"flashes The self-clema cycle has been • ('Jose the oven door,
in the display selected but the door is not
closed.
"LOCKED"light is The oven door is locked * Touch the CLEAR/OFFpad.Allow the oven to cool.
on when you want because the temperature
to cook inside the oven has not
dropped below the
locking temperature.
4O
Page 41

ge.com(U.S.)
www.GEAppliances.ca(Canada)
Possible Causes What ToDo
"F--anda number You have a function error code. • Touch tile CLEAR/OFFpad. Put tile oven back into
or letter" flash ()peratiou.
in the display If the function code repeats, * Discol]l]ect ;ill power to tile range for ;it least 30
seconds and then reconnect I)OWeL If the hmction
elTOl" code l'el)eats , call fin" Sel'vice.
Controlsignals after You forgot to enter a • Touch the BAKE pad and desired temperatm'e or
entering cooking time bake temperature or the SELF CLEAN LO/STD pad and desired clean time,
or start time cleaning time,
Display goes blank A fuse in your home may • Replace the thse or reset the circuit breaker:
be blown or the circuit
breaker tripped.
The clock is in the • See the Special features of your oven control section.
black-out mode.
Displayflashes Power failure. • Reset the oh)ok,
Unable toget the Oven control pads were • The BROILHI/LOand BAKEpads must be toud/ed ;it
displayto show "SF" not touched properly, the same time and held for 3 seconds.
"Probe" appears in This is reminding you to • Enter a probe temperature.
thedisplay enter a probe temperature
after plugging in the probe.
Power outage, Power outage or surge. • Reset the clock. If the oven was in use, yot! must reset
clock flashes it by touching the CLEAR/OFFpad,setting the clock
and resetting any cooking flmction.
Steam from the vent When using the convection • This is normal.
feature, it is normal to see
steam coming out of the oven
vent. As the number of racks
or amount of food being
cooked increases, the amount
of visible steam will increase.
"Burning" or "oily" This is normal in a new oven • To speed the process, set a self-clean cycle for a
odoremittingfrom and will disappear in time. minimum of 3 hours, See the Using tho self-cleaning
the vent oven section.
Strong odor An odor from the insulation • This is temporaI T,
around the inside of the oven
is normal for the first few times
the oven is used.
Fannoise A cooling fan or a convection • This is normal, The cooling tim will turn off and
fan (depending on the on to cool internal parts. It may run aDer the oven is
function you are using) may turned OFF, The convection tim will cycle on and off
automatically turn on mad off. until the hmction is over or the door is opened,
LOC shows in the The Range Lock-Out feature • Be sure the surfilce burner controls are turned OFE
display is activated. Turn this feature off to use the ran _e See the
RangeLock-Out section, 4l ]
Page 42

m
Notes.
P=
r _
m
x:
m
I
42
Page 43

FOR CONSUMERS IN THE UNITED STATES
GE Service Protection Plus '_'
GE, a i]ame recog_]_zed _or]d_ide for qt_a]it),' aild depei_dabi_it}, offers you
Service Protectioli Phls '_'--compre}lellsi_e protectioll (maH }ore appliallces--
No Matter What Brand!
We Ti CoverAny Appliance°
Benefits Include:
* Backed by GE
* All brands covered
* Unlimited service calls
* All parts and labor costs included
, No out-ofopocket expenses
* No hidden deductibles
* One 800 number to call
Y<a_ will be completely satisfied with ore" seYcice p_'otectiom_ o_" yol_ may _'eql_est _r_" m<mey back
<m the remaim_im_g vah_e of )ore" comm'act. No ql_estiom_s asked. It's that simple.
Protect yore" refrigexatox; dishwasher, washer am] dryex; ram_ge, TV, VCR am] milch more--aoy brand!
P]las there's m_o extra cb a rge {k)r em e rg el_ cy s ervi ce a m_d ]ow m tmth ]y fi m_a N_ci m_g is avail ab]e. Ev el_ icem a ker
coverage am] _k)od spoilage protectiol_ is o_tered. \'o_ ca_ rest eas}, ki_owi_g that all vom" walk,able
ho_seho]d products are protected aga]_st expe_sive repairs.
Anywhere° Anvtimo.
:\/l brands coxe*>d, lip m 20 }_a*s *_ld, in dl_ cond*]emal [.S.
Pleaseplacein envelopeand mail to:
General Electric Compan_
Warranty Registration Department
P.O. Box 3215(}
Louisville, KY 4(}232-215(}
43
Page 44

FOR CONSUMERS IN THE UNITED STATES
Consumer Product Ownership Registration
Deal Customer:
Thank you for purchasing our product and thank you for placing your confidence in us.
_;e are proud to haxe you as a customer!
Follow these three steps to protect your new appliance investment:
Complete and mail
your Consumer
Product Ownership
RegJstra|ion today:
IIavc the peace ot
mind of knowing we
Call COlllaCt VOll ill
the unlikel_ event of' a
satk*tvmodification.
After mailing the
registration below,
store this dOClllnent
in a saf;u place. It
contains information
vou will need should
you require service.
Our service number is
800.GE.CARES
(80(t.432.2737).
Model Number Serial Number
I I
Important: If you did not get a registration card with your
product, detach and return the form below to
ensure that your product is registered, or register
online at ge.com.
Consumer Product Ownership Reg
Model Number Serial Number
Re_l(] VOtlr ()wller'g
Mamml careftdly.
It will help you
operate your new
appliance properly.
I I
I
_Cut her(
Mr. his. Mrs. Miss
FiletI I L'stl I
Nam< I I I I I I I I I Nam< I I I I I I I I I I I I
Stre<t I I
Address I I I I I I I I I I I I I I I I I I I I I I I I
Al)l. #I , , , , , , , I f_:mailA,l_lr,_'
CityI I I
Dam Placed
hi Use Ill
._lonth
I I I I I I I I I I I I S,a,,,I
f)a,' I ] ] xt,,ar I I I Nlllll )(,l" I I
GE Consumer & Industrial
Appliances
General Electric Cornpang
Louisville, KY 40225
ge.com
Pholle
* Please provide your eqnail addrc,,,, to receive, xia e-mail, discounts, special ot'f_1-_and other important
communications from GE Appliances (GK\).
Check here if vou do not want to receive communicaIions from (;EA's carcfidly selected partnel.',.
FAILL RE TO COMPI.ETE AND RET[ rRN Tt tlS CM{f) DOES NOT DIMINfSt t h_)l JR
W.\P,I_ \NTY RIGt fTS.
For more int) mnation about (;l_\'s privacy and data usage poll(?; go to ge.com and click on
'Privacy Poli_y" or call 800.626.2224.
I-I,, H,,, I
Zip
44
Page 45

Please place in envelope and mail to:
Veuillez mettre dans une enveloppe et envoyez _ :
OWNERSHIPREGiSTRATiON
PoO.BOXt780
MIS$1$$AUGA,ONTARIO
L4Y4G1
IJ:ORCANADIANCONSUMERSONLY)
45
Page 46

For Canadian
Customers
Pour ;es
Consommateurs
Canadiens
P;easeregisl_ryour product to enab;eusto corrb3ctyou
in theremote eventa safetynolJceisissuedforthis product
z
andto a;;owfor efficientcommunication underthe terms
<_
ofyour warranty, shouNthe needarise.
H
REG;STERON-LINE: _ww.geapp;iaacesoca MA;LTO:
0::
ENREGISTREMENTSURINTERNET_,:_e;eetremenag#_oca POSER_,:
[] MR./M C! MRS./MME.=FiRSTNAME/PRENOM =LASTNAME/NOM
z
El MiSS/MLLE.[3MS. E i
Q::
STREETNO/N°RUE _lSTREETNAME/RUE [AFq:.NO/APR/RR#
_3C
c_
G_FY/\4LLE _ _POSTALCODE/POSTAL
z
<_
uJ
z
AREACODE/ ND.REG.ITELEPHONE _lE@IA_L
.J
!
DIDYOUPURCHASEA SER_,ICECONTRACTFORTHISAPPLIANCE? YES/OUi[] iFYES/ SiOUi:EXPiRATiON
I==
AVEZ:VOUSACHETEUNCONTRATDESERVICEPOURC_APRAREiL? NO/NON[]
(D
z
NAMEOFSELLINGDEALER/NOMDUMARCHAND i
2
INSTAUJ_TIONDATF/DATED'INSTALEATION[ CORRESPONDENCE[] ENGLISH
L)
YiA M D/J I
[] ido notwishtoreceiveanypromotionaioffersregardingthisproducb
E:] Jened&ire pasrecevoird'offrespromotionneiiesconcernan[ceprc4uit
• 1- ....... 7- ....
• Y/A M DJ
I J
I I
I I
1 [PRO'vINCE _. ..... z__
I I
I CORRESPONDANCErq FPC,,N_AiS SERiAL/SERiE
I
_L
Veui;ezenregis_rvcCeproduitafindenousperm_ de
communiqueravecvoussijamaisunavisdes6cudt_concemant
ceproduit_ait_misetdecommuniquerfacibmentavecwus en
vertudev_e garanlJe,sib besoins'enfa_tsonar.
P.O.BOX1788,M;SS;SSAUGA
ONTAR;O,[4Y 4G1
L :
MODEL/MODELE
I
J
46
Page 47

ge.com(U.S.)
Accessories. www.OEAppliances.ca (Canada)
Looking For Something More?
Youcan find these accessories and many more at ge.com (U.S.) or www.GEAppfiances.ca
(Canada), or call 800.626.2002 (U.S.) or 800.661.1616(Canada) (during normal business
hours). Have your model number ready.
Grates
Light Bulbs
Surface Burner Heads & Caps
o,/,_ ..........zc ........._,, o
,J,i _ "_zc _ ' ,,,,
BroHerPan
Knobs
47
Page 48

GEGasRange Warranty.(Forc.stomersintheUnitedStates)
All warranty service provided by our Factory Service Centers,
or an authorized Customer Care®technician. Toschedule service,
on-line, 24 hours a day, vis# us at ge.com, or carl 800.GE.CARES
(800.432.2737).Please have serial number and model number
available when calling for service.
GE Will Replace:
Anypartof the range which fifils due to a defect in materials or workmanship. During this
Fromthedateof the
originalpurchase
Service trips to your home to teach you how to use
the product.
Improper h_staJlation, delivery or maintenance.
FaJhtre of the product if it is abused, misused,
or used for other thm_ the intended purpose or
used commercially.
Replacement of house fuses or resetting of circuit
breakers.
limited one-year warranty, GE will also provide, free of charge, all labor and in-home service to
replace the defecti\'e part,
Staple your receipt here.
Proof of the original
purchase date is needed to
obtain service under the
warrant_
Dmnage to the product caused by accident, fire, floods
or acts of God.
Incidental or consequentiaJ dmnage caused by possible
defects with this applimlce.
Dmnage caused after delivery.
Product not accessible to provide required service.
EXCLUSIONOFIMPLIED WARRANTIES--Your sole and exclusive remedyis product repak as provided iu this Limited
Warranty.Any implied warranties, includiug the implied warranties of merchantability orfitness fora particular purpose,
are limited to one year or the shortestperiod allowed by law.
This warranty is extended to the original purchaser and any succeeding owner for products purchased for
home use within the USA. If the product is located in an area where service by a GEAuthorized Servicer is not
available, you maybe responsible for a trip charge or you maybe required to bring the product to an Authorized GE
Service location for service. In Alaska, the warranty excludes the cost of shipping or service calls to your home.
Some states do not allow the exclusion or limitation of incidental or consequential damages. This warranty
gives you specific legal rights, and you may also have other rights which vary from state to state. To know what
your legal rights are, consult your local or state consumer affairs office or your state's Attorney General.
Warrantor: General Electric Company.Louisville,KY 40225
4P_
Page 49

GEGasRange Warranty. (Forc.stomersinCanada)
Aft warranty service provided by our Factory Service Centres
or an authorized Customer Care®technician. For service,
carl 1.800.361.3400.Please have serial number and model number
available when calling for service.
Mabe Will Replace:
One Year
Fromthectateof the
originalpurchase
Service trips to your home to teach you how to use
the product.
Improper installation, delivery or maJntenauce.
Failure of the product if it is abused, misused, or
used for other thaa_ the intended purpose or used
commercially.
Replacement of house fuses or resetting of circuit
breakers.
Anypattot the range which tifils due to a deii_ct in materials or workmanshii. ) During, this
limited one-year warranty, Mabe will also provide, free ofcharge,all labor and in-home
serxk-e to replace the defectixe part.
Staple your receipt here.
Proof of the original
purchase date is needed to
obtain service under the
warrant_
Dmnage to the product caused by accident, fire, floods
or acts of God.
h_ddentaJ or consequential dmnage caused by possible
defects with this appliance.
Dmnage caused after delivery.
Product not accessible to provide required service.
Warranty.Any implied warrauties, iucludiug the implied warranties ofmerchantahilily or fitness for a particular purpose,
EXCLUSIONOFIMPLIED WARRANTIES--Your sole aud exclusive remedyis productrepa# as provided hi this Limited
are limited to oueyear or theshortest period allowed bylaw.
I _A.ARRANTOR IS NOT RESPONSIBLE FOR CONSE(_UENTIAI_ DAMAGES. I
I 'Warrantor: MABE CANADA IN(:. I
49
Page 50

m
Notes.
P=
r _
m
x:
m
I
5O
Page 51

www. e]ectromenegersge, ca
Instructions de s&_ritd ..... :s2-:s7
r_
©
bJo
Mode d' emploi
Auto-nettoyage ............ 77, 78
gatterie de cuisi]]e ............ 59
grfllems de surface ....... 58, 59
Conve×ion ................ 70-74
Cuisiner et r6tir
avec la minmerie ............. 68
Cuisiner ou r6tir . ............. 62
Fermentation ................ 7:5
Fonction du Sabbath ........ 82-83
Fonctiol_s sp_ciales ......... 79-8l
Fore . .................... 60-83
Griller, guide pour griller . ..... 6:5
Horloge et mim_terie ......... 1_1_
I,ockout (verrouillage)
des contr61es ................. 1_7
Verrouillage de la cuisi_]i&re .... 67
R_!chaufi%r . .................. 75
Sonde ....................... 69
Thermostat .................. 76
Entretien et nettoyage
Ampoules .................... 86
Assemblage du brfllem . ....... 84
gore(ms .................... 85
Smf_ce de ctdss(m ............ 85
Evem ....................... 88
{ GS _08
£ (,_5 >xi)
Grilles du brfllem
et grille centrale .............. 85
Grilles dt_ fbm . .............. 86
Pam]eau de comr61e .......... 88
Plancher de Ibm . ............ 88
Porte ....................... 87
Porte du f}am retirable ........ 87
R,d)an d'emballage ............ 84
Smfi_ces d'acier ino×vdable .... 88
Smfilce de ctfiss(m ......... 87, 88
Smfaces peintes .............. 85
Tiroir de r;mgemem .......... 88
Consei[s de d@annage .... 89-92
Aceessoires .................... {)3
Soutien & [a elientble
Garantie .................... 95
S(mtie_] 5 la cliem_le .......... 96
Ecrivez ici los num&os de
modMe et de serie :
N ° de modMe
N ° de serie
Ces m_IH]_ (_l'os se [l"()l_vem_ [ s{11"
]'_tiquette derriere la porte
d'ol_vertm'e (]!_ fl>m" daN_s ]e
coim_ h_[itriem" gauche (b_
cbfissis de c_]si_ibre.
Page 52

f F
INFORMATIONDESECURITE/MPORTANT£
USEZTOUTE$LE$INSTRUCTIONSAVANTL'UTIUSATION
t
B
DISPOSITIFANTIBASCULEMENT
TOUTE$£ES CUI$/N/tRESPEUVENT
BA$CULER
DESBLE$$URESPOURRAIENTENRESULTER
INSTALLEZLE$D/$PO$ITIF$
ANTIBASCULEMENTEMBALLES
AVECLACUI$/NIERE
REPORTEZ-VOUSAUXINSTRUCTION$
B'INSTALLATION
AAVERTI$$EMENT :siVi,_fo,-ma.on_on_on,.o
dans ces instructions n_est pas suivie exactement, il pourrak
y avoiv un incendie ou une explosion causant des dommages
la proprietY, des blessures personneUes ou la mort°
-- Ne rangez pas et n'utilisez pas d'essence ou d'autres vapeurs
et liquides inflammables pros de cet appareil _lectrom_nager
OU autFe.
= CEQU'/LFAUTFAIRE$1VOU$OETECTEZ
UNEODEURDEGAZ
N'essayez ]?as d_allumer un quelconque appareil
_lectrom_nager.
Ne touchez aucun commutateur _lectrique; n_utilisez Das
le t61_phone de votre bfitiment.
Appelez imm_diatement votre fournisseur de gaz du
t_l_phone d_un voisin. Suivez les instructions du
fournisseur de gaz.
Si vous ne pouvez pas rejoindre votre fournisseur de gaz_
appelez le service d_incendie.
-- L'installation et Fentretien doivent _tre effectu_s par un
installateur qualifi_ une agence de service ou le fournisseur
de gaz.
52
Page 53

w_,electromenagersge.ca
Pour votre s_curit_, vous devez suivre I?nformation contenue dans ce manue! pour r_duire les
risques d?ncendie et d'explosion, de choc blectrique ou pour bviter tout dommage matbrie_ des
blessures ou /a mort.
DISPOSITIFANTIBASCULEMENT
Toutes les cuisinieres peuvent bascu/er et causer des b/essures,
Pour _viter tout bascu/ement accidentel de/a cuisinibre, fixez4a au mur ou au plancher en insta!lant
/e dispositif antibascu/ement foumL
Si /e dispositif foumi avec /a cuisini&e ne convient pas pour cette app!ication, utilisez le dispositif
ant,_bascu!ementuniverse! WB2)(7909.
iiiiiiiiiiiiHiiiiiiiii
Pour v_rifier si /e dispositif est fiTstaflbet engag6 correctement, retirez /e tiroir de rangement et
inspectez /e pied de niveflement arribre. Assurezwous qu'il soit bien instaflb dans la fente.
Si _ms iediez la ctdsini#Ie dt_ muI pouI quelque mis<m que ce soit, assuiez-_ms que
le disposifif soit engag_ co_[ectemeI_t loFsque _ms la ieplacez au muI- S'il I_e Fest pas, il
pouI[ait y ax_ii tm iisque que la cuisini&e bascule et elle pouHait alois _ms blessei ou
blesse_ m_ e_f;tl_t qui est assis, debout ou apptw_ suI tree poite omwite.
Vet il]ez xous iepoitei a 1 i _fbH_ _tkm st _ le disposidf antibasculeme_t da_s ce ma_mel.
Si_o_, la (uisi_i&e pou_nait bascule_ et ca_se_ des bless_es.
AVISDESE-CUR/TE-IMPORTANT
La /oi de/a Ca/ifomie "SafeDrin/dng Water and Toxic Enforcement" ex_geque /e Gouvemeur de
/a Ca/ifomie pub/ie une /iste des substances qui, de !'avis de/'Etat, peuvent causer des anomalies
cong_nM/es ou autres pmb/Omes de reproduction et exige aussi des entreprises qu"el/es avisent les
clients des dangers associbs _ /'exposition possible _ de te!/es substances.
Les apparei/s au gaz peuvent causer une exposition mineure _ quatre de ces substances, soit
/e benzgne, /e monoxyde de carbone, /e formaldehyde et /a suie, rbsu/tant principa/ement d'une
combustion incomplbte des carburants de PLou du gaz nature/. Des brO/eurs ajust_s correctement
(une f/amme b/eue p/utSt quejaune) rbduiront /a combustion incomp/bte. L'exposition _ ces
substances peut _tre r_duite par une abration grgce _une fen_tre ouverte ou par/'utffisation
d'un venti/ateur ou d'une hotte.
L'iso/ant de fibre de verre des fours autonettoyants _met une trbs petite quanti_ de monoxyde de
carbone durant /e cycle de nettoyage. L'exposition peut Otrer_duite en a_rant grOce _ une fen_tre
ouverte ou par I'utifisation d'un ventilateur ou d'une hotte.
53
Page 54

54
I
PIlE-CAUTIONSDESECURITE
Lorsque vous uti/isez un apparei/ 6/ectrique, vous devez toujours suivre des pr6cautions de base,
y compris ce quisuit:
Uti]isez cet apparei] seuiei-p, ent pore
Fusage auque] il est desdn_ sekm ce
manuel du propri&taire.
Assmez-_ms que _me appareil soit bien
install& et mis i:l la terre par un technicie_
qualifi6, confbrm6_ment aux instiucfio_s
d'installation fbm_ies.
A_ant d ef[ectt eI tout service, coupez
le comant fi la cuisink)re darts le tableau
de distribution rc4sidentiel en retirant le
fusible ou en coupant le disionctem-
{{ Demandez 5 1installatem de "<ms momrer
1empla< eme _t du dis'o _ctem ou dr/
fusible. Marquezqe pour a_oir tree
rdfFrence facile.
Ne laissez pas les enisnts seuls--|es enflmts
ne doixwnt pas &tre laiss6s seuls et sans
surveillance darts un endroit oi_ un
appaieil 61ectrom6_nager est utilis6. On ne
doitjamais leur permeme de s'asseoir ou
de se tenir debout sur quelque pattie que
ce soit de l'appareil.
Demandez fi l'installatem de \_ms montrer
l'emplacement du robinet d'mr&t du gaz
de la cuisini&> et commem le f>rmer au
][)eSOiIL
Faites installer x_me cuisini_re et fidtesqa
mettre 5 h terre coHectement par un
installatem qualifi6, conff_rm6_ment aux
instructions d'installation. Tout _!iustemem
et emretien doi_wnt &tre eflbctu6s
seulement par des installatems de
cuisini&res au gaz ou des techniciel_s
de service qualifi6s.
Placez la cuisini_re darts tm endroit fi
l'6cart de la circulation darts la cuisine
et fl l'6cart des comants d'air pour 6viter
d'm_ir une mauvaise ci_vulation (Fair
Assmez-_ms que tout le mat6riel
d'emballag_ soit retir6 de la cuisinic)re
avant de l'utiliser pour &'iter tout incendie
ou dommage caus6 par la fum6e si le
mat6riel d'emballage s'enflamme.
Ne laissez pas les enfimts seuls ou sans
supervision lorsqu'une cuisini_.re est
chaude ou allum_e. Ils pomraient
&tre gravemem brflk_s.
N'essayez pas de r6parer ou de remplacer
m_e quelconque pi&ce de _me cuisini&e
5 moins que cela ne soit recommand6_
spc4cifiquement darts ce manuel. Tout
autre entreden dolt &.tre eff>ctu6 par
un technicien qualifi#.
Assmez-_ms que _me cuisini_.re soit
_-_ust6e coHectement par un technicien
de service qualifi6 ou par un installatem
pour le gpe de gaz (ham-tel ou PL) utilis6_
Votre cuisini&re peut {_tre comwrtie pore
l'un ou l'atm> type de gaz. Reportez-_ms
aux instructions d'installation embalk?es
a\wc la cuisini&i>.
granchez _me cuisini&e seulement
darts une prise murale de 120 _dts avec
raise i:_la terre. Ne redrez pas la broche de
raise 5 la terre ronde de la fiche. Si x_ms
l?'&tes pas certain de la raise 5 la terre du
svst&_e 6_lectrique r6sidentiel, \_ms &tes
responsable et darts Fobligafion de fidre
remplacer la prise qui n'est pas raise fi la
tene par une prise fi trois broches raise fi la
teIl> conform6ment au Code national de
F61ectricit6. N'ufilisez pas de rallonge mwc
cet appareil.
Cesajustements doivent #tre effectu6s
par un technicien de service qua/ifib,
conferm6ment aux instructions du
fabricant et _ tous ies codes et exigences
de i'autorit# responsable. Le non respect
de ces instructions peut mener Ode graves
blessures ou _ des dommages mat6rie/s.
L'agence qua/ifi6e effectuant ce travail
assume la responsabi/it# de la conversbn.
Oardez les filtres de graisse et la hotte
prop_>s pour maintenir une b(mne
ventilation et 6xiter les fbux de graisse.
iiiiiiiiiiii_iii
Enseignez aux enf, mts fine pasjouer axwc
les commandes ou axwc route at/tre pi&ce
de la cuisini&e.
iiiiiiiiiiii_iii
Gardez toujoups les serxiettes, les linges
;_xaisselle, les poiga_6es et autre linge de
maison i'_distance de _otre (uisini&e.
Page 55

" DESECUfllTE
www,electromenagersge.ca
Gardez toqioms les uste,_silesdebois et de
plasfique et lesalimems e_ bo_te_t_distm_cede
votre cmsmmre.
Oardez tot{iours ]esre@teme_ts mmaux
combustibles, les fideaux ou les temmes _
distm_cede voue cuisbfi&e.
Ne _ettovez pas la cuisi_fi_'re avec des ]iquides
AprOs m_e ufilisatkm prokmg_e de ]a odsfidt_re,
le plancher peut deve_drtrOsd)aud et de
_ombreux rev&emems de plancl)er pom)aie_t
_e pas r&ister _:_ce bpe d'ud]isath:m. N'h_sta]]ez
jamais de cuish/ib_e sin des car_eaux de _in;]e
ou du ]ino]&m/qui pomrait _/e[)as r&ister'
ace bpe (FufiIisafi<m. Ne ]'h/staIIezjamais
dfiectement sur ]e tapis de cuisi,/e.
} Evitez d'_gmdg,/er ]a sm[i_ce de cuiss<m vitr_e
avec des insmlmems tnmc])ams ou a\'ec des
Ne laissez personne gfimpeL se tenh debout
ou se suspendre sin ]a porte du [bm, [e fir<fir
de nmgemem ou ]a smt:i:Jcede cuiss<m. Cda
pourmit endommager ]a cuisfifi&re et m&)/e ]a
fi]ire bascu]el; provoquai/t de grievesb]essmes.
pourraientatt_Perbs aqfantsnedoiventfoasOtto
rangesdartsbs an_oiressu-dessusdeb cuisinibm
ousurledosseretfl'unecui£dbre_/es enfantsqd
ggmpentsur/aculslnlbrepourattel?dm/esarticles
pourraient_tregravementb/esMs.
"'S
t td_:ez JAMAIS cet appareil pour
rg_chauffbr ou chaufler la pic)ce. Ceci
pouHait mener _ un empoisom_emem au
mo_oxvde de cad)one et une sin( harder>
de la surfi<e de ( uiss(m ou du [bur
Pour votre s_cmit_, _/'ufilisez jamais voue
appareil _lecuom&/ager [)our r&l)auffer et
cl)auffer la piece.
}[ De ]arges &gradgmues ou d) ocs sin ]es po,les
de verre peuvem casser ou fidre &laer la ;i_re.
} Ne _/etto) ez [)as ]a cuisbd_re pea/dam qu'e]]e
[}mctkm _/e.
Ne portezjamais de v6teme_/ts amp]es ou
tombm/ts ]o_sque vous ufi]isez l'apparefl.
Atte_/don e_/vous _d_mt pour atteindre ]es
arddes nmg& darts ]es am/ohes au-dessus
de ]a cuisbfibre. Un dssu b/flammable pourrak
s'e//flammer au comac_ des flammes ou des
sm%ces c])audes du four et pourmit p_ovoque_
Ne i;mgez [)as de mat&iaux i_/fiammab]es dm/s
]e [bin; ]e droir de m_/gemem de ]a cuisi_/ibre
ou prbs d'm/e smtsce de cuiss<m.
Ne ivmgez [)as e__/'ud]isez pas de mat&iaux
combustibles, d'esse_/ce ou d'autres vapems
et ]iquides inflammables prbs de cet apparei]
5]ectrom&/ager _/id'auom autre.
Ne laissez pas ]a g_vdssede cuiss<m ou autres
matib_es h/flammables s'accumu]er sm ou prbs
de ]a cuish/ibre.
N'ud]isez [)as d'eau sin ]es feux de gmisse.
Ne saisissezjamais role casserole e_/flamme.
Eteignez les commm/des. Eteig_/ez un feu sm
m/br0]em e_/sm_i_ce en couvnmt emibreme_/t
]a casserole avec un couve_de bier/:[iust_, role
plaque a biscuit ou un plateau plat. Ud]isez m_
exd_/cteur d'i_/ce_/die a mousse ou role poudre
chimiq ue tom usage.
I;_ gmisse el/fiammes _ Fext_Jem d'une
casserole s'&eint en la couvmm de bicarb¢mate
de sodium, ou, si possible en uti]isam un
exd_/ctem d'ince_/die _ mousse ou fi poudre
d)imique tout usage.
Les flammes darts ]e if>m peuvem &re
&eintes emi_rement e_/[era/am la porte du
fbm et e_/fern/ant ]a commas/de ou el/ udlisant
m/exti_/ctem" d'h/ce_/die _ mousse ou fi poudre
chimique tout usage.
Iaissez ]es gdHes de b_0[eur et autres smfi_ces
_efmidir avant de ]es touc])e_ ou de ]es ]aisse_ _:_
m/e_/droit ot'_]es e_ffimts peru e_/t ]es atteh/dre.
Ne Noquezjamais les &eros (ouvermres d'ah)
de la cuisfifi&e. Ils ofhent role e_m_e et une
sorde d'ah _/&essahes pour que la cuishdbre
fimcdom/e correctement avec la bom/e
combustkm. Les ouvelmres d'air se trouvei/t
a Farfibre de la sin-face de cuisson, davis le
1)aut et le [)as de la po_le du fbm et au bas
de la cuisfifi&e sous [e firoir de nmgement
ou ]e pam/eau coup de pied.
Ne soulevez [)as la sm-fitce de cuiss(m. Soulever
]a sm fi_cede cuiss<m peu_ e_/dommage_ ]a
cuisinibre ou causer m/mam'ais
fbl/cfiolmeme_/t.
55
Page 56

l
BROLEURSDESURFACE
Utilisezla bonnetail& de casseroie--_vitez les casserolesinstablesou quibasculent facilement.Choisissez
unebattefiede cuisine_ fond plat assezlargepour couvrirlesgrii/esdu brOleurPour _vfterlesd6versements,
assurez-vousque/acasserolesoit assezgrandepour biencontenirles ailments.Ceciferagagnerdu temps
denettoyageet _vfterales accumulationsdangereusesd'a/imentspuisqueles _c/aboussuresimportantes
oulesfl_versementsiaiss_ssurla cuisinibrepeuvents'enflammerUtilisezdescasserolesauxpoign_es
faciles_ saisirqui restentfra_ches.
56
[Jti]isezto@_urs la position] UTEen allumam
les b_01eurs supe_rieurset assurez-xous q,le les
brfileurs soient allum_s.
Ne laissezjamais les b, filems de surfi,ce sans
supervision 5 des r_glages de temp_rattn'e _lev_Xe.
[_s de_bordements par bouillom]ement peuven t
ptwvoqt_er de la fum_e et les d_versements
g_'aisseuxpeuvem s'enflamme_:
Aiustez la millede la flamme du brfilem sup_riem
pour qu'e]le ne d@asse pas le bord de la
casserole. {_Jneflamme excessive est dangereuse.
Utilisez seu]ement des poig_-_e_esde cuisb]e
s_ches les poign_es hum]des sur les sm'fi_ces
cBaudes pemeat provoquer des br(ilures de
_q)eur. Ne laissez pas les po]g_-i_esde cuisine pros
de flammes m_es]orsque _ous ,_oulexezla
casserole. N'utilisez pas de setMetm t]i auu>
chifIbn ou tissu @ais pour remplacer role poigl]_e
de cuisine.
[x)rsqtle xot_s uti]isez une casserole de xerre,
assmezoxous qu'elle soit con(:ue pore le dessus de
llt cuisinibre.
Pour r_duirc la possibilitd de brS1m'es,
l'inflammatiot] de mat&iaux i_]flammables
et les d_versemems, tournez les poign_es des
casseroles vers le cdt_ ou vers l'arri&_v de la
cuisini&'e sal_s_>couvrir les brflleurs ad,iacems.
Surveillez attent]vement ]es aliments fiits 5 un
rg'glage de flammes _]evOes.
Faims to@)urs chauftcr la graisse lenmment et
surveilleMa mndis qu'elle cBaufIc.
Ne laissez auctm article sur la stiff,tee de cuisson.
][,'air chaud de l'_veat pourrait erfflammer les
articles inflammables et augmentera lap] ession
darts des conmnal]ts fbrm&sce qui pomTait les
fhire _clater.
Sivous util]sez ensemble des huiles ou des graisses
pour la fi'ittwe,brasseMes mant de r_Xchauflcrou
mndis que les graisses fi)ndent lentement.
[Jtilisez tm thermom_tre 5 fiittuv si possible peru
&'iter toum stHchatlf}_'de graisse au<lela du point
de fucn_e.
Ne fititespi_-,fbnctionner le blfilem sans que
routes les places dt_b, filem soiem en place.
Utilisez le inoins possible de graisse pour
une fiitm> efl]c_mepeu profonde ou 5 g_wnde
fi'itut>. Trop *>mplir la casse_ole de g_aisse peut
pro_quer des d6versemems lors de l'@)ut
d'alimems.
Ne faites,jamais flamber d'aliments sin la surface
de cuisson. Si u)us faites flamber des aliments sous
la hotte, mettez e_ marche le ve_ltilatetlt'.
N'utilisez pas de woksin"la surfhce de cuisson
si le wok atm anneau rend de in,m] plac_ sin
la gTilledt_ br(ileur pore supporter le wok. (let
ac_neatl agJt comme pibge 5 chaleur ce qui
potnTait endomm_ger llt grille et lltt_'te du
br(fleur. ('_elapourrait aussi pro_)quer tm mam_t]s
fol]ctiorlnement du brfiletm Cela pomTait aussi
crier un niveau de monox}de de carbone au-
dessus des norines perm]ses acmellemem,
me_lant doric ;_tin danger pour la sant_.
I.cs Nimems 5 £rire doivent &tre aussi sees qtle
possible. 1_ giw'e sur les alimems sut'gel_s otl
l'lmmidit_ sin"les idiments frais peuvem crier des
bu!les de graisse qui peuvent reenter sur les cdt_s
des casseroles.
N'essa}ez,jama]s de d@]acer une casserole
de graisse chaude, tout particulk)rement tlne
fiiteuse. Atmndez que la graisse refi'oidisse.
Ne laissez pas d'articles de p]astique sur la slufitce
de cuisson-- ilspeuvent fondre s'ils sont trop pros
de l'&ent,
(;ardez tousles plastiques loll] des brfileurs de
stufitce.
Pour _'viter la possibilit_ d'une br0hne, so?ez
tot!}otlrs certain que les commandes de tous
les briilems sont ec_position OFFNRRET)etque
toutes les grilles sot]t refioidies a_ant d'essa}er
de les rotifer;
Sila cuisini_> se trotlve pros d'tme fe_]_tre, ne
susper_dez pas de longs rideaux qui pourraient
toucher les br(ilems de surfitces et crtier tm
danger d'incendie.
Sivous de_tecteztree odeur de gaz, coupez le g_tz
5 lltcuisinibre et appelez tm mchnicien qua]iriS.
N'utilisez,jm_mis m_eflmm_e hue pour trouver
tree fhite.
StH'}itCea\ a_-lt de rotifer les c_sseroles.
Pour annulet le verrouillag'e de la cuisini&'e,
asstn'ez-_us que les con ngles de la sjwfhce de
ctfisson soiel3ten position OFFNRR£D (',ela
emp_chera tree circulation de gaz quand vous
mettrez en marcBe la cuish3i_re.
Page 57

www, electromenagersffe.ca
FAITESBIENCUIREIA VIANOEETIA VOLAIIIE.,
Fa/tesbbneulke/avbndeet/avob//b--b vbndedo/tavol?unetemperatureINTERNEde7I°C(IGO°F),et/avolailbunetemperature
INTERNEde82°C(I80° F,tPreparerb nourr/ture_eestemperaturesprotggenormabmentcontTebsmabd/esa/l?nentalkes.
t
B
FOUfl
Lorsquevousouvrezlaporte dufour,restez_ 1"6cartdeta cuisini&e.Defair chaudoude ta vapeurs'_chappant
peutprovoquerdes brEfluresaux mains,auvisageegouauxyeux:
Ne chaufiez pas ]es co_tenams d'alimen_s Ne laissez pas de produits e_ papie_, uste_si]es
de cuiss<m ou aliments da_s ]e fbur knsqu'i]
(;ardez l'£'ve]l-J[dH J[OHYexempt de route
ol)stmctio_.
) Ga_dez ]e fore ]ibre de route accumulad<m
de graisse.
P]acez ]a giJHe du fbur5 la positkm voulue
}[ E*_udlisant les sacs de cuisso*_ ou de r6dssage
da,_s le fore; suh'ez los dhecdves du fi_b_icam.
So, dr la giillejusqu'au ve_rou de butte est
du fbm:
[[ N'udlisez pas le fbur pour s_cl) er lesjom_aux.
S k surcl)aufiem, ils peuvem s'enflamme,:
[ N'udlisez pas le fbur comme espace de
m_gemem. Les ardcles _m_g& da,_s m_four
ii, AVERTISSEMENT:
JAMAISaucm_e[e_te, trou ou passageda_s le
bas du four et _e recouvrez [)as complbtemem
la glJlle d'm_ mat&Jau comme le papier
alumi_dum. Ced bloq uerait le d_bit d'air da_s
]e [bur et [)(nurait caHser [m empois(mnement
au monox)de de carl>one. I,es doublures
de papier a]umini um pournfien t aussi
empfiscmner ]a cha]eu_; me_/a_/t fi m/
N' utilisez pas de papier a]umi_ium pour com'_3r
]e fired du fore: U_e mam'aise i_staHadcm de
[[ _smez-vous que m_e lbcheflJte soit
cor_ectement e_ place pour r&luhe la
possibilit_ d'i_ce_dies de gndsse.
Si vous avez m) feu de graisse da_s m_e
]bchefiite, appuvez smIa touche CLEAR/OFF
(a_t_ubtio_/afr_t)et gardez ]a porte du IOta
fe_)__e p our co_ te_dr l'i_ ce_ diej usq u'_ ce
qu'i] s'&eig_e.
FOURAUTONETTOYANT
N'uti/isezpasdenettoyantdefour,I/nefautjamaisutitiserdenettoyantdefourcommercialniderevgtementprotecteurde
fioubturedefourdequelquetypequecesoitautourfi'unequetconquesectiondufour.Lesr_sidusdenettoyantsdefour
enrlommagerontI'int_fieurdufour!orsd'uncyclefi'autonettoyage,
Ne nettoyez pas le.ioint de porte. I.c.ioit_t de
porte est essei_tielau maintien de l'&anch_it&
l1ne fm_tpas fi'otm,; ni endommagc,; ni d@lacer
lejoint.
Ax'a_t l'auu:mettoyage, rethez los gxJlles du [bur
b_JHames de couleur a_gent_e (sur ce_mins
modbles) et tousles uste_siles.
Vo_s pomez nettoye_ darts le four pendant ]e c)cle
d'auu_ _ett_vag_ los g_illesde fbur r_couverms de
porcelaine grise (sur cermins mod&les).
Assurez-vous d'es_mer tout d&vrsement excessif
a_tnt de lancer l'mitonetto) age.
S'il ) a d<!f_dllanceet! mode d'autonett_}_tg_,
_mignez le fbur et coupez le courant. FaimMe
r@arer par un technicien qualifi&
Nettv_}ezseulement les pi&cesindiqu_es darts ce
malmel du propri&ahc
LISEZATTENTIVEMENTETCOIVFORMEZ-VOUSACESIfVFORMATIONSDESECURIT L.
gONSERVEZg,E$INST Ug,TION$ 7
Page 58

Utitisationdesbt leum de surface au gaz.
Dans ce manuel, les foncfions et I'apparence pourraient diffbrer de votre modble.
//
!i _iil_}(_i!_!_!_!_j!__iii_
Enfoncez le bouton do contr6le et
tournez-fe _/a position _LITE _.
ii Moyen Petit
Grand Extra grand
o_F
LO
%
FRONT
Brl)leur extra grand uniquoment
Avant d'aHumer un fltgdeur au gaz
Assm'ez-vt _l_sq ue tol aes ]es grill es
de ]a cl_isim_i&re soie_t em_ place _r_m_t
d I_ti]iser m_ b_C_]em;
Si votre cl_ish_i5_'e est &iuipSe de ]a
fkmcthm de verrol_i]]age de Ia o_isim_i_re,
assl_rez-_ oils (p_'e]]e soit arr_te_e avm_t
d _essayer d'a]] m_ er ]es brC_]eros
de sl_rfi_ce.
Apres avoir aHume un br_leur
au gaz
Ne {hi tes pas fire cd on m_er]e brCd e_r
hmgtem, })s......sans casserole sin" ]a ,gri]]e-
l,e {h_i pom'_:dt s'eScai]]er sm_s casserole
; Assm'ez-_ om ql_e ]es brCflem's et les
g_J]]es soient rei}'oidis avm_t d'v mettre
]a mai_, m_e poign_e de cuish_e, des
chinims de _etto}_ge o_ m_tres
_]? a te_ lJ allx.
Comment a#umer un br_leur de surface au gaz
E_timcez ]e bom(m de commm_de et I xn'sq_ m_ 1)r_iem" passe i)LITE,to_s les
tom'_ez-]e en p(_siti(m L/YE. b_0]em's _mettent m_ (hSc]ic. N'essa}ez pas
V0us e_te_drez m_ petit declic--]e so_ de m_to_r d'm_ b_ Oiem" tin,dis (p_'m_ m_tre
l'Sti_ce]]e 5]ectrique q_d a]]ume ]e br_]em: br_]em" est a]hm_5. [h_ choc 5]ectrkp_e
{J_e {ois ]a fiamme a]hm_eSe, to_mez le pom'_dt e_ d_couler ce q_d ",'ore {erait
bo_ao]_ pore" a]_ster ]a tai]]e de In {]amme. pe_t-Stre rem'erser des casseroles thin,des.
Si ]e boutol_ reste i'_ LITE. i] c<mtim_em fi
de de_m<mter im b] _l]em" oil de _?ettoyer
Br_/e_rs a gaz sce#es
l,a sm[hce de clliss<m de votre cllisi_ibre i)
gaz a q_atre b_flem's 5 gaz sce]]_s. I]s so_t
pmtiques, E_d]es fi nettoyer et flexib]es, et
co_wie]ment parfi_iteme]?t i) line gmm??e
_te_(;b.e d'app]icatio_s de c_.isso_L
I,e b_'£_]ellr ]e [)his perk (nrlJbre droite) est
]e b_]em +i) m!joten Vom pomez tom'_er
ce brCdem" en posit]o_ LO (tempeSramre
basse) po_r m!]oter vos plats _'_trbs basse
tempe_mmre. I] fbm'_it m_e c_isso_ precise
pC,m" des a]ime_ts d_licats comme ]es
sauces o_ ]es aliments qui neScessitent m_e
temp_mtm'e basse pe]?dm?t line hmg_le
dm'_e de c_isso_.
l,e brC_]em"mo'_e_ (arxibre gauche) et ]e
gml_d br_flem" (awmt gauche) sont los
br_dems p_i _ cipa ux po_r ]a p] upart des
c_isso_s. Vo_s pom'ez chm_ger le r_glage
de ces br_lJel_.rs mll]ti_a]ents de HI
(tempSramre eSleveSe) i) tO (tempS_amre
basse) po_r romp]it m_e gamme ehend_e
de besoh_s de o_isson.
l,e ]br_l]em" extra gnmd (;_wm_t droit) est ]e
b_'_]em" (p_i fbm'n_it la cha]em" maximm_L
Comme ]es trois m_tres brCdeurs, vous
pomez dimhmer s(m re_glage de HI
(temp_rat_.re _]eve_e) £3LO (tempe_ratm'e
basse) pore" m_e gamme _tei_d{_e
d'app]ications de o_isson. Cependa_]t, ce
b_O]em" est co_qu pour fidre bo_i]]ir
mpk]ement de grandes q_antiteSs de
]iquide. I] a m_ r_glage sl%cia] POWER
BOIL"(ctdssen puissante] co_qu po_r ]es
mtensiles de ] 0 po_ces o_ p]m de
diam btre.
58
Comment choisir la taifle de _a#amine
Pourune Fl?atflpu/st/or}Ssns(tst}gerdesosssero/es, Toute {]amine ph_s ]qro-e,b (p_eJe has de ]a
ne/a/ssezjama/s los flammesmonter/e long des casserole est perd_e et _e sert q_i)
cOtbs"descasseroles.
Sm'_ei]]ez ]a fiamme, _mn pas ]e bo_,tol_,
e_ r_:(;h_ism_t ]a cha]em: l,a tai]]e de la
fiamme d'm_ br_]em" a_ gaz doit com/e_h"
a_ t}T>e de casserole _ti]isSe.
Page 59

Batterie de cuisine sur /a cuisiniere
A/uminium: line kmerie de cldsh_e de
poids moven est recommm]d_e car elle
chauf_e mpidement et imifbrm&_ent.
I,a plupart des al]mem_ts bmm]issem_t
im]fbn_e}ment dm_s line po_]e i)[}ire
d'ahmJmJum. {Jtilisez des po_hms i5
couverdes hem/_tiques en cuishmm?t
avec de petites qlmm_t]t& d'ealL
F0nte: si elles chaufle]]t lenteme_]h la
p]upar[ des po_]es i'_{_'ire pr_se]_tent des
r_su]tats satisfi_isa N_is.
Fer&na#/_: sol_scertah_es
cond]tkms, l'&_m]l de certah]es batteries
de cuish_e pomTait {imdre. Su]vez les
reco]]lmamld_tio]ls dll [i_H)IJc_/m][ de
batte_Je de cuish_e pour les
m_thodes de cldssom
Verre : il ? a deux types de batteries
de cuisim_e de verre--celles pour le tbur
&i//e de dessus de cuisiniere
www.e/ectromenagersge.ca
seulement et celles pour la cuisson sur la
cuishJbre (po_hms, ca:{_ et the). i,e verre
conduit la chaleur trbs lem_temem_t.
C6mmique de verre r_sistaute _ /a cha/e_r :
sert i) la cuisson de surfi_ce ou au fblm
EHe conduit la chalem" trbs le_teme_t et
se re{_'oidit trbs ]e_]tement. V_J:[]ez ]es
directives du {hb_Jca_t de ]a batte_Je de
cu]sh_e pour _tre certah_ qu'eHe pu]sse
_tre utihs_e avec les cuishJbres au gaz.
Acierhmxgg_Me : ce m_tal seld a de
mama]ses prop_J_te% pour la chaleur et
est _?on3m]eme_?t combh?e} avec le CUhTe_
]'ahlmil]]llm OH d'all[res m(_tallx pOllY
am_]]orer la r_partit]on de cha]em; l,es
po_]es i3 {Hre _'_comb]m_]son de m_taux
fimcdo]me]?t ]?on?m]eme]?t de ma_Jbre
satis{hisa_te s] elles so_t utilise}es i) [eu
moyen sehm les recomma_?dathms du
fi_b_J ca _ t.
Ufifisezun wok D fond plat.
N'utilisez pas de grilles de dessus de
cu]shJ_re sur yes b_£llems au gaz scell&.
S] vous utilisez la g_Jlle de dessus de
cu]shJbre sur ]e b_(_leur au gaz scell& cela
[)Yo\oqllel_/ IH]e CO]]J)llS[iO]] i_?co_??ple[e
Uti/isation du wok
Nousmcommandonsd'utiliserunwokde
35,56cm(14po)oumobsDfondplm:Assurez-
vousquelefondduwoksoitDplatsurlagrille.
ilssontdisponibleschezVotTequbcai/lierlocal
Sell] Im wok ]7_fired plat dok Otre utilis&
N'ut]hsez pas de wok ;'l fbnd ]Jar slur Im
am_eau de support. Placer l'am_eau sur
le b_ Cllem" ou ]a g_J]]e pourm]t provoquer
tm mamais fb_ct]om_ement du bi_l]eul;
l]]el]al][]?_des l]]yeauxde l]]ol]o×\de de
carbo_]e au-dessus des _ormes permJses.
Cec] pom'_:_it _tre da_gereux pour votre
sa_t&
_ans /es cas de panne de ceurant
e[ doric i)ourl:_]t mel]er ]'_line exposithm
i'_des _?iveaux de mom>×_de de carbo_?e
d(_passm_t les _ormes admissibles
actuelles.
Cecipeut Ottodangemuxpour votre sant6,
Dal]s le cas d'lll]e pal]lie de colli_tl/[, veils
pouvez aHumer ]es b_deurs de ]a smti_ce
au gaz de votre cu]sh_]breavec line
aHumette. Tenez line allumette aHum_e
prbs du bIOlem; puis elz{i)ncez et tollrllez
le bouton de contrgle i]la position] UTE.
Attemion tout particu]i_reme_[ ]orsque
vous a]]umez ]es bx_l]ems de cette
I11 a I1 i e ]'e.
[,es bx 2llem's de surli_ce utilis& pendant
une pmme d'U]ectricit_4 conthmero_t ]:_
f( }l]Cti {_I]I]e 1"I](}1"I]]aIell]e l]1.
REMARQUE : Si /a cuisbi_m est verrou#lbe
pendant unepanne decoumnt_vousnepouvezpas
al/umer lesbrOleursdesurface.
59
Page 60

Uti#sezlos centr61esdufour,(s.rc+rtainsmod_/es)
(Dans ce manuel,/es fonctions et I'apparence pourraient diff_rer de votre modble.)
_4ultf/ _Rack
H_/Lo
Los fonctions et I'apparence pourraient parlor,
Fonctionsetr@/agesdescontrdesdufour,
Touche BAKE (cuisson)
EIff_m(e>"pore choisir la _-bncdo_de (uisson.
ToucheBROILHI/LO(griilerfi haute/basse
temp&ature)
Enfimcez pore" (hoidr la ftmcdon 'gdller'.
ToucheCONVECTIONBAKEMULTI/IRACK
(cuisson par convexion multi/l grille) 0
Enfbn(ez pore (l-loid_ l_+cuisso_ mec la
_i>,lcti()_ co[ix exio_L
ToucMCONVECTIONROAST(rOtirpar
convexion)
Enfon(ez pore d+oid_ de rCdr ae( la fb_cdon
de c()Bxex[oH.
Touc,_ePROOf(fe_mentation)
Enfoncez pore choisi! H]_ et?xit'ol_l_eJ//el_t (:}_aHd
u{ile pour los prod+tits _'_]exm'e.
0 Touc, eSTART(d m0rrer 0
[)(tit +)tt'eer_tbn(:_e pore" de_marrer toute
{km(:do_*de cuisine ou de *_etto}:Ige.
Affichage
?dS(he l'hem'e, Ia temp&amre du _bm; si
le fi>m"est e+_mode de cuisson, gfilIade ou
autonettoyage, les heures _Te:g}(4esde la
mi+mterie o+_des ope_alfio_m mltomadques
du (bur et sila cuisiaib_e est verroutlk4e.
Si "F- et un nora#reou une lettre" c#_gmte_tst_r
rafficflage ets_Hes signaux de contr#Jedu fo_, cod
indiq_e _mcode d'erreur dereaction.Enfoncezla touche
CLEAR,+OFF(anmdatio#/arr_t).Laissezle fourrefoidirpendant
uneMute..Rernettez/efourenmarche.Si/ecodefi'erreurde
foncfionser@#te,coupez/ecourantdufouret appelezpour/e
Si votm four #tait r#gl# D#heoR#ratio#&_four a mi_#terie
ets'il y a eu##e pamtede co_ra#t, I'horlogeet touteslos
fonctionsprogramm#esdoivent#trerdnitialisds.
L'he_recfgnotera s_r raffichage apres_nepam_ede
Ce!IaCIt.
O ToucMSELFCLEANLO/STD
(autonettoyage bas/std)
Enfbn(ez pore d_oi_ir 1_fbncdo_
d'auto+_ettoyage. Reportez-_o+m fi la section
UtitTs'erIe fourautonettoyant,
ToucheOVENLIGHTON/OFF(lumi&ede four
60
marche/arrOU
Enfbt_cez pour mettre e*_marche ou &ebb(Ire la
lumiTre du Ibm:
Fq FqFq
o
@
deI'hoflogeetdelaminuterie
Touche DELAYSTART (d_marrage retardS)
Udlisez axec los touches COOKTIME (temps
decuissoN ou SELFCLEANLO,/STD(a_tonettogage
flaS/'Std)pore" r_gler le tbm" afin qu'il (t&_awe
et s'arl&m automatiquement fi m_ mome_t
pretalableme_t choisi.
Touche COOKTIME(temps de cuisson)
En{bucez cetm/o+/che, ptiis milisez les to+,ches
num&iques pour r+Xglerle romps _ouhl pour
pr@arer les aliments. [e fbm7s'et/eindm fila fin
du temps de od>on.
Touche CLEAR/OFF(annulation/arrOt)
Enfbncez pour atmuler TOUTESles op&'adons
d+*tom7 sauf l'hodoge, la minutcrie et le
ToucheCLOCK(horloge)
Enfimcez axantde _e_gterPhorlog<
Touchesnum_riques
Udlise>les pore r+Xglerroute fb_ction
exig-ea_tdes chi_res comme pour I'hemTesin"
l'ho_logo,la minmerie, la mmp&'atm> du Rmr,
la temp&'ature interne des aliments, l'heme
de d_marrage et ladm'_e d'op&'adon pour
la cuisso[_i] minutettie et l'auto_ett+>?ag-e.
ToucheKITCHENTIMERON/OFF_minuteriede
cuisinemarche/arrgt)
En_b[_cezpour choish"la {bnctkmde mi[_uterie.
roucM PROBE(sonde)
Entbmez lorsque vous udlisez lasonde pore"
Touche WARM (r#chauff+r)
E_tbncez pour g:u'der Ies alimems )r@m'&
chauds, Reporte>xous fi la secd(m uorilrilent
r@ler lefourpour #chauffer,
RANGELOCK-OUT
(verrouillage de la cuisini&e)
E_+fbncez et g=_t'deze_#bi_cCes la/ouche _AN_E
tOCK-OUT(eerro_i]lagede la c_isM#re) pe_&mt
3 secondes pore7 verro+dllerid& e_rouiller los
b_Oleurs de sulTfi_ce,los b_Olem> du _i>itret le
pam_eau de contrgle, de mani&_e ii ce qu'ils *_e
Page 61

Fonctionset /aesdescontrdesdufour,deI'hor/oeetdelam/nuterie
Touche BAKE (cuisson)
0
Emffbm_cez pollr choisi r la fire cd o_/de
cuisso_/.
Touche BROIL H//LO
@
(drifter _ haute/basse temperature)
Em/{bm/cez pollr choisir la {kmcd(m 'grilleff.
Touche OVENLIGHT &mibre du four)
@
E]/{kmcez pore" mettre ell marche oll
_teim/dre ]a hm/i_re du fbm:
Touche SELFCLEANLO/STD
O
(autonettoyage bas/std)
E_/{b_/cez pour choish" la {b_wdo_/
d_aHt(metto_ge_ P.eportez-\ o11s_'_]a sectio]/
Utiliser le four autonettoyant
Touche START(d6marrer)
Doit Otre em/{imc_e pore" de,matter tollte
fbncti<m de cu]sh/e oll de m/etto}_ge.
Touches num&4ques
[ ]ti]isez-]es pollr r_gIer to/ire Jrkmctiom/
exigeam des chifl_'es comme pour Fhem'e
sllr ] hordoge, ]a mimlterie, ]a temp&_mlre
dll {bur, ]a temp&;_mre im/terN/e des
a]imem/ts, ] ]]em'e de deqmarmge et ]a dm'Se
d'op&;_dol/ polar ]a odss<m 5 mimlterie
CONTROLLOCK-OUT (verrouL//age des
0
contr_les)
I,e verrolli]]age des comm'6]es est 9 et 0.
E_/{b_/cez et gardez en%_]cetes ]es _ollches .q
et 0 e_/ ca&me temps pendant 3 secondes.
Touche CLEAR/OFF(annulafion/arrgt)
0
E_/{b_wez pore" anmder TOUTESles
opetmtio_/s dll fore" sallf ]'horloge, ]a
miml_erie e_ ]e verrold]]age de commm/de.
Touche KIEgHEN TIMER ON/OFF (minuterie de
0
cuisine marche/arrgt)
E_ffim cez [)ollr ch oisi r ]a fire cti on de
mi _/IIteI'ie.
ToucheCLOCK(horloge)
E_ffb_/cez ava_/_de r_gler ]'hor]oge_
Touche DELAYSTART (d_marrage retardS)
[ Jd]isez avec ]es to_mhes COOKING TIME
(temps de c_isse_) ou SELFCLEAN LO/STO
(a_onettoyage flas/std)pore _r_gler ]e fore"
aIi_/ q111] de,matte et s'arr_te
aiKoi//_KiqLlei/]e]/[ i) IH/ _//o1//e_/[
Touche COOKING TIME (temps de cuisson)
El/{bl/cez cease_ol_che, i:mis ud]isez ]es
to11_hes mm/_riqlles pollr r_gler ]e temps
voH]11 pollr jpr_parer ]es a]ime_/ts, i,e {ore"
s'e}teh/d_ 5 ]a fi_/ dll temps de olissom
Affichage
O
Aftiche ]'hem'e, ]a temp_ratm'e du {ore; s]
]e %m" est el/ mode de cl_isso_/, griHade oll
alltonetto}_lge et ]es hem'es r_gl_es de ]a
mhmtelJe (311des op&l;/tio_/s alltomadqlles
du Ibm:
Si "F-etgmhombreou_ne /ettre'c//g_ote_tsur
/'_ff/cflegeets_r lossig_e_x decontrS/ed_four,
ceci i_dique _ coded'erre_r defo_ctio_. Enfoncez
la toucheCLEAR/OFF(ann_/ation/arrOt).Laissezle four
mfto/d/rpendantoneheum.Remettezle fourenmarche.
57/ecoded'erreurdefonctionserbpbte,coupezle courant
dufouretappelezpourle fa/rerbpamr
Si votrefo_r _tait r_/_ a _e operation d_fo_r
min_terie et s'il Ya e__nepa_e de courant,I'hor/oge
ettoutesbefoncfiooeprograren_besdo/ventgtre
rbbitia/L_bs.
t'he_re c/ig_eteras_r /_fficflageapres _nepanne
de co,rant
61
Page 62

Utiliser te fou
Pour #viter route br_/ure possible, placez les grilles _ /a position vou/ue 8vant de mettre /e four en marche,
Avant de commencer,..
i !
Le four possbde 7positions fie gMle.
I,es grilles on_t des bl_t&es doric
lorsqu'elles sont plac(_es correctemem_t,
elles blo(p_e_t av_mt de sortir
compl_teme]?t et ]?e se pe]?cherom?t pas.
E_ plaqam et retham_t les casseroles,
sortez h_ g_Jlle jmqL_'i'_ ce (p_'elle bloql_e.
[,'(_l&ment chm_fEmt se trome sore
le plam_cher (h_ {i)m: Ne placez pas
d'a]imem_ts sin" ]a pa]tie h]:[iX_Jem'e
dL_fbm" pore" los pr(_pare_:
Pourrotifer unegrille, tirez-lavers vol_s,
[:)e]_chez ]'a_m_t ve_s ]e hm_t et sortez.
Comment reeler le four pour eMsiner ou r_tir
Peur replacer, p]acez ]e bollt de ]a g_JHe
(verrom d'arrSt) sin" ]e slq)port, pe_]d_ez
]'a_m_t vers ]e hm_t et pomsez pore" ]_
_i_h'e el/tI'eI;,
M $E ENGAflDE:lors , o
I/OUSUt//isez /a grille _ /a pos/tTon /a plus basso
(A),faiths att_ntT?)n /ors'que vous /a sortez. IVous
vous recommandons de sortir /agnl/edep/usburs
Ftouces et ensuite d'uti/iser deux poignbe,_de
m/sbe pour sortir /a grilleen /a tenant par/es"
cOtbs, ta grilleest basso et vous pouvez vous
brSbr si vous mettez /a rnab au milieu et /a
sortez entTbrement Attention de ne /)as vous
brder /a mab sur /a porteen utfl/s'ant /agrille
fi la positionlaplus"bassofA).
ii i i i i i
';/ i i ; i
[] El_timcez ]a touche BAKE(c_issen).
[] Entimcez ]es to_d]es ]mm(_xiq_es
pore" ch oisi r ]a tern p_r4t m'e "_'o_] _e.
[] E_timcezla touche STABT
(_marrer).
[] VSrifiez si ]es a]ime_ts sont prSts a_
temps de ]a recette. F_ites
c_h'e p]m ]o_gtemps a_ besoh_.
[] Entimcez ]a to_che CLEAN/OFF
clliss()]/.
REMABOUE: Unventf/aaurderefrokfissdnent
semetonmarcheets'btm?}tautomatTquema}t
pourrefro/d/rlospbcesbtema_.Ceciestnormal
et/eventf/ateurpourraitcontl?_uer_ fonctionner
mgme apr_s que b four soit btebL
Typeffalime_t Positiondegrille
Tartessurgel@s{surunephque_biscuits} CouD
@eaudesanges A
G_teausavarinouquatre-quarts BouC
Biscuitssecs,muffins,brownies,biscuits, CouD
petitsgSteaux,g_teaux6tag_,s,tartes
Casseroles CouD
Dinde A
Si vo_*s pr(_parez q_*atre (_tages de
gfitem* i'_]a R_is, ph_cez-e_ de_*x sin" ]a
grille Bet de_*x sin" ]:_grille D. R(_partissez
]es mo_*]es sin" ]a grille pore" q_'a_mm_
d'e_m'e ellx _?e soil directement
a_-dessm de l'a_m'e.
62
Page 63

Ne placez pas fl'afiments
dflectement fians /e fond du four;
Precflau#age et placement des moMes
Prc}ch:_ uf_e'z 1e to m" si 1:_ recette 1'i m_di q i_e.
II est m_cess:_ire de pr_ch:mf{er pore" de
mei]]em's r_sl_]tats ]or,-; de ]a pr_pamtiom_
de g;3tea_x, de ]biscldts sees, de pfitisse_Jes
et de [)aim
Pour prbchauffer, r@lez /e four _ /a bonne
t_rnpbraturaLe contrO/e fera ent_ndre un bip
Iorsqueb four est prbchauffbetI'affid_age
bdiquerala tempbraturechoisie. Le temps
de pr_chauffagevariera selon /e r@/age
de t_rrtpbratum.
Pepier Muminium
N'ufi/isezpasdepapieralunfniumaufond
dufour
Ne colwrezjamais el_tibrement m_e grille
de papier ahm_h_hm_. Ceci af_ecte_ ]a
circ_latio_ de chalem" et mb_em i'_m_e
Humidite d_ four
Tin,dis que votre _bm" se r&hm_fle, le
chm_gement de temperature de lair (h_
fore" pe_t {bm_er des go_tte]ettes d'e;m
mr le verre de h_ porte. Ces go_melettes
_e so_t pas dangeremes et s'_qx_re_t
t:mdis (p_e ]e fbm" co_tim_e i) se
electromenagersge.ca
[,es r_sl_ltats sero_t meillems si les
moll]es so1/1 el_tr(_s dales le [k}Ul" alltam/[
ql_e possible. Si vom pr_:parez p]m d'm_
mollie, pIaceMes jpol_r qu'i]s aient al_
mob,s 2,5 cm i:_3,8 cm (1 po i'_1½po)
d'ah" m_tom" d'el_x.
Vom po_wez _*dliser m_e ph*s
petite {b_dlle de jpapier po_r saish" les
d_ve_seme_ts e_ ]a p]aqa_t 5 que]q_es
polices sous ]es a]ime_ts s_r m_e grille
h_i_lJ e m'e.
63
Page 64

Udfisationdu fou
Went de four
qui se tx'olwe vex's Fax'x'i&x'ede la cuish_iex'e.
Ne b]oql*ez pas cet &e_*t e_* cuisim_am_t
da_s le {him I1est impo'rtam_t ql*e le
col*_:mt d'ai_" chm*d du fbl*_"et l'ai_"
f_.is d_*bFfilem" du {bu_"ci_'cule sa_s
i m_te_'*'ltpti o_. E'vitezde tougher les
euvertures d_vent ell les sudaces
avoisinentes tandis que le four ou
le gril est aHum_, car ils po_rreient
_tte chards,
Panne de courant
M_SEEN GARDE: n'essay_zpas de faire
fonctionnerb fourfi a/lumageb/edTiquedurant
unepanned'dedTicith.
I,e Ibm" o_* le g_'il _e peru &t_'ealhm_d*
(]111"a_t Ih_e pantie (]e Co111"a_]t, J[,e _az _e
i_ca_desce_ce _e soit chaude.
Lespoignbesdescasserobs sur /asurface
decuissonpeuvent devenirchaudessi onbs
laissetropprbs de I'&enL
Ne /a/_'sezfJasd'artic/es dep/astique sur/a
surfacede cuisson;/Ls"peuventfondres'i/s
sont tropprhsde I'hvenL
Ne/ahsezaucunarticlesur/asurface
decure'son.L'airchauddeI_ventpourrait
enf/ammerbs articbsbf/ammabbset
augmentera/apress/ondansdescontenanL_
ferrnbs,ceqd pourrait/esfairebc/at_r
Lesarticlesdembta/deviennenttrbschauds
s'i/ssont/aissbssur/asurfacedecuissoneti/s
peuventprovoquerdesbK,%'res.
comme_ce, ]e ]b__t]el_x"all1{bl_l" se I_b'l"me
et _e peru pas &tx'e xall_m_ ava _t q_e le
co,mint _*e soit x'_talblL Ia cix'c_dado_ de
gaz est a_w&teteautomatiq_*eme_t et _e
l"epl"e]_dl;_ jpas avaunt que ]e coul;mt _e soit
_'&tabli et q_*e la ba_'_'e fi i_ca_desce_ce
_'ait attei_t la temp&;m*_'e de
64
Page 65

Comment regler le four g_griller
IMPORTANT:pour&ita lesbrOlurespos,_#31es,placez
/astab/arras9/apo,dt/bnvou/ueavantd'a//umer/efour
[] Placez ]a a'iande ou ]e poisso_ sin" m_e
gdlle d:ms m_e ]_cheiHte.
[] S(_ivez les positio_/s de g_:[lles su _-o-_:retes
da!_s le Guide pour gd//or
[] La porte d_l _)_m" dolt 6tre ferrule
pe0dm_t (lue les aliments grille_t,
[] E_K)mcez la to_che BROIt Hl/[O (_lriller
haute/bassetempbrature)m_eibis pore_HI
Broil(grillera hautetemperature),
Pore" passer ;'_LO Broil (grillera hasse
temperature),en_m(e,-; la toucl'te BROIL
H!/tO(grillera haute/lmssetemperature)
5nom_'au.
6uide pour gri#er
www,electromenagersge,ca
LJtilisez tO Broil (griller _ basse temperature)
po_r bie_ pr@arer des aliments tels qua
_lai!les ou co_pes @aisses sa_s trop brm_ir,
[] E_t_mcez la to_tche ST_r(demarrer).
[] Ap_Ss a_oir gH!lS, e]/fi>flcez la touche
CtEA&'OFF(a.m_btion./arr_t).
Se_xez imm_dL_t_ment les alime_ts, et laisse/
_efroidir la l_chef!ite fi Fext_HeHr d_ fi41r
din'ant le repas pour ii_ciliter le _/em*?:ige.
NEMARaUE:gri//ernefonch:oooepassi /ason& &
l,a tail]e, ]e poids,
]'e}paissem; ]a tempSratm'e
de dSmarrage et votre
pr6%rel_ce de c_issol_
a{tb'ctercmt ]e temps
de preparations.
Ce g_ide est e}tab]i
i'_partir de via_des
i'_ In temp_rat_re
d_ r_f_'igetrate_,r.
z,_?i_:; _ozz I<@/llPt qtzg z,_ I_
Sq) t_x)dBe&. }bratlOz<:/l_t_(;_zide.
{2_;lZt(Id_,._l_/ zi_z19N5)
Aliment
B_eMbathe
niforru6,ment
Stea_s de _e_f
Saignantt
A point
Biencuit
Sa[gnantt
A point
Biencuit
Pellet
Pred_Rdebealangerie
Pain (grillS}
Muffin anglais
Q_eae$ de
homard
FHets de peisse_
Sa_mell
Steaks
Filets
Traeahesdeiamban
(precuit}
C&teJeResdepore
Biennuit
C_telettesd'agneaa
A point
B[encuit
_,point
Biencuit
@uantite eti eu Position Premier c_te
epaisseur grille Temps {rain,}
1,3cma1,9clT/il,i2poa s/@oi@aisseur D 13
1,9cTia2,5c'n(ai_poaIpo)@aisseur F 6
0,45kg50,68kg(1a1/, Ibs} E 8
3,8cra (I_/_po)epMsseur E 15
0,91kga 1,13kg(2a2_ Ibs) E 15
I completdeceup6 C 25
0,91kga 1,13kg(2a2_ Ibs},
separeanIongueur
Peitrine C 25
2 a 4tranches F 3
2 (sepate} F 3-4
2a4 C 18 20
0,45kg(1Ib}(0,6cma1,3cm E 6
[74poa I/2po] epaisseur}
2 (2,5em [1 po]epaisseur) E 10
2 (1,3cm a 1,9cm E 15
[I/2poa s/4po]epaisseur)
1,3cm (72pe}epaisseur D 8
2,5cm (I po}epMsseul D 8
2 (I,3 eel [V2po] epaisseu0 D 10
2{2,0c[1{1po}@aisseur)e,v_ron0,45kg(/Ib) D 15
2 (2,5cm [1 po]epMsseur) E 7
envkon283g_340g(I0a12oz} E 10
2 (3,8cru[I 1½po}epa[sseur/ E 9
environ0,45kg (I Ib) E I4
E 10
D 20
Second c6te
Temps {mi,.)
8
4
6
8
10
15
20
25
15
I
Nepas
retoulner
5
8
10
5
4
9
6
10
Cemme_taires
Espacez
Lessteaksde mainsde
1,9cm (V4pc) _pa[ssent
d[ffidbs paul pr6pamr
sa[gnaet,
Incisez ]e gras
Brossezcilaquee0te
debeurrefondu
Gr[llerpeauversle
basd'abord
Espacezun[formSment.
P]acezlesmuffins
anglaiscoupesversle
I_autet badigeonnez
debeurres[desire
Coupaza traversla
eoqui[[e.Ouvrez.
Badigeonnezde beurre
fonduavantde grillar
etapres [arnoitiede
[acuisson
Manipulezet tournez
tresdelicatement
Badigeonnezde beurre
eitronneavantet
durantla cuissen,
si desir6
Tournez avec soin.
Ne tournez pas avecla
peau vers ]e has
Incisezb gras
Incisez ]e gras
65
Page 66

Utiliser /'horloge______et la minut+ti+.
Pour regtor l'horloge
l,'hor]oge dolt Otre rSglSe {'_]a bolme
hem'e pour que los _k>m_cti(>m_sde
mira*reTie amomatique du Ibm"
}b_ctiom_em_tcorrecteme_L l,'heure
Assurez-vous que ]?7or/oge soit
r@lbe b la bonne heure.
m_eperu pas ktre chm_ge_e&mint m_e
odsso]_ fi mhmtel{e o_1m_ c_c]e
Pour reg/er /a miuuterie
[] E1Kbl_cez ]a tol_che CLOCK(hor/oge).
] Em_)m_cez ]es toHthes m_Hmt_]'i(]Hes.
[] E*Kb_cez k+ touche STAflT
(d_marrer).
On/Off
La minuterie compte /es minutes
seu/emenL
E//e ne contr_le pas les op&ations
flu four; Le r@lage maximum de fa
minuterie est de 9 heures et 59
minutes,
[] Emdb_cez la touche KITCHENT/MEEt
ON/OFF(minuterie tie cuisine
marche/arrOt).
[] E_db_cezlos tol_chesm,m&iql_es
,!+_s(p_'i'_ce ql_e ]e temps \'oldl_
s'atliche. Par exemp]e, pour r_g]er
2 hem'es et 45 mim*tes, eldbl_cez
]es to_mhes Z 4 et 5 dm_s cot ordre.
Si vo_ls {i_ites +me errem; e_dimcez
]a touche KITCHENTIMEEtON/OFF
(min_teriede cuisine marche/arrOg)
[] E_[b_cez k+touche STAEtT
(d_marrer).
Pour reinitia/iser /a minuterie
Si]'altlichage i_diq_*e e_core ]e temps
restant, vous po_wez ]e chal_ger el_
e.[i+g..t ]. u .che KITCHENTI EEt
ON/OFF(mh_uteriedecuisinemarche/arrOt),
p_ds ]es to+_c]+es mm_riq_es i_sfl_ i'_ce
q_e ]'h e_ re void _e s'at_?che.
Aprb._avoirenfoncb/atoucheSTAEtT
(d_matrer).SET#_.gler)dispam?t,m quivous
bd/quequeb compte_reboursestcommencb,
bienque/affs2i_agenec't_angequ'aprbsune
mbut_.Lossec'ondesn'af_paraft_ontpasavant
laUembrembut_ducompteb rdsours.
] l,orsque la _'dm_terie attei_t 200,
]e c<mtrS]e {b_;_e_te_(;[re 3 1)ips
s_dvisd'm_ hip tomes los 6 seco_des
jusq_*'5 ceque w>us e_dimciez ]a
u_mhe KITCHENTIMERON/OFF
(min_terie de cuisine marche/arrOt).
ta _na//t_de 8sec'ondespoutgt_+annu/_e_n
suivantbs bt_pesdesfonct/onsspbciabsde/a
sectionde conWb c:/eVOtT8fourSO&9Tona/itbs
b/a find'unc_b avec/arebut+rio.
Si ]e temps res_imt n'est pas a[_iche5
(hor]oge, de, marriage re_arde_ o+_ temps
de c_isso_ _e s+mt pas af[?ch_s), rappe]ez
]e temps restm_t en eidb_lrm/t ]a tollc]le
KITCHENTIMEEtON/OFF(minuteriede
cuisine marche/arr_t)et en e,db]](a,_t
e]_s+]ite ]es to_ches mm_:riques pore,
el/[rer ]e _/OllVe{;_ll [e_'_?ps voll] I1.
66
Pour annMer /a minuterie
E_dbn+ ez la to_che KITCHENTIMER
ON/OFF(minuteriede cuisine marche/arr_t)
desex lois.
Page 67

LOCK/UNLOCK HOLD 3 SECONDS
VerroM#age de la CUiSifiiefO (sur certains modules)
_/btTecontrO/evous"perroettTade verroui//er/es
brdeurs de surface,/es brL?bursdu fouret /e
panneau deconW/e, de manbre bce quT/sne
puLs',_entgtTemisen marche.
verrol dllage/d&,'errol_i]]age
des c<mtr6]es :
[] Eteigl_ez tol_s ]es brCdem's de
sm'f_ce.
Appu}ez et tem_ezappl_ye_e]a tol_c]le
[]
RANGE LOCK-OUT (verroui#age de re
cuisini_re) pe_ (kin t 3 sec(m des
,il_sq_'i'_ceque l'_c_m im_diqueLOC
ON (verroui#age en marche).
Pore" (kSverro_,i]]er le co_m'6]e,
[]
appuyez et te_ez appuy_e ]a to_.che
RANGELOCK-OUT (verro_i#age de la
c_isini_re) pe_ (]a_ t :4sec(m des
j_*sq_'a ce que l'eSc_m* indiq_*e LOC
OFF(verro_i#e_e arrON).
l ,orsq I_e cette fimctiol_ est a ctive_e et
]orsque vo{_s em_{kmcez]es to,lobes, le
com_tr6]e {b'ra em_te_dre {m hip som_ore et
]'atiichage im_diqlmm LOC ON,
te roD& de verroui//agede,s'contTO/esa de
I'effet sur touslos contrO/es.Aucun contrObne
foncfionnequandcett_ caracMdstiqueest eo
foncfionnemenL
L'ajustementseraconservben mbmo/?eaprbs
unepanne d'dectn_vtb.
Lock-out (verroufl_age) des contrives (surterrainsmodbles)
_/btTecontrO/evouspermet de verroui//erlos
touchespourqu'e//es nepuissent pas gtre
acfivbesenlosenfon_anL
Po_r verro_d]ler/d&erro_dller les
COl_ tr_)] es :
[] Elff(mcez ]es touches 9 et 0e_
re&me temps pe_(]a_t 3 secoi_des,
jusqu'i'_ ceque ]'at}ichage i_(liq_*e
LOCON (verro_ an marche).
[] Pore" d&,'erroui]]er ]e c(mtr6]e,
e_K}mcez ]es touches 9 et 0 e_/ mSme
temps pei/da_/t 3 secoi/des,j{lsqll'i)
ce (p_e ]'at_?chage h_diq_e LOC OFF
(verro_il/ege errg,N).
l,orsq_*e cette fb_*ctio_ est a ctive_e et
]orsque v(ms e_{b_cez ]es touches, ]e
coim'g]e [b_:_ e_tei_dre m_ bip s(more et
]'aNchage h_diq_e_:_ LOC ON (verre_ en
place).
Lemode de verrouillagedescontrOles
affect_ tour,s los touches.Aucunetouchene
foncfionnera/orsquecette fonctionest activbe.
L'ajus't_mentseraconservben mbmo/?eapr_s
unepanne d'#bctrl_'it#.
67
Page 68

Ud#sationdesfoncdenspour cuisiner et r tir avec ta minuterie.
(sur ce,'tains mod_tes)
REMARQUE: les aliments qui se g#tent facilement--comme le lair, les oeufs, le poisson, la farce, la volatile et le
porc--ne devraient pas rester sortis pendant plus d'une heure avant ou apMs la cuisson. La temperature ambiante
favorise la croissance de bact#ries dangereuses. Assurez=vous que /a lumi#re du four soit bteinte car la chaleur de
/'ampoule favorisera la croissance de bacMries dangereusex
Comment r#gler un d#marrage imm#diat et un arrfit automadque
Le four s'a//urnera irnmbdiatement et fera cu/re [ ,affich;_ge im)diqueL_L le chm)geme_)t
pendant une durbe chois/e. ,4/a fl_} du temps de de [emp&_m_re (em_commem_qm_t i:L
cuisson, /e four s'#te/7}dra automafiquement.
[] Emffkmcez la tol_che BAKE (cuissen).
[] [Jdlisez les tol_ches mm_iql_es et
em_trez ]a tempe_r_ma'e vol_]l_e.
[] ELffkmcez ]a touche COOKINGTIME
¸
(tempsde cuisson),
REMARQUE : si votm mcette exl)e quevous
prbchauffTezle fou; vousdevrezpeut-gtm ajouter
du temps de cuisson.
] [Jdlisez ]es toLLches mm_ri(p_es et
e_m'ez ]_Ldm'e}e de (;lfiSSLm v(}10]10e_
[,a temp_L_ma'e (1_ fbm" et]e temps
de CHiSSOi_ ei_[L'(_s seroi_[ ;Lf[iches.
: 8 C (H)0 ° F) et le [emps de cLfissol).
I "L_HC])'d_e coi-_iL))em)cey_L i'_ C]l;._II_eL"
'' 'D
lorsqLle la temp_mtm'e atteim)t 38 ° C
l,e [i>m" pomsldw_ la cldssol_ pendal_t
]e te_'_q)s progL_mm_(_, p_is s'_Lrr0te_L
m_tomatiq_emeL_t i'_ mob,s q_e ]_L
515 active_e. Reportez-_ o_s i) ]a sectio_
Comment r@/er /e four poa rbchauffer.
Elffimcez ]a touche CLEAR/OFF
(enndadoe/arrff)po _." e{th cer ] 'a:kti ch _Lge.
[ i [
68
[] E_ffimcez ];Lto_che START
(d#marrer).
Comment regret un demarrage retarde et #n arr#t automatiq_e
V0uspouvezr@/erb contrObdufourpour
retarder b dbmarrage du four, cu/re pendant
un certab terrm9 prbcL_, puts s'btebdre
8utomStl(Tuemefl£
Assiwez-voHs qHe H)or]oge mo_)Q'e ];L
bomle hem'e.
[] E_ffimcez ]_Lto_che BAKE (c_Nso_).
[] [Jdlisez ]es to_ches mm_iq_es et
e_?trez ]_Ltempe}r_ma'e vol0]10e.
[] ELdimcez la toLLche COOKING TIME
(temps de c#isson).
REMARQUE : si votm mcette exige que vous
pMchauff/ezle four,vous devrezpeut-gtm ajbuter
du temps de cuisson.
] [Jti]isez ]es to_ches mm_Sriq_es et
e_trez ]a dm'(_e de c_fisso_ ",'o_]_e.
[] ELffimcez ]a touche BELAYSTART
(d#marrage retard#).
[] [Jti]isez ]es touches mm_e}riques,
e_m'ez ]'hem'e i:L]a(]_e]]e vo_s
de}sirez que ]e ibm" s'_d]_m_e
et commel?ce ]a Cll]SSOI).
[] ELffimcez ]a to_che START
(dfimarrer).
REMAROUE : une tor_8//t# se fern entendre si
vous ufi//sez /a cuLgsonfi ml?}uter/e et ne touchez
pas /a touche START (d#marrer) apr_s avo/r
entTb /a tempbrature de cu/sson.
Si w_s detsh'ez versifier ]es hem'es
r_gIetes, e_ziimcez ]a to_che OELAYSTART
(demurrage retard#)pore-versifier ]'hem'e
de de}tam'rage re}gk} o_1 e_#kmcez ]a
to_L])e COOKING Y_Mg (temps de c#issen)
pore" vetritier ]_Ldm'_e de c_dsso_ r_g]ete.
r(_g]Se, ]'a[tichage h_diq_em ]e
chm?geme_?t de temp(_l_Ltm'e (e_/
comme_K;a_t i'_38 <,C [100 ° F])
et]e temps de c_dssom l,'att?chage
commeilcem i) chaLlger ]ols(pLe ]a
tempe}_;Ltm'e _Ltteh_t 38 ° C (100 ° F).
I,e {iLm" poLLrs_dw_L ]a c_dsso_ peL_dm_t
]e temps progLamme}, [:mis s'arr0tem
aLltomatkplemei?t 5 moi_?s LiLle ]a
fimcdoi? WARM (rSchmffter) _'ait
5t4 acdve_e. Reportez-\ o_s 5 ]a secdo_)
Comment r@ler & four poa rbchauffer.
E_#b_cez ]a toL_che CLEAR/OFF
(a#fiuladee/arr#t) po_r e{tiLcer ]'a#ichage.
Page 69

Uti/iser /a sonde, (surcertainsmod tes) ww_.dectrome,agersge.ca
Pourde nombreuxaliments,toutparticuli&ement los rSfisetla volaille,latemp&ature internedesailments estle meilleurmoyen
de savoirs'ifssontprOts.La sondedetemp&ature permetde neplus tenter dedevinersilos a/Lmentsr6tis sontbien cults.
Udliser des sore/des mitres qlle
celle fom'N/ie avec ce produit pour_dt
e]/dommager la sore/de (Ill le comm'61e
du _bm:
[ Jtilisez les I x_igneSes, de la sore/de et de
la fiche en les im/se_mt et les red_mt des
La sonde de temp&ature possbde
un capteur ressemblant _ une
brochette b une extr_mit_ et une
fiche b/'autre, c'est ee qui p&;_tre
darts la prise du fou_
aliments et de ]a }xJse.
Pourbv@rd'en@mmager/asonde,n'uti//sez
pasdepincespourtirer/ec'@ben/erefirant
Pourbviterdebriser/asonde,assurez4/ous
que los aliments sont b/en d@e/bs avant de
I'insbrer
Apt& avoir pretpar_ la vim/de et Favoir
pLtceSe sin" m/e daie ou sur m/e gri]]e de
la lbche{_'ite, sl_.ivez ces im/stHlctiom/s pore"
bier/ placer la sore/de.
Ins_rez enti6rement la sonde dm'xs la
viandeo lane ne devrait pas toucher l'os,
le gras on le carnage.
Pourbviter/esbr_)/urespossibles,ne
dbbranchezpas /asonde de/a pdse avant que
/efour ne soft mfroidL
Ne /aissezjamais /asondebI'/ntbdeur du four
dumnt un cyc/ed'autonettoyage.
Ne rangezpas /a sondedansb four
Pour ]es r6tis sm/s os, h/s6rez ]a sonde
dm/s la parde aym/t ]e [:>his de chair du
rgd. Pore" le jambo_/ol_ I'agneau i:_os,
h/so, fez ]a sol/de all cel/tre (Ill mllsc]e
laxge le phls has.
h/so'fez ]a sore/de a_l centre de p]ats tels
qlle pah/de vim/de oil mets e_/cocotte.
InseSrez ]a so_de dm_s ]a parde aym/t ]e
phls de chair de ]'h/tet_Jem" de ]a odsse
du dessolls et paralliele i) la odsse d'm/e
Comment reg/er /e four pour r_tir en utifisant /a sonde
h/so, fez Lt sonde dm/s Fa]iment.
[]
B_mchez la so,/de dm/s la prise
[]
du {bin: _ssm'ez<'ous de ]a po_sser
e_ti_reme_lt. Fermez la porte du
fore; Assm'ez-vo_s q_e le c_ble de
]a so_]de _/e to_che pas ]'eS]eSme_/t
du gril.
E_/[imcez la touche PRORE(sende).
[]
En{imcez les tol_ches mm/&Jqlles
[]
pour r_gler ]a temp&_mlre
i_/te_Jem'e de_s]re_eposit les aiime_/ts
o_l ]a vine/de, l ;I tempe_mlre
h/ter_/e maximm//de ]'aliment
que vo_ls jpo_wez r6gler est de
93 ° C (200 ' F).
E_/{b_/cez ]a to_che RAKE(ctiissefi).
[]
E_][kmcez ]es touches mm/&'iques
[]
[>o_n" r&gler la temp&*;_t_a'e voul ue
d_ fbm;
[] Enfimcez k_ touche START
(d_marrer).
L'affichagec//)noterasilason@estbsbrbe
dans/apriseetsivousn'avezpasr@/bde
tempbratumdesondeetenfoncb/atouche
START(d_marrer}.
I,oxsq_e ]a tempe_ratm'e i_/terne de
]'a]ime_/t attei_/t 37,8 ° C (100 ° F), la
tei//p(_r_{_lre h/teH/e chm/gea_/te
I xn'sque ]a tem}:x_ramre i_/terl/e des
[]
a]ime]/ts attei_/t ]e chifl}'e rt_g](_, ]a
so_/de et ]e %m" s't_teigl/el/t et ]e
colin'hie d_1%m" &/let m/s]gi/aL
Pore" arr&ter ]e signal el/iimcez la
to_mhe CtEAR/OFF {afi.u/atiefi/atr_t).
[ Iti]isez des poigneSes chmldes posit
retirer ]a so_lde des a]ime_ts.
N'uti]isez pas de ph/ces posit ]a
Pore" cha_/ger ]a tempeSratm'e du ibm"
dmsmt le cycle Rgth; e_/[imcez la to_lche
RAKE(c_issen)et ells_.ite ]es tol_.ches
mm/&'iques pore" r_g_er ]a _/o_we]]e
Si /a sondeest mtiMe de/'a//?nentavant que
/a t_mpbraturefinale nesoit at_e/nte,vous
entsndrezune tona/itb et f affi@age c/ignotera
jusqu_ ce que/asondesoit retfMe du fou_
VouspouvezutilLs'er/ambut_rie mgmesi vous
nepouvez/)as uti//serbs opbrationsdu fourfi
mbut_rie enutilisant /asonde. 6_
Page 70

Utiliset te fo#r # conveMon. (surce, ainsmod#tes)
Position b multigHlles,
Vent#ateurde convexion
Densun fourb conve;_/on,fi ya unvent//ateur
qui fair circu/er/'air chaudau-dessus,souset
autourdesa//#zents.
Cetair chaudestrbpartiuniformbment
dens/'ensemblede/a cavitbdu four
AbsL lesa/irnentscuisentet bmnissent
uniformbment_souventenmoinsde
tempsavech cha/eurdE,convex/on.
Cuissen a cenvexien a 1grifle
I,e vem]til;_tem" de co]wexkm I_i_]tcircl_]er
m_ifk)rm_mei_t Fair r_chm_ft_' m_-dessl_s et
m_tom" des a]]mei_ts.
Pour/a cuhson b convexion avec une seu/e grille,
uti/Ls'ez/es positionsdes'grillesrecon_mand_es
dens h section Ut_s'at/on du four
Cuisson # convexion a mMtigfifles
P_fisq_e Fair r_chm_f_ ch'c_]e
iH_i_k)r_]lemei_t da_s ]e _k)lll; ]es a]ime_]ts
i)e_lvei/t 5tre i)rSparSs avec d'exce]]ei/ts
re_s_]mts e_ _d]isa_t ph_siem's grilles.
[,a c_dss(m {:_ph_siems g_J]]es pe_t
mlgmei/ter m/ Dell ]e temps de c_lisso]/
pore" certah_s _dime]_ts, ma]s dm_s
]'ei_sem]b]e e]]e rSd_fit ]e temps, l,es
bisc_fits, ]es m_fti_s, ]es bisc_its sees et
_tlKres [)ai_?s r_[)ides do_l_lei?[ de ]bol_s
r_s_]mts avec ]a c_fisso_ {)ph_siems g]J]]es.
REMAROUE: m_ vendlatem" de co_we×io_
s'alhm_e et s'_teh_t pe]_(Jm_t la clfiss(m
pore" m]el_x r_pardr Fair ch;md d;ms
le fbm:
I ,e vei_ti]atem" (]_ %m" i'_c<mveM(m
s'_teim_t ]ors(p_e ]_ porte dl_ %m" est
OIIveFte.
ldbalpourbrunirunifom_bment/esafiment:£
cuiL_sur I grilleetpour/eshrgesa/imenL_.
Vouspouvezremarqueraussiunecerta/oe
rbduct/ondetemps.
Bons rbsultatz pour/es bhcuits secs, hs
biscuitt_,bsmufhks;hsbrownie,s;bs pefiL_
g_t_au;_; /es chou;_b h creme, hs brioches,
h g_teau des anges et h pa/o.
El_ c_dsh_m_t a_ec 3 grilles, p]acez-e]]
m_e dm_s ]a (p_atribme posid(m (D), m_e
da_s ]_ ch_q_fibme pos]do]_ (E) et m_e
d_ms ]a sixibme posithm (F). S] ]es
c_ssero]es _]'e_m'e_t pas, _d]isez ]es
positio]_s B, D et F des g]J]]es.
70
Adaptation des recettes...
Vo_s pomez _ti]iser vos recettes pr_{_r_es
dm_s ]e fbm" i) com'exiom
PoHr ce[[e CIl]sso_?, ]a {k)]ict](}_) de
c(mversio_ A_to Recipe _ r&I_fit
m_tomatiq_eme_t ]a temp_a_tm'e de
c_dsso_ r&g_di6re par ]a temp&mtm'e
de 14 ° ( (25 ° F),
Reportez-\o_s fi ]a Oonvers/on Auto HeClf)eTM
de ]a secti(m de FoncfionsSpdc/a/a_.
Ufilisez/a tai//e decasserolemcommandbe.
Certa/oes/ostrucfionsd?mballage
d'alimaTt:s"encocottesurqe/bsoudeplat:_
pr/ocipauxontbtbdbve/oppbesenuti/isant
/esfoursb conve_foncommerciauzPourde
mei//eursrbsdtatsdenscefour,prbchauffez-/e
etdf/isez/atempbraturesurI'emba//age.
Page 71

Rfitir per convexion
w'ww.eleotromenaffemffe.oa
Lorsque vous prbparez des
biscuits, vous obtiendrez tes
mei//eurs rbsu/tats si vous
utJYisezune plaque _ biscuit
plate p/utSt qu'une cassem/a
bords bas,
Convbntpour/esb(gescoupestendresdeviand<
d£ouvettes.
Le ve_ltilateur de comexioa fi_itcir_u[er
an[%n;q&'c_ellt Fair __)chauf}_)m>dessas et
aurora" des alh_lents. [_avial/de et lax ol;_ille
st)at b_m_ies de tousles c6t_s col'm;qe si elles
eltaient pr@ar&es dans u{le rbtissoh'e. [,'air
r&hauff_ e_Krme Ies,jl_s mpidemeat pore:
an produit ten<h'e et humkle rout ea cr&mt
m/ext&'iem" dhm b_/m dor_:.
Batterie de cuisine pour la cMsson
Akkmtdhltilisec votre lbur _'_co_lvexhm,
v6dfiez si yes casseroles la[ssent suNsamment
d'espace pour fidre circuler Fair dmis le %m:
Sious pr@arez plusieurs alimems en cocotte
l>_issezde l'espace eatre riles, Ax_ure>',ous
aassi qa'elles ae se touche_t pas ou qu'elles
ae toucheat pa_ les patois du fbm:
Papiet atplastiwe
[,es/ontenm_ts de papier et de pl>_sdq/le
r&ismats h la cholera" recommaad_s pore,
la cuissoa torn'ante pe/_vent aussi £_tre utilis_s
pear la cuisstm ii COll_exkm, m_ds aoa pas
5 des temp& atm'es ph_s haines q ue celles
recommandSes par Ie fi_bricaat de Ia battefie
de cuisi_/e. Los casseroles de plasfique
r&ist_mtes fila chaleurjusqa'fi des
[,orsque _)us r@issez par convexkm, i1est
import mt d'utiliser m/e 15chefiite et uae
g_:ille coac/_e pour la grillade pour ob[e_lir les
meillem's r&ultat_, [_a l_chefl_te sert fi reteair
los gTaisses et la g_:illesert i'_emp_cher les
i?cl>_boussu_'csde gTaisse taadis que Fair
relchaul_l_ de ci_culer sore la viande et _'_
augmemer le bruaissement sous la viaade ou
la olaille.
;_ Placez la g_ille (IlL%m"fi la posifioa qui
ceatre les alimeats e//tre le dessas et le has
dl/fbm:
convexion
temp_:ratures de 204' C (400" F)
Metal et verre
Tout t) pe de battecie de cuisine fkmcdom/e_
dam _otre fbm7_'_comexioa, Par co_m'e,
los casseroles de m&al chauflent le plus
_@demeat et so_t _vcommand_es pore"
la c/dssoa ficoavexioa.
i[es casserolesaufinimatouPenncuirontplus
rapidementquecdlesquisentbrillantes,
[escasserolesdevermou deMramiquescuisent
plus/enternent
Pour ]es recettes relies q/_e pealer au %m;
_ltilisez tree casserole mix parois basses, [,'air
chaud ae peut pas bien circuler amour Lies
aliments dons m_e casserole aux patois hmlms.
Comment rbgler /e four pour cuire ou rfitir a convexion
[] E!ffbncezlatola:he CONVECTIONBAKE
MUtT/fl RACK(edsse_ ee_vexienmoltg
I grille) ou CONVECTIONROAST(r6tir
cenvexie_).
[] ElL%nee/los toud-les mmK!iques pour
r_gler la teag%ramre xoul/le du ibm:
[] Enfkmcez ]a to/a;he SNRr(dmarrefl.
Pore" chaager Ia temp&_tm'e du ii_m;
enfimcez la touche CONVECTIONBAKEMtJtrl/
RACK(coisso, eo_vexioomulti/7grille) ol _
CONVECTIONROAST(r6tir eonvexio_)et
e[Ls/l[te los touches [mm_)_:iques pore
r_gter Ia ao/welle mmpeh'atme,
Lorsque le %m: commence fi chau_eE, le
cha_lgeme_lt Lietemp&'ature ea commengaat
fi 38 C (100" F) sera aNch& I,o_:sque le Ibm7
atteiat Ia temp&ature choisie, 3 hips se fi_nt
entendre,
[] E_fbacez la toucheCLEA&'OFF
(annobtien/'arrOt)5 lafi_.
Vousenl_nfirezunvenfi/ateurpenfiantb cuisson
convexion.Leventibl_urs'arr_tesib porteest
ouverte,mais/acha/eurcontlTluera.
Vousentendrezpeut-&e/efourc/ktuer&rant
/acuisson.Ceciestnormal
REMAR_UE:Pourouirepar couvectio_,la
temp&aturedufourest14° C(25°F)plus
basseque la tempbraturerbglbe.Cousu#ezla
seotio, Utiliserlaco,versiouAutoRecipe.
do,s los Fouctio,s spbcialos de votre
coutr61edefourpourdeplus amples
iuformetio_s.Pourle rOtissogeper
convection,la tempbmtureflu four ueso
couvertitpasautomatiqueme_t.
71
Page 72

Utiliser les foncdensa minuterie
pOUr _a CUiSSOfi _t COfiVeXiOfi, (sur certains mod_tes)
Veus entendrez un ventilateur en cuisinant avec cos fonctions. Le ventilateur s'arr_te si la porte est ouverte, mais la
chaleur continuera.
REMARQUE : los ailments qui se ggtent facilement--comme /e lait, los oeufs, le poisso¢ la farce, la volaifle et le
porc--ne devraient pas rester sortJs pendant plus d'une heure avant ou apr_s la cuisson. La temp6rature ambiante
favodse la croissance de bact6ries dangereuses. Assurez-vous que la lumi_re du four soit 6teinte carla chaleur de
I'ampouie favodsera la croissance de bact6ries dangereuses.
Comment regler un demarrage immediat et un arr_t automadque
t_ulti /1 Rack
i iii iI
Lefours_//umma /mmM/atementetferacu/re
pendantunefiureechois/e./_/a fin du temps@
cu/sson,/e fours'eteli_draautomat/quement.
Assm'e>_o_s q_e l'horloge montre 1_
l']on n (t }]eHl'@,
[] En:tbncez la touche CONVECTION
RAKEMULTI/1 RACK (cuisseu
ceuvexieu multi/l gri#o) o u
CONVECTIONROAST (rStir oouvoxiou).
[] Ei]fbncez ]es touches !]um&'iques
pour r6g]er ]a temp&'ature _ou]ue
du Ibm'.
[] Enfbl]cez 1, u_uche COOKINGTIME
(tempsdo cuissmg
REMARORE:si vot,'orecetteexigeque vous
prechauffiez/efour,vous@vmzpeutgtreajouter
&/ tempsdecuisson.
[] Elsfbncez ]es touches mms6i:i(]ues
pour choisir ]a dm'_e de c/_issol]
_oulue. [,e temps de cuissol] minimmn
q_e _ous pomez r6gler est de
I rain ute_ [a temi)&atm'e du
ti_ul: qne _o_s r6g]ez et le temps
de c_dsson entl6s s'aNc]]eront,
[] E_]fimcez la_touche START(d_morror),
i,'a}Iichage indique_:_ le c]mngcment
de temp@_Ltm'e (on commenqant fi
38° C [ ] (}0° F] ) et le temps de cuisso_,
L'afIichage comme_]cera a chat]g-or lorsq_e
la temp@'atm'e attei_] t 38° C (100 ° F).
[e fbur pours_dw'a ]a cuisso_ pendam
le temps pl:ogramm6, puis s'arr&mra
mm)mati(Fmment fi moi_]s que ]a fbnction
_'_ARM (r&hm_ffer) _]e soit r6g]6e.
Repol:tex-_otxs fila section Oorronentr_/er/e
[] Enfbncez la to_mhe CLEAR/OFF
(onodatioo/orr_t)pour ef_hcer
l'afIichage at_ besoim Retirez les
aliments dn Ibm', Rappele>_o_s
que bier] que le fbm: s'@eigne
automatiquement, los ailments qui
reste[]t daI]s ]e fi_Hl:co[]{]l]He[x)_]t _'/
c_dre apr&s que ]e fbur soit _teim,
REMARQUE: Pour cuiro par couvoctiou, la
tomp_raturo du four ost 14° C(25°F)plus
basso quo la tomp&aturo r_glOo. Cousu#oz la
soctiou Utilisor la couvorsiou Auto Recipe,
dens los Fouctiofls sp6ciMos de votro
coutr_lo de four pour de plus amples
iuformatious. Pour Io rfitissage par
convection, la tomp6rat_ro du four noso
cou vortit pas automatiquomout.
72
Page 73

Nulti /1 Rack
www.eleetromenegersge.ca
Comment regler un demarrage retarde et un error autometique
I/ouspouvezreg/m/e con_(_/edufourpourmtardm
/edernanagedufou_cuirependantuntempeprec'ie,
pu/es'eteindreautomatiquement.
Assm'e>_o_s q_e l'hor]oge montl e la
bt)l] I]e }]etli'e,
[] En[b_cezla touche CONVECTION
BAKE MULTI/I RACK (euisson
eenvexion muM/1 gri#e) ou
CONVECTIONROAST (r6tir eonvexion).
[] E_fim(ez les t°_whes mm_&_kP _es
pore r_gler la temp&'atm'e _ouh_e
REMAROUE: Pont cuire par convection, la
temp&atnre du four est !4° C(25°F) pkls
basso que la temp&atum r_gl6e. Consdtez la
section Ut#iser la conversion Ante Recipe,
donslos Fonctions sp#eiMes de votre
eontr61e defoor pour de plus amples
information& Pour le r6tissage par
convection, la temp&ature du four ne se
convettit pas automatiqoement
[] Entimcez la touche COOKINGTIME
(tempsdecoissmg
REMAROBE: si votremcette exigeque vous
prechauffiez/efour,vousdevez peut-g_eajouter
dutempedecuieson.
[] Enfimcezles touches mm_&'iq_es
pour choisir le temps de ctdss<m
',oHhL
[] Enfimcez la touche OELAYSTART
(demorrogeretarde),
REMAROBE: unetona/itdse feraentendresivous
ufi/ieezb cuieson_ minuterieet netouchezpasb
touche5TART(demorrsr) aprbsavoiren_'_/a
Lorsque le %ur s'alhmle 5 !'heure r_gl_e,
l'anicl_age indkluera le changemem
de mmp&ature (en commencant ;'_
38° C [100' F] ) et le temps de c_issom
L'an]chage commet?cera _'_change_ lorsque
la temp_ratm'e atteindra 38' (; (I O0° F).
[e four potn's_dvr:_ la cuisso_ pe_dant
la dm-_e programm_e, p_ds s'an'btera
automatiquemem fi mob> qt_e la fimction
_4ARM (r&hanner)_e soit _gl_e,
Reporte>_<ms a la sectio_ Comment
r_glerle fourpourr_chauffer.
[] Entbncez la touche CLEA_OFF
(annolotion/orr#t) }:)our ef}i_cer
l anichag'e au besoin. Retirez los
ailments du fbuc Rappele>_ ous
que bier] q_e le ibm" s'_teigt]e
amomatkp_ement, les aliments q_*i
restent dang le fore: continueront _'_
cuire apr_Xsq_e le ibm" soit _teiI]t.
REMAROUE : Pour euire par convection, la
tempOmtnre du four est 14° C(25°F) plus
basso que la temp#rature r#gl#e, Cons_tez la
section Utiliser la conver_JonAuto Recipe,
dons los Fonctions sp#ciales de votre
eontr#_e defont pour de pins amples
informations. Pour le rStissage par
convection, la temp#ratnre dofour ne se
convert# pas aotomatiqoement
[] Utilisez los touches mm%riques pore"
_glec l'hem'e _'_laquelle vous d_sirez
que le tbm s'alhm_e et commet]ce
la cldsso_].
Si vousde,s'ir_zvddfierIceheuresregimes,enfoncez
/atou&e BELAYSTART(demarroge retarde)
pour v&ifier I'heur_dedernarrageregldouenfoncez
/atoucheCOOKINGTIME (temps tie coisson)
pour v_rifierla dlu_edecuiesonreg/ee.
[] Enfimcezla touche 5TABT(demorreg
73
Page 74

Utiliser te fe#r # cofvexio#. (surcenainsmod#tes)
Comment r6gler le feur pour r#tir a convexien en utilisant ta sende
Pour de meifleurs r#suitats en
pr#parant de grosses dindes et
r&tis, nous recommandons d'ufifiser
la sonde incluse dons le four b
convexion.
[]
I ,e m ot PROBE (sonde) align otex'a
sla" l'af_ichage et le omt]'Ole (]{_ fore"
h_d]que_'a s]la som_de est h_se_'g:e dam_s
la pdse et s] vol_s m_'avez pas _'_gl_ de
tempe_wtm'e de som_de et em#imce_ ]a
tol*_he STaRrtd#,marrer).
PHacezHagriHHedu I_bm"51;_po@io_
[]
qloi cem]'e los a[ime'_ts e_tre le
dess_ts et]e has tilt {i4m h_sg"rez
]a soude dam_s ]a vhmde.
[] B]_mcbez Hasom]e d;ms Hapr_se
dH }oLin _ssLtrez-vol_s de Ha pol_sser
e']_r]&remem_L Fermez la I>o]'re (h_
fbm:
[] E]ffo]_cez la touche CONVECTION
ROAST(rOt#cenvexien).
[] E_ffo_cezles ro_cbes mm_riq_es
I)oHr rclg_er Ha [empg'Fat_.Ye ',oHl_.e
du {hm:
E._b_cez la touche PROBE (so#de).
[]
E_{k)_ cez des[o Hch es t_{tm _'Yiq Hes
[]
po_._r 1"¢I_]e1"Ha{e'mpg'_'a{{tre
i _tg'_i e_tre dg's]r_e I >om" la via _de.
[] E_ffo]_cez ]a ro_che START
(d6marrer).
J x4"sq{te le fk_u]" common/co fi chmff}b"r
le mot LO (basso) daHiche.
] Lo]'scpte la [emp_]_ma'e i_Ke]'n]e
de la vkmde a_eim le chif[]'e retglet,
la sonde e_le }bin"s'_eig_e_ e_le
co_m'Sle du {bin" &]]e_ m] signal.
Pore" mTOte'r ]e signal en:Rmcez k_
to_che CLEAR/OYF(a_nulatien/arr#t).
[ Idl]sez des po]gn_es pore" _'edrer la
so_de des a]ime_s. N'm]lisez pas
de p]nces pore" la _'edre_" car cola
M $E EN ARBE : our
bviterlosbrdurespossib/a_,ned_@anchez
pas/a sondede/apriseavantqueb fourn'ait
rdroidi.Ne rangez pas /a sonde dans b four
NOTE:
Sila sondees'tretir_edeI'al/?nentavantque
/atempbraturefsT_a/enesostattebte,vous
entendrezunetona/itbet I'affichagec/ignotera
jusqu_cequelasondesoitretireedufour
l/bus entendrez un ventilateur pendant /a
cuis'son avec cette fonction. Le venfi/ateur
s'arr_te si /a porte est ouverte, reals/a chabur
Coflt/fE_er8.
Vbuspouvezufiliserlam_7_ut_nedeo,us_Tte
m&__e s/vous ne pouvez pas ufilis'er /es
opbratJons du four fi mlrluterle.
Pour change: la temp&ature du
four durant le cycle R6ti:; enfoncez
la touche CONVECTIONROAST
(r5tir convexie_) et ensuite los
touches num&iques pour rbgler
la nouvefle temp&ature.
de la viaude atteim 38 ° (_ ([00 ° F),
la teF_pe']vttHFe ]_te]l_e cha_ge;mte
_uide _ourr#tir a cenvexien
Viandes [q[h*utesr&g/[b Temp, du four Temp, interne
8_f C{Stes,c{_tesdesossees, Saigaant 4_53 (20 24) 163'C(325_'F) 60-'C(140F)t
Pore Avec os,sansos (1,36kg& 2,27kg [3a 5 ibs]) 51 60 (23 27) 163°C(325'F) 77° C(170°F)
Jambol_ Enb01'ters0c,jarlet(1,36kg_2,27kg[3_5Ibs]entitlementcuit} 3I 40 (I_18) 163°C(325'F) 60°C(140°F)
Agnoaa Avecos,sansos A point 37 44(I7 20) 163'C (325°F) 7I C(I60'F)
Fruit do Poisson,entier (1,36kg a 2,27kg[3 a5 Ihs]) 68_88{3%40}t0tal 204C (40O°F)
met
Vo[ai[[e Pouletentier(I:3 kga 1,59kg[2½a3Z Ibs]) 53 57(2_26) 177°C(350 F) 92°-85°C(180° 185°F)
Hautde sudonge A poh_t 53 62 {24_8) 163°C(325'F) 7I ° C(160"'F)
(I,36 kg&2,27kg [3a5 Ibs]) Biencuit 62 7I (28 32) 163'C(325°F) 77 C(170 F)
Filet de bceuf S_dgnant 22 3I (I0 14) 163°C(325'F) 60° C(140°F)t
A point 3I 40(I_18) 163'C(325°F) 7I C(160 F)
COtelettes(I,3 cma2,5 cm 2 c@telettes6_-77(3(>35}t0tal 163'C(325°F) 77 C(I70F)
[I/2 a I po}@aisseur) 4 cOtelettes77 88(3_40)t0tal 163'C(325°F) 77 C(I70F)
6 c6telettes 88 99(4_.P45}t0tal163C (325'F) 77° C(I70°F)
(I ,36 kga 2,27 kg [3a 5 Ibs]) Biencuit 44 53(20 24) 163°C(325'F) 77° C(I70°F)
Queuesdehomard(I70ga227g chacune[6&8 oz]) 4&55(2%25)t0tal 177C (350°F)
P0oletsdeC0rn0uailles,sansfarce(0,45kg'_0,68kg[l_1_lbs])11(>121(50_55)tota]177C(350P) 92°q_5°C(180° 185°F)
Farcis(0,45kga0,68 kg{1 a 1½Ibs]) 121132(5_60}t0tal 177°0(350 F) 92°-85%(180° 185°F)
Canard(I,8I kg& 2,27 kg{4a 5 Ibs]) 53 57{2_26) 163°C(325'F) 92°-85%(180° 185°F)
Dinde,entiere*
Sansfarce (4,54kg &7,26 kg[I0 ,_16Ibs]) I8_4 (8 1I) 163°C(325'F) _2°-85°C(180° 185°F)
Sansfarce (8,16kg a I0,89kg [I8 a24 [bs]) I5_2 (7 10) 163'C(325°F) 92°-85°C(180° 185°F)
Poitrinede din@(I,8I kg&2,72kg {4a 6Ibs]) 35 42(I6 19) 163°C(325'F) 77° C(170°F)
74
Page 75

Uti#serlosfonctiensde fermentation
et de r#cfla#ffeme#t (Rutcertains modbtes) _w.deczrome,a#ers#e.ca
La foncfion de fermentation conserve un environnement chaud utile pour que les produits _ levure Ibvent.
Comment r#gler le four pour la fermentation
[] ,_ ]a fin de ]a fermemadon,
ei]fbl]cez ]a touche CLEAR/OFF
(enndadolgarr#t)_
Pourdviterde rMuire /atemp&aturedu four
etprolonger/e ternpsdefermentation,n'ouvrez
};;_Venfiez/espains tOtpourdvitertoute
surfermentation.
REMARQUE:
N'utiliseZMSlemodedefermentationpour
rbchaufferleealimentsouleegarderchauds.La
ternporatur_ rJu four pour /8 brmentationn_st
pasassezchaudepourconserver/esaliments
destemperaturessansdange_Utilisezb fonction
WARM(r#cflauffer)pourgarderbs aliments
chauds.
LabrmentationnefonctionnerapasIorequele
bur deMSSe52°C(I2'5°F)._HOT_,(chaudl
s'affbhera.
iiiiiiiiiiii_ ii_IIiiiiiii!ii_!i
ii i i _I / ili!iiill
ii!f!iilliliiili!ii_ !ii!iiiiiiiiill_
[] Placez ]a }x'ktecomecte darts m] plat
&ms ]e fbm" sin" la tablette g ou C.
NOTE: pour& rnei//eursr_su/tats,couwezla pore
d'un tlasuoud'unepellk:uledep/astiquegrabsde
(lep/astiquedevrapeut-_tre_tTeaneresousle
contenantpourquele ventilateuralL/fourne/e
retL_eMS).
[] Enfimcez ]a touche PROOF
(fermentation) p/ds l, touche
START(d&narrer),
1,afSchage i_diquer PrF (proof ou
fb'cme_]mt]o_]).
[a ]um]&'e &/fi)m" s a]]m]]e et ['este
allmn_e dm';mt ]a f>cmemado_].
La %_]cfion de fenllemafion %m'_]it
amomadquemem ]a temp&'amre optimale
pore"la ferme]]tat]o[] et _]'a done aRCH[]
@_stemem de tem}x4rature.
[] R<4glez KITCHENTIMERON/OFF
(mht_teriedecuisinemarche/arr#t)pour
]e [elil})s (:[e f_'i'Ille[]tat]o[] ]ll][]]!llHIi1,
Comment regler le four pour rechauffer
;_i_ii_iiii_i![_ 'i__I_!_I_I_
Z i
[,a fimcdol_ WARM(rechatfffer)garde les
aliments cults c]]auds.
Cette fb_]cdon i]'est pas coi]Q[le })OH["
r_cl]a_ffer leealiments f_'okis.
Pour ud]isec ]a fbnctio_] WARM(recha_ffer)
en%ncez ]a _oucheWARM(recha_ffer)e_
ensu]te la to[_che START(dfmarrer).
Pore,uti]]ser]afb_cdo_] WARM(rechauffer)
apr_s avoid"cuit o_ _ot]avec la rain merle,
s_ixez ces _tapes :
] E_]f}mcez ]e u]ode de c[I]ssoI] \OHIH
[] Enfimcez lee _ot_chesmm]&'iques
[] En%ncez ]a touche COOKINGTIME
] gi]fk)i]cezles touches numSriq_es
[] Enfb_]cez ]a touche WARM(r#chauffer),
[] En%_]cezla touche START(d#marrer),
Pourrendrelosarticlesrassfscreustf#ants
Placez]esalimemsdartsdescasseroles
ou plats ;'_c6t& has.
POUl: de c_]eil]emTs re:ell]tats, })]acez
lee aliments e_]m] seu] _]ixea_L
N'empilez pas.
(BAKEfc_isse_], CONVECTION_AKE
MULTI/1RACK[c_issen cenvexien
m_M/1gr#le] ou CONVECTIONROAST
[rOtirconvexion]).
pore"r_gle_"]a temperature du fimr.
(tempsdecuisso_),
pore"choisii: ]a dur_e de c_dsso_]
};Z[;aissez-les dScomerts_
V&ifiezap*'bs20 _'_30 minirues s'ils sore
c_xmsti]]ants.A.}outezdu temps ;m besoin.
NOTESIMPORTANTES:
, Leealimentsdoiventresterchaudsdane/eur
contenantdeculasonoutransferg9_unplat
deserviceconvenantauxa/imentechauds.
, PourlesalimentsteMms,couvrez-lesd'un
couvercleallantaufouroud'unMpbr alurnbiurn.
Lesa/imentefritsoucroust//lantsn'ontMs besob
d'b_ecouverts,maispeuvents_ss£'hers'i/s
sentr#chauff&5"trop/ongtemps.
OuvrirlaportebrepddtionpermetOI'£r chaudde
s'echapperetau_alimentsdesereffoidir
Prevoyezdutempssupplernentairepourquela
ternperatiJre O.I'intdrieurdufoursestabi/laeaprbs
avoiralbut#,deearticles.
Avecdegrossescharges,//faudrapeut-_tre
couvrircertainsdesa//YnenLs"cdL_,
Refirez/escu/7/emsdeservice,etc.avantde
placer/escontenant:_dane/efour
N'ufillaezpasdecontenants,couvemleede
ptastiqueoudepe//icu/edeplasfique,
MfSg EN_ARDE"
contenant_,couverc/esdep/ast/queou/ape//icu/e
deplastiquefonderonts'ilesentdanele fourLe
p/astTwefondupourraflnepaspouvoirOtrerefirb
etn_stpascouvertsousvotregaranfie.
, /eS
75
Page 76

Ajustez/e thermostatdufour FMtes4e vous-m#me!
Vouspouvez dbcouvrir qua votre nouveau four pr6pare les alirnents diffbremment de celui qu'il remplace. Ufilisez
votre nouveau four pendant quelques semaines pour vous familiarisez avec luL Si vous croyez qua votre nouveau
four est Fop chaud ou trop froid, vous pouvez ajuster vous=m_me le thermostat.
N'uti/isez pas de thermombtres, comma ceux qubn trouve dans les 6piceries pour v_rifier le r@/age de tempbrature
de votre four Ces thermombtres peuvent varier de 11_ 22degrbs C(20 _40 degrbs F).
REMAROUE: cat ajustement n'affectera qua/es tempbratures pour cuire _ convexion (sur certains models) et rStir
convexion (sur certafi}s models) et non pas celles de gri/, ou autonettoyage. L'ajustement sera conservb en mbmoire
aprbs une panne d'#lectricit_.
Pour ajuster le thermostat
[] Eld_mcezles tol_d_esBBO&B//LO
[][]
[] Em_[imcezla tol_che BAKE(cuNson).
! !i ; iiii ii
(gri#er a flaute/flasse temp#rature)
et BAKE(cuisson) e_ m Ome temps
pem_dm_t 3 secom_des iL_sql_ i'_ce ql_e
]'at_ichage im_diql_e SF.
llh_ m_ombre i'_del_x chiffres
S'_t[[i ch el_L
E_#kmcez BAKE(cuissen)i'_ N_om'e;m
po _a" a 1ten_ er e_ t_'e a __gm e_ {er et
[]
I,a tempe_mmre (;l_ Jti_m"pe_t
s qp_steri_sq_ i:_(+) 19° C (35 ° F)
ph_s cha_d o_ (-) 19 C (35° F)
[:)h_s froid. E_#imcez les to_ches
mlm_:lJq_les de ]a mOme {i_qo_ (p_e
wins ]es ]isez. Par exemp]e, pore"
chm_ger ]a temp&ratm'e (;hi %m"
de S < C (15 <,F), e_iimcez _ et B
Aprbs F:_i_stemem, e_Kimcez
[]
]a touche START(d#marrer)pom
reve_ir i:_]'af{iche de l'hem'e.
[J[i]i sez "_'(K]'e f_ i01"_/o]'n?/a] em el/L
te type demargarineaffeetera /a performancedecdsson !
La p/upart des recettes ont btb dbvelopp#es avec des pmduits _ forte teneur en gras comma/e beurre ou la
margarine (80 %de gras). Si vous r#duisez /e gras, /a recette ne produira pas nbcessairement /es m#mes r#sultats
qu'avec un produit _ plus forte teneur en gras.
Des problbmes de recette peuvent appara¢tresi les ggteaux, /es tartes, les p#tisseries, /es biscuits ou /esbonbons
sont fabriqu#es de ces produits. Moins i/ y a de matibre grasse darts un produit, plus/a difference sara remarquable.
I,es _om_es {_d_m]es des E_[I exige]_t (p_e ]es prod_dts port;m/]_ me]_do]_ 'margari_e' co]_/ie]me_t m_ mob,s S0 %
de m_ti_re g_sse par poi (Is. I ,es prod_its {) ta rti _ er i) S_ib] e tel_ e m" e_ g_s col_ ti el_ _ el_ t m oi _ s de g_;_s et p] _s d ea _L
l ,e co_ te_ _ _]eve_ d'h _m_idite_ de ces prod_d ts i) tartiner a f{ecte ]a texture et ]a salem" des prod_d ts de bo_]m_ge_J e et
de p_tisse_Je. Pore" de mei]]em's r_s_]tats _ec vos m_ciem_es recette pr_i_r_es, _ti]isez de ]a ma_ga_J_e, (t_ berate,
des b_ to_ _ ets _'_tarti _ er co_ te_ a _ t a _ moi _ s 70 % d']_ _i] e ve_g&ta] e.
76
Page 77

La porte du four dolt #tre fermbe et tous /es contr61es rbg/bs correctement pour que les cycles foncfionnent
correctement.
Avant un cyMe de nettwage
Essuyez toute accumulation de
salem sur le fond flu fore:
E]/]evez line gri]-H_che{_'ite, tolls ]es
uste_/si]es, ]a so_/de et tom pap(el
d'ahm/]mum dll %m'- i]s role pelwei/t
s_q)porter ]es tempe_ratllres _]e', e_esde
I/ettoyage.
REMAROUE:
i,es grilles bri]kmtes de colllem"
a_ge]/te_e (sur certah/s modules)
pelwe]/t &Ire m/ettoy_es pe]/dam/t
]'autlmettoyage, mais ]em" coldem"
fimce_w, e]]es perdrom/t ]em" b_i]]m/t et
(;[e_ie]/(;[ro]/t dllres {'/fhire glissen
; Si voile {bin" est eSqidpe5 de gillies de
fbm" recomertes de porcelah/e giJse,
vol_s po/wez ]es ]aisser dm/s ]e fbm"
pel/dm/t ]e _3v]e d'allto m/etto}_tge.
l,es sa]ete_s sin" ]e cadre avm/t de
]a cllish/i_re et Fexte_riellr (;[lljO]m/t de ]a
porte do]re]It Otre m/etto_e_es i) ]a mah/.
Nettovez ces e]/droits {) ]'eall challde,
avec im mmpo]/i'_ rScm'er de jp]asdque
oil remp]i de sa_om/oil des m/etto/m/ts
te]s ql_e Soft Scrub <. Rim/cez biel/i'_ ]'eal_
propre et asseSchez.
Ne _/ettoyez pas ]e.ioh/t. l,e mat_4(Jall de
fibres de verre dlljoh/t de ]a porte du
fi_m" m/er&iste pas it/l'abmsion. I1 est
essemie] ((lie ]e,ioh/t reste h/tact. Si
vous remarqllez qll'i] deviem/t iise_ oil
s
Essl[_ez tola deSverseme]/t ]om'd all fired
dll folll:
_Ssllrez-volIS qlle ]e com'erc]e de
]'ampolde du ibm" est el/place et qlle ]a
]lm/ibre est e_teim/te.
IMPORTANT: ]a sam5 de cermh(s oiseallx
est extr&meme]/t se]/sib]e aux {im/_es
d_gag_es dlmmt ]e cycle d'auto]/ettoplge
de to/Ire cllish/ibre. De_p]acez ]es oisemm
et mettez-]es dm/s line piece biei/a&'eSe.
Comment regret _efour pour _enettoyage
[] Eteig]/ez tolls ]es br_l]eurs de
surfi/ce.
Enflmcez ]a touche SELFCLEAN
[]
LO/STD (a_tenetteyage bas/std) role
lois pore" line dm'eSe de _/ettoyage
de 4 ](em'es (3 heures slur certai_/s
modi4es) oil dellx this polar
line dureSe de 3 hem'es (4 hem'es
slit certah/s modb]es).
[hie dm'_e d allto_/etto}:_ge
de 3 hellres est recomman/de_e
]olNque ]es d_velNeme]/ts so,it
petits et coil tel/us. [ ]_/e dur_e
d al_ton/ettoyage de 4 ](em'es
OI1 [)]llS es[
[] S'i] fitllt line peSiiode alltre qlle
3 heures ou 4 heures, utilisez les
[OllC]/es _/II_//(_IJ q lies et el/trez ]a
dur_e de _/etto} age vol_]l_e.
Volls pomez c](a_/ger ]a p_Jode ii tollte
alltre el/Ire 3 (2½ bem'es sin" certah/s
modb]es) et 5 hem'es se]o]/]a saiete_
dll %m:
[] Elffon/cez k_ tolmhe START
(d#marrer).
l ,a porte se verrolli]] e a iltom ati qilem el/t.
l,'atlichage h/diqllem ]e temps de
_/ettop/ge resta_/t. 1{]_/e se(_ pas possible
d'olwrir ]a porte (;Ill{bin" ava_/t ((lie
]a temp&_mlre _/e tombe sous ]a
temp_4nlmre de verrollillage et awmt qlle
]e vo'<mt LOCKED(verro_ifl#)_le s'_teigne.
l ,orsq lie ]e voym/t LOCKED(verreg###)
s'Steh/t, rolls pollrrez ollw'ir ]a porte.
[] Sm']es modb]es _qldpe_s (ill
verroll[]]age de ]a cll[sh/[bre,
ai:/p/13ez Sill ]a tollc](e RANGE
LOCKOUT(verre_i#age de N
c_isini_re) et te]/ez-]a appl[I'(_e
[/e_/(;[n_/t 3 seco]/des pour ]'arr_ten
l,e mot LOCKED (verro_i##) c]ignote_:/
et ]e co]m'6]e dll fbm" sigmdera si rolls
rSg_ez ]e c(cle de _/etto/er et si rolls
ollb]iez de {briner ]a porte dl_ %m:
Pore" arr_ter im c/c]e de _/etto}_/ge,
entimcez ]a tol_c]]e CLEAR/OFF
(ann_lation/arr#t). l,orsql_e ]e vowmt
LOCKED(verre_i##) s'_tehlt h/diql_am
qlle ]a tempeSrature du fi)llr est passeSe
sol_s ]a temI:/eS_:m_re de verrold]]age,
vol_s polm'ez olwrir ]a porte. 7 7
Page 78

Uti/iser/e four autonettoyant.
La porte du four dolt #tre fermOe et tous los contr61es Mgibs correctement pour que /e cycle fonctionne
correctement,
Comment retarder/e d#hut du nettoyage
Lo/ Std
REMAROUE : Vbus devez bt_indre /es brE,@urs
de surface avant I'heure de dbbut d'auto
nettoyage.
[] Em_mcezla [o_lche SELFCLEAN
LO/$TD (autenetteyage has/std) m_e
{ois pore" m)e dm'(_e de m)ettoyage
de 4 hem'es (3 hem'es sin" certah_s
modi4es) ol_ del_x _i_ispolar
line (;[m'_e de 3 hem'es (4 hem'es
[Im_e dm'_e d'al_toN_ettoyage
de 3 hem'es est recommam_d_e
Mlsqlle ]es d@elsements so]it
perils et c(mtem_s. [Im_e dm'_e
d'm_to_etto_ge de 4 hem'es
oll pills est recommm_d_:e
pore" m_ fbm" plies sale.
[] S'il fma m_e p_riode mare que
3 hem'es ()it 4 heures, utilisez les
tollches m?llmt_lJqHes et e]?trez la
dm'_e de m_ettoyage vou]l_e.
V0us pomez cham_ger ]a [)_J(_(lte i) t(mte
;mtre e]_tre 3 (2½ hem'es sin" certaim_s
modb]es) et 5 hem'es solon ]a sa]ete_
d_ ibm:
[] En[imcez ]a to_che DELAYSTART
(d#marrage retard#).
[] [Jti]isez]es to_ches mm_ri(p_es,
d_sirez q_e ]e c}c]e de _etto'_a_e,_,
corn m el? ce.
[] E_[imcez la to_che START
(d#marrer).
[ ,a porte se verro iliH e a _Ko]??a [i (]Ilem el? t.
(;h_ cYcle. I] _e sere [)as possible d'o_w_Jr
]a porte (1_ {bin" ;waist (p_e ]a temp(_ramre
_e tom]be so_s ]a tempe_;m_re de
verro_dllage et a_;mt q_e le voym_t
LOCKED(verre_i##)_es'_teigne.
l ,or_que le roy:mr LOCKED(verro#i##)
s'_teh)t, vo_s pore'fez o_wrir ]a porte.
[] Sm']es modb]es (_(p_ip(_s (1_
"_'erro_d]]age de ]a c_isi_)ibre,
appll}ez sin" ]a tollc]le RANOELOCK-
OUT (verre#i#age de la c#isi#i#re) et
te]_ez-]a ajpp_y_e pend;mt 3
seco]_des [)om" 1 _nT_ter.
78
Apres un cycle de nettogage
Vo_s remar(p_erez pem-_tre m_ pe_ de
ce_dre blm_che d;ms le fi_m: Essm'ez-la
_ec m_ chiflim lmmide aprbs q_e le Ibm"
ref_'oi disse.
Si des po/7}t7 bkncs testent re,firez-/es avec un
tamponb,rbcurer de p/astiqueoummp/ide savon
et nncez bien avec un mb/ange d'eau et de
i!l_?ai_re,
Ces de_pOts s(mt ]_oHm_]eme_]t m_ r_si(;[_
de se] (]_] _e [)e_t _tre retir_ par ]e _c]e
de _etto}_ge.
Si ]e {ore" _'est })as propre apr_s m_ cycle
de _etto}v_ge, r&p&tez ]e cycle.
; Vo_s _e po_vez pas r&gler ]e Ibm" po_r
]a c_dsso_ a_a_t q_']] _e soil assez f_'ok]
[)o_r q_e ]a porte se (;[_",erro_]]]e.
; Pe_da_t l'm_to_etto?age d_ fore;
vo{is pou_ez e]?fo]?cez ]a tollche
CLOCK (herlege) po_r a#i ch er ]'h eure.
Pore" revenh" m/compte i) reboms d_l
_etto}_ge, e]_{imcez ]a to_che SELF
CLEANLO/$TD(a_tenetteyagehas/std).
Si les grilles deviem_e_t difliciles i_
g_isser, app]iq_ez m_e petite (p_a_tite_
d']mi]e de c_dsso_ sin" m_ ess_de-to_t
et ess_yez ]es bords des grilles a_ec
]'ess_de-to_t.
Page 79

Fonctiens speciales de votre centrSlede four. ..elect,eme,ege,sge.c,
Votrenouveau contrS/e tactiie a d'autres fonctions. Voici ies fonctions et comment/es activer.
Lesmodes de foncfions spbcb/es peuvent gtre acfivbes seulement Iorsque I'affichage prbsente I'heure. Elies restent
en mbmoire jusqu'9 ce que les btapes soient rbpbtbes.
Lorsque I'affichage montre votre choix, enfoncez la touche START(dbmarrer). Les foncfions sp_ciales restent en
m_moire aprils une panne de courant, sauf la fonction du Sabbath qui dolt gtre rbinifialis_e.
Arr_t de 12 heures
Hi/Lo
Aveccettefonction,si vousoub/iezet
/ais,s'ezlefourenmamh¢lecontrO/eI'_tebdm
automatiquementapr_s12heuresdumntlos
fonctionsdecu/ssonouaprbs3heuresdurant
unefonctiondeSI.
Si vol_s de_sirez d_sactiver cette J_k)m_ctio_,
sl_ivez ces _tapes.
Elffi)_cez la to_che SELAYSTAST
[]
(d&narrage retard_),i_squ'i'_ce q_e
no sh&_ (a_c_ arr_t) s'at_khe.
E_ffimcez la touche STAST(d_marret)
[]
pore. _cdver 'm_cm_ arr_t' et laisser
le co_m'61e 5 ce mode de fkmcdo_
sp&ial e.
[] £1do_cez les tol_d_esSROILHI/LO
(gr#terahaute/bassetemperature)
et SAKE(cuissen)e_m _me temps
pe_dam_t 3 seco_des il_sql_'i) ce ql_e
l'afl]chage im_diql_eSF.
Seleetion de temperature on Fahrenheit ou en Celsius
Vbtmcontr_/edefourestr@/bpouruti/iserdes
sb/ectionsdetempbratureFahrenhdt:maisvous
pouvezloschangerensb/ectionsCdsius,
[] E_ff'(mcez les to_ches SSOIL HI/LO
(gri#er _ haute/basse temperature)
et SAKE (c_issen) e_ m _m e temps
pe_da_t 3 seco_des i_sq_'i) ce q_e
l'a:t_?chage i_diq_e SF.
[] Enfimcezles to_ches
COOKINGTIME(tempsde c_isse_t)et
BROILHI/LO(gri#er _ haste/basso
temperature) e_ m_me temps.
[] E_ffi)_cez les to_ches COOKINGTIME
(tempsde c_isse_)et BROILHI/LO
(gri#er a haste/bassotemperature)e_
Hi/Lo
Tonalites de fin de cycle a minuterie
A/a find_,ncyclebminuterie,vousentendez
3b/pscourtssuM}d'unautreaux8secondes
jbsqu_cequevousenfonciez/atouche
CtEAS/eFF(anndatien/art_t). Ceb/f_
continude8secondespoutgtreannu/b.
I_)OIOY l'i_?_?lllel" :
[] E_ffo_cez les to_ches SSO_LHI/LO
(gri#er _ haste/basso temperature)
et SAKE (c_issen) e_ m _m e temps
pe_da_t 3 seco_des i_sq_'i) ce q_e
]'a:t_?chage i_dique SE
i_dique_ C (Ce]si_s).
[] E_t_mcez k_touche START
(d_marrer).
[] E_ffimcez la to_che KITCHENTIMES
ON/OFF(minutetie dec_isine
marche/_rf_t), li,at_ic]]age h]diq_e
CONSEEP(hipcontinu).En_6,_cez
la to_che KITCHENTIMESON/OFF
(minutefledecuisinemarche/arr_t)
5 nou_ea_L 1,:d_ichage h_diq_em
BEEPNipZ (Ceci amm]e ]e hip
m_x O seco_des.)
[] Elffimcez ]atouche START
(d_marrer).
Page 80

Fonctionssp .ciMes de votmcontr.& de four.
Volumede tonMite
Cettefoncfionvouspermetd'ajuster/esvolumes
des tona/it_s pour obtefflr un nii/eau acoeptab/e,
//y a tTOI:S"niveauxpos,ffblas'.
[] E_ffimcez les touches BROIL B//IO
(griller _ haute/hasse temperature)
et BAKE(cuissen) em_m&_e temps
pe_dm_t 3 seco_desjl_sql_ 5 ce ql_e
Fa_ichage im_diql_e SF
[] Em_bn(ez ]a tol_che OVENUGBT
ON/OFF(&mi&e dufourmarche/arr_t).
I,affichage h_diq I_e_,l2 BEEP(2hips).
Cec] est ]e m_i,/eal_ _lev_ dl_ w/hinge.
Em_[bm_cez]a u/uche OVENUGHT
ON/OFF(&miere d_ fe_r marche/arr_t)
[]
[]
12 heures, 24 heures o_ ef&cer Yhortege
VotmcontrOleestr@/bpouruti/iserunehor/oge
de 12heums.
Si vo_*s pr_i_Tez m_e ho_toge de
24 hem'es o_ im arr&t d'affichage,
s_dvez ces e}tapes :
[] Elffi'mcez ]es touches BBOIL BI/LO
(gri/ler & fla_te/hasse temp&at_re)
et BAKE(c_issen) e_ m6me temps
pe_dm_t 3 seco_desj_sq_ 5 ce q_e
]'aff?chage i_diq_e SF
[] E_ffimcez ]a touche CLOCg(herlege)
m_e Ibis. l,'aftichage i_(liq_el:/24hr
(24fle_res). Si c'est ]e choix (p_e vo_s
dSsirez, eldb_cez ]a to_che START
(rib.matter).
En%_cez ]a to_*che CLOCK (heflege)
5 _<mvem* pour passer 5 ]'ho_toge de
24 hem'es, i ;a}lichage i_diq_*em 24 hr
(24 heures), Si c'est ]e choix que vo_ls
d4sirez, en%_lcez ]a tollche START
(d&narrefi.
Enflmcez ]a to_*che CLOCK (hofloge)
5 _ouveau pore" effi/cer ]'at}]chage.
I ;affichage h_diq_*e_:/oYg(arrOt).
Si c'est ]e choix q_e w_s dSsirez,
elffimcez ]a tolmhe SYABY(d&narrer).
REMABOUE : si/'hor/ogeest enmode d'arr_t
Start (dbmarrageretardb).
3 BEEP(3hips). Cod est ]e _ivem_ ]e
p]_s h/rt d_ vo] _m_e.
Ei_%_/cez ]a to{lobe OVEN U_BT
ON/OFF(&mi&e dubur marche/arr_t}
5 _ome:m. I, af_]chage h_di(p_e_/
BEEP(f hip)_C.eci est ]e _ivem* ]e
p]_*s has &* vo] _*me.
Pore chaque cha_/gemei/t de _/iveml,
vo_*s e_te_dez _me tom_]ite_ (p*i
i_]di q _e ]e _]]veau de vo] m]]e.
C]_oisissez ]e niveau vou]u (_ hip,
2 hip; 3hips).
E_ ['lmce z ]a t//_mh e START(d_marrer)
p{mr a cdver ]e _ ivea _ i _ di q_15.
vousnepourrezpas uti/iser/a fonctionDelay
8O
Page 81

Cuisiner ot maintenir (surcertains modbles)
VotTecontrO/ea unefonct/on t'ookandhold" []
(cu/s/)_eret mabten/r) qu/garde lee a/#nenL_
chaudslbsqu _ 3 heuresaprhs/a f#_ducycle
cuisber et rOtiravec/a mbutefie.
BEMARQUE : cettefonction pout seu/ementgtTe
programmbeavec /ecycle Cu/#/?}eret r_t/ravec /a
m#}utede.((bnsultez /a sectsondes"fonct/ons
Ut///sationde cu/sber et rot# avec/ambutene.)
Lorsquecette foncdons'arrgteauton_at/quement []
/a fonction 2uisber et rnabtenir'prograren_be
commenceraautomatiquemenL
1pore"acd\'er cette fb_cdo_ fi i_dliser aprL_s
Timed Bakim_g or Roasdm_g ((Mis]m_er et
rGdr avec ]a mim_terie), slfivez ]es 5tapes
sllivam_tes.
[] EIKbl_cez ]es tol_c]les BROIL.B//LO
(griller a haute/basse tempGrature)
et BAKE (cuissen) e_ m&_e temps
pe_&mt 3 secom_desfimql_'5 ce ql_e
Faffichage im_diql_e SF.
REMABQUE :b contrObfernentendre m_b/p
routeslos 8 secondessi /a fonctionCuisberet
Maintenir est rbg/_epour vousrappe/er que los
a/#nent7sont dans"/efour Enfoncez/a touche
CLEAR/OFF(a_mdatien/arr_t) et mfirez/es
a/#nenL_Iorsquevous/ed_sirez.Oerappelne
foncfionnepas si los tonafitbs_ /a fin d'un cycle
minuth sontannu/bes.Reportez-vousau;_
Tonafit_sfi /a fin don cycleminut_ dane/a
sectionde.Fonctionsspbcia/es
www.electromenagersge.ca
En:fol_cez ]a to_che COOKING TIME
(temps de culssen), i ,'at5 ch e_r
i_diq_e Hid OFF(maintie_ arrOt_),
En%ncez ]a umche COOKING TiME
(temps de cuissen ) 5 _om ea_ po_r
acdver ]a fb_cdon. I,'a[ticbem"
i_diq_e Hid ON (malntlen en marche).
Ei/%i/cez ]a _o_lc]le START(d_marrer)
pore" acdver ]a %_cfiol_ _cook m_d
hok_!' (c_dsh/er et mah/tei/ir) et
laissez ]e co_trg]e i:_ce mode de
UtiHser _a conversion Auto Recipe TM (surterrains modbles)
Pour/acuis'sonfi conve_ion,/a foncfion
deconversionAutoRec/))e"_convert/ra
automafiquemd_tleeLetup&attiresde
cu/ssonrbgu/ihresparla ternpbramre
decuissonb convex/on.
L'affichagebdiquem la temphmtum convertie
(rbduite}8ctuel/e.Par exeF,qp& si vous erltmz
unetempbmtum de mcette r@u//hm de 177°C
(350° F)etsi vousenfoncezb toucheSTART
(dGmarrer),I'aff/_'hagebd/que CON et /a
terepbratureconvert/eeelde 183°C(325° F).
REMABOUE :cette fonct/onne convertit que
be tempbmt_res de cuisson,nonlee durbesde
cdseon. Ooandvousufilisezla rotisseriepar
convection,/a tempbratumdu fournese convmfit
pas automat/qoemenL
Pe_rarrOtercettefencden :
E_K)mcez les to_a;bes BROIL _I/LO
[]
(griller a ha_te/flasse temp&atare)
et BAKE (c_issen) e_ mOme temps
pe_&mt 3 seco_desjusqu fi ce que
E_*:iimcez k_touche CONVECTION
[]
BAKE MULTIfl BACK (c_issen
cenvexlen m_ti/l grille), i 'atHch'_,_e
h_dique_ COt# ON (centint_ en
marche), E_b_cez k_ _ouche
CONVECTIONBAKE MULTIfl RACK
(c_lssen ce_vexien m_tifl grille).
I2atHchage indiq_e_ CON OFF
(arr_t tenting).
[] E_ffimcez ]a to_che START
(d_marrer).
Po_*r activer cette [b_ ctiom reSpeStez]es
_tapes ]i i) 3 pre_c_(;[e_tes, mais e_[imcez
]a touche SNRT (d6marrer) ]orsq_*e CON
ON (centint_ en marcfle) s'atH che.
o°7
Page 82

Ut#iser/a fonctionSabbath
(Con;ue pour te Sabbath et tes Grandes F tes juives.)
La fonction Sabbath peut servir seulement sous cuire/rdfir Eriene peut servir pour/a convexion, grLI,autonettoyage ou
d#marrage retard#.
REMARaUE : /a lumi&e du four s'aflume automatiquement Iorsque /aporte s'ouvre et s'#teint /orsqu'efle se ferme. L'ampoule
peut gtre retiree. Reportez-vous # /a section Remp/acer /a lumibre du four Sur los modbles # commutateur sur /epanneau de
contrSle, /a /umibre du four peut gtre aflum#e et /aiss#e aflum#e.
Comment regler le four pour cuisiner ell rStir de maniere regMiere
i_ ii ii
Lorsque I'affichage indique _ le
four est r@l# _ Sabbath, Lorsque
/'affichage indique _ C /e four est
r@16 _ cuire/r6fit:
Assurez-vousque/'hoflogernontmb bonneMum et []
] Entbucez e_ te_/ez eMb_/c&s les
to_ches BROILNgtO (gfiRera haute,&asse
temp&ature) et BAKE(euisson)en m_me
tempsiusq_F?_ee que l'affkhage h_dique
SE
REMARGUE:sibake (cuisson) o_*broil
(Triller) s'a_iche, les touches BROILBt/_.O
(grJRera flaute/q;assetemperature)et BAKE
(cuisson)_'o_t pas _t_ entb_c_es en
m_me temps. En%ncez la touche
CLEAR'OFF(annulation,,'arrOt)et
FecoI'_tI!/eH( ez,
Ud]isez ]es touches mm_&:iques et entrez
la temp&'atmTe _oulue efme 77: Cet
k88: ( : (170" F et 5_')0"F). Aucu!_ sig_al
ou temp&'ature afiich£
En_bl/cez ]a touche SYARY(d#matret},
[]
Apr_s ul_e [)&'[odede d&d al£m_[re
[]
(Fer_qro_ 30 secondes fiI mbmte, D c
s'afficbe_v_indiquant (p*eIe fi,m"est fi
c_drei_6tie SiD C _e s'a_iche pas,
commencez fi [/omeau fiI'&ape 4,
Pour @*ster la temp&;mlre du thug ea%ncez
]a touche BAKE(cuisso*_)ete*m'ezia nouvelle
mmp_ratme miliw_*tles to_ches m/me_riques
et ex/fimcez]a to_,che START(d#marrer).
[] En%_cez la touche OELAYSTART
(d#marrageretard#)iusq_l'¢_ee que
SA_hath s'affiche.
REMARGUE: I,estouchesCLEA&gFF
(ammlation/arr#t)et COOKINGTIME(tempsde
cuisse#) _imedom_eront dur:mt ]afimedcm
[] En%_cezla touche START(d#marmr)et
s'ai_iche.
Sabbad_,
[] En%_cezia touche BAKE(cuisson),
Auem_signal dome&
Comment regret cuire/rOtir a min_terie = d#marrage imm#dMt et arr_t
autemadque
Assurez-vousque/'hoflogemontmb bonneheureet
I mimite et 9 bem'es et 99 mim_tes. Le
temps de (:uissol_ el/Q'_:s'a;_icheH.
Lorsque /'affichage infiique _ le
four est r@l_ b Sabbath. Lorsque
]'affichage irldique _ _ ]e four est
r@l# _ cuire/rStiz:
82
] En%ncez et te_/ez e_/tb_/cSes ]es touches
BROILHI/tO (griRera flaute/_asse
temp#rature)et BAKE(cuissot_)en re#me
tempsjusq_,?_ee que Faffkhage i_dique
SF
REMARGUE:sibake (cuiss<m) ou broil
(g_:iiler) s'afliche, ]es touches BROILB_/_.O
(griRera flaute./#assetemp#rature)et BAKE
(cuisso_)_o_t pas Ot_ entireties en
mGme _emps. Enibncez la toucI_e
CLEAR/OFF(a_nu_atieniarrO#et
/'e( oi/'_i/_en(eY,
[] Er,%r,<z Ia u_uche OELAYSTART
(d#marrageretard#)jusq__'¢_ee que
SA_ hAtH s'atfiche.
[] En%ncez Ia touche START(d#marmr)et D
s'attk:be.
[] En%ncez Ia touche COOKINGTIME
(temps de euisson).
[] Enfimcez los _ouches mlm_Xriques pore:
the[sir ]a (hlre_ede cuissoll xouhle entre
[] Entkmcez la touche SraRrfdemarrefl.
[] E_ffo!_cezla touche BAKE(e_isso.).
Aucm_ signal donner.
Ud]isez les touches _um&'iques et e_trez
[] la temp&'atme _oulue. _ucm_ signal ou
temp&:at ure af_ich_.
[] Enfimcez la U_uche SraRr(rbmarrefl,
[] 5pr&s m_e @riode de d&li alGatoire
d'eoxito_ _0 seco0des fi ] mimlte, D C
s'M_ichem indiqu mtque le ibm" est fi
cuire/r6ti_: Si D C _e s af_icbe pas,
commencez _'/!_om'eau _/I'e:t;_pe7.
Pour @_ster la tem[%mtm'e (hi %m', en%ncez
la touche BAKE(euisson)et e_m'ez ia i/oHveHe
temperature uti]isant les touches nmn&kiues
et entbncez ]a to_lc]'teSTARr(d#marrefl.
la _i_de la cuisso_, l'a_M_age cha_Nera de
D C ii Det 0:00apparakH, i0diqtlmt que le
ibm" est &eh_t, mais e_core r_gl6 fi Sabbath.
Redre:, los aliments.
Page 83

Comment quitter la fonction Sabbath
www.electromenagersge.ca
÷÷÷
Ht/Lo
[] Enfi_!_cez la {ouche CLEAR/OFF
(armulation/arr_t).
] Si le fbm fb_ctiom_e, atte_dez pen&mr
role p&'iode de d_lai al&itoire d emi_o_
30 seco_ldes fi1 mim_te@lsqu'fi ce q_te
seuleme_it _ s af_iche.
[] E0fimcez et te_Iez e_if_mc_es les
to_d_es BROILH!,,'LO(gri#er a haute/_asse
temp6ratum)et BAKE(cuisson) enm_me
tempsjusqu_ ce que 1'af_ich_ge
indique SE
[] Enfb_cez Ia {ouche BEIAYSTAflT
(d6martageretard6l iusqu?_ce que
t2shdn (arr_t 12)o_ noshdn (aucunarr_t)
s';d[kI/e.
[] Choisissez 12shd_, indiqu mtque le
tbur s'&ei_dra automatiquement apr6s
J2 heroes ou fi0 $_dfi (_cufi _rr_t),
i_diquant que le Ibm" ne s'e_tei_dm pas
automatkluement ap_bs I 2 heroes.
[] Enfimcezlato_lche STA_T(d&narror}
lorsq_le [k@tio_ que vous d&i_e/
s'a_iche ( 12shd_ ou .0 shd_),
REMANQUE:s'il ? a m_e palme de corn;mr
ta_dis que le fi_m7est sous la fimctio_
Sabbath, le fi_ur s'e_teindra automatkjuement
e{ r'esteH eteill{ ii/eme a{i retom7 (hi co,!Fault.
][,ecoxm ¢_ledu fbur dok &t_ere_i_fitialis_,
_S
Page 84

Entretienetne oyagede le cddm re.
Assurez-vous qua tousles contrffes sent _tein_set quetoutes /es surfaces sent fra_chesavant de nettoyer routepattie de fa cuisini&e
Si votrecuisinibreestrefirbe pour le nettoyage,I'entrefienoupour routeautreraison,assurez-
vousquale disposififanfibasculementestr_engag_carteclementIorsquela cuisini&e est
replac_e.Sinon,la cuisini&e pourrait basculeretitpourraity avoirdesblessures.
Commentretirerb pe#icde d'exp6ditiondeprotection et/e ruflan d'emfla#age
BdJbur eventdmit(sue@rtainsme@les}
Boucilon
Agdppez aec soin m_ coin de 1:_pellicuIe
d'exp&[itkm de protection aec vos doigts
et retireMa lenteme_/t de la surti_ce de
Fappme& N'udlisez pas d'ol_iet tmnchm/t
pour I'enle_er, Redrez [oute la pdlicule av,mt
d'udlieer l'appareil pore7 la premiSre fbis,
Boucflons et t_tes de br_leurs
[_es assemblages de b!('dem's doive!_t &re
la%s rSguli6rement et, bien s('m apt& tout
d_:',ersement.
Eteigneztoesleecontr_)/eseventderetirerlespbces
flubr(21eu_
Pour s'assmcr qu'il n') air pas de dommages
au fini du produit, le meillem" mo}en de
tether Fadhe%if du mban d'emballage du
nom'cI apparei! est d'appliquer du d_mrge_t
Iiquide pour Iaver la _;dsselle, Appikiuez a_vc
m_ chNbn souple et l_dsseztrempet:
REMARO_E: ISdhdsiffioit_,treretirederouteslee
pibces.IInepeutI'_tres'/Iestcuitenplace.
Po_t remonEe_ _cp/acez d'abord In {eEe du
br('/ieul [)HIS/e l)oHd_ol! dH br('/leur et elffin
Base
br_ieur_
Assurezrvausdebienpositionner!e
troudelat_tedubr_leursur
I'_lectrodeeta'e bieninsbrerlatgte
dubrOteur_ l'intbrieurfie labasedu
br_teur,Unpefitespacee_trela
baseetla t_teestnormal
Braleuravantdroit(surcertainsrno@les,
brOieureventgauche,br_ieurarri_reNeff
Bouchendu brOieur
T6tedubrOleu[
Ci/amb_e destabilit6 . aiguilb
BasedubrOieur _ur
tToisou quarto taque_s, Pourremettre
M/SE EN GARDE: NEFAITESPAS
FONCTIONNERLEBRULEURSANS
OUE TOUTESLESPtECESSOIENT
EN PLACK
' trlcoter OU un
Assurezwousdebienposifionnerle
troufle laI_tedubr_leursur
l_tectrode.LebauchendubrOleura
en place le bouchalZ, assurez,vou_
q_ucun decos taquetsnerepose
flansla chambredestabilit&
84
Utilisezune
lientoJsad_
pour
dOboucherle
Page 85

Grilles dubr_leur et grille centrale
www.electrumenaffersffe.ca
I,es grilles du br('deur en _:l_>_]lde
porcelaine et la grille d'&e_/t doi_ent _tre
la%es r{)guli0rement et, Ne_/£m apr0s lout
d& et:sement.
Les grilles se lave_/t salt &ms le lme-_ dsselle
salt dins de l'eau saxonneuse puis dnce2es fi
Feau ptopre. Vous pouez aussi udliser des
_ett_/xants abrasitg et des tampons fir&:m er
pour netto?er Ies g-_Jllesdu brOleur et Ia grille
d'&'{mt. Ess%ez Ies grilles a_ec ml chiflbn--ne
les replacez pas sin"m_e sut'f_me de cuisso_ si
elles sont }mmides.
Pore7 refirer les aliments cuits, place>Ies
dons m_ comc_/ant comert. Ajoutez 59mL
(1/4 de tasse) d'ammoniaque et laissez
tramper pe!_dant plusieurs heures ou pour
la mdt. [_aez, lJncez et ass&hez bien.
gie_l que Ies grilles soient &m_bles, elles
pe_dront leur &Iat gTaduelleme_t peu
imporm leur entretie_L Ceci est caus(4 pat"leur
ii de hautes temp&'atures.
Ne tidtes pas tkmctiom_er le br('tlem7 pe_dant
lox_gtemps sans qu'il *f)ait uae casserole sm7
Surface de cuissen
la g_ille. I_e fini pomtP{tit s'&ailler sa_s
casserole pour absorber la cholera'.
Aprbs le aetto? age, rcplacez d'abord la grille
d'(_ ent central Replacez lee grilles lat(4mles
pore" qua les rallo_*ges centHles soient
o_Jer_t_es vers le centre de la surti_ce de
cuisson. [,es rallonges cent_ales arri_re doivent
che_aucher ul_ peu la grille d'&ent. Assm'e>
_tls que Ies gailles soient Men plac&s sur les
b*('deurs et qu'elles soie_lt st INes et fi aivemt,
Plods degrille de caoutchouc
Pore 1:_smbilit& les pie(is du br('_leur de
x_tre sm'time de cuisson sont retain'arts de
caoutchot_c. S[ces pieds sont endommag&
ou per&s, remplace>[es imm&liatement.
Pottr commm*der des pieds de grille de
caoutchot*c de rechm/ge, _wuillez appeler
[/o/l'e H//t'II(_FO Saris _DIiS :
Centrenational
depieces............... 800._1.1616
Plodsdegri#e
e_caoutehouo......... #WBO2T_OfOf
Pore &'iter d'e_dommager la sm'ti_ce e_
email vitrifi(_ de la sm'ti_ce de cuisso_ et
pom'l'emp0cher de perdre s(m b_Jllm_t,
_?ettovez hm?/(_diateme]/t totlt
de2bordeme_t, l,es a]ime_ts (pfi s{mt tr_es
acides (tomates, chot*crot*te, it,s de t_ trite,
etc.) ot_ ]es a]imel_ts qtfi saint tries st_cr(_s
petwe_?[ Gmser des taches mates, si o[? ]es
laisse repose_:
(_t*a_d ]a sm'fime a ret_'oidi, ]avez-la et
iJ_?cezqa. Pore" d'atltres taches comme
lee taches de g_:_s, etc., ]oyez i) Feat_.
savom_et_.se quaked ]a sm'fi_ce a ret_'oidi.
Rh_ces e_stfite et polissez avec m_ lh_ge
sec.
Beutens de centrfile
Leeboutonsde contrO/eserefirentpour faei/iter
/enettoyage.
Av;mt de retirer ]es bout(ms pore" ]e
_]etto);_ge, veuillez _]oter (_*e les bomo_]s
s(mt e_ [)oski(m OFF(ARRED
REMARQUE : Ne rangezjarnah de
mafihresinflammablesdaneun four,un
tiroir oupros dela surfacede caieson.Ne
mr}gezjeFoaisou n'util/sezjamaL_de
mafihrescombus_?_dee,d'eseenceoud'autre
vapeurou /iquidebf/an?ma,Sbau veisinage
decet apparei/ou de toutautfe apparei/
mbnager
REMARQUE : Ne soubvezjamaie /a surfacede
cu/_'son.Si voussoubvez/a surfacede cu/sson,
vousdsquezd'endommagervotrecuieinbre et de
/a fairereal foncfionner
REMAR_UE: Pourbe surfacesdecu/ssonen
acierboxkdab/e,coneu/t_zlasectiondeesurfaces
enacierinoxydab/e.
I,es bot,to_s se _etto]e[_t m_ lave-_a]sselle
at* vot*s potwez lee laver avec de Feat* et
(lt_ sauo_. Assm'ez-_ otis (p_e ]'h_te£riem" des
botlto_]s sok sec avm]t de ]es rep]acel:
E_/ remp]agat_t ]eso.bot_to_/s, ve}rifiez ]u
positio[/ OFF(ARRET) pore" assm'er ]e bo_
o°5
Page 86

Entmden et nettoyagede la cuisiniere.
Grilles de four et grille a rStir de convexion
6riliede four
i i
C0uverciedeverre
i
D0uille
Tol_tes ]es grilles de {_m" se m_ettoie_t
{'_h_mah_ a_ec im m_ettovel_r _bmsif ol_
m_e laim_ed'aciex_ Apr_s le m_etto)_ge,
m_cez les grilles a_ec de l'em_ propre
et ass&hez m ec m_ chif{km propre.
I,es grilles re', braes de porce]aim_e grise
pelwei_t rester (]_ms ]e libra" (hmmt ]e
c}c]e d m_tonettoyage p()!_r &viter ]es
dommages, l,es grilles b_iIhmtes de
col_]em" ar_ei_te_e pe_wei_t rester d_ms
le {bin" din;mr le cycle d'al_tonem>yage,
mais elles perdro_t lem" _clat et
de'de_drom_t dif_iciles i'_glisse_:
I] fim(h;_ g_dsser ]es herds des U>tets des
grilles a_ec m_e l_gbre co_mhe d'h_dle
•,etg&tale aprbs le _ettoyage i'_la mah_ o_
d:ms le fern: Ceci _fidem i'_glisser
fi_ci]eme_t ]es g_Jlles (]_ms le fbm:
Ampoules de four
REMAROUE: le couvercle de verre dolt _tre
retir_ seulement /orsqu'ii est froid. Des gants
de latex peuvent offrir une meil/eure prise.
M $EENGARDE:avant j
remplacer /'ampoule du four, coupez te _rise
courant au four _ /a bo_teprincipale de
fusibles ou de disjoncteur.
As_umT-\ous de [;dsser ]e tom,role et
l_ampoule _¢fi'oidi_ comp/btemunt.
Pore" xx_t_es_cudt_, ne mmfiptde_, p_s
(['mn]_o/_[e ch_l/K[e i'l _;lh_5 _Hes oH ;nec /m
('h ifl}i)l_ ]_ HH_ide.
POIH"rotifer:
To/ir!_ez _e co/ive! (_e (lie ",'erre (][_Hs ]e
[]
sens ai_dhorai_e de I/4 de tom" it_s(l/l'_'_ I,JI
(e (lue les kmg_lettes (h_ com,ercIe de
retire d_:passe!_t Ies mi0ures de la
douille.
[] l'ortez des gants ou t_tilisez m_ (:hi[_bn
propre et retirez 1ampoule e_ dmi_t
pour la sortie:
Po_rtemp_acet:
[] Uti[ise;,"m_e nom'elle ampo_le 5
halog_e de 130 volts sam d@asser
50 watts.
[] Portez des g_antsou _tilisez m_ chi_tb_
propre et retirez l'm_xpoule de so_
emballage. Ne to_lchez pas l'ampo_lle
ii doi ,ts mls.
r_q
r_q
Placez les langt_ettes &_ couvercle de
_u'e darts les raim_res de 1_douille.
Tom_ez le _om_r(le de ecre &ms le
se_s hot_i_e de I/4 tom" pore" eng:_ge_:
Pore" _mmeillem" &lairage i:_l'int&_iem"
d_ fk_m;netto} ez fi'd:q_lemmentle
com'erde vitr_ i?l'a[de (thin (:hiffb_
}mmide. (]eci se fi_it i'_fbm7bien fi'oid.
CUIS10le['e.
86
Page 87

m i
Ne frottez pas et ne nettoyez pas
le joint de porte car il a une r_sistance
extr_mement faible b I'abrasion.
Si vous remarquez qu'il fiedent us_,
s'effiloche, est enflommag_ de quelque
fa_on ou a _td d@lac_ sur la porte, vous
devriez le remplaceL
Nettoyage de ta porte du four
Pournettoyer Yinteriea deb porte:
Puisque ]a section'+_'_['iot(4fiem" dujoiut se
_mttoie durmK ]e c}c]e d+autonetto} age,
aucut_ besoi_/de ]e _etto}er _'_]a m>_Ju,
[,>)section _'_Fext&:iem" dujoint et la
doubMre de porte se !+ettoieat aec m+
mmpo!_ fi r&m'er de pl:_stique ou r'empli
de saxon, de l'eau chaude et du d6tetgent.
Rincez bien aec m_e solution de qaaig-re
et d'eau,
Pournettofer I'ext&iour dola porte:
Utilisez (h_ saxon et de l'eml pour bier/la_e_
le dess+ls,los c6t& et I'a_mit de la porte du
fi)m" N_/cez Non. \%us pomez m_ssi utiliser
u[_/_etto)_m_tpore" Ie wcrre pore"//etto+er Ie
Retrait de ta porte du four
www.electromenagersge.ca
verre fi l'ext&iem" de la porte. Ne laissez
pas ['em_ co+_ler &ins les oHveft_lres des
&el+is.
Si des taches sur la g_m_itm'e d'&ent de la
porte reste_K, u[ilisez {m iietto_a_K (lie/ix
abrasif.... et m_ racloir &_)onge,pore7 de
meillem's r&ultats.
:+Les mari_+ades, lesjus de finite, les sauces
tomates et les pr'oduits [)our arroser
co_?tenant des acides peuveut l)ro_oquer
m_e d&olomtkm et doivent Otr_ essm&
imm_diatemeat. Lorsque la surf;+ce elst
froide, +/etto}ez et Hncez,
:+N'utilisez pas de _em)? a+/t de %m; de
poudres de _ett+)}age o+ld'abrasifi_ forts sin:
Fext&Jem7 de la porte.
For/to
Verroudecharnib,re
Tirezfes verrous dela chami&e
vets le baspour d#verrouiflet:
Position de retrait
d_b
ta porte osttres ]outdo.Attention enrotirant ot
sonlovant la porte.
N+soulevezpaslapo,_+parIspoignee.
Po_r rotiferla porte:
] Omrez e_S&'ement 1_porte.
Po+tssez los xeu'ous de la chami&'e xe_:s
[]
le has xers le cadre de porte,fllsqu'fi la
position d&errouilDe, U_ o+ltil, comme
m_ petit tom nexus fi lame plate pourrait
_tre _/_:cessaire,
Agdppez i;_m_ement les (te+_xc6t& de
[]
la porte sin7le dessus.
Femiez la porte fi la positio_ de retrak
[]
de Ia porte, soit ?_moiti_ chemic/entre
la positio_ d'arr_t de gril et k+position
entibrement omerte.
[] So+_le_ezla porte vers le ha+ajusqu'i? ce
que le bras de chami&'e soit d_gag+4de
Po_r replacer b porte:
[] Agrippez fem_ement les deux c(_t& de
la porte sin"le dessus.
Poussez le vecro+l de la charni_re vers le
[]
haut co_m'ele cadre axllK de ]a caxit_
du Ibm; e_*position verro+lilk4e.
charniere,
chamiere
Poussez les verrous de la eharni&e
vetslehaut pourverrouillet:
]Brasdechami0re
Fond de foursmovibte
Pourrotifer le fond d_ fontotfac#itnr Io
nettoyage:
[] Reth'ez I:_porte du fbm" en sui_ant les
i]+stmctio_s de ]a sectkm Retrajt de/o
porto du four.
[] Agrippez Ies _e_/tes du ik)_(1du ibur
arH&res de chaque c6t(4 et sortez-le.
[] Fem_ez la porte du fbm',
[] Nettoyez le ibnd du Ibm: fi l'eau chmlde
savommuse,
IMPO_NNT: replacez to_{iOULSle %rid
de l-our amoxible a_;mt de l'miliser finom,eau,
0°7
Page 88

Entmtienet ne oyage de la cuisineS.re.
Surfaces d'acier inoxydaflle (surcertainsmodbles)
0 Event central @
Surface decuiss0n
N'utilisez pas de tampotTsdeInine d'aeier;
#spourreientrnyer la sudeee.
F'O{IY Hotter, el ' I;_ SLIFti_(e en ;_(ie["
inox}dable, utilisez de ['eau chmlde
S_/\O_]Be{IX OH {111prodtfit netto}ant ou cii:e
a acier inox_daMe. Essuyez toqiours la
sm ti_ce (la_]s le sens (h{ grai_]. Sui_ez Ies
instructions (Itl prodtlit _]etto}ant pore
netto_ur la sm'fi_ce en acier inox_tlable,
Surfaces peintes
[,es sm'_i{cespeintes incluent ]e dess_s et]es
c_'_t&de la porte et l'axant (hi tiroir Netto_ez-
les axec du saxo[l et de l'eau ou m]e soh_t[oH
Evem de four
I,'&e]/t est ve]/tile_ g_ce i_ m/e o_wertm'e
davis la smIi_ce de c_lisso_/so_ls la grille.
Ne couw'ez jamais ]'o_wertm'e de papier
ahlH/iHillH/ Hi d'allcIIH all[l'e H/a[e_lJall,
Panneau de contrS_e
Si vousb dbsirez,vouspouvezdbsacfiverlos
touchesratifies avant/enettoyage.
Reportez-\ ous _'_la sect]o]/ Verroufl/age de
/a cuisbbre.
Essmez les _clabol0ssm'es avec m/chifiim
h I omide.
VOHs polr_'ez al{ssi H[iliser 10_/ _/e[[o'_a_/[
PoLlr sa_oir coH-l[/-ie[?t acheter Ie [)rodHit
netto_am on Ie cite pore' appareils
dlectromdnagers en acier inoxydable, ou
pour tromer 1111ddtaillam o11 1111magasin
de pi_ces Mabe pros de chez _ous, _euillez
appeler notre i1{{ii]dl;OsHns fl'ais :
Centre national de pieces 1.800.66E16!6
www.eleetromenagersge.en
N'utilisez pas de _]ettoyant de Ibm"
(tOl]]me_?ciak de /)°_dres ....de nett()vage,, ou
d'abrasi[_ [brts sin" aucu!]e sm'e{ce peinte.
(]eci emp&che]wit le b(m fimctiom/eme_/t
de l'&'em du fbm _.
Retirez les salet_s plus ]mportm/tes avec
de l'eml ti&de savom/e_lse. N'_ltilisez
a_mm/abmsi} de q_lelq_le type q_le
ce soit.
Rdac'_fvez/e,__'ches_ac_f/es_;r_,_/enettoyage.
88
Retrait du tiroir de rangement
Pe_r rotifer le dreir :
[] Tirez le tiroir miss] lob/ q_le possible. []
[] So_lle_ ez l'avm/t d{_ tiroh'j_lsq_l'fi ce
q_le ]es b_lte_esdetpasse_/t ]es guides. []
Retirez ]e tirol1:
[]
Po_rreplacer le tiroir:
["lacezle,s rails (;h{ tiroir sin" les
g{fides.
Poussez le tiroir aussi loi_/que
p(_ssible.
So_levez 1avm/t (]u tir()ir et poussez
[]
,lusq_'fi ceque los b_tetes deSpassem
les g{fides.
_baissez l'ava_/t du tiroir et poussez
[]
,lusqu'i'_ ce q_'il ferme.
Page 89

Conseils de d6pannage
Gagner du temps et de/'argent / R#visez les tableaux des
pages suivantes d'abord et vous n'aurez peut=#tre pas
besoin d'appeler /e service,
Action
® { tilisez Jes illuslr Itions }>his has po++r ddl+ _miuer si ks {l_mm>es
de _os bc6k urs sont normales. Si los fl unm(s rcssembk nt ;) A,
ap]p+ Iez k ser_k:e. I ,es flammes uormak s dcvr dent ressemble_
_'_Nou C, solon Ie t}pe de glz _tilis& .\_cc Ie _gdzPl _,iJ est
normal (p+e ks cgues ext(qie+_cs aFtiche_/_ ties extr(quitds
i _tlI/es.
A F&mmesjamles B Exttemitesjaultes C-F&mmes Neu p_&
Appelez le service sur loss&les ext&ieurs Normal pour le gaz
Narmal pourle gaz Pt naturel
Boutolls dO gontf_le Le bouton n _est pas enfonc_,, ® Pore" mcm'e _'ll;+posithn_ OFF (ARRET), cHt_n_+ei/e bo+aoH, pui_
Be to_ment p_s i¢+m_tc z.
Lesbrii&urs_o La foncllon Range Lock-Out ® i ,;dssez rcCcoidh" 1;+cmsini6cc ct appl+}cz I;__ouchc RANGE
s'aH_i_eMpas _verro_ag, e de la c+fisMiere) LOCK-OUT(wrroufl_/gc tic [a c+dshdbre) (sin" cec_;dns
est adive, modOles) pc_dmt_ 3 sec+,_des,.iusqt_'h +e q+_e l'&'rmt i_tdiq_e
LOCKoOUT(wrrouiHagc arr(qd).
l,a fiche sttr _a ctfis_iere ® ,\ssm'c_'-_+us (p_e la/k'hc es_ brm_( I/de d_ms mw [wise so++s
n'esl pas _s6r_'e e_ti_reme_t /eHshm, ('orrcc_cmcm raise d J;_/en'c.
da_s la prise blectdque,
L'alJ_entafion er_gaz r;est pas ® Rcpov_c/+_++_s _1_x iHstvu('do_s d'i_smlI_lh+H ibm'Hies :at'( I_
bra_chbe ou en ma_'che° +uisiniOlv.
Ur_ ft_sible potwralt btre ® Rcmpla+ez le/i_si!flc o1_ rdinifialisez/e disiom'wm;
grillb oule d_sjoncteer a btb
d6denchi_,
Los pi_ces du brfile_ ne sont ® (:oHs_dwz k_sc('fioH Entretien et nettoyage de ta cuisiniOro.
pas replaci_es correcte_r_er_t,
La fonction de VermuiRa_e ® s_ £0C ON s':dth he, k" comr61c dc h_ c+_isi_iOre cs_ wvrouilld.
do ]a cuish_iote O_ des ]_t+,i_!le/ceuc [b_wtioH pore" +_[ilise_"1_/ctdshdbre. Rcportei-
sontr_/es est astig_e _o1_ 5 I_ section1 Vorrouittage de/a cuisinibro +m Vorrouitlage des
£O SOn dO ge_]i_ de Le bot_ton de contr61e est ® Tou++w7 !e +++>!++<++th++l_ de l++posido_ Life :m _'dgiz_ge
[aHHibe_r contill_e too.me encore en poNgon UTE. ddsh'd.
ap_s que [e br_leur ® 1,_wignc7 Jc bcfik,lu- (q r;dhlmc_-le. Si Ic s<+Hdc dd('Ik
soitaH_ln_ sc pore'sub, ++ppeJe/lc scr'_i('e.
Flammesdubt_leurtrOs Mauvais rapport d'air h gaz, ® S_ +a ctdsi+dbvc cs+ bc;mchdc m +_g,+zPI., +dfi//cz +++t+wsle,_
[_ggeso_laul_es dt;_[)cs d;ms los ]!_SlVH( [i+)Hs d'/Hsl;_H;_[_+H_ t[HII'H/CN ;_\CC_(_H'C
La ]umi_re du [our L'arnpoMe est desserrbe ou ® R+,sscrl+,z ou _vmpla(ez l'ampoulc.
rio [oBgt_onno _aS d_+fectuet+se,
Le commutate+_r de la hmfiiere ® Appelc/le scr_i+e.
est bris_o
Le fo_rnefonMiom+e pas La fiche r_'est pas el+fJ__rerrlel+t ® ,\ssHrez=\otls q/lc J:__]('hc cM brmu hdc dx+l_s+H_c pl"_sc sous
ir_s_r(ee da_s la prise de courarm _cnsiom bict_ mist fi [a _crvc.
Ur_ fttslble potwrah btre grill6 ® Rempl:t( cz Ic [i_siblc o+_rdi_ifi_discz le disjoH( win;
oule dJsjoncteur a 6t6 dbdench6+
Des contr61es du f(utr sore ® Reporw /-_+ms _tl++sc( fi(+n Uti]Jser /e four. oo_
mal r_gl@°
contrges.
( UisiniOlv.
Page 90

Aventffeppelerleservice...
Conseilsde d@annage
Les gri#es gu lout
on t d_ mM _ giisset
Les _lles brillantes de couieur
argent&e (snr certai_s mod_.les)
or_t{_t_ rmttoyges darts le four.
Les grilles en porcelalne
vitrlfi_e grise (sl votre
eulslm_re est alr_sl _quip_e)
n'ont pas {_t{• bien nettoy{_es°
Mettez m_ pedt moumu_ d'huite vdgdtaI( sur mm serxiette
e_ p _pie_ e_ {}:oHez les (:6_ds des grilles du ti)_[" _ec ceHe
se_aie_t_ en papie_; Ne pul_drisez jamais (/( P_m c' c)_
d'mtce lubrifimL
Page 91

www,electtomenagersge.ca
Si le code de foncdon se r_pbteo ® Co(_pez [c (:o(_r _Ht _'*l_ (:_isini_ re p( _da_t _u Inoi_s 30
seco]_(l( S, ])HIS t'(H/eli( Z _(! (?olll_t_/. _i ]( (?ode d'( l!'( HI" d(!
['OHCtJOH S( I'('p('q(!_ _tpp( I(z l( se/'_ic(.
Page 92

Avent d'eppeler le service..,
Conseilsde d@annage
Uric odourdo abt_l_ _ ou Ceel est norma] pour tm nouveau * Pour accdK'n'_" la pint ddure, cdgk'z m_ Qde d'amomq_o}age
_ d'lmile _ sort do ]_gont four et dlspara_t avee le temps, pc_dmH au moius 3 heures. Re}>octez-t_>us h/a scc_o_ Utitisor
FOre Orient Une odeur d'isola_t autour * C'es[/empomicc.
Bmitd_veNi[ato_t Un venfilateur de ref_oldissement * C'est _urma[. [,c _cm_[a_cur de nqi'oh/issemel_ st' mem'a
t_ran indique
tog (verroailiage/
de l'b_tbrleur du four est normale
pendant les premliwes udlisatlons.
ou u_ venfiJateur de convex_on t'u tam'the c_ s'&cb_dm pour _vfi'oidiv its [>_5ces imc_l_es. /I
(selon la foncfim_ utNs6e) pent penn':all combiner 5 /bm'_kmNcr mdme apff's quc Ic/bur soil
so n_ettre en marche et s_{_te}_dre d_eh/t. _.e _{'tH[[a_eHr de tomcx[im se _itcttl_ el! Ht;tFC[tC el
automafiquement, s'dte[mh'a jusq_ffh ('e que |a |bm'_on mh ddsa_ fi\ge ou que la
La fonction Range Lock-Out
(verrouillage de la culslniSre)
est active.
to four autonoltoyant
])ot'/e sol[ o/lx el'/e.
* Assurez-vol*s (pro les comr6Ies des br61eurs soiem
en position OFF (actS0, Acr4tez (:e_e [bur;don pour
pore utilisur votre cuisinibre. ( ons_dtez |a sur_ion
Vorrouillago do/a cuisini&e,
92
Page 93

Veuscherchez quetque chose de plus ?
Vous pouvez trouver ces accessoires et beaucoup plus encore
www.electromenagersge.ca, ou appelez 800.661.1616 (durant /es heures normales de
bureau). Ayez le num_ro de module _ pottle de la main.
i i ¸¸¸¸¸¸¸¸¸ ¸¸¸
Gr#tes
Grifie
Ampoules
Bouchons et t_tes
debr61eurs de surface
Lficheffite
BOUtORS
83
Page 94

¢
94
Page 95

Garandedela cddni&e augazGE
Tous los services sous garanfie sont fournis par nos centres
de service ou un technicien de service autoris_ _ la clientele.
Pour le service, composez le t.800.56t.3344. Veuillez fournir le
numbro de sbrie et le numbro de modble Iorsque vous appelez
pour obtenir le service.
Mafle remplacera :
Teute piece de la cldsh_iO_'e q ld com_a'_t _me d&fidllm_ce sldte fi m_ d_{imt de mat_ia_
Deia date de
!'achatorigbal
Les d_placements du service pour vons enseigner
comment n_liser le produit.
Mauvaise insta]]ation, livraison ou maintenm_ce.
D&fa_a_ce du prodmt suite atm abtts, mauvaise
u_sation on ufil_sation g des _h_s autres que ceres
pr_vnes on n_sadon commerdaJe.
{ Remplacement des fttsibles r&s_dendeHes on
r_i_tial_satlon des disjoncteurs.
ou de fid)x'icado_. Din;mr cette a/_/l#e de garafltie lim#_e, Mabe {burm_i_;_ a_ssi, sans #ai&
to_s les sepdces i'_la maiso_ et tol_s les fl;_is de maim_ (]'oelw_'e pore" _'emplace_" la piece
Agrafez votre regu icZ Lapreuve
de date d'achat original est
n_cessaire pour obtenir
/'entretien et /es r_parations
sous /a garantie.
Dommages an produit suite Rtm accident, incendie,
hmndations ou force ma_eure.
Dommages mdkects on cons6cudfs causes par des
d_fants possibles de FappareR.
Dommages apr@s la fivraisom
Le service s'il est _xpossible d'avok ace,s au produit
pour ce fake.
EXCLUSION DE GARANTiES _MPUCffES = Votro se_#et nniqne recoups est /_ r#paratien dn pro&dt scion
los dispositions de torte Garande fimit#o. Tontos los garantios impfic#es, ineluant los garantios de
cemmerciafit# et d'ad#quation _ un usage sp#oifiqno, sent tim#des anne ann#e on a _ap#riodo /a p_ns
conrto antoris#e par/a _#gis/ation.
LE GARANT N'EST PAS RESPONSABLE DES D()MMAGES INDIRECTS. ]
i
Ga_ant : MABE CANADA INC.
85
Page 96

$oudene/a c/iente/e.
Site Webappare/Is_,"ectrom_nagers6E www.e/ectromenagersge.ca
gi)l_,s _]_'ez IH_e q l_es[io_ ol_ '_'(>{_s _:_'_'ez......besoim_ d'_:_ide [)°l_]" _'()[]'e ;_ll) )_]'eil ..... elec[_'ol_(_m_:_e_ "p_ (_om_[;tc[ez-m_ol0s
par h_mr_m_ a_ s_m www.electmmenag'ersge.¢a =4 lmm'es par io_m _o_s les io_rs de 1 am_e.
Serviceder_parations
Service de ]'_paratio_s (;E est _o_ pros de yore.
Po_u" fhire r_parer votre _lectrom_]mger (;E, il s_f[]t de _om te_l_pho]mr a_ 1.800.561.3344.
9
ESOO.5_f.33_4
Studio de conceptionr_a/iste
Sin"dema_de, GE pe_ Jt_m'_ir mm broch_n'e s_r l'am_m_gemen_ d'mm c_]shm po_r les pe_somms
a mob]l]t_ re_d_,]te.
]_crivez: Dh'ectem, l,{e]a_hms _',ec ]es co]_somma_ems, Mabe (]n_m(;h_ h_c.
Bm'em* B]O, ] F'acto_w Ia_e
Pro/ongationde garantie www.e/ectmmenage_ge.ca
ch e _ez _ _ co]_ t_ _ d e]_ _]'e _ie]_ (;E ax'a _ _ q_ e votre gain _ _ie _ expire e_ b _]__{i ci ez d _ _ mba is s_bs_a _ _iel.
_:i_si ]e service aprbs-vente (;E sere to_!iom's ]i'_aprbs expimtio_ de ]a ganmtie.
V_sitez notre site Web on appdez-nous au 1.800.461.3636.
P/bceset accessoires
Ce_*x ql*i d_sh'e]lt r_parer el*x-re&rues leto's _lectrom_mgers [:>el*ve_lt recew_ir [:>]bces et accessoh'es dh'ecteme]lt
i) la maiso]_ (cartes VISA, Maste_(_ard et Discover accept_es)_
_esdi_e_ti_essdpuNes darts/ep_sen¢m_nue/peugeot_tm e#e_t_es pa_n'impotte q_e/ _ti/isage_. _ese_t_es
r@aretions doi_ent _n_ra/ement Ot_e e_e_u_es par _n te_fl_i_ien q_e/i_i_. $oyez prudent, _r _ne r_paration
inadequate pe_t a_e_ter /e fonctionnement s_c_ritaire de KappareiL
Vo m tro_*verez d;_ _ s les pages ja m_ es de votre a _ _ _*;dre 1e _ _*m &to d_* Ce]_ tre de servi ce Mabe 1e i:>]_*sproch e.
Contactez-nous
S] vo_*s _'&tes pas satis}i_it (h* service apries-_ e]_te do_t _)_*s avez b_]_fici& :
Premi6rement, comm m_iq _ez avec ]es gelds q _1 on_t r_par_ votre a[_[mrei].
Er_suite, si \'ore _'0tes to_!]om's pas satisihit e]_vo_ez tom les d_tai]s-nm]]_ro de t_]_pho_m comp_J_m_
Directe_*_; Relations avec ]es Mabe (5_mda Inc.
Bm'em_ 310, ] Factor_ la_e
Inscrivezvotreappare/I_lectrom_nager www.e/ectmmena_e_e.ca
lnscrivez votr, e appareil dectrom_nager en direct, aussitbt que possible. Cela am_liorem _ms
et notre .....service al)rL_s-vente....... V0m [>om'ez, &ga]eme_t no_ts, era,o? er par la poste le fi_rm_daire d'i_scriptio_ ,joiner
h votre docllme]?tatthm.
Imp rim _ aux Eta ts- Urlis
Page 97

ge.com
Ins&uaqones de Segnwidad .. 98-10 3
<
0
Instrucciones de Operaci6n
Asado, Gufa de asado .... l l 0, l l l
Auto-limpieza ........... 123-124
Bloqueo de cocina ........... 113
Bloqueo de control .......... 113
Calentamiento ............... 121
Caracter/sucas
especiales .............. 125-127
Convecci6n ............. 116-120
Funci6n Sabbath ......... 128-129
Horneado o rosfizado .... 108-109
Horneado v rosfizado con
mmporizador. ............... 114
Homo ................. 106-129
Leudar . .................... 121
Q uemadores
de superficie ............ 104-105
Recipientes de cocci6n ........ 105
Reloj y temporizador ........ 112
Sonda ..................... 115
Termostam ................. 122
Cuidado y limpieza
Caj6n de almacenamiento .... 134
Cinta de embalaje ........... 130
Focos de luz ................ 132
Panel de control ............. 134
Parrillas .................... 132
Perillas .................... 131
P(,S 908
PCS9/5
Piso ....................... 133
Puerta ..................... 133
Puerta del homo desmontable .. 133
Rejillas de los quemadores
y parrilla de venfilaci6n ....... 131
Superficie del anafe .......... 131
Superficies de acero inoxidable . 134
Superficies pintadas ......... 134
Tapas y cabezales de
los quemadores ............. 130
Ventilaci6n ............. 131, 134
Consejos para detecci6n
de problemas .......... 135-138
Accesorios .................... 141
Atenci6n al cliente
Atenci6n al cliente ........... 143
Garantfa ................... 142
Escriba los numeros de modelo
y de serie aquL"
Modelo #
Serie #
Puede enconti'arlos en [111_1
etiqueta ubicada detr;is de la
puerta del homo en el extremo
izquierdo inferior del marco de
la cocina,
Page 98

INFORMACIONIMPORTANTEDESEGURIDAD.
LEATODASLASINSTRUCCIONESANTESDEUSARELARTEFACTO.
iADVERTENCIA!
DISPOSITIVOANTI-VOLCADURAS
TODASLASCOCINASPUEDEN
VOLCARSE
PUEDENPROVOCARSELESIONES
PERSONALES
INSTALELOSDISPOSITIVOSANTI-
VOLCADURASINCLUIDOS CONLA
COCINA
VERINSTRUCCIONESDE INSTALACION
AADVERTENCIA:si la informaci6n de este
manual no se sigue al pie de la letra, puede ocasionarse
un incendio o una explosi6n, generando dafios a la
propiedad, lesiones personales o la muerte.
-- No almacene o use gasolina u otros vapores o liquidos
inflamables cerca de este o cualquier otto artefacto.
- QU_:HACERSI HUELEGAS
No trate de encender ningfin artefacto.
No toque ningfin interruptor el6ctrico, ni utilice ningfin
tel6fono en su edificio.
Inmediatamente [lame a su proveedor de gas desde
el tel6fono de tin vecino. Siga las instrucciones
del proveedor de gas.
Si no puede comunicarse con el proveedor de gas,
llame al departamento de bomberos.
-- La instalaci6n y servicio t6cnico deben realizarlos
tin instalador calificado, una agencia de servicio
o el proveedor de gas.
98
0(
Page 99

ge.com
iADVERTENCIA!
Para su seguridad, la informaciSn de este manual debe seguirse al pie de la letra a fin de minimizar
el riesgo de incendio o explosiSn, descarga el#ctrica, o para prevenir dafios, lesiones personales o
la muerte.
D/SPOS/TIVOANTI-VOLCADURAS
Todas/as cocinas pueden volcarse yprovocar lesiones.
Para evitar la volcadura accidental de la cocina, suj_tela a la pared o piso mediante el dispositivo
anti-volcaduras suministrado.
Si el dispositivo anti-volcaduras suministrado con la cocina no se adecua a esta aplicaciSn, utilice
el dispositivo anti-volcaduras universal WB2X7909.
Para verificar que el dispositivo est# instalado ysujeto correctamente, quite el cajSn de
almacenamiento e inspeccione la pata niveladora trasera. Verifique que calce bien en la ranura.
Si separa la cocina de la pared pot alguna raz6n, asegdrese de que el disposidxo est_ bien
enganchado cuando x_mlva a colocar la cocina contra la pared. Si no lo est5, exism la
posibilidad de que la cocina se x_mlque y provoque lesiones si usted o un nif_o se paran,
sientan o apoyan sob_e una puerta abierta.
Teng'a a bien consultar la informaci6n sobre el disposidvo and<olcaduras de esm manual.
Si no toma esta precauci6n, la cocina puede xolcarse y proxocar lesiones.
INFORMACIONDESEGURIDADIMPORTANTE
La ley sobre aguas potables y tSxicos exige que el Gobemador de California publique una lista de
sustancias que segOnel estado provoquen defectos cong#nitos u otros dafios reproductivos, y exige
alas empresas que adviertan a los clientes sobre la exposicidn potencial a dichas sustancias.
Los artefactos de gas pueden provocar una exposiciSn mfnima a estas sustancias, a saber,
benceno, monSxido de carbono, formaldehfdo y hollfn, generados principalmente pot la combustidn
incompleta de gas natural o combustibles LR Los quemadores bien ajustados, indicados pot una
llama azulina en lugar de amarilla, minimizar_n una combustidn incompleta. La exposicidn a estas
sustancias puede minimizarse ventilando con una ventana abierta o usando una campana
o ventilador.
La aislaciSn de fibra de vidrio de los homos auto-limpiantes emite una pequefia cantidad de
monSxido de carbono durante el ciclo de limpieza. La exposicidn puede minimizarse ventilando
con una ventana abierta o usando una campana o ventilador.
99
Page 100

INFORMACIONIMPORTANTEDESEGURIDAD.
LEATODASLASINSTRUCCIONESANTESDEUSARELARTEFACTO.
iADVERTENCIA!
PRECAUCIONESDESEGURIDAD
Cuando se usen artefactos el6ctricos, siempre deben seguirse precauciones b#sicas de seguridad,
incluyendo las siguientes:
Use este armthcto solo con el objefixo para
el que file creado, como se desclibe eta
esm Manual de Propietaiio.
Asegdrese de q ue un t_cnico calificado
haya instalado y conectado a tiena el
artelhcto de acuerdo con las instrucciones
de insta]aci6n suministradas.
Anms de realizar cualquier clase de
reparaci6n, desconecte la conexi6n
el_ctrica de la cocina desde el panel de
distribuciOn dom_sfica quitando el fllsible
o desconectando el dis,_mtor
Solicite al instalador que le muestre
la ubicaci6n del dis_lmtor o fllsible.
Mfirquelo para una fiicil referencia.
No deje a los nifios solos; _stos no deben
quedar solos o sin amnci6n eta un firea
donde un armthcto est_ eta uso. Nunca
debe pei_nitirse que se sienmn o se paten
eta cua]quier parm de este armfacto.
Solicite al instalador que le muestre la
ubicaci6n de lax _ilvula de apagado del gv_s
de la cocina v c6mo apagarla cuando sea
necesalJo.
Haga que un t_cnico calificado instale su
cocina y la conecm a 6erra de acuerdo con
las Instrucciones de instalaciOn. Cualquier
ajuste o reparaci6n debe realizarla solo un
instalador de cocinas calificado o un
t_cnico de servicio.
Ubique el artetZacto lejos de la circulaci6n
de la cocina y flmra de las ubicaciones con
coixiente de aire para evitar una pobre
circulaciOn de aire.
Asegdrese de quimr de la cocina todos los
mamriales de empaque anms de ponerla
eta flmcionamiento para evitar dafios
prox_cados por incendios o humo si el
mamrial de empaque se prendiera flleg_.
No deje niflos solos o sin atenci6n cuando
una cocina est_ caliente o eta
flmcionamiento. Podrfan sufrir grmes
quemaduras.
100
No inmnm reparar o cambiar ningmm
pieza de su cocina a menos que est_
eq)ecfficamente recomendado en esm
manual. Cualquier otro servicio debe
realizarlo un t_cnico calificado.
Asegdrese de que un t_cnico o instalador
calificado ajusm su cocina con_ectamenm al
6po de gas (naulral o I,P) que se ufilizar_.
Su cocina puede comerfirse para poder
utilizarse con cualquier tipo de gas.
Consulte las Instrucciones de instalaciOn
incluidas con la cocina.
Enchufe su cocina solo en un
tomacorrienm con conexi6n a delta de
190 x_ltios. No quite la pata de conexi6n a
delta redonda del enchufe. Si dene dudas
sol)re la conexi6n a derra del sistema
el_ctrico hogarefio, es su responsabilidad
personal y su obligaci6n reemplazar un
tomacorrienm sin conexi6n a fierra por un
tomacorrienm con_ectamente conectado a
derra de ues patas de acuerdo con el
COdig_ El_ctrico Nacional (EE. UU.) No
utilice un cable de exmnsi6n con este
arte/aacto.
A ADVERTENCIA:Unt0cnic0
calificado debe realizar estos ajustes
de acuerdo con las instrucciones del
fabricante y toflos los cOdigos y
requerimientos de la autoridad competente.
No seguir estas instrucciones puede
provocar lesiones graves y dafios a la
propiedad. La agencia calificada a cargo
de este trabajo asume la responsabilidad
de la conversion.
Conser\> la campana y fihros de grasa
limpios para mantener una buena
xendlaci6n y para evitar incendios
prox_cados por la grasa.
iiiiiiiiiiii_iii
Ensefle a los niflos que no debenjugar
con los controles u otras piezas de la cocina.
iiiiiiiiiiii_iii
Siempre mantenga repasadores,
agaiTaderas y otras telas a una distancia
prudencial de la cocina.
 Loading...