

GE PGS975SEM2SS, PGS968TEM3WW, PGS968SEM3SS, PGS968SEM2SS, PGS968KEM2CC Owner’s Manual
...
ge.com(U.S.)
wvvvv.GEApp/iances.ca(Canada)
Safety Instruc_ons ............ 2-7
Operating Instruaions
Baking or Roasting .............. 11
Broiling, Broiling Guide ......... 14
Clock and Timer . .............. 15
Control Lockout ............... 15
Convection ................. 18-22
Cookware ...................... 9
Oven ...................... 10-30
Probe ........................ 17
Proofing ...................... 23
Sabbath Feature ................ 30
Self:Cleaning ............... 25, 26
Special Features ............. 2%29
Surfi_ce Burners .............. 8, 9
Thermostat .................... 24
Timed Baking & Roasting ........ 16
V\anning ...................... 23
Care and Cleaning
Burner Assembly' ............... 31
Burner Grates and
Vent Grille .................... 32
Control Panel ................. 35
Door ......................... 34
Floor . ........................ 35
Glass Cooktop .............. 36, 37
I_obs ........................ 31
ycs96s
PGS 968
Lift-Off Oven Door ............. 34
Light Bulbs .................... 32
Packagdng %_pe ................ 31
Painted Surfi_ces ................ 35
Racks ........................ 33
Stainless Steel Surfi_ces .......... 35
Storage Drawer . ............... 33
Vent ...................... 32, 35
Troubleshooting Tips ,:8-42
Accessories ................... 47
Cons_mer Support
Consumer Support ..... Back Co_r
Product Regdstration
(Canada) .................. 45, 46
Product Regdstration (U.S.A.) . 43, 44
V\.wrantv fbr Customers
in Canada .................... 51
_\arranty for Customers
in the U.S.A ................... 50
Write the model and serial
numbers here:
Model #
Serial #
You can find them on a label
behind the open oven door
on the lower left corner of the
range ti'am e.
49-80496 07-07 JR
IMPORTANTSAFETYINFORMATION.
READALLINSTRUCTIONSBEFOREUSING.
WARNING!
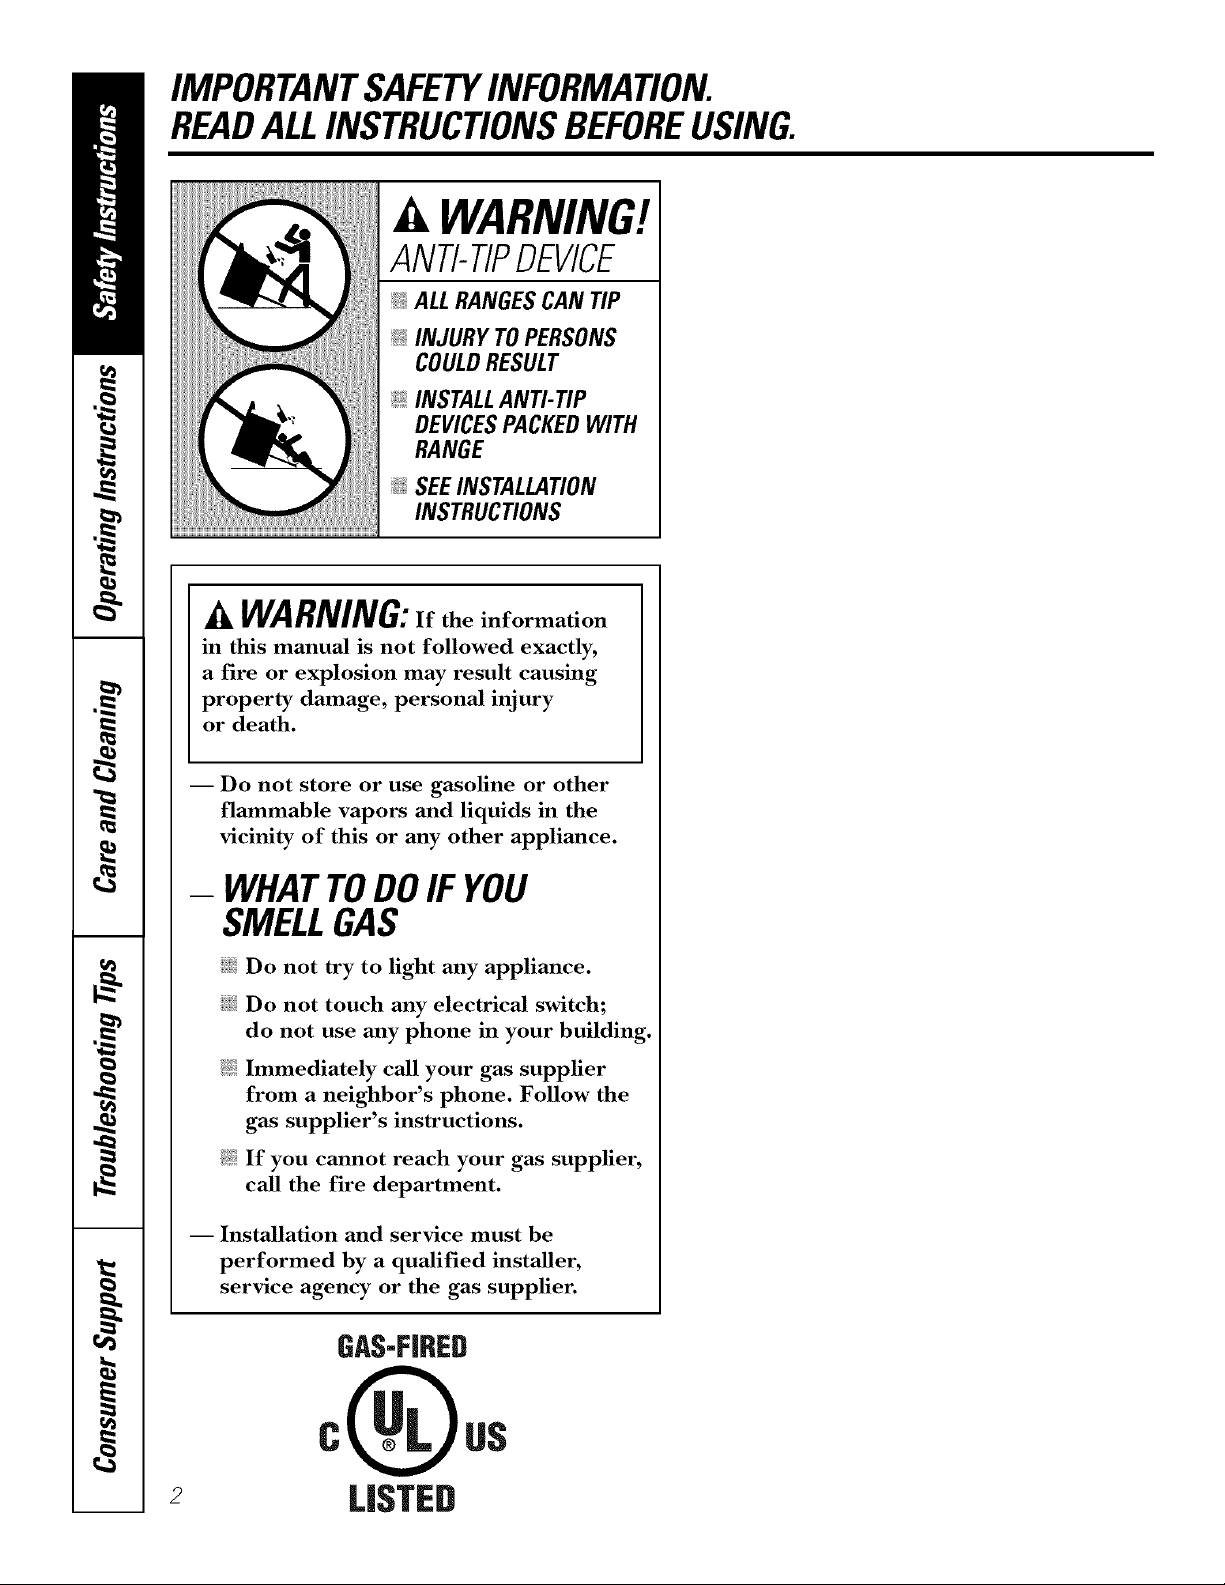
ANTI-TIPDEVICE
_!_ALLRANGESCAN TIP
_ INJURY TOPERSONS
COULDRESULT
@INSTALLANTI-TIP
DEVICESPACKEDWITH
RANGE
_ SEEINSTALLATION
INSTRUCTIONS
A WARNING:If the information
in this manual is not followed exactly,
a fire or explosion may result causing
property damage, personal injury
or death.
I Do not store or use gasoline or other
flammable vapors and liquids in the
vicinity of this or any other appliance.
- WHATTODOIF YOU
SMELLGAS
iJ_:illDo not try to light any appliance.
i_i:iDo not touch any electrical switch;
do not use any phone in your building.
Immediately call your gas supplier
from a neighbor's phone. Follow the
gas supplier's instructions.
If you cannot reach your gas supplier,
call the fire department.
-- Installation and service must be
performed by a qualified installer,
service agency or the gas supplier.
GAS-FIRED
2
LI_;TED
ge.com(U.S.)
vvvvw.GEAppliances.ca(Canada)
WARNING!
For your safety, the information in this manual must be followed to minimize the risk of fire or
explosion, electric shock, or to prevent property damage, personal injury, orloss of life.
ANTI-TIPDEVICE
All rangescan tip and injury could result.
Toprevent accidental tipping of the range, attach it to the wall or floor by installing the Anti--tip device
supplied.
If the Anti--tip device supplied with the range does not fit this application, use the universal Anti--17p
device WB2X7909.
Tocheck if the device is instafled and engaged properly, remove the storage drawer and inspect the
rear leveling leg. Make sure #fits securely into the slot.
If yOU pull tile range otlt flom tile wall for ally reason, mal_.e stlie the device is properly
engaged when you push tile rang_ back against file wall. If it is not, there is a possible risk of
the rang_ tipping oxer and causing iIlju]_] if YOUor a child stand, sit or lean on an open door
Please refer m the And-Tip device infounafion in tiffs manual. Failure m rake fills precaution
could result in tipping of the rang_ and iIIjm>
IMPORTANTSAFETYNOTICE
The California Safe Drinking Water and ToxicEnforcement Act requires the Governor of California to
publish alist of substances known to the state to cause birth defects or other reproductive harm, and
requires businesses to warn customers of potential exposure to such substances.
Gas appliances can cause minor exposure to four of these substances, namely benzene, carbon
monoxide, formaldehyde and soot, caused primarily by the incomplete combustion of natural gas or
LP fuels. Properly adjusted burners, indicated by a bluish rather than a yellow flame, will minimize
incomplete combustion. Exposure to these substances can be minimized by venting with an open
window or using a ventilation fan or hood.
The fiberglass insulation in self-clean ovens gives off a very small amount of carbon monoxide during
the cleaning cycle. Exposure can be minimized by venting with an open window or using a ventilation
fan or hood.
3
IMPORTANTSAFETYINFORMATION.
READALLINSTRUCTIONSBEFOREUSING.
WARNING!
SAFETYPRECAUflONS
When using electrical appfiances, basic safety precautions should be foflowed, including the
following:
_:;Use this appliance only tbr its intended
purpose as described ill tins )wner s
Mannal.
_t{:;Be sure your appliance is properly installed
and grounded by a qualified technician in
accordance with the provided installation
instrnctions.
_{:_Before perfo_ning any service, disconnect
the range power supply at the household
disu-ibufion panel by removing the fl_se or
switching off the circuit breaken
;fi:,iHaxe the installer show you tile location of
tile circuit breaker or fl_se. Mark it for easy
reference.
;f; Do not leme children alone----r'hildren
should not be left alone or unattended in
all area where all appliance is ill use. They
should nexer be allowed to sit or stand on
ally part of the appliance.
;f; Haxe the installer show you the location
of the range gas shut-offxahe and how to
shut it off if necessa U.
_i:,:Hax> your rang_ installed and pioperly
grounded by a qualified installei; in
accordance with tile Installation
Instructions. Ally' adjusunent and se_Mce
should be perfomled only by qualified gas
range installers or service technicians.
_{::i,ocate the range out of kitchen tral_c path
and out of dr_fftv locations to prexent poor
air circulation.
_::Be sure all packaging materials are
removed from rite rang_ before operating
it to pre\ent fire or smoke damage should
the packaging mamrial ignite.
;f; Do not leme children alone or nnattended
where a range is hot or in operation. They
could be seriously burned.
• {_
Do not attempt to repair or replace ally
part of your range unless it is specifically
recommended in this manual. All other
service should be refelTed to a qualified
technician.
Be sure your range is con-ecfly adjusted
by a qualified se_Mce mchnician or installer
for tile type of g_s (natural or I,P) that is
to be used. Your rang_ call be comermd
for use with either type of gas. See the
Installation Instructions packed with
the rang_.
_::Plug your range into a 190=\olt grounded
outlet only. Do not remove tile round
g_ounding prong from the plug. If in
doubt about the grounding of the home
elecuical system, it is your personal
responsibility and obligation m haw
all ungrounded outlet replaced with a
properly gTonnded, three-prong onflet ill
accordance with flae National Electrical
(',ode (U.S.). Do not use all exmnsion cord
with fl)is appliance.
-& WARNING:Theseadjustments
must be made by a qualified service
technician in accordance with the
manufacturer's instructions and aft codes
and requirements of the authority having
jurisdiction. Failure to follow these
instructions could result in serious injury or
property damage. The qualified agency
performing this work assumes
responsibility for the conversion.
_::Kee I) the hood and grease filters clean to
maintain good xenting and to axoid grease
fires.
_::Teach children not to play with tile
controls or ally other part of the rang>.
_::Always kee I) dish towels, dish cloths, pot
holders and other linens a satb distance
fronl vonr rangP.
4
SAFETYPRECAUTIONS
ge.com(U.S.)
vvvvw.GEAppliances.ca(Canada)
;_?:,:Always kee I) wooden and plastic utensils
and canned tbod a safe distance fiom your
range.
_i:,iAlways kee I) combnsdble wall coxetings,
curtains or drapes a safe distance fiom
yonr range.
_{::Do not clean tile rang_ with flammable or
x_latile cleaning fluids.
_i:,:After prolong>d use of a range, high floor
mmperautres may result and many floor
coxelJng3 will not withstand this kind of q?{::
use. Nexer insta]l tile range oxer vinyl tile
or linoleum that cannot wifllsmnd such
type of use. Nexer install it directly over _::
inmrior Mtchen caq)efing.
;f?:':Avoid scratching die glass cooktop widt
sharp instruments, or wifl3 tings and other
jeweh T.
;_i:,:Do not allow anyone to climb, stand or
hang on die oxen door; storage drawer or
cooktop. They could damag> the rang>
and even tip it oxel; causing sexere
personal ilIjm T.
CAUTION:Itemsinteresttochildren
shouldnot be storedin cabinetsabovearangeor
on thebacksplashof a range--children climbing
on therangeto reachitemscouldbeseriously
injured.
mamfial could be ignimd if brought in
contact with flame or hot oxen surtZaces
and may cause sexere b/li-/ls.
Do not store flammable materials in an
oxen, a range storag> drawer or near a
cooktop.
Do not store or use combnsuble mamrials,
gasoline or other flammable vapors and
liquids in the vicinity of this or any other
appliance.
Do not let cooking grease or other
flammable mamrials accumulam in or
near the rang>.
Do not use wamr on grease fires. Nexer
pick up a flaming pan. Turn dm conuols
off: Smother a flaming pan on a surfi_ce
burner 1)5' coxering tile pan complemly
with a well-fitting lid, cooMe sheet or fiat
trW. Use a multi-pml)ose d U chemical or
foam-type rite extinguisher
Flaming grease outside a pan can be put
out by covering it with baking soda or;
if available, by using a multi-pm])ose d U
chemical or foam-type fire extinguisher
Flame it3 die oxen can be smodtered
completely by closing the oxen door and
turning tile control to off or 1)5' using a
nmlti-pm])ose d_T chemical or foam-type
fire extinguisher
WARNIN&NEVERusethis
appliance as a space heater to heat or
warm the room. Doing so mW result
in carbon monoxide poisoning and
oxedteafing of the cookmp or oxen.
_i:,:For your safety, hexer use your appliance
for wanning or heating the room.
;_?:':Large scratches or impacts to glass doors
can lead to broken or shatmred glass.
;_?:':Do not clean fire rang_ when the appliance
is in use.
_i:,:Nexer wear loose-fitting or hanging
gammnts while using the appliance.
Be carefifl when reaching for imms stored
in cabinets oxer the range. Flammable
q_{::Let tile burner g_ates and other surtZaces
cool before touching them or leaving
then3 where children can reach them.
_?_::Nexer block dte xents (air openings) of
the range. They provide die air inlet and
oudet fllat are necessa U for the range to
operam properly with cotwect combustion.
'Air openings ate located at rite teat of the
cooktop, at tile top and bottom of file
oxen door; and at tile 1)oUom of the rang>
under the storage drawer or kick panel.
_7_::Do not lift tile cooktop. Lifting the
cooktop can lead to damag> and improper
operation of the rang>.

IMPORTANTSAFETYINFORMATION.
READALLINSTRUCTIONSBEFOREUSING.
WARNING!
SURFACEBURNERS
Useproperpan size--avoid pansthatare unstableor easilytipped.Selectcookware havingflat bottomslarge
enoughto coverburnergrates.Toavoidspillovers,makesure cookwareis largeenoughto containthefood
properly, Thiswillbothsave cleaningtimeandprevent hazardousaccumulationsoffood,sinceheaw spattering
or spilloversleftonrangecan ignite.Usepanswith handlesthat canbe easilygraspedandremaincooL
_i)!Ahvays use dm LifE position when igniting
the top burners and make sure the burners
hme ig_dted.
!_'Never leme the surface btuners unattended
at high flame settings. Boilovers cause
smoking and greasy spillovers that may
catch on fire.
!_'Adjust the top burner flame size so it does
not extend 1)eyond the edge of the cookware.
Excessive flame is hazardous.
!_:Use only dry pot holders--moist or damp pot
holders on hot surPaces may resuh in burns
flom smam. Do not let pot holders come
near open flames when lifting cookware. Do
not use a towel or other 1)ulky cloth in place
of a pot holder:
!_'X_\hen using glass cookware, make sure it
is desig_md for top-of-_',mge cooking.
!:_'To minimize dm possibili_, of 1)urns, ignition
of flammal)le mate_Jals and spillage, turn !:_'
cookware handles toward the side or back of
the range without extending over adjacent !:_,
btlI'IleI's.
_i_!Careflflly watch foods 1)eing flied at a high
flame setting.
_i_!Ahvays heat fat slowly and watch as it heats.
!_:Do not lea\e any imms on the cooktop. The
hot air flom the vent may ig_im flammable
imms and will increase pressure in closed
containers, which may cruise them m burst.
_i)!If a coml)ination of oils or _lts will be used
in fl"dng stir together before heating or
as _lts meh slowly.
the pan too flfll of_u can cause spillovers
when food is added.
_i_;X&qmnprepa_Jng flaming foods under the
hood, turn the fan on.
_i_:Do not use a wok on dm cooking sur£1ce
if the wok has a round metal _Jng that is
placed o\er the burner g_'am m support the
wok. This dng acts as a heat m_p, which may
damage the burner g_v_mand N_rner head.
Also, it m W cm_se the N_rner m work
improperly. This may cause a cad)on
monoxide level above that allowed by current
standards, resulting in a heahh hazard.
_i?!Foods for flTing should be as dry as possible.
Frost on flozen foods or moisture on flesh
foods can cause hot l_lt to 1)ul)l)le up and over
the sides of the pan.
!_'Never u), to move a pan of hot Pat especially
a deep _lt flyer. X'\hit until the _t is cool.
Do not leme plastic items on tim cooktop--
they may meh if left too close to the vent.
J J
Kee I) all plastics mvay flom the surPace
1)tlI'Ile I'S.
To moid the possibility of a burn, ahvays be
certain that the conuols for all burners are
at the OFFposition and all g_'ates are cool
before attempting to remove them.
If _ange is located near a window, do not
hang long curtains that could 1)low over the
surface burners and create a fire hazard.
!_' If you smell gas, turn off the g_s to the range
and call a qualified service technician. Nexer
use an open flame to locate a leak.
_i_!Use a deep flit thermometer whenever
possible to prevent oxeflmating _t 1)eyond
the smoking point.
_i)!Do not operate the 1)tHner wid_out all 1)tHner
parts in place.
_i)!Use the least possible amount of£u for
efl>ctive shallow or deep-Set flying. Filling
_i_!Ahvays turn the stHJ_ce burner conuols off
before removing cookware.
vvww.GEAppliances.ca(Canada)
COOKMEATANDPOULTRYTHOROUGHLY...
ge.com(U.S.)
(Cookmeatandpoultrythoroughly--meattoat leastanINTERNALtemperatureof 160°F(71°C)andpoultrytoatleastan
INTERNALtemperatureof I80 F(82 C_Cookingtothesetemperaturesusuallyprotectsagainstfoodbomeillness.
0 0
A WARNING!
OVEN
Stand awayfrom the range when opening the oven door. Hot air or steam which escapes can cause
bums to hands, face and/or eyes.
!_:Do not heat unopened fbod containets.
Pressure could 1)uild up and the container
could buL_t, causing an inju U.
!_i:!Keep the oven vent unol)stmcted.
ij;_:Kee I) the oven flee from grease buildup.
iJii:iPlace the oven ,'ack in the desired position
while the oven is cool. If rocks must be handled
when hot, do not let pot holder contact the
heating elements.
iJii:iWhen using cooking or roasting bags in the
oven, follow the manufi_ctuter's directions.
!_:Pulling out the tack to the stop-lock is a
convenience in lifting heax3 fbods. It is also a
precaution against 1)urns flom touching hot
surfilces of the door or oven walls.
iJii:iDo not use the oven to dU newspape,s.
If overheated, the) can catch on fire.
iJii:iDo not use the oven for a stot'age area. Items
stored in an oven can ignite.
Do not leave paper products, cooking utensils
or food in the oven when not in use.
A WARNING:N WRcove,
any slots, holes or passages in the oven bottom
or cover an entire rock with materials such as
alulninuln fioil.Doing so blocks air flow
through the oven and may cause carbon
inonox]de poisoning. Ahllninuln foil linings
may also map heat, causing a fire hazard.
Do not use aluminum f0il to line oven 1)ottoms.
hnproper installation of aluminum foil ma,
result in a risk of electric shock or fire.
Make sure a broiler pan is in place correctl) to
reduce the possibilit} of grease fires.
If)ou should have a grease fire in a broiler
pan, press the C/,fAR/0FFpad and keep the
oven door closed to contain fire until it
btlI'ns OUt.
SELF-CLEANINGOVEN
Donot useovencleaners.No commercialoven cleaneror ovenliner protectivecoatingofanykindshouldbe
usedin or aroundanypart of theoven.Residuefrom ovencleanerswill damagethe insideofthe ovenwhenthe
self-cleancycle isused.
!'_;:Do not clean the door gasket. The door gasket !'_;:
is essential for a good seal. Care should be
token not to ml), damage or move the gasket. !:_:
!:_:Be%re selfZcleaning the oven, ,emove shin),
siDe>colored oven mcLs (on some Inodels) and
all other cookware.
Be sure to xOpe up excess spillage be%re
starting the selfkleaning operation.
If the selfqleaning mode malflmctions, turn the
oven off and disconnect the power suppl): Have
it serviced 1)xa qualified technician.
!_:Clean only parts listed in this Owner's Manual.
READANDFOLLOWTHISSAFETYINFORMATIONCAREFULLY.
SAVETHESEINSTRUCTIONS 7
Usingthegas surfaceburners.
Throughout this manual, features and appearance may vary from your model.
How to Light a Gas Surface Burner
Push the control knob in and turn it
to the LITEposition.
Push tile control knob in and mrn it to
tile tirE position.
You will hear a little clicking noise_
tile sotmd of the electric spark igniting
the burne_:
?dter the flame lights, turn the knob to
at!just tile flame size./f the knob stays at
t/rE, it will continue to click.
Sealed Gas Burners
When one burner is turned to LITE, all
the burners spark. Do not attempt to
disassemble or clean around anv bm'ner
while another burner is on. An electric
shock may result, which could cause you
to knock over hot cookware.
The smaller burner (right rear position)
will give the best simmer results fin.
delicate toods, such as sauces or fi)ods
which need to cook over low heat fin" a
hmg time. It can be turned down to a very
low setting.
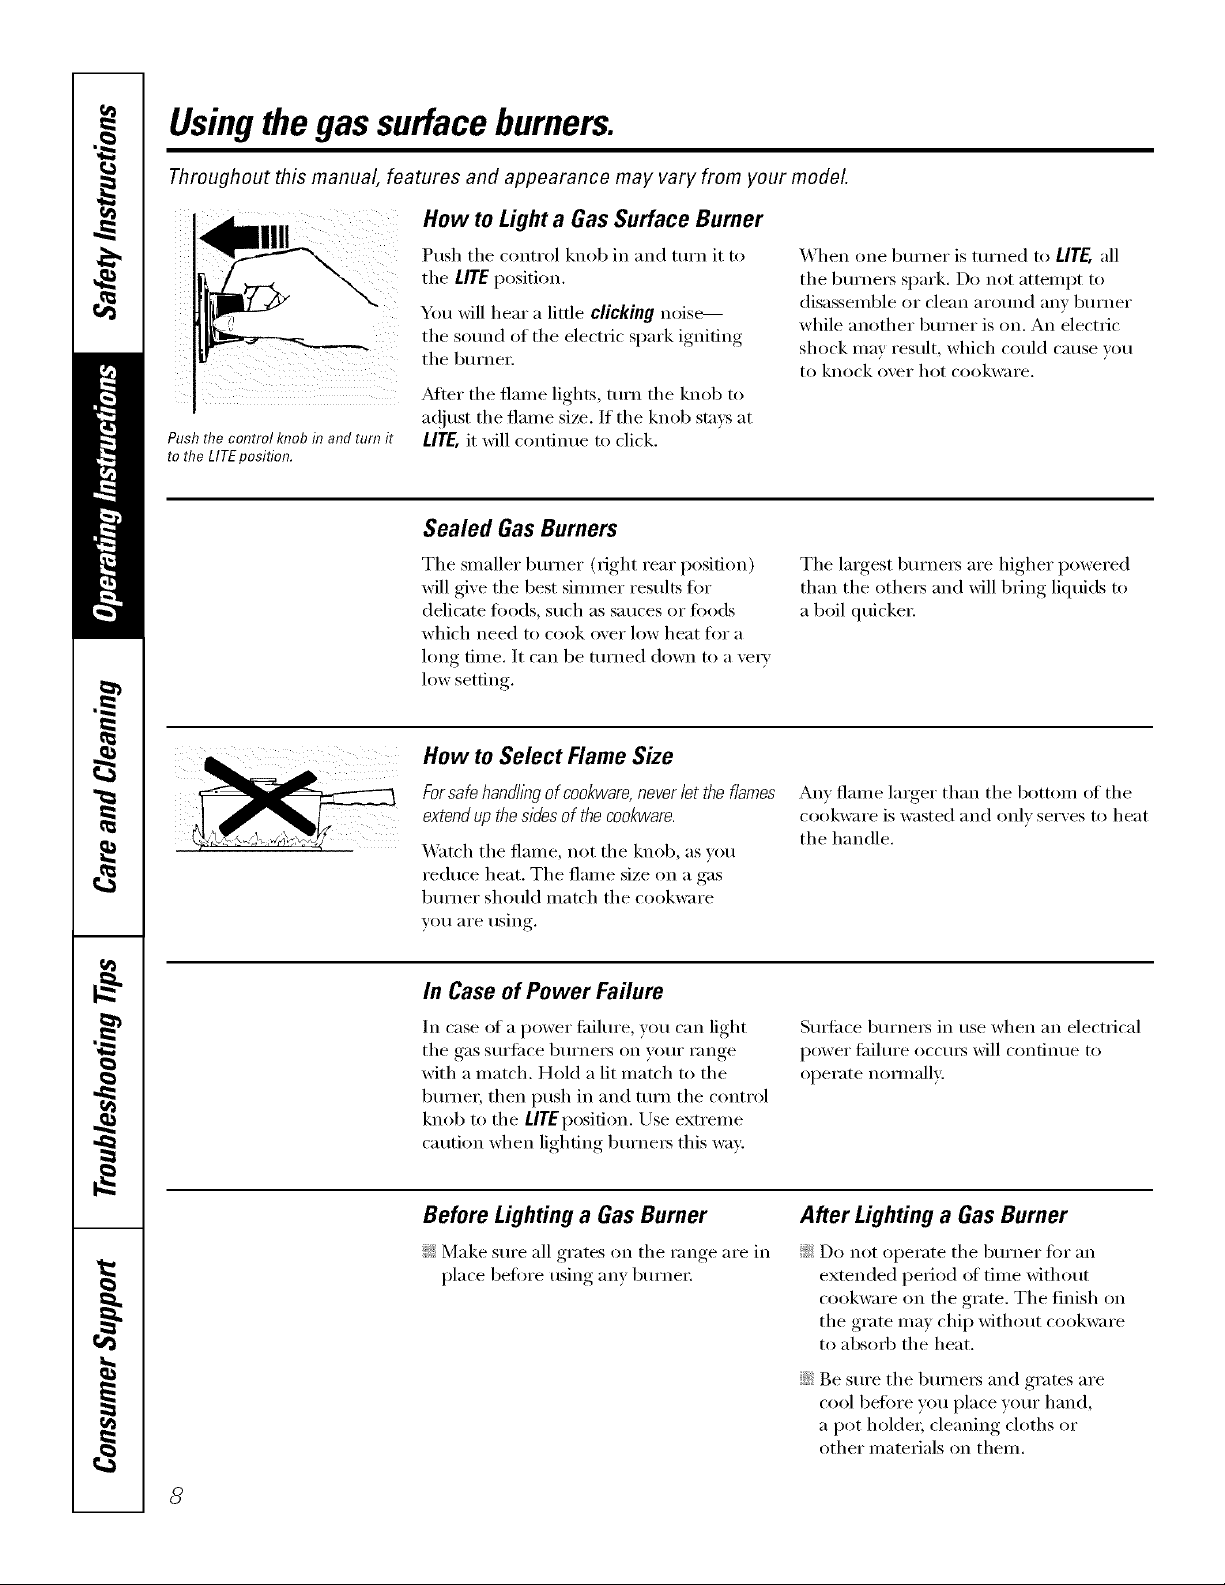
How to Select Flame Size
Forsafe handh}_gof cookware,never let the flames
extendup the sides of thecookware.
_A'atch tim flame, not tile knob, as you
reduce heat. The flame size on a gas
burner should match the cookware
VOII aI'e rising.
In Case of Power Failure
In case ot a power fililure, you can light
the gas surtilce burners on your range
with a match. Hold a lit match to the
burner, then push in and mrn the control
knob to the L/TEposifion. Use extrelne
caution when lighting burne_ this way:
The largest, burnei_ are hi,*her,_ I)°wered
than the others and will bring lkluids to
a boil qtficke_;
An} flame larger than the bottom of the
cookware is wasted and oiflv ser\ es to heat
the handle.
Smtilce burners in use when an electrical
power tililure occms will continue to
operate nommllv.
Before Lighting a Gas Burner
!;_:Make sure ;111grates on the range are in
place befin'e tlsino,b [IIIV, bt/rner
After Lighting a Gas Burner
_: Do not operate the burner for an
extended period ot time without
cookware on the grate. The finish on
the grate may chip without cookware
to absorb the heat.
::Ji::Be sure the burners and grates are
cool betore you place your hand,
a pot holder; cleaning cloths or
other materials on them.
8
Top-of-Range Cookware
ge.com(U.S.)
vvww.GEAppliances.ca(Canada)
Aluminum: Medium-weight cookware is
recommended because it heats quickly
and evenly: Most fi)ocls brown evenh' in
an ahuninum skillet. Use saucepans with
tight-titling lids when cooking with
IllinillltlI// alllO/ints el watei:
Cast-#on: If heated slowly, most skillets
will give satisti_cto_ T results.
Enamelware: Under some conditions,
tile enalllel of SOllle cookwaI'e Ill}IV
inelt. Follow cookware ill_lilt/lilCttli'eY's
recommendations tot cooking methods.
Glass: There are two t)pes of glass
cookware--those tor o;'en/ise only
and those tot toi>otZrange cooking
(saucepans, coffee and teapots).
Glass conducts heat ve_w slowly.
Stove TopGrills
Do not use stove top giills on your sealed
gas burners. If'you use tile st_)ve top grill
on tile sealed gas burne_; it will cause
incomplem combustion and can result
in exposure to carbon monoxide levels
above allowable current standards.
Heatproof Glass Ceramic: Can be used
for either SUltilce or oven cooking. It
con(hlcts heat velw slowly and cools velw
slowh'. Check cooJ_waI'e illanttlilCttli'er's
directions to be sure it can be used on gas
ranges.
Stainless Steel'. This metal alone has
poor heating properties and is usually
combined with coI)pe_; aluminum
or other metals for improved heat
distribution. Combination metal skillets
usually work safisli_ctofilv if they are used
with medium heat as tile manufi_cmrer
i'ecoi/lillends.
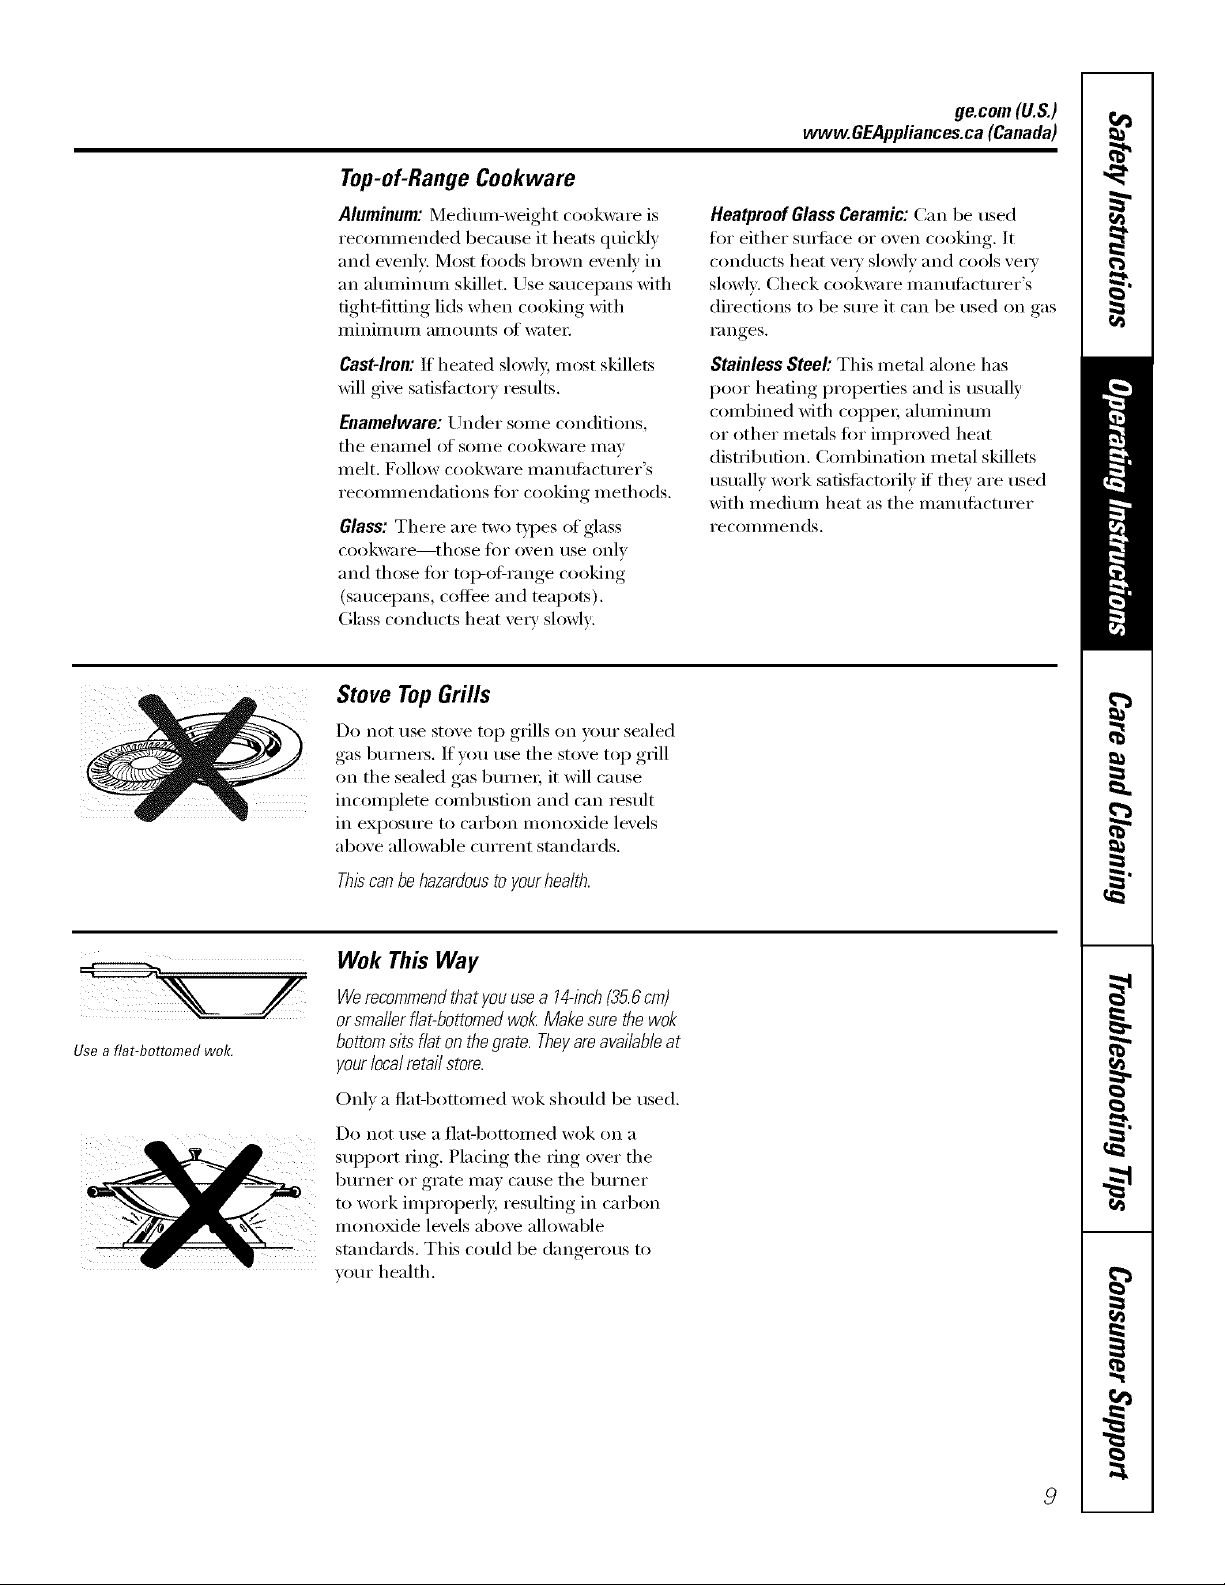
Use a flat-bottomed wok.
Thiscanbehazardoustoyourhealth.
Wok This Way
Werecommendthatyouusea 14-inch{35.6cm)
orsmallerflat-bottomedwok Makesurethewok
bottomsitsflatonthegrate.Theyareavailableat
yourlocalretailstore.
Onh a fiat-bottomed wok should be used.
Do not rise a []at-bottoi//ed wok on a
support _ing. Placing tile ring over tile
burner or grate inay cause tile burner
to work improperly, resulting in carbon
monoxide levels abo_e allowable
standards. This could be dangerous to
veto" health.
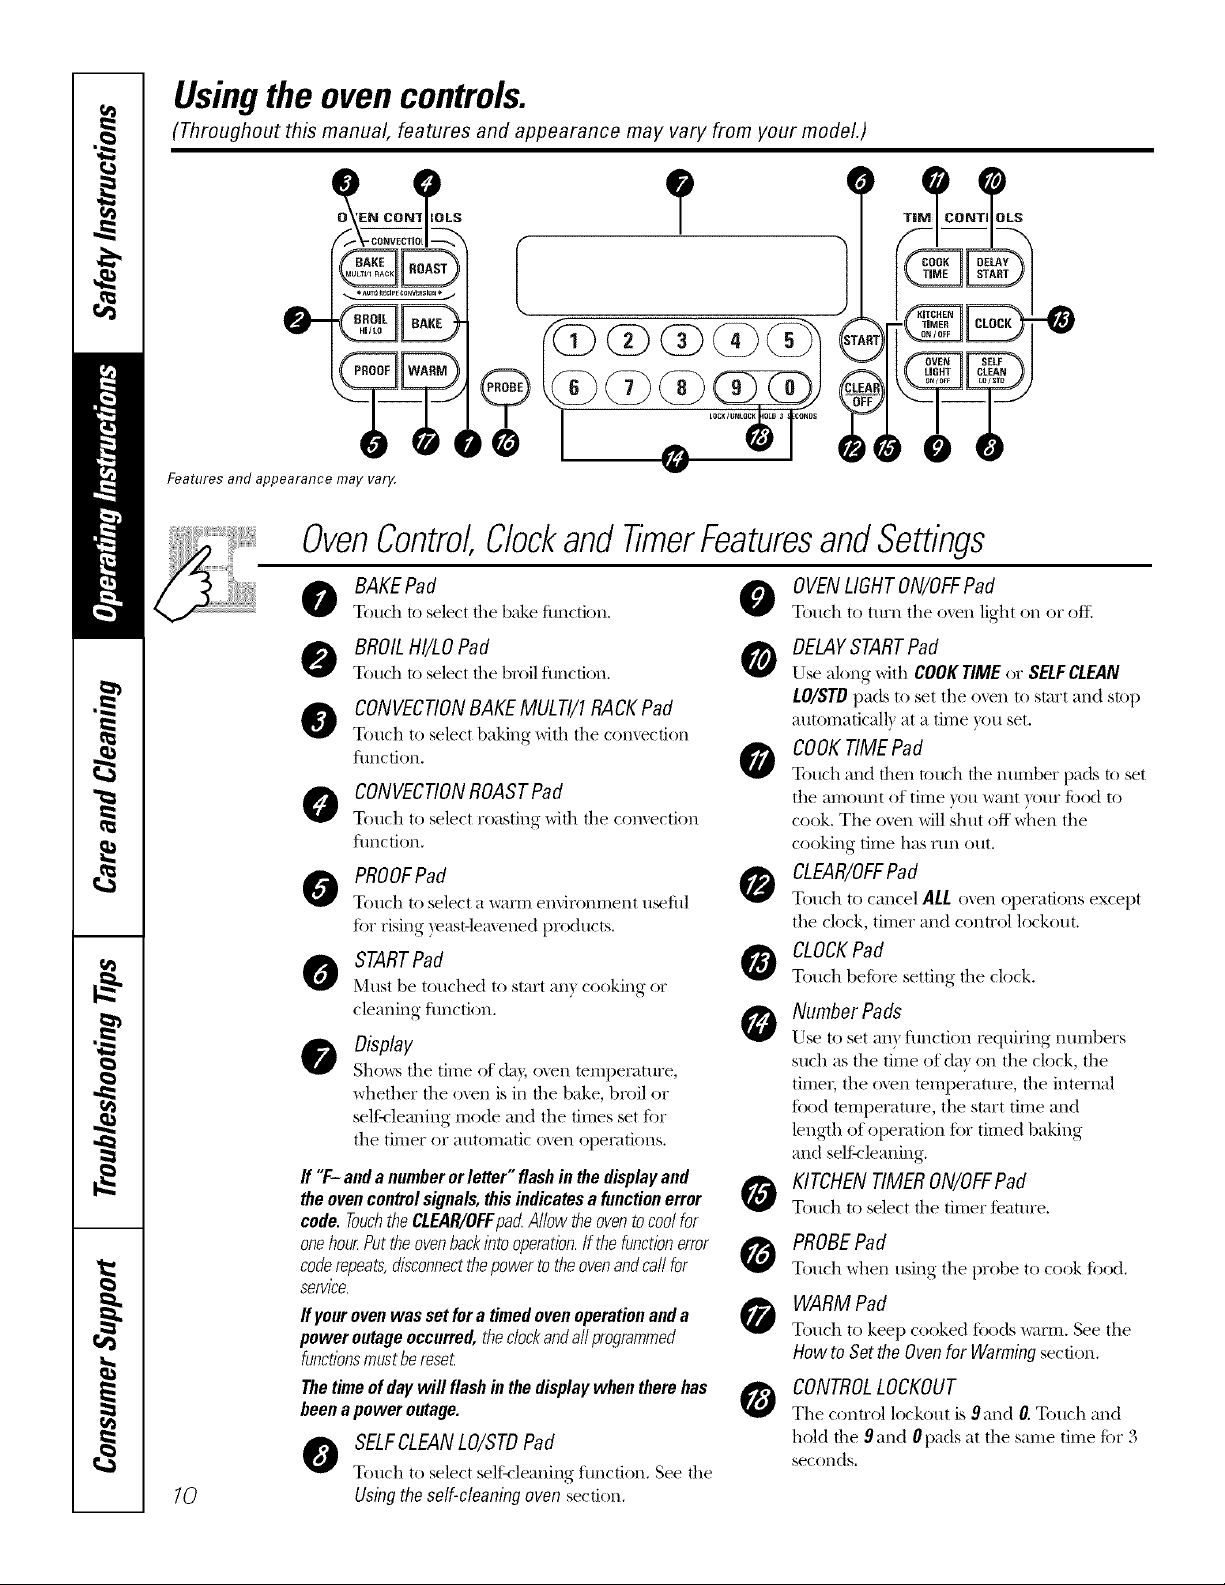
Usingthe ovencontrols.
(Throughout this manual, features and appearance may vary from your model.)
elO_'EN CO NI_O LS t_
_ AUI_ _CIPE CO_ERSlQN *
Features and appearance mayvar_¢
OvenControl,ClockandTimerFeaturesandSettings
-0
10
BAKEPad 0
Touch to select tile b;&e fimction.
@ BROILHI/LOPad 0
Touch to select tile broil function,
CONVECTIONBAKEMULTI/1RACKPad
Touch to select baking with the comection
function,
CONVECTIONROASTPad
Touch to select roasting with tile comection
function,
PROOFPad
Touch to select a warm en'dronment u_ful
fi)r rising,, veast-lemened,.... [)roducts,,
STARTPad
M_tlst be totwhed to start an} cooking or
cleaning function,
Display
Sho_,_stile time of da); oven teillperattlre,
whether the oven is in the bake, broil or
self:_'lemfing mode and the times set fi)r
the timer or autonaatic oxen opeiatk)ns.
ff "F- anda number orletter" flashin the displayand
theovencontrolsignals, thisindicates a functionerror
code. Touchthe CLEAR/OFFpa_ Allow the oventocool for
onehour.Putthe ovenbackinto operation,if the functionerror
coderepeats,disconnectthepowerto theovenandcall for
service.
ffyouroven was setfor a timed oven operationanda
power outage occurred, theclockandall programmed
functionsmustberese_
Thetime of daywill flash in thedisplaywhen therehas
beena power outage.
SELFCLEANLO/STDPad
Touch to select selik-leaning fimction. See tile
Usingthe self-cleaning oven section.
OVENLIGHTON/OFFPad
Touch to tm'n tile oven light on or oftl
DELAYSTARTPad
Use along with COOKTIME or SELFCLEAN
LO/STD I/ads to set the o',_n to start and stop
automatical b at a time you set.
COOKTIMEPad
O
Touch and then touch the nunlber pads to set
the amount of time you want your food to
cook. The ()veil will shut off when the
cooking time has Yt]n ()hit.
CLEAR/OFFPad
Touch to cancel ALL oven oilerafions except
tile clock, timer and control lockout.
CLOCKPad
Touch befi)re setting the clock.
Number Pads
Use to set an} flmction requiring nmnbers
such as the time of da) on the clock, the
timei; the o_en temperatm'e, the internal
filed temperatm'e, the start time and
length of opeiation fi)r timed baking
and sellqleaning.
KITCHENTIMERON/OFFPad
Touch to select the timer teatm'e.
PROBEPad
Touch when using tile probe to cook fbod.
WARM Pad
Touch to keep cooked tbods warm. See tile
How to Set the Ovenfor Warming section,
CONTROLLOCKOUT
The control lockout is 9and O.Touch and
hold the 9 and 0 pads at the same time for 3
seconds,

ge.com (U.S.)
Using the oven. vvvvw.OEAppliances.ca(Canada)
Toavoid possible bums, place the racks in the desired position before you turn the oven on.
Before youbegin...
The racks have stops, so that when placed
correctly on the supports, they will stop
before coming completely out, and will
not tilt.
Toreplace, place the end of the rack
(stop-loci<s) on the support, tilt up the
fl'ont and push the rack in.
CAUTION:Whenyouareusingthe
_A]/en placing and removing cookware,
pull the rack out until it stops.
The bake burner is under the oven floo_:
Do not place toods on the oven bottom
fi)r cooking.
Toremove a rack, pull it toward you,
tilt the ti'ont end up and pull it out.
Theoven has 7rack positions.
How to Set the Oven for Baking or Roasting
rackin the lowest position (,4),youwffl needto
usecaution whenpulling the rackout We
recommendthat you puffthe rackout several
inchesandthen,using two pot holders,puff the
rackout byho/ding the sides of it Therackis low
andyou couldbe burnedif youplace yourhand in
the middleof therackand pu// a// the way out Be
verycareful not to burnyourhandon the door
when using therack in the/owestposition (A).
[] Touch the BAKE pad.
[] Touch the numl)er pads to set
the desired temperature.
[] Touch the STARTpad.
[] Check fi)od fin" doneness at
minimum time on recipe. Cook
longer if necessmT:
[] Touch the CLEAR/OFFpad when
cooking is complete.
NOTE:A coolingfanwillautomaticallyturnon
andoff tocoolinternalparts.Thisisnormal,and
thefanmaycontinuetorunevenaftertheoven
in turnedoff
TypeofFood Rack Position
Frozenpies(oncookiesheet) CorD
Angelfoodcake A
Bundtorpoundcakes BorC
Biscuits,muffins,brownies, CorD
cookies,cupcakes,
layercakes,pies
Casseroles CorD
Turkey A
If baking fi)ur cake layers at the same time,
place two la)'e_ on rock B and t_ layers on
rack D. Stagger pans on the rack so one is
not (tirect]} ab_)_e the othe_:
77
Usingthe oven.
Preheating and Pan Placement
Do not place foods directly on tlTe
oven floo_
Preheat the oven if the redpe calls fin" it.
Preheating is necessm T for good results
when baking cakes, cookies, past_ T and
breads.
Topreheat,set theovenat thecorrecttemperature.
Thecontrol will beep when the ovenis preheated
andthe display will show yourset temperature.
Thepreheat time will varydependingon the
temperaturesetting.
Aluminum Foil
Donotusealuminumfoilonthebottom
of the oven.
Never entirely cover a rack with
ahlIl/intlIll toil. This will disturb tile heat
circulation and result in poor baking.
Oven Moisture
_&svour oven heats uI), tile temperature
change of the air in the oven may cause
water droplets to titan on tile door glass.
These droplets are hamfless and will
eV[ll)OI'ilte lie tile oven contintles to
heat up.
Baking results will be better if baking
pans are centered in the oven as much
as possible. If baking with more than one
pan, place the pans so each has at least 1"
(2.5 cm) to 1½" (3.8 cm) of air space
around it.
A smaller sheet of fifil may be used to
catch a spillover b)' placing it on a lower
rack several inches below the fi_od.
/2
Oven Vent
ge.com(U.S.)
www.GEAppliances.ca(Canada)
Y_)ur oven is vented through one vent
located toward the rear ot the range, Do
not block this vent when cooking in the
oven--it is important that the flow oI hot
air fl'om the oven and fl'esh air to the
oven burner be uninterrupted, Avoid
touching the vent openings or nearby
surfaces duringoven or broiler operation--
they may become hot
Power Outage
CAUTION: Do not make any attempt to operate
the electric i_?nition oven during an electrical
power failure.
The oven or broiler cmmot be lit dtwing a
power fifilm'e, Gas will not flow tmless the
glow bar is hot.
_ Handlesofpotsandpansonthecooktopmay
becomehotif left toodosetothevenL
_ Donot leaveplastic items on the cooktop--
theymay melt if left too closeto the venL
;;Ji::Donot leaveany items on thecooktop. Thehot
air from the vent mayignite flammableitems
and will increasepressureinclosedcontainers,
whichmay causethem to burst.
_ Metal items will become veryhot if theyare
left on the cooktop,andcouldcause burns.
If the oven is in use when a power fifilm'e
occm_, the oven bm'ner shuts off and
cannot be re-lit tmfil power is restored.
This is bec;mse the flow of gas is
automatically stopped and will not resume
when power is restored tmtil the glow bar
has reached operating temperattu'e.
13
Usingthe oven.
How to Set the Oven for Broiling
IMPORTANT'.Toavoidpossibleburns,placethe
shelvesinthedesiredpositionbeforeyouturnthe
oven on.
[] Place the meat or fish on a broiler
,grid in a broiler I_an designed,
fin" broiling.
[] Folh)wsuocestedshelfposifionsin.,_,_ ....
the Broiling Guide.
[] The o_en door must be closed
dtwing broiling.
[] Touch the BROILHI/LOpad once fin.
HIBroil.
To change to LO Broil, touch the
BROILHI/LO pad again.
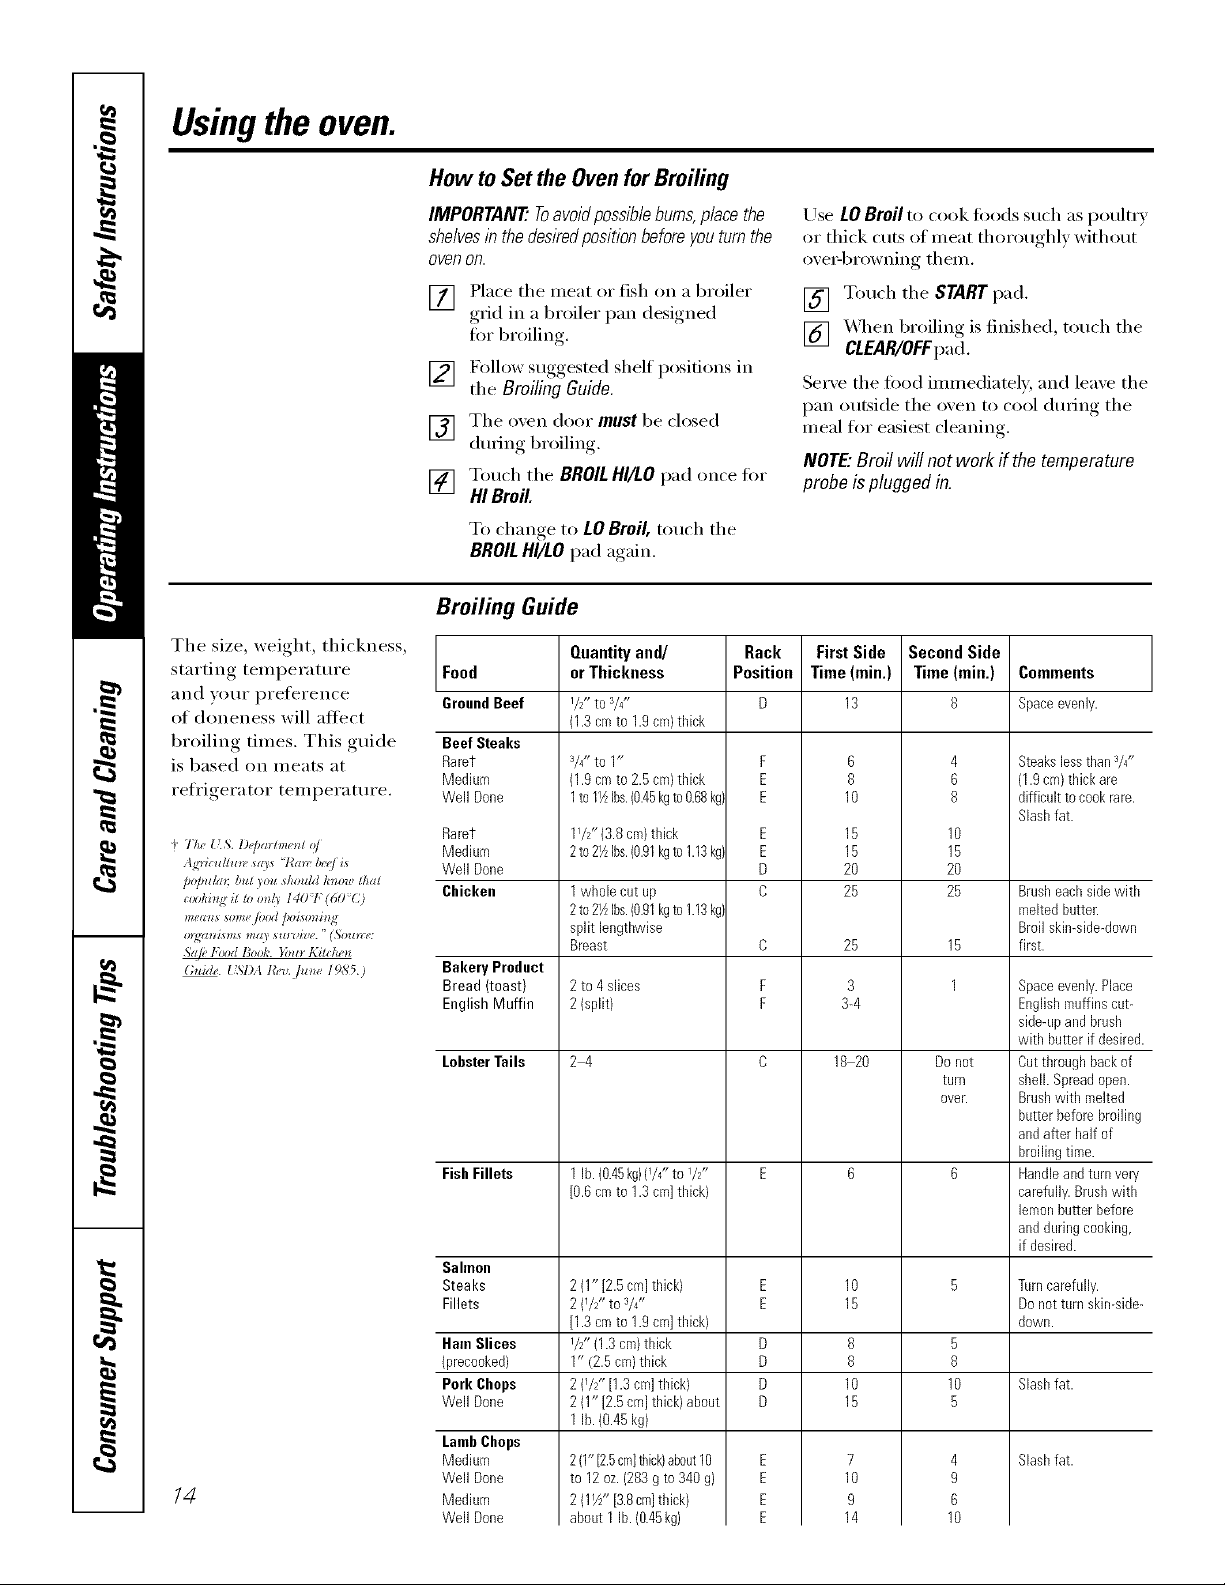
Broiling Guide
The size, weight, thickness,
starting temperature Food
}lIld _OtlI" preference GroundBeef
of doneness will affect
broiling times. This guide Beef Steaks
is based on meats at Rarer
refrigerator temperature. Well Done
+ 77w{L';. l)@a_lm_l o/
tg'dcuflun, *((/* '7{awb*'_Jis
po/mlm; but )ou shouM /mow thai
ciJi)lli_git lo on/3 140<T(60 %)
means *ome/vM poisonin,<
19_{_1721SItlS ltl(ll S_LI'IJ_P('. ' (*%l)_tt_':
Sdf!, l,'_d Book. }bu_ Kilche_
Guide. [ SI)A t&l,.flz_** 19,S'5.)
/4
Medium
Rarer
Medium
Well Done
Chicken
Bakery Product
Bread (toast)
English Muffin
LobsterTails
FishFillets
Sahnon
Steaks
Fillets
HamSlices
(precooked)
Pork Chops
Well Done
LambChops
Medium
Well Done
Medium
Well Done
Quantityand/
or Thickness
l/z- to a/4"
(1.3cmto 1.9cm}thick
3/4"to 1"
(1.9cmto 2.5cm)thick
1to1_ Ibs.(0.45kgto0.68kg)
11/2"(3.8cm)thick
2to21AIbs.(0.91kgto1.13kg)
1wholecut up
2to21_Ibs.(0.91kgto1.13kg)
spilt lengthwise
Breast
2 to 4 slices
2 (split}
2_
1lb. (0.45kg}(1/4"to I/2"
[0.6cmto 1.3 cm]thick)
2 (1" [2.5 cm]thick)
2 (1/2" toV4"
[1.3cmto 1.9 cm]thick)
1/2"(1.3 ca/) thick
1" (2.5cm)thick
2 (72" [1.3cm]thick)
2 (1" [2.5 cln]thick} about
1lb. (0.45kg)
2(10[2.5cmlthick)about10
to 12oz.(283g to 340g)
2 (11//' [3.8cm]thick)
about 1 lb.(0.45kg)
Rack
Position
F
E
E
E
E
D
D
C
F
F
D
D
D
D
Use LOBroil to cook fi)ods such as poultr}
or thick cuts of meat thoroughl)without
oxe>browning them.
[] Touch the STARTpad.
[] _,_q_en broiling is finished, touch the
CLEAR/OFFpad.
Serve the fi)od immediately, and leave the
pan outside the oxen to cool dufim*_ the
meal for easiest cleaning.
NOTE'.Broil will notwork ff the temperature
probeis pluggedin.
FirstSide
Time(min.)
13
10
15
15
2O
25
25
3-4
18 20
10
15
10
14
SecondSide
Time(rain.)
8
6
8
3
8
8
7
9
4
6
8
10
15
2O
25
15
1
Donot
turn
OVer.
5
8
10
5
4
9
6
10
Comments
Spaceevenly.
BteakslessthanS/4"
(1.9cm)thick are
difficultto cookrare.
Slashfat.
Brusheachsidewith
meltedbutter.
Broilskimsidedown
first.
Spaceevenly.Place
Englishmuffinscat-
side-@andbrush
with butter if desired.
Cutthroughback of
shell. Spreadopen.
Brushwith melted
batterbeforebroiling
andafter Mf of
broilingtime.
Handleandtamvery
carefully.Brushwith
lemonbutter before
anddaringcooking,
if desired.
Turncarefully.
Donotturn skin-side-
down.
Slashfat.
Slashfat.
ge.com (U.S.)
Using the clock, timerandcontrollockout, www.GEAppliances.ca(Canada)
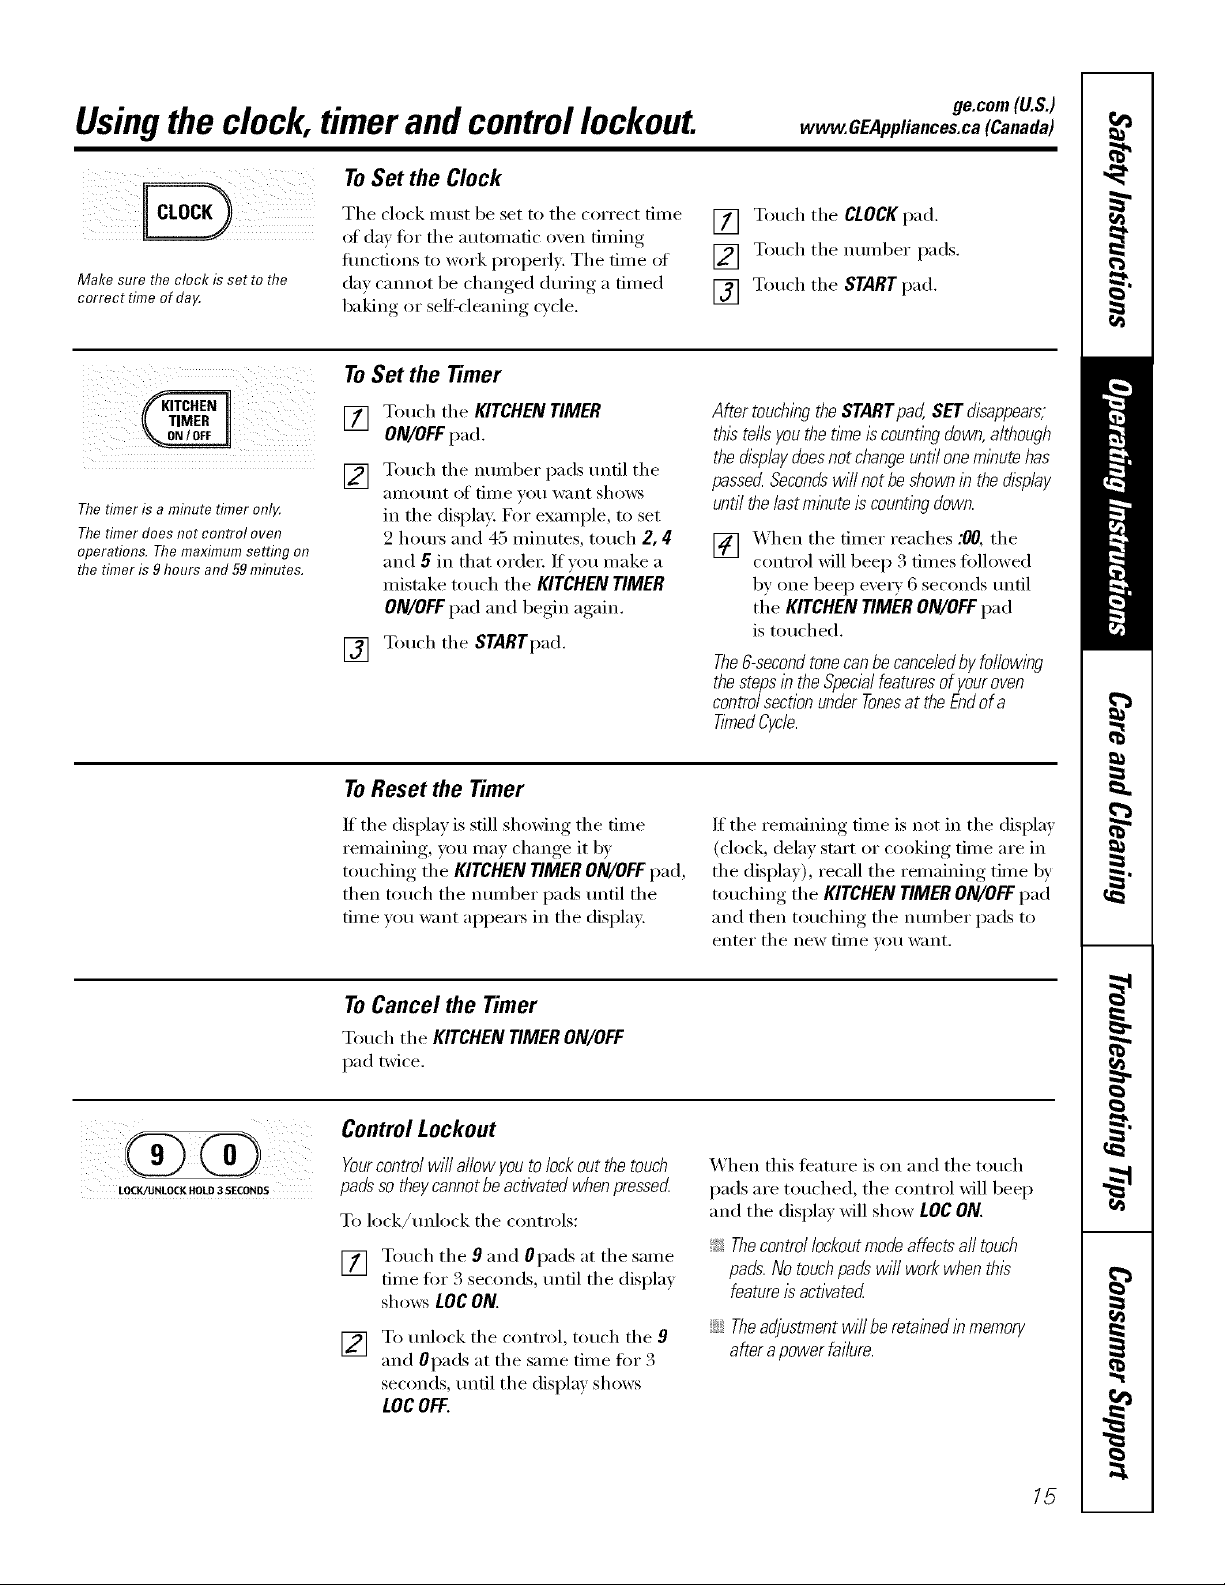
ToSet the Clock
iii ili i Iii
Make sure the clock is set to the
correct time of da_
The dock must be set to tile correct time
of day fin" tile autonmfic oven tinting
flmctions to work properly. Tile time ot
da)' cannot be changed during a timed
baking or self:cleaning cycle.
ToSet the Timer
[] Touch tile CLOCK pad.
[] Touch tile number pads.
[] Touch the START pad.
Thet#ner is a minute timer onl_
Thetimer does not control oven
operations. The maximumsetting on
the timer is 9 hours and 59mhTutes.
Touch tile KITCHENTIMER
ON/OFFpad.
Touch tile nmnber pads tmfil tile
[]
_lIIlO//nt of time yet] want shows
in tile display: For example, to set
2 hems and 45 minutes, touch 2, 4
and 5 in that order: If you make a
mistake touch tile KITCHEN TIMER
ON/OFFpad and begin again.
[] Touch tile STARTpad.
ToReset the Timer
If tile display is still shoMng tile time
remaining, you may change it by
touching tile KITCHEN TIMER ON/OFFpad,
then touch tile number pads tmtil tile
time you want appea_ in tile display.
AftertouchingtheSTARTpad,SETdisappears,
thistellsyouthetl_neiscountingdown,although
thedisplaydoesnotchangeuntiloneminutehas
passedSecondswi//notbeshownin thedisplay
untilthe/astmbute iscountbgdown.
[] _'_ hen tile timer reaches :00, tile
control will beep 3 times fbllowed
by one beep eve_ T 6 seconds tmtil
tile KITCHENTIMERON/OFFpad
is touched.
The&secondtonecanbecance/edbyfo//owlbg
thestepsintheSpecialfeaturesof youroven
controlsectionunderTonesat theEndofa
TimedCycle.
If tile remaining time is not in tile display
(dock, delay start or cooking time are in
tile display), recall tile remaining time by
touching tile KITCHEN TIMER ON/OFFpad
and then touching tile number pads to
enter tile new [lille VO/I want.
LOCK/UNLOCK HOLD 3 SECONDS
ToCancel the Timer
Touch tile KITCHENTIMERON/OFF
pad twice.
Control Lockout
Yourcontrolwill allowyoutolockoutthetouch
padssotheycannotbeactivatedwhenpressecL
To lock/tmlock tile controls:
[] Touch tile 9 and Opads at tile same
time fin 3 seconds, tmtil tile displa)
shows LOCON.
[] To unlock tile control, touch tile 9
and 0pads at tile same time for 3
seconds, until tile display shows
LOCOFF.
When this teatm'e is on and tile touch
pads are touched, tile control will beep
and tile display will show LOC ON.
_: Thecontrol lockoutrnode affects all touch
pads.No touchpadswill work when this
featureis activated
iJi::Theadjustmentwillberetabedlnmemory
afterapowerfailure.
15
Usingthe timedbakingand mastingfeatures.(onsome models)
NOTE."Foods that spoil easily--such as milk, eggs, fish, stuffings, poultry and pork--should not be allowed to sit for
more than 1hour before or after cooking. Room temperature promotes the growth of harmful bacteria. Be sure that
the oven light is off because heat from the bulb will speed harmful bacteria growth.
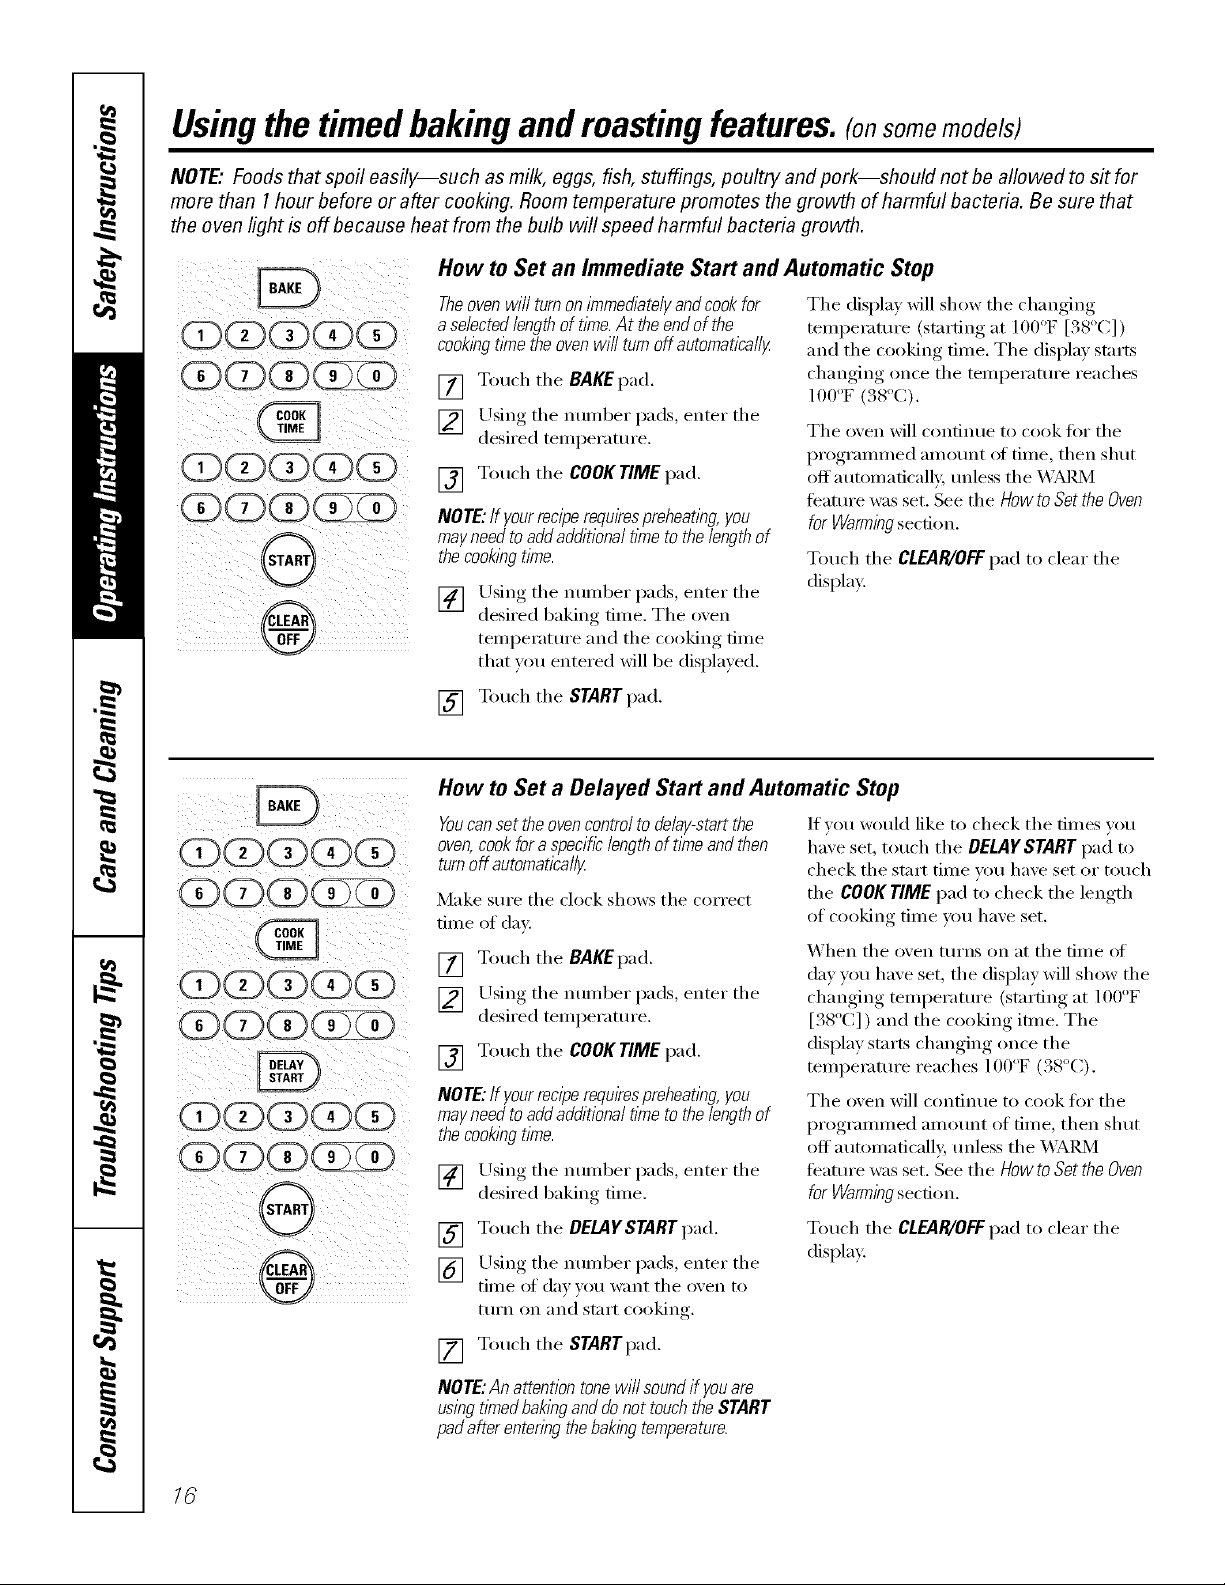
How to Set an Immediate Start and Automatic Stop
Theoven will turnon immediatelyandcook for
aselected lengthof tlYne.At the end of the
cookingt/me the oven wi// turnoff automatica//y
[] Touch tile BAKE pad.
[] Using tile number pads, enter tile
desired temperature.
[] Touci/tile COOKTIME pad.
NOTE:/f your reciperequkespreheating, you
may needto addadditional time tothe length of
thecookingt/me.
[] Using tile munl)er pads, enter tile
desired baking time. Tile oxen
temperatm'e and tile cooking time
that you entered wiii be dispiayed.
[] Touci/tile STARTpad,
Tile dispiay wiii si/ow tile ckmging
temperature (starting at ] 00°F [38°C])
and tile cooking time. Tile dispiay starts
cimnging once tile temperatm'e reaci/es
IO0°F(.%°C).
Tile oven wili continue to cook tot tile
programmed amo/mt of time, ti/en simt
offautomaficaliy, tmiess the _&]M/M
teature was set. See the How to Set the Oven
for Warming section.
Touci/tile CLEAR/OFFpad to ciear tile
dispiay:
iQ Q00i
How to Set a Delayed Start and Automatic Stop
Youcanset the oven control to delay-start the
oven,cookfora specifc length of time andthen
turnoff automafical/g
Make sm'e tile ciock si/ows tile correct
time of day:
[] mouci/tile BAKEpad.
[] Using tile nmnber pads, enter tile
desired temperature.
[] Touci/tile COOKTIME pad,
NOTE:Ifyourreciperequkespreheating,you
mayneedtoaddadditionaltimetothelengthof
thecookingrime.
[] Using tile nmnber pads, enter tile
desired baking time.
[] Touci/tile DELAYSTARTpad.
[] Using tile number pads, enter tile
time of (ia))ou want tile o_en to
[tlI'n on [lIl(i st;Irt cooking,
[] Touci/tile STARTpad.
If _ou wouid like to ci/eck tile times )ou
im',e set, tou(i/tile DELAYSTARTpad to
ci/eck tile stnrt time you im\'e set or tou('i/
tile COOKTIMEpad to ci/eck tile iengti/
of COOkiIl_ time VO/I h_l_,e set,
_'_ i/en tile o_en ttlrns on at tile time of
(ia) you im_e set, tile dispia)wiil si/ow tile
changing temperatm'e (stnrting at i00°F
[. 8 C] ) and the cooking itme. The
dispim stnrts chanoino once the
temperature reaches i00"F (38°C).
The oxen wili continue to cook for the
programmed amotmt of time, then shut
off automaticali), tmiess the _4 kl_d_/l
teature was set. See the How to Sot the Oven
for Warming section.
Touci/tile CLEAR/OFFpad to ciear tile
dispiay:
16
NOTE:An attention tone wi// soundif youare
using t/_nedbakingand do not touch the START
padafter entering the baking temperature.
ge.com (U.S.)
Using theprobe, www.GEAppliances.ca(Canada)
For many foods, especially roasts andpoultry, internal food temperature is the best test for doneness. The
temperature probe takes the guesswork out of roasting by cooking foods to the exact doneness you want.
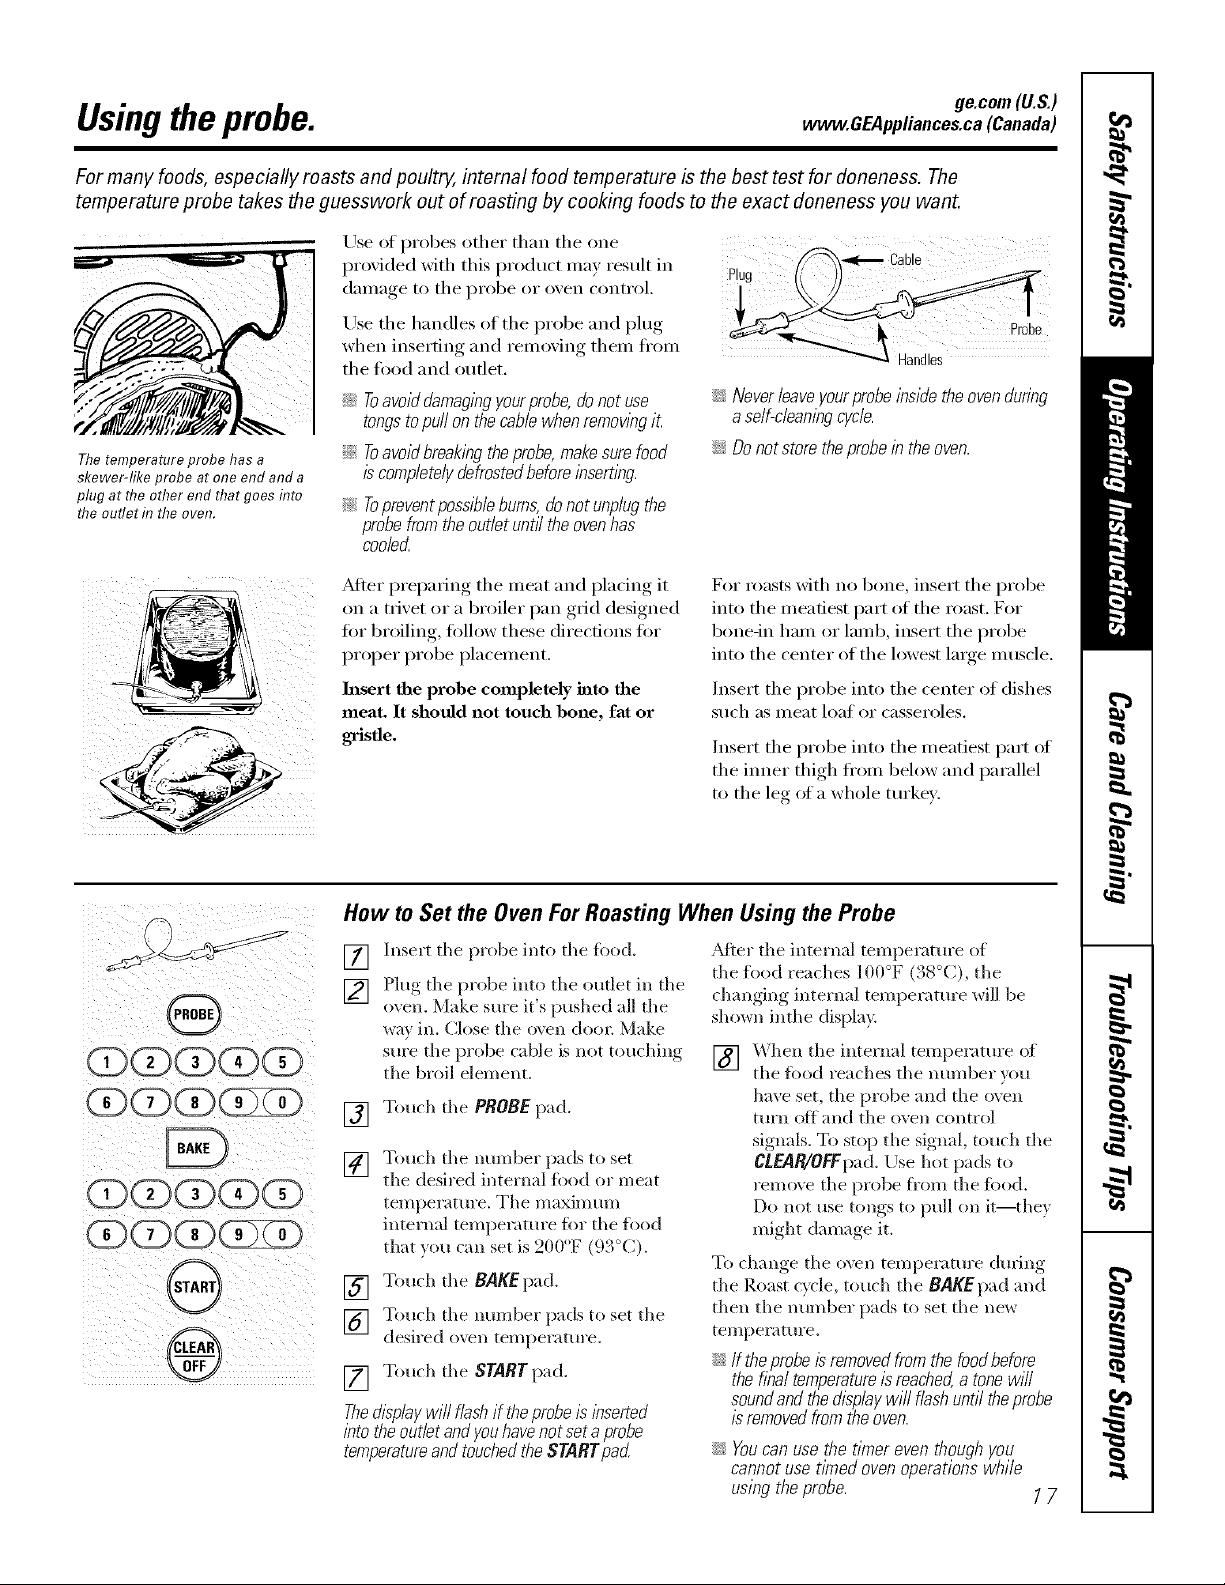
Thetemperature probe has a
skewer-like probe at one end and a
plug at the other end that goes flTto
the outlet f17the oven.
Use of probes other than the one
proxided xdth this product ma) result in
daIllage to the pi'obe or o_,en conti'ol,
Use the handles of the probe and plug
when inserting and remoxim* them fl'om
the fi)od and outlet.
::Ji::Toavoiddamagingyourprobe,donotuse
tongstopuffonthecablewhenremovingiL
_ilToavoidbreakingtheprobe,makesurefood
iscompletelydefrostedbeforeinserting.
Toprevent possible bums,donot unplugthe
probe from the ouflet unt/7the ovenhas
cooled
_Mter preparing the meat and placing it
on a trivet or a broiler pan grid designed
tor broiling, follow these directions for
proper probe placement.
Insert the probe completely into the
meat. It should not touch bone, fat or
_ Cable
iJi::Neverleave yourprobe/bs/detheovenduring
a self-cleaningcycle.
iJi::Donotstore the probe in the oven.
For masts with no bone, insert the probe
into the meatiest part of the roast. For
bone-in ham or lamb, insert the probe
into the center of the lowest lmge muscle.
Inse_t the probe into the center of dishes
Stlch as Illeat loat or casseroles.
Insert the probe into the meatiest part of
the inner thigh fi'om below and parallel
to the leg of a whole turkey.
O
cv'j(Z)(Z)O)(Z)
How to Set the Oven For Roasting When Using the Probe
]nsell the probe into the fi)od.
[]
Plug the probe into the oudet in the
[]
oven. Make sure it's pushed all the
*_avin. Close the o\en do(n: Make
sure the probe cable is not touching
the broil element.
[] Touch the PROBEpad.
Touch the munber pads to set
[]
the desired internal fi)od or meat
temperature. The maximum
internal temperatm'e fi)r the food
that }ou can set is 900°F (93°C).
[] Touch the BAKEpad.
] Touch the mlmber pads to set fl_e
desired oven temperature.
[] Touch the STARTpad.
Thed/sp/aywi// f/ashif theprobe/s/bserted
/btothe outlet and youhave not set aprobe
temperatureandtouchedthe STARTpad
_Mter the internal temperature of
the food reaches 100°F (38°C), the
changing internal temperature will be
shown inthe display.
] _hen the internal temperature of
the fi)od reaches the mlmber ",ou
have set, the probe and the o\ en
turn off and the oven control
signals. To stop the signal, touch the
CLEAWOEEpad.Use hot pads to
remove the probe ,q'om the fi)od.
Do not use tongs to pull on it--fl_ey
might damage it.
To change the oven temperatm'e during
the Roast cycle, totuh the BAKEpad and
then the number pads to set the new
temperature.
iJi::If theprobe/s removedfrom the food before
the tim/temperature isreached,a tone w///
soundand the displaywi// flash until theprobe
isremoved from the oven.
iJi::Youcan usethetimereventhoughyou
cannotuset/Ynedovenoperationswhile
usingtheprobe. 7 7
Usingthe convectionoven.
Convection Fan
in a convection oven,a fancirculates hot air
over, under and around the foocL
This cimulating hot air is evenly distributed
throughout the oven cavity.As a result, foods
are,evenly cooked andbrowned--often in less
time with convection heat.
1-Rack Convection Baking
Tile comection tim circulates tile heated
air evenl_ oxer and around the food.
Whenconvectionbakingwith only 7rack,
use therackpositions recommendedinthe Using
the oven section.
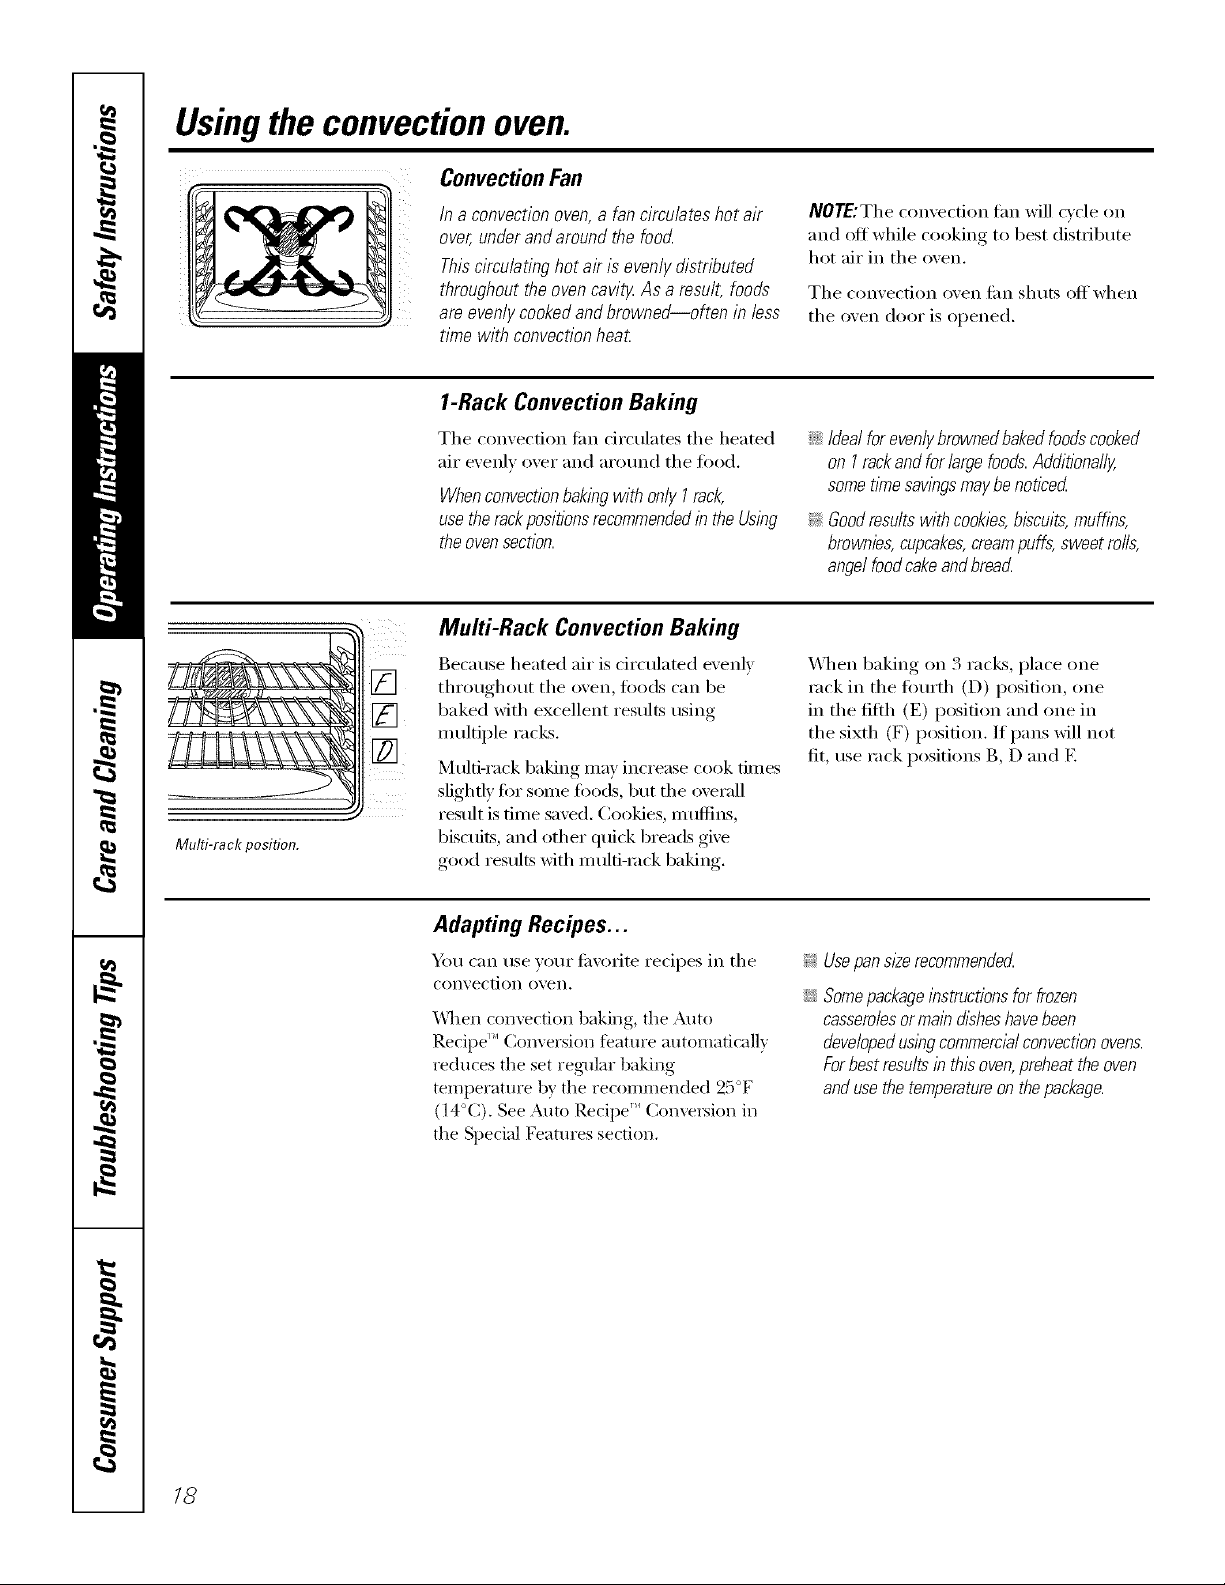
Multi-Rack Convection Baking
Because heated air is circulated evenly
throughout tile oven, foods can be
baked with excellent results using
multiple racks.
Multi-rack baking may increase cook times
slightly fin" some fi)ods, but tile overall
result is time saved. (_ookies, mttflins,
Multi-rack position.
biscuits, and other quick breads give
good results with m ulfi-mck baking.
NOTE:The convection tim will cycle on
and off while cooking to best distribute
hot air in the oven.
The convection oven tim shuts offwhen
the oven door is opened.
;;Ji::Idealforevenlybrownedbakedfoodscooked
on I rackandforlargefoods.Additionally,
sometimesawbgsmaybenoticed
_ Goodresultswithcookies,biscuits,muffins,
brownies,cupcakes,creampuffs,sweetrails,
angelfoodcakeandbreacL
_A]/ell baking on 3 racks, place one
rock in the fimrth (D) position, one
in the fifth (E) position and one in
the sixth (F) position. If pans will not
fit, use rack positions B, D and E
18
Adapting Recipes...
Ym can use }our fi_xmite recipes in tile
con_, ection o'_ en.
\\qlen convection baking, tile Auto
Recipe '_ Conversion feature automatically
reduces the set reg-ular baking
teml)erature by tile recommended 25°F
(l 4°C), See Auto Recipe '_ Conversion in
tile Special Features section.
_ Usepansl2e recommendecL
::Ji::Somepackageibstructions for frozen
cassera/esor main disheshave been
developedusing commercialconvection ovens.
Forbest results inthis oven,preheat the oven
andusethe temperatureon thepackage.
Be.corn(U.S.)
www.GEAppliances.ca(Canada)
When baking cookies, you will
get the best results if you use a
flat cookie sheet instead of a
pan with Iow side&
Convection Roast
_Ji::Goodforlarge tendercuts of meat, uncovered
Tile convection tim circulates tile heated
air evenly over and around tile fi)od.
Meat and poulti T are browned on all
sides as if they were cooked on a
rotisserie. The heated air seals in juices
quickly fin" a inoist and tender product
while, at the sanie tinie, creating a rich
golden brown exteIJoI:
Cookware for Convection Cooking
Bet(ii'e rising yo/II" convection oven,
check to see if vour cookware leaves
rodin fi)r air d_'culafion in tile ()veil.
If you are baking with several pans, leave
sp_ce between thein. _Mso, be sure tile
pans do not touch each other or tile
walls ot the ()veil.
Paper and Plastic
Heat-resistant paper and plastic
containei_ that are reconiinended fl)r
use in regular baking can also be used
fi)r convection baking, but should not
be used at teniperatuies higher than
tile teinperature recoinnlended by tile
cookwaI'e ii/[llltililCttli'eY. Plastic cookware
that is heat-resistant to tenlperatuI'es ot
400°F (204°C) can also be used.
\4lien x_)u are convection roasting, it is
iinpoitant that you use a broiler pan and
grid designed fi)r broiling fl)r best
convection roasting results. Tile pan is
used to catch grease spills and the grid
is used to prevent grease spattei_.
_Ji::Place the oven rack in the position
that centei_ tile fi)od between tile top
and bottoIll 01' tile ()veil,
Metal and Glass
Any _'pe of cookwai'e will work in w)ur
convection (wen. Uowe\'ei; Illetnl I)}lns
heat tile fi_stest and are reconiinended
fi)r convection baking.
_ Darkenedor matte-finishedpanswill bake
faster thanshinypans.
;;Ji::Glassor ceramicpanscookmore s/ow/)z
For recipes like ovenq)aked chicken,
use a pan with low sides. Hot air cannot
drculate well around fi)od in a pan with
high sides.
C81_VECTiOR
(D(Z)C (3)@
@
®
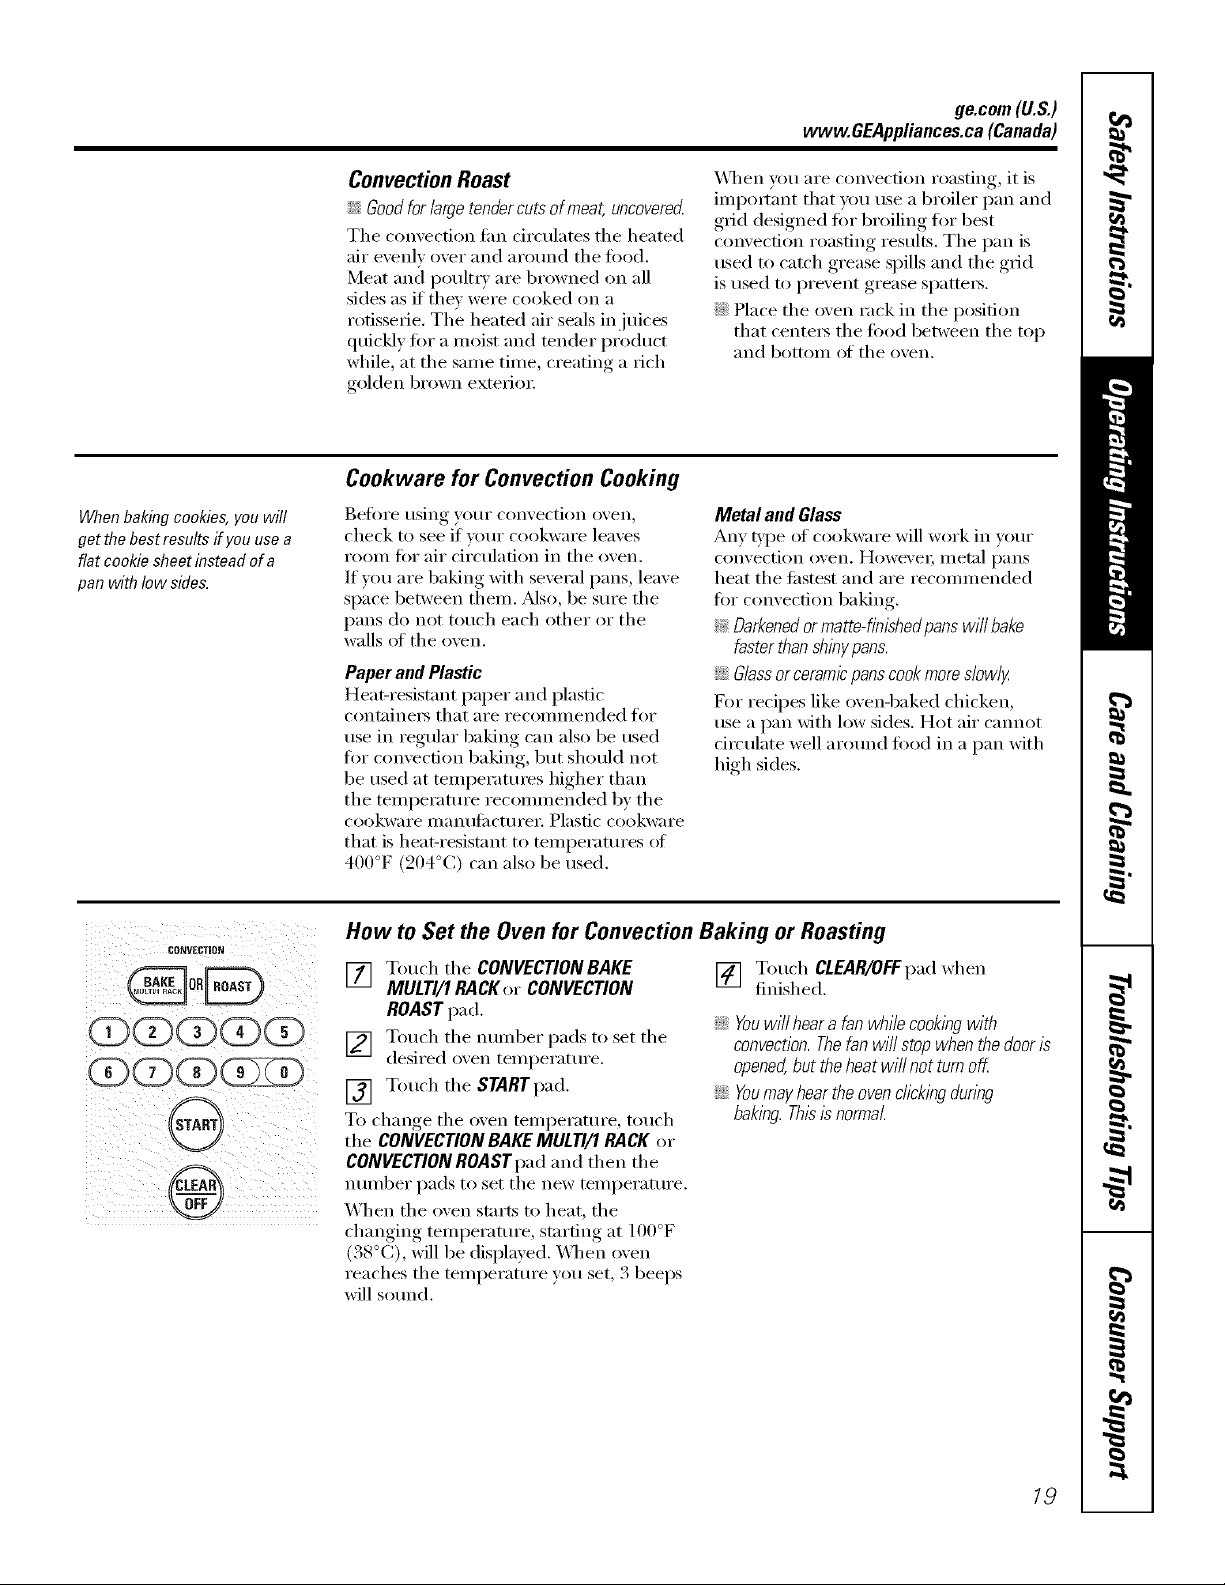
How to Set the Oven for Convection Baking or Roasting
[] Touch tile CONVECTION BAKE
MULTI/1 RACKor CONVECTION
ROAST pad.
[] Touch tile nuinber pads to set tile
desired men teinperature.
[] Touch tile START pad.
To change tile oven teniperature, touch
tile CONVECTIONBAKEMULTI/1 RACK or
CONVECTIONROAST pad and then tile
nuniber pads to set tile new teniperature.
When tile oven starts to heat, tile
changing tenlperature, starting at 100°F
(38°(;), will be displayed. X4]/en oven
reaches the teniperature you set, 3 beeps
will sound.
[] Touch CLEAR/OFFpad when
finished.
;;Ji::Youwillhearafanwhilecookingwith
convection.Thefanwill stopwhenthedoor Is
opened,but theheatwillnotturnoK
;;J_::Youmayheartheovencrickingdunbg
baklbg.Thisisnormal
19
Usingthe timedfeaturesforconvectioncooking.
Youwill hear a fan while cooking with these features. The fan will stop when the door& opened, butthe heat
will not turn off.
NOTE:Foods that spoil easily--such as milk, eggs, fish, stuffings, poultry and pork--should not be aflowed to
s# for more than 1hour before or after cooking. Room temperature promotes the growth of harmful bacteria.
Be sure that the oven light is off because heat from the bulb will speed harmful bacteria growth.
CQNVECTION
(D (5) (5)
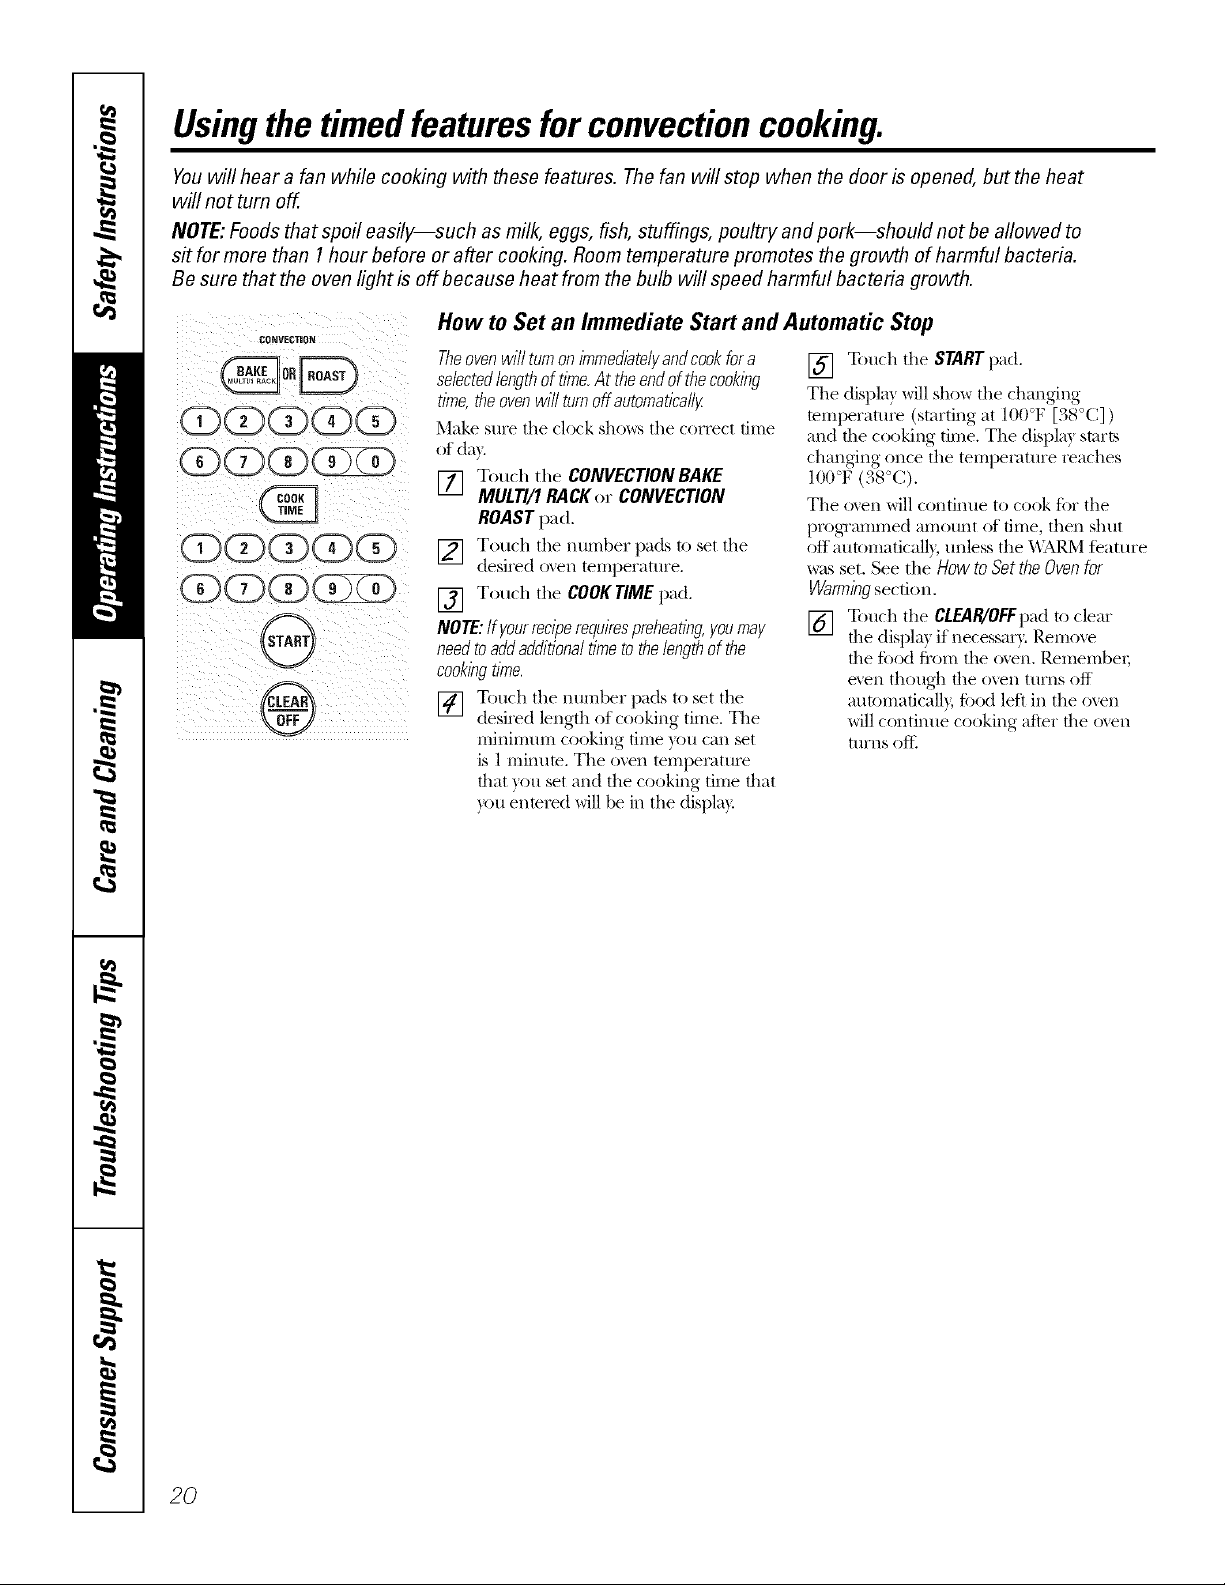
How to Set an Immediate Start and Automatic Stop
Theoven wilfturn on immediate/I/andcook for a
selectedlengthoftime.At theendofthecooking
time,theovenwillturnoffautomatically
Make sure tile clock sho_,_:s tile correct time
of day.
[] Touch the CONVECTIONBAKE
MULTI/1RACKor CONVECTION
ROASTpad.
[] Touch tile number pads to set tile
desired o'_en temperattu'e,
[] Touch tile COOK TIME pad.
NOTE: ffgourreciperequirespreheating,you may
need to add additional time to the lengthof the
cookingtime.
[] Totlch tile ntln-lber pads to set tile
desired length of cooking time. Tile
mininmm cooking dine you can set
is 1 minum. Tile oven tempemtm'e
that you set and tile cooking dine that
you enmred will be in tile displa):
[] Touch tile STARTpad,
Tile displa) will show tile changing
temperattwe (starting at 100°F [38°C] )
and file cooking time, Tile displa) starts
changing once tile temperatm'e reaches
100°F (38°C),
Tile o_en will continue to cook ti)r tile
[/i'ogTammed amotmt of time, then shut
off autonmticalb; mlless tile _\IM_,M t_'atm'e
was set. See the How to Set the Oven for
Warmingsection.
[] Touch tile CLEAR/OFFpadto clear
the displa) if necessai T. Remo_e
the ti)od fl'om tile oxen. RemembeI;
e'.en though the ()veil ttlFns off
autonmficall}, ti)od left in tile ()veil
will continue cooking after the o_en
turns oft_
2()
ge.com(U.S.)
www.GEAppliances.ca(Canada)
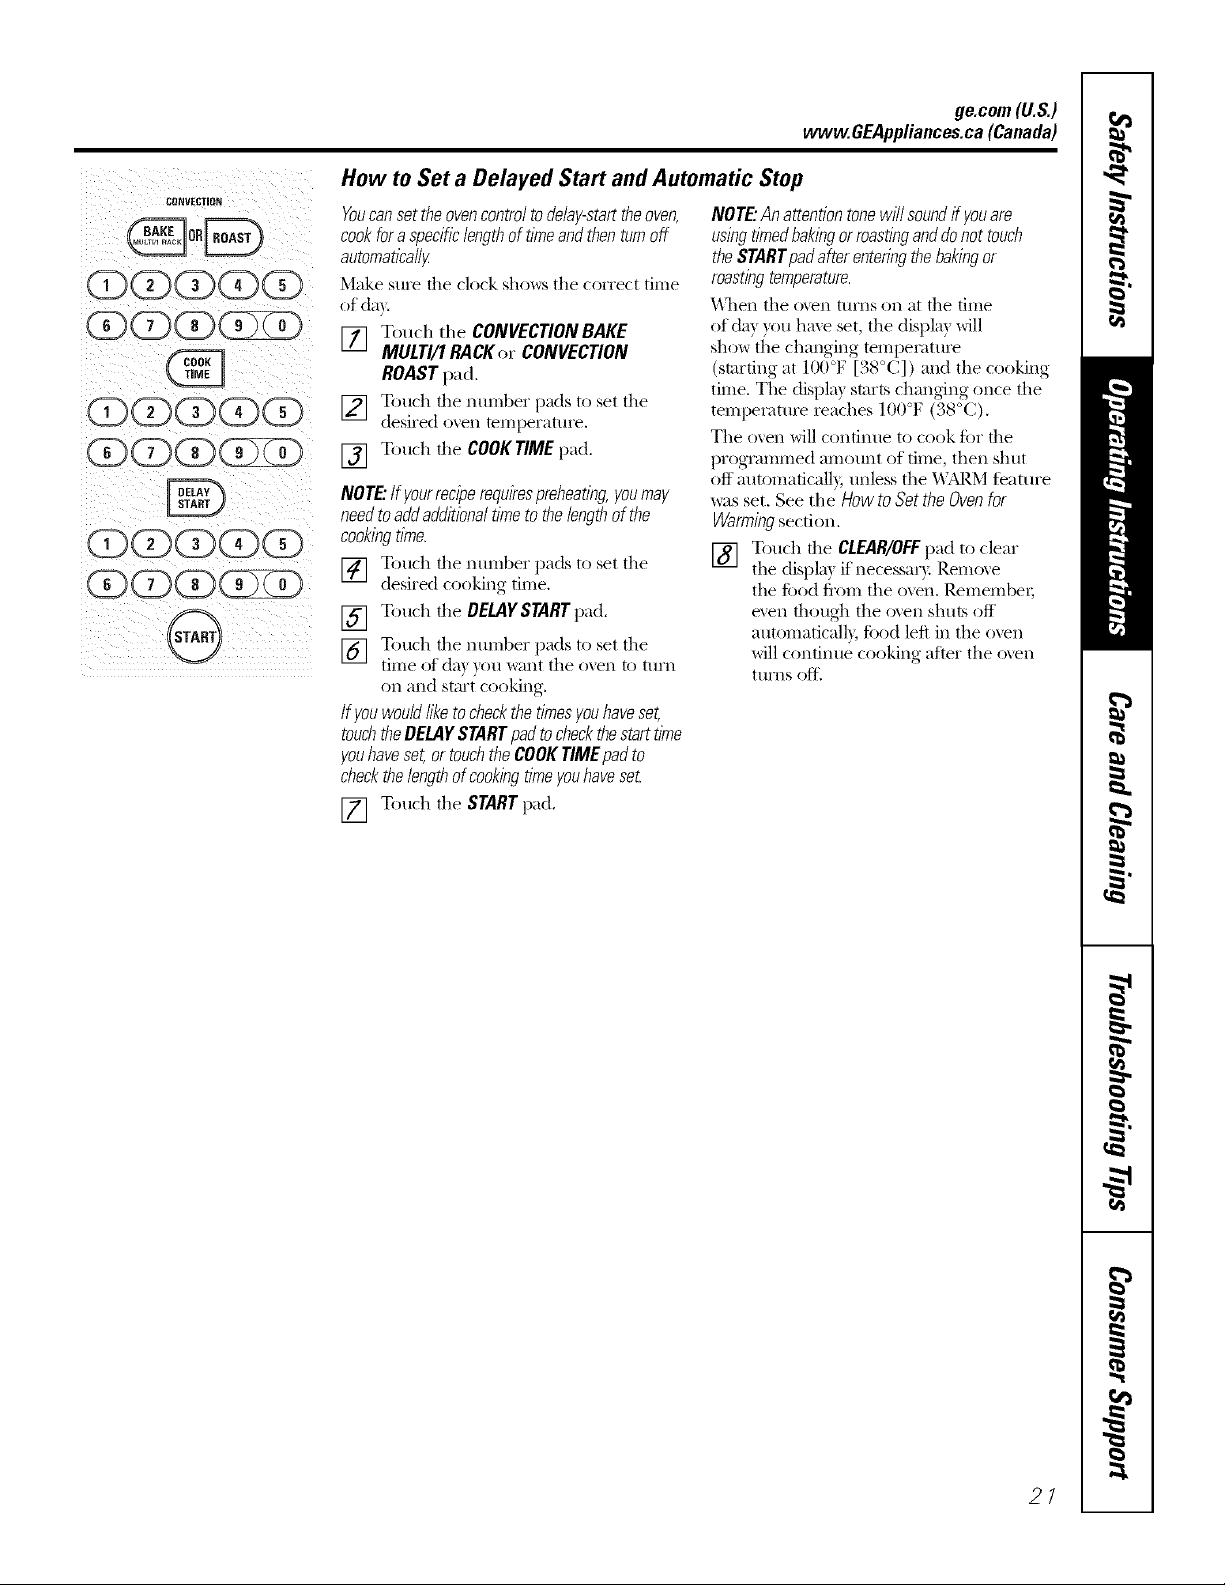
C0_VECTION
G(D(5)(?)(5)
(DG(5)(?
(i)OOOO
G)O(5)
How to Set a Delayed Start and Automatic Stop
Youcan settheovencontroltodelay-starttheoven,
cookforaspecificlengthoftimeand then turnoff
automatically
Make SllI'e file clock sho_s file correct time
of day.
[] Touch the CONVECTIONBAKE
MULTI/1 RACKor CONVECTION
ROAST pad,
[] Touch the nmnber pads to set the
desired oven temperatm'e.
[] Touch the COOKTIMEpad.
NOTE"Ifyourreciperequirespreheating,youmay
needtoadd additionaltime to thelengthof the
cookingtime.
[] Touch the nmnber pads to set the
desired cooking time.
[] Touch the DELAYSTARTpad.
[] Touch the nmnber pads to set the
time of de} )ou want the ()',el1 to tllI'n
on mid stm't cooking.
Ifyou wouldlike tocheckthe timesyouhaveset,
touchtheDELAYSTARTpadtocheckthestarttime
youhaveset,or touchthe COOKTIMEpad to
checkthelengthofcookingtimeyouhavese_
[] Touch the START pad.
NOTE."An attentiontonewill soundff youare
usingtimedbakingorroastinganddonot touch
the STARTpadafter enteringthebakingor
roastingtemperature.
_'\llen file oven turns on at file tillle
of de)you hme set, the displa)will
show the changing tempemtm'e
(starting at 100°F [38°C]) mid the cooking
time. The displa) starts chinning once the
tempetatm'e reaches 100°F (38°(:).
The oven will confintle to cook tbr the
programmed amount of time, then shut
oft automaficall}, unless the _'\;M_.Mteatm'e
_:ls set. See the How to Set the Oven for
Warming section.
[] Touch the CLEAR/OFFpad to clear
the displa) if necessa_?: Remove
the food fl'om the oven. Remember;
even though the o',en shuts off
automaticalb, , ti)od left in the oven
will continue cooking after the o',en
ttlrns oII_
21
Usingthe convectionoven.
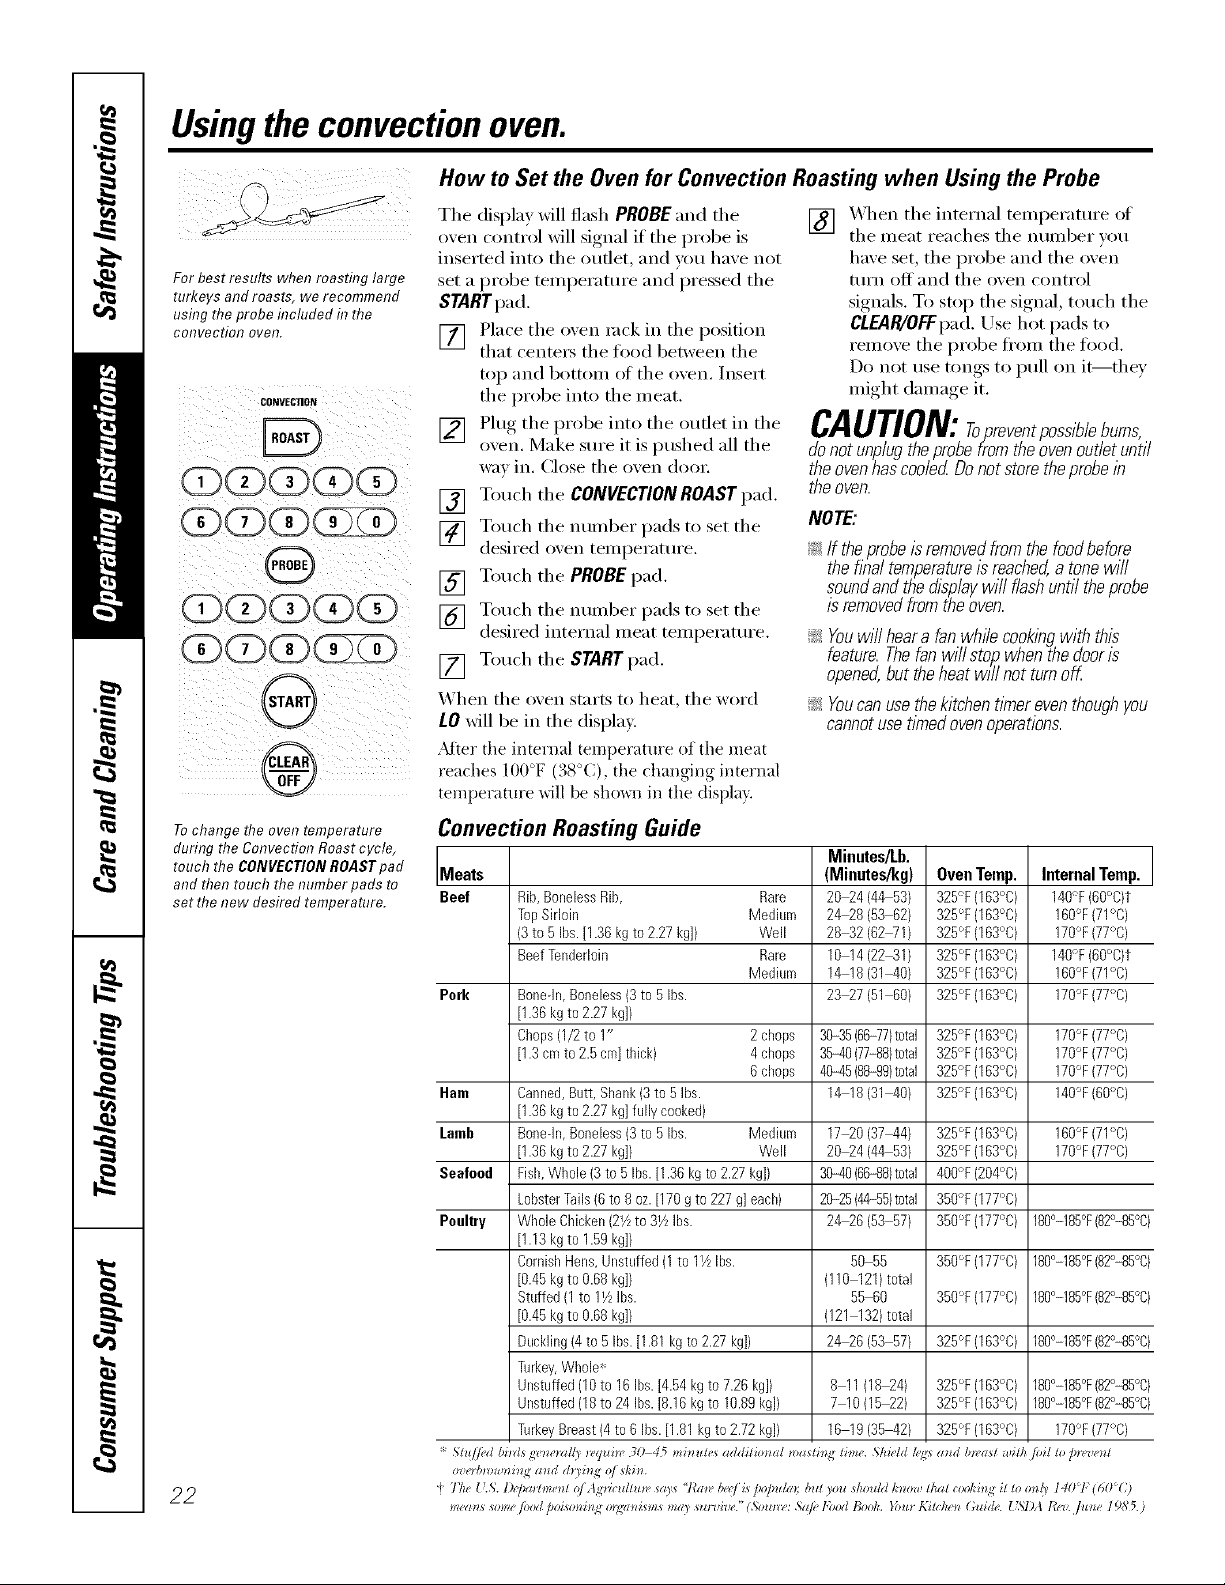
How to Set the Oven for Convection Roasting when Using the Probe
For best results when roasting large
turkeys and roasts, we recommend
usflTg the probe flTcluded t7 the
convection oven.
CONVECTI00
(3X3X3 (
OCGOO
QC(3 (3ZD
®
,®
The display will flash PROBE and the
oven control will signal if the probe is
inserted into the outlet, and you have not
set a probe temperature and pressed the
STARTpad,
[] Place the oxen Im'k in the position
that centei_ the food between the
top and l)ottom ot the oven. Insert
the probe into the meat.
[] Plug the probe into the outlet in the
oxen. Make sure it is pushed all the
way in. Close the oven dooi:
[] Touch tile CONVECTION ROAST pad,
[] Touch tile munber pads to set tile
desired oxen temperature.
[] Touch tile PROBEpad.
[] Touch tile numl)er pads to set tile
desired internal meat temperature.
[] Touch tile STARTpad.
When tile oven starts to heat, tile word
lO will be in the display.
.Mter the internal temperatm'e of the meat
reaches IO0°F (38°C), the changing internal
temperature will be sho_al in the displa}.
[] X._q/en tile internal temperature of
tile meat reaches tile number xou
have set, the probe and the oven
tuI'n off }lIl(l tile oven conti'ol
signals. To stop the signal, touch the
CLEAR/OFFpad. Use hot pads to
remove tile probe ti'om tile too(l.
Do not use tongs to pull on it--they
might damage it.
CAUTION:ropreventpossiblebums,
donotunplugtheprobefromtheovenoutletuntil
the oven has cooled Do not store the probe/b
the oven.
NOTE:
!i>If theprobeisremovedfromthe foodbefore
thef/haltemperature/sreached,atonewill
soundandthed/2playwill flashuntiltheprobe
isremovedfromtheoven.
!i>Youwillheara fanwhffecookingwiththis
feature.Thefanwillsto/_whenthedooris
opened,but theheatwillnotturnoK
!i>Youcanusethekitchent/_nereventhoughyou
cannotusetimedovenoperations.
Tochange the oven temperature
during the Convection Roast cycle,
touch the CONVECTIONROASTpad
and then touch the number pads to
set the new desired temperature.
Convection Roasting Guide
Minutes/Lb.
Meats (Mieutes/kg) Oven Temp. Internal Temp.
Beef Rib,BonelessRib, Rare 20_4 (44 53) 325°F (163°C) 140"F(60°C)t
TopSirloin Medium 24_8 (53 62) 325°F(163°C) 160°F(71°C)
(3to 5 Ibs.[1.36kgto 2.27kg]) Well 28_2 (62WI[ 325°F (163°C) 170°F(77°C)
BeefTenderloin Rare 10 14 (2241) 325°F (163°C) 140°F(60°C)t
Medium 14 18 (31_0) 325°F(163°C) 160°F(71°C)
Pork Bonedn,Boneless(3to 5Ibs. 23_7 (51 60} 325°F(163°C) 170"F(77°C)
[1.36kgto 2.27kg]/
Chops(1/2to 1" 2 chops 3035 (66-77)total 325°F(163°C) 170°F(77°C)
[1.3cmto 2.5 cm]thick) 4 chops 36-40(77-88)total 325°F(163°C) 170°F(77°C)
6 chops 4%45(88-99)total 325°F(163°C) 170°F(77°C)
Ham Canned,Butt,Shank(3to 5 Ibs. 14 18 (31_0} 325°F(163°C) 140°F(60°C)
[1.36kgto 2.27kg]fully cooked)
Lomb Bonedn,Boneless(3to 5Ibs. Medium 17_0 (37_4) 325°F(163°C) 160°F(71°C)
[1.36kgto 2.27kg]) Well 20_4 (44 53) 325% (163°C) 170°F(77°C)
Seafeed Fish,Whole(3 to 5 Ibs.[1.36 kgto 2.27kg]) 36-40(66-88)total 400% (204°C)
LobsterTails(6 to 8oz.[170g to 227g] each) 2025 (4455)total 350°F (177°C)
Poultry Whole Chicken(2Yzto31/LIbs. 24_6 (53 57) 350°F(177°C) 180°-185°F(82°-85%)
[1.13kgto 1.59kg]/
CornishHens,Unstuffed(1to 11/LIbs. 50 55 350°F(177°C) 180°-185°F(82°-85%)
[0.45kgto 0.68kg]) (110 121)total
Stuffed(1 to 11/zIbs. 55 60 350°F (177°C) 180°-185°F(82°-85%)
[0.45kgto 0.68kg]/ (121 132)total
Buckling(4to 5 Ibs.[1.81kg to2.27 kg]) 24_6 (53 57) 325% (163°C) 180°-185°F(82°-85%)
Turkey,Whole*
Unstuffed(10to 16 Ibs.[4.54kgto 7.26kg]) 8 11(18_4) 325°F (163°C) 180°-185°F(82°-85%)
Unstuffed(18to 24 Ibs.[8.16kgto 10.89kg]} 7 10(15_2) 325°F (163°C) 180°-185°F(82°-85%)
TurkeyBreast(4to6 Ibs.[1.81kg to2.72kg]) 16 19(35_2) 325% (163°C) 170°F(77°C)
22
"_77ze 17.S'.l)e/_m tme_ll (ff Agv_(tdZu_l,s(z)_ "l_atl, /)e('/A po/mlat; bld )ou dumld know that c(x>/,'_ng_l l0 ml!y 1401"160C)
mg'm_*some /<mdpo_sm*h*_ o_;¢zm_sms may stu'ui*w."( So*u*(,: &l/("l'bM Be&. }ha* Kih /u _*t h gde. { Sl)A tb'z', fit_*e 19A'5.)
ge.com (U.S.)
Usingtheproofingandwarmingfeatures, wvvw.GEAppliances.ca(Canada)
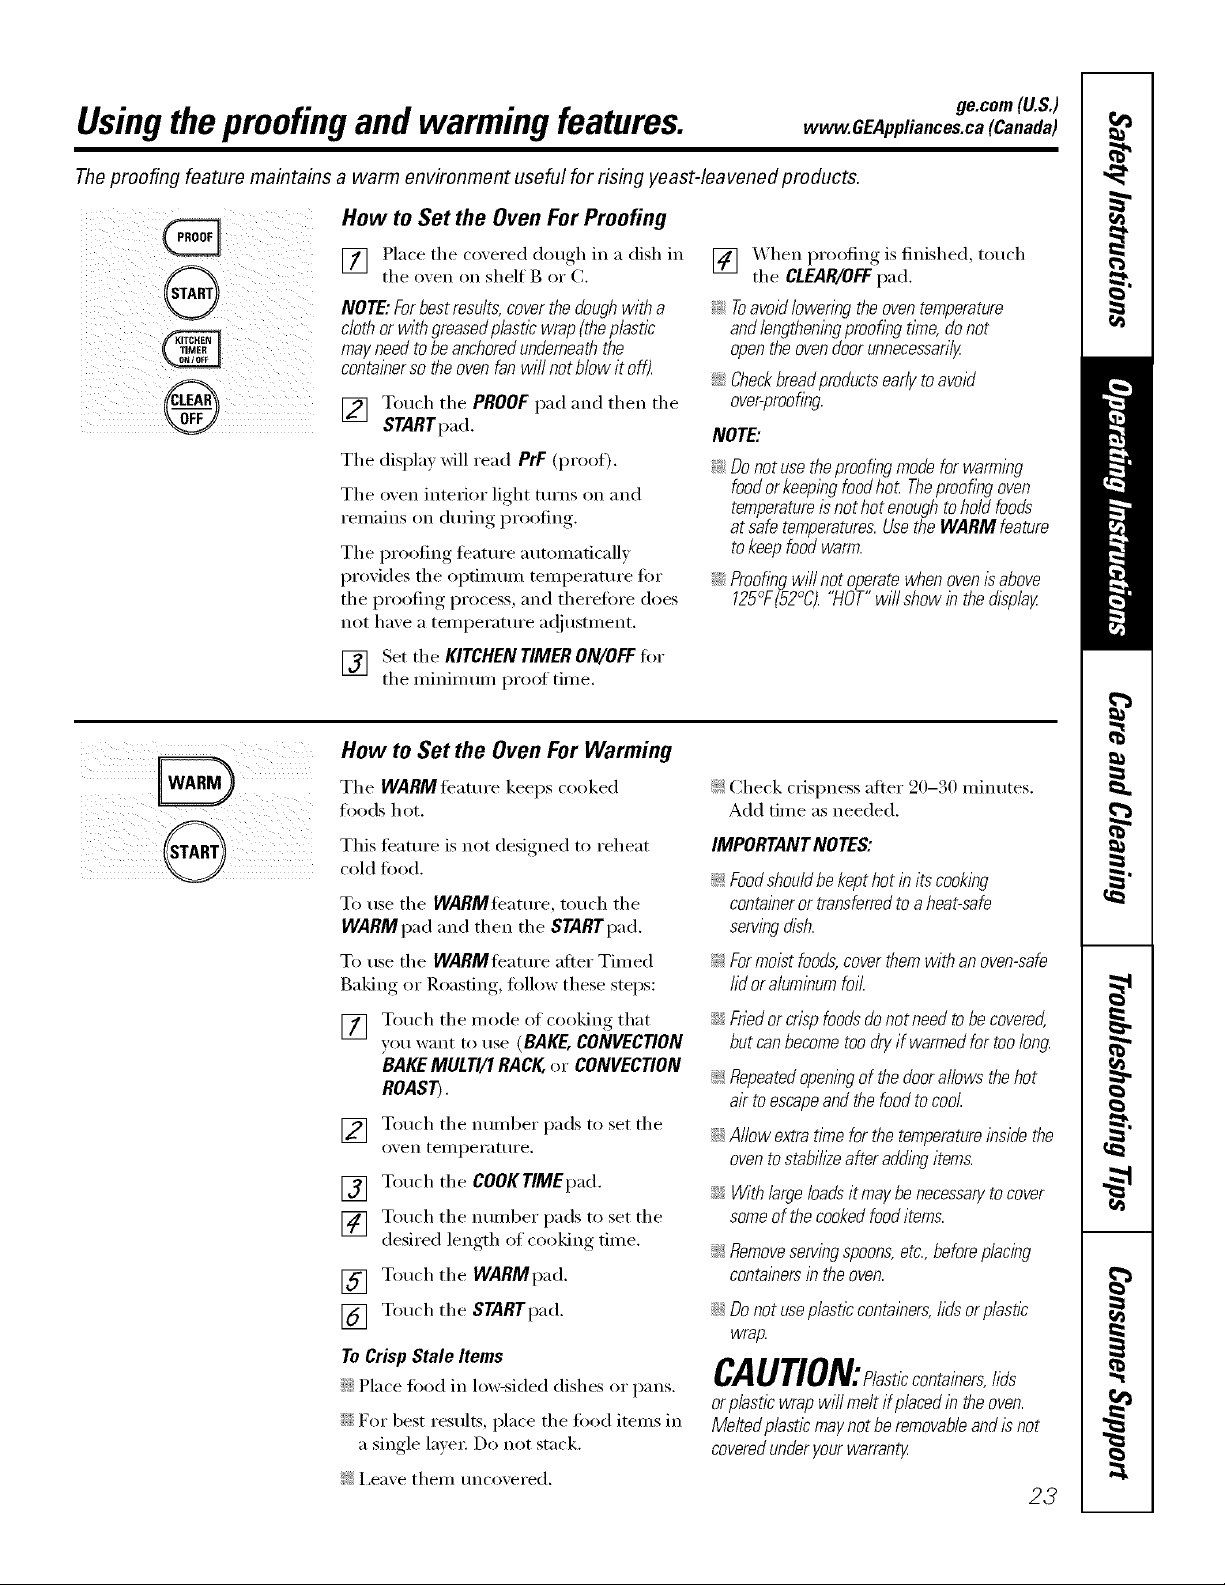
Theproofing feature maintains a warm environment useful for rising yeast-leavened products.
How to Set the Oven For Proofing
@3
0
®
[] Place the coxered dough in a dish in
the oxen on shelf B or C.
NOTE:Forbest rasults,cover the doughwith a
cloth or with graasedp/astic wrap (theplastic,
may needto beanchoredunderneaththe
containerso the ovenfan will not Mow it off).
[] Touch the PROOF pad and then the
STARTpad.
The display will read PrF (proof).
The oven intedor light turns on and
remains on dining proofing.
The proofing teattlre automatically
provides the optimmn tempemtm'e fin"
the proofing process, and therefin'e does
not have a temperatm'e ac!justment.
[] Set the KITCHENTIMERON/OFFfiw
the minim mn proof time.
[] _._hen proofing is finished, touch
the CLEAR/OFFpad.
_: Toavoid lowering the oven temperature
andfengtheningproofing tlYne,donot
openthe ovendoor unnecessarily
::Ji::Checkbraadproductsearly to avoid
over-proofing.
NOTE:
_: Donotusetheproofingmodeforwarming
foodorkeepingfoodhot Theproofingoven
temperatureisnothot enoughtoholdfoods
atsafetemperatures.UsetheWARMfeature
tokeepfoodwarm.
iJi::Proofingwillnot operatewhenovenisabove
125°F(52°C)."HOT"willshowin thedisplay
How to Set the Oven For Warming
The WARMfi_amre keeps cooked
foods hot.
This teatuI'e is not designed to reheat
cold food.
To use the WARMfe'atm'e, touch the
WARMpad and then the STARTpad.
To use the WARMfeamre after Timed
Baking or Roasting, tollow these steps:
[] Touch the mode of cooking that
VOII W_lllt [O tlse (BAKE,CONVECTION
BAKEMULTI/1 RACK, or CONVECTION
ROAST).
[] Touch the nmnber pads to set the
oven [eillpei';lttli'e.
[] Touch the COOKTIMEpad.
[] Touch the ntllllbeI" pads to set the
desired length of cooking time.
[] Touch the WARMpad.
[] Touch the STARTpad.
To Crisp Stale Items
::Ji::Place _'bod in lo_sided dishes or pans.
::Ji::For best results, place the ti)ocl items in
a single lave_: Do not stuck.
_: i,eave them uncovered.
i_:Check c_ispness after 20-30 minutes.
Add time as needed.
IMPORTANTNOTES:
_:Foodshouldbekepthotin itscooking
containeror tramferredtoaheat-safe
servingdish.
_:Formoistfoods,coverthemwithanoven-safe
lid oraluminumfoil.
::Ji::Friedor crisp foodsdo not need tobe covered,
but canbecome too dry if warmed for too long.
_: Repeatedopeningof the doorallows the hot
air toescapeand the food to cool.
::Ji::Allow extratlYneforthe temperatureinside the
oventostabifl2eafter adding items.
::Ji::With large loadsit maybe necessarytocover
someof the cookedfood items.
!i_:Removeservingspoons,etc.,beforeplacing
containersin theoven.
::Ji::Do not useplastic containers,lids or p/asflc
wrap.
CAUTION: iaet/ccontainers,lids
or plastic wrap will meltif placed in theoven.
Me/tedp/astlc maynotbe removabfeand is not
coveredunder your warranty.
23
Adjust the oven thermostat--Do it yourself!
Youmay find that your new oven cooks differently than the one it replaced. Use your new oven for a few weeks to
become more familiar with it. If you still think your new oven is too hot or too cold, you can adjust the thermostat
yourself.
Donot use thermometers, such as those found in grocery stores, to check the temperature setting of your oven.
These thermometers may vary 20-40 degrees F (11-22 degrees C).
NOTE,"This adjustment will only affect baking and roasting temperatures; # will not affect broiling, convection or
self-cleaning temperatures. Theadjustment will be retained in memory after apower failure.
ToAdjust the Thermostat
The oxen temperatm'e can be
a(!justed up to (+) . : F (I9°C)
hotter (:,r (-) . : F (1. C) cooler.
Touch the number pads the same
way you read them. For example, to
change the oxen temperature 1 F
(8°C), touch I and 5.
_'_hen you haxe made the
a(!justment, touch the STARTpad to
go back to the time of day display.
Use VOtli" oxen as _()tl Wotlld
nor///allv.
35" _
5'
(E)dZ)dZ)dZE
[] Touch the BROILHI/LO and BAKE []
pads at the same time fi)r 3 seconds
until the display shows SE
[] Touch the BAKE pad. A two-digit
munber shox_s in the display:
Touch BAKE"'againto alternate
between increasing and decreasing
the oxen temperature. []
Thetype ofmargarine will affect bakingperformance!
Most recipes for baking have been developed using high-fat products such as butter or margarine (80%fat). If you
decrease the fat, the recipe may not give the same results as with ahigher-fat product.
Recipe failure can result if cakes, pies, pastries, cookies or candies are made with low-fat spreads. Thelower the fat
content of a spread product, the more noticeable these differences become.
U.S. federal standards require l)roducts labeled "margarine" to ('ontnin at least 80% lilt by weight. Ixmqht spreads, on
the other hand, contain less tilt and more water: The high moisture content of these spreads affects the textm'e and
flavor of baked goods. For best results with umr old tm'orite recipes, use mmgarine, butter or stick spreads contnining
at least 70% vegetable oil.
24
ge.com (D.S.)
Usingthe self-cleaning oven. vvww.OEAppliances.ca(Canada)
The oven door must be closed and all controls set correctly for the cycle to work properly.
Before a Clean Cycle
Wipe up heavy soil on flTeoven
bottom.
QOOGC
We reconmlend venting your
kitchen with an open window ()r using a
ventilation tim or hood during tile fiI_t
self-clean cycle.
Reinoxe i'acL_, broiler pan, broiler grid,
probe, all cookware and any ahuninuni
fifil fl'oni the oxen.
Tile shin)', silve>colored ()veil racks
(on SOllle models) can be selfXcleaned,
but they will darken, lose their hIster
and beconle hard to slide.
Soil on tile fl'ont fl'anle of tile range
and outside the gasket on the door will
need to be cleaned bv hand. (:lean these
areas with hot watei; soap-filled or i)lastic
scouting pads or cleanseis such as Soft
Scrub<i Rinse well with clean water
and dry:
How to Set the Oven for Cleaning
[] Touch tile SELFCLEANLO/STD [)ad
once fi)r a 4-hour clean tiine or
twice fiw a 3-houI clean tinle.
A 3-hour sel6clean tinie is
i'ecolili/lended I()i" rise when
cleanino,_ snlall, contained spills. A
seltk'lean tiine of 4 houi_ ()r hmger
is reconinlended fin" a dirtier oxen.
V_ If a tiIne other than 4 houis or
3 houI_ is needed, use tile nunlber
pads and enter the desired clean
tinle.
Yo/I can chall<re tile clean tillle to allX
dine between 3 houi_ and 5 houI_,
dei)ending, on how dirty, )our oxen is.
Do not clean tile gasket. Tile fiberglass
inatei_ial ot the ()veil door gasket cannot
withstand abrasion. It is essential fin" tile
gasket to reniain intact. If you notice it
becoining worn or fl'ayed, i'eplace it.
_]l)e up any hear)' sl)illovei_ on tile oven
bottonl.
Make sure tile oven light bulb cover is in
I)lace and the oven light is off.
IMPORTANT'. Tile health of sonle birds
is extrenielv sensitive to the flunes given
off during tile self cleaning cycle of any
range. Move birds to another well-
ventilated i'OOlil,
When tile LOCKEDlight goes off; you will
be able to open the dooi:
_: The woM LOCKED will flash and the
()veil control will signal if you set the
clean cycle and finget to close the
()veil dooi:
::Ji::To stop a clean cycle, touch tile
CLEAR/OFFpad. \_l/eIl tile LOCKED light
goes off indicating the oven has cooled
below tile locking teinl)eramre , you
will be able to open tile dooi:
[] Touch the START pad.
Tile door locks autoniaficallv: Tile display
will show tile clean tiine renlaining. It Mll
not be possible to open tile ()veil door
until tile tenli)ei'ature drops below tile
lock teinl)erature and tile LOCKEDlight
goes olX
25
Usingthe self-cleaning oven.
The oven door must be closed and all controls must be set correctly for the cycle to work properly.
How to Delay the Start of Cleaning
OD(DCD@(D
(DODCD(33
ODC <D(Z)CD
(DOD(Z)(?ZS)
[] Touch the SELFCLEANLO/STD pad
once fi/r a 4-hour clean tiine or
twice fi)r a 3-hour clean tiine.
A 3-hour self_'lean tiine is
i'eCOllli//ended l()r rise when
cleaning sinall, contained spills. A
self=clean fin/e at 4 houi_ or longer
is reconnnended fl)r a dirtier ()veil.
[_] lfa tiIne other than 4 houI_ or
3 houI_ is needed, use the nunlber
pads and enter the desiied clean
tinle.
You can change the clean tiine to any
tiine between 3 houi_ and 5 houi_,
del)ending oil how dirty your ()veil is.
[] Touch tile DELAYSTART pad.
[] Using tile nunlber pads, enter tile
tiIne of (lax you want tile clean c_cle
to start.
[] Touch tile START pad.
After a Clean Cycle
Y)u nlav notice soine white ash in tile
oven. Wipe it up with a daInp cloth alter
tile ()veil cools.
If white spots remain, removethem with asoap-
filledor plastic scounhgpad andrinsethoroughly
with a wnegarand water mixture.
These deposits are usually a salt residue
that cannot be ren/oved by tile clean
cycle.
If the oven is not clean after one clean
wcle, repeat the cvcle.
Tile door locks auton/atically: Tile display
will show the start tin/e. It will not be
possible to open tile ()veil door until
tile ten/i)erature drops below tile lock
teini)erature and tile LOCKEDlight
goes off.
_4]/eIl tile tOCgEOlight goes off; you will
be able to open tile door.
iJi::_)u cannot set tile oven fin" cooking
until tile oxen is cool enough fin" tile
dooI" to tlnlock.
_: X4]file tile ()veil is sel6cleaning, you can
touch tile CLOCKpad to display tile
tiIne of day. To return to tile clean
countdown, touch tile SELFCLEAN
LO/STD pad.
_: If tile racks becon/e hard to slide,
apply a sn/all anlount of cooking oil to
a paper towel and wipe tile edges of tile
oven racks with tile paper towel.
26

ge.com(U.S.)
Special features ofyourovencontrol www.OEAppliances.ca(Canada)
Yournew touch pad control has additional features that you may choose to use. The following are the features
and how you may activate them.
The special feature modes can only be activated while the display is showing the time of day. They remain
in the control's memory until the steps are repeated.
When the display shows your choice, touch the STARTpad. The special features will remain in memory after
a power failure, except for the Sabbath feature, which will have to be reset.
12-Hour Shutdown
i i
Withthbfeature,shouldyouforgetandleavethe
ovenon,thecontrolwillautomaticallyturnoff the
[] Touch the DELAYSTARTpad Imfil
ovenafter 12hoursduringbakbgfunctionsor
after3hoursduringabroilfunction.
If }ou wish to mrn OFF this teatm'e, follow
tile steps below.
[] Touch the BROIL HI/LOand BAKE
pads at tile sanle time fin" 3 seconds
tmfil tile displa} shows SF
[] Touch tile STARTpad to acfix Ite tile
Fahrenheit or Celsius Temperature Selection
Yourovencontrol isset to use the Fahrenheit
temperatureselectionsbut youmaychangethis
to use the Celsiusselectlbns.
[] Touch tile BROIL HI/LOand BAKE
pads at tile sanle time fin" 3 seconds
tmtil tile displa} shows SF.
[]
[]
[] Touch tile START pad.
Tonesat the End of a Timed Cycle
Attheendofatimedcycle,3shortbeepswill
soundfollowedbyonebeepevery6seconds
untiltheCLEAR/OFFpadls touchedThis
contlbual6-secondbeepmaybecanceled
To cancel tile 6-second beep:
[] Touch tile BROIL HI/LO and BAKE
pads at tile same time fi)r 3 seconds
tmfil tile display shows SF.
[]
[]
noshdn(no shut-oft) appeax_ in tile
display.
no shut-offand leaxe tile control
set in this special teatures mode.
Touch tile COOKTIMEand BROIL
HI/LO pads at tile same time. Tile
display will show F (Fahrenheit).
Touch tile COOKTIMEand BROIL
HI/LO pads again at tile same time.
Tile display will show C (Celsius).
Touch tile KITCHENTIMERON/OFF
pad. Tile displa)shows CONBEEP
(continuous beep). Touch tile
KITCHENTIMERON/OFFpad
again. Tile display shows BEEP.
(This cancels tile one beep
every 6 seconds.)
Touch tile STARTpad.
27
Special featuresof yourovencontrol.
12-Hour, 24-Hour or Clock Blackout
Yourcontrol is set to usea 12-hourdock.
If you would prefer to have a 24-hour
militnrv time clock or black out the clock
display, fidlow the steps below.
@
[] Touch the BROILHI/tO and BAKE
pads at the same time fin" 3 seconds
tmtil the display shows SE
[] Touch the CLOCKpad once. The
display will show 12ht: If this is
the choice you want, touch the
STARTpad,
Touch the CLOCK pad again to change
to the 24 hour militm_' time clock. The
display will show 24ht: If this is the choice
you want, touch the START pad.
Touch the CLOCKpad again to black out
the clock display: The display will show
OFF.If this is the choice you want, touch
the START pad,
NOTE:If the clock Is in the black-outmode you
will not be able to use the Delay Start function.
28

CONVECTION
Using Auto Recipe TM Conversion
Whenusingconvectionbake,theAuto Recipe_
Conversionfeaturewill automaticallyconvert
enteredregularbaking temperaturesto
convectionbakingtemperatures.
Thedisplaywill show the actual converted
(reduced)temperature.Forexample,if you entera
regularrecipe temperatureof 350°F(177°C)and
touchthe START pad, the display will show
CON and the convertedtemperatureof 325°F
(763%
NOTE"Thisbatureonlyconvertscooklbg
temperatures,notcookingtimes.
ge.com(U.S.)
vvww.GEAppliances.ca(Canada)
Toturn off this feature:
Touch the BROIL HI/LO"and BAKE
[]
pads at the same time fo_ 3 seconds
tmtil the display shows SF.
Touch the CONVEC770N BAKE
[]
MUL77/1RACKpad. The displa_
will show CON ON. Touch the
CONVECTION BAKEMULTI/1 RACK
pad again. The display will show
CON OFF.
[] Touch the STARTpad.
To tm'n on this teature, repeat steps 1-3
abo'_e but touch the STARTpad when
CON ON is in the display.
29
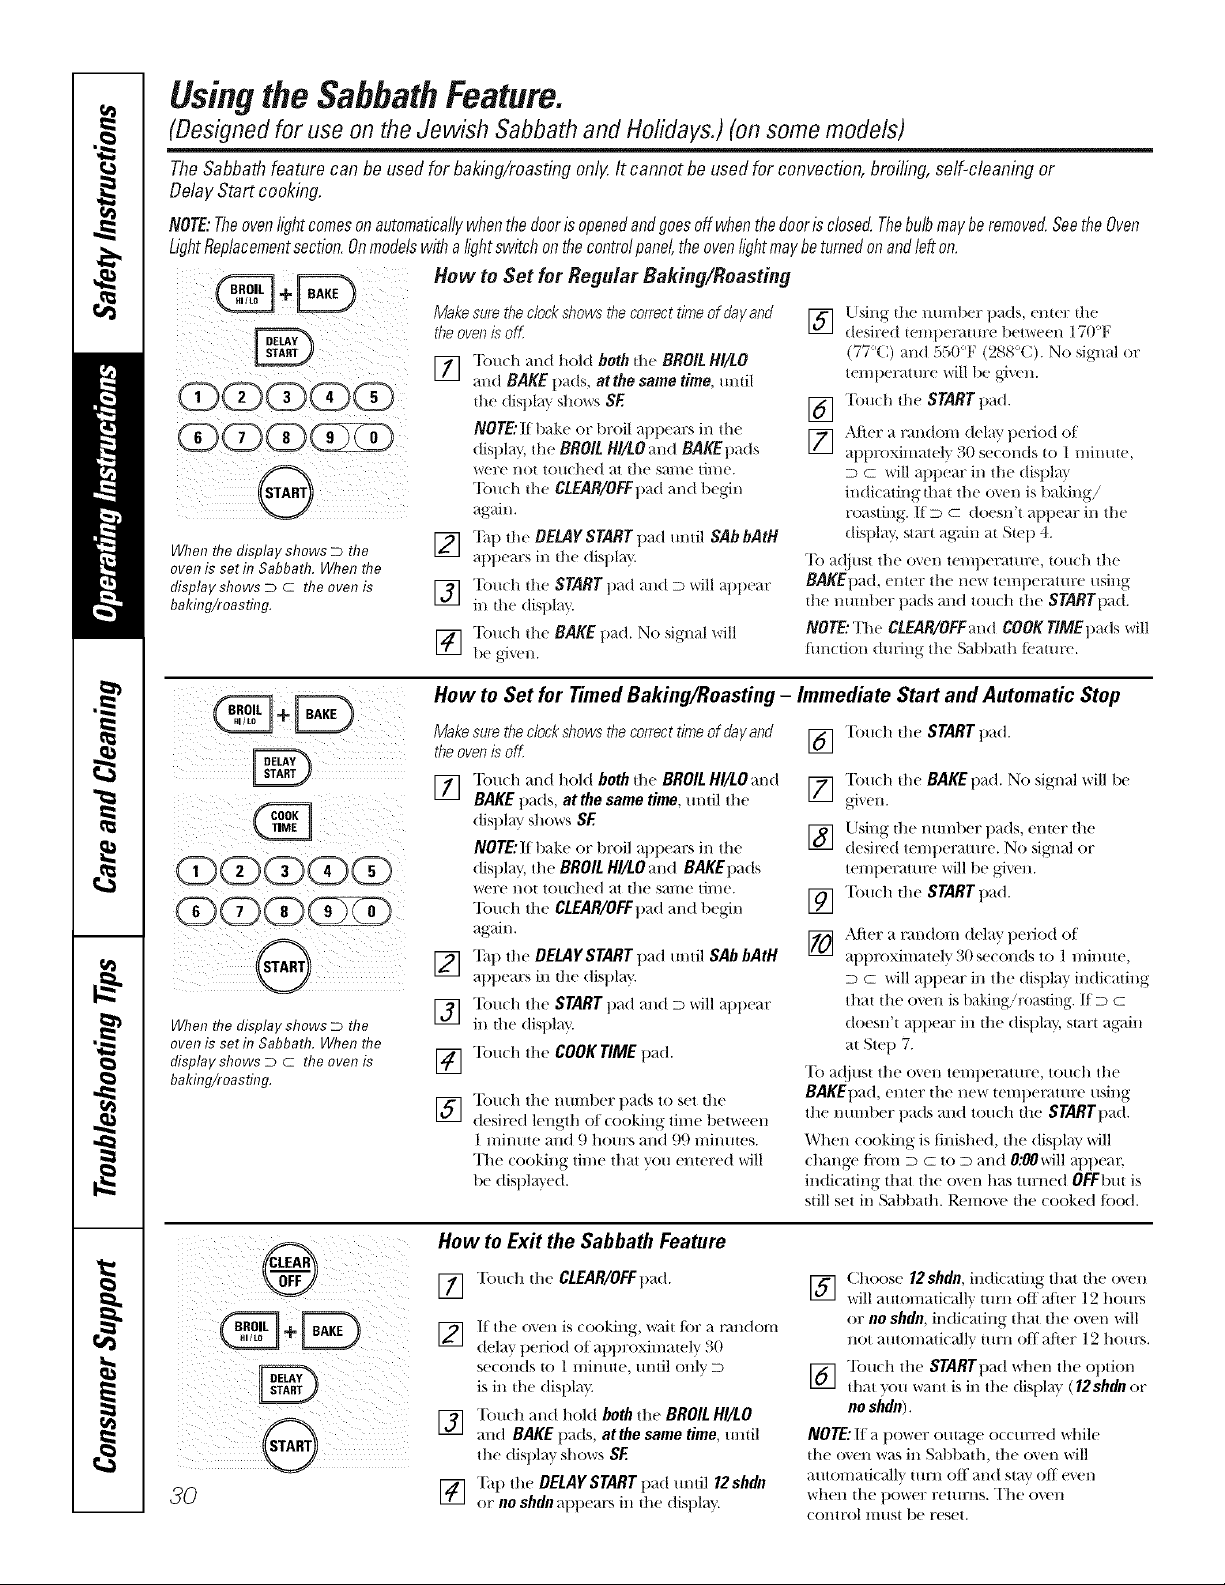
Usingthe SabbathFeature.
(Designed for use on the Jewish Sabbath and Holidays,) (on some models)
TheSabbathfeature canbeusedfor baking/roastingonly It cannot be usedfor convection,broiling,self-cleaningor
DelayStart cooking.
NOTE:Theovenlightcomesonautomaticallywhenthedoorisopenedandgoesoffwhenthedoorisclosed.Thebulbmayberemoved.SeetheOven
LightReplacementsection.Onmodelswithalightswitchonthecontrolpanel,theovenlightmaybeturnedonandlefton.
How to Set for Regular Baking/Roasting
When the display shows D the
oven is set in Sabbath. When the
display shows D C the oven is
bakflTg/roasting.
Make sure the clockshows the correct time of day and
theoven is oK
fll Touch and hold both the BROIL HI/tO
I/1
and BAKE l/ads, atthe same time, mltil
the disl)lay sllows SE
NOTE:H 1lake or broil appears in the
(iisl)l_y, tile BROIL HI/tO mid BAKEpads
%ere HOt to/IClled at the sal/le til/le.
Touch tile CLEAR/OFFpad and begdn
ag_dn.
F2] Tall the DELAYSTART pad m/Ill SAb bAtH
appears in the disl)l m.
] Touch the START pad and D will appear
in the disl)la?+.
] Touch the BAKE l>ad. No signal will
be _i_en.
Using the number l/ads, enter the
[]
desired teillllelTtt/tr( l)et'x_eei/ 170'F
(77X:) and 550q_ (288+(;). No signal or
wmtlerat ure/_ill be given.
Tou(h the START pad.
[]
After a randon/delay l)( riod of
[]
ailt>roxiimuel ) 30 se(onds to 1 minute,
D c will apl)em: in th( displ m
indi(ating that tile o_(n is baking!
roasting. IID c doesn't appear in the
display, start again at Step 4.
To a(!itlst tile oxen temperature, touch tile
BAKEI)ad, enter th( n(w tempeF4ture using
tile number pads and touch th( STARTpad.
NOTE:Th( CLEAR/OFFand COOK TIME pads will
flmction dm+ing tile Sabbath tcamre.
When the display shows D the
oven is set in Sabbath. When the
display shows D C the oven is
bakflTg/roasting.
How to Set for Timed Baking/Roasting - Immediate Start and Automatic Step
Make sure the clockshows the correct time of day and Touch the START pad.
theoven is oK []
"lbu(h and hold both the BROIL HI/LO and
[]
BAKE t/ads, at the same time, m/til the
display shows SE
NOTE:I1 bake or tlroil al)llears in tile
display, tile BROIL HI/LOand BAKEllads
were not touched at the same time.
"Ibuch tile CLEAR/OFFt)ad and begin
again.
Tall the DEMYSTART t)ad until SAb bAtH
[]
atll)ears in tile disl)lay.
"Ibttch the START pad and D *+'+rillal)t/ear
[]
in the display.
"Ibuch the COOK TIME t)ad.
[]
Tott(h the numl>er llads to set the
[]
desired length ot (ooking dine tletvvre(!ll
1 minttte and 9 hottrs and 99 mintttes.
The (()()king time that you entered will
be distlla)'ed.
] Tottch the BAKE pad. No signal will l)e
_1_,e] 1.
] UsiHg the mtn/1)er pads, eHter tile
desired teH/t)elTatttre. No sigl/al or
ten/t/eratttre will 1)e gdxen.
] Tou(h the START t)ad.
] ,\fter a random delay t)eriod of
at/t/roximatel" _ 30 seconds to 1 minute,
D G '+*,rillal/pear ill tile displa} indicating
that the oven is baking/roasting. If D C
doesn't at)peru: in the display, start agvfin
at Step 7.
To a(!iust tile (),+eli temt)emmre, touch tile
BAKEI)ad, enter tile new tenlllemture using
tile number t)ads and touch tile STARTllad.
When cooking is tinishe(I, th( display '+,+'ill
change/i:om D C to D and 0;_0will apllear
indicating that the o_m has turned OFFbut is
still set in Sabbath. Remove the cooked/i)od.
How to Exit the Sabbath Feature
i_i I ii i
i iii i! i! ;iiii ii !i i
30
FI] Tou(h the CLEAR/OFFtlad.
I/I
] It"the o'+en is cooking, wait for a nmdonl
delay t)eriod of apl)roximately 30
se(onds to 1 minute, m/til only D
is in the distllaT_
[] "[buch and hold both the BROIL HI/tO
and BAKE llads, atthe same time, until
the dist)lay shows SE
[] "[_tl) the DELAY START tlad tmtil 12shdn
or no shdn atll)ears in the display.
] (_hoose 12shdn, in(ti(ating that the oxen
will atttonlaticalh' tim J,off a/+ter 12 horn's
or no shdn, indi(atiug that the oxen will
llOt atltOl//ati( allv ttlrll OfT" afler ] 2 hotll'S.
] "lbuch the STARTI)ad when the option
that )(lit W;411tis in the (tistlla } ( 12shdn or
no shdn).
NOTE:II a l)ower outage o((urred while
the o,+('n _r_S i_ Sat)bath, the o_en '+,+'ill
a/ltOl/latica]]v ttlrll ott' aI/d slav ott e,+el/
when tile t)ower rettllTI/S. The ovell
control lIltlSt be reset.
 Loading...