

GE PGS968TEP2WW, PGS968TEP1WW, PGS968SEP2SS, PGS968SEP1SS, PGS968DEP2BB Owner’s Manual
...
GEPpp/iances.com
Safety Instructions ............. 2-7
©
|
Operating Instructions
Baking or Roasting .............. 11
Broiling, Broiling Guide .......... 14
Clock and Timer ................ 15
Control i,ockout ................ 15
Convection .................. 18-22
Cookware ....................... 9
Oven ....................... 10-30
Probe .......................... 17
Pro(Nng ....................... 23
Sabbath Feature ................. 30
Self'Cleaning ................ 25, 26
Special Features .............. 27-29
Surface Burners ............... 8, 9
Thermostat ..................... 24
Timed Baking & Roasting ........ 16
Warming ....................... 23
Care and Cleaning
Burner Assembly ................ 31
Burner (;rates and
Vent Grille ..................... 32
Control Panel .................. 35
Door .......................... 34
Floor .......................... 35
(;lass Cooktop ............... 36, 37
F_obs ......................... 31
i,itt-()ff Oven Door .............. 34
Light Bulbs ..................... 33
Packa_ng Tape ................. 31
Painted Surfaces ................ 35
Racks .......................... 32
Stainless Steel Surfaces ........... 35
Storage Drawer ................. 32
Vent ....................... 32, 35
Troubleshooting Tips ....... 38-42
Accessories .................... 45
Consumer Support
Consumer Support .............. 48
Ownership Registration
tbr Customers in
Canada only .............. 43, 44
Warranty fbr Customers
in Canada ...................... 47
Warranty fbr Customers
in the U.S.A .................... 46
,lcs96s
PG5968
In Canada:
_.GEAppliances.ca
Printed in the UnitedStates
Write the model and serial
numbers here:
Model #
Serial #
You can find them on a label
behind the open oven door
on the lower leR corner of the
range flame.
49-80542-3 07-09JR
iMPORTANTSAFETYINFORMATION.
READALLiNSTRUCTiONSBEFOREUSING.
WARNING:Iftheinformation
in this manual is not followed exactly,
a fire or explosion may result causing
property damage, personal injury
or death.
-- Do not store or use gasoline or other
flammable vapors and liquids in the
vicinity of this or any other appliance.
- WHATTODOIF YOU
SMELLGAS
Do not try to light any appliance.
Do not touch any electrical switch;
do not use any phone in your building.
Immediately call your gas supplier
from a neighbor's phone. Follow the
gas supplier's instructions.
If you cannot reach your gas supplier,
call the fire department.
-- Installation and service must be
performed by a qualified installer,
service agency or the gas supplier.
GAS-FIRED
C
US
LISTED
2
GEPpp/iance&corn
m
For your safety, the information in this manual must be foflowed to minimize the risk of fire or
explosion, electric shock, or to prevent property damage, personal injury, or loss of fife.
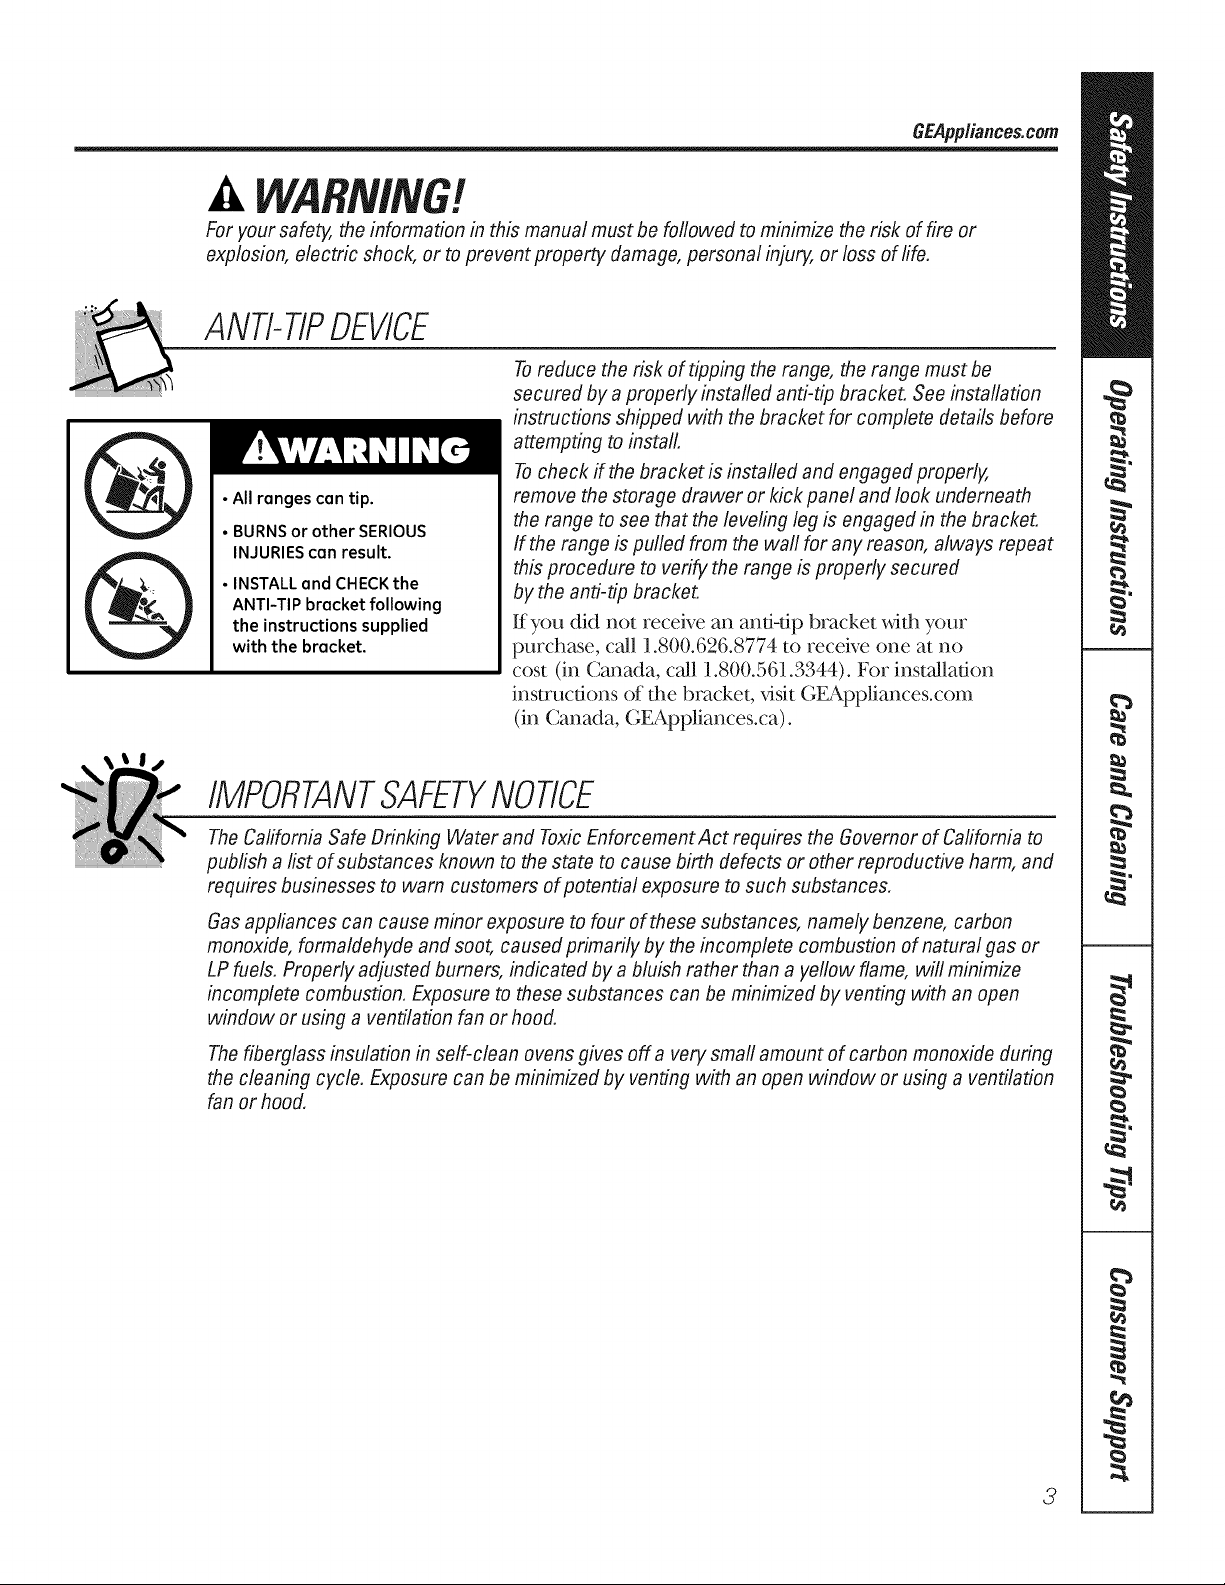
ANti- TIPDEVICE
Toreduce the risk of tipping the range, the range must be
secured by aproperly installed anti-tip bracket. See installation
instructions shipped with the bracket for complete details before
attempting to install.
Tocheck ff the bracket is installed and engaged properly,
• All ranges can tip.
• BURNS or other SERIOUS
INJURIES can result.
• INSTALL and CHECKthe
ANTI-TIP bracket following
the instructions supplied
with the bracket.
remove the storage drawer or kick panel and look underneath
the range to see that the leveling leg is engaged in the bracket.
If the range is pulled from the wall for any reason, always repeat
this procedure to verify the range is properly secured
by the anti-tip bracket.
Kyou did not receive an and-tip bracket with your
purchase, call 1.800.626.8774 to receive one at no
cost (in Canada, call 1.800.561.3344). For installation
instructions of the bracket, x,isit GEAppliances.com
(in Canada, GEAppliances.ca).
IMPORTANTSAFETYNOtiCE
TheCalifornia Safe Drinking Water and ToxicEnforcement Act requires the Governor of Cafifomia to
publish a list of substances known to the state to cause birth defects or other reproductive harm, and
requires businesses to warn customers of potential exposure to such substances.
Gas appliances can cause minor exposure to four of these substances, namely benzene, carbon
monoxide, formaldehyde and soot, caused primarily by the incomplete combustion of natural gas or
LP fuels. Properly adjusted burners, indicated by abluish rather than a yellow flame, will minimize
incomplete combustion. Exposure to these substances can be minimized by venting with an open
window or using a ventilation fan or hood.
Thefiberglass insulation in self-clean ovens gives off a very small amount of carbon monoxide during
the cleaning cycle. Exposure can be minimized by venting with an open window or using a ventilation
fan or hood.
3
iMPORTANTSAFETYiNFORMATiON.
READALLiNSTRUCTiONSBEFOREUSING.
m
SAFETYPRECAUTIONS
When using electrical appliances, basic safety precautions should be followed, including the
following:
}}Use this appliance only for its intended
purpose as described in this Owner's
Manual.
iii}i}i
Be sure your appliance is properly installed
and grounded by a qualified technician in
accordance with the prox_ided installation
instructions.
iii}i}i
Befbre perfbrming any ser_ice, disconnect
the range power supply at the household
distribution panel by remox_ing the filse or
switching off the circuit breaker.
iii}i}}li_
Have the installer show you the location of
the circuit breaker or fllse. Mark it fbr easy
reference.
iii}i}i
Do not leave children alone--children
should not be left alone or unattended in
an area where an appliance is in use. They
should never be allowed to sit or stand on
any part of the appliance.
iii}i}}li_
Have the installer show you the location
of the range gas shut-off valve and how to
shut it off ff necessary.
iii}i}}li_
Have your range installed and properly
grounded by a qualified installer, in
accordance with the Installation
Instructions. Auy a£1justment and ser_,ice
should be perfbrmed only by qualified gas
range installers or ser_,icetechnicians.
iii}i}}li_
Locate the range out of kitchen tragic path
and out of drafty locations to prevent poor
air circulation.
iii}i}i
Be sure all packa_ng mamrials are
removed flom the range befbre operating
it to prevent fire or smoke damage should
the packa_ng material ignim.
iii}i}}li_
Do not leave chiktren alone or unattended
where a range is hot or in operation. They
could be seriously burned.
}} Do not attempt to repair or replace any
part of your range unless it is specifically
recommended in this manual. All other
serx,ice should be referred to a qualified
technician.
::_Be sure your range is correcdy a£1jusmd
by a qualified ser_,ice technician or installer
for the type of gas (natural or LP) that is
to be used. Your range can be converted
for use with either type of gas. See the
Installation Instructions packed with
the range.
_:_Plug your range into a 120-volt grounded
outlet only. Do not remove the round
grounding prong flom the plug. If in
doubt about the grounding of the home
electrical sysmm, it is your personal
responsibility and obligation to have
an ungrounded outlet replaced with a
properly grounded, three-prong outlet in
accordance wkh the National Electrical
Code (U.S.). Do not use an exmnsion cord
with this appliance.
WARNING:theseadjustments
must be made by a qualified service
technician in accordance with the
manufacturer's instructions and all codes
and requirements of the authority having
jurisdiction, Failure to follow these
instructions could result in serious injury or
property damage, The qualified agency
performing this work assumes responsibility
for the conversion,
}}Keep the hood and grease filters clean to
maintain good venting and to avoid grease
fires.
}} Teach chiktren not to play with the
controls or any other part of the range.
}}Always keep dish towels, dish cloths, pot
homers and other linens a sNE distance
from your range.
4
SAFETYPRECAUTIONS
GEPpp/iances.com
_:_Always keep wooden and plastic utensils
and canned fbod a s_e distance flom your
range.
_:_Always keep combustible wall coverings,
curtains or drapes a s_e distance from
your range.
_:_Do not clean the range ;_dth flammable or
volatile cleaning fluids.
_:_After prolonged use of a range, high floor
mmperatures may resuh and many floor
coverings ;_ill not ;_dthstand this kind of
use. Never install the range over x,inyltile
or linoleum that cannot ;_dthstand such
type of use. Never install it directly over
inmrior kitchen carpeting.
_:_Avoid scratching the glass cooktop ;_dth
sharp instruments, or ;_dth rings and other
jewelry.
iii::vDo not allow anyone to climb, stand or
hang on the oven door, storage drawer or
cooktop. They could damage the range
and even tip it over, causing severe
personal injury.
CAUTION:itemsinteresttoch,dren
shouldnotbestoredin cabinetsabovearangeor
onthebacksplashofarange--childrenclimbing
ontherangetoreachitemscouldbeseriously
injured.
mamrial could be ignited if brought in
contact with flame or hot oven surfaces
and may cause severe bums.
iii::vDo not store flammable materials in an
oven, a range storage drawer or near a
cookmp.
iii_:_Do not store or use combustible mate,rials,
gasoline or other flammable vapors and
liquids in the x;icinityof this or any other
appliance.
iii_:_Do not let cooking grease or other
flammable materials accumulam in or
near the range.
iii::vDo not use wamr on grease fires. Never
pick up a flaming pan. Turn the controls
o_, Smod_er a flaming pan on a surface
burner by covering the pan completely
_ith a well4itting lid, cookie sheet or flat
tray. Use a multi-purpose dry chemical or
foam-type fire extinguisher.
Flaming grease outside a pan can be put
out by covering it ;_dthbaking soda or,
if available, by using a multi-purpose dry
chemical or fbam-type fire extinguisher.
Flame in the oven can be smothered
complemly by closing the twen door and
turning the control m off{ or by using a
multi-purpose dry chemical or fbam-type
fire extinguisher.
WARNING:NEWRusethis
appliance as a space heater to heat or
warm the room. Doing st) may result
in carbon monoxide poisoning and
overheating of the cookmp or oven.
iii_:_For your s_ety, never use your appliance
fbr warming or heating the room.
iii_:_Large scratches or impacts to glass doors
can lead to broken or shattered glass.
iii::vDo not clean the range when the appliance
is in use.
iii::vNever wear loose-,fitting or hanging
garments while using the appliance.
Be careflfl when reaching fbr imms su)red
in cabinets over the range. Flammable
iii::vLet the burner grams and other surfaces
cool befbre touching them or leax,ing
them where children can reach them.
iii::vNever block the vents (air openings) of
the range. They proxdde the air inlet and
outlet that are necessary fbr the range to
operate properly ;_ith correct combustion.
Air openings are locamd at the rear of the
cooktop, at the top and bottom of the
oven door, and at the bottom of the range
under the storage drawer or kick panel.
iii::_Do not lift the cooktop. Lifting the
cooktop can lead to damage and improper
operation of the range.
5
iMPORTANTSAFETYiNFORMATiON.
READALLiNSTRUCTiONSBEFOREUSING.
A
,!
m
SURFACEBURNERS
Useproperpan size--avoid pans thatare unstableor easilytipped.Selectcookwarehavingfiatbottomslarge
enoughto coverburnergrates.Toavoidspillovers,makesure cookwareis largeenoughto containthefood
properly.Thiswill bothsave cleaningtimeandpreventhazardousaccumulationsof food,sinceheavyspattering
orspilloversleft onrange canignite.Usepanswith handlesthat can beeasilygraspedandremaincool
Always use the Life posidon when iofidng
the top bm_ners and make sm_e the bm_mrs
have i_fited.
Never leave the surface btm_ers unattended
at high flame settings. Boik)vers cause
smoking and _easy spillovers that may
catch on fire.
Adjust the top burner flame size so it does
not extend beyond the edge of the cookware.
Excessive flame is hazardous.
Use only dU pot holders--moist or damp pot
holders on hot surtaces may result in bums
flom steam. Do not let pot holders come
near open flames when liNng cookware. Do
not use a towel or other bulky clod1 in place
of a pot holder.
_%en using glass cook, s-are, make sure it
is designed fbr top-of:range cooking.
To minimize the possibility of bums, i_fition
of flammable materials and spillage, turn
cookware handles toward the side or back of
the range without extending over adjacent
burners.
Carefldly watch fbods being flied at a high
flame setting.
Always heat fat slowly, and watch as it heats.
Do not leave any items on the cooktop. The
hot air from the vent may i_fite flammable
items and _sdllincrease pressure in closed
containers, which may cause them to burst.
K a combination of oils or fats will be used
in fi}4ng, stir together befbre heating or
as fats melt slowly.
the pan too fldl of fat can cause spillovers
when fbod is added.
_4%en preparing flaming fbods under the
hood, turn the fan on.
Do not use a wok on the cooking surface
if the wok has a round metal ring that is
placed over the burner _ate to support the
wok. This ring acts as a heat trap, which may
damage the burner _ate and burner head.
Also, it may cause the burner to work
improperly. This may cause a carbon
monoxide level above that allowed by cmTent
standards, resulting in a health hazard.
Foods fbr fi}4ng should be as dU as possible.
Frost on flozen tbods or moisture on flesh
tbods can cause hot tat to bubble up and over
the sides of the pan.
Never try to move a pan of hot tat, especially
a deep fat flyer Wait until the fat is cool
Do not leave plastic items on the cooktop--
they may melt if left too close to the vent.
Keep all plastics ms'ay fiom the surface
bm_ ers.
To avoid the possibility of a bum, always be
certain that the controls fbr all burners are
at the OFFposition and all grates are cool
befbre attempting to remove them.
If range is located near a window, do not
hang long curtains that could blow over the
surface burners and create a fire hazard.
If you smell gas, mm off the gas to the range
and call a qualified sen,ice technician. Never
use an ()pen flame to locate a leak.
Use a deep fat the_nometer whenever
possible to prevent overheating fat beyond
the smoking point.
Do not operate the btmmr without all btmmr
parts in place.
Use the least possible amount of tat fbr
effective shallow or deep-fat fi?4ng. Filling
Always turn the surtace burner controls off
befbre rem(Mng cookware.
6
GEPpp/iances.com
COOKMEATANDPOULTRYTHOROUGHLY...
(CookmeatandpoultryttToroughly--meattoat leastanINTERNALtemperatureof 160°F(71°C)andpoultrytoat leastan
INTERNALtemperatureof 180°F(82°C).Cookingtothesetemperaturesusua!lyprotectsagainstfoodborneillness.
Stand away from the range when opening the oven door. Hot air or steam which escapes can cause
bums to hands, face and/or eyes.
: Do not heat unopened food containers.
Pressure could build up and the container
cotfld burst, causing an injury.
: Keep the oven vent unobstructed.
: Keep the oven flee flom grease buildup.
: Place the oven rack in the desired posidon
while the oven is cool. If rocks must be handled
when hot, do not let pot holder contact the
heating elements.
: E,l_en using cooking or roasdng bags in the
oven, follow the mamzfacmrer's directions.
: Ptflling out the rack to the stopqock is a
convenience in lifting hea_.yff)ods. It is also a
precaution against burns flom touching hot
surfaces of the door or oven _-alls.
: Do not use the oven to dry newspapers.
If ovefl_eated, they can catch on fire.
: Do not use the oven for a storage area. Items
stored in an oven can ignite.
: Do not leave paper products, cooking utensils
or food in the oven when not in use.
WARNING:N WRco,,er
any dots, holes or passages in the oven bottom
or cover an endre rock with materials such as
aluminum foil. Doing so blocks air flow
through the oven and may cause carbon
monoxide poisoning. Aluminum foil linings
may also trap heat, cruising a fire hazard.
: Do not use aluminum foil to line oven bottoms.
Improper installation of aluminum foil may
result in a risk of electric shock or fire.
: Make sure a broiler pan is in place correcdy to
reduce the possibility of grease fires.
: If you should have a grease fire in a broiler
pan, press the CLERR/OFFpadand keep the
oven door dosed to contain fire until it
burns ()tit.
SELF-CLEANINGOVEN
Donot useovencleaners.No commercialovencleaneror ovenliner protectivecoating ofany kindshouldbe
usedin or aroundanypart oftheoven.Residuefrom oven cleanerswilldamagethe insideofthe ovenwhen the
self-cleancycleis used.
: Do not clean the door gasket. The door gasket
is essential for a good seal. Care should be
taken not to rob, _'tamage or move the gasket.
: Before self:cleaning the oven, remove shiny,
silver<ok)red oven rocks (on some models) and
all other cookware.
: Be sure to wipe up excess spillage before
stardng the self:cleaning opemdon.
: If the self:cleaning mode malfunctions, mrn the
oven off and disconnect the power supply. Have
it ser_4ced by a qualified technician.
: Clean only parts listed in this O_oer's Manual.
READANDFOLLOWTHISSAFETYINFORMAtiONCAREFULLY.
SAVETHESEiNSTRUCTiONS
Using the gas surface burners.
Throughout this manual, features and appearance may vary from your model
How to Light a Gas Surface Burner
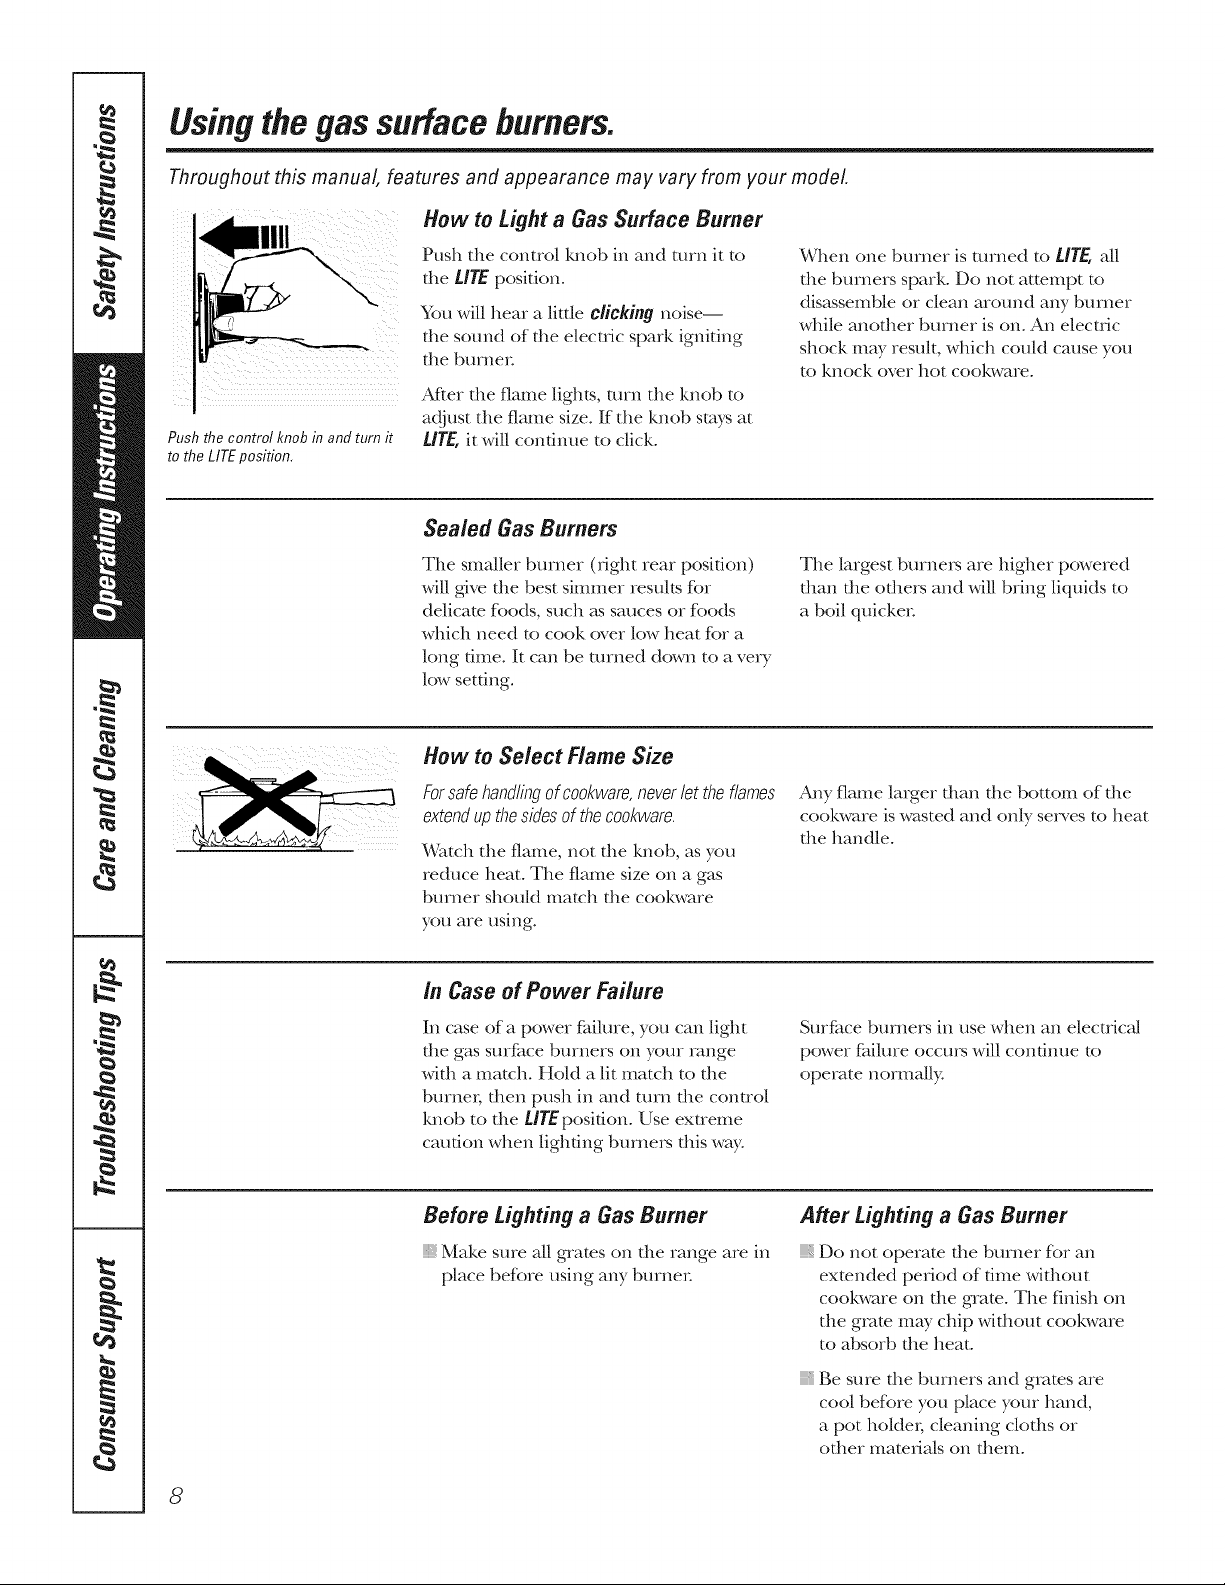
Push the control knob inand turn it
to the LITEposition,
Push the control knob in and mrn it to
the LITE position.
You will llear a little C/iCMng noise--
the sound of the electric spark igniting
the burner
After the flame lights, mrn the knob to
adjust the flame size. If the knob stays at
UTE, it will continue to click.
Sealed GasBurners
When one burner is turned to UTE, all
file burners spark. Do not attempt to
disassemble or clean around any bmner
while another burner is on. An electric
shock may result, which could cause you
to knock over hot cookware.
The smaller burner (fight rear position)
will give the best simmer results fur
delicate foods, such _s sauces or foods
which need to cook (we, low heat for a
long time. It can be turned down to ave, T
low setting.
How to Select Flame Size
Forsafehandlingofcookware,neverlettheflames
extendupthesidesofthecookware.
Watch the flame, not die knob, as you
reduce beat. The flame size on a gas
burner should match the cookware
you are using.
/n Case of Power Failure
In case of a power thilme, you can light
the gas surface burners on your range
with a match. Hold a lit match to the
bmne,; then push in and mrn the control
knob to the UYEposidon. Use extreme
caution when lighting bmne,_ this way.
The largest bmne,_ are higher powered
than the others and will bring liqukts to
a boil quicke,:
Any flame larger than the bottom of the
cookware is wasted and only serves to heat
the handle.
Surfime burners in use when an electrical
power fhilure occm_ will condnue to
operate normally.
Before Lighting a Gas Burner
Make sure all gTates on the range are in
place before using any burner
After Lighting a Gas Burner
Do not operam die burner for an
exmnded period of dine witbot_t
cookware on the g_am. The finish on
the gram may chip without cookware
to absorb the beat.
Be sure file burners and grates are
cool befbre you place your band,
a pot holde,; cleaning clodls or
other mamHals on them.
8
Top-of-Range Cookware
GEApp/iances.com
Aluminum: Medium-weight cookware is
recommended because it heats quickly
and evenly. Most foods brown evenly in
an aluminum skillet. Use saucepans with
fight-fitting lids when cooMng with
ItliniIlltllIl _t/IlOtllltS of _,V_t{eI-
Cast-Iron: If heated slowly, most skillets
will give safisfimtory results.
Enamelware: Under so)me conditions,
the enamel of some cookware may
melt. Follow cookware manuf_cturer's
recommendations for cooking methods.
Glass: There are two types of glass
cookware--those for oven rise only
and those for tel>of:range cooking
(saucepans, coffee and reapers).
(;lass conducts heat very slowly.
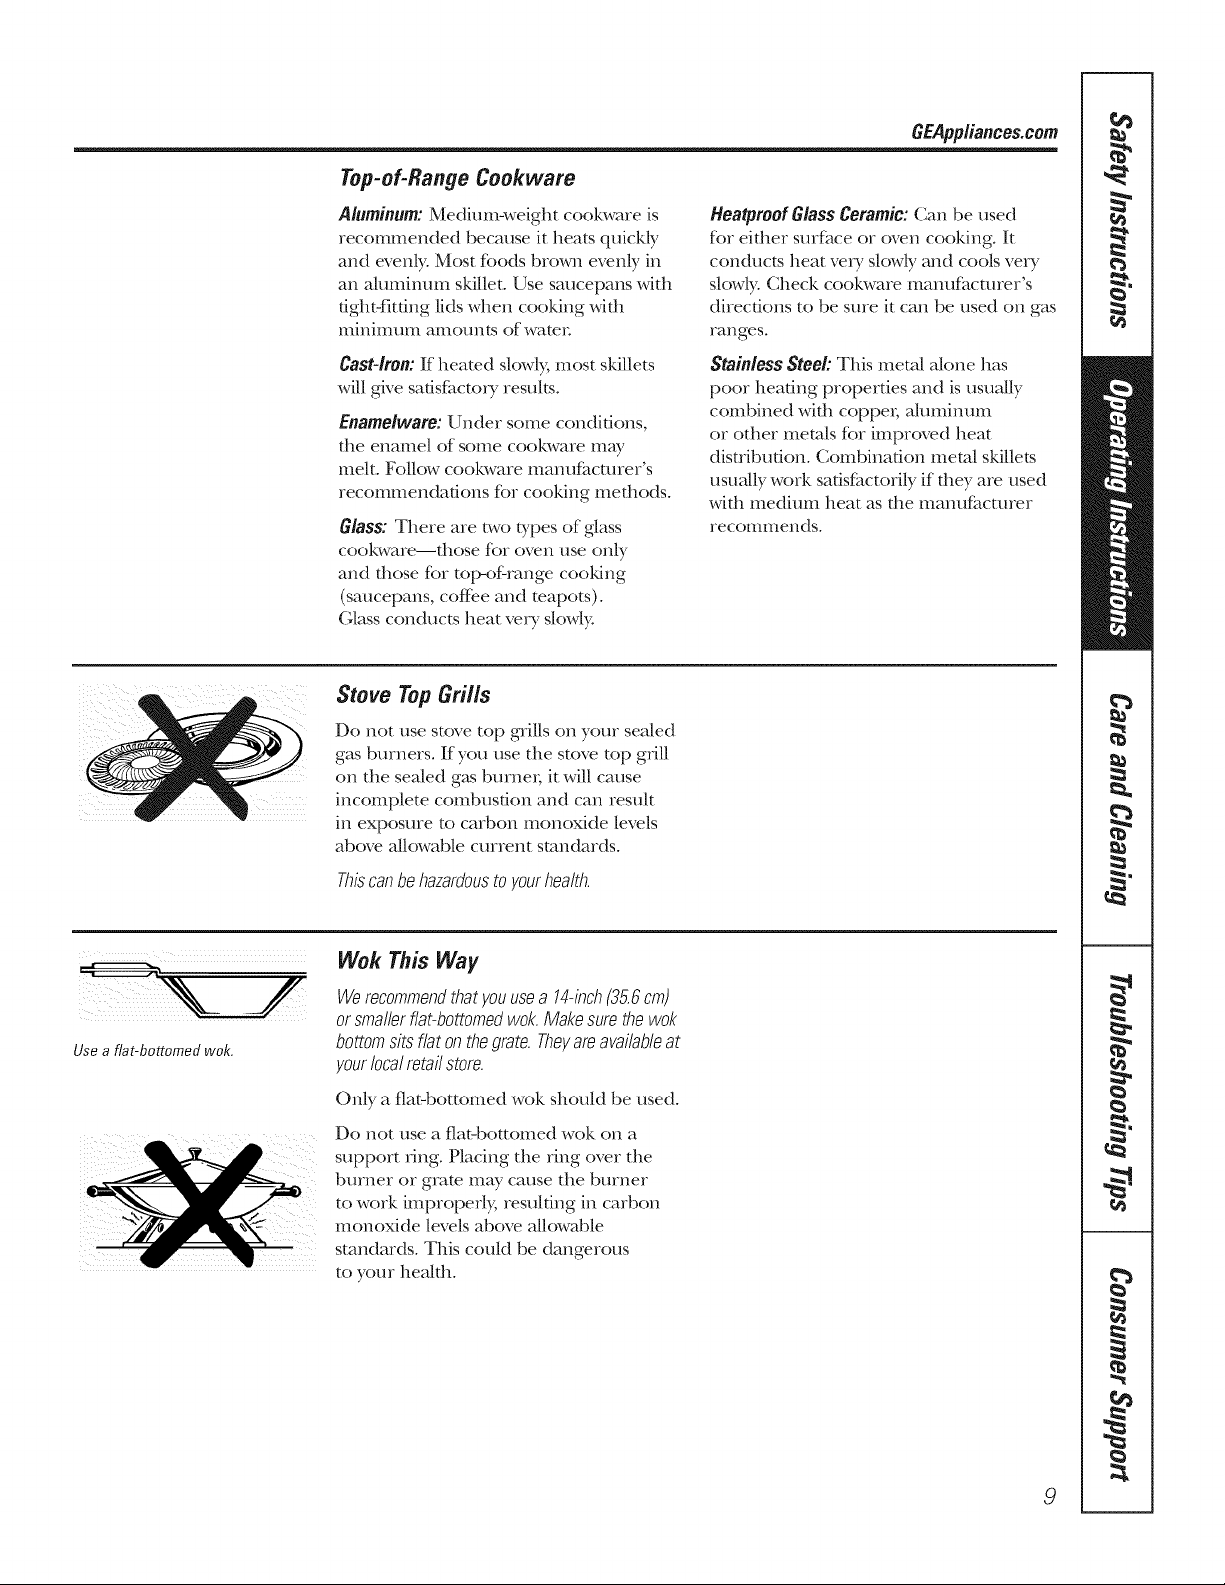
Stove Top Grills
Do not use stove top g_ills on your sealed
gas burners. If you use the stove top grill
on the sealed g_ksburnei; it will cause
incomplete colnbtlsfion and can result
in exposure to carbon monoxide levels
above allowable current standards.
Heatproof Glass Ceramic: Can be used
for eidler surfi_ce or oven cooking. It
c(mducts heat very slowly and cools very
slowly. Check cookware mamffhcmrer's
directions to be sure it can be used on gas
ranges.
Stainless Steel: This metal aJone has
poor heating properties and is usually
combined with coppei; ahmlinum
or other metals for improved heat
disuibudon. Combination metal skillets
usuMly work sadsfimtorily if they are used
with medium heat as the manufimmrer
recommends.
Use a fiat-bottomed wok,
Thiscanbehazardousto yourhealth.
Wok This Way
Werecommendthatyouusea 14-inch(35.6cm)
orsmallerflat-bottomedwok.Makesurethewok
bottomsitsflatonthegrate.Theyareavailableat
yourlocalretailstore.
Only a fiat-bottomed wok shouM be used.
Do not use a fiat-bottomed wok on a
support ring. Placing the ring over the
burner or grate may cause the burner
to work improperly, resulting in carbon
Inonoxide levels above allowable
standards. This couM be dangerous
to your heakh.
9
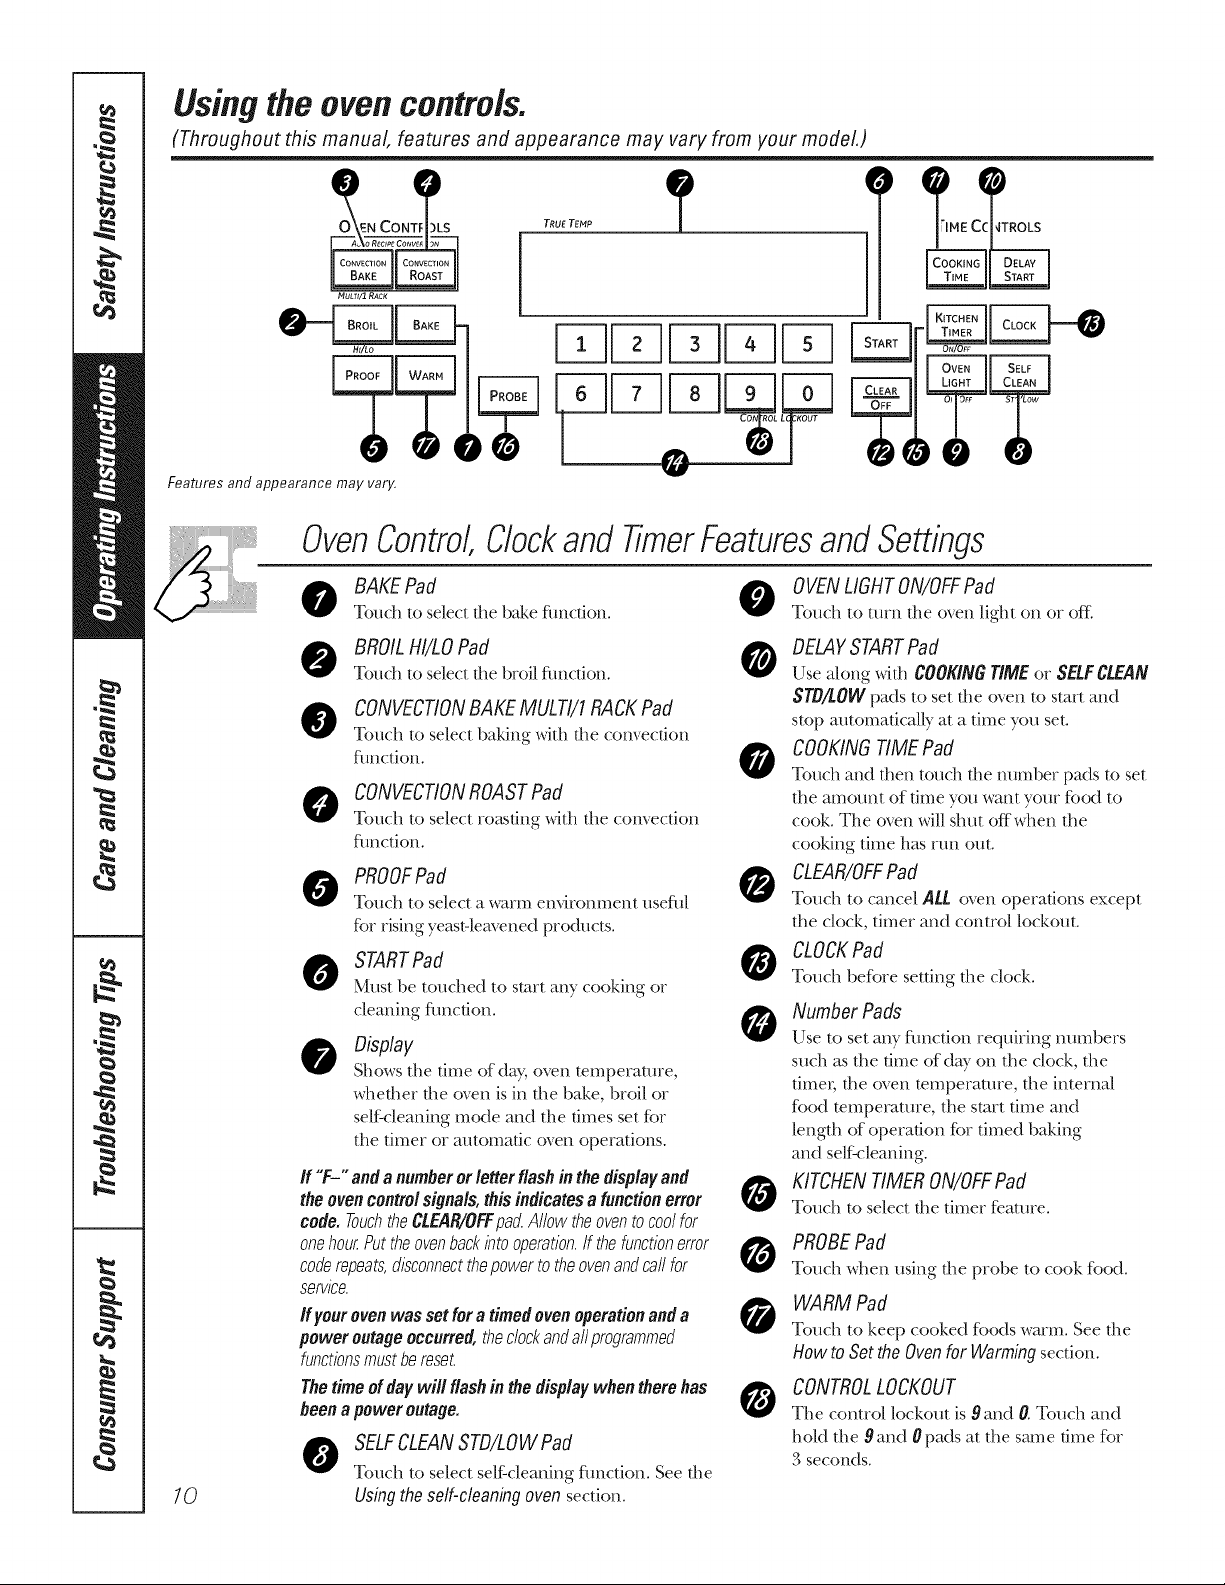
Usingtheovencontrols.
(Throughout this manual, features and appearance may vary from your mode/,)
N CON S TRUETENP _IME Cc qTROLS
NuLTt/1 RACK
Features and appearance may vary.
OvenControl,Clockand TimerFeaturesandSettings
BAKEPad
Touch to select file bake function.
BROILHI/LOPad 0
Touch to select file broil function.
CONVECTIONBAKEMULTI/I RACKPad
Touch to select baking with the convection
flmction.
CONVECTIONROASTPad
Touch to select roasting with the convection
fhnction.
PROOFPad
Touch to select a warm environment usefid
fbr rising _east-leavened products.
STARTPad
Must be touched to start an_ cooking or
cleaning fimction.
Display
Shows the time of day, oven temperature,
whether the oven is in the bake, broil or
serf:cleaning mode and the times set for
the timer or m/tomatic oven operations.
If "F-" and a numberor letter flash in thedisplayand
theoven controlsignals, this indicates a functionerror
code. TouchtheCLEAR/OFFpad.Allow theovento coolfor
onehour,Puttheovenbackbto operatbn,if thefunctbn error
coderepeats,d/sconnectthepower to theovenandca//for
serwce.
Ifyourovenwassetfora timedovenoperationanda
poweroutageoccurred,theclockandallprogrammed
functbnsmustbereset.
Thetime ofday will flash in the displaywhen there has
been apower outage.
SELFCLEANSTD/LOWPad
Touch to select self:cleaning fimction. See file
10
Usingthe self-cleaning oven section.
@ --
OVENLIGHTON/OFFPad
Touch to turn file oven light on or ore
DELAYSTARTPad
Use along widl COOKINGTIME or SELFCLEAN
STD/LOWpads to set the oven to stmt and
stop automatically at a time you set.
COOKINGTIMEPad
O
T(mch and fllen touch file number pads to set
the amount of time you want your food to
cook. The oven will shut offwhen the
cooking time has run out.
CLEAR/OFFPad
e
Touch to cancel ALL oven operations except
the dock, timer and control lockout.
CLOCKPad
T(mch before setting file clock.
Number Pads
Use to set any fimction requMng numbers
such as the time (ffday on the dock, the
timel; the oven temperature, the internM
food temperature, file start time and
length of operation fbr timed baking
and self:cleaning.
KITCHENTIMERON/OFFPad
Tot/ch to select the timer feature.
PROBEPad
To//ch when using file probe to cook food.
WARM Pad
0
T(mch to keep cooked foods warm. See the
How to Setthe Ovenfor Warming section.
CONTROLLOCKOUT
Y_e
Tile control lockout is 9and 0. T(mch and
hold the 9 and 0 pads at the stun e time for
3 seconds.
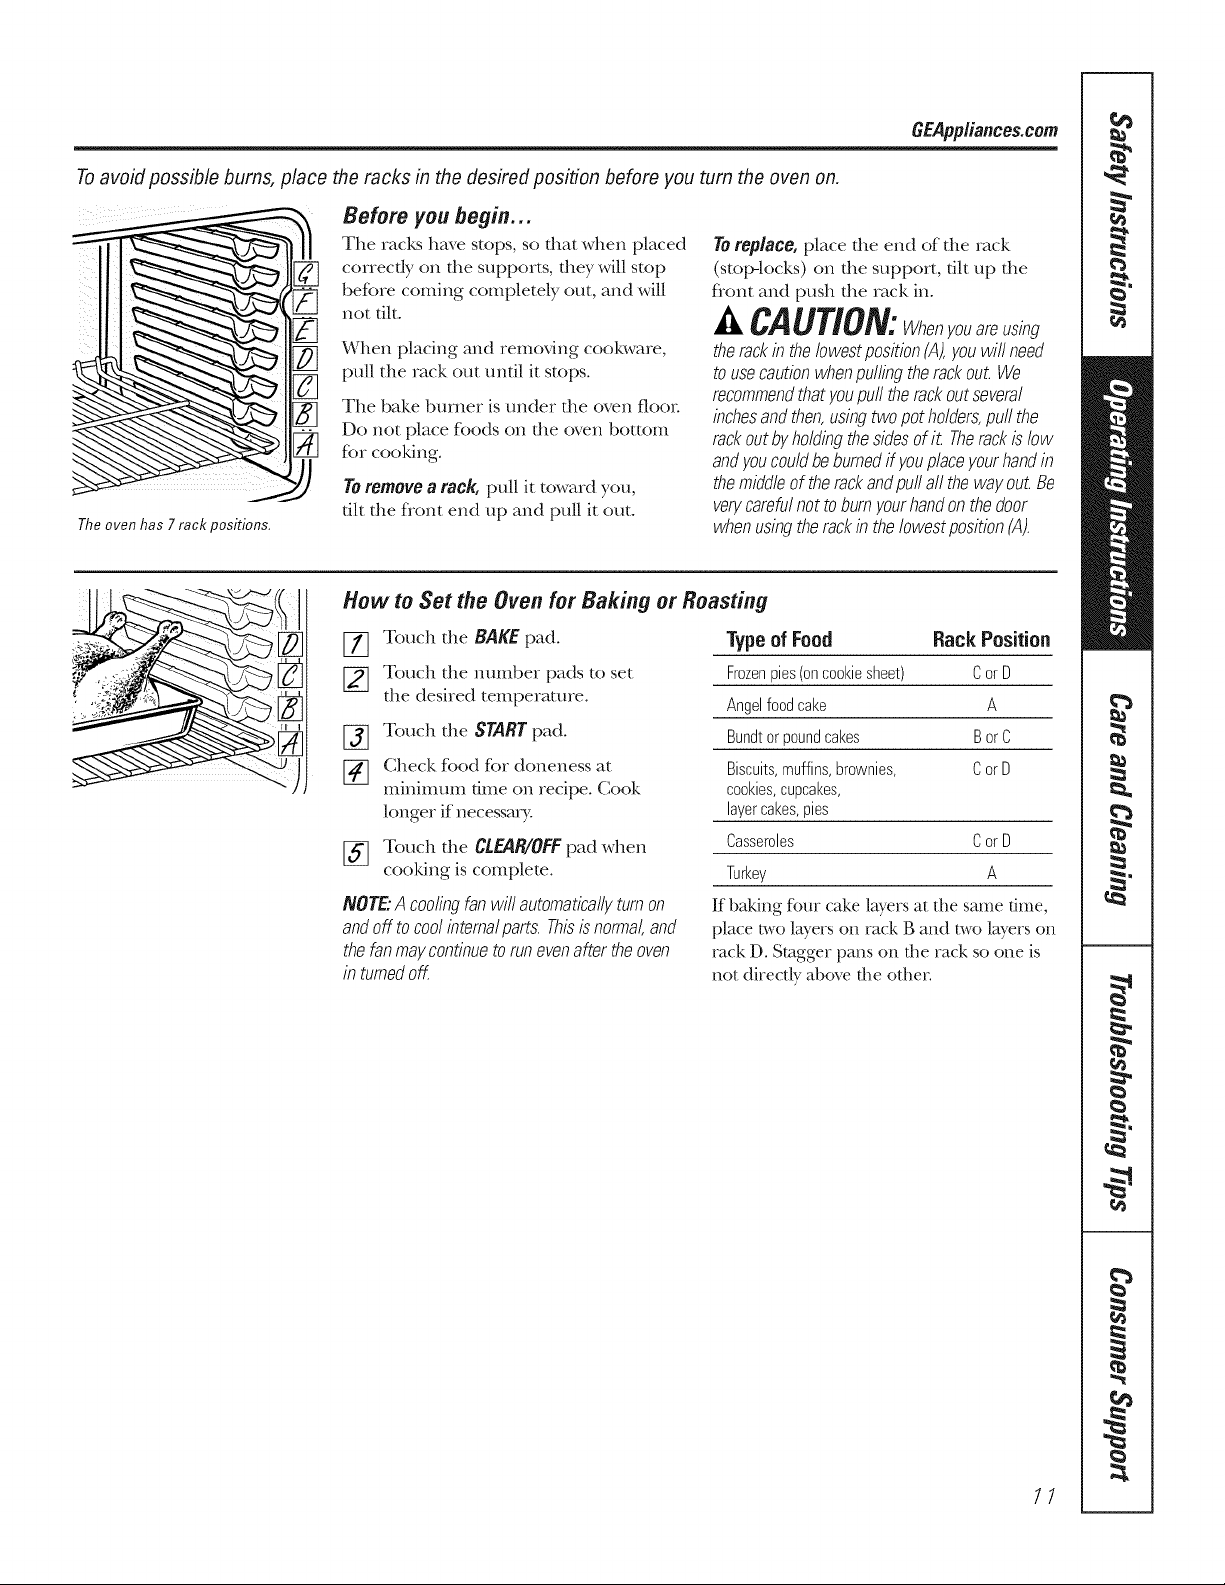
Toavoid possible bums, place the racks in the desired posifion before you turn the oven on,
Before you begin...
The racks have stops, so dmt when placed
correcdy on file supports, flley will stop
before coming completely out, and will
not flit.
To replace, place die end of die tack
(stop-locks) on die support, flit up file
flont and push the rack in.
GEApp/iance&com
The oven has 7 rack positions.
When placing and removing cookware,
pull tile rack out unfll it stops.
Tile bake burner is under tile oven floon
Do not place foods on tile oven bottom
for cooking°
Toremove a rack, pull it toward you,
flit tile flont end up and pull it out.
the rackin the Iowestposition (A),you will need
to usecaution whenpulling the rackout We
recommendthat youpull therack out several
inchesand then,using two potholders,pull the
rackout&holding the sidesof it Therack is low
andyoucouldbe burnedff youplace your hand in
the middle of therack andpull all the way out.Be
verycareful not to burnyour handon thedoor
when using the rackin the Iowestposition(A).
How to Set the Oven for Baking orRoasting
177 Touch tile BAKE pad.
[_ Touch tile nmnber pads to set
tile desired temperature.
[_ Touch tile START pad.
[_ Check K_od Kn" doneness at
minimum flme on recipe° Cool<
longer if necessat T.
[_ Touch tile CLEAR/OFFpad when
cooking is complete.
NOTE."Acoolingfanwill automaticallyturnon
andoff tocoolintemalparts.Thisisnormal,and
thefanmaycontinuetorunevenaftertheoven
in turnedoF
Type of Food Rack Position
Frozenpies(oncookiesheet) CorD
Angelfoodcake A
Bundtorpoundcakes BorC
Biscuits,muffins,brownies, CorU
cookies,cupcakes,
layercakes,pies
Casseroles CorU
Turkey A
If baking four cake layers at file same time,
place two lwers on rack g and two layers on
rack D. Stagger pans on tile rack so one is
not directly above the othen
11
Usingtheoven.
Preheating and Pan Placement
Do not place foods fl/recfly on the
oven floor,
Preheat the oven if die recipe calls R_rit.
Preheating is necessa_y fbr good results
when baking cakes, cookies, pasu y and
breads.
Topreheat,settheovenat thecorrecttemperature.
Thecontrolwillbeepwhentheovenispreheated
andthedisplaywiflshowyoursettemperature.
Thepreheattimewill varydependingonthe
temperaturesetting.
Aluminum Foil
Donotusealuminumfoilonthebottom
of theoven.
Never entirely cover a rack with
ahnninunl foil. This will disturb the heat
circulation and result in poor baking.
Oven Moisture
As your oven heats up, file temperature
change of the ah in the oven may cause
wamr droplets to form on file door glass.
These droplets are harmless and will
evaporate as the oven contintles to
heat up.
Baking results will be better if baldng
pans are cenmred in file oven as much
as possible. If baking with more than one
pan, place the pans so each has at least
1" (2.5 cm) to 1½" (3.8 cm) of air space
around it.
A smaller sheet of ff>ilmay be used to
catch a spillover by placing it on a lower
rack several inches below the food.
12
Oven Vent
GEApp/iances.com
Your oven is vented fluough one vent
located toward the rear of the range. Do
not block this vent when cooking in the
oven--it is important that the flow of hot
air f}om the oven and f_esh oh to the
oven burner be uninmrrup[ed. Avoid
touching the vent openingsor nearby
surfaces duringovenorbroileroperation--
theymaybecomehot.
Power Outage
A CAUTION: not,rakeany
attempttooperatetheelectricignitionovenduring
anelectricalpowerfailure.
The oven or broiler canno[ be lit during
a power fidlure. (;as will not flow unless
the glow bar is hot.
,, Handlesofpotsandpansonthecooktopmay
becomehotif left tooclosetothevent.
Donotleaveplasticitemsontheco&top
theymaymeltif lefttoocloseto thevent
Donotleaveanyitemsonthecooktop.Thehot
airfromtheventmayigniteflammableitems
andwifl increasepressureinclosedcontainers,
whichfraycausethemtoburst.
Metalitemswillbecomeveryhotif theyare
left onthecooktop,andcouldcausebums.
If die oven is in use when a power fidlure
occurs, the oven burner shuts off and
cannot be reqit until power is restored.
This is because the flow of gas is
automatically stopped and will not resume
when power is restored undl the glow bar
licksreached operating mmperature.
13
Usingtheoven.
How to Set theOven forBroiling
IMPORTANT:Toavoidpossiblebums,place
theracksin thedesiredpositionbeforeyouturn
theovenon.
Use tO Broil to cook foods such as pouluy
or thick cuts of meat thoroughly without
eve>browning them.
[_ Place the meat or fish on a broiler
grid in a broiler pan designed
for broiling.
_] Follow suggested rack positions
in the Broiling Guide.
[_ The oven door mustbe closed
during broiling.
[_] Touch the BROILHI/LOpad once fbr
HI Broil.
To change to LOBroil,touch
the BROIl.HI/LOpad again.
Broiling Guide
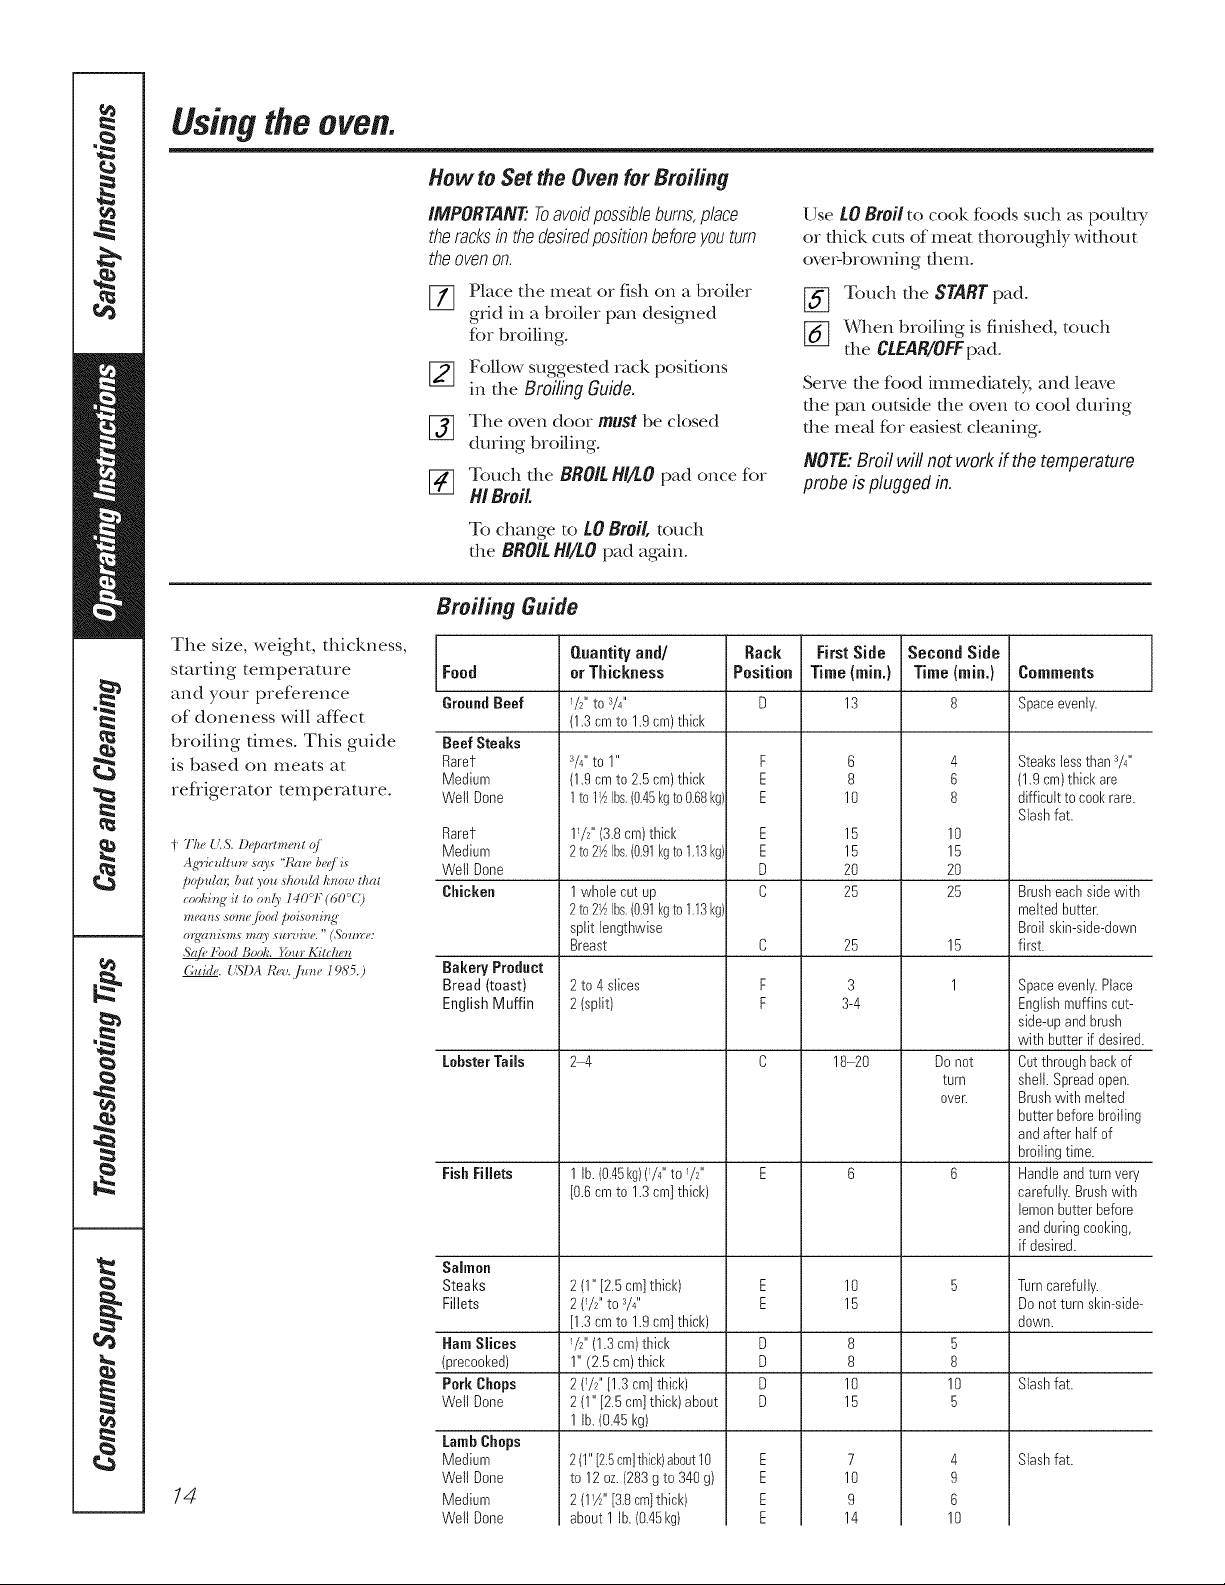
The size, weight, thickness,
starting temperature Food
and your preference GroundBeef
of doneness will affect
broiling dines. This guide BeefSteaks
is based on meats at Rarer
ref)igerator temperature. WellDone
t The{LS.De/aarlmenl_!/ Medium
Ag'r_cu/tlm,,w0_ 't/bin' b_',:/i_ Well Done
po/aula_;but you ,st_ouldh_ow that
codging it to o_151407"(60'C) Chicken
metros some fl_od poi_m_ing
0)'_711ttS!#5 !#( 0 S_tF_t_*_t#. " (,_Olt!_:#:
S@_ t_bod Bodg. _bur Kitchen
Guide. USDA Ib, v. /u_e 19<'¢5.)
14
Medium
Rarer
Bakery Product
Bread (toast)
English Muffin
LobsterTails
FishFillets
Salmon
Steaks
Fillets
HamSlices
(precooked)
Pork Chops
WellDone
LambChops
Medium
WellDone
Medium
WellDone
Quantityand/
orThickness
W' to a/4"
(1.3cmto 1.9cm)thick
a/4"to 1"
(1.9cmto 2.5 cm)thick
1to1Y_Ibs,(0,45kgto0.68kg
1!/2" (3.8 cm)thick
2to2_ Ibs.(0.91kgto1.13kg
1whole cut up
2to2½Ibs.(0.91kgto1.13kg
split lengthwise
Breast
2 to 4slices
2 (split)
24
1lb. (0,45kg)(74"to!/F
[0.6cmto 1.3cm]thick)
2 (1" [2.5cm]thick)
2 (W' to 3/4"
[1.3cmto 1.9cm]thick)
W' (1.3cm)thick
1" (2.5cm)thick
2 (W' [1.3 cm]thick)
2 (1" [2.5cm]thick) about
1lb. (0.45I<g)
2(1"[2.5cm]thick)about10
to 12oz.(283g to 340g)
2 (I_A'' [3.8cmlthick)
about 1 lb.(0.45kg)
Rack
Position
F
E
E
E
E
D
C
C
F
F
E
E
D
D
D
D
[_ Touch the START pad.
[_ When broiling is finished, totlch
the CLEAR/OFFpad.
Serve die food immediately, and leave
the pan outside the oven to cool during
the meal for easiest cleaning.
NOTE: Broil will not work if the temperature
probe is plugged in.
FirstSide
Time{rain.)
13
10
15
15
20
25
25
3-4
18-20
10
15
10
15
10
14
Second Side
Time{min.)
6
8
4
6
8
10
15
20
25
15
3
8
8
7
9
I
Donot
turn
over.
5
8
10
5
4
9
6
10
Comments
Space evenly.
Steakslessthan3/4"
(1.9cm)thick are
difficultto cool<rare.
Slashfat.
Brusheachsidewith
meltedbutter.
Broilskin-side-down
first.
Spaceevenly.Place
Englishmuffinscut-
side-upandbrush
with butter if desired.
Cutthroughback of
shell. Spreadopen.
Brushwith melted
butterbeforebroiling
andafter halfof
broilingtime.
Handleandturn very
carefully.Brushwith
lemonbutterbefore
andduringcooking,
if desired.
Turncarefully.
Donotturn skin-side-
down.
Slashfat.
Slashfat.
Usingthe clock, timerandcontrollockout. CEApplia,ce .com
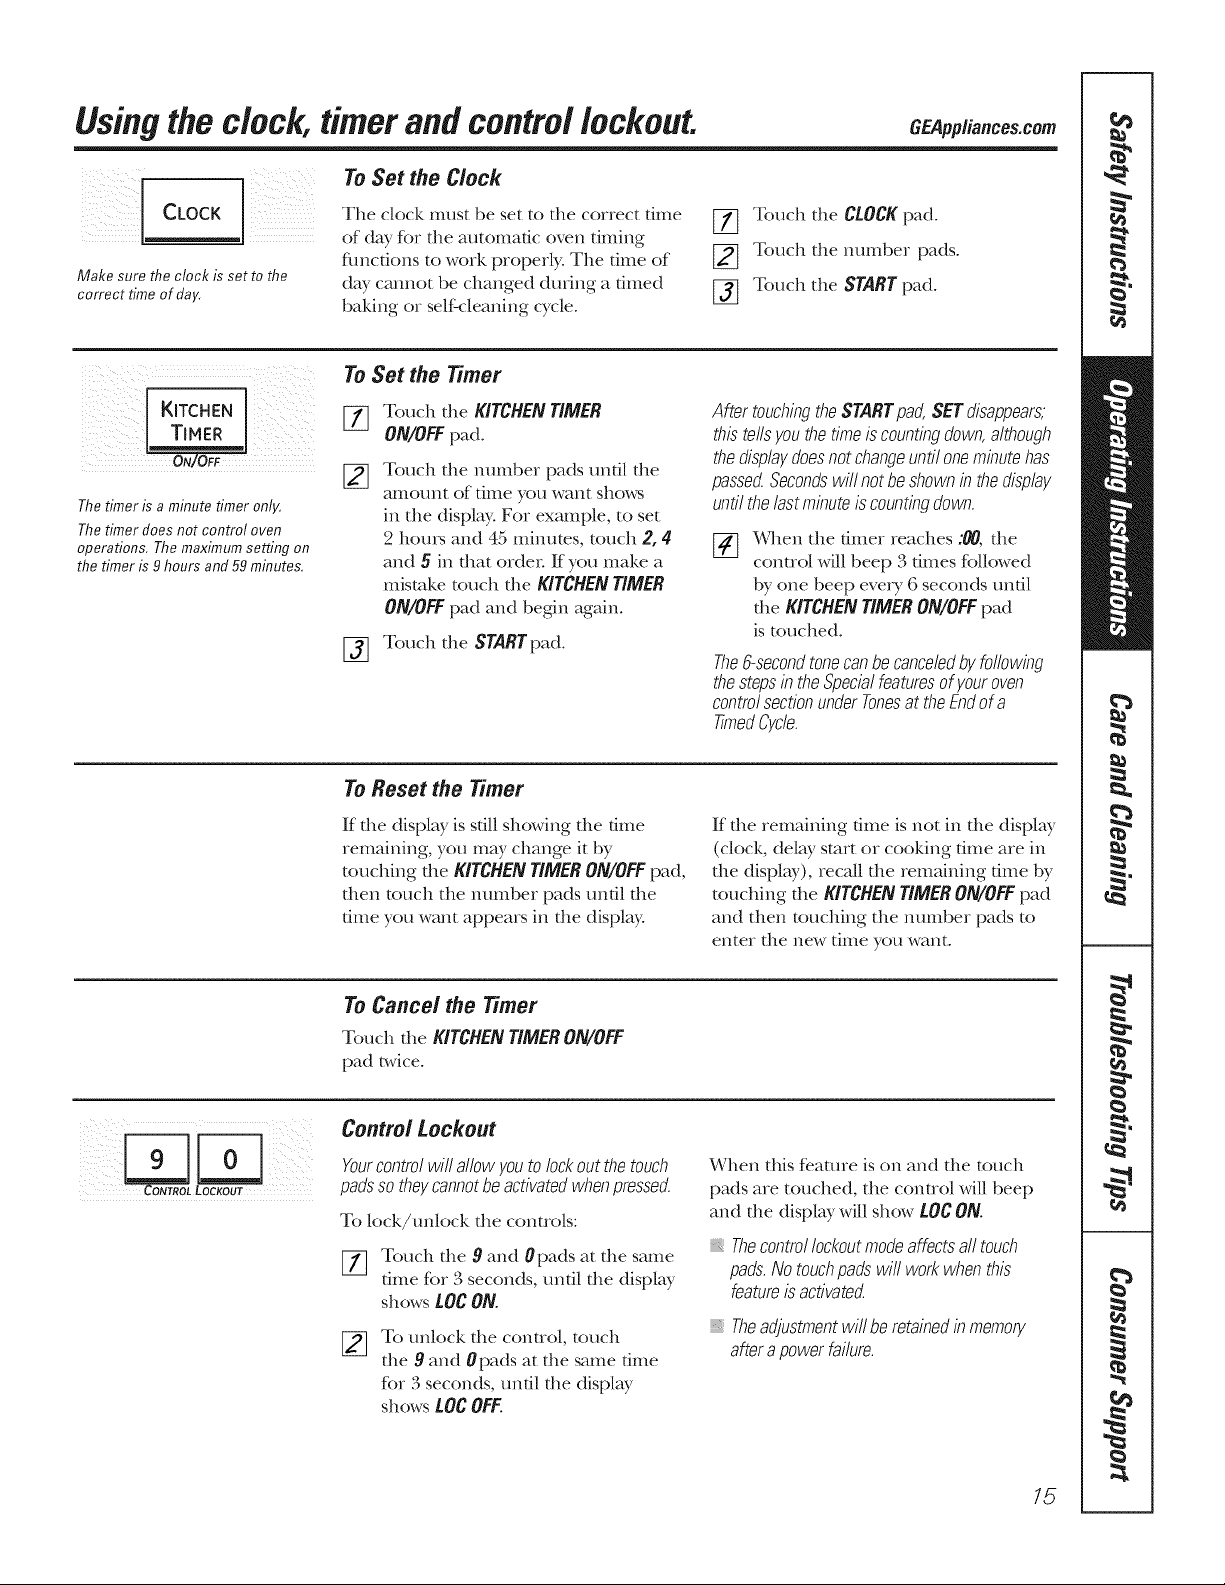
To Set the Clock
Make sure the clock is set to the
correct time of day.
ON/OF_
The timer is a minute timer only.
The timer does not control oven
operations, The maximum setting on
the timer is 9 hours and 59 minutes.
The clock nmst be set to die correct time
of day for die autonlafic oven timing
flmcfions to work properly. The dine of
day cannot be changed during a timed
baldng or selfXcleaning cycle.
To Set the Timer
Touch tile KITCHEN TIMER
ON/OFF pad.
Touch die number pads undl die
a[noLlnt of dine you _,VitIlt sho_,vS
in tile display. For example, to set
2 hems and 45 minums, touch 2, 4
and 5 in that or(let: ff you make a
mistake touch the KITCHEN TIMER
ON/OFF pad and begin again°
[_ Touch tile STARTpad.
ToReset the Timer
[77 Touch tile CLOCK pad.
[_] Touch tile nmnber pads.
[_] Touch tile STARTpad.
After touchingtheSTARTpad,SETdisappears,
thistellsyouthetimeis countingdown,although
thedisplaydoesnotchangeuntiloneminutehas
passec_Secondswillnotbeshowninthedisplay
untilthelastminuteiscountingdown.
_-] When tlle diner reaches :00, die
control will beep 3 times R_llowed
by one beep eve_ T 6 seconds until
tile KITCHEN TIMERON/OFFpad
is touched.
The6-secondtonecanbecanceledbyfollowing
thestepsintheSpecialfeaturesofyouroven
controlsectionunderTonesattheEndofa
timedCycle.
If die display is still showing die time
remaining, you may change it by
touching the KITCHEN TIMERON/OFF pad,
then touch tile number pads until the
time you want appears in tile display.
To Cancel the Timer
Touch die KITCHEN TIMER ON/OFF
pad lwice.
Control Lockout
Yourcontrol will allow you tolock out the touch
padsso they cannotbe activatedwhen pressed.
To lock/unk_ck tile controls:
[77 Touch tile 9 and 0pads at tile same
time for 3 seconds, until tile display
shows LOC ON.
To mllock die control, touch
tile 9 and 0pads at die same time
for 3 seconds, until tile disphy
shows LOC OFF.
If file remaining dine is not in die display
(clocl<, delay start or cooldng time are in
the display), recall tile remaining dine by
touching the KITCHEN TIMERON/OFF pad
and then touching the number pads to
enter the new dine you want.
When dlis feature is on and file touch
pads are touched, the conuol will beep
and the display will show LOCON.
Thecontrollockoutmodeaffectsa//touch
pads.Notouchpadswit workwhenthis
featureis activatec_
Theadjustmentwi//beretainedinmemory
afterapowerfailure.
15

Usingthetimedbakingandmastingfeatures.(onsome models)
NOTE: Foods that spoil easily--such as milk, eggs, fish, stuffings, poultry and pork--should not be afiowed to s# for
more than I hour before or after cooking. Room temperature promotes the growth of harmful bacteria, Be sure that
the oven light is off because heat from the bulb will speed harmful bacteria growth,
How to Set an Immediate Start and Automatic Stop
Theovenwill turnonimmediatelyandcook
foraselectedlengthoftime.At theendofthe
cookingtirnetheovenwill turnoff automaticallg
[77 Touch the BAKE pad.
[_] Using the nmnber pads, enter
the desired temperature.
[_ Touch the COOKINGTIME pad.
NOTE: If yourreciperequirespreheating, youmay
need to add additional time to the length of the
cookingtirne.
[_] Using the number pads, enter tile
desired baldng dine. The oven
temperature and the cooMng time
that you entered will be disphyed.
[-_ Touch the START pad.
The display will show the changing
temperature (smrdng at 100°F [38°C])
and the cooldng time. The display starts
changing once tile mmpemmre reaches
100°F (38°C).
The oven will condnue to cook for die
programmed amount of time, then shut
off automatically, unless the WARM
feature was set. See the How to Set the Oven
for Warming section.
Touch the CLEAR/OFF pad to clear the
display.
How to Set a Delayed Start and Automatic Stop
Youcanset theovencontroltodelay-startthe
oven,cookfora specificlengthoftirneandthen
turnoffautomatically
Make sure tile clock shows tlle correct
time of day.
[77 Touch the BAKE pad.
_] Using the number pads, enter
the desired temperature.
[_] Touch the COOKINGTIME pad.
NOTE:Ifyourreciperequirespreheating,youmay
needtoaddadditionaltimetothelengthofthe
cookingtirne.
[-_ Using the number pads, enter
the desired baking dine.
[_ Touch the BELAYSTART pad.
If you would like to check die dines you
have set, touch the DELAYSTART pad to
check the start time you have set or touch
the COOKING TIMEpad to check the
length of cooldng dixie you have set.
When rite oven turns on at file dine of
day you have set, tlle display will show tile
changing temperature (starting at 100°F
[38°C]) and the cooking lime. The
display starts changing once the
mmpemmre reaches 100°F (38°C).
The oven will condnue to cook fbr
die programmed amount of dine, dlen
shut off automatically, unless the WARM
fe.ature was set. See the How to Set the Oven
for Warming section°
Touch the CLEAR/OFFpad to clear
the display.
[_ Using the number pads, enter
tile time of day you want tile oven
to mrn on and start cooldng.
16
[Z] Touch the STARTpad.
NOTE:Anattentiontonewillsoundif youare
usingtimedbakinganddonottouchtheSTART
padafterenteringthebakingtemperature.
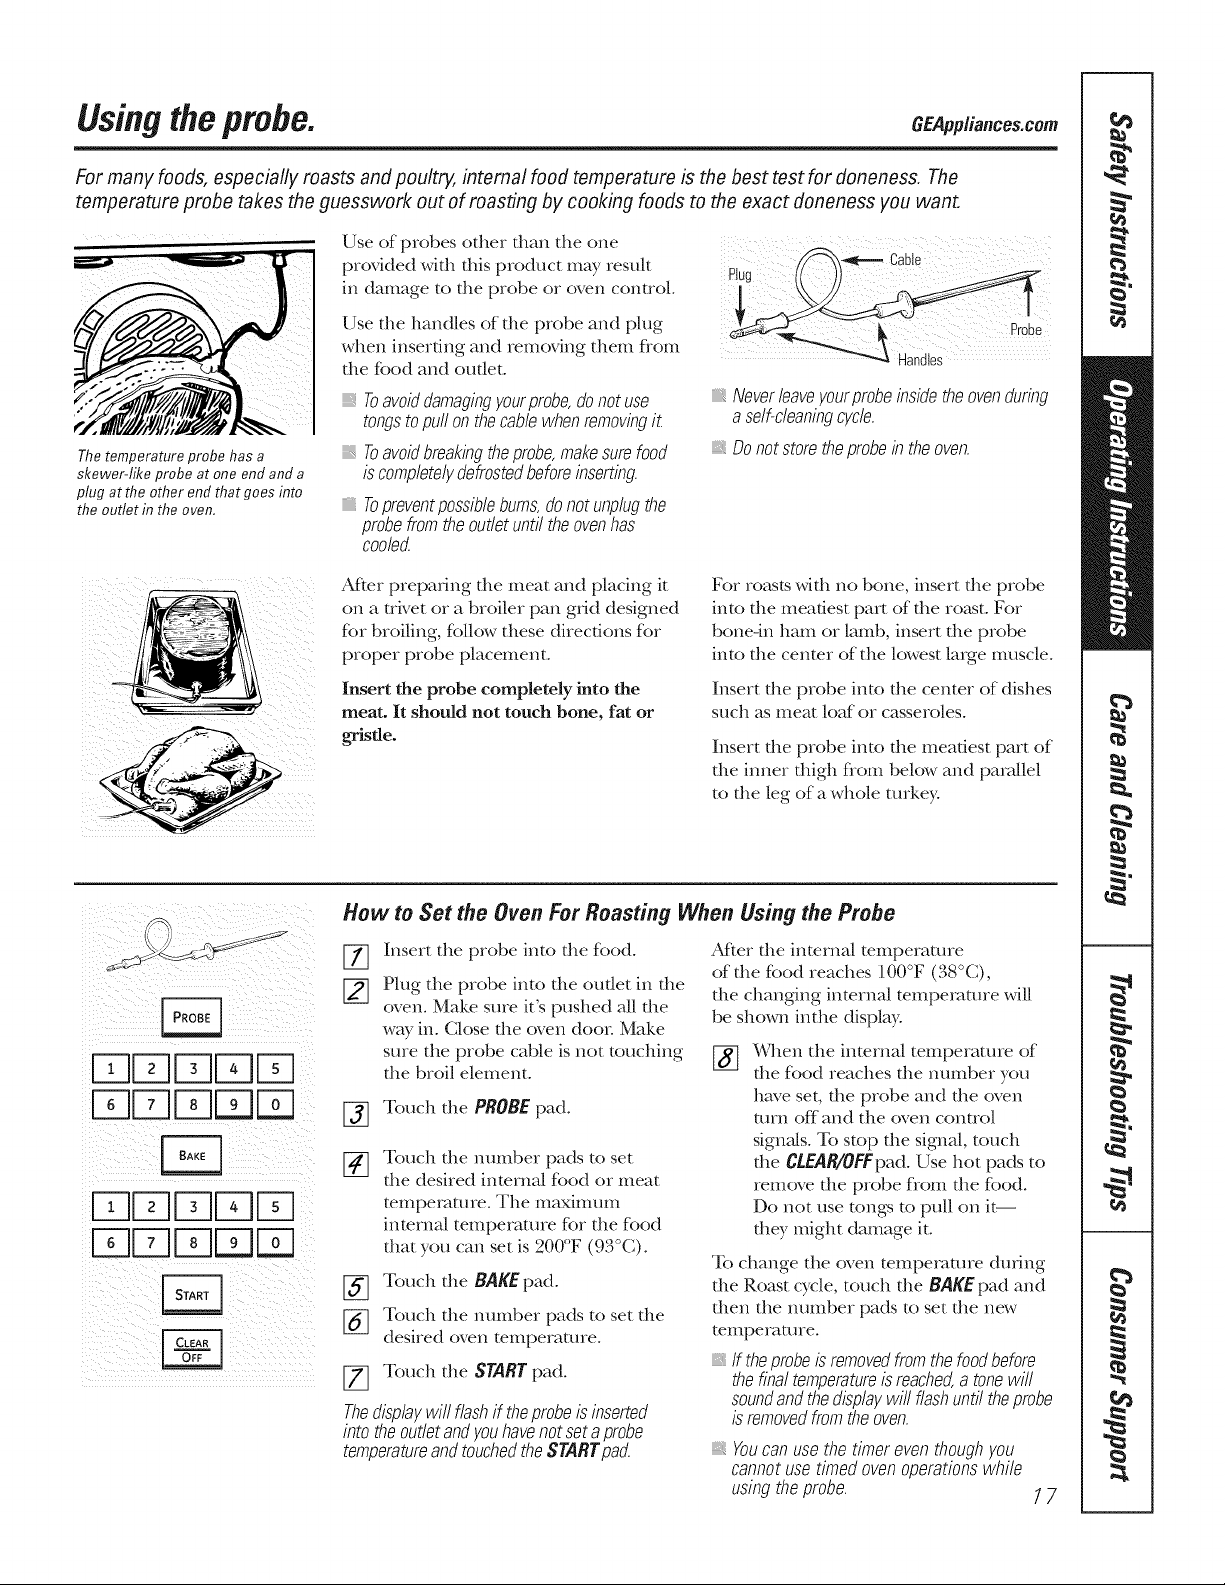
For many foods, especially roasts and poultry, internal food temperature is the best test for aloneness. The
temperature probe takes the guesswork out of roasting by cooking foods to the exact doneness you want.
Use of probes other than the one
provided with this product may result
in damage to the probe or oven control°
Use the handles of the probe and plug
Thetemperature probe has a
skewer-like probe at one end and a
plug at the other end that goes into
the outlet in the oven.
when inserting and removing them fiom
the food and outlet°
Toavoiddamagingyourprobe,donot use
tongstopull onthecablewhenremovingit
Toavoidbreakingtheprobe,makesurefood
iscompletelydefrostedbeforeinserting.
Topreventpossib/ebums,donotunplugthe
Neverleaveyourprobeinsidetheovenduring
aself-cleaningcycle.
Donot store theprobein the oven.
Handles
probefromtheoutletuntiltheovenhas
coolec_
Probe
FqFqDDFq
D DD q
FqFqDDD
UUE EB q
After preparing file meat and placing it
on a trivet or a broiler pan grid designed
for broiling, follow these directions for
proper probe placement°
Insert the probe completely into the
meat. It should not touch bone, fat or
gristle.
For roasts widl no bone, insert die probe
into the meatiest part of the ro_st. For
bone-in ham or lamb, insert the probe
into the cenmr of the lowest large muscle.
Insert the probe into the center of dishes
such as meat loaf or casseroles.
Insert the probe into the meatiest part of
the inner thigh flom below and parallel
to the leg of a whole turkey:
How to Set the Oven For Roasting When Using the Probe
Insert the probe into the food.
Plug the probe into die oudet in die
oven. Make sure it's pushed all die
way in. Close the oven door Make
sure the probe cable is not touching
file broil element.
[_ Touch the PROBE pad.
Touch the number pads to set
the desired internal food or meat
temperature. The maximum
internal temperature for the food
that you can set is 200°F (93°(;).
Aider die internal temperature
of the food reaches 100°F (38°C),
the changing inmrna/mmpemmre will
be shown inthe display.
When the internal temperature of
the food reaches the number you
have set, the probe and the oven
mrn off and the (wen control
signNs. To stop the signN, touch
the gLEAR/0FFpad. Use hot pads to
rernove the probe flom the food.
Do not use tongs to pull on it--
they might damage it.
To change the oven temperature dunng
Touch the BAKE pad.
Touch the number pads to set the
%
desired oven temperature.
Touch the START pad.
Thedisplaywill flashif theprobeisinserted
die Roast cycle, touch die BAKE pad and
then the number pads to set the new
temperature.
If theprobeisremovedfromthefoodbefore
thefinaltemperatureisreached,a tonewill
soundandthedisplaywillflashuntiltheprobe
isremovedfromtheoven.
intotheoutletandyouhavenotsetaprobe
temperatureandtouchedtheSTARTpad.
Youcan usethe timereventhoughyou
cannotusetimedovenoperationswhile
usingthe probe. 17
Usingtheconvectionoven.
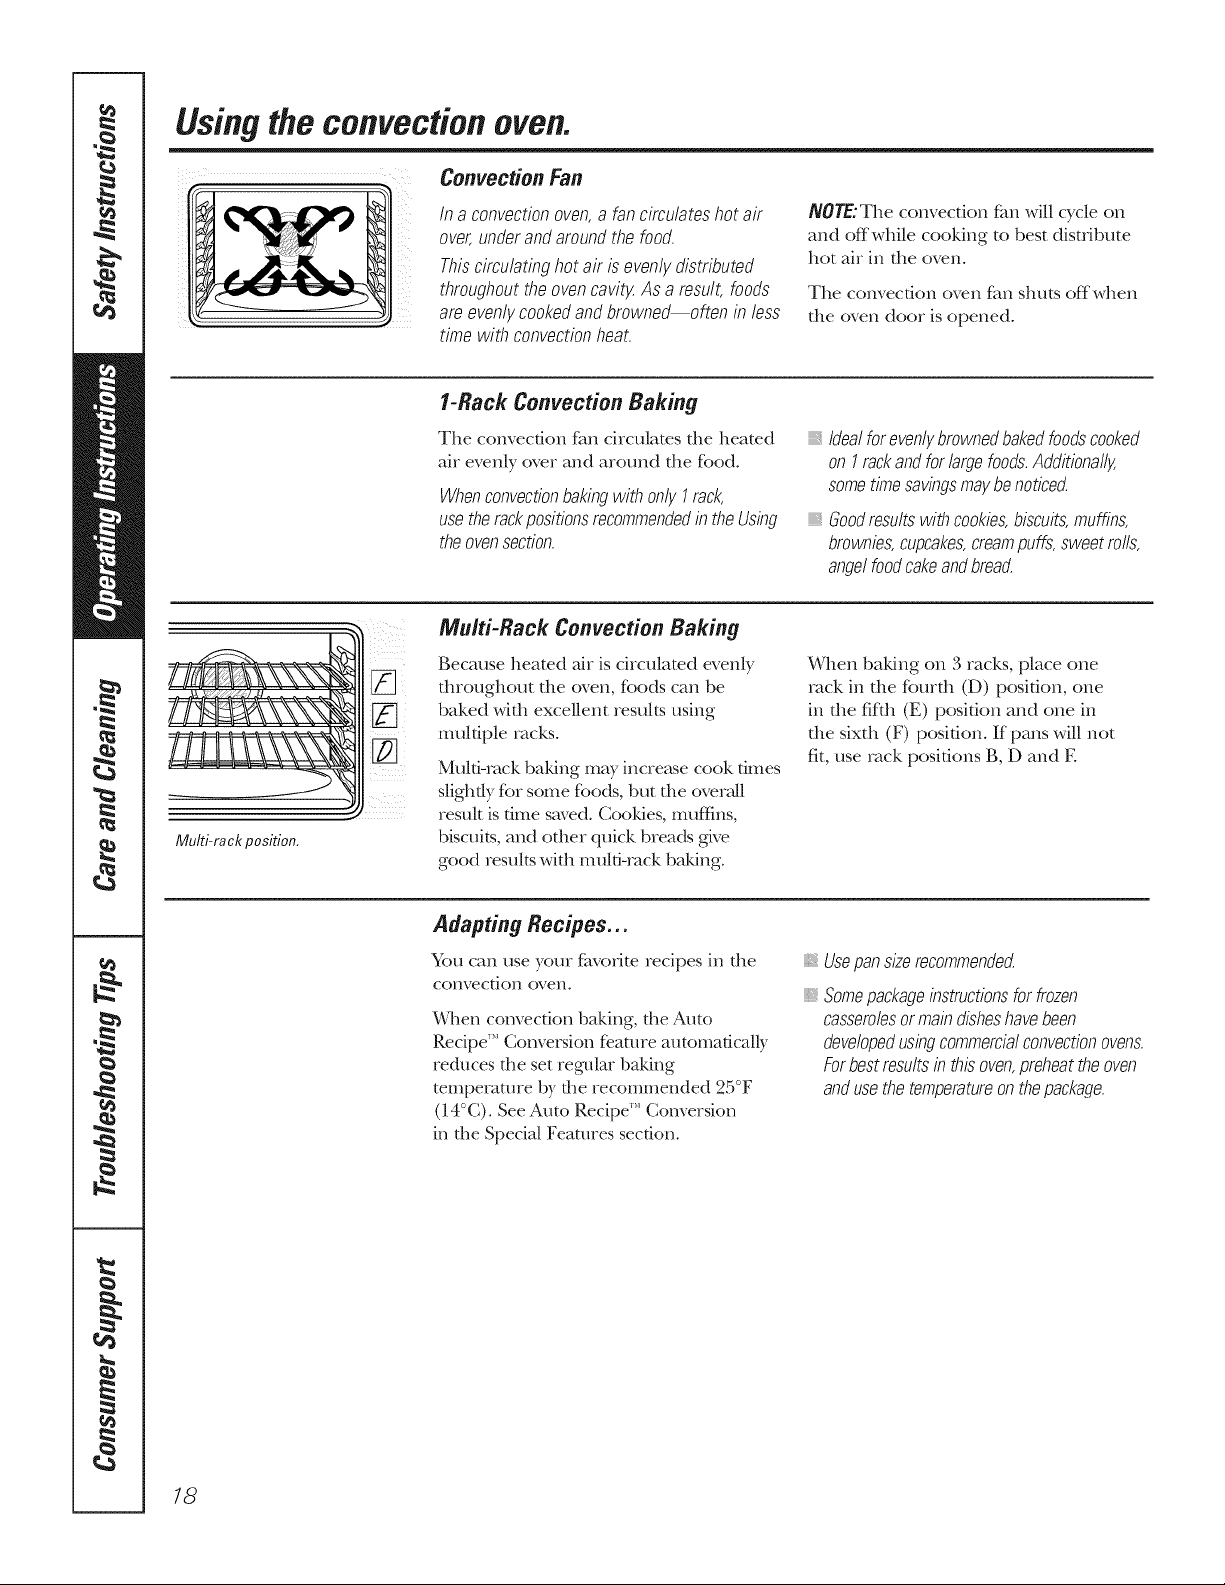
Convection Fan
Multi-ra ck position.
i[] ¸
Ina convectionoven,a fancirculateshotair
over,underandaroundthefood.
Thiscirculatinghotair is evenlydistributed
throughouttheovencavity,Asa result,foods
areevenlycookedandbrowne_often in less
timewith convectionheat.
1-Rack Convection Baking
Tile convection tim circulates tile heated
air evenly over and around tile food.
WhenconvectionbakingwithonlyI rack,
usetherackpositionsrecommendedintheUsing
theovensection.
Multi-Rack Convection Baking
Because heated air is circulated evenly
duoughout die oven, foods can be
baked wkh excellent results using
multiple racks.
Multi-rack baking may incre;_se cook dines
slightly fbr some foods, but tlle overall
result is time saved. Cookies, muffins,
biscuits, and other quick breads give
good results with multi-rack baking.
NOTE;Tile convection tim \,viii cycle on
and offwhile cooking to best distribute
hot air in tile oven.
Tile convection oven tim shuts offwhen
tile oven door is opened.
Idealforevenlybrownedbakedfoodscooked
on I rackandforlargefoods.Additionally,
sometimesavingsmaybenoticed.
Goodresu/tswithcookies,biscuits,muffins,
brownies,cupcakes,creampuffs,sweetrolls,
angelfoodcakeandbread.
When baldng on 3 racks, place one
rack in die fburdl (D) position, one
in tile fifth (E) position and one in
tile sixdl (F) position. If pans will not
fit, use rack positions B, D and E
18
Adapting Recipes..,
You can use your fiwofite recipes in tile
convection oven.
Vdlen convection l)aking, the Auto
Recipe"* Conversion feature automatically
rednces the set regular baking
temperature 1)ythe recommended 25°F
(14°C). See Auto Recipe'" Conversion
in the Special Features section.
}; Usepansizerecommende_
Somepackageinstructionsforfrozen
casserolesormaindisheshavebeen
developedusingcommercialconvectionovens.
Forbestresultsin thisoven,preheattheoven
andusethetemperatureonthepackage.

GEApp/iance&com
Whenbaking cookies,you will
get thebest resultsif you use
aflat cookiesheet instead of
apanwith low sides.
Convection Roast
_,good for large tendercuts ofmeat, uncoverec_
The convection fan circulates the heated
ah evenly over and around tile food.
Meat and pouluy are browned on all
sides as if dley were cooked on a
rotisserie. Tile heated ah seals ill juices
quickly for a moist and tender product
while, at the same time, creating a rich
goMen brown exterior
Cookware for Convection Cooking
Before using your convection oven,
check to see if your cool<ware leaves
room K)I ah circulation ill die oven.
If you are baldng with several pans, leave
space bet_,veen them. Also, be sure the
pans do not touch each oilier or file
walls of the oven.
Paper and Plastic
Heat-resistant paper and plastic
containers that are recommended fk_)i
use ill regular baldng can a/so be used
for ccmvecdon baldng, but should not
be used at mmpeIaUlres higher than
the temperaUlre recommended by the
cool<ware mamlfacUlreI: Plastic cool<ware
dmt is ]1eat-resistant to mmperamres of
400°F (204°C) call a/so be used.
¼,qlen you are convection roasting,
it is important that you use a broiler pail
and gIid designed for broiling for best
convection roasting results. The pan is
used to catch gqease spills and the grid
is used to prevent grease spatteIs.
Place the oven rack ill the position
flint centers the K_od between file top
and bottom offile oven.
Metal and Glass
Ally type of cool<ware will work in your
convection oven. Howevei; Illet_J palls
heat the fhsmst and are recommended
for convection bN<ing°
Darkenedor matte-finishedpans will bake
faster thanshiny pans
glass orceramicpans cookmoreslowl;_
For recipes like oven-baked chicken,
use a pan with low sides. Hot air cannot
circulam well around food ill a pan with
high sides.
NULTt/I RACK
E [ FqF-qFq
DDFqF;qr-;q
How toSet the Oven for Convection Baking orRoasting
_] Touch the CONVECTION BAKE
MULTI/1 RACKor CONVECTION
ROAST pad.
[_ Touch the immber pads to set the
desired oven telnperamre.
[_] Touch the START pad.
To change the oven tempeiature, touch
the CONVECTIONBAKE MULTI/1 RACK or
CONVECTIONROASTpad and then the
number pads to set the new teInperature.
When the oven starts to beat, the
changing mlnpeiaalre, starting at ]00°F
(38°C), will be displayed. _&qlen oven
reaches the mmpeIaUlIe you set, 3 beeps
will sound.
[_ Touch CLEAR/OFFpad when
finished.
,, Youwill hearafanwhilecookingwith
convectionThefanwillstopwhenthedoor
isopened,buttheheatwill not turnoff
_,Youmayheartheovenclickingduring
bakingThisisnormal
19
Usingthe timedfeaturesfor convectioncooking.
Youwill hear a fan while cooking with these features. The fan will stop when the door is opened, but the heat
will not turn off.
NOTE:Foods that spoil easily--such as milk, eggs, fish, stuffings, poultry and pork--should not be allowed to
sit for more than 1hour before or after cooking. Room temperature promotes the growth of harmful bacteria.
Be sure that the oven light is off because heat from the bulb will speed harmful bacteria growth.
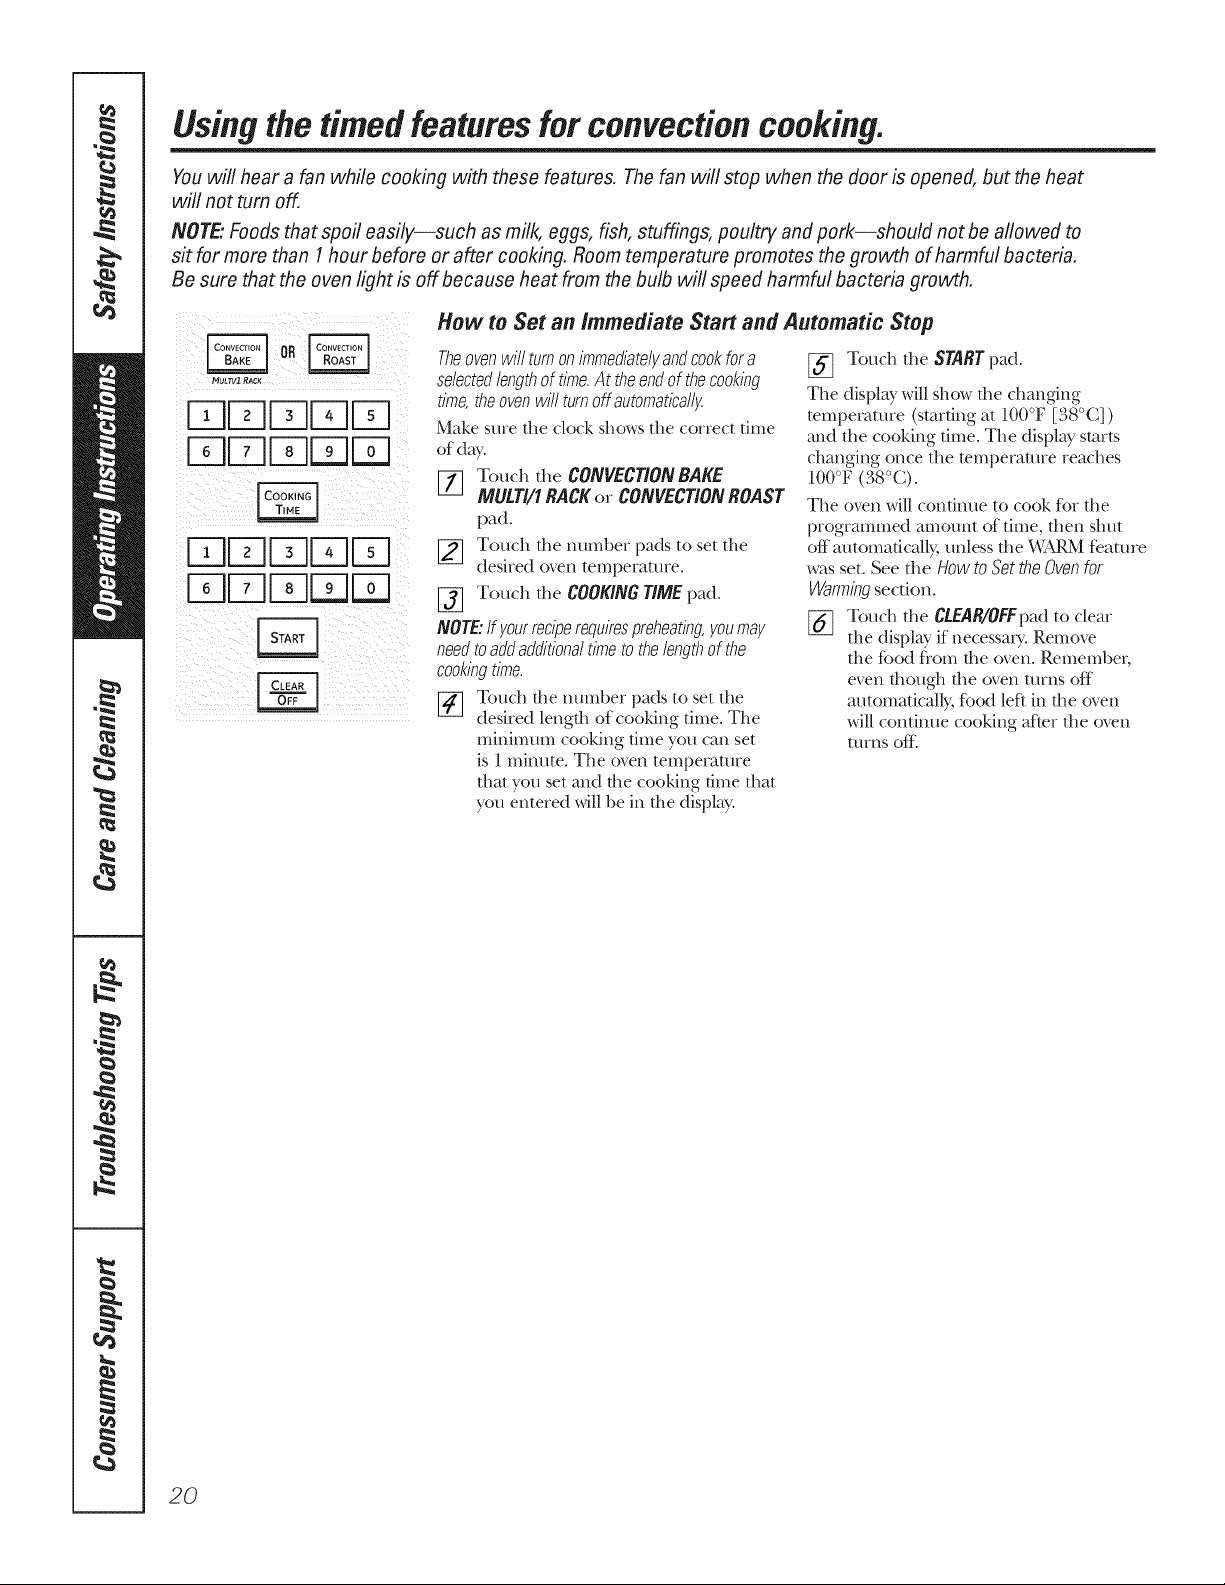
How to Set an Immediate Start and Automatic Stop
Numll RAC_
53FqDDFq
53FqDD
53DDDD
qr-qDD
Theovenwill turnonimmediatelyandcookfor a
selectedlengthof time.At theendof thecooking
time,theovenwill turnoff automatically.
Make sure file clock shows file correct time
of day.
[7] Touch the CONVECTION BAKE
MULT/fl RACK or CONVECTIONROAST
pad.
[_ Touch the munber pads to set the
desired oxen temperature.
[_ Touch the COOKINGrIME pad.
NOTE."Ifyourreciperequirespreheating,youmay
needto addadditionaltimeto thelengthof the
cookingtime.
[_ Touch file mm_ber pads to set the
desired length of cooking time. The
minimum cooking time you can set
is 1 mim/te. The oven temperature
that you set and the cooking time that
you entered will be in the display.
To/lch tile STARTpad.
The display will show rite changing
wmpemmre (starting at 100T [38°C])
m_d the cooking time. The display starts
changing once the mmperamre reaches
_oooF(38°(3.
The oven will contim]e to cook for the
programmed amount (ff time,/hen shut
off m/tomaficMly, unless/he X_fARMfeature
was set. See the HOWtOSet theOvenfor
Warmingsection.
[_ T.mch the C£EAR/OFFpadto dear
the displa_ if necessary. Remove
the food fl'om the oven. Remember;
even though the oven turns off
m/tomaticNly, fbod lef/in the oven
will contiime cooking af/er the oven
turns (}fIi
20
MULTII1RACK
DDDDD
DDDD
DDDDD
DDDDFq
DDDDD
DDDD
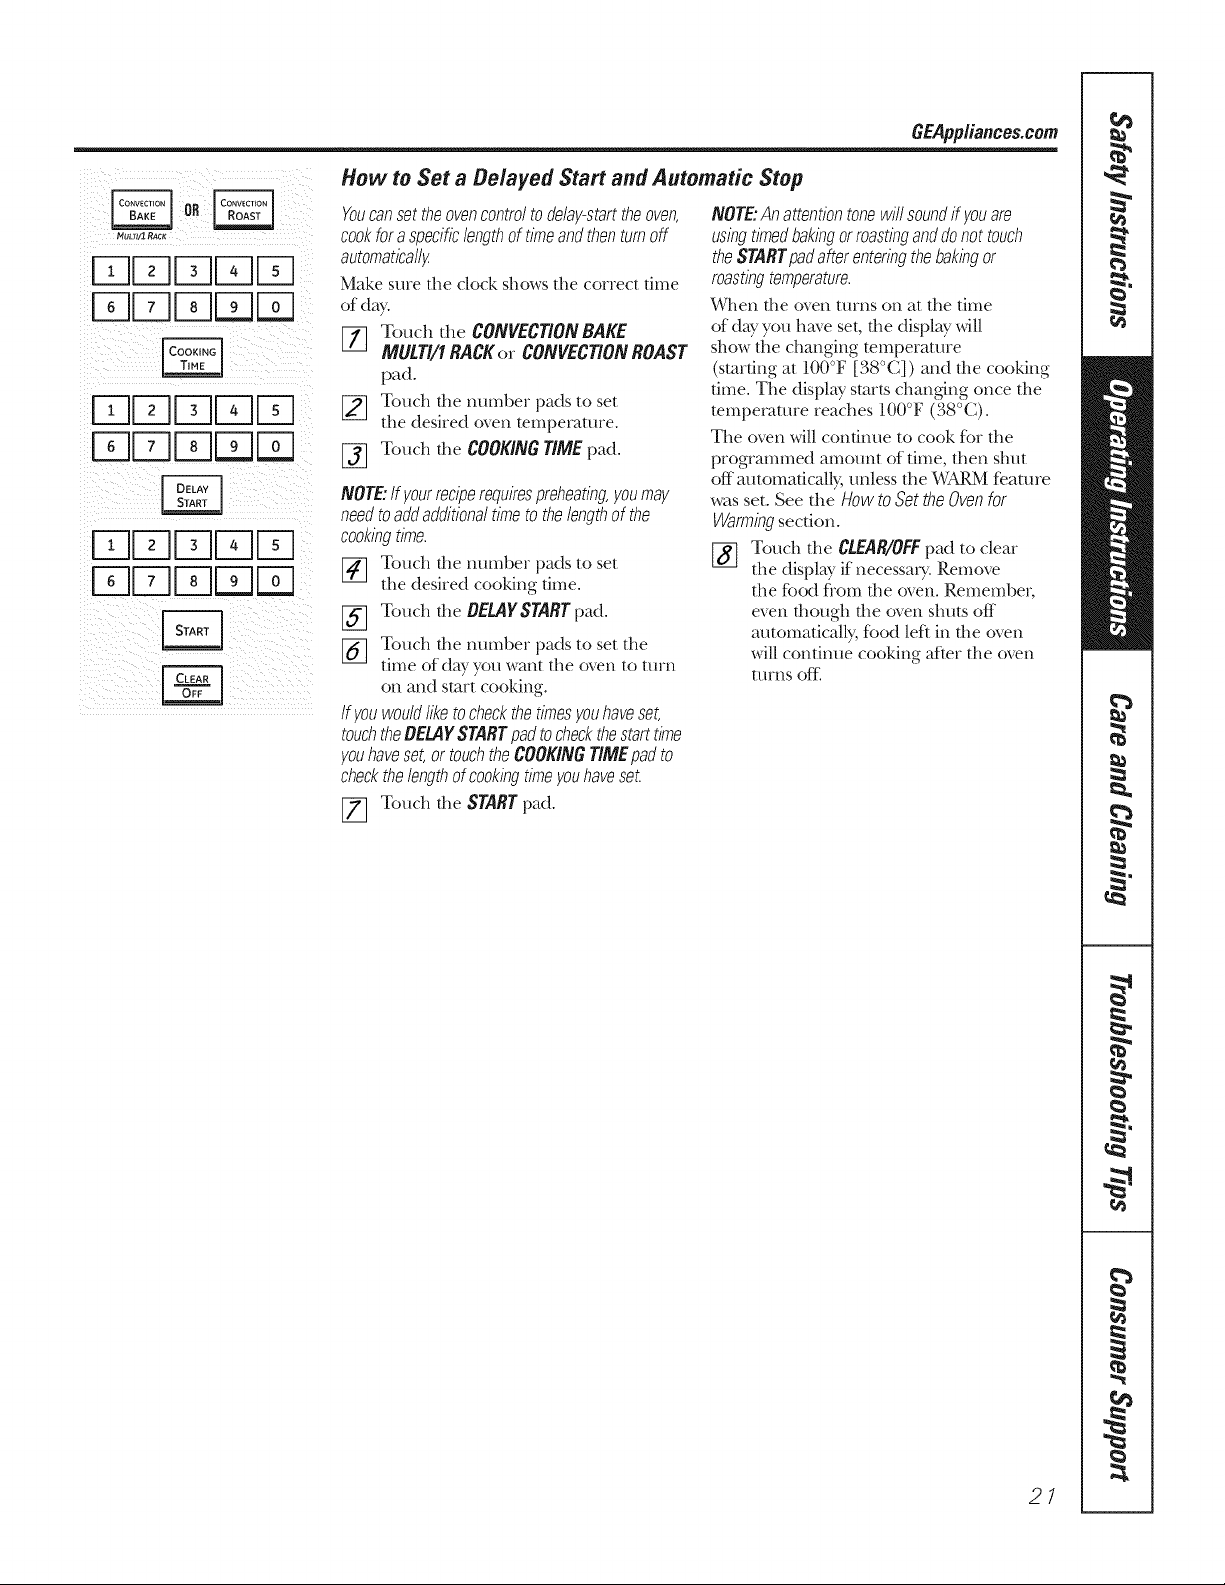
How to Set a Delayed Start and Automatic Stop
Youcansettheovencontroltodelay-starttheoven,
cookfor a specificlengthof timeand then turnoff
automatically.
Make sure file dock shows file correct time
of day.
[77 Touch the CONVECT/ON BAKE
MULTI/1RACKor CONVECTION ROAST
pad.
[_ Touch the number pads to set
the desired o_en temperature.
[_ Touch the COOKINGT/ME pad.
NOTE."Ifyourreciperequirespreheatingyoumay
needtoaddadditionaltimetothelengthofthe
cookingtime.
_-] Touch rite m_mber pads to set
the desired cooking time.
Touch the OEMYSTARTp_d.
%
Touch rite m_mber pads to set the
%
time of da_ _ou want the oven to turn
on and start cooking.
Iflieuwouldliketocheckthetimesyouhaveset,
touchtheDEL4YSTARTpadtocheckthestarttime
youhaveset,ortouchtheCOOK#VGT/MEpadto
checkthelengthofcookingtimeyouhaveset.
[77 Touch dte STARTpad.
NOTE."Anattentiontonewillsoundffyouare
usingtimedbakingorroastinganddonottouch
theSTARTpadafterenteringthebakingor
roastingtemperature.
When rite oven turns on at rite time
of dW you have set, the displ W will
show fire changing temperature
(starting at 100°F [38°C]) and the cooking
time. The displW starts changing once rite
temperature reaches 100°F (38°C).
The oven will continue to cook for the
programmed amcmnt of time,/hen sht_t
off m/tomafically, unless/he _,kfARMfeature
wasset.Seedie HOWtO Set theOvenfor
Warmingsection.
[_ Touch the CLEAR/OFFpad to cleat
the displa_ ifnecessary. Remove
the f}.)odfrom the oven. Remember,
even fltough the oven shuts off
automatically, food left in rite oven
will continue cooking af/er the oven
turns ore
GEApp/iances.com
2/
Usingtheconvectionoven.
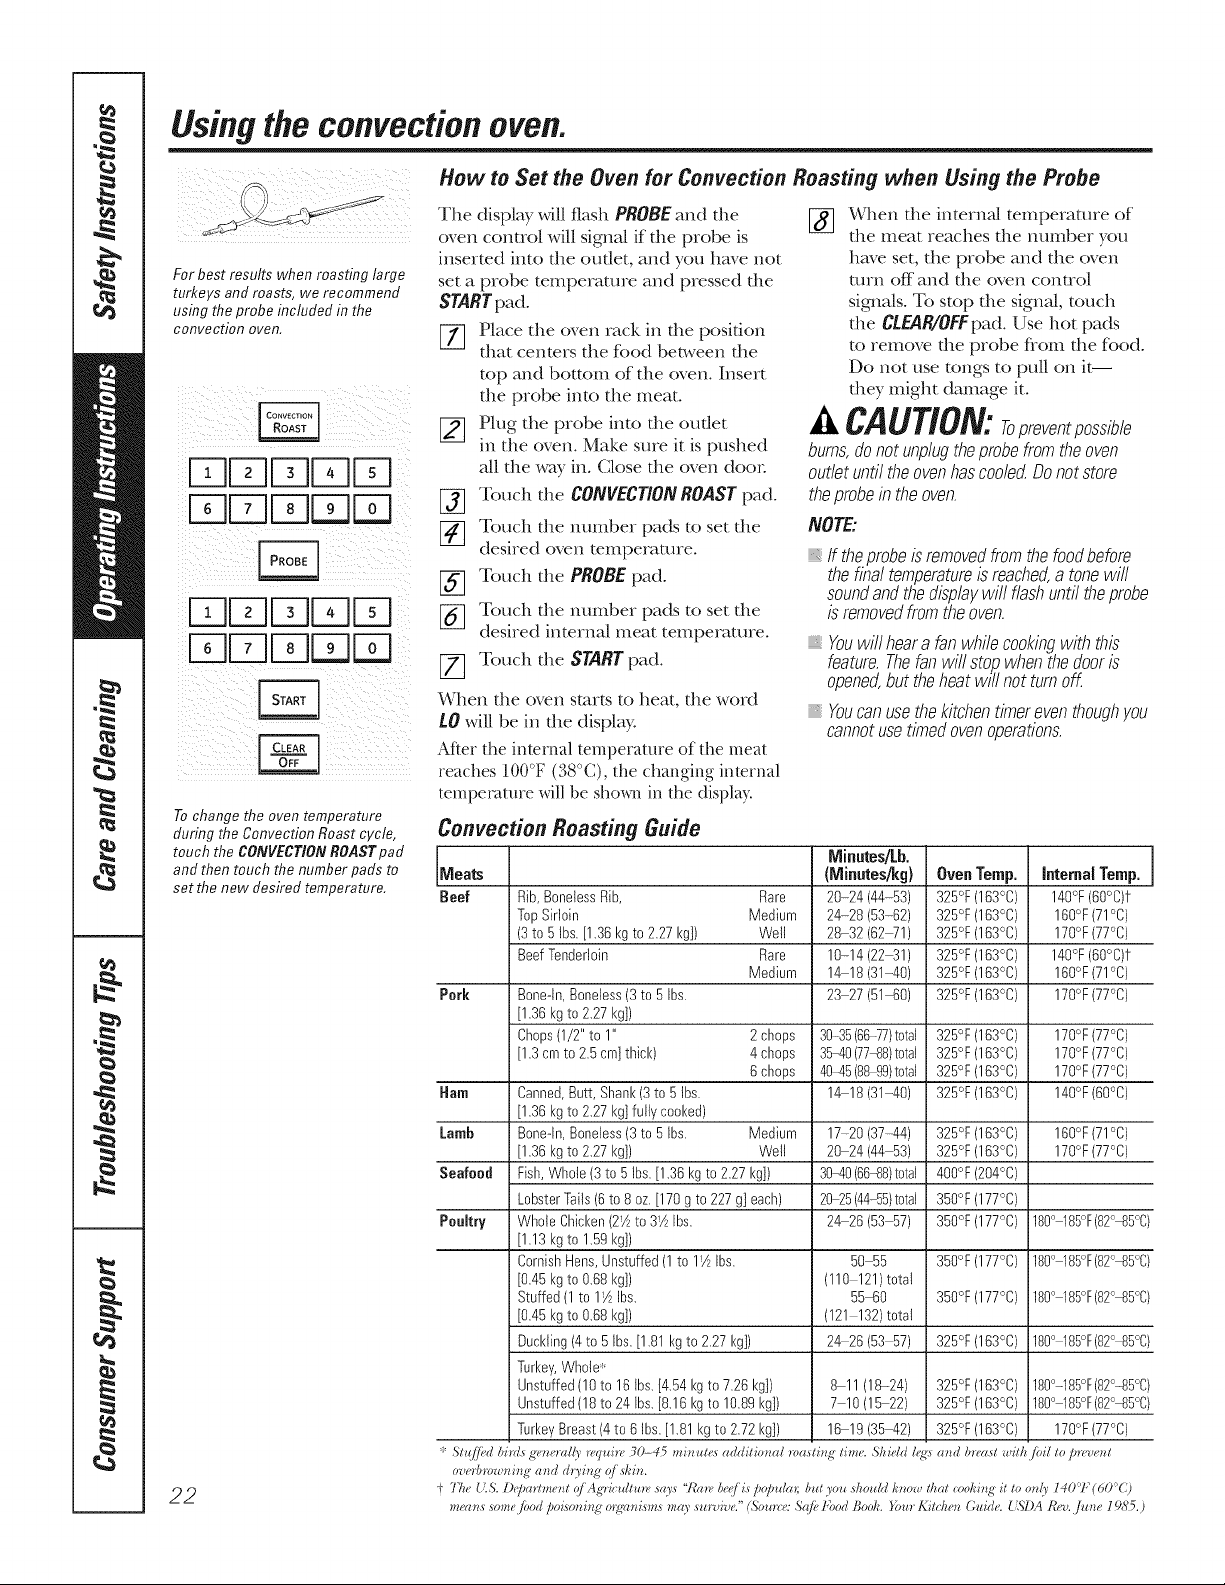
How to Set the Oven for Convection Roasting when Using the Probe
Tile display will flash PROBEand tile [_ _3,qlentlle internal temperature of
oven control will signal if tile probe is tile meat reaches tlle number you
For best results when masting large
turkeys and masts, we recommend
using the probe included in the
convection oven.
F71FqE DF-q
DF71FqFqFq
r71Fq[Z]r-qr-q
DF71DDFa
To change the oven temperature
during the Convection Roast cycle,
touch the CONVECTION ROAST pad
and then touch the number pads to
set the new desired temperature,
inserted into die oudet, and you have not
set a probe temperature and pressed the
STARTpad.
[] Place tile oven rack in tile position
that centers tlle food be_,veen the
top and bottom of tile (wen. Insert
die probe into tile meat.
[_ Plug tile probe into tile oudet
in tlle oven. Make sure it is pushed
all the way in. (_lose tile oven doon
[_ Touch tile CONVECTIONROASTpad.
[_] Touch tile number pads to set tile
desired oven temperature.
[_ Touch tile PROBEpad.
[_ Touch tile number pads to set tlle
desired internal meat temperature.
Touch the STARTpad.
When file oven starts to heat, film word
tO will be in file display.
After the internal temperature of the meat
reaches 100°F (38°C),/he changing interred
/empmvmue will be sho,_ in the display.
Convection Roasting Guide
Meats {Minntes/kg) OvenTemp. InternalTemp.
Beef Bib,BonelessRib, Rare 20-24 (44-63) 325°F(163°C) 140°F(60°C)t
Pork Bone-In,Boneless(3 to 5Ibs. 23 27 (51-60) 325°F(163°C) 170°F(77°C)
Ham Canned,Butt, Shank(3to 5 Ibs. 1_18 (31-40) 325°F(163°C) 140°F(60°C)
Lamb Bone-In,Boneless(3to 5Ibs. Medium 17-20 (37-44) 325°F(163°C) 160°F(71°C)
Seafood Fish,Whole(3 to 5Ibs.[1.36I<gto 227 I<g]) 3040(66-88)total 400°F(204°C)
Poultry Whole Chicken(2_Ato3_AIbs. 2_26 (53 57) 350°F(177°C) 180° 185°F(82°-85°C)
TopSirloin Medium 24-28 (53-62) 325°F(163°C) 160°F(71°C)
(3to 5 Ibs.[1.36kg to2.27kg]) Well 28-32 (62_1) 325°F(163°C) 170°F(77°C)
BeefTenderloin Bare 10-14 (22_1) 325°F(163°C) 140°F(60°C)t
[1.36kgto 2.27kg])
Chops(1/2"to 1" 2 chops 30-35(66-77)total 325°F(163°C) 170°F(77°C)
[1.3cmto 2.5cm]thick) 4 chops 3540 (77-88)total 325°F(163°C) 170°F(77°C)
[1.36I<gto 2.27I<g]fully cooked)
[1.36I<gto 227 I<g]) Well 20 24 (44 53) 325°F(163°C) 170°F(77°C)
LobsterTails(6to 8oz.[170 gto 227g] each) 20_5 (44-55)total 350°F(177°C)
[1.13I<gto 1.59I<g])
CornishHens,Unstuffed(1to lY2Ibs. 50 55 350°F(177°C) 180° 185°F(82°-85°C)
[0.45I<gto 0.68I<g]) (110 121)total
Stuffed (1to 11AIbs. 55-60 350°F(177°C) 180° 185°F(82°-85°C)
[0.45I<gto 0.68I<g]) (121 132)total
Duckling(4to 5 Ibs.[1.81I<gto 227 I<g]) 2_26 (53 57) 325°F(163°C) 180° 185°F(82°-85°C)
Turkey,Whole_
Unstuffed(10 to 16lbs.[4£4 I<gto 726 I<g]) 8-11 (18-24) 325°F(163°C) 180°-185°F(82°-85°C}
Unstuffed(18 to 24 Ibs.[8.16 I<gto 10.89I<g]) 7 10(15-22) 325°F(163°C) 180° 185°F(82°-85°C)
TurkeyBreast(4to 6 Ibs.[1.81I<gto 2.72I<g]) 16 19(35_42) 325°F(163°C) 170°F(77°C)
have set, the probe and the oven
mrn off and die oven conUol
sigma/s. To stop tile signal, touch
tile CLEAR/OFFpad. Use hot pads
to remove tile probe from tile food.
Do not use tongs to pull on it--
they might damage it.
a,CAUTION:To
burns,donot unplugtheprobefromtheoven
outletuntiltheovenhascoolecZDonotstore
theprobein theoven.
NOTE:
iii}iil;ii;,
If theprobeisremovedfromthefoodbefore
thefinal temperatureisreached,a tonewill
soundandthedisplaywill flashuntiltheprobe
isremovedfromtheoven.
iiiiiiiiii:,
Youwill heara fanwhilecookingwith this
feature.Thefanwillstopwhenthedooris
opened,but theheatwillnotturnoK
iii}i}}ii_
Youcanusethekitchentimereventhoughyou
cannotusetimedovenoperations.
Minutes/Lb.
Medium 1_18 (31-40) 325°F(163°C) 160°F(71°C)
6 chops 4045(88@9)total 325°F(163°C) 170°F(77°C)
22
Usingtheproofingand warming features. CEApplia,cos.com
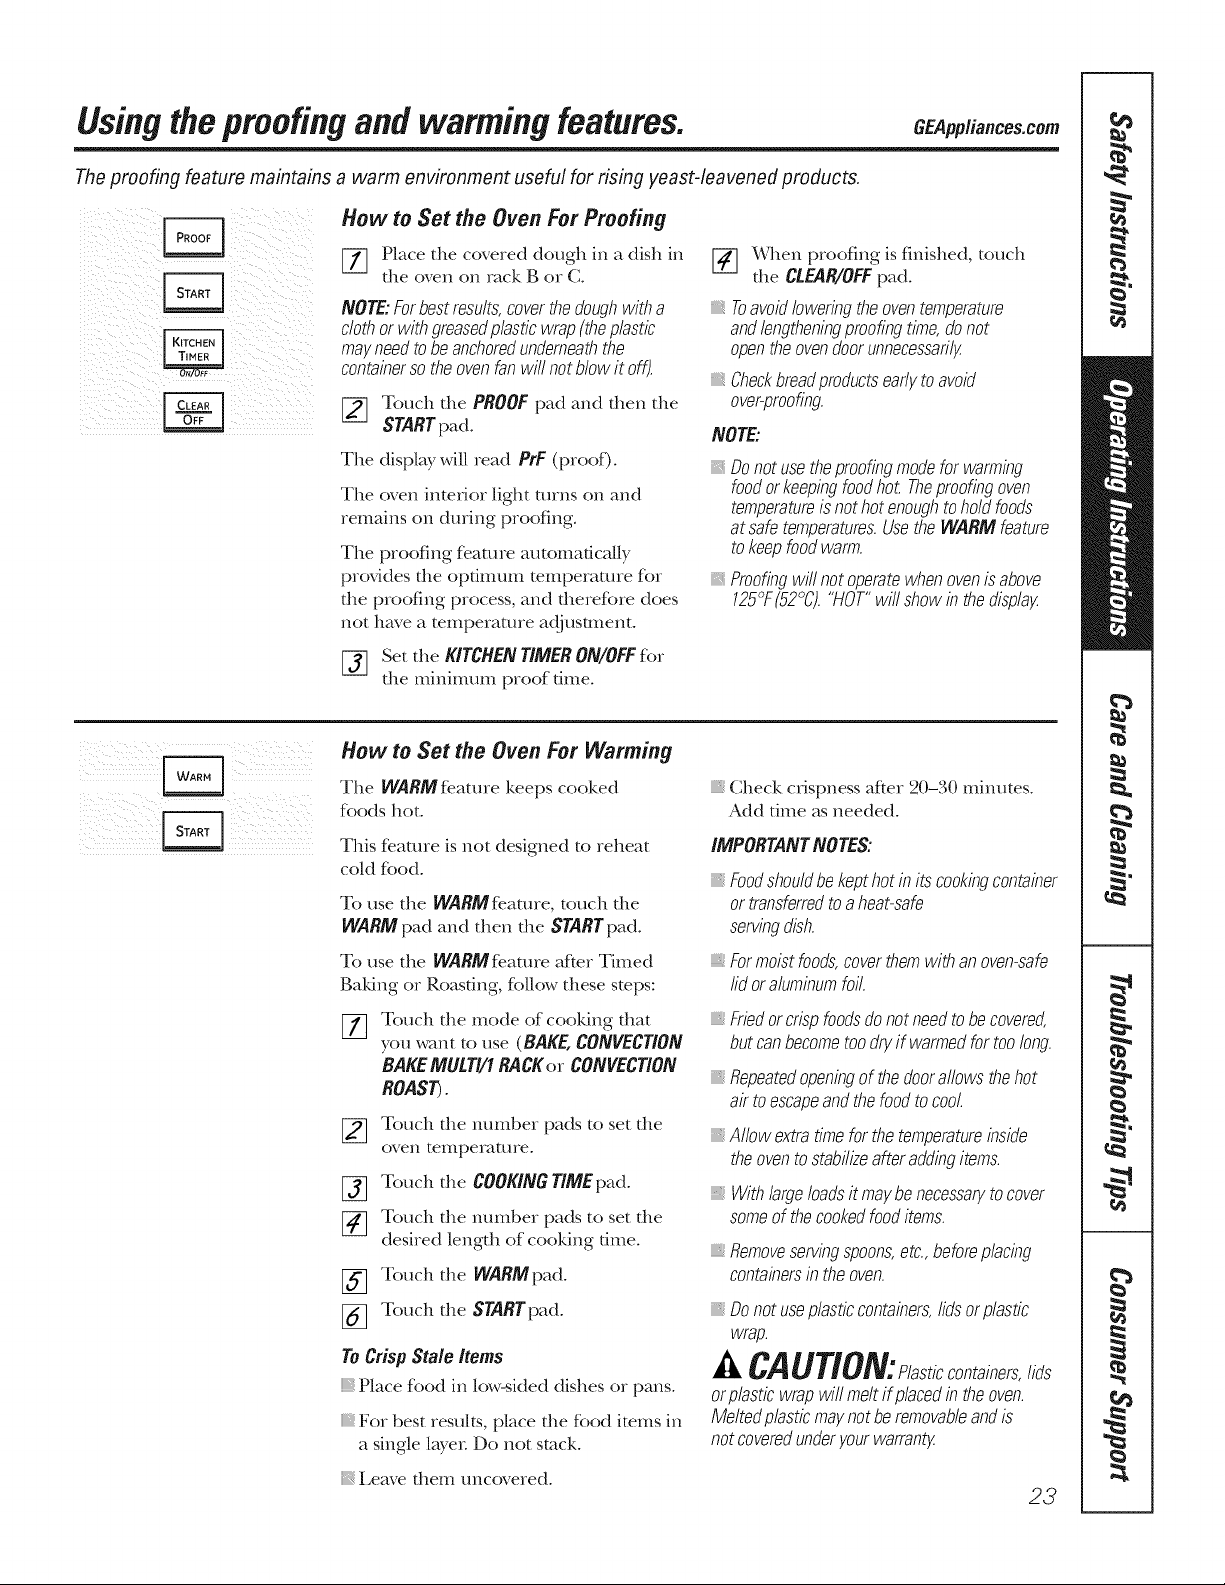
Theproofing feature maintains a warm environment useful for rising yeast-leavened products,
How to Set the Oven For Proofing
[77 Place the covered dough in a dish in
the oven on rack B or C.
NOTE:Forbestresults,coverthedoughwitha
clothorwithgroasedplasticwrap(theplastic
mayneedtobeanchoredunderneaththe
containersotheovenfanwill notblowit off).
[_ Touch the PROOFpad and then the
STARTpad.
Tile display will read PrF (proof)°
The (wen inm_Jor light rams on and
remmns on during proofing.
The proofing feature automadcNly
provides the optimum mmperamre for
the proofing process, and therefore does
not have a mmperamre adjustment.
Set the KITCHENTIMERON/OFFR_r
the minimum proof time.
How to Set the Oven For Warming
The WARMfe.ature keeps cooked
foods hot.
This feature is not designed to reheat
cold food.
To use the WARMfeamre, touch tile
WARM pad and then the STARTpad.
To use the WARM feature after Timed
Baldng or Roasdng, follow these stops:
[77 Touch tile mode of cooldng that
you w_ultto use (BAKE,CONVECTION
BAKEMUtTI/1RACKor CONVECTION
ROAST_.
[_ Touch tile mmlber pads to set tile
(wen temperature°
[_ Touch the COOKINGTIMEpad.
[_ Touch tile number pads to set the
desired length of cooldng time°
[_ Touch the WARMpad.
[_ Touch the STARTpad.
ToCrisp Stale/toms
Place fbod in low-sided dishes or pans°
For best results, place tile food imms in
a single layer: Do not stuck.
Leave them uncovered°
[_ When proofing is finished, touch
the CLEAR/0FF pad.
Toavoidloweringtheoventemperature
andlengtheningproofingtin)e,donot
opentheovendoorunnecessarily
Checkbroadproductsearlytoavoid
over-proofing.
NOTE:
Donotusetheproofingmodeforwarming
foodorkeepingfoodho£Theproofingoven
temperatureis nothotenoughtoholdfoods
atsafetemperaturos.UsetheWARMfeature
tokeepfoodwarn).
Proofingwill notoperatewhenovenisabove
125°F(52°C)."HOT"willshowin thedisplag
Check crispness after 20-30 minutes.
Add time as needed.
iMPORTANTNOTES:
iiiiiil;ii;,
Foodshouldbekepthot initscookingcontainer
ortransferredtoaheat-safe
servingdish.
Formoistfoods,coverthemwithanoven-safe
lidoraluminumfoil.
Friedorcrispfoodsdonotneedtobecovered,
butcanbecometoodryif warmedfortoolong.
Repeatedopeningof thedoorallowsthehot
air toescapeandthefoodtocool.
Allowextratimeforthe temperatureinside
theoventostabilizeafteraddingitems.
Withlargeloadsitmaybenecessaryto cover
someof thecookedfooditems.
Removeservingspoons,etc., beforeplacing
containersin the oven.
Donot useplasticcontainers,lidsorplastic
wrap.
CAUTiON:Plast,ccontainers,lids
orplasticwrapwillmeltif placodin theoven.
Meltedplasticmaynotberemovableandis
notcoveredunderyourwarranty.
23
Adjustthe oventhermostat--Do it yourself!
Youmay find that your new oven cooks differently than the oneit replaced. Use your new oven for a few weeks to
become more familiar with it. If you stiff think your new oven is too hot or too cold, you can adjust the thermostat
yourself.
Do not use thermometers, such as those found in grocery stores, to check the temperature setting of your oven.
These thermometers may vary 20-40 degrees F(11-22 degrees C).
NOTE: This adjustment will only affect baking and roasting temperatures; it will not affect broiling or self-cleaning
temperatures. The adjustment will be retained in memory after a power failure.
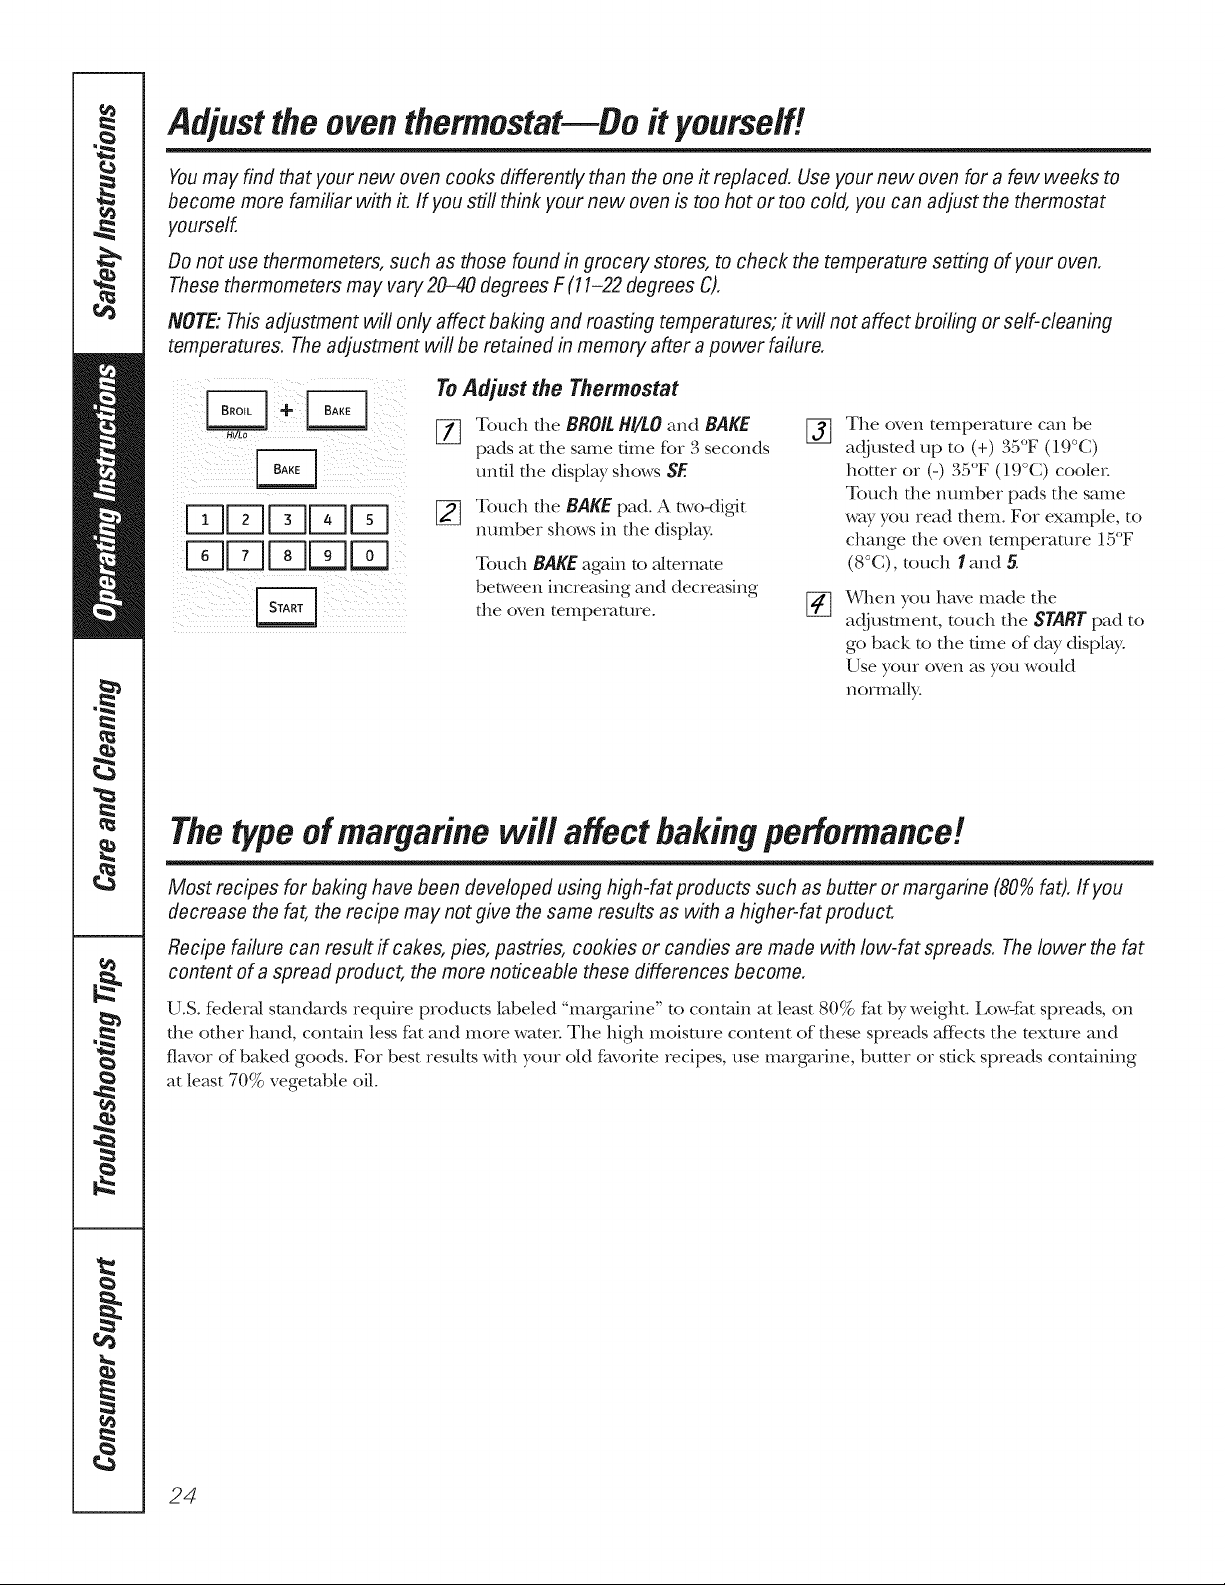
ToAdjust the Thermostat
The oven temperature can be
adjusted up to (+) 3a F (l. C)
hotter or (-) 35°F (19°C) cooler
Touch the number pads tile same
way you read them. For example, to
change the oven mmpemmre 15°F
(8°C), touch land 5.
When you have made tile
adj usunent, touch tile START pad to
go back to tile dine of day disphy.
Use your oven as you woukt
normally:
5]DFqF-qD
E DFqF;q
[_ Touch tile BROILHI/tO and BAKE []
pads at tile same time for 3 seconds
until tile disphy shows SE
[_ Touch tile BAKE pad. A two-digit
number shows in tile display°
Touch BAKE again to alternate
between increasing and decreasing
tile oven temperature° []
Thetypeofmargarinewi/! affectbakingperformance!
Most recipes for baking have been developed using high-fat products such as butter or mamarine (80% fat). If you
decrease the fat, the recipe may not give the same results as with a higher-fat product
Recipe failure can result if cakes, pies, pastries, cookies or candies are made with low-fat spreads. The lower the fat
content of a spread product, the more noticeable these differences become.
U.S. federal standards require products labeled "margarine" to contain at least 80% flit by weight. Low-flit spreads, on
the other band, comain less flit and more water Tile high moistme content of these spreads affects tile texture and
flavor of baked goods. For best results with your old fi_vofim recipes, use margarine, butter or stick spreads containing
at least 70% vegetable oil.
24
Usingtheself-cleaning oven. aapp.a,ce com
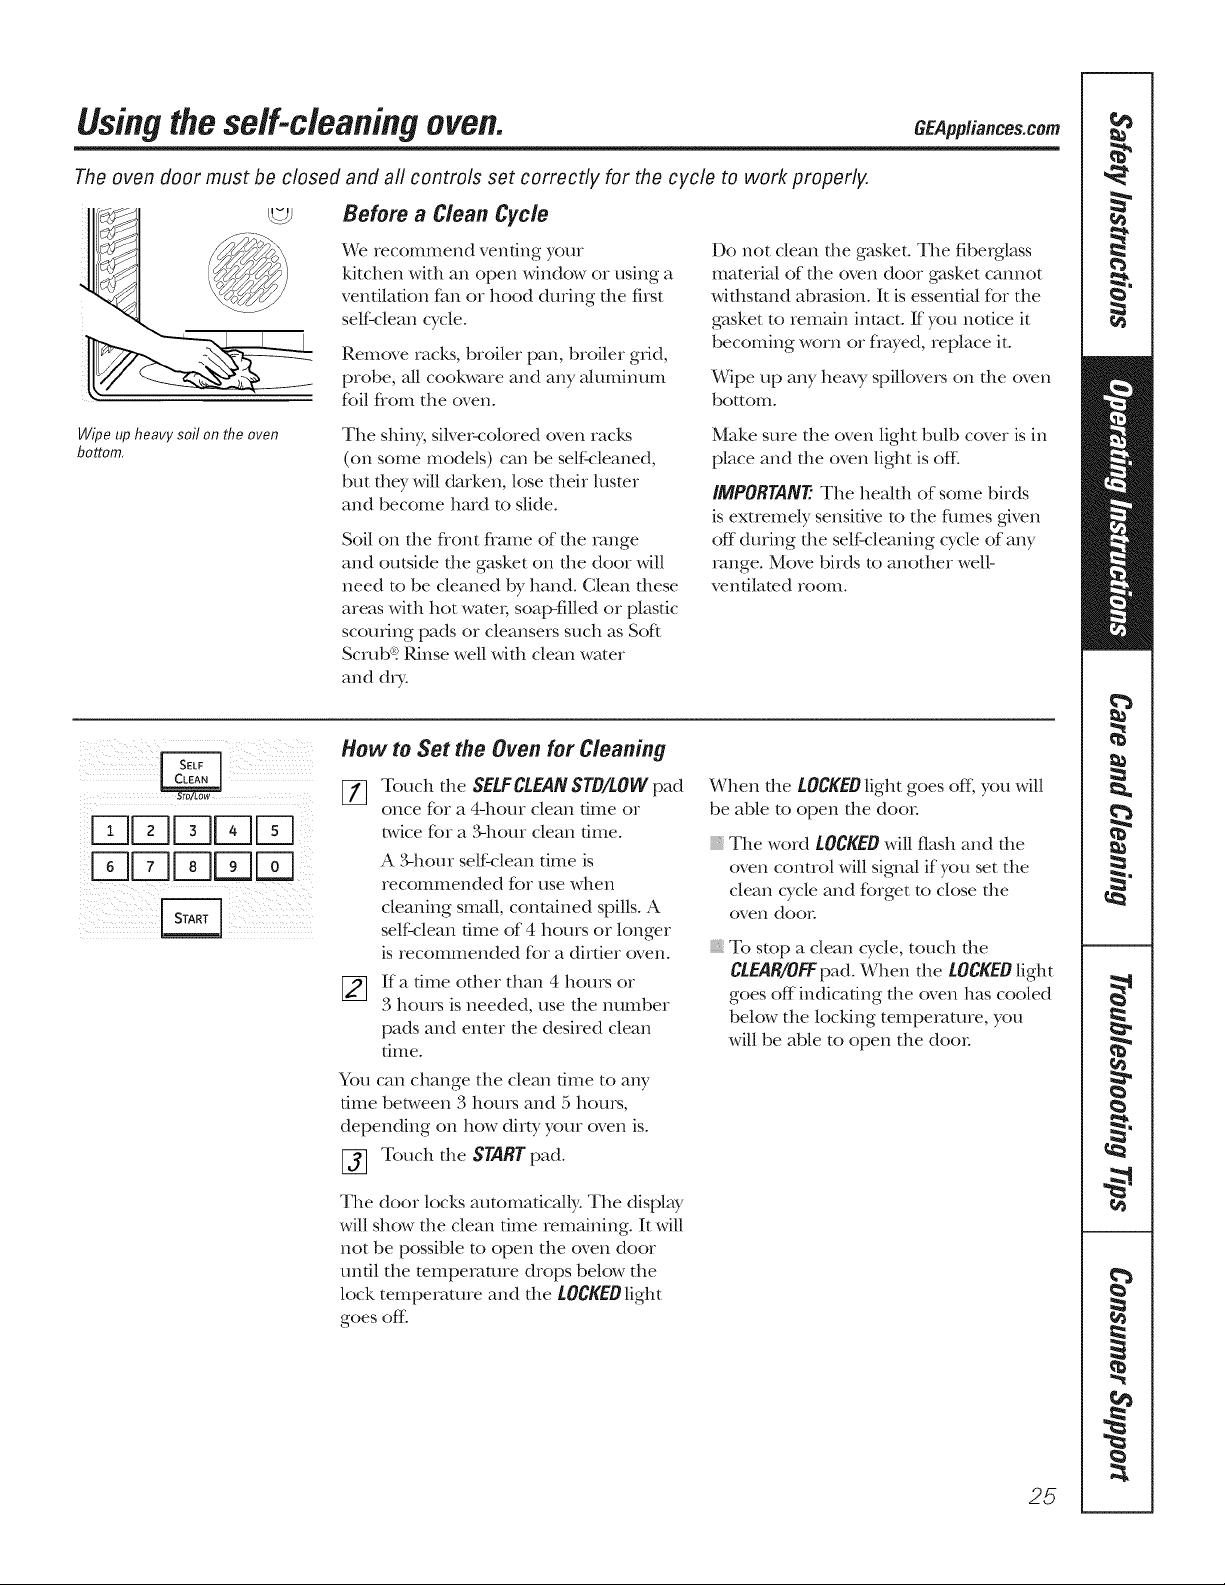
The oven door must be closed
Wipe up heavy soil on the oven
bottom,
and all controls set correctly for the cycle to work properly,
Before a Clean Cycle
We recommend venting your
ldtchen wifll an open window or using a
ventilation tim or hood during the first
self'clean cycle.
Remove racks, broiler pan, broiler grid,
probe, all cookware and any aluminum
fbil flom the oven.
The shiny, siNe>colored oven racks
(on some models) can be selfkTleaned,
but they will darl<en, lose their lusmr
and become hard to slide.
Soil on die flont flame of file range
and outside file gasket on file door will
need to be cleaned by hand. Clean these
areas with hot wam_; soal>filled or plastic
scouting pads or cleansers such as Soft
Scrub? Rinse well with clean water
and d_T
Do not clean die gasket. The fiberglass
material of die oven door gasket cannot
withstand abnksion. It is essential for the
gasket to remain intact. If you nodce it
becoming worn or flwed, replace it.
Wipe up any hem T spillove,_ on the oven
bottom.
Make sure the oven light bulb cover is in
place and the oven light is (fie
IMPORTANT: The health of some birds
is extremely sensitive to the flmles given
off dming the self:cleaning cycle of any
range. Move birds to another well-
vendlamd room.
How to Set the Oven for Cleaning
i i;;;;_ iii _i
iiDDMm[-71 :
i;DU-1U-IDFcq
i _i i i _ _i_ii ii
[77 Touch the SELFCLEAN STD/LOW pad
once for a 4-hour clean time or
twice for a ,_hour clean dlIle.
A ._ghotn" self clean dine is
recommended for use when
cleaning small, contained spills. A
self clean fillle of 4 hours or longer
is recommended for a dirtier oven.
If a time other than 4 hom_ or
3 hom_ is needed, use the number
pads and enter the desired clean
[ilIle.
You can change the clean time to any
time between 3 hom_ and 5 hom_,
depending on how dirty your oven is.
[_ Touch the STARTpad.
The door locks automatically: The display
will show tlle clean dine remaining. It will
not be possible to open the oven door
until the mmpemmre drops below the
lock temperature and the LOCKEDlight
goes ore
When the LOCKEDlight goes ofI; you will
be able to open the door
The word LOCKEDwill flash and die
oven conuol will signal if you sd file
clean cycle and forget to close file
oven door
To stop a clean cycle, touch file
CLEAR/OFFpad. When die LOCKEDlight
goes off indicating the oven has cooled
below the locking temperature, you
will be able to open the door
25
Usingtheself-cleaning oven.
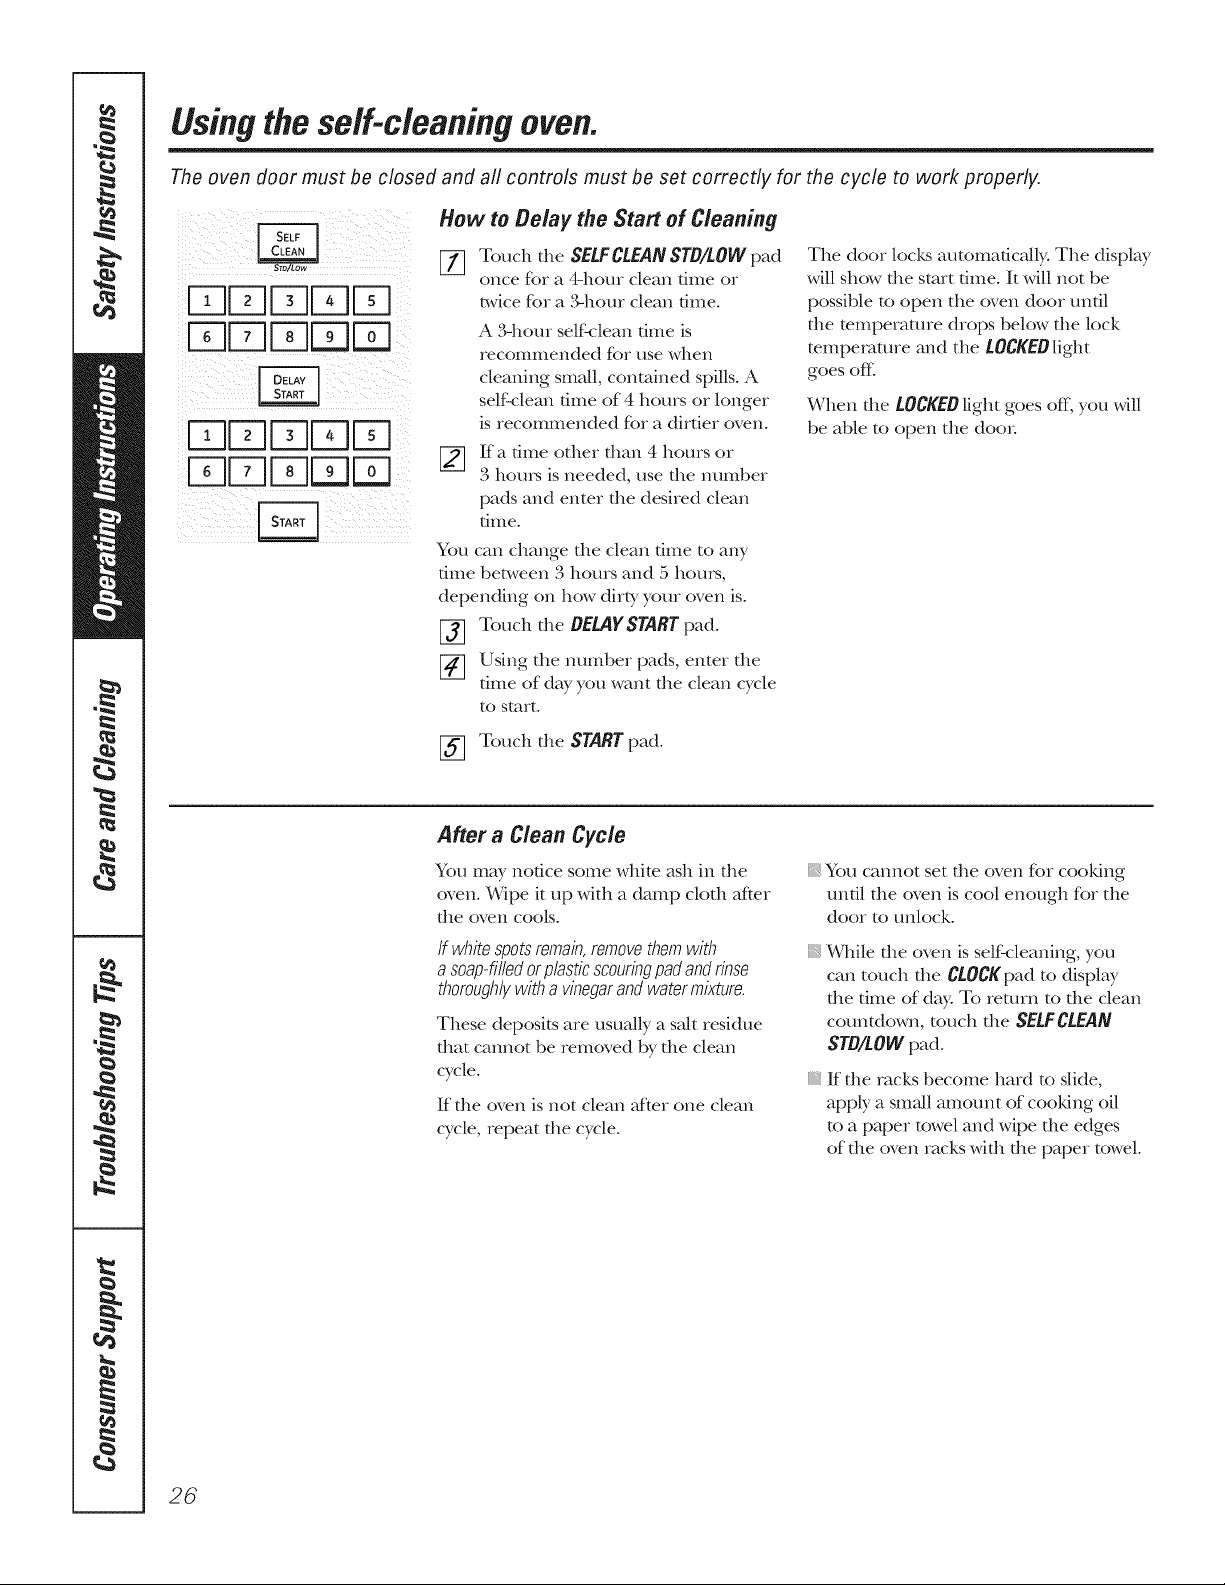
The oven door must be closed and aft controls must be set correctly for the cycle to work proper/y,
How to Belay the Start of Cleaning
iiFqFqu]U]Fq
iF;qFq[ K35q :?
ii!i
[_ Touch the SELFCLEANSTD/LOW pad
once for a 4-hour clean dine or
h,vice for a ,_hom clean time.
A 3qlour selfkflean dine is
recommended for use when
cleaning small, contained spills. A
self'clean dine of 4 hours or longer
is recommended Kw a dirtier oven.
If a time other than 4 hours or
[]
3 hom_ is needed, use the number
pads and enter the desired clean
{ilIle.
You can change the clean time to any
time between 3 hours and 5 hom_,
depending on how dirty your oven is.
[-_ Touch the DELAYSTARTpad.
[_] Using the number pads, enter the
time of day you want the clean cycle
to start.
[_] Touch the STARTpad.
After a Clean Cycle
The door locks automadcNly: The display
will show the start time. It will not be
possible to open the oven door until
the temperature drops below the lock
mmpemmre and the LOCKEOlight
goes ore
When the LOCKEDlight goes off, you will
be able to open the doo_:
You may notice some white ash in the
oven. Wipe it up with a damp cloth after
the oven cools.
If whitespotsremain,removethemwith
a soap-filledorplasticscouringpadandrinse
thoroughlywitha vinegarandwatermixture.
These deposits are usually a salt residue
that cannot be removed by the clean
cycle.
If the oven is not clean alter one clean
cycle, repeat the cycle.
}_You cannot set the oven for cooldng
until the oven is cool enough for the
door to unlock.
While die oven is self cleaning, you
can touch the CLOCKpad to display
the time of day. To return to the clean
countdown, touch the SELFCLEAN
STD/LOW pad.
If die racks become hard to slide,
apply a small amount of cooldng oil
to a paper towel and wipe the edges
of the oven racks with the paper towel.
26
Special featuresofyour ovencontrol. CEA,plia,ce_.com
Yournew touch pad control has additional features that you may choose to use. Thefoflowing are the features
and how you may activate them.
Thespecial feature modes can only be activated while the display is showing the time of day. Theyremain
in the control's memory until the steps are repeated.
When the display shows your choice, touch the $TARTpad. Thespecial features will remain in memory after
a power failure, except for the Sabbath feature, which will have to be reset.
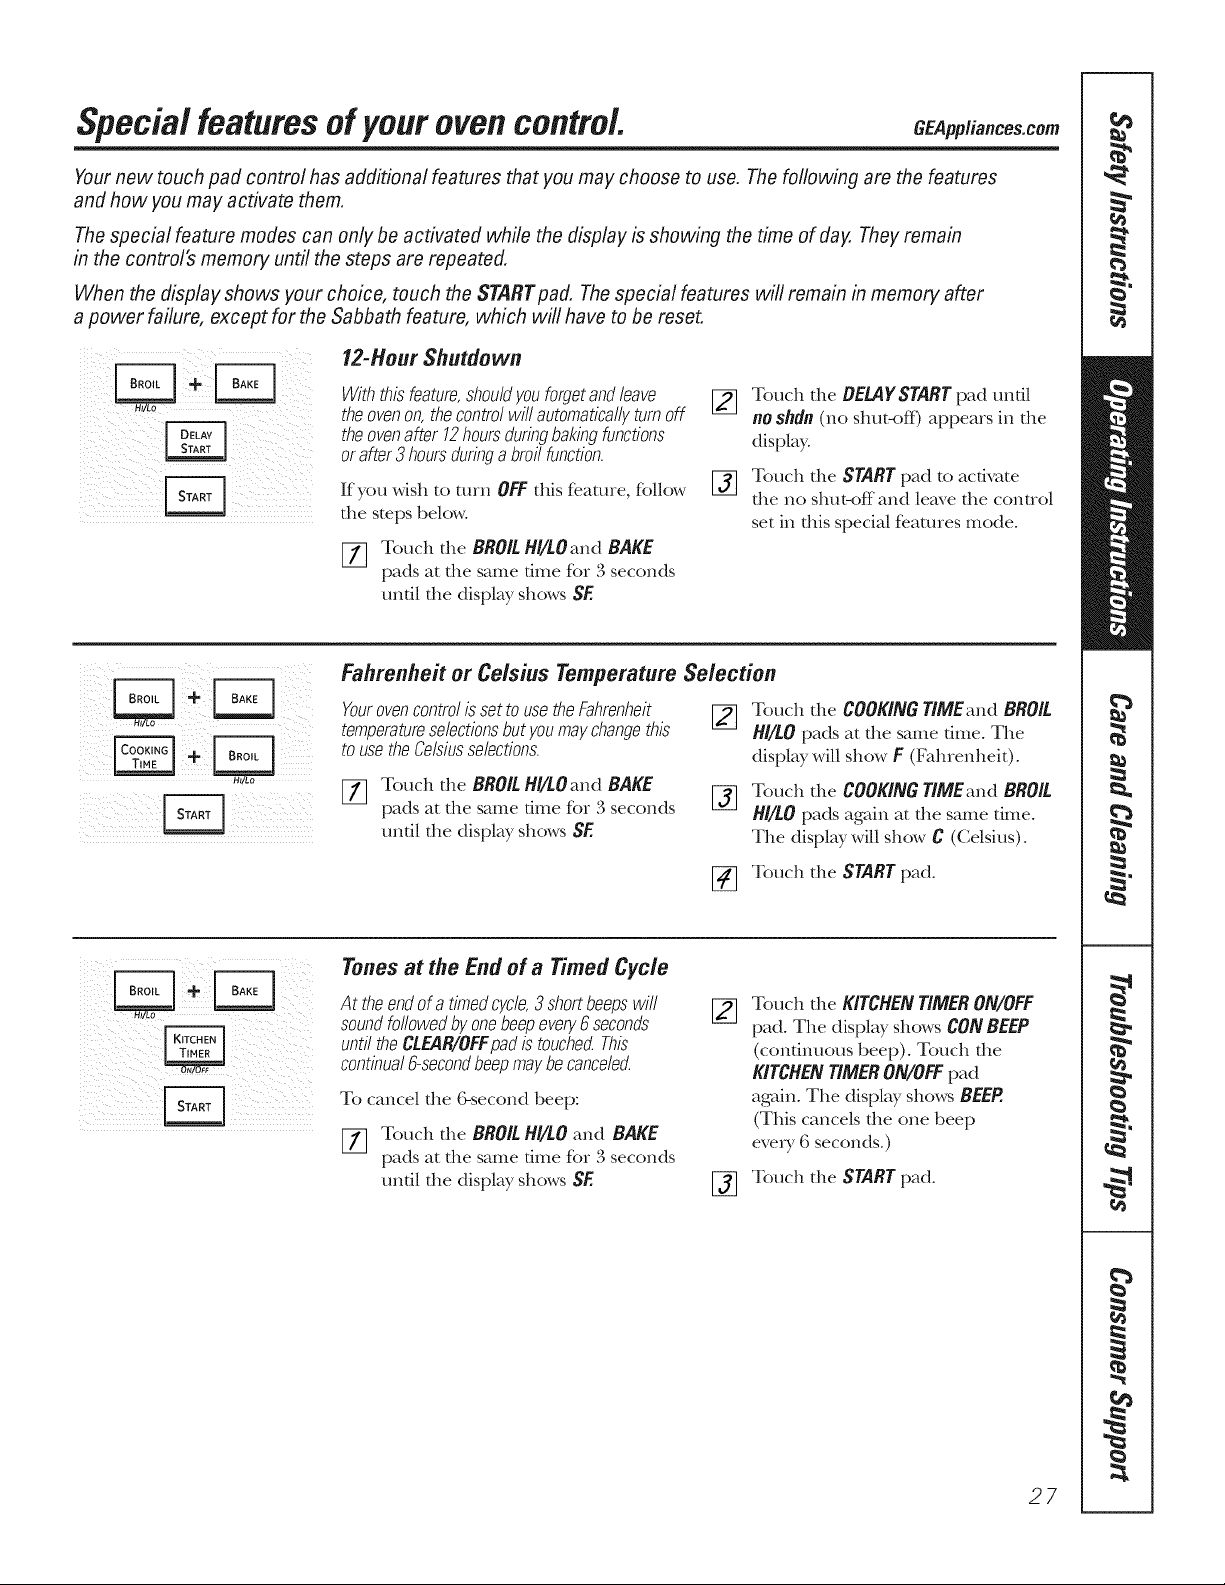
12-Hour Shutdown
ii !
/_i_i _,_ i i _ i_i_
! i )il¸ _ !i¸i
Hi Lo
E_
i_iii_iiiill_i_i_;i!ii_,ii_ii_!iiiii_i!iii_!_i!_
i i i
Withthisfeature,shouldyouforgetandleave
theovenon,thecontrolwillautomaticallyturnoff
theovenafter 12hoursduringbakingfunctions
orafter3 hoursduringa broilfunction.
If you wish to mrn OFF this reaLme, fbllow
the steps below.
[77 Touch the BROIL H//tOand BAKE
pads at the same time for 3 seconds
until the display shows SF.
Fahrenheit or Celsius Temperature Selection
Yourovencontrolis setto usetheFahrenheit
temperatureselectionsbutyoumaychangethis
tousetheCelsiusselections.
[77 Touch the BROIL H//tOand BAKE
pads at the same time for 3 seconds
until the display shows SE
Tones at the End of a Timed Cycle
At theendofa timedcycle,3shortbeepswill
soundfollowedby onebeepevery6 seconds
untiltheCL£4R/OFFpadistouchec_This
continual6-secondbeepmaybecanceled.
To cancel the (bsecond beep:
[77 Touch the BROIL Hi/tO and BAKE
pads at the same time for 3 seconds
until the display shows SE
_q
%
_q
%
[_ Touch the START pad.
[_ Touch the START pad.
Touch the BELAYSTART pad undl
noshdn (no shut<_ff) appears in the
display°
Touch the START pad to acdvate
the no shut-off and leave the control
set in this special fe.amres mode.
Touch the COOKING TIMEand BROIL
/'///tO pads at the same dine. The
display will show F (Fahrenheit)°
Touch the COOKING T/MEand BROIL
H//LO pads again at the same time.
The display will show C (Celsius)°
Touch the KITCHEN TIMER ON/OFF
pad. The display shows CONBEEP
(continuous beep) oTouch the
KITCHEN TIMER ON/OFF pad
again. The display shows BEEP.
(This cancels the one beep
every 6 seconds.)
27
Special features of your oven control
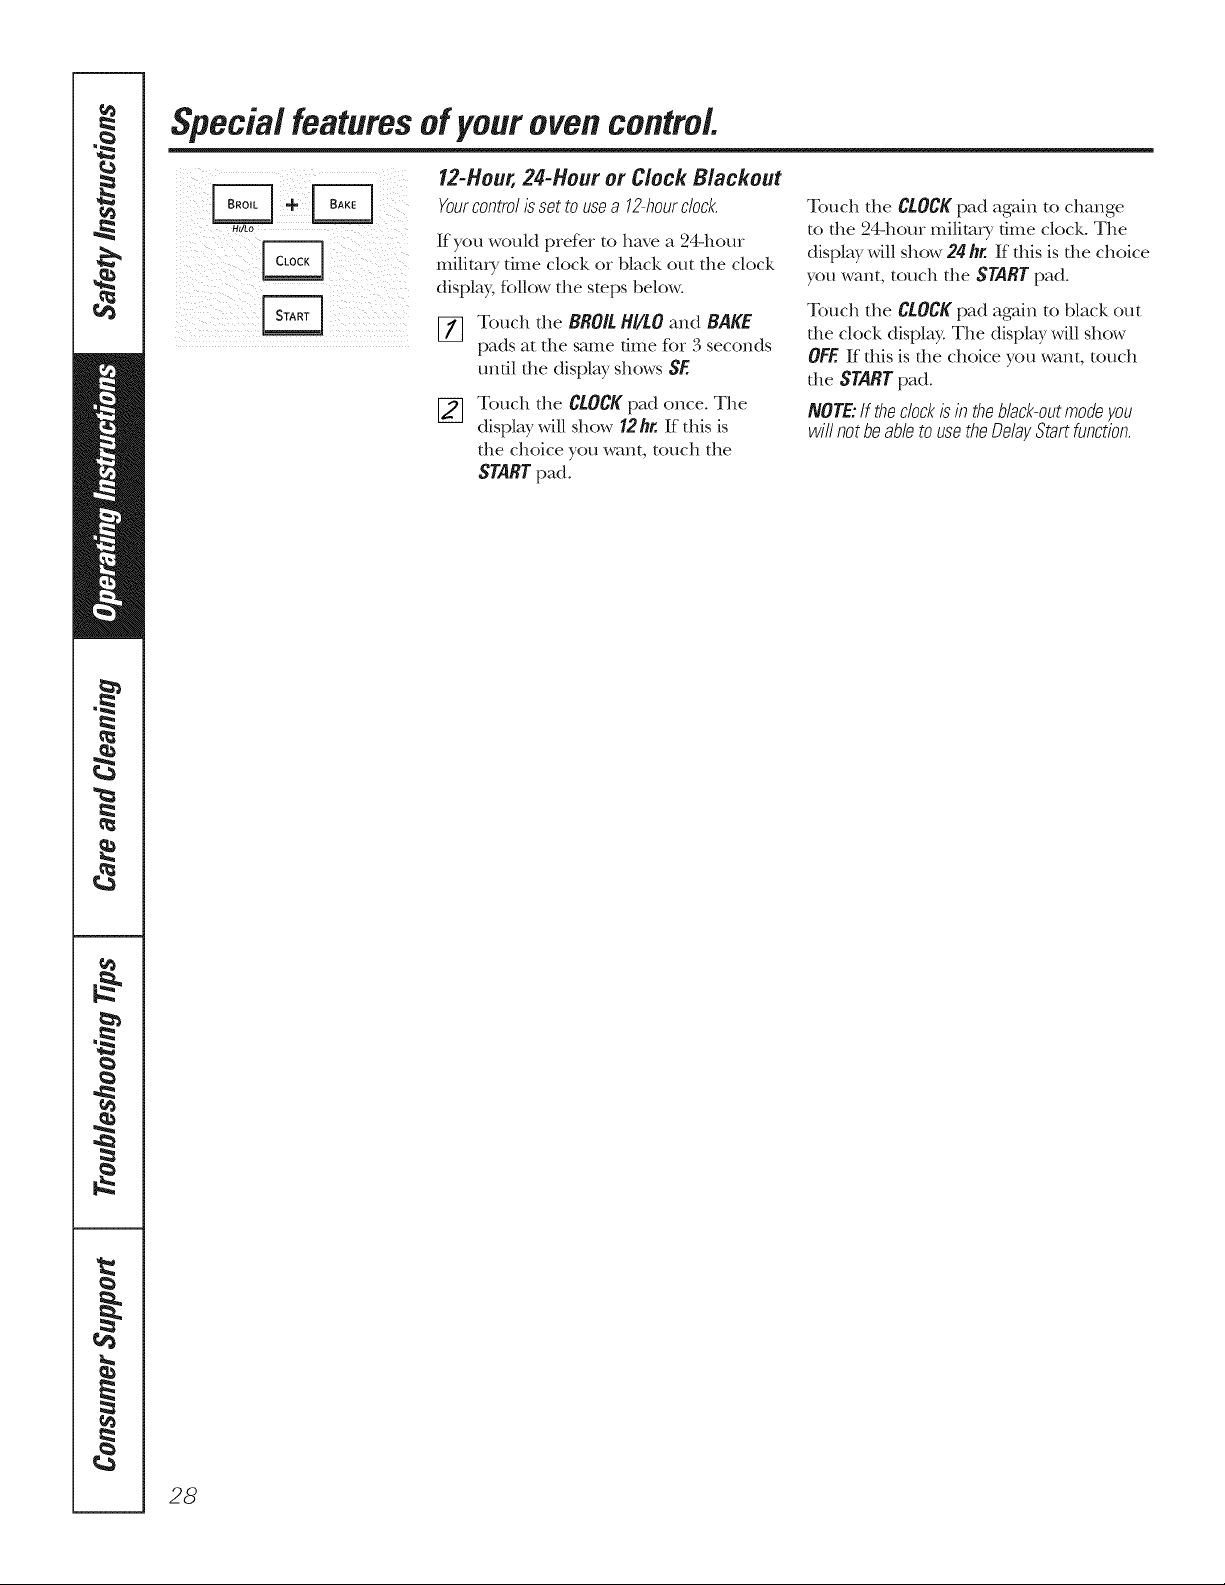
12-Hour,24-Hour or Clock Blackout
Yourcontro/isset to usea 12-hourdock,
m/Lo
If you wouM prefer to have a 24-hour
military dine clock or black ()tit tile clock
display, R)llow tile steps below°
[] Touch the BROIL H//LO and BAKE
pads at the same time for ,'3seconds
until tile display shows SE
Touch tile C!.OCK pad once. The
display will show 12 h_ If this is
tile choice you want, touch tile
STARTpad.
Touch tile CLOCK pad again to change
to file 24-hour milimi y time clock. The
display will show 24 hr. If this is tile choice
you want, touch file START pad.
Touch tile Ci-OCK pad again to black ()tit
die clock display. Tile display will show
OFF.If this is the choice you want, touch
file START pad.
NOTE:If theclockis in theblack-out modeyou
wifl notbe able to usethe DelayStart function.
28
MULTJII RACK
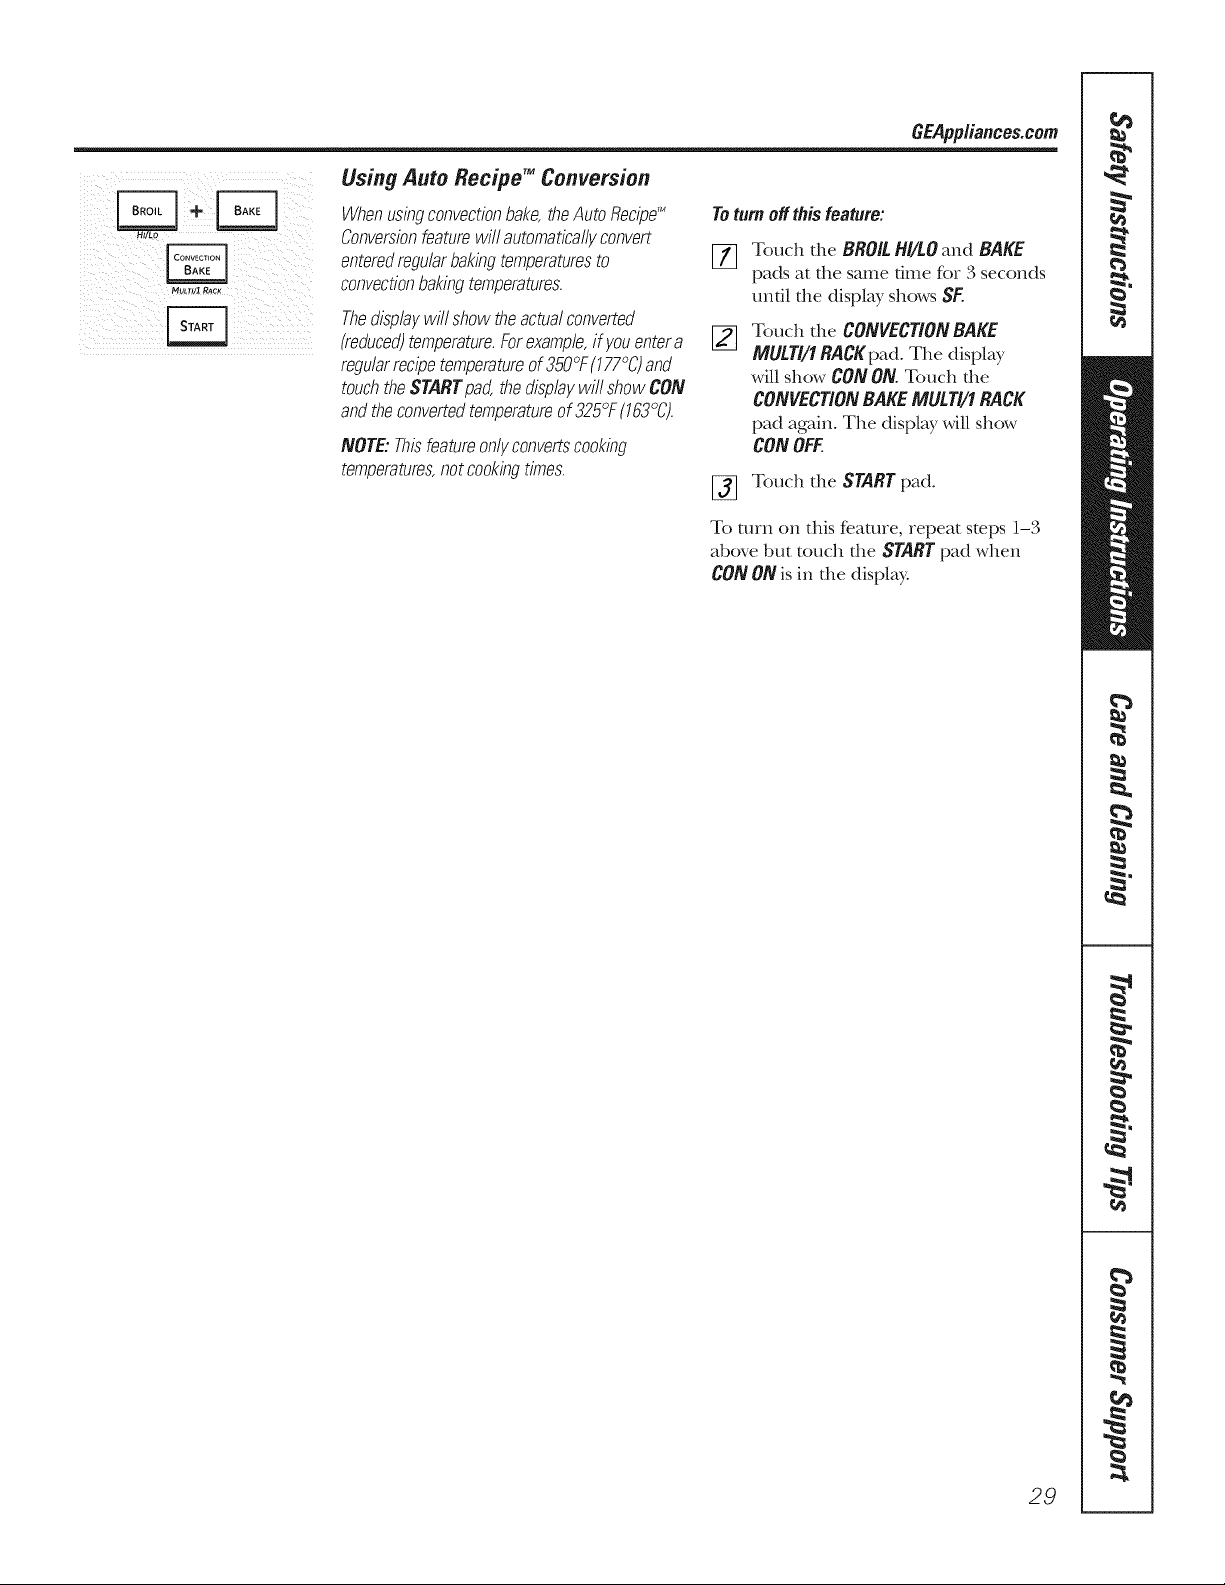
Using Auto RecipeTM Conversion
Whenusingconvectionbake,theAutoRecipe'_
Conversionfeaturewillautomaticallyconvert
enteredregularbakingtemperaturesto
convectionbakingtemperatures.
Thedisplaywill showtheactualconverted
(reduced)temperature.Forexample,if youentera
regularrecipetemperatureof350°F(177°C)and
touchtheSTARTpad,thedisplaywillshowCON
andtheconvertedtemperatureof 325°F(163°C).
NOTE:Thisfeatureonlyconvertscooking
temperatures,notcookingtimes.
GEApp/iances.com
Toturn off thisfeature:
Touch tile BROILH//LOand BAKE
[]
pads at tile same time for 3 seconds
until tile display shows SF.
Touch tile CONVECTIONBAKE
MULTI/1RACKpad. Tile display
will show CONON. Touch die
CONVECTIONBAKEMULTI/fRACK
pad agahl. Tile display will show
CONOFF.
Touch tile START pad.
To turn on this feature, repeat steps 1l-3
above but touch tile STARTpad when
CON ON is ill tile display.
29
 Loading...