

GE GDT580 Series, GDF570 Series, DDT575 Series, GDT720 Series, GDT740 Series Owner's Manual
...
GEAppliances.com
Safety Instructions ............. 2-3
Operating Instructions
Care and Cleaning .............. 22, 23
Getting Started ..................... 4-7
Loading the Dishwasher .......... 10-21
Using the Dishwasher ...............8-9
Owner’s Manual
Dishwashers
CDT 725-765 Series
DDT 575 Series
GDF 570 Series
GDT 580-740 Series
PDT 750-760 Series
Troubleshooting Tips ......... 24-26
Consumer Support
Consumer Support ...........Back Cover
Warranty ............................27
Lave-vaisselle
Manuel d’utilisation
La section française commence à la page 33
Lavaplatos
Manual del propietario
La sección en español empieza en la página 65
Write the model and serial
numbers here:
Model # _________________
Serial # __________________
You can find them on the tub wall,
just inside the door.
Dishwashers
Printed in the United States
FRONT CONTROL MODELS TOP CONTROL MODELS
49-55085-2 09-13 GE
IMPORTANT SAFETY INFORMATION
5($'$//,16758&7,216%()25(86,1*³
SAVE THESE INSTRUCTIONS
WARNING!
For your safety, the information in this manual must be followed to minimize the risk of fire,
explosion, electric shock, and to prevent property damage, personal injury, or death.
WARNING!
Under certain conditions, hy drogen gas may be produced in a water heater that has not been used for two or more
weeks. HYDROGEN GAS IS EXPLOSIVE.
If the hot water has not been used for two or more weeks, prevent the possibility of damage or injury by turning
on all hot water faucets and allowing them to run for several minutes. Do this before using any electrical appliance
connected to the hot water system. This simple procedure will allow any built-up hydrogen gas to escape. Since
the gas is flammable, do not smoke, use an open flame, or use the appliance during this process.
WATER HEATER SAFETY
When using your dishwasher, follow basic precautions,
WARNING!
Use this appliance only for its intended purpose
as described in this Owner’s Manual.
Do not operate your dishwasher unless all enclosure
panels are properly in place.
Do not store or use combustible materials including
gasoline or other flammable liquids or vapors in the
vicinity of this or any other appliance.
WARNING!
This dishwasher must be properly installed and located in accordance with the Installation Instructions before
it is used. If you did not receive an Installation Instructions sheet with your dishwasher, you can receive one
by visiting our Website at GEAppliances.com. In Canada, visit www.GEAppliances.ca.
Connect the dishwasher/appliance to a grounded
metal, permanent wiring sy stem; or run an equipmentgrounding conductor with the circuit conductors and
connect to the equipment-grounding terminal or lead
of the appliance.
Improper connection of the equipment-grounding
conductor can result in a risk of electric shock. Check
with a qualified electrician or service representative
if you are in doubt whether the appliance is properly
grounded.
Dispose of discarded appliances and shipping
or packing material properly .
including the following:
Do not abuse, sit on, hang from, or stand on the door
or dish rack of the dishwasher.
Do not tamper with controls.
Do not wash plastic items unless marked dishwasher
safe or the equivalent. For plastic items not so marked,
check the manufacturer’s recommendations.
PROPER INSTALLATION AND MAINTENANCE
Do not attempt to repair or replace any part
of your dishwasher unless it is specifically
recommended in this manual. All other servicing
should be referred to a qualified technician.
To minimize the possibility of electric shock,
disconnect this appliance from the power supply
before attempting any maintenance.
NOTE: Turning the dishwasher off does not disconnect
the appliance from the power supply . We recommend
having a qualified technician service y our appliance.
2
IMPORTANT SAFETY INFORMATION
5($'$//,16758&7,216%()25(86,1*³
SAVE THESE INSTRUCTIONS
WARNING! RISK OF CHILD ENTRAPMENT
Do not allow children to play with, on, or inside this appliance at any time.
PROPER DISPOSAL OF THE DISHWASHER
Junked or abandoned dishwashers are dangerous…even if they will sit for “just a
few days.” If you are getting rid of your dishwasher, please follow the instructions
below to help prevent accidents.
Do not allow children to play with, on, or inside this or any discarded appliance.
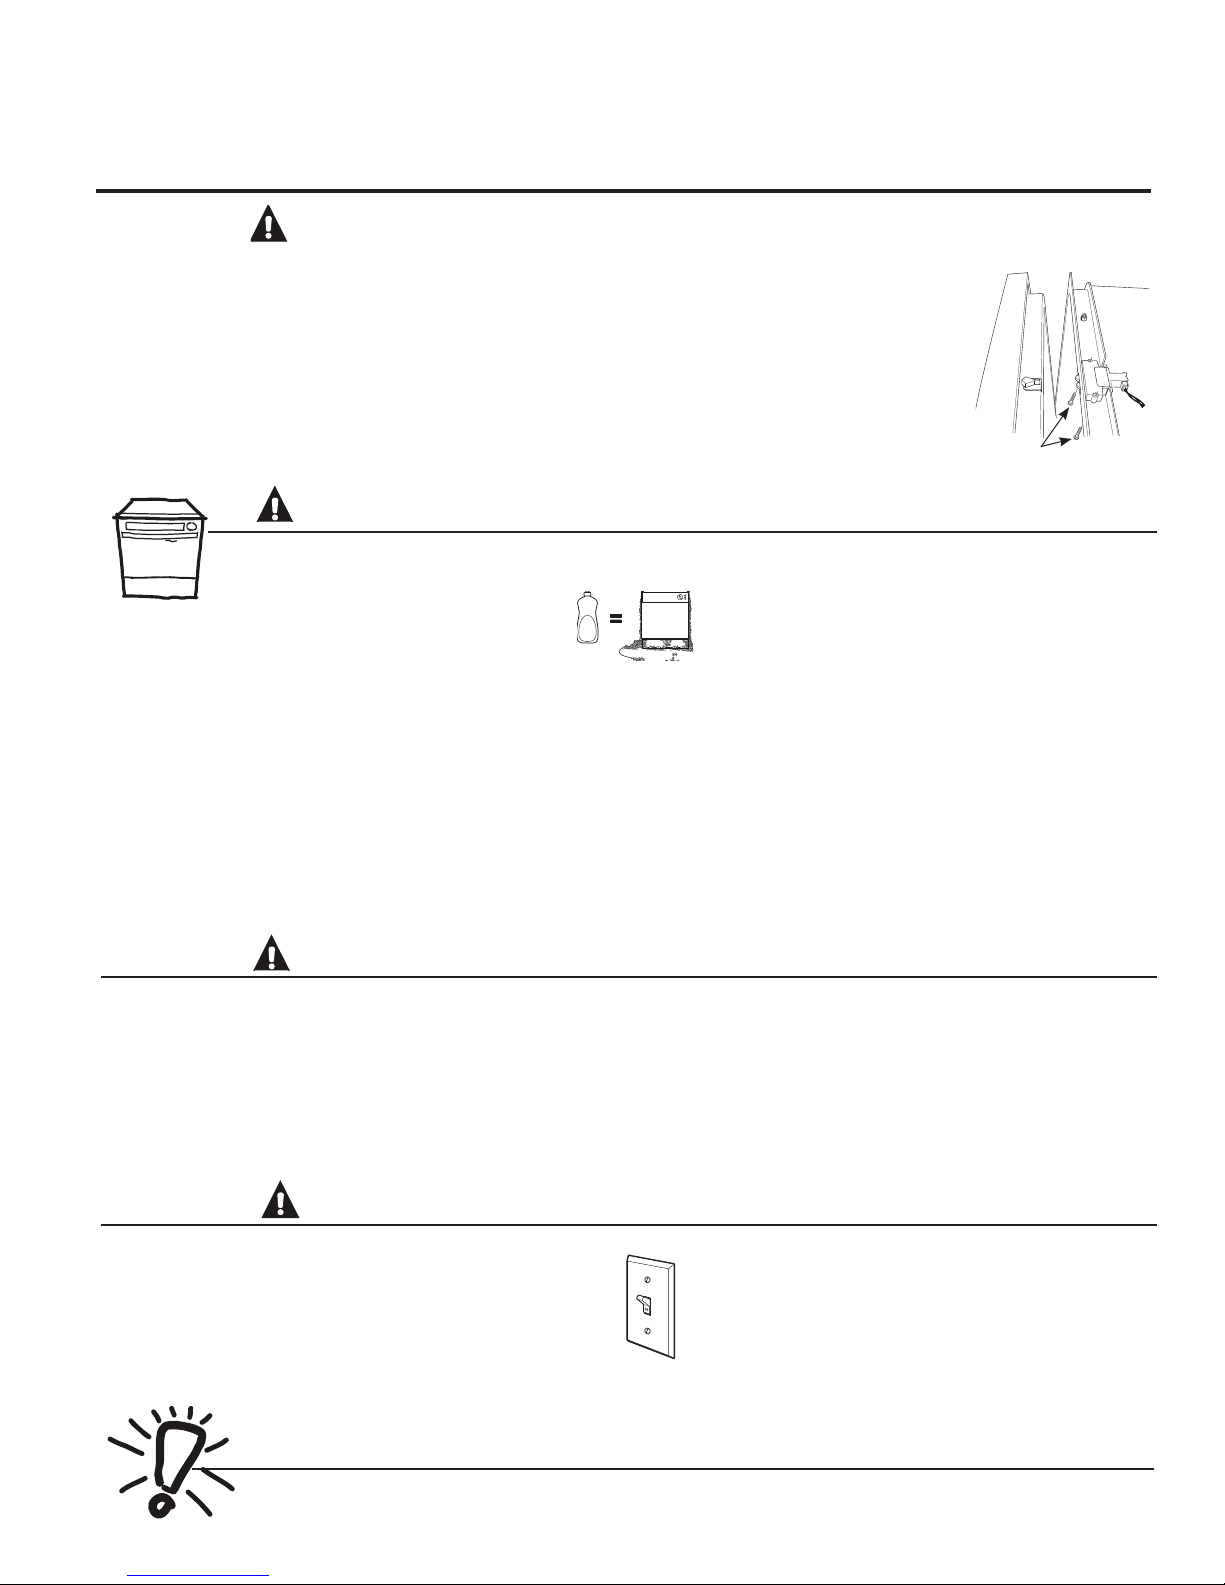
Take off the door of the washing compartment or remove
removing the two screws from the latch receiver inside the tub (as shown).
CAUTION: To prevent minor injury and property damage
During or after wash cycle, contents may be hot to
the touch. Use care before handling.
Using a detergent that is not
specifically designed for dishwashers
will cause the dishwasher to fill with
suds.
Non-Dishware Items: Do not wash items such as
electronic air cleaner filters, furnace filters and
paint brushes in your dishwasher. Damage to the
dishwasher and discoloration or staining of the
dishwasher may result.
Close supervision is necessary if this appliance is
used by or near children. Do not allow children to
play around the dishwasher when closing the door,
closing the upper rack, or while vertically adjusting
the upper rack due to the possibility of small fingers
being pinched.
GEAppliances.com
the latch by
Load light-weight, plastic items so they do not
become dislodged and drop to the bottom of the
GLVKZDVKHU³WKH\PLJKWFRPH LQWRFRQWDFWZLWKWKH
heating element and be damaged.
Locate sharp items so that they are not likely to
damage the door seal.
Load sharp knives with the handles up to reduce the
risk of cut-type injuries.
Do not touch the heating element during or
immediately after use.
Two screws
CAUTION: ELECTRICAL REQUIREMENTS
This appliance must be supplied with 120V , 60 Hz, and
connected to an individual, properly grounded branch
circuit protected by a 15 or 20 amp circuit breaker or
time-delay fuse.
If the electric supply provided does not meet the
above specifications, it is recommended that a
licensed electrician install an approved electrical
connection.
Your dishwasher circuit should not be used for
any other appliance while the dishwasher is in
operation as the dishwasher requires the full
capacity of the circuit.
If the wall receptacle you plug the dishwasher’s
power cord into is controlled by a switch, turn on
the switch.
NOTICE
If your dishwasher is connected to a wall
switch, ensure that the switch is on prior to
use.
If you choose to turn the wall switch off
between wash cycles, allow 5-10 seconds
after turning the switch on before touching
Start to allow the control to initialize.
READ AND FOLLOW THIS SAFETY INFORMATION CAREFULLY.
Use only powder, Cascade® Platinum Pacs, liquid
detergents or rinse agents recommended for use
in a dishwasher and keep them out of the reach
of children. Cascade
Dishwashing Detergent, and Cascade®Complete
Rinse Aid rinse agents are recommended for use in
all GE dishwashers.
®
Platinum Pacs Automatic
SAVE THESE INSTRUCTIONS
3

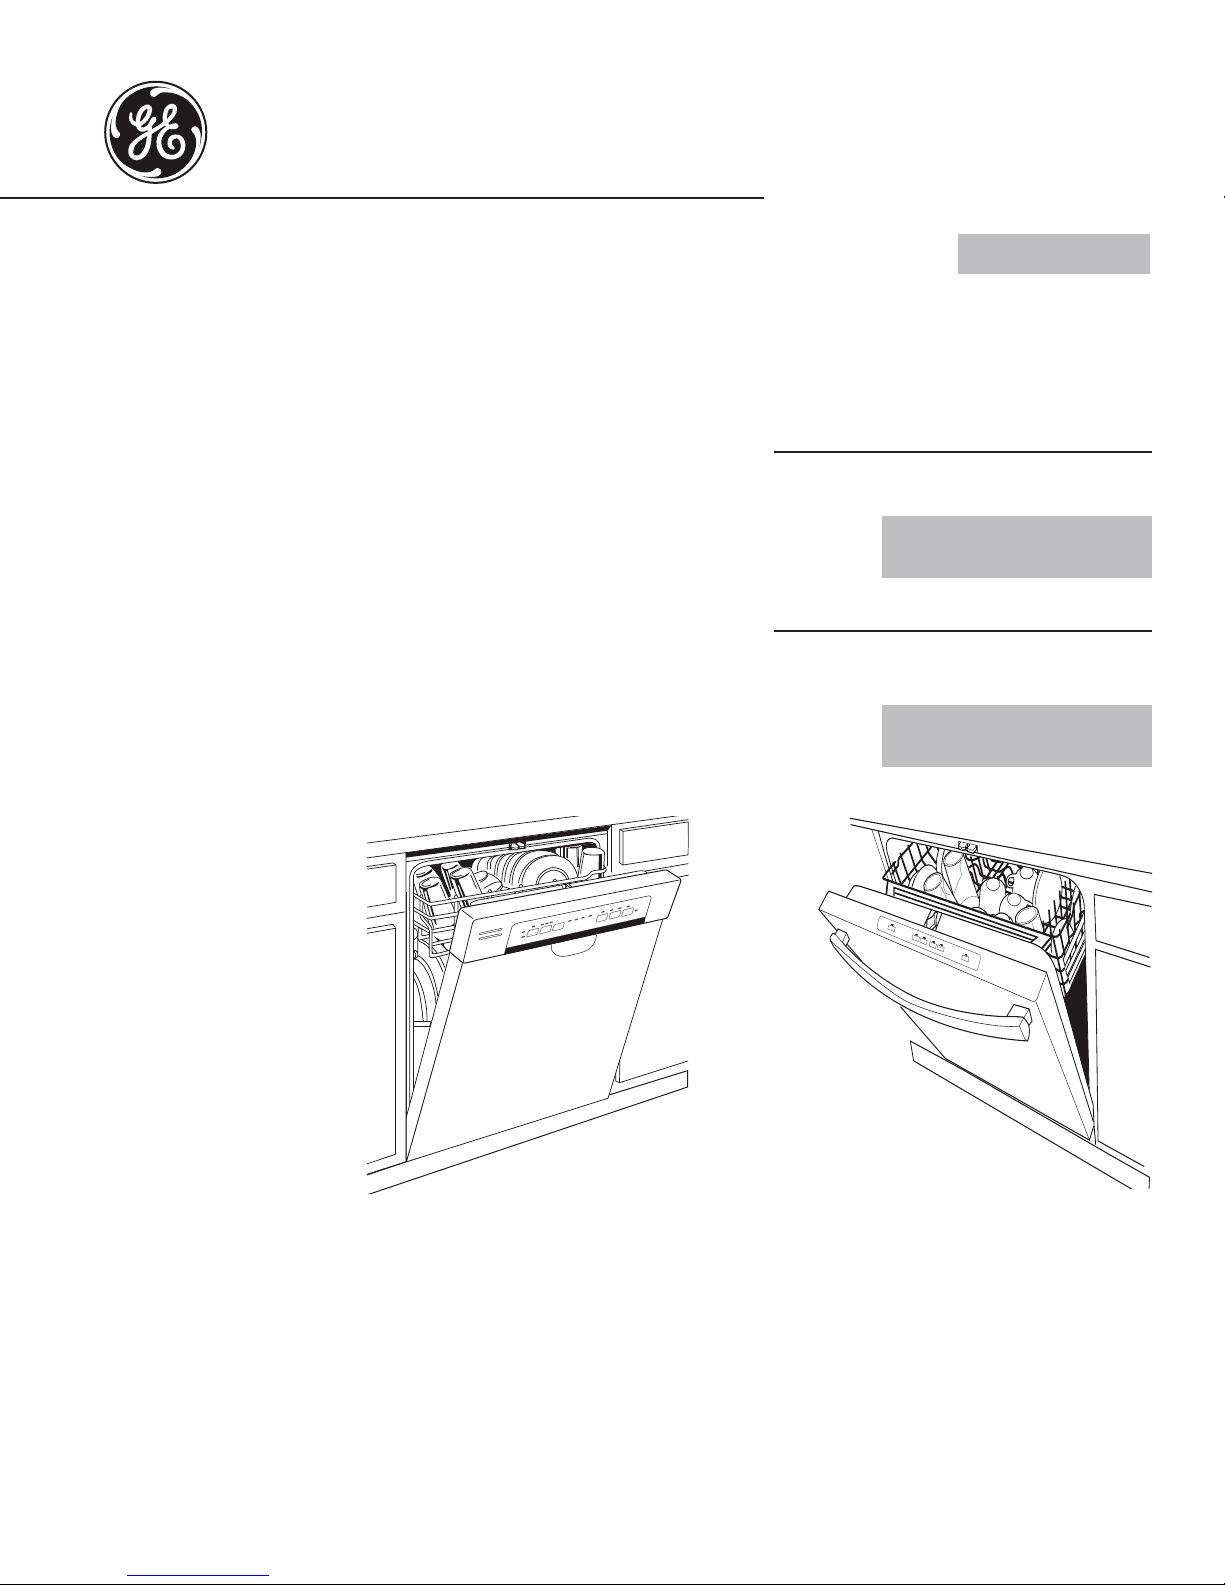
Getting started!
Features and appearance will vary throughout this manual
GDF570
DDT575, GDT580
GDT720
GDT740, PDT750, PDT760
CDT725
6WHDP
CDT765
Load Dishwasher
1
For best dishwashing results, follow the loading guidelines found in the Loading the dishwasher section. No pre-rinsing of normal
food soil is required. Scrape off hard soils, including bones, toothpicks, skins, and seeds. Remove leafy vegetables, meat trimmings,
and excessive amounts of grease or oil.
Add Detergent
2
Add needed amount of detergent to the detergent dispenser. Use a detergent such as Cascade® Platinum Pacs. See Detergent
Dispenser in the Using the dishwasher section.
Add Rinse Agent
3
Add Rinse Agent to the rinse agent dispenser. See Use a Rinse Agent in the Using the dishwasher section.
4

GEAppliances.com
Select Cycle
4
Press the Select Cycle button for the desired wash cycle. On some models, the light next to the Select Cycle button will be lit to
indicate which wash cycle has been selected. On other models, pressing the Select Cycle button will show various cycles in the
display window. Press the button until the desired cycle is shown.
NOTE: Actual cycle times vary based on soil level, water temperature, and options selected.
The cycle may be selected with the door in the open position. The cycle will not start until after the door is closed and Start selected
within 10 seconds.
AutoSense This cycle automatically senses the soil level and adjusts the wash cycle accordingly. *Time range: 1 hour 50
minutes - 2 hours 10 minutes.
Heavy This cycle is meant for heavily soiled dishes, cookware, pots, or pans with dried-on or baked-on soils.
Everyday dishes are safe to be used in this cycle. *Time: 2 hours 31 minutes.
Normal This cycle is meant for normal everyday soil levels and is designed to conserve both water and energy. *Time range: 1
hour 15 minutes - 1 hour 50 minutes. NOTE: Normal was used to rate the energy efficiency of this dishwasher.
Light This cycle is for light to medium soiled dishes. It is safe for china and crystal. *Time: 50 minutes.
Rinse For rinsing partial loads that will be washed later. Do not use detergent. Detergent is not dispensed during the
(on some models) rinse cycle. *Time: 16 minutes.
Express This cycle will quickly wash lightly soiled dishes. *Time: 32 minutes. For faster drying, select Power Dry. The final rinse
(on some models) temperature will be increased. Power Dry will add 15 minutes to the cycle time. When the Clean light comes on,
open the door, pull the racks out, and the dishes will “flash” dry in approximately five minutes.
eWash This cycle will efficiently wash dishes using about 2 gallons of water and .8 KWhr. Selecting Power Dry with this cycle
(on so me mod e l s ) adds an energy efficient 1 1/2 hour dry period. Dry ing is accomplished with an efficient 2 w att fan. *Time: 1 hour 3 minutes.
*Washing time only. Does not include drying time, Auto Hot Start, or options. NOTE: If the incoming water temperature is too low,
the A uto Hot Star t feature may add up to 11 minutes of additional time.
5

Getting started!
Select Options
5
The light by the selected button will be lit to indicate which Option has been selected.
Normal Temp This option is for normally soiled dishes, optimizes wash performance while conserving energy.
(on some models)
Wash Temp This option increases the temperature to help clean heavily soiled dishes and may increase the overall cycle time.
Boost or Option may be turned On or Off during the wash cycle. This option will also improve dry performance on the
Boost Temp Normal cycle.
Wash Temp This option raises the water temperature in the final rinse to sanitize your dishware. The cycle length will
Sani or vary depending on the temperature of your inlet water.
Sanitize NOTE: This option is monitored for sanitization requirements. If the cycle is interrupted during or after the main
Temp wash portion or if the incoming water temperature is so low that adequate water heating cannot be achieved,
the sanitizing conditions may not be met. In these cases, the Sanitized or Cycle Sanitized light will not illuminate
at the end of the cycle. Utilizing this option will modify the cycle to meet the requirements of Section 6, NSF 184
for soil removal and sanitization efficacy.
Heated or Shuts off the drying option. Dishes air dry naturally and energy is saved. Open the dishwasher door to
Power Dry Off speed drying.
Heated or Turns on the option for faster drying. This option may add up to 65 minutes to the cycle time.
Power Dry On This option is not available with the Rinse cycle.
Steam For use with heavily soiled and/or dried-on, baked-on soils. This option MUST be selected PRIOR to
(Prewash) starting the cycle. The Steam option adds up to 30 minutes to the cycle time. This option is
(on some models)
Pre Soak
(on some models)
Wash Zones Selecting either the Upper or Lower Wash Zones will target dishwashing of just one rack. This will shorten
(on some models)
Bottle Wash
(on some models)
recommendations in the Loading the dishwasher section.
Delay Hours
number of hours, then press Start one time and close door to begin countdown. The cycle will start once allotted
time has expired.
Control You can lock the controls to prevent selections from being made. You can also lock the controls
Lock after you have started a cycle to prevent cycle changes. For example, children cannot accidentally
start the dishwasher by pressing buttons with this option selected.
Energy When connected to a smart meter and your electric company, the dishwasher will automatically delay starting a
cycle during the more expensive peak demand times, and run when demand is low. However, you can override
Smart
the delay settings and use the dishwasher as needed. Learn more about Energy Smart under the Using the
Dishwasher section.
NOTE: NSF certified residential dishwashers are not intended for licensed food establishments.
available with Heavy,AutoSense, and Normal cycles.
Use this option to improve wash performance with heavy or dried-on soils. This option is available
on Heavy, AutoSense, and Normal cycles and may add up to 30 minutes to the cycle time.
the cycle time and conserve energy. This option should be used when dishes are placed in only one rack.
This option increases the time that the bottle jets are on and may add up to 23 minutes to the cycle
time. Use this to wash difficult to clean, dishwasher safe baby bottles, sport bottles, tall coffee cups, etc. See use
Delays the start of a wash cycle up to 8 to 12 hours depending on model. Press Delay Hours, to select the
To LOCK the dishwasher control, depending on the model, press and hold the 1 or 2 buttons indicated on the
controls for 3 seconds. On some models, it will be the Heated Dry, another the Steam and Wash Temp buttons,
and another model is the Pre-Soak and Bottle Wash buttons. The Control Lock light will turn on to indicate the
control is locked.
To UNLOCK the dishwasher control, depending on the model, press and hold the 1 or 2 buttons indicated on
the controls for 3 seconds. The Control Lock light will turn off to indicate the control is unlocked.
6

GEAppliances.com
Start Dishwasher
6
Start Open door to select the desired options. Press the Start button and close the door within 10 seconds to start the
cycle or begin the Delay Hours countdown. The wash cycle will begin shortly after closing the door. The display
will turn off if the door remains open for two minutes. To activate the display, close and open the door or press
any button.
Interrupt To interrupt or pause a dish cycle, slowly open the door. Opening the door will cause the wash cycle to
or Pause pause. The dishwasher will beep every minute to remind you to close the door. To restart or resume
the cycle, press Start, and close the door within 10 seconds.
Cancel To cancel a wash cycle, press and hold the Start button for 3 seconds and close door. The dishwasher will drain,
emit a beep sound, and the wash cycle light will turn OFF.
Cycle Indicator Lights and Sounds
7
Sanitized or
Cycle Sanitized
or pressing any button will turn off light.
Clean or
Displayed at end of the cycle when Wash Temp Sani or Sanitize Temp has been selected and dishwasher has
met requirements for sanitization. See Wash Temp Sani or SanitizeTemp, for complete description. Closing door
Displayed when a wash cycle is complete. The light stays ON as a reminder that the dishes are clean.
Cycle Complete
Low Rinse Aid
(on some models) Pre-Soak or Steam button 7 times within 5 seconds. Repeat this process to turn the Low Rinse Aid indicator back
on.
Cycle Status
(on some models) indicator light will be amber. When the wash cycle is complete, the light will change to green.
Sounds
press the Heated Dry or Power Dry button 7 times within 5 seconds. Repeat this process to turn sounds back on.
Door Wake
Up Mode
(on some models)
control and interior lights, press any button.
Displayed when rinse agent is low or empty. See page 8 for Use a Rinse Agent. To turn indicator off, press the
The indicator light on the door front will change color to indicate the wash status. During the wash cycle, the
The dishwasher will emit a sound to indicate cycle completion, button presses, and door ajar. To mute all sounds,
To turn this option ON/OFF, press and hold the START and WASH TEMP buttons for 5 seconds. In the OFF mode,
the control display, control sounds, and interior lights (on some models) will not respond to the door opening/
closing. This mode can be used when observing certain religious holidays such as the Sabbath. To activate the
7
Using the dishwasher.
Check the Water Temperature
The entering water should be at least 120°F (49°C) and not
more than 150°F (66°C) for effective cleaning and to prevent
dish damage. Check the water temperature with a candy or
meat thermometer.
Turn on the hot water faucet nearest the dishwasher,
place the thermometer in a glass and let the water run
continuously into the glass until the temperature stops rising.
Energy Smart
Energy Smart enables your dishwasher to reduce energy
consumption during periods of high energy costs. If you are
in an area where your electricity provider charges variable
rates at different times of the day, your dishwasher will
inform you of those times when you are paying the highest
rate. You can then either delay starting your dishwasher until
the rate goes down; or you can override the feature and run
your dishwasher at your convenience.
What you will need:
Smart Meter that will communicate with y our dishwasher .
1
Consult your local electricity provider to determine if the
technology is available in your area.
An Energy Smart dishwasher model (CDT725-765,
2
DDT575, GDF570, GDT580-740, PDT750-760).
An Appliance Communication Module (ACM). Please visit,
3
gebrillion.com to order the communication device that
will need to be installed in the dishwasher.
Use a Rinse Agent
Rinse agents, such as Cascade® Complete Rinse Aid are designed for great drying action and to protect
against spots and film build-up on your dishes, glasses, flatware, cookware, and plastic.
Filling the Dispenser
The rinse agent dispenser holds 3.5 oz. (104 ml) of rinse agent. Under normal
conditions, this will last approximately one month.
Make sure the dishwasher door is fully open.
1
Open the Rinse Agent dispenser door.
2
Slowly add rinse agent until the cup is full. You may need to pause several times to
3
allow rinse aid to settle.
Clean up any spilled rinse agent with a damp cloth to prevent foam from forming
4
inside the dishwasher.
Close the Rinse Agent dispenser door.
5
Indicator
window
Rinse Aid Setting
The amount of rinse agent released into the final wash can be adjusted.
If water drops or hard water spots
remain on dishes after the dry cycle,
increase the setting.
To adjust the setting
Open the
then turn the adjuster clockwise to
increase the amount of rinse agent,
counterclockwise to reduce the amount
of rinse agent.
Rinse Agent
dispenser door;
Leak Protection (on some models)
If a leak is detected, the dishwasher will drain and the cycle
will stop. The display will show “LEAK DETECTED”. Call for
service.
8
Clockwise to reduce
water drops and
hard water spots
Rinse
agent
adjuster
Counterclockwise
to reduce foaming
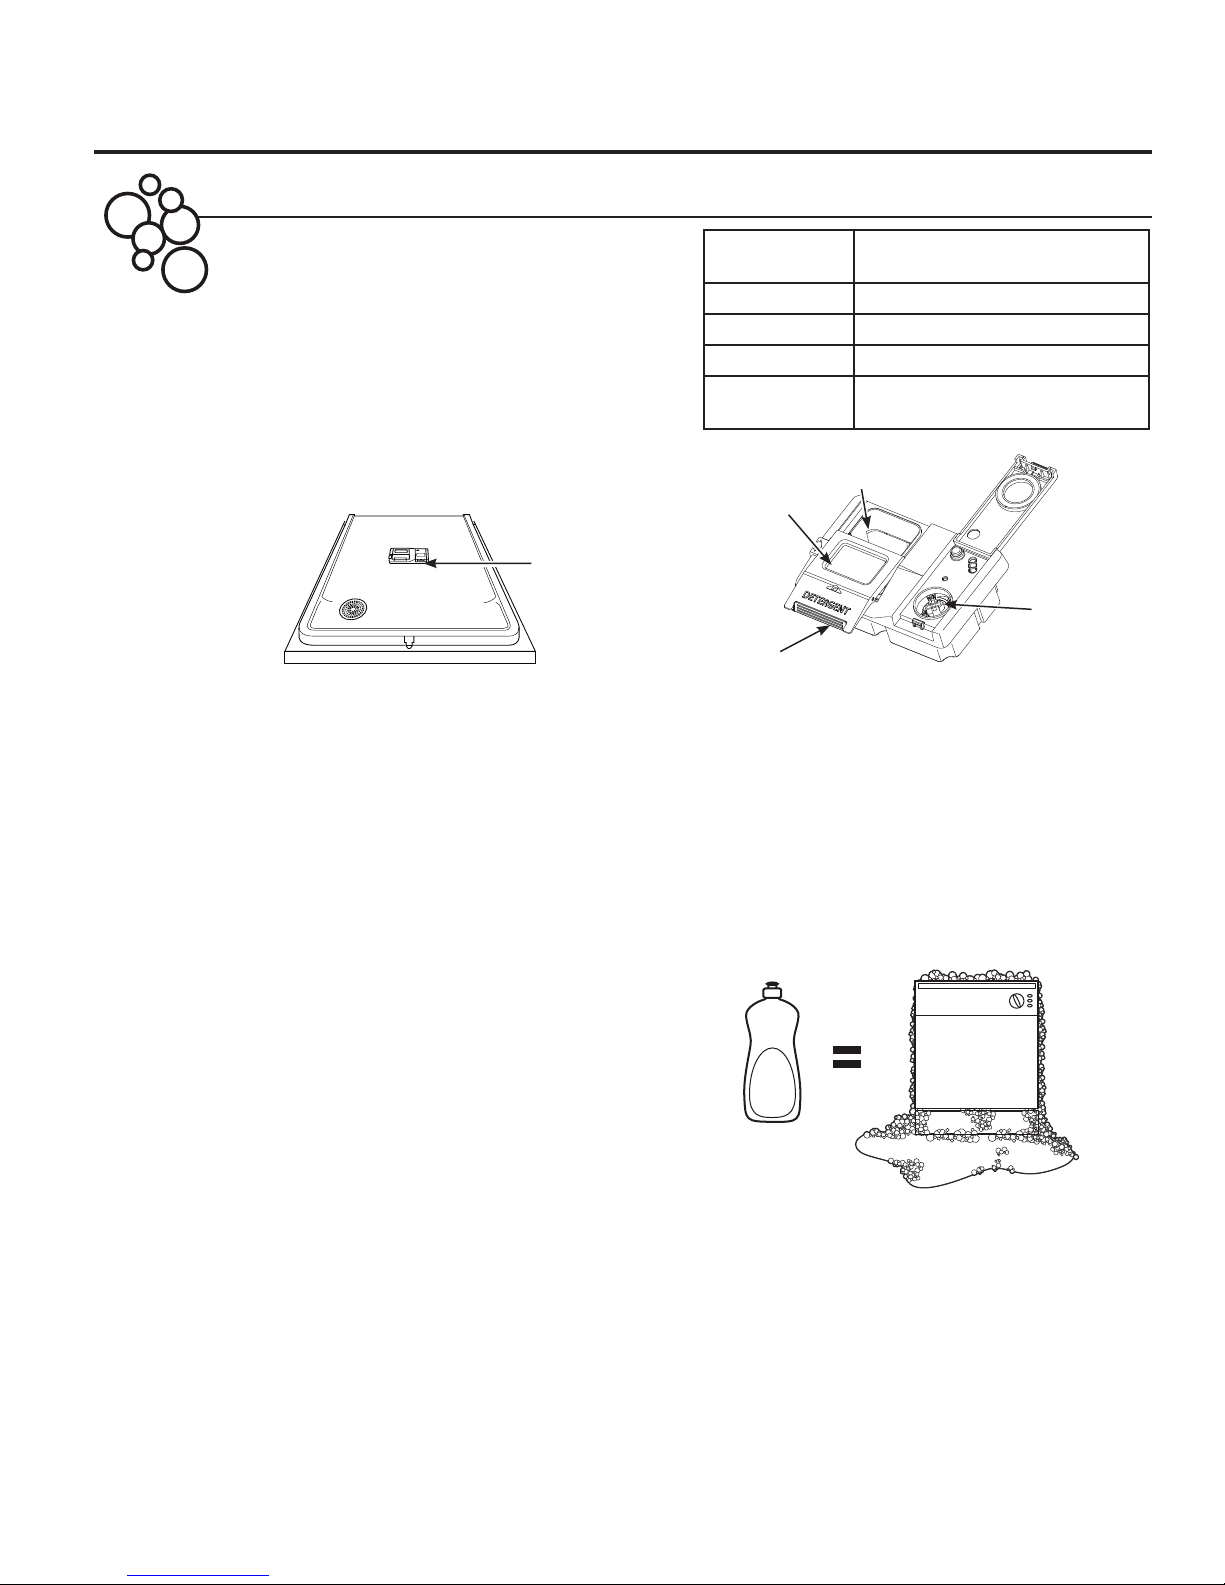
Detergent Dispenser
GEAppliances.com
The detergent dispenser is located in the center of the
dishwasher door. It has two compartments. The main wash
compartment is found inside the detergent dispenser.
To open, press the button on the side of the dispenser.
The pre-wash compartment is on the lid of the detergent
dispenser. Use the pre-wash compartment only when y our
water is extremely hard or when you have a heavy soiled
load. The pre-wash compartment is not used when tablet
or packet detergents are used.
NOTE: Do not load large items in the lower rack where
they may block the wash jets from rinsing out the
detergent dispenser.
Detergent
Dispenser
You may use tablet, packet, powder, liquid or gel automatic
dishwasher detergent. Make sure y ou use only detergents
specifically labeled for use in automatic dishwashers.
Never use liquid hand dish detergent in an automatic
dishwasher. Sudsing and poor wash performance will
result with the use of improper detergents.
Detergents should be stored in a dry location and in their
original container to prevent loss of effectiveness. Place
detergent in the cup just prior to starting the dishwasher
and then close the cover. The cover will open during the
wash cycle.
Filling the Detergent Dispenser
GE recommends using detergent in tablet or packet form.
Independent testing has shown this form of detergent is
very effective in the dishwasher.
Pacs
are an example of this ty pe of detergent. Simply put
a tablet or packet into the main wash compartment and
slide to close the detergent cup cover. Please notice that
the tablet or packet must be placed in the main wash
compartment of the detergent cup. If the tablet or packet
is tossed in the bottom of the dishwasher, the detergent
will be flushed down the drain in a very short period of
time and will thus be wasted. Wash performance will be
very poor as a result.
If you choose to use detergent in powder, liquid or gel
form, the amount of detergent y ou use will be determined
by the hardness of your water, the temperature of your
water, and the food soil load inside the dishwasher.
Contact your water company to get information about
the hardness of the water in y our area. Water hardness is
measured in grains per gallon. Use this information and
the table above to determine the amount of detergent
to use. You may purchase a hard water test strip
from GE. Call 1-877-959-8688 and ask for part number
WD01X10295. In Canada, call 1-800-661-1616.
Cascade® Platinum
Number of
Grains/Gal.
Detergent Cups to Fill
Less than 4 Fill cup to 1/3 full
4 to 8 Fill cup to 2/3 full
8 to 12 Fill cup completely full
Greater than 12
Fill both main wash cup and pre
wash cup
Main
Wash
Pre-Wash
Rinse Agent
Push/Slide
to Close
Using too much detergent with very soft and/or very hot water
may cause a condition called etching on your glassware.
Etching is a permanent cloudiness in your glassware. This
condition is irreversible. However, using too little detergent will
cause poor wash performance.
Use the table as a starting point and then adjust the amount
of detergent you use. Use just enough to get good wash
performance. Using just the right amount of detergent will
provide great wash performance without wasting detergent or
etching glassware.
DO NOT USE HAND DISH DETERGENT
NOTE: Using a detergent that is not specifically designed
for dishwashers will cause the dishwasher to fill with suds.
During operation, these suds will spill out of the dishwasher
vents, covering the kitchen floor and making the floor wet.
Because so many detergent containers look alike, store the
dishwasher detergent in a separate space from all other
cleaners. Show anyone who may use the dishwasher the
correct detergent and where it is stored.
While there will be no lasting damage to the dishwasher, your
dishes will not get clean using a dishwashing detergent that is
not formulated for automatic dishwashers.
9
Loading the dishwasher.
For best dishwashing results, follow these loading guidelines. Features and appearance of racks and silverware
baskets may vary from your model.
Upper Rack
Clip
Nozzle
The upper rack is primarily for glasses, cups, and
saucers. For best wash performance, tilt cup and
glass openings toward the center of the rack. Other
items such as pots, pans, and plates may be placed
in the upper rack. This is also a secure place for
dishwasher-safe plastic items. The upper rack can
be used for odd sized utensils. Sauce pans, mixing
bowls, and other similarly shaped items should
be placed face down for best wash performance.
Ensure small plastic items are secure so that they
cannot fall on the heater at the bottom of the
dishwasher, potentially damaging the item. Some
models are equipped with a hidden heater, so
dishwasher safe plastic items can be placed in the
lower rack.
IMPORTANT: Ensure items in the upper rack do not
interfere with the 3rd Rack (on some models) when
loading and unloading.
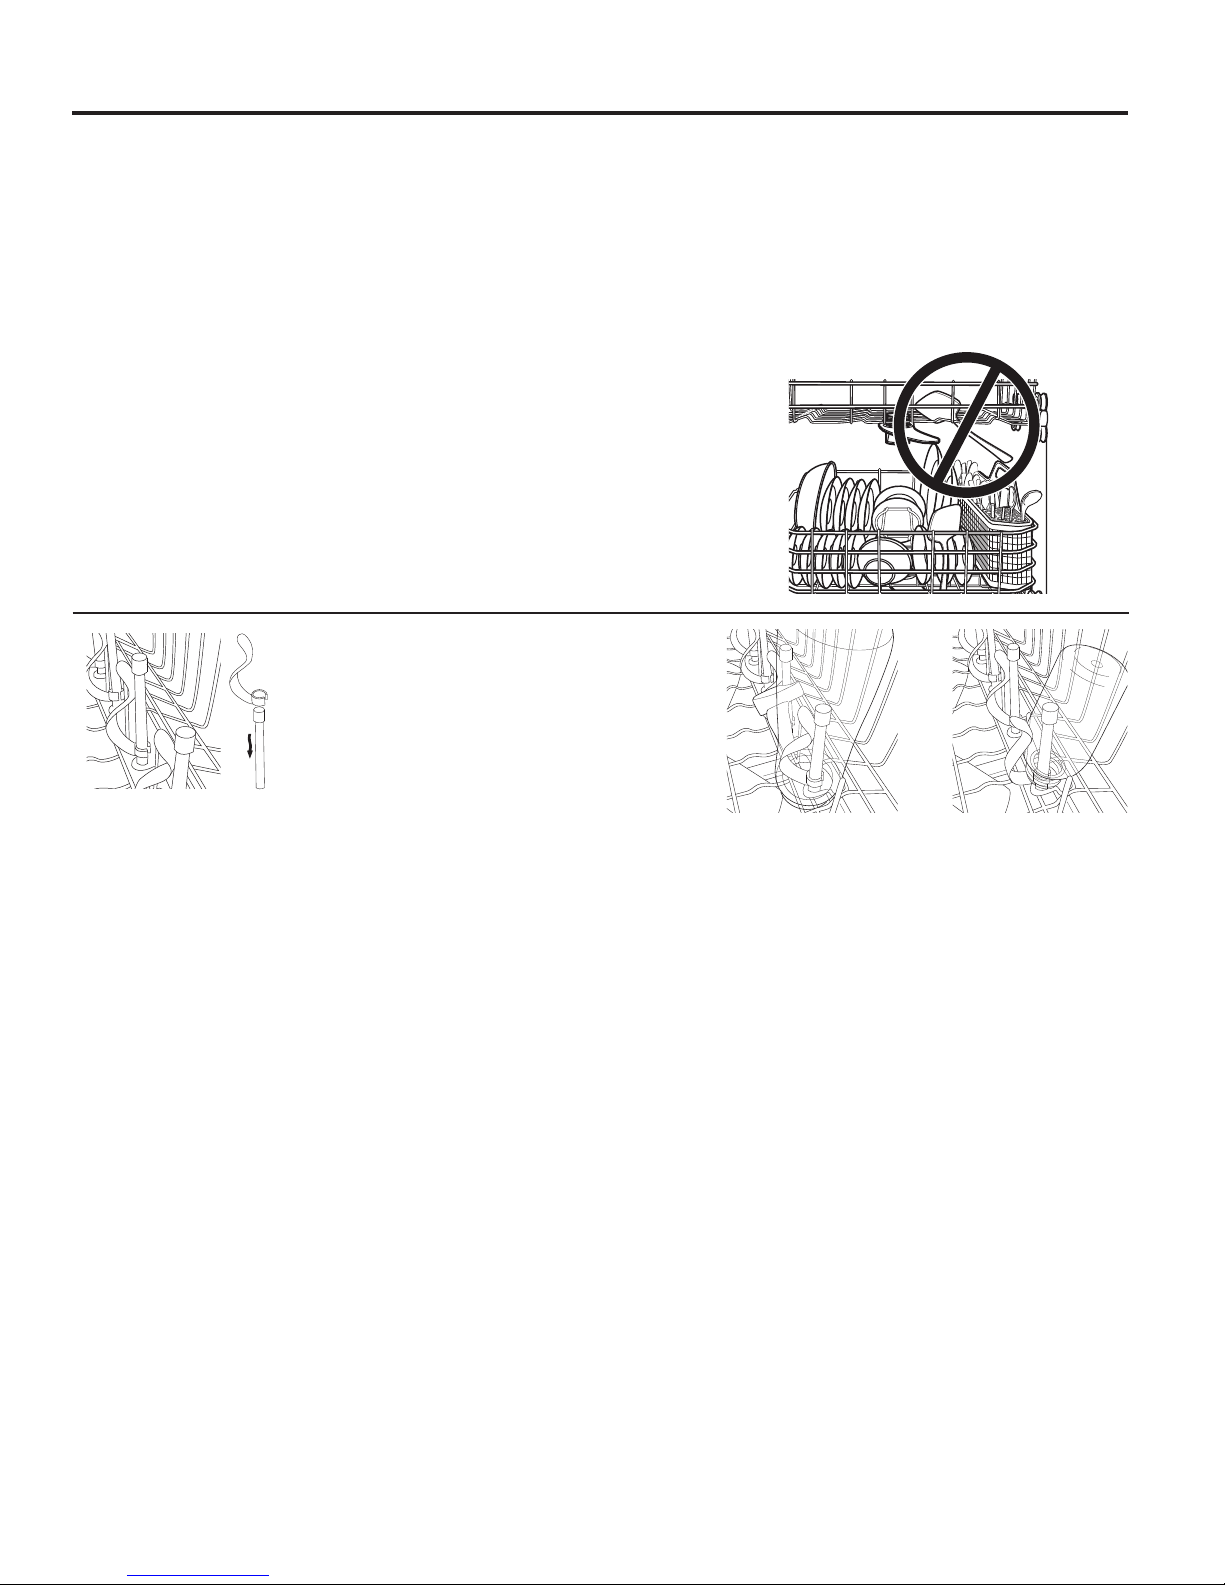
The Bottle Wash system (on some models) is
the ideal location to position baby bottles and
tall sports bottles. The Bottle Wash clips hold
bottles with small openings in place so water jets
are directed inside the bottles to clean hard to reach
areas. Clips can be installed or removed by simply
slipping the clip opening over the top of the nozzle.
IMPORTANT: Ensure that items do not protrude
through the bottom of the rack or silverware basket
where they will block the rotation of the middle spray
arm. This could result in noise during operation and/
or poor wash performance.
Bottle Wash
Sports bottle held in
place over a Bottle
Wash clip
Baby bottle held in
place under a Bottle
Wash clip
10
 Loading...