

Page 1
ge.com
Safety Instructions .............. 2-5
©
_J
©
L3
Operating Instructions
Broiling ......................... 14
Ck)ck, Kitchen Timer and
Control i,ock ..................... 17
Convection Oven .............. 19-23
Roasting Guide ................. 23
Timed Feanlres .............. 21, 22
Cookware ......................... 7
i,ower Oven ..................... 13
Oven Controls ................ 10, 11
Probe ........................... 16
Sabbath Feature .................. 30
Self:Cleaning ................. 26, 27
Slow Cook, Pizza
and Warming Features ......... 24-25
Special Feanlres ............... 28-29
Surface Units ................... 6-9
Thermostat Adjustment--
Do It Yourself .................... 18
Timed Baking and
Roasting Features ................. 15
Upper Oven ..................... 12
PB970
PB975
Care and Cleaning ........... 31-37
Troubleshooting Tips ......... 38-41
Accessories ...................... 46
Consumer Support
Consumer Support ....... Back Cover
Product Re_strafion .......... 43, 44
Warranty ........................ 47
Write the model and serial
numbers here:
Model #
Serial #
You can find them on a label
behind the storage drawer
on the range flame.
49-80528 04-08JR
Page 2
IMPORTANTSAFETYINFORMATION.
READALLINSTRUCTIONSBEFOREUSING.
WARNING!
For your safety, the information in this manual must be followed tominimize the risk of fire, electric
shock, or toprevent property damage, personal injury, or loss of life.
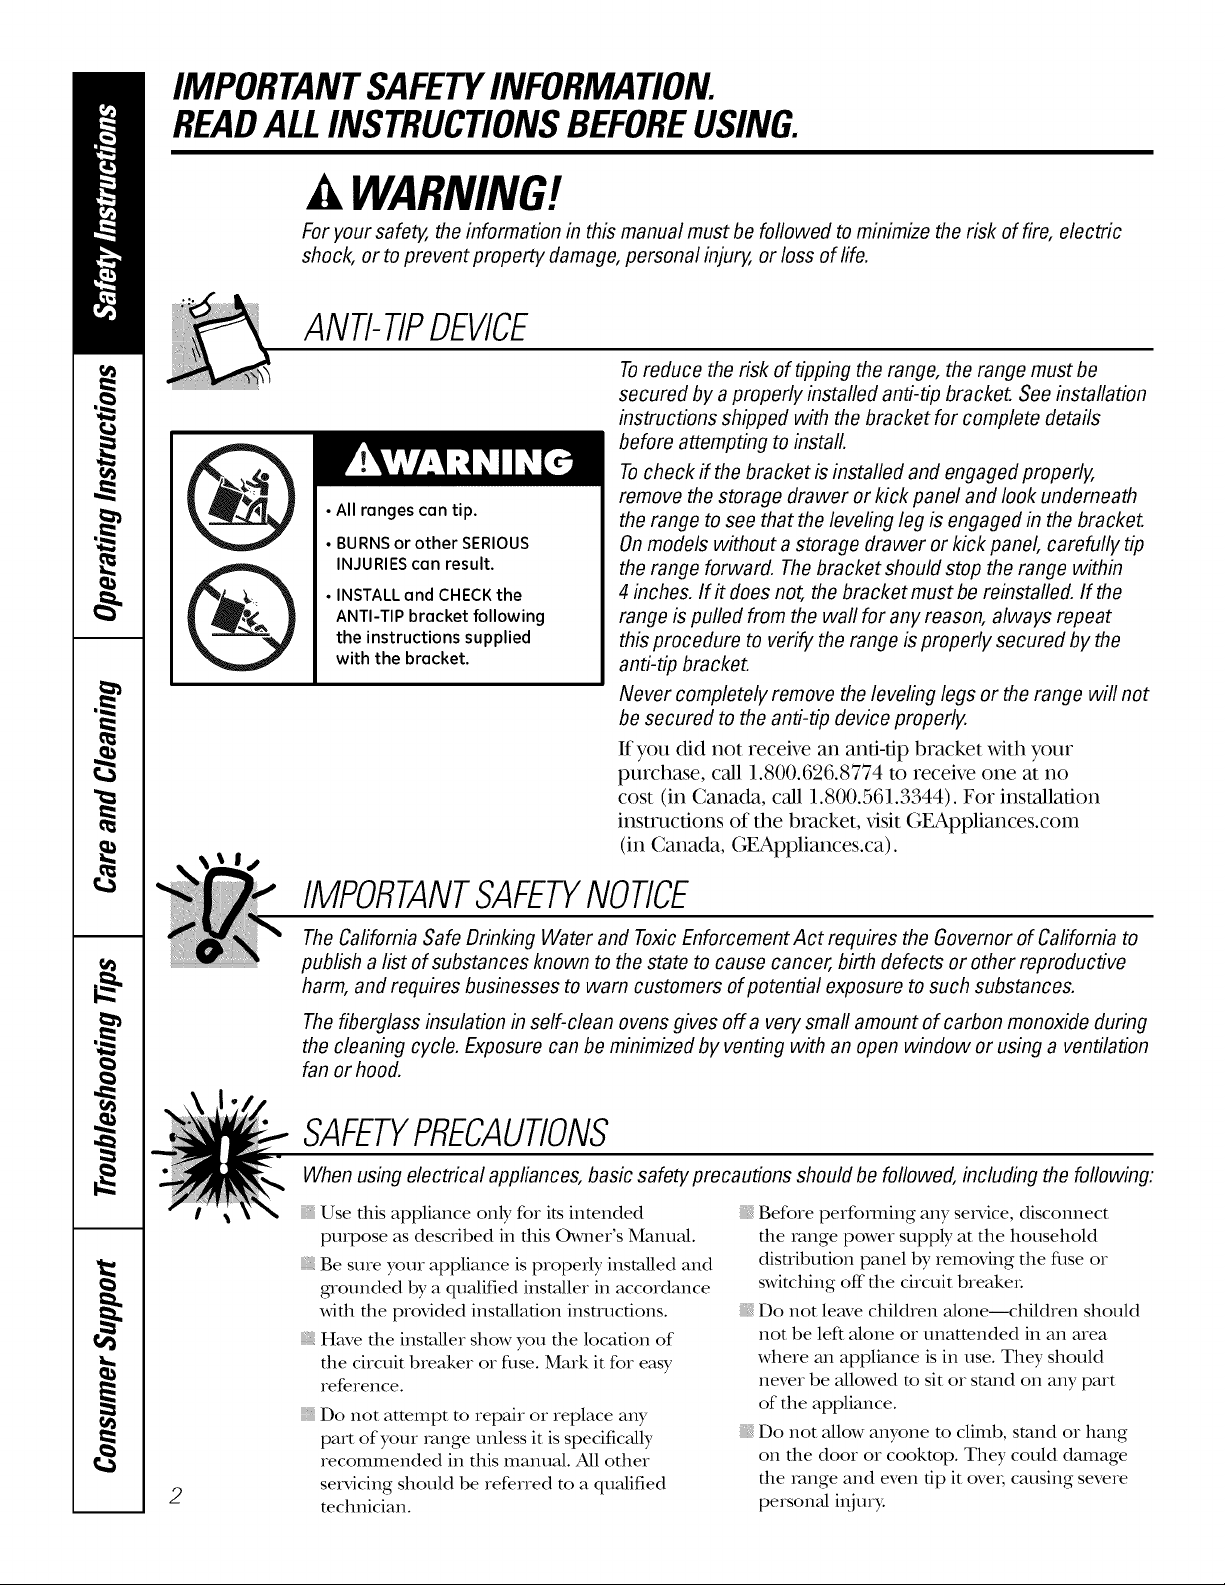
ANTI-TIPDEVICE
Toreduce the risk of tipping the range, the range must be
secured by a properly installed anti-tip bracket. See installation
instructions shipped with the bracket for complete details
before attempting to install.
Tocheck if the bracket is installed and engaged properly,
• All ranges can tip.
• BURNS or other SERIOUS
INJURIES can result.
• INSTALL and CHECK the
ANTI-TIP bracket following
the instructions supplied
with the bracket.
remove the storage drawer or kick panel and look underneath
the range to see that the leveling leg is engaged in the bracket.
On models without astorage drawer or kick panel, carefully tip
the range forward. The bracket should stop the range within
4 inches. If# does not, the bracket must be reinstalled. If the
range is pulled from the waft for any reason, always repeat
this procedure to verify the range is properly secured by the
anti-tip bracket.
Never completely remove the leveling legs or the range will not
be secured to the anti-tip device properly.
It you did not receive an anfi-dp bracket with your
purchase, call 1.800.626.8774 to receive one at 11o
cost (in Canada, call 1.800.561.3344). For installation
instructions of the bracket, x,isit GEAppliances.com
(in Canada, GEAppliances.ca).
IMPORTANTSAFETYNOTICE
The Cafifornia Safe Drinking Water and ToxicEnforcement Act requires the Governor of California to
publish a list of substances known to the state to cause cancer, birth defects or other reproductive
harm, and requires businesses to warn customers of potential exposure to such substances.
The fiberglass insulation in self-clean ovens gives off a very small amount of carbon monoxide during
the cleaning cycle. Exposure can be minimized by venting with an open window or using a ventilation
fan or hood.
SAFETYPRECAUTIONS
When using electrical appliances, basic safety precautions should be followed, including the following:
Use flds appliance only for its intended
propose as described ill flds Owner's Manual.
Be sure youI appliance is propeIly installed and
gnounded by a quMified installer ill accordance
with the provided installation insmlcfions.
Have the instaUer show you the location of
the circuit breakei or fllse. Maik it for easy
IefeIence.
Do not attempt m repair oI ieplace any
part of your ivmge unless it is specifically
recommended ill this maimal. All other
2
seivicing should be referred to a qualified
mclmician.
Before perfomling ally service, disconnect
the range power supply at the household
disuibudon panel by removing the fllse or
switching off"the circuit breakeL
Do not leave children alone--children should
not be left alone or unattended in all area
where an appliance is ill use. They should
never be allowed m sit or stand on ally part
of the appliance.
Do not allow anyone m climb, stand or hang
on the dooi or cookmp. They could damage
the Imlge and even tip it ovei, causing severe
personal i_ijtn>
Page 3
ge.com
WARNING!
SAFETYPRECAUTIONS
Do not operate the oven or cooktop controls ff the glass is broken. Food splatter or cleaning solution
may penetrate a broken control panel or cooktop and create a risk of electrical shock. Contact a
qualified technician immediately should your glass control panel or cooktop become broken.
Do not store flammable materials in an oven
or near file cookmp.
CAUTION:I emsofi,.e, cllild,e,l
should not be stored in cabinets above a range
or oil tile back of a range--children climbing
on the range m reach items could be seriously
i_,jured.
Never wear loose-fitting or hanging garments
while using the appliance. Be careful when
reaching for items stored over the range.
Flammable mamrial could be igmimd if
brought in contact with hot surface units or
heating elements and may cause severe burns.
Use only d_T pot holders--moist or &unp
pot holders on hot surfaces may result in
burns flom swam. Do not let pot holders
much hot surface units or heating elements.
Do not use a towel or other bulky cloth in
place of pot holders.
Do not use wamr on grease fires. Never pick
up a flaming pan. Turn tile controls off:
Smother a flaming pan on a surface unit
by coveting tile pan completely wkb
a well-fitting lid, cookie sheet or fiat tray.
Use a multi-propose dxT chemical or
foam-tTpe fire extinguisheL
Flaming grease outside a pan can be put
out by covering it with baking soda o,; if
available, by using a multi-purpose d_y
chemical or foam-tTpe fire extinguisheL
Flame in file oven can be smofllered
completely by closing die oven door and
turning the oven off" or by using a multi-
propose d_T chemical or fo_un-tTpe fire
extinguisheL
Do not let cooking grease or other flammable
materials accumulam in or near the range.
Do not much die surface units, die heating
elements or tile inmrior surface of tile oven.
These surfaces m W be hot enough to burn
even though they are dark in coloL During and
after use, do not much, or let clothing or other
flammable mamfials contact the surface units,
areas nearby tile surface units or any inmfior
area of tile oven; allow sufficient time for
cooling fi_st.
Pomntially hot surfaces include die cookmp,
areas facing tile cookmp, oven vent opening,
surfaces near the opening, cre_@es around the
oven dooL
REMEMBER: Tile inside surface of file oven
may be hot when die door is opened.
Do not store or use combustible mamfials,
gasoline or other flammable vapors and liquids
in the vicinitT of this or any other appliance.
Keep tile hood and grease filmrs clean
m maintain good venting and m avoid
g,re_tse fires.
Teach children not m play wifll die conUols
or any odler part of die range.
Always keep dish towels, dish clodls, pot
holders and other linens a safe distance
flom your range.
Always keep wooden and plastic utensils and
canned food a safe distance from your range.
Ah,vays keep combustible wall coverings,
curtains or drapes a safe distance from
your range.
For your safetT,never use your appliance
for warming or heating the room.
COOKMEATANDPOULTRYTHOROUGHLY...
Cookmeat andpoultry thoroughly--meat to at leastan INTERNALtemperatureof 160°Fandpoultry toat least
an INTERNALtemperatureof 180°ECookingto thesetemperaturesusuallyprotectsagainstfoodbomeillness.
3
Page 4
IMPORTANTSAFETYINFORMATION.
READALLINSTRUCTIONSBEFOREUSING.
RADIANTSURFACEUNITS
Useproper pan size--select cookware having flat bottoms large enough to cover the surface unit heating
element.Theuse of undersized cookware will exposea portion of thesurface unit todirect contact andmay
result in ignition of clothing. Proper relationship of cookware tosurface unit will also improve efficiency.
Never lem'e die surface units unattended at
high heat settings. Believers cause smoking
and greasy spillovets that may catch on fire.
Only certain types of glass, gktssA:eramic,
eartbemvare or other glazed containers are
suitable for cookmp service; others may break
because of the sudden change in mmpetaune.
To minimize the possibilit T of burns, igmi6on
of flammable mamrials and spillage, the handle
of a container should be a]rned toward the
center of the range without extending over
nearby surface units.
Always turn the surface units off before
removing cookware.
When preparing flaming foods under the
hood, u]rn the fan on.
Use care when touching the cookmp.
The _ass surface of the cookmp will retain
heat after the controls have been turned off:
Keep an eye on foods being flied at high or
medium high heat settings.
Foods for flying should be as dry as possible.
Frost on frozen foods or moisu]re on flesh
foods can cause hot fat m bubble tap and
over the sides of the pan.
Use little fat for eff>ctive shallow or deep
fat flTing. Filling the pan me flail of fat can
cause spillovers when food is added.
If a combination of oils or fats will be used
in flTing, stir together before heating, or
as fats melt slowly.
Always heat fat slowb,, and watch as it heats.
Use a deep fat tbermomemr whenever
possible m prevent overbearing fat beyond
the smoking point.
Avoid scratching the glass cookmp. The
cookmp can be scratched with imms such
as sharp insuuments, rings or otherjewehy,
and rivets on clothing.
Iarge scratches or impacts to glass doors or
cookmps can lead m broken or shattered glass.
Do not operate the radiant surface units if the
glass is broken. Spillovers or cleaning solution
may penetram a broken cookmp and cream a
risk of elecuical shock. Contact a qualified
teclmician immediamly should your glass
cookmp become broken.
Never use the glass cookmp surface as a
cutting board.
Do not place or store imms that can melt or
catch fire on the glass cooktop, even when it
is not being used.
Be carefl]l when placing spoons or other sorting
umnsils on glass cooktop surfi_cewhen it is in use.
They may become hot and could cause burns.
Clean the cookmp with caution. If a wet
sponge or cloth is used to wipe spills on a hot
surfi_ce unit, be careflfl m avoid steam burns.
Some cleaners can produce noxious flmles if
applied m a hot surface.
NOTE:We recommend that you avoid wiping
any surface unit areas until they have cooled
and the indicator light has gone off: Sugar
spills are the exception to this. Please see the
Cleaningtheglass cooktopsection.
When the cooktop iscool, use only the
CERAMA BRYTE®Ceramic Cooktop Cleaner
and the CERAMA BRYI'E Ceramic Cooktop
Cleaning Pad m clean the cookmp.
To avoid possible damage to the cooking
surface, do not apply cleaning cream m
the glass surfime when it is hot.
Aider cleaning, use a dtT cloth or paper towel
m remove all cleaning cream residue.
Read and follow all insnucfions and warnings
on the cleaning cream labels.
Do not use plastic wrap to cover food. Plastic
may melt Ohm the surface and be vetT difficult
m remove.
4
Page 5
ge.com
WARNING!
OVEN
Stand away from the range when opening the oven door. Hot air or steam which escapes can cause
bums to hands, face and/or eyes.
Do not heat unopened food containers.
Pressure could build up and the container
could bu_t, causing an i_ju_ T.
Keep the oven vent unobstl_ucmd.
Keep the oven flee flom grease buildup.
Place tile oven rack in the desired position
while the oven is cool. If racks must be handled
when hot, do not let pot holder contact tile
heating elements.
When using cooking or roasting bags in the
oven, follow tile illanufacQliei"s directions.
Pulling out file rack to die stop-lock is a
convenience in lifting heax3,foods. It is Mso
a precaution against burns flom touching
hot surfaces of the door or oven waUs.
Do not use die oven m dxT newspapers.
If overheamd, dley can catch on fi_e.
Do not use tile oven for a sm_v_gearea. Imms
stored in an oven can ignite.
Do not leave paper products, cooking umnsils
or food in the oven when not in use.
Do not use Muminum foil m line oven bottoms,
except as suggested in dds manual. Improper
installation of aluminum foil mW result in a
risk of elecuic shock or fire.
SELF-CLEANINGUPPEROVENANDLOWEROVEN
Do not use oven cleaners. No commercial oven cleaner or oven liner protective coating of any kind
should be used in or around any part of the oven. Residue from oven cleaners will damage the inside
of the oven when the self-clean cycle is used.
Do not clean file door gasket. Tile door gasket
is essential for a good seal. Care should be
token not m _ub, damage or move tile gasket.
Before self-cleaning tile oven, iemove shin>
silver-colored oven racks (on some models)
and all other cookwme.
(7hW porcelain-coated oven racks (on some
models) mW be cleaned in tile oven during
the self-clean cycle.
READANDFOLLOWTHISSAFETYINFORMATIONCAREFULLY.
SAVETHESEINSTRUCTIONS
Be sure m Mpe up excess spillage before
starting tile self-cleaning operation.
If tile self-cleaning mode malfunctions, mm
tile oven off and disconnect the power supply.
Have it serviced by a qualified technician.
Glean only parts listed in this Owner's Manual.
5
Page 6
Abouttheradiant surfaceunits.
NOTE:Throughoutthis manual,featuresandappearancemayvaryfromyourmodel
About the radiant surface units
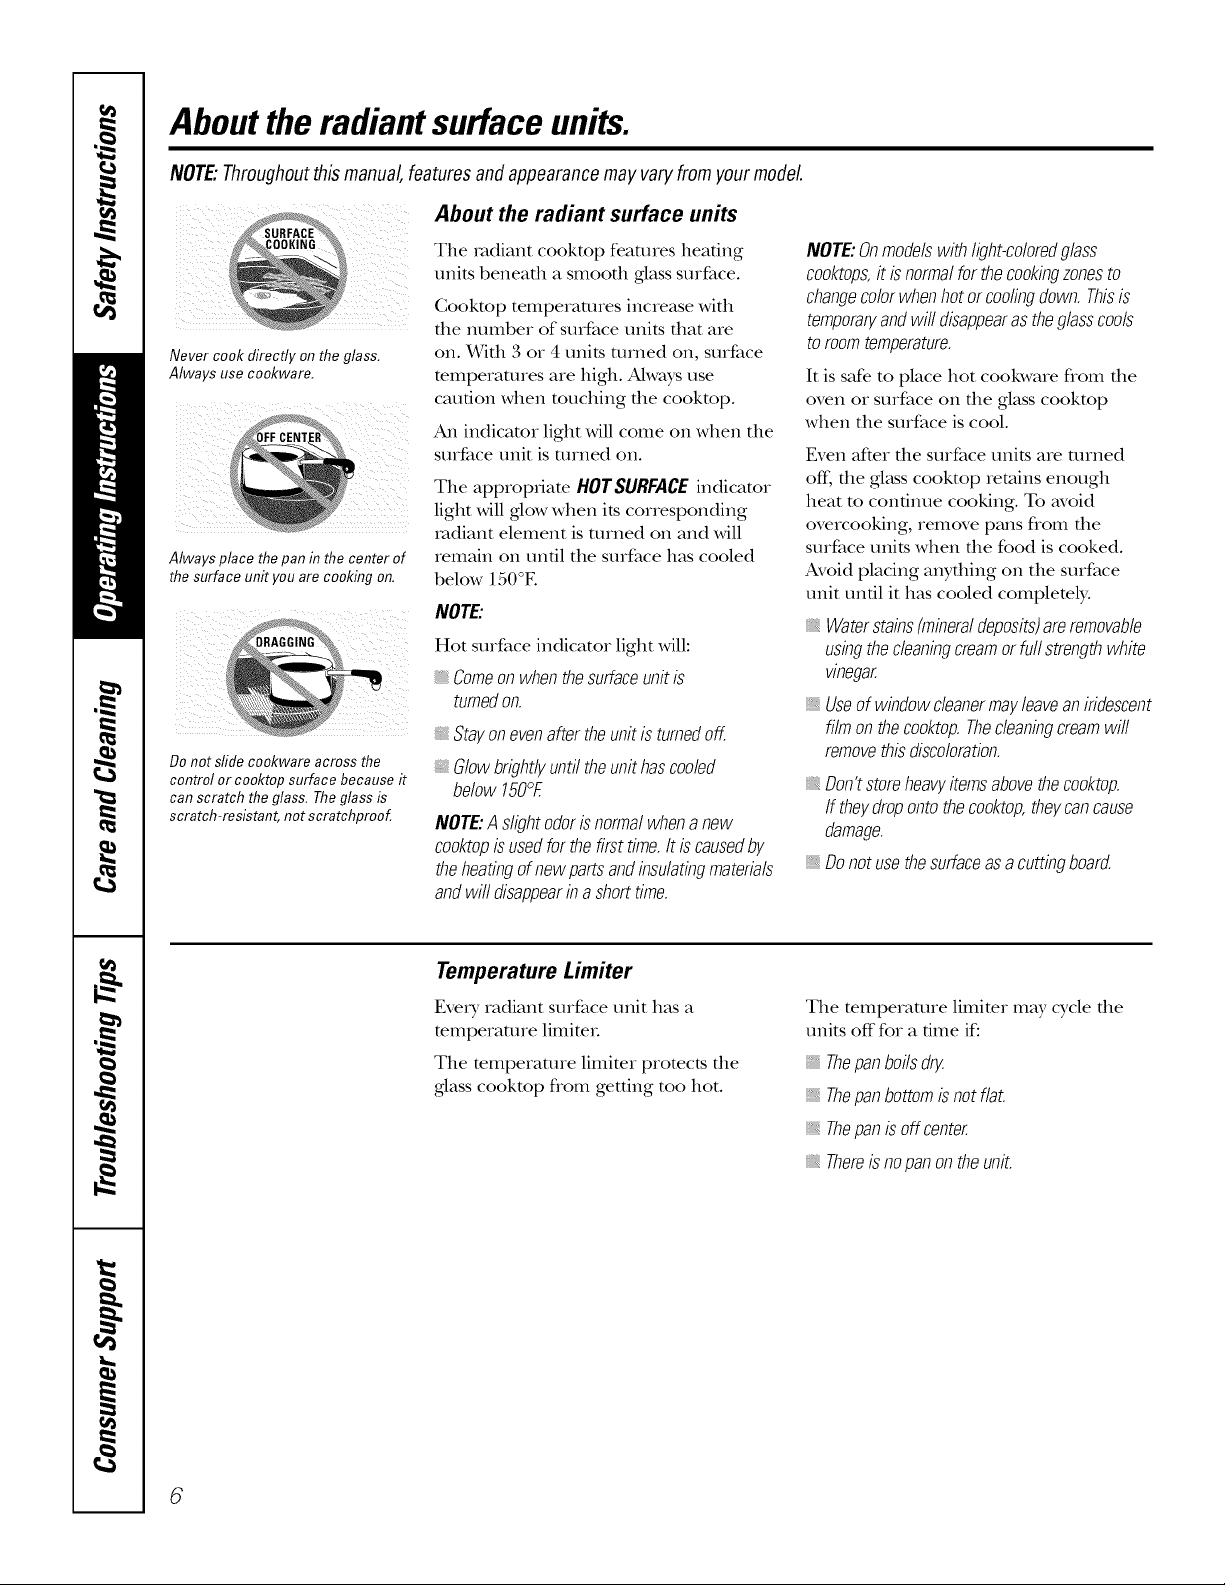
_SUR FACE_;%_
_,COOKING _
Never cook directly on the glass,
Always use co&ware,
Always place the pan in the center of
the surface unit you are cooking on,
d}j. DRAGGING_%
Do not sfide cookware across the
control or cooktop surface because it
can scratch the glass. Theglass is
scratch-resistant, not scratchproof.
The radiant cooktop feaulies heating
units behead1 a smoofll glass amface.
Cooktop temperatures increase with
the number of sueface units that a_e
on. With 3 or 4 units turned on, surface
mmpe_amres aie high. Always use
caution when touching the cookmp.
An indicatoi light will come on when the
amface unit is m_ned on.
The appropriate HOTSURFACEindicator
light will glow when its corresponding
radiant element is turned on and will
remain on until the surface has cooled
below 150°E
NOTE:
Hot sin(ace indicator light will:
CometurnedOnon.Whenthesurfaceunitis
Stayonevenaftertheunitisturnedoff.
Glowbrightlyuntiltheunithascooled
below150°E
NOTE:Aslightodorisnormalwhenanew
co&top is usedforthefirsttime.Itiscausedby
theheatingofnewpartsandinsulatingmaterials
andwilldisappearin ashorttime.
NOTE:Onmodelswithlight-coloredglass
co&tops,itisnormalfor thecookingzonesto
changecolorwhenhotorcodingdown.Thisis
temporaryandwilldisappearastheglasscools
toroomtemperature.
It is safe to place hot cookwa_e fiom the
oven oI sin(ace on the glass cooktop
when the amface is cool.
Even afteI file surface units a_e tinned
off; the glass cooktop retains enough
heat m continue cooking. To avoid
overcooking, _emove pans flom the
surface units when the food is cooked.
Avoid placing anything on the suIface
unit until it has cooled complemly.
Waterstains(mineraldeposits)areremovable
usingthecleaningcreamorfurlstrengthwhite
vinegar.
_,Useof windowcleanermayleaveaniridescent
filmonthecooktop.Thecleaningcreamwill
removethisdiscoloration.
Don'tstoreheavyitemsabovetheco&top.
If theydropontotheco&top, theycancause
damage.
, Donotusethesurfaceasacuttingboard.
Temperature Limiter
Every radiant surface unit has a
mmpe_atme limim_.
The mmpe,atme limim, promcts the
glass cookmp flom getting too hot.
The mmperamre limimr may cycle file
units off for a time if."
Thepanboilsdry
Thepanbottomisnot flat.
Thepanis off.center.
Thereisnopanontheunit.
6
Page 7

The following information will help you choose cookware which will give good performance on glass cooktops.
ge.com
Check pans for flat bottoms by using
a straight edge,
Stainless Steel'.
recommended
Aluminum:
heavyweightrecommended
Good conductMty. Aluminum residues
sometimes appear as scratches on the
cooktop, but can be removed if cleaned
immediately. Because of its low melting
point, thin weight aluminum should not
be used.
CopperBottom:
recommended
Copper may leave residues which can
appear as scratches. The residues can
be removed, as long as the cooktop is
cleaned immediately. HoweveL do not let
these pots boil dry. Overheamd metal can
bond to _ass cookmps. An overheamd
copper bottom pot will leave a residue
that will permanently stain the cooktop
if not removed immediamly.
Porcelain EnamelCoveredCastIron:
recommended
As long as the cookware is covered
completely wifll porcelain enamel, dds
cookware is recommended. Caution is
recommended for cast iron cookware
that is not complemly covered with
smooth porcelain enamel, as it mW
scratch the glass ceramic cookmp.
Glass-ceramic:
usable,butnotrecommended
Pool performance. May scratch die
soIface.
Stoneware:
usable,butnotrecommended
Pool performance. May scratch file
soIface.
Pans with rounded, curved, ridged
or warped bottoms are not
recommended.
Use only flat-bottomed woks.
Home Canning Tips
Be sure the canner is centered over the
surface unit.
Make sure die canner is fiat on die
bottom.
To prevent burns flom steam or heat,
use caudon when canning.
WokCooking
Werecommendthatyouuseonlyaflat-bottomed
wok.Theyareavailableatyourlocalretailstore.
Do not use woks that have support Iings.
Do not use round,bottom woks. You
could be seriously burned if the wok
tipped oveL
Use recipes and procedures flom
reputable sources. These are available
flom manufacUlrers such as Ball" and
Kerr" and die Del)artment of Agriculture
Extension SeiMce.
Flax-bottomed canners are recommellded.
Use of water bail1 cannei_ wifll Iippled
bottoms m W exmnd the 6me required to
biing the water to a boil.
Page 8
Usingthe surface units.
How to Set
HI
1 9
8
3 7
4 i
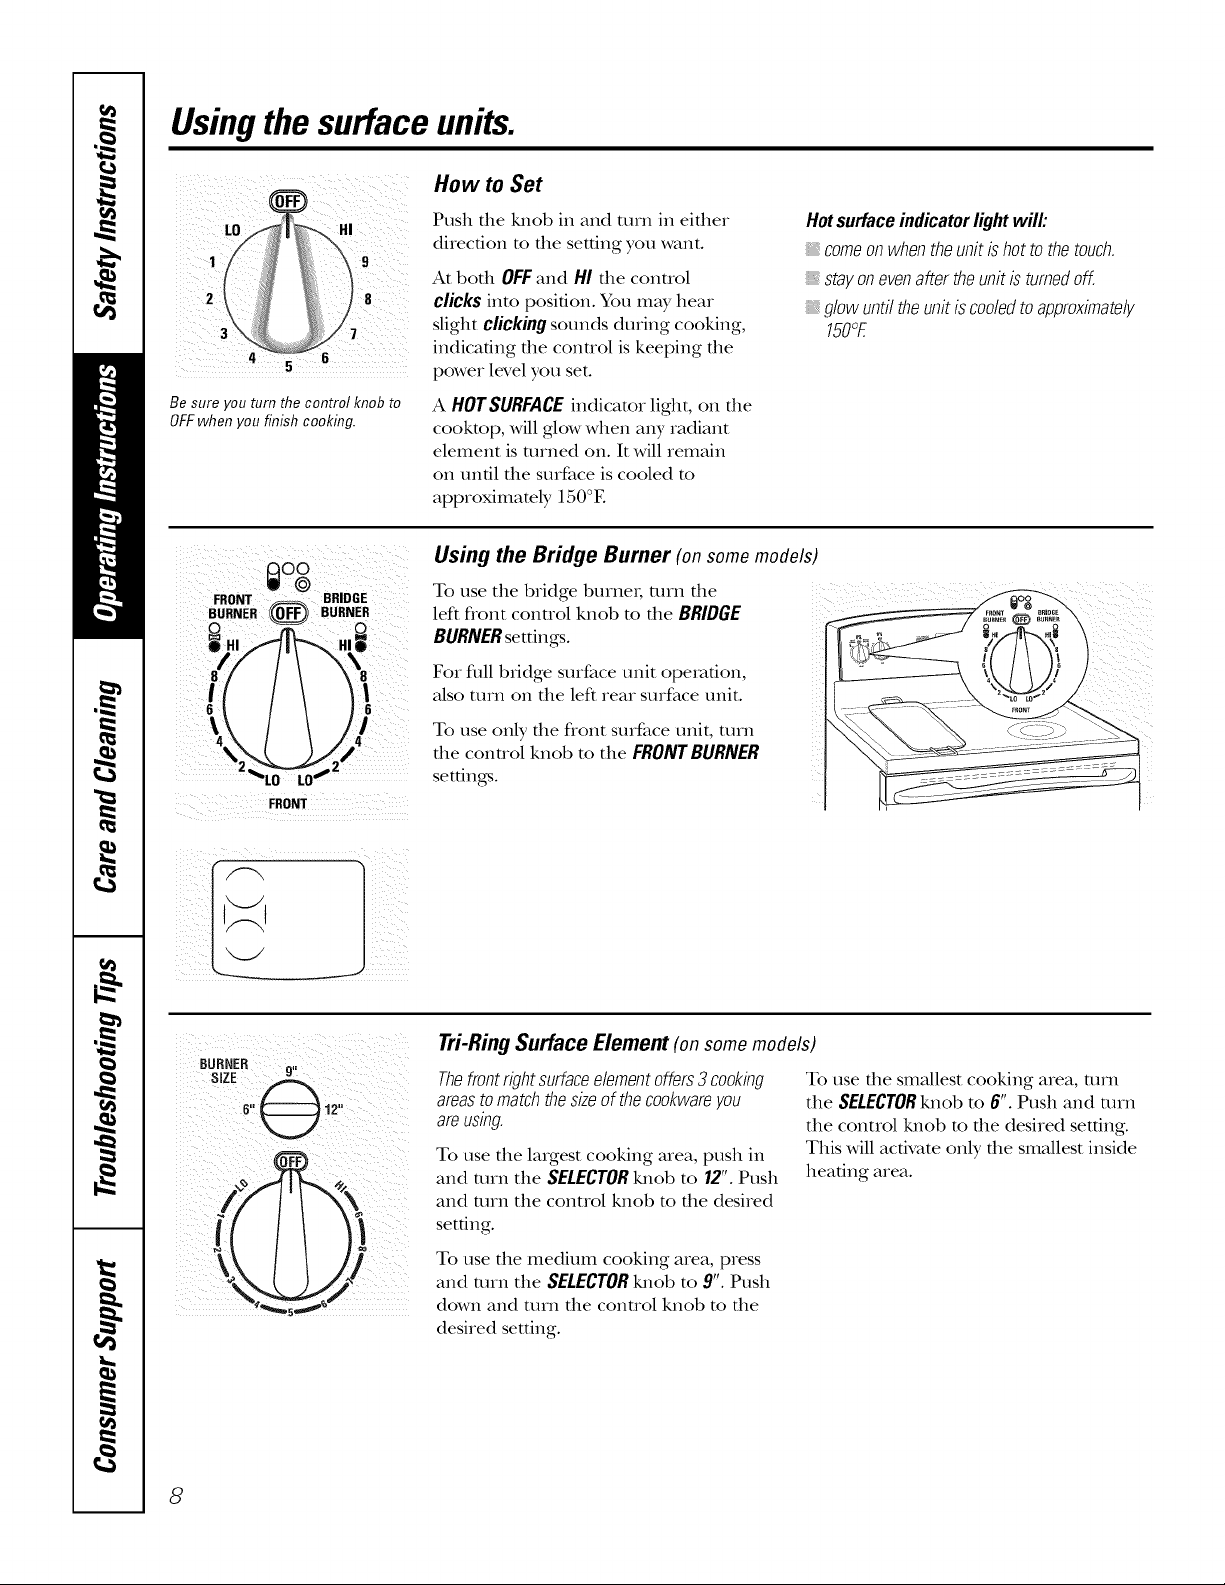
Be sure you turn the control knob to
OFFwhen you finish cooking.
FRONT
Push the Mlob in and turn in either
direction to the setting you want.
At both OFFand HI the control
clicks into position. You may hear
slight clicking sounds during cooking,
indicating the control is keeping the
power level you set.
A HOTSURFACEindicator light, on file
cookmp, will glow when any radiant
element is turned on. It will remain
on until the surface is cooled m
approximately 150°E
Using the Bridge Burner (on some models)
To use the bridge burnei; turn the
left flont conuol knob m the BRIDGE
BURNERsettings.
For full bddge surface unit operation,
also turn on the left rear surface unit.
To use only the flont surface unit, turn
the control knob to the FRONT BURNER
set6ngs.
Hotsurfaceindicatorlightwill:
comeonwhentheunitishottothetouch.
stayonevenaftertheunitisturnedoff.
glowuntiltheunitiscooledto approximately
150°E
Tri-Ring Surface Element (onsome models)
Thefrontrightsurfaceebmentoffers3cooking
areastomatchthesizeofthecookwareyou
areusing.
To use the laIgest cooking area, push in
and turn the SELECTORMlob to 12".Push
To use the smallest cooking area, turn
the SELECTORknob m 6". Push and turn
the control Mlob m the desired setting.
This will activate only the smallest inside
hea6ng area.
and turn the control knob to the desired
setting.
To use the medium cooking area, press
and turn the SELECTORMlob to 9". Push
down and turn the control knob to the
desired setting.
8
Page 9
0"8
OFF
WARMING ZONE
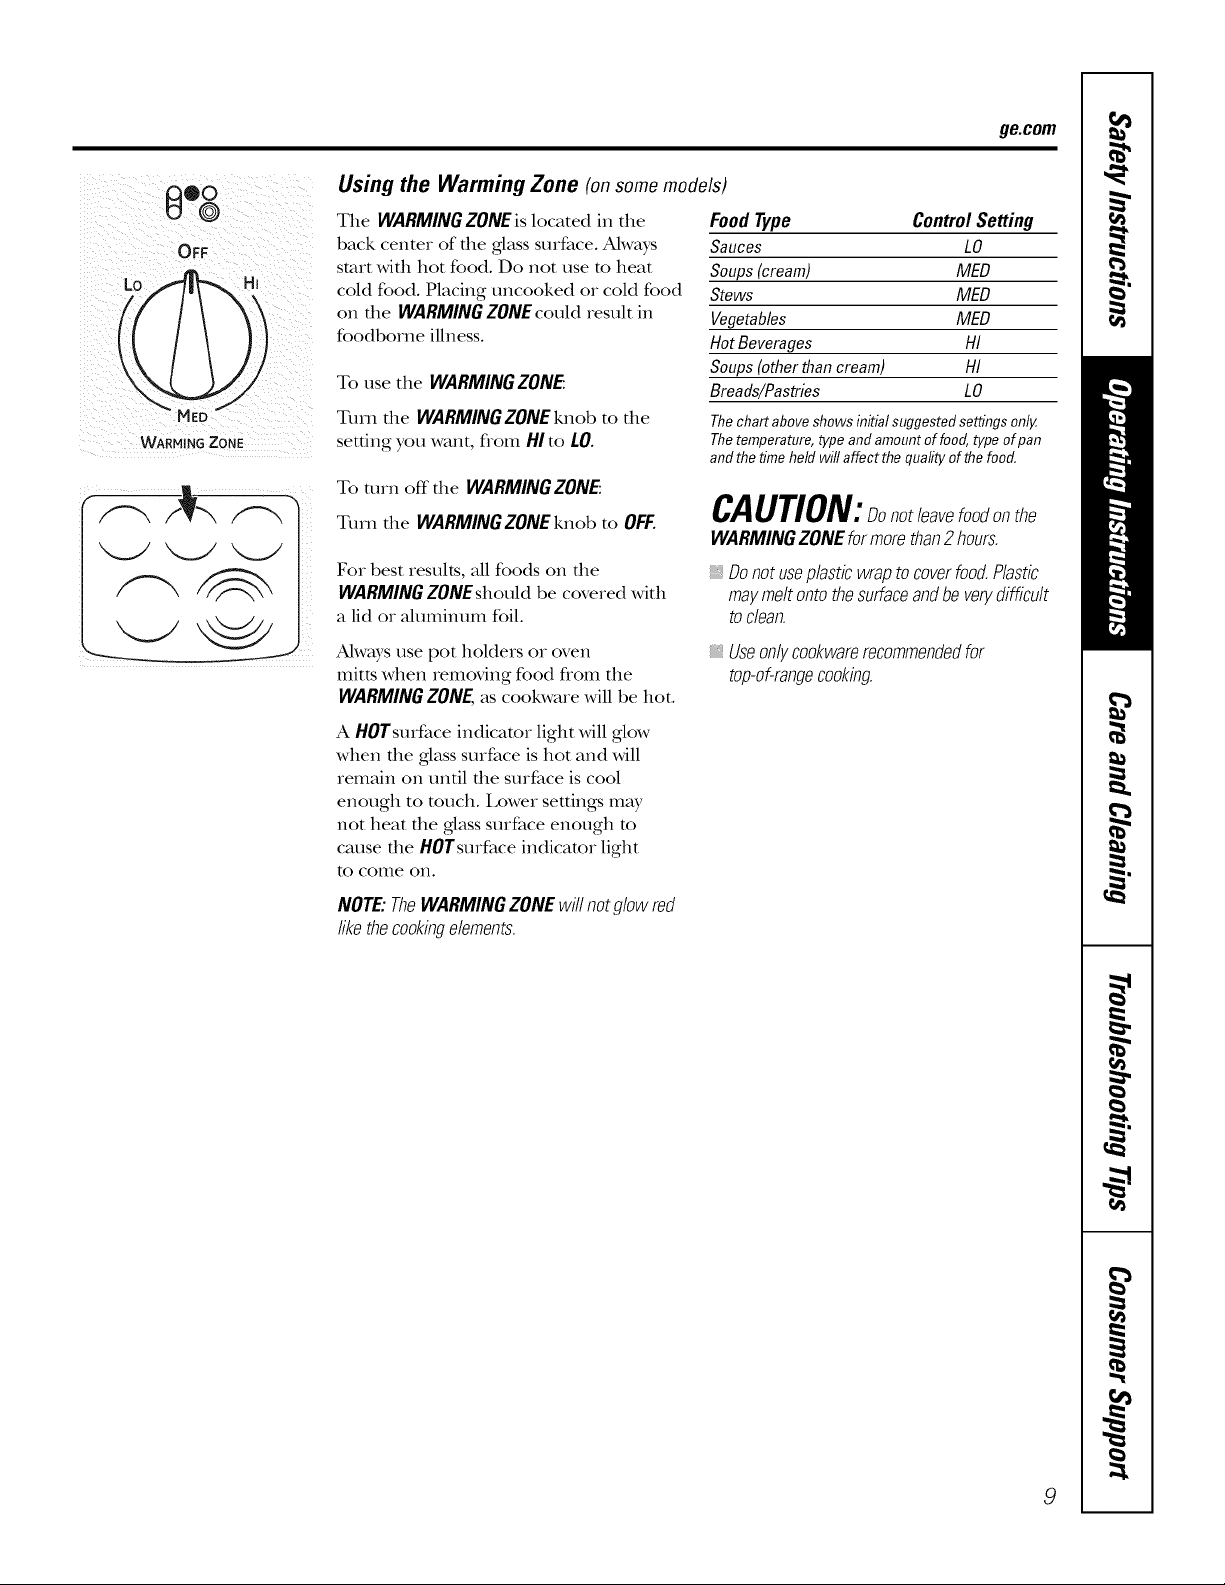
Using the Warming Zone (on some models)
The WARMINGZONEislocated in the
back center of die ,glass surface. Always
start widl hot food. Do Riotuse to heat
cold food. Placing uncooked or cold food
on die WARMINGZONE could result in
foodborne illness.
To use the WARMINGZONE:
Turn die WARMINGZONEknob to die
setting you want, flom HIto LO.
To mrn off die WARMINGZONE:
Turn die WARMINGZONEknob to OFF.
For best results, all foods on die
WARMING ZONEshould be covered with
a lid or ahmlinum foil.
ge.com
Food Type Control Setting
Sauces LO
Soups(cream) IVIED
Stews IVIED
Vegetables IVIED
HotBeverages HI
Soups(otherthan cream) HI
Breads/Pastries LO
The chart above shows initial suggested settings only.
The temperature, type and amount of food, type of pan
and the time hem wi// affect the qua/ity of the food.
CAUTION:Donotleavefoodonthe
WARMINGZONEformorethan2 hours.
_,Donotuseplasticwraptocoverfood.Plastic
maymeltontothesurfaceandbeverydifficult
toclean.
Ahvays use pot hoMers or oven
nlitts when removing food flom the
WARMINGZONE,as cookware will be hot.
A HOTsurface indicator light will glow
when die glass surface is hot and will
remain on until die surface is cool
enough to much. l,ower settings Rn_
not heat die glass surface enough m
cause die HOTsurface indicator light
tO CORIle ORI.
NOTE:TheWARMINGZONEwill notglowred
likethecookingelements.
_,Useonlyco&warerecommendedfor
top-of-rangecooking.
9
Page 10
Usingthe ovencontrols.
NOTE."Throughoutthismanual,featuresandappearancemayvary fromyourmodel.
-- TrueTem#
FqQ][Z]E]E]
E]Fl %Fq
OvenControl
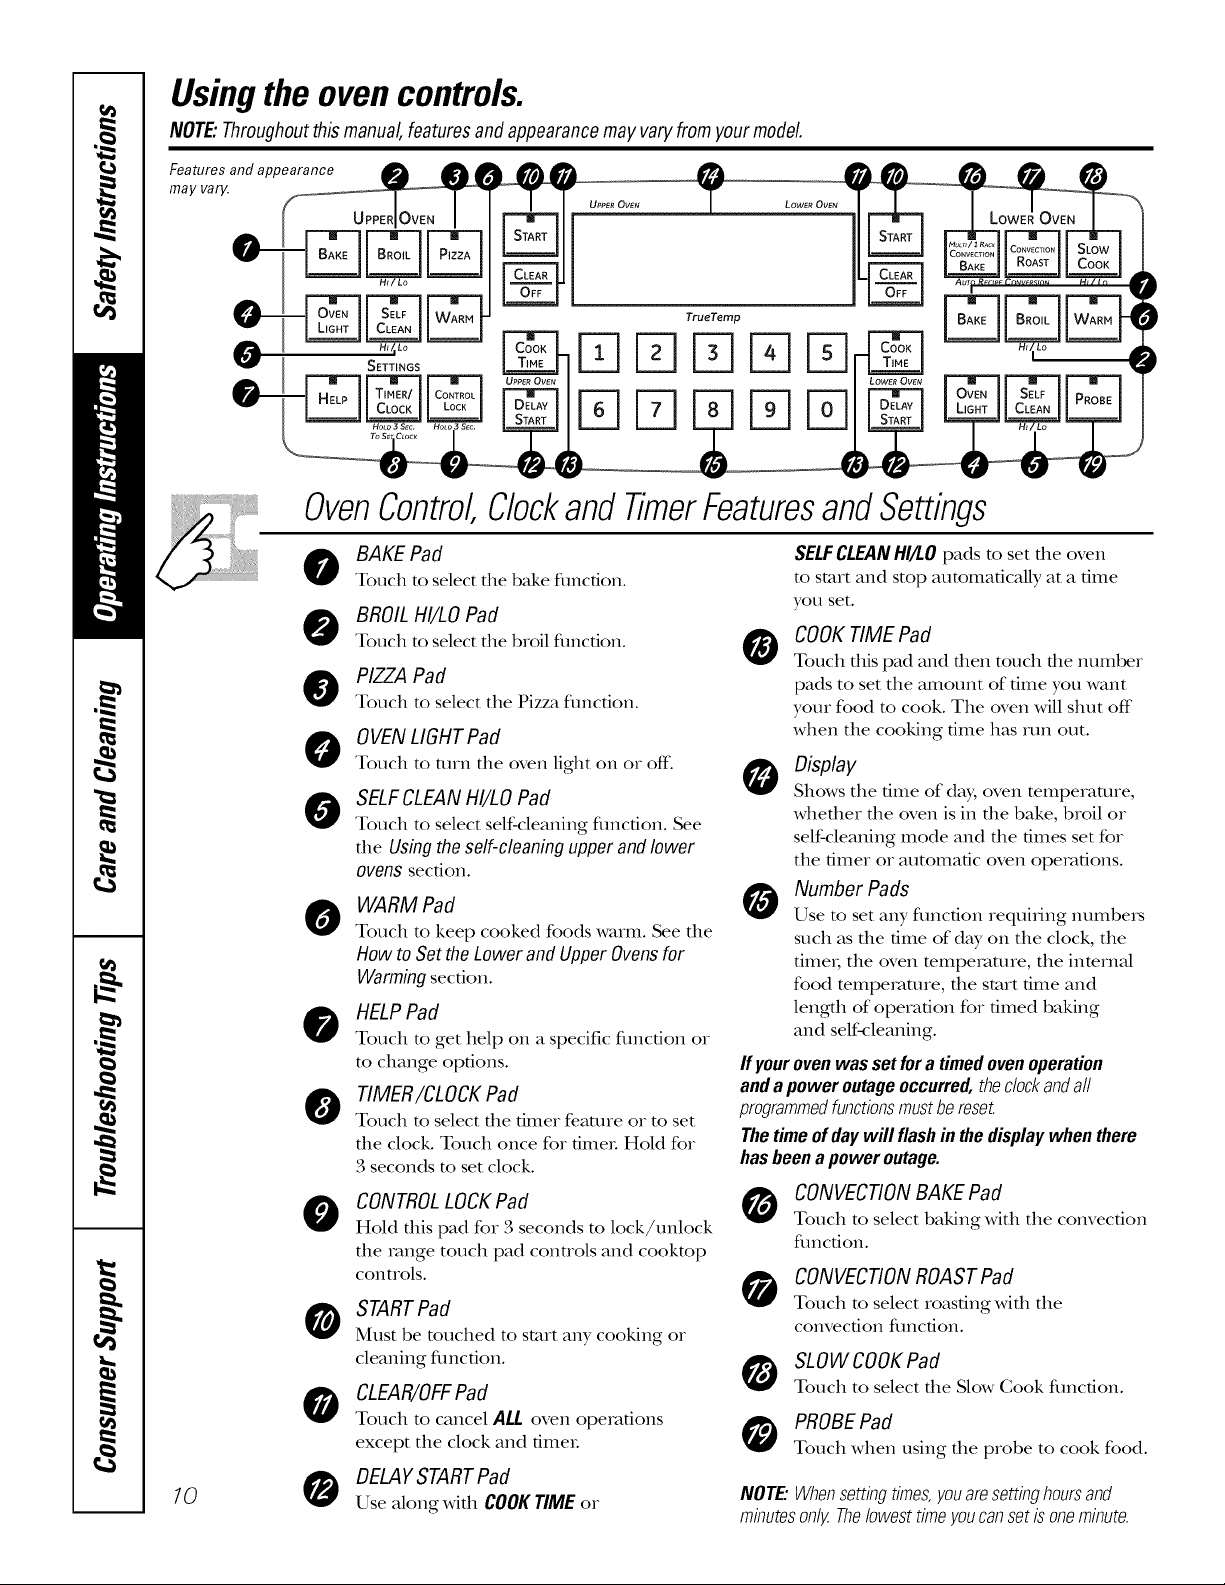
BAKE Pad
0
Touch to select the bake fimcfion.
BROILHI/LO Pad
0
Touch to select the broil fimcfion.
PIZZA Pad
@
Touch to select the Pizza fimcfion.
0 VENLIGHTPad
@
Touch to turn the oven light on or off:
SELFCLEANHI/LO Pad
0
Touch to select self-cleaning fimction. See
the Usingtheself-cleaningupperandlower
ovens section.
WARM Pad
0
Touch to keep cooked foods warm. See the
How toSetthe Lower andUpperOvensfor
Warmingsecdon.
HELPPad
Touch to get help on a specific fimcdon or
to change options.
TIMER/CLOCKPad
Touch to select the timer feature or to set
the clock. Touch once for dmeL HeM for
3 seconds to set clock.
ClockandTimerFeaturesandSettings
SELFCLEANHI/LOpads to set the oven
to start and stop automatically at a time
yOU set.
COOKTIME Pad
O
Touch this pad alld then touch the ntlnlber
pads to set the amount of time you want
your food m cook. The oven will shut off"
when the cooking time has mn out.
0 Display
Shows the time of da); oven temperature,
whefller file oven is in file bake, broil or
self-cleaning mode and file times set for
the timer or automatic oven operations.
Number Pads
Use to set any function requi_ing numbei_
such as the time of d W on the clock, the
fime_; the oven mmperature, the inmrnal
food mmpemture, the start time and
length of operation for timed baking
and self-cleaning.
ff yourovenwas set fora timedovenoperation
andapoweroutageoccurred, theclockandaft
programmedfunctionsmustbereset.
Thetimeof daywill flashin thedisplaywhen there
hasbeenapower outage.
0
,o 0
CONTROLLOCKPad
Hold this pad for 3 seconds to lock/unlock
the range touch pad controls and cooktop
controls.
STARTPad
Must be touched to start any cooking or
cleaning fimcfion.
CLEAR/OFFPad
Touch to cancel ALLoven operations
except the clock and fimeL
DELAYSTARTPad
Use along with COOKTIMEor
CONVECTIONBAKE Pad
Touch to select baking with the convection
flmcfion.
CONVECTIONROAST Pad
Touch to select roasting with the
convection fimcdon.
SLOWCOOKPad
Touch to select the Slow Cook function.
PROBEPad
Touch when using the probe to cook food.
NOTE:Whensettingtimes,youaresettinghoursand
minutesonly.Thelowesttimeyoucansetisoneminute.
Page 11
_ _ TrueTemp
l ITIITI
OvenControl ClockandTimerFeaturesandSettings
ge.com
I
i
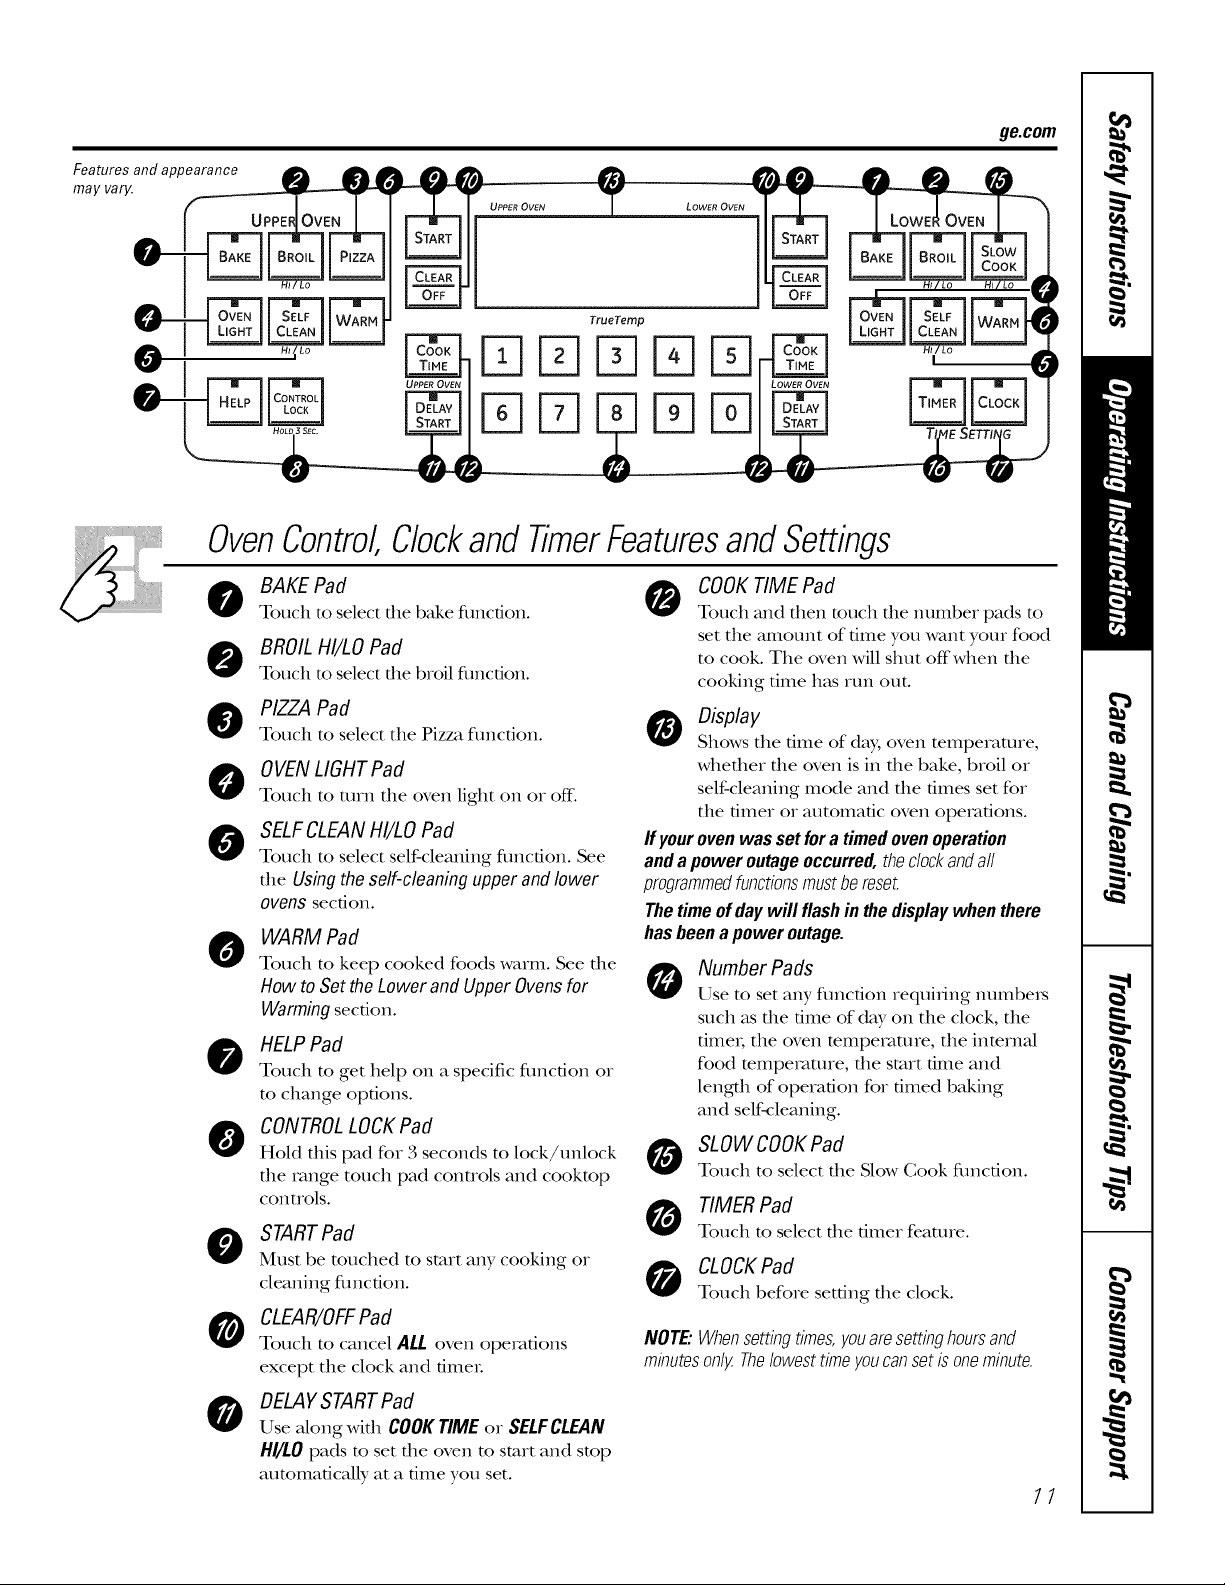
BAKE Pad
0
Touch to select the bake fimcfion.
BROILHI/LO Pad
0
Touch to select the broil fimcfion.
PIZZA Pad
@
Touch to select the Pizza fimcfion.
0 VENLIGHTPad
0
Touch to turn the oven light oi1 oi off.
SELFCLEANHI/LO Pad
0
Touch to select self-cleaning fimction. See
the Usingtheself-cleaningupperandlower
ovens section.
WARM Pad
0
Touch to keep cooked foods warnL See tile
How toSetthe Lower andUpperOvensfor
Warmingsecdon.
HELPPad
Touch to get help oi1 a specific fimcfion or
to change options.
CONTROLLOCKPad
Hold this pad for 3 seconds to lock/unlock
tile range touch pad controls and cooktop
connols.
STARTPad
Must be touched to start any cooking oi
cleaning fimcfion.
CLEAR/OFFPad
Touch to cancel ALLoven operations
except tile clock and fimeL
DELAYSTARTPad
0
Use along widl COOKTIMEoi SELFCLEAN
HI/LOpads to set tile oven to start and stop
autonlafically at a time you set.
COOKTIME Pad
0
Touch and then touch the number pads to
set tile amount of time you want your food
to cook. Tile oven will shut off'when tile
cooking time has run out.
0 Display
Shows tile time of day, oven temperature,
whefller file oven is in file bake, broil oi
self-cleaning mode and file times set for
tile timer oi automatic oven operations.
If yourovenwas setfora timed ovenoperation
andapoweroutageoccurred,thec/ockandall
programmedfunctionsmustbereset.
Thetimeof daywill flashin thedisplaywhenthere
hasbeenapower outage.
Number Pads
0
Use to set any fimcfion requiiing numbei_
such as the time of d W on the clock, the
time1; tile oven mmperature, tile inmrnal
food mmpemmre, tile start time and
length of operation for timed baking
and self-cleaning.
SLOWCOOKPad
Touch to select tile Slow Cook function.
TIMER Pad
Touch to select tile timer feature.
CLOCKPad
Touch before setting tile clock.
NOTE:Whensettingtimes,youaresettinghoursand
minutesonly.Thelowesttimeyoucansetisoneminute.
77
Page 12
Usingthe upperoven.
Toavoid possible bums, place the racks in the desired position before you turn the oven on.
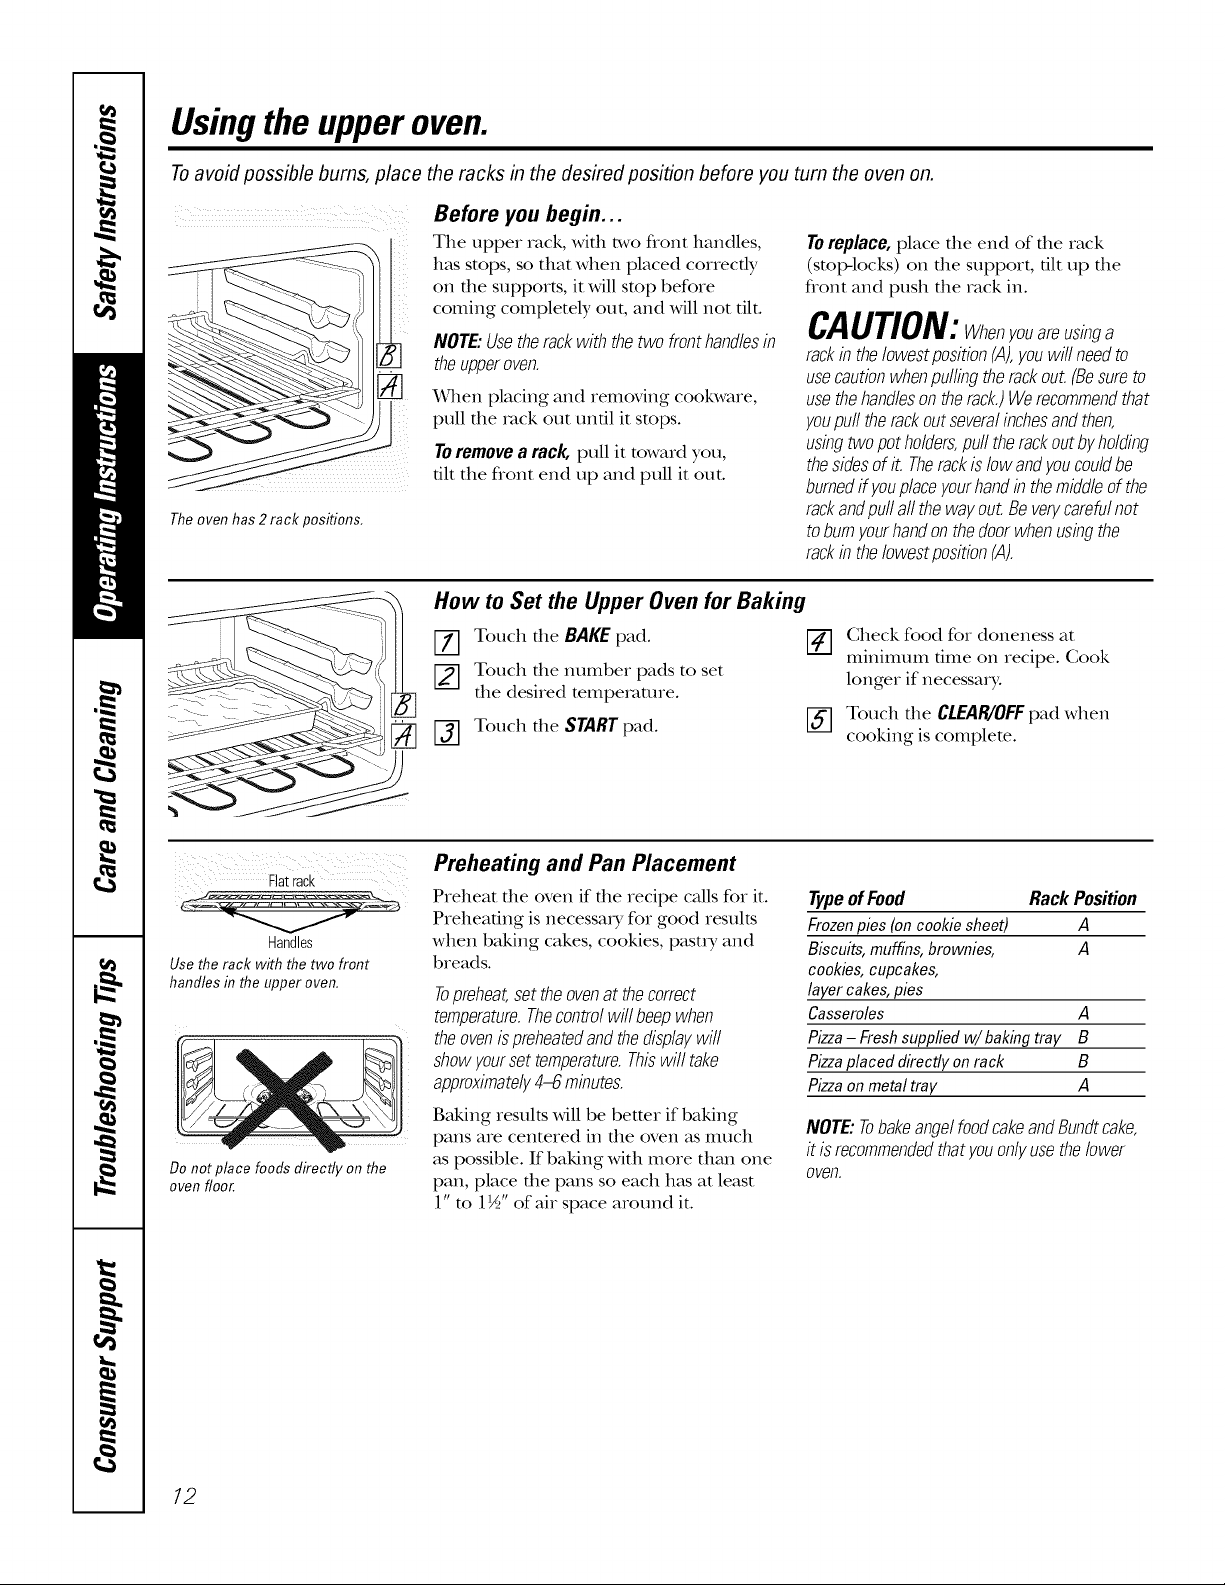
Before you begin...
The oven has 2 rack positions.
The upper rack, with two front handles,
has stops, so that when placed correcdy
on the supports, it will stop before
coming completely out, and will not flit.
NOTE:Usetherackwiththetwo fronthandlesin
theupperoven.
When placing and removing cookware,
pull fl_e _v_ckout unfll it stops.
Toremovea rack, pull it toward you,
flit the flont end up and pull it out.
How to Set the Upper Oven for Baking
1-_ Touch tile BAKEpad. []
[] Touch tile number pads to set
tile desired tempe_ture.
[-_ Touch tile STARTpad.
Toreplace,place file end of file rack
(stop-locks) on die support, flit up file
flont and push the rack in.
CAUTION:When;/ouareusinga
rackinthelowestposition(A),youwillneedto
usecautionwhenpullingtherackout.(Besureto
usethehandlesontherack.)Werecommendthat
;/oupu//therackoutseveralinchesandthen,
usingtwopotholders,pu//therackoutb;/holding
thesidesofit. Therackislowand;/oucouldbe
burnedif ;/oup/ace;/ourhandin themiddleofthe
rackandpu//a//thewa;/out.Beverycarefulnot
tobum;/ourhandonthedoorwhenusingthe
rackinthelowestposition(A).
Check food for doneness at
mmmmm flme on recipe. Gook
longer if necessary:
[] Touch tile CLEAR/OFFpad when
cooking is complete.
Handles
Use the rack with the two front
handles in the upper oven,
Do not place foods directly on the
oven floor.
Preheating and Pan Placement
Preheat the oven if the recipe calls for it.
Preheating is necessaz T for good results
when baking cakes, cookies, pasu T and
breads.
Topreheat,settheovenat thecorrect
temperature.Thecontrolwill beepwhen
theovenispreheatedandthedisp/a;/wi//
show;/oursettemperature.Thiswi//take
approximate/;/4-6minutes.
Baking results Mll be better if baking
pans are centered in file oven as much
as possible. If baking with more than one
pan, place the pans so each has at least
1" m 1½" of air space around it.
Typeof Food Rack Position
Frozenpies(on cookie sheet) A
Biscuits,muffins,brownies, A
cookies,cupcakes,
layercakes,pies
Casseroles A
Pizza- Freshsuppliedw/baking tray B
Pizzaplaced directly onrack B
Pizzaonmetal tray A
NOTE:TobakeangelfoodcakeandBundtcake,
it isrecommendedthatyouonlyusethelower
oven.
12
Page 13
Usingthe lower oven. gecom
Toavoid possible bums, place the racks in the desired position before you turn the oven on.
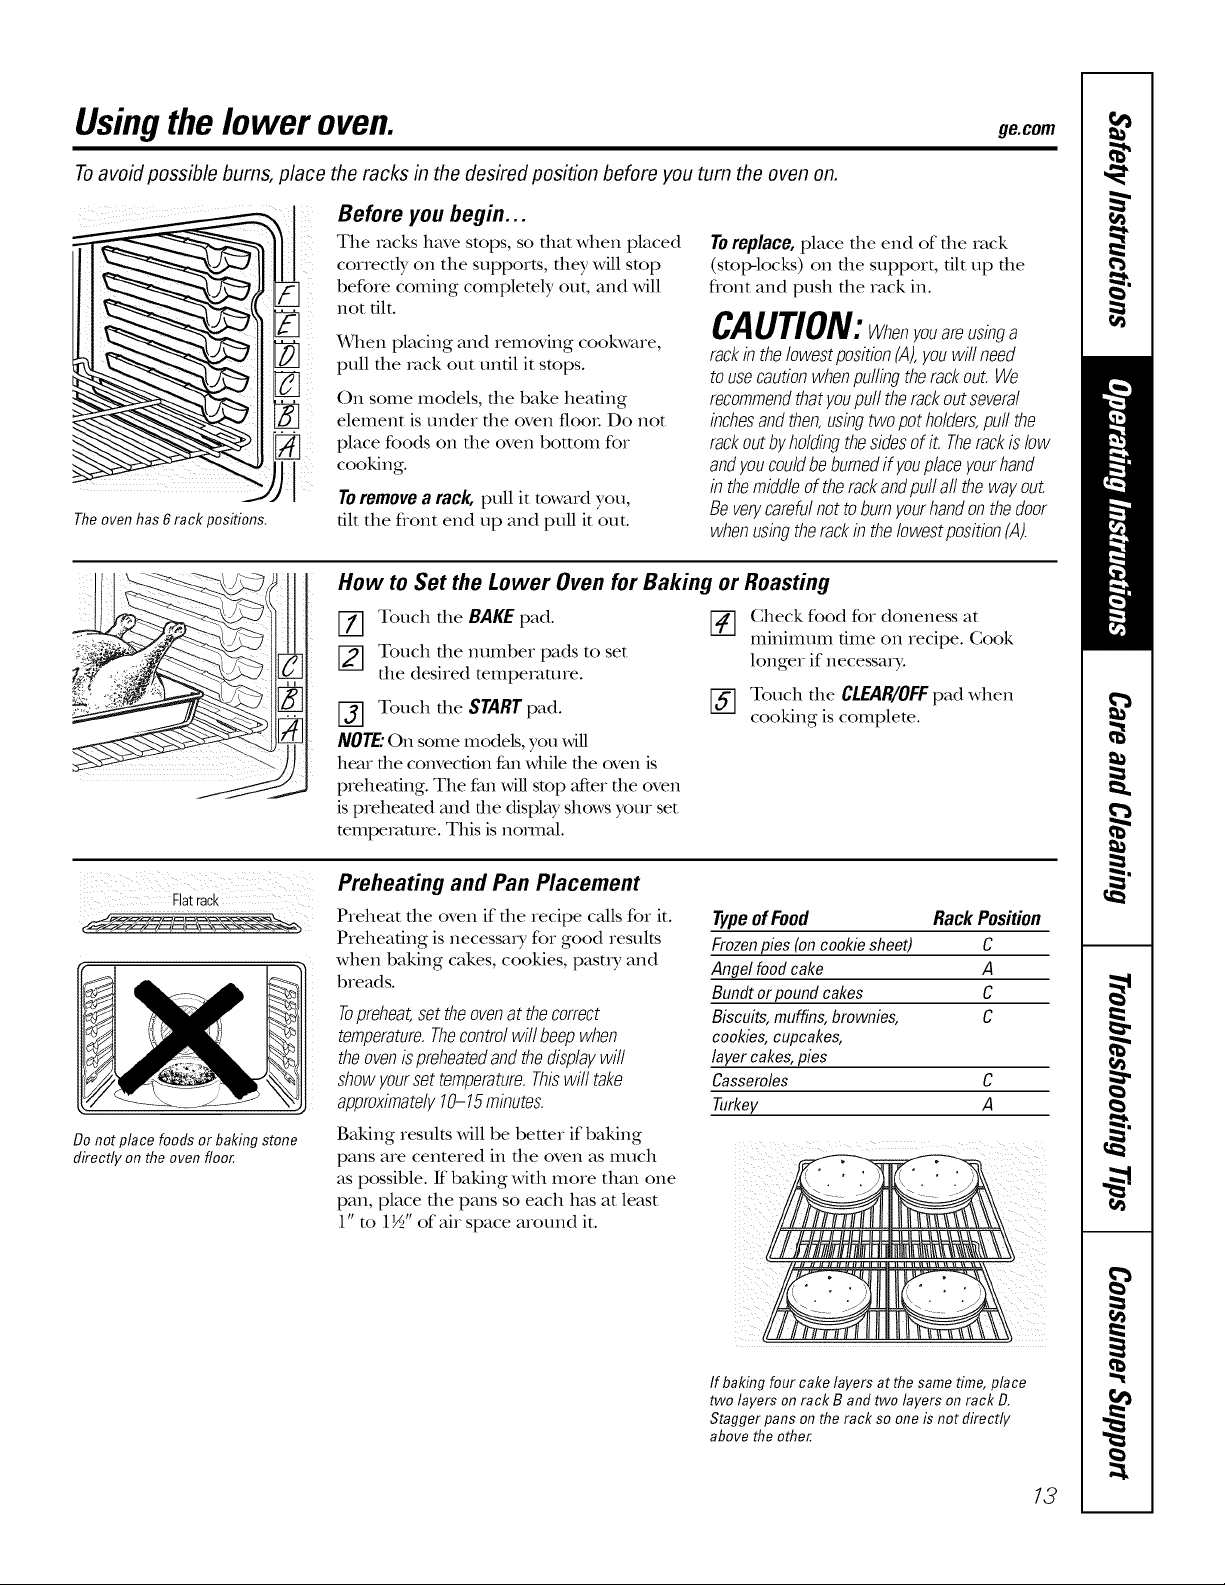
Before you begin...
The oven has 6 rack positions.
The racks have stops, so that when placed
correcdy on the supports, they will stop
before coming complemly out, and will
not flit.
x4qlen placing and removing cookware,
pull the rock out until it stops.
On some models, file bake heaflng
element is under die ovei:t flooL Do not
place foods on tile oven bottom for
cooking.
Toremovea rack, pull it toward you,
flit the flont end up and pull it out.
How to Set the Lower Oven for Baking or Roasting
[-_ Touch tile BAKEpad.
Touch tile number pads to set
tile desired tempe_ture.
[-_ Touch tile STARTpad.
NOTE."On some models, you will
hear the convection fan while the oven is
preheaflng. The fan Mll stop Jter die oven
is preheated and die display shows your set
mmpemmre. This is nomlal.
Toreplace,place file end of file rack
(smpqocks) on die support, flit up die
flont and push the rack in.
CAUTION:Whenyouareusinga
rackinthelowestposition(A),youwillneed
tousecautionwhenpullingtherackout.We
recommendthatyoupulltherackoutseveral
inchesandthen,usingtwopotholders,pullthe
rackoutbyholdingthesidesofit.Therackislow
andyoucouldbeburnedifyouplaceyourhand
in themiddleoftherackandpullall thewayout.
Beverycarefulnotto burnyourhandonthedoor
whenusingtherackin the/owestposition(A).
Gheck food for doneness at
mmmmm time on recipe. Gook
longer if necessary:
Touch tile CLEAR/OFFpad when
cooking is complete.
F]atrack
Do not place foods or baking stone
directly on the oven floor.
Preheating and Pan Placement
Preheat the oven if the recipe calls for it.
Preheating is necessaz T for good results
when baking cakes, cookies, pasu T and
breads.
Topreheat,settheovenat thecorrect
temperature.Thecontrolwill beepwhen
theovenispreheatedandthedisplaywill
showyoursettemperature.Thiswilltake
approximately10-15minutes.
Baking results Mll be better if baking
pans are centered in file oven as much
as possible. If baking with more than one
pan, place the pans so each has at least
1" m 1½" of air space around it.
Typeof Food Rack Position
Frozenpies(on cookie sheet) C
Angel foodcake A
Bundt or pound cakes C
Biscuits,muffins,brownies, C
cookies,cupcakes,
layercakes,pies
Casseroles C
Turkey A
If baking four cake layers at the same time, place
two layers on rack B and two layers on rack D.
Stagger pans on the rack so one is not directly
above the other.
13
Page 14
Usingthe upperandlower ovens.
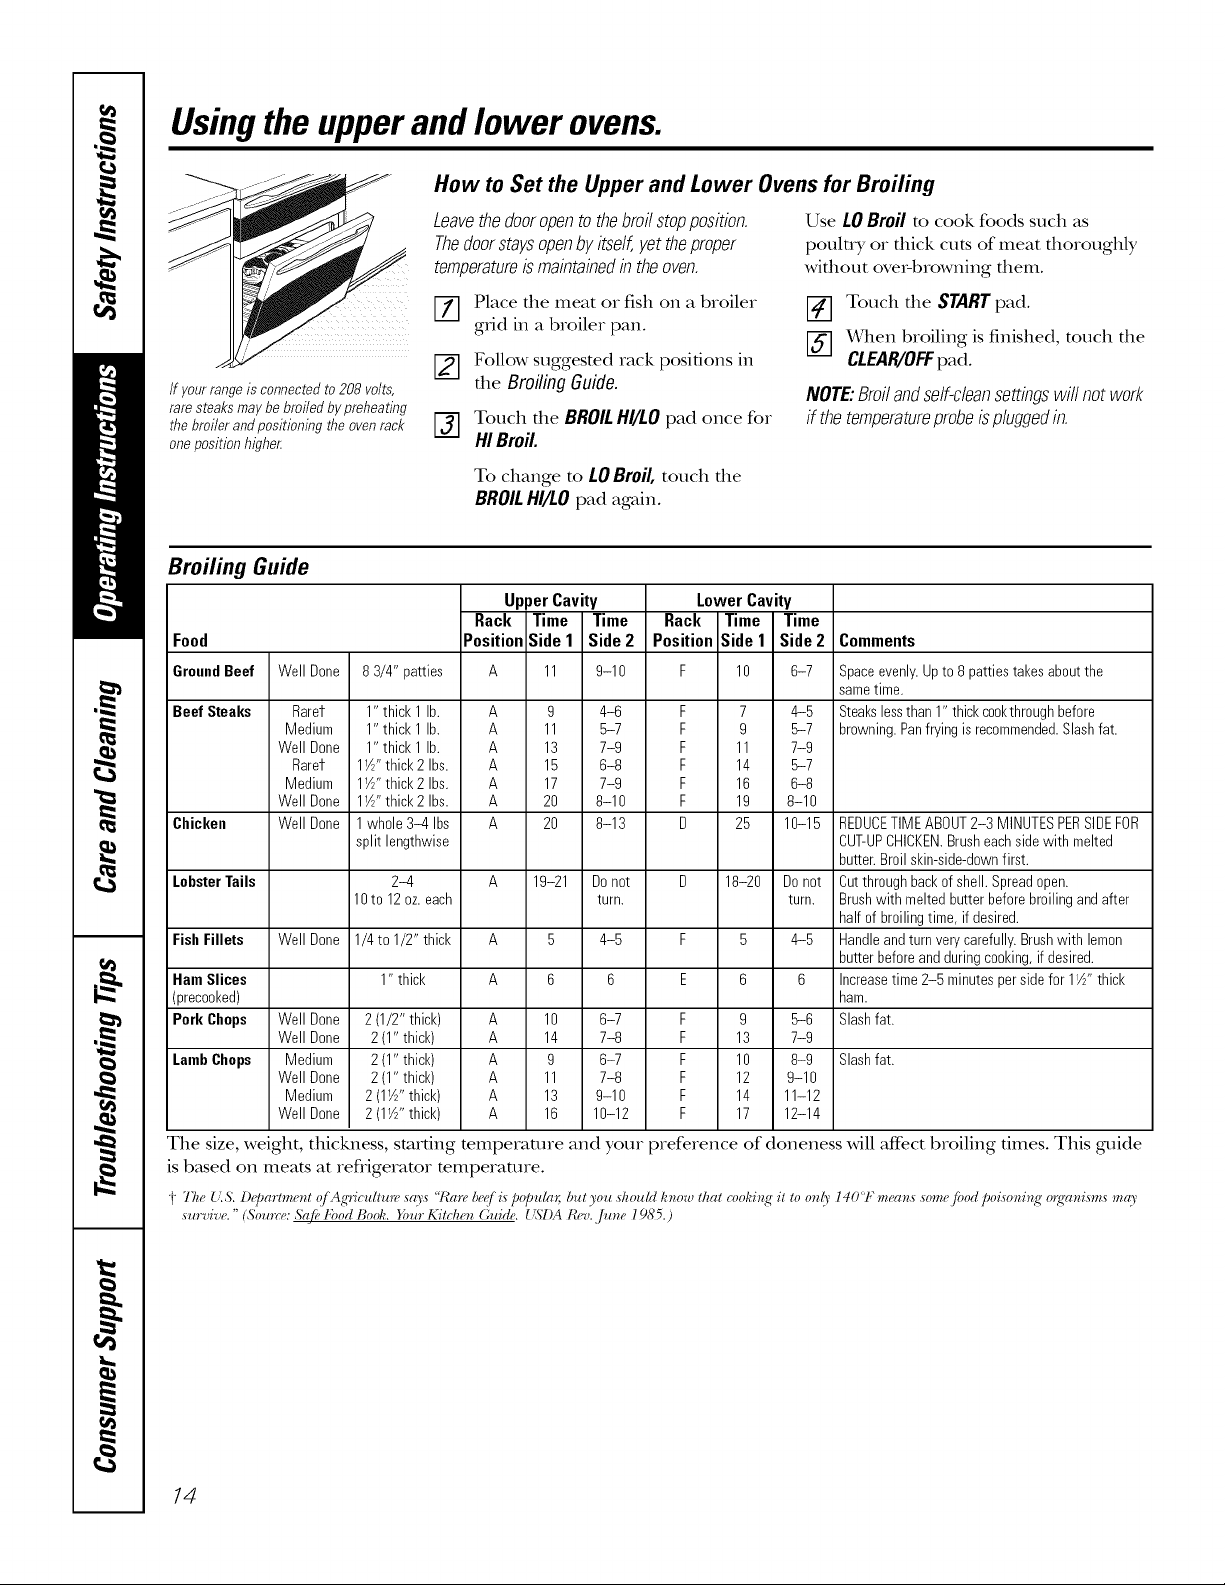
How to Set the Upper and Lower Ovens for Broiling
Leavethedooropento thebroilstopposition.
Thedoorstaysopenbyitself,yettheproper
temperatureismaintainedintheoven.
Use LO Broil to cook foods such as
poulu y or dlick cuts of meat dloroughly
wifllout eve>browning them.
[] lace the meat or fish oil a broiler
grid in a broiler pan.
[_] Touch the START pad.
When broiling is finished, touch the
CLEAR/OFFpad.
NOTE:Broil and self-clean settings will not work
if the temperatureprobeis plugged in.
tf yourrangeis connectedto 208 volts,
raresteaksmaybebroiledbypreheating
thebroiler andpositioning theovenrack
oneposition higher
[] Follow suggested rack positions in
the BroilingGuide.
[_] Touch the BROIL HI/LO pad once for
HIBroil.
To change to LOBroil,touch the
BROILHI/LOpad again.
Broiling Guide
UpperCavity Lower Cavity
Rack Time Time Rack Time Time
Food
GroundBeef
Beef Steaks
Chicken
LobsterTails
Fish Fillets
Ham Slices
(precooked)
Pork Chops
LambChops
Well Done
Rarer
Medium
Well Done
Rarer
Medium
Well Done
Well Done
Well Done
Well Done
Well Done
Medium
Well Done
Medium
Well Done
83/4" patties A 11 9-10 F 10 6-7
1" thick 1 lb. A 9 4-6 F 7 4-5
1" thick 1 lb. A 11 5-7 F 9 5-7
1" thick 1 lb. A 13 7-9 F 11 7-9
1Z" thick 2 Ibs. A 15 6-8 F 14 5-7
1Z" thick 2 Ibs. A 17 7-9 F 16 6-8
1Z" thick 2 Ibs. A 20 8-10 F 19 8-10
1whole 3-4 Ibs A 20 8-13 U 25 10-15
split lengthwise
2-4 A 19-21 Donot D 18-20
lOto 12 oz.each turn.
1/4to 1/2" thick A 5 4-5
1" thick
2(1/2" thick) A 10 6-7 F 9 5-6
2 (1" thick) A 14 7-8 F 13 7-9
2 (1" thick) A 9 6-7 F 10 8-9
2 (1" thick) A 11 7-8 F 12 9-10
2 (1W' thick) A 13 9-10 F 14 11-12
2 (1W' thick) A 16 10-12 F 17 12-14
PositionSide1 Side2 Position Side 1 Side 2 Comments
Spaceevenly.Upto 8 pattiestakes aboutthe
sametime.
Steakslessthan 1" thick cookthroughbefore
browning.Panfryingis recommended.Slashfat.
REDUCETIME ABOUT2-3 MINUTESPERSIDEFOR
CUT-UPCHICKEN.Brusheachside with melted
butter.Broil skin-side-downfirst.
Donot Cutthroughbackof shell.Spreadopen.
turn. Brushwith melted butter before broiling andafter
half of broilingtime, if desired.
4-5 Handleandturnverycarefully.Brushwith lemon
butterbeforeandduring cooking,if desired.
6 Increasetime 2-5 minutespersidefor 1I/2"thick
ham.
Slashfat.
Slashfat.
The size, weight, thickness, starting mmperamre and your preference of doneness will aft_ct broiling times. This guide
is b_tsed on meats at refiigeramr mmperature.
i "l'ke{'.S. l)_JJartment (j Ag'Hculture says "/Carebe(,/i_ popul(n; but you should know that (_,oldng"it to only 140 'F mean,s some /bod poisoning" o_gwnisms "frO'
survive. " (Sou_re: &{fi"kbod Book. }bur Kitchen Guide. {(S'I)ARev.,/une 19S5.)
14
Page 15

Usingthe timedbakingand mastingfeatures.(onsomen od /s) ge.oom
NOTE: Foods that spoil easily--such as milk, eggs, fish, stuffings, poultry and pork--should not be allowed to sit for
more than 1hour before or after cooking. Room temperature promotes the growth of harmful bacteria. Be sure that
the oven light is off because heat from the bulb will speed harmful bacteria growth.
How to Set an Immediate Start and Automatic Stop
Theovenwill turnonimmediate/}/andcookfor
a selectedlengthof time.At theendofthe
cookingtimetheovenwill turnoff automatica//}/
[Z] Touch tile BAKEpad.
Touch tile number pads to set tile
desired oven temperaune.
Touch tile COOKTIMEpad.
%
NOTE:ff}loutreciperequirespreheating,}/oumail
needtoaddadditionaltimetothelengthofthe
cookingtime.
-_ otlch tile ntllIlbeI pads to set tile
desired length of cooking dine. Tile
minimum cooking time you can set
is 1 minum.
Tile oven mmperamre fllat you set
and the cooking dine that you
entered will be in tile display.
Tile oven will mrn ON, and die display will
show die cooking dine countdown and die
chang4ng mmperature starting at 100°E
(The mmperatme displ W will start m
change once tile oven mmpemmm reaches
100°E) X_qlen tile oven reaches file
mmpemmre you set, 3 beeps will sound.
Tile oven will continue m cook for
file set amount of time, t]len turn off"
automatically, unless file ¼5kRM feature
was set. See the How to Set the Oven for
Warmingsection.
Touch tile CLEAR/OEFpad to clear
%
tile display if necessaD,. Remove tile
food flom tile oven. Remembex;
even ttlough tile oven turns off"
automatically, food left in tile oven
will continue cooking after tile oven
turns off:
DDD D
%DD D
DDD D
DDDDD
DDD D
DDDDD
B
Touch tile STARTpad.
NOTE"Anattentiontonewillsoundif }/ouareusing
timedbakinganddonottouchtheSTARTpad.
How to Set a Delayed Start and Automatic Stop
Theovenwill turnonatthetimeofda}/}/ouset,
cookforaspecificlengthoftimeandthenturnoff
automatical/}/
Make stlIe die clock sllows tile correct
time of day.
[Z] Touch tile BAKEpad.
Touch tile number pads to set tile
desired oven temperature.
Toucll tile COOKTIMEpad.
NOTE:ff}loutreciperequirespreheating,}/oumail
needtoaddadditionaltimetothelengthofthe
cookingtime.
Totlch tile ntllllbeI pads to set tile
desired length of cooking time. Tile
minimum cooking time you can set
is 1 minum.
Tile oven mmperatme fllat you set
and tile cooking time that you
entered will be in tile display.
Toucll tile DELAYSTARTpad.
@
Touch tile number pads to set tile
@
time of dayyou want tile oven to
mrn on and start cooking.
Toucll tile STARTpad.
m
NOTE"Anattentiontonewillsoundif }/ouareusing
timedbakinganddonottouchtheSTARTpad.
NOTE:ff}/ouwouUliketocheckthetimes}/ou
haveset,touchtheDELAYSTARTpadtocheck
thestarttime}/ouhavesetortouchtheCOOK
TIMEpadto checkthelengthofcookingtime
}/ouhaveset.
When file oven turns ONat file time
of day you set, file display Mll stlow file
cooking time countdown and file
changing mmpemmre starting at 100°E
(Tile mmpemmre displW will start m
change once tile oven mmperature
reaches 100°E) When tile oven reaches
tile mmperamre you set, beeps will sound.
Tile oven will continue m cook for
tile set aHlotlnt of fillle, t]len t/lIn off
automatically, unless tile ¼5kRMfeature
w_tsset. See file Howto get the Ovenfor
Warmingsection.
Touch tile CLEAR/OEFpad to clear
tile display if necessaD,. Remove tile
food flom tile oven. Remembex,
even ttlough tile oven turns off"
automatically, food left in tile oven
will continue cooking after tile oven
turns off: 15
Page 16

Usingtheprobe on the lower convectionoven.(o,somemodels)
Formany foods, especially roasts and poultry, internal food temperature is the best test for doneness. The
temperature probe takes the guesswork out of roasting by cooking foods to the exact doneness you want.
Thetemperature probe has a
skewer-fike probe at one end and
a plug at the other end that goes
into the outlet in the oven.
Use of probes other than the one
provided with this product may result in
damage to the probe or oven control.
Use the handles of the probe and plug
when inserting and removing them flom
the food and outlet.
_,Toavoiddamagingyourpmbe,donotuse
tongstopullonthecablewhenremovingit.
Toavoidbreakingtheprobe,makesurefood
iscompletelydefrostedbeforeinserting.
AtYerpreparing die meat and placing
it on a trivet or a broiler pan grid, follow
these directions for proper probe
placement.
Insert the probe completely into the
meat. It should not touch bone, fat
or gristle.
NOTE:Failuretofullyinsert theprobeintothe
meatmayresultinpoorcookingperformance
becausetheprobewillsensetheovenair vs.
thefoodtemperature.
PIL
Probe
ovelabel
Neverleaveyourprebeinsidetheovenduring
aself-cleaningorbroilcycle.
Do notstore theprebe in the oven.
CAUTION:Topreventpossibleburns,
do not unplug theprobe from the ovenoutlet until
the ovenhascooled.
Fox roasts widl no bone, insert the probe
into the meatiest part of the roast. Fox
bone-in ham or lamb, insert the probe
into the center of the lowest large muscle.
Insert the probe into the center of dishes
such as meat loaf or casseroles.
Insert the probe into the meatiest part of
the inner thigh flom below and parallel
to the leg of a whole turke):
NOTE:Self-cleanandBroilsettingswillnotwork
if thetemperatureprobeispluggedin.
DDDD
%DDDD
DD%D
%DD D
16
How to Set the Lower Oven For Baking/Roasting When Using the Probe
(onsomemodels)
Insert the probe fldly into the food.
Plug file probe into the oudet in the
oven. Make sure it's pushed all the
way in. Close the oven dooL Make
sure the probe cable is not touching
the broil element.
Touch the PROBE pad. Display will
show "Set Probe Tempemtux e.'
_-] Touch the number pads to set the
desired internal food or meat
temperature. The maxinmm
internal temperature for the food
that you can set is 200°F.
[_] Touch the BAKE pad.
Touch the number pads to set the
desired oven temperature.
Aider the internal temperature of the
food reaches 100°E the changing internal
temperature will be shown in the display:
X&qlen the internal temperature of
the food reaches the number you
have set, the probe and the oven
mrn off" and the oven control signals.
To stop the signal, much the
CLEAR/OFFpad. Use hot pads m
remove the probe from the food.
Do not use rungs to pull on it--they
might damage it.
If theprobeis removedfromtheovenwhile
probecooking,theovenwillnotautomatically
turnoff.
To change die oven mmperamre during
the Bake/Roast cycle, much the BAKE
pad and then the number pads m set the
_-] Touch the START pad.
new temperature.
YoucanusetheKitchenTimereventhough
youcannotusetimedovenoperations
whileusingtheprobe.
Page 17

Usingthe clock, kitchen timerand controllock. gecom
To Set the Clock
(onsomemodem
(onsomemodels)
Makesuretheclockissettothe
correcttimeofday.
(onsomemodeM
(onsomemodels)
TheKitchen 17meris inhoursand
minutes.
TheKitchen lTmerdoes not control
oven operations. Themaximum
setting on the Kitchen Timeris
9 hours and59 minutes.
The clock nmst be set to file correct dine
of day for tile autonlafic oven timing
tractions to work properly. Tile time of
day cannot be changed during a timed
baking or self-cleaning cycle.
To Set the Kitchen Timer
[] Toucll die TIMER/CLOCKer TIMER
pad (depending on model).
Touch tile number pads until tile
amount of time you want shows
in the display: For example, to set
2 hems and 45 minutes, touch 2, 4
and 5 ill fllat ordeL If you make a
mistake touch the TIMER/CLOCKer
TIMERpad (depending on model)
and begin again.
[_] Touch tile STARTpad.
On somemodels, touch tile
%
TIMER/CLOCKpad and heM for
3 seconds. Onother models, touch the
CLOCKpad.
Touch tile number pads.
Touch tile START pad.
%
AftertouchingtheSTARTpad,SETdisappears;
thistellsyouthe timeiscountingdown,although
thedisplaydoesnotchangeuntiloneminutehas
passed.Secondswit notbeshowninthedisplay
untilthelastminuteiscountingdown.
x_qlen file Kitchen Timer reaches :00,
[]
tile control will beep 3 times followed
by one beep eyeD, 6 seconds until
tile TIMER/CLOCKer TIMER pad
(depending on model) is touched.
The&secondtonecanbecanceledbyfollowing
thestepsin theSpecialfeaturesofyouroven
controlsectionunderTonesat theEndofa
timedCycle.
To Reset the Kitchen Timer
If file display is sdll showing file
time remaining, you may change it by
touching tile TIMER/CLOCKer TIMER pad
(depending on model), then touch tile
number pads until tile time you want
appems in tile display:
To Cancel the Kitchen Timer
Touch tile TIMER/CLOCKor TIMERpad
(depending on model) twice.
ControlLock (on some models)
Yourcontrolwillallowyoutolockoutthetouch
padsandthecooktopsotheycannotbeactivated
whentouched.
To lock/unlock die conUols and cookmp:
[-7] Touch and heM tile CONTROLLOCK
pad for 3 seconds.
Tile oven display will show "Oven
controls and burners locked" for
several seconds, then "Range
Locked."
If file remaining time is not in die
display (clock, delay start or cooking
time are in the display), recall tile
remaining time by touching tile
TIMER/CLOCKer TIMER pad (depending
on model) and then touching tile
number pads menmr tile new
time you want.
To unlock tile control, touch and
hold CONTROL LOCKfor 3 seconds.
TheCONTROLLOCKmodeaffects all
touchpads.Notouchpadswill workwhen
thisfeatureisactivated.
77
Page 18

Adjust the upper or lower oven thermostat--Do it yourself!
Youmay find that your new oven cooks differently than the one it replaced. Use your new oven for a few weeks to
become more familiar with it. If you still think your new oven is too hot or too cold, you can adjust the thermostat
yourself.
Do not use thermometers, such as those found in grocery stores, to check the temperature setting of your oven.
These thermometers may vary 20-40 degrees.
NOTE: This adjustment will only affect baking and roasting temperatures; # will not affect broiling or self-cleaning
temperatures. The adjustment will be retained inmemory after a power failure.
To Adjust the Thermostat
_-] Touch the BROILHI/LO and BAKE
Fq
FqFqPqFqFq
FqFqE3Dr-q
Fq
pads at the same time until the
display shows SE
[] Touch the BAKEpad. A two digit
number shows in the display:
Touch BAKEagain to alternate
between increasing and decre_tsing
the oven temperature.
To adjust the upper oven
dlex_nostat, touch file upper Oven
BAKEpad. To adjust the lower oven
tbemlostat, touch the lower Oven
BAKEpad.
The oven temperature can be
[]
adjusted lap to (+) , : F hotter or (-)
35°F cooleL Touch the number pads
the s_une way you read them. Fox
example, m change the oven
mmperanne 15"F, much I and 5.
35"
x_qlen you have made the
adjusmlent, touch the STARTpad
to go back to the time of day display:
Use your oven as you would noml_fll):
Thetype ofmargarine will affect bakingperformance!
Most recipes for baking have been developed using high fat products such as butter or margarine (80%fat). If you
decrease the fat, the recipe may not give the same results as with a higher fat product.
Recipe failure can result if cakes, pies, pastries, cookies or candies are made with low fat spreads. Thelower the
fat content of a spread product, the more noticeable these differences become.
FederM standards require products labeled "margarine" m contain at least 80% fat by weight. Low fat spreads, on the
other hand, contain less fat and more wateL The high moisture conmnt of these sl)reads mCfbcts the mxtme and flavor
of baked goods. Fox best results with your old favorite recipes, use margarine, butmr or stick spreads containing at least
70% vegetable oil.
18
Page 19

Usingthe convectionoven.(o,some models) ge.com
Convection Fan Operation
Inaconvectionoven,a fancirculateshotair over,
underandaroundthefood.
Thiscirculatinghotairisevenlydistributed
throughouttheovencavity.Asaresult,foodsare
evenly,cookedandbrowned--ofteninlesstime
withconvectionheat.
Introduction
NOTE:To maximize cooking evenness,
tile fan is designed to rotate in both
directions, wkh a pause in between.
This is normal.
The convection fan shuts offwhen file
oven door is opened. DO NOTleave tile
door open for long periods of time while
using convection cooking or you may
shorten the life of the convection heating
element.
Multi-rack position.
The convection oven comes wkh two
convection baking modes: Convection
Bake Multi and Convection Bake 1 Rack:
MULTI--Ibr convection cooking on more
dmn one rock. Touch die CONVECTION
BAKEMULTI/1RACK pad and then the 2
pad. See the Multi-Rack Convection Baking
section below.
1RACK--Ibr convection cooking on one
rack only. Touch die CONVECTIONBAKE
MULTI/1RACKandthen the I pad. See the
l-RackConvectionBakingsecdon below.
Multi-Rack Convection Baking
Because heated air is circulated evenly
fllroughout file oven, foods can be
baked with excellent results using
multiple racks.
Multi-rack baking may increase cook
!%
iii
\
times slighdy for some foods but die
overaU result is time saved. Cookies,
muffins, biscuits and other quickbreads
give ve_T good results with multi-rack
baking.
To cook food on more than one rack in
convection t)ake, use CONVECTIONBAKE
MULTI.
When baking on 3 rocks, place one
rack in the second (A) position, anodler
rack in the fourdl (C) position and tile
third rack in the sixth (El position.
For two-rack baking, place one rack in tlle
second (B) rock position. Place the odler
rack in the fifth (El rack position.
1-Rack Convection Baking
WhenconvectionbakingwithonlyI rack,use
Idealforbakedfoodscookedon I rack
CONVECTIONBAKE1RACKandfollowthe
rackpositionsrecommendedintheUsingthe
ovensection.
Adapting Recipes...
You can use your favcmte recipes in tile
convection oven.
¼]len convection baking, the Auto
Recipe"* Conversion feature automaficalb,
reduces the set regular baking temperature
by the recommended 25°E See Auto
Recipe'" Conversion in the Special
Features section.
Usepan sizerecommended.
Somepackageinstructionsforfrozen
casserolesormaindisheshavebeen
developedusingcommercialconvectionovens.
Forbestresultsinthisoven,preheattheoven
andusethetemperatureonthepackage.
19
Page 20

Usingthe convectionoven.(o,some models)
Grid
Broilerpan
DDD%D
D Fq D i-q
Convection Roast
Goodfor large tendercutsof meat, uncovered
The convection fan circulates tile heated
air evenly over and around tile food.
Meat and poult D, are browned on
all sides as if they were cooked on a
rotisserie. The heamd air seals in juices
quickly for a moist and tender product
while, at tile same time, creating a rich
golden brown exmrioL
When you are convection roasting it is
important fllat you use a broiler pan and
grid for best convection roasting results.
The pan is used to catch grease spills
and file grid is used to prevent grease
spatters.
How to Set the Lower Oven for Convection Baking or Roasting
Touch file CONVECTIONBAKEMULTI/
1RACK pad and fllen tile 2pad for
mulfiqack com'ecfion baking. This
mode is used for cooking food items
on more titan one rack (i.e., 2, 3 or
more racks) at tile same time in
convection bake. See tile Multi-Rack
Convection Baking section for more
infomlation.
Touch the CONVECTIONBAKEMULTI/
1RACKpad and then tile I pad for
one-rack convection baking. This
mode is used for cooking food ite3ns
on only one rack in convection bake.
Touch the CONVECTIONROASTpad
for convection roasting.
Touch tile number pads to set tile
oven teI]QpeIat/lIe.
Touch tile STARTpad.
NOTE: If theAuto Recipe_ConversionFeature
is on, it will automatically,reduce the set regular
bakingtemperatureby.25°Fto the appropriate
convectiontemperatureinconvectionbakemode.
SeeAutoRecipg_Conversionin theSpecial
Featuressection.
To change file oven tempelamre, touch
tile CONVECTION BAKE MULTI/I RACKer
CONVECTION ROASTpad and then tile
number pads m set tile new mmperature.
When tile oven starts to heat, tile
changing tempe,aune, starting at 100°E
will be displayed. When oven reaches tile
mmpemmre you set, 3 beeps will sound.
[_] Touch CLEAR/OFFpad when finished.
Youwill heara fan while cooking with
convection.The fan will stop when thedoor
is opened,but the heat will not turn off.
Youmay.hear the ovenclicking during
baking.Thisisnormal
Inconvectionbakemodes,formaximumcooking
evenness,thefan is designed torotate in
bothdirections, with a pausein between.
Thisisnormal
When baking cookies, you wifl get
the best results ff you use a flat
cookie sheet instead of a pan with
low sides.
2O
Cookware for Convection Cooking
Before using your com'ecfion oven, check
m see if your cookware leaves room for air
circulation in tile oven. If you are baking
with several pans, leave space between
them. Also, be sure tile pans do not much
each other or the walls of the oven.
PaperandPlastic
Heat-resistant paper and plastic
containeIs that are recommended for
use in regular baking can also be used
for convection baking, but should not
be used at temperatures higher than
tile mmperamre recommended by tile
cookware Illan/lfacUlIeI; Plastic cookware
dial is heat-resistant to temperatures of
400°F can also be used.
Metal and Glass
Aaly type of cookware will work in your
convection oven. Howevei; metal pans
heat the fitstest and are recommended
for convection baking.
Darkenedor matte-finishedpans will bake
faster thanshiny,pans.
Glassorceramicpans cookmore slowly.
For recipes like oven-baked chicken,
use a pan Mill low sides. Hot Mr
cmmot circulam well around food
in a pan wkb high sides.
Page 21

Usingthe timedfeaturesforconvectioncooking,io.somemodels;ge.oom
Youwill hear a fan while cooking with these features. The fan will stop when the door is opened, but the heat
will not turn off.
NOTE: Foods that spoil easily--such as milk, eggs, fish, stuffings, poultry and pork--should not be allowed to sit
for more than 1hour before or after cooking. Room temperature promotes the growth of harmful bacteria. Be sure
that the oven light is off because heat from the bulb will speed harmful bacteria growth.
How to Set an Immediate Start and Automatic Stop
DDDDD
%DDDD
DDDD
%DDDD
B
Thelowerovenwill turnonimmediatelyandcook
foraselectedlengthoftime.Attheendof the
cookingtime,theovenwillturnoffautomaticall)z
Make sure tile clock shows tile correct
time of day'.
Touch the CONVECTION BAKE
%
MULTI/1 RACK pad and then the
2 pad for multi-rock convection
baking. This mode is used for
cooking food items on more than
one rock (i.e., 2, 3 or more racks)
at the stone time ill convection bake.
See Multi-Rack Baking section for
more information.
Touch die CONVECTIONBAKEMULTI/
1RACKpad m_d then file 1pad for
one-rack convection baking. This
mode is used for cooking food items
on only one rack in convection bake.
Touch tile CONVECTIONROASTpad
for convection roasting.
Touch tile number pads to set tile
ovetl temperatt/re.
Touch tile COOKTIMEpad.
NOTE:Ifyour reciperequirespreheating,youmay
needtoaddadditionaltimeto thelengthof the
cookingtime.
Touch tile number pads to set tile
desired length of cooking time. Tile
minimum cooking time you cml set
is 1 minute. Tile oven temperature
that you set and the cooking time that
you entered will be in the display'.
Touch tile STARTpad.
Tile oven will mm ON, mid die display' will
show die cooking time countdown mid die
changing temperature starting at IO0°E
(Tile temperature display' will start to
change once the oven temprature reaches
100°E) X/VI]eI1the ovei1 reaches the
temperature you set, .t beeps will sound.
NOTE:ff theAutoRecipg_ConversionFeature
ison,it will automatical/}/reducethesetregular
bakingtemperatureby25°Ftotheappropriate
convectiontemperatureinconvectionbakemode.
SeeAutoRecipg_Conversionin theSpecial
Featuressection.
Tile oven will continue to cook %i" file set
mnount of time, then Ulrn off automatically,
unless the WARM feature _,,v_tsset. See file
How to Set the Ovenfor Warmingsection.
After the oven turns off, the end-of:cycle
tone will sound.
Touch tile CLEAR/ORZpad to clear
%
tile display' if necessary. Remove
the fbod fl'om the oven. RemembeI,
even though the oven turns off
automatically, fbod left in the oven
will continue cooking after the oven
01I'ns off.
27
Page 22

Usingthe timedfeaturesforconvectioncooking,io.somemodels;
How to Set a Delayed Start and Automatic Stop
DDD D
%DD D
DDD D
%DD D
DDD%D
%D% D
Thelowerovenwill turnon at thetimeof da}/}/ou
set,cookfor aspecificlengthof timeandthenturn
off automatically.
Make sure tile clock shows tile correct
time of day'.
Touch the CONVECTION BAKE
%
MULTI/1 RACK pad and then the
2 pad fox mulfi-xwck convection
baking. This mode is used for
cooking food items on more than
one rock (i.e., 2, 3 or more racks)
at the stone time in convection bake.
See Multi-Rack Baking section for
more informadon.
Touch die CONVECTIONBAKEMULTI/
1RACKpad m_d then file 1pad for
one-rack convection baking. This
mode isused for cooking food items
on only' one rack in convection bake.
Touch the CONVECTIONROASTpad
for convection roasting.
Touch the number pads to set the
oven [empeFattli'e.
E_] Touch the COOK TIMEpad.
NOTE:If}/ourreciperequirespreheating,youmay
needtoaddadditionaltimeto thelengthof the
cookingtime.
Touch the number pads to set the
desired length of cooking time. The
minimun_ cooking time you can set
is 1 minute.
The oven temperature that you set
and the cooking time that you entered
willbe in the display'.
Touch the DELAYSTARTpad.
Touch the number pads to set the
time of day you want the oven to tt/F[1
on and start cooking.
_-] Touch the STARTpad.
NOTE:Anattentiontonewillsoundff}/ouare
usingtimedbakingorroastinganddonottouch
theSTARTpad.
NOTE:ffyouwouldliketocheckthetimesyouhave
set,touchtheDELAYSTARTpadtocheckthestart
timeyouhaveset,ortouchtheCOOKTIMEpadto
checkthelengthofcookingtimeyouhaveset.
XAfhenfile oven rams ONat file time of day
you set, file display' will show file cooking
time countdown mad the chmlging
temperature starting at 100°E (The
temperature display' will st.art to change
once the oven temperature reaches 100°E)
XAfhenthe oven reaches the temperature
you set, 3 beeps will sound.
NOTE:If theAutoRecipg_ConversionFeature
ison,it will automatical/}/reducethesetregular
bakingtemperatureb}/25°Ftotheappropriate
convectiontemperatureinconvectionbakemode.
SeeAutoRecipg_Conversionin theSpecial
Featuressection.
The oven will contimm to cook for file
programn_ed amount of time, fllen slmt
off automaticMly, unless rite XYARM feature
w_ts set. See file HOWto Set the Oven for
Warming section.
After the oven turns off, the end-of:cycle
tone will sound.
Touch the CLEAR!OFF pad to clear
%
the display' if necessary. Remove
the food fl'om the oven. RemembeI;
even fllough rite oven shuts off
automatically, %od left in rite oven
will continue cooking after die oven
O]I'nS off.
22
Page 23

Usingthe convectionoven.(o,some models) ge.com
For best results when roasting large
turkeys and roasts, we recommend
using the probe included in the
convection oven,
DDDD
Tochange the oven temperature
during the Convection Roast cycle,
touch the CONVECTIONROAST pad
and then touch the number pads to
set the new desired temperature.
How to Set the Lower Oven for Convection
[7] Place the oven rack in the position _-]
dlat cente_ tile food between tile
top and bottom of tile oven. Insert
the probe into the meat. Make sure
it is pushed all the way in.
Plug file probe into the oudet in the
[]
oven. Make sure it is pushed all die
way in. Close the oven dooL
Touch the PROBEpad.
%
Touch tile number pads to set the
[]
desired internal meat tempexvmne.
NOTE:The maximum inmmal mmpemmre
for the food that you can set is 200°F.
NOTE:Iftheprobeisremovedfromthe
ovenwhileprobecooking,theovenwillnot
automaticallyturnoff.
CAUTION:Topreventpossibleburns,
donotunplugtheprobefromtheovenoutletuntil
_-] Touch tile CONVECTION ROAST pad.
_-] Touch the number pads to set the
desired oven temperature.
The displ W will flash PROBE and the oven
control Mll signM if file probe is inserted
into file outlet, and you have not set a probe
mmpemmre and pressed the STARTpad.
_-] Touch tile START pad.
_qlen the oven starts m heat, the word
LO will be in the displ W.
theovenhascooled.
NOTE:
AtYertile internM temperature of tile meat
reaches 100°E tlle changdng internal
temperature willbe shown in the display.
Roasting when Using the Probe
_qlen tile internal temperature of
the meat reaches the number you
have set, the probe and the oven
mrn off"and the oven control signals.
To stop the signal, much the
CLEAR/OFFpad. Use hot pads m
remove the probe fiom the food.
Do not use rungs to pull on it--
they might damage it.
Youwillheara fan whilecookingwiththis
feature.Thefanwit stopwhenthedooris
opened,but theheatwillnotturnoff.
Youcan use theKitchen Timereventhough you
cannotuse timed ovenoperations.
_,Neverleaveyourprobeinsidetheovenduring
aself-cleaningcycle.
Do not store theprobe in the oven.
ProbenotforuseinBroilorSelf-Cleanfunctions.
_,Fanonly rotatesin onedirection.
Convection Roasting Guide
Meat Minutes/Lb. Oven Temp. Internal Temp.
Beef Rib,BonelessRib, Rare 27-31 325°F 140°F1-
TopSirloin Medium 31-35 325°F 160°F
(3to 5Ibs.) Well 35-39 325°F 170°F
BeefTenderloin Rare 17-21 325°F 140°Ff
Medium 21-25 325°F 160°F
Perk Bone-In,Boneless(3to 5 Ibs.) 30-34 325°F 170°F
Chops(1/2 to 1" thick) 2 chops 37-42 total 325°F 170°F
4chops 42-47 total 325°F 170°F
6chops 47-52 total 325°F 170°F
Ham Canned,Butt, Shank 21-25 325°F 140°F
(3to 5Ibs.fully cooked)
Seafeed LobsterTails(6to 8 oz.each) 20-25 total 350°F
Poultry Whole Chicken(27_to 31/_Ibs.) 31-33 350°F 180°-185°F
Turkey(18to 24Ibs.)* 7-10 325°F 180°-185°F
* St_{ifd binls ,g*'_eral(r nqai_, 30-45 mh_ut*,_ additio_ml roasth_g" time. Shidd h'g:_a_d br,'ast withfi_il to pn*ve_t
ovedm>w_th_g" a_td dLrh_g"q/ shbt.
"i' 77w {'.S. I)_,part_ne_tt (!/Agricaltm_, sq_'s "t'a_v be,j i_ p(q_ula_; but you shoul4 know that cookbtg"it to o_tl_' 140 'F m_mts
,ome /bod poi_m_i_g"owmi_m,_ may sa_"oive." (5omv_c &(/b I'bod Booh. _3m Kitche_t Guide. ( %I)A I_t_v.,/u_te l 9S5.)
23
Page 24

Usingthe slow cook,pizzaand warmingfeatures.
How to Set the Lower Oven For Slow Cook
When the Slow Cook flmcfion has
completed, file oven will go into file
Warn1 mode. Display will say "Cooking
Complete Keeping Warm." The total time
the oven will be on (Slow Cook time plus
Warn1 time) is 12 houxs. This is because
of the safelTy 12-Hour Shutdown feature
descxibed on page 28.
NOTE:Ifapoweroutageoccurswhiletheovenis
in SlowCook,therangewill shutoff.
E]DDD
FqElE D
DE %D
Slow Cook is designed for long houxs of
unattended cooking.
[] Touch the SLOWCOOKpad once for
HI Slow Cook.
To change to I.O Slow Cook, touch
the SLOWCOOK pad again.
Touch the number pads to select the
[]
desired setting - 1 for Beef, 2 for
Poultry, 3 for Pork or 4 for Stews.
Use 1-Beef if you are unsure which
setting to use.
Touch the number pads to set
%
the desired length of cooking time.
Fox the HI setting, the cooking time
must be between 3 and 8 hours. Fox
the LO setting, the cooking time
must be between 3 and 12 hours.
_-1 Touch the STARTpad.
Slow Cook Guide
Food
Beef
ChuckRoast
BeefRibs
Poultry
WholeChicken
ChickenPieces
Pork
BonelessBladeRoast
CountryStylePorkRibs
PorkChops
Soup
VegetableBeefSoup
Chili
Quantity
3-37_Ibs
3Y_-4Ibs
4 Ibs
8 pieces
(approx.3Ibs.)
3-4 Ibs
3_A-4Ibs
4-8
4 quarts
4 quarts
30"Ovens
Rack
Position
C
C
C
C
C
C
C
C
C
30"Ovens
Food
SeHing
1-Beef
1-Beef
2-Poultry
2-Poultry
3-Pork
3-Pork
3-Pork
4-Stew
4-Stew
30"Ovens
Time
(Hours)
HI5-6 hrs.
LO8-10 hrs.
HI3-4 hrs.
LO6-8 hrs.
HI4-5 hrs.
LO7-9 hrs.
HI3-4 hrs.
LO5-6 hrs.
HI5-6 hrs.
LO8-10 hrs.
HI3-4 hrs.
LO6-8 hrs.
HI3-4 hrs.
LO6-8 hrs.
HI4-5 hrs.
LO8-10 hrs.
HI3-4 hrs.
LO6-8 hrs.
Comments
Add 1/2 cup liquid.
Placeribsin a singlelayer.
Add 1/2 cup liquid.
Bestsubmergedunderasauceto preventsurfacedrying.
Add 1/2-1 cupliquid.
Placeribsin a singlelayer.
Placechopsina single layer.
Makesurebeefchunksare submerged.
Submergebeansto preventsurfacedrying.
24
Page 25

iFqiD Fq
i ii iilIIiiiii(
How to Set the Upper Oven For Pizza
Adjust rack position for type of pizza m_y
being used (see chart).
Touch the PIZZA pad
[] Touch the number pads to select
1 for fiesh or 2 for fiozen pizza.
_] Touch the number pads to set the
baking temperature.
[] Touch the STARTpad.
Baking time is demrmined by package
directions.
How to Set the Lower and Upper Ovens For Warming
The WARMfeature keeps cooked I,eave them uncovered.
foods hot.
This feature is not desigmed m reheat
cold food.
To rise the WARMfeature, much the
WARMpad and then the STARTpad.
To use the WARMfeature after Timed
Baking or Roasting, follow these stops:
[] Touch the mode of cooking that
you want m use (BAKE,CONVECTION
BAKEMULTI,CONVECTIONBAKE
1RACKor CONVECTIONROAST).
Touch the number pads to set the
oven mmpe_mne.
_-] Touch the COOKTIMEpad.
Touch the number pads to set the
desired length of cooking time.
Touch the WARMpad.
Touch the STARTpad.
To Crisp Stale Items
Place food in low-sided dishes or pans.
For best results, place the food items in
a single layeL Do not stack.
Typeof Pizza Tray Rack Position
Traysuppliedwith freshpizza B
Pizzaplaced directly onrack B
Metal tray A
Check crispness after 20-30 minutes.
Add time _ts needed.
IMPORTANTNOTES:
Foodshouldbekepthotinitscookingcontainer
ortransferredtoaheat-safeservingdish.
Formoistfoods,coverthemwithanoven-safe
lidoraluminumfoil.
Friedorcrispfoodsdonotneedtobecovered,
butcanbecometoodryif warmedfortoolong.
Repeatedopeningofthedoorallowsthehot
air toescapeandthefoodtocool
Allowextratimeforthetemperatureinsidethe
oventostabilizeafterawing items.
Withlargeloadsitmaybenecessarytocover
someof thecookedfooditems.
_,Removeservingspoons,etc.,beforeplacing
containersin theoven.
_,Donotuseplasticcontainers,lidsor
plasticwrap.
CAUTION: lasticcontainers,lidsor
plasticwrapwi//meltif placedin theoven.
Me/tedplasticmaynotberemovableandis not
coveredunderyourwarran
ge.com
25
Page 26

Usingthe self-cleaning upperand lower ovens.
Before a Clean Cycle
Wipeupheavysoilontheoven
bottom.
We recommend venting your kitchen
with an open window or using a
ventilation fan or hood during the
fi_st self-clean cycle.
Remove any broiler pan, broiler grid,
probe, all cookware and any aluminum
foil flom tile oven.
NOTE:
If your oven is equipped wffh shin)/,
silver-colored oven rocks, remove diem
before you begdn tile self-clean cycle.
If your oven is equipped wifll gray
porcelain-corned oven tacks, flley
may be left in the oven during the
self-clean cycle.
Soil on file flont flame of file range and
outside tile gasket on die door will need
m be cleaned by hand. Clean these areas
with hot wamx, soal>filled smel-wool pads
or cleansers such as Soft Scrubq Rinse
well with clean wamr and dry.
Do not clean die gasket. The fiberglass
mamfial of the oven door gasket cannot
withstand abrasion. It is essential for the
g_tsket to remain intact. If you notice it
becoming worn or flayed, replace it.
Wipe up any hem T spillovers on tile
oven bottom.
Make sure tile oven light bulb cover is
in place and tile oven light is off:
IMPORTANT'.The healdl of some birds
is exnemely sensitive to die fumes given
off during the self-cleaning cycle of any
range. Move birds to another well-
ventilated room.
How to Set the Upper/Lower Oven for
iii)ii! /(II )}i!i(ii!iJ(ill
properly.
You can change the clean time to
any time between 3 horns and 5 hours,
depending on how dirty your oven is.
The upper and lower oven doors
lock automaticMly. The cooktop elements
are also locked out during self-clean.
The display will show the clean time
remaining. It will not be possible to
The oven floors must be closedl and all
controls set correctly for the cycle to work
Touch tile SELFCLEANHI/LO pad
once for a 5-hour clean time or
twice for a 3-hour clean time.
A 3-hour self-clean dine is
recommended for use when
cleaning small, contained spills.
A self-clean time of 5 hours is
recommended for a dirtier oven.
Ifa time other than 5 horns or
,3horns is needed, use tile number
pads and enter the desired
clean time.
Touch tile STARTpad.
Cleaning
open die oven doors or use die cookmp
until die mmperamre drops below tile
lock temperature and LOCKEDgoes off
in tile control display.
x_qlen LOCKEDgoes ofL you will be able to
open the doors.
The word LOCKEDwill flash and tile
word doorwill display if you set the
clean cycle and foxget to close the
oven dooIs.
To stop a clean cycle, much the
CLEAR/OFFpad. When LOCKEDgoes off;
indicating the ovens have cooled below
die locking temperature, you Mll be
able to open die doors.
You can set a clean cycle in both ovens
at die same time; however; dley Mll not
self-clean at the same time. The last oven
set Mll automaficMly delay its start until
the end of the first oven's clean cycle.
X_qlen an oven is set m self-clean, bodl
oven doo_s Mll lock and die cooktop
controls Mll lock out. The ovens and
cooktop camlot be used when an
oven is set m self-clean.
26
Page 27

The oven doors must be closed and all controls set correctly for the cycle to work properly.
How to Delay the Start of Cleaning
ge.com
DDD%D
%DD D
DDD D
%DD D
Touch tile SELFCLEANHI/LOpad
once for a 5-hour clean time or
twice for a ,%hour clean time.
A ?,-hour self-clean time is
recommended for use when
cleaning small, contained spills.
A self-clean time of 5 hours is
recommended for a dirtier oven.
Ifa time odler than 5 houis or
[]
3 hours is needed, use tile number
pads and enter the desired
clean time.
You can change the clean time to
any time between 3 hours and 5 hours,
depending on how dirty your oven is.
After a Clean Cycle
You may notice some white _tsh in the
oven. Wipe it up with a damp clod1 meter
tile oven cools.
If whitespotsremain,removethemwithasoap-
filledsteelwoolpadandrinsethoroughlywith
a vinegarandwatermixture.
These deposits are usually a salt residue
tllat cannot be removed by tile clean
cycle.
If tile oven is not clean after one clean
cycle, repeat tile cycle.
f-_ Touch tile DELAYSTARTpad.
f-_ Using tile number pads, enter tlle
dine of day you want tile clean cycle
to sta_t.
[_ Touch tile STARTpad.
The upper and lower oven doors lock
automatically. The cookmp elements are
also locked out during self-clean. The
displW will show the start time. It will not
be possible m open the oven doors or use
the cookmp until the mmperamre drops
below the lock tempe_mlre and LOCKED
goes off'in the conuol display.
x_qlen LOCKEDgoes off; you will be able
to open tile doors.
You cannot set tlle oven for cooking or
anodler self-clean cycle until the oven
is cool enough for tile door to unlock.
While file oven isself-cleaning, you can
much the TIMER/CLOCKor CLOCKpad
(depending on model) m displW the
time of dW. To return m the clean
countdown, much tile SELFCLEAN
HI/LOpad.
If die racks become hard m slide,
apply a small amount of cooking oil
m a paper towel and wipe the edges
of tile oven _vmkswith tile paper towel.
27
Page 28

Special featuresof yourovencontrol
Yournew touch pad control has additional features that you may choose to use. The following are the features
and how you may activate them.
The special feature modes can only be activated while the display is showing the time of day. They remain
in the control's memory until the steps are repeated.
Toenter a special feature for either oven, you must first touch the upper oven BROILHI/LO and BAKE pads at the
same time. The lower oven BROIL HI/tO and BAKE pads will not activate special features.
When the display shows your choice, touch the STARTpad. The special features will remain in memory after
a power failure, except for the Sabbath feature, which will have to be reset.
Help Function
}iii!iil)j if(!iiiiJl
Touch this pad to get additional
information on the keypad of your
choice.
Touch the HELP pad and the display will
show "Press keypad for help on that feature
or I for options."
12-Hour Shutdown
Withthisfeature,shouldyouforgetandleavethe
ovenon,thecontrolwillautomaticallyturnoff the
ovenafter12hoursduringbakingfunctionsor
after3 hoursduringabroilfunction.
If you wish to mrn OFFthis feature, follow
the steps below.
[7] Touch the upper oven BROIL HI/LO
and BAKE pads at the same time
until the display shows SE
The options on pages 28 and 29 can
be adjusted using the method described
here or through HELP.
Touch the DELAYSTARTpad until
noshdn(no shut-off) appears in the
display:
Touch the START pad to acdvate the
%
no shut-off and leave the control
set in this special features mode.
Fahrenheit or Celsius Temperature Selection
YourovencontrolissettousetheFahrenheit [] Touch the COOKTIMEand BROIL
temperatureselections,butyoumaychangethis HI/LO pads at the same time. The
tousetheCelsiusselections, displaywill show F (Fahrenheit).
!i/ ii! iiiil ii iiiiiliiiii iilIIiiiiii!
28
[] Touch the upper oven BROIL HI/LO
and BAKE pads at the same time
until the display shows SE
Tones at the End of a Timed Cycle
At theendof atimedcycle,3shortbeepswit
soundfoflowedbyonebeepevery6seconds
untiltheCL£AR/OFFpadis touched.This
continual6-secondbeepmaybecanceled.
To cancel the &second beep:
Touch the upper oven BROIL HI/LO
and BAKEpads at the same time
until the display shows SE
[] Touch the COOKTIMEand BROIL
HI/LOpads again at the same time.
The display will show C (Celsius).
[] Touch the STARTpad.
Touch the BROILpad. The display
shows CONTIBEEP(continuous
beep). Touch the BROILpad again.
The display shows SINGLEBEEP.
(This cancels the one beep
evexy 6 seconds.)
_] Touch the STARTpad.
Page 29

Tone Volume
ge.com
H
ii_ _i i i iii I ii
ii i ii iliI) iil I!II
i ii!ii! iiiv
7"oSErCLOC_
Thisfeatureallowsyoutoadjustthetonevolumes
toa moreacceptablevolume.Therearethree
possiblevolumelevels.
Touch the upper oven BROIL HI/LO
%
and BAKEpads at the same time
until the display shows SF.
Touch the COOK TIME pad. The
[]
display will show 2 BEEP. This is the
middle volume level.
Touch the COOKTIME pad again.
The display will show 3 BEEP.
This is the loudest volume level.
12-Hour,24-Hour or Clock Blackout
Yourcontrolissettousea 12-hourclock.
7 C
If )ou would prefer to have a 24-hour
militm T time clock or black out tile clock
display, follow tile steps below.
[--]-] Touch tile upper oven BROIL HI/LO
and BAKEpads at tile s_une time
until tile display shows SF.
Touch tile TIMER/CLOCKor CLOCK
pad (depending on model) once.
Tile display will show 12hr. If this
is tile choice you want, touch tile
START pad.
Touch the COOK TIME pad again.
Tile display will show 1 BEEP. This is
tile quietest volume level.
For each time tile level is changed,
a tone will sound to provide an
indication of tile volume level.
[-_ Choose tile desired sound level
(1BEEP,2 BEEP,3 BEEP).
[] Touch tile STARTpad to activate
tile level shown.
Touch file TIMER/CLOCKor CLOCK pad
(depending on model) again m change
m the 24 hour military time clock. The
display will show 24 hr. If this is the choice
you want, much tile STARTpad.
Touch file TIMER/CLOCKor CLOCK pad
(depending on model) again m black
out the clock display. The display will
show OFF. If this is the choice you want,
much tile STARTpad.
NOTE:If theclockisin theblack-outmodeyou
willnotbeabletousetheDelayStartfunction.
Auto Recipe TM Conversion
Whenusingconvectionbake,theAutoflecipg_
Conversionfeaturewillautomaticallyconvert
enteredregularbakingtemperaturesto
convectionbakingtemperatures.
Thisfeatureisactivatedso thatthedisplaywill
;i !i ; ! i iiii i
showtheactualconverted(reduced)temperature.
Forexample,ifyouenteraregularrecipe
temperatureof350°FandtouchtheSTARTpad,
thedisplaywillshowCONandtheconverted
temperatureof325°E
Todeactivatethefeature:
Touch tile upperovenBAKEand
BROILHI/LOpadsat the sametime
until tile display shows SF.
Touch tile CONVECTIONBAKE
MULTI/1RACKpad. Tile display
will show CONON.Touch tile
CONVECTIONBAKEMULTI/1RACK
pad again. The displaywill show
CONOFF.
Touch tile STARTpad.
To reactivate tile feature, repeat steps
1-3 above but touch tile STARTpad when
CONONis in tile display:
29
Page 30

Usingthe Sabbathfeature.I.pperandlowero ens)
(Designed for use on the Jewish Sabbath and Holidays) (on some models)
TheSabbathfeaturecanbe usedfor baking/roastingonly.It cannotbeusedfor convection,broiling,self-cleaning or
DelayStart cooking•
NOTE:Theovenlightcomesonautomatically(onsomemodels)whenthedoorisopenedandgoesoffwhenthedoorisclosed.Thebulbmaybe
removed.SeetheOvenLightReplacementsection.Onmodelswithalightswitchonthecontrolpanel,theovenlightmaybeturnedonandlefton.
How to Set forRegular Baking/Roasting
When the display shows-1 the
oven is set in Sabbath. When the
display shows -1 r- the oven is
baking/roa sting.
Make sure the dock shows the correct time of day and
theoven :s off
[-_ Touda and laold both tlae BROIL HI/LO:md
Itl
BAKE pads, at the same time, until tlae
display slao_v_ SE
NOTE." If bake or broil appears ira the
displa), tlae BROILHI/LO and BAKEpads
were not touclaed :at the same time.
Touch tlae CLEAR/OFFpad :and begin
again.
Tap the DELAYSTART pad until SAb bAtH
appears in tlae display.
V_ Touch the START pad and -mwill appear
in tlae displa).
Touch the BAKE pad. No signal will
1)e gix en.
Using tlae numl)er pads, enter tlae
%
desired tempelature between 170°F :and
550°E No signal or tempelature will be
given.
Toucla tlae START pad.
%
After a 1.mdom delay period of
approxinmtel), 30 seconds to 1 minute,
--1r-- will appear in the display
indicating that tlae oven is 1)aking/
roasting. If -7 r- doesn't api)ear in tlae
displa), start again :at Step 4.
To adjust tlae oven tempelature, toucla the
BAKEpad, enter tlae new tempel_ature using
tlae number pads :and toucla tlae STARTpad.
NOTE." Tlae CLEAR/OFF:and COOK TIMEpads are
active during tlae Sal)l)atla feature.
ifq PqE] FqiFqi:
When the display shows -1 the
oven is set in Sabbath. When the
display shows -1 r- the oven is
baking/roa sting.
<
30
How to Set for timed Baking/Roasting--Immediate Start and Automatic Stop
Make sure the dock shows the correct time of day and Toucla tlae START pad.
theoven/s off. [_
Toucla :and laold both tlae BROIL HI/LOand
%
BAKE pads, at the same time, until the
dispk g slao_vs SE
NOTE."If bake or broil appears ira the
displa), tlae BROILHI/LO and BAKEpads
were not touclaed :at the same time.
Touch tlae CLEAR/OFFpad :and begin
again.
Tap the DELAY START pad until SAb bAtH
r2-q
appears in tlae display.
Touch the START pad :and --1will appear
%
in tlae displa).
Toucla tlae COOK TIME pad.
Toucla tlae number pads to set tlae
%
desired length of cooking time 1)etween
1 minute :and 9 hours :and 99 minutes.
Tlae cooking time tlaat )ou entered will
be displa) ed.
77 Toucla tlae BAKE pad. No signal will be
gl\ en,
[_] Using tlae number pads, enter tlae
desired tempel_ature. No signal or
tempel_ature will be given.
[_ Toucla tlae START pad.
After a landom delay period of
approximatel), 30 seconds to 1 minute,
--7r-- will appear in the display indicating
that the oven is baking/r0asting. If -1 r-
doesn't appear in the displa); start again
:at Step 7.
To at!just tlae oxen tempel_ature, toucla the
BAKEpad, enter tlae new tempelature using
tlae number pads :and toucla the STARTpad.
When cooking is tinislaed, tlae display will
change from --1 r-- to --1 :and 0:00will appem;
indicating that the oxen has turned OFFbut is
still set in Sal)batla. Remove tlae cooked tood.
How to Exit the Sabbath Feature
Touch tlae CLEAR/OFFpad.
/I_L_I
If the oxen is cooking, wait for a
l_andon/dela) period of approxin/atel)
30 seconds to 1 minute, until onl) -7 is
in tlae displa).
V_ Toucla :and hold both the BROIL HI/£O
:and BAKE pads, at the same time, until
tlae displa) slao_vs SE
Tap tlae DELAYSTART pad until 12shdn
_] or no shdn appears in tlae display.
_-] Claoose /2 shdn, indicating that the oxen
will automaticall) turn off after 12 hours
or n0 shdn, indicating that the oven will
not automatically mrn off alter 12 laours.
Press STARTwhen tlae option tlaat )ou
x_¢mtis in tlae displa} ( 12shdn or no shdn).
NOTE."If a power outage occurred while
tlae oven was in Sabbatla, tlae oven will
automatically turn off :and stay off even
wlaen tlae power returns. Tlae oven
control must be reset.
Page 31

Careand cleaning ofthe range, g,oom
Be sure all controls are off and all surfaces are cool before cleaning any part of the range.
If your range is removed for cleaning, servicing or any reason, be sure the anti-tip
device is re-engaged properly when the range is replaced. Failure to take this
precaution could result in tipping of the range and cause injury.
How to Remove Protective Shipping Film and Packaging Tape
Carefldly grasp a corner of file protective
shipping fihn wifli your fingels and slowly
peel it from die appliance surface. Do not
use any sharp items to remove die film.
Remove all of the film before using die
appliance for die first time.
Control Knobs
Thecontrolknobsmayberemovedforeasier
cleaning.
Make sure the knobs are in the OFF
positions and pull them straight off the
stems for cleaning.
Oven Vent
Thelowerovenventislocatedabovetheright
rearsurfaceunit.Theupperovenventis located
abovetheleftrearsurfaceunit.
These areas couM become hot during
oven use.
To assure no damage is done to die
finish of die product, die safest way to
remove the adhesive flom packaging tape
on new appliances is an application of a
household liquid dishwashing detergent.
Apply wifli a soft clofli and allow to soak.
NOTE:Theadhesivemustberemovedfromall
parts.Itcannotberemovedif it isbakedon.
The knobs can be cleaned in a
dishwasher or fliey may also be washed
Mill soap and wateL Make sure die inside
of the knobs are dry before replacing.
Replace the knobs in the OFFposition to
ensure proper placement.
It is normal for steam to come out of
the vent.
Theventisimportantforproperaircirculation.
Neverblockthisvent.
Control Panel
If desired,thetouchpadsmaybedeactivated
beforecleaning.
See the Control Lock information in the
Using the clocg kitchen timer and control
lock section in this manual.
(;lean up splatters with a damp cloth.
You may also use a glass cleaneL
Remove heavier soil Mill waml soapy
wateL Do not use abrasives of any kind.
Reactivatethetouchpadsaftercleaning.
31
Page 32

Careand cleaning ofthe range.
Cleaning the Upper and Lower Oven Doors
Tocleantheinsideof thedoors: Tocleantheoutsideofthedoors:
Because the area inside the gasket is Use soap and water to thoroughly
cleaned during the self-clean cycle, clean the top, sides and fiont of the
you do not need to clean this by hand. oven dooL Rinse well. You may also
Donotrubor cleanthe door gasket--
it has an extremelylow resistanceto
abrasion.
If younoticethegasket becomingworn,
frayedor damagedin anywayorif it
hasbecomedisplacedonthe door,
youshouldhaveitreplaced,
The area outside file gasket and
file door liner can be cleaned Mdl
a soap-filled smel wool or plastic pad,
hot water and detergent. Rinse well
with a vinegar and water solution.
use a glass cleaner to clean the glass
on the outside of the dooL Do not let
water drip into the vent openings.
If any stain on the door vent trim is
persistent, use a soft abrasive cleaner
and a sponge-scrubber for best results.
Spillage of marinades, fl-uitjuices,
mmam sauces and b_ksfingmamrials
containing acids m W cause
discoloration and should be wiped
tap immediately. When surface is
cool, clean and rinse.
Do not use oven cleaners, cleaning
powders or harsh abrasives on the
outside of the dooL
Oven
Release
buttons
Lift-Off Upper Oven Door
Toremovethedoor:
[_ Fully open the dooL
_] Lift tap on the hinge lock toward the
oven flame until they stop.
(;lose the door to 45 degrees (you
will feel the door stop). The hinge
lock will contact the oven flame.
[_ On both sides of the dooi; press
down on the release buttons on
each hinge.
[_ Lift door tap until it is clear of the
hinge.
[_] Pull on hinge am3s slightly to relieve
pressure on the locking robs.
[_ Push the hinge locks down onto
the hinge.
[_ Push the hinges in toward the unit
so they are closed.
Toreplacethedoor:
[y] Pull the hinges down away flom the
oven flame to the flail),open
position.
[_ Lift tap on the hinge locks toward
the oven flame until they stop.
[_ The hinges will release to the
45-degree position. The hinge locks
will contact the oven fl_m3e.
[_ Slide the door back onto the hinges.
Make sure the buttons pop back out.
[_ Fully open the dooL
[_ Push the hinge locks down onto
the hinge.
[_ (;lose the oven dooL
32
Page 33

Lift-Off Lower Oven Door
ge.com
Slot_ !_4_
Hinge_
Pullhinge locks clownto unlock.
Removal position
Thedooris veryheavy.Becarefulwhen
removingandliftingthedoor.
Donotlift thedoorbythehandle.
Toremovethedoor:
Fully open tile dooL
%
Pull tile hinge locks down toward
[]
the (loot frame, to the unlocked
position. A tool, such as a small
fiat-blade screwdriver; may be
required.
Firmly grasp both sides of the (loot
%
at the top.
(;lose door to file door removal
[]
position, which is hMfivay between
file broil stop position and dilly
closed.
[_ I,ift (loot up and out until the hinge
am1 is cleat of the slot.
Toreplace the door: 10ck
[_ Firmly grasp both sides of the (loot Hinge
at tile top.
X_qth the Bottom
door at the edge
same angle as \
file removal
position, seat fl_e
indentation of
file hinge arm
into file bottom
edge of the hinge slot. The notch in
file hinge arm must be dilly seated
into file bottom of file slot.
Fully open die door. If die door will
%
not dilly open, the indentation is not
seated conectly in d_e bottom edge
of the slot.
Push the hinge locks up against the
flont flame of the oven cavity to the
locked position.
arm
Push hinge locks up to lock.
ofslot
(;lose the oven (loot.
%
33
Page 34

Careand cleaning ofthe range.
Receptacle Socket
, , Bulb
i i
i i
/
Glasscover
Oven Light Bulbs
NOTE: Theglass cover should be
removed only when cold. Wearing latex
gloves may offer a better grip.
CAUTION... Before replacing your
oven light bulb, disconnect the electrical
power to the range at the main fuse or
circuit breaker panel.
Be sure to let the light cover and bulb
cool completely.
For your safety, do not touch a hot bulb
with bare hands or a damp cloth.
Toremove:
[] Turn the glass cover
counterclockwise 1l/4 nlrn until the
robs of the glass cover clear the
grooves of the socket.
[_ Using gloves or a dry cloth, remove
the bulb by pulling it straight out.
Toreplace:
[-_ Use a new 130-volt h_dogen bulb,
not to exceed 50 watts.
[-_ Using gloves or a dry cloth, remove
the bulb flom its packaging. Do not
touch the bulb with bare finge_.
/
/
Receetacle
orclom
"1 /
Push the bulb straight into the
@
receptacle all the way.
Place the robs of the ,glasscover into
[]
the grooves of the socket. Tmn the
glass cover clockwise 1l/4 turn.
For improved lighting inside
file oven, clean the glass cover
fiequenfly using a wet cloflL This
should be done when die oven is
completely cool.
[-_ Reconnect electrical power to
the oven.
Wipeupheavysoilontheoven
bottom.
34
Oven Heating Elements
Do not clean the broil element. Any soil
will burn offwhen the element is heated.
Clean the oven floor with winm, soap),
wateI:
Onsomemodels,thebakeelementisnot
exposedandisundertheovenfloor./fspi//overs,
residueorashaccumulateontheovenfloor,
wipeupbeforeself-cleaning
Page 35

ge.com
iYi T 15Qi J i¸¸¸¸¸¸)¸7/¸(¸¸¸i?
Flatrack
Handles
Use the rack with the two front
handles in the upper oven.
Use the rack without the two front
handles in the lower oven.
Oven Racks
All oven racks may be cleaned by hand
wifll an abrasive cleaner or steel wool.
Afker cleaning, rinse the racks with clean
water and dry wifll a clean clofll. Gray
porcelain-coamd oven tacks may remain
in the oven during the self-cleaning cycle
without being damaged. The nickel-
plamd oven tacks may remain in the oven
Stainless Steel Surfaces (on some models)
Donotuseasteel woolpa& it will scratch
thesurface.
To clean die stainless smel surface,
use warm sudsy wamr or a stainless steel
cleaner or polish. Ahvays wipe the surface
in the direction of the groin. Follow the
cleaner insUucfions for cleaning the
stainless steel surface.
Painted Surfaces
during die self-cleaning cycle,
but they will lose flmir luster and become
hard to slide. It will be necessary m grease
all oven rack side edges with a light
coating of vegetable oil after cleaning
them by hand or in the oven. This will
help maintain the ease of sliding the
racks in and out of the oven.
To inquire about purchasing stainless
smel appliance cleaner or polish, or to
find the location of a dealer nearest you,
please call our mll-flee number:
NationalPartsCenter 1.800.626.2002
ge.com
Painted surfaces include the dooI;
mp of file control panel and file drawer
flont. Clean these with soap and wamr
or a vinegar and wamr solution.
Do not use commerciM oven cleaners,
cleaning powders, steel wool or hmsh
abrasives on any pmnted surface.
35
Page 36

Cleaningthe glass cooktop.
Normal Daily Use Cleaning
ONLY use CERAMA BRYTE ® Cermnic
Cooktop Cleaner on the glass cooktop.
Other creams may not be as effective.
To maintain and protect the surface of
your glass cooktop, follow these steps:
Before using the cooktop for the
%
fi_st time, clean it with CERAMA
BRYTE®Ceramic Cooktop CleaneL
Cleanyourcooktopafter
eachspill. Use CERAMA
BRYTE® CeramicCooktop
Cleaner.
This helps protect the top and
makes cleanup easieL
[] Daily use of CERAMA BRYFE®
Cermnic Cooktop Cleaner will help
keep the cooktop looking new.
Burned-On Residue
Shake the cleaning cream well.
%
Apply a few drops of CERAMA
BRYTE®Ceramic Cooktop Cleaner
directly to the cooktop.
Use a paper towel or CERAMA
[]
BRYTE®Cleaning Pad for Ceramic
Cooktops to clean the entire
cooktop surface.
Use a dry cloth or paper towel
%
to remove all cleaning residue.
No need to rinse.
NOTE:Itis veryimportantthatyouDONOTheat
theco&topuntilithasbeencleanedthoroughly.
Use a CERAMABRYTE_Cleaning
Pad for Ceramic Cooktops.
TheCERAMABRYTEC_Ceramic
Cooktop Scraper and aft
recommended suppfies are
available through our Parts Center.
See instructions under "ToOrder
Parts" section on next page.
NOTE:Do not use a duffor nicked
blade.
WARNING'.DAMAGEto yourglasssurfacemay.
occurif y.ouusescrubpadsotherthanthose
recommended.
Allow the cooktop to cool.
Spread a few drops of CERAMA
BRYTE®Ceramic Cooktop Cleaner
on the entire burned residue area.
Using the included CERAMA
%
BRYTE ® Cleaning Pad for Ceramic
Cooktops, rub the residue area,
applying pressure as needed.
Heavy, Burned-On Residue
Allow the cooktop to cool.
%
Use a single-edge razor blade scraper
at approximately a 45 ° angle against
the glass surface and scrape the soil.
It will be necessm y m apply pressure
m the ra_zor scraper in order m
remove the residue.
Aider scraping with the razor scrapex;
@
spread a few drops of CERAMA
BRYTE ® Ceramic Cooktop Cleaner
on the entire burned residue area.
Use the CERAMA BRYTE ®Cleaning
Pad m remove any remaining
residue.
If any residue remains, repeat the
steps listed above as needed.
Fox additional protection, after all
%
residue has been removed, polish
the entire surface with CERAMA
BRYTE®Ceramic Cooktop Cleaner
and a paper towel.
Fox additional promcfion, after all
residue has been removed, polish
the entire surface with CERAMA
BRYTE®Ceramic Cooktop Cleaner
and a paper towel.
36
Page 37

ge.com
Metal
Marks and Scratches
Be careflll not m slide pots and pans
%
across your cookmp. It will leave
metal markings oi1 file cookmp
surface.
These marks are rem(_mble using
the CERAMA BRYFE®Ceramic
Cookmp Cleaner with the CERAMA
BRYTE®Cleaning Pad for Ceramic
Cookmps.
Rubber-like Seal
To clean the robber-like seal at the outer
edge of the glass, wipe it with cooktop
cre_urt when needed.
If pots with a thin overlay of
[]
aluminum or copper are allowed
to boil dry, the overlay may leave
black discoloration on the cooktop.
This should be removed
immediately before heating again
or file discoloration may be
permanent.
WARNING:Carefullycheckthe
bottomofpansforroughnessthatwouldscratch
theco&top.
Glasssurface potential forpermanent damage.
Sugaryspillovers(suchas
jellies,fudge,candy,syrups)
ormeltedplasticscancause
pittingofthesurfaceofyour
cooktop(notcoveredbythe
warranty)unlessthespillis
removedwhile stillhot.
Specialcareshouldbetaken
whenremovinghot
substances.
Besureto useanew,sharp
razorscraper.
Donotusea dullor nicked
blade.
Damage from Sugary Spills and Melted Plastic
Turn offall surface units. Remove
hot pans.
Wearing an oven mitt:
a. Use a single-edge razor blade
scraper (CERAMA BRYTE®
Ceramic Cooktop Scraper) to
move the spill m a cool area on
the cooktop.
b. Remove the spill with paper
towels.
To Order Parts
To order CERAMA BRYTE®Ceramic
Cooktop Cleaner and the cookmp
scrape_; please call our tolM'ree ntllilbei:
NationalPartsCenter 800.626.2002
ge.com
CERAMABRYTE®Ceramic
CooktopCleaner............ # WX10)(300
CERAMABRYTE_ Ceramic
CooktopScraper ........... #WX10)(0302
Kit.......................... #WB64XS027
(Kitincludescreamandcooktopscraper)
_] Any remaining spillover should be
left un61 the surface of the cooktop
has cooled.
Don't use the surface units again
until all of the residue has been
completely removed.
NOTE:ffpittingorindentationin theglass
surfacehasalreadyoccurred,theco&top glass
willhavetobereplaced.In thiscase,servicewifl
benecessa_
CERAMABRYTE_ CleaningPadsfor
CeramicCooktops.......... # WX10)(350
37
Page 38

Beforeyoucall forservice...
Troubleshooting -tips
Save time and money! Review the charts on the following
pages first and you may not need to call for service.
Possible Causes What ToDo
Surface units willnot Improper cookware * Use pans which are fiat and match the diameter of
maintainarolling being used. the surface unit selected.
or cookingis not
fast enough In some areas, the power • Cover pan with a lid undl desired heat is obtained.
Surfaceunitsdo A fuse in your home may be • Replace the fllse or reset the circuit breaker.
not work properly blown or the circuit breaker
Surfaceunitstops This is normal. The unit
glowingwhenturned is still on and hot.
toa lower setting
(voltage) may be low.
tripped.
Cooktop controls * Check to see the correct control is set for the surface
improperly set. unit you are using.
Scratches(mayappear
ascracks)oncooktop
glasssurface
Incorrect cleaning
methods being used.
Cookware with rough bottoms
being used or coarse particles
(salt or sand) were between
the cookware and the surface
of the cooktop.
Cookware has been slid
across the cooktop surface.
• Scratches are not removable. Tiny scratches Mll become
less visible in time as a result of cleaning.
• To avoid scratches, use file recommended cleaning
procedures. Make sure bottoms of cookware are clean
before use, and use cookware with smooth bottoms.
Areas ofdiscoloration Food spillovers not cleaned • See the Cleaningthe glass cooktop section.
on the cooktop before next use.
Hot surface on a model • This is normal. The surface may appear discolored
with a light-colored cooktop, when it is hot. This is temporary and will disappear
as the glass cools.
Plastic melted to Hot cooktop came into * See the Glass surface--potential for permanent damage
the surface contact with plastic placed section in the Cleaning the glass cooktop section.
on the hot cooktop.
Pitting (or indentation) Hot sugar mixture spilled • (;all a qualified technician for replacement.
ofthe cooktop on the cooktop.
Frequentcycling Improper cookware • Use only fiat cookware to minimize cycling.
offand onof being used.
surface units
Ovenlightdoes Light bulb is loose. • Tighten or replace the bulb.
not work
Ovenwillnot work Plug on range is not completely • Make sure electrical plug is plugged into a live, properly
inserted in the electrical outlet, gmounded puffer.
A fuse in your home may be • Replace the fi_seor reset the circuit breakeL
blown or the circuit
breaker tripped.
Oven controls improperly set. • See the Using the oven section.
38 Oven too hot. • Allow the oven to cool to below locking temperature.
Page 39

Possible Causes What ToDo
Food does not bake Oven controls improperly set. * See the Using the oven section.
or roast properly
Food does not Oven controls improperly set. • Make sure you touch the BROIL HI/tO pad.
Rack position is incorrect * See the Using the oven section.
or the rack is not level.
Incorrect cookware or • See the Using the oven section.
cookware of improper
size being used.
Oven thermostat needs • See the Adjust the oven thermostat--Do it yourself!
adjustment, section.
broilproperly Improper rack position • See the Broiling Guide.
being used.
Cookware not suited • For best results, use a pan desigaled for broiling.
for broiling.
The probe is plugged into the • Unplug and remove file probe flom file oven.
outlet in the oven.
(on some models)
ge.com
In some areas the power • Preheat the broil element for 10 minutes.
(voltage) may be low.
Oventemperature Oven thermostat
toohot or toocold needs adjustment.
• Broil for the longest period of time recommended in
the Broiling Guide.
• See the Adjust the oven thermostat--Do it yourself!
section.
39
Page 40

Beforeyoucall forservice...
Troubleshooting -tips
Possible Causes
Clockandtimerdo
notwork
Oven will not self-clean The oven temperature is • Allow file range to cool and reset file controls.
"Crackling" or This is the sound of the • This is normal.
"popping" sound metal heating and cooling
Excessive smoking Excessive soil. • Touch the CLEAR/OFFpad. Open the windows to
during a clean cycle rid the room of smoke. Wait until LOCKED goes off:
Plug on range is not completely
inserted in the electrical outlet.
A fuse in your home
may be blown or the
circuit breaker tripped.
Oven controls improperly set. • See the Using the clock and timer section.
too high to set a self-clean
operation.
Oven controls improperly set. • See the Using the self-cleaning oven section.
The probe is plugged into • Remove the probe flom the oven.
the outlet in the oven.
(on some models)
during both the cooking and
cleaning functions.
What ToDo
• Make sure electrical plug is plugged into a live, properly
g_ounded outlet.
• Replace the fl]se or reset the circuit breakeL
Wipe up the excess soil and reset the clean cycle.
Oven door will not Oven too hot. • Allow the oven to cool below locking temperature.
open after a clean cycle
Ovennotclean after a Oven controls not properly set. • See the Using the self-cleaning oven section.
clean cycle Oven was heavily soiled. • (;lean up heax-y spillovers before starting the clean
cycle. Heavily soiled ovens may need to self-clean
again or for a longer period of finle.
"LOCKED"flashes The self-clean cycle has been • (;lose the oven dooL
in the display selected but the door is not
"LOCKED"is on The oven door is locked • Touch the CLEAR/OFFpad. Allow the oven to cool.
when you want because the temperature
tOCOOk inside the oven has not
"F--anda number You have a flmction error code. • Disconnect all power to the range for at least 30
or letter"flash seconds and then reconnect power. If the flmcfion
closed.
dropped below the
locking temperature.
in the display error code repeats, call for service.
4O
Page 41

Possible Causes What ToDo
Range Locked The controls have * See the Control Lock section to unlock.
appears in the oven been locked.
display
Control signals after You forgot to enter a • Touch the BAKE pad and desired temperature or
entering cooking time bake temperature or the SELFCLEAN HI/LO pad and desired clean time.
or start time cleaning time.
ge.com
Display goes blank A fuse in your home may be • Replace the fi_se or reset the circuit breakeL
Display flashes Power failure. * Reset the clock.
Unable to get the Oven control pads were • The BROIL HI/LO and BAKE pads must be touched at
display to show "SF" not touched properly, the same time and held for 3 seconds.
blown or the circuit
breaker tripped.
The clock is in the * See the Special features of your oven control section.
black-out mode.
"Probe"appearsin This is reminding you to • Enter a probe temperature.
the display enter a probe temperature
(on some models) after plugging in the probe.
Power outage, Power outage or surge. * Reset the clock. If the oven was in use, you must reset
clock flashes it by touching the CLEAR/Off pad, setting the clock
and resetting any cooking traction.
Steam from the vent When using the ovens, • This is normal.
it is normal to see steam
coming out of the oven
vents. As the number of racks
or amount of food being
cooked increases, the amount
of visible steam will increase.
"Burning" or "oily" This is normal in a new oven • To speed the process, set a self-clean cycle for a
odor emitting from and will disappear in time. minimum of 3 hours. See the Using the self-cleaning
the vent oven section.
Strongodor An odor from the insulation * Tiffs is temporary.
around the inside of the oven
is normal for the first few times
the oven is used.
Fan noise A convection fan may • This is normal. To maximize cooking evenness,
automatically turn on the fan is designed to operate in both directions,
and off. with a pause in between.
• The convection fan will operate during preheat
of the bake cycle. The fan will turn off after the oven
is heated to the set temperature. This is normal.
Ovenracksare
difficultto slide
The shiny, silver-colored
racks were cleaned in a
self-clean cycle.
• Apply a small amount of vegetable oil to a paper
towel and wipe the edges of the oven racks with
tim paper towel. Do not spray with Pam ®or other
lubricant sprays.
4/
Page 42

m
w
m
Notes.
m
m
42
Page 43

GE Service Protection Plus TM
GE, a name recognized worldwide ff)r quality and dependability, offers you
Service Protection Plus'_'--comprehensive protection on all your appliances--
No Matter What Brand!
Benefits Include:
* Backed by GE
* All brands covered
* Unlimited service calls
* All parts and labor costs included
* No out-of-pocket expenses
* No hidden deductibles
* One 800 number to call
You will be completely satisfied with our service protection or you may request your money back
on the remaining value of your contract. No questions asked. It's that simple.
Protect your refligerato_; dishwasher, washer and dryer, range, TV, VCR and much more--any brand!
Plus there's no extra charge for emergency service and low monthly financing is available. Even icemaker
coverage and food spoilage protection is offbred. You can rest easy, knowing that all your valuable
household products are protected against expensive repairs.
Place your confidence in GE and call us in the U.S. toll-free at 800.626.2224
for more information.
_%11brands cover_ d, up lo 20 years old, in lhe continental lJ.S.
We'll CoverAny Appfiance.
Anywhere. Anytime.*
..................
Pleaseplacein envelopeandmail to:
General Electric Company
Warranty Registration Department
P.O. Box 32150
Louisville, KY 40232-2150
43
Page 44

Consumer Product Ownership Registration
Dear Customer:
Thank you for purchasing our product and thank you for placing your confidence in us.
We are proud to have you as a customer!
Follow these three steps to protect your new appliance investment:
Complete and mail
your Consumer
Product Ownership
Registration today.
Have the peace of
mind of knowing we
can contact )ou in
the unlikely event of a
satet} modification.
After mailing the
registration bel(m,
store this document
in a sate place. It
contains intormation
)ou will need should
)ou require service.
Our service nmnber is
800.(;E.(;ARES
(800.432.2737).
Model Number Serial Number
Important: If you did not get a registration card with your
product, detach and return the form below to
ensure that your product is registered, or register
online at ge.com.
Consumer Product Ownership Registration
Read }our Owner's
Mamml carefully.
It will help )ou
operate }otlr ilew
appliance properly.
._.,,_ Cut here
Model Number
,,,,,,,,,,I I
Mr. i Ms.::;! Mrs.::;! Miss
First] ] I,ast ]
Name I I I I I I I I I Name I I I I I I I I I I I
Street I
Address I I I I I I I I I I I I I I I I I I I I I I I
Serial Number
I I I I I I
ap,.#l I t I , I I I I E-mailA(_(_ress*
I)at_ Pla<(d
'"_'1 _ I Da,,I _ I _arl, I PhoneN.mberlI. I-I.. I-I . .
Month
* Please provide your e-mail address to receive, via e-mail, discotmts, special offers and other impormm
commtmications ti'om GE Appliances (GEA).
GE Consumer & Industrial
Appliances
General Electric Compan U
Louisville, K¥/40225
ge.com
Check here if you do not _m]t to receive commtmications fi'om GEA's careftfll} selected partnel_.
FAII MRE TO COMPI,ETE AND RETURN THIS (ARD DOES NOT DIMINISH YOUR
_,_SKRRAN TY RIGHTS.
For more information about GEA's privacy and data usage poliq; go to ge.com and click on
"Pfivac) Polic)" or calm 800.626.2224.
44
Page 45

Notes.
w
45
_P
!
m
m
!
!
Page 46

Accessories.
Looking For Something More ?
Youcan find these accessories and many more at ge.com, or call 800.626.2002
(during normal business hours). Have your model number ready.
_i _ iii i iiiii i i_iI i_i i iI
i i i iii ii ii ii ii ii ii ii ii i ii ii ii ii ii ii
Surface Elements & Drip Pans
Oven Elements
Cleaner Cleaning Pads Scraper
OvenRacks Broiler Pan
Light Bulbs
Knobs
46
Tired of discolored racks? Wishing you had extra-heaxf-duly oven racks?
NOWA VAIl.ABLEtier your range:
GE's innovative, selt:cleanable porcelain-coated oven racks!
• Heaxy Du W
• Durable
• Able to be cleaned in a self-cleaning oven
Visit ge.com ti)r more inti)rma6on.
Page 47

GEElectricRange Warranty.
Aft warranty service provided by our Factory Service Centers,
or an authorized Customer Care®technician. Toschedule
service, on-line, visit us at ge.com, or carl 800.GE.CARES
(800.432.2737).Please have serial number and model number
available when calling for service.
GEWill Provide:
Anypartof the range which fails due to a defect in materials or workmanship. During fllis
Fromthedate of the
originalpurchase ...............
Service trips to your home to teach you how to use
the product.
Improper installation, delivery or maintenance.
Failure of the product if it is abused, misused,
or used for other than the intended purpose or
used commercially.
Damage to the glass cooktop caused by use of cleaners
other than the recommended deaning creams and
pads.
limitedone-year warranty,GE will also provide, freeofcharge,all labor and in-home se_Mce
to replace the defective part.
Staple yourreceipt here.
Proof of the original purchase
dateis needed to obtain service
under the warranty.
Replacement of house fuses or resetting of circuit
breakers.
Damage to the product caused by accident, fire, floods
or acts of God.
Incidental or consequential damage caused by possible
defects with this appliance.
Damage caused after delivery.
Product not accessible to provide required service.
Damage to the glass cooktop caused by hardened
spills of sugary materials or melted plastic that
are not deaned according to the directions in
the Owner's Manual.
Warranty.Any implied warranties, including the impfied warranties of merchantabifity or fitness for a particular purpose,
EXCLUSIONOFIMPLIED WARRANTIES--Your sole and exclusive remedy isproduct repair as provided in this Limited
are limited to one year or the shortestperiod allowed bylaw.
This warranty is extended to the original purchaser and any succeeding owner for products purchased for
home use within the USA. If the product is located in an area where service by a GEAuthorized Servicer is not
available, you may be responsible for a trip charge or you may be required to bring the product to an Authorized GE
Service location for service. In Alaska, the warranty excludes the cost of shipping or service calls to your home.
Some states do not allow the exclusion or limitation of incidental or consequential damages. This warranty
gives you specific legal rights, and you may also have other rights which vary from state to state. Toknow
what your legal rights are, consult your local or state consumer affairs office or your state's Attorney General
Warranton GeneralElectric Company.Louisville,KY 40225
47
Page 48

ConsumerSupport
GEAppliancesWebsite
Have a ques0on ov need assistance with your appliance? TD_the GE Appliances Website 24 hours a day,
any day of the year! Foxgreater convenience and fz,tster service, you can now download Owner's Manuals,
order parts ox even schedule sex_qceon-line.
ge.com
ScheduleService ge.com
Expert GE repair service is only one step away fiom your dooL Get on-line and schedule your sex_ice at
your convenience any day of the year! Or call 800.GE.GARES (800.432.2737) dux-ing norm_d business hours.
RealLifeDesignStudio
GE supports the Universal Design concept--products, services and environments that can be used by
people of aU ages, sizes and capabiliues. We vecogmize the need m design for a wide range of physical and
mental abili0es and impaixments. Fox details of GE's Univexsal Desigm applica0ons, including kitchen
design ideas for people with disabili0es, check out our Website today. Fox the hearing impaired, please call
800.TDD.GEAG (800.833.4322).
ExtendedWarranties
Purchase a GE extended warranty and learn about special discounts that are available while your warranty
is still in eff)ct. You can purchase it on-line anytime, or call 800.626.2224 during nomml business houxs.
GE Gonsumer Home Sex_qceswill still be there _ffteryour warrani T expires.
ge.com
ge.com
PartsandAccessories
IndMduals qualified to service their own appliances can have parts or accessox-iessent directly to their
homes (VISA, MasterGard and Discover cards ave accepted). Order on-line today, 24 houxs every day or
by phone at 800.626.2002 during normal business hours.
Instructionscontainedinthismanualcoverprocedurestobeperformedbyanyuser.Otherservicinggenerally
shouldbe referredtoqualifiedservicepersonnelCautionmustbeexercised,sinceimproperservicingmaycause
unsafeoperation.
ContactUs
If you ave not satisfied wifll die service you receive flom GE, contact us on our Website wifll all die details
including your phone numbex, or wx-imm: General Managex; Gusmmer Relations
GE Appliances, Appliance Park
Louisville, KY40225
RegisterYourAppliance
Register your new appliance on-line--at your convenience! Timely product regism_fion will allow for
enhanced communication and prompt service under die texans of your warrant3,, should die need arise.
You m W also mail in the preprinted regism_fion card included in the packing mamx-ial, or detach and use
the form in the Owner's Manual.
ge.com
ge.com
ge.com
Printed in the United States
 Loading...