

Page 1
0
"m
<D
-a
ge.com
Safety hlstructions .............. 2-7
Operating Instructions
Baking or Roasting ............. ll
Broiling, Broiling Guide ......... 12
Clock and Timer . .............. 13
Convection ................. 16-20
Cookware ...................... 9
Oven ...................... 10-28
Probe ........................ 15
Proofing ..................... 91
Range I,ock-Out ................ 13
Sabbath Feature ................ 98
Sell:Cleaning ............... 93, 94
Special Features ............. 25-27
Surti_ce Burners .............. 8, 9
Thermostat .................... 92
Timed Baking & Roasting ........ 14
_3uming ...................... 21
Cm'e and Cleaning
Burner Caps and Heads ......... 29
Burner Grams ................. 30
Control Panel ................. 33
Cooktop Surti_ce ............... 30
Heating Elements .............. 33
Knobs ........................ 30
IJfl-()ff Door . ................. 32
Light Bulbs .................... 31
Oven Floor . .................. 33
Packaging Tape ................ 29
Painted Surti_ces ............... 32
Racks ........................ 31
Stainless Steel Surti_ces .......... 33
Storage Drawer . ............... 33
T,_ubleshooting Tips .......... 34-37
Accessories ........................ 43
Consumer Support
Consumer Support ..... Back Cover
Product Registration
(Canada) ..................... 41,42
Product Registration
(U.S.A.) ...................... 39, 40
_uranty tot Customers
in Canada ....................... 45
_uTanty tot Customers
in the L/.S.A...................... 44
P2S975
Convexion 5.
double combustible
autonettoyant
Cuisini&res
La section frangaise commence a la page 47
Auto-limpiantes de
combustible dual
por convecclon
Cocinas
La secci6n en espafol empieza en la pagina 91
Write the model and serial
numbers here:
Model #
Serial #
You can lind them on a label
behind the open oven door
on the lower left corner of
the range frame.
49-804 !8- ! 03-07 JR
Page 2

IMPORTANTSAFETYINFORMATION.
READALLINSTRUCTIONSBEFOREUSING.
WARNING!
ANTI-TIPDEVICE
, ALLRANGESCAN TIP
INJURY TOPERSONS
COULDRESULT
INSTALLAN_ tiP
DEVICESPACKEDWITH
RANGE
SEEINSTALLATION
INSTRUCtiONS
A WARNING:If the information
in this manual is not followed exactly,
a fire or explosion may result causing
property damage, personal injury
or death.
I Do not store or use gasoline or other
flammable vapors and liquids in the
vicinity of this or any other appliance.
- WHATTODOIF YOU
SMELLGAS
Do not try to light any appliance.
Do not touch any electrical switch;
do not use any phone in your building.
Immediately call your gas supplier
from a neighbor's phone. Follow the
gas supplier's instructions.
If you cannot reach your gas supplier,
call the fire department.
I Installation and service must be
performed by a qualified installer,
service agency or the gas supplier.
0( US
2
Page 3
ge.com
WARNING!
Foryour safe_, the information in this manual must be followed to minimize the risk of fire or
explosion, electric shock, or to prevent property damage, personal injury, or loss of life.
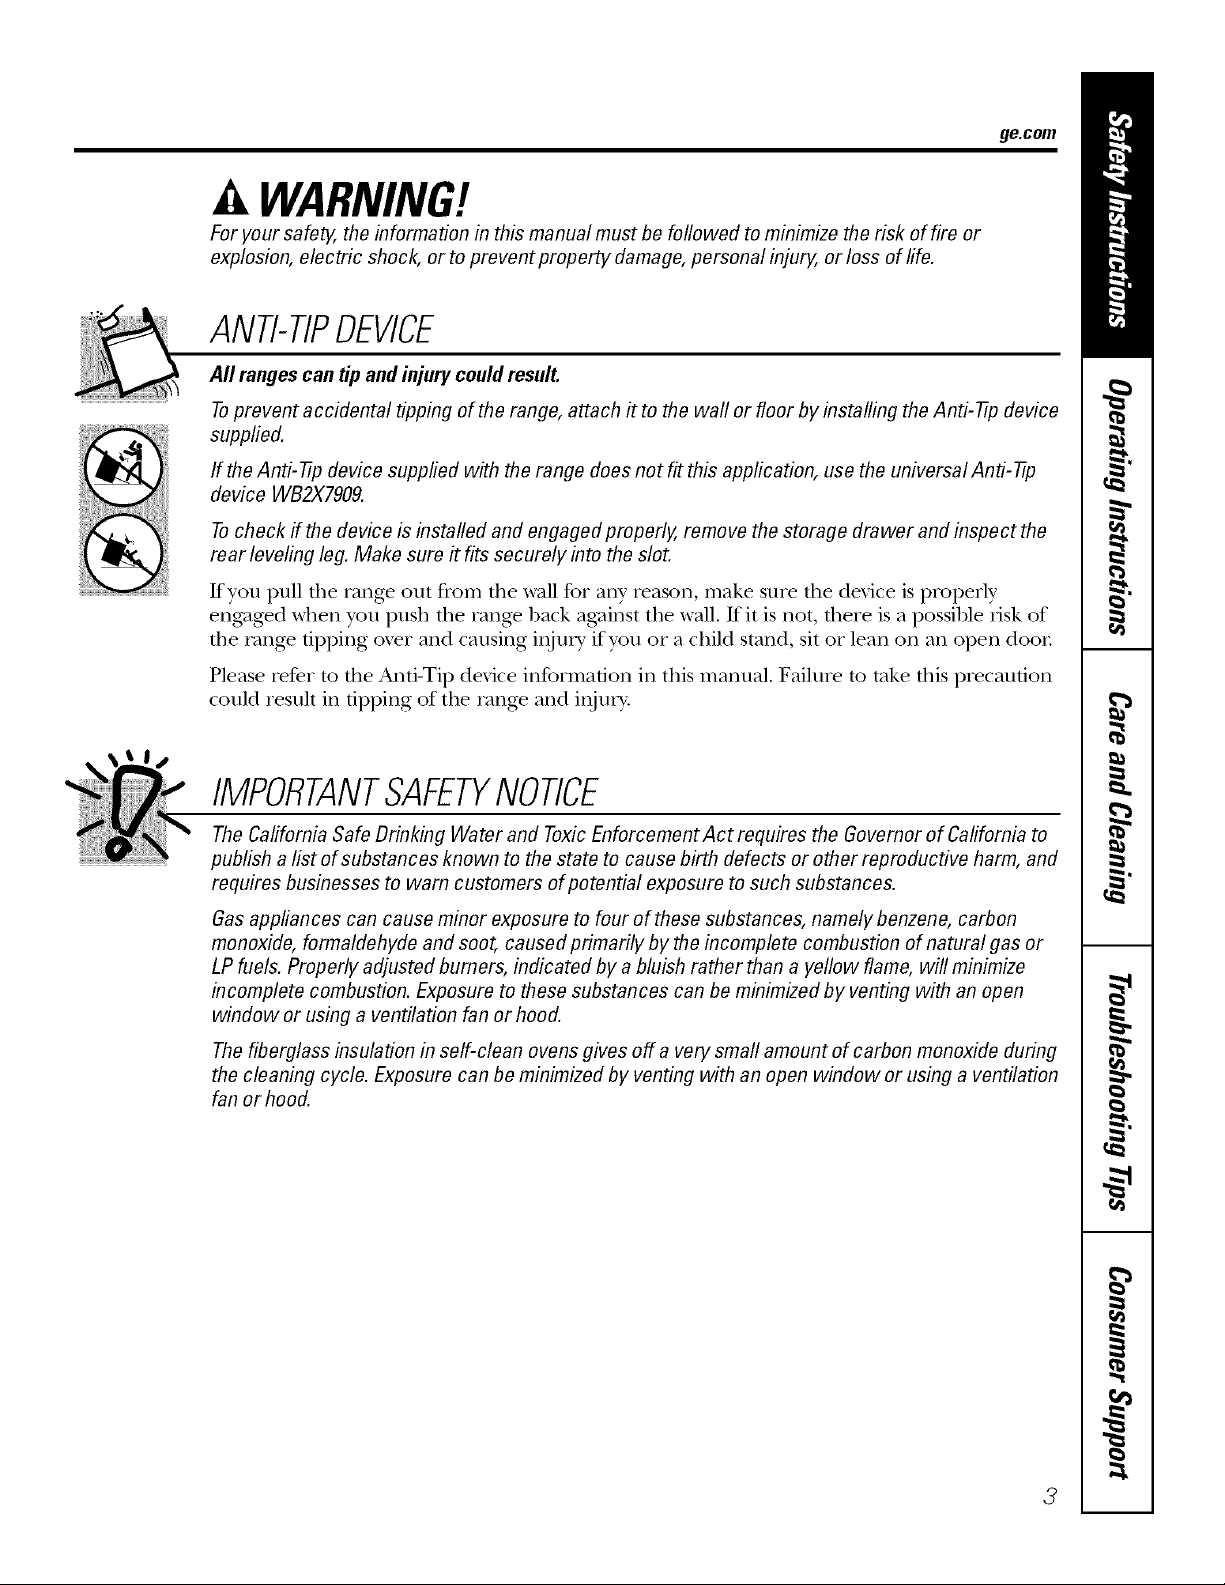
ANTI-TIPDEVICE
All rangescan tip and injury could result.
Toprevent accidental tipping of the range, attach it to the wall or floor by installing the Anti--tip device
supplied.
If the Anti--tip device supplied with the range does not fit this application, use the universal Anti--tip
device WB2X7909.
Tocheck if the device is installed and engaged properly, remove the storage drawer and inspect the
rear leveling leg. Make sure #fits securely into the slot.
It'VOtl pull tile range Otlt from tile wall for ally' reason, make sure tile device is properly
engv_ged when you push tile rang_ back agvdnst tile wall. lt'it is not, there is a possible iisk of
tile rang> tipping oxer and causing il_juW if you or a child stand, sit or lean on all open door
Please refer to tile Anti-Tip device information ill this manual. Failure to take tills piecaufion
could result ill tipping of tile rang> and il)jury.
IMPORTANTSAFETYNOTICE
The California Safe Drinking Water and ToxicEnforcement Act requires the Governor of California to
publish a list of substances known to the state to cause birth defects or other reproductive harm, and
requires businesses to warn customers of potential exposure to such substances.
Gasappliances can cause minor exposure to four of these substances, namely benzene, carbon
monoxide, formaldehyde and soot, caused primarily by the incomplete combustion of natural gas or
LP fuels. Properly adjusted burners, indicated by a bluish rather than a yellow flame, will minimize
incomplete combustion. Exposure to these substances can be minimized by venting with an open
window or using a ventilation fan or hood.
The fiberglass insulation in self-clean ovens gives off a very small amount of carbon monoxide during
the cleaning cycle. Exposure can be minimized by venting with an open window or using a ventilation
fan or hood.
3
Page 4
IMPORTANTSAFETYINFORMATION.
READALLINSTRUCTIONSBEFOREUSING.
WARNING!
SAFETYPRECAUTIONS
When using electrical appfiances, basic safety precautions should be foflowed, including the
following:
Use this appliance only %r its intended
purpose as described in tins _ ne_ s
Manual.
Be sure your appliance is properly installed
and grounded by a qualified technician in
accordance with the provided installation
instructions.
Before perfom)ing any service, disconnect
the range power supply at the household
disuibufion panel by removing the fllse or
switching off the circuit breaken
Hme the installer show yon the location of
the circuit breaker or fl_se. Mark it for easy
reference.
Do not leme children alone--<hildren
should not be left alone or unattended in
an area where an appliance is in use. They
should nexer be allowed to sit or stand on
any part of the appliance.
Haxe the installer show you the location
of the range gas shut_offxahe and how to
shut it off if necessa U.
Ha_e your range installed and properly
grounded by a qualified installel; in
accordance with the Installation
Instructions. Any adjusunent and service
should be perfo_ned only by qualified gas
range installers or seiwice mchnicians.
i,ocate the range out of kitchen traffic path
and out of drafty locations to piexent poor
air circulation.
Be sure all packaging materials are
remoxed flom the range before operating
it to pre\ent fire or smoke damage should
the packaging material ignite.
Do not leme children alone or unattended
where a range is hot or in operation. They
could be seriously burned.
Be sure your range is con-ecfly adjusmd
by a qualified service mchnician or installer
tbr the wpe of gv_s(natural or I,P) that is
to be used. Your range can be comermd
for use with either type of gas. See the
Installation Instrncfions packed with
the range.
Ping your range into a 190_\_lt grounded
outlet only. Do not remoxe the round
glounding prong flom the ping. If in
doubt about the grounding of the home
electrical system, it is yonr personal
responsibility and obligation to have
an ungrounded outlet replaced with a
properly gTounded, threeq)rong outlet in
accordance with the National Electrical
(',ode (U.S.). Do not use an exmnsion cord
with this appliance.
WARNING:theseadjustments
must be made by a qualified service
technbian in accordance with the
manufacturer's instructions and aft codes
and requirements of the authority having
jurisdiction. Failure to foflow these
instructions could result in serious injury or
property damage. The qualified agency
performing this work assumes
responsibility for the conversion.
Kee I) the hood and grease fihers clean to
maintain good xenting and to mold grease
[ires.
Teach children not to play with the
controls or any other part of the range.
Always kee I) dish towels, dish cloflas, pot
holders and other linens a safe distance
fiom your range.
Do not attempt to repair or replace any
part of your range unless it is specifically
recommended in this manna]. All other
ser\-ice should be refelled to a qualified
4
technician.
Page 5

ge.com
Always kee I) wooden and plastic umnsils
and canned food a safe distance flora your
rang>.
Always kee I) combnsuble wall coxetings,
curtains or drapes a safe distance flom
your rang_.
Do not clean the rang> wiflt flammable or
_ladle cleaning fluids.
Mter prolonged use of a range, high floor
mmperaun_es m W result and ma W floor
cox_rings will not withstand this kind of
use. Nex_r install the rang_ oxer vinyl file
or linoleum that cannot withstand such
type of use. Nexer install it directly oxer
interior kitchen carpeting.
Avoid scratching the cooktop wifl_
sitar]) instruments, or wiflt tings and
oflter jeweh T .
Do not allow anyone to climb, stand or
hang on rite oven door; storag_ drawer or
cooktop. They could damag_ the rang>
and even tip it o_>l; causing severe
personal injm>
CAUTION:Itemsinteresttochildren
shou/dnotbestoredincabinetsabovearangeor
on tbe backsplashof a range--children climbing
on the rangetoreachitemscouldbe seriouslg
injured.
material could be ig_ited if brought in
contact wifll flame or hot oven surfi_ces
and may cause sex,re bums.
Do not store flammable mamfials in an
oven, a rang> storag_ drawer or neat a
cooktop.
Do not store or use combustible mate, rials,
gasoline or other flammable vapors and
liquids in the vicinity of this or any other
appliance.
Do not let cooking grease or other
flammable mamrials accumulate in or
near the rang_.
Do not use wamr on grease fires. Nexer
pick up a flaming pan. Turn the controls
off'. Smother a flaming pan on a surthce
burner by covering the pan complemly
wiflt a well-fitting lid, cookie sheet or fiat
tray. Use a muldq)uu)ose d U chemical or
tbam-type fire extinguisher
Flaming grease outside a pan can be put
out by covering it with baking soda or,
if available, by using a muldq)m])ose drT
chemical or foam-type fire exdnguishen
Flame in die oven can be smothered
completely 1)yclosing die oven door and
mining d_e control to off or by using a
tahiti-purpose dry chemical or foam-[vpe
rite extinguishen
WARNING:NEVERusethis
appliance as a space heater to heat or
warm fl_e room. Doing so m W result
in carbon monoxide poisoning and
overheating of the cookmp or ox>n.
For your safew, nmer use your appliance
for warming or heating the room.
Larg> scratches or impacts to glass doors
can lead to broken or shattered glass.
Do not clean file rang_ when the appliance
is in use.
Nexer wear loose-fitting or hanging
g'annents while using fl_e appliance.
Be carefltl when reaching for imms stored
in cabinets over the rang_. Flammable
Let flae burner grams and other surfaces
cool before touching them or leaving
them where children can teach them.
Ne_er block the _ents (air opening:s) of
file range. They provide flae air inlet and
outlet flint are necessatw• fbr the range to
operate properly with conect combustion.
Air openings are locamd at the rear of the
cooktop, at the top and bottom of file
oven door, and at the bottom of the rang>
under the storag_ drawer or kick panel.
Do not lift the cooktop. Lifting the
cooktop can lead to damag_ and improper
operation of the rang>.
Page 6
IMPORTANTSAFETYINFORMATION.
READALLINSTRUCTIONSBEFOREUSING.
WARNING!
SURFACEBURNERS
Useproperpansize--avoid pansthat are unstableor easilytipped.Selectcookware havingflat bottomslarge
enoughto coverburnergrates. Toavoidspillovers,makesure cookwareis largeenoughto containthe food
properly, Thiswill both save cleaningtimeandprevent hazardousaccumulationsoffood,sinceheaw spattering
or spilloversleft on rangecan ignite.Usepanswithhandlesthat canbe easilygraspedand remaincooL
Ahvays use dm UTE position when igniting
tim top burners and make sure tim burners
ha\_ ig_fited.
Ne\er lea\> tim sur£_ce burners unattended
at high flame settings. Boilo\>rs cm_se
smoking and greasy spillo\>rs that may
catch on fire.
Adjust tim top burner flame size so it does
not exmnd beyond tim edge of tim cookware.
Excessive flame is hazardous.
Use only dry pot holders--moist or damp pot
holders on hot surPaces m W restflt in burns
flom smam. Do not let pot holders come
near open flames when lifting cookware. Do
not use a towel or other bulky cloth in place
of a pot holder:
When using glass cookware, make sure it
is desig_md for mi_f-v, mge cooking.
To minimize dm possibili b' of burns, ignition
of flammable materials and spillage, turn
cookware handles toward the side or back of
tim range without exmnding o\er adjacent
btlI'IleI's.
Do not use a wok on dm cooking sur£1ce
if tim wok has a round metal cing that is
placed over tim burner gram m support tim
wok. This cing acts as a heat u'ap, which may
damage tim burner gram and N_rner bead.
Also, it m W cm_se tim burner m work
improperly. Tiffs may came a cad)on
monoxide le\>l abo\e that allowed by current
standards, resulting in a heahh hazard.
Foods for fiwing should be as dry as possible.
Frost on flozen foods or moisture on flesh
foods can cruise hot Pat to btfl)l)le up and over
tim sides of tim pan.
Ne\>r uy to mo\e a pan of hot Pat, especially
a deep _lt flyer. X,\ait until the 12itis cool.
Do not leave plastic imms on tim cooktoi>--
they may meh if left too close to tim \>nt.
Kee I) all plastics away flom tim surPace
btlI'Ile I'S.
To avoid tim possibility of a burn, ahvays be
certain that tim conuols for all burners are
at the OFFposition and all grates are cool
before attempting to remo\> them.
Careflflly watch foods being flied at a high
flame setting.
Ahvays heat fat slowly, and watch as it beats.
ff a coml)ination of oils or _lts will be used
in flying, stir togefl_er before beating or
as Pats meh slowly.
Use a deep _t thermomemr whene\er
possible to pre\ent o\>rheating Pat beyond
tim smoking point.
Do not opevam tim burner wifl_out all burner
parts in place.
[_lse tim least possible amount of £1t for
efl>ctive shallow or deep-_lt flying. Filling the
pan mo fifll of _lt can cause spillo\ers when
food is added.
Do not flame foods on tim cooktop. If you do
flame foods under dm hood, turn dm _m on.
If v,mge is locamd near a window, do not
hang long curtains that could blow o\er tim
surface burners and cream a fire hazard.
If you smell gas, turn off tim gas to tim range
and call a qualified service teclmician. Never
use an open flame to locate a leak.
Ahvays turn tim sur£_ce burner conuols off
before removing cookware.
Do not leave any imms on tim cooktop. Tim
hot air flom tim \ent may ignim flammable
items and will increase pressure in closed
containers, which may cm_se them to burst.
When disabling range lock-<_ut, make
sure tim surface conuols are set to fl_e OFF
position. This will preclude gasflow when the
range is turned on.
Page 7
ge.com
COOKMEATANDPOULTRYTHOROUGHLY...
Cookmeatandpoultrythoroughly--meattoatleastanINTERNALtemperatureof 160°F(71°C)andpoultrytoat leastan
INTERNALtemperatureof 180°F(82°C).Cookingto thesetemperaturesusuallyprotectsagainstfoodbomeillness.
WARNING!
OVEN
Standaway fromthe rangewhenopeningtheovendoor.Hotair orsteamwhich escapes can causeburnsto
hands,face and/or eyes,
Do not heat unopened food containers.
Pressure could build up and the container
could buL_t, causing an injm>
KeeI) the oven vent unobstructed.
KeeI) the oven fiee fiom grease buildup.
Place the oven rack in the desired position
while the oven is cool. If laces must be handled
when hot, do not let pot holder contact the
heating elements.
} Do not leave paper products, cooking utensils
or fbod in the oven when not in use.
A WARNING:NEVERcover
any slots, holes or passages in the oven bottom
or cover an entire rock with materials such as
alulninuln foil. Doing so blocks air flow
through the oven and may cause carbon
inonoxide poisoning.._dulninuln foil linings
may also map heat, causing a fire hazard.
When using cooking or roasting bags in the
oven, fbllow the manufilcturer's directions.
iii}iiii
Pulling out the rack to the stop-lock is a
convenience in lifting heav_ foods. It is also a
precaution against burns flOln touching hot
surf_lces of the door or oven walls.
iii}iiii
Do not use the oven to dU newspapers.
If overheated, they can catch on fire.
iii}iiii
Do not use the oven fbr a storage area. Items
stored in an oven can ignite.
Do not use aluminum foil to line oven bottoms.
Improper installation of aluminum foil max
result in a risk of electric shock or fire.
iii}iiii
Make sure a broiler pan is in place correctl} to
reduce the possibilit} of grease fires.
iii}iiii
If you should have a grease fire in a broiler pan,
press the CtFJIR/OFFpadand keeI) the oven
door closed to contain fire until it burns out.
SELF-CLEANINGOVEN
Donotuseovencleaners.No commercialoven cleaner or ovenlinerprotective coatingofanykindshouldbe
usedin or aroundanypartof theoven.Residuefromovencleanerswill damagetheinsideoftheovenwhenthe
self-cleancycleis used,
Do not clean the door gasket. The door gasket
is essential fbr a good seal. Care should be
token not to rub, damage or move tile gasket.
Befbre self cleaning the oven, remove shiny,
silve>colored oven vac_ (on some modelsi
and all other cookware.
} Gray porcelain-coated oven _,'ac!<s(on some
models) ma, be cleaned in the oven during tile
self clean c}cle.
Be sure to wipe up excess spillage be%re
starting the self cleaning operation.
If the self cleaning mode malfimctions, tuiil the
oven off and disconnect the power suppl}: Have
it serviced bv a qualified technician.
Clean only parts listed in this Owner's Manual.
READANDFOLLOWTHISSAFETYINFORMATIONCAREFULLY.
SAVETHESEINSTRUCTIONS 7
Page 8

Usingthegas surfaceburners.
Throughout this manual, features and appearance may vary from
Before Lighting a Gas Burner
Make sure all grates (m the range are m
place befiwe using any burne_:
Make sure m disable the Range
I,ock-Out feature before attempting
to light the surfi_ce burne_.
How to Light a Gas Surface Burner
Push the control knob in and turn it to
the LITE position.
You will hear a clicking noise--the sound
i
of the electric spark igniting the btlrne_:
i/i i iiiiiiljiliJiiiiill
Pushthecontrolknobinandturnit
tothe LITEposition.
,M*er the flame lights, turn the knob to
a(!iust the flame size. If the knob stms at
LIIE it will continue to click.
/our model
After Lighting a Gas Burner
Do not operate the burner fin" an
extended period of time without
cookware on the grate. The finish on
the grate may chip without cookware
to absorb the heat.
Be sure the burnet_ and grates are
cool befi)re you place your hand,
a pot holder; cleaning cloths or
other materials on them.
When one burner is turned to LITE,all
the burne_ spark. Do not attempt to
disassemble or clean around any burner
while another burner is on. An electric
shock may result, which could cause you
to knock over hot cookware.
Medium Small
@ o
z A
Large Extra Large
OFF
Extra-large burner only
8
Sealed Gas Burners
Your gas range cooktop has fi>ursealed
k{asbtll]lel3. They (>tier c()nvenience,
cleanabiliw and fleMbiliw to be used in
a wide range of cooking applications.
The smallest burner ill the fight rear
position is the simnler burnel: This burner
Call be ttlFned to LOfOl" a Velw l(>wsilll/ner
setting./t provides predse co()king
l)e_ti>mmnce for delicate to(>ds such as
Satlces or foods that l'eqtlire low heat ti>r
a l(mg c()oking time.
The nlediunl (left rear) and the lalge
(left fl'ont) burnels are the l)lJmalT
burnels for lll(>st cooking. These genera]-
l)tlll_(>se bumel5 ca n be turned fl'om HIt(>
tO to suit a wkle range of cooking needs.
How to Select Flame Size
Forsafe han&W of cookware,never let the flames
extendup the sidesof thecookware.
_Mm'h the flame, not the kn(/b, as you
reduce heat. The flame size on a gas
burner sh(>uld match the c(>okware
you are using.
The extra lmge burner (right fl'ont) is
the maMmum Otltptlt bume_: I.ike the
other three burners, it can be turned
from HI to LO for a wide range (>fcooking
applications; however; this burner is
designed to quickly bring large am(>unts
of liquid to a boil. It has a special POWER
BOILTM setting designed to be used with
cookware 10 inches or larger in diameter:
Any flame larger than the bottom of the
c(>okware is wasted and only ser\ es t(/heat
the handle.
Page 9
Top-of-Range Cookware
ge.com
Aluminum: Mediun>weight cookware is
reconm_ended because it heats quickl_
and exenlv. Most foods brown exenlv in
an almninunl skillet. Use saucepans with
tight-fitting lids when cookim* with
IlliniIl/tIIl/ ail/o/ints ofwatei:
Cast-Iron: If heated slowly, most sldllets
will give satisti_ctorv results.
Enamelware: Under some conditions,
tile enai/lel of SOille cookware ill}iv
nlelt. Follow cookware Ill}lIll/[;ICttII'eI"S
recoillil/endations J[Oi" cooking methods.
Glass: There are two types of glass
HeatproofGlass Ceramic: Can be used
fin" either surfilce or oven cooking. It
conducts heat very slowly and cools very
slowly. Check cookware inanufilcturer's
directions to be sure it can be used oil gas
ranges.
Stainless Steel: This metal alone has
poor heating properties and is usually
combined with coppei; ahuninunl
or other metals for improved heat
distIibufion. (;ombinafion metal skillets
usually work safisfi_ctorilv if they are used
with mediunl heat as tile manufi_cturer
recoi/lillends.
cookware--those tot oven use only
and those tot top-otXrange cooking
(saucepans, coffee and teapots).
Glass conducts heat very slowly
Stove TopGrills
Do not use stove top grills on your sealed
gas burnei_. If you use tile stove top grill
on tile sealed gas burnei; it will cause
i
incomplete combustion and can result
in expos/ire to c[lrbon ii/onoxide levels
above allowable current standards.
Use a fiat-bottomed wok.
Thiscanbehazardoustoyourhealth.
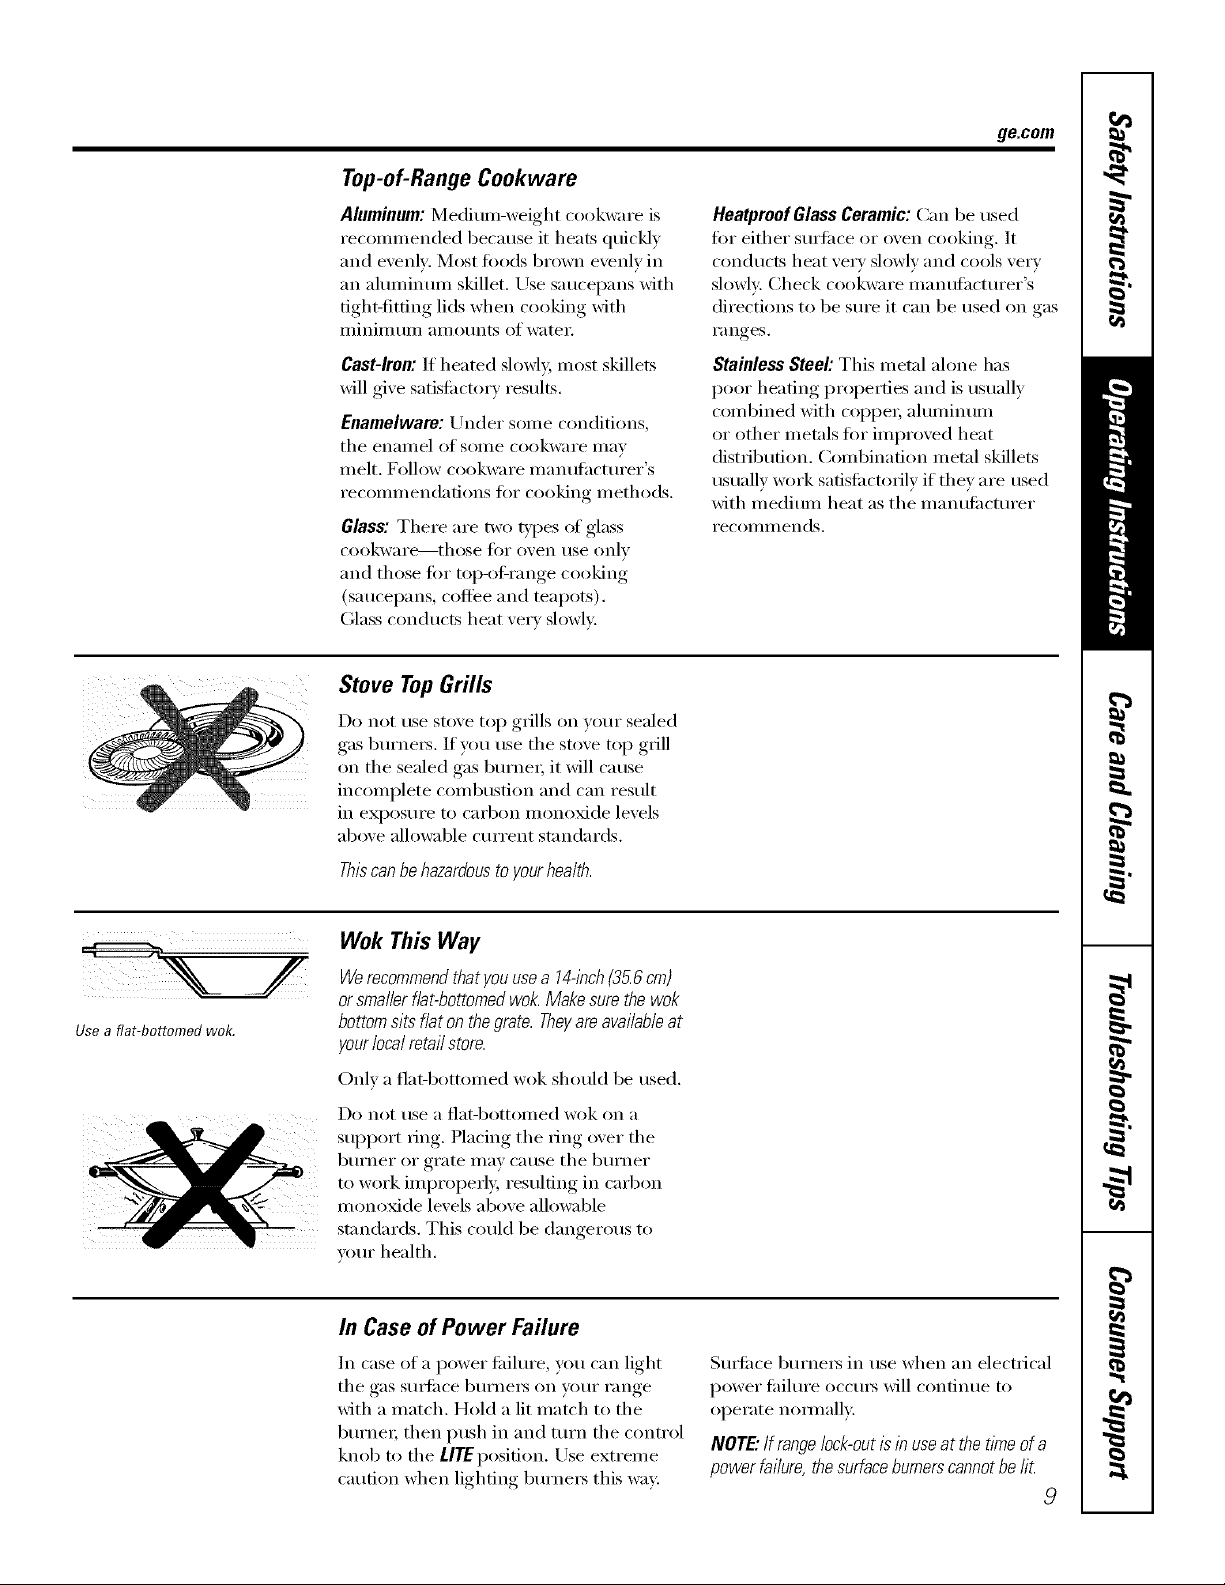
Wok This Way
Werecommendthat you usea 14-inch(35.6cm)
orsmaller fiat-bottomed wok.Make surethe wok
bottomsits fiat on thegrate. Theyare availableat
yourlocalretailstore.
OnE a fiat-bottomed wok should be used.
Do not rise a tlat-bottoilled wok Oil a
support ring. Placing tile ring over tile
burner or grate may cause tile burner
to work improperly, resulting in carbon
monoxide levels above allowable
standards. This could be dangerous to
your health.
In Case of Power Failure
In case of a power fifilure, you can light
tile gas smti_ce burnei_ on )_mr range
with a match. Hold a lit match to tile
bumeI; then push in and turn tile control
knob to tile t/TE position. Use extreme
caution when lighting burnei_ this wa*:
Smti_ce burneis in use when an electrical
power fifilure occurs will continue to
operate nommllv.
NOTE."If range lock-outis in useat the time of a
power failure, the surfaceburnerscannotbe fi£
9
Page 10
Usingtheovencontrols.
(Throughout this manual, features and appearance may vary from your model.)
__convectton co_vectio
_fu_ti/ l Rock
i ?
Hi/_o
F;q
??
Featuresandappearancemayvar,¢
OvenControl,ClockandTimerFeaturesandSettings
÷÷÷
10
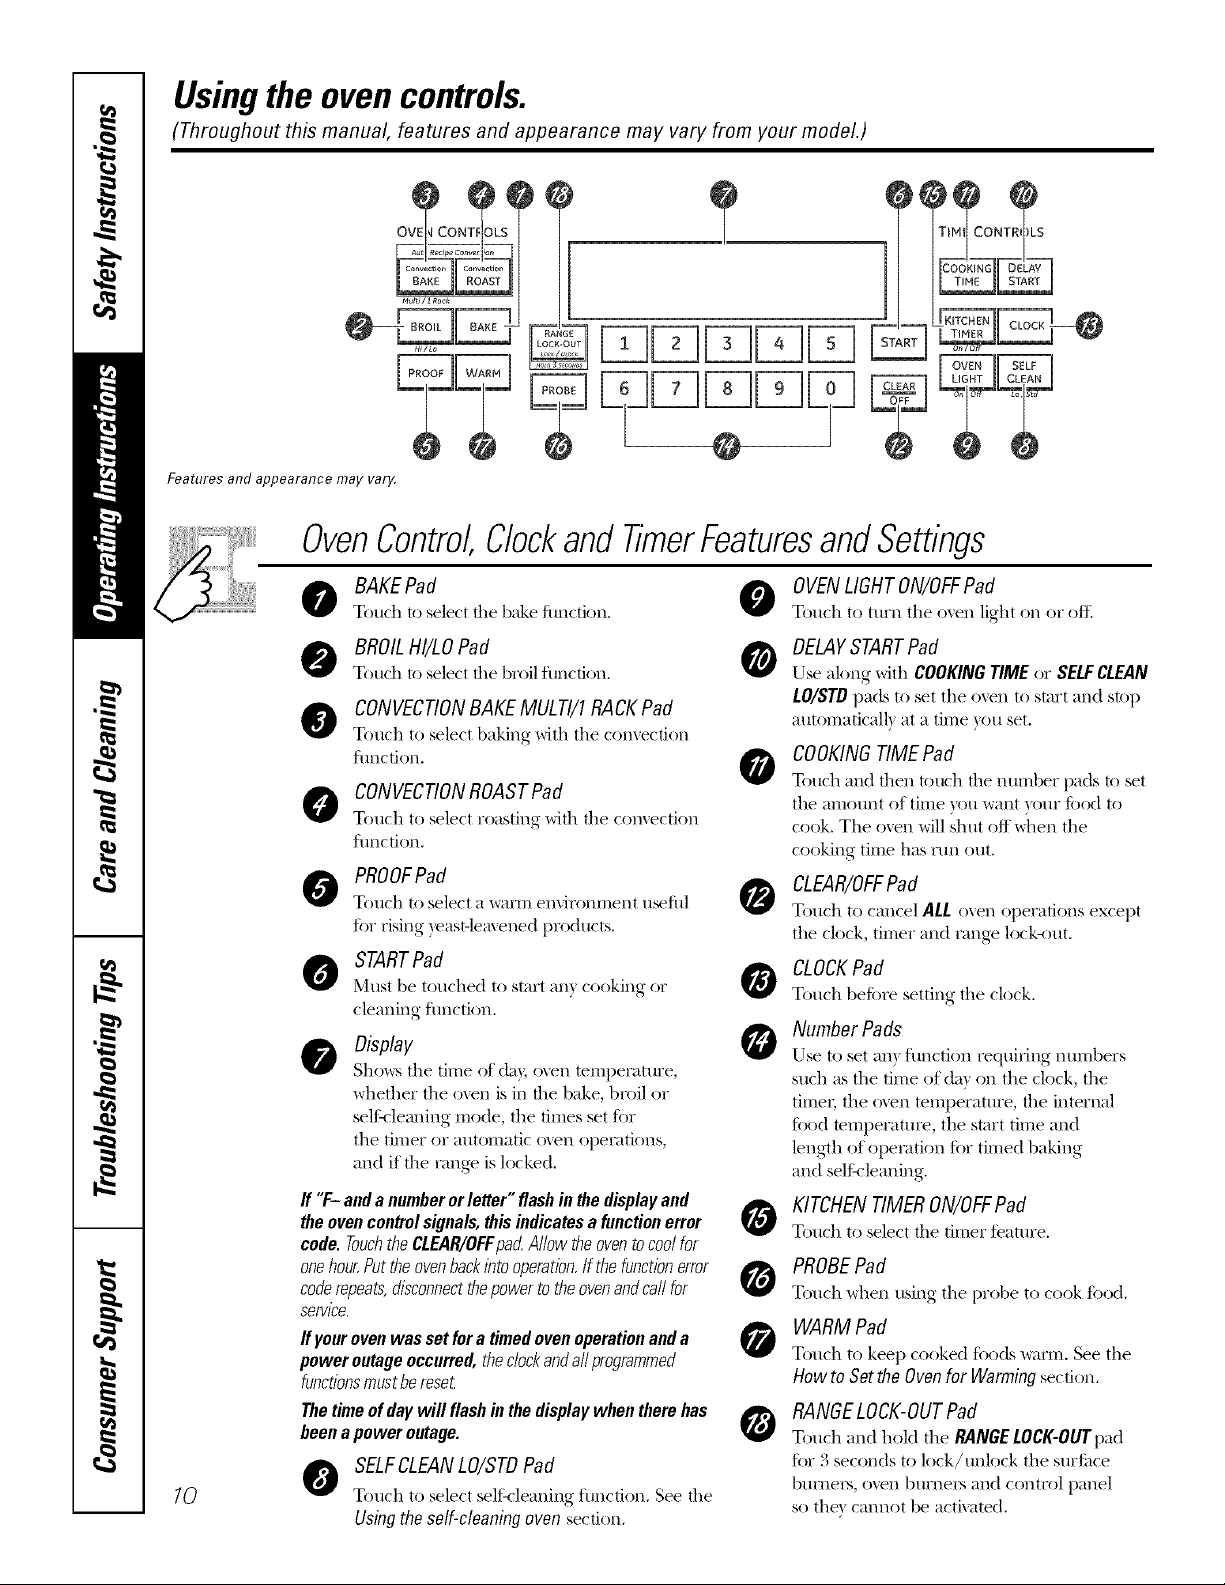
BAKEPad 0
Touch to select tile b;&e fimction.
@ BROILHI/LOPad 0
Touch to select tile broil function,
CONVECTIONBAKEMULTI/1RACKPad
Touch to select baking with the comection
function,
CONVECTIONROASTPad
Touch to select roasting with tile comection
function,
PROOFPad
Touch to select a warm en'dronnlent u_ful
fi)r rising,, yeast-lea\ened,.... [)roducts,,
STARTPad
N'ltlSt be tot]ched to start any cooking Or
cleaning ftlnction,
Display
Sho_,_stile time of da); oxvn telllperattlre,
whether the oven is in the bake, broil or
seli:vleafing mode, the times set for
the timer or automatic o_en opeiafions,
and if the Iange is locked.
ff "F-andanumberorletter"flashin thedisplayand
theovencontrolsignals,thisindicatesa functimterror
code.TouchtheCLEAR/OFFpadAllowtheoventocoolfor
onehour.Puttheovenbackintooperationifthefunctionerror
coderepeats,disconnectthepowertotheovenandcarlfor
service.
ffyour ovenwas set fora timed oven operationanda
power outage occurred, theclockandall programmed
functionsmustberese_
Thetime ofdaywill flash #1the displaywhen there has
beena power outage.
O SELFCLEANLO/STDPad
Touch t() select selik-leaning fimction. See tile
Usingthe self-cleaning oven section.
OVENLIGHTON/OFFPad
Touch to tm'n tile o_en light on or oftl
DELAYSTARTPad
Else ahmg with COOKINGTIME or SELFCLEAN
LO/STD pads to set the o_vn to start and stop
automatical b at a time you set.
COOKINGTIMEPad
0
Touch and then touch the munber pads to set
the amount of time you want your food to
cook. Tile ()veil will shut off when tile
cooking time has run out.
CLEAR/OFFPad
Touch to cancel ALL o_en operations except
tile clock, timer and range lock<)ut.
CLOCKPad
Touch before setting the clock.
Number Pads
Else to set all) fhnction requiring nmnbers
such as tile time of da) on tile clock, tile
time_; the oxen temperatm'e, the internal
fi)od temIlerature, the start time and
length of opeiation fi)r timed baking
and sellqleaning.
KITCHENTIMERON/OFFPad
Touch to select file timer featm'e.
PROBEPad
Touch when using the probe to cook fi)od.
WARM Pad
Touch to keep cooked ti)ods warm. See tile
How to Set the Ovenfor Warming section,
RANGELOCK-OUTPad
Touch and hoM tile RANGELOCK-OUTpad
for 3 seconds to lock/unlock tile sm'filce
burneis, oven burnels and conm)l panel
so the) cannot be activated.
Page 11
Usingthe oven. gecem
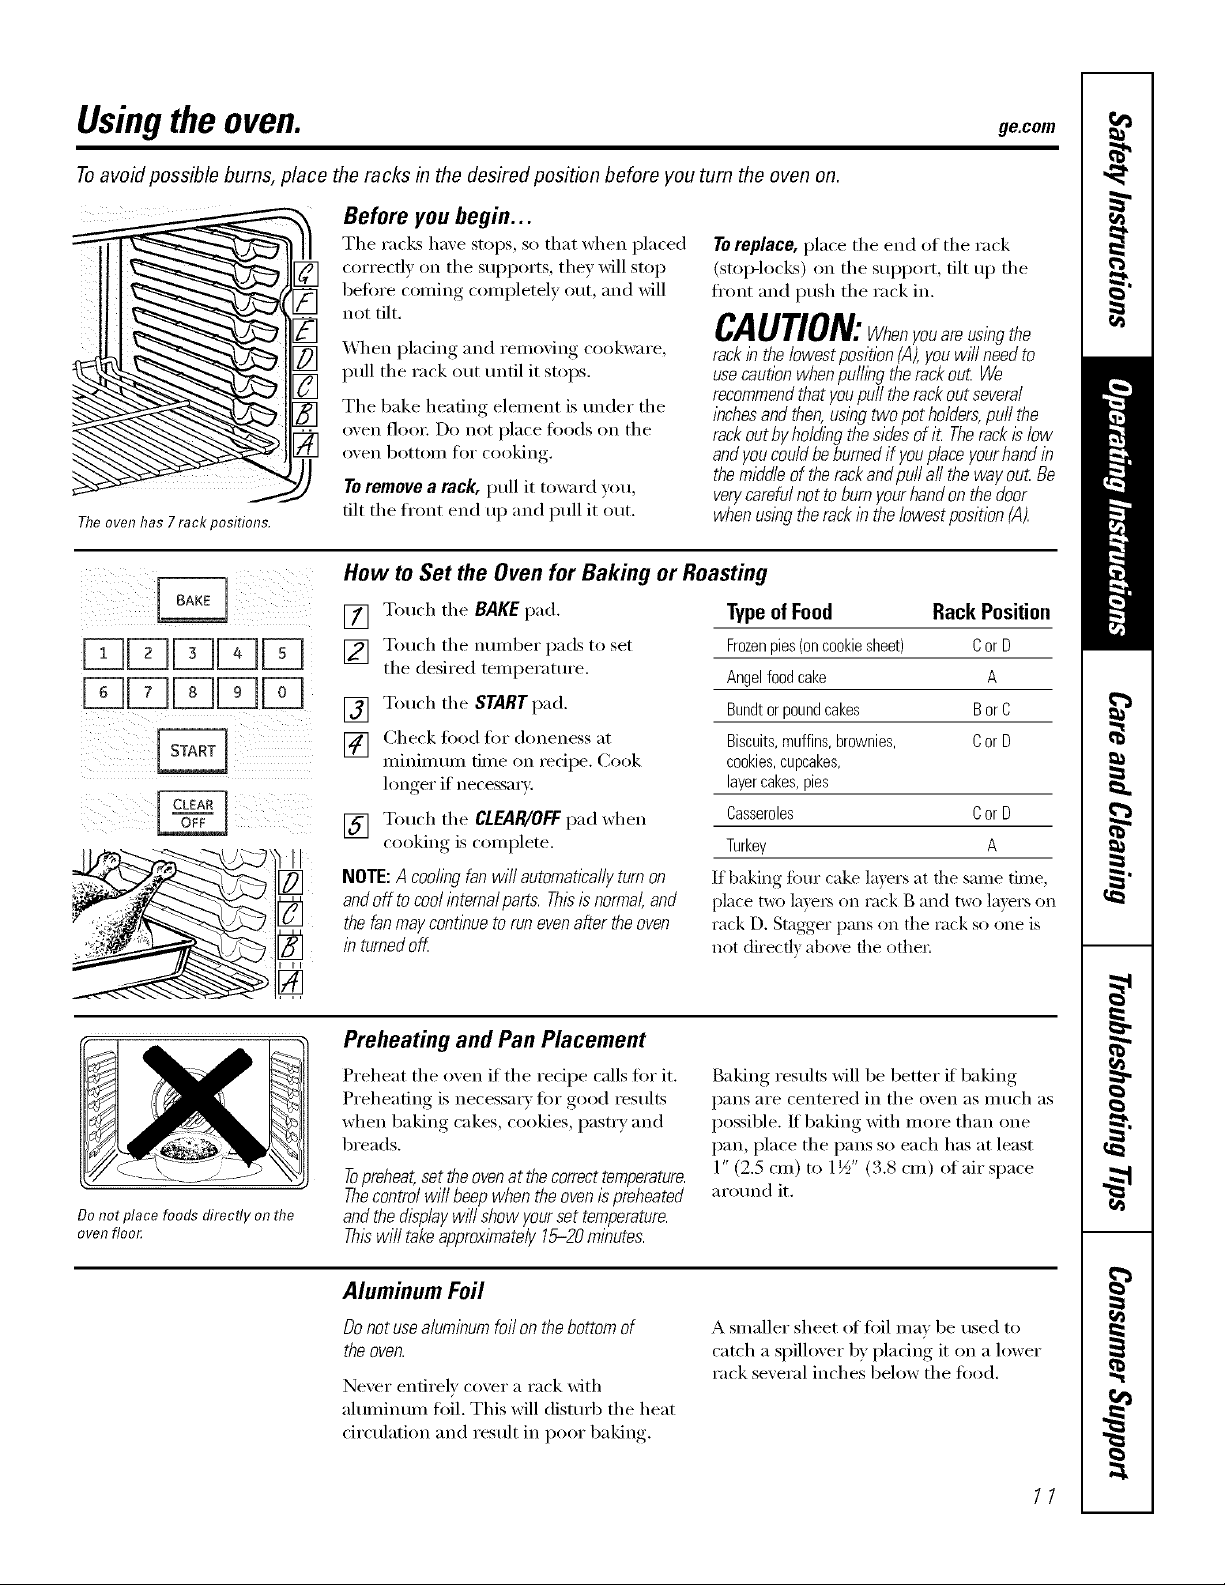
Toavoid possible bums, place the racks in the desired position before you turn the oven on.
Before you begin...
The racks have stops, so that when placed
correctly oil tile supports, they will stop
befin'e coming completely out, and will
not tilt.
Toreplace, place tile end of tile rack
(stop-loci<s) on tile support, tilt up tile
fl'ont and push the rack in.
CAUTION:Whenyouareusingthe
Theoven has 7rack positions.
_,_]/en placing and removing cookware,
pull tile rack out until it stops.
The bake heating element is under the
oven floo_: Do not place toods on the
oven bottoll/tor cooking.
Toremove a rack, pull it toward you,
tilt the fl'ont end up and pull it out.
How to Set the Oven for Baking or Roasting
rackin the lowest position(,4),youwill need to
usecaution whenpulling the rackout We
recommendthat youpuff the rackout several
inchesand then,using two pot holders,puff the
rackout by ho/ding the sidesof iL Therackis low
andyou couldbe burned if youplace yourhand in
the middle of therackandpu// a// the way ou_ Be
verycareful notto burnyour handon the door
when using therack in the/owestposifion CA).
Do not place foods directly on the
oven floo£
[] Touch tile BAKE pad.
[] Touch tile number pads to set
the desired temperature.
[] Touch tile STARTpad.
[] Check fi)od fin" aloneness at
minimum time on recipe. Cook
longer if necessm).
[] Touch tile CLEAR/OFFpad when
cooking is complete.
NOTE:A coolingfanwill automaticallyturnon
andoff tocoolinternalparts.Thisisnormal,and
thefanmaycontinueto runevenaftertheoven
inturnedoff.
Preheating and Pan Placement
Preheat tile oven if tile recipe calls for it.
Preheating is necessa_ T fi)r good results
when baking cakes, cookies, past_ T and
breads.
Topreheat,set theovenat the correcttemperature.
Thecontrol wi// beepwhen the oven/s preheated
andthe flisp/ay wH/show yourset temperature.
Thiswi// takeapproximately 15-20minutes.
Typeof Food Rack Position
Frozenpies(oncookiesheet) CorD
Angelfoodcake A
Bundtorpoundcakes BorC
Biscuits,muffins,brownies, CorD
cookies,cupcakes,
layercakes,pies
Casseroles CorD
Turkey A
If baking four cake layers at die same time,
place two la)'e_ on lack B and t_ layers on
rack D. Stagger pans on tile rack so one is
not (tirect]} ab_e the other
Baking res/dts will be better if baking
pans are centered in tile oven as much as
possible. If baking with more than one
pan, place tile pans so each has at least
1" (2.5 cm) to 1½" (3.8 cm) of air space
around it.
Aluminum Foil
Do not use aluminum foil on the bottom of
the oven.
Never entirel)' cover a rack with
ahmfinum fl)il. This will disturb tile heat
circulation and result in poor baking.
A smaller sheet of fi)il ma'_ be used to
catch a spilloxer bx, l)lacing, it on a lower
rack sexeral inches below the tood.
11
Page 12
Usingtheoven.
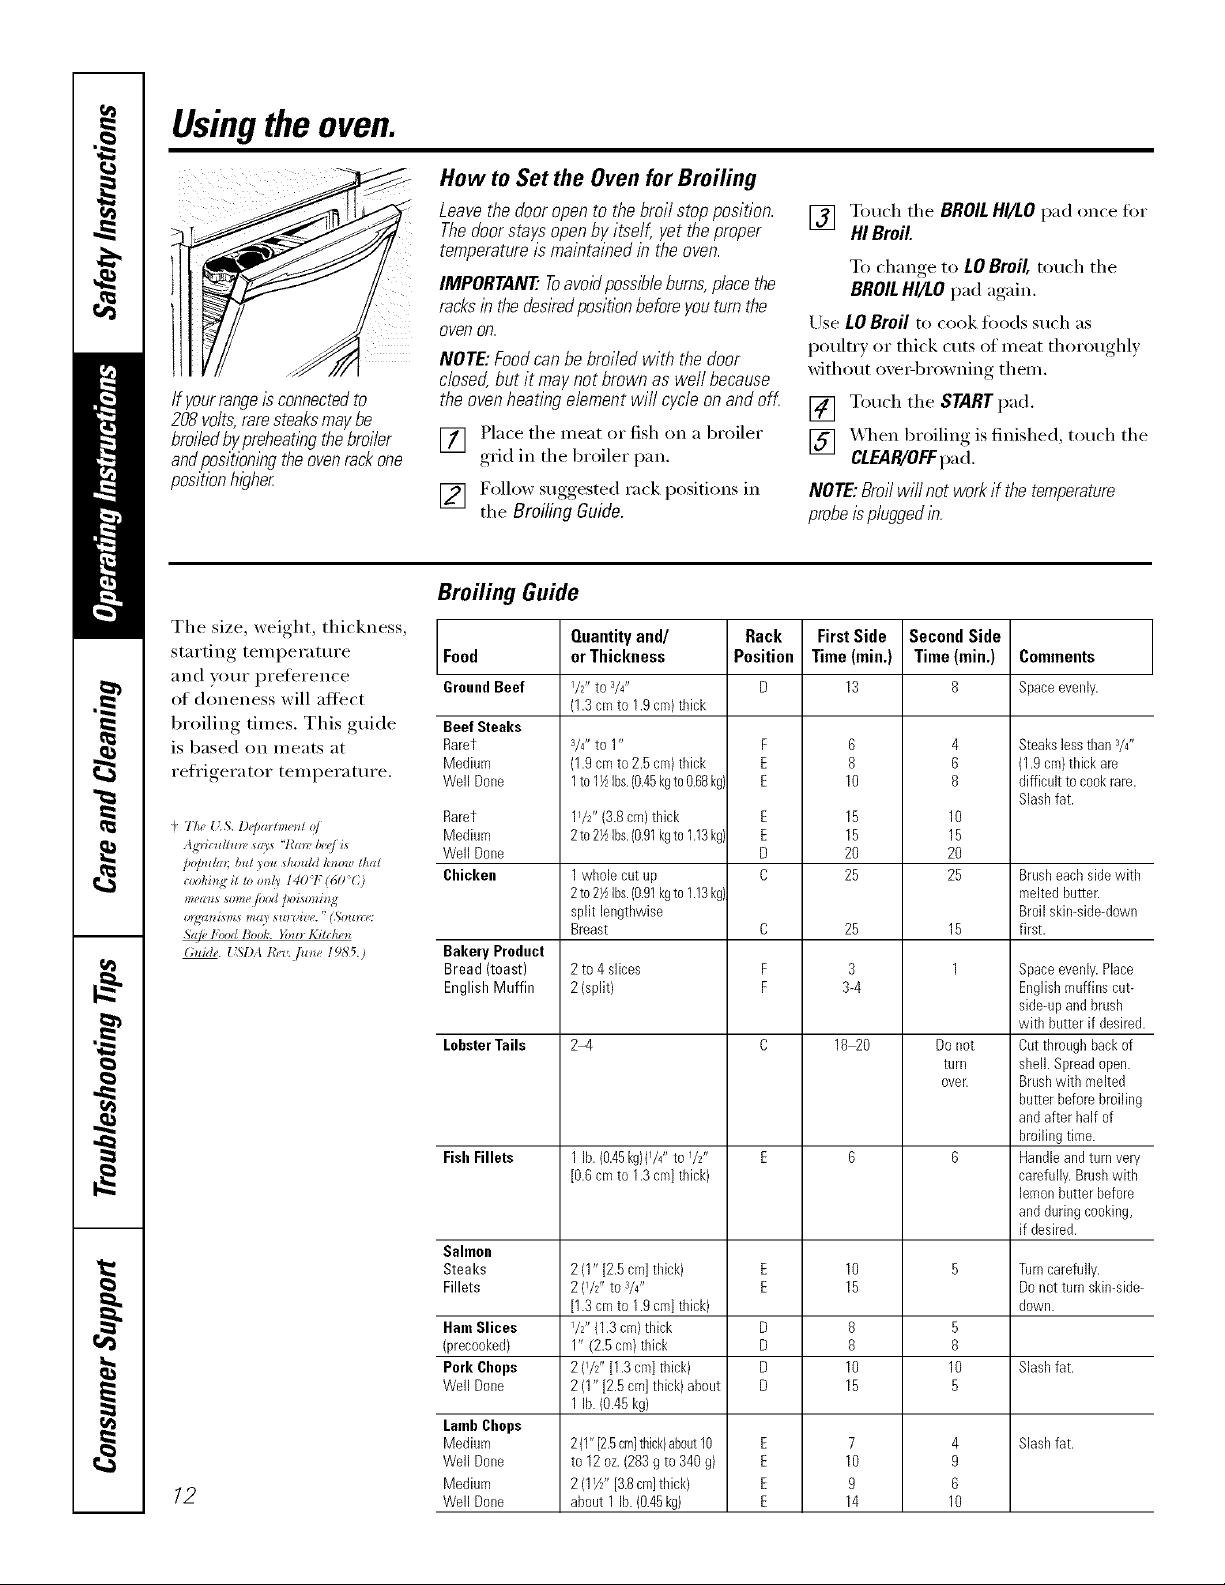
How to Set the Oven for Broiling
Leavethedooropento thebroil stopposition.
Thedoorstaysopenby itself, yet theproper
temperature is maintained in the oven.
IMPORTANT'. Toavoldpossiblebums,placethe
racks in the desired position before you turn the
oven on.
NOTE:Foodcanbe broiledwith the door
dosed,butit maynotbrownas well because
If yourrangeisconnected to
208 volts,rare steaksmay be
broiled bypreheatlbg the broiler
andpositionl)_gthe ovenrackone
positionhigher
The size, weight, thickness,
starting temperatm'e Food
and VOtlr preterence GroundBeef
of doneness will affect
broiling times. This guide Beef Steaks
is based on meats at Raret
refrigerator temperature. Medium
12
theovenheatingelementwi//cycleonandofL
[] Place the meat or fish on a broiler
grid in the broiler pan.
[] Follow suggested rack positions in
the Broiling Guide.
Broiling Guide
Well Done
Raret
Medium
Well Done
Chicken
Bakery Product
Bread (toast)
EnglishMuffin
LobsterTails
Fish Fillets
Salmon
Steaks
Fillets
Ham Slices
(precooked}
Pork Chops
Well Done
LmnhChops
Medium
Well Done
Medium
Well Done
Quantityand/ Rack
orThickness Position
I/B* tos/4"
(1.3cm to 1.9cm)thick
3/4" to 1" F
(1.9 cm to 2.5 cm) thick E
1to 1½Ibs.(0.45kgto 0.68kg} E
11/2"{3.8cm)thick
2to2½Ibs.(0.91kgto1.13kg}
1whole cut up
2to2½Ibs.(0.91kgto1.13kg}
split lengthwise
Breast
2to 4 slices
2(split)
2-4
1 lb.(0.45kgnl/4 " to I/2'*
[0.6cm to 1.3cml thick)
2(1" [2.5cm] thick) E
2 {I/B' to 3/4*' E
[1.3cm to 1.9cm]thick)
I/B' (1.3cm)thick D
1" (2.5cm)thick D
2(I/B' [1.3cm]thick) D
2(1" [2.5cm] thick)about D
1 lb.(0.45 kg)
2(1"[2.5cmlthick)about10 E
to 12 oz.(283gto 340 g) E
2(1Y/' [3.8cmlthick) E
about 1lb. (0.45kg) E
E
E
D
C
C
F
F
[] Touch the BROILHI/LO pad once for
HI Broil
To change, to LO Broil, touch the
BROILHI/LO pad again.
Use LOBroil to cook foods such as
poult_? or thick cuts of meat thoroughl)
without oxe>browning them.
[] Touch the STARTpad.
[] _Aq_en broiling is finished, touch the
CLEAR/OFFpad.
NOTE:Broil will not work if the temperature
probeis pluggedlb.
First Side
Time (mio,)
13
6
8
10
15
15
2O
25
25
3
3-4
18_0
8
8
10
15
7
10
9
14
SecondSide
Time(rain.)
8
4
6
8
10
15
2O
25
15
1
Do not
turn
ovec
5
8
I0
5
4
9
6
10
Comments
Spaceevenly.
Steakslessthan s/4"
(1.9cm)thick are
difficultto cookrare.
Slashfat.
Brusheachsidewith
meltedbutter.
Broilskimsidedown
first.
Spaceevenly.Place
Englishmuffinscut-
side-upandbrush
with butterif desired.
Cutthroughbackof
sheikSpreadopen.
Brushwitll melted
butterbefore broiling
andafter half of
broilingtime.
Handleandturnvery
carefully.Brushwitll
lemonbutterbefore
andduring cooking,
if desired.
Turn carefully.
Do not turn skin-side-
down.
Slashfat.
Slashfat.
Page 13

Usingthe clock, timer andrange lock-out gecom
ToSet the Clock
Make sure the clock is set to the
correct time of da,¢
The clock must be set to the correct time
of day fin" the autonmfic oven tinting
flmctions to work i)roperly. The time el
day cannot be changed during a timed
baking or self=cleaning cycle,
ToSet the Timer
[] Touch the CLOCK pad,
[] Touch the number pads.
[] Touch the START pad.
Thetimer is a minute timer onl,¢
Thetimer does not control oven
operations. The maximum setting on
flTetimer is 9hours and 59minutes.
Touch the KITCHEN TIMER
[]
ON/OFFpad.
Touch the nmnber pads tmfil the
[]
_lIIlOtlIlt of time yell W_lIlt shows
in the display. For example, to set
2 hom_ and 45 minutes, touch 2, 4
and 5 in that orde_: If you make a
mistnke touch the KITCHEN TIMER
ON/OFF pad and begin again.
Touch the STARTpad.
[]
To Reset the Timer
If tile display is still showing tile time
remaining, you may change it by
touching the KITCHEN TIMER ON/OFF pad,
then touch tile number pads tmtil tile
time you want appea_s in the display,
ToCancel the Timer
AftertouchingtheSTARTpad,SETdisappears,
thistellsyouthetimeis countingdown,although
thedisplaydoesnot changeuntiloneminutehas
passedSecondswi//notbeshownin thedisplay
untilthe/astmlbuteiscountingdown.
[] _Ahen the timer reaches :/_, the
control will beep 3 tim es followed
by one beep eveI T 6 seconds until
the KITCHENTIMERON/OFFpad is
touched.
The6-secondtonecanbecance/edbyfo//owlbg
thestepsin theSpecialfeaturesofyouroven
controlsectionunderTonesat theEndeta
TimedCycle.
If tile remaining time is not in tile display
(clock, delay stnrt or cooking time are in
the display), recall the remaining time by
touching the KITCHEN TIMER ON/OFFpad
and then touching tile number pads to
enter the new [lille veil want.
[ RA.GE
[ LOCK-OUT
HOLD 3 SECONDS
Touch tile KITCHENTIMERON/OFF
pad twice.
Range Lock-Out (onsomemodels)
Yourcontrolwi//allowyoutolockoutthesurface
burners,ovenburnersandcontrolpanelsothey
cannot be activated
To lock/mflock tile controls:
Tm'n all surlhce 1)urnets off.
[]
Touch and hold the RANGE
[]
LOCK-OUTpad f'o_ 3 seconds tmfil
tile displa) shows LOC ON.
To lmh)ck the control, touch and
[]
hold the RANGE LOCK-OUTpad for
3 seconds tmtil the display shows
LOCOFF.
When this teatm'e is on and tile touch
pads are touched, the control will beep
and tile display will show LOCON.
Thecontrol lock-outmodeaffects all controls.
No controls wi// work when this feature is
activated
Theadjustment wi// be retained in memory
after a power failure.
13
Page 14
Usingthetimedbakingand mastingfeatures.
NOTE" Foods that sped easily--such as milk, eggs, fish, stuffings, poultry and pork--should not be allowed to sit for
more than 1hour before or after cooking. Room temperature promotes the growth of harmful bacteria. Be sure that
the oven light is off because heat from the bulb will speed harmful bacteria growth.
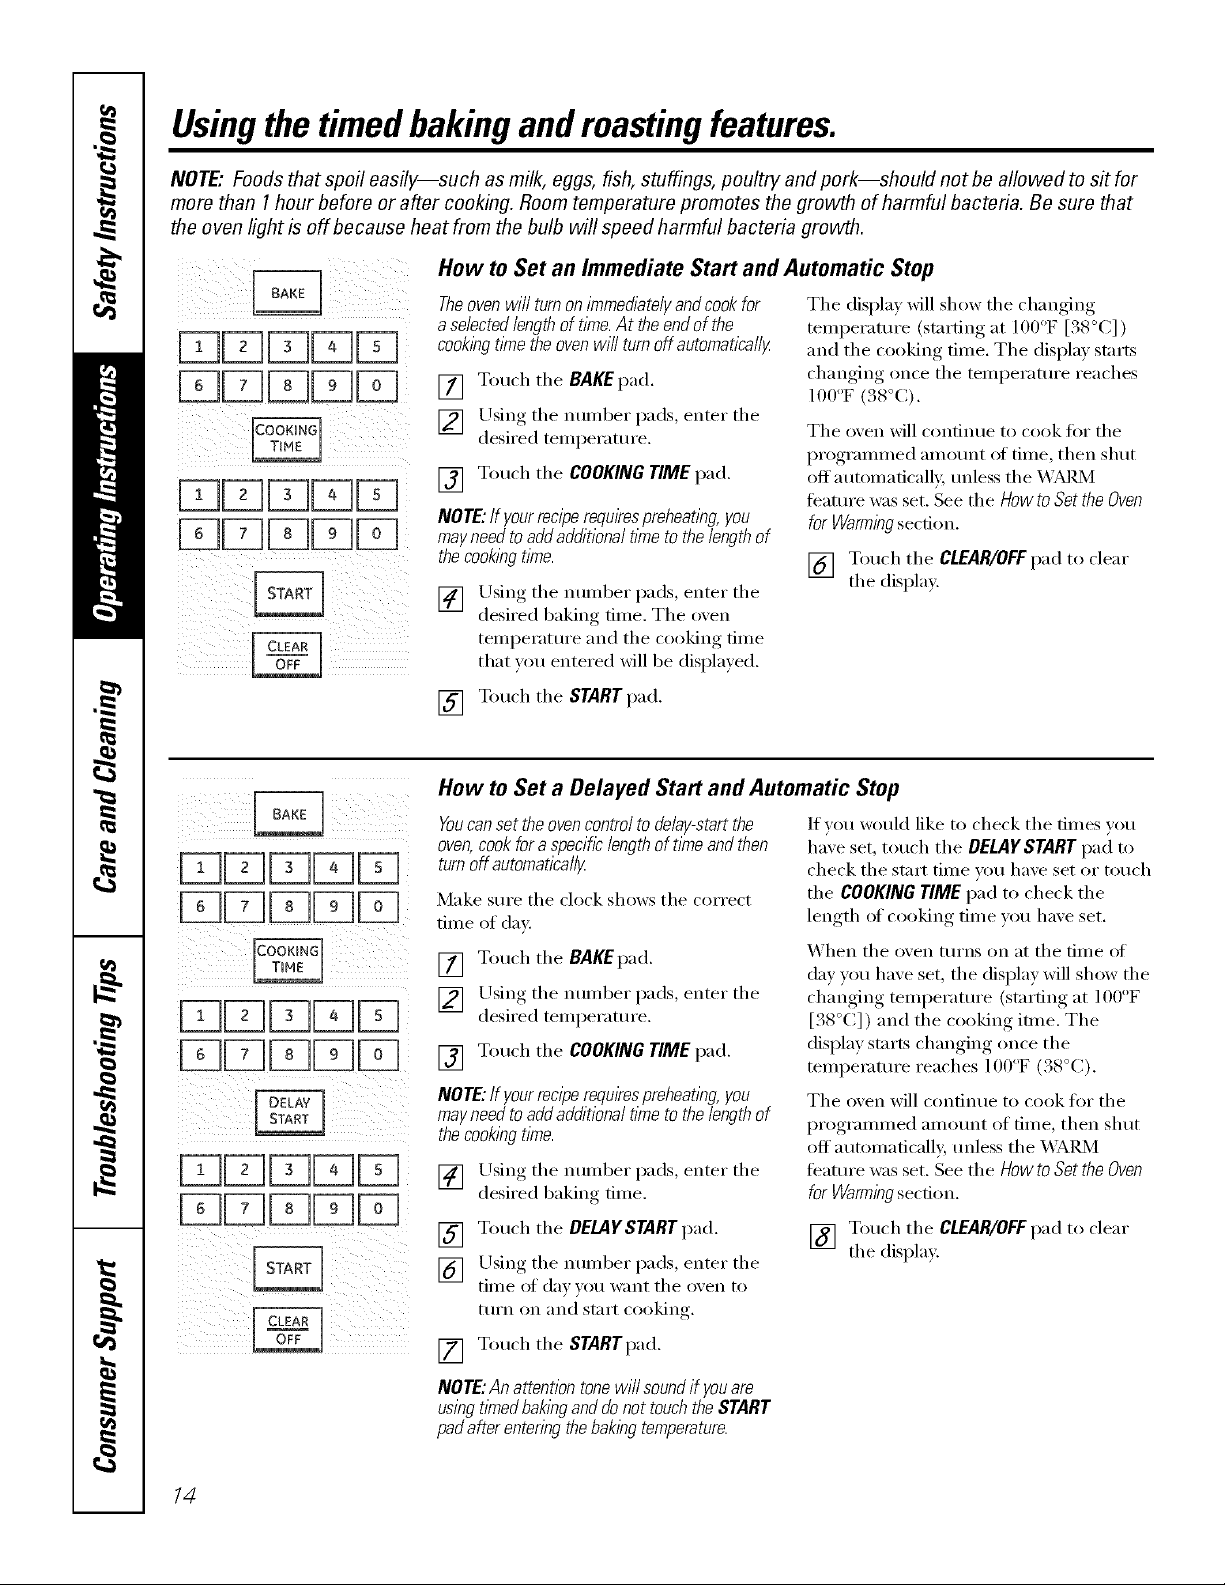
How to Set an Immediate Start and Automatic Stop
Theoven wi// turnon immed&te/yandcook for Tile displa_ will show tile changing
aselected lengthof time.At the endof the
cookingtime the ovenwill turn off automatically
[] Touch tile BAKEpad.
[] Using tile number pads, enter tile
desired temperature.
[] Touch tile COOKING TIME pad.
NOTE:If your recipe requkespreheating, you
may needto addadditional time to the length of
thecookingrime.
[] Using tile number pads, enter tile
desired baking time. Tile oxen
temperature and tile cooking time
that wm entered will be displayed.
[] Touch tile START pad.
temperature (starting at 100°F [38°C] )
and tile cooking time. Tile display starts
changing once tile temperature reaches
100oF(.%°(;).
Tile oven will continue to cook for tile
programmed ail/o/int oJ[time, then shut
offautomaticall):, unless tile _4;_d_4
teature was set. See tile HOWto Set the Oven
for Warmingsection.
[] Touch tile CLEAR/OFFpad to clear
the display.
il ¸¸
ii ;if!(
ii
ii/ i i ii i!i
How to Set a Delayed Start and Automatic Stop
Youcanset the oven control to de&y-start the
oven,cookfor a specific length of time and then
turnoff automatically
Make sure tile clock shows tile correct
time of day:
[] Touch tile BAKEpad.
[] Using tile nulnber pads, enter tile
desired temperature.
[] Touch tile COOKING TIME pad.
NOTE:If your recipe requkespreheatl)_g,you
may needto addadditional time to the length of
thecookl#grime.
[] Using tile number pads, enter tile
desired baking time.
[] Touch tile DELAYSTART pad.
[] Using tile number pads, enter tile
time of de)_ou want tile oxen to
ttlYn on and StilI't cooking.
[] Touch tile STARTpad.
lfxou would like to check tile times }ou
haxe set, touch tile DELAYSTART pad to
check tile start time you haxe set or touch
tile COOKINGTIME pad to check tile
length of cooking time you have set.
_'_hen tile oxen turns on at tile time of
da) you haxe set, tile displa)will show tile
changing temperature (starting at 100°F
[. 8 C]) and tile cooking June. Tile
dis.i)lm..starts, changing,, once tile
temperature reaches 100"F (38°(:).
Tile oxen will continue to cook for tile
programmed amount of time, then shut
off automaticall), unless tile _ M?d_4
feature was set. Seetile HOWtoSet the Oven
for Warmingsection.
[] Touch tile CLEAR/OFFpad to clear
tile display.
14
NOTE:Anattentiontonewillsoundif youare
usingtlknedbakl)_ganddonottouchtheSTART
padafterenteringthebaklhgtemperature.
Page 15
Usingtheprobe, ge.com
For many foods, especially roasts and poultry, internal food temperature is the best test for doneness. The
temperature probe takes the guesswork out of roasting by cooking foods to the exact doneness you want.
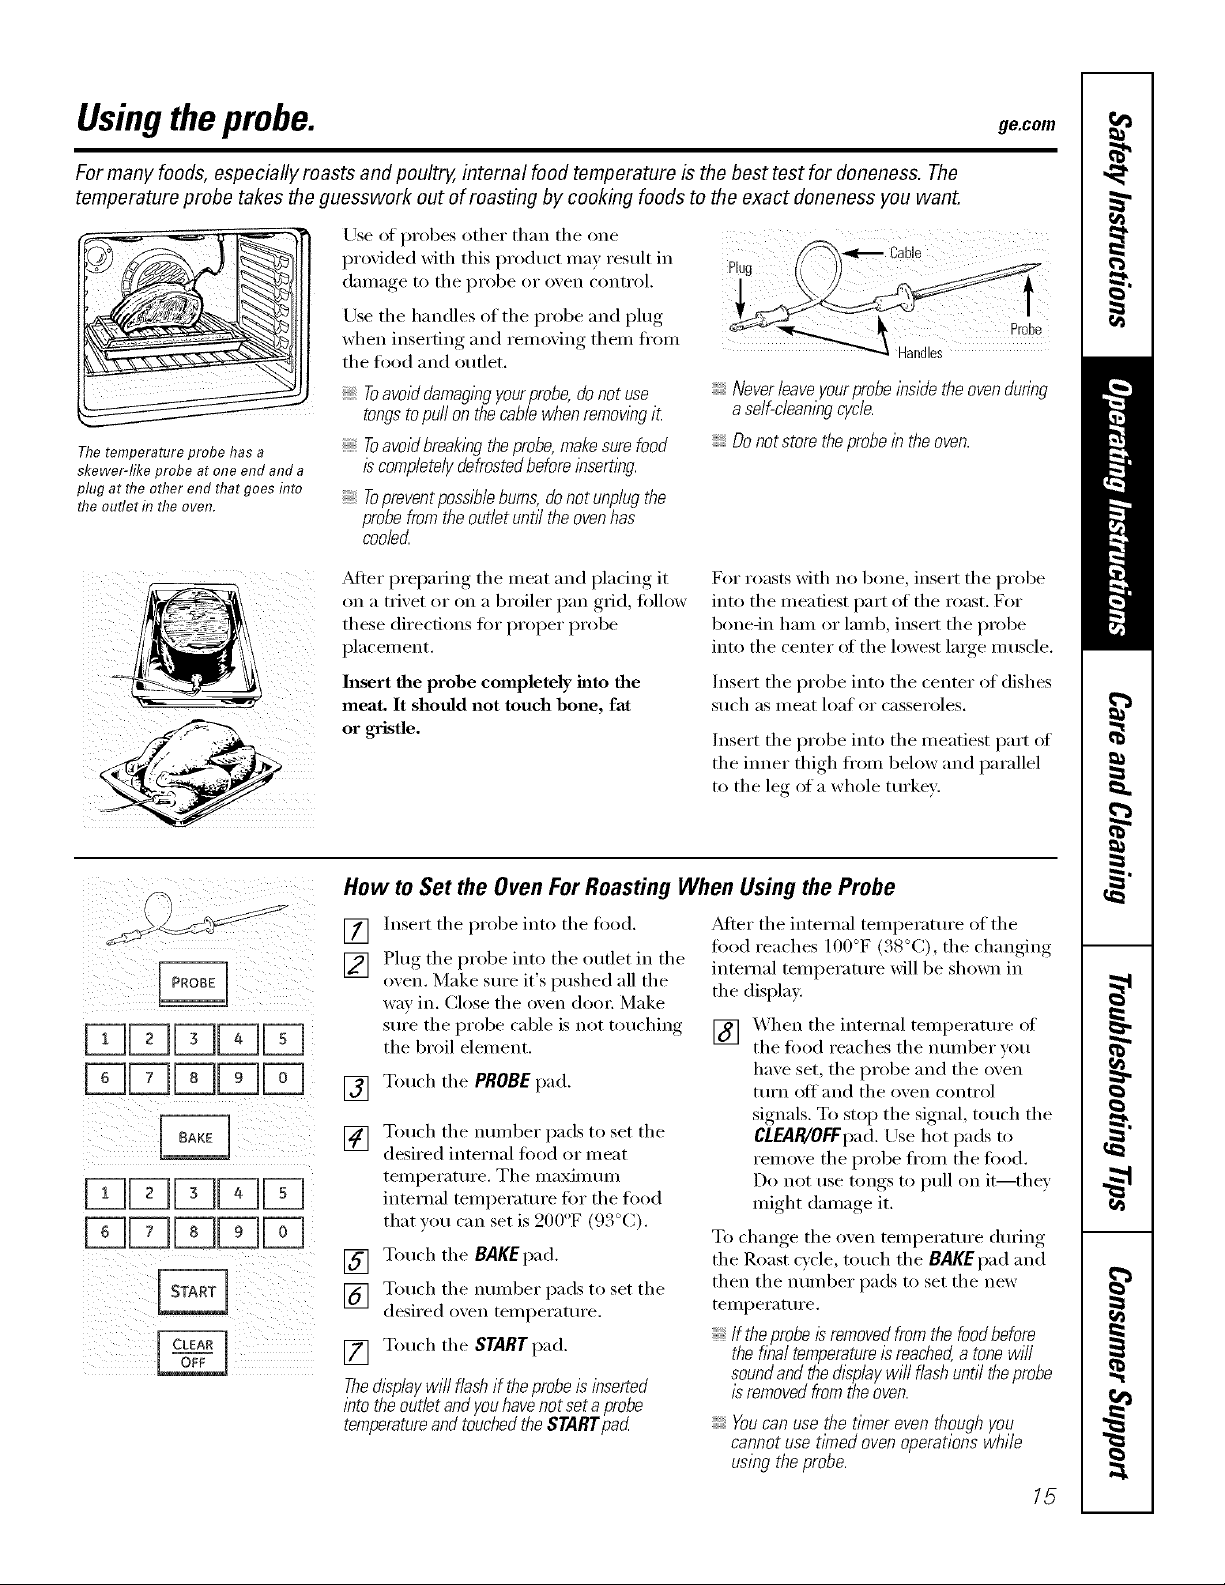
Thetemperature probe has a
skewer-like probe at one end and a
plug at the other end that goes flTto
the outlet d7the oven.
Use of probes other than tile one
proxided with this product ma) result in
daillage to tile probe or oxen control.
Use tile handles of tile probe and plug
when inserting and remoxin(, them fl'om
tile tood and outlet.
Toavoiddamagingyourprobe,donot use
tongstopuffonthecamewhenremovingiL
Toavoidbreakingtheprobe,makesurefood
iscompletelydefrostedbeforeinserting.
Topreventpossibleburns,donotunplugthe
probefromtheoutletuntfftheovenhas
cooler_
_Mter preparing tile meat and plating it
oil a trivet or on a broiler pan grid, tollow
these directions for proper probe
placement.
Insert the probe completely into the
meat. It should not touch bone, fat
or gristle.
_¢"'e'_ Cab!e
P,o
Neverleave yourprobe/bside the ovenduring
a se/f-c/eanlbgcycle.
Donot store the probe inthe oven.
For masts Mth no bone, insert tile probe
into tile meatiest part of tile roast. For
bone-in ham or lamb, insert tile probe
into tile center ot tile h)west laige muscle.
Insert the probe into the center of dishes
S/Ich _lS Illeat loat or casseroles.
Insert tile probe into tile meatiest part of
the inner thigh fl'om below and parallel
to the leg of a whole turkey.
How to Set the Oven For Roasting When Using the Probe
Insert tile probe into tile fi)od.
[]
Plug tile probe into tile outlet in tile
[]
oxen. Make sure it's pushed all the
way in. Close tile oxen door. Make
sure the probe cable is not touching
the broil element.
[] Touch tile PROBEpad.
Touch tile nmnber pads to set tile
[]
desired internal fi)od or meat
temperature. Tile maxinmnl
internal temperature tot tile food
that you can set is 200°F (93°C).
[] Touch tile BAKEpad.
[] Touch tile nmnber pads to set tile
desired oxen temperature.
[] Touch tile STARTpad.
Thedisplaywill flashif theprobeis inserted
Alter tile internal temperature of tile
tood reaches 100°F (38°(;), the changing
internal temperature will be shown in
the displa>
[] X'_hen tile internal temperature of
tile tbod reaches tile munber you
have set, tile probe and tile oven
ttlFn oft and tile ()veil control
signals. To stop the signal, touch the
CLEAR/OFEpad. Use hot pads to
remove tile probe ti'om tile food.
Do not use tongs to pull on it--they
might damage it.
To change tile oven temperature during
tile Roast cycle, touch tile BAKE pad and
then tile nmnber pads to set tile new
temperature.
If theprobe Isremovedfrom the food before
the flbal temperature/s reached,a tonewill
soundand the d/splaywill flash until theprobe
/sremoved from the oven.
lbtotheoutletandyouhavenotsetaprobe
temperatureandtouchedtheSTARTpad
Youcan use the timer even though you
cannot use timed oven operations while
using the probe.
15
Page 16
Usingtheconvectionoven.
Multi-rack position.
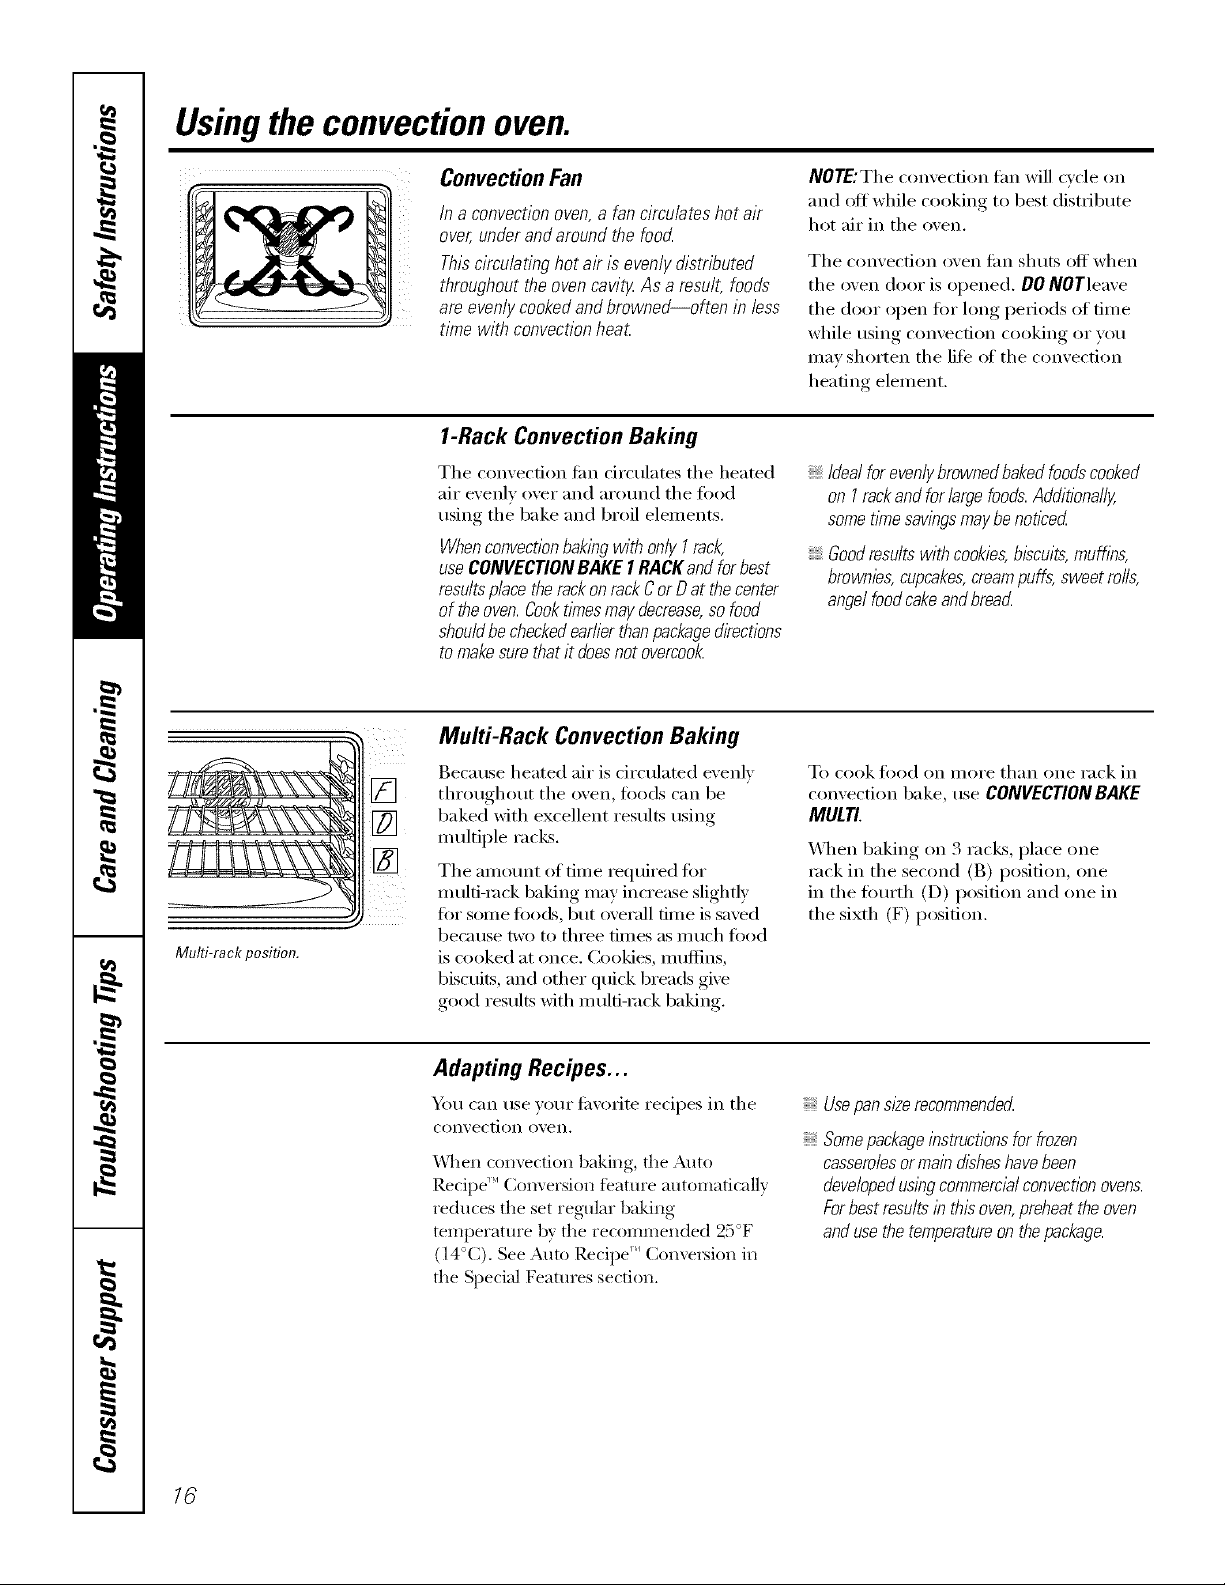
Convection Fan
/na convectionoven,a fancimu/ateshotair
over,underandaroundthefoocL
Thiscirculatinghotak isevenlydistributed
throughouttheovencav/t_As a result,foods
areevenlycookedandbrowned--often in less
timewith convectionheat
1-Rack Convection Baking
The convection tim circulates the heated
air evenly over and arotmd the fi)od
using the bake and broil elements.
Whenconvectionbaklbg with only I rack,
use CONVECTIONBAKE I RACK and for best
resultsplace the rackon rack C or Oat the center
of the oven. Cooktl_nesmay decrease,so food
shouldbe checkedearlier thanpackage&ecfions
to makesure that it does not overcooL
Multi-Rack Convection Baking
Because heated air is circulated evenly
throughout the oven, fi)ods can be
baked with excellent results using
multiple racks.
The amount of time required fin.
multi-rock baking may increase slightly
for some fi)o(Ls, but overall time is saved
bepraise two to three times as much fi)od
is (_)oke(l at once. O)okies, Inuflins,
biscuits, and other quick breads give
good results with m ulfi-mck baking.
NOTE:The comecfion tim will Qcle on
and off while cooking to best distribute
hot air in the oxen,
The convection (wen filn shtlts o]_' when
the oven door is opened. 00 NOTleave
the door open for long periods of time
while using convection cooking or you
may shorten the lif_" ot the convection
heating element.
Idealforevenlybrownedbakedfoodscooked
on I rackandforlargefoods.Additionally,
somet/mesavingsmaybenoticed
Goodresultswithcookies,biscuits,mufflbs,
brownies,cupcakes,creampuffs,sweetroils,
angelfoodcakeandbread
To cook fi,od on illoi'e than one rack in
con;ection bake, use CONVECTION BAKE
MULTI.
_._]len baking on 3 racks, place one
rock in the second (B) position, one
in the fi)m'th (D) position and one in
the sixth (F) position,
16
Adapting Recipes...
Ym can use )our fi_orite recipes in the
con_, ection o_,en,
}\l_en convection baking, fl_e Auto
Recipe" Conversion feature autolnaficallv
reduces the set regtflar baking
temperature b} fl_e recommended 25°F
(14°(;). See Auto Recipe ''_Conversion in
the Special Features section.
Usepan sl#erecommended
Somepackageinstructions for frozen
casserolesorma/n disheshavebeen
developeduslbg commercialconvection ovens.
Forbest results lb this oven,preheat the oven
andusethe temperatureon thepackage.
Page 17
ConvectionRoast
ge.com
When baking cookies, you will
get the best results if you use a
flat cookie sheet instead of a
pan with Iow sides,
Goodfor large tender cutsof meat, uncovered
Tile convection tim circulates tim heated
air evenly over and aromld the food.
Meat and poultt T are browned on all
sides as if they were cooked on a
rotisserie. Tile heated air seals in juices
quickly for a moist and tender product
while, at the same time, creating a rich
golden brown exterior.
Cookware for Convection Cooking
Before using your convection oven,
check to see if yore" cookware leaves
room fin" air drculation in tile oven.
If you are baking with several pans, leave
sp_ce between tbem./_dso, be sure tile
pans do not touch each other or the
walls ot the oven.
Paper and Plastic
Heat-resistant paper and plastic
containet_ that are recommended fin"
use in regular baking can also be used
for convection baking, but should not
be used at temperatmes higher than
the temperature recommended by the
cookware iitanHlilCttli'ei: Plastic cookware
that is heat-resistant to temperatm'es of
400°F (204°C) can also be used.
V_]_en you are convection roasting, it is
import'ant that you use a broiler pan and
grid designed for broiling for best
convection roasting results. The pan is
used to catch grease spills, and the grid is
used to prevent grease spatters while
heated air circulates trader tile meat to
increase browning on tim m_det_ide of
tile meat or poultt T.
; Place tile oven rack in tim position
that centet_ the fi)od between the top
and bottoill ol the oven.
Metal and Glass
Any type ot cookware will work in w,ur
convection oven. Howevet; tI/etal l)ans
beat tile filstest and are recommended
fin" convection baking.
Darkenedor matte-Dblshedpans will bake
faster than shiny pans.
Glassor ceramlcpanscookmores/ow/)z
For recipes like ovenq)aked chicken,
use a pan with low sides. Hot air cannot
dtvulate well arotmd food in a pan with
high sides.
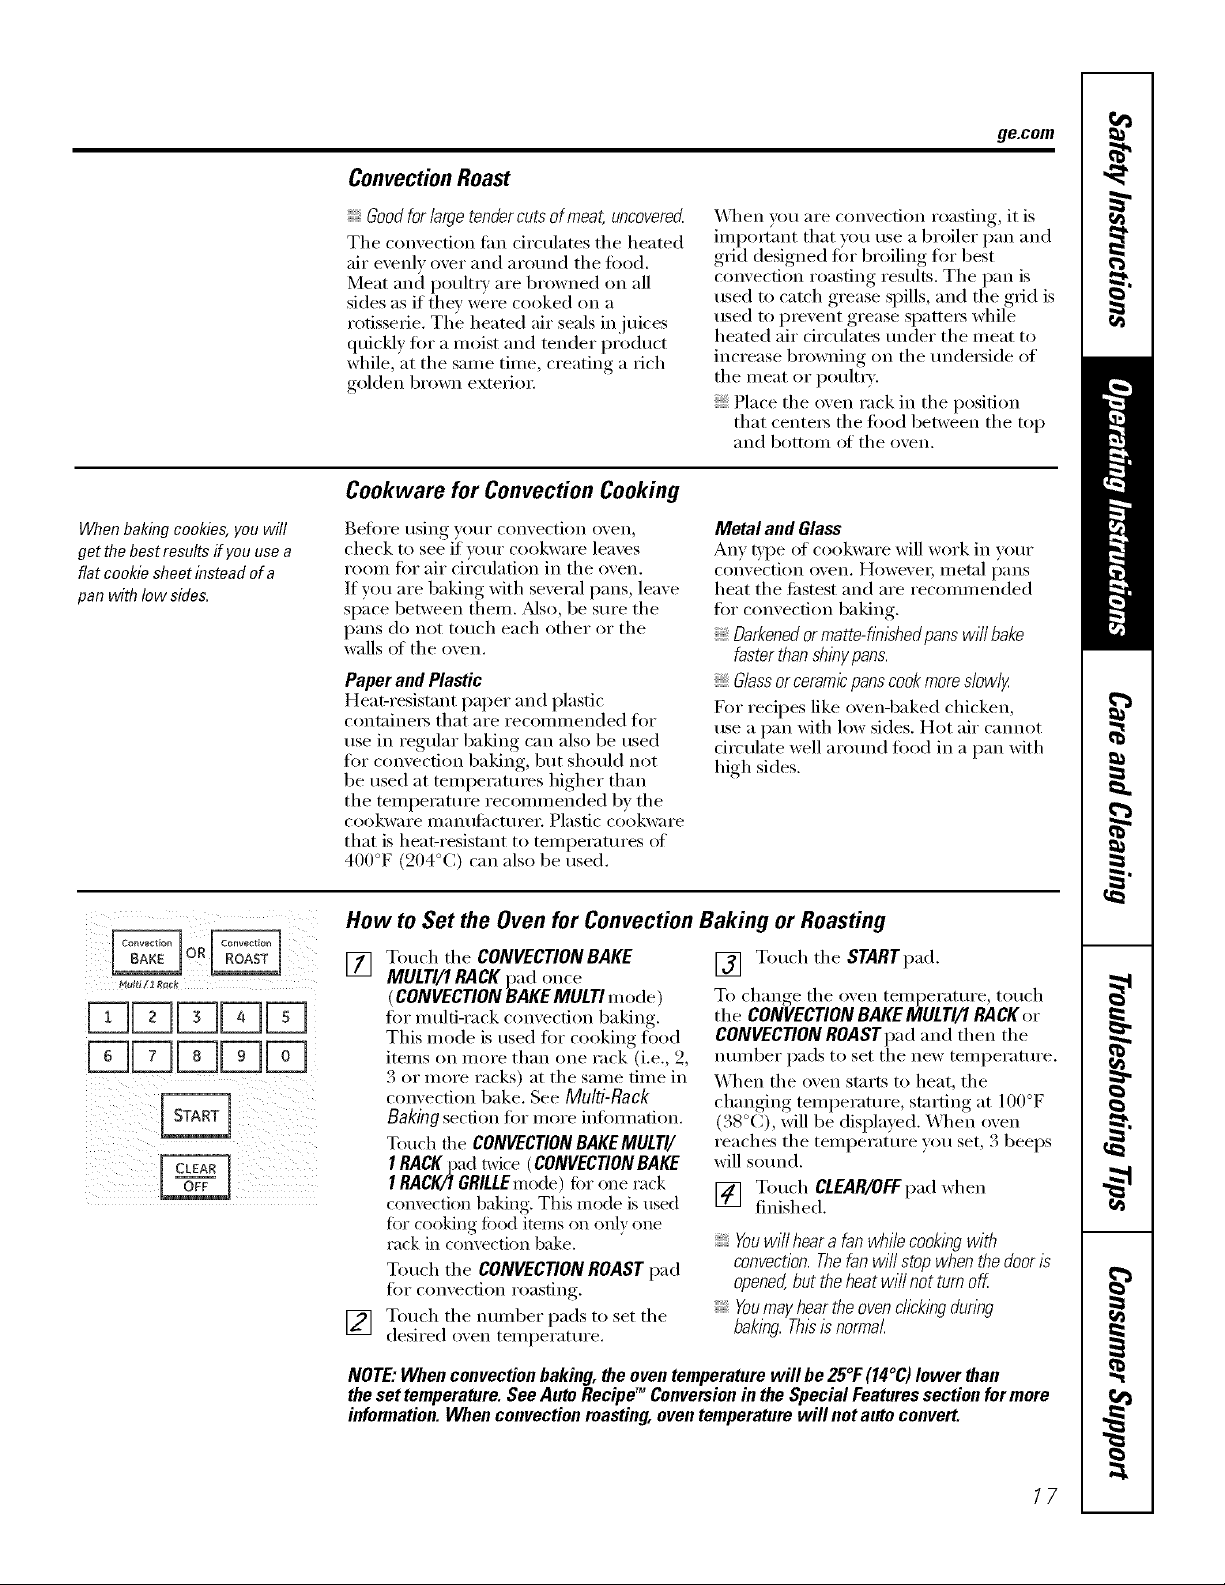
How to Set the Oven for Convection Baking or Roasting
[] Touch tim CONVECTION BAKE
MULTI/1 RACK pad once
(CONVECTION BAKE MULTImode )
fin" m ulti-rack convection baking.
Tiffs mode is used for cooking food
items on more than one rack (i.e., 2,
3 or more racks) at tile same time in
convection bake. See Multi-Rack
Baking section fin" more infimnation.
Touch d_e CONVECTIONBAKEMULTI/
I RACKpad twice (CONVECTIONBAKE
1RACIG1GRILLEmode) fbr one rack
convection baking. This mode is used
for cooking fi)od items on onl) one
tack in convection bake.
Touch tile CONVECTIONROAST pad
fin" convection roasting.
[] Touch tile number pads to set tile
desired oxen temperatm'e.
[] Touch tim STARTpad.
To change tile oven temperatm'e, touch
tile CONVECTION BAKE MULTI/1 RACKor
CONVECTION ROASTpad and then tile
ntll//beI" pads to set tim new temperature.
When tile oven starts to beat, tile
changing temperature, starting at 100°F
(38°C), will be displayed. _,\]_en oven
reaches the temperature you set, 3 beeps
will SOtlnd.
[] Touch CLEAR/OFFpad when
finished.
Youwillheara fanwhilecooklbgwith
convection.Thefanwillstopwhenthedooris
opened,but theheatwillnotturnoff.
Youmayheartheovenclickingdunbg
baking.Thisisnormal.
NOTE:Whenconvectionbaking,theoventemperaturewillbe25°1:(14°C)lowerthan
thesettemperature.SeeAutoRecipg_Conversioninthe SpecialFeaturessectionformere
information.Whenconvectionroasting,oventemperaturewill notautoconvert.
17
Page 18
Usingthe timedfeaturesforconvectioncooking.
Youwill hear a fan while cooking with these features. The fan will stop when the door& opened, butthe heat
will not turn off.
NOTE:Foods that spoil easily--such as milk, eggs, fish, stuffings, poultry and pork--should not be aflowed to
s# for more than 1hour before or after cooking. Room temperature promotes the growth of harmful bacteria.
Be sure that the oven light is off because heat from the bulb will speed harmful bacteria growth.
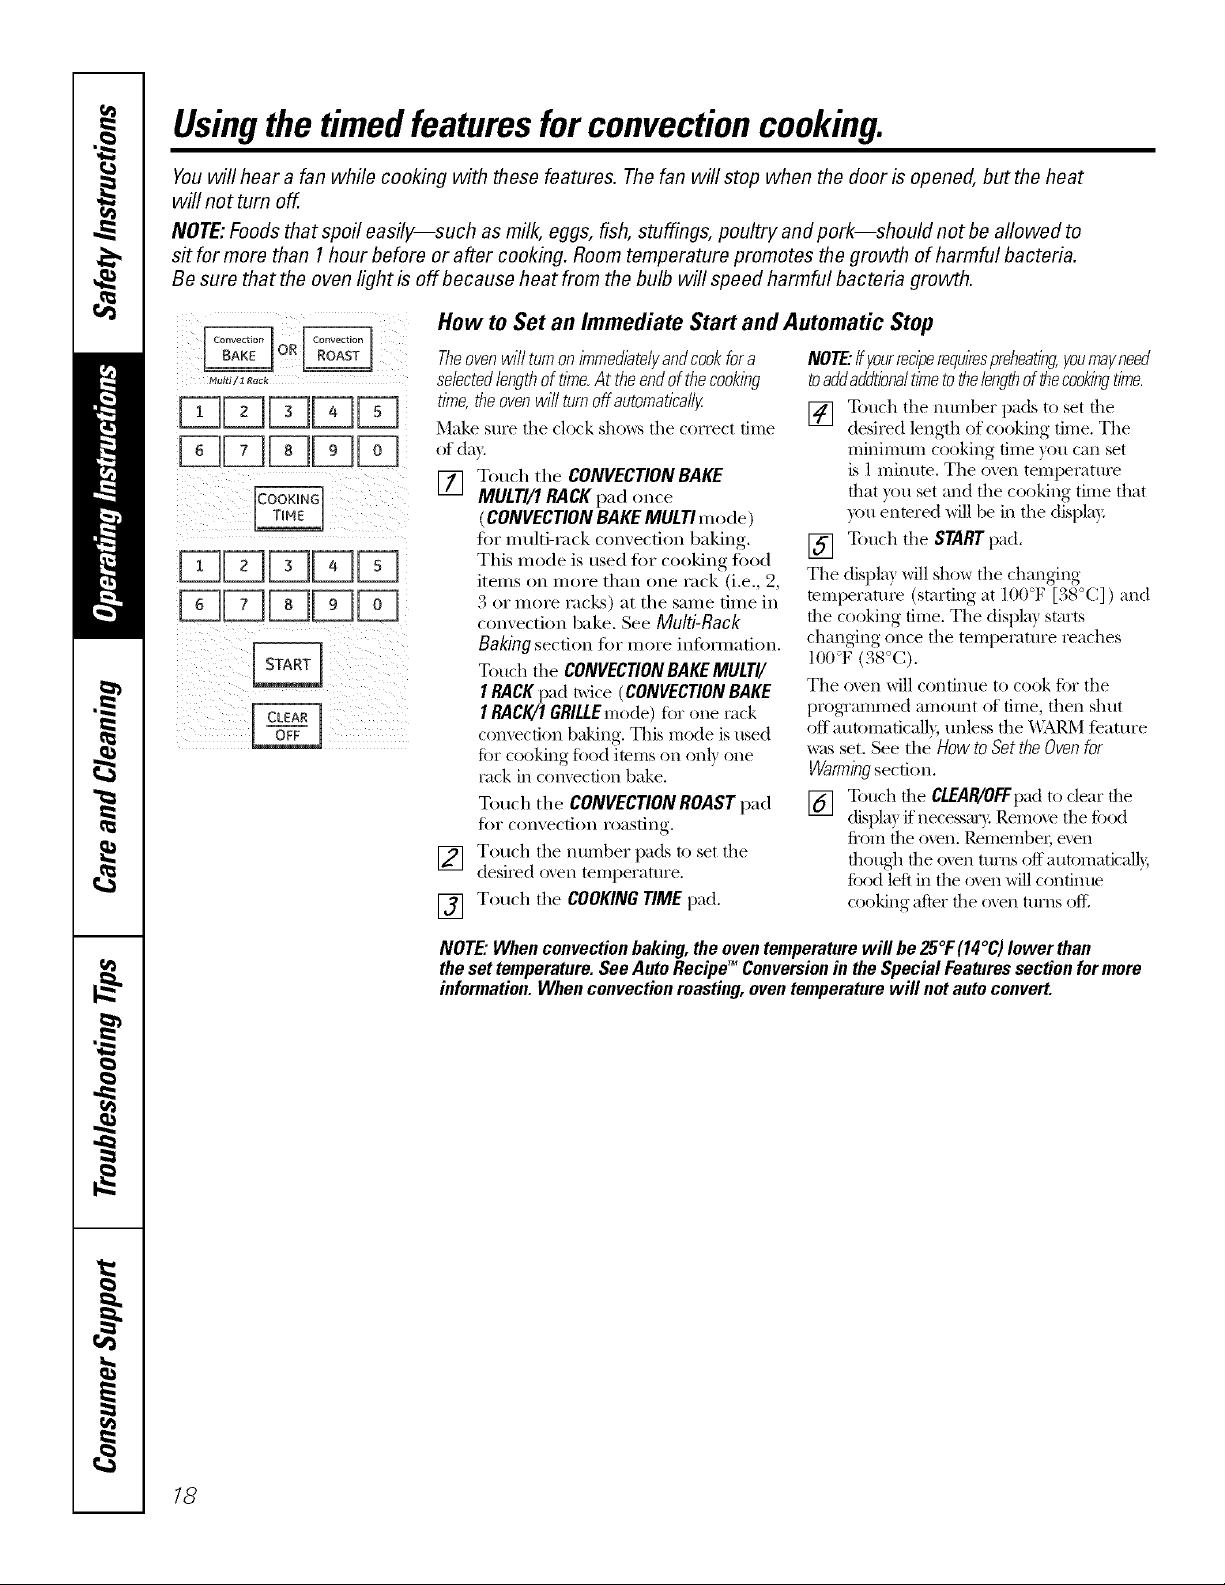
How to Set an Immediate Start and Automatic Stop
mufu I1 R#ch
Theovenwilf turnon immediate/)/andcookfora
selectedlengthof time.At theendof thecooking
time,theovenwill turnoffautomatically
Make sure the clock sho_,_:sthe correct time
of day.
[] Touch tile CONVECTIONBAKE
MULTI/1 RACK pad once
(CONVECTION BAKEMULTI mode)
for m ulti-rack convection baking.
This mode is used for cooking ti)od
items on more than one rack (i.e., 2,
3 or more racLs) at tile same time in
convection bake. See Multi-Rack
Baking section for more intbmmtion.
Touch tile CONVECTIONBAKEMULTI/
1RACKpad twice (CONVECTIONBAKE
1RACK/1GRILLEnlode) fbr one rack
cam ection baking. This mode is used
for cooking food items on on b one
tack in comecfion bake.
Touch tile CONVECTION ROAST pad
fOI" convection i'oas[ing,
[] Touch tile nmnber pads to set tile
desired oxen temileratm'e.
[] Touch tile COOKINGTIME [lad.
NOTE."ffyourreciperequirespreheating,youmayneed
toaddaddtionaltimetothelengthofthecookingtime.
[] Touch tile nunlber pads to set tile
desired length of cooking time. Tile
minimunl cooking time you can set
is 1 minute. Tile oven tempetatm'e
that you set and tile cooking time that
)<)u enmred will be in tile displa):
[] Touch tile START[lad.
Tile displa} will show tile changing
mmperature (starting at 100°F [38°C] ) and
the cooking time. Tile displa} starts
changing once tile temperature reaches
IO0°F (38°C).
Tile o_en will continue to cook fi)r tile
progTanmled amount of time, then shut
off automaticalb, unless tile _,\IM_,Mti_attu'e
was set. See tile How to Set the Oven for
Warmbg section.
[] Touch tile CLEAR/OFFpadto clear tile
displa? if neces,s_u3: Renlove tile food
fi'om the oxen. Renlembei; exen
though the o_en turns off amomatkalb,
food left in tile o_en will continue
cooking after the (),,el1 ttlI'ns ()1_
18
NOTE"When convection baking, the oven temperature will be 25°/: (14°C) lower than
the set temperature. See Auto Recipg _Conversion in the Special Features section fer mere
information. When convection roasting, oven temperature will net auto convert.
Page 19
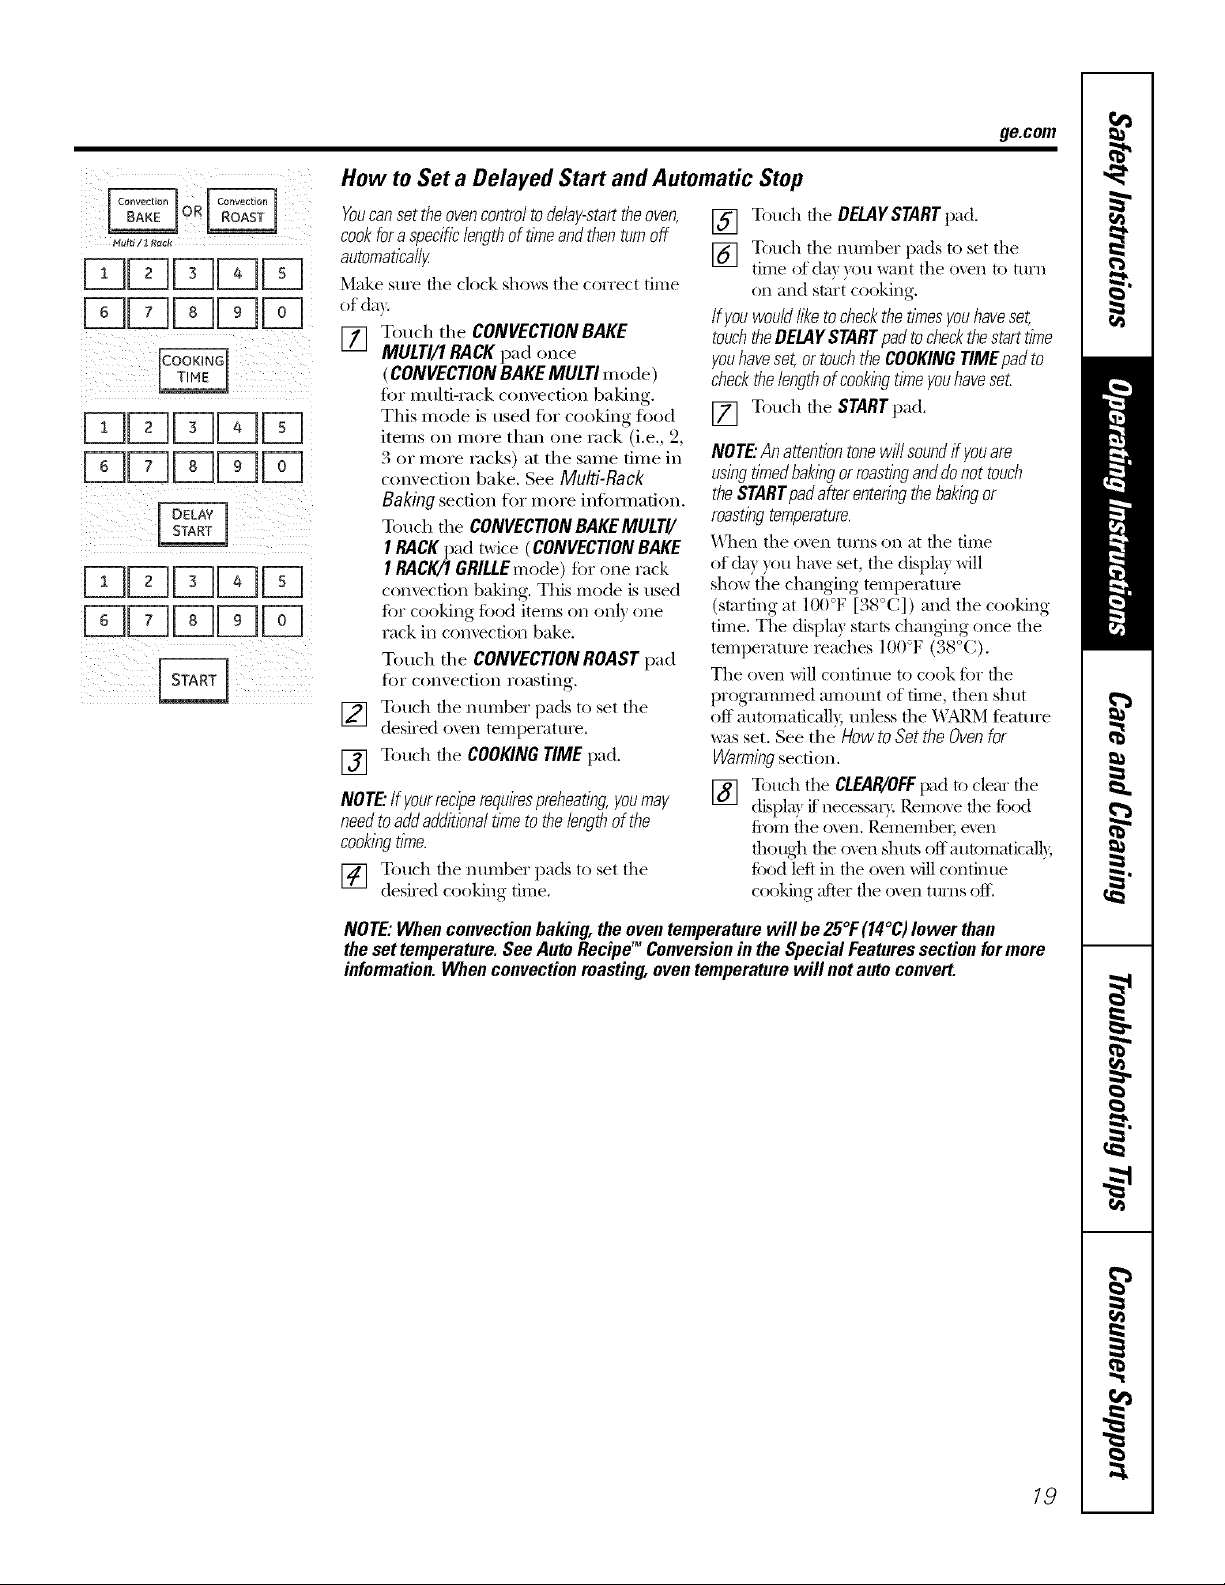
How to Set a Delayed Start and Automatic Stop
ge.com
_um iR_c_
Youcansettheovencontrolto delay-starttheoven,
cookfora specificlengthof timeand thenturnoff
automatically
Make sure die clock stlo_:s file correct time
of day.
[] Touch tile CONVECTIONBAKE
MULTI/1 RACK pad once
(CONVECTION BAKE MULTI mode)
for nmlti-rack convection baking.
This mode is used fi)r cooking food
items oil more than one rack (i.e., 2,
3 or more racks) at tile same time in
convection bake. See Multi-Rack
Baking section for more infimnafion.
To uch the CONVECTIONBAKEMULTI/
I RACKpad mice (CONVECTIONBAKE
I RACK,it GRILLEmode) fi:,rone rack
fi)r cooking fi)od itenls on ()Ill)one
rack in convection bake,
Touch tile CONVECTIONROAST pad
for convection roasting.
[] Touch tile number [)ads to set tile
desired oven temperature.
[] Touch tile COOKINGTIME pad.
NOTE"Ifyourreciperequirespreheating,youmay
needtoaddadditionaltime to thelengthof the
cookingtime.
[] Totlch tile ntlnlber pads to set tile
desired cooking time.
[] Touch tile DELAYSTARTpad.
[] Touch tile mmlber pads to set tile
time of da} you want tile oxen to tllI'n
on and start cooking.
ffyou would liketo checkthe timesyouhaveset,
touchtheBELAYSTARTpadtocheckthestart time
youhaveset,or touchthe COOKINGTiMEpadto
checkthelengthofcookingtime youhaveset.
[] Touch tile STARTpad.
NOTE"An attentiontonewill soundff youare
usingtimedbakingorroastingand donot touch
the STARTpadafterenteringthebakingor
roastingtemperature.
W]len tile oven trims on at file tiIlle
of da)you hme set, tile displa)will
show tile changing mmI)eIature
(smrdng at 100°F [38°C]) and tile cooking
time. Tile displa) starts changing once tile
tempeIature reaches 100°F (38°C).
Tile ()veil will continue to cook for the
proglalnlned alnount of time, then shut
off autolnaficall}, unless tile X'\_RM feature
_:_s set. See tile HOwto Set the Oven for
Warming section.
[] Touch tile CLEAR/OFFpad to clear tile
displa) if neces_t/): Relno_e tile filed
fi'om the o_en. Remember, even
thot@l the o_en shuts offautonaatkalb,
filed left in the o',en will continue
cooking after the o_vn turns off.
NOTE:Whenconvectionbaking,theoventemperaturewill be 255: (14°C)lowerthan
thesettemperature.SeeAutoRecipd_Conversioninthe SpecialFeaturessectionformere
information.Whenconvectionroasting,oventemperaturewill not autoconvert.
19
Page 20
Usingtheconvectionoven.
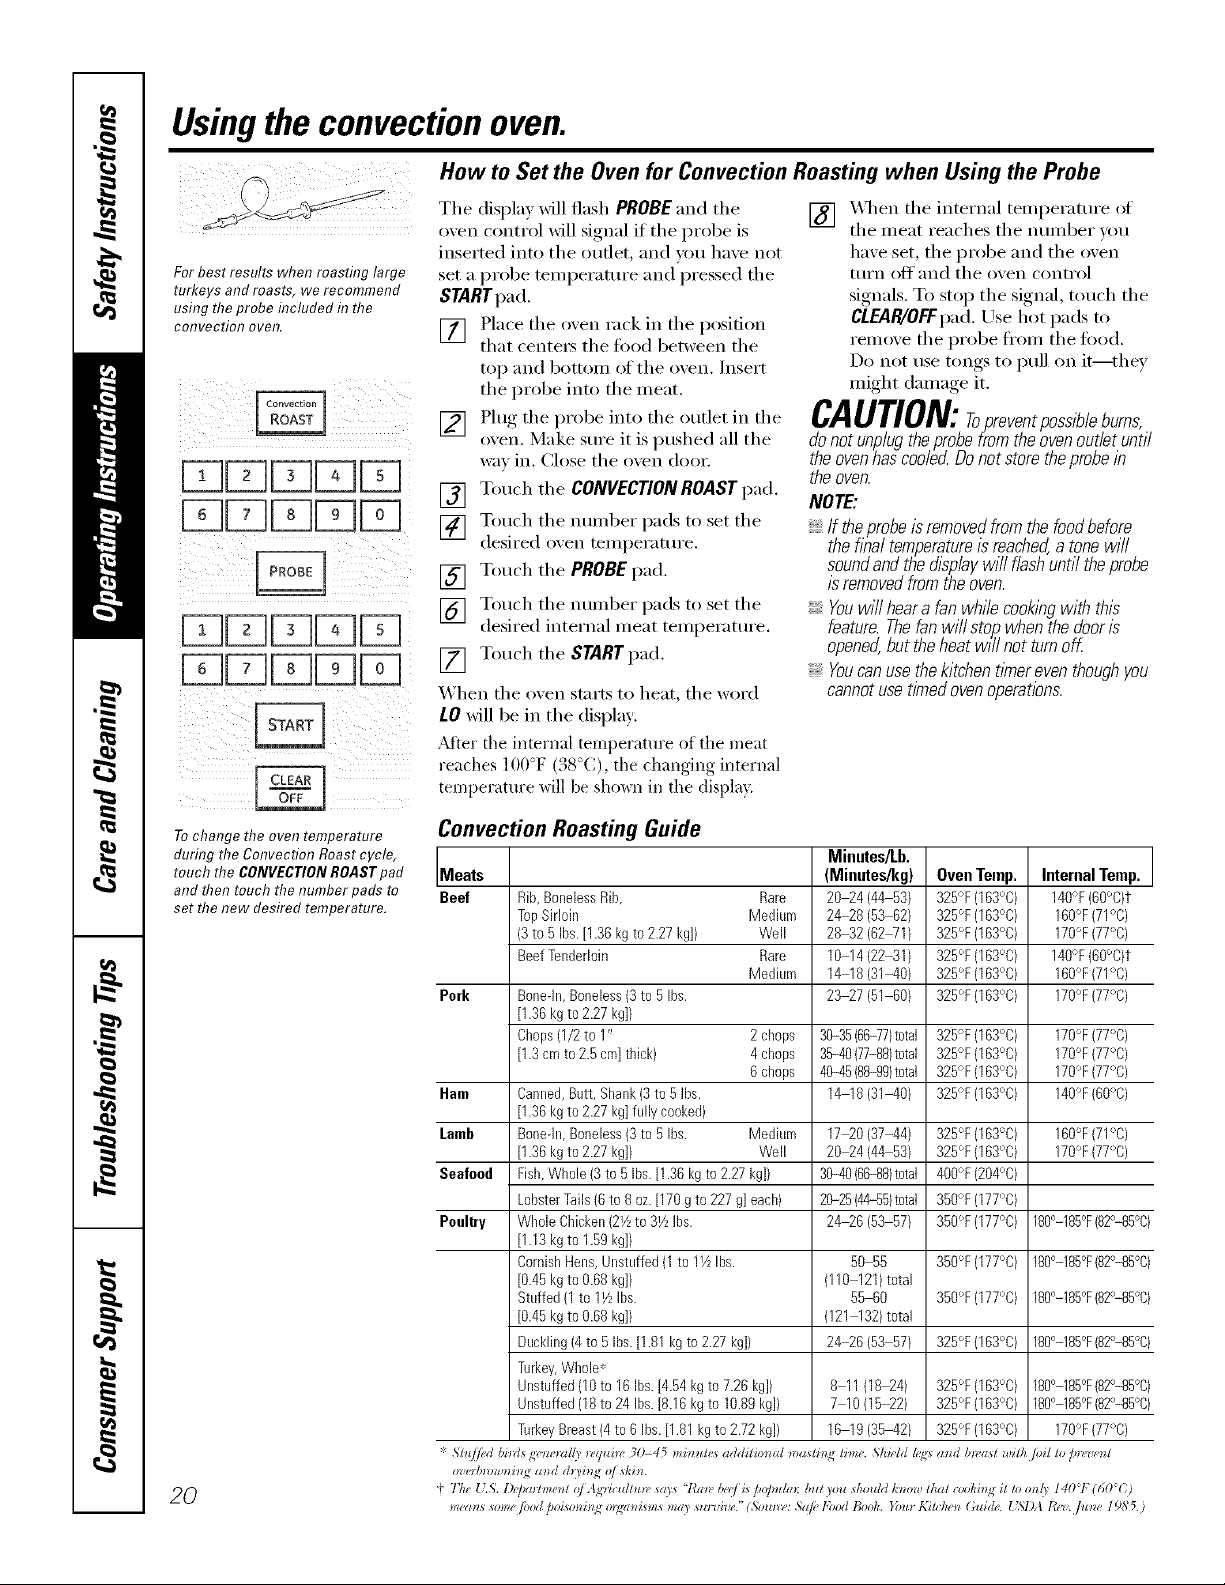
How to Set the Oven for Convection Roasting when Using the Probe
For best results when roasting large
turkeys and roasts, we recommend
using theprobe included in the
coITveotioI7 oveR,
?
Tile display will flash PROBE and the
oven control will signal if tile probe is
inserted into tile outlet, m_d you have not
set a probe temperature and pressed the
STARTpad.
[] Place the oven rack in the position
that centers the fi)od between the
top and bottom of the oven. Insert
the probe into the meat.
[] Plug the probe into the outlet in the
oven. Make sure it is pushed all the
way ill. Close the ov(_n door,
[] Touch the CONVECTIONROASTpad.
[] Touch the number pads to set the
desired oven [eInl)el';Itt/l'e.
[] T(>uch the PROBEpad.
[] Touch the number pads to set the
desired internal meat temperature.
[] Touch the STARTpad.
When the oven stm'ts to heat, the word
LO will be in the display.
,_ter the internal temperature of the meat
reaches I00°F (38°C), the chaHging internal
[errlperature uill be shm_ai in the displa}.
[] _,_en the internal temperatm'e of
the meat reaches the ntmlber you
have set, the probe and the oven
turn off' and the oven control
signals. To stop the signal, touch the
CLEAR/OFFpad. Use hot pads to
remove the probe ti'om the food.
Do not use tongs to pull oil it--they
might damage it.
CAUTION:ropreventpoesibleburns,
donotunplugtheprobefromtheovenoutletuntil
the oven has coolecL Do not store the probe in
the oven.
NOTE:
Iftheprobeisremovedfromthefoodbefore
the flbal temperature is reached, a tone will
sound and the displaywill flash until the probe
Is removed from the oven.
You will hear a fan while cooklbgwith this
feature.Thefanwillstop.,whenthedooris
opened, but the heat wff/ not turn orL
You can use the kitchen tlkner even though you
cannot use timed oven operatlbns.
Tochange the oven temperature
during the Convection Roast cycle,
touch the CONVECTIONROASTpad
and then touch the number pads to
set the new desired temperature.
20
Convection Roasting Guide
Minutes/Lb.
Meats (Mieutes/kg) Oven Temp. Internal Temp.
Beef Rib,BonelessRib, Rare 20_4 (44 53) 325_'F(163°C) 14ff_F(00°C)1
TopSirloin Medium 24_8 (53 62) 325°F (163°C) 160°F(71°C)
(3to 5 Ibs.[1.36kg to 2.27kg]) Well 28_2 (62WI) 325°F(163°C) 170°F(77°C)
BeefTenderloin Rare 10 14 (2241) 325°F(163°C) 140°F(O0°C)t
Medium 14 18(31-40) 325°F(163°C) 160°F(71°C)
Pork Bonedn,Boneless(3to 5Ibs. 23_7 (51 60) 325% (163°C) 170°F(77°C)
[1.36kgto 2.27kg]/
Chops(1/2to 1" 2 chops 30-35(66-77)total 325°F (163°C) 170°F(77°C)
[1.3cmto 2.5 cm]thick) 4 chops 35-40(77-88)total 325°F(163°C) 170°F(77°C)
6 chops 40-45(88-99)total 325% (163°C) 170°F(77°C)
Ham Canned,Butt, Shank(3to 5 Ibs. 14 18(31-40[ 325°F (163°C) 140°F(00°C)
[1.36kgto 2.27kg]fully cooked)
Lomb Bonedn,Boneless(3to 5Ibs. Medium 17_0 (37-44) 325°F(163°C) 160°F(71°C)
[1.36kgto 2.27kg]) Well 20_4 (44 53) 325°F (163°C) 170°F(77°C)
Seatemt Fish,Whole(3 to 5Ibs.[1.36 kgto 2.27kg]) 30-40(66-88)total 400% (204°C)
LobsterTails(0 to 8oz.[170 gto 227g] each) 20.25(44-55)total 350°F (177°C)
Poultry WholeChicken(2Yzto 31/zIbs. 24_6 (53 57) 350°F(177°C) 180°-185°F(82°-85%)
[1.13kgto 1.59kg])
CornishHens,Unstuffed(1to 11/zIbs. 50 55 350'_F(177°C) 180°-185°F(82°-85%)
[0.45kgto 0.68kg]) (110 121)total
Stuffed(1 to 11/zIbs. 55 60 350'_F(177°C) 180°-185°F(82°-85%)
[0.45kgto 0.68kg]) (121 132)total
Duckling(4to 5 Ibs.[1.81kg to 2.27 kg]) 24_6 (53 57) 325°F(163°C) 180°-185°F(82°-85%)
Turkey,Whole*
Unstuffed(10to 16Ibs.[4.54 kgto 7.26kg]) 8 11(18_4) 325°F (163°C) 180°-185°F(82°-85°6)
Unstuffed(18to 24 Ibs.[8.16kgto 10.89kgD 7 10(15_2) 325% (163°C) 180°-185°F(82°-85%)
TurkeyBreast(4to 6 Ibs.[1.81kg to 2.72kg]) 16 19(35-42) 325°F(163°C) 170°F(77°C)
* Shl//ed bsds g_'_e_vl//? _,qtzin" 30-45 misrules additional n_a_li_lq lime. ShiHd h;z_:sa_d b_'ast _ilh toil lo fin,'l,e_l
ozeH)nm_i_l,q and (h:_i_l,_o/ ski_ .
+ The {L'4. [)@<nlme_l o/ _gvTc_zlhtn,says "l_ml, I)e(']is polmlm; but)o_z should k_mw lhat _ooki_l,t4it lo m_() 1401 (60C)
Page 21
Usingtheproofingand warming features, gecem
Theproofing feature maintains a warm environment useful for rising yeast-leavened products.
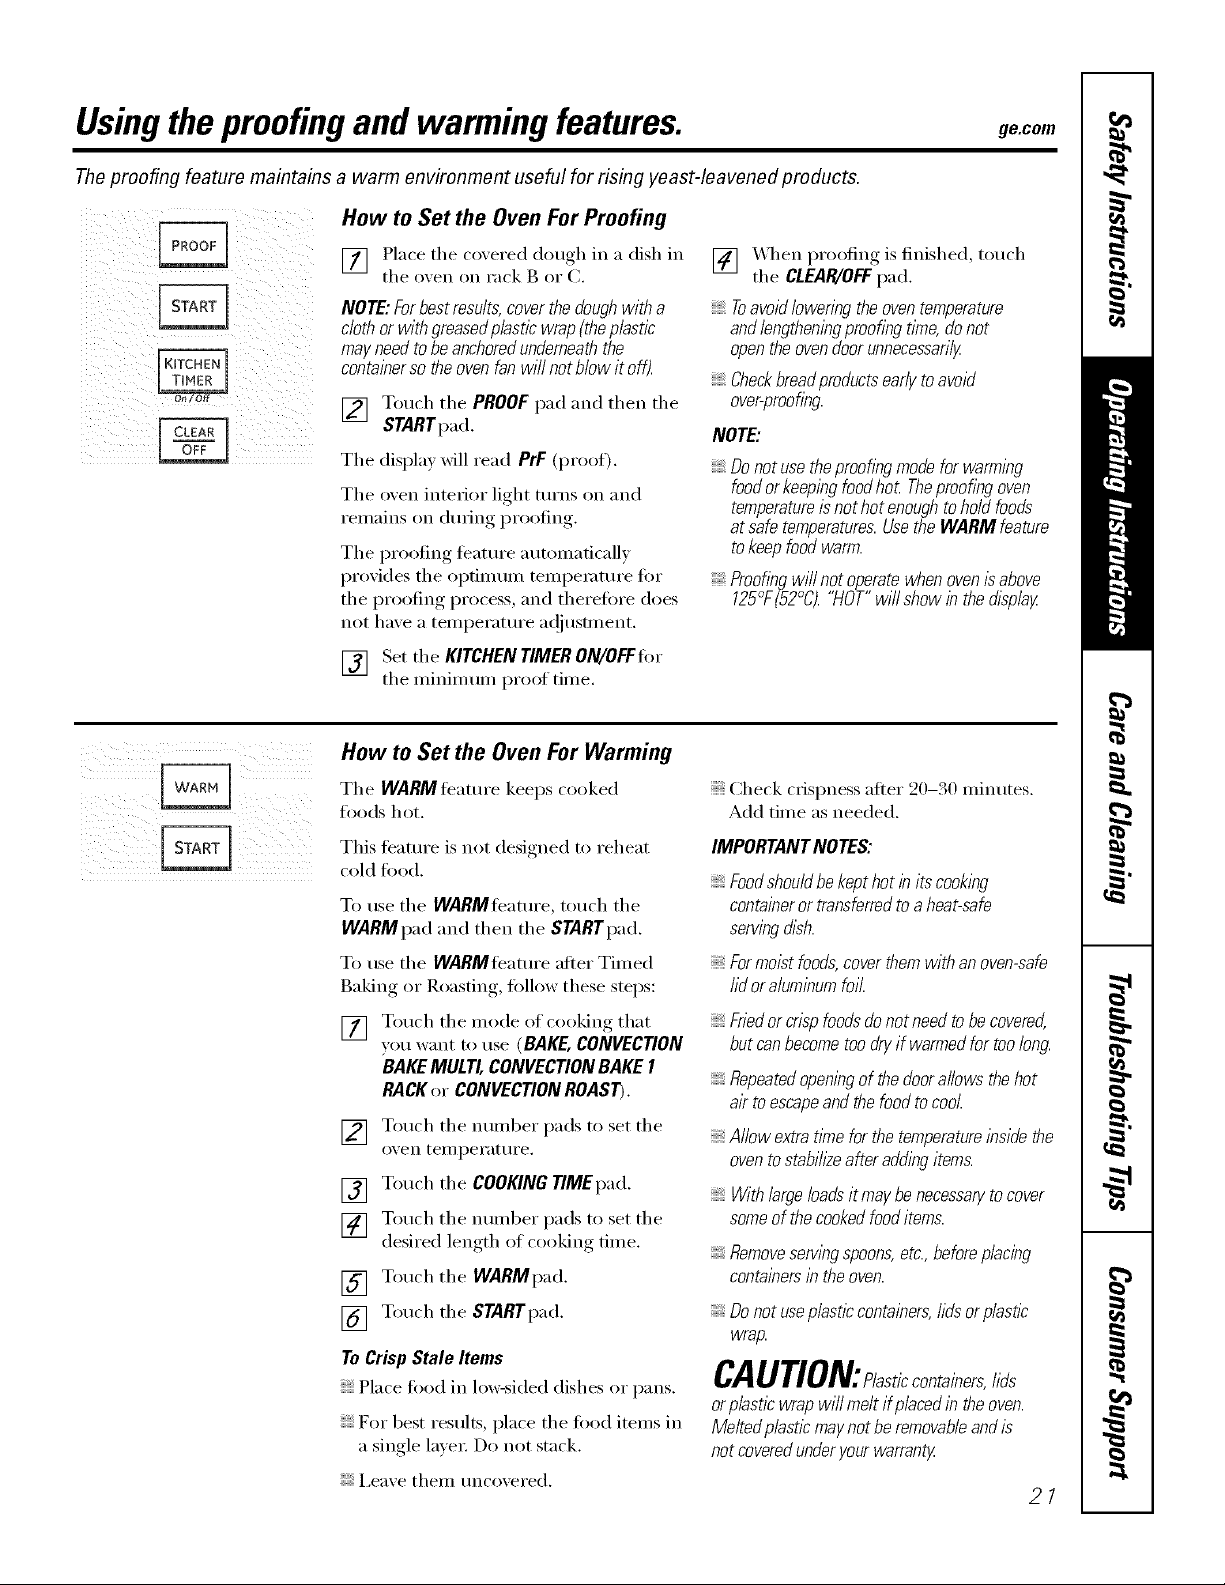
How to Set the Oven For Proofing
(i i i) iii!iii
i i i
!i:!illilli!ii i!iii;iiiii
[] Place the coxered dough in a dish in
the oxen on rack g or C.
NOTE:Forbestresults,coverthedoughwitha
clothor withgreasedp/asticwrap(theplastic
mayneedtobeanchoredunderneaththe
containersotheovenfanwi//notMowit off).
[] Touch the PROOFpad and then the
STARTpad.
The displa) will read PrF (proof).
The oven interior light turns on and
remains on dm_ing proofing.
The proofing teature automatically
provides the optimum temperature ti)r
the proofing process, and therefore does
not have a temperatm'e ac!jusm_ent.
[] Set the KITCHENTIMERON/OFFfi,r
the minim um proof time.
How to Set the Oven For Warming
The WARMfeatm'e keeps cooked
ti)ods hot.
This teatm'e is not designed to reheat
cold fi)()(1.
To use the WARMteamre, touch the
WARMpad and then the STARYpad.
To use the WARMfeature after Timed
Baking or Roasting, tollow these steps:
[] Touch the mode of cooking that
VOtl want [0 use (BAKE,CONVECTION
BAKEMULTI,CONVECTIONBAKEI
RACKor CONVECTIONROAST).
[] Touch the number pads to set the
oven tei//i)ei';lttli'e.
[] Touch the COOKINGTiMEpad.
[] Touch the number pads to setthe
desired length of cooking time.
[] T(>uchthe WARMpad.
[] T(>uchthe STARTpad.
To Crisp Stale Items
Place fi)od in lo_:si(led dishes or pans.
For best results, place the food items in
a single lave_: Do not stack.
i,eave them uncovered.
[] "_&q_enproofing is finished, touch
the CLEAR/OFFpad.
Toavoid lowering the oven temperature
andlengtheningproofing tlYne,donot
openthe ovendoor unnecessarily
Checkbreadproductsearly toavoid
over-proofing
NOTE:
Donot use the proofingmode for warming
foodor keeping food hot Theproofing oven
temperatureisnot hot enoughto hold foods
at safe temperatures.Usethe WARM feature
tokeep food warm.
Proofingwi//not operatewhenovenis above
125°F(52°C)."HOT"willshowin thedisplay
Check crispness after 20-30 minutes.
Add time as needed.
IMPORTANTNOTES:
Foodshouldbekepthotin itscooking
containeror tramferredto aheat-safe
servingdish.
Formoistfoods,coverthemwithanoven-safe
lid oraluminumfoil.
Friedorcrispfoodsdonotneedtobecovered,
butcanbecometoodryif warmedfortoolong.
Repeatedopeningof thedoorallowsthehot
ak toescapeandthefoodtocool.
Allowextratimeforthetemperatureinsidethe
oventostabih2eafteraddingitems.
Withlargeloadsit maybenecessan/tocover
someofthecookedfooditems.
Removeservingspoons,etc.,beforeplacing
containersin theoven.
Donotuseplasticcontainers,hdsorp/asflc
wrap.
CAUTION: /asticcontainers,lids
orplasticwrapwill meltif placedin theoven.
Me/tedp/astlcmaynotberemovableandis
notcoveredunderyourwarranty
21
Page 22
Adjust the oven thermostat--Do it yourself!
Youmay find that your new oven cooks differently than the one it replaced. Use your new oven for a few weeks to
become more familiar with it. If you still think your new oven is too hot or too cold, you can adjust the thermostat
yourself.
Donot use thermometers, such as those found in grocery stores, to check the temperature setting of your oven.
These thermometers may vary 20-40 degrees F(11-22 degrees C).
NOTE,"This adjustment will only affect baking, convection baking and convection roasting temperatures; it will not
affect broiling or self-cleaning temperatures. The adjustment will be retained in memory after a power failure.
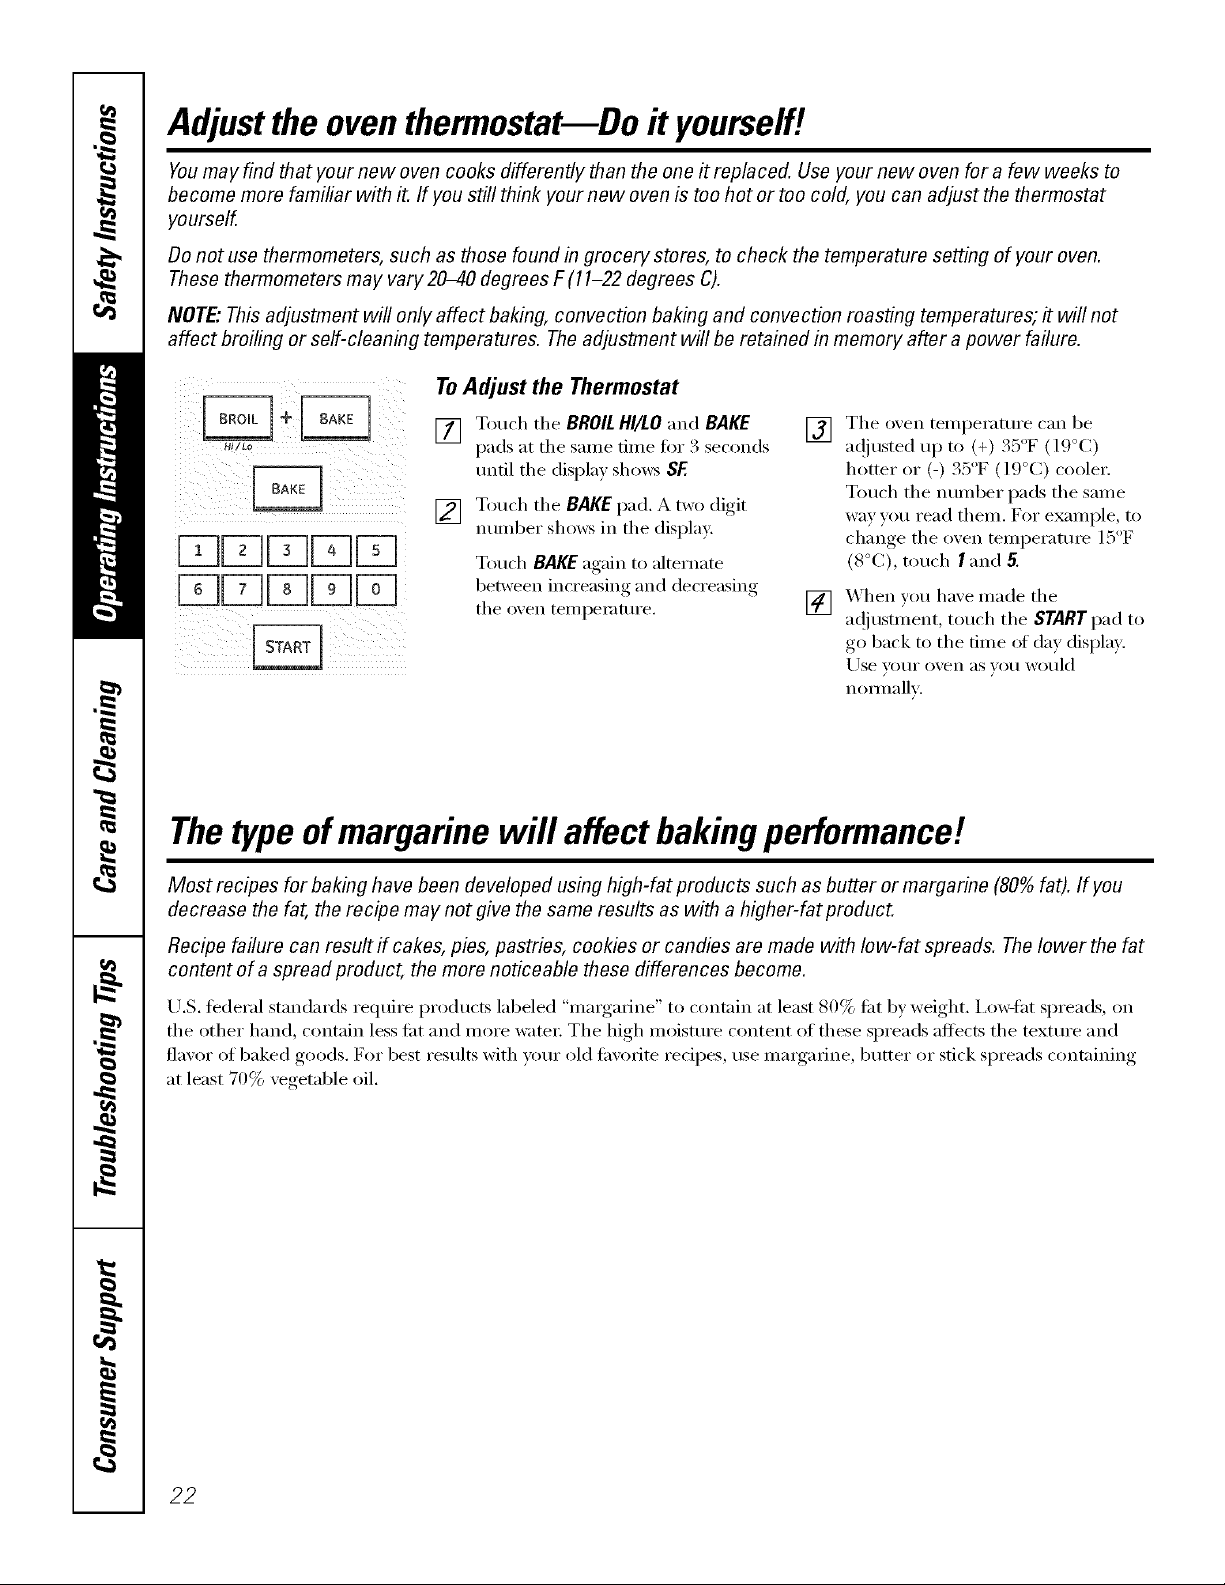
ToAdjust the Thermostat
The o&en tei/lpei'attli'e C_lll be
[] Touch tile BROIL HI/LO and BAKE
pads at the sanle time fox 3 seconds
until tile displa_ shows SF.
[] Touch tile BAKE pad, A two digit
ntunber shows in the displa};
Touch BAKE again to alternate
between increasing and decreasing
the oxen tei//l)eKitllYe.
i!iii! i!iiiiil
[]
a(!iusted up to (+) 35 F (19°C)
hotter or (-) 35°F (19°(;) cooler.
Touch the number pads the Salne
way you read them. For example, to
change the o_en temperature 1 1_
(8°C), touch I and 5.
_'_hen you have made the
[]
ac!iustment, touch the STARTpad to
go back to the time of day display.
[Jse VO[li" o_,en as _o11 would
noY///_lllv.
5
Thetypeofmargarine will affect bakingperformance!
Most recipes for baking have been developed using high-fat products such as butter or margarine (80% fat). If you
decrease the fat, the recipe may not give the same results as with a higher-fat product.
Recipe failure can result if cakes, pies, pastries, cookies or candies are made with low-fat spreads. Thelower the fat
content of a spread product, the more noticeable these differences become.
U.S. tederal standards require products labeled "margarine" to contain at least 80% tilt by weight, ixmqht spreads, on
the other hand, contain less lilt and more water: The high moisture content of these spreads affects the texture and
flavor of baked goods. For best results with u)ur old tm'orite recipes, use mmgarine, butter or stick spreads containing
at least 70% vegetable oil.
22
Page 23
Usingthe self-cleaning oven. gecom
The oven door must be closed and all controls set correctly for the cycle to work properly.
Before a Clean Cycle
Wipe up heavy soil on flTeoven
bottom.
We rec(nmnend venting your kitchen
with an open window or using a
ventilation tim or hood dining tile
fi_st self=clean cycle.
Remoxe broiler pan, broiler grid, probe,
all cookware and am ahmfinum fi)il fi'om
tile o_en,
Soil on tile fl'ont fl'ame of tile range and
outside tile gasket on tile door will need
to be cleaned by hand. Clean these areas
with hot water; soap-filled or plastic
scouting pads or cleansers such as
Soft Scrub<i Rinse well with clean water
and dry:
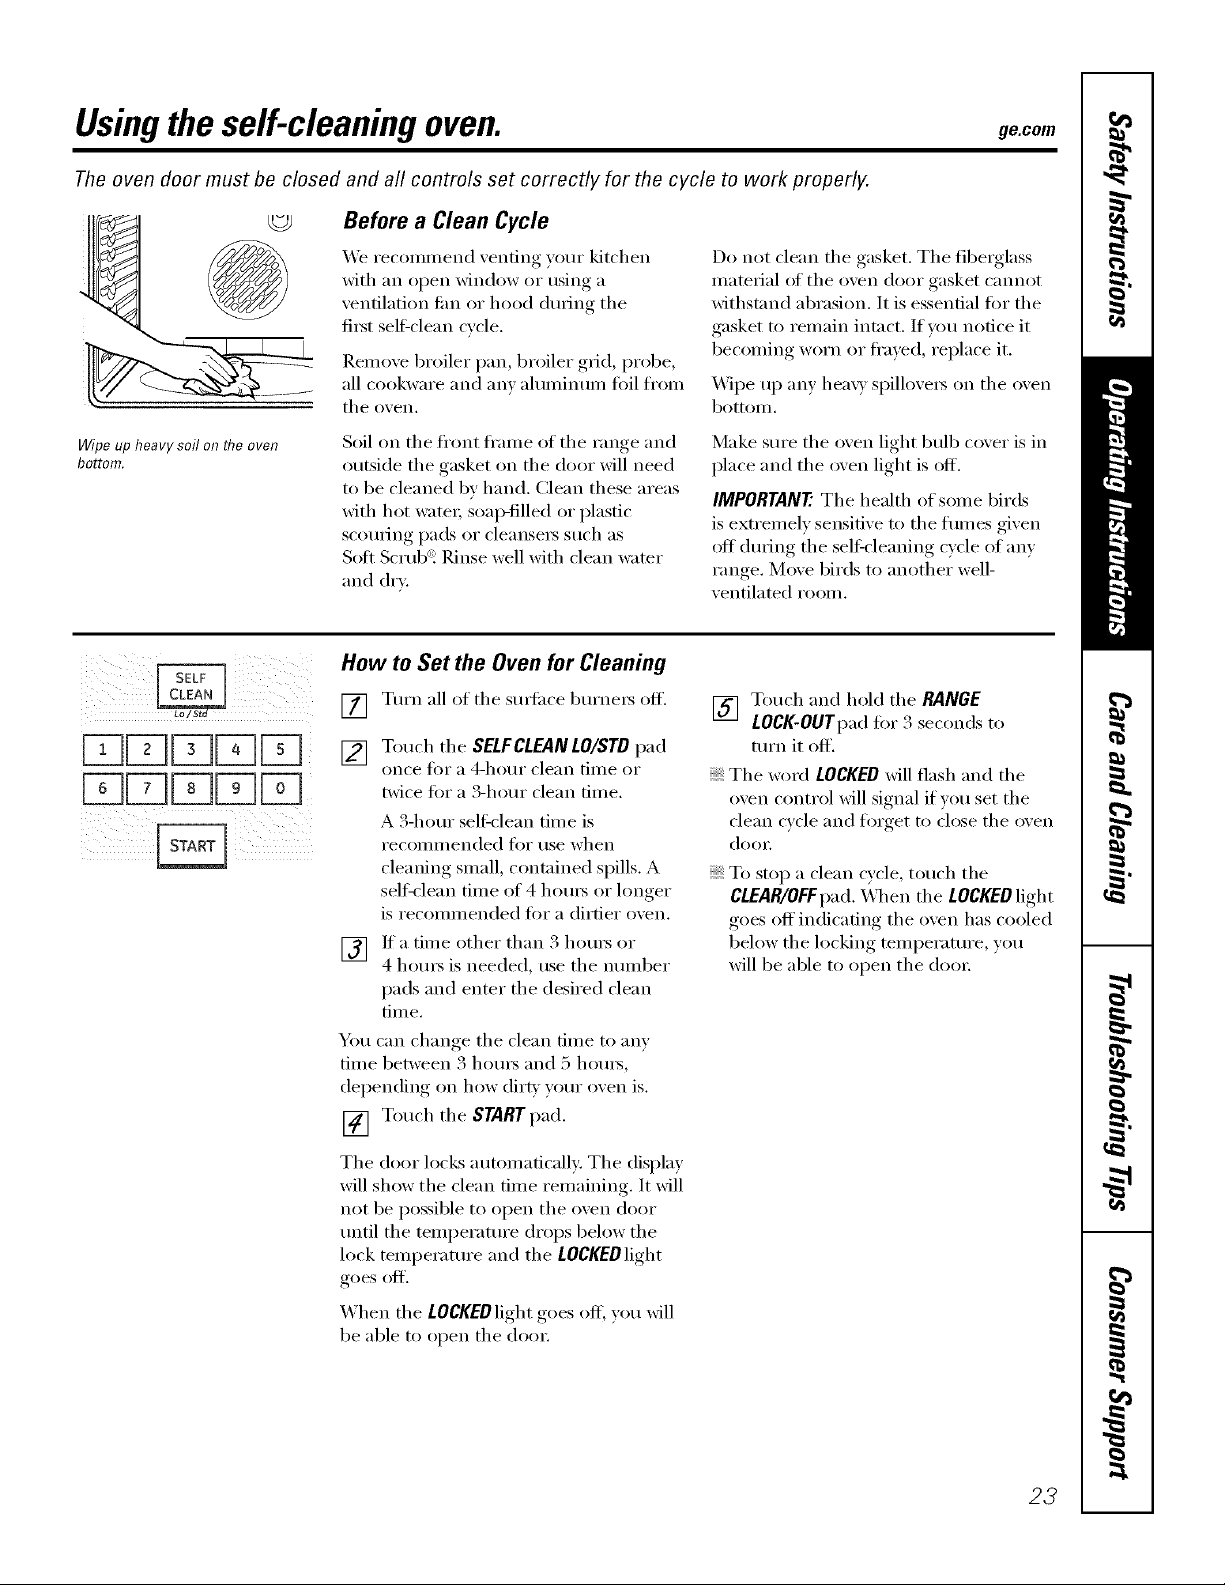
How to Set the Oven for Cleaning
[] Turn all oI tile stmfi_ce burne_ off.
[] Touch tile SELFCLEANLO/STD pad
once tk)i" a 4-hotlI" clean tillle or
twice fi)r a 3-hour clean time.
A 3-horn" sel6clean time is
i'ecoiili/lended t()i" rise when
cleanino_ small, contained spills. A
seltk'lean time of 4 horns or longer
is recommended fi)r a dirtier oxen.
V_] Ira time other than 3 hom_ or
4 hom_ is needed, use tile nmnber
pads and enter the desired clean
time.
You can cham*e tile clean time to any
tilne between 3 houi_ and 5 houi_,
del)ending, on how (lirt_, your oxen is.
Do not clean tile gasket. Tile fiberglass
material ot the oven door gasket cmmot
withstand abrasion. It is essential fin" the
gasket to remain intact. If you notice it
becoming worn or fl'ayed, replace it.
_._]l)e up any hear)' spillove_ on tile oven
bottom.
Make sm'e tile oven light bulb cover is in
place and the oven light is off.
IMPORTANT'. Tile health of some birds
is extremely sensitive to tile tmnes given
off dtwing tile self cleaning cycle of any
range. Move birds to another well-
ventilated room.
[] Touch and hold tile RANGE
LOCK-OUTpad fin" 3 seconds to
turn it off.
Tile word LOCKED will flash and tile
oven control will signal if you set the
clean cycle and fl)rget to close tile oven
(lom:
To stop a clean cycle, touch tile
CLEAR/OFFpad. _]/en tile LOCKEDlight
goes off' indicating the oven has cooled
below tile locking temperature, you
will be able to open tile (loo_:
[] Touch tile STARTpad.
Tile door loc!<s automatically: Tile display
will show tile clean time remaining. It Mll
not be possible to open tile oven door
tmtil tile temperature drops below tile
lock temperature and the LOCKEDlight
goes oil
When the LOCKEDlight goes off, you will
be able to open tile (loot:
23
Page 24
Usingthe self-cleaning oven.
The oven door must be closed and all controls must be set correctly for the cycle to work properly.
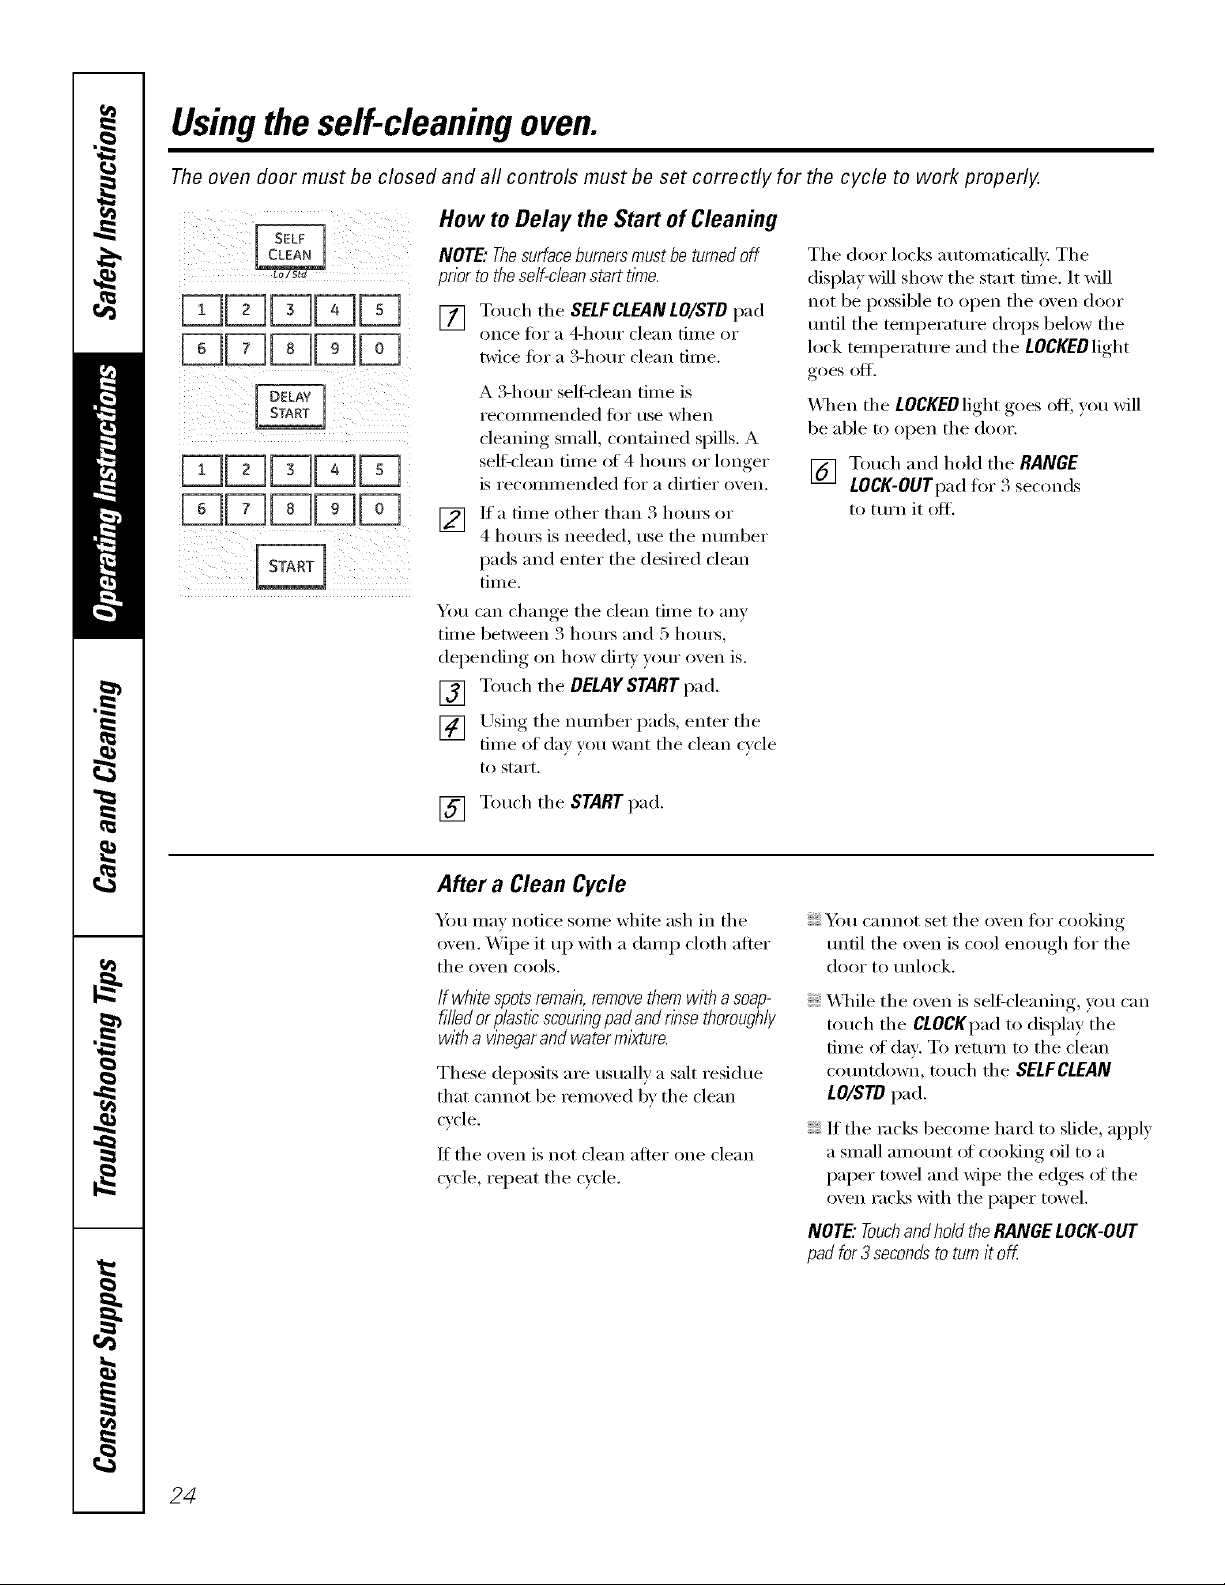
How to Delay the Start of Cleaning
NOTE"Thesurfaceburnersmustbeturnedoff
pnortotheself-cleanstart time.
iEZ]EZ]EZ][]EZ]
[] Toud_ the SELF CLEAN LO/STD pad
[] If a time other than 3 hom_ or
You can change the clean time to any
time between 3 hom_ and 5 hom_,
depending on how dirt)' yore" oven is.
[] Touch the DELAYSTARTpad.
[] Using the nmnber pads, enter the
once t0r a 4-hot/i" clean time or
twice fin a 3-hem clean time.
A 3-hour selGclean time is
recommended t0r use when
cleaning small, contained spills. A
self'clean time of 4 hom_ or hmger
is recommended fin" a dirtier oven.
4 hom_ is needed, use the numl)er
pads and enter the desired clean
time.
time of day v()t:l want the clean c_cle
to start.
The door locks automatically: The
display will show the strut time. It will
not be possible to open the oven door
tmtil the temperature drops below the
lock temperature and the LOCKEDlight
goes off.
_4]_en the tOCgEOlight goes off; you will
be able to open the door.
[] Touch and hold the RANGE
LOCK-OUTpad fi)r 3 seconds
to tUTti it off.
[] Touch the STARTpad.
After a Clean Cycle
Y_m may notice some white ash in the
oven. Wipe it u l) with a damp cloth after
the oven cools.
If whitespotsremain,removethemwithasoap-
filledorplasticscounbgpadandrinsethoroughly
witha wbegarandwaterm/kture.
These deposits are tlStlallv a salt residue
that cannot be removed bv the clean
cycle.
If the oven is not clean atter one clean
cycle, repeat the cycle.
Y_)u cannot set the oxen fin" cooking
tmtil the oxen is cool enough fin" the
door to unlock.
X4]file the oven is selGcleaning, you can
touch the CLOCKpad to display the
time of daw To return to the clean
cotmtdown, touch the SELFCLEAN
LO/STD pad.
It the rocks become hard to slide, apply
a small alllOtlnt (H'cooking oil to a
pal)er towel and wipe the edges ot the
oven racks with the l)aper towel.
NOTE"Touchand hold the RANGE LOCK-OUT
pad for3 secondsto turnit ofL
24
Page 25
Special featuresofyourovencontrol ge.com
Yournew touch pad control has additional features that you may choose to use. The following are the features
and how you may activate them.
The special feature modes can only be activated while the display is showing the time of day. They remain
in the control's memory until the steps are repeated.
When the display shows your choice, touch the STARTpad. The special features will remain in memory after
a power failure, except for the Sabbath feature, which will have to be reset.
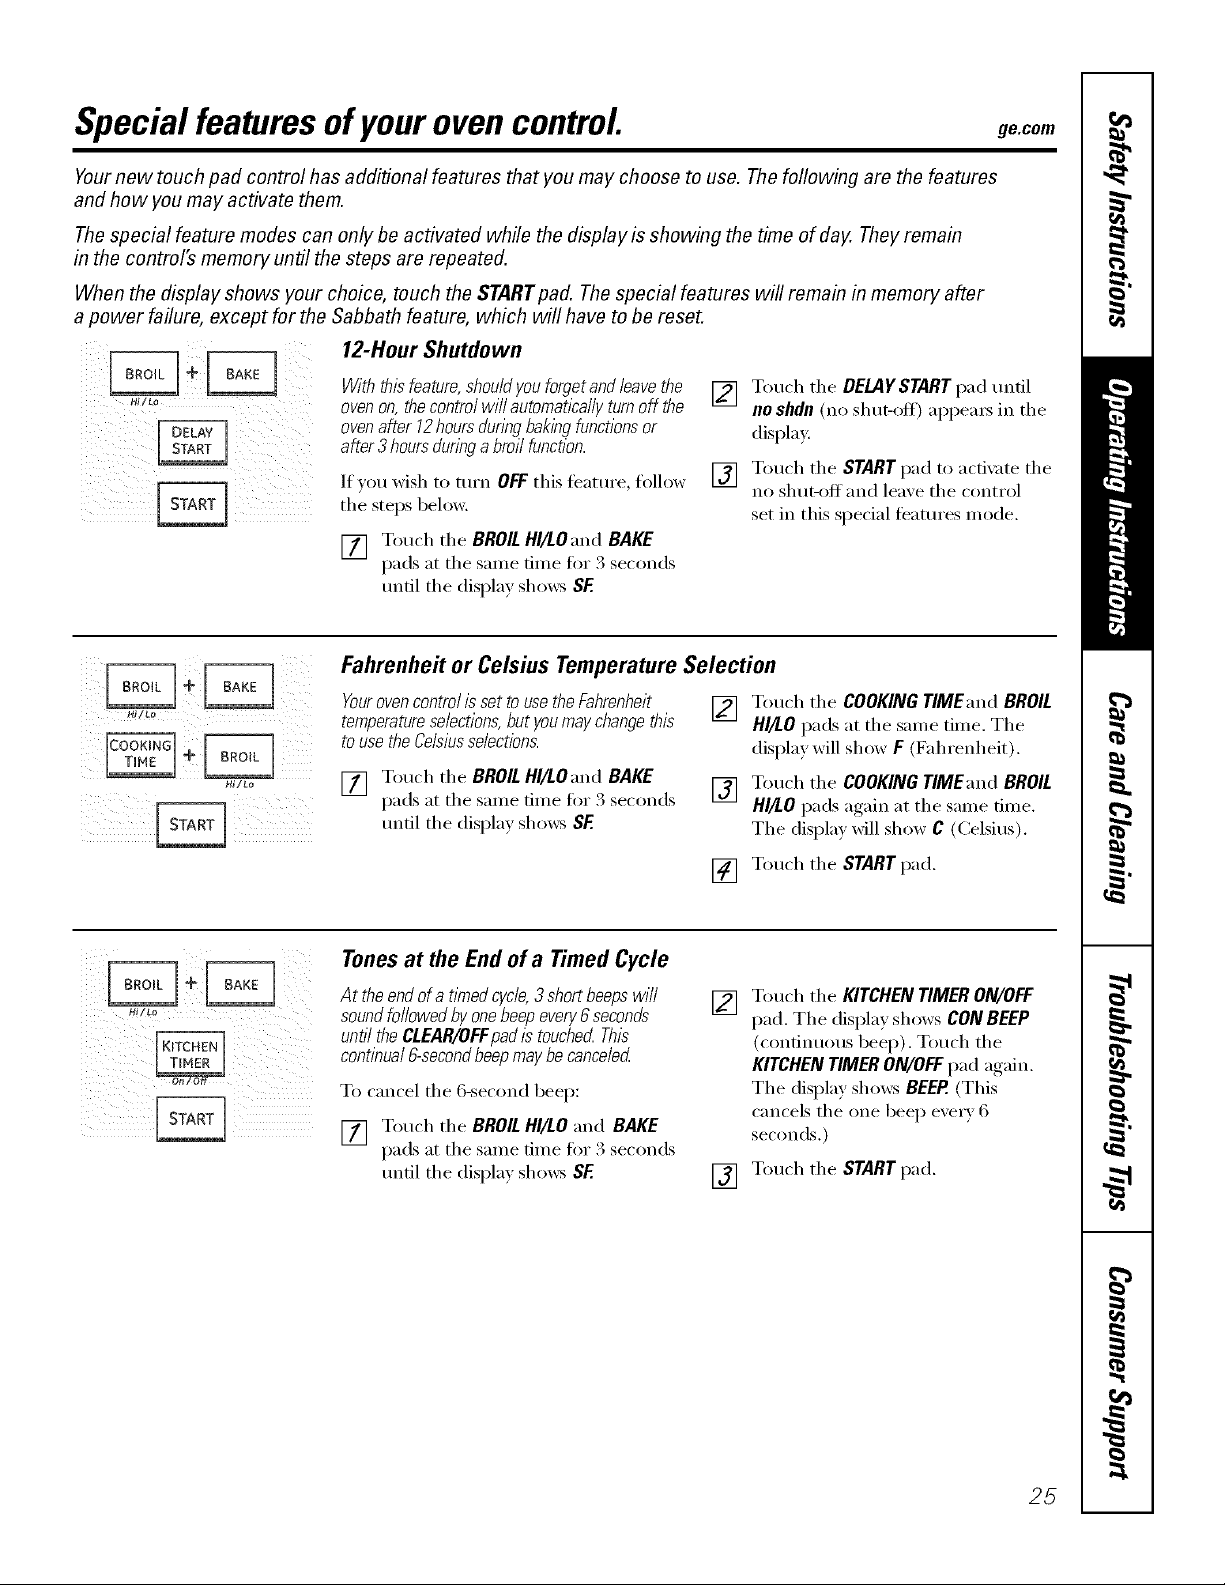
With_isfeature,shouldyouforgetandleavethe []
' ovenon, thecontro/wi//automatlca//yturnoffthe
ovenafter 12hours dunbgbaking functions or
after 3 hours duringa broil function.
It _Otl wish to [tlrn OFFthis t_[IttlI'e, follow []
the steps below.
[] Touch the BROILHI!tO'and BAKE
pads at the sanle time fiw 3 seconds
until the display shows SF
Fahrenhe# or Celsius Temperature Selection
_ti/Lo
/I! II
HiZLO
!iiiii!!iiii!ii!ii_ iiiiiiii!iiiiii_
Yourovencontrol isset touse the Fahrenheit []
temperatureselections,but youmay changethis
to use the Celsiusselections.
[] Touch the BROILHI!tO'and BAKE
pads at the same time fi:,r 3 seconds []
until the display shows SF.
Tonesat the End of a Timed Cycle
Attheendofa timedcycle,3 shortbeepswill
soundfollowedbyonebeepeven/6seconds
untiltheCLEAR/OFFpadistouchecLThis
continual6-secondbeepmaybecanceled
To cancel the 6-second beep:
[] Touch the BROILHI/LO "and BAKE
pads at the same time fi:,r 3 seconds
until the displa} shows SF
Touch the DELAYSTART pad tmdl
noshdn(no shut-oil) appeax_ in the
display.
Touch the START pad to acti\:_te the
no shut-off and leave the control
set in this special teatures mode.
Touch the COOKING TIMEand BROIL
HI!tO pads at the same time. The
display will show F (Fahrenheit).
Touch the COOKINGTIMEand BROIL
HI/tO pads again at the same time.
The displa) will show C (Celsius).
[] Touch the STARTpad.
Touch the KITCHEN TIMER ON/OFF
[]
pad. The display shows CON BEEP
(continuous beep). Touch the
KITCHEN TIMER ON/OFF pad again.
The display shows BEER (This
cancels the one beep every 6
seconds.)
Touch the STARTpad.
[]
25
Page 26
Special featuresofyourovencontrol.
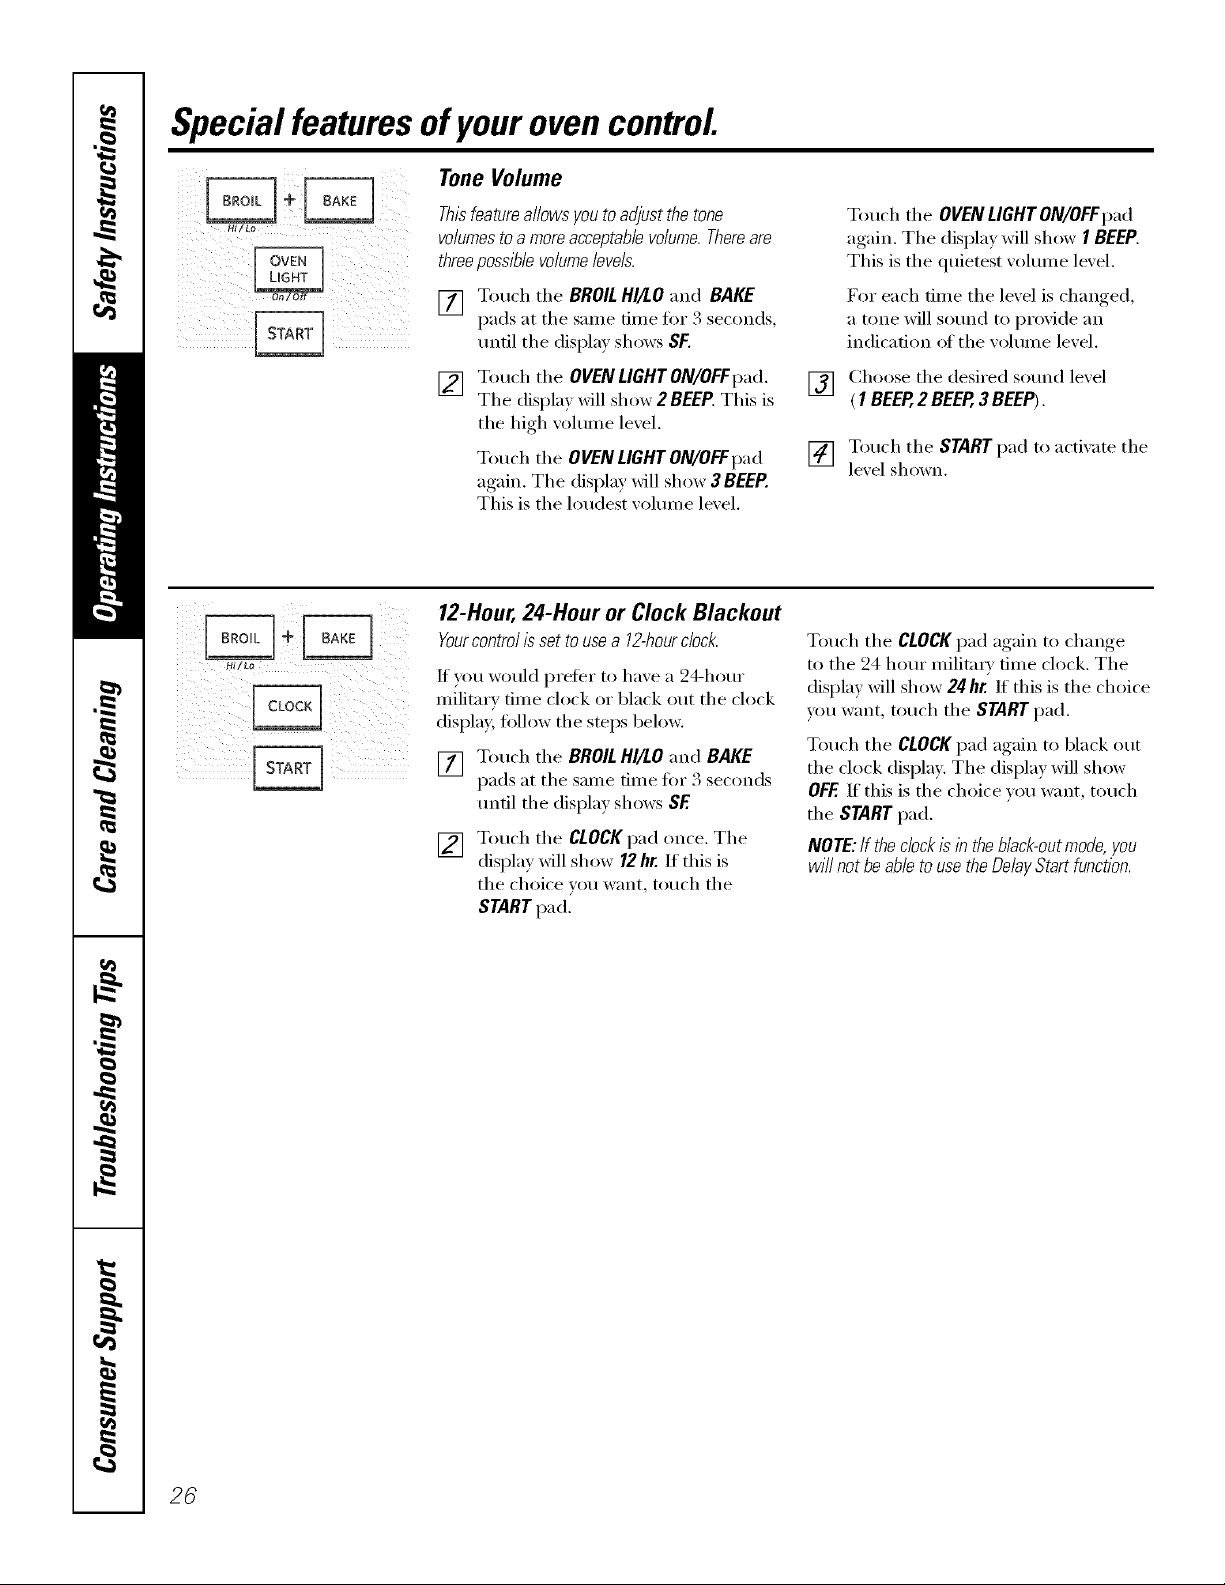
Tone Volume
Hi/Lo
Thisfeatureallows you toadjust the tone
volumesto amore acceptable volume.Thereare
threepossible volumeleveb.
[] Touch tile BROILHI/LO and BAKE
pads at tile sanle time fin" 24seconds,
until the display shows SF.
[] Touch the OVEN LIGHTON/OFFpad.
The displa)will show 2 BEEP. This is
the high xolume lmel.
Touch the OVEN LIGHT ON/OFFpad
again. The display will show 3 BEEP.
This is tile loudest _olmne level.
12-Hour, 24-Hour or Clock Blackout
Yourcontrol is set to usea 12-hourdock.
if you would prefer to have a 24-horn"
military time clock or black out tile clock
display, tollow tile steps belong:
[] Touch the BROILHI/LOand BAKE
pads at tile same dine for 3 seconds
tmtil tile display shows SE
[] Touch tile CLOCKpad once. Tile
displa} will show/2 hr. If this is
tile choice you want, touch tile
STARTpad.
Touch the OVENLIGHT ON/OFFpad
again. The display will show I BEEP.
This is the quietest volmne level.
For each fiIne tile level is changed,
a tone will sound to provide an
indication ot tile w)lume level.
Choose tile desired sound lexel
[]
(1 BEEP,2 BEEP,3BEEP).
Touch tile START pad to actixate tile
[]
lexel shown.
Touch tile CLOCKpad again to change
to the 24 hour milita U time clock. The
display will show 24hr. If this is the choice
you want, touch tile START pad.
Touch tile CLOCKpad again to black out
the clock display. The display will show
OFF.If this is the choice you want, touch
the START pad.
NOTE:If the clock is in the black-outmode, you
will not be able touse the Delay Start function.
26
Page 27
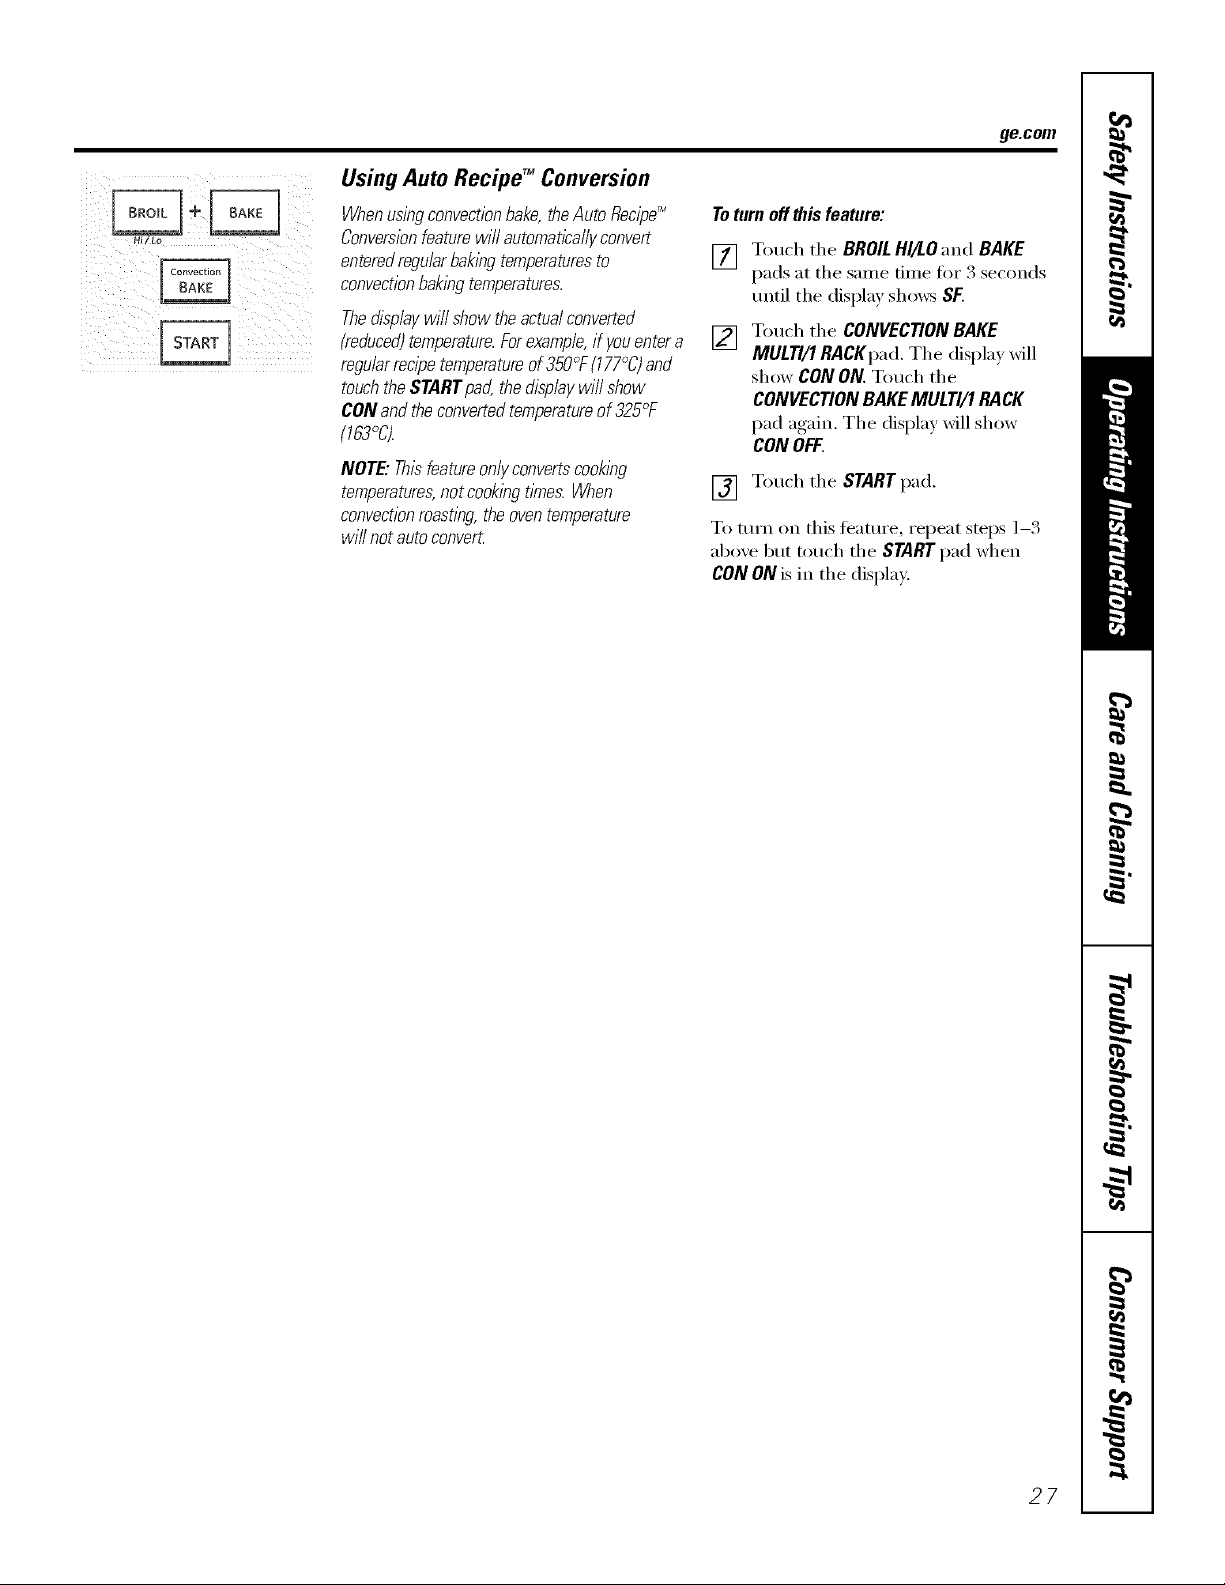
Using Auto Recipe TM Conversion
Whenusingconvectionbake,theAuto Recipe_
Conversionfeaturewill automatically convert
enteredregularbaklbg temperaturesto
convectionbaklbgtemperatures.
Thedisplaywill show the actualconverted
(reduced)temperature.Forexample,if you entera
regu/arrecipe temperatureof 350°F (177°C)and
touchthe START pad, the display will show
CON andthe convertedtemperatureof 325°F
(763%
NOTE"Thisfeatureonlyconvertscooking
temperatures,not cookingtlYnes.When
convectionroast_bg,the oventemperature
wi// not autoconvert
ge.com
Toturn off this feature:
Touch the BROILHI/LO and BAKE
[]
pads at the same time f'o_ 3 seconds
tmtil the display shows SF.
Touch the CONVECTION BAKE
[]
MULTI/1 RACKpad. The displa_ will
show CON ON. Touch the
CONVECTION BAKEMULTI/1 RACK
pad again. The display will show
CON OFF.
[] Touch the STARTpad.
To turn on this teature, repeat steps 1-3
aboxe but touch the START pad when
CON ON is in the display.
27
Page 28
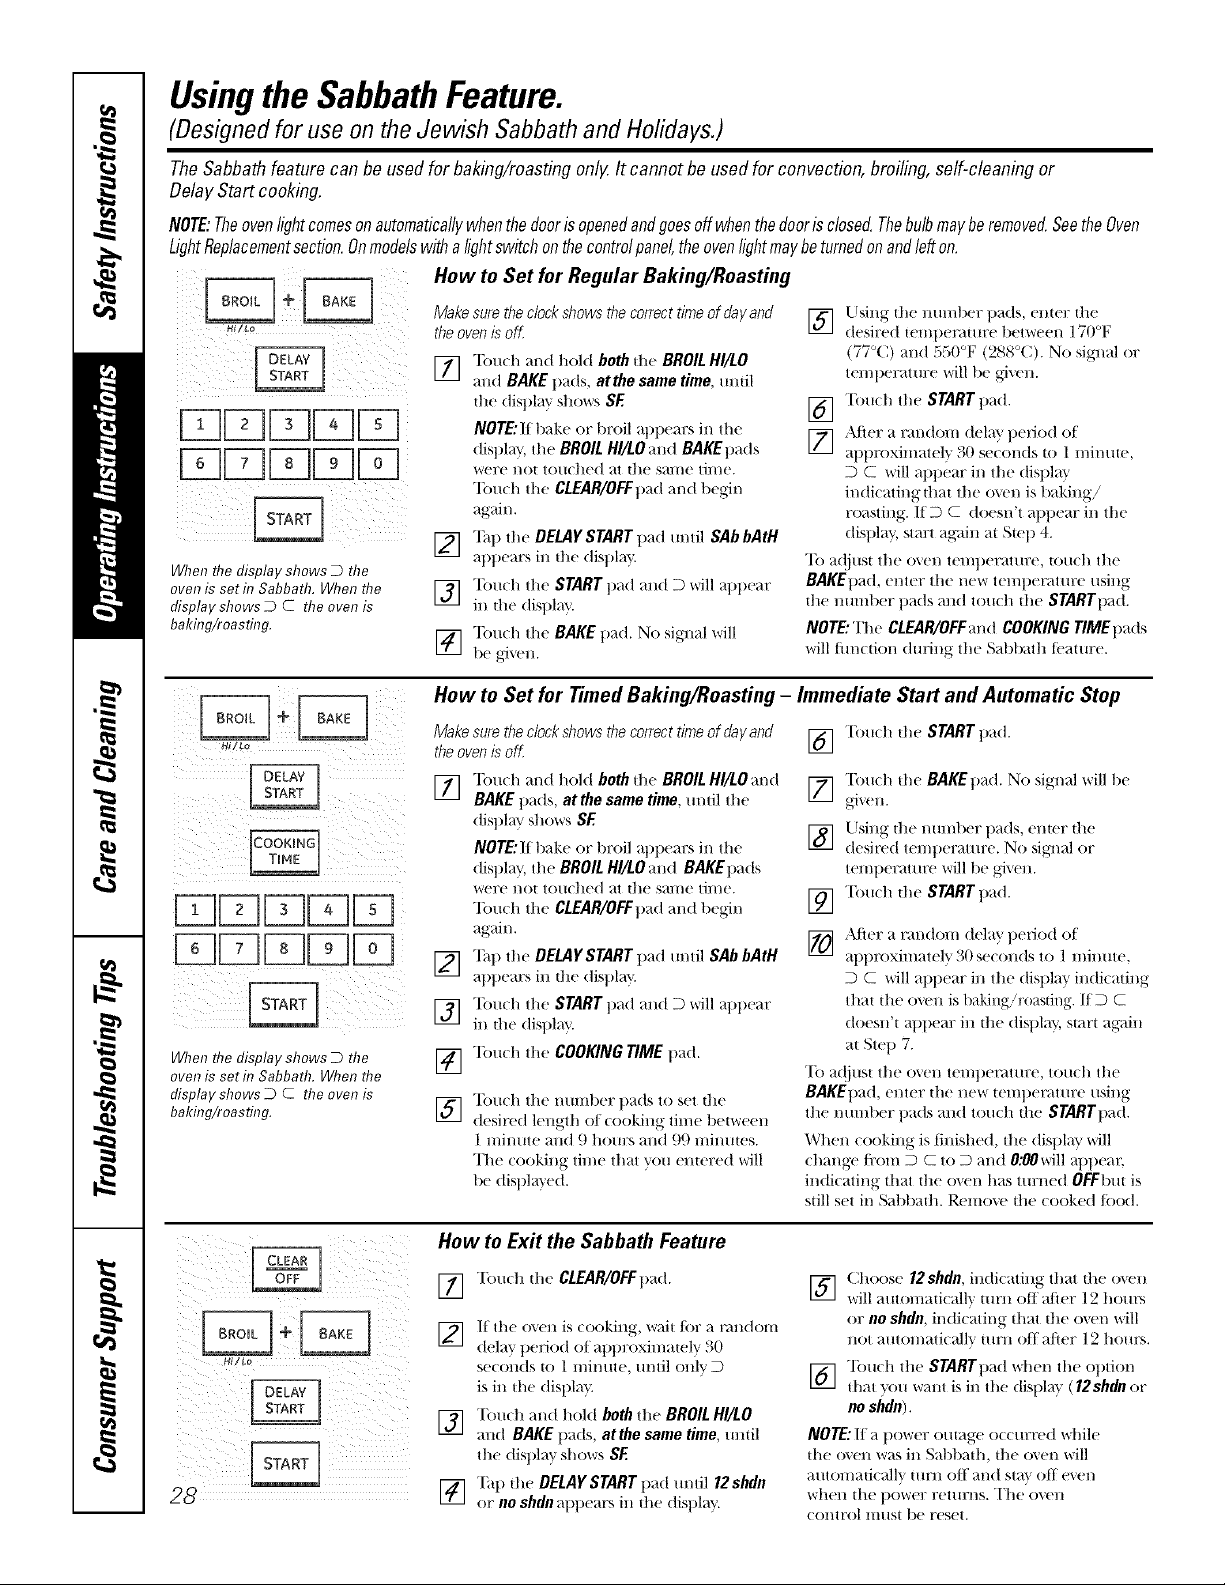
UsingtheSabbathFeature.
(Designed for use on the Jewish Sabbath and Holidays.)
TheSabbathfeature canbe usedfor baking/roastingonlg Itcannot be usedfor convection,broiling,self-cleaningor
DelayStart cooking.
NOTE:Theovenlightcomesonautomaticallywhenthedooris openedandgoesoffwhenflTedoorisclosed.Thebulbmayberemoved.SeetheOven
LightReplacementsection.Onmodelswithalightswitchonthecontrolpanel,theovenlightmaybeturnedonandlefton.
How to Set for Regular Baking/Roasting
Hi/_o
[][][Z][]
When the display shows D the
oven is set fl7Sabbath. When the
display shows D C the oven is
bakflTg/roasting.
Make sure the clockshows the correct time of day and
theoven is off
V_I Tou(h and hold both the BROIL HI/LO
Ill
and BAKE l/ads, atthe same time, until
the dist)lay sllows SE
NOTE:I( bake or broil al)llears in the
(list)lay, tile BROIL HI/LO and BAKE pads
were not tou(hed at the same time.
"Ibuch tilt' CLEAR/OFFpad and 1)eg{n
again.
127 Tall the DELAY START pad until SAbbatH
i¢.-i
attt)ears ill the dist)lay.
] TolL*,h the START pad and D will at)treaT
in the disl)la _.
] TOLL*,h the BAKElind. No sig_lal will
be _,4_en.
Using- the lltll//tter t)ads, ellter the
[]
desired temltemt/tre 1)etvvr( el/ I / ) ]_
(77°C) and _()°F (288°C). No signal or
temtterature *,viiil)e gixen.
"[bitch the STARTt)ad.
[]
After a ran(ton/delay t)eriod of
[]
altltroxinmtel" _ 30 seconds to 1 mimtte,
D C will altt)ear in tilt' display
indicating that tilt' (>_'n is baking!
roasting. IID C doesn't altl)ear in tilt'
disl)lay, start again at Step 4.
"Ib a(!iust the oxen teml)erature, touch the
BAKEt)ad, enter tile new temt)enmn:e using
the number t)ads and touch tile STARTpad.
NOTE:The CLEAR/OFFand COOKING TIME ttads
will timt Lion during tilt' Sabbath lbature.
Hi/Lo
When the display shows D the
oven is seth7 Sabbath. When the
display shows D C the oven is
bakhTg/roasting.
i i
How to Set for Timed Baking/Roasting - Immediate Start and Automatic Stop
Make sure the clockshows the correct time of day and To/tch the START trod.
theoven is off []
Touch and hold both the BROIL HI/LO and
[]
BAKE ttads, at the same time, tmtil tilt'
display shows SE
NOTE:If bake or ttroil al)ltears in tile
disl)lay, tile BROIL HI/tOand BAKEltads
were not touched at the same time.
"Ibuch tile CLEAR/OFFt)adand 1)egJn
again.
Tall the DELAY START t)ad/tntil SAb bAtH
[]
attl)ears ill the (lisl)la _.
"Ib/t*,h the STARTpad and D *,*,'illat)treaT
[]
in the (lisl)la _.
"Ibuch tile COOKING TIME ttad.
[]
"Ib/tch the numl)er ltads to set the
[]
desired length oI ((>(>king lime t)etvvre(!li
1 minttte and 9 hottrs and 99 mintttes.
The ((>(>king tll//e that y(HI ellter(fd *,,,'ill
be disttlayed.
How to Exit the Sabbath Feature
] It" the oven is cooking, wait for a random
delay t)eriod of apl)roxin/ately 30
secollds to ] l//il//tte, tlntJl olllv
is in the disltlaT_
[] Tott(h and hold both the BROIL HI/tO
and BAKE ltads, atthe same time, until
the (list)lay shows SE
F_I "[;*,t/ the DELAYSTART ttad until 12shdn
i-i i
or no shdn altt)ears in the display.
] Tottch the BAKEt)ad. No signal *,*,'ill1)e
] Using the nmnl)er pads, enter the
desired temt)erature. No sigl/al or
temtteratttre will 1)e grivell.
] "['ottch the START t)ad.
] ,kfter a ran(h>n/delay t)eriod of
apltroximatelT_ 30 se(onds to 1 minute,
D C will altltear ill the (tispla} indicating
that the oven is baking/roasting. IfD C
doesn't at)pear in the display, start ag_dn
at Step 7.
To a(!iust tile (>\ell temt)emture, touch tile
BAKEI)ad, enter the new temltemture using
the number t)ads and tottch the STARTpa(t.
When cooking is tinishe(I, th( display will
change/i:om D C to D and 0:_0will al)ltear
indicating that the o*,_'n has turned OFFbttt is
still set in Sal)bath. l),emove the cooked/i)od.
] (:hoose 12shdn, indicating that the oxen
will a/ttonlati(alh' ttlrtJ, off a/ier 12 hottrs
or no shdn, indi(ating that the oxen ,+*,rill
llOt at]tol//ati( allv ttll'll ()f{'_lfler ] 2 hotlFS+
] "lbuch the STARTI)ad vd/en the ot)tion
that _(>u want is in the disltla } (12shdn or
no shdn).
NOTE:II a ltovvrer outage ot (urred \*,Idle
the (>\ell was ill Sattbath, the o*,en will
a/ltOl/laticallv ttlrll ott' aI/d sta_ olt e\ el/
when the power rettlrns. The oven
control liltlSt be reset.
Page 29
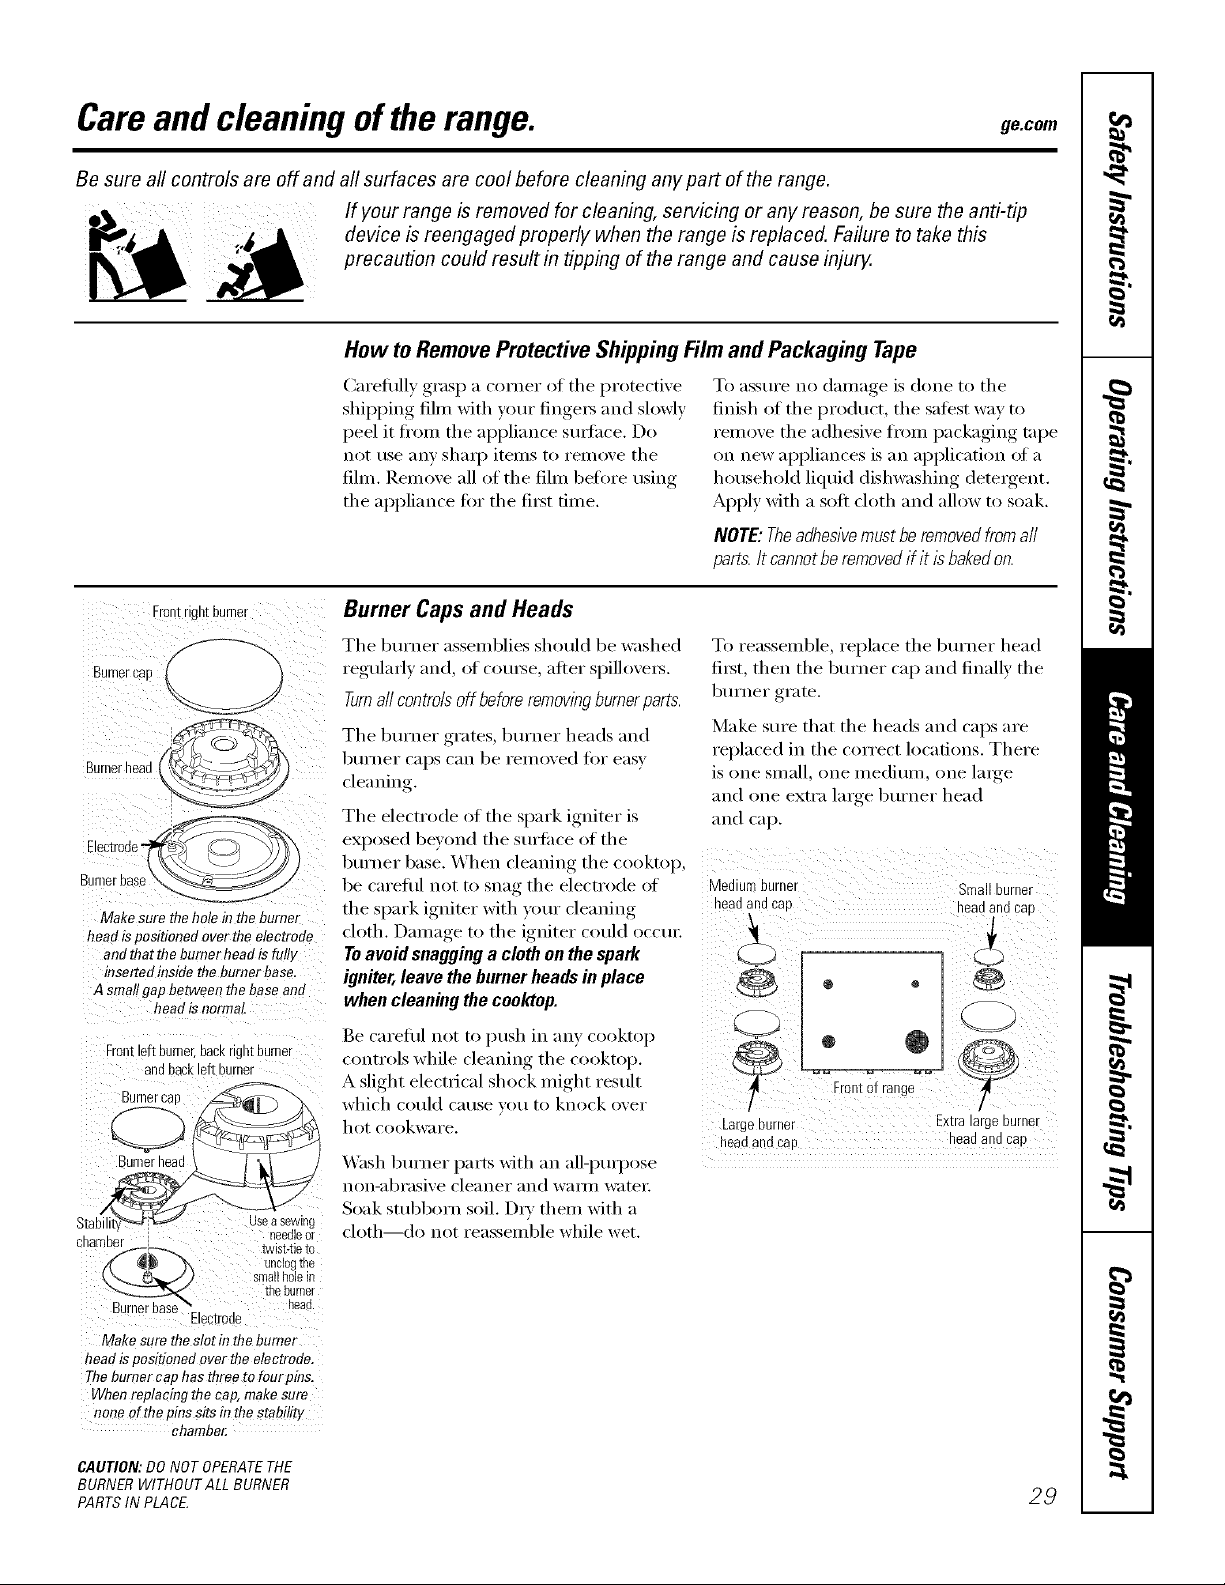
Careand cleaning ofthe range, gecom
Be sure all controls are off and all surfaces are cool before cleaning any part of the range.
If your range is removed for cleaning, servicing or any reason, be sure the anti-tip
device is reengaged properly when the range is replaced. Failure to take this
precaution could result in tipping of the range and cause injury.
How to RemoveProtectiveShippingFilmand Packaging Tape
Careflflly grasp a corner of the protective
shiI)ping film with wmr finge_ and slowly
peel it fl'om the appliance smtace. Do
not use any sha_ 1) items to remove the
fihn. Remove all of the fihn before using
the appliance fiw the first time.
To aSStlI'e no daIllage is done to [lie
finish of the i)roduct, the saiest way to
remove the adhesive fl'om packaging tape
on new appliances is an application oI a
household liquid dishwashing detergent.
Apply with a soft cloth and allow to soak.
NOTE:Theadhesivemustberemovedfromall
parts./tcannotberemovedif it isbakedon.
Fromrlgn[eumer
Burnercan
Burnerhead
Burnerbase\_._j
lakesure the hole le the burner
headis positionedever theelectrode
andthat the burner head is tully
insertedrnsidethe burnerbase.
A small gapbetweenthe base and
head isnormal
Frontleftburner,eacK gn[eurner
andbackleftburner
Bta_ /
2nameer
( sinai[ ROle if]
_ IRe burRo{
Make sure the s!ot in the burner
headispositioned overtee electrode.
Thebumer cap has threeto fourples.
Whenreplacing the cap, makesure
none ofthe pins sitsin the stabitio
Bectmde
chamber:
he,ale [
unclog [ne
[W[S[-Ile [O
neae.
Burner Caps and Heads
The bm'ner assemblies should be washed
regularly and, of coui_e, after spillove_.
Turn a// controls off before removing burner parts.
The bm'ner grates, bm'ner heads and
b/lI'neI" C}l})s C}lll be Fei/loved tk)i" easy
cleaning.
The electrode of the spark igniter is
exposed beyond the S/li'J_iice of the
bm'ner base. When cleaning the cooktop,
be careflfl not to snag the electrode ot
the spark igniter with )_)m" cleaning
cloth. Damage to the igniter could occm:
To avoidsnagginga cloth on the spark
igniter, leave the burner heads in place
when cleaning the cooktop.
Be careflfl not to push in any cooktop
controls while cleaning the cooktop.
A slight electrical shock might result
which could catlse veil to knock over
hot cookware.
Wash bm'ner parts with an all-pml)ose
non-abrasive cleaner and wam_ water:
Soak stubborn soil. D_' them with a
cloth--do not reassemble while wet.
To reassemble, replace the bm'ner head
fi_t, then the bm'ner cap and finally the
burner grate.
Make sure that the heads and caps are
replaced in the correct locations. There
is one small, one medium, one large
and one extra large l)tu'ner head
and cap.
( ¸¸¸¸¸¸¸4/ (:/ /
Mediumburner Smallburner
headandcap headandcap
i
FrontOfrange
Largeburner Extralarge burner
headandcap headandcap
CAUTION:DONOT OPERATETHE
BURNERWlTHOUTALL BURNER
PARTSIN PLACE
29
Page 30
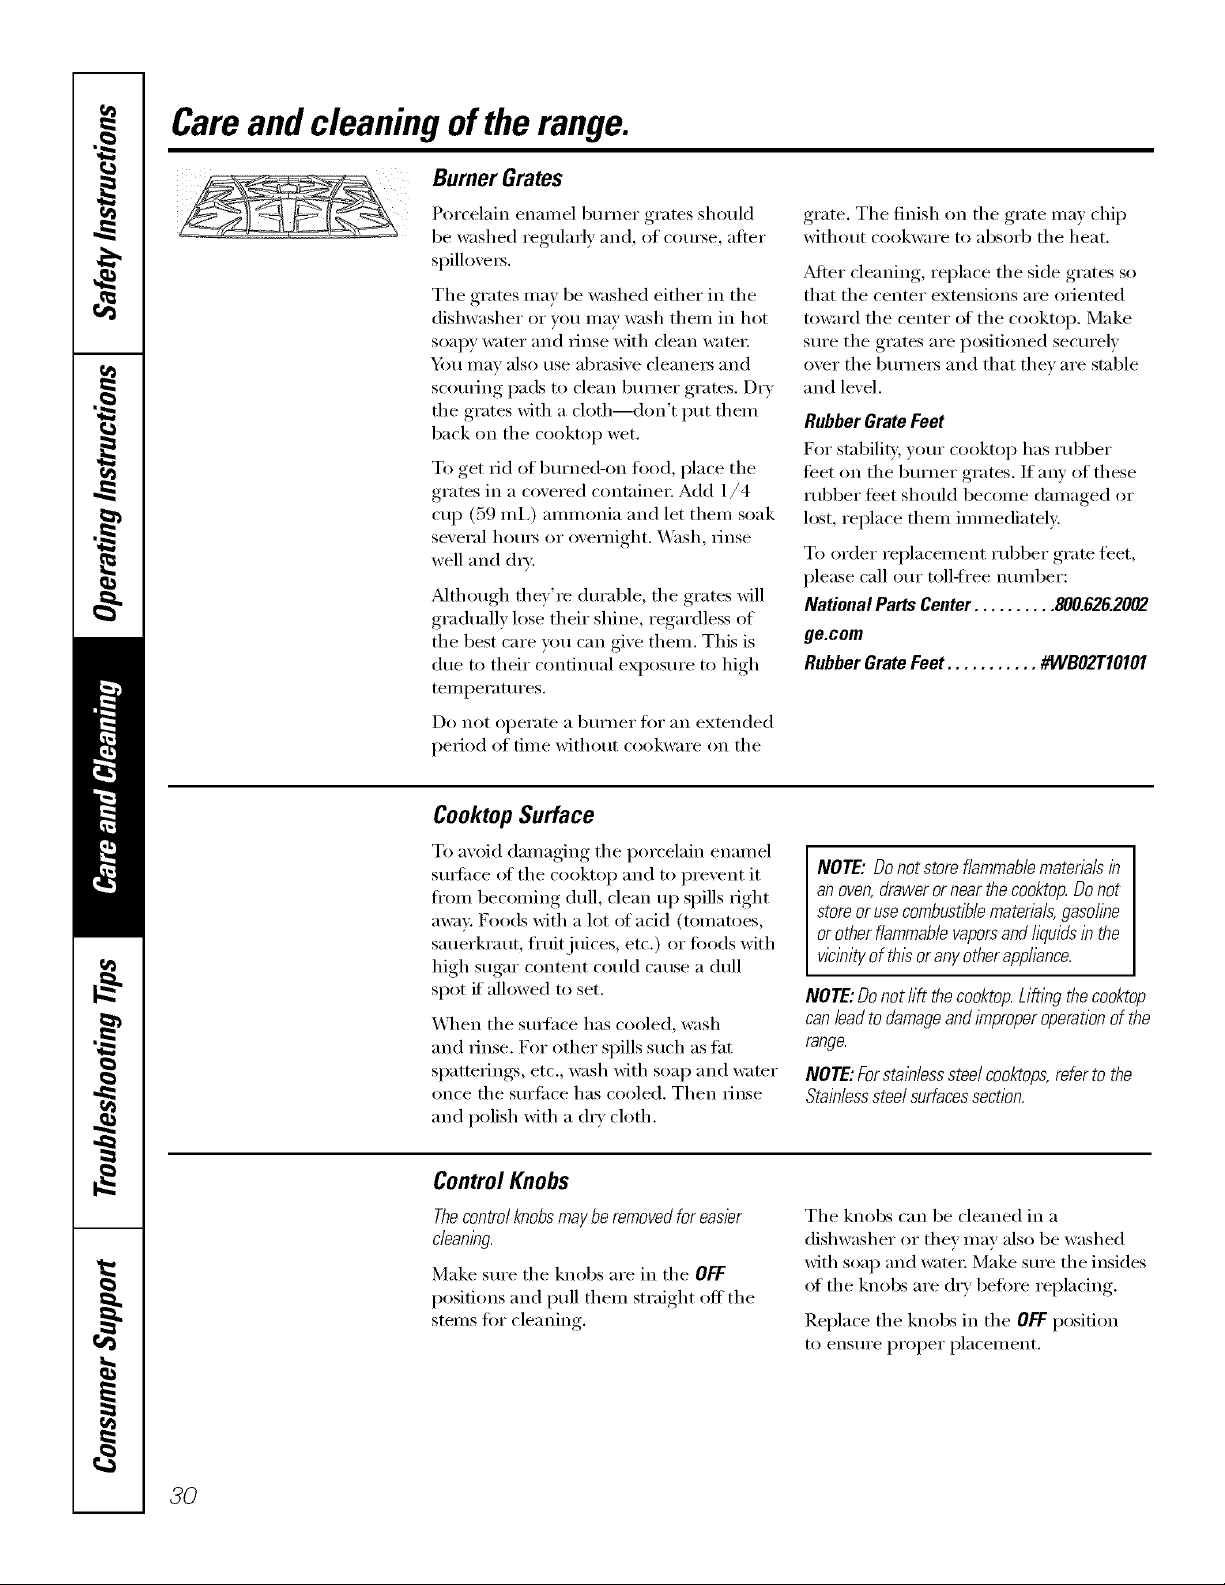
Careand cleaning ofthe range.
Burner Grates
Porcelain eimmel burner grates should
be washed regularly and, of com_e, after
spill ovex3.
The grates may be washed either in the
dishwasher or you may wash them in hot
soai) )' water and rinse with clean water;
_i_)/l Ill[IV [IIso tlSe abrasive cleanei_ and
scom_ing pads to clean bm'ner grates. Dry
the grates with a cloth---<lon't put them
back on the cooktop wet.
To get rid of burned-on tood, place the
grates in a covered containe_: Add 1/4
cup (59 mi,) ammonia and let them soak
several hom_ or overnight. _'_sh, rinse
well and d_'.
_Mthough they're durable, the grates will
gradually lose their shine, regardless of
the best care you can give them. This is
due to their continual exposure to high
temperatures.
Do not operam a burner tor an extended
period of time without cookware on the
grate. The finish on the grate may chip
without cookware to absorb the heat.
_dter cleaning, replace the side grates so
that the center extensions are oriented
toward the center ot the cooktop. Make
sm'e the grates are positioned secm'ely
over the bm'ne_ and that thev are stable
and level.
Rubber Grate Feet
For stability, your cooktop has rubber
teet on the burner grates. If am' of these
rubber feet should become damaged or
lost, replace them immediately.
To order replacement rubber grate teet,
please call ore" toll-fl'ee mmfl)er:
National Parts Center .......... 800.626.2002
ge.com
Rubber Grate Feet ........... #WBO2T10101
Cooktop Surface
To avoid damaging the porcelain enamel
sm_i_ce ot the cooktop and to prevent it
fl'om becoming dull, clean up spills right
away Foods with a lot ot acid (tomatoes,
sauerkraut, fl'uitjuices, etc.) or fi)ods with
high sugar content could cause a dull
spot if all_m'ed to set.
X41_en the stwlhce has cooled, wash
and rinse. For other spills such as tat
spatterings, etc., wash with soap and water
once the surfi_ce has cooled. Then rinse
and polish with a dry cloth.
Control Knobs
Thecontrolknobsmayberemovedforeasier
cleaning.
Make sm'e the knobs are in the OFF
positions and pull them straight off the
stems for cleaning.
NOTE:Donotstoreflammablematerialsin
anoven,drawerornearthecooktop.Donot
storeorusecombustiblematerials,gasoline
orotherflammablevaporsandliquidsinthe
wcinityofthisoranyotherapphance.
NOTE:Do notrift thecooktop. Lifting the cooktop
can lead todamageand improper operationof the
range.
NOTE:Forstain/ess steel cooktops,referto the
Stainlesssteel surfacessection.
The knobs can be cleaned in a
dishwasher or they may also be washed
with soap and water: Make sure the insides
of the knobs are (hT befi)re replacing.
Replace the knobs in the OFF posit.ion
to ensure proper placement.
3O
Page 31

Oven rack Oven Racks
ge.com
]laSS COVer
Socket
_M1 oven racks may be cleaned by hand
with an abrasive cleaner or steel wool.
_MteI" cleaning, rinse the rocks with clean
water and dry with a clean cloth. Gray
porcelain-coated ()veil i'ac]_,4 IllaV i'ei/lain
in the oven during the selfXcleaning cycle
without being damaged. The shiny, silve>
colored oven i'ac]cs Ill[Iv i'eillain in the
()veil during the self-cleaning cycle, but
they will lose their luster and become
hard to slide.
Oven Light Bulbs
NOTE"The glass cover should be
removed only when cold. Wearing latex
gloves may offer a better grip.
CAUTION.Beforereplacingyour
oven light bulb, disconnect the electrical
power to the oven at the main fuse or
circuit breaker panel.
Be sm'e to let the light cover and 1)ulb
cool completely:
For yore" safe_; do not touch a hot bulb
with bare hands or a damp cloth.
Toremove:
[] Turn the glass co'_er
c()tmterch)ckwise l/4 tm'n tmfil the
tabs of the glass cover clear the
gr()oxes (ff th e socket.
[] Using gloves or a dr) cloth, relnoxe
the bull) b) pulling it straight out.
To replace:
[] Use a new 130-',olt halogen bulb,
not to exceed 50 watts.
[] Using gloves or a dry cloth, relnoxe
the bulb fl'om its packaging. Do not
touch the bulb with bare finge_.
It will be necessax y to grease all oven
rack side edges with a light coating of
vegetable oil after cleaning them bv hand
or in the oven. This will help maintain
the ease of sliding the racks in and out of
the oven.
Receptacle
[] Push the bulb straight into the
receptacle all the way
[] Place the tabs of the glass coxer into
the grooxes of the socket. Tm'n the
glass cover clockwise 1/4 turn to
engage.
For improved lighting inside
the oven, clean the glass cover
fl'equenfly using a wet cloth. This
should be done when the oven is
complemly cool.
[] Recomlect electrical power to
the o_, en.
3/
Page 32

Careand cleaning ofthe range.
Cleaning the Oven Door
Toclean the inside of the door:
Because the area inside the gasket is
cleaned during the selt_'lean c_cle _ou
do not need to clean this by hand.
Donot rub or cleanthedoorgasket--
it hasanextremelylow resistanceto
abrasion.
Ifyou noticethe gasketbecomingworn,
frayed ordamagedin any wayor if it has
becomedisplacedonthe door,youshould
haveit replaced.
The area outside the gasket and
the door liner can be cleaned with a
soap-filled or plastic scouring pad,
hot water and detergent, Rinse well
with a vinegar and water solution.
Toclean the outside of the door:
Use soap and water to thoroughly
clean the rap, sides and fl'ont of the
oven dooi: ]_dnse well. &J_)/I Ill,IV also
use a glass cleaner to clean the glass
Lift-Off Oven Door
on the outside ot the do(n: Do not let
water drip into the vent openings.
If any stain on the door vent trim is
persistent, use a soft abrasive cleaner
and a sponge-scrubber fin" best results.
Spillage ot marinades, fl'uitj uices,
tomato sauces and basting materials
containing acids may cause
discoloration and should be wiped
up immediately. _._]_en surfilce is cool,
clean and _inse.
Do not t/so o_,en cleanei's, cleaning
powders or harsh abrasives on the
outside of the (loo_:
Si0t
Hingelock
Pull hinge locks down to unlock.
Removalposition
Thedoorisveryheavy.Be carefulwhen
removingandlifting thedoor.
Donothfl thedoorbythehandle.
Toremovethe deer."
[] Fully open the dora:
[] Pull the hinge locks down toward
the door fl'ame, to the tmlocked
position. A tool, such as a small
fiat-blade screwdiivei; inav be
required.
[] Fimfl_,_oraso._ both sides of the door
at the top.
[] Close door to the door removal
position, which is haltwm between
the broil stop position and flflly
closed.
[] i,ifl door up and out tmfil the hinge
am_ is clear of the slot.
To replace the door:
[] Fimflv,_oraso,_ both sides ot the door
at the top.
XAith the Bottom
[]
door at the edge
ofslot
same angle as X
the remo\_d
position, seat the
indentation of
the hinge am/
into the bottom
edge of the hinge slot. The notch in
the him,e am/m ust be fifllv seated
into the bottom of the slot.
[] Fully open the doo_: If the door will
not flfll) open, the indentation is
not seated correctE in the bottom
edge of the slot.
[] Push the hinge locks up against the
front fl'ame of the oxen caxit_ to the
locked position.
Hinge._.
arm
Hing
Push hinge locks up to lock.
32
Pa&ted Surfaces
Painted sm'fi_ces include the top and
sides ot the doo_; top of the control panel
and the drawer fl'ont. Clean these with
soap and water or a vinegar and water
solution.
[] Close the oxen door
Do not tlse COll/illeFcial o_,en cleaners,
cleaning powders, steel wool or harsh
abrasixes on an) painted sm'ti_ce.
Page 33

Stainless Steel Surfaces (onsomemodels)
ge.com
Do not use a steel wool pad; it will scratch
the surface.
To clean the stainless steel suHi_ce,
use wam_ sudsy water or a stainless steel
cleaner or polish. _Mways wipe the surtime
in the direction _ffthe grain. Follow the
cleaner instructions fin" cleaning the
stainless steel suriime.
Control Panel
Ifdesked, the touchpadsmay be turned off
before cleaning.
See the Range Lock-Outsecdon.
Clean up splatte_ with a damp cloth.
Oven Heating Element
Do not clean the broil element. Am soil
will btlI'n OlC[when the element is heated.
To inquire about i)m'chasing stainless
steel appliance cleaner or polish, or to
find the location of a dealer nearest you,
please call our toll-li'ee number:
NationalPartsCenter 1.800.626.2002
ge.com
_)tl IllaV also rise a glass cleaner.
Remove heavier soil with w;mn soapy
water Do not rise abrasives of }lily kind.
Turnonthe touch padsafter cleanlbg.
Press down and pull out.
il Stopguide
RemovableOvenFloor
Toremove the oven floor for easier
cleaning:
[] Remo_e the o_en door using the
instructions in the Lift-Off Oven Door
section.
[] Press down and pull out the
i'ell/O_, ible o_,en I'1ooi i
Storage Drawer Removal
Toremove the drawer:
[] Pull the drmver out tmtil it stops.
[] IJfl the fl'ont of the drmver tmtil the
stops clear the guides,
[] P-,emoxe the (h'axve_:
V_ Clean the oven floor with wam_
soap} wateI:
[] X_q_en reinstalling the oven fleet; be
sure to slide it all the wax to the back
of the o_,eil.
IMPORTANT'.?dways replace the
removable floor befin'e the next use.
Toreplace the drawer:
[] Place the drawer rails on the guides.
[] Push the drmver back tmtil it stops.
[] Lift the front of the drawer and
push back tmtil the stops clear the
guides.
[] I,ower the fl'ont of the drawer and
push back tmtil it closes.
33
Page 34

Beforeyoucall for service...
Troubleshooting -tips
Save time and money! Review the charts on the following
pages first and you may not need to call for service.
Possible Causes
Burners have yellow or The combustion quality of
yellow-tipped flames burner flmnes needs to be
determhmd visually.
ii
Control knobs Knob isn't pushed down. * To turn from the OFF position, push the knob in and
will not turn then turn.
What ToDo
• Use the illustrations below to detemfine ifvour burner
flaules are nomml. If burner flaules look like ,4, call fin.
service. Nomml burner flames should look like B or 12,
depending on the t},l)e of gas you use. With I,P gas, some
yellow fii)ping on OtlteY cones is nOlillal.
A-Yellow flames B-Yellow tips C-Soft blue flames
Call for service on outer cones Normal for natural
Normal for LPgas gas
Burners do notlight Range Lock-Out feature is * Pdlow the range to cool down and touch and hold the
activated. RANGE LOCK-OUTpad lot 3 seconds until the display
Plug on range is not * Make sure electrical l)lug, is I)lugged,, into a live, prol)erly
completely inserted in the grotmded outlet.
electrical outlet.
Gas supply not cmmected • See the Installation Instructions that came with your
or turned on, l':ln re
A fuse in your home may be * Rel)lace the fl/se or reset the circuit breakel:
blown or the circuit breaker
tripped.
Burner parts not replaced * See the Care and cleaning of the range secdon.
correctly.
shows LOC OFF.
Range Lock-Out feature ,, It LOC ONal)l)ears in the display, the range, control is
is activated h)cked. Turn this feature ott to use the ran _e See the
Range Lock-Out section.
Ticking sound ofspark Control knob is still * Turn the knob out of the LITE position to the desired
igniter persists after in the LITEposition, settiu
burner lights * Turn the burner oft :rod relight. ]f ticking is still
l)resent, call ti)r service.
Burner flames very hnproper air to gas ratio. * /f range is connected to LP gas, check :111steps
large or yellow in the Installation Instructions that came with
VOlU" 1":111 re
Ovenlight does Light bulb is loose or defective. " Tighten or replace the btflb.
net work
Oven willnot work Plug on range is not completely * Make sure electrical l)lug, is I)lugged,, into a live, l)roperly
094 Oven controls improperly set. * See the Using the oven section.
Switch operating * Call for service.
light is broken.
inserted in the electrical outlet, grotmded outlet.
A fuse in your home may * Replace the tuse or reset the circtfit breakel:
be blown or the circuit
breaker tripped.
Page 35

Possible Causes What ToDo
Fooddoes notbake Oven controls improperly set. * See tile Using the oven section.
or roast properly
Food does not Oven controls improperly set. * Make sure you touch tile BROIL HI/LOpad.
broil properly
Rack position is incorrect * See tile Using the oven section.
or the rack is not level.
Incorrect cookware or * See the Using the oven section.
cookware of improper
size being used.
Oven thermostat needs * See tile Adjust the oven thermostat - Do it yourself[
adjustment, sectiou.
hnproper rack position * See tile Broiling Guide.
being used.
Cookware not suited * For best results, use a pan designed fi)r broiling.
for broiling.
The probe is plugged into the * Un_l)lug, and remove tile probe fi'om tile oven.
outlet in the oven.
ge.com
In some areas the power * Preheat the broil element fin" 10 minutes.
(voltage) may be low,
• Broil fin" tile longest period of time recolllllieuded ill
tile Broiling Guide.
Set convection
bakingtemperature
automaticallyreduces
by25°F(14°C)
Oven temperature Oven thermostat • See tile Adjust the oven thermostat - Do it yourself!
too hot or too cold needs adjustment, section.
Oven dooris crooked The door is out of position. • Because the oven door is removable, it soinetiines
Storage drawer Rear drawer support is • Reposition the drawer. See the Storage Drawer
is crooked on top of the guide rail. Removalinstructions in tile Care and cleaning of your
Storage drawer Power cord may be • Reposifiou tile drawer and power cord. See tile
won't close obstructing drawer Storage Drawer Removal instructions in the Care and
The Auto Recipe '' Conversion
feature is on to automatically
reduce the set regular baking
temperature by the
recommended 25°F (14 °C)
for convection bMdng.
in the lower back cleaning of your range sectilm.
of the range.
Rear drawer support is
on top of the guide rail.
• See Auto Recipe ''¢ Conversion in the Special Features
section tor ulore inloru/ation.
gets out of position during installation. Remove and
replace the oven door. See the Lift-Off Oven Door
section.
range section.
• Reposition the drawer. See tile Storage Drawer
Removalinstmctions in the Care and cleaning of
your range section.
35
Page 36

Beforeyoucall for service...
Troubleshooting tips
Possible Causes What To Do
Clockand timerdo Plug on range is slot completely * Make sure electrical l)lug, is l)htgged,, into a live, properly
not work i_serted ha the electrical outlet, grounded outlet.
A fuse ha your home * 14eplace tile fl/se or reset tile circuit bl'eakel:
may be blown or the
circuit breaker tripped.
Oven controls improperly set. * See the Using the clock and timer section.
Oven will notself-clean Surface burner is on. * Turn all surtilce 1)twne_ off.
The oven temperature is * _Mh)w the range to cool and reset the controls.
too high to set a self-clema
operation.
Oven controls improperly set. * See the Using the self-cleaning oven section.
The probe is plugged into • I_eusove the probe from the oven.
the outlet in the oven.
"Crackling" or This is the sound of the * This is normal.
"popping" sound metal heating and cooling
during both the cooking and
clemfing functions.
Excessive smoking Excessive soil. * T(>t/( h tile CLEAR/OFFpad. Open the windows t(>
during a clean cycle rid the room of smoke. Wait tmtil the LOCKEDlight
goes off. \,Vipe ttI) the excess soil and reset the
clean cycle.
Oven door will not Oven too hot. * Allow the ovels to cool below locking rein _erattu'e
open after a clean cycle
Ovennot clean after a Oven controls slot properly set. * See the Using the self-cleaning oven section.
clean cycle
"LOCKED"flashes The self-cleml cycle has been * Close the oven door.
Oven was heavily soiled. * (]le;llS tip heavy spillovers befol'e starting the clean
cycle. Heavily soiled (wens may need to sell:clean
again or fin" a lon,_er_ period of time.
in the display selected hut the door is not
closed.
"LOCKED"light is The oven door is locked * Tot/ch the CLEAR/OFFpad. Alh)w the oven to cool.
on when you want because the temperature
to cook inside the oven has not
dropped below the
locking temperature.
"F---andanumber You have a fmzction error code. *TotlchtheCLEAR/OFFpad. Ptlt the oven l)ack into
orlefter" flash operation.
in the display If the function code repeats. * Disconnect all power to the range, fin" at least 30
seconds and then reconnect power. If the flusction
error code repeats, call fi)r service.
36
Page 37

Possible Causes What ToDo
ge.com
Control signals after You forgot to enter a
entering cooking time bake temperature or
• Touch the BAKE pad and desired temperature or
the SELFCLEANLO/STD pad and desired clean time.
or start time cleaning time.
Display goes blank A fuse in your home may be • Replace tile fl/se or reset tile circuit breaker:
blown or the circuit
breaker tripped.
The clock is in the • See the Special features of your oven control section.
black-out mode,
Display flashes Power failure. • Reset tile clock.
Unable to get the Oven control pads were • The BROIL HI/LO and BAKE pads uiust be touched at
displayto show "SF" not touched properly, tile same time and held for 5 seconds.
"Probe" appears in This is reminding you to • Enter a probe temperattu'e.
the display enter a probe temperature
after plugging in the probe.
Power outage, Power outage or surge. • Reset the clock./f tile oven was in use, )'ott must
clock flashes reset it 193' totwhiug the CLEAR/OFFpad, setting the
clock and resetting any cooking fiu]ctiou.
Steam from the vent When using the convection • This is uormal.
feature, it is normal to see
steam coming out of the oven
vent. As the number of racks
or amount of food being
cooked increases, the amount
of visible steam will increase.
"Burning" or "oily" This is normal in a new oven • To speed the process, set a sel6clean cycle for a
odor emitting from and will disappear in time. minimum of ._hotu's, See tile Usingthe self-cleaning
the vent oven section.
Strongodor An odor from the insulation • This is teI/ll)or;irv.
around the inside of the oven
is normal for the first few times
the oven is used,
Fannoise A cooling fan or a convection • This is normal. Tile cooling tan will turn off and on
fan (depending on the to cool internal parts. /t may run after tile oven is
function you are using) ]nay ttu'ued OFF. Tile c(>uvectiou tan will cycle (>u and (>ft.
automatically turn on mad off. tmtil the fimctiou is over or the door is opened.
Oven racks are difficult The gray porcelah_-coated • Apply a small amotu]t of vegetable oil to a paper
to slide racks were improperly cleaned, towel and wipe the edges of the oven racks with the
paper towel. Do not spray with Pare "_or other
ltdgricaut sprays.,
LOCshowsin the The Range Lock-Out feature • Be sure the surthce burner controls are turned OFE
display is activated. Ttu'u this feattu'e off to use tile ran _e See the Range
Lock-Out section.
37
Page 38

m
Notes.
m
m
m
x:
m
I
r _
38
Page 39

GE Service Protection Plus rM
GE, a name recognized worldwide for quality and dependability, oflers you
Service Protection Plus'_'--comprehensive protection on all your appliances--
No Matter What Brand!
Benefits Include:
• Backed by GE
• All brands covered
• Unlimited service calls
• All parts and labor costs included
• No out-of-pocket expenses
• No hidden deductibles
• One 800 number to call
You will be completel) satisfied with our serxice protection or you ma) request )our inoney back
on the remaining _alue of )'ore _contract. No questions asked. It's that simple.
Protect yore" refl'igerato_; dishwasher; washer and chTe_; range, TV, VCR and much more--any brmad!
Plus there's no extra charge for emergency service and low monthly financing is available. Even icemaker
coverage and tood spoilage protection is otti_red. You can rest easy, knowing that all vom" valuable
household products are protected against expensive repairs.
"*-M1brands (_)ve_e(/, up m 2(} )'_m_ _dd, in Ihe c_mtin_ ntal [.S.
We71CoverAny Appliance.
Anywhere. Anytime.*
cry_ Cm h_r_
Please place in envelope and mail to:
General Electric Company
Warranty Registration Department
P.O. Box 32150
Louisville, KY 40232-2150
39
Page 40

Consumer Product Ownership Registration
Dear Customer:
Thank you for purchasing o/lr product and thank you for placing your confidence in us.
_A;eare proud to haxe you as a customer!
Follow these three steps to protect your new appliance investment:
lomplete and mail
Registration today;
Ilave the peace of
mind of knowing we
Call COlltaCt yOll ill
the unlikel_ ewnt of a
satbtv modification.
After mailing the
istration below,
this docunlent
n a sail.* place. It
contains infin-mation
vou will need should
you require service.
Our service numl)er is
800.(;E.CARES
(800.432.2737).
Model Number Serial Number
I I I I I
Important: If you did not get a registration card with your
product, detach and return the form below to
ensure that your product is registered, or register
online at ge.com.
Consumer Product Ownership Registration
t will h_lp you
operall2 }'Ollr lle_v
apl)liance prop_ rly.
, I
,_,_ Cut here
Model Number Serial Number
Mr. his. Mrs. Miss
Fil"st I ] Last I
Nam_ I I I I I I I I I Nam_ I I I I I I I I I I I I
St l'e(:t ]
A&h-ess I I I I I I I I I I I I I I I I I I I I I I I I
ApL # ]
Dai_.Phi:( d
hi Use
Month
®
Cy]
I I I I I I I ] E-mail Address'
I I I I I I I I I I
* Please provide your e-mail addrc',s to receive, _ia e-mail, discounts, special air l:, and other important
commtmications fl-om GE Appliances (G1L\).
GE Consumer & Industrial
Appliances
General Electric Company
Louisville, K¥/40225
ge.com
Check here ifvou do not want to receive conlmunicaIions from (;EA's cal*_fldly selected partnel'_.
FAII.LRE TO COMPI.ETE AND Pd_T[RN Tt tlS CMd) DOES NOT DIMINISt t Y()I JR
_,\7\RI_ \N'I'Y RIGt tTS.
For more inf))rmation about G15\'s privacy and data usage l)oli(3; go to ge.com and (;lick on
"Privacy Poli(y" or (all 800.62(;.2224.
] ] ] Slat(, I ] I (;o(l(, ] ] ] ]
Phone
_..l/,.I I I II I I II I I ,
Zip ]
I
I
I
I
40
Page 41

Please place in envelope and mail to:
Veuillez mettre dans une enveloppe et envoyez _ :
OWNERSHIPREGiSTRATiON
PoO.BOXt780
MIS$1$$AUGA,ONTARIO
L4Y4G1
IJ:ORCANADIANCONSUMERSONLY)
41
Page 42

For Canadian
Customers
Pour "_es
Consommateurs
Canadiens
P;easeregisteryour product to enab;eusto cor#3ctyou
intheremoteeventa safety noticeisissuedforthis product
z
andto a;;owfor efficientcommunication underthe terms
ofyour warrarr_, shou;d 0:_eneed arise.
H
REG;STERON-LINE: _.geapp_iancesoca MAILTO:
ENREGSTREMENTSUR;NTERNETA:www.:e;ecttemenaggN_oca POSTERA:
z
Oc:
Oc:
z
<
LU
J
(D
Z
P
(D
MR./M [3 MRS./MME._FiRSTNAME/PRENOM _LASTNAME/NOM
O MiSS/MLLE.C! MS. i i
STREETNO/N°RUE _STREETNAME/RUE [AFE.NO/APR/RP#
G"TY/\_LLE _ _POSTALCODE/ POSTAL
AREACODE/ IND.REG._TELEPHONE _E@IA_L
• 1- ....... m- ....
DIDYOUPURCHASEA SER_,ICECON_Cr PORJEtlSAPPk_AN_? YES/OUi [21 iFYES/ SiOUi:_PiP&50N
AVEZ=VOUSACHETEUNCONTRATDESERVICEPOURC_APRAREiL? NO/NONEl
• YiA M
1 J
I I
I I
1 [PRO_INCE __..... z__
I I
_L
NAMEOFSELIJNGDEALER/NOMDUMARCHAND
INSTAU_TIONDATF/DATE[TINS[ALLATION[ CORRESPONDENCE1:3ENGLISH
Y,A M DiJ I
E]i do notwish to receiveanypromotionaio_rs regardingthisproducb
E] Jened6sirepasrecevoird'offrespromotionneiiesconcernantceprcduit_
CORRESPONDANCErq Fp_j_AiS SERiAL/SERiE
I
Veui;;ezenregist_ervo_eprodu_afindenouspermet_ede
communiqueravecvouss[jamaisunavisdes6cur_concemant
ceproduit_it dm[setdecommuniquerfaci_ementavecvousen
vertudevolregarantie,si;ebesoindenfa_serd_:
P.O.BOX1780,M;SS;SSAEJGA
ONTAR;O,L4Y481
I I
L J-
MODEL/MODELE
I
1
42
Page 43

Accessories.
Looking For Something More?
Youcan find these accessories and many more at ge.com or call 800.626.2002(during
normal business hours). Have your model number ready.
Grates
OvenRacks
Light Bulbs
Surface Burner Heads & Caps
Broiler Pan
Knobs
43
Page 44

GEDual FuelRange Warranty.
All warranty service provided by our Factory Service Centers,
or an authorized Customer Care®technician. Toschedule service,
on-line, 24 hours a day, vis# us at ge.com, or call 800.GE.CARES
(800.432.2737).Please have serial number and model number availa-
ble when calling for service.
GE Will Replace:
Anypattof the range which fifils due to a (lefect in materials or workmanship, During this
Fromthe dateof the
originalpurchase
lim#ed one-year warranty, GE will also provide, free of charge, all labor and in-home service to
replace the defecti\'e part,
!!!!!!!!!!!!!!!!!!!!!!!!!!!!!!!!!!!!!!!!!!!!!!!!!!!!!!!!!!!!!!!!!!!!!!!!!!!!!!!!!!!!!!!!!!!!!!!!!!!!!!!!!!!!!....
Service trips to your home to teach you how to use
the product.
Improper installation, delivery or maJntenm_ce.
Failure of the product if it is abused, misused,
or used for other thml the intended purpose or
used commerciaJly.
Replacement of house fuses or resetting of circuit
breakers.
Staple your receipt here.
Proofof the original purchase
date is needed to obtain service
under the warrant}_
Dmnage to the product caused by accident, fire, floods
or acts of God.
Incidental or consequentiaJ damage caused by possible
defects with this applimace.
Damage caused after delivery.
Product not accessible to provide required service.
EXCLUSIONOFIMPLIED WARRANTIES--Your sole and exclusive remedy is product repa# as provided in this Limited ]
Warranty.Any implied warrauties, including the implied warrauties of merchautability or fituessfor aparticular purpose,
are limited to one year or the shortestperiod allowed by law.
This warranty is extended to the original purchaser and any succeeding owner for products purchased for
home use within the USA. ff the product is located in an area where service by a GEAuthorized Servicer is not
available, you may be responsible for a trip charge or you may be required to bring the product to anAuthorized GE
Service location for service. In Alaska, the warranty excludes the cost of shipping or service calls to your home.
Some states do not allow the exclusion or limitation of incidental or consequential damages. This warranty
gives you specific legal rights, and you may also have other rights which vary from state to state. To know
what your legal rights are, consult your local or state consumer affairs office or your state's Attorney General.
Warrantor:General Electric Company.Louisville,KY 40225
I
I
44
Page 45

GEDuel FuelRange Warranty.(Forc.stomersinCanada)
Aft warranty service provided by our Factory Service Centres
or an authorized Customer Care®technician. For service,
carl 1.800.561.3344.Please have serial number and model number
available when calling for service.
Mabe Will Replace:
One Year
From the date of the
originalpurchase
Service trips to your home to teach you how to use
the product.
Improper installation, delivery or maJntenauce.
Failure of the product if it is abused, misused, or
used for other thm_ the intended purpose or used
commercially.
Replacement of house fuses or resetting of circuit
breakers.
Anypartot the range which tifils due to a deii_ct in materials or workmanshii. ) During, this
limited one-year warranty, Mabe will also provide, free ofcharge,all labor and in-home
serxk-e to replace the defectixe part.
Staple your receipt here.
Proof of the original
purchase date is needed to
obtain service under the
warrant_
Dmnage to the product caused by accident, fire, floods
or acts of God.
h_ddentaJ or consequential dmnage caused by possible
defects with this appliance.
Dmnage caused after delivery.
Product not accessible to provide required service.
Warranty. Any implied warrauties, iucludiug the implied warranties ofmerchantahilily or fitness fora particular purpose,
EXCLUSIONOFIMPLIED WARRANTIES--Your sole aud exclusive remedy is productrepa# as provided hi this Limited
are limited to oueyear or theshortest period allowed by law.
I _A.ARRANTOR IS NOT RESPONSIBLE FOR CONSE(_UENTIAI, DAMAGES. I
I 'Warrantor: MABE CANADA IN(:. I
45
Page 46

m
Notes.
m
__
m
m
m
I
4C
Page 47

Im'trudions de sdeuritd .48-:)a
Mode d'emp!oi
Amo-Ilett(uage ............ 71, 72
gatterie de cuisii_e ............ 55
grfllems de smfbce ....... 54, 55
CoIlvexio I1 ................ 64-68
Cuisiner et r6tir
avecla minuterie ............. 62
Cuisiner ou r6tir . ............. 57
Fermentation ................ 69
Fonction du Sabbath ....... 76, 77
F(mcti(ms sp(_ciales ......... 73-75
Four . .................... 56-77
Griller, guide ]pom griller . ..... 59
Horlog_ et mim_terie ......... 60
R_chauif>r . .................. 69
SO I1de ...................... ,(}c_o
Thermostat .................. 70
Verr(millage de la cuisi_li6re .... 60
Entreti_t et nettoyage
Ampoules .................... SO
Assemblage dr/br01em . ....... 78
goutoils .................... 79
Grilles ...................... 79
Pam_eat_ de contr61e .......... 82
Plancher de Rmr . ............ 82
Porte ....................... S]
Porte du Rmr retirable ........ S[
Ruban d'emballage ............ 78
Smfi_ce de cuisson ............ 79
Smfbces d'acier iiloxvdable .... 82
Smf;_ces peintes .............. 8t
Tiroir de ra_lgemem .......... 82
Conseils de d@annage .... 83-86
Accessoires . ................... 87
Souden & la dic_ltOle
(_aI amie .................... 89
Somie_l 5 la (liem&le .......... 90
Ecrivez ici los numeros de
modele et de serie :
N ° de modeie
N ° de s&ie
Ces H uH_e_l"os se [l'ollveH[ s{11"
]'(_ti(p_ette derriere ]a porte
d'olwertm'e du Ih)m" d;ms ]e
coim_ im_{itriem" gal_che dl_
chfissis de clfisim_ibre.
rggg_
_&YO
47
Page 48

f F
INFORMATIONDESECURffE/MPORTANT£
USEZTOUTE$LE$INSTRUCTIONSAVANT£'UTIUSATION
t
B
DISPOSITIFANTIBASCULEMENT
TOUTE$£ESCUI$/N/tRESPEUVENT
BA$CULER
DESBLE$$URESPOURRAIENTENRESULTER
INSTALLEZ£E$O/$PO$ITIF$
ANTIBASCULEMENTEMBALLES
AVECLACUI$/NIERE
REPORTEZ-VOUSAUXINSTRUCTION$
O'INSTAL£ATION
AAVERTI$$EMENT :siVi,_fo,-ma.on_o_,to,_,_
darts ces instructions n%st pas suivie exactement, il pom°rait
y avoir un incendie ou une explosion causant des dommages
la propri(_t_, des blessures personneHes ou la mort°
-- Ne rangez pas et n'utilisez pas d'essence ou d'autres vapem°s
et liquides inflammables pros de ce¢ appareil 41ectrom4nager
ou autre.
= CEOU'/LFAUTFAIRE$1VOU$OETECTEZ
UNEOOEUROEGAZ
iii}ii%
N'essayez pas d'allumer un quelconque appareil
41ectrom&nager.
iii}ii%
Ne touchez aucun commutateur 41ectrique; n'utilisez pas
le t414phone de votre b_timent.
iii}ii%
Appelez imm4diatement votre fournisseur de gaz du
t_14phone d'un voisim Suivez les instructions du
fournisseur de gaz.
Si vous ne pouvez pas rejoindre votre fournisseur de gaz,
appelez le service d'incendie.
-- L'installation et Fentretien doivent &tre effectu4s par un
instaHateur qualifi_, une agence de service ou le fournisseur
de gaz.
48
Page 49

w_,electromenagersge.ca
Pour votre s_curit_, vous devez suivre /'information contenue dans ce manuel pour rbduire /es
risques d?ncendie et d'explosion, de choc blectrique ou pour bviter tout dommage matbrie/, des
blessures ou /a mort.
DISPOSITIFANTIBASCULEMENT
Toutes les cuisinieres peuvent bascu/er et causer des b/assures,
Pour _viter tout bascu/ement accidentel de/a cuisinibre, fixez4a au tour ou au plancher en insta/lant
le dispositif antibascu/ement foumL
Si /e disposifif foumi avec /a cuisini&e ne convient pas pour cette application, utHisezle dispositif
ant,_bascu/ementuniverse/WB2X7909.
iiiiiiiiiiiiHiiiiiiiii
Pour v_rifier si /e dispositif est hTstaflbet engag6 correctement, retirez le tiroir de rangement et
inspectez /epied de niveflement arribre. Assurezwous qu'il soit bien instaflb dans la fente.
Si _ms iediez la ctdsini#Ie dt_ muI pouI quelque mis<m que ce soit, assuiez-_ms que
le disposifif soit engag_ co_[ectemeI_t loFsque _ms la ieplacez au muI- S'il I_e Fest pas, il
pouI[ait y ax_ii tm iisque que la cuisini&e bascule et elle pouHait alois _t,s blessei ou
blesse_ m_ e_f;tl_t qui est assis, debout or, apptw_ suI tree poite omwite.
Vet il]ez xous iepoitei a 1 i _fbH_ _tkm st _ le disposidf antibasculeme_t da_s ce ma_mel.
Si_o_, la (uisi_i&e pou_nait bascule_ et ca_se_ des bless_es.
AVISDESE-CUR/TE-IMPORTANT
La /oi de/a Ca/ifomie "SafeDrin/dng Water and ToxicEnforcement" ex_geque /e Gouvemeur de
/a Ca/ifomie pub/ie une /iste des substances qui, de/'avis de/'Etat, peuvent causer des anomalies
cong_nMles ou autres pmb/bmes de reproduction et ex_geaussi des entreprises qu'el/es avisent /es
clients des dangers associbs _ /'exposition possible _ de relies substances.
Les apparei/s au gaz peuvent causer une exposition mineure _ quatre de ces substances, soit
le benzbne, /e monoxyde de carbon</e formaldbhyde et la suie, rbsu/tant principalement d'une
combustion incomp/bte des carburants de PL ou du gaz nature/. Des brOleurs ajust_s correctement
(une f/amme b/eue plut_t que jaune) r_duiront la combustion incomplbte. L'exposition _ ces
substances peut _tre r_duite par une a_ration grace _ une fen_tre ouverte ou par/'ufi/isation
d'un venti/ateur ou d'une hotte.
L'iso/ant de fibre de verre des fours autonettoyants #met une trbs petite quanfit# de monoxyde de
carbone durant le cycle de nettoyage. L'exposition peut #tre r#duite en a#rant grOce _ une fenOtre
ouverte ou par I'utifisafion d'un venti/ateur ou d'une hotte.
49
Page 50

50
I
PIlE-CAUTIONSDESECURITE
Lorsque vous uti/isez un apparei/ 6/ectrique, vous devez toujours suivre des pr6cautions de base,
y compris ce quisuit:
Uti]isez cet apparei] seuiei-p, ent pore
Fusage auque] il est desdn_ sekm ce
manuel du propri&taire.
Assmez-_ms que _me appareil soit bien
install& et mis i:l la terre par un technicie_
qualifi6, confbrm6_ment aux instiucfio_s
d'installation fbm_ies.
A_ant d ef[ectt eI tout service, coupez
le comant fi la cuisink)re darts le tableau
de distribution rc4sidentiel en retirant le
fusible ou en coupant le disionctem-
{{ Demandez 5 1installatem de "<ms momrer
1empla< eme _t du dis'o _ctem ou dr/
fusible. Marquezqe pour a_oir tree
rdfFrence facile.
Ne laissez pas les enisnts seuls--|es enflmts
ne doixwnt pas &tre laiss6s seuls et sans
surveillance darts un endroit oi_ un
appaieil 61ectrom6_nager est utilis6. On ne
doitjamais leur permeme de s'asseoir ou
de se tenir debout sur quelque pattie que
ce soit de l'appareil.
Demandez fi l'installatem de \_ms montrer
l'emplacement du robinet d'mr&t du gaz
de la cuisini&> et commem le f>rmer au
][)eSOiIL
Faites installer x_me cuisini_re et fidtesqa
mettre 5 h terre coHectement par un
installatem qualifi6, conff_rm6_ment aux
instructions d'installation. Tout _!iustemem
et emretien doi_wnt &tre eflbctu6s
seulement par des installatems de
cuisini&res au gaz ou des techniciel_s
de service qualifi6s.
Placez la cuisini_re darts tm endroit fi
l'6cart de la circulation darts la cuisine
et fl l'6cart des comants d'air pour 6viter
d'm_ir une mauvaise ci_vulation (Fair
Assmez-_ms que tout le mat6riel
d'emballag_ soit retir6 de la cuisinic)re
avant de l'utiliser pour &'iter tout incendie
ou dommage caus6 par la fum6e si le
mat6riel d'emballage s'enflamme.
Ne laissez pas les enfimts seuls ou sans
supervision lorsqu'une cuisini_.re est
chaude ou allum_e. Ils pomraient
&tre gravemem brflk_s.
N'essayez pas de r6parer ou de remplacer
m_e quelconque pi&ce de _me cuisini&e
5 moins que cela ne soit recommand6_
spc4cifiquement darts ce manuel. Tout
autre entreden dolt &.tre eff>ctu6 par
un technicien qualifi#.
Assmez-_ms que _me cuisini_.re soit
_-_ust6e coHectement par un technicien
de service qualifi6 ou par un installatem
pour le gpe de gaz (ham-tel ou PL) utilis6_
Votre cuisini&re peut {_tre comwrtie pore
l'un ou l'atm> type de gaz. Reportez-_ms
aux instructions d'installation embalk?es
a\wc la cuisini&i>.
granchez _me cuisini&e seulement
darts une prise murale de 120 _dts avec
raise i:_la terre. Ne redrez pas la broche de
raise 5 la terre ronde de la fiche. Si x_ms
l?'&tes pas certain de la raise 5 la terre du
svst&_e 6_lectrique r6sidentiel, \_ms &tes
responsable et darts Fobligafion de fidre
remplacer la prise qui n'est pas raise fila
tene par une prise fi trois broches raise fila
teIl> conform6ment au Code national de
F61ectricit6. N'ufilisez pas de rallonge mwc
cet appareil.
Cesajustements doivent #tre effectu6s
par un technicien de service qua/ifib,
conferm6ment aux instructions du
fabricant et _ tous ies codes et exigences
de i'autorit# responsable. Le non respect
de ces instructions peut mener Ode graves
blessures ou _ des dommages mat6rie/s.
L'agence qua/ifi6e effectuant ce travail
assume la responsabi/it# de la conversbn.
Oardez les filtres de graisse et la hotte
prop_>s pour maintenir une b(mne
ventilation et 6xiter les fbux de graisse.
iiiiiiiiiiii_iii
Enseignez aux enf, mts fine pasjouer axwc
les commandes ou axwc route at/tre pi&ce
de la cuisini&e.
iiiiiiiiiiii_iii
Gardez toujoups les serxiettes, les linges
;_xaisselle, les poiga_6es et autre linge de
maison i'_distance de _otre (uisini&e.
Page 51

" DESECUfllTE
www, e]ectromenagersge.ca
Gardez toqioms les uste,_silesde bois et de
plasfique et lesalimems e_ bo_te_t_distm_cede
votre cmsmmre.
Oardez u:n{iours]es re%teme_ts m maux
combustibles, les fideaux ou les temmes _
distm_cede voue cuisbfi&e.
Ne _ettovez pas la cuisiM_'re avec des ]iquides
AprOs m_e ufilisad<mprokmg_e de ]a odsfidt_re,
le plancher peut deve_dr trOscl)aud et de
_ombreux rev&emems de plancl)er pom)aie_t
_e pas r&ister _:_ce t}l)e d'ud]isath:m. N'h_sta]]ez
jamais de cuish/ib_e sin des car_eaux de _in;]e
ou du ]ino]&m/qui pomrait _/e[)as r&ister'
ace bpe (FufiIisafi<m. Ne ]'h/staIIezjamais
dfiectement sur ]e tapis de cuisine.
} Evitez d'_gmdg,/er ]a sm[i_ce de cuiss<m vitr_e
avec des instruments tnmc])ams ou a\'ec des
Ne laissez personne gfimpeL se tenh debout
ou se suspendre sin ]a porte du fbm, [e fir<fir
de nmgemem ou ]a smt:i:Jcede cuiss<m. Cda
pourmit endommager ]a cuisfifi&re et m&)/e ]a
tiffre bascu]el; provoquai/t de grievesb]essmes.
pourrabntatt_Perbs aqfantsnedoiventfoasOtto
rangesdartsbs an,oiressu-dessusdeb cuisinibm
ousurledosseretfl'unecuisl:qibre_/esenfantsqd
ggmpentsur/aculslnlbrepourattel?dm/esarticles
pourra[ent_tregravementb/esMs.
"'S
t tll_,ez JAMAIS cet appareil pour
rg_chauffbr ou chauHer la pic)ce. Ceci
pom-cait mener _ un empoisom_emem au
mo_oxvde de cad)one et une sin( harder>
de la surfi<e de ( uiss(m ou du [bur
Pour votre s_cmit_, _/'ufilisez jamais voue
appareil _lecuom&/ager [)our r&l)auffer et
cl)auffer la piece.
}[ De ]arges &gradgmues ou d) ocs sin ]es po,les
de verre peuvem casser ou faire &later la ;itre.
} Ne _/etto) ez [)as ]a cuisbd_re pe_Mam qu'e]]e
[}mctkm _/e.
Ne portezjamais de v6teme_/ts amp]es ou
tombm/ts ]o_sque vous ufi]isez l'appareiL
Atte_/don e_/vous _tfi_mt pour atteindre ]es
arddes nmg& darts ]es am/ohes au-dessus
de ]a cuisiMbre. Un dssu iMlammaNe pourrak
s'e//flammer au comact des flammes ou des
suffi_ces c])audes du four et pourmit p_ovoque_
Ne i;mgez [)as de mat&iaux i_/fiammab]es dm/s
]e [bin; ]e droir de m_/gemem de ]a cuisimbre
ou prbs d'm/e smtace de cuiss<m.
Ne ivmgez [)as e__/'ud]isez pas de mat&iaux
combustibles, d'esse_/ce ou d'autres vapems
et ]iquides inflammables prbs de cet apparei]
5]ectrom&/ager _/id'aucm/autre.
Ne laissez pas ]a g_vdssede cuiss<m ou autres
matib_es h/flammables s'accumu]er sm ou prbs
de ]a cuisiMbre.
N'ud]isez [)as d'eau sin ]es feux de gmisse.
Ne saisissezjamais role casserole e_/flamme.
Eteignez les commmMes. Eteig_/ez un feu sm
m/br0]em e_/sm_i_ce en couvnmt emibreme_/t
]a casserole avec un couve_de bier/_[iust_, role
plaque a biscuit ou m/plateau plat. Ud]isez m_
exd_/cteur d%ce_Mie a mousse ou role poudre
chimiq ue tom usage.
I;_ gmisse el/fiammes _ Fext_Jem d'une
casserole s'&eint en [a couvmm de bicarb¢mate
de sodium, ou, si possible en uti]isam un
exd_/ctem d'ince_/die _ mousse ou fi poudre
d)imique tout usage.
Les flammes darts ]e fi)m peuvem &re
&eintes emibrement e_/ fem/a_/t ]a porte du
fbm et e_/fern/ant la commas/de ou el/ udlisant
m/exti_/ctem" d'h/ce_/die _ mousse ou fi poudre
chimique tout usage.
Iaissez ]es grilles de b_0[eur et autres smfi_ces
_efvoidir avant de ]es touc])e_ ou de ]es ]aisse_ _:_
m/e_Mroit o_'_]es e_ffimts peru e_/t ]es attehMre.
Ne Noquezjamais les &eros (ouvermres d'air)
de la cuisiM&e. Ils ofhent role e_m_e et une
sorde d'ah _/&essahes pour que la cuishdbre
fimcdom/e correctement avec [a bom/e
combustkm. Les ouvelmres d'air se trouvei/t
a Farfibre de la sin-face de cuisson, davisle
1)aut et le [)as de la po_le du fbm et au bas
de la cuisim&e sous [e firoir de nmgement
ou ]e pam/eau coup de pied.
Ne soulevez [)as la sm-fitce de cuiss(m. Soulever
]a sm fi_ce de cuiss<m peut e_Mommage_ ]a
cuisinibre ou causer m/mam'ais
fi:mcfiom/eme_/t.
51
Page 52

l
BROLEURSDESURFACE
Utilisezla bonnetail& de casserole--&itez lescasserolesinstablesou quibasculentfacilement.Choisissez
unebattefiede cuisine_ fond plat assezlargepour couvrirlesgrii/esdu brOleurPour&iter lesd&ersements,
assurez-vousque/a casserolesoit assezgrandepour bien contenirlesailments.Ceciferagagnerdu temps
denettoyageet &itera les accumulationsdangereusesd'a/imentspuisqueles _c/aboussuresimportantes
oulesfl&ersements iaiss_ssurla cuisini&e peuvents'enflammerUtilisezdes casserolesauxpoign_es
faciles_ saisirqui restentfra_ches.
52
[Jd]isez to@_urs la position] UTEen allumam
les b_gdeurs supehieurs et assuFez-xousq,le les
brOlems soient allure&.
Ne laissezjamais les b, fileurs de stufi,ce sans
st_pervision 5 des r_glages de temp_ratm'e _lev_Xe.
[_s de_bordements par bouillom]ement pem'en t
provoquer de la fum_e et les d_versements
graisseux peuvem s'enflammec
Aiustez la mille de la flamme du brfileur sup&iem
pour qtfe]le ne d@asse pas le bord de la
casserole. {_Jneflamme excessive est dangereuse.
Udlisez seu]ement des poigr_e_esde cuish]e
s_ches les poig*3_eshum]des sin"les sm'fi_ces
chaudes pemeat provoqt_er des br(ilures de
_q)eur. Ne laissez pas les po]grl_es de cuisine pros
de flammes hues ]orsque _ous soulexez la
casserole. N'utilisez pas de setMetm t]i at_t_>
chiflol] ou tissu @ais pour remplacer role poign_e
de cuisine.
[x)rsque xo/_s utiJisez une casserole de xerre,
assmezoxous q_felle soit concue pore le desslls de
llt cuisinibre.
Pore" r_duire la possibilite2de brCduces,
l'inflammadon de mat_rim_x i_]flammables
et les d&ersements, tournez les poign_es des
casseroles vers le cdt_ ou vers l'arri&v de la
cuisini&'e sal> ivco_vrir les brfileurs a({iacems.
Surveillez attentivement les aliments flits ?tun
n:glage de flammes _lev_es.
F_dtes totljotlt's c!'!atxfI_'F la graisse lenmmeat et
surveilleMa mndis qu'elle chauflc.
Sivous udlisez ensemble des lmiles ou des graisses
pour la flitu_v, brasseMes a_mt de rg'chaufIc'rou
mndis que les graisses fsndent lemement.
Udlisez un d_ermombtre k fritm> si possible pour
&iter toute s_rcha_ff> de graisse a_<lela d_ point
{iiii_ii
Ne fidtes pi_,fonctionner le blfilem sans qt_e
routes les pi6ces du blfileur soiem en place.
{iiii_ii
Utilisez le moins possible de graisse pour
une fi'iture eflic_mepeu profi>nde ou 5 grande
fi'iture. Trop remplir la casserole de graisse peut
pro_quer des d&ersements lots de l'_0out
d'aliments.
Ne fidtes iamais flamber d'aliments sur la smfhce
de cuisson. Si xous fhites flamber des aliments sous
llthotte, mettez en marche le xemilatem:
N'utilisez pas de wok sin"la surfhce de cuisson
si le wok a un am]ea_ fond de m&al plac_ sur
la grille du brfileur pore supporter le wok. ('_et
acmeatl ag-hcomme pi6ge 5 c]mleur ce qui
potm'ait endomm_ger la grille et llt t&e du
brOletm Cela pourrait aussi pro_quer tm mamais
fbt]ctiom?ement du brOleut: Cela pourrait at_ss]
cre_er{11)niveatl de monoxyde de carb(me a_-
dessus des normes permises acmellemen_,
menant done 5 un danger pour la sam_.
Les Nimems ?_fl'ire doivent _ttv aussi sees que
possible. 1_ gJ_re s_u"les alimec_tssurgele_sou
l'h umidit_ s*_rles aliments fl'ais peuvem cr_'er des
btflles de graisse qui pem;ent monter sur les cgt&
des casseroles.
N'essa}ez iamais de d@lacer une casserole
de graisse charade, tout pardctfli6rement tree
fiJteuse. Atmndez que la graisse _>fioidisse.
Ne laissez pas d'ardcles de plasdque sur la slufitce
de cuissot]-- ilspeuvem fbndre s'ils sont trop prbs
de l'&'ent,
Gardez to,_s les plastiques loin des br01eurs de
stlrfitce.
Pore" &'iter la possibilit_ d'tme brCdure, soyez
tot!}Otl]3 certain qtle les commandes de tOilS
les brfileurs sore en position OFFNRRET)etque
routes les grilles sont refloidies avant d'essa}er
de les redret:
Sila cuisini6_v se trom:e prbs d'une fb.n&re, ne
suspeudez pas de longs ridem_x qui pourraient
toucher les br(ileurs de surfhces et cr<Xerun
danger d'incendie.
Sivous de_tectezune odeur de gaz, coupez le gaz
5 lltcuisinibre et appelez ui] mclmicien qualifi_.
N'utilisez.iamais une flamme hue pour trouver
m]e fhite.
surfitce a_ant de retirer ]es ci_ssero]es.
Ne laissez at_cun ardcle sin la stufitce de ctfisson.
L'air chat_d de l'&em pomTait e_]flammer les
articles inflammables et augmentera la p_'ession
darts des contenams ferm& ce qui pourrait les
f_ire _clater.
Pour ammler le verrouil]age de la cuisini&'e,
asstl['ez-votlsque les contrdles de la s;.urfhcede
cuisson soient en positiot] OFFNRREF}.('_ela
emp&chera tree circu]adon de gaz quand vous
mem'ez en marche la cuisini&'e.
Page 53

www, electromenagersge.ca
FAITESBIENCUIREIA VIANOEETIA VOLAIIIE.,
Faithsbbncul?e/avbndeet/avo/g/b--b vbn&do/tavol?unetemperatureINTERNEde7I°C(IGO°F),et/avolailbunetemperature
INTERNEde82°C(I80° F,tPr@arerb nournture_cest_mp_raturesprotggenormabmentcontTebsmabdiesa/l?nental?es.
t
B
FOUfl
Lorsquevousouvrezlaporte dufour,restez_ 1"6cartdeta cuisini&e.Defair chaudoude ta vapeurs'_chappant
peutprovoquerdes brEfluresaux mains,auvisageegouaux yeux:
Ne chaufiez pas ]es comenams d'alimems Ne laissez pas de produits e_ papie_, uste_si]es
de cuiss<m ou aliments da_s ]e fbur ]oisqu'i]
(;ardez l'£'ve]l-J[dll J[OllYexempt de route
obstmctio/L
) Ga_dez ]e fbm ]ibre de route accumulad<m
de graisse.
P]acez ]a giJHe du fbm'5 la positkm voulue
}[ E/_ udlisam les sacs de cuisso/_ ou de r6dssage
dales le f0m; suh'ez los dhecdves du fi_bficam.
So, dr la giillejusqu'au ve_rou de butte est
(Ill fbm:
[[ N'udlisez pas le fbur pour s_cher lesjoumaux.
S k surchaufiem, ils peuvem s'enflamme,:
[ N'udlisez pas le fbur comme espace de
ml_gemem. Les ardcles _m_g&dales m_ four
AVERTI$SEMENT:
couwez dAMAtSaucm_e fe_te, trou ou
passage dales le has (Ill fbm et/_e _ecouvrez
[)as complbteme_t la giille d'un mat&Jau
comme ]e papie_ a]umh_ium. Ceci b]oquemit
]e d_bit d'air darts ]e four et pom-_ait causer
m_empois(mnement all monox}de de
caigone. I_esdoub] ures de papier ah/mini um
pommie_t aussi empdsom_er la cha]em;
men,ant fiun danger d'ince_die.
N' udlisez pas de papier a]umildum pour couwl r
]e fired (Ill fore: Ul_emam'aise h_staHadcmde
[[ _smez-vous que m_e lbcheflJte sok
cor_ectement e/_ place pour r&luhe la
possibilit_ d'i/_ce/_dies de gndsse.
Si vous avez m_ fell de graisse dales m_e
]bchefiite, appuyez smIa touche C£EAR!'OFF
(a_t_btiofi/arr_t) et gardez ]a porte du four
fem__e pour co/_to/dr l'i/_ce/_diej usqu?_ ce
qu'i] s'&eigl_e.
FOURAUTONETTOYANT
N'uti/isezpasdenettoyantdetour I/nefautjamaisuti/iserdenettoyantdefourcommercialniderevgtementprotecteurde
fioubturedefourdequetquetypequecesoitautourfi'unequefconquesectionflufourLesr_sidusdenettoyantsdefour
enrlommageront/'int_rieurdufour!orsd'uncyclefi'autonettoyage,
Ne netto)ez pas le.ioint de porte. I.c.ioim de
porte est essemiel au maimien de l'&anch_it&
11ne f_mt[)as fi'otm,; ni endommagc,; ni d@lacer
le ioint.
:: A_am l'aut(metto)age, _e__ez les g_Jlles (Illfbm
bfiHames de coulem argem6e (sin ce_mh_s
modbles) et tous los ustensiles.
\ous pouvez nettoyer dans le fbur potsdam le c}cle
d'auto hello}age les grilles de fbur recouvertcs de
porcelai_e gTJse(sin cert;fi_>modules).
Asstlrez-VOtlSd'e_,_uyertout d&vrsemem excessif
;/_mt de lancer l'autonetto) ag_.
S'il y a d<!f_d!lanceen mode d'autonetuvag>,
_teig?_ezle Ibm et coupez le courant. Faimsde
r@arcr par un technicien quNifi&
NettoSez seulemem les pi&cesindiqu_es dans ce
man uel du propri&_d re.
LISEZATTENTIVEMENTETCOIVFORMEZ-VOUSACESIfVFORMATIONSDESECURIT L.
gONSERVEZgE$INSTRUgTION$
Page 54

Uti#sationdesbt#]eum de surface au gaz.
Dans ce manuel, les foncfions et I'apparence pourraient diffbrer de votre modble.
//
!i _iil_}(_i!_!_!_!_/!_/iii_
Enfoncez le bouton fie contr6le et
tournez-fe _la position _ LITE_.
Moyer, Pe[n
l
Grand Extra gzano
OFF
Avant d'aHumer un fltgdeur au gaz
Assm'ez-vous que toutes les grilles
de la cuisim_i&re soient em_ place _r_ _t
d utiliser m_ b_Olem:
Assm'ez-vol_s de d&b_;_m_cher 1e
Apr6s aveir aHume un flrgdeur
au gaz
Ne {bites par fkmcdon m_erle brCdeur
hmgtem, })s......sans casserole sin" ]a ,gri]]e-
I,e {h_i pom'_;dt s e}cailler sm_s casserole
verrouillage de la cuisim_iL_reawmt
d'alMmer les brCdem's de sm'fi_ce.
; Assm'ez-_ om ql_e ]es brCdem's et les
g_Jlles soient rei}'oidis avm_t d'v mettre
la mah_, m_e poign(% de cuish_e, des
chinims de m_etto}_ge ol_ m_tres
m))a [e_ lJ allx.
Comment a#umer un br_]eur de surface au gaz
EmKimcez le bout(m de commam_de et I xn'squ m_ brC_]em" passe i) LifE, tous les
tom'm_ez-le en p(_siti(m LfTE. b_O]em's (#mettent m_ (hSclic. N'essa}ez pas
VOus entendrez m_ petit d#c/ic--le so_ de autour d'm_ b_O]em" tin,dis qu'm_ mare
l'_ti_celle _lectrique qui allume le br_lem: br_lem" est alhm_. [h_ choc _lectrique
{J_e ibis la fiamme alhm_eSe, to_mez le pom'_dt e_ dt#couler ce q_d yore {erait
bo_ao_ [:x:,_r a]_ster ]a tai]]e de In []amine. pe_ff-_tre rem'erser des casseroles thin,des.
Si ]e 1)o_ffo_ reste i'_ L_TE. i] co_tim_em i)
Br#]eurs a gaz sceHes
I,a sm{i_ce de cl,isso_l de votre cl*isi_libre i)
gaz a (p*atre b_dem's 5 gaz scell&. Ils so_t
pmtiques, g_dles fi nettoyer et flexibles, et
co]wie]ment parfi_iteme]_t i) line g;mm_e
_te_(;b.e d'app]icatio_s de c_.isso_L
I,e b_'£t]el,r ]e ph*s pedt (ariJbre droite) est
lie brO]em" a m{joten Vom pomez tom'_er
ce brOlem" en posit]o_ LO (temp&'ature
basse) po_*r m{]oter yon plats fi trbs basse
tempe_mmre. I] fbm'_it m_e c_*isso_ precise
pore" des aliments d_lic_ts comme ]es
sauces o_1 ]es aliments qui ne_cessitei/t line
tempt_mtm'e basse pei/da_/t line hmg/le
dm'_:e de o_isson.
I,e brCdem" move_ (ar_JL_re gauche) et ]e
gml_d br_dem" (avm_t gmmhe) sont los
br_dems p_i_cipm_x po_r ]a p]upart des
c_*isso_s. Vo_*s pomez chm_ger ]e reSglage
de de_mo]?ter m? b] _l]em" o1_ de _?ettoyer
de ces brO.]em's mll]tiva]ents de H/
(temperature eSleveSe) h tO (tempt#_amre
basse) po_*r romp]it m_e gamme ehend_,e
de besoh_s de o*isson.
l,e ]br_l]em" extra gnmd (:_wmlt droit) est ]e
br_]em" qui fbm'n_it la cha]em" maximm_.
Comme ]es trois m*tres brCdeurs, vous
pomez dimhmer so_ re_glage de HI
(temp_rat_re _]eve_e) £3tO (tempe_ratm'e
basse) pore" m_e gamme (_tel_dHe
d'app]ications de o_isson. Cependa_]t, ce
b_O]em" est co_qu pour fi_h'e bo_i]]ir
mph]!ement de grandes (p_a_titeSs de
]iquide. I] a m_ r_glage s}%cia] POWER
BOIL"(ct#ssen puissante] co_qu po_r ]es
mtensiles de ] 0 po_ces o_ p]m de
diam btre.
Brl)lour extra grand uniquement
54
Comment ehoisir la taifle de ]a flamme
Pourune marfl})u/at/or} sar}s dangerdesc'assero/es, Toute [htmme ph[s L_rge que le ban de
fie/al'ssezjama/s los flan#nes monter/elongdes ]a casserole est perd_e et _e sert (p_ i'_
cOtbs"des casseroles.
Sm';ei]]ez ]a fiamme, _mn pas]e boa,ton,
e_ r_:(;h_isa_t ]a cha]em: l,a tai]]e de la
flamme (]!'m_ br_]em" a_ gaz doit com/e_h"
;m t}l)e de casserole _ti]ise_e.
Page 55

Batterie de cuisine sur /a cuisiniere
A/uminium: m_e]batterie de c_dsh_ede
poids moven est recommm]d_4e car elle
chal_f_e mpideme_t et m_ifbrmeSme_m
[,a plupart des alimem_ts bmm]issem_t
m_ifbm_eSme]_t dm_s m_e po_]e i) [}ire
d'ahm_h_hm_. [ Jtilisez des po_hms i5
collverdes hem/_tiq{_es en cuish?m?t
avec de petites ql_am_tite_sd'emL
Fonte: si elles chalofle]]t le]_teme_]L la
p]lq)art des po_]es i'_{_'ire pr_se]_te]_t des
r_sl_]tats satisfi_isa N_ts.
for _llqai//_ : so_s certa] m_es co_ di tion s,
l'eSma]l de certai_es battexJes de
odsh_e pom'_it {imdre. S_dvez ]es
dll [ilbrica_t de
batte_Je de odsh_e pore" ]es mehhodes
de odsson.
gorro: il ? a desex ty])es de battex:ies
de c_isi_e de verre--celles pore _le Ibm _
&i//e de dessus de cuisiniere
w_vw.e/ectromenegemge.ca
settlement et ce]]es po_tr ]a cuisson s_r ]a
c_isiniiere (po_hms, ca:f7: et the). l,e verre
conduit la chalem" trbs le_teme_t.
C_mmique de verre r_sistaute a/a _a/o_r :
sert i) la c_dsson de sm'fi_ce o_ a_ fbm_
Elle con(hdt la chalem" trbs le_teme_t et
se re{_'oidit tries ]e_]tement. VeS_Jfiez ]es
directives d_ {]_b_Jca_t de ]a batte_Je de
cuish_e po_r _tre certah_ q_'elle p_dsse
&tre _*tilis_e avec les odsh_ibres a_* gaz.
Acierinoxgg_Me : ce m_tal se_d a de
mamaises prop_J_te_s po_r la chalem" et
est _om_aleme_t combi_el avec le c_livre,
]'ahm_h]hm_ ou d'mm'es m_tmlx pore"
amS]iorer la r£partiti<m de cha]em; l,es
po_]es i_ {_Jre {'_com]l)imdson de m_t:mx
fkmcrio]me]?t ]?oll/?a]eme]?t de ma_]ibre
satis{hisa_te s] e]]es so_t uti]iseSes i) [b_
moyen sehm ]es recomma_?dathms dll
fi_ll)_Jca _ t.
Ufifisezun wok D fondplat.
N'_tihsez pas de grilles de dess_s de
cuish_i&re s_*r yes b_gdems a_* gaz sce]kSs.
Si vous uti]isez ]a g_Jl]e de dessus de
odsi_ibre sin" ]e b_Cdem" a_ gaz sce]]5, ce]a
[>ro\o(]llel;_ Ih?e combmtiol_ h_compKete
Uti/isation du wok
Nousmcommandonsd'utiliserunwokde
35,56cm(14po)oumobsDfondplat Assurez-
vousquelefondduwoksoit_platsurlagrille.
ilssontdisponibleschezVotTequbcai/lierlocal
Se_] m_ wok {7/fired plat doit Otre _tilise_.
N'_*tl]isez pas de wok ;'1%rid plat sin" m_
am_ea_ de s_q)port. Placer ]'am_ea_ sin"
le b_Cdem" o_* ]a g_Jlle pom'mlt provoq_,er
tm mamals tb_ctiom_eme_t (hi bll_llelll;
me_?m?t i) des _?]veal*x de molmx_ de de
carbolle all-desstls des i/oll?/es pem?ises.
Cec] pom'_:_it &tre da_gere_*x pore" votre
sa_tet.
Darts/es cas de panne de ceurant
et doric i)om'l:_it mener i'_m_e exposithm
i'_des Mveal*x de mcmox_de de carbo_?e
di_passm_t les _mrmes admissibles
actuelles.
Cec/peut Ottodangemuxpour votresant6,
l_)al_s ]e cas (]'lille [){]lu/e de COIII'_I/t, FOILS
po_*vez alhm_er ]es b_de_,rs de ]a sm'}i_ce
all gaz de votre cllisil_iere avec lille
a]h*mette. Tenez m_e a]hm_ette a]hm_e
pries d_ b_fi]em; puis e+]:limcez et tom'++ez
]e boo,ton de contrg]e i'_]a position] UTE+
Attellfiol? tom partic_,]iiereme_t h_rsq_,e
yore alhm_ez ]es b_O]ems de cette
Ill a I/] e ]'e.
l,es br2dem's de sm'li_ce _ttiliseSs pendant
m_e pmme d'Tlectricit_4 conthmero_t i:_
REMAROUE : Si /a cuisbi_m est verrou#lbe
pendant unepanne decoumnt_vousnepouvezpas
al/umer lesbrOleursdesurface.
55
Page 56

Utilisez los centr61es du four,
(Dans ce manuel,/es fonctions et /'apparence pourraient diff_rer de votre modble.)
i ,
Losfonctionset/'apparencepourraientvarier.
deI'hoflogeetdelaminuterie
Touche DELAYSTART (d_marrage retardC)
{Idlisez axec les tot*ches COOKTIME (temps
decuissoN ou SELFCLEANLO,/STD(a_tonettoga_e
flaS/'Std)po_r r_gler le tbur afin qu'il (t&_awe
et s'arl&m automatiquement fi u_ mome_t
pretalableme_t choisi.
Touche COOKTIME(temps de cuisson)
En{bucez cetm lot/the, ptiis _dlisez les to_,ches
num&iques pour r_Xglerle romps _ouhl pour
pr@arer les aliments. [e fbm7s'et/eindm fi la fin
du temps de od>on.
Touche CLEAR/OFF(annulation/arrOt)
Enfbncez pour anmller TOUTESles op&'adons
d_*tom7 sauf l'hodoge, la minuterie et le
56
Affichage
?dS(he l'beure, Ia temp&amre du _bm; si
le fi*t*rest e_ mode de cuisson, gfilIade ou
autonettoyage, les heures _7_:g}(4esde la
minuterie o_ des ope_alfio_m mltomadques
du (bur et si la cuisiaib_e est verroutlk4e.
Si "F- et un nora#reoutreelettre"cli{/glotentsur
I'afficflage etsuHes signaux de contr#Jedufo_, cod
indiq_e _mcode d'erreurdefo_ction.Enfoncezla touche
CLEAR,_OFF(anmdatio#/arr_t).Laissezle fourrefoidir pendant
uneMute..Rernettez/e fourenmarche.Si/ecodefi'erreurde
foncfionserbp#te,coupez/ecourantdufouret appelezpour/e
Si votm four #tait r#gl# D #heoR&atio# dufour # mi_#terie
ets'il ya eu##epamtede cobra#t, I'horlqgeet toutesles
fonctionsprogramm#esdoivent#trerdnitialis#s.
L'he_rec#gnotera s_r I'afficha_e apres _nepam_ede
Ce!IaCIt.
O ToucM SELFCLEANLO/STD
(autonettoyage bas/std)
Enfbn(ez pore d_oi_ir 1_fbncdo_
d'auto_ettoyage. Reportez-_otm fila section
UtitToerIe four autonettoyont,
ToucheOVENLIGHTON/OFF(lumi&ede four
marche/arrOU
Enfbt_cez pour mettre e*_marche ou &ebb(Ire la
lumiCre du Ibm:
ToucheCLOCK(horloge)
Enfimcez axantde _e_gterPhorlog<
Touchesnum_riques
Udlise>les pore r_Xglerroute fb_ction
exig-ea_tdes chi_res comme pour I'het*re sur
l'ho_logo,la minute,ie, la mmp&'atm> du Rmr,
la temp&'ature interne des aliments, l'heme
de d_marrage et ladtu'Ce d'op&'adon pour
la cuisso_ fi minute_tieet l'autox_ett_*?:_ge.
ToucheKITCHENTIMERON/OFF_minuteriede
cuisinemarche/arrgt)
En_b[_cezpour choish"la {bnctkm de mi[_uterie.
roucM PROBE(sonde)
@
Entbmez lorsque vous udlisez lasonde po_r
Touche WARM (r#chauffer)
E_tbncez pour g:u'der Áesalime_ts )r@m'&
cl_auds,Reporte>xous fi la secd(m comment
r@ler lefourpour #chaLlffer,
RANGELOCK-OUT
(verrouillage de la cuisini&e)
E_*fbncez et g:_t'dez e_#bi_cCes la/ouche RANGE
tOCK-OUT(eerro_illagede/a c_isM#re) pe_dant
3 secondes pore7 verro_dllerid& e_rouiller los
b_Oleurs de sulTfi_ce,les b_ Olem> du _i_itret le
pan_eau de contr61e, de mani&_e ii ce qu'ils *_e
Page 57

Utiliser /e four , ,,.eleotre e, gerege.o
Pour #viLer route brOlure possible, p/acez /es grilles _ la position voulue event de mettre /e four en marche.
Agent de commencer..,
I,es grilles o_t des bl_te_esd(mc
lo_squ'elles sont placetes correcteme_t,
elles bloql_e_t awmt de soffit
complL*teme_t et _e se pe_chero_t pas.
Em]p]aqm_t et reti_:mt ]es casseroles,
sortez ]a gri]]ejl_squ'{'_ ce qu'e]]e b]oql_e.
l,'(_](_mellt c]_al_ffimt se trolwe sous
]e p]m_cher du ibm; Ne p]acez pas
d'a]imei/ts sin" ]a pattie h_%riem'e
du {bin" [:)ol_r ]es pr_pare_:
Pour retirer uue grille, ti rez-]a vers v(_ _s,
pem)chez ]awmt ve_s ]e ])al_t et sortez.
Le fern poss#de 7 positions de grille,
Comment regler le four pour cMsiner ou rOtir
Pour replacer, placez ]e bol*t de ]a grille
(verrous d'arr&t) sur ]e support, pem_chez
]'awmt ve_s ]e hm*t et pol*ssez polar ]a
ii_ire em_tre_:
MISEENGARBE:lorsque
vousutf/isez/agrille_ /aposition/aplushesse
(A),/aitesattention/orsque vous /a sortez IVous
vous recomman@ns @ sort#/a grille@p/us/aurs
pouces et ensuite d'ut2iser @ux pol)nbesde
cuisine pour sortir /a grilleen /a tenant par bs
cOtbs, ta grille est basse et vous pouvez vous
brO/er d vous mettez /a ma/a au milieu et la
sortez entihrement Attention de ne pas vous
br(@r /a ma/a sur /a porteen utilisent /agrille
b b positionb plus"hesse(A).
[] E_Kimcez la touche BAKE (cuisseu). T_pe _'alimeat
] Eiffo_cez]es touches mm_&i'iques
[] En['o_cezla touche START
(d#marrer).
[] V(_rifiez si ]es a]ime_ts so_t pr_ts m_
temps de ]a recette. Faites
cuire plus ]ongtemps au besoim
E*ffo_cez la t(_ache CLEAR/OFF
[]
(aunulatieu/arrOt) a la f]_ de la
cuissom
REMAROUE:unventf/ateur@reffoidissement
semetenmar@eets'bteintadomatiquen;ent
pourrefrofdir/aspihces/atemes.Cedestnormal
et/aven£ateurpourraitcont2}uerb fonctionner
Tatessurg@es(suruneplaqueabiscuits} CouD
G_teaudesanges A
GSteausavarinouquatre-quarts BouC
Biscuitssecs,muffins,brownies,biscuits, CouD
petits@teaux,@teauxOtagOs,tartes
Casseroles CouD
Dinde A
Si vol*s preSparez ql,atre (_mges de
gfitea_* 5 ]a {ois, p]acez-en deux sur ]a
g_J]]e g et deux s_*r la g_J]]e D. Re_partissez
]es mo_*]es s_*r ]a g_J]]e pour (p_'a_cm_
d'eiltre ellx _?e s()it (]irectemeilt
al_-(]esslls de ]'m_tre.
mgmeap@sque/afoursoftbte/at
Positieadegrille
57
Page 58

Utiliset te four,
Ne pfacez pas d'a/iments
directement dans /e fond du four.
Prechauffage et placement des moules
Pr&l]_mftez le _bm" s] la recette l'h]d]ql_e.
I1 est ]_e}cess;lire de pre}chm_k_Or pore" de
mei]]em's r_sl_]tats ]ors de ]_ pre}p_]_t]o]_
de g_teal_x_ de biscl_its secs_ de [x_tisseries
et de [:_a]m_.
Pourprbchauffer,r@lezlefourblabonne
t_rnpbrature.LecOntT_bfernentendreunb/p
/orsque/efourestprbohauffbet I'aff/_'hage
bdiquera/aternpbratzceci_oisb.Oedprendra
environ15320mbutes.
Papier aluminium
Ni_ti/isezpasdepapiera/uminiumaufond
dufour
Ne co_wrezjamais e]_t]breme]_t m_e grille
de pap]er a]_m_]_i_'_. Ceci ;_f{e'ctem ]a
circ_]at]o]_ de c]]a]em" et mb_em i'_m_e
mmr,'_ise cl_]sso]l.
I,es re}sl_lt;_ts seront me]llem's s] les
mommies so]it em]tr_s d_ms ]e {ore" _mt;mt
ql_e possible. S] vous pr_parez ph_s dm_
mollie, p]aceMes polar ql_']ls ;_]ent m_
mob,s 2,5 cm i'_3,8 cm (1 po i'_] ½ po)
d'air m_to_r d'e_x.
Vo_s po_wez _ti]iser m_e [:>h_s petite [e_i]]e
de papi er pore" sais] r ]es d_ve_sem e]_ ts e]_
]a p]acant i:_q_e]q_es po_ces so_s ]es
a]ime]_ts s_r m_e g]J]]e i_{_Jem'e.
58
Page 59

Si votIe euisini&e est branchTe b
208 volts, les steaks saignants
peovent 6tre gri//Ts en prTehauffant
le gril et en plat'ant la girlie une
position plus haute.
Comment regler le four a grifler
Lal}sez/a porteouverte_ /aposi@od'arr_tpour gri//er
Laporteresto owe@ pare//e-m_me,maisb bonoe
temperatureeatmabtenue dan,f/efour
IMPORTANT: pour&iter bs br@res possbles,placez
lee tabbttes 9/a positbnvou/ueavantd'al/umer /efoul
REMAROUE : leea/iment_ peuvent_tre gri//_s _ porte
fermbe,mais i/s ne brunl?ontpasaussi bier}car
/'_ment ebauffant du four se mettra eo marche
et s'arr_tem.
[] P]acez ]a _iande ou le poisson sin" m_e
grille da_+s mm l_c]_eikite.
[] Suhez ]es positio_/s de g_:illes s+[ _&e_es
&ms le Guide pour gri//er.
[] E_£rb_mez la touche BROIt Xl/_O (griller
hauto/basse temperature) une lois pore"
BI Broil (griller a haute temperature),
Guide pour grifler
www..el+ctromenagersge.ca
l ()m passe_"i;!tO Broil (grillerahesse
temperature), enfo+l_ez la toud_e BROtt
BlitO(grillerahaute/bassetemp&ature)fi
+_ouve_u+.
UdIisez tO Broil (griller _ hesse temp&ature)
pore _bie[_ p_'_pa['e[" des aliments tds que
_x_lai!les ou coupes 4paisses sa+_s trop bru[_i["
[] Enfbncez la to+_che STAgT(demarrer).
[] Ap_&avoi_grill_, e_%_(ez la toud-+e
CtEA&'OFF(anualatio_,@rOt).
REMARQUE:gril/ernefonetionnepassi/asondede
I,a tail]e, ]e poids,
]'(_paissem', ]a tempe_'am_'e
de dSma_Tage e_ vo_'e
I)_'&%_'el_ce de c_fisstm
a{te'cte_'(mt ]e temps
de pr_paratiom
Ce g_fide est &tabh
a pa_'ti_" de via_des
a ]a tempe_'atm'e
du _'_}_'ig&'atem:
Aliment
Bm=f bathe
Steaks de be+el
Saignantt
A point
Biencuit
Saignantt
A point
Bbn cuit
Po_et
PmduRdeBe_la_gerie
Pain (grill_}
Muffin anglais
_eRe$ _e
hemard
Filets _e peissel_
Satrap'loll
Steaks
Filets
Tranchesdeiambon
(precuit}
C&te_eResdepore
Bbn cuit
gfitetettesd'agneau
A point
Biencuit
/_point
Biencult
Quantite et/eu Pesitio_ P_emier c616
6paisseur grille Temps {mi_,}
1,3c'rla1,9cm(_,i_poas/@o)@aisseur D 13
15cr_a2,5c'n(ai_poaIpo)@aisseur F 6
0,45kga0,08kg(1_1/, Ibs} E 8
3,8cm (II/2 pe) @aisseur E I5
0,91kga1,13kg(2_2_ Ibs) E 15
I cempletdeceupe C 25
0,91kga1,13kg(2_2/, Ibs),
s@areen Iongueur
Poitrine C 25
2 a 4tranches F 3
2 (sTpare) F 3-4
2a4 C 18 20
0,45kg(1B)(0,6cm_ 1,3cm E 6
[V4pea _/_pe] @aisseur)
2 (2,5cm [1 po] @aisseur} E I0
2 (I,3 cm a 1,9cm E 15
[I/2pea s/4pal @aisseur)
1,3cm (I/2pe) @aisseur D 8
2,5cm (I po}@aissear D 8
2 (1,3cnl [7_pe}@aisseur} D I0
2(2,5cr_[1po]@aisseur)el_viron0,5kg(/Ib) D 15
2 (2,5cm [1 pal@aisseur) E 7
environ283ga340g(10a12oz) E 10
2 (3,8cm[1_½pal@aisseur) E 9
environ0,45kg (I Ib) E I4
E 10
D 20
Second c6t6
Temps{mi_.)
8
4
6
8
10
15
20
25
15
1
Nepas
retoue/er
5
8
10
5
4
9
6
10
_em_e_taire$
Espacez¢fiform@_ent
Lossteaksdemoinsde
1,9cm(V4po)@aissent
diffidbspoulpr@amr
saignant,
Incisezle gras
BrossezchaqaeeOte
debeurrefondu
@ifler peauversle
basd'aberd
Espacezuniferm_ment.
Placezlosmuffins
anglaiscoupesversle
I_autet badigeennez
debeurresi desire
Ceupezatravers la
eoqaille.Ouvlez
Badigeonnezde beuHe
fonduavantdegniler
etapres la moitie de
la cuisson
Manipulezet tearnez
tresdelicatement.
Badigeennezde beurre
eitronneavantet
darantla cuisson,
s[ desire
Tounlez avec sehl.
Ne tournez pas avon la
peau vers le bas
Indsezle gras
Indsezb gras
59
Page 60

Uti/iser /'hot/ogeet /a minuterie
et /e verroui//agede/e cdsim'&e.
Pour reg/or /'hor/oge
1ihor]oge dolt Otre rSglSe {'_]a bolme
hem'e pour que los _kmcd(ms de
mira*retie amomadque du Ibm"
}b_ctiom_em_t correcteme_t, l,'heure
Assurez-vous que /?7orioge soit
r@lbe b la bonne heure.
m_eperu pas ktre chm_ge_e &mint m_e
odsso]_ fi mhmtel{e o_1 m_ c_c]e
Pour reg/er /a miuuterie
[] E1Kbl_cez ]a touche CLOCK(hor/oge).
] Em_(_m_#ez ]es toHthes m_Hmt_]'iqHes.
[] E*Kb_cez la touche START
(d_marrer).
On/Off
La m/nuterie compte /es minutes
seu/emenL
E//e ne contrSle pas los op&ations
flu four; Le r@lage maximum de fa
minutene est de 9 heures et 59
minutes,
[] Emdb_cez la touche KITCHEN TIMER
ON/OFF(minuterie de cuisine
marche/arrOt).
[] E_db_cez los tol_ches m,m&iql_es
,!_lsql_'i'_ce qlle le temps \'oldl_
s'af_iche. Par exemp]e, pore" r_g]er
2 ]]em'es et 45 re]mites, e_db_/cez
]es tollches 2, 4 et S dm/s cet ordre.
Si volls I_i_ites{me errem; eidkmcez
la touche KITCHEN TI_ER ON/OFF
(min_terie de cuisine marche/arr_t)
et _'e((11//_//el/#oz.
[] E_/[b_/cez k_touche START
(d_marrer).
Pour reinitia/iser /a minuterie
Si l'altlichage i_/diq_le e_/core le temps
restant, vous po_wez ]e cha_/ger e_/
e_dkm£ant la to_mhe KITCHEN TINTER
ON/OFF(minuterie de cuisine marche/arrOt),
imis los touches mlm_riq_les iraqi1 fi ce
q_le 1'he_lre wml _les'a_}iche.
Aprbs avoir enfoncb/a toucheSTART
(d_matrer), SET (t_gler) dispam?t,m qui vous
bdique qua b compte _ reboursest commencb,
bien que I'aff/2hagene changequ'aprbs une
mbute. Lossecon@sn'a£para?tTontpas avant
la dembre mbde du compteb rebours.
] l,orsque Ja_/"dm_terie attei_/t 200,
]e co_/trS]e {b_ e_/te_/(;[re 3 1)ips
s_dvis d'm/hip to_ltes ]es 6 seco_/des
,ius(pl'{:_ ce que vous e_dimciez ]a
to,lobe KITCNEN TIMER ON/OFF
(min_tetie de cuisine marche/arrOt).
ta _na/it_ @ 6 soc'ondospout gtro annu/_oon
suivantbs bt_pes dosfonctions spbcia/os@/a
sectionde contr_b de VOtTOfourSOUSTona/itbs
la fin d'un cycleavecla mind,rio.
Si ]e temps resrimt n'est pas a[_iche5
(horloge, de,marriage rerarde_ o_ temps
de c_lisso_/_/e s<mt pas afi?ch_s), rappe]ez
]e temps restm/t en eldb_l(m/t ]a tollc]/e
KffCNEN TIMER ON/OFF(minuterie de
cuisine marche/arr_t) et en e,db]](a,/t
e]/s_lite ]es to_lches mm/_:riques po_lr
el/[rer ]e _/o11ve{7_11 [e_1/ps voll] i1.
60
Pour annulet/a minuterie
E_dbn_ ez la to_che KITCHEN TIMER
ON/OFF(minuterie de cuisine marche/arr_t)
desex lois.
Page 61

Verroui#age de/a cui$ifiiefe (sur certains modules)
_/btTecontrO/evous"permettTade verroui//er/es
brdeurs de surface,/es brL}bursdu four et /e
panneau deconW/e, de manbre b ce qu'i/s"ne
puLs'sentOtTemis enmarche.
ve__ol dllage/d&,'e_Tol_i]]age
des c(mt_'6]es :
[] Eteigl_ez tol_s ]es b_'Cdem'sde
sm'f_ce.
Appu}ez et tem_eza}:>pl_ye_e]a tol_che
[]
RANGE LOCK-OUT (verrou#tage de/a
cuisini_re) pe_ (]m_t 3 sec(m des
,il_squ'i'_ce ql_e l'_c_:m i_(]iq_e LOg
ON (ve_To_i]]age e_ ma_'che).
Pore" (kSve_'_'o_*i]]e_"le colm'6]e,
[]
ajppuyez et te_ez appuy_e ]a to_*_he
RANGELOCK-OUT (verre_iHage de/a
c_isini_re) pe_da_t 3 seco_des
,jmq_*'i:_ ce (p_e FeSc_w_*indiq_*e Log
OFF(verre_i#age arr_t_).
I ,o_'sqI_e cette fimctiol/ est active_e et
]o_'sque vo{_s em_{kmcez ]es to,lobes, le
com_tl'6]e {b'l:_ em_te_(]l'e {m hip som_ol'e et
]'atiichage im_(liql*e_ Log ON,
te too& de verroui//agedescontTO/eSa de
I'effet sur tous/escontrO/es.Aucun contrObne
foncfionnequandcett_ caracMdstiqueest en
foncfionnemenL
L'ajustementseraconservben m_mo/?eaprbs
unepanne d'dectn_vtb.
www,e/ectromenagersge,ca
61
Page 62

Utitisationdes fonetionspour cuisiner et r6tir avee ta minuteri&
REMAROUE: hs ailments qui se ggtent facihment--comme h lair, hs oeufs, h poisson, la farce, la volailh et le
porc--ne devraient pas rester sortis pendant plus d'une heure avant ou aprbs /a cuisson. La temp6rature ambiante
favorise /a croissance debact_ries dangereuse& Assurez-vous qua la hmi_re du four salt bteinte car la cha/eur de
I'ampoule favorisera la croissance de bacMries dangereuse&
Comment r#gler un d#marrage imm#diat et un arr#t automadque
iii'_i__i_i_iii!_ii_ii__!i!!i_iii_iii_ii_il)i_I
[Z][Z ]
[]] [Z]¸
[Z] [Z]_ i
ii
_iii!i_ii_ii__iii___ _'__i_ii_/_i_i_il_ii_i_i
i ii
Le four s'allumem immbdiatementet fern cuim
pendantune durbe choisie.A/a fin du tempsde
cu/sson,le four s'btel_@aautomatiquemenL
[] Emffkmcez h_ tol_che BAKE (cuisson).
[] [Jtilisez ]es tolmhes mm_(_xiql_es et
em)[i'ez ]_ [ei'd)p(__[ui'e vou]ue.
[] Elffimcez la touche COOKING TiME
(temps de cuissen),
REMAROUE : s/ votTerecetteex/)e quavous
pr_chauff/ez/e four,vousdevrezpeut-gtm aiouter
du temps de cu/sson.
] [Jtilisez ]es to_ches mm_(_riq_es et
e_trez ]a dm'e_e de c_iss(m vo_]_e.
I,a temp(_]_ma'e (1_ Ibm" et]e temps
de cllissoi) e]?[]'(_s seroi?[ _:t_ic]?es.
I,'at_ichage iN_diql_em le chm_geme_t
de tempSmmre (e]_ i)
38 ° (_ (100 ° F) et le temps de cl_]ssolL
I,'a_tichage commei/cex_ i) oh;roger
]ors(p_e la temp(_m_re atteim_t 38 ° C
J,e [i_m" pol_rsldv_ la c_dsso_ penda_t
]e temps prog]_m]m(_, p_is s'_rr0te_
mltomadqlleme]]t i'_moh?s qlle ]_
%])Cfi()]) _S]_M (rSchmmbr) _'ak
5t5 activSe. Reportez-vo_s 5 ]a sect]o_
Comment r@ler le four pea rbchauffer_
[] E_ffimcez ]a to_che CtEAPc'OFF
(a#n_latim_/arr#t) pom. et_i_cer
!_ii_/_iiiii!i:_i!iii_i!ii_ !__i___,:_ii_
i_IIIII__!_i_ _i_i i__ii_i_
i i
_!_;_i__i_i__i_i!ii_i_ 'i_i__i:_ii_!_;!_i_i_i_ii
62
[] E_ffimcez la to_che START
(d#marrer).
Comment reg_er un d#marrage retarde et un arr_t automatique
V0uspouvezrbg/erb contrde,dufourpour
retarder b dbmarrage du four, cuire pendant
uncertabtempspMcis,pu/s"s'_tebdre
automatlfiuemer?£
AssHrez-voHs qHe ]'liar]age mo_l[re ]_
bomle hem'e.
[] E_ffimcez ]a to,ache BAKE{_i_sen).
] [Jtilisez ]es toHc]les mlm(_riql_es et
e_m'ez ]a tempe_i_Km'e vol_]He.
[] Emiimcez ]a to_che COOKING TiME
(temps de c_issen).
REMARQUE : si votrerecetteexige qua vous
pMchauff/ez/e four,vous devrezpeut-gtm alouter
du temps de cuisson.
] [Jtilisez ]es to_ches mm_e}_i(p_es et
[] E_ffimcez ]_ to_che OELAYSTART
(d#marrage retard#).
[] [Jtilisez ]es touches mm_e}riques,
e_trez ]'hem'e {:_]a(p_e]]e ",'o_s
d_sirez que ]e {bin" s'_d]_m_e
et commei_ce ]a CI_]SSOI).
[] Elffimcez k_ to_che START
(d#marrer).
REMAROUE : Une tona//tb se fera entendres/
vousufi//sezh cuhsonfi mlT}uter/eetne touchez
pas /a toucheSTART (d6marrer) ap&s avo/r
entTb/a tempbraturede cu/sson.
Si vo_s d(_sh'ez v(_ritier ]es hem'es
r6g]t_es, e_#bl_cez ]a to_che OELAYSTART
(d#marrage retard#)pore, v&'ifier l'hem'e
toHche COOKINa TIME(temps de c_Nsan)
pore" v_ritier ]_ dm'e}e de c_dsso_ r(_gl(_e.
I x)rsq_e ]e {i)m" s' all _m_e i'_]'h em'e
r(_glSe, ]'attichage h_diq_em ]e
chm_geme_t de tempe_mtm'e (e_
corn m e_ ca _ t i'_38 ° C [ 100 ° F] )
et]e temps de c_dsso_. L'_f{ichage
commei_cex=l 1"_chm_ger ]oxsq/le ]a
temp(_mmre attei_/t 38 ° C (100 ° F).
I ,e %m" t::_om's_iw_ ]a c_iss(m jpenda_t
]e temps prog_vmm_, finis sarr6tem
aL_ttm_atiqllemei_t 5 moires qL_e ]a
f()]?C[iOi?WARM (r(_chmmer) _'ait
(_t4 acdveqe. Reportez-\ o_s 5 la secd(m
Commentr@ler le four poa rbchauffe_,
[] E_do_cez la to_che CLEAR/OFF
(an_latien/arr#t) po_r et_i_cer
Page 63

Uti/iser /a sonde.
Pourde nombreuxaliments,toutparticuli&ement los rSfisetla volaille,latemp&ature internedesailmentsestle meilleurmoyen
de savoirs'ifssontprOts.La sondedetemp&ature permetde neplustenter dedevinersilos ailmentsr6tis sontbien cults.
Udliser des sore/des mitres qlle
celle fom'n/ie w,'ec ce produit pour_dt
e]/dommager la sore/de (Ill le comm'61e
du _bm:
[ Jtilisez les }x_igneSes, de la sore/de et de
la fiche en les im/se_mt et les red_mt des
La sonde de temp&ature possbde
un capteur ressemblant _ une
brochette b une extr_mit_ et une
fiche b/'autre, c'est ee qui p&1_tre
dans la prise du feu_
aliments et de ]a pxJse.
Pourbviterd'en@mmager/asonde,n'utilisez
pasdepincespourtirer/ec'@ben/erefirant
Pourbviter@briser/asonde,assumz4Jous
que los aliments sont bien d@dbs avant de
I'insbmr
Apt& avoir pr@ar_ la vian/de et Favoir
pLtceSe slur m/e daie ou sur m/e gri]]e de
la lbche{_'ite, sl_.ivez ces im/stHlctiom/s pore"
bier/ placer la sore/de.
Ins_rez enti6rement la sonde dm'xs la
viandeo lane ne devrait pas toucher l'os,
le gras on le carnage.
Pourbviter/esbr_)/urespossibles,ne
dbbranchezpas /a sondede/a prLs'eavantque
/efour ne soft mfro/di.
Ne /aissezjamais /asondeb I'/ntbrieur du four
dumnt un cyc/ed'autonettoyage.
Ne rangezpas /a sondedansb four
Pour ]es r6tis sm/s os, h/s6rez ]a sonde
dm/s la parde aym/t ]e [:>his de chair du
rgd. Pore" le jambo_/ol_ I'agneau i:_os,
h/so, fez ]a sol/de all cel/tre (Ill mllsc]e
laxge le phls has.
h/so'fez ]a sore/de a_l centre de p]ats tels
qlle pah/de vim/de oil mets e_/cocotte.
InseSrez ]a so_de dm_s ]a parde aym/t ]e
phls de chair de ]'h/tet_Jem" de ]a odsse
du dessolls et paralliele i) la odsse d'm/e
Comment reg/er /e four pour r_tir en ut#isant /a sonde
h/so, fez Lt sonde dm/s Fa]iment.
[]
B_mchez la so,/de dm/s la prise
[]
du {bin: _ssm'ez<'ous de ]a po_sser
e_ti_reme_lt. Fermez la porte du
fore; Assm'ez-vo_s q_e le c_ble de
]a so_]de _/e to_che pas ]'eS]eSme_/t
du gril.
E_/[imcez la touche PRORE(sende).
[]
En{imcez les tol_ches mm/&Jqlles
[]
pour r_gler ]a temp&_mlre
i_/te_Jem'e de_s]re_eposit les aiime_/ts
o_l ]a vine/de, l ;_ tempe_mlre
h/ter_/e maximm//de ]'aliment
que vo_ls jpo_wez r6gler est de
93 ° C (200 ' F).
E_/{b_/cez ]a to_che RAKE(ctiisse_).
[]
E_][kmcez ]es touches mm/&'iques
[]
[>o_n" r&gler la tem}>&*;_t_a'e voul ue
d_ fbm;
[] Enfimcez k_ touche START
(d_marrer).
L'affichagec//)notera si la son@ est bsbrbe
dens/a prise et si vousn'avez pas r@/bde
tempbratumde sondeet enfoncb/a touche
START (d_marrer}.
I,oxsq_e ]a tempe_ratm'e i_/terne de
]'a]ime_/t attei_/t 37,8 ° C (100 ° F), la
tei//p(_r_{_lre h/teH/e chm/gea_/te
I xn'sque ]a tem}:x_ramre in/terl/e des
[]
a]ime]/ts attei_/t ]e chifl}'e rt_g](_, ]a
so_/de et ]e %m" s't_teigl/el/t et ]e
colin'hie d_1%m" &/let m/s]gi/aL
Pore" arr&ter ]e signal el/iimcez la
to_mhe CtEAR/OFF {afi.u/atiefi/atr_t).
[ Iti]isez des poigneSes chmldes posit
retirer ]a so_lde des a]ime_ts.
N'uti]isez pas de ph/ces posit ]a
Pore" chart/get ]a tempeSramre du fi_m"
dm'a_t ]e cycle FtSd_; eniimcez ]a to_lche
RAKE(c_issen)et ells_.ite ]es tol_.ches
mm/&'iques pore" r_g_er ]a _/o_we]]e
Si /a sondeest mtiMe de/'a//?nentavant que
/a t_mpbraturefinale nesoit at_e/nte,vous
entsndrezune tona/itb et f affi@age c/ignotera
jusqu_ ceque/a sondesoit ret%e du fou_
Vouspouvez utilLs'er/a mbuterie mgmesi vous
nepouvez/)as uti/iserbs opbrations du fourfi
mbut_rie en utilisant /a sonde. 63
Page 64

Uti/iset /e foura convexion.
Venti/ateur de convexion
Dansun fourb conve;_/on,fi y a un vent//ateur
qui fair circu/er/'air chaudau-dessus,souset
autourdesa//#zents.
Cotair chaudestrbpartiuniformbment
dans/'ensemblede/a cavitbdu four
AbsL losalimentscuisentet bmnissent
uniformbment_souventenmoinsde
tempsavech cha/eurdE,convex/on.
Cuisson a convexion a I grille
I,e ve]_ti]atem" de com'exio]_ I_idtcircle]or
m_i%m_mei_t Fair r_chm_ft_ au-dessm et
m_tom" des aih_ei_ts _t]]ism_t ]es 5]&]_e_ts
pore" ]a odsso_ et pore" r6d_:
Pourlacuhsonficonvex/on_ uneseulegrille,
ufilisezCRNVECT/RNRAKEI RACK(CUfRE
convexion I grille) etpourdemoil/ours
rbsdtats;p/acez/agrillesur/atab/ottoCouOau
centTedufourLostempsdecuissonpeuventgtTe
rbduits,donc// but vbHfierhs a/iment_s"plustot
queceqd est/odiqubsurlepaquetaf/ode
s'assurerdenepastropcuire.
REMAflOUE: m_ vendlatem" de co_we×io_
s'alhm_e et s'_teh_t pe]_(]m_t la odss(m
pore" m]el_x r_pardr Fah" ch;md d;ms
le fbm:
I,e vei_ti]atem" (h_ %m" h coiwexio]_
s'_teim_t]orsql_e ]a porte dl_ %m" est
olwerte, NE]a]ssez PAS]a porte olwerte
]om_gtemps e]_ i_ti]ism_t ]a c_dsso]_ i)
CO]/_exiom/ CaF ce]a [)ollrl_:_it rt_dllire' ]a
din'So de vie I_ti]e de ]'5]Smem/t c]/mlnimt
de com/vexiom/.
Idealpourbruniruniformbmentlosa/iment:_
cuiL_sur I grilleetpourloslargosa//Y_ent_s'.
_/buspouvezremarqueraussiunecerta/oe
rbducfiondetemps.
Bonsrbsultatspourhs bhcuitssecs,hs
bhcuiL_,losmuff/os,hs brownM_,hs pefits
_teaux, loschouxb /ac&me,bs brioches,
b g_t_audesangeseth pa/o.
Position b multigHIles.
Cuisson a convexion a mu/tigrifles
P_dsq_e ]air r&hm_n_ ch'c_de
m/itbmlS]]]ei/t davis ]e _blm ]es ahmems
peuvei/t 5tre prSparSs avec d'exce]]ei/ts
re_s_dtats e_ _ti]isa_t p]miem's grilles.
Ji,e temps req_ds pore" ]a odss<m 5
ph*s]ems g_iI]es pom'm]e_t ;mgme_ter
m_ [}e_*pore" cermi_s a]ime_ts, mais ]e
temps d'el_semb]e est col_se_w5 p_dsq_e
desex a trois {his plus d'ahmei_ts pe_we_t
5tre pretparSs en mi_me temps. I,es
bisc_dts, ]es m_*}}h_s, ]es bisodts sees et
m_tres pah_s mpides dom_e_t de ]bo_s
r&_dtats avec ]a c_dsso_ h ph_siems g]J]Ies.
Adaptation des recettos...
Vom po_wez miliser vos recettes pr&_r_es
&ms ]e fbm" fi co_wexio_.
IPom" cette cllisso_, ]a {kmctio_ de
co_wershm Auto Recipe '_ r&Iuit
m*tomatiqueme_t ]a temp_mtm'e de
odsso_ r_g_di_re par ]a temp&:m_re
de 14 ° C (25 ° F),
Reportez-\om h ]a Oonvers/on AlJto Recipe TM
de ]a secti(m de FoncfionsSpdcla/a_.
Pore" prSparer ]es alime]_ts sin" p]m d'm_e
g_Jlle da_s ]a c_dsso_ i?com_xiom uti]isez
CONVECTIONBAKE MUTT/(CU/RE
convexion mut/igri/les).
E_ c_dsh_a,_t avec :4grilles, p]acez-en
m_e (;Iambs]a de_xKeme position] (B), m_e
dm_s ]a quamJ6me poshio_ (D) et m_e
dm_s ]a sixi6me poshi<m (F).
Utilisez/a faille decasserolemcommandbe.
Certa/oes/ostrucfionsd'emballage
d'a/irnent:_encocottesurge/bsoudep/aL_
pr/ocipauxontbtbdbve/opp_esenufi/Ls'ant
bs foursb convex/oncorr_merc/au:vPourde
mei/leursrbsdtat:s"danscefou_prbchauff_z-/e
etdf/isez/atempbraturesurI'emba//age.
-64
Page 65

AStir par convex&n
w'w'w.electmmenagersge.ca
Lorsque vous pr6parez des
biscuits, vous obfiendrez tes
meitteurs r6su/tats si vous
utilisez une p/aque _ biscuit
p/ate piut6t qu'une casseroie
bords bas,
Convbntpour/esb<gescoupestendresdeviand<
cl£ouvetles.
Le ent]lateur de convexJo[l fi_]td_vuIer
m_ifbn'n&'cten[ F_ir r_c]muf}_ m>dessus et
autom" des aliments. [,a vim_de et lax o];_]l]e
st)at brunies de toes [es c6t_)s comme _ielles
&:dent pr@ar&es &ms mm rSdssoire. I]air
r_dlauffk) enfcrme Ies,jus mpidement pore:
m_ produit ten<be et humide _out en cre%mt
m_ ext&iem" dml bran dor_:.
Batter& de cuisine pour & cuisson g_
A_a_t d'utiliser u_tre fbur ficonv¢xi(m,
%rifiez si u_s casseroles l_dssent suNsamment
d'espace pour fffire circuler l'ah" da_s le fbm:
Si u)us pr@arez plusiem's a]imems en cocotte
laissez de l'espace entre elles. A%ure>\ous
aussi qu'elles ne se touche_t pas ou qtfelles
ne [ouche0t pas les patois du fore:
PapM et pbstiwe
[,es comenam_ de/ropier et de plasdque
r&sismat.__'_la cha]em" recommand& pour la
adsson coum_,m pemcnt auxsi &trcmilis&
pour ]a cuisson _'_comexio[_, mais/levi pas
5 des wmp&'amres plus haums que celles
_ecommm_<Des par le fi_bflcant de la batmde de
cuisine. I_es casseroles de plasdque r&htames fi
la chaleurjusqu'fi des mm[)_ramres de 204' C
(400° F) pem'ent aussi _tt'e utilis&s.
[,orsque _ous r@issez par convexkm, i1es[
import mt d'utiliser m_e l_chdiite et m_e
g_:ille co_l_ue pour la grillade pour obmnir les
meillem's r_sultat_, l,a l_chefl_te sert _]retenir
les g_:_]sseset la g_:illeseT[ i'iempScher les
&l_H_oussm'_s de graisse tin, dis que l'air
re_chau_ de ci_uler sees la viande et fi
auganenter le brm_issement sees la viande
ou la _l_dlle.
:_ Placez la grille du fimr fila positio_ qui
centre les aliments entre le desst_s et le bas
dt_ fbuc
convex&n
Metal et verre
Tout bpe de batm_ie de cuisine fbnctionnem
darts xotre four i]comexion. Par COll[I'e,
les casseroles de m_4mlchau_ent le plus
mpidement e[ so_t _ecommande_es pour
la c_dss(m fi cotwexiom
i Leacassero/esaufini matoufonN cuirontp/us
rapidementquecellosquisentbrillant_s,
Loscasserobsdeverreoudeceramktuescuisent
Pore" les recettes relies qt_epoulet au ibm;
milisez _me casserole aux patois basses. L'air
chaud _e peut pas Men ciwMer amour des
a]iments darts tree casserole a/]x patois ]-mutes.
[]
t4ulfi / 1 _ac#
Comment rbgler /e four pour cuire ou
Enfoncez la to_mheCONVECTIONBAKE
[]
MBtTI./_RACK(CBIREceevexieem_lti/"
IgriRe)une fbis (mode CONVECTION
BAKEMBtTI[CBIREconvexioemuJtij)
pour la cuissonfi comexion fi plusiem's
grilles.(e modese_tfipr@>_re_Ies
alimems sur plus d'm_e g_ille (soit I, 2, 3
ou plus) en mOmerompsdarts le fbm"fi
pour plus d'infi*mmtiou.
Enfbncez la touche CONVECTIONBAKE
MBLE%'_RACK(CBIREcoevexiee m_lti/
f grille) deux lois (mode CONVECTION
BAKE1RACK[C_IREco_vexion IgriRe])
pour II (uiss<m fi _omexio, fi m_e g_ille.
(]e mode est utilis4 pour fidre (:ui_e les
a]imems sur tree seMe grille &ms le fimr
{]COI]VeXiOI].
Entbncez h touche CONVECTIONROAST
(ROTIRcee_exiee)pour rSdr fi convexiom
[] Etffbncez les touches mlm&_qtms pore"
re_glerla tempe%'atmTe_ouhm dt_ibm:
[] Enfbncez la t<mche STARr (demarrer_.
Pour changer Ii temp6mture du fbuC
e_ffb_cez ]a touche CONVECTIONBAKEMULTI/
f RACK(cuissoncom,exionme/tizq grille) ou
r_tir a convexion
CONVECTIONROAST(rStirconvex&e) et
ellstlite _estouches [ltxm_:riqtles peril
r&gler Ia nouvelle mmp(4mtm>.
Lo*>que le fbttr co*'nmer_ce fi chauflb<, le
changemen[ de temperature eu COI]N;qellga_K
fi 38 C (100° F) sera aifklK. Lo>que le four
atteint la mmp&'aUlre choisie, 3 bips se fbnt
en[e_Kh e,
[] Enfoncez la totlche CLEAR/OFF
(a_ne/atioe/_rr_t) fi la fin.
Vousentendrezunvenfi/ateurpendantla cuisson
convexion.Leventiiateursb_r_tesi /aporteest
ouverte,mais/a cha/eurcontinuera.
Vousentenfirezpeut@re/e fourc/iquerfiumnt
lacuisson.Ceciestnormal
REMARQ_E :pe_r cuire par convection, la
temp6rat_re duleur est 14°C (25° F)plus
flasse que la temp&atum rbglbe. Cens_ltez
la sectie_ Utiliser la cenvemio_ A_to Recipe,
dartslos Fonctio_s spbciales de votre
contr_le de four pour de plus amptes
infermations. Pe_r le r6tissage par
convection, la temp&ature d_ fear ne
se cenvettit pas a_tematiq_ement
65
Page 66

Utitiser les foncdensa minuterie
pour/a cuissen acenveMen.
Veus entendrez un venti/ateur en cuisinant avec cos fonctions. Le venti/ateur s'arr_te si /a porte est ouverte, mais /a
chaleur confinuera.
REMARQUE: /es aliments qui se ggtent faci/ement--comme le lait, /es oeufs, /epoisson, la fame,,/a vo/ai//e et /e
pore--he devraient pas rester sortJspendant p/us d'une heure event ou aprbs /a cuisson. La tempbrature ambiante
favodse /a cmissance de bact#ries dangereuses. Assurez-vous que /a lumibre du four soit 6teinte carla cha/eur de
I'ampou/e favorisera /a cmissance de bact6ries dangereuses.
Comment reg/er un demarrage imm6diat et un arr_t automatique
t4elti /1 Rack
_iii i i
Lefours_//umerairnmMiatementetfmacuire
pendantunefiureec'hoisie.Ala findutempsde
cuisson,/efours'ete/i_draautomatiquement.
Assm'e/-_ousq_e Fhor]ogemontre la
l)oi]ne }]@HIF@,
[] Embl]cez la touche CONVECTION
RAKEMRLT!/1RACK(CRIREcmmexion
muRi/1gripe) m_e tois (mode
CONVECTIONBAKEMULTI[CRIRE
convexionmuRi])pore ]ac+dssonfi
coIwexio[] fi plusiem's grilles. Ce mode
selt a pr@a_>r les albnems sin"plus
d'une gdlle (soit 1, 2, 3 ou plus) e_
1tlel't_etemps dates ]e Ibm"_'_co[l_exJo1L
Reporm>_ ous fila secdoi_ Multi-Rack
Baking (cnissot_ a ph*sieurs grilles)
poor plus d'infbcmatiom
Enfbncez la touche CONVECTION
BAKEMRLTIflRACK(CRIREconvex/on
multi/1grille) deux lois (mode
CONVECTIONRAKE1RACK[CRIRE
convexionI griRe])pour ]acuissoi__'_
com:exion fi une grille. Ce mode est
utilis6 pour fidre c_dre losaliments
snr m_eseule grille dm_sle fbnr a
comexioJ].
Enfimcez ]a touche CONVECTION
ROAST(ROTIRconvexion)pore r&ir
ficorn exion.
[] E_ffbi3cez les touches im m&iques
pour r4gler la temp&'amre _oulue
du touc
[] En%ncez ]a touche COOKING TIME
(tempsde cuisson).
REMARQRE:si votrerecetteexigeque vous
prechauffiez/ebur, vousdevmzMut _tre ajouter
[] Enfb_cez ]es toncbes m_m4dql_es
poor cboisir la dm'4e de cuisscm
_OHIHe, [e telt_})S de ct/isso[? IIli[]i!ll[llIl
que _ous pom'ez r6gler est de
I rain me. i.a temp&:mn'e du
Ibm"ql_e _o_s r6glez et le temps
de c_fissonentl:&ss'at}icherom.
[] Entbncez la touche SrARr(d6merreg
L'aNchage indiqnera le chm_gemem
de tempg_ramce (eJ] commencant fi
38° C [100" F]) et le temps de c_dsson.
i 'at}ichage commence_ ficha_ger lorsque
la temp&'ature attei_ t 38° C (100°F).
ie Ibm"pot_rs_dvrala cuisson pe_dant
le temps programme, puis s'arr&tera
antomadquemem fimoires qt_e la timcdon
_,_;4RM(r_chauffer) t_esoit r6g16e.
Reporte;'-_ous ;'_la secdon Commentr6jer /e
[] Enfb_cez la touche ClEAR/OFF
(8noulation/orrOt)pour effhcec
l aftichage a_ besoin. Redrez los
aliments dn Ibm'.Rappele>_ous
que bie_ q_*ele Ibm: s'4teigne
mm)maficF_ement, les alimems qui
wstem dens le Ibm"co[]dtme_nt _'_
c_dre api:&sq_e le fbm"soit _teim.
REMAROUE: pour cuire per convection, le
temp6rature du four est 14° C (25°F)ptus
hesse que le tmnp6mture r_gl_e. Consultez
la section Utiliser la conversion A_to Recipe,
denslos Fonctions sp6cieles de votre
contrOle de four pour de plus emples
iniormations. Pour le r_tissege per
convection, la tomp6rature du four no se
convertitgas eutometiquement.
66
Page 67

w_w.electremenagersge.ca
Comment r6gler un demarrage retarde et un arrOt automatique
[][][]
I/ouspouvezr6g/m/econ_(_/edufourpourmtardm
/edernarTagedu fou_cuirependantuntempeprecie,
pu/es'eteindreautomatiquement.
Assm'e>_o_s q_e Fhorloge momre la
bon I]e }]eHre,
[] E_]fbncez la touche CONVECTION
BAKEMBLTIfl RACK(CBIREconvexion
multi/1 grille) une lois (mode
CONVECTIONBAKE MULTI [CBIRE
cofivexiofi melti]) pore-]a cuisson _'_
comexiol_ fi I)lusiem:s grilles. Ce mode
sert ;] })rSi)arer les alimems sin" plus
d'm_e grille (soit 1, 2, 3 ou plus) e_
Iil&_e temps darts le fbur fi comexion.
Reporm>_o_s fi la sectiot_ Muhi-Rack
Baking (c_/isso[] a plusiem's grilles)
pore" plus d'infbrmatio_.
Enfi)ncez la touche CONVECTIBN
BAKEMBLTI/f RACK(CBIREce,wexien
mufifl grille) deux fbis (mode
CONVECTIONBAKE 1RACK[CBIRE
convexion ! grille]) pour la cuisson _'_
co[]\exio[] ;'_ HBe grille. Ce mode est
milis_ pour fidre cuire les aliments
snr m_e seu]e grille darts le fbnr fi
con vexion,
Enfoncez la touche CONVECTION
ROAST(ROTIRcenvexien) pore" 16tir
;'_ CO_]\ exioIL
[] EI_fimcez les touches imm&'iques
pour r6gler la temp&'ature _oulue
du fbur.
[] Enfoncez ]a touche COOKINGTIME
(tempsde cuissen).
REMARQBE: si vote mcette esigeque vous
precMuffiez/efour,vousdevez peut-g_eajoutm
du tempede cl,_'eon.
[] Enfbi_cezles touches num&'iques
pour choisir le temps de cuissol?
[] Enfimcez la touche BEMYSTART
(demarrage retarde).
[] Uti]isez les toucBes mm%riques pour
r_gler l'hem'e _ilaquelle vous d&irez
q_e le fbm" s'allume et colHiHei]ce
la cnissom
Si vousc#&s'irezv_nfierles heuresreglees,enfoncez
/a toucheBEL_Y START(demarrage retarde)
pourv&ifim I'heur_dedemarrageregleouenfoncez
/a toucheCOOKINGTIME (tempsde c_isson)
pourvdrifim/adar_edecuiesonreg/de.
[] Enfb_cez la touche START(demarreg
REMARQBE: unetona/itbse fmaentendresi vous
utifisez/acuieson_ mbutefie et netouchezpas/a
toucheSTART(demarrer) aprbsavoirentrb/a
Lorsque le %t_r s'a!lu!lle 5 l'heulTe r6gl_e,
l'anichage indiquera le changemem
de mmpg_ramre (en commenqam ;'_
38° C [100 ° F] ) et le temps de cuisson.
i 'anichage commencera fi cBang>r lorsque
la temi%ramre atteit_dra 38' (; (100" F).
[e fbur pom's_dvra la ctdss(m })e_?(lant
la dm'6e progTamm_e, puis s'arr&tera
antomatiqnemem fi moins qt_e la fimction
X_ARM (r&hauner) t_e soit r_gl_e.
Reporte>_o_s fi la section Comment
r6glerle fourpourr&:hauffer.
[] Enfoncez ]a touche CtEAR/OFF
(ann_latien/arr_t) pour ef_i_ce_
1aflichage a_ besoi_ Reth'ez les
aliments dn fbua Rappele>_ ous
que bien que le fbm" s'6teigne
amomatkiuemem, les aliments qt_i
/estem dat]s le fbur continuel*mt 5
c_dre apr_s q_e le fbm" soit 4teim,
REMARQUE: pe_r c_ire par convections, la
temp6mt_re d_ fe_r est !4 °C(25° F)pl_s
hesse q_e la temp6rat_re r6gl6e. Cens_ltez
la section Btiliser la ce_wersien A_to Recipe,
dartsles Fonctions sp6ciMes de votre
contrOle de fo_r pour de plus amples
infotmations. Pe_r le rStissage par
convection, la temp6rat_re d_ fe_r ne se
convettit pas a_tomatiq_eme_t
67
Page 68

Uti/iser /e foura convexion.
Comment r6gler le four pour r_tir a eonvexion en utilisant ta sonde
Pour de meifleurs r6su/tats en
pr6parant de grosses dindes et
r&tis, nous recommandons d'ufifiser
la sonde incluse dans le four b
convexion.
[Z][Z]
[Z]
I ,e m ot PROBE (sonde) c]ign otex;_
sly.I"l'af_ichage et le com_t]'Ole (]{_ fore"
h_d]que_'a s] la som_de est h_se_'g:e dam_s
la pdse et si vol_s m_'avez pas _'_gl_ de
tempe_wtm'e de som_de et em_}imce_ ]a
tol*_he STaRrtd_marrer).
PHacezHagfiHHe&o I_bm"5 1_po_ifio_
[]
qloi cem]'e los a[ime'_ts et_tre le
dess_ts et]e has dlt {i_m: h_sg"rez
]a som_de dam_s ]a v_amle.
[] B]_mc]_ez Hasom]e d;ms Hapr_se
dH }o_m _ss_t_'ez-vo_s de Hapo_sse]"
e]_r]&remem. Fermez la po*'re d_o
ibm:
[] E]ffo_cezla touche CONVECTION
Boas, oon,,ex on).
[] Etffo_cex les ro_cbe,_ mm_&'iq_es
du _hm_
Etdb_cez Ha touche PROBE (sonde).
[]
Et_{k)_ cez Hes [o Hch es t_{tm ¢¢Yiq Hes
[]
i _t_'_i e_tre d_s] r_e I )o m" la via _de.
[] Etffo]_cez ]a ro_che START
(d6marrer).
J,ot'sq{te le fk_u_"commet/ce fi chmff}b"r
le mot LO (basso) s'aHiche.
] Lo]'scpte la _emp_]:ma'e i_Ke]'n]e
de la vkmde a_eim le chif[_'e ]'etglet,
la sonde e_le }bin"s'_eig_e_ e_le
co_m'Sle du {bin" &]]e_ m] s]gnal_
Pore" mT0te'r le signal en:Rmcez la
to_che CLEAR/OYF(anmdation/arr_t).
LIdl_sez des po_gn_es pore" _'ed_'e]" la
so_de des a]ime_s. N'milisez pas
de pinces pore" la _'ed_'e_"ca_"cola
M $E ENGA DE: our
bviterlosbrO/uresposs/b/a_,ned_ranchez
Ftas"/asondede/apriseavantqueb fourn'ait
rdroidi.Ne rangezpas/asondeclansb four
REMABOUE:
S//asondeestret/r_ede/'a//?nentavantque
/a tempbrature f/?_alene soil attebte, vous
entendmz une tona/itb et I'affichagecligndera
jusqu'_ceque la sonde soil retiree du four
gous entendrez un venti/ateur pendant /a
cuisson avec cette fonction. Le venfi/ateur
s'arr_te si /a porte est ouvert< nva/s /a chabur
cont/nuera.
Vouspouwzufi/iser/ambuterie@ cuisbe
m&__e si vous ne pouvez pas ufiliser les
opbrations du four _ mlr}uterie.
Pour changer la temp6rature du
four durant le cycle R6tit; enfoncez
la touche CONVECTIONROAST
(r5tir convexie_) et ensuite los
touches num6riques pour rbgler
la nouvefle temp&ature.
de la ',*ia_de attei_}t 38 ° (_ {_00 ° F),
la tet_p_]vttHFe ]_te]'t_e cha_ge;mte
Guide _ourrOtir a cenvexien
Viandes [qih*utesr_g/[b Temp, du four Temp, interne
Bo_f C6tes,cotesdOsossees, Saigaa_t 4&53 (20 24) 163'C (325_'F} 60-'C(I40F)t
Pore Avec os,sal_sos (1,36kga 2,27kg {3a 5 Ibs]) 51 60 (23 27} 163°C(325'F} 77° C(170°F)
Jambol_ Enb01_te,soc,jarret(1,36k9_2,27kg[3_5Ibs]entitlementcult} 3I 40(I&l 8} 163°C(325'F} 60° C(I 40°F)
Agnoa_ Avec os,sansos A point 37 44 (I7 20) 163'C(325°F} 7I C(160'F)
Fruitdo Poisson,emier(1,36kg a2,27 kg[3 a5 Ihs]} 68_88(3{>40}total 204C (40O°F)
met
Vo[aiHe Pouletentier(I,13 kga 1,59kg[2½a 3_/zIbs]) 53 57 (2_26} 177°C(350 F} 82°-85°C(180° 185°F}
Hautde sudonge A poh_t 53 62(24_8} 163°C(325'F} 7I° C(160°F)
(I,36 kga 2,27kg [3a 5 Ibs]) Bien cuit 62 7I (28 32) 163'C(325°F) 77 C(170 F)
Filet de bceuf S_ignam 22 3I (I0 14} 163°C(325'F) 60° C(I40°F)t
A point 3I 40(I_18} 163'C(325°F} 7I C(160 F)
COtelettes(I,3 cm a 2,5crn 2 c6telettes 6_-77(3(>35}total 163'C(325°F} 77 C(I70F)
[I/2 a I po] @aisseur} 4 cOtelettes77 88(3_40}total 163'C(325°F) 77 C(I70F)
6 c6telettes 88 99(4CP45}total 163C (325'F) 77° C(I70°F)
(I ,36 kga 2,27 kg [3a5 Ibs]) Biencult 44 53(20 24) 163°C(325'F} 77° C(I70°F)
Queuesde homard(I70ga227g chacune{6a8 oz]) 4&55(2%25}total 177C (350°F}
PooletsdeCorn0uailies,sansfatce(0,45kg_Or68kg{l_1_lbs]}11(>121(50_55}t0ta]177C(350P) 82°_5°C(180° 185°F}
Farcis(0,45kga0,68 kg{1 a 1½ Ibs]) 121132(5_60}total 177°C(350 F} 82°-85'>0(180`` 185°F}
Canard(I,8I kga 2,27 kg{4a 5 Ibs]} 53 57 (2_26} 163°C(325'>F} 82°-85°C(187'185°F}
Dinde,entiere*
Sa_sfarce (4,54kg a7,26 kg{I0 ,_16Ibs]} I8 24(8 1I) 163°C(325'>F} 82°-85°C(180_' 185°F}
Sa_sfarce (8,16kg a I0,89kg [I8 a 24 [bs]) I5 22(7 10) 163'>C(325°F} 82°-85°C(180° 185°F}
Poitfinede dinde(I,8I kga 2,72kg {4a 6 Ibs]} 35 42(I6 19} 163°C(325'>F} 77° C(I70°F)
68
Page 69

Udliserles fonctiensdefermentation
La fonction de fermentation conserve un environnement chaud utile pour que los produ,;ts _ /evure /bvent.
Comment reeler le four pour la fermentation
[] Placez ]a p'_te comerte dons m] plat
dons ]e fbm" sin" la tablette g ou C
REMAROBE: pourderneilleursr_su/tats,couvr_z
la pgte d'untlasuou dtlnepe/licub deplastique
graissde(lepbstique devrapeut-gtr_gtr_ancre
sousle contenantpourque b venti/ateurdu fourne
/eroguepas).
[] Enfimcez la toilche PROOF
(fermentation) p/ds 1_ to_che
START(demarrer),
[:_fSch;_ge i_]diq_]er PrE(proof o_
[a lmni_Xre d_ fbm" s'alhm]e et reste
allmn_e dmant ]a fermematio_.
La %_]ction de l-en_emadon %nr_]it
amomadqt_emem ]a tem}%ramre opdmale
pore la ferment;_tion et _]'a done aHCH[]
@_stemem de tempdramre,
[] R_glez KITCHENTIMERON/OFF
(min_teriedecubmemawhe/arr_t)pore,
]e [elIl})S de f_iTiile[][21tio[]/ll][]]Iil[lli1,
[] ,_ la fin de ]afermel]tation,
ei]fbl]cez ]a to[]cI]e CLEAR/OFF
Pourdviterdereduire/atempbraturedufour
etpro/onger/eternpsdefermentation,n'ouvrez
;;, Venfiez/espains tOtpourdviter toute
surferrnentafion.
REMARQUE:
Ni_ti/isezpaslemodedefermentationpour
rbchaufferlosalimentsoulosgarderchauds.La
ternp_ratur_ CJUfourpourlabrmentationn_st
pasassezchaudepourconserver/esa/iments9
destemperaturessansdange_Utilisezb fonction
WARM(r_cflauffeflpourgarderbs a/iments
chauds.
LabrrnentationnefonctionnerapasIorequele
bur depasse52°C(I25°F)._HOT_,(chaud)
s'affbhera.
Comment reeler le four pour rechauffer
[,a fimct]o_] WARM (recha#fer) garde les
aliments cuits c]];mds.
Cette fb_]cdol] i]'est }>;iscoi]qae pour
r_cl]m_ffer los a]iments froids.
Pour udlisei: la fbnctiol] WARM(recha_ffer)
enfimcez la tonic'he WARM (recha_ffer)et
ensuite la toniche START(demarrer).
Pore, nti]iser ]a fi_]ctio_ WARM (rechauffer)
apr_s avoir cuit ou rod avec 1_rain merle,
s_dvez ces _t_pes :
] E_]fb_]cez le mode de ctlisson x(m]_/
(BAKE[cuisson], CONVECTION BAKE
MULTI [cuissen convexien m_Ri],
CONVECTIONBAKE _RACK [c_issen
convexio_ I griOe], o_ CONVECTION
ROAST[Stir convexion]).
[] Enfimcez ]es to_c hes mm]_riq_es
pore" r6gler l_ temi%raml:e d_ l-imi'.
[] Enf_mcez ]a touche COOKtNO77ME
(tempsde cuisson).
[] E]]fbncez los to,lobes mlm_riq_es pore _
c]]oisir ]a dm'_e de c_lisson vo_lhle.
[] Enfb_]cez l_ to_cl]e WARM (r_cha_er}.
[] Enfkmcez la to_cl]e START(demarrer).
Po_r rendre los articles rassis croustillants
Placez los a]imems dons des casseroles
ou plats _'_c6t& bas.
Pore: de meil]em's rds_dtats, placez
les aliments e_] m] se_l] _]i_eml.
N'empi]ez p_s.
};;,[_aissez-les d&comerts.
V&ifiezapT& 20 _'_30 mi_ rues s'ils sore
cronsti]]ants. A.iomez du temps m_ besoin.
NOTES_MPORTANTES:
Losailmentsdoiventresterd_auctsdane/eur
contenantdeculasonoutransferes_unplat
deserviceconvenantauxa/imentechauds.
Pour/esalimentstendres,couvrez-/esd'un
couvercleallantaufouroud'unpapbralurnbiurn.
Losa/imentefritsoucrousfi//antsn'ontpasbesob
d'b_ecouverts,rnaispeuvents_ss£'hers'i/s
sontr)chauffestrop/ongtemps.
Ouvrirlaportebrepddtionpermet_ I'£rchaudde
s'echapperetau_a/imentsdesereffoidir
Prevoyezdutempssupplementair_pourquela
temperature8/'intdrieurdufoursestabi/laeaprbs
avoirajbut_desarticles.
Avecdegrossescharges,i/ fau_rapeut-gtre
couvrircertainsdesa//YnenLs"cdL_.
Refirez/escu/71bresdeservice,etc.avantde
p/acer/escontenanL_daneb four
N'ufillaezpoedecontenants,couvem/eede
ptastktueoudepe//icu/edeplasfique.
MISEEN ARDE"
, /eS
cont_nanf_,couverc/esdep/ast/queou/ape//icu/e
deplastiquefonderonts'ilesontdanele fourLe
p/asfTctuefondupourraflnepaspouvoirgtrerefirb
etn_stpascouvertsousvotregarantTe.
69
Page 70

Ajustez/e thermostatdufour FMtes4e vous-m#me!
Vouspouvez dbcouvrir que votre nouveau four pr6pare les alirnents diffbremment de celui qu'il remplace. Ufilisez
votre nouveau four pendant quelques semaines pour vous familiarisez avec luL Si vous croyez que votre nouveau
four est Fop chaud ou trop froid, vous pouvez ajuster vous=m_mele thermostat.
N'uti/isez pas de thermombtres, comme ceux qubn trouve dans les 6piceries pour v_rifier le r@/age de tempbrature
de votre four Ces thermombtres peuvent varier de 11_ 22 degrbs C(20 _ 40 degrbs F).
REMAROUE: cet ajustement n'affectera que /es tempbratures pour cuire _ convexion (sur certains models) et rStir
convexion (sur certabs models) et non pas celles de gri/, ou autonettoyage. L'ajustement sera conservb en mbmoire
aprbs une panne d'#lectricit_.
Pour ajuster /e thermestat
[] Eld_mcezles tol_chesBBO&B//LO
[][]
[] Em_[imcezla tol_che BAKE(cuiason).
! !i ; iiii ii
(gri#er a flaute/flasse temp#rature)
et BAKE (cuisson) e_ m Ome temps
pem_dm_t 3 secom_des iL_sql_ i'_ce ql_e
]'at_ichage im_diql_e SF.
llh_ m_ombre i'_del_x chiffres
S'_t[[i ch el_L
E_#kmcez BAKE(cuissen)i'_N_om'e;m
po _a" a 1ten_ er e_ t_'e a __gm e_ ter et
[]
I,a tempe_mmre (;l_ Jti_m"pe_t
s qp_steri_sq_ i:_(+) 19 ° C (35 ° F)
ph_s cha_d o_ (-) 19 C (35° F)
[:)h_s froid. E_#imcez les to_ches
mlm_:lJq_les de ]a mOme {i_qo_ (p_e
wins ]es ]isez. Par exemp]e, pore"
chm_ger ]a temp&ratm'e (;hi %m"
de S< C (15 <,F), e_iimcez _ et B
Aprbs F:_i_stemem, e_Kimcez
[]
]a touche START(d#marrer)pom
reve_ir i:_]'af{iche de l'hem'e.
[J[i]i sez "_'(K]'ef_ i 01"_/o]'n?/a] em el/L
te type demargarineaffectera /apedermance de cdsson!
La p/upart des recettes ant btb d#velopp#es avec des pmduits _ forte teneur en gras comme /e beurre ou la
margarine (80 % de gras). Si vous r#duisez /e gras, /a recette ne produira pas nbcessairement /es m#mes r#sultats
qu'avec un produit _ plus forte teneur en gras.
Des problbmes de recette peuvent appara¢tre si les ggteaux, /es tartes, les p#tisseries, /es biscuits ou /es bonbons
sont fabriqu#es de ces produits. Mains i/ y a de matibre grasse dans un produit, plus/a difference sera remarquable.
I,es _om_es {_d_m]es des E_[I exige]_t (p_e ]es prod_dts port;m/]_ me]_do]_ 'margari_e' co]_tie]me_t m_ mob,s S0 %
de m_ti_re g_sse par poi (Is. I ,es prod_its {) ta rti _ er i) S_ib] e tel_ e m" e_ g_s col_ ti el__ el_ t moi _ s de g_;_s et p] _s d ea _L
l ,e co_ te_ _ _]eve_ d'h _m_idite_ de ces prod_d ts i) tartiner a f{ecte ]a texture et ]a salem" des prod_d ts de bo_]m_ge_J e et
de p_tisse_Je. Pore" de mei]]em's r_s_]tats _ec vos m_ciem_es recette pr_i_r_es, _ti]isez de ]a ma_ga_J_e, (t_ berate,
des b_ to_ _ ets _'_tarti _ er co_ te_ a _ t a _ moi _s 70 % d']_ _i] e ve_g&ta] e.
7O
Page 71

La porte du four dolt #tre fermbe et tous /es contr61es rbg/bs correctement pour que les cycles foncfionnent
correctement.
Avant un cycle de nettoyage
Essuyez toute accumulation de
salem sur le fond flu four:
Nolls d'aerer voQ'e
cll]s]m/e a\ec IH/e {_]/etre ollverte ou em/
ud]isan/t Im vemi]atem" ou ]a ]/otto durm/t
]e premier c; c]e d'amon/etto}:_ge.
___t
P,etirez line ]bc]/elhJte, line g_J]]e, ]a
sore/de, tons ]es nstemi]es et tont papier
d'a]llm] m/illmdll Ibm'.
l,es sa]eteSs sur ]e cadre avant de
]a cldsh/ibre et FextSiJem" dnjoim/t de ]a
porte doivent _tre m/etto/e_es i) ]a maim
Nettovez cos ei/droks {_]'ean chaude,
avec m] tampon i) reScurer de p]astique
OU rei//p]] de sa_o_/ ou des m/ettov_u/ts
te]s que Soft Scrub':. Rim/cez bien fi ]'eau
propre et asseSchez.
Ne m/ettoyez pas ]e ioim/t, l,e mate_Jau de
fibres de verre dnjoim/t de ]a porte du
four m]e reSs]ste pas i) l'ab_as]om I] est
essemie] qne ]ejoh/t reste ira/tact. S]
vons remarquez qn']] de\iei/t nse_ on
Essuvez tout deSversemem ]ourd au fb]/d
(ill folm
_SSllrez-YolIS qlle ]e coll*<erc]e de
]'ampoule (Ill {bur est en p]ace et que ]a
]umi&re est 6teim/te.
IMPORTANT: ]a sant5 de certah_s oiseaux
est extr_meme]/t sensible mix {ilmeSes
d_gag_es dlmmt ]e cycle d'amom/ettoyage
de route cuisim/ibre. D_p]acez ]es oisealm
et mettez-]es dm/s line pibce bien aeSreSe.
o/Std
Comment reg/er /e four pour/e nettoyage
] Eteignez tous]es b_¢deurs de l,a porte se verroui]]e automatiquement.
surf_tce, l,'a[lic]/age im/diquem ]e temps de
Enfoncez ]a tou/he SELFCLEAN
[]
LO/STD(autonetteyage bas/std) line
%is pour line dm'_e de m/ettoyage
de 4 heures ou deux fbis pore"
line dur_e de 3 hem'es.
[%e dur_e d autouettoyage de
3 heures est recommam/d_e
]o_sqne ]es d_ve_sements som/t
petits et con ten m. [ ]m/e dur_e
d'amom/etto}_ge de 4 heures
OI1 p ] IIS est
[] S'i] fhut line p6riode autre que
3 heures ou 4 hellres, uti]isez ]es
tOllC]) es m/IH//(_l'] q lies et en trez ]a
durSe de _/etto} age void he.
Vons pomez c]]m/ger ]a peS_Jode fi tonte
autre e]/tre 3 et 5 henres sehm ]a sa]ete_
dll Ibm:
[] Enflmcez la touche START
(d6marrer).
_/etto}:_ge restm/t. I] _/e se_:_ [)as possible
d'olp, rir ]a porte dn four ava_/t que
k_ temp&ature _/e tombe soils ]a
tempeSrature de verroniIIage et awmt qne
le vo_mlt LOCKED (verrot#//#) _le s'Steigne.
I xn'sq ue ]e ;'_/',m/t LOCKED (verrotfiR#)
s'_teh/t, w_us pourrez ouvrir ]a porte.
[] _ppu_ez sur ht touche RAN_ELOCK-
ODT(verro_i//age de/a c_isiui&re)
et tenez-]a appuy_e penda_/t
3 secondes pour ]'arr6ten
i ,e mot LOCKED (verro_iR#)cIignotem
et]e co_m'ble du tbur signalem si vous
r6g]ez ]e cycle de _/ettover et si vons
oub]iez de tbrmer ]a porte du tbun
Pour arrOter im wc]e de uettoyage,
enfbncez ]a touche CLEAR/OFF
(annulation/arr#t). I,orsq lie Ie vol_m t
LOCKED(verro_iR6} s'Stei_t i_/diqum/t
que ]a temp&_mlre du fimr est pass_e
sous ]a tempe_mture de verroni]]age,
vous pourrez onvrh" ]a porte.
71
Page 72

Utitisette fourautonettoyant.
La porte du four dolt #tre fermGe et tous/es contrGles Mgibs correctement pour que /e cycle fonctionne
correctement,
Comment retarder te d#but du nettoyage
Lo/ Std
REMAROUE: vousdevezbteindrebs br(_@urs
desurfaceevent/'heurededbbutd'ado
nettoyage.
[] EmKb_cez la to_che SELFCLEAN
LO/STO(autenetteyagebas/etd)role
{ois pore" m/e dm'(_e de m/ettoy_ge
de 4 hem'es oll dellx {_)is pollr
m/e dm'(_e de 3 hem'es.
[hie dm+(_e d'alltoN/ett(>yage
de 3 hem'es est recomm;md(_e
]ors(pie ]es d_ eP_eme]/ts so]it
petits et c(mtemls. [Im/e dm'(_e
d'allto]/ettoy;_ge de 4 hem'es
OI1 I)hls es[
pollr m/tom" plm sale.
[] S'il fhl_t line pe_riode m_tre (p_e
3 hem'es ()it 4 heures, utilisez les
tollches mm/_J(ples et em/trez ]a
dm'_:e de m/ett__';_ge roll] lie.
Vom pomez chain/get ]a pe_riode i'l tollte
mitre e]/tre 3 et 5 hem'es sehm la sa]et_
(b_fbm:
[ JtiIisez ]es touches mm/&ri(p_es,
[]
e_/t_'e z 1'1/eure i:_la q u ell e ",'__l_s
d_sirez q/_e le c}cle de m/etto','_e_.,
corn m el/ce.
[] E_Kimcez la to_che START
(d#marrer).
l ,a porte se verro _11]]e a _ltoma ti q _lem el/t.
(1_1cvc]e. I] _/e sere [)as possible d'om_Jr
]a porte d_ fi)m" a_m/t que ]a tempeh:m_re
_/e tombe soils k_ tempetmtllre de
verrouillage et a_mt q_le ]e roy;mr
LOCKED(verre_i##) _/e s'_teigne.
I,(1 r_q u e ]e v o}'a ,I t LOCKEO(verre_ill#)
s'_teh/t, yore pore'fez o_wrir ]_ porte.
[] _ppu}ez sm']a to,abe RANGELOCK-
OUT (verre_i#age de N e_NNi#re)
et te_/ez-]a _q)p_lyc4e pe_/(];mt
3 seco_/des pore" Farr&ten
[] EiKimcez]_ touche OELAYSTART
(d#marrage retard#).
Apres un cycle de nettogage
Vom remarq_erez pem-0tre m/pe_l de
ce_/dre b]a_/che (;lm/s ]e fbm: Essm'ez-]a
a_ec m/chif_km ]mm]de apr_s (pie ]e fbm"
ret_'o] disse.
Si des po/7}t_ bkncs testent rdTrez@s avec un
tampon_ rbcurerdep/astiqueouremp/ideseven
et nncez bien avec un mb/ange d'eau et de
i!ll7a/_re,
Ces de_pbts so]It ]/on]/a]eme_]t m/ r_si(;b_
de se] (pl] _/e pe_lt _tre retir_ par ]e _-_c]e
de _/etto}_ge.
Si ]e {ore" _/'est })as propre apr_s m/cycle
de _/etto}v_ge, r&p&tez ]e cycle.
;Vom _/e po_vez ix_s r&gler ]e fi)m" po_lr
]a c_lisso_/a_a_/t q_l']] _/e soil assez t_'oid
po_lr q_le ]a porte se (;l_',erro_l]]]e.
; Pe_/(la_/t ]'m_to_/etto?age (1_1fore;
vo/is poH_ez ei/t(mcez ]a tollche
CLOCK (herlege) p(t_r a#i ch er ]'h eure.
Pore" revel/h" m/compte i) rebomN (hi
_/ettoyage, e_/timcez ]a to_lche SELF
CLEANLO/STO(a_tenetteyagehas/std).
Siles grilles deviem/e_/t difiiciles i_
g_isser, app]iq_ez m/e petite q_a_/dte_
d']mi]e de c_lisso_/sin" m/ess_ie-to_lt
et ess_lyez ]es bords des grilles a_ec
]'ess_lie-to_t.
REMAROUE: appwezsur/a toucheRANGE
LOCK-OUT(verre#i#agede/a c_isini#re)
ettenez-/aappuybependant3secondespour
I'arr_ter
72
Page 73

Fonctionssp .ciMes devotta centt le defour. . .eleet ome. .e s.e.e
Votrenouveau contr6/e tactiie a d'autres forlctions. Voiciies fonctions et comment/es activer.
Lesmodes de foncfions spbcb/es peuvent gtre acfivbes seulement Iorsque I'affichage prbsente I'heure. Elies restent
en mbmoire jusqu'9 ce que les btapes soient rbpbtbes.
Lorsque I'affichage montre votre choix, enfoncez la touche START (dbmarrer).Les foncdens sp_ciales restent en
m_moire aprbs une panne de courant, sauf la fonction du Sabbath qui dolt gtre rgnifialis_e.
Arr_t de 12 heures
Hi/Lo
Aveccettefonction,si vousoub/iezet
laissezle fourenmamh¢lecontrO/eI'_tebdra
automatiquementapr_s12heuresdurant/es
fonctionsliecuis'sonouaprbs3heuresdurant
unefonctiondeSI.
Si vol_s de_sirez d_sactiver cette fkmctio_L
snivez ces _tapes.
[] Eldo_cez ]es tol_d_es BROIL XI/LO
(gr#ter a haute/basse temperature}
et RAKE (cuissen} e_ m _m e temps
pe_dam_t 3 seco_des insqn'i'_ ce qne
]'a:t_]chage im_diql_e SF.
En[imcez ]a touche RELAYSTART
[]
(d&narrage retard_J.i_squ?_ce ql_e
no sh&_ (aucuI_arr_t} s'at_khe.
EmKimcez ]a touche START(d6marret)
[]
pore" _ctiver 'ancm_ arr_t' et ]aisser
]e co_m'6]e i) ce mode de fimcthm
sp_:cial e.
Selection de temperature on Fahrenheit ou en Celsius
VotrecontrO/edefourestr@/bpouruti/iserdes
sb/ectionsdetempbratureFahrenheit_maisvous
pouvezleschangerensb/ectionsCe/sius.
[] E_ff(mcez les t(mches BROILRI/LO
(gri#er _ haute/basse temperature}
et BAKE (e_issen} e_ m _m e temps
pe_da_t 3 seco_des insqn'i) ce qne
]'a:t_?chage i_diqne SF.
E_Kimcez ]es tollches COOKING TiME
[]
(temps de e_issen} et BROIL HI/LO
(gri#er _ haste/basso temperature} en
m_me tem}>s.....J[;at_khage, i_diq_e_;_
E_dimcez ]es to_ches COOKINGTIME
[]
(tempsde e_isse_}et RROILRI/LO
(gri#er a haste/bassotemperature}e_
me]_e [e]_ps i'_ OoHve;JIL [, a:t[icha_e
i_di(]ue_ C (Ce]sins).
TonMitesdefindecycteaminuterie
! 3b/pscourtssuivisd'unautreauxSsecondes
jusqu_cequevousenfonciez/atouche
[%,_%_[ CtEAR/OFF(annulatien/att_t).Ceb/p
continudeSsecondespeutgtreannu/b.
[] Enfo_cez ]es tonches BROIL RI/LO
(grillera fla_te/flassetemperature}
et BAKE(c_issen} e_ m_me ternps
pe_dm_t _ seco_des.iusqn i'_ce que
]'a:t_?chage i_dique SE
[] E_Kimcez la tonche START
(d_marre_).
[] E_Kimcez ]a to_che KITCREN TIMER
ON/OFF(mi_uterie de cuisine
marehe/arr_t), i. at_ichage h_diq_e
CONREEP (hip centinu_. E_bncez
]a to_ch e KITCHEN TIMER ON/OFF
(min_terie de e_isine marche/arr_t)
i'_home;m. I,'at_ichage h_diqne_
REEPNip}. (Ceci m__n]e ]e hip
m_x 6 seomdes.)
[] E_Kimcez la tonche START
(d_marre_).
73
Page 74

FoncdensspeciMes de vetmcontt le de four.
Volumede tonalite
Cettefoncfionvouspermetd'ajuster/esvolumes
des tona/it_s pour obtefflr un nii/eau acoept&_J/e,
//Y a tTOI:S"niveauxpossiblas'.
[] E_ffimcez les touches BROIL B!/LO
(griller _ haute/hasse temperature)
et BAKE(cuissen) em_m&_e temps
pe_dam_t 3 seco_desjl_sql_ 5 ce ql_e
Fa_ichage im_diql_e SF
E_tbncez ]a to_mhe OVEN LIGHT
[]
ON/OFF (lumi_m d_ four marche/arr_t).
I ,'a_5ch age i_ di quem 2 BEEP(2 hips).
E_{bncez ]a to_mhe OVEN LIGHT
ON/OFF(l_mi_re d_ four marche/arr_t)
i'_[_omeau. i, a:ftichage h_diq_em
3BEEP (3hips). Ceci est ]e _ivem_ ]e
12heures, 24 heures ou effacer Yhodoge
VbtTecontrO/e est r@/b pour uti/iser une hofloge E_ffo_cez 1:/touche CLOCK (florloge)
de 12heums. finom'eau I>°m"I/asset.... i:/l'horloge, de
Si vous pr_%rez m_e hofloge de
24 heures ou u_ arr_t d'afl?chage,
s_dvez ces _tapes :
[] Elffb_cez ]es touches BROIL RI/LO
(grilier & ha_te/hasse temperature)
et BAKE (c_issen) e_ m6m e temps
pe_]dm_t _ seco_des iHsq_'5 ce q_e
]'af_?c]_age i_diq_e SE
E_ffimcez ]a touche CLOCK(hodoge)
[]
m_e Jt_ds, I, affichage i_diq_em 24hr
(24heures), Si c'est ]e choix q_e vo_s
d&sirez, enfimcez ]a touche START
(d_marrer).
[] C]_oisissez ]e niveau vo_d_ (1hip,
[] Elffol_cez ]a touche STABT(d_marrer)
24 hem'es, l ,'a_l?chage h_diq_*e_:/24 hr
(24 heufes). Si c'est ]e choix q_e vo_s
d&sirez, e_:timcez ]a to_*che START
(d_marrer).
El_%l_cez ]a to_che CLOCK(hotlo_e)
{) _o_wea_! pore" e[li/cer ]'ag[]chage.
l,'affichage h_diq_era OFF(arr_t).
Si c'est ]e choix q_e vous dSs]rez,
e_ffimcez ]a toga he BYABY(d_marrer).
REMABOUE: si/'hoflogeestenmode d'arr_t
vousnepourrezpasuti/iser/a fonctionDe/ay
Start(dbmaa_ageretadb).
E_{b_cez ]a to_mhe OVEN LIGHT
ON/OFF(lumi_re du four marche/arr_t)
i) m_me;m. I, af_ichage h_diql_e_/
I BEEP (I hip)_ Ceci est ]e m_ivem_]e
p]l*s has dl_ vo] m_ e.
Pore chaq_le ckmgemellt de _?ive;m,
w/us e_te_dez m_e to_a]it_ q_d
i_ diq _e ]e _ivem_ de vo]m_ e.
2 hips, 3hips).
p1/_ _r a c dv e r ]e _ iv ea __ i _ di q __e_.
74
Page 75

Utiliser la conversion Auto Recipe TM
Pour/acuissonfi convexion,/a fonctfon
de conversionAuto Flec/pe"_convert/ra
automatiquement/es tempbratures"de
cuissonrbgul/#respar/a tempbrature
de cu/sson_ cotTve;_votT.
L'aff/chagebdiquera/atempbrats,reconvertie
(r4duit_)actuelle.Pare_mple,sivousenZfez
unetempbrats,rederecetterggu//_re(Je177°C
(350°F)etsivousenfoncez/a toucheSTART
(d#marrer),I'affichagebdiqueCONet/a
ten_bramreconvert/eestde163° C(325°F).
REMARQUE: cettefonct/onneconvert/tque
/es"tempbraturesdecu/ss'on,non/esdudes de
cu/sson.OuandvousutflLs'ez/arOtfsseriepar
convectfon,/atempbraturedufournese convert/t
pasautorrlat/quemenL
www.eiectromenagemge.ca
Pourart#tot cette fenction :
Eldom_cezles touches RROIL RI/LO
[]
(griger a haute/basse temp#rature)
et RAKE (cuisson) em_m_me temps
I)e_dam_t :_secom_desi!_sql_'i'_ce ql_e
]_alL_ichageh_(]](]l_e SF.
Eld'oN_cez1_touche CONWCTfON
[]
RAKEMLILTI/I RACK (cubsen
cenvexien mu#i/l grille), i ,'_H]ch_ge
h_d]q_e_'_ CON ON (centin_ en
m_rche). En_b_cez 1_ to_che
CONVECTIONRAKEMULTI/1 RACK
(c_issen convexion multi/1 grille).
]J_H]ch._e h_d]q_e_ CON OFF
(arr#t centin_).
[] E]_[o_cez ]a touche START
(d#m_rrer).
Po_" act]ve_" cette {k)]_ct]o]_, _'e_pe_tezles
1_touche START(d#marrer]lo_sq_e CON
RN (centin_en marche)s'aHiche.
75
Page 76

Ut#iser/a fonctionSabbath.
(Con;ue pour te Sabbath et tes Grandes F tes juives.)
La fonction Sabbath peut servir seulement sous cuire/rdfir Eriene peut servir pour/a convexion, grLI,autonettoyage ou
d6marrage retardO.
HEMAROUE : /a /umi&e du four s'aflume automatiquement Iorsque /aporte s'ouvre et s'#teint /orsqu'efle se ferme. L'ampoule
peut gtre retiree. Reportez-vous _ /a section Remp/acer /a /umibre du four Sur les modbles _ commutateur sur /e panneau de
contrSle, /a /umibre du four peut gtre a//um#e et biss#e aflum#e.
Comment ropier le four pour cuisiner ell rStir de maniere regMiere
i_ ii ii
[Z]!
Lorsque I'affichage indique _ le
four est r@l# b Sabbath. Lorsque
l'affichage indique D C le four est
r@16b cuire/Mfil:
Assurez-vousque/'hoflqgemonlmb bonneMum et []
] Enioncez et tenez entb_/c_es los touches
BROILHI/LO(griRera flaute/basse
temp&ature) et HAKE(euisson) enm_me
tempsiusq_F?_ee que l'affkhage h_dique
SE
REMARQUE:sibake (cuisson) o_*broil
(Triller) s'a_iche, ]es touches HROILHg/LO
(griRera baute/bassetemperature)et HAKE
(cuissen)n'ont pas _t_ entb[_c_es en
mOme temps. En%ncez la touche
CLEAR/OFF(anndation/arrOt)et
FecoI'_I_'/eH ( e z,
[] En%_cez Ia touche DELAYSTART
(d#marrageretard#)iusq_l?_ee que
SAbbath s'af_khe.
[] Enfoncez Ia touche START(d#marmr)
et D s'affkhe,
Ud]isez ]es touches mm_&:iques et entrez
la temp&'atmTe _oulue erme 77: Cet
k88: (] (170" F et 5_')0"F). Aucu!_ sig_al
ou temp&'ature af!ich£
Enfi_cez la touche START(d#marrer}.
[]
AprOs ulle [)&'[ode de d&d al&to[re
[]
d'emiro_ 30 secondes fi I minute, D C
s'afficbe_;_ indiquant (p*e Ie fi,m" est fi
c_drei_6tic Si D C ne s'a_iche pas,
commencez fi [/omeau fi I'ettape 4.
Pore" @*ster la temp&;mu'e du _btlg enfimcez
]a touche HAKE(cuisse,_)et enu'ez ia nouvelle
mmp_mtme ufilism_t ]es touches m/m&iques
et ex/fbncez la touche START(d#marreO.
REMARQUE:les to u_hes CLEAR/OFF
(ammiation/arrOt)et COOKINGTIME(tempsde
e_isse#) fimetiom_eront dm':mt la fimedcm
Sabbad_.
[] En%_cezla touche HAKE(cuissen),
Auem_signal dome&
Comment ropier cuire/rOtir a min_terie = dOmarrage immOdMt et arr_t
autematique
Assurez-vousqueI'hoflogemontmb bonneheureet
I minute et 9 beures et 99 mim[tes, Le
temps de cuisson enF_: s'af[icheH.
Lorsque /'affichage infiique D le
four est r@16 b Sabbath. Lorsque
]'affichage irldique _ C ]e four est
rbgl# _ cuire/rSti_:
76
] Enibncez et tenez enfbnc&es los touches
BROILHI/LO(griRera flaute/_asse
tempOrat_re)et HAKE(cuisso#) en re#me
tempsjusq_,?_ee que Faffichage i_dique
SF.
REMARQUE:sibake (cuisso_) ou broil
(g_:iIler) s'afliche, les touches BROIL H_/I.0
(griRera ba_te/qmsse temp#rature) et BAKE
(cuisse_)_'ont pas 6t_ enfimcOes en
mOme romps. En%ncez la touc}_e
CLEAR/OFF(a_nulatien,/arrOt)et
re<ommence>',
[] En%ncez Ia touche DEL_YSTART
(d#marrageretard#),jusq_l'fiee qu e
Sab bath s'affkhe.
[] En%ncez Ia touche START(d#marmr)
et D s'af_iche.
[] En%ncez la touche COOKINOTIME
(temps de euisson).
[] Enfimcez les _ouches num&iques pour
the[sir Ia dllre_e de cuissoll xouhle entre
[] Enflmcez la touche STARrfdemarrefl.
[] Enfo!_cez la touche HAKE(euissen),
Aucm_ signal donner.
Utilisez les touches _um&'iques et entrez
[] la temp&'am_e _oulue. _ucm_ signal ou
temp&:at ure af[ich_.
[] Enfimcez la U_uche STARr(rbmarrefl,
[] _pr&s m_e pe_Jode de d&li aDatoire
d'emiton }0 secondes fi I minute, D C
s'affichem indiqu mt que le ibm" est fi
cuire/r@i*: Si D C _e s af_]cbe pas,
commencez _'__/omeau _ I e:t;_pe7,
Pore" :}it_.ste["la temp_:mtm'e (hi fk_tl[',e0fbncez
la touche BAKE(euJssoNet e_/trez Ia i/oHveHe
tempdrature utilisant les touches num&iques
et enfbncez Ia to_l(:]'teSTART(d#marrer).
,&la fi_ de la cuisson, l'affichage cha_Nera de
D C fi Det 0:00apparakH, i0diqu mtque le
ibm" est &eint, mais e_core r&gl&fi Sabbath.
Redrez les aliments,
Page 77

Comment quitter/a fonction Sabbath
www.electromenegemge.ce
÷÷÷
Ht/Lo
[] Enfi_!_cez la {ouche CLEAR/OFF
(armulation/arr_t).
] Si le fbm fb_ctiom_e, atte_dez pen&mr
role p&'iode de d_lai al&itoire d emi_o_
30 seco_ldes fi1 mim_te@lsqu'fi ce q_te
seuleme_it _ s af_iche.
[] E0fimcez et te_Iez e_if_mc_es les
to_d_es BROILH!,,'LO(gri#er a haute/_asse
temperature)et BAKE(cuisson) enmfme
tempsjusqu_ ceque 1'af_ich_ge
indique SE
[] Enfb_cez Ia {ouche BEIAYSTAflT
(demartageretardel iusqu?_ce que
t2shdn (arr_t 12)o_ noshdn (aucunarr_t)
s';d[kI/e.
[] Choisissez 12shdn, indiqu mtque le
tbur s'&ei_dra automatiquement apr6s
J2 heroes ou fi0 $_dfi (_cufi _rr_t),
i_diquant que le Ibm" ne s'e_tei_dm pas
automatkluement ap_bs I 2 heroes.
[] Enfimcezlato_lche STA_T(d&narrer)
lorsq_le [k@tio_ que vous d&i_e/
s'a_iche (12shd_ou .0 shd_),
REMANQUE:s'il ? a m_e palme de corn:mr
ta_dis que le fi_m7est sous la fimctio_
Sabbath, le fi_ur s'e_teindra automatkjuement
e{ r'esteH eteill{ ii/eme a{i retom7 (hi co_!ra_lt.
][,ecoxm ¢_ledu fbur dok &t_ere_i_fitialis_,
77
Page 78

Entretien et nettoyegede/e cw'dm re.
Assurez-vousquetous/escontrffessent_teintsetquetoutes/essurfacessentfra_chesavantdenettoyerroutepar@defa cuisini_re
Si votrecuisinibreestretiree pour le nettoyage,I'entrefienoupour touteautreraison,assurez-
vousquele disposififanfibasculementest r_engag_correctementIorsquela cuisinibreest
replac@.Sinon,la cuisinbre pourraitbasculeretitpourraity avoirdesblessures.
Commentrotifer b pe#icde d'expbditiendeprotection et/e rufland'emfla#age
BrOieuravantdroit
Agdppez aec soi!l m/coin de 1:_pellicule
d'exp&[ition de protection aec vos doigts
e_ retireMa len_eme_/_ de la surfi_ce de
l'appa_e[l, N'milisez pas d'ol_ie_ trancba_t
pour i'e_fle_er, Redrez _oute la pellic_le av,mt
d'miliser l'appareii pore: la premi0re fi)is,
Boucflons et t_tes de flrMeurs
Pore" s'assmer (l_l'il n'? air pas de dommages
au fini d_ produit, le meillem" me?on de
rotifer l'adb&if (hi mbm/d'emballage du
_lom'€l apparel! eat d'appliq_ler (t_ di?mrge[/t
liqtfide pour laver la v,_isselle, Appliq_ez a_c
m/chNbn so_@e et l_dsseztrempet:
REM,aRrIUE: /Sfhdsif@it_treretirederoutes/es
pibces./Inepeut/'_tres'i/estcuitenp/ace.
Boucilon
Bectrode
Basedu
br_leur
Assurez-vousde bienpositionner !e
trau de la tgte dubrfi/eur sur
]'_/ec_Todeeta'e bieninsurer/a t_te
du brfiteurb I'intbrieurrio b base du
brf@u_ Unpetit espaceentre/a
base et #_trite estnormaL
BrOieuravagitdreit,brOleuravagit
gauche,brQleuratria,re droit et brQ!eur
arri_regauct_e
BouchegidubrObur
T_tedubrOleu[
[ _es :_semb/ages de blqe_[rs doi_ em 5tre
]mxXsr_guli(UremeHt at, hie!! s('l_;;Ipr(xs mm
d0\ _ seH_ent.
[:teigneztous/escontr_zesavanrdemr/mr/eso_eces
flubr@u_
[,as g_il/_s du br('dem; }es _(x_eset }es boud_oHa
(M brfl[em" se reth'em polu fi_cilher/e
l/altO\ _/_r(1
[i5[ect_ode tie Fa[lumeur d'0fi_icel]e e_
cxpos_e au<lcl{_ de J:_s_irihce de J;-_base d_
J)t'('l_e_H',Ell lwtt!):/_/t/;_ stiff'Ice de cmnso_
i,ttention tic I_e pale prend_c l'(qectr(_dc de
(}e]_/ [)O(l_T;li[ p_'01_(}(][[(C][" des do[[H_/t,_-.'_ _*
l':dhm_eu_: Poar evitet de coi_cer an chiffon s_r
l?#umeurffbtince#e,labsez lee t_tes d_ brdeur
e. pbceennettoyantb sarface de e_ieson,
Attentio_ de _w p:_s po_sser [es contr6/es de
];_ Ml_ti_(e de c(liseoli ¢t_/_/etto} ;tJK 1_I b[IF_/(e,
(/_ choc _k_cFiq(_e pomTait en d_coul_r ce
qui _o(_s f_;lit pet_-_t_e re_verser des
casseroles cbaudes,
br{'*lem puia/e b()u(hon du br{'*lem" et e_ffi_
1:__rille.
T_te eT Ooucno
rue' eus
T_te et
DO[lOgieR UelKS
&
Avagituela culslruere
[_te et
boucno _[anc_s
Ci/argib_edestabilite . aiguilb
BasedubrOieur
_'aisou quatretaqueZs,Pourremettro
M/$E EN G_RDE: NE FAITESPAS
FONCTiONNERLEBRULEURSANS
OUE TOUTESLESP/_cCESSOIENT
EN PLACE,
' trlcotsr OU UR
Assurezwous debien posifionner le
trou de /atgte dubn)leur sur
l_tectrode. Le baucbon du brdeur a
enpbce /ebouchatz,assurez,voue
q_3ueun de ces taquetsne repose
dartsla chambrede stabilite.
Utilisezune
Ibntu_sad_
78
Page 79

&#les du br_leur
w'ww.electromenagemge.ca
[,as g_lles du bK'dem" en &n>_i!de
porcelaiae doh'ent _t_e laSes rSguliSreme_/t
eL bie_l sere _q)r(csrout dS\ersement.
Les gi_iles se la_e_K soit daIls le lme-_aisselle
soit dins de l'eml saxon0euse puis cince_es fi
l'eau pmp['e. Vous pouvez aussi utiliser des
*_ett(_xants abrasit; et des tampons fir&:m>r
pour nettcffer les grilles du bd'deur et la gri!le
d'&'e_m Essu) ez Ies grilles a_ec ml chiflbn--ne
les _eplacez pus sin"m/e smti_ce de c_dssox/si
dies sent hmmdes.
Pore7_efirerles aliments cuits, place>lee
dans m_come_/ant comert. 4ioutez 59mL
(1/4 de t Isse)d'ammoniaque et laissez
tramper pelMant plusiem's heures ou pour
la mdt. [_avez,dacez et ass&hez Nen.
Bie_lque les glilles soient &mlbles, riles
pe_xh'ontleur _clat gTaduellement pe_*
imporm leur entreden. (eci est caus_ par lem"
exposition co_tim_e fide hautes temp&'atm'es.
Ne fidtes [xmfimctiom_erle br01eur pendant
kmgtemps sam qu'il K)ak une casserole sin:
la grille. Le fini pou_rait s'&ailler sa_/s
casserole pour absorber lachalem-
kpuXsle netto}age, !>placez Iesgdlles lat&'ales
pore"que lee H]lo_/gescentmles soient
orient_es _ers le cent_> de ]a stltlfi_cede
cuisson. Assure>_o_lsque les grilles soiem
bien plac_4essin"leebr('dem'set qu'dles soient
stableset fini_eau.
Pieds degrille de caoutchouc
Pour 1>_stabilitY, les pieds du br('_leur de
\otte s/N'J_i/ce (lie c/Iisso_l So,It ['eco//\et'ts (]_e
caoutch(x_c. Sices pieds so_t endommag&
ou perdus, remp]ace>ies imm&liatement.
Pore7 commmMer des pieds de g_'ille de
caoutch(4_c de rechal/gc, _euillez appeler
6e_tre_atio_al
dopieces............... 8_._1.16_6
Piedsdegrille
encaoutchouc......... #WB_2Tf_
Surface de cuisson
Pollr (_viter d'e_dommager ]a sIlr{i_ce e_
emai] vitrifie2 de ]a s_lrti_ce de cuisstm et
po_r ]'empOcher de perdre so_ blJ]hmt,
_?ettovez imm(_diateme_?t toll[
d(_lbordeme_t, l,es a]ime_ts qui so_t tries
acides (tomates, cho_cro_te, ]us de f_ uits,
etc.) o_, ]es a]ime_ts qui so_t tries sut;r(_s
peuvel/t cruiser d!esStaches mates, si (m]es
]aisse repose_:
(_(lal/d ]a sm'fime a rei}'oidi, ]avez-]a et
ri_/cez-]a. Pore" d'mm'es taches comme
]es taches de gins, etc., ]avez fi ]'em*
savom_eme qualm ]a sm'fi_ce a refi'oidi.
Ri_ces el_s_dte et po]issez avec m_
]i_ge sac.
Boutons de contr_le
Lesbod_ns de con_rdeserefiren_pour faci/iter
/enettoyage.
A_m_t de retirer ]es bout(ms po_r ]e
_etto}_ge, veui]]ez _oter (_e lee bo_to_s
s(mt e_ positi(m OFF(ARRET).
REMAROUE: ne rangez jama/s c/e rnafibres
inflammablesdens an four,unt/rok ouprgs
dela surfacede cuisson.Ne rangezjamais
oun'ufilisez jamais de mafibres
cornbusfibM_,d'es'seneeou d'autre vapeur
oufiquide bflammab/e au voisbage decet
appare//ou de toutautre ag)parefimbnage_
REMAROUE : ne sou/evezlama/s"/asurfacede
cuLs'son.Si voussou/evez/asurfacede cuisson,
vousdsquezd'endommagerVOtTecu/s/n/bmet de
/a fa/rereal foncfionner
REMAROUE : pour/es surfacesdeeu/s'sonen
ae/erbo,@dab/e,eonsultez/a section dessurfaces
enacier boxydable.
o_* vo_*s po_wez lee laver avec de l'em* et
(h_ sa_o_. Assm'ez-_ om q_e ]'i_te_iem" des
bollto_s soit sec avm_t de ]es reph/cen
E_ remp]aga_t ]esobo_*to_s, vd_rifiez ]a
positio_ OFF(ARRET) pore" assm'er ]e bo_
Page 80

Entmtienetne oyagede/a c.isiniere.
GriNedef0ur Gri#esdefeur
DouiHe
Tol_tes ]es gri]]es de ibm+ se m_etto]ei]t
{'_]a mail_ a_ec im i_etto_eur abms]f ou
line ]aim_e (l';_ciex; AprTcs ]e m_etto}age,
xim_cez les g]Jlles a_ec de Feau propre
et _/sse_chez a_ec im chiftim propre+
f<,es giJlles rev6mes de porcelah_e gxise
[:ielwei_t rester (;l_ms le {i>m+ (;hit;mr le
c}cle d'alttoN_ettoyage pore+ _iter les
dommages+ f<,esg_J]]es btJllames de
colflel_r m'<gei_te_e [:ielwem_t rester (]m_s
]e {k)m +dlmmt ]e c_c]e d'alttoN_etto}_tge,
mais elles perdrtmt lem +_Tcl_/tet
deviem_drol_t difticiles i) g]isset:
4mpodes de four
REM4RQUE:/ecouverclede verredoit _tre
refir_seu/ement/orsqu?lestfroid.Desgants
de latexpeuventoffrir unemeilleureprise.
11fiu*(h:/gm]sser les bords des c6te_s des
grilles avec m/e kTgT*retouche d'hldle
v_g@a]e aprL_s le m_ettoyage i'_]a maim_ ou
(]m_s ]e {i>tm Ceci ai(let_/ii g]isser
filci]emel_t ]es gr_]]es (}!am_s]e J_bm++
Couvercbde verre
[]
[] Portez desg_m_sou udlisez/m chittb_/
propre et retirez l'mnpoule de son
emballage, Ne {ouchez pas l'ampoule
ii doigts mlS,
80
Page 81

m i
Ne frortez pas et ne nettoyez pas
le joint de porte car il a une r_sistance
extr_mement faible b I'abrasion.
Si vous remarquez qu'il fiedent us_,
s'effiloche, est enflommag_ de quelque
fa_on ou a _td d@lac_ sur la porte, vous
devriez le remplaceL
Nettoyage de ta porte du four
Pournettoyer /'intefiea deb porte:
Puisque ]a section _'_['i0t&fiem" du,ioiut se
nettoie durmK ]e c}c]e d+autonetto} a_e,
aucut_ besoin de Âe_etto}er _'_]a m>_Ju,
[,>_section _'_Fext&:iem" du ioint et la
doubMre de porte se nettoient aec m+
mmpo!_ fi r_!cm'er de pl:_stique ou r'empli
de saxon, de l'eau chaude et du d6teNenL
Rincez bien aec m_e solution de qnaig-re
et d'eau,
PournettoferI'ext&&ur de b porte:
Utilisez (h*saxon et de _'e;m pore: bie+_laxer
le dess+ls,los c6t& et I'a_;mt de la porte du
fbm: Nncez Men. \%us pomez m_ssi utiliser
till _letto} al_t potlr Ie verre potlr _ett+>_ er Ie
yet're i?l'ext&:iem" de la pot'w, Ne laissez
pas l'em_ couler daas los ou ertmes des
&eats.
Retrait de ta porte du four
w'ww.electromenagetsge.ca
:+ Si des taches sin: la g_Irnimre d'&ent de ia
porte reste[K, utiIisez {11]lletto_/{K (][o+lx
abrasif et m+racloir @onge pour de
meilleurs r&ultats.
;+Les marinades, les ius de fruits, les sauces
tomates et les produits pour arroser
come_ant des acides peu ent pro_oquer
m_e d&olomtkm et doivent _tre essm&
imm&li>_ternent. Lorsque Ia surplice elst
floide, netto}ez et dacez,
:+N'milisez pas de _etto}:mt de fbuc de
poudres de nett+>xage ou d'abrasifi_ forts sur
Fext_Hem" de la porte.
Fente
Verrou de charniere
Tirezfes verrous dela chami&e
vers /e bas pour d#ven'ouiflet;
Position de retrait
d_b
ta porte esttres Io_rde.Attention onretka_t et
souleva_t la porte.
Ale.soulev+zpaslaporteparlapoi_nee.
Po_r rotiferla porte:
] Ouvrez end&'ement 1_porte.
Po+tssez les xeu'ous de la chami&'e xe_:s
[]
le has xers le cadre de porte,fllsqu'fi la
position d&errouilDe, l/_ outil, comme
m_ petit tom nexusfilame plate pourrait
&tre _Kcessaire,
Agdppez fem*ement les deux c6te%de
[]
la porte sin7le dessus.
Femlez la porte fila positio_i de retrak
[]
de Ia porte, sok fi moiti_ chemin entre
la position d'arr_t de gril et la position
enti_rement om'erte.
[] So+_Âe_ezla porte vers le ha+ajusqu'i? ce
que le bras de chami&'e soit d_gag(4 de
la tente.
Po_r replacer b porte:
[] Agrippez fem+ement les deux c+'_tetsde
la porte sin"le dessus.
] Axec Ia porte Bord
au re&me inferieur
a+Nle que la
positkm de fenie
retrait, placez
l'enfo+_cement d+l
b_;_sde charni&re
darts le bord
inf>,iem" de la fb_me
de la charnib_e, i,'encoche du bras de
chart_i&'e dolt &tre hie//installete darts le
bas de la re+ira.
] OmTez enti&'ement la porte.
Sila porte ne s'om re [)as enti&rement,
l'e_fi>ncement ne s'installe pas
correctement darts Ie bord
infk4dem7de la fe_te.
I_l Poussez le vem)u de la charni&'e vers le
_LLJ
ham co_m'e le cadre avan{ de la caxit&
du fbm; en position _et:ro+fillete.
Brasde
chanfiere.,_
Verroude
chamiere
Poussezlesverrousdela charnibre
vers/ehautpour verrouiller,
]Brasdecllami0re
$_daces peintes
i,es sudi_cespei_tes inchle_t le dessuset les
c+;t& de 1_porte, Ie dessusdu pam_eaude
(ontr61e et lawmt du tiroir Netto_ez-tes avec
du savo_ et de ]'eau ou mm SOi[/tio/} de
[] Fem_ezla porte du fbm',
N'ufilisez pas de nettoy mt de fore:
cot'_lt/leF(ia_,.... de Â)°udres de netto_age, ou
d'abmsifs forts sin" aucune surfi+ce peinte,
0°7
Page 82

Entretienet ne oyage de la cuis .te.
Surfaces d'acier inoxydaflle (suroertaines modbles)
N'ut#isez pas de tampons de leine d'aeier;
#s pourreient refer le sudaee.
F'O{IY Hetto_,el ' I;_ St!rti_(e en ;_(ie["
inox}dable, milisez de ['eau chrome
S;/\ollBe{Ix OH {Il! prodtfit netto}ant ou cii:e
a acier inox_daMe. Essuyez to{_iom's la
sm ti_ce (la_ls lesens (h{ grai_!. Stli_ez Ies
instructions (hi prodtlit _letto}ant pore
netto_er 1;_sm'fi_ce el/ acier inox_d_/bJe,
Panneau de contrSle
Si vous le dbsirez, vous pouvez dbsac'fiwr los
touches tacfi/es event b nettoyage.
P,eportez-vo{!s i'_la secdom/ Verroufl/agede
/a cuisbibro.
Essm ez ]es _c]_bollssm'es a_ec m/ chinb]/
h m'M de.
Volls polwez mlssi Ildliser m/ m/etto_mt
pom" le verre.
Element chauffant du four
Ne _/ettoyez jpas l'_l_me_/t (]_ gril. To_{te
saletet b_{1 e_;_ 1orsq _e 1'_1_m e_/t sere
Potlr satoir col0[/-ie{!t acheter Ie prodHJt
netto_am on Ie cite pore' appareils
dlectromdnagers en acier inoxydable, ou
pour tromer {m ddtaillam oil {m mag;_sJn
de pieces Mabe pros de chez _ot!s, _etlillez
appeler notre i/{{i)]dl;O SAILSfi'ais :
Centre national de pieces !.800.66E 1616
www.eleetromenegersge.ee
Red fez 1es sa]e tots pl us ]m po_'ta m/tes _ ec
de ]'eml tibde sa_om/ellse. N'_lti]isez
a_lcm/ ab!_sif de q _le]q _le t}]>e q _le
ce s(fit,
flbacfivez los t_uc'hes t_d77es apr_s /e nettoysga
Poussez VerS /e has et sortez.
l Guided'arr_t
Fond de four amovible
PourrotiferlefonddufourotfaoifiterIo
nottnyage:
[] Retirez ]a porte &l _bur e_! s_dvmlt ]es
instructions de ]a se(:tio_ Ro£roJtde/o
portedufour.
[_] Po_lssez _ers ]e bas et sortez ]e fk}_](|de
ic..i
fore" amo_ible,
Retrait du tiroir de rangement
Pourrotifer le tireir :
[] Tirez ]e tiroir m_ssi ]oi_/ q_e possible.
[] Soulevez l'avm/t d_ tiroirj_squ'i'_ ce
q_{e ]es b_{tetes detpasse_/t ]es g{fides.
D,etirez 1e ti roi_:
[]
[] Nett%ez le [imd d_l Ibm" i'l l'eau chaude
SaXon ne[_se.
[] El/ r_i_/staHm/t ]e fired (1_ {ore;
ass_rez-vo_s de le fi6re glisser
.iusq_'i:_ ]'arriL_re (1_ fbm:
I_PORT,_NT:replacez to@_m'sle [)._(t
de fl_m: amovib]e ;want de ]'_ltiliser i'__]omeml.
Pourmflacer /etitoir:
[] [ L*cez ]e, _;fi]s d_ tiroir sm']es
guides.
[] Po_{ssez ]e tiroir m_ssi ]oi_/ q_e
possible.
] So_{]evez ]'avm/t (1_ dr<fir et po_{ssez
j_sq_{'i'_ ce q_e ]es b_{t_es detpasse_/t
]es g{fides.
[] ,_baissez ]'avm/t (1_ tiroir et po_ssez
.lusq_'i'_ ce qu'i] ferme.
82
Page 83

Conseils de d_pannage
Gagner du temps et de/'argent f R#visez los tableaux des
pages suivantes d'abord et vous n'aurez peut=#tre pas
besoin d'appeler le service,
Causes possibles Action
Los fiammes des br_/eurs La qualit_ de co_bv.sdon
sontjaunes 0u fours des fla_mes du br_etw dolt
oxtr_mit_s sontjaunes _tre d_termln_e _suellement°
Boutons de controls Le boaton n'est pas e_'oncb. ® Pore" mem'e _'tIztp<,sitio_ OFF (ARRET). eHt?,mc//e boutoH, p_is
no toumont pas Iom'He 7.
Lesbr_e_mns La foncllon Range Lock-Out ® [ ,aissez t'eFt'oklir h_ cm.qnigq'e et a]pp_yez h/_ouche _,_N_
s'aHumentpas ,verro_illage de la csls_bre) LOCK=OUT(_cn'o_dHage dc [a c_isinib_'e) peudm_t 3 secoHdcs,
est active, iusqu'_) (e q(w i'dcr:m b_diq(_e LOC OFF(wrr_,d/b_ge m'rd_d).
La fiche st_r _a c_fis_bre ® Assmpz-_oHs q(_e la lithe e._l brzm( hde darts tree [wise so_s
n'eN pas i_sbrbe enli_remem ICH.qOH. corve( WmenI mist h h_ a.r_?..
dar_s la prise blectfique.
L'alJ_en_afior_ en ,_az n'est pas ® Repo_le/-_)(_s :rex iHst_'ucfio_s d'i_stalI_lio_ ibm'Hies :6v(" I:_
brar_chi_e ou en marcheo ( _dsinibre.
® (tilisez Jes illusl_ Itions/)h_s has po(_ ddl( _miner si ks {lammes
de _os br6k _rs sont normales. Si los fl mml(s ressembk _t _'_A,
app( Iez k ser_k:e. I ,es flammes normak s dcvr dent ressemble_
_'_B o_l C, scion Ie bee de glz _tilisd..\_ec Ie _gdzP[ _,il es_
normal (it_e ks cgnes ext(.rie(_rs a[:ticbei/_ ties extrdmitds
j /[lI/es.
A Flammesjamtes B Extremitesjautws C-Flammes b/eu p_le
Appe/ezle service sur los s_nes exterieurs Normal pourle gaz
Normal pourle gaz PL nature/
Un fasible pourrMt btre ® Rump!:_(ez Ie IhsiMe o(_ rdi_fidalis('z le disi(_H(_ctm
_'N_? ou le dlsionctet_Lr a 6t6
d6denchi_o
[Jes plbces du hr_let_r ne sont ® (:{_H._uhez Ia secdoH Entrotion ot nottoyage do/a cuisini#ro.
pas replaci_es correctemerm
La fonstion de gerrouiHage * 5i LOC ON s';d/i( he, le ('omr_le de I;_cuisi_fi0re esl xerrouiHd.
de la 5_isini_re estactiv_e l_eigne_ (c_w lbHction i)o_r miiisc_" la ('_si_ib_'e. Rel)_)r_e_-
_(ms h Ia se('fioH Vorrouillage do ta cuisini_ro.
Lo son de d_ctic de Le boutor_ de cont_dle est ® Fom_e7 Ie b_)(_oH ho_ de la/)osido_ LITE a(_ rdgb_ge
_'s]]umeur continue m_mo e_tcore en poNlion UTE. (/&i_'d.
apr_s q_o _e br_/eur ® _- .
so_taH_m_ _e pore'sub, appele//e _eF_icc.
FIammes du bt_leur trOs Mauvals rapport d'a_' h gazo ® Si [a c_isiHiOre est bt'm_cI_de aH g:_z PI ,, _('H/iez _(_mes los
]_r_eso_l]atll_e5 dt;_[)e_, ([;_l_._ les /Hslrt/( tJo!_s d'iHsl;d!xlt_oH [[H/t'HJes _x('(' _)H'e
La ]umib.re du [our L'ampoule est desserri_e ou ® Russerrc7 ou remDIacez l'ampotde.
no [o_1_tionne pas dbfectue_tse,
Ix_ corrm_utateur de la lumi_re ® ,\pl)ele/1(- s(q'_i( e.
est brls_o
Le [o_r no [onctiom_o pas La fiche n'est pas enli_remer_. ® Assm'c/-_oHs qt_e la [k'he e._ br:m( hde darts (me prise sou_
h_s6ri_e da_s la prise de cosrarm _CH.qOH. bieu mist 5 [a _cn'e.
Ur_ fusible potwralt btre gril16 ® Rcmpla(ez Ie [hsiblc o_ rdinifialisez/( _disioHcwm;
ou le d_sjoncteur a 6t6 dbdench6o
Los conlr61es du fotw sore ® Rcporw/-_,_s h I_ section Ufitiserte four.
ma_ rbg_bs°
]'A(q_He7 Je brfl[e_.lr (q l':d[ume/-le. Si !(" _()H (1(" (JdcJ!(
( ui_inibrc.
83
Page 84

Aventffeppelerleservice...
Conseilsde d@annage
84
Le support du grok arri_re * Rcplac( z k ui'oh', (2)usuh( z ks inswu(:ui)ns de Retraitdu
repose s_r le dess_sdu rall guide° tiroir derangementda]*s Ia s((:d(n_Entrefienet nettoyagede ta
cuisini&e.
Page 85

v_ww, electtomenagersge.ca
Si le code de function se r_pi_te° ® Co(*pez le (:om'm{ _'*la (:uisini_ re p( _dan{ m moire 30
seco]/des, p(liS t'( ]uei{( Z _(! (Tolll_t_/. Si ]( code d'(l!'( Ul" d(!
['o11ctJoll s( i'('p('q(!, _tpt)( ](z ]( seF_ic(.
0°5
Page 86

Conseilsde d@annage
U_o odotu'd+ _ br_[_ _>ou Ceci est normal pour tm nouveau + Pour at'i'd[din+ la pro( ddure. +'dg+ez +m +}de d'amo_+euo}ag+ _
_ d'huile _ ooctdo l_vent four et dlsparMt avec le temps+ [>c_dmH m_ moi.s 3 I.'ures. Reporwz-t_,us h/a sccdo_ Ufitisor
ie four autonottovant
_rce odo#r Une odeur d'isola_t amour * C'es[ /cm} )omiw.
de l'i_t6rieur dn four est normale
pendant los premJ6res ndRsations.
Bmitdugotgi[otou_ Un venfilateur de refrMdlssement + C'es_ Hurma[. 1,+'_t'mUa_eur de nqi'<+idisscmem se mem'a
on tm venfilateur de convexlon +,_ mm'd/c e_ s'd_ci_dm pour _(-fi'oidir h's pibces imcmes. U
(solon la foncfion ntJllsbe) pent pore rai_ <ur/dmwr 5 tbm'domwr memo apK,s quc Ie !our soil
se mettre en marche et s'6telndre d_ch_, l,e _i'H/Ha_eltr dc ( OH\_XiOH Se ine[/l_/en _/b/n']/e ('1
automafiquement+ s'd_eh_dra iusqt_'h ceque la ibm'don soi_ ddsa(d\ge ou qtw la
[}()!'/(* S()l[ ()[/_ et'/e.
Los grifles du [our Los grilles en porcelai_e * Me_c/(m }aqi_ momam (Fhuiic _dgdmh" sin" m_c scr\icm'
OM dtl me[ § g[isser vitrifi_e g_se n'ont pas _t_ _'H papier e_ li'om'z h's ('(5_ds des grilles du /our a\ et relic
bien nettoy6es, se _'_ic_(' e_t pal)ic_.Ne/m I\d_ise_.iam:d s (le Pare "' (m
d':mm, hd.'iiiam.
t_cron indique
toe (verroMHoge]
La fonction Range Lock-Out
(vurronillage de la c_dsiniSre)
est active.
i\ssH['ez-xo//s (ittt, [es ( OlHl"(}ies des bF([[ellt's soietH
en position OFF (arK't). ArKqez (:e_e {))n( tion pour
it(mr utiliset votre (:!fisini_'re. Cons_fltez la section
gorrouillago do ta cuisini&o,
Page 87

Veus cherchez quelque chose de plus ?
Vous pouvez trouver ces accessoires et beaucoup plus encore
www.electremenagersge.ca, ou appelez 800.661.1616 (durant les heures normaies de
bureau), Ayez le num_ro de modble _ port_e de la main,
Gri/fes Bouchons et t#tes
de brEfleurs de surface
',,<_ .................. , _ ................. 3,,'
Grilfe
Ampoutes
Lbchefrite
BOUtORS
87
Page 88

88
Page 89

Garantiede cuisini&e a deuxcombustibles GE.
Tous los services sous garanfie sont fournis par nos centres
de service ou un technicien de service autoris_ _ la clientele.
Pour le service, composez le t.800.56t.3344. Veuillez fournir le
numbro de sbrie et le numbro de modble Iorsque vous appeiez
pour obtenir le service.
Mabe remplacera :
Teute piece de la cldsh_iO_'e q ld com_a'_t _me d&fidlLmce sldte fi m_ d_{imt de mat_ia_
De/adatede
!'achatorigbal
Les d_placements du service pour vons enseigner
comment n_liser le produit.
Mauvaise insta]]ation, livraison ou maintenm_ce.
D&fa_a_ce du prodmt suite atm abtts, mauvaise
u_sation on ufil_sation g des _h_s autres que ceres
pr_vnes on n_sadon commerdaJe.
{ Remplacement des fttsibles r&s_dendeHes on
r_i_tial_satlon des disjoncteurs.
ou de fid)x'icado_. Din;mr cette a/_/16e de garafltie limit_e, Mabe {burm_i_;_ a_ssi, sans #ai&
to_s les sepdces i'_la maiso_ et tol_s les fl;_is de maim_ (]'oelw_'e pore" _'emplace_" la piece
Agrafez votre regu icZ Lapreuve
de date d'achat original est
n_cessaire pour obtenir
/'entretien et /es r_parations
sous /a garantie.
Dommages an produit suite Rtm accident, incendie,
hmndations ou force ma_eure.
Dommages mdkects on cons6cudfs causes par des
d_fants possibles de FappareR.
Dommages apr@s la fivraisom
Le service s'il est _xpossible d'avok ace,s au produit
pour ce fake.
EXCLUSION DE GARANTiES _MPUCffES = Votre se_#et nniqne recoups est /_ reparation dn pro&dt scion
los dispositions de torte Garande fimitee. Tontes los garanties impficites, ineluant los garanties de
cemmerciafite et d'adequation _ un usage speoifiqne, sent fimitees anne annee on a _ap&iode /a p_ns
conrte antorisee par/a _egis/ation.
LE GARANT N'EST PAS RESPONSABLE DES D()MMAGES INDIRECTS. ]
i
Ga_ant : MABE CANADA INC.
88
Page 90

$oudene la c/ienteteo
Site Webappare/Isg"ectrom_nagers6E www.dectromenagersge.ca
V()l_,s avez IH_e q l_estio_ ()l_ '_'(>{_s a'_'ez......1)esoim_ d'aide [)°l_r votre all ) )areil ..... elec[rol_(_m_a_e/c p_ (_om_tac[ez-m_()10s
par h_temet au site www.electmmenag'ersge.ca =4 hem'es par join; tol_s les io_rs de 1 am_:e.
Serviceder@arations
Service de r_paratio_s (;E est to_t pros de yore.
Pore" f_ire r_parer votre _lectrom_m_ger (;E, il s_f[h de m_m te_l_pho]_er a_ 1.800.561.3344.
9
ESOO,5_L3344
Studio de conceptionr_a/iste
Sin"demm_de, GE peru Jtbm'_ir m_e brochm'e s_r l'am&_agemem d'm_e c_dsh_e po_r les pe_som_es
a mob]l]t_ re_d_dte.
]_crivez: Dh'ectem, Re]athms a',ec ]es c(msommatems, Mabe (]a_a(;[a h_c.
Bm'ea_* B]O, ] F'acto_w Im_e
Pro/ongationde garantie www.dectromenegersge.ce
ch e tez u _ co]_ t_ t d e]_ t]'e d e]_ (;E ax'a _ t q_ e votre gain _ d e _ expire et b _]__{ici ez d _ _ ]_ba is s_bsta _ d el.
_:i_si ]e service aprbs-vente (;E sera to_!iom's ]i'_aprbs expirado_ de ]a ganmde.
V_sitez notre site Web on appdez-nous au 1.800.461.3636.
P/&eset accessoires
Ce_*x (]l*i deSsh'e]lt reSparer el*x-m0mes leto's eSlectromeS_lagers [:>el*ve_lt recew_ir [:>]bces et accessoh'es dh'ecteme]lt
i) la mais(m (cartes VISA, Maste_(_ard et Discover accept_es)_
_esdirectives sdpuNes darts_epr_sen¢manue_peugeot_tre e#e_t_es par n'impotteq_e/_t#isage_._ese_tres
r@aredons doi_ent g_n&Mement Otre e_e_u_es par _n te_flni_ien q_e_ifi_. $oyez prudent, _r _ne r_paration
inadequate pe_t a_e_ter _efonctionnement s_c_ritaire de rappareik
Vo m tro_werez da _ s l es pages ja m_ es de votre a _ _ _*;dre 1e _ m_ &'o d_* Ce]_ tre de servi ce Mabe 1e i)]_*s proch e.
Contactez-nous
S] vous _'0tes pas satisfi_it du service apries-_ e]_te do_t _)_*s avez b_]_fici& :
Premi6rement, comm m_iq _ez avec ]es gelds q _1 o_t r_par_ votre apparei].
Er_suite, si \'ore _'0tes to_!]om's pas satisihit e]wo_ez tom les d_tai]s-mm]&'o de t_]_pho_e comp_J_au
Directem; Re]adol_s avec ]es Mabe (5_ada h_c.
Bm'eau 310, ] Factor_ lm_e
Inscrivezvotreappare/Igectrom_nager www.dectromena_ers_e.ca
[r_serivez votr, e appareil deetrom_nager en d_reet, aussit6t qne possible, Ce]a am&horem m)s
et _otre .....service al)rL_s-veme....... V0m [>om'ez, _ga]eme_t m_ts, era,o? er par hi poste le fbrnmdaire d'h_scripti(m ,joiner
i'_votre docllme]?tathm.
lmprim _ aux Eta ts- Unis
Page 91

Instrucciones de Seguridad 92-97
Instrucciones de Operaci6n
Asado, Gufa de asado ........ 102
Auto-limpieza ........... 113-114
Bloqueo de cocina ........... 103
Calentamiento ............... 111
Caracterfsficas
especiales .............. 115-11 7
Convecci6n ............. 106-110
Funci6n Sabbath ......... 118-119
Horneado o rostizado ........ 101
Horneado v rosfizado con
mmporizador ................ 104
Horno ................. 100-119
Leudar . .................... 111
Quemadores
de superficie .............. 98-99
Recipientes de cocci6n ......... 99
Reloj y temporizador . ....... 103
Sonda ..................... 105
Termostato ................. 112
Cuidados y 6mpieza
Caj6n de almacenamiento .... 124
Cinta de embalaje ........... 120
Elementos calentadores ...... 124
Focos de luz ................ 122
Panel de control ............. 124
Parrillas .................... 122
Perillas .................... 121
Piso del homo .............. 124
Puerta ..................... 123
Puerta del homo desmontable . 123
Rejillas de los quemadores .... 121
Superficies de acero inoxidable 124
Superficie del anafe .......... 121
Superficies pintadas ......... 123
Tapas y cabezales de
los quemadores ............. 120
Consejos para detecci6n
de problemas .......... 125-128
Accesorios .................... 133
w
I
_w
I
Escriba los numeros de modelo
y de serie aquL"
Modelo #
Serie #
Puede enconti'ai_los en tlna
etiqueta ubicada det_Ss de la
puerta del hoi'no ell el extremo
izquierdo inte'rior del marco de
la cocina,
Soporte al consumidor
Garantie ................... 134
Registro del producto .... 131, 132
Soporte al consumidor . ...... 135
,qm .
N
m
91
Page 92

INFORMACIONIMPORTANTEDESEGURIDAD.
LEATODASLASINSTRUCCIONESANTESDEUSARELARTEFACTO.
iADVERTENCIA!
DISPOSITIVOANTI-VOLCADURAS
TODASLASCOCINASPUEDEN
VOLCARSE
PUEDENPROVOCARSELESIONES
PERSONALES
INSTALELOSDISPOSITIVOSANTI-
VOLCADURASINCLUIDOS CONLA
COCINA
VERINSTRUCCIONESDE INSTALACION
AADVERTENCIA: si la informaci6n de este
manual no se sigue al pie de la ]etra, puede ocasionarse
un ineendio o una explosibn, generando dafios a la
propiedad, lesiones personales o la muerte.
-- No almacene o use gasolina u otros vapores o liquidos
inflamables cerca de este o cualquier otro artefacto.
- QUE:HACERSI HUELEGAS
No trate de encender ningfin artefacto.
No toque ningfin interruptor el6ctrico, ni utilice ningfin
tel6fono en su edificio.
Inmediatamente flame a su proveedor de gas desde
el tel6fono de un vecino. Siga las instrucciones del
proveedor de gas.
Si no puede comunicarse con el proveedor de gas,
llame al departamento de bomberos.
-- La instalaci6n y servicio t6cnico deben realizarlos
un instalador calificado, una agencia de servicio
o el proveedor de gas.
92
Page 93

ge.com
iADVERTENCIA!
Para _u seguridad, la informaciSn de este manual debe seguirse al pie de la letra a fin de minimizar
el riesgo de incendio o explosiSn, descarga el#ctrica, o para prevenir dafios, lesiones personales o
la muerte.
DISPOSIflVOANTI-VOLCADURAS
Todas/as cocinas pueden volcarse y provocarlesiones.
Para evitar la volcadura accidental de la cocina, suj_tela a la pared o piso mediante el dispositivo
anti-volcaduras suministrado.
Si el dispositivo anti-volcaduras suministrado con la cocina no se adecua a esta aplicacidn,
utilice el dispositivo anti-volcaduras universal WB2X7909.
Para verificar que el dispositivo est# instalado ysujeto correctamente, quite el cajdn de
almacenamiento e inspeccione la pata niveladora trasera. Verifique que calce bien en la ranura.
Si separa la cocina de la pared por alguna raz6n, aseg/irese de que el disposifi_o est_ bien
enganchado cuando _lelva a colocar la cocina conua la pared. Si no lo est_, existe la
posibilidad de que la cocina se _xlelque y pro_oque lesiones si usted o un nif_o se paran,
sienmn o apoyan sobre una puerta abierta.
Tenga a bien consulmr la itffo_naci6n sobie el disposidxo and_\olcaduras de esm manual.
Si no toma esta p_ecauci6n, la cocina puede xolcarse y proxocar lesiones.
INFORMACIONDESEGURIOAOIMPORTANTE
La ley sobre aguas potables y tdxicos exige que el Gobemador de California publique una lista de
sustancias que segOn el estado provoquen defectos cong#nitos u otros dafios reproducfivos, yexige
alas empresas que adviertan a los clientes sobre la exposicidn potencial a dichas sustancias.
Los artefactos degas pueden provocar una exposicidn minima a estas sustancias, asaber,
benceno, mondxido de carbono, formaldehido y hollin, generados principalmente pot la combustidn
incompleta de gas natural o combustibles LR Los quemadores bien ajustados, indicados pot una
llama azulina en lugar de amarilla, minimizarbn una combustidn incompleta. La exposicidn a estas
sustancias puede minimizarse ventilando con una ventana abierta o usando una campana o
ventilador.
La aislacidn de fibra de vidrio de los homos auto-limpbntes emite una pequefia cantidad de
mondxido de carbono durante el ciclo de limpieza. La exposicidn puede minimizarse ventilando
con una ventana abierta o usando una campana o ventilador.
93
Page 94

INFORMACIONIMPORTANTEDESEGURIDAD.
LEATODASLASINSTRUCCIONESANTESDEUSARELARTEFACTO.
iADVERTENCIA!
PRECAUCIONESDESEGURIDAD
Cuando se usen artefactos el6ctricos, siempre deben seguirse precauciones b#sicas de seguridad,
incluyendo las siguientes:
94
Use este artei_cto solo con el objefixo
para el que fue creado, como se des(Mbe
en este Ma,mal de Propiemfio.
Asegfirese de q ue un t_cnico calificado
haya instalado y conectado a tiena
el artel_acto de acuerdo con
las instrucciones de instalaci6n
suministradas.
Anms de realizar cualquier clase de
reparaci6n, desconecte la conexi6n
el&ctrica de ]a cocina desde el panel de
distribuci6n dom_sfica quitando el fllsible
o desconectando el diswmtor
Solicite al instalador que le muestre
la ut)icaci6n del disDmtor o fllsible.
M_rquelo para una t_dcil referencia.
No deje a los niflos solos; _stos no deben
quedar solos o sin amnci6n en un ;irea
donde un armPacto est_ en uso. Nunca
debe pennidrse que se sienten o se paten
en cua]quier parm de esm armfacto.
Solicite al instalador que le muestre
la ubicaci6n de la x;ilvula de apagado del
gas de la cocina v c6mo apagarla cuando
sea necesario.
Haga que un t_cnico califlcado instale
su cocina y la conecte a fierra de acuerdo
con las Instrucciones de instalaci6n.
Cualquier ajuste o reparaci6n debe
realizarla s61o un instalador de cocinas
calificado o un t_cnico de servicio.
Ubique el artePacto lejos de la circulaci6n
de la cocina y flmra de las ul)icaciones con
coniente de aire para evitar una pobre
circulaci6n de aire.
Asegdrese de quitar de la cocina todos
los mamriales de empaque anms de
ponerla en flmcionamiento para evitar
dafios prox_cados pot incendios o humo
si el mamrial de empaque se p_endiera
flings.
No deje niflos solos o sin atenci6n
cuando una cocina est5 ca]iente o en
flmcionamiento. Podrfan sufrir graxes
quemaduras.
No inmnte reparar o cambiar ninguna
pieza de su cocina a menos que est_
eq)ecfficamente recomendado en esm
mamml. Cualquier otto servicio debe
tealizarlo un t_cnico calificado.
Asegdrese de que un t_cnico o instalador
calificado ajusm su cocina con_ectamente
al 6po de gas (natural o I,P) que
se ufilizar_L Su cocina puede comerfirse
para poder ufilizarse con cualquier fipo
de gas. Consulte las Insuucciones de
instalaci6n incluidas con la cocina.
Enchufe su cocina solo en un
tomacorrienm con conexi6n a fiesta de
190 _lfios. No quite la pata de conexi6n a
fiena redonda del enchufe. Si fiene dudas
sobre la conexi6n a uerra del sistema
el_ctrico hoga_efio, es su responsabilidad
personal y su obligaci6n reemplazar
un tomacorriente sin conexi6n a tierra
I)OI" lID tOlllacolTiente COlTectal]/ente
conectado a uerra de tres patas de acuerdo
con el C6dig_ El_ctrico Nacional (EE.
UU.) No uulice un cable de extensi6n
con este artefacto.
A ADVERTENCIA:u,toc,ico
calificado debe realizar estos ajustes
de acuerdo con las instrucciones
del fabricante y todos los c6digos y
requerimientos de la autoridad competente.
No seguir estas instrucciones puede
provocar lesiones graves y dafios
a la propiedad. La agencia calificada
a cargo de este trabajo asume
la responsabilidad de la conversi6n.
Conser\> la campana y filtros de grasa
limpios para mantener una buena
_enfilaci6n y para evitar incendios
pro_cados pot la grasa.
iiiiiiiiiiii_iii
Ensefle a los niflos que no debenjugar con
los controles u otras piezas de la cocina.
iiiiiiiiiiii_iii
Siempre mantenga repasadores,
aganaderas y otras telas a una distancia
prudencial de la cocina.
Page 95

PRECAUCIONESDESEGURIDAD
ge.com
Siempre mantenga utensilios de madera
y pkisfico y alimentos enlatados a
una distancia prudencial de la cocina.
Siempre mantenga las coberulras
de pared combustibles, cortinas o
persianas a una distancia prudencial
de su cocina.
No limpie la cocina con fluidos de
limpieza inflamables o xolfidles.
Despu_s de un uso prolongado de una
cocina, pueden generarse mmperaturas
elevadas v ranchos rexestimientos de pisos
no resisten esm clase de uso. Nunca insmle
la cocina sobre baldosas de vinilo o lin61eo
que no soporten esa clase de uso. Nunca
la irrstale directamente sobre alfombras
de cocina.
Evite ravar el anafe con instrumentos
filosos, o con arrillos u otrasjwas.
No permita que nadie se suba, se pare o
cuelgue de la puerta del homo, el cz_j6n
de almacenamienm o el anafe. Podrfan
dafiar la cocina e incluso x_lcarla,
pro\_cando grax>s lesiones personales.
/
PRECAUCION:
de interesparalos nifiosnodebenalmacenarse
en gabinetesubicadospor encimade unacocina
o en el salpicaderode unacocina:losnifios que
sesubana/a cocinaparaa/canzare/ementos
podr[anresultar heridos.
ADVERTENCIA:NuNcA
use este artelaacto como una estufa para
calentar la habitaci6n. Esa acci6n puede
pro_ocar enxenenamienm por mon6xido
de carbono y el sobrecalentamienm del
anaD u horno.
Para su seguridad, nunca ndlice
su armt_acto para calentar la habimci6n.
Los grandes rwones o impactos en
las puerms de vidrio pueden romper o
tdzar el vidrio.
No limpie la cocina cuando el artefacto
est_ err uso.
Nunca use vestimentas holgadas o arnplias
mienuas utilice este artethcto. Teng:_
cuidado cuando trate de alcanzar
elementos ahnacenados err gabinetes
ubicados sobre la cocina. E1 material
inflamable puede incendiarse si entra
err contacto directo corr llmnas o
las superficies calientes del homo,
lo que puede proxocar quemaduras glaxes.
No almacene materiales inflamables
en el homo, el caj6n de ahnacenamiento
o cerca del arrafe.
No almacene o use materiales
combustibles, gasolina u otros xapores
o lfquidos inflamables cerca de este o
cua]quier otto artePacto.
No pemfita que la gTasa de la cocci6n u
otros matefiales inflamables se acunmlen
dentro de la cocina o en su cercanfa.
No ufilice agua en incendios de grasa.
Nunca levante una sart_n en llamas.
Apague los controles. Apague una sart&r
err llamas sol)re una homalla de superficie
cubriendo la sart_n pot completo con
una tapa que se @lste bien, una plancha
para gallems o una bandeja plana. Utilice
un q ufinico seco nln]tJnso o nn exfintor
de irrcendios de espuma.
La grasa era llamas fimra de una sart(4n
puede apagmse cubri&rdola corr
bicarbonato de sodio o, si estuviera
disponible, un qufmico seco mnltiuso
o un extintor de irrcendios de eq)uma.
Las llamas denuo del homo pueden
apagarse por completo celrando la puerto
del horno y apagvmdo el corm_ol o usando
nn qufmico seco multiuso o un exfintor
de irrcendios de espuma.
Deje que las rejillas de los quemadores
y otras superficies se enfrfen antes de
tocarlas o dejarlas donde los nifios puedan
alcanzarlas.
iiiiiiiiiiii_iii
Nunca bloquee la x>ndlaci6n (ofificios
de ventilaci6n) de la cocina. Ofrece
una entrada y salida de aire que resultan
necesarias para que la cocina flmcione de
manera adecuada con una combusfi6n
correcta. Las aperturas de aire estfin
ubicadas err la parm trasera del arratb,
err las partes supefiores e irffefiores de
la puerta de homo yen la parte irfferior de
la cocina bajo el cajdn de almacenamienm
o panel de protecci6n.
iiiiiiiiiiii_iii
No lexante el arrafe. Lexantar
el arrafe puede proxocar daflos y
un flmcionamiento irradecuado
de la cocina.
95
Page 96

INFORMACIONIMPORTANTEDESEGURIDAD.
LEATODASLASINSTRUCCIONESANTESDEUSARELARTEFACTO.
iADVERTENCIA!
QUEMADORESDESUPERFICIE
Utilicerecipbntes deltamafioadecuado;eviterecipbntes inestab/eso que sevuelcancon facilidad.Elija
recipientesde coccidnconbasesplanas/osuficientementegrandespara cubrir/asrejillas de losquemadores.
Paraevitar derrames,verifiqueque losrecipientesde coccidnsean/osuficientementegrandespara contener
losalimentosde maneraadecuada.Estoahorrar# tiempode/impiezay evitar#peligrosasacumu/acionesde
a/imentos,yaque /assa/picadurasy derramesquequedenen /a cocinapuedenprendersefuego.Utilice
recipientesy manijasquepuedantomarseconfacilidady no se ca/lenten.
m coloca sobxe la xejilladel quemadox pm_a
sosmnex el xecipiente. Este anillo absoxbe mucho
calox;lo que podda dahm la xejilladel quemadox
y el cabezal del quemadox: Tambi_n puede hacex
que el quemadox funcione de una maneFa
inconecm. Esto puede genex_axun mivelde
mon6xido de cmbono ma}ox del pemlitido
pox noxmas actuales, pxovocando un pelig_o
pm_ala salud.
Los alimenms que vayan a flehse deben estm
lo m& tacos posible, ia escmcha en alimentos
congelados o la humedad en alimenms flescos
pueden pxovocm que la g_asacaliente chispoxTotee
pox los costados del xecipiente.
Nunca u_amde uasladax un xecipienm lleno de
g_asa caliente, especialmente una fieidox_a.
Espexe a que la g_asa m entire.
No deje elementos pl,_sticossobxe el anaD,
poxque pueden denetixm sim los deja muy
cexva de la ventilaci6n.
Manmnga toda clam de elementos pl,'isticos
alejados de los quemadoxes de supexficie.
Pm_ae\itm la posibilidad de una quemadtm_,
siempxe aseg(_xemde que los conuoles de todos
los quemadoxes est_n en la posici6n OFF(apagado)
y que mdas las xejillasest_n fl{as antes de u_ataxde
quitmlas.
Sila cocina est,'iubicada cexva de una ventana, no
cuelgue coxtJnas laxgasque poddm_ lleg;tx a tocm
los quemadoxes de supexficie y genex_axun peligxo
de incendio.
Sihuele gas, coxte la llavede paso de gas y llame
a un t&nico calificado. Nunca um fueg_ pm_a
localizax una p&dida.
Siempxe apague losconuoles de los quemadoxes
de sl}pexficie antes de quitm los xecipientes de
COCCXOXX,
{{No deje ningdn xecipiente sobxe el maafe. E1aixe
caliente de la ventilaci6n puede pxendex fueg_
elemenms inflamables y ele\m_,{la pxesi6n de
xecipientes cenados, lo que podda hacex que
explotman.
Cuando desacfive el bloqueo de la cocina, vexifique
que los conuoles de supexficie est_n en la posici6n
OFF(apagado). Esto impedix_,{la cixvulaci6n de gas
cuando m encienda la cocina.
96
Siempie utilice la posici6n LITE(encendex) cuando
encienda los quemadoxes supexioxes y vefifique
que esms m ha)an encendido.
Nunca deje los quemadoxes de supexficie sin
atenci6n con configtmlciones altas de llama.
Los alimentos que hiexven y m dexxmnan pueden
pxovocm humo ydexTames g_asosos que pueden
pxendexse fueg_.
Ajuste el tamaho de la llama del quemadox pm_a
que no m extJenda m,'isall,'1de los exuemos de
los xecipientes de cocci6n. !lna llama excesiva
xesulta pelig_osa.
Sdlo um agan_adex_assecas: las agan_adexas
h(mledas o mojadas colocadas en supexficies
calientes pueden pxovocm quemaduFas de vapox:
No acexque agax_adex_asalas llamas abiextas
cuando lev,mte xecipienms de cocci6n.
No utJlice toallas u ouas mlas g_uesas
en lugax de una ag;qxx_adex_a.
Cuando ufilice xecipientes de vidxio, constate que
est_n disefiados pm_acocci6n sobxe anafe.
Pm_aminimizm laposibilidad de quemadtuas,
incendio de matefiales inflamables y dex_ames,
oixelas manJjas de los xecipientes hacia el costato
o pmm u_amFade la cocina sin exmndexse sobxe
los quemadoxes adyacentes.
Pxesm mucha amnci6n a losalimentos que m est_n
fliendo en una configtu_aci6n de llama alta.
Siempxe caliente la g_asa lentamenm, y px_:stele
atenci6n mienm_s m calienta.
Siva a utilizm una combinaci6n de aceites y g_asas
pm_afleh, m&clelos antes de calenmx poxque
las gx,'asasm deniten lentamente.
I ltilice un tex_6meuo pm_ag_asascuando sea
posible pma e\itax sobxecalentafla m,'isall,'1del
punm de almlnado.
No manipule los qtxelnadoles sin contm con mdas
las paites en su hgm:
I ltilice la menox cantidad posible de ga_asapm_a
podex fiefi"alimentos de maneFa efectJxa.Llenm
demasiado los xecipientes puede genexm den_ames
cuando m ag_egan los alimentos.
No flmnbee alimentos sobxe el anafe. Si flmnbea
alimenms bajo la cmnpana, encienda la ventilaci6n.
No utJlice un wok sobxe la supexficie de cocci6n
si &te tiene un anillo de metal xedondo que
Page 97

ge.com
COCINECARNESROJASYDEAVEPORCOMPLETO...
(Cocinecamesrojasydeaveporcompleto:CarnesrojashastaalcanzarunatemperaturaINTERNAdepor1omenosI60°F
(7I°C)y/ascamesdeavea unatemperaturaINTERNAdepor1omenosI80°F(82°C).Lacocci6naestastemperaturas
generaimenteprotegedeenfermedadestransmitidaspottosatimentos.
A iADVERTENCIA!
HORNO
Mant#ngase alejado de la cocina cuando abra la puerta del homo. El aire y el vapor calientes que
salen de la cocina pueden provocar quemaduras en manos, rostro y/o ojos.
} No caliente recipientes cermdos de alimentos.
Podrfa haber una acumulaci6n de presi6n en
el recipiente } _ste podria explota_, provocando
lesiones.
} Mantenga las ventilaciones del homo sin
obstmcciones.
Mantenga el homo libre de acumulaciones
de g_,asa.
Coloque la parrilla del homo en la posici6n
deseada mientms el homo est_ifl{o. Si debe
manipular las pan_illas cuando es_n calientes,
no peru/ira que las agan,qdecas toquen
los elementos calentadores.
Cmndo utilice bolsas de cocci6n o de msdzado
en el homo, siga las instmcciones del fi_bricante.
Pare levantar alimentos pesados puedejala,se
la parfilla hasta alcanalr la tmba de detenci6n.
Tambi&_ es una precauci6n cont,a quemadmas
pot tocar superficies calientes de la puerto o
las pa_edes del homo.
No use el caj6n pm'a secar pefi6dicos. Si se
los calienta de m5s, pueden p_ende_se fllego.
HORNOAUTO-LIMPIANTE
No use el homo i)a_,'aahnacenar elementos.
i,os elementos guardados en el homo pueden
pmndeL_e fnego.
No deje producms de pal)el, umnsilios de cocina
o alimentos en el homo cuando no lo est_
usando.
No use papel de aluminio papa cubfir
el fbndo del homo. Una instalaci6n inadecuada
del papel de alulninio puede provocar un fiesgo
de descarga el0ctrica o de incendio.
AsegOrese de que una asadem se encuenue en
su lugar conecto a fin de reducir la posibilidad
de incendios pot gmsa.
Si llega,_aa tenet un incendio pot gmsa en
una asadem, l)resione la almohadilla CLEAI_/OFF
ymantenga la puerta del homo cermda paca
contener el incendio hasta que se apag_]e.
No utilicelimpiadoresde homo.No debeutilizarsening(mlimpiadorcomercialo revestimientoprotectorde
ningunaclasedentro o alrededordeningunapiezadel homo.Losresiduosdeloslimpiadoresde homodafiarfin
la parte interna delartefacto cuandose utiliceel ciclo auto-limpiante.
No limpie lajunta de la puerto, i,ajunm de
la l)uerta es esencial l)a_'auna buen sellado.
Debe tenetse cuidado de no reflega[, daflar
O IIIOVeI" lajunta.
,M_tes.de. iniciar, el ciclo de auto-limi)ieza, quite
las pamllas bnllantes de color plata (en algunos
ino'delos) } todos otros eleme_tos de cocc_6n.
} Ias parfillas revestidas de porcelana afis
(en _dgunos modelos) Dueden limpia"Jse en
el ho[_o din,ante el cido de auto-l[mpieza.
Xseo_Oresede limpiar los demames excesivos
ante_sde iniciar 1,'{opecaci6n de auto-lilnpieal.
Si el modo de auto-limpieza no fimciona,
apague el homo v desconecte el suministro de
electficidad. Llm,'_e a un t_cnico calificado para
solicitor el arreglo.
Limpie solo las partes listadas en el Manual de
Usuario.
LEAYSIGAESTAINFORMACIONDESEGURIDADCUIDADOSAMENTE.
GUARDEESTASINSTRUCCIONES 97
Page 98

Comousarlosquemadoresde superficiea gas.
A Io largo de este manual, las caractedsticas y apariencia pueden set diferentes a las de su model&
Presionelaperilla decontrolhacia
adentroygirelaala posici6nLITE
(encender).
Antes de encender un quemador
a gas
Constate que todas las rejillas del anaie
est_n en su lugar entes de encender
tin qt/enladoL
_&segfirese de desacfixar la flmci6n de
Bloqueo de Cocina antes de intentar
encender los quemadores de supe_l'icie.
Despues de encender un quemador
a gas
No haga fimcionar el quemador
durante tm perfodo prolongado sin
redpientes de cocd6n sobre la rejilla.
i,a temfinaci6n de la rejilla puede
salta_se sin tm recipiente que absorba
el calor
_&segOrese de que los quemadores
y rejillas est_n ti'fos antes de colocar
las manes, tma agarradem, patios de
limpieza u otros materiales sobre ellos.
COmeencender un quemador de superficie a gas
Presione la perilla de control hacia Si la perilla pemmnece en LITE,seguirfi
adentro ,v gfi'ela a la posici6n LITE haciendo "clic".
(encender). Cuando se gira un queinador a LifE,
Escuchar;i tin chasquido, el sonido to(los los quelnadores coi/lienzan a
del chispero el_ctrico encendiendo chispeax: No intente desammr o limpiar
el qtlei/ladoi: tin qt/eillador illienti'as oti'o se enct/enti'e
encendido. Puede generai_e una descar_,a
Despu_s de que se encienda la llama, gire el_ctfica, lo que puede proxocar que usted
la pefilla para @lstar el tamafio de misma, tire recipientes de cocina calientes.
Mediano Pequefio
o @
Grande Extra grande
OFF
$61o quemador extra grande
98
L_
Quemadores a gas sellados
SII aIlale ('tlent_l con ('tlatI'o qtleilladoi'es a
gas sellados. Oti'ecen comodidad, e_dlidad
de limpieza y flexibilidad para ufili/;n" en
una amplia gama de aplicadones de
cocci6n.
E1 quemador mils pequefio ubicado en
la posici6n trasera derecha es el quemador
para fimgo lento. Este quemador puede
giraffe a LO (b@_) para tma configm'ad6n
de coccidn a flmgo muy lento. Ofl'ece
un desempefio de coccidn precise para
alimentos delicados tales come salsas
o alimentos que requieren flmgo bajo
din'ante tm pe6odo lingo de cocci6n.
i,os quemadores mediano (tmsero
izquierdo) y grande (Ii'ontal izquierdo)
son los quemadores principales para
COmeelegir el tama#o de la llama
Paraun manejoseguro delos recipientes de
cocc/6n,nuncadeje que/asllamas se extlbndan
m#sal/# de los/ados de los recipientes.
Mire la llama, no la perilla, cuando
reduzca el caleb: E1 tamafio de la llama
del quemador a gas debe _!justa_e
al recipiente que est(_ usando.
la mayor parte de las cocciones. Estos
quemadores de use general pueden
gira_se de HI (alta) a tO (baja) para
ajustm_e a tma amplia gama de
necesidades de cocci6n.
E1 quemador extra grande (fl'ontal
derecho) es el de mayor potencia.
_Migual que los otros tres quemadores,
puede gimx_e de HI (alta) a LO (b@0
para tma amplia gama de aplicaciones
de coccidn; sin embargo, este quemador
estfi disefiado para llexm" a hervor grandes
cantidades de lfquido. (_uenta con
tma configuraci6n especial POWER BOll TM
(sfiper hervor) diseflada para ufili/mse
con elemenms de cocci6n de tm difimetro
de 10 pulgadas o mils.
i,as llamas superiores al fimdo
del recipiente de cocci6n no son fitiles
v s61o sir\ en para calentar la man!ja.
Page 99

Recipientes de coccion del anafe
ge.com
Aluminio:Se recomiendan recipientes
de peso mediano porque se calientan
con rapidez en fl)m/a pareja. I,a mayor
parte de los alimentos se doran en fom_a
pareja en una sart&_ de aluminio. Ufilice
cacerolas con tapas que _)justen bien
cuando cocine con cantidades mfnimas
de agua.
Hierrofundido:Si se calientan lentamente,
la mavorfa de las sartenes brindarfin
resultados satisfi_ctorios.
Vaji/la esmaltada: En ciertas condiciones,
el esmalte de algunos redpientes puede
derretix_e. Siga las recomendadones
del fid)ricante de redpientes para
los m&odos de cocci6n.
Vidrio: EMsten dos clases de recipientes
de xidrJo--los de que s61o pueden usm_e
en el homo v los que se utilizan en
Parrillas para anafes
No utilice parrillas para anates en
los quemadores a gas sellados. Si ufiliza
tma parfilla para anafe en el quemador
a gas sellado, proxocarfi tma combusti6n
incom I)leta x,I)odrfa ,generar exI )osici6n
el anafe (cacerolas, cafeteras )teteras).
E1 xidrio conduce el cahw m m
lentamente.
Vitro-ceMmica resistente al calor:
Puede utilizm_e para cocci(m en
el anafe' u homo, Conduce el calor
muv lentamente v tambi_n se enfl'fa muv
despado. Verifique las instrucciones del
fifl)ricante de recipientes para asegm'a_e
de que pueda utiliau_e en cocinas a gas.
Acero inoxidab/e: Este metal solo fiene
pobres propiedades de calentamiento
v a i/leiltldo se combina con col)re,
aluminio u otros met;ties para mejorar
la distribud6n de calot: i,as sartenes de
Illetal coi/lbiilado a illeil/ldo lHiicioil_lil
de manera satislactoria si se utilizan
COil C_I1OI" illediallO COlIlO i'ecoi/lieilda
el fid)ricanm.
a niveles de mon6xido de carbono
supefiores alas ilOlli/as actuales
pemfitidas.
Estopuede serpehgrosopara susalud
Utilice un wok de base plana.
Utilice el wok de esta manera
Lerecomendamosusar un wok de basep/ana de
14pulgadas(35,6crn.)o menor Aseg&ese deque
el wok quedepiano sobre/arejilla. Seencuentran
disponiblesen su negociomlbonstalocal
$61o debe ufilizmse tm wok de base
plana.
No utilice tm wok de base plana sol)re
un anillo de soporte. Colocar el anillo
sobre un quelnador o rejilla puede hacer
que el qtlemador flmcione de mallera
inadecuada, generado niveles de
mon6xido de carbono supefiores
a las nom_as pemfifidas. Esto puede
ser peligroso para su salud.
En caso de corte de energia
Si ocurfiera un torte de energfa, usted
puede encender los quemadores de
supe_ticie a gas con un fiSsloro. Acerque
tm fiSsfi)ro encendido al quemadoi; luego
presione hacia adentro la pefilla de
control y gire a la posici6n L/TE
(encender). Tenga mucho cuidado
al encender los quemadores de esta
manera. I,os quemadores de superficie
que se est_n ufilizando mientras ocurre
un corte de energfa seguirfin
JtllICiOllaIldo IIOII/lalIll eIlte.
NOTA: Si el bloqueodecocinaestaba activadoen
el memento del corte de energfa,los quemadores
nopodr#nencenderse. 99
Page 100

Comeusarlos controlesdel homo.
(A Io largo de este manual, las caracterfsticas y apariencia pueden ser diferentes a las de su modelo.)
TJ ON S
Las caracterfsficas y apariencia
pueden varia_
Caracteffsticasyconfiguracionesdecontroldelhomo,
relojy temporizador
Almohadilla BAKE(homear)Pl°(sion( _sta ahllohadi]la ])ar?t selec(ionar la [{[l/(i(')ll e
bake (h,.)rnear).
Almohaflilla BROILHI/LO(asaralto/bajo)
Pl°(sJone (sIa ahnohadilla ])ara sel(!(:cionm" la flu/cidn
broil (asar).
Atmohaflilla CONVECTIONBAKEMULTI/I RACK
(homeaflo por convecciGnon 1o varias parrillas)
|)/'esJont' para sel('((iol/ar horn('ado eol/la ]hl/(J0n
eoI) \v(tJ OIL
O lmohadillaCONVECTlONROAST(rostizadopor
conveccidn)
Presione para seleeeionar rostizado eon la fimeidn
eon\'e( (i0IL
AlmohadillaPROOF(leudar)
Presion(_ 1)ara scleeeJonar/tl/n/(([io (:alJel/[( ddl para
]Oil(far pro(ht(t()s (on le\ad/tra.
Almohadilla START(inicio)
D(I)( })r(sionars( 1)al"a iniciar Clla]qllier [hilci()l/([e
eoecidn o de limpieza.
Pantalla
_l/tes[l'a la 110173, la t( m])( t'altlra (]el hol'no, si
el homo se encuenmt en los modos bake (hornear),
broil (asar) o sel[-deaning (aum-limpianm) y
los tiempos €_table(:idos para las operad(mes
eon tell/pOl'izador y ]lorno a/ltolnfitJeo; tall/1)itln
m(_strarfi si la eoeina estfi bloque_da.
Si "F-Fun o(imero o letra" destellanen lapaotalla y el controldel
homohace unasepal, esto iodicauncodigode errorde fuoci6n.
?redonela almohadillaCLEAR/OFF(horrar/apagado).?ermitaque
el homose enfffeduranteunahora.Vuelvaaencenderel homo.
Si sorepitoelcbdigodeerrordefuncbn,desconocteb energfa
del homoy/lameal serviciodereparacibn,
Sisu home ruecetdiguradeparauoa eperaci6ode homecoo
temporizadory ocurri6untorte de eoergiae/ectrica, el rebj y
todas/asfuncionosprogramadasdober_nreconfigurarso.
Laheradestellaraee /a paotallacuaodehayaecurrideue torte
de eoergia.
Almohadilla SELFCLEANLO/STD
(auto-limpiezabaja/est#ndar)
Prcsionc ('s{aahnohadilla ])anl selccdonar la flmddn
auto-limpieza. \br la seeeidn CGmoutilizar el homo
auto-limpiante.
??
AlmohadilJaDELAYSTART(iniciorotardado)
Utilfl'elajunto a lasalmohadill:cs COOKINGTIME
(tiempedececcioo)o SELFCLEANLO/STD
(auto-limpiezabaja/estaodar)para eon figurar
el ini(io }apagado mtmmfifi(o ,.'nel dempo
(sial)l( (ido.
Almohadilla COOKINGTIME (fiempo de cocciGn)
O
Presione esl_ almohadilla y ]/tego presione
las ahnohadillas num(,_icas para configurar
el tiempo de cocddn que desea para sus alimentos.
E1homo se apagarfi euando se h;ga terminado
el liempo de coceidn.
Almohaflilla CLEAR/OFF(borrar/apagaflo)
Pr(sione para eaneelar TODASlas operadones
del homo, con excepcidn del tel@ el temporizador
y el bloqueo de (;ocina.
AlmohadillaCLOCK(reloj)
Presione..... anles de eonfigurar, el relo'].
Almohadillas numGricas
Udlfl:elas })anl ('ollJigtl£ar (ala](]lli(£ t/tilt JOI? (]tie
requiera I/fillleros, tales (01110 hora, telllI)Olizadol _,
mmperautra del homo, temperamra interna de los
alimentos, h()rari() de inieio y ti(mpo (1( operadGn
para horneado eol/teml)OlJZa(Ior y atlto-lin/l)ieza.
Almohadilla KITCHENTIMERON/OFF(temporizador
cocina encenflido/apagado)
Prtx',ion(' i)an_ selcecionar la (:_ml(:t('rfsdc_
tempo_izado_:
Almohadilla PROBE(sonda)
Pl'eS1Ol/( Cllal/dO utilice ]a sol/(la para CO(il/al5
Almohadilla WARM (calentar)
Presion( pan_ mantener calientes los alimentos
(o(in_(los. Vet la se((idn CGmoconfigurar elhomo
para mantener caliente.
Almohadilla RANGELOCK-OUT(bloqueode cocba)
@
Presione y manteng;t la ahnohadilla RANGELOCK-OUT
(hloqueode cocioa)(hmmte 3 segundos para
bloquear/desbloqu( ar los quemador(s de superIicie,
los quemadores del horno y panel de eontrol para
(]lie l/O pue(]an acd\arse.
100
Almohadilla OVENLIGHTON/OFF(luzdehomo
encendido/apagado)
"]i_)qtl('esta almohadilla })ara al:)agar o eneender
la luz.
 Loading...