

GE P2B918SEM4SS, P2B918SEM3SS, P2B918SEM2SS, P2B918DEM4WW, P2B918DEM4BB Owner’s Manual
...
ge.com
0
og
4.J
U
Q)
>
C
O
U
LL
a
Safety Instructions ...... 2-8
Operating Instructions
Convection Oven .......... 19-23
Roasting Guide .............. 22
Timed Convection Baking ..... 23
Gas Surface Burners ....... 9, 11
Griddle ........................ 10
Lower Oven Drawer .......... 28
Thermostat ................... 27
Upper Oven ............... 12-27
Aluminum Foil ............... 14
Baking or Roasting .......... 14
Broiling Guide ............... 15
Clock and Timer ............. 16
Oven Controls ............... 12
Preheating ................... 14
Probe ..................... 18, 21
Sabbath Feature ......... 26, 27
Self-Cleaning ............. 29, 30
Special Features ......... 24, 25
Timed Baking and
Roasting Features ........... 17
Care and Cleaning
Burner Grates ................. 33
Burner Caps and Heads ...... 32
Control Panel and Knobs ..... 37
Cooktop Surface .............. 33
Griddle ........................ 34
Lift-Off Oven Door ............ 35
Lower Oven Drawer .......... 36
Oven Air Vents ................ 37
Oven Heating Elements ....... 35
Oven Light Replacement ...... 38
Oven Racks ................... 38
Sealed Burner Assemblies .... 31
Self-Cleaning .............. 29, 30
Stainless Steel Surfaces ....... 33
Installation
Instructions ............ 39-52
Anti-Tip Device ................ 52
Check Ignition of
Surface Burners ........... 50, 51
Connect Range
to Electric ................. 4/4,46
ConnectRange toGas .....43, 45
Dimensions and
Clearances .................... 41
Electrical Connections ...... 46-49
Level the Range ............... 51
Location Guidelines ........... 42
LP ............................. 52
Safetg Instructions ........ 39, 40
Accessories .................. 57
Troubleshooting
Tips ...................... 53-56
Consumer Support
Consumer
Support .............. Back Cover
Product Registration ...... 61, 62
Warrantg ..................... 63
P2B918
Write the model and serial
numbers here:
Model #
Serial #
You can find them on a label on the
front of the range behind the lower
oven drawer.
183D5580P230 49-85148 09-08JR
IMPORTANT SAFETY INFORMATION.
READ ALL INSTRUCTIONS BEFORE USING.
_kWARNING: If the information
in this manual is not followed exactlg,
a fire or explosion mag result causing
propertg damage, personal injurg
or death.
Do not store or use gasoline or other
flammable vapors and liquids in the
vicinitg of this or ang other appliance.
WHAT TO DO IF YOU
SMELL GAS
Do nottrg to light ang appliance.
Do not touch ang electrical switch;
do not use ang phone in gout building.
Immediatelg call gour gas supplier
from a neighbor's phone. Follow the
gas supplier's instructions.
if gou cannot reach gour gas supplier,
coil the fire deportment.
installation and service must be
performed bg a qualified installer,
service agencg or the gas supplier.
®
2

WARNING!
For your safety, the information in this manual must be followed to minimize the risk of fire or
explosion, electric shock, or to prevent property damage, personal injury, or loss of life.
ANTI-TIPDEVICE
Toreduce the risk of tipping the range, the range must be
secured by a properly installed anti-tip bracket. See installation
instructions shipped with the bracket for complete details before
attempting to install.
Tocheck ff the bracket is installed and engaged properly, remove
• All ronges con tip.
• BURNSor other SERIOUS
INJURIEScan result.
• INSTALL and CHECKthe
ANTI-TIP bracket following
the instructions supplied
with the bracket.
the storage drawer or kick panel and look underneath the range
to see that the leveling leg isengaged inthe bracket. On models
without a storage drawer or kick panel, carefully tip the range
forward. The bracket should stop the range within 4 inches. If it
does not, the bracket must be reinstalled. Ifthe range is pulled
from the wall for any reason, always repeat this procedure to
verify the range is properly secured by the anti-tip bracket.
For flee-standing or slide-in ranges, never completely remove
the leveling legs or the range will not be secured to the anti-tip
device properly.
If you did not receive an anti-tip bracket with your purchase,
call 1.800.626.8774 to receive one at no cost (in Canada,
call 1.800.561.3344). For installation instructions of the bracket,
visit GEAppliances.com (in Canada, GEAppliances.ca).
ge.com
IMPORTANT SAFETY INFORMATION.
READ ALL INSTRUCTIONS BEFORE USING.
WARNING!
IMPORTANT SAFETYNOTICE
The California Safe Drinking Water and Toxic Enforcement Act requires the Governor of California to
publish a list of substances known to the state to cause birth defects or other reproductive harm, and
requires businesses to warn customers of potential exposure to such substances.
Gas appfiances can cause minor exposure to four of these substances, namely benzene, carbon
monoxide, formaldehyde and soot, caused primarily by the incomplete combustion of natural gas or
LP fuels. Properly adjusted burners, indicated by a bluish rather than a yellow flame, will minimize
incomplete combustion. Exposure to these substances can be minimized by venting with an open
window or using a ventilation fan or hood.
SAFETYPRECAUTIONS
When using electrical appliances, basic safety precautions should be followed, including the following:
iiiiiil
Use this appliance only for its intended
purpose as described in this Owner's Manual.
iiiil}i
Be sure your appliance is properly installed
and grounded by a qualified technician in
accordance with the provided installation
instructions.
iiiiiiiiii_
Do not attempt to repair or replace any
part of your range unless it is specifically
recommended in this manual. All other
servicing should be referred to a qualified
technician.
iiiiiiili_
Before performing any service, disconnect
the range power supply at the household
distribution panel by removing the fuse or
switching off the circuit breaker.
Do not leave children alone---children should
not be left alone or unattended in an area
where an appliance is in use.They should
never be allowed to sit or stand on any part
of the appliance.
iiiiiiili_
Do not allow anyone to climb, stand or hang
on the door, storage drawer, or cooktop. They
could damage the range and even tip it over,
causing severe personal injury.
iiiiiiili_
Do not store flammable materials in an oven
or near the cooktop.
CAUTION: Itemsofinteresttochildren
should not be stored in cabinets above a
range or on the backsplash of a range-
children climbing on the range to reach
items could be seriously injured.
SAFETYPRECAUTIONS
Have the installer show you the location of the range gas shuboff valve and how to shut it off if
necessary.
*:, Have your range installed and properly
grounded by a qualified installer, in
accordance with the Installation Instructions.
Any adjustment and service should be
performed only by qualified gas range
installers or service technicians.
4
Do not attempt to repair or replace any
part of your range unless it is specifically
recommended in this manual. All other service
should be referred to a qualified technician.

SAFETYPRECAUTIONS
ge.com
Locate the range out of kitchen traffic path
and out of drafty locations to prevent poor air
circulation.
Besure all packaging materials are removed
from the range beforeoperating it to prevent
fireor smoke damage should the packaging
material ignite.
Be sure your range is correctly adjusted by
a qualified service technician or installer for
the type of gas (natural or LP)that is to be
used. Your range can be converted for use
with either type of gas. Seethe Installation
of the range section.
WARNING:theseadjustments
must be made bg a qualified service
technician in accordance with the
manufacturer's instructions and all codes
and requirements of the authority having
jurisdiction. Failure to follow these instructions
could result in serious injury or property
damage. The qualified agency performing
this work assumes responsibility for the
conversion.
_:,After prolonged use of a range, high floor
temperatures may result and many floor
coverings will not withstand this kind of use.
Never install the range over vinyl tile or
linoleum that cannot withstand such type
of use. Never install it directly over interior
kitchen carpeting.
Do not leave children alone or unattended
where a range is hot or in operation. They
could be seriously burned.
Do not allow anyone to climb, stand or hang
on the oven door, drawer or cooktop. They
could damage the range and even tip it over,
causing severe personal injury.
CAUTION: Items of interest to
children should not be stored in cabinets
above a range or on the backsplash of a
range-children climbing on the range to
reach items could be seriouslg injured.
For your safety, never use your appliance
for warming or heating the room.
iiiiiil
Neverwear loose-fitting or hanging garments
while usingthe appliance.Becarefulwhen
reachingfor itemsstoredin cabinetsoverthe
range.Flammablematerial could be ignited if
brought incontact with flame orhot oven
surfaces and may causesevereburns.
iiiiiiili_
Do not store flammable materials in an oven,
a range drawer or near a cooktop.
iiiiiiili_
Do not store or use combustible materials,
gasoline or other flammable vapors and
liquids in the vicinity of this or any other
appliance.
iiiiiiili_
Do not let cooking grease or other flammable
materials accumulate in or near the range.
iiiiiiili_
Do not use water on grease fires. Never
pick up a flaming pan. Turn the controls off.
Smother a flaming pan on a surface burner
by covering the pan completely with a
well-fitting lid,cookie sheet or flat tray.
Use a multi-purpose dry chemical or
foam-type fire extinguisher.
Flaming grease outside a pan can be put
out by covering it with baking soda or,
if available, by using a multi-purpose dry
chemical or foam-type fire extinguisher.
Flame in the upper oven or lower oven drawer
can be smothered completely by closing the
oven door or drawer and turning the control to
off, or by using a multi-purpose dry chemical
or foam-type fire extinguisher.
iiiiiiili_
Let the burner grates and other surfaces cool
before touching them or leaving them where
children can reach them.
iiiiiiili_
Never block the vents (air openings) of the
range. They provide the air inlet and outlet
that are necessary for the range to operate
properly with correct combustion. Air openings
are located at the rear of the cooktop, at the
top and bottom of the oven door, and at the
bottom of the range under the lower oven
drawer or kick panel.
iiiiiiili_
Do not lift the cooktop. Lifting the cooktop can
lead to damage and improper operation of the
range.
Large scratches or impacts to glass doors
can lead to broken or shattered glass.
IMPORTANT SAFETY INFORMATION.
READ ALL INSTRUCTIONS BEFORE USING.
WARNING!
SURFACEBURNERS
Use proper pan size-avoid pans that are unstable or easily tipped. Select cookware having flat
bottoms large enough to cover burner grates. Toavoid spillovers, make sure cookware is large enough
to contain the food properly. This will both save cleaning time and prevent hazardous accumulations of
food, since heavy spattering or spfllovers left on range can ignite. Use pans with handles that can be
easilbtgrasped and remain cool.
Always use the LITE position when igniting the
top burners and make sure the burners have
ignited.
iiiil}i
Never leave the surface burners unattended at
high flame settings. Boilovers cause smoking
and greasy spillovers that may catch on fire.
iiiiiiili_
Adjust the top burner flame size so it does not
extend beyond the edge of the cookware.
Excessive flame is hazardous.
iiiil}i
Use only dry pot holders-moist or damp pot
holders on hot surfaces may result in burns
from steam. Do not let pot holders come near
open flames when lifting cookware. Do not use
a towel or other bulky cloth in place of a pot
holder.
iiiiiil
When using glass cookware, make sure it
isdesigned for top-of-range cooking.
iiiiiiili_
To minimize the possibility of burns, ignition
of flammable materials and spillage, turn
cookware handles toward the side or back
of the range without extending over adjacent
burners.
iiiil}i
Carefully watch foods being fried at a high
flame setting.
iiiiiiili_
Always heat fat slowly, and watch as it heats.
iiiiiiili_
Do not leave any items on the cooktop. The
hot air from the vent may ignite flammable
items and will increase pressure in closed
containers, which may cause them to burst.
iiiiiiili_
If a combination of oils or fats will be used
in frying, stir together before heating or
as fats melt slowly.
iiiiiiili_
Use a deep fat thermometer whenever
possible to prevent overheating fat beyond
the smoking point.
iiiiiiili_
Use the least possible amount of fat for
effective shallow or deep-fat frying. Filling the
pan too full of fat can cause spillovers when
food is added.
Do not flame foods on the cooktop. If you do
flame foods under the hood, turn the fan on.
iiiiiil
Do not use a wok on the cooking surface
if the wok has a round metal ring that is placed
over the burner grate to support the wok. This
ring acts as a heat trap, which may damage
the burner grate and burner head. Also, it may
cause the burner to work improperly. This may
cause a carbon monoxide level above that
allowed by current standards, resulting in a
health hazard.
iiiil}i
Foods for frying should be as dry as possible.
Frost on frozen foods or moisture on fresh
foods can cause hot fat to bubble up and
over the sides of the pan.
iiiiiiili_
Never try to move a pan of hot fat, especially
a deep fat fryer. Wait until the fat is cool.
iiiiiiili_
Do not leave plastic items on the cooktop-
they may melt if left too close to the vent.
iiiiiiili_
Keep all plastics away from the surface
burners.
To avoid the possibility of a burn, always be
certain that the controls for all burners are
at the OFF position and all grates are cool
before attempting to remove them.
If range is located near a window, do not hang
long curtains that could blow over the surface
burners and create a fire hazard.
iiiil}i
If you smell gas, turn off the gas to the range
and call a qualified service technician. Never
use an open flame to locate a leak.
iiiiiiili_
Always turn the surface burner controls off
before removing cookware.
6
ge.com
ELECTRICWARNING DRAWERAND LOWEROVEN DRAWER
::_The purpose of the warming drawer
and WARM ZONEsetting of the lower oven
drawer is to hold hot cooked foods at serving
temperature. Always start with hot food;
cold food cannot be heated or cooked in the
warming drawer or the WARM ZONEsetting
of the lower oven drawer.
Do not use the lower oven drawer to drg
newspapers. If overheated, theg can catch
on fire.
Do not leave paper products, plastics, canned
food or combustible materials in the drawer.
Neverleavejars or cans of fat drippings in or
neargour lower oven drawer.
Do not warm food in the lower oven drawer
for more than two hours.
Do not touch the heoting element or the
interior surfuce of the lower oven druwer.
These surfaces mag be hot enough to burn.
REMEMBER:The inside surface of the lower
oven drawer mag be hot when the drawer
is opened.
Use care when opening the lower oven
drawer. Open the drawer a crack and let
hot air or steam escape before removing
or replacing food. Hot air or steam which
escapes can cause burns to hands, face
and/or eges.
Do not use aluminum foil to line the lower
oven drawer. Foil is an excellent heat insulator
and will trap heat beneath it. This will upset
the performance of the drawer and it could
damage the interior finish.
Never place, use or self-clean the lower oven
drawer pan in the upper oven.
IMPORTANT SAFETY INFORMATION.
READ ALL INSTRUCTIONS BEFORE USING.
COOK MEATAND POULTRY THOROUGHLY...
Cook meat and poultry thoroughly-meat to at least an INTERNALtemperature of l 60°F and poultry
to at least an INTERNAL temperature of l80°F. Cooking to these temperatures usually protects against
foodbome illness.
UPPEROVEN
Standaway from
the range when opening the door of a hot oven. The hot air and steam that escape
cancause burnsto hands,face and eyes.
Do notuse theoven fora storagearea.
Itemsstoredintheoven can ignite.
Keep the oven free from grease buildup.
iiiil}i
Place the oven racks in the desired position
while the oven iscool. If racks must be
handled when hot, do not let pot holder
contact the heating elements.
iiiil}i
Pulling out the rack to the stop-lock isa
convenience in lifting heavy foods. It is also
a precaution against burns from touching hot
surfaces of the door or oven walls. The lowest
position "R" is not designed to slide.
Do not heat unopened food containers.
Pressure could build up and the container
could burst, causing an injurg.
SELF-CLEANING UPPER OVEN
iiiiiil
When using cooking or roasting bags in the
oven, follow the manufacturer's directions.
Do not use gour oven to dry newspapers.
If overheated, theg can catch fire.
iiiil}i
Do not leave paper products, cooking utensils
or food inthe oven when not in use.
iiiiiiili_
Keep the oven vent unobstructed.
iiiiiiili_
Make sure an N broiler pan is in place correctlg
to reduce the possibilitg of grease fires.
iiiiiiili_
If gou should have a grease fire in a broiler
pan, press the Clear/Off pad and keep
the oven door closed to contain fire until
it burns out.
iiiiiiili_
Never place, use or self-clean the lower oven
drawer pan in the upper oven.
iiiil}i
Be sure to wipe up excess spillage before
self-cleaning operation.
iiiiiiili_
Before self-cleaning the oven, remove
the racks, ann broiler pan, grid and
other cookware.
iiiil}i
Never place, use or self-clean the lower oven
drawer pan in the upper oven.
iiiiiiili_
Do not clean the door gasket. The door gasket
isessential for a good seal. Care should be
taken not to rub, damage or move the gasket.
iiiiiil
Clean onlg parts listed in this Owner's Manual.
iiiiiil
If the self-cleaning mode malfunctions,
turn the oven off and disconnect the power
supplg. Have it serviced bg a qualified
technician.
iiiil}iDo not use oven cleaners. No commercial
oven cleaner or oven liner of ang kind should
be used in or around anNpart of the oven.
Residue from oven cleaners will damage the
inside of the oven when the self-clean cgcle
is used.
READ AND FOLLOW THISSAFETY INFORMATION
CAREFULLY.
SAVE THESE INSTRUCTIONS
8

Using the gas surface burners.
Throughout this manual, features and appearance may vary from your model.
ge.com
Push the control knob in and turn
it to the LITEposition.
Before Lighting u Gas Burner
Hake sure all burners are in place.
Hake sure all grates on the range are
properly placed before using any burner.
How to Light u Gas Surface Burner
Hake sureall the surface burners are placed
in their respectivepositions.
Pushthe control knob in and turn it to
the LifE position.
Youwill hear a little clicking noise-
the sound of the electric spark igniting
the burner.
Turnthe knobto adjustthe flame size.
If the knob stays at LITE,it will continue
to click.
After Lighting u Gas Burner
Donot operate the burner for an extended
period of time without cookware on the
grate. Thefinish on the grate may chip
without cookware to absorb the heat.
Besurethe burners and grates are cool
before you place your hand,a pot holder,
cleaning cloths or other materials on them.
When one burner isturned to LITE,all the
burners spark. Donot attempt to disassemble
or clean around any burner while another
burner ison.An electric shock may result,
which could cause you to knock over hot
cookware.
Oval
Medium |small
Large Extra Large
Sealed Gas Burners
Yourgas range cooktop hasfive sealed
gas burners.They offer convenience,
cleanability and flexibility to be usedin
a wide range of cooking applications.
Thesmallest burner in the right rear position is
the simmer burner.Thisburner can beturned
down to LOfor a very low simmer setting. It
provides precisecookingperformance for
delicate foods such as saucesor foodsthat
require low heat for a long cooking time.
Themedium (leftrear)andthe large (leftfront)
burners are the primary burnersfor most
cooking.Thesegeneral-purpose burners can
be turned down from HI to LOto suit a wide
range of cooking needs.
How to Select Flume Size
Forsafehandling of cookware,neverlet the
flames extend up the sides ofthe cookware.
Watch the flame, not the knob,as you reduce
heat. When fast heating is desired,the flame
sizeon agas burner should match the
cookware you are using.
Theextra large burner (rightfront)is the
maximum output burner.Likethe other four
burners,it can beturned down from HIto LO
for a wide range of cookingapplications;
however,this burner is designedto quickly
bring large amounts of liquid to a boil. It has
a special POWERBOILT"setting designed to
be usedwith cookware 10 inchesor larger
in diameter.
Thecenter ovalburner (on some models)is
for large pots/pans or for usewith the griddle.
Flameslarger than the bottom of the
cookware will not resultin faster heating
of the cookware and could be hazardous.
Using the griddle.
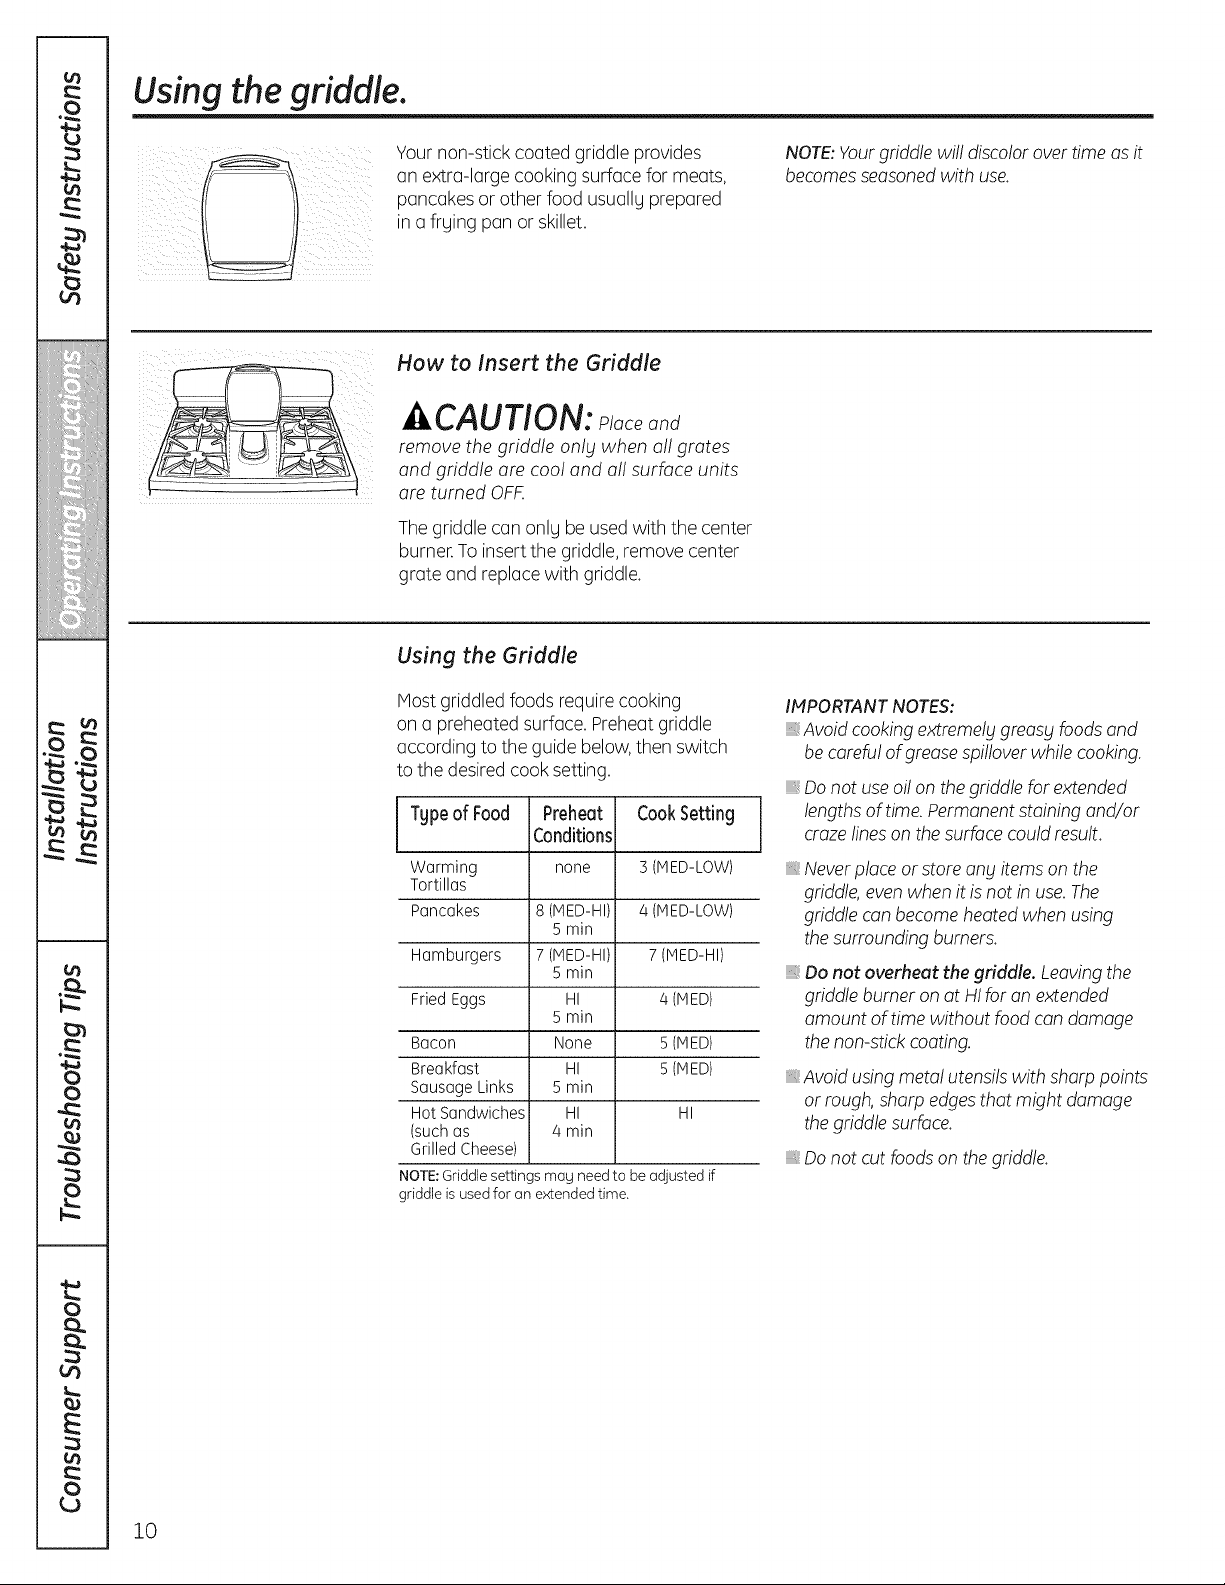
Yournon-stick coated griddle provides
an extra-large cooking surface for meats,
pancakes or other food usuallg prepared
in a frging pan or skillet.
How to Insert the Griddle
CAUTION: Placeand
remove the griddle onlg when a!! grates
and griddle are coo! and al! surface units
are turned OFF.
The griddle can onlg be used with the center
burner.To insertthe griddle,remove center
grate and replace with griddle.
Using the Griddle
Most griddled foods require cooking
on a preheated surface. Preheat griddle
according to the guide below,then switch
to the desired cook setting.
l Tgpeof Food Preheat CookSetting
Warming none 3 (MED-LOW)
Tortillas
Pancakes 8 (MED-HI) /4 (MED-LOW)
Hamburgers (MED-HI) 7(MED-HI)
Fried Eggs HI /4(MED)
Bacon None 5(MED)
Breakfast HI 5(MED)
SausageLinks 5min
HotSandwiches HI HI
(suchas /4min
GrilledCheese)
NOTE:Griddle settings mug need to be adjusted if
griddle is used for an extended time.
Conditions
5 min
5 min
5 min
NOTE:Yourgriddle wi!! discolor overtime asit
becomesseasonedwith use.
IMPORTANTNOTES:
Avoidcooking extremelggreasg foodsand
becarefu!of greasespi!!overwhile cooking.
Do not use oilon the griddle for extended
lengths of time. Permanent staining and/or
craze!inesonthe surfacecould result.
Neverplace or store ang items on the
griddle,evenwhen it is not in use.The
griddle canbecome heatedwhen using
thesurrounding burners.
Do not overheat the griddle. Leavingthe
griddle burner on at HIfor anextended
amount of time without foodcan damage
thenon-stick coating.
Avoidusing meta!utensilswith sharp points
or rough,sharp edgesthat might damage
thegriddle surface.
Donot cutfoods on the griddle.
10
Using the gas surface burners, ge.com
Top-of-Range Cookware
Aluminum: Medium-weight cookware is
recommended because it heats quickly
and evenly.Host foods brown evenly in an
aluminum skillet. Usesaucepanswith tight-
fitting lids when cooking with minimum
amounts of water.
Cast-iron: If heated slowly, most skilletswill
give satisfactory results.
Enamelware: Undersome conditions,
the enamel of some cookwore may
melt. Followcookwore manufacturer's
recommendations for cooking methods.
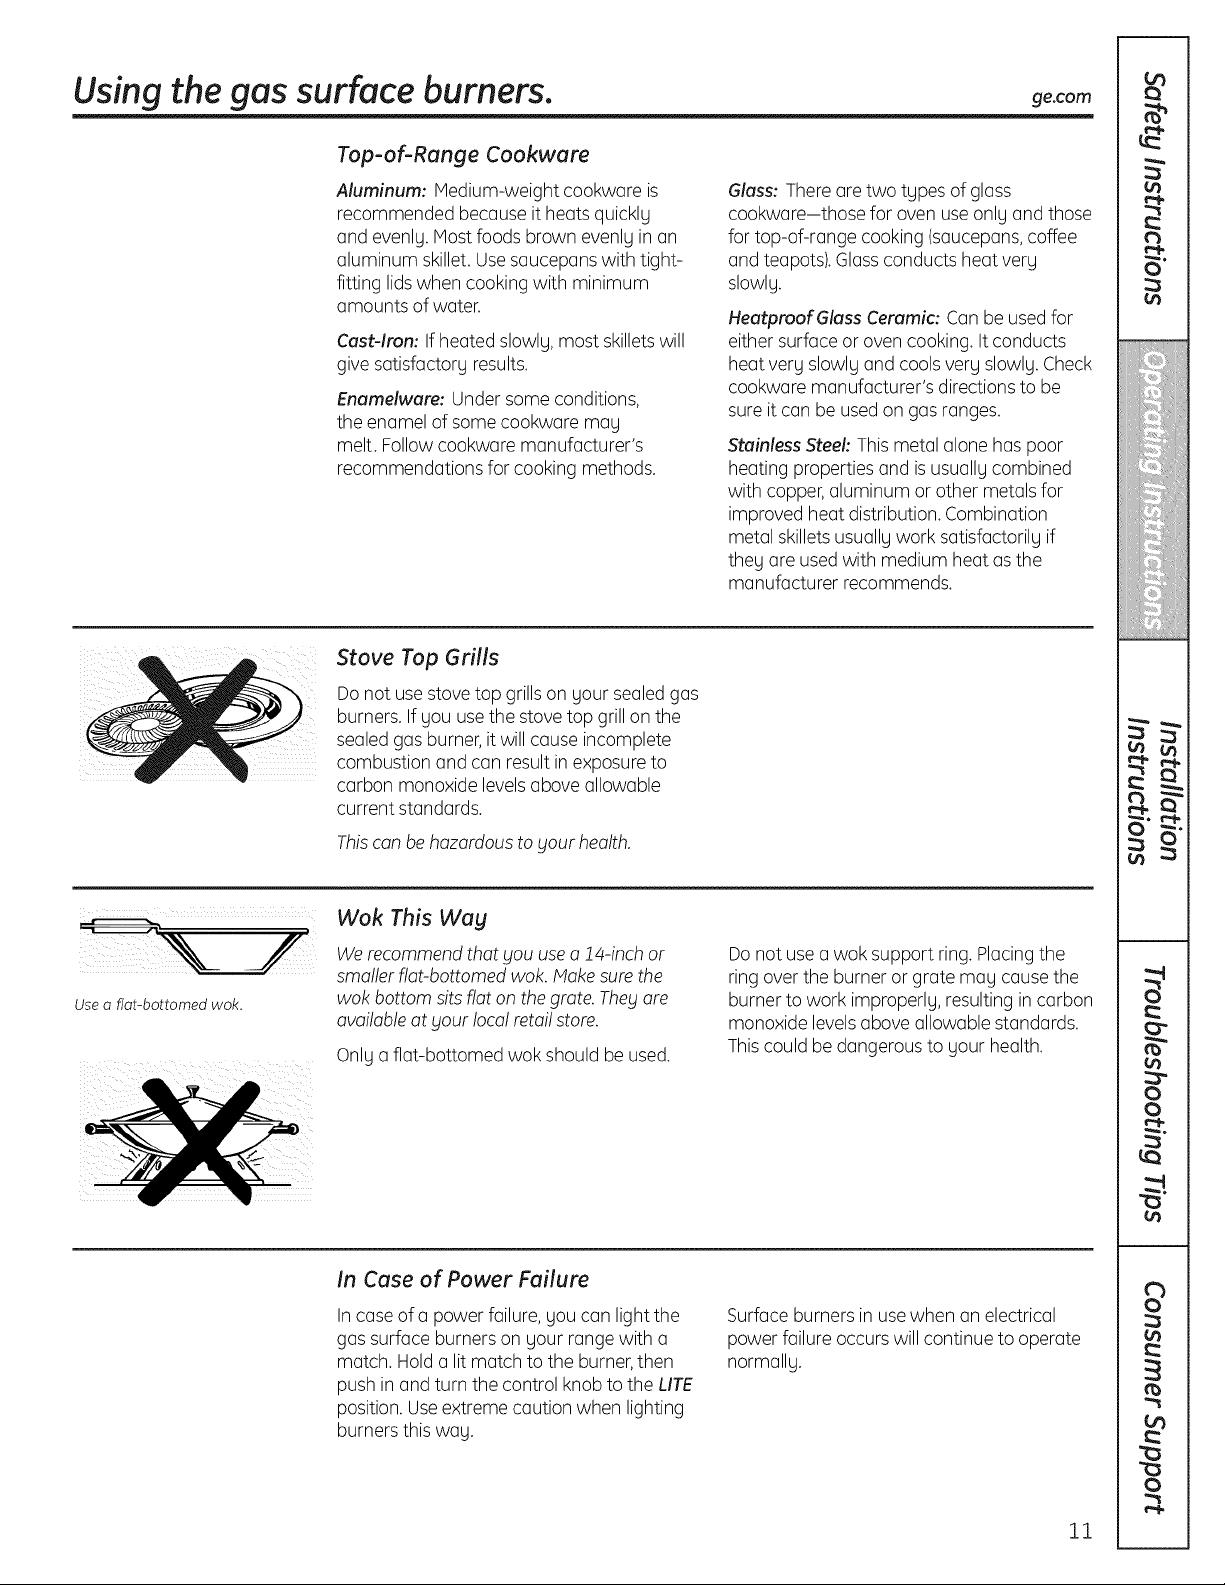
Stove Top Grills
Do not usestove top grills on your sealedgas
burners. If you use the stove top grill on the
sealedgas burner,it will cause incomplete
combustion and can result in exposure to
carbon monoxide levelsabove allowable
current standards.
Glass: There ore two types of gloss
cookware-those for oven use only and those
for top-of-range cooking (saucepans,coffee
and teapots).Glossconducts heat very
slowly.
HeatproofGlass Ceramic: Conbe usedfor
either surface or oven cooking. It conducts
heat very slowly and cools very slowly. Check
cookware manufacturer's directions to be
sureit can be usedon gas ranges.
Stainless Steel: Thismetal alone has poor
heating properties and is usually combined
with copper,aluminum or other metals for
improved heat distribution. Combination
metal skilletsusuallywork satisfactorily if
they are usedwith medium heat as the
manufacturer recommends.
Use a flat-bottomed wok.
Thiscan behazardous to your health.
Wok This Wag
Werecommend that you usea J4-inch or
smaller flat-bottomed wok. Makesurethe
wok bottom sits flat on thegrate. Theyore
availableat your loca!retai!store.
Only a flat-bottomed wok should be used.
In Case of Power Failure
In caseofo power failure, you can light the
gas surface burners on your range with a
match. Hold o lit match to the burner,then
push in and turn the control knob to the LITE
position. Useextreme caution when lighting
burners this wag.
Donot usea wok support ring.Placingthe
ring over the burner or grate may causethe
burner to work improperly, resulting in carbon
monoxide levelsabove allowable standards.
Thiscould be dangerous to your health.
Surface burners in use when an electrical
power failure occurswill continue to operate
normally.
11

Using the ovencontrols.
(Throughout this manual, features and appearance mag varg from _lour model.)
VEN CONTRO
H_/Lo
?
Features, appearance and pad locations may vary.
OvenControl,Clock,Timerand Featuresionsomemodels)
BakePad 0
Touchtoselectthe bakefunction.
0 BroilHi/Lo Pad 0
Touchtoselectthe broilfunction.
Convection BakeMulti/1 RackPad
@
(on some models)
Touchto selectbakingwith the convection
function.
O Convection Roast Pad (onsome models)
Touchto selectroastingwiththe convection
function.
Start Pad
Mustbetouched tostart any cookingor
cleaningfunction.
O Display
Showsthetime ofdab, oventemperature,
whetherthe ovenis inthe bake,broilor
self-cleaningmode,the timessetfor
thetimer or automatic ovenoperations,
and ifthe rangeislocked.
If "F- and a numberor letter" flash in the display
and the oven control signals,this indicates afunction
error code.Touchthe Clear/Off pad.Allow theovento
coolforonehour.Puttheoven backintooperation.Ifthe
functionerror coderepeats,disconnectthepower to the
ovenand calfforservice.
If your oven was set for a timed oven operation and a
power outage occurred, the clock and alfprogrammed
functions must be reset.
The time of day will flash in the display when there
has been a power outage.
O_ / OFF
7q
OvenLight On/Off Pad
Touchto turn theovenlight on or off.
Delay Start Pad
UsealongwithCooking Time or Self Clean
pads to set the oven to start and stop
automaticallg at a time gou set.
Cooking TimePad
0
Touchandthentouchthenumberpadstoset
theamount oftime gou want gourfoodto cook.
Theovenwill shut offwhen the cookingtime
hasrun out.
Clear/Off Pad
0
Touchto cancelALLovenoperationsexcept
theclock,timer and Gas/ControlLockoutor
ControlLockout(dependingon model).
ClockPad
Touchbeforesettingthe clock.
Number Pads
Useto set anUfunction requiringnumbers,
suchasthetime ofdaUon theclock,thetimer,
theoventemperature,the internalfood
temperature,the start time and lengthof
operationfor timed bakingand self-cleaning.
Kitchen Timer On/Off Pad
0
Touchtoselectthetimerfeature.
Probe Pad
0
Touchwhen usingthe probeto cookfood.
Control Lockout
0
Thecontrol lockoutis9 and O.Touchand hold
the9 and 0 padsatthe sametimefor 3 seconds.
12
Self Clean Pad
Touchto selectself-cleaningfunction.
Seethe Usingtheself-cleaningovensection.
Using the upper oven. ge.com
To avoid possible burns, place the racks in the desired position before you turn the oven on.
Before you begin...
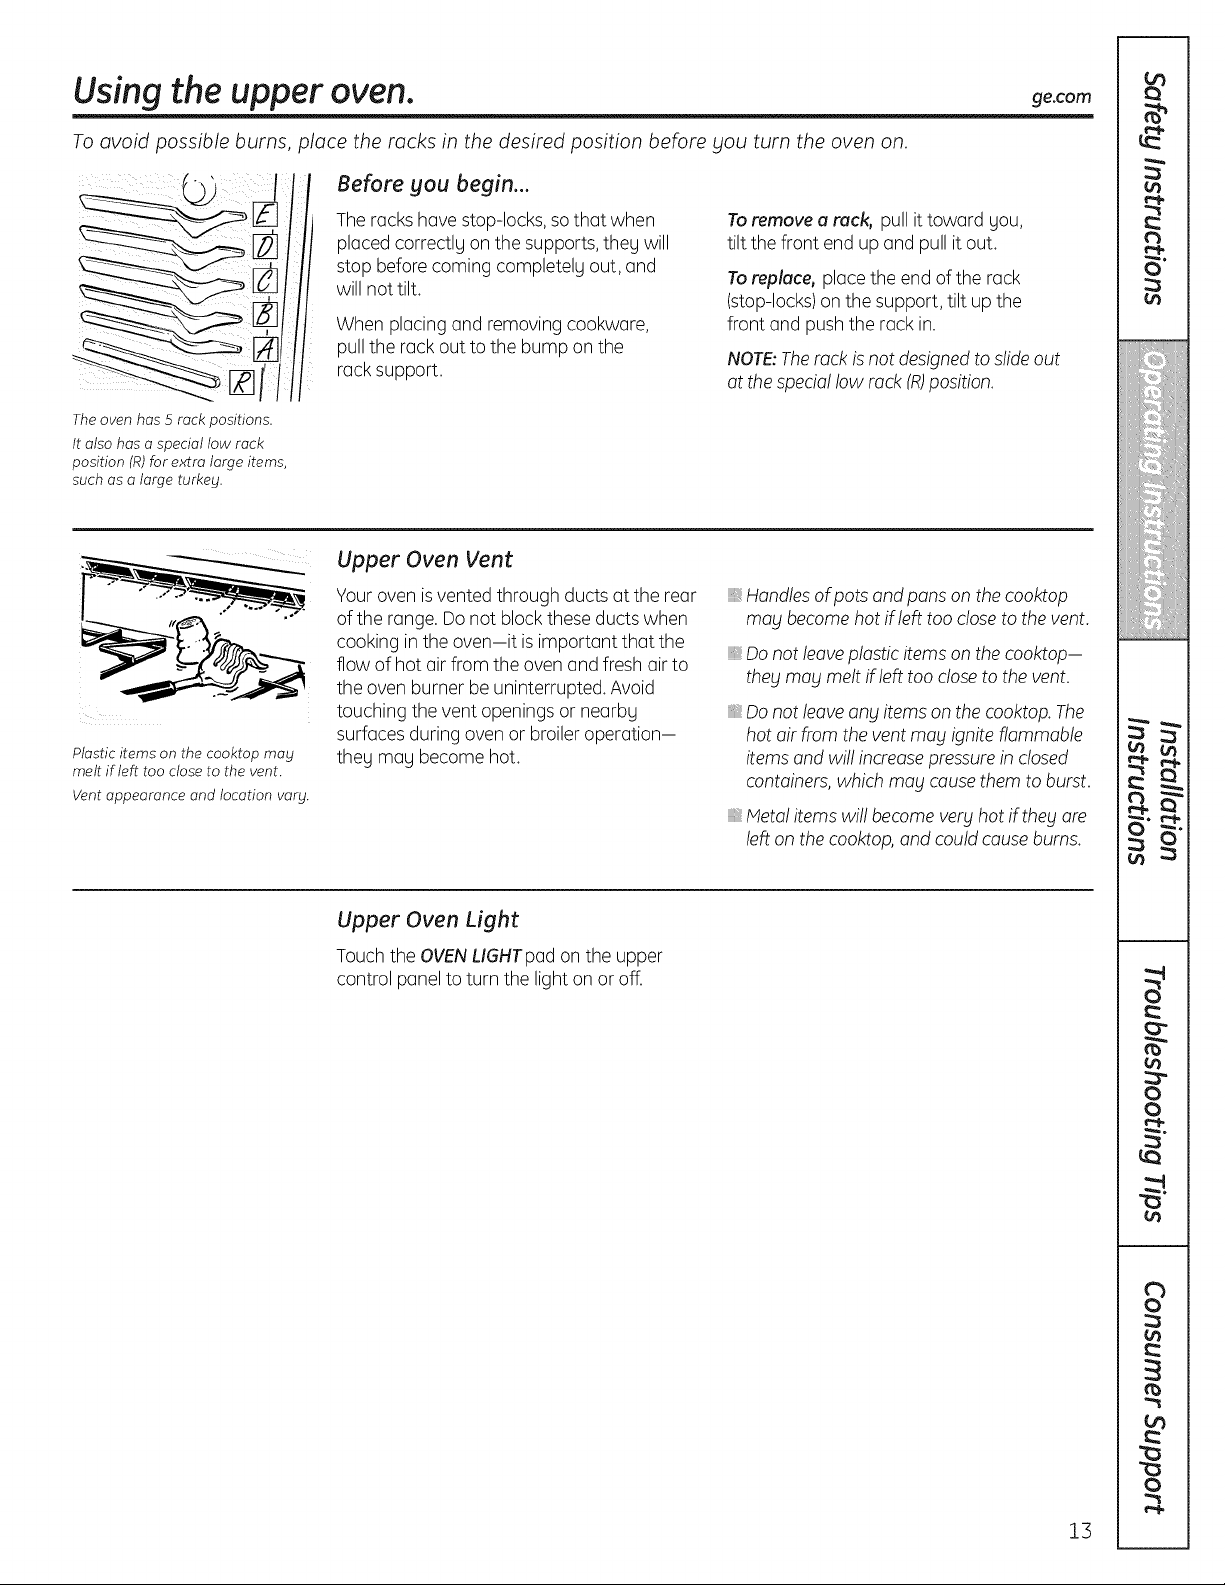
The oven has 5 rack positions.
It also has a special low rack
position (R)for extra large items,
such as a large turkey.
Plastic items on the cooktop may
melt if left too close to the vent.
Vent appearance and location vary.
Theracks havestop-locks, sothat when
placed correctlg on the supports, theg will
stop before coming completelg out, and
will not tilt.
When placing and removing cookware,
pull the rack out to the bump on the
rack support.
Upper Oven Vent
Youroven isvented through ducts at the rear
of the range. Do not block these ducts when
cooking in the oven-it is important that the
flow of hot air from the oven and fresh air to
the oven burner be uninterrupted. Avoid
touching the vent openings or nearby
surfaces during oven or broiler operation-
theg mag become hot.
Toremove a rack, pull it toward you,
tilt the front end up and pull it out.
Toreplace, placethe end of the rack
(stop-locks)on the support, tilt up the
front and push the rack in.
NOTE:Therack isnot designedto slideout
at the speciallow rack (R)position.
Handles ofpots and pans onthe cooktop
may becomehot if left too closeto the vent.
Do not leave plastic items on the cooktop-
they may melt if left too close to the vent.
Do not leave any items on the cooktop. The
hot air from the vent may ignite flammable
items and wi!!increase pressure in closed
containers, which may cause them to burst.
Meta! items wi!!become very hot ifthey are
left on the cooktop, and could cause burns.
Upper Oven Light
Touchthe OVENLIGHTpad on the upper
control panel to turn the light on or off.
13
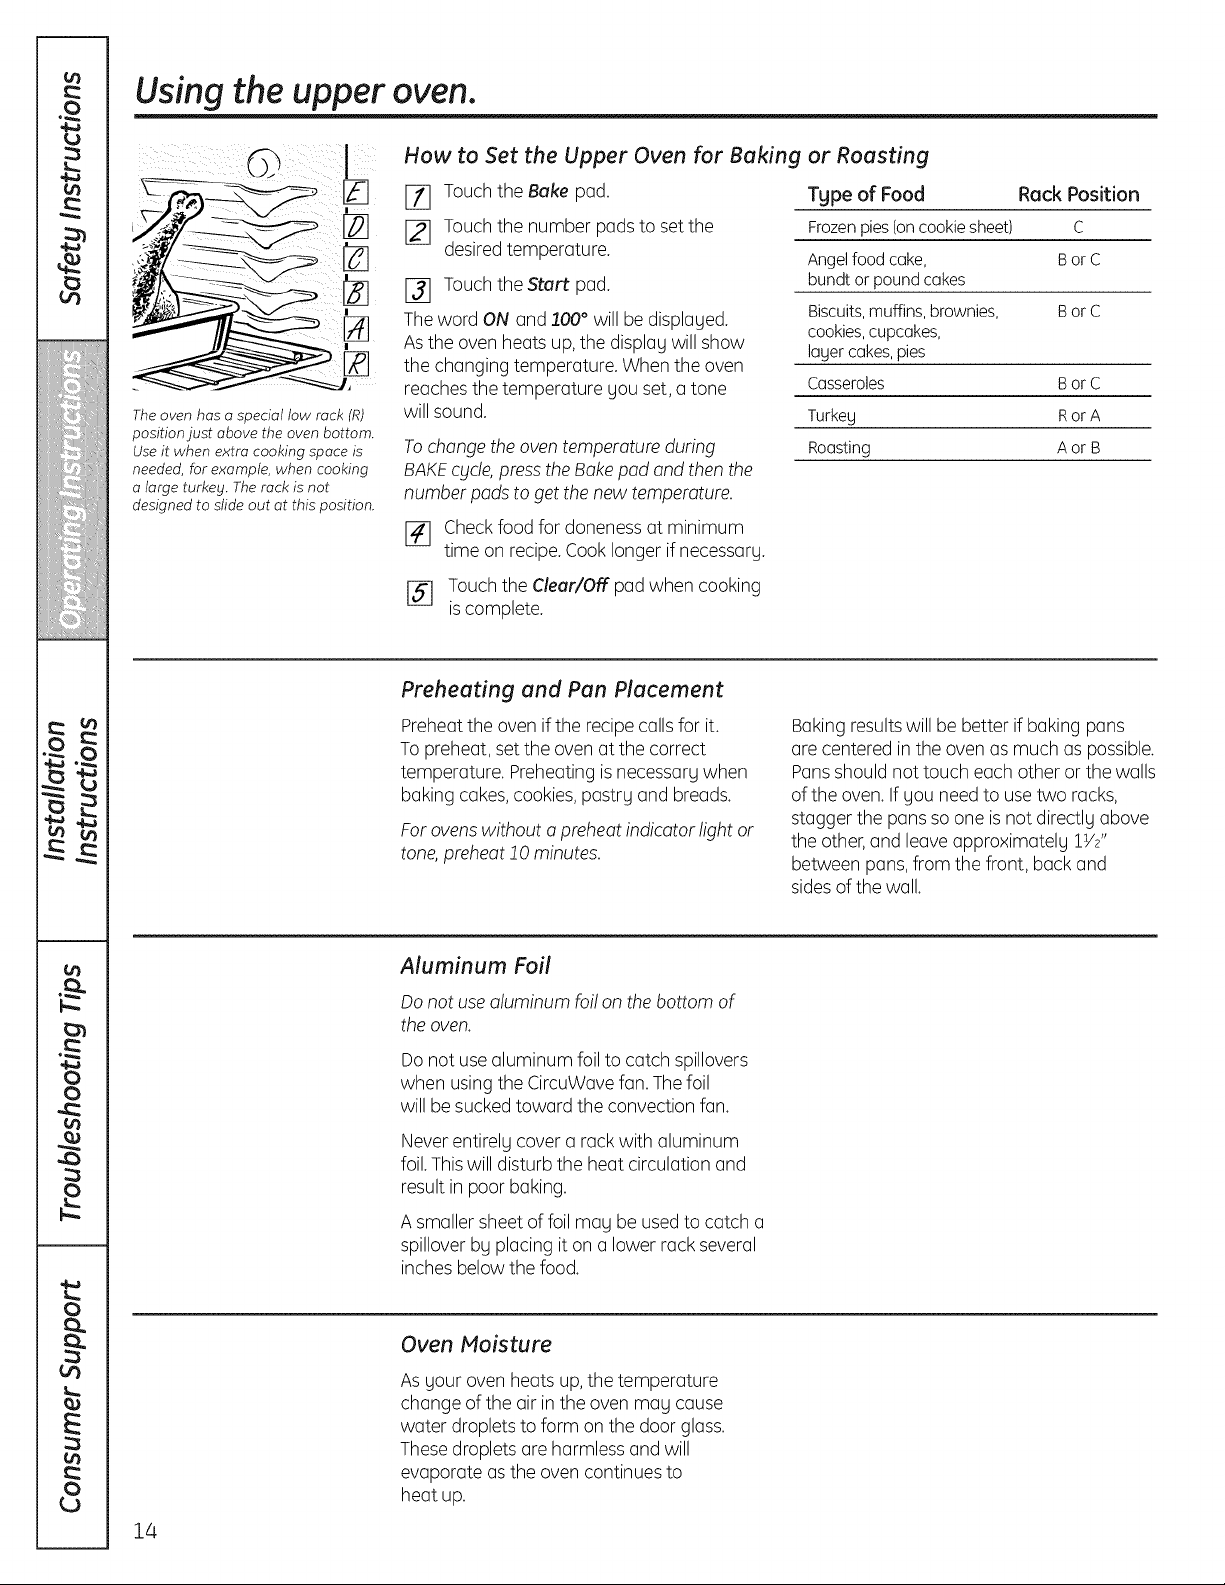
Using the upper oven.
[]
The oven has a special low rack (R)
position just above the oven bottom.
Use it when extra cooking space is
needed, for example, when cooking
a large turkey. The rack is not
designed to slide out at this position.
How to Set the Upper Oven for Baking
[_ Touch the Bake pad.
[_ Touch the number pads to set the
desiredtemperature.
[_] Touchthe Start pad.
Theword ON and 100° will be displaged.
Asthe oven heats up, the display will show
the changing temperature. Whenthe oven
reachesthe temperature you set, a tone
will sound.
Tochange theoven temperature during
BAKEcgcle,pressthe Bakepad and then the
number pads to get the new temperature.
[] Checkfood for doneness at minimum
time on recipe.Cooklonger if necessary.
[_] Touch the Clear/Off pad when cooking
iscomplete.
Preheating and Pan Placement
Preheatthe oven if the recipecoilsfor it.
To preheat, set the oven at the correct
temperature. Preheatingis necessorgwhen
baking cokes,cookies,pastrg and breads.
Forovenswithout a preheatindicator light or
tone,preheat JOminutes.
or Roasting
Tgpe of Food Rack Position
Frozenpies(oncookiesheet) C
Angelfood coke, BorC
bundtor poundcokes
Biscuits, muffins, brownies, B or C
cookies,cupcakes,
lagercokes,pies
Casseroles BorC
Turkeg RorA
Roosting AorB
Bakingresultswill be better if baking pans
are centered in the oven as much as possible.
Pansshould not touch each other or the walls
of the oven. If you need to usetwo racks,
stagger the pans soone isnot directly above
the other,and leave approximately 1Vj'
between pans, from the front, back and
sidesof the wall.
14
Aluminum Foil
Do not use aluminum foi!on the bottom of
the oven.
Do not usealuminum foil to catch spillovers
when using the CircuWavefan. Thefoil
will be sucked toward the convection fan.
Never entirelg cover a rack with aluminum
foil.Thiswill disturb the heat circulation and
result in poor baking.
A smaller sheet of foil mag be used to catch a
spillover bg placing it on a lower rack several
inches below the food.
Oven Moisture
Asgour oven heatsup, the temperature
change of the air in the oven mag cause
water droplets to form on the door glass.
These droplets are harmlessand will
evaporate asthe oven continues to
heat up.
How to Set the Upper Oven for Broiling--Close the oven door
ge.com
Placethe meat or fish on a broiler grid in
[77 a broiler pan.
[_ Followsuggested rack positions in
the BroilingGuide.
_1 The oven door must be closed during
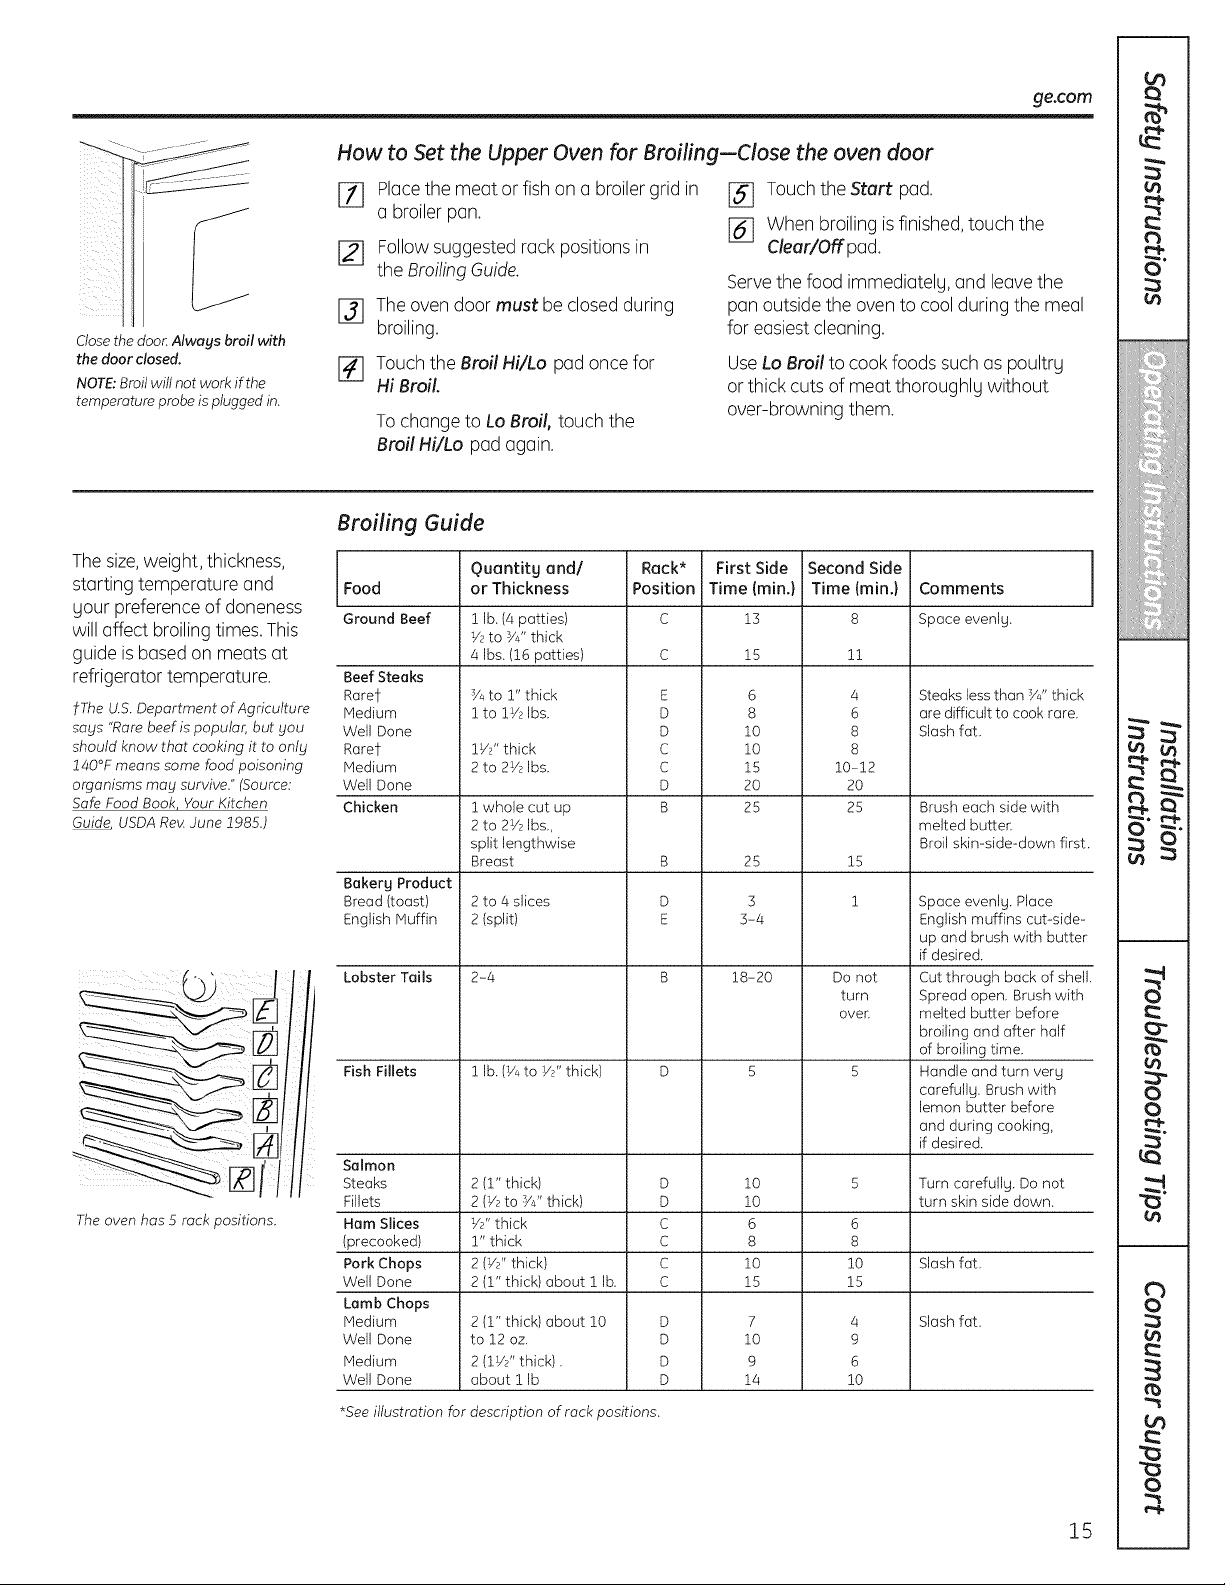
Closethe door Always broil with
the door closed,
NOTE: Broil will not work if the
temperature probe is plugged in.
broiling.
[] Touch the Broil Hi/Lo pad once for
Hi Broil.
To change to Lo Broil, touch the
Broil Hi/Lo pad again.
Broiling Guide
Thesize,weight, thickness,
starting temperature and Food
your preference of doneness
will affect broiling times. This
guide isbasedon meats at
refrigerator temperature. Beef Steaks
t The U.S.Department of Agriculture Medium
says "Rare beef is popular, but you Well Done
should know that cooking it to only Rare?
140°F means some food poisoning Medium
organisms may survive." (Source: Well Done
Safe Food Book Your Kitchen Chicken
Guide_USDA Re_June 1985.)
The oven has 5 rack positions.
Ground Beef
Raret
Bakery Product
Bread (toast)
English Muffin
Lobster Tails
Fish Fillets
Salmon
Steaks
Fillets
Ham Slices
(precooked)
Pork Chops
Well Done
Lamb Chops
Medium
Well Done
Medium
Well Done
*See illustration for description of rack positions.
[_ Touchthe Start pad.
[] When broiling isfinished,touch the
Servethe food immediately, and leavethe
pan outside the oven to cool during the meal
for easiest cleaning.
UseLo Broil to cook foods such as poultry
or thick cuts of meat thoroughly without
over-browning them.
Quantitg and/
or Thickness
1 lb. (4 patties)
% to 3/4"thick
4 Ibs. (16 patties)
Y4to 1" thick
i to 1% Ibs.
1%" thick
2 to 2% Ibs.
1 whole cut up
2 to 2% Ibs,
split lengthwise
Breast
2 to 4 slices
2 (split)
2-4
1 lb. (1/4to W' thick) D
2 (1" thick) O 10
2 (% to Y4"thick) O 10
%" thick C 6
1" thick C 8
2 (%" thick) C 10
2 (1" thick) about 1 lb. C 15
2 (1" thick) about 10 D 7
to 12 oz. D 10
2 (1%" thick). O 9
about 1 Ib D 14
Rack*
Position
E
D
D
C
C
D
B
B
D
E
First Side
Time (min.}
2O
25
25
3-4
18-20
Clear/Off pad.
Second Side
Time (min.}
13
15
6
8
10
10
15
3
11
4
6
8
8
10-12
2O
25
15
1
Do not
turn
oven
5
6
8
10
15
4
9
6
10
Comments
Space evenJg.
Steaks less than Y4"thick
are difficult to cook rare.
Slash fat.
Brush each side with
melted butter.
Broil skin-side-down first
Space evenly. Place
English muffins cut-side-
up and brush with butter
if desired.
Cut through back of shell
Spread open. Brush with
melted butter before
broiling and after half
of broiling time.
Handle and turn verg
carefullg. Brush with
lemon butter before
and during cooking,
if desired.
Turn carefully. Do not
turn skin side down.
Slash fat.
Slash fat.
15
Using the clock and timer.
Not all features are on all models.
To Set the Clock
Make sure the clock is set to the
correct time of day.
KITCHEN
TIMER
Ot_/ OFF
rq ITID l-qI-;-I
12rq 12
The timer is a minute timer only.
The Clear/Off pad does not affect
the timer.
Theclock must be set to the correct time
of day for the automatic oven timing
functions to work properly. Thetime of day
cannot be changed during a timed baking or
self-cleaning cycle.
[_ Touchthe Clock pad.
I]_ Touchthe number pads.
Touch the number pads the same way you
read them. For example,to set 12:3/4,touch
the number pads1, 2,3 and 4 in that order.
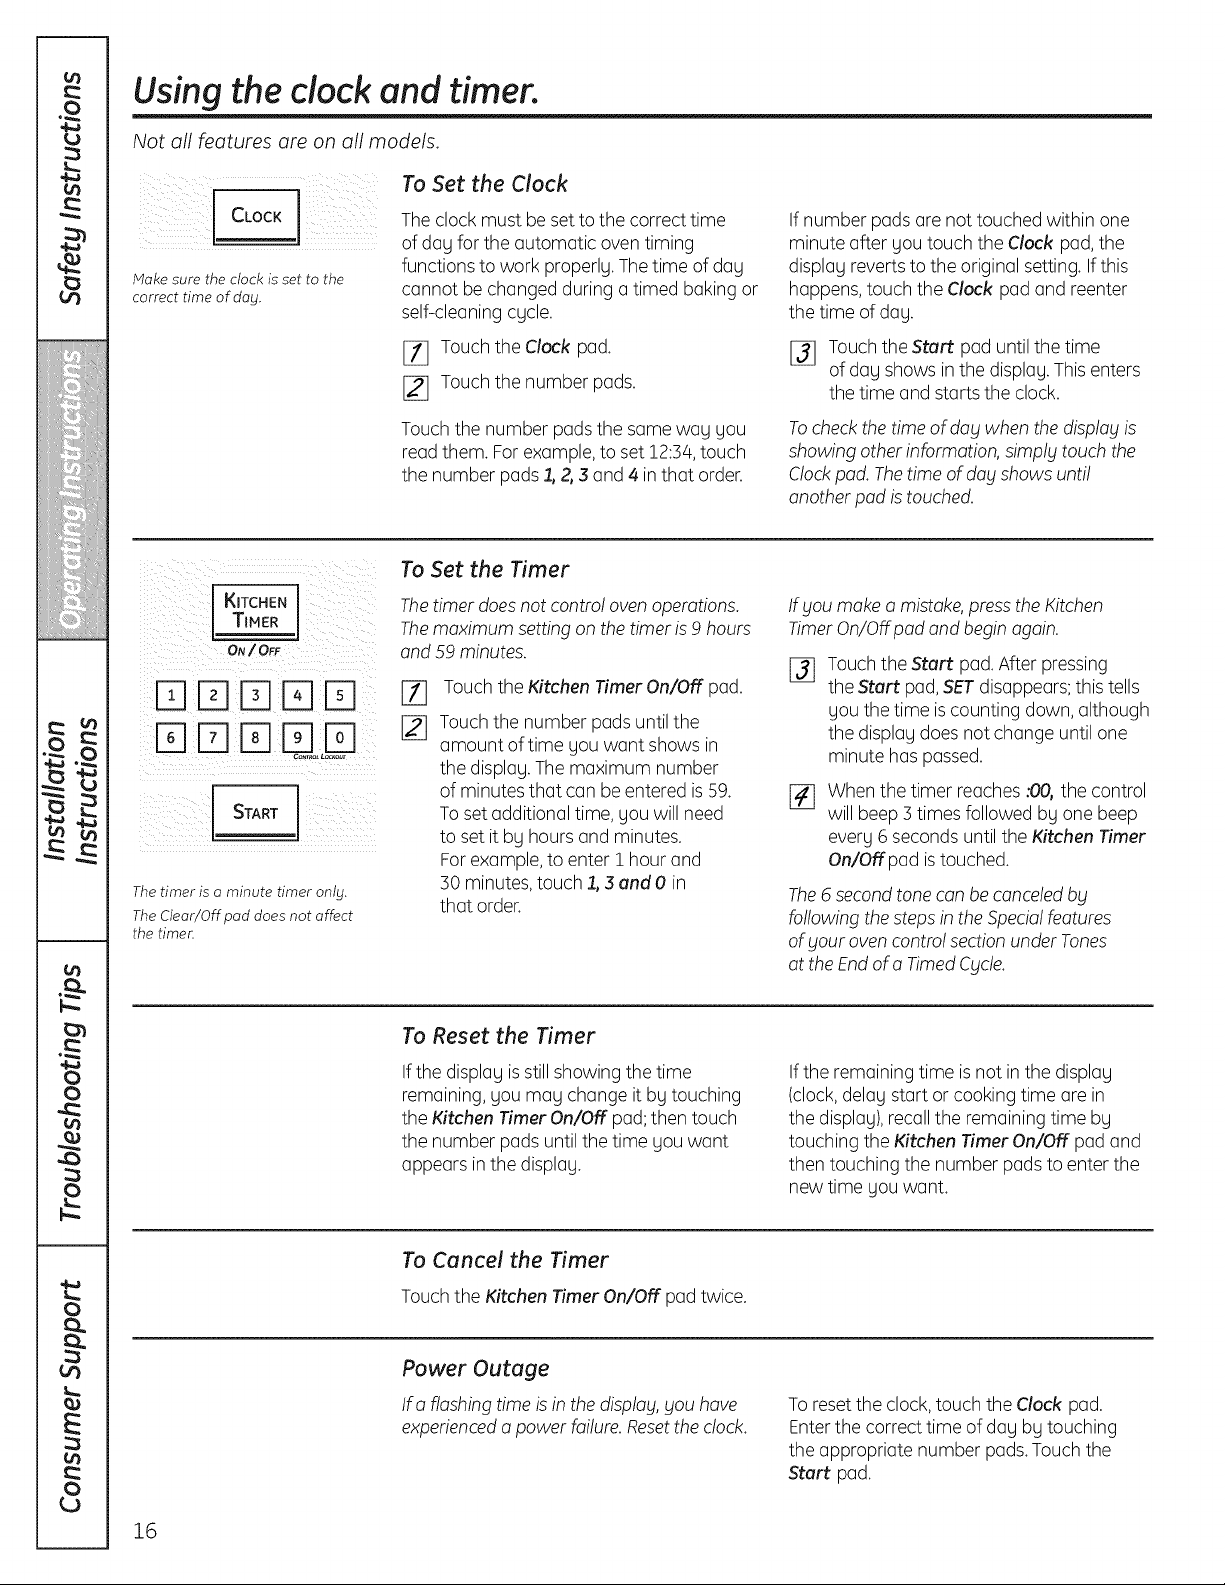
To Set the Timer
Thetimer does not contro! ovenoperations.
Themaximum setting on thetimer is9 hours
and 59 minutes.
Touch the Kitchen Timer On/OFFpad.
%
Touch the number pads until the
amount of time you want shows in
the display. Themaximum number
of minutes that can be entered is 59.
Toset additional time, you will need
to set it by hours and minutes.
Forexample,to enter 1 hour and
30 minutes, touch 1,3 and 0 in
that order.
If number pads are not touched within one
minute after you touch the Clock pad, the
display revertsto the original setting. Ifthis
happens,touch the Clock pad and reenter
the time of day.
[_ Touchthe Start pad until the time
of day shows inthe display.This enters
the time and starts the clock.
Tocheck the time of day when the display is
showing otherinformation, simply touch the
Clockpad. Thetime of day shows unti!
another pad is touched.
Ifyou make a mistake,pressthe Kitchen
TimerOn/Offpad and begin again.
Touch the Start pad.After pressing
%
the Start pad,SETdisappears; this tells
you the time iscounting down, although
the display does not change until one
minute has passed.
When the timer reaches :00, the control
[]
will beep 3 times followed by one beep
every 6 seconds until the Kitchen Timer
On/Off pad istouched.
The6 second tone can be canceledby
following thestepsin the Specia!features
ofyour ovencontro!section under Tones
at the End ofa TimedCycle.
16
To Reset the Timer
Ifthe display isstillshowing the time
remaining, you may change it by touching
the Kitchen Timer On/OFFpad; then touch
the number pads until the time you want
appears in the display.
To Cancel the Timer
Touch the Kitchen Timer On/OFFpad twice.
Power Outage
Ira flashing time is in the display,you have
experiencedapower failure.Resetthe clock.
If the remaining time isnot inthe display
(clock,delay start or cooking time are in
the display), recallthe remaining time by
touching the Kitchen Timer On/OFFpad and
then touching the number pads to enter the
new time you want.
To resetthe clock,touch the Clock pad.
Enterthe correct time of day by touching
the appropriate number pads.Touch the
Start pad.
Using the timed baking and roasting features, lupperoven onlu) ge.com
If Four model has a door latch, do not lock the oven door with the latch during timed cooking. The latch is used for
self-cleaning only.
NOTE: Foods that spoil easily-such as milk, eggs, fish, stuffings, poultry and pork-should not be allowed to sit for
more than 1 hour before or after cooking. Room temperature promotes the growth of harmful bacteria. Be sure that
the oven light is off because heat from the bulb will speed harmful bacteria growth.
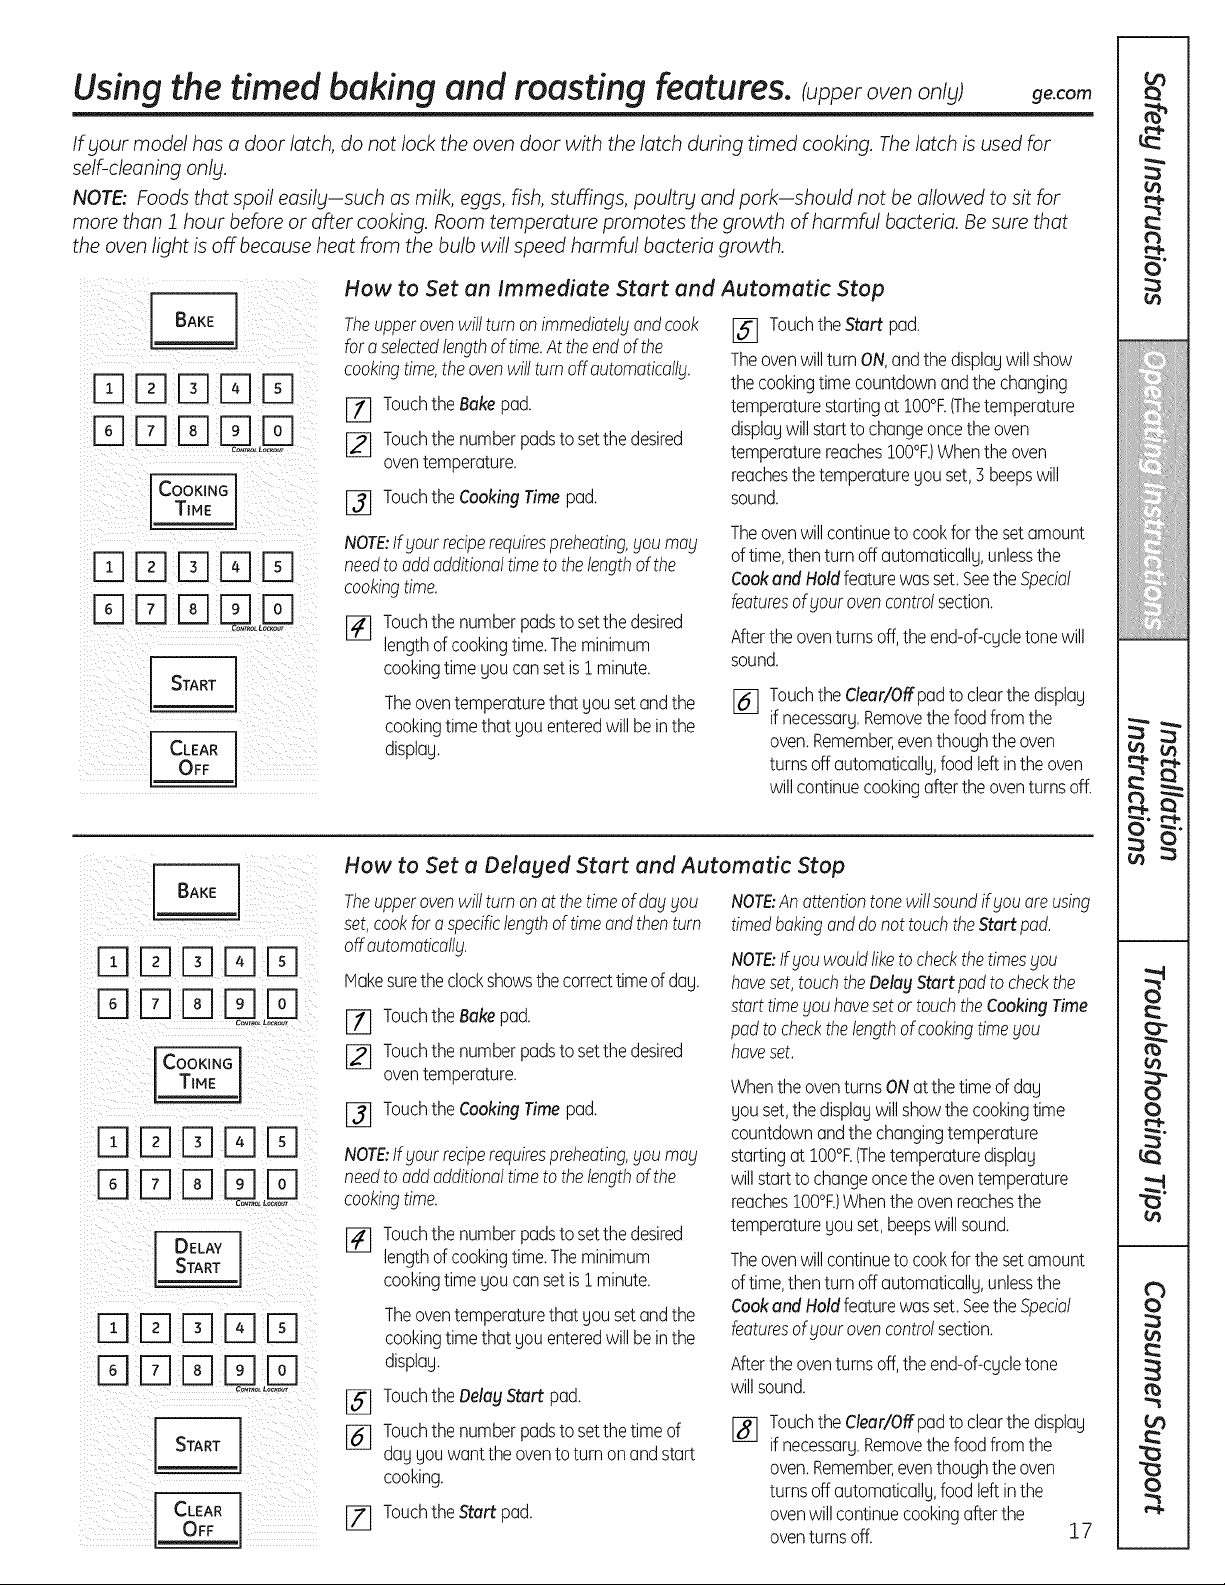
How to Set an Immediate Start and Automatic Stop
Theupperovenwillturnonimmediatelyandcook _] TouchtheStart pad.
foraselectedlengthoftime.At theendofthe
ii/-qt2-113-1iF-IFq<
_?_IIII_I_I_i _i_ii!i__i_ii
iii l I !iiii
i i
q: I CLEARi
! OFF I
cookingtime,theovenwillturnoffautomaticall_j. TheovenwillturnON,andthedisplaywillshow
FT] TouchtheBakepad.
[_ Touchthe numberpadstosetthedesired
oventemperature.
[_ Touchthe Cooking Time pad.
NOTE:Ifyourreciperequirespreheating,youmo_j
needto oddadditionaltimetothelengthofthe
cookingtime.
[_] Touchthenumberpadstosetthedesired
lengthofcookingtime.Theminimum
cookingtime youcansetis1minute.
Theoventemperaturethat yousetandthe
cookingtimethat you enteredwillbeinthe
display.
thecookingtimecountdownandthechanging
temperaturestartingat IO0°R(Thetemperature
displaywillstartto changeoncetheoven
temperaturereachesIO0°F.)Whentheoven
reachesthetemperatureyouset,] beepswill
sound.
Theovenwillcontinueto cookfor thesetamount
oftime,thenturnoff automatically,unlessthe
CookandHoldfeaturewasset.SeetheSpecial
featuresof£ourovencontrolsection.
Aftertheoventurnsoff,theend-of-cycletonewill
sound.
[_] TouchtheClear/Offpadtoclearthedisplay
if necessary.Removethefoodfromthe
oven.Remember,eventhoughtheoven
turnsoffautomatically,food leftintheoven
willcontinuecookingaftertheoventurnsoff.
bAKE 1
D [i][Z]D D
DDDUo D
CooKINGT_ME I
DDDDD
DDD o D
DDDDD
DDDUo U
START
CLEAR
1
How to Set a Delayed Start and Automatic Stop
Theupperovenwillturnonatthetimeof da_tyou
set,cookforaspecificlengthoftimeandthenturn
offoutomoticoll_j.
Hakesuretheclockshowsthecorrecttimeofday.
[] TouchtheBakepad.
[] Touchthenumberpadstosetthedesired
oventemperature.
[_ Touchthe Cooking Timepad.
NOTE:Ifyourreciperequirespreheating,youma_j
needto oddadditionaltimetothelengthofthe
cookingtime.
[_ Touchthe numberpadstosetthedesired
lengthofcookingtime.Theminimum
cookingtime youcansetis1minute.
Theoventemperaturethat yousetandthe
cookingtimethat you enteredwillbeinthe
display.
[_ Touchthe DelayStartpad.
[_ Touchthe numberpadstosetthetime of []
day youwanttheoventoturn onandstart
cooking.
[_] TouchtheStart pad.
NOTE:Anattentiontonewillsoundif_touareusing
timedbakinganddonottouchtheStartpod.
NOTE:lf _touwouldliketocheckthetimes_tou
haveset,touchtheDelayStartpadto checkthe
starttime_/ouhavesetortouchtheCookingTime
podtocheckthelengthofcookingtimeyou
haveset.
When the oventurns ON at the time of day
you set,the display will show the cooking time
countdown and the changing temperature
starting at IO0°F.(Thetemperature display
will start to change once the oven temperature
reaches IO0°F.)When the oven reachesthe
temperature you set, beeps will sound.
Theovenwillcontinueto cookfor thesetamount
oftime,thenturnoff automatically,unlessthe
CookandHoldfeaturewasset.SeetheSpecial
featuresof_tourovencontrolsection.
Aftertheoventurnsoff,theend-of-cycletone
willsound.
TouchtheClear/Offpadtoclearthedisplay
if necessary.Removethefoodfromthe
oven.Remember,eventhoughtheoven
turnsoffautomatically,food leftinthe
ovenwillcontinuecookingafterthe
oventurnsoff. 17
Using the probe, ionsomemodels)
If your model has a door latch, do not lock the oven door with the latch while cooking with the probe. The latch is used
for self-cleaning only.
For many foods, especially roasts and poultry, internal food temperature is the best test for doneness. The
temperature probe takes the guesswork out of cooking foods to the exact aloneness you want.
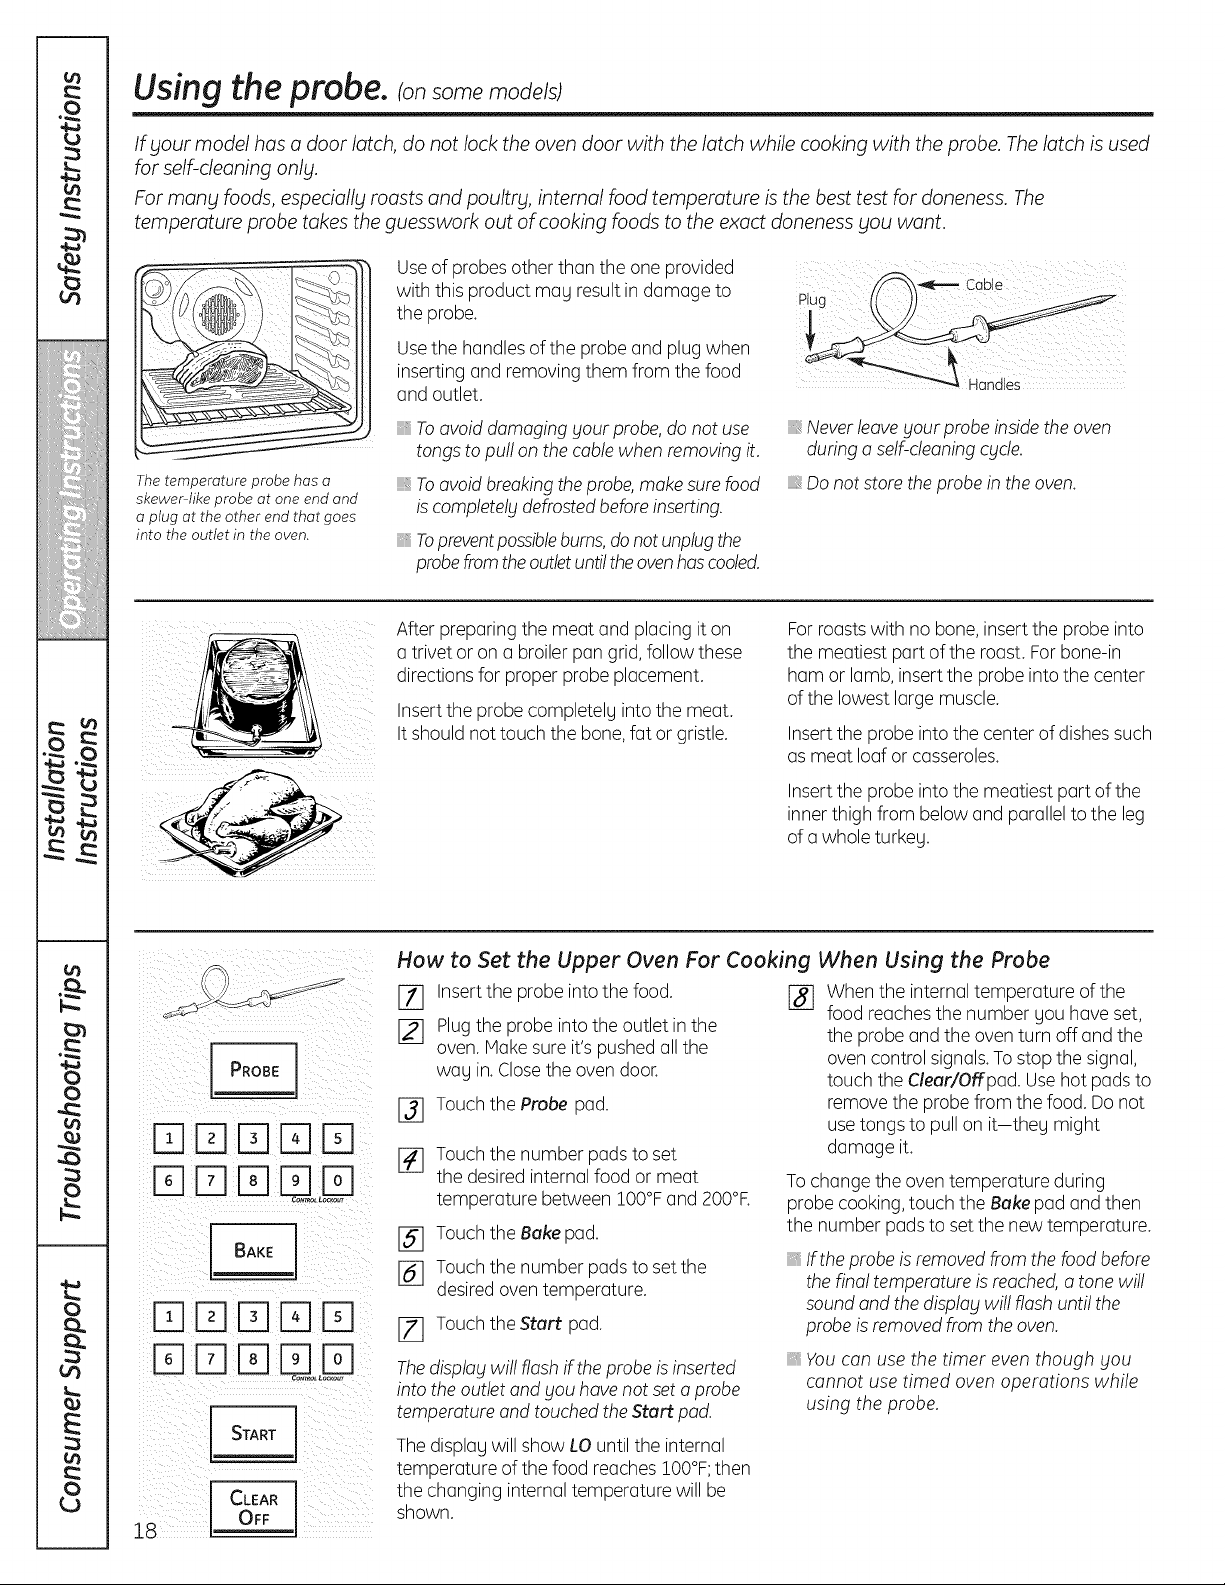
Useof probesother than the one provided
with this product may result in damage to
the probe.
Usethe handlesof the probe and plug when
inserting and removing them from the food
and outlet.
The temperature probe has a
skewer-like probe at one end and
a plug at the other end that goes
into the outlet in the oven.
j PROBE_
Toavoid damaging your probe,do not use
tongs to pu!!on the cablewhen removing it.
Toavoid breakingthe probe,make sure food
iscompletdg defrostedbefore inserting.
_,Topreventpossiblebums,donotunplugthe
probefrom theoutletunti!theovenhascooled.
After preparing the meat and placing it on
a trivet or on a broiler pan grid, follow these
directions for proper probe placement.
Insertthe probe completely into the meat.
It should not touch the bone, fat or gristle.
Neverleaveyour probe insidethe oven
during a self-cleaningcgcle.
_,Donot store the probeinthe oven.
Forroasts with no bone,insert the probe into
the meatiest part of the roast. Forbone-in
ham or lamb, insert the probe into the center
of the lowest largemuscle.
Insertthe probe into the center of dishessuch
as meat loaf or casseroles.
Insertthe probe into the meatiest part of the
inner thigh from below and parallelto the leg
of a whole turkey.
How to Set the Upper Oven For Cooking When Using the Probe
[] Insertthe probe into the food. j-_
[_ Plugthe probe intothe outlet in the
oven. Make sureit's pushed all the
way in.Closethe ovendoor.
Touch the Probe pad.
Touch the number padsto set
the desired internalfood or meat
temperature between 100°Fand 200°F.
Touch the Bakepad.
%
Touch the number padsto set the
%
desiredoven temperature.
Touch the Stert pad.
Thedisplay wil! flash if theprobe isinserted
into the outlet and you have not set a probe
temperature and touched the Stert pad.
Thedisplauwill show LO until the internal
temperature of the food reaches 100°F;then
the changing internal temperature will be
shown.
When the internaltemperature of the
food reachesthe number Uouhave set,
the probe and the oventurn off and the
oven control signals.Tostop the signal,
touch the Cleer/Offpad. Use hot pads to
remove the probe from the food. Do not
usetongs to pull on it-they might
damage it.
To change the oven temperature during
probe cooking,touch the Bekepad and then
the number pads to set the new temperature.
,, If the probeis removed from the food before
the final temperature is reached,a tonewi!!
sound and the display wi!!flash unti! the
probe is removedfrom the oven.
_,Youcan use the timer even though you
cannot use timed oven operations while
using the probe.
Using the convection oven. lunneroven onlu) ge.com
If your model has a door latch, do not lock the oven door with the latch during convection cooking. The latch is used
for self-cleaning only.
The convection oven fan shuts off when the oven door is opened. DONOTleave the door open for long periods of time
while using convection cooking.
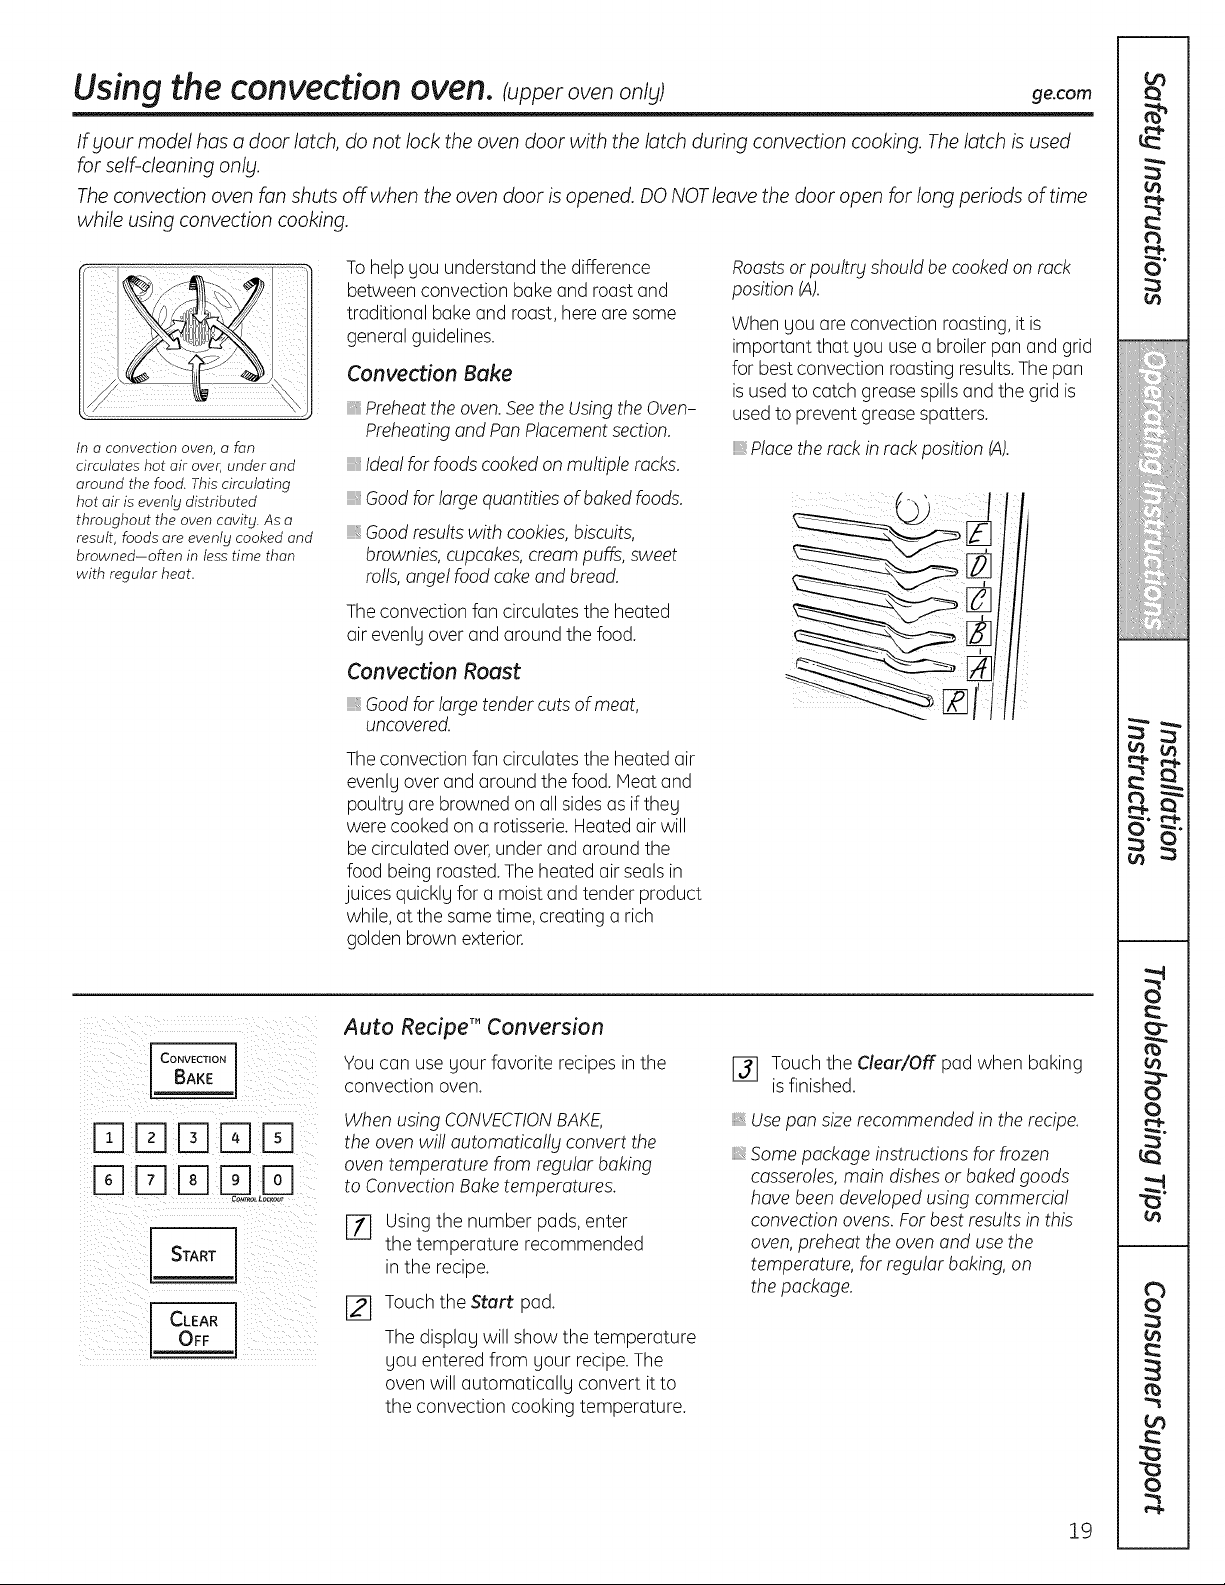
In a convection oven, a fan
circulates hot air over, under and
around the food. This circulating
hot air is evenly distributed
throughout the oven cavity. As a
result, foods are evenly cooked and
browned-often in less time than
with regular heat.
Tohelp gou understand the difference
between convection bake and roast and
traditional bakeand roast, here are some
general guidelines.
Convection Bake
Preheat the oven. See the Using the Oven-
Preheating and Pan Placement section.
Idea! for foods cooked on multiple rocks.
Good for large quantities of baked foods.
Good results with cookies, biscuits,
brownies, cupcakes, cream puffs, sweet
rolls, ange! food cake and bread.
Theconvection fan circulates the heated
air evenly over and around the food.
Convection Roast
,, Good for largetender cuts of meat,
uncovered.
Theconvection fan circulates the heated air
evenlg over and around the food. Meat and
poultrg are browned on all sidesas if theg
were cooked on a rotisserie. Heated air will
be circulated over,under and around the
food being roasted. Theheated air sealsin
juices quicklg for a moist and tender product
while, at the same time, creating a rich
golden brown exterior.
Roastsor poultry shouldbe cooked on rock
position IA).
When gou are convection roasting, it is
important that gou use a broiler pan and grid
for best convection roasting results.The pan
isusedto catch grease spillsand the grid is
usedto prevent greasespatters.
Placethe rock in rock position (A).
CONVECTION
BAKE
DDDDD
DDD o D
START
OFFCLEAR I
I
Auto Recipe'" Conversion
Youcan use gour favorite recipes in the
convection oven.
When using CONVECTIONBAKE,
the oven wi!! automatically convert the
oven temperature from regular baking
to Convection Bake temperatures.
[7] Usingthe number pads, enter
the temperature recommended
in the recipe.
[_ Touch the Start pad.
The displag will show the temperature
you entered from your recipe.The
oven will automatically convert it to
the convection cooking temperature.
[_J Touch the Clear/Off pad when baking
isfinished.
Usepan sizerecommended in the recipe.
_,Somepackage instructions for frozen
casseroles,main dishes or baked goods
have been developed using commemia!
convection ovens.Forbest results in this
oven,preheat the oven and usethe
temperature, for regular baking, on
the package.
19
Using the convection oven. lunneroven onlu)
Cookware for Convection Cooking
rq El E]F-1El
r r E] LLD
START
CLEAROFF ]
Beforeusing your convection oven,check
to see ifyour cookwore leavesroom for air
circulation in the oven. If you ore baking with
several pans,leave space between them.
Also,besure the pans do not touch each
other or the walls of the oven.
Paper and Plastic
Heat-resistant paper and plasticcontainers
that are recommended for use in regular
ovens can be used in convection ovens.
Plasticcookware that isheat-resistant to
temperatures of 400°F can also be used,
when oven isbelow 400°R
How to Set the Upper Oven for Convection Baking or Roasting
[_ Touch the Convection Bake
or Convection Roast pad.
121 Touch the number pads to setthe
desiredoven temperature.
F3] Touchthe Start pad.
Tochange the oven temperature, touch the
Convection Bake or Convection Roast pad
and then the number pads to set the new
temperature.
Metal and Glass
Any type of cookware willwork in your
convection oven. However, metal pans heat
the fastest and are recommended for
convection baking.
Darkened or matte-finished pans wi!!bake
faster than shiny pans.
_,Glassor ceramicpans cook more s!ow!_l.
When baking cookies,you will get the best
resultsif you usea flat cookie sheet instead
of a pan with low sides.
Forrecipes like oven-baked chicken,use a
pan with low sides. Hot air cannot circulate
well around food in a pan with high sides.
When the ovenstarts to heat,the changing
temperature, starting at ZOO°F,will be
displayed.When the oven reachesthe
temperature you set, 3 beeps will sound.
_-] Touchthe Clear/Offpad when finished.
NOTE:Youwil! hear o fan while cooking with
convection.Thefan wi!!stop when the door is
opened,but theheat wi!! not turn off.
Thefan wi!! not start unti! the preheat
temperature is reached.
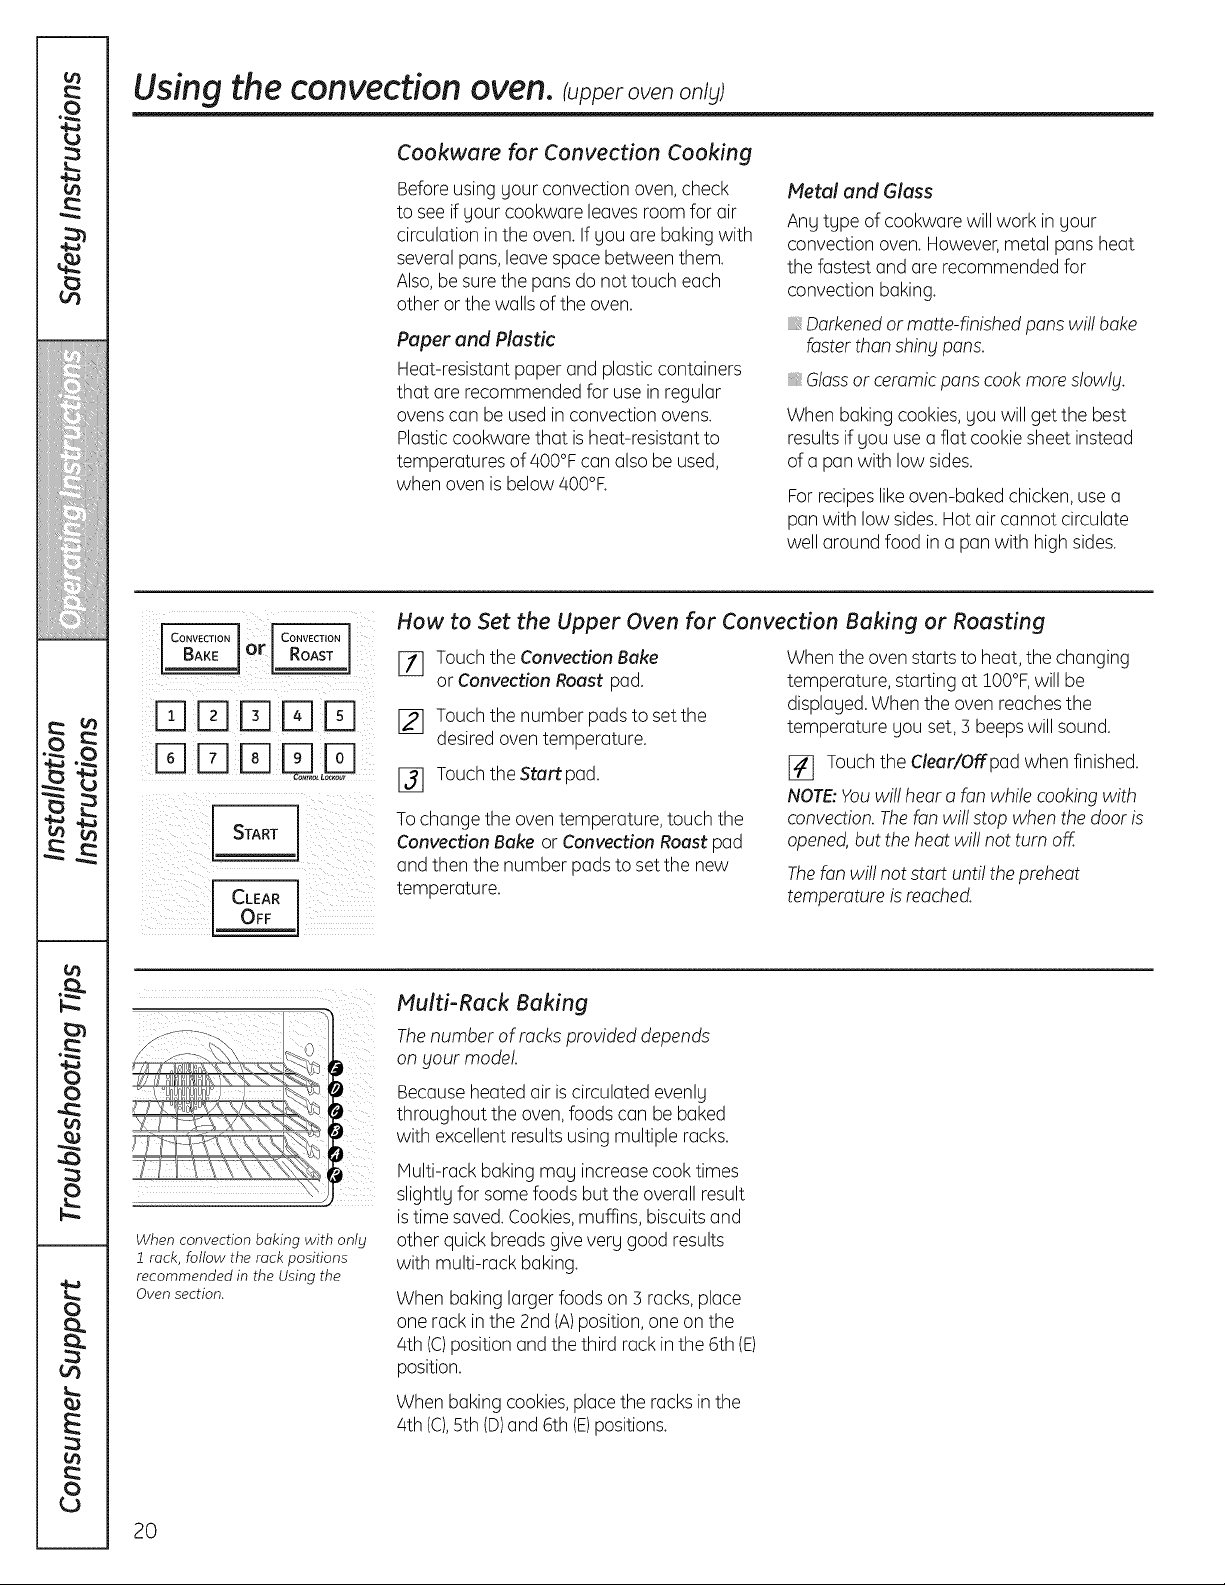
When convection baking with only
1 rock, follow the rock positions
recommended in the Using the
Oven section.
20
Multi-Rack Baking
The number of rocks provided depends
on gout mode!.
Because heated air is circulated evenly
throughout the oven, foods con be baked
with excellent results using multiple racks.
Multi-rack baking may increase cook times
slightly for some foods but the overall result
istime saved.Cookies,muffins, biscuitsand
other quick breads givevery good results
with multi-rack baking.
When baking larger foods on 3 racks, place
one rack in the 2nd (A)position, one on the
4th (C)position and the third rack inthe roth(E)
position.
When baking cookies,placethe racksin the
4th (C),5th (D)and roth(E)positions.
 Loading...