

GE monogram ZDP304LP6SS Owner's Manual
Owner's M
30", 36" ond 48"
Professionol Duol Fuel Ronges
Manuel du propri@taire
76 cm (30 po),91 cm (:36po)et 121 cm (48 po)
Cuisini@resmixtes professionnelles
Lo section fronqoise commence _ Io poge 45
Manual del propietario
30", 36"y 48"
Cocinos profesionoles de combustible duol
I
Lo secci6n en espohol empiezo en Io pdgino 87
49-85117-41
08-12 GE
monogram.com
Consumer Information
Professional Dual Fuel Range
Contents
Surface Cooking
Burners ............................. 10
Controls ......................... 9, 10
Cookware ........................... 11
Dual-Flame Stacked Burners......... 10
Features ............................ 9
Griddle............................. 14
Grill............................. 12, 13
Oven
Aluminum Foil ................ 7, 17, 21
Baking/Roasting ................... 19
Broiling/Broiling Guide ........... 20, 21
Controls ................. 9, 16, 19, 20,
............................. 23, 25, 26
Convection Cooking ......... 20, 22-24
Features ......................... 9, 15
Proofing ........................... 25
Self-Cleaning Instructions ....... 26, 27
Care and Cleaning
Burner Caps .................... 34, 35
Burner Grates ...................... 35
BroilerPan,Gridand RoastingRock..... 29
Control Panel and Knobs ............ 29
Cutting Board ...................... 36
Grease Troughs ..................... 36
Griddle............................. 36
Grill................................ 37
Lift-Off Oven Door............... 31,33
Oven Heating Elements.............. 29
Oven Lights ....................... 32
Probe .............................. 31
Sealed Burner Assemblies ....... 34, 35
Self-Cleaning Oven Racks........... 30
Stainless Steel....................... 33
AWARNING:Iftheinformation in this
manual is not followed exactly, a fire or explosion
may result, causing property damage, personal
injury or death.
- Do not store or usegasoline or other flammable
vapors and liquids in the vicinity of this or any
other appliance.
- WHATTODOIFYOUSMELLGAS
• Do not try to light any appliance.
• Do not touch any electrical switch;
do not useany phone in your building.
• Immediately call your gas supplier from a
neighbor's phone. Follow the gas supplier's
instructions.
• If you cannot reach your gas supplier, call the
fire department.
Installation and service must be performed by
a qualified installer, service agency or the gas
supplier.
Consumer Services
Important Phone Numbers ......... 42
Model and Serial Number ............ 3
Problem Solver................. 38-40
Safety Instructions .............. 2, 4-8
Warranty .......................... 44
Remove
packaging
tape
Carefully remove all packaging, foam pads
and tape.
To assure no damage is done to the finish
of the product, the safest way to remove
the adhesive from packaging tape on new
appliances is an application of a household
liquid dishwashing detergent. Apply with a
soft cloth and allow to soak.
NOTE',The adhesive must be removed from all
parts. It cannot be removed if it is baked on.
write
down the
model
& serial
numbers
If you
received a
damaged
range
Trouble-
shooting
tips
You'll find them on a label located behind the
left burner knob or below the control panel
which isvisible when the oven door is opened.
Immediately contact the dealer (or builder) that
sold you the range.
Before you request service, check the Problem
Solver in the back of this manual.
Before sending in the registration card, please
write these numbers here:
Model Number
Serial Number
Use these numbers in any correspondence or
service calls concerning your range.
It lists causes of minor operating problems that
you can correct yourself.
If you
need
service
To obtain service, see the Consumer Services
page in the back of this manual.
We're proud of our service and want you to be
pleased. If for some reason you are not happy
with the service you receive, here are the steps
to follow for further help.
FIRST,contact the people who serviced your
appliance. Explain why you are not pleased.
In most cases, this will solve the problem.
NEXT,if you are still not pleased, write all the
details-including your phone number-to:
Manager, Customer Relations
GEAppliances
Appliance Park
Louisville, KY40225

IMPORTANT SAFETY NOTICE
IMPORTANT SAFETY INSTRUCTIONS
The California Safe Drinking Water and Toxic
Enforcement Act requires the Governor of
California to publish a list of substances known
to the state to cause cancer, birth defects
or other reproductive harm, and requires
businesses to warn customers of potential
exposure to such substances.
The fiberglass insulation in self-clean
ovens gives off a very small amount of
carbon monoxide during the cleaning cycle.
Exposure can be minimized by venting with
an open window or using a ventilation fan
or hood.
,&WARNING: SAFETY PRECAUTIONS
Gas appliances can cause minor exposure
to four of these substances, namely
benzene, carbon monoxide, formaldehyde
and soot, caused primarily by the incomplete
combustion of natural gas or LPfuels.
Properly adjusted burners, indicated by a
bluish rather than a yellow flame, will minimize
incomplete combustion. Exposure to these
substances can be minimized by venting
with an open window or using a ventilation
fan or hood.
IMPORTANT: The health of some birds is
extremely sensitive to the fumes given off
during the self-cleaning cycle of any oven.
Move birds to another well-ventilated room.
When using your appliance, follow basic
safety precautions, including the following:
* Have the installer show you the location of
the range gas shut-off valve end how to turn
it off if necessary.
Be sure all packing materials are removed
from the range before operating it to prevent
fire or smoke damage should the packing
material ignite.
After prolonged use of a range, high floor
temperatures may result end many floor
coverings will not withstand this kind of
use. Never install the range over vinyl tile or
linoleum that cannot withstand such use.
Never install it directly over interior kitchen
carpeting.
* Locatethe range out of kitchen traffic path
and out of drafty locations and areas with
poor air circulation.
Do not install this product with an air curtain
hood or other range hood that operates by
blowing air down on the cooktop. This airflow
may interfere with operation of the gas
burners resulting infire or explosion hazard.
,&.WARNING:
• All ranges can tip.
• BURNSor other SERIOUS
INJURIEScan result.
INSTALLend CHECKthe
anti-tip bracket following the
instructions supplied with the
bracket.
To reduce the riskof tipping the range, the range
must besecured by a properly installed anti-tip
bracket. Seeinstallation instructions shipped
with the bracket for complete details before
attempting to install.
Tocheck if the bracket is installed and engaged
properly, carefully tip the range forward. The
bracket should stop the range within 4 inches.
If it does not, the bracket must be reinstalled.
If the range ispulled from the wall for any reason,
always repeat this procedure to verify the range
is properly secured by the anti-tip bracket.
If your range has no anti-tip bracket, call
1.800.626.8774 to receive one at no cost.

IMPORTANT SAFETY INSTRUCTIONS
WARNING: SAFETY PRECAUTIONS
* Use this appliance only for its intended use
as described inthis manual.
* Be sure your appliance is properly installed
and grounded by a qualified technician in
accordance with the provided installation
instructions.
. Do not attempt to repair or replace any
pert of your range unless it is specifically
recommended in this manuel. All other
servicing should be referred to a qualified
technician.
* Before performing any service, DISCONNECT
THE RANGE POWER SUPPLY AT THE
HOUSEHOLD DISTRIBUTION PANEL BY
REMOVING THE FUSE OR SWITCHING OFF
THE CIRCUIT BREAKER.
* Do not leave children alone-children should
not be left alone or unattended in an area
where an appliance is in use. They should
never be allowed to sit or stand on any part
of the appliance.
* Children in walkers, or children crawling, can
be attracted to the oven door handle end
may grab end open the oven door. This can
result in injury from the door being pulled open
on a child, or severe burns if the oven is in use
and hot.
Never wear loose-fitting or hanging
garments while using the appliance. Be
careful when reaching for items stored over
the range. Flammable material could be
ignited if brought in contact with surface
burners, burner grates or oven heating
elements and may cause severe burns.
Use only dry pot holders-moist or dump
pot holders on hot surfaces may result in
burns from steam. Do not let pot holders
touch surface burners, burner grates or
oven heating elements. Do not use a towel
or other bulky cloth.
When surface cooking, do not touch surface
burners, burner grates, grill or griddle (on
some models} or the surrounding ureas.
When using the oven, do not touch the
oven heating elements, the interior surface
of the oven or the exterior area immediately
surrounding the door or back trim.
These surfaces may be hot enough to burn.
During and after use, do not touch, or let
clothing or other flammable materials contact,
the surface burners, grill or griddle (on some
models), areas near the surface burners or any
interior area of the oven; allow sufficient time
for cooling first.
* Do not allow anyone to climb, stand or hang
on the door, control panel or cooktop. They
could damage the range and even tip it over,
causing severe personal injury.
* Do not store flammable materials in the
oven or near the cooktop.
* Do not store plastic, flammable liquids or
combustible materials on top of the optional
high shell
* CAUTION: ITEMSOF INTERESTTO CHILDREN
SHOULD NOT BESTOREDIN CABINETS
ABOVEA RANGEOR ON THE BACKSPLASH
OF A RANGE--CHILDRENCLIMBING ON
THE RANGETO REACH ITEMSCOULD BE
SERIOUSLYINJURED.
* Never use this appliance as a space heater
to heat or warm the room. Doing so may
result in carbon monoxide poisoning or
overheating of the appliance.
Potentially hot surfaces include the cooktop,
areas facing the cooktop, oven vent opening,
surfaces near the opening, crevices around the
oven door, metal trim parts above the door or
any backguard or high shelf surface.
A CAUTION: The inside surface of the
oven may be hot when the door is opened.
Keep the ventilator hood and grease filters
clean to maintain good venting and to avoid
grease fires. Turn the ventilator OFF in case
of fire or when intentionally "flaming" liquor or
other spirits on the cooktop. The blower,
if in operation, could spread the flames.
Cook meat and poultry thoroughly-meat
to at least an INTERNALtemperature of
160°Fand poultry to at least an INTERNAL
temperature of 180°F. Cooking to these
temperatures usually protects against
foodborne illness.

IMPORTANT SAFETY INSTRUCTIONS
A WARNING: SAFETY PRECAUTIONS
, Do not use water on grease fires. Never
pick up a flaming pan. Turn the controls
off. Smother aflaming pan on a surface unit
by covering the pan completely with a well-
fitting lid, cookie sheet or flat tray. Use a
multi-purpose dry chemical or foam-type fire
extinguisher.
Flaming grease outside a pan can be put out
by covering it with baking soda or, if available,
by using a multi-purpose dry chemical or
foam-type fire extinguisher.
Flume in the oven can be smothered completely
by closing the oven door and turning the oven
off or by using a multi-purpose dry chemical or
foam-type fire extinguisher.
, DO NOT STOREORUSE COMBUSTIBLE
MATERIALS,GASOLINEOR OTHER
FLAMMABLEVAPORSAND LIQUIDS IN THE
VICINITY OFTHIS ORANY OTHERAPPLIANCE.
Do not let cooking grease or other flammable
materials accumulate in or near the range.
Clean grease troughs {some models) and
burner pans after every use.
If you smell gas, the installer has not done a
proper job of checking for leaks.Youcan have a
small leak, and therefore a faint gas smell, if the
connections are not completely tight.
Finding a gas leak is NOT a do-it-yourself
procedure. Some leaks can only be found
with the burner control in the ON position. For
your protection, it must be done by a qualified
service technician. Never use an open flame to
locate a leak.
, If by some chance a burner goes out and
gas escapes, open a window or a door to
let the room air out. Do not attempt to use
the appliance until the gas has had time to
dissipate. Follow the instructions in "What to
do if You Smell Gas" on page 2.
, Never block the vents lair openings) of the
range. They provide the air inlet and outlet
that are necessary for the range to operate
properly with correct combustion. Air openings
are located at the top and bottom of the oven
door, inthe front portion of the control panel,
at the rear of the cooktop and along the
bottom of the range.
, Besure all the range and/or cooktop
controls are turned off and the appliance is
cool before using any type of aerosol cleaner
or cooking spray on or around the appliance.
The chemical that produces the spraying
action could, in the presence of heat, ignite or
cause metal parts to corrode.
A WARNING: SURFACE COOKING SAFETY PRECAUTIONS
Do not heat unopened food containers; a
buildup of pressure may cause the container
to burst.
Set the burner control so that the flame
heats only the bottom of the pan and does
not extend beyond the bottom of the pan.
Excessiveflame is hazardous. The high BTU
burners can easily melt cookware handles.
, Hold the handle of the pan, using a dry pot
holder, to prevent movement of the utensil
when stirring or turning food.
, Always use the LITEposition when igniting
the surface burners and make sure the
burners have ignited.

IMPORTANT SAFETY INSTRUCTIONS
A WARNING: SURFACE COOKING SAFETY PRECAUTIONS
* Never leave the surface burners unattended *
at high flume settings. Boilovers cause
smoking and greasy spillovers that may catch
on fire. If the burner flames are smothered
by e severe boilover which affects the igniter,
unburned gas will escape into the room.
* To minimize the possibility of burns, ignition
of flammable materials and spillage, turn
cookware handles toward the side or back of
the range without extending over adjacent
burners.
* Always turn the surface burners to OFF
before removing cookware.
* Carefully watch foods being fried at a high
flume setting.
* Foods for frying should be us dry as possible.
Frost on frozen foods or moisture on fresh
foods can cause hot fat to bubble up and over
the sides of the pan.
* Use the least possible amount of fat for
effective shallow or deep fat frying. Filling the
pan too full of fat can cause spillovers when
food is added.
* Use a deep fat thermometer whenever
possible to prevent overheating fat beyond the
smoking point.
* Always heat fat slowly, end watch us it
heats.
* Never try to move a pen of hot fat, especially
a deep fat fryer. Wait until the fat is cool.
* If a combination of oils or fats will be used in
frying, stir together before heating or as fats
melt slowly.
* When using glass cookware, make sure it is
designed for top-of-range cooking.
* Do not leave any items on the cooktop. The
hot air from the vent may ignite flammable
items and will increase pressure in closed
containers, which may cause them to burst.
* Do not use aluminum foil to cover the grates
or line any part of the cooktop. Doing so
may result in carbon monoxide poisoning,
overheating of the cooktop surfaces, or a
potential fire hazard.
Use proper pan size--avoid pans that are
unstable or easily tipped. Select cookware
having flat bottoms large enough to properly
contain food and avoid boilovers and spillovers
and large enough to cover burner grate. This
will save cleaning time and prevent hazardous
accumulations of food, since heavy spattering
or spillovers left on the range can ignite. Use
pans with handles that can be easily grasped
and remain cool.
Do not leave plastic items on the cooktop--
they may melt if left too close to the vent or
burner.
To avoid the possibility of a burn, always be
certain that the controls for all burners are at
the OFF position and all grates are cool before
attempting to remove them.
Grease is flammable. Let hot grease cool
before attempting to handle it. Avoid letting
grease deposits collect in the grill or the
griddle grease troughs (some models). Clean
these areas after each use.
For proper lighting end performance of the
cooktop burners, keep the burner ports
clean. It may be necessary to clean these
when there is a boilover or when the burner
does not light, even though the electronic
igniters click.
After cleaning, it is important to make sure
the cap and burner port are properly aligned
with the burner base. Incorrect alignment
will produce poor burner performance. Never
operate the burner without all burner parts in
place.
Clean the cooktop with caution. Avoid steam
burns; do not use a wet sponge or cloth to
clean the cooktop while it ishot. Some cleaners
produce noxious fumes if applied to a hot
surface. Follow manufacturer's directions.
Do not use the grill for cooking excessively
fatty meats or products that can flare-up.
If range is located near a window, do not
hang long curtains that could blow over the
surface burners and create a fire hazard.

IMPORTANT SAFETY INSTRUCTIONS
A WARNING: OVEN SAFETY PRECAUTIONS
Place the oven rack in the desired position
while the oven is cool. If racks must be
handled when hot, do not let pot holder
contact the heating elements.
Stand away from the range when opening
the oven door. Hot air or steam which
escapes can cause burns to hands, face and/
or eyes.
Never broil with door open. Open door
broiling isnot permitted due to overheating of
control knobs.
Extending the rack to its fully open position
is a convenience in lifting heavy foods. It is
also a precaution against burns from touching
hot surfaces of the door or oven walls.
A WARNING: SELF-CLEANING OVEN
Be sure to wipe up excess spillage before
starting the self-cleaning operation.
Before self-cleaning the oven, remove the
broiler pan, grid and other cookware or
aluminum foil.
Do not clean the oven frame semi or the door
semi.These seals are essential for a snug fit.
Care should be taken not to rub, damage or
remove the seals.
When using cooking or roasting begs in the
oven, follow the manufacturer's directions.
Do not use your oven to dry newspapers. If
overheated, they can catch on fire.
Do not use oven for a storage area. Items
stored in an oven can ignite.
Do not leave paper products, cooking
utensils or food in the oven when not in use.
Do not allow anyone to climb, stand or hang
on the door. They could damage the oven or
cause severe personal injury.
Do not use aluminum foil to line oven
bottom. Foil may trap heat from the bottom
heating element, resulting in a risk of fire or
product damage.
Do not use oven cleaners. No commercial
oven cleaner or oven liner protective coating
of any kind should be used in or around any
part of the oven. Residue from oven cleaners
will damage the inside of the oven when the
self-clean cycle is used.
Clean only the appliance parts specified in
this manual during the self-cleaning cycle.
If the self-cleaning mode malfunctions, turn
the oven off and disconnect the power supply.
Have it serviced by a qualified technician.
SAVE THESE INSTRUCTIONS

Features of Your Range
Professional Dual Fuel Range
Design
information
(Not all features
are on all models.
Appearance may
vary.)
ZDP486NR,ZDP486LR-6 burners and qrill
ZDP486ND, ZDP486LD-6 burners u
griddle
,i,,i,,i,,i ,i,i,i,,i ,i,i,i,,i ,i,,i,,i,,i
Bamboo Cutting
Board
n_d
©
Grill and Griddle Covers
Toekick
__
Q--
©--
i
ZDP484NG,ZDP484LG
4 burners, grill and griddle
ZDP364NR,ZDP364LR-4 burners and qrill
ZDP364ND, ZDP364LD-4 burners u
griddle
illlllllllllli illlllllllllll illilllllllllli
ZDP366N, ZDP366L
6 gas burners
ZDP304N, ZDP304L
n_d
Double oven model shown includes a small oven.
Feature Index Page
:1 Bamboo Cutting Board 36
2 Toekick
3 Grill and Griddle Covers
4 Oven Vents 17
5 IR(Infrared) Grill 12, 13
6 Grill and Griddle Grease Troughs 36
7 Griddle !4
8 Cooktop Burner Grates !1, 35
9 Burner Location Indicator
:10 LEDBullnose Task Lighting Control
:1:1 Burner Control Knob with Lighted Bezel 10,29
12 Oven Display 16
:13 Mini-Knob
(to select PROBE,TIMERor Special Features) 16, 29
:14 Oven Mode Selector 16
:15 Oven Temperature Knob 16
:16 Kitchen Timer 16,27
:17 Leveling System (4)

Cooktop Controls
Professional Dual Fuel Range
Electronic
ignition &
automatic
reignition
To light
a surface
burner
The range is equipped with electronic ignition
which eliminates the need for a standing pilot
light.
The burners on this range will automatically
relight if the flame goes out.
All surface burner igniters will spark and make
clicking sounds when any burner is turned on.
Do not touch any of the burners when igniters
are clicking.
Occasionally the burners may spark if excess
wind or a draft blows the flame away from the
burner's flame sensor.
Pushthe control knob in and turn it
counterclockwise to the LITEposition.
ON Indicator
Light
The griddle and IR(infrared) grill are equipped
with GIo-Bar igniters, The GIo-Bar remains
energized whenever the griddle or IRgrill is in
use to ensure the burner always stays lit.
In case of a power outage, you can light the
surface burners on your cooktop with a match.
Hold a lighted match to the burner, then turn the
knob to the LOWposition. Use extreme caution
when lighting burners this way.
Do not attempt to light the grill or griddle during
a power outage. The gas to these burners will
automatically shut off during a power outage.
After the burner ignites, turn the knob to adjust
the flame size.
To turn a burner off, turn the knob clockwise,
asfar as it will go, to the OFFposition.
Do not operate a burner for an extended
period of time without cookware on the grate.
Thefinish on the grate may chip without
cookware to absorb the heat.
Dual-flame
stacked
burners
All surface burners on your range have two sets
of flames stacked one on top of the other; the
dual-flame burners have a lower (simmer) flame
and a upper (main) flame.
When a burner isturned on, the lower flame will
always light and stay on.
Simmering:
The stacked burner design provides a wide
range of heat settings with which to simmer.
Depending on the type and quantity of food, and
pan size,the flame can be adjusted to suit your
specific need. The lowest setting uses only the
lower flame and can maintain delicate foods at
a safe 140%.
Cooking:
Settings from LOto X-HIwill use both upper
and lower flames. Use LOto HI for all purpose
cooking. Use HI or ×-HI (highest setting) with
larger diameter cookware.
The indicator light on each bezel verifies the
burner is on. However, it should not be a
substitute for visually checking the flame at the
burner.
_ ower
×-HIand HI are very high heat settings and
are intended to sear foods quickly and boil
large quantities of water.
Flame
V,pper
lame
Lower Flame
10

Surface Cooking
Professional Dual Fuel Range
How to
select
flame size
Wok
cooking
Watch the flame, not the knob, asyou increase
or reduce heat.
Theflame sizeon a gas burner should match
the cookware you are using.
FORSAFEHANDLINGOFCOOKWARE,NEVER
LETTHEFLAMEEXTENDUPTHESIDESOFTHE
COOKWARE.Any flame larger than the bottom of
the cookware will not result infaster heating and
could be hazardous.
The burner grates are uniquely designed to cook
on either side. Theflat side accommodates flat
bottom cookware (stockpots, sauce pans, frying
pans and flat bottom woks), while the wok side is
designed to hold a wide variety of round bottom
woks without the need for a separate ring.
For easy access, a front burner location is
recommended for wok cooking.
The front center burner is recommended for wok
cooking on 6-burner 36" and 48" ranges.
Forsurface stability, 6" minimum diameter
cookware is recommended. Use larger
diameter cookware for heat settings between
HIand ×-HI.
Wok Side Flat Side
A CAUTION: To properly fit the grate
and match the flame size, the wok must be
between !2" and !4" in diameter.
!1

Surface Cooking
Professional Dual Fuel Range
Grill safety
precautions
(on some models)
Using the
IR grill
A WARNING: oonotleavetheIRgrill
unattended at any time.
Grease Flare-ups:
Occasionally, during grilling, grease drippings
can ignite creating minor bursts of flame for a
second or two. This is normal when grilling.
The grill radiant baffle is designed to catch
excess grease, limiting flare-ups.
If a flare-up becomes excessive, remove the
food from the grill and lower the heat setting
until the flare-up subsides.
Tofurther reduce flare-ups, trim excess fat
around the edges of steaks and chops, use
hamburger that is lean, remove the skin from
poultry, etc.
Usea long spatula and a non-flammable mitt
when turning food on the grill.
Removethe cover before lighting the burner. The
cover must beremoved when using the IRgrill.
Set the control knob to PREHEAT.The longer the
grill is preheated, the darker the grill murks will
be on the food.
Grill Cover:
Remove the cover before lighting the burner. For
your safety, the cover must be removed when
using the grill. If the cover is left in place it will
become extremely hot.
Cookware:
Do not use any cookware on the grill.
Allow 5to 15 minutes to fully preheat the grill.
After preheat, the control knob may be set to
any position between HIand LO.
Do not leave the grill unattended at any time.
The intense heat caramelizes fats and juices
creating authentic barbecued flavor. The IRgrill
will achieve the same results as an outdoor grill.
All gas grills cook differently. Adjust cooking
times and methods when using the IRgrill.
Clean the grill grate, grease trough and grease
basin after each use. Remove the parts for
cleaning after they are cool to the touch.
NOTE:The grill will take approximately
45 seconds to ignite. Unlike the surface burners,
which use electric igniters, the grill uses
a GIo-Bar for ignition. It takes approximately
45 seconds for the GIo-Bar to reach
temperature. Gas is only supplied to the grill
once the GIo-Bar reaches temperature.
12

Surface Cooking
Professional Dual Fuel Range
Grill grates
(on some models)
Removethe cover before lighting the IRgrill.
Thegrill grate is reversible. Place the handle end
toward the front of the cooktop.
The grate will change color when subjected
to the heat, and us oils cook onto the surface.
This isnormal and does not affect the cooking
performance.
The porcelainized cast-iron grill grate does not
need to be seasoned.
One side of the grate (SideA)isgrooved and
should be used for foods such as steak or
hamburger patties. The grooves are sloped so
the excess liquids and oils run toward the front
of the grill and into the grease trough.
The other side of the grate (SideB)is designed
for delicate foods such as fish.
Turn and move foods as needed.
Food Setting Preheat
Hamburger Patties (8) HI or LO 5 Minutes
Chicken Breast (6)
(Bone side down) LO 5 Minutes
T-Bone Steak
(1-1/2" thick) LO 5 Minutes
Salmon LO 5 Minutes
Side A
Side B
Grill
radiant
baffle
Models equipped with an IRgrill have a radiant
baffle which distributes the heat from the
burners evenly across the grill urea. The grill
baffle also helps to limit grease flare-ups.
The grill baffle rests on tabs in the grill opening.
Besure the baffle is secured in place by fully
engaging the tabs.
IMPORTANT:Avoid contact with the igniter. It is
fragile and can chip or break.
SupportTabs
GIo-Bar Igniter
13

Surface Cooking
Professional Dual Fuel Range
Griddle
sofety
precoutions,
leveling
(on some models)
Season
the griddle
A WARNING: oonotallowtheairflow
from the griddle flue cover to be obstructed by
cookwure or towels.
Removethe metal cover and the cutting board
before turning the griddle on.
The griddle assembly should not be removed
for cleaning.
Once the unit is in position, the griddle can be
leveled. Remove the flue cover by lifting it straight
up. Be careful not to scratch the surrounding
stainless steel surfaces during removal of the
flue cover.
The two inner screws are clumping screws for
securing the griddle in place. Loosen these two
screws before leveling. Do not remove these two
screws.
The two outer screws are leveling screws. Do not
remove these two screws. They can be turned to
level the griddle or to provide u forward slope to
help grease and oils to drain away from the food
being cooked. After the first few uses,you will be
able to judge the slope best suited for the foods
you (]re cooking and personal preference.
Before using the griddle for the first time, it must
be seasoned.
If the griddle has not been used for a period of
time, it should be reseusoned.
1. Clean the griddle thoroughly with hot, soapy
water to remove any protective coating.
2. Wipe the surface using a solution of 1 quart
water and 1 cup white vinegar. Dry thoroughly.
3. Usea paper towel and wipe 1tablespoon
vegetable oil evenly across the griddle. Do not
use corn oil as it can get sticky.
fffff_
After leveling the griddle, tighten the clamping
screws to secure griddle in place. Hand tighten
screws; do not over-tighten.
4. Turn the control knob to 400% for approximately
30 minutes. Turn the heat off when the oil starts
to shimmer.
5. RepeatStep 3. Besure to cover the entire
surface with the oil.
6. Allow the griddle to cool. Wipe the entire surface
of the griddle using a heavy cloth to remove the
oil. The griddle is now ready to use.
Using
the griddle
14
The griddle surface is a combination of highly
polished Type 30z_stainless steel and an aluminum
thermal plate for even heat distribution. It is
normal for it to darken with use as oils cook onto
the surface to provide a stick-resistant base or
"seasoning."
The griddle is thermostatically controlled and can
be set to maintain any temperature from 200°F
to 450°F.
NOTE:Unlike the surface burners, which use
electric igniters, the griddle uses a GIo-Bar for
ignition. It takes approximately z_5seconds for
the GIo-Bar to reach temperature. Gas is only
supplied to the griddle once the GIo-Bar reaches
temperature.
To heat the griddle, push inthe control knob and turn
to the desiredtemperature setting. Thelight on the
bezelwill glow to indicate the thermostat control
isworking.
Food Item Temperature Setting
Pancakes 575°F
Hamburgers /400°F
Bacon* 400°F
Grilled Cheese 550°F
Eggs 275°F
*NOTE: Place bacon on a cold griddle.
Do not preheat.

Design
information
Note: Not all Features
are on all models.
Full Extension Oven Rack Broiler Panand Grid
| II |||||||||| |R|||||I _ I||||||n
©
I
©
I
@
@
Features of Your Oven
Professional Dual Fuel Range
©
©
Temperature Probe
Roasting Rack
Feature Index Page
1 Full Extension Oven Rack(s) 18, 19, 23, 30
-- 3 in large oven
-- 2 in small oven
2 Broiler Panand Grid 22, 29
3 Temperature Probe 24, 31
4 Roasting Rack 22, 29
5 Automatic Oven Door Latch 26
6 Broil Elements (2) 29
7 Halogen Oven Lights 32
8 Oven RackSupports 19,23
-- 5 positions in large oven
--/4 positions in small oven
9 Bake Elements (2)(under oven floor) 29
10 Oven Door Seal 33
11 Oven Frame Seal 33
12 Temperature Probe Outlet 24
- right side in large oven
- left side in small oven
13 Convection Fan and Convection Elements (2)
(operate during preheating and convection cooking) 22, 23
14 Oven Door 3!,33
NOTE:On models equipped with 2 ovens, both ovens have same features.
15

Features of
your oven
control and
timer
Oven Control
Professional Dual Fuel Range
Q) PUSH TO
%,,,
!
i
SELECT
1 Oven Mode Selector - Turn outer ring to
select:
PROOF- Maintains a warm environment
useful for rising yeast-leavened products.
BAKE- Select for traditional baking.
CONVBAKE - Use for convection baking.
CONYROAST- Usefor convection roasting.
CONYBROIL - Use for convection broiling.
BROIL- Select for broiling.
CLEAN- Select for the self-cleaning
function. Seethe Self-Cleaning Oven section.
2 Temperature Knob - Turn to select:
Temperatures from 175°F to 550°F.
LOW BROIL - A lower broiling temperature
isautomatically set.
HIGH BROIL - Ahigher broiling temperature
isautomatically set.
CLEAN- The self-clean temperature is
automatically set.
3 Mini-Knob - Turn to select and push to enter
PROBEor TIMERsettings. Also to adjust CLEAN
cycle time.
4 Timer Button - Push to select the kitchen
timer function. The timer does not control oven
operations.
5 Oven Display - Displays oven functions such
as oven and probe temperatures and kitchen
timer.
The Oven Mode Selector (!) AND the Temperature
Knob (2)must be set together in one of the
following valid pairings:
Oven Mode Selector Temperature Knob
BAKE 175 ° to 550°F
CONV BAKE 175 ° to 550°F
CONVECTION/ROAST 175 ° to 550°F
CONVECTION/BROIL HIGH or LOW BROIL
BROIL HIGH or LOW BROIL
CLEAN CLEAN
PROOF ----
To cancel a feature, turn either the Oven Mode
Selector or the Temperature knob to OFF.
To cancel PROOF, turn the Oven Mode Selector
to OFF.
16

Baking Tips
Professional Dual Fuel Range
Rear oven
vents
Aluminum
foil
Pan
placement
An internal cooling fun operates during all oven modes.
Thewarm airfrom the oven isexhausted through
vents located at the rearof the cooktop.
Donot allow the airflow from the rear vents to be
obstructed bycookware or towels.
Neverfully cover a rack with aluminum foil.Thiswill
disturb the heat circulation and result in poor baking.
A smaller sheet of foil or sheet tray may be used
to catch a spillover by placing it on a lower rackseveral
inches below the food.
Do not use aluminum foil to line oven bottom.
Foilmay trap heat from the bottom heating
element, resulting in a risk of fire or product
damage.
Aluminum foil to
catch spillovers J
Foreven cooking and proper browning, there must
be enough room for air circulation inthe oven.
Bakingresults will bebetter if baking pans are
centered as much as possible rather than being
placedto the front or to the back of the oven.
Baking
pans/sheets
Preheating
Usethe proper baking pan.The type of finish on the
pan effects the amount of browning that will occur.
Dark,rough or dull pansabsorb heat resulting in a
browner, crisper crust. Usethis type for pies.
Allow the oven to preheat before placing food inthe
oven. Preheatingisnecessary for good resultswhen
baking cakes,cookies,pastry and breads.
Shiny,bright and smooth pans reflect heat,
resulting in a lighter, more delicatebrowning.
Cakesand cookies require this type of pan
or sheet.
Glassbaking dishesalso absorb heat. When
baking in glass baking dishes,the temperature
may need to bereduced by 25%.
17
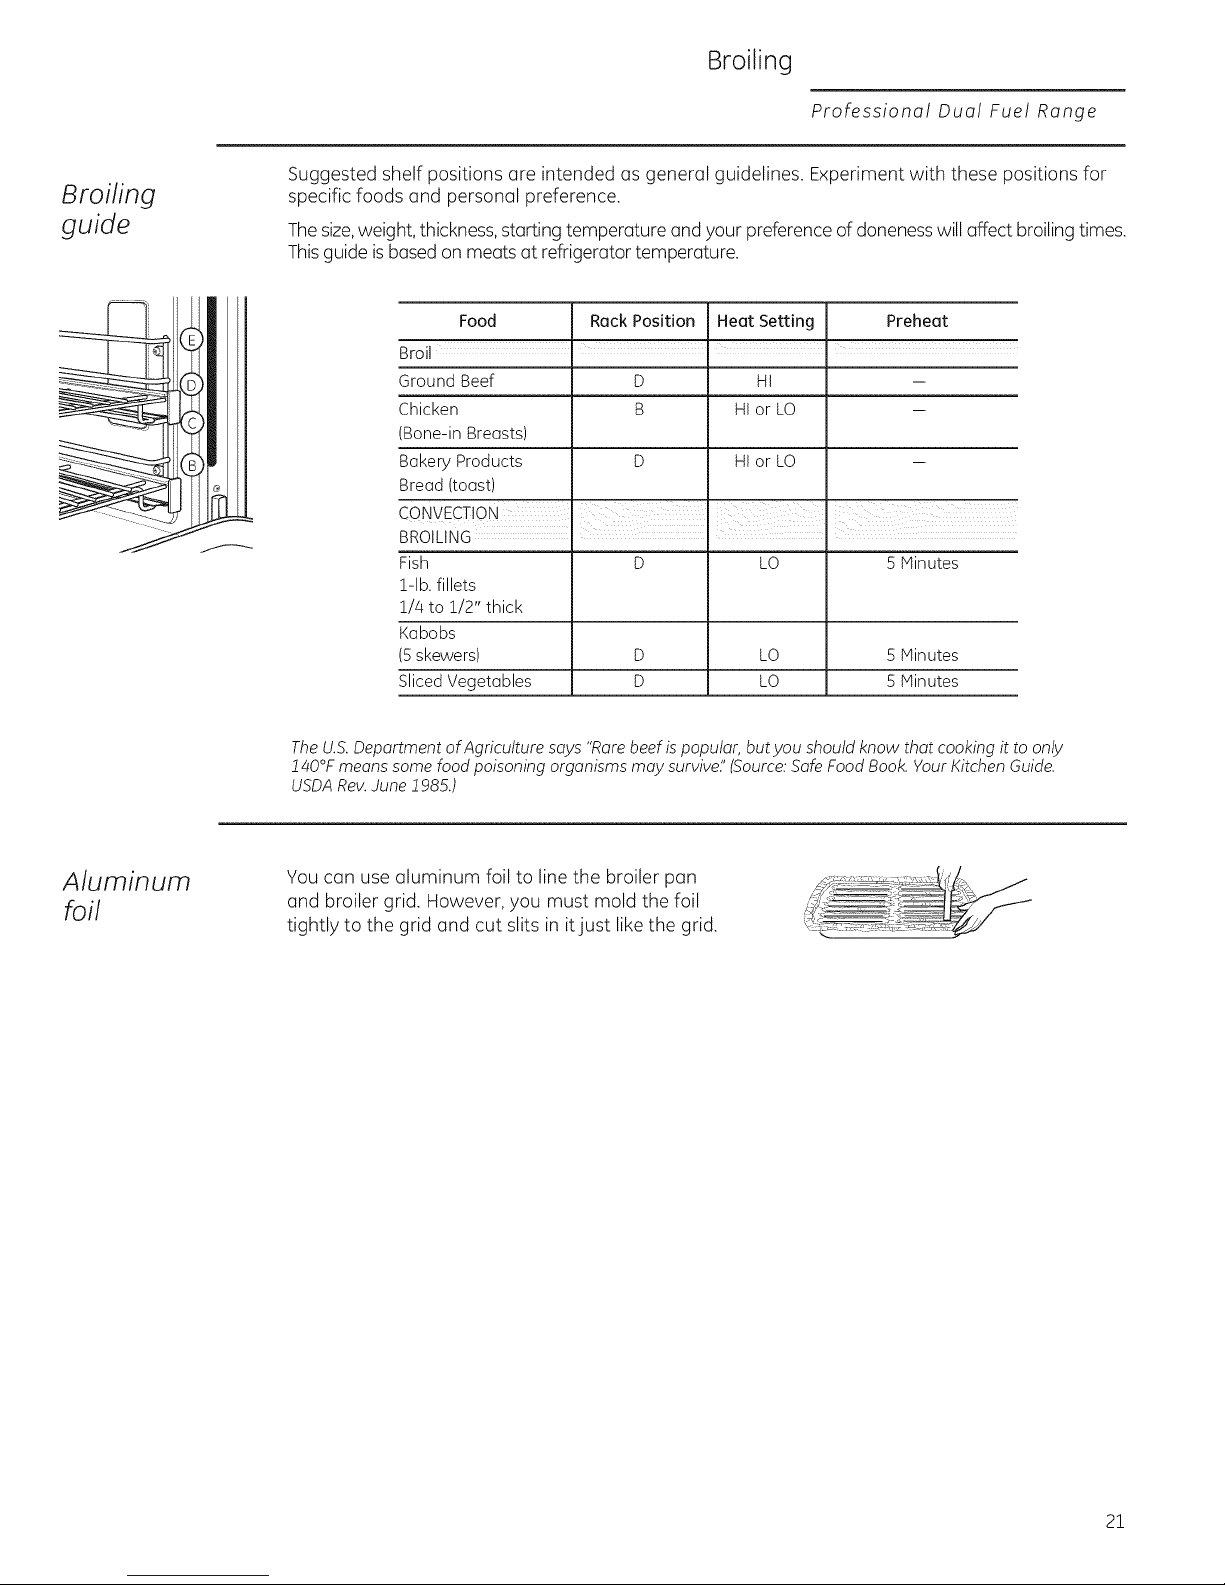
Oven Rocks
Professional Dual Fuel Range
Full
extension
oven racks
Remove
and
replace
oven racks
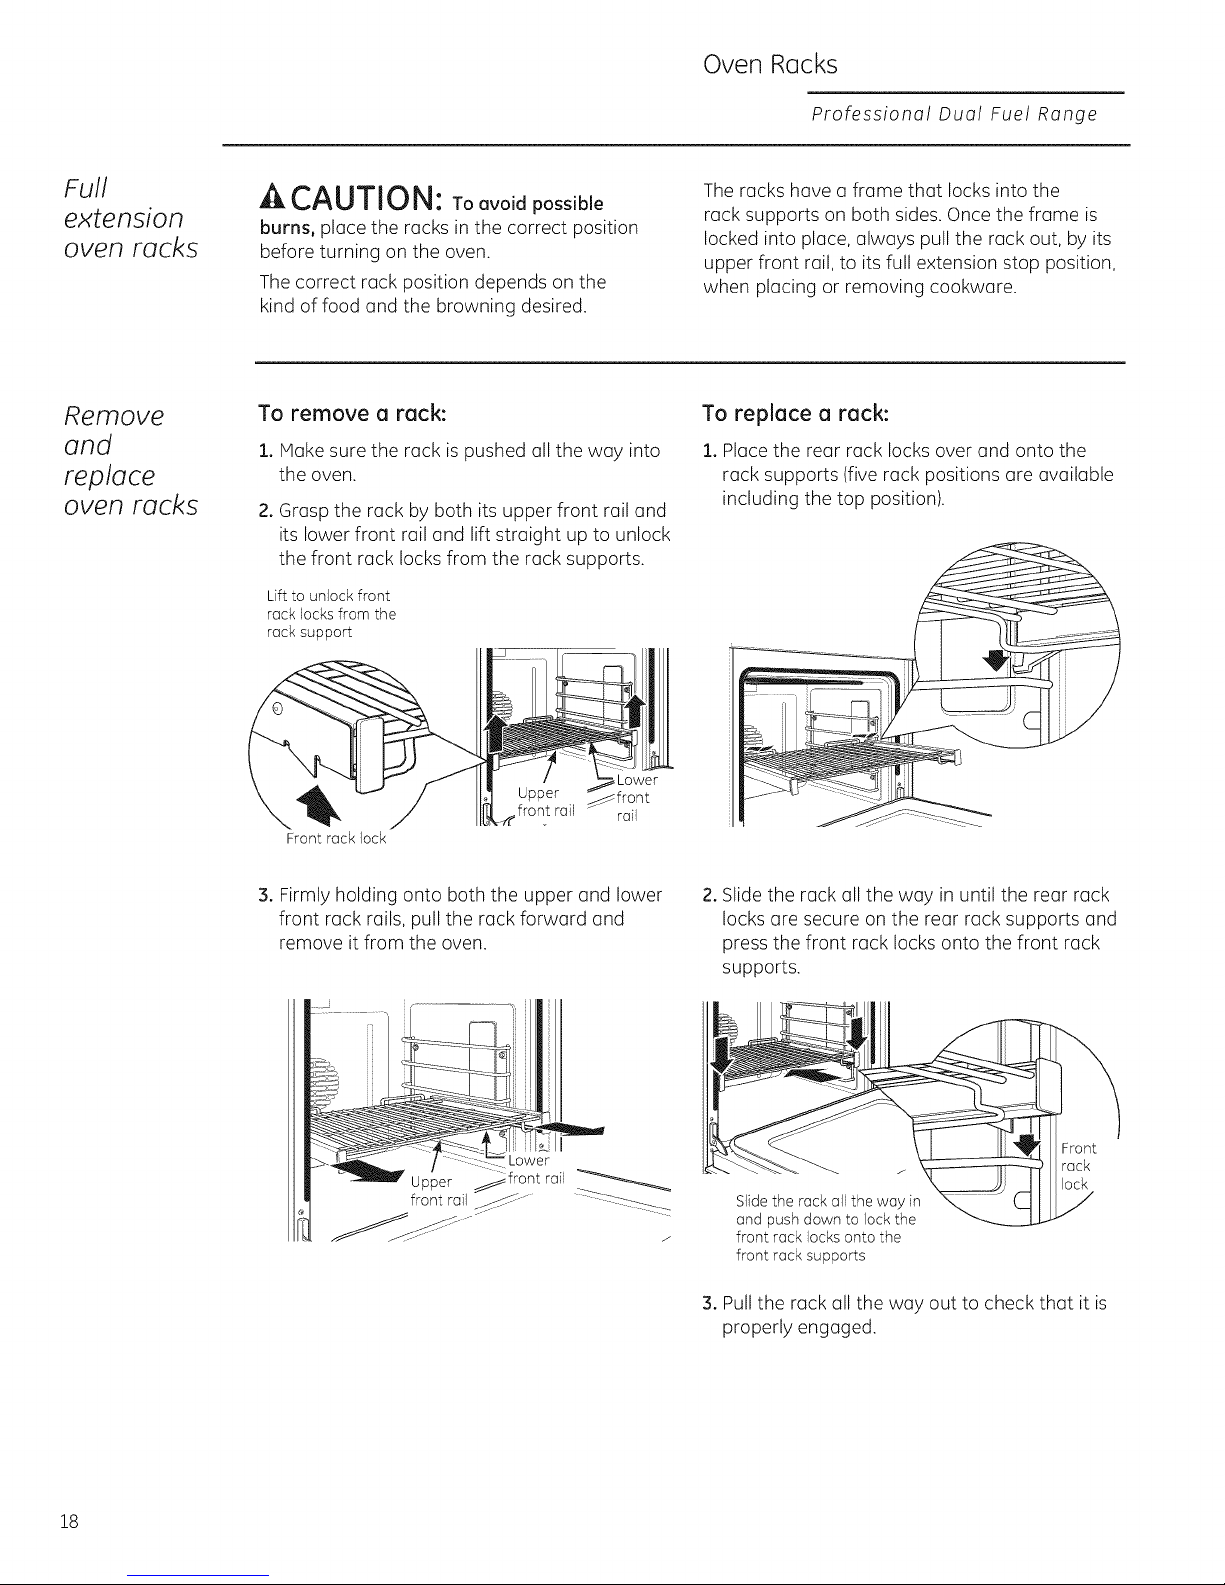
A CAUTION: Too oidpossible
burns, place the racks in the correct position
before turning on the oven.
The correct rack position depends on the
kind of food and the browning desired.
To remove a rack:
1. Make sure the rack is pushed all the way into
the oven.
2. Grasp the rack by both its upper front rail and
its lower front rail and lift straight up to unlock
the front rack locks from the rack supports.
Lift to unlock front
rock locks from the
rock support
The racks have a frame that locks into the
rack supports on both sides. Once the frame is
locked into place, always pull the rack out, by its
upper front rail, to its full extension stop position,
when placing or removing cookware.
To replace a rack:
i. Place the rear rack locks over and onto the
rack supports (five rack positions are available
including the top position).
Lower
"_ rail
Front rock lock
3. Firmly holding onto both the upper and lower
front rack rails, pull the rock forward and
remove it from the oven.
2. Slide the rack all the way in until the rear rack
locks are secure on the rear rack supports and
press the front rack locks onto the front rack
supports.
Front
rock
lock
Slidethe rock oil the way in
end push down to lock the
front rock locks onto the
front rock supports
3. Pull the rack all the way out to check that it is
properly engaged.
18

Baking
Professional Dual Fuel Range
How to set
the oven
for baking
TIMER
Oven Mode
(Outer)
1. Turn the Oven Mode Selector to BAKE.
.
Using the Temperature knob, set the desired
temperature, in 25% increments, from 175°F
to 550%.
The oven will now begin to preheat. The
temperature display will begin at 100°F and
remain there until the oven exceeds that
temperature. From that point, the display will
show the actual temperature.
The interior lights will turn on and stay on until
the oven isturned off. The convection oven fun
will turn on temporarily during preheat. The
control will beep when the oven is preheated
and food can now be placed inside the oven.
.
Turnthe OvenModeSelectorand the Temperature
knob to OFFwhen baking isfinished.
NOTE:A cooling fun will turn on to cool internal
parts. This is normal, and the fun may continue to
run even after the oven is turned off.
Usethe temperature probe when a precise
internal temperature is important. See Using the
_robe.
When baking four cake layers at the same time,
use racks B and D.Stagger the pans so that one
pan is not directly above another.
Q) PUSH TO
SELECT
Oven Temperature
Knob
(Inner)
Or, place four pans on one shelf using the center
position C.Place the pans so each has at least
1-1/2" air space around it.
The oven has 5 rack positions. Seethe Full
extension oven rocks section for how to use,
remove and replace the racks.
The double oven range has a small oven with
/4rack positions. Rack position C is not in the
small oven.
Large Oven Small Oven
Type of Food Rack Position Rack Position
Angel food cake A A
Biscuits or muffins C A or B
Cookies C B
Brownies B B
2 Layer cakes B B
4 Layer cakes C -
Sheet cakes or
9 x !3 cakes Bor C B
Quick breads C B
Bundt or pound cakes C B
Scratch Piesor pie shells B A
Frozen pies Bor C --
Casseroles Bor C B
Pizza C B
Suggested shelf positions are intended as general
guidelines. Experiment with these positions for
specific foods and personal preference.
19

Broiling or Convection Broiling
Professional Dual Fuel Range
Introduction
to broiling
How to set
the oven
for broiling
and
convection
broiling
There (]re 2 different broil modes: Broil (]nd
Convection Broil. Choose HIor LOsetting in
either mode.
* The HI setting c(]n be used to se(]l injuices or
provide intense browning or ch(]rring when
needed for foods such (]s h(]mburgers, ro(]sted
veget(]bles, whole peppers, eggpl(]nt, corn,
(]ssorted cut veget(]bles, k(]bobs (]nd very thin
me(]ts such (]s smoked pork chops, London
broil (]nd chicken.
* The LOsetting c(]n be used for foods th(]t
need (]dequ(]te browning (]nd (]lso need to
be thoroughly cooked, like fish fillets, pork
tenderloin (]nd beef ro(]st.
Convection Broil:
Usesthe convection f(]n for (]dded evenness.
SELECT
O) PUSH TO
Oven Temper(]ture
Knob
(Inner)
1. Turn the Oven Mode Selector to BROIL or
CONV BROIL.
2. Turn the OvenTemper(]ture Knob to LO BROIL
or HI BROIL.LOor HI will (]ppe(]r inthe displ(]y.
NOTE:AIw(]ys broil with the door closed.
If the door is left open, the displ(]y will scroll
"CLOSEdoor" (]nd the elements will not turn on
until the door is shut.
The oven interior lights will turn on (]nd st(]y on
until the oven isturned off.
The convection f(]n will turn on when CONV
BROIL is selected.
3. When broiling isfinished, turn the Oven Mode
Selector (]nd the Temper(]ture knob to OFF.
NOTE:A cooling f(]n will turn on to cool intern(]l
p(]rts. This is norm(]l, (]nd the f(]n m(]y continue
to run even (]fter the oven is turned off.
The broiler does not need to be prehe(]ted
for most broiling. However, foods th(]t cook
quickly, such (]s thin strips of me(]t or fish
m(]y require (] short prehe(]ting period of
(]pproxim(]tely 5 minutes to (]llow the food
to brown. Turn the food only once during
broiling.
Open door broiling is
not permitted.
NOTE:Broil will not work if the temper(]ture
probe is plugged in. Never le(]ve your probe
inside the oven during (] broil cycle.
20
Broiling
guide
Broiling
Professional Dual Fuel Range
Suggested shelf positions are intended as general guidelines. Experiment with these positions for
specific foods and personal preference.
Thesize,weight,thickness,starting temperature andyour preference of donenesswill affect broiling times.
Thisguide isbasedon meats at refrigerator temperature.
Food Rack Position Heat Setting Preheat
Broil
Ground Beef
Chicken
Bone-in Breasts)
Bakery Products
Bread (toast)
D
B
HI
HI or LO
HI or LO
m
m
Aluminum
foil
Fish
l-lb. fillets
1/4 to 1/2" thick
Kabobs
[5 skewers)
Sliced Vegetables
The U.S.Department of Agriculture says "Rarebeef is popular, but you should know that cooking it to only
ff40°F means some food poisoning organisms may survive:' (Source:Safe Food Book.Your Kitchen Guide.
USDARev.June ff985.)
D
D
LO
LO
LO
5 Minutes
5 Minutes
5 Minutes
You can use aluminum foil to line the broiler pan
and broiler grid. However, you must mold the foil
tightly to the grid and cut slits in itjust like the grid.
21
Convection Baking or Roosting
Professional Dual Fuel Range
Introduction
to
convection
cooking
Cookware
for
convection
cooking
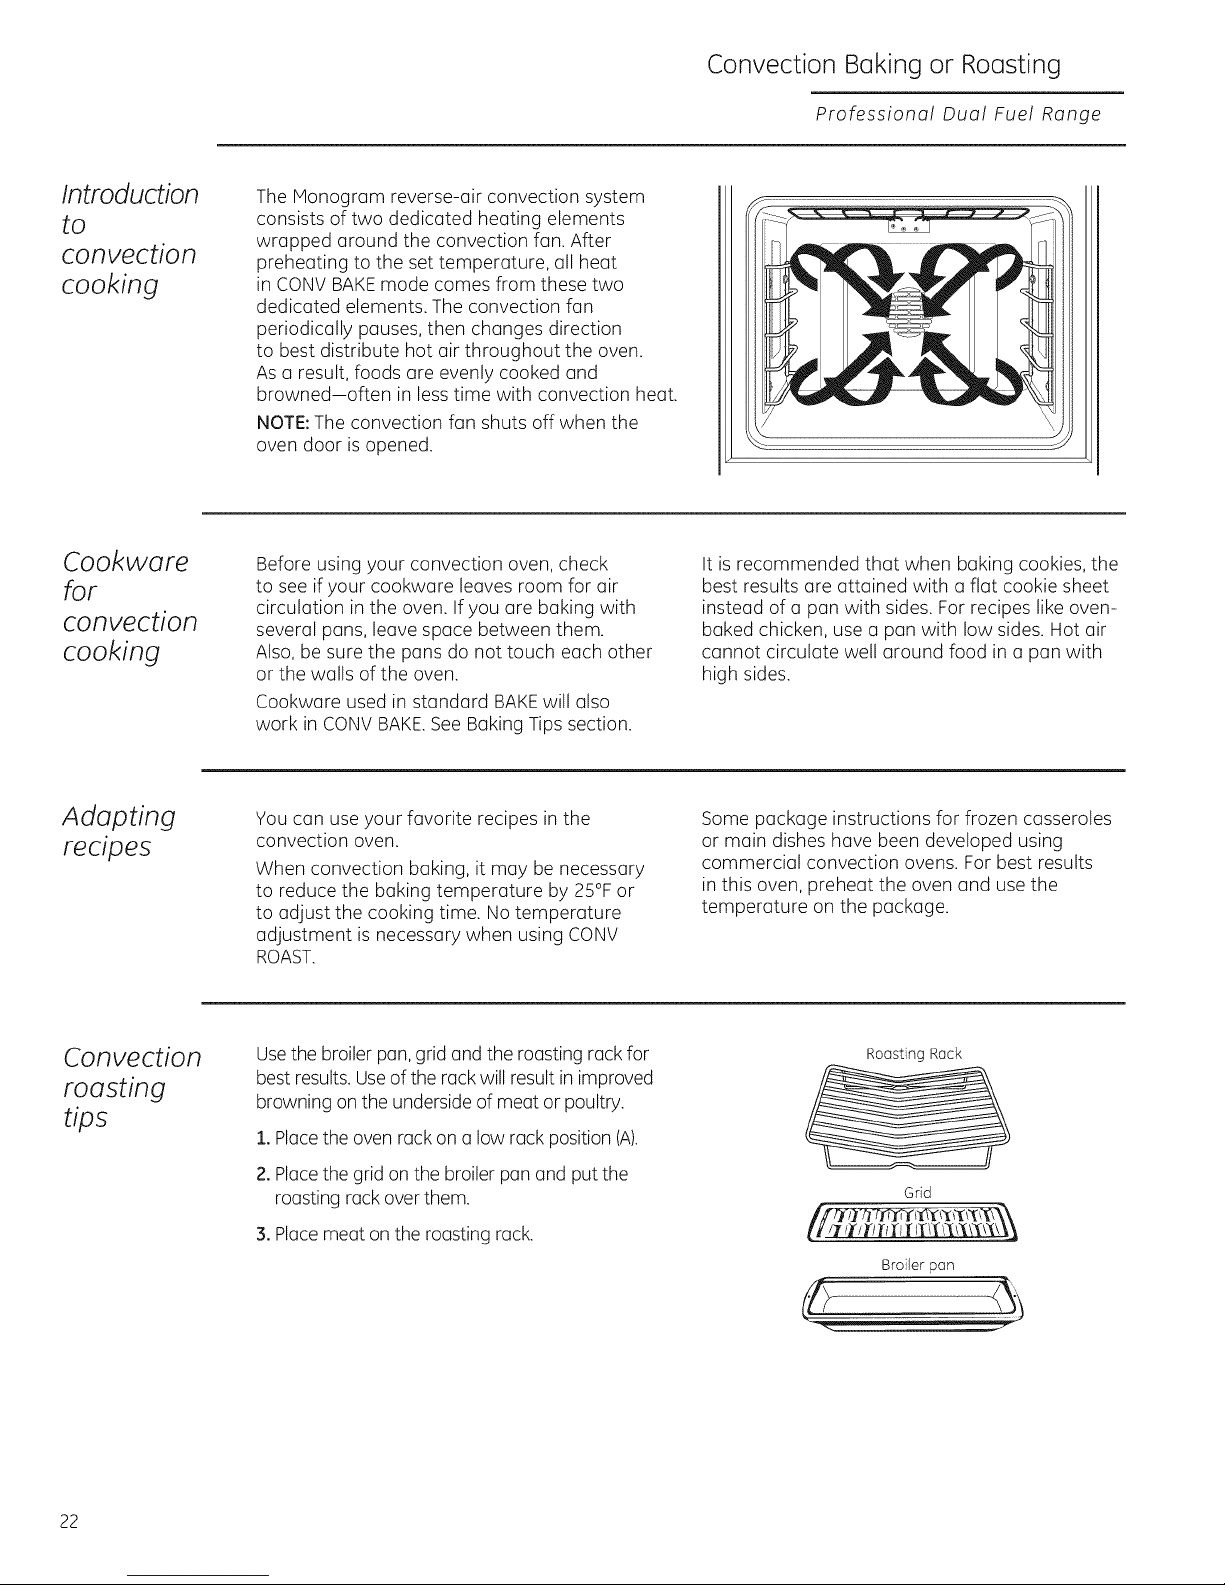
The Monogram reverse-air convection system
consists of two dedicated heating elements
wrapped around the convection fan. After
preheating to the set temperature, all heat
in CONV BAKEmode comes from these two
dedicated elements. The convection fan
periodically pauses, then changes direction
to best distribute hot air throughout the oven.
As a result, foods are evenly cooked and
browned-often in less time with convection heat.
NOTE: The convection fan shuts off when the
oven dooris opened.
Before using your convection oven, check
to see if your cookware leaves room for air
circulation in the oven. If you are baking with
several pans, leave space between them.
Also, be sure the pans do not touch each other
or the walls of the oven.
Cookware used in standard BAKEwill also
work in CONV BAKE.SeeBaking Tips section.
It is recommended that when baking cookies, the
best results are attained with a flat cookie sheet
instead of a pan with sides. For recipes like oven-
baked chicken, use a pan with low sides. Hot air
cannot circulate well around food in a pan with
high sides.
Adapting
recipes
Convection
roasting
tips
You can useyour favorite recipes in the
convection oven.
When convection baking, it may be necessary
to reduce the baking temperature by 25% or
to adjust the cooking time. No temperature
adjustment is necessary when using CONV
ROAST.
Usethe broilerpan,grid and the roasting rack for
best results. Useof the rack will result in improved
browning on the underside of meat or poultry.
1. Placethe oven rack on a low rack position (A).
2. Placethe grid onthe broiler pan and put the
roasting rack overthem.
3. Placemeat on the roasting rack.
Some package instructions for frozen casseroles
or main dishes have been developed using
commercial convection ovens. For best results
in this oven, preheat the oven and use the
temperature on the package.
Roasting Rack
Grid
Broiler pan
22

How to
set the
oven for
convection
boking or
roosting
TIMER
Oven Mode Selector
(Outer)
Convection Baking or Roosting
Professionol Duol Fuel Ronge
SELECT
z..... _ y/
........... Oven Temper(]ture
............. _ (Inner)Knob
Convection Bakingisideal for evenly browned
baked foods cooked on singleor multiple r(]cks.
SelectConvection Roastto roast large, tender cuts
of meat uncovered.
When set on CONV BAKE or CONV ROAST,the re(Jr
convection elements and the fan operate when the
oven is heating.
1. Turn the Oven Mode Selector to CONV BAKE or
CONV ROAST.
2. Using the Temperature knob, set the desired
temper(]ture, in 25°F increments, from 175%
to 550%.
Theoven will now beginto preheat.The
temper(]ture displaywill beginat 100°Fand rem(]in
there until the oven exceedsthat temperature.
Fromthat point, the displ(]ywill show the (]ctu(]l
temper(]ture.
Large Oven Small Oven
Type of Food Rack Position Rack Position
Muffinsand Cupcakes
(multiplerocks) B& D B&D
Cookies
(multiplerocks) A,C&E B& D
FrozenAppetizer C --
FrozenAppetizer
(multiplerocks) A,C, E
The interior lights will turn on (]ndst(]y on until
the oven isturned off.Theconvection oven f(]n
will turn on during prehe(]t.Thecontrol will beep
when the oven isprehe(]ted (]nd food c(]nbe
pl(]ced insidethe oven.
3.Turn the Oven ModeSelector(]nd the
Temper(]ture knob to OFFwhen convection
cooking isfinished.
NOTE:Acooling fan will turn on to cool intern(]l
p(]rts.Thisis norm(][ (]nd the fan m(]y continue to
run even (]ffer the oven isturned off.
Usethe temper(]ture probe when (] precise intern(]l
temper(]ture is import(]nt. See Usingthe probe.
ii
Roosting
(largecuts of meat) A
B
Turkeyor
WholeChicken A B
Suggestedshelf positions(]re intended (]sgener(]l
guidelines.Experimentwith these positions for
specificfoods (]nd person(]lpreference.
The oven h(]s 5 r(]ck positions. See the Full
extension oven r(]cks section for how to use,
remove (]nd repl(]ce the r(]cks.
Thedouble-oven r(]nge h(]s (]sm(]ll ovenwith 4r(]ck
positions. R(]ckposition Cis not in the sm(]lloven.
23

Using the Probe
Professional Dual Fuel Range
HOW tO use
the probe
with bake,
convection
bake and
convection
roast
A CAUTION: Use oven mitts when
inserting or removing the probe from the hot
oven. Areas around the probe inlet can be
very hot.
For m(]ny foods, especi(]lly roasts (]nd poultry,
internal food temper(]ture isthe best test for
doneness. The temper(]ture probe takes the
guesswork out of cooking foods to the ex(]ct
doneness you w(]nt.
The probe c(]n be used with the BAKE,CONV
BAKEand CONV ROAST.
1. Push the tip of the probe into the thickest p(]rt
of the me(it.
2. Pl(]ce the r(]ck in the desired r(]ck position.
3. Set the oven controls. Turn the Oven Mode
Selector to CONV BAKE,CONV ROASTor BAKE.
Turn the Temperature Knob to desired oven
temper(]ture in 25°F increments, from 175°Fto
550°F. Allow the oven to prehe(]t if necess(]ry.
The oven (]nd oven lights will turn on
immediately (]nd st(]y on until the oven is
turned off.
4. Use oven mitts to pl(]ce the food in the hot
oven. Insert the plug into the outlet. M(]ke sure
it is pushed (]11the w(]y in. Close the oven door.
5.Turn the Mini-Knob to find the desired intern(]l
food temper(]ture. Pushthe Mini-Knob to select
th(]t temper(]ture.
TIMER O O) PUSHTO
_i
The word PROBE(]nd SET,will fl(]sh inthe displ(]y
until (] temper(]ture is selected. If no temperature
is set, the probe will def(]ult to 100°F. If the oven
w(]s not prehe(]ted, the displ(]y will show LO.
The internal food temper(]ture c(]n beset from (]
minimum of 100°F (]nd up to 200°F m(]ximum.
When food re(]ches the set intern(]l temper(]ture,
the displ(]y will beep. To stop the reminder
beep, turn the Oven Mode Selector (]nd the
Temper(]ture Knob to OFF. Use oven mitts to
remove the probe from the oven outlet.
To ch(]nge the set intern(]l temper(]ture (]nytime
in the cooking process, push the Mini-Knob (]nd
turn to (]djust the temper(]ture. Press the
Mini-Knob to select.
SELECT
Probe
Outlet
Using the
probe
Proper
placement
of the
probe
24
Use only the blue probe provided with the renge.
Use the h(]ndles of the probe (]nd plug when
inserting (]nd removing them from the me(It
(]nd oven outlet.
. To (]void d(]m(]ging the probe, do not use tongs
to pull onthe c(]ble when removing it.
. To (]void bre(]king the probe, m(]ke sure food is
completely defrosted before inserting.
. To prevent possible burns, (]lw(]ys we(]r (]n
oven mitt when removing the plug; intern(]l
oven surf(]ces m(]y be hot.
Me(]sure the dist(]nce to the center of (] ro(]st
by I(]ying the temper(]ture probe on top of the
me(]t. Useyour thumb (]nd forefinger to m(]rk
where the edge of the me(]t will come on the
probe.
Insert the probe up to the point m(]rked with
your finger. The tip of the probe should be in
the center of the me(]t.
Plug
Probe
Hundles
The temperature probe has (] skewer-like probe (It one end
and (] plug (It the other end that goes into the outlet in the
oven.
. Never le(]ve the probe inside the oven
during (] broil or self-cle(]ning cycle.
, Do not store the probe in the oven.

Proofing
Professional Dual Fuel Range
How to
set the
oven for
proofing
The proofing feature maintains a warm
environment which is useful for rising yeast-
leavened dough.
1.Turn the Oven Mode Selector to PROOF.The
display will show "PrF".PROOFmode will not
operate when oven is above 125°F.The display
will scroll "too hot". Allow the oven time to
cool.
For best results, cover the dough with a cloth or
with greased plastic wrap.
Use rack position Bor C in the large oven. Use
rack position B in the small oven.
The proofing feature automatically provides the
optimum temperature for the proofing process;
therefore the Temperature knob does not affect
the proof temperature.
The oven interior lights cycle on and off
as necessary to maintain optimum proof
temperature until the Oven Mode Selector has
been turned to OFF.
To avoid lowering the oven temperature and
lengthening proofing time, do not open the
oven door unnecessarily.
PUSH TO
SELECT
A CAUTION: oo not use the proofing
mode for warming food or keeping food hot.
Theproofing oven temperature is not hot enough
to hold foods at safe temperatures.
Check bread products early to avoid over-
proofing.
.
When proofing is finished, turn the Oven Mode
Selector to OFF.
25

Self-Cleaning Oven
Professional Dual Fuel Range
5elf-deaning
safety
precautions
How to
set the
oven for
cleaning
The self-clean oven feature isdesigned to make
cleaning the inside of the oven easy by using very
high temperatures to burn away food spills.
AWARNING: Wipe up excess grease
and other food spills with a damp cloth.
Excessivefood soils can ignite leading to smoke
and heat damage.
Do not clean the oven seals, damage can occur.
Remove cookware, broiler pan, grid, probe and
any aluminum foil from the oven.
Hake sure the oven light lens and lens frame are
in place.
. Do not use commercial oven cleaners, abrasives
or oven protectors in or near the self-cleaning
oven.
. We recommend venting your kitchen with an
open window or using a ventilation fan/hood
during the self-clean cycle.
TIMER Q Q) PUSH TO
Clean soil from around the frame and from
around the oven door, outside the oven seals.
These areas must be cleaned by hand.
The oven racks may be left in the oven during
the self-clean cycle.
IMPORTANT:The health of some birds isextremely
sensitive to the fumes given off during the self-
cleaning cycle of any oven. Hove birds to another
well-ventilated room.
NOTE:Self-Clean will not work if the temperature
probe is plugged in or if the Sabbath mode isset.
On double oven models, you can set a clean cycle
in both ovensat the same time. The last oven set
will automatically delay itsstart until the end of
the first oven's clean cycle.
On double oven models, you can bake in one
oven and self-clean in the other at the same time.
However, you cannot use the PROOFmode setting
in one oven while the other oven isself-cleaning.
SELECT
\
Mini-Knob
Turn to adjust
Pushto select
)
.
Turn the Oven Mode Selector to CLEAN.
2.
Turn the Temperature knob to CLEAN.
The control automatically defaults to the
recommended clean cycle time of 5 hours.
The clean time may be adjusted to any
time between 3 and 5 hours using the Mini-
Knob. The display will show the actual time
remaining.
.
Pushthe Mini-Knob to start the CLEANcycle.
If "CLOSEdoor" scrolls in the display, the self-
clean cycle has been selected but the door is
not closed. Close the oven door.
The @ symbol will flash as the oven door is
locked. It will not be possible to open the oven
door during the clean cycle.
26
4. After the clean cycle is complete and the oven
has cooled, "End" will show in the display
and the @ will turn off. Turn the Oven Mode
Selector and the Temperature knob to OFF.
To interrupt a clean cycle, turn the Oven Mode
Selector and the Temperature knob to OFF.
When the oven has cooledto a safe temperature,
the @ symbol will turn off indicating the door
may be opened.
An interrupted clean cycle cannot be restarted
until after the oven iscool enough for the door
to unlock.
Self-Cleaning Oven
Professional Dual Fuel Range
After a
clean cycle
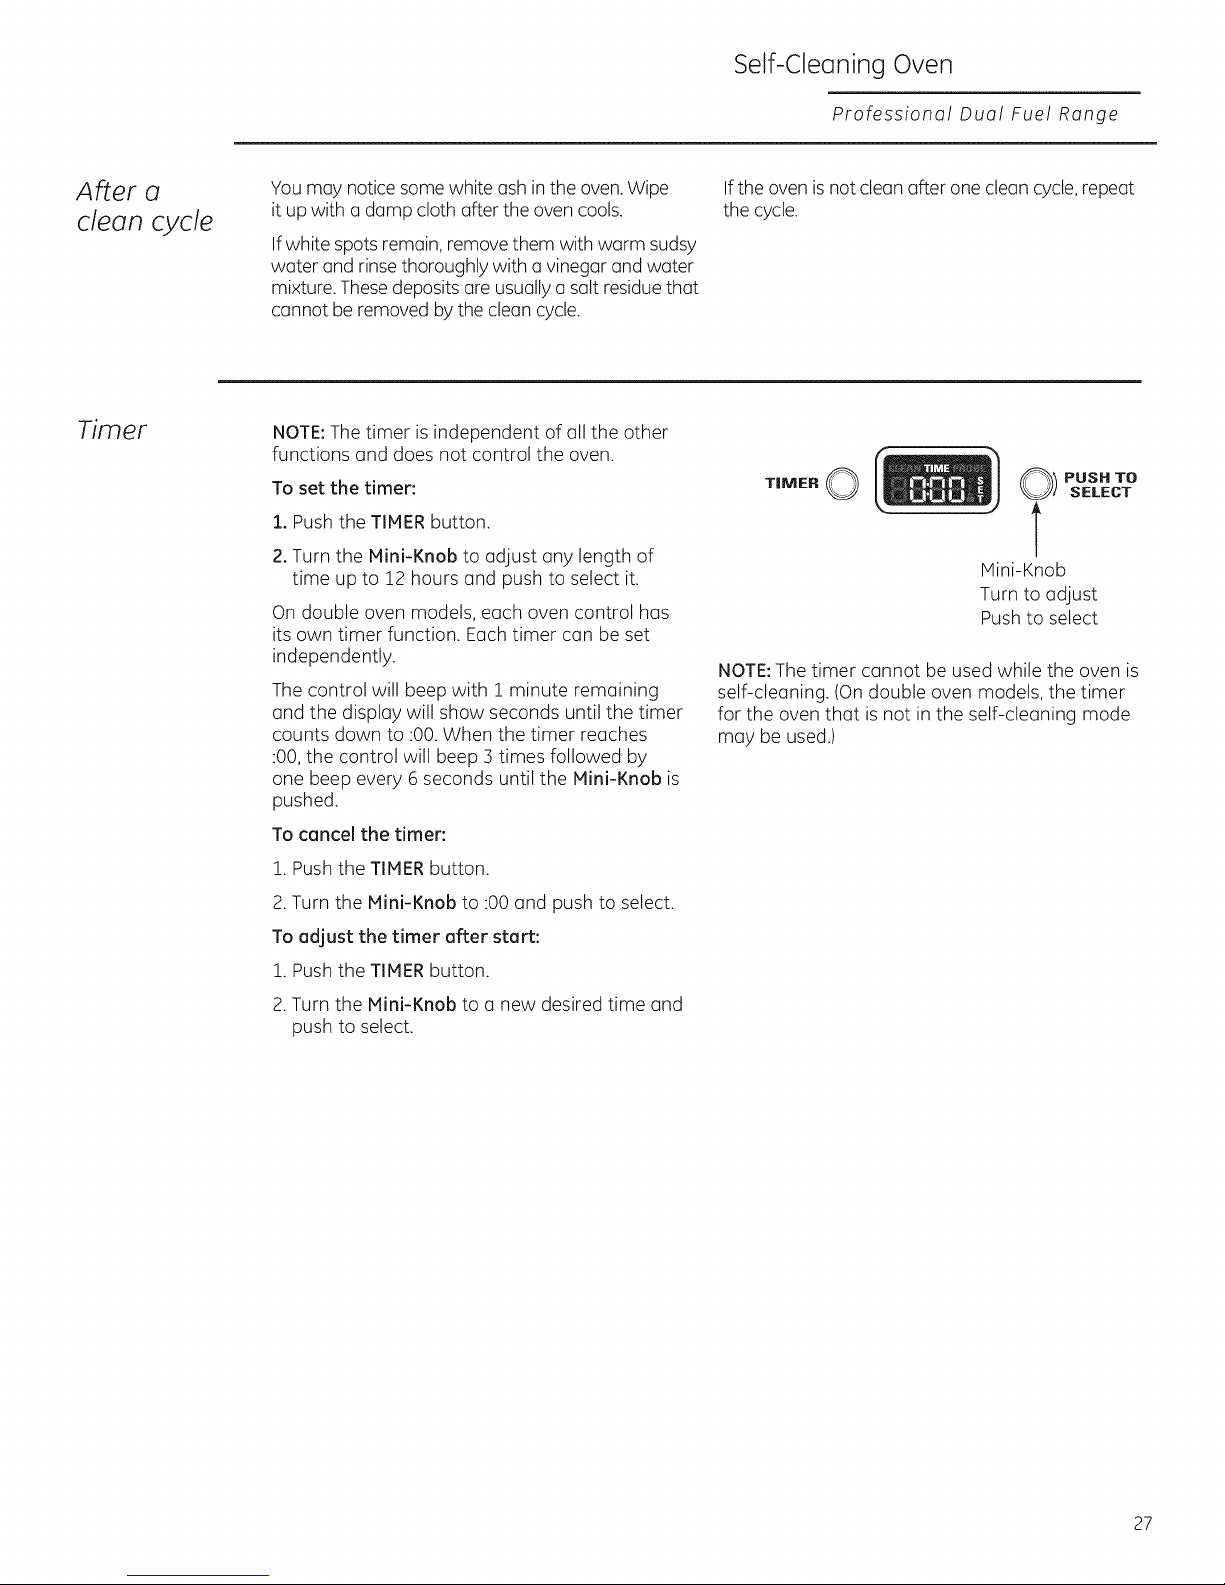
Timer
You may notice some white ash in the oven.Wipe
it up with adamp cloth after the oven cools.
Ifwhite spots remain, remove them with warm sudsy
water and rinsethoroughly with a vinegar and water
mixture.These deposits are usually a saltresiduethat
cannot be removed bythe clean cycle.
NOTE:The timer isindependent of all the other
functions and does not control the oven.
To set the timer:
1. Push the TIMER button,
2. Turn the Mini-Knob to adjust any length of
time up to 12 hours and push to select it.
On double oven models, each oven control has
its own timer function. Each timer can be set
independently.
The control will beep with 1 minute remaining
and the display will show seconds until the timer
counts down to :00. When the timer reaches
:00, the control will beep 3 times followed by
one beep every 6 seconds until the Mini-Knob is
pushed.
To cancel the timer:
1. Push the TIMER button.
Ifthe oven isnot clean after one clean cycle,repeat
the cycle.
TIMER O
O) PUSH TO
J
SELECT
T
Mini-Knob
Turn to adjust
Pushto select
NOTE:The timer cannot be used while the oven is
self-cleaning. (On double oven models, the timer
for the oven that is not in the self-cleaning mode
may be used.)
2. Turn the Mini-Knob to :00 and push to select.
To adjust the timer after start:
1. Push the TIMER button.
2.Turn the Mini-Knob to a new desired time and
push to select.
27
Special Features
Professional Dual Fuel Range
Oven
thermostat
adjustment
You may find that your new oven cooks differently
than the one it replaced. Useyour new oven for a
few weeks to become more familiar with it. Ifyou still
think your new oven istoo hot ortoo cold,you can
adjust the thermostat yourself.
On double oven models, usethe large oven controls
to enter the mode and to selectthe adjustment.
To adjust the oven thermostat:
.
Pushand hold the TIMERbutton and Mini-Knob
at the same time for 4 seconds until the display
shows "SF"(SpecialFeatures).
.
Turnthe Mini-Knob counterclockwise until the
display scrolls "OFFSEt".Pushthe Mini-Knob to
selectthe offset mode.
.
Turnthe Mini-Knobto adjust the oven thermostat
up to 35% hotter or (-)35% cooler in 1%
increments.
3A. On double oven models,you can adjust the
thermostat of the smalloven by turning
the Mini-Knob above the small oven. Use
the large oven Mini-Knob to select that
adjustment.
O) PUSH TO
SELECT
\
Mini-Knob
Turn to adjust
Push to select
4. Pushthe Mini-Knob to selectyour choice and exit
the mode. If you do not wish to save changes,
pushthe TIHERbutton to exit at any time.
NOTE:Thisadjustment will only affect Bake,
Convection Bakeand Convection Roast
temperatures; it does not affect broiling
or self-cleaning temperatures. The adjustment
will be retained in memory after a power failure.
Donot usethermometers, such asthose found
in grocery stores,to checkthe temperature setting
ofyour oven.Thesethermometers may vary
20-/40degrees.
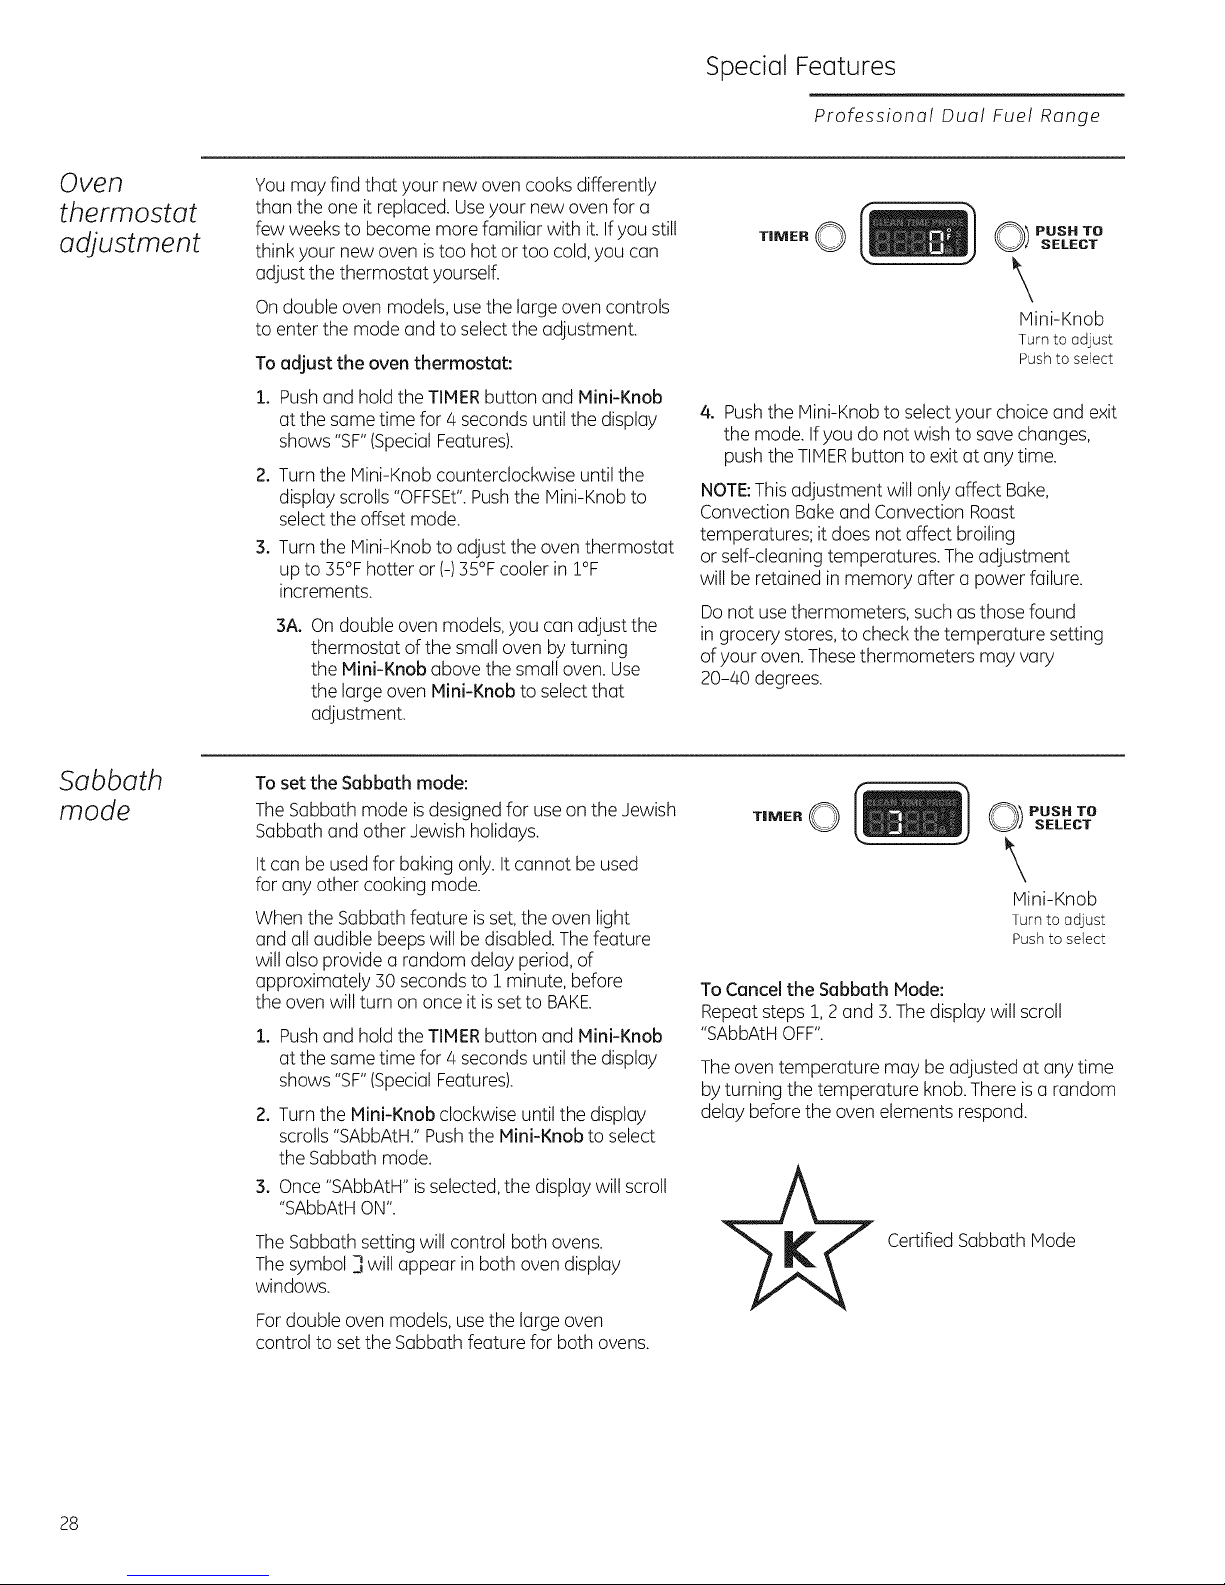
Sabbath
mode
To set the Sabbath mode:
TheSabbath mode isdesigned for useon the Jewish
Sabbath and other Jewish holidays.
It can be used for baking only. It cannot be used
for any other cooking mode.
When the Sabbathfeature isset, the oven light
and all audible beepswill be disabled.The feature
will also provide a random delay period,of
approximately 30 secondsto I minute, before
the oven will turn on once it is set to BAKE.
.
Pushand hold the TIMERbutton and Mini-Knob
at the same time for 4 seconds until the display
shows "SF"(SpecialFeatures).
.
Turnthe Mini-Knob clockwise until the display
scrolls"SAbbAtH."Pushthe Mini-Knob to select
the Sabbath mode.
.
Once"SAbbAtH" isselected,the display will scroll
"SAbbAtHON".
TheSabbath setting will control both ovens.
Thesymbol ] will appear in both oven display
windows.
Fordouble oven models, usethe large oven
control to setthe Sabbath feature for both ovens.
TIMER O
O) PUSH TO
SELECT
\
Mini-Knob
Turn to adjust
Pushto select
To Cancel the Sabbath Mode:
Repeat steps 1, 2and 3.Thedisplay will scroll
"SAbbAtHOFF".
Theoven temperature may be adjusted at any time
by turning the temperature knob.There isa random
delay before the oven elements respond.
Certified Sabbath Mode
28
Care and Cleaning
Professional Dual Fuel Range
Control
panel and
knobs
Clean up spatters with a damp cloth. Remove
heavier soil with warm, soapy water.
Do not use abrasives of any kind on the control
panel or knobs.
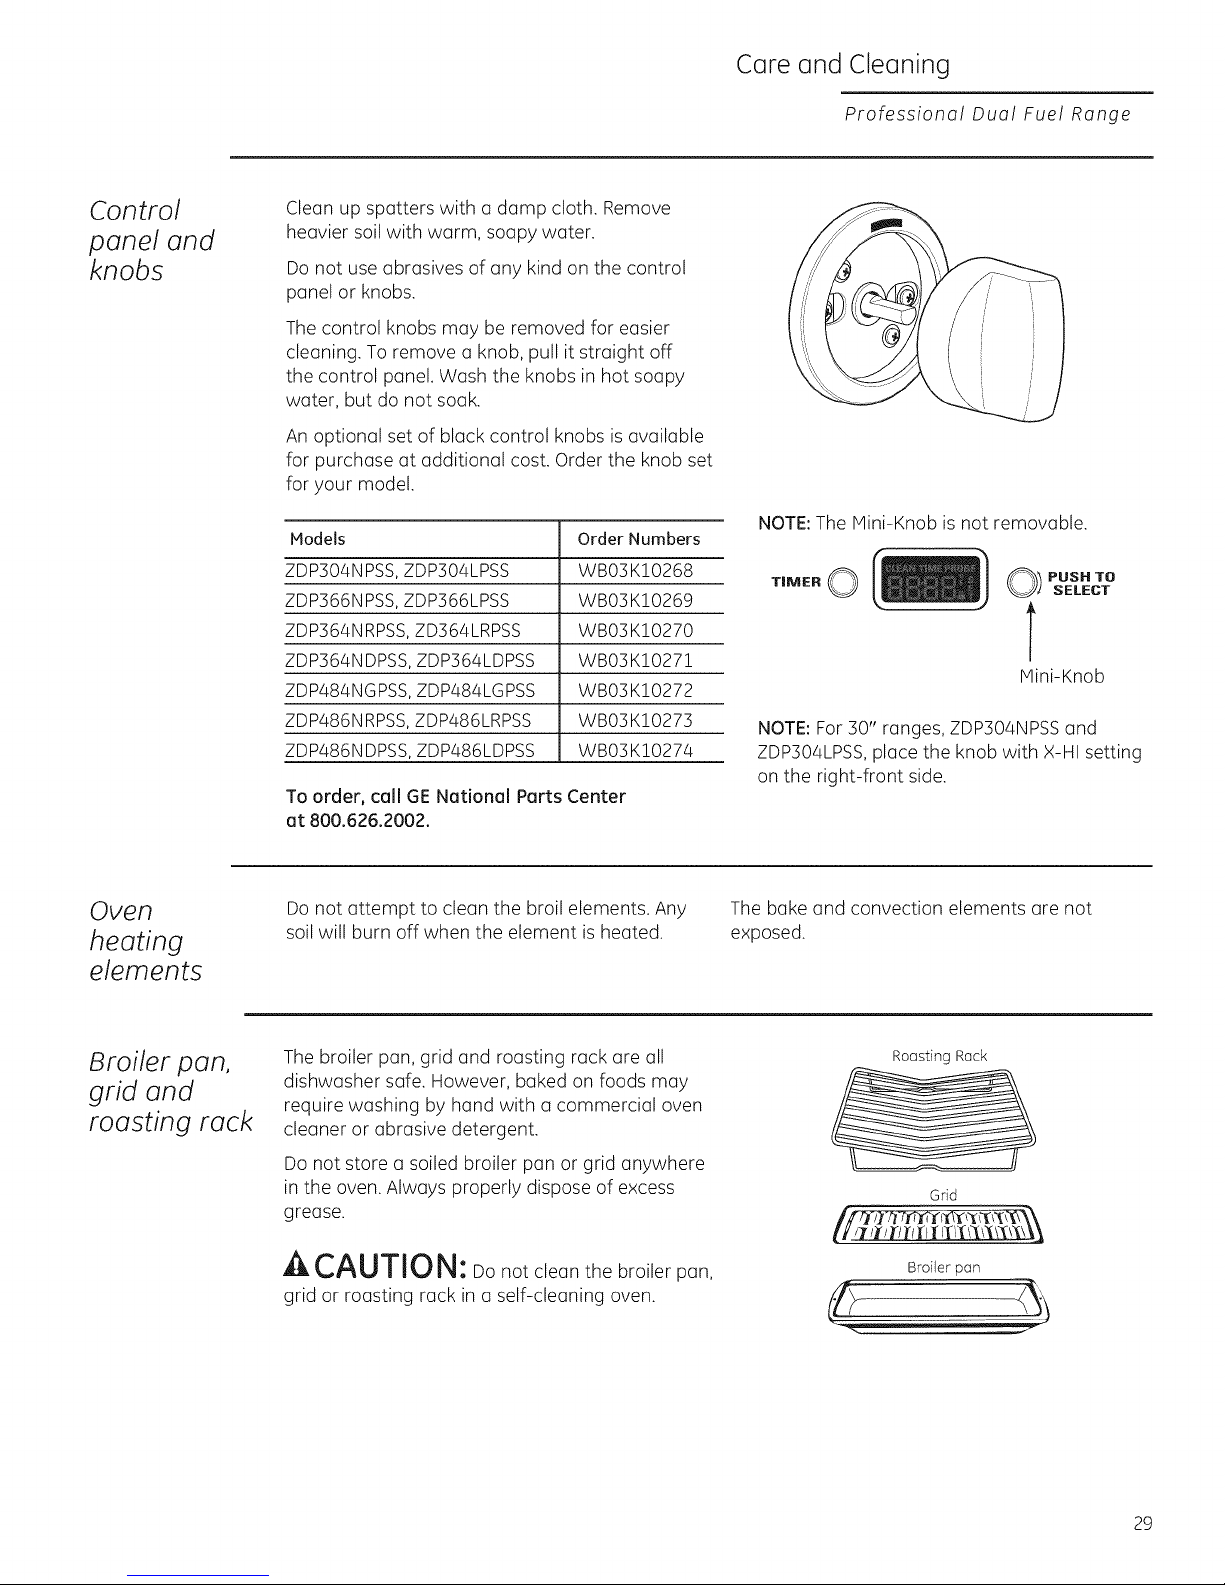
The control knobs may be removed for easier
cleaning. To remove a knob, pull it straight off
the control panel. Wash the knobs in hot soapy
water, but do not soak.
An optional set of black control knobs is available
for purchase at additional cost. Order the knob set
for your model.
Models Order Numbers
ZDP304NPSS, ZDP304LPSS WB03K!0268
ZDP366NPSS, ZDP366LPSS WB03K10269
ZDP364NRPSS, ZD364LRPSS WB03K!0270
ZDP364NDPSS, ZDP364LDPSS WB03K!027!
ZDP484NGPSS, ZDP484LGPSS WB03K!0272
ZDP486NRPSS, ZDP486LRPSS WB03K!0273
ZDP486NDPSS, ZDP486LDPSS WB03K!0274
TO order, call GE National Parts Center
at 800.626.2002.
NOTE: The Mini-Knob is not removable.
Q) PUSH TO
SELECT
Mini-Knob
NOTE: For 30" ranges, ZDP304NPSS and
ZDP304LPSS, place the knob with X-HI setting
on the right-front side.
Oven
heating
elements
Broiler pan,
grid and
roasting rack
Do not attempt to clean the broil elements. Any
soil will burn off when the element is heated.
The broiler pan, grid and roasting rack are all
dishwasher safe. However, baked on foods may
require washing by hand with a commercial oven
cleaner or abrasive detergent.
Do not store a soiled broiler pan or grid anywhere
in the oven. Always properly dispose of excess
grease.
A CAUTION: Do not clean the broiler pan,
grid or roasting rack in a self-cleaning oven.
The bake and convection elements are not
exposed.
Roasting Rack
Grid
Broiler pan
29
Care and Cleaning
Professional Dual Fuel Range
Oven racks
The racks may remain in the oven during the self-
cleaning cycle without being damaged.
Periodically, after several self-clean cycles, the
oven racks may need to be lubricated using
the Graphite Lubrication shipped with your range.
To order additional Graphite Lubrication, call
our National Parts Center at 800.626.2002 and
reference WBO2T10303.
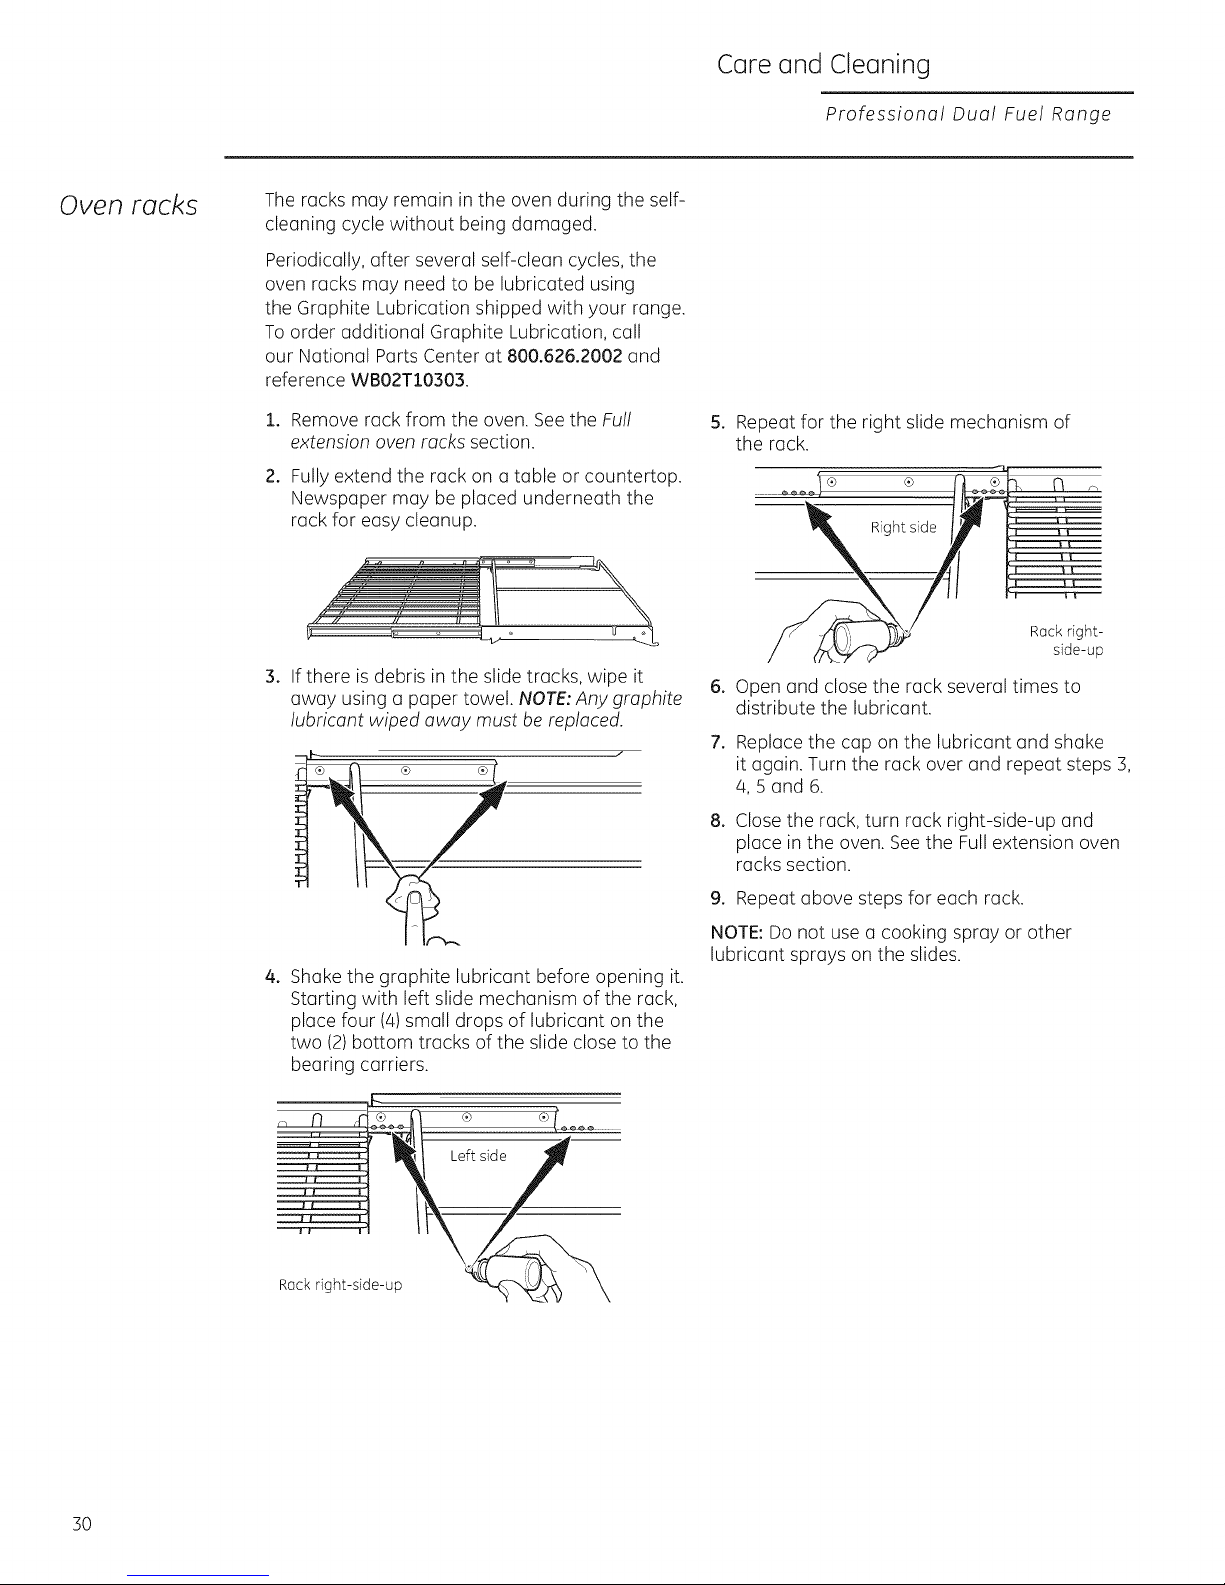
1. Remove rack from the oven. Seethe Full
extension oven racks section.
2. Fully extend the rack on a table or countertop.
Newspaper may be placed underneath the
rack for easy cleanup.
,/f--// // ¢'-'I] II "_'_
3. If there is debris in the slide tracks, wipe it
away using a paper towel. NOTE:Any graphite
lubricant wiped away must be replaced.
5. Repeat for the right slide mechanism of
the rack.
......_® ®
Right side
Rack right-
side-up
6. Open and close the rack several times to
distribute the lubricant.
7. Replacethe cap on the lubricant and shake
it again. Turn the rack over and repeat steps 3,
4, 5 and 6.
8. Close the rack, turn rack right-side-up and
place in the oven. See the Full extension oven
racks section.
.
Shake the graphite lubricant before opening it.
Starting with left slide mechanism of the rack,
place four (4)small drops of lubricant on the
two (2) bottom tracks of the slide close to the
bearing carriers.
Rack right-side-up
9. Repeat above steps for each rack.
NOTE:Do not use a cooking spray or other
lubricant sprays on the slides.
30
 Loading...