

Page 1

GE Mono_am ®
Owner's Manual
57" Convection
Wall Oven
72)72)72). ))ZO'l? O_r;'(l ))Z. (0 Ill
Page 2
(;onstlmer ] ntbnnation
Wall Ovet_
Introduction
Yore" new Monogram wall o\ en makes all eloquent statement of st)le, convenience and kitchen
plamfing flexibility. Whether you chose it ti)r its pm'itv of design, assiduous attention to detail--
or flw both of these reasons--you'll find that yore" Monogram wall oven's superior blend of fbrm
and function will delight you for years to come.
Your Monogram wall oven was designed to provide the flexibility to blend in with your kitchen
cabinetr_: Its sleek design can be beautihdly integrated into the kitchen.
The infl)rmation on the fl)llowing pages will help you operate and maintain your wall oven
properly.
Contents
Care and ClemMng
Broiler Pan and Grid .................... 37
I,ifl-Ofl Oven Door . .................. 35, 36
I,ight Bulb ............................ 38
Probe ................................. 38
Selt:Cleaning Oven ................... 33, 34
Shelves ............................... 36
Stainless Steel and Metal Pints ............. 36
Consumer Services
Beflwe You Call For Service ............ 39-40
Important Phone Numbel_ .............. 43
Model and Serial Numbers ................ 3
Product Registration ................ 3, 41-42
Safbty Instructions ..................... 4, 5
_'\.uTanty .............................. 44
Oven
Ac!iust the Oven Thermostat .............. 32
Aluminum Foil .................... 4, 17, 33
Baking or Roasting ................... 16, 17
Broiling/B, oiling Guide .............. 18, 19
Control, Clock and Timer . ............. 7-12
Convection Oven .................... 25-30
Features ............................... 6
Probe .............................. 22-24
Proofing .............................. 31
Sabbath Feature ...................... 13-15
SelgCleaning Oven ................... 33, 34
Timed Baldng ....................... 20, 21
_glT_tOT?e
pachaging
t@e
To assure no damage is done to tlle finish of
tile product, the saiest way to remove adhesive
leit fl'om packaging tape on new appliances
is an application of a household liquid
dishwashing detergent, mineral oil or cooking
oil. Apply with a soft cloth and allow to soak.
Wipe dry and then apply an appliance polish
to thoroughly clean and protect the surthce.
NOTE: The plastff tape must be r_moved /mm the
_hrome trim on the ove_z parts. It _annot be r_moved
!/it is baked on.
Page 3

Be[bre
using your
wall oveTt
Read this manual carefully. It is intended to
help yon operate and maintain your new wall
oven properly.
Keep it handy fi/r answel_ to your questions.
If you don't understand something or need
more help, there is a list of toll-fl'ee consmner
service numbers included in tile back section
of this manual.
OR
Visit our Website at: www.monogrmm.com
Write
down the
model &
serial
n u Tytbers
You'll find them on a label on the fl'ont of
the oven behind the oven door (on single
oven models) or on tile fi'ont of the lower
oven behind the oven door (on double oven
m odels).
Fill out and return the Consmner Product
Registration Card that is packed with this
pioduct. If you cannot find it, please send
in the duplicate card printed in the back of
this manual.
Before sending in this card, please write these
nmbers here:
Model Number
Serial Number
Use these Ii(llllbers ill all)' correspondence or
service calls concerning your wall oven.
[./you
received a
damaged
wall oveTt
Immediately contact the dealer (or builder)
that sold you the wall oven.
Save time
& money
Befi/re you request service, check the Problem
Solver in tile back of this manual.
It lists causes of minor operating problems that
you call correct yourself.
[.[you
need
service
To obtain service, see tile Consumer Services
page in the back of this manual.
We're proud of our service and want you to be
pleased. If fl/r some reason you are not happy
with tile setMce you receive, here are tile steps
to tilllow tm further help.
FIRST, contact tile people who serviced vom"
appliance. Explain wily you are not pleased.
In most cases, this will solve the problem.
NEXT, if you are still not pleased, write all tile
details--including your phone numbe_to:
Managec Customer Relations
GE Appliances
Appliance Park
Louisville, KY 40225
Page 4

IMPORTANT SAFETY INSTRUCTIONS
WARNING!
For xour satetv tile infornmtion in this manual must be followed to minimize tile risk of fire or
explosion, electric shock, or to prexent property damage, personal ii_jtu'), or hiss of life.
IMPORTANT SAFF, TY NOTICE
" The California Safe Drinking Water and
Toxic Enforcement Act requires tile Governor
of Cali_brnia to publish a list of substances
known to the state to cause cancel birth
defects 05" other reproductive harm, and
requires bt(sinesses to waYn ctlstoulers of
potential exposure to such substances.
" The fiberglass insulation in self-cleaning ovens
gives off a very small amount of caMmn
monoxide during the cleaning cycle, Exposure
call be minimized by venting with all open
window or using a ventilation thn 05"hood.
.IMPORTANT: Thehe:,lth
some birds is extremely sensitive to the hmles
given oH during tile sell=cleaning cycle of any
oven. Move birds to another well-ventilated
room.
SAFETY PP&2CAUTIONS
When using your appliance, follow basic safety
precautions, including the following:
, Use this appliance only for its intended use
as described in this manual.
" Be sure your appliance is properly installed
and grounded b) a qualified technician in
accordance _dth tile provided installation
instructions.
, Be sure the oven is securely installed in a
cabinet that is firmly attached to the house
structure, Never allow anwme to climb, sit,
stand 05" hang on tile oven door.
" Have the installer show you the location of
the circuit breaker or fuse. Mark it for eas}
5"efes"ellce.
* Do not attempt to repair or replace amy part
of your wall oven unless it is specifically
recommended in this manual. All other
sesMcing should be re_brred to a qualified
technician.
, Teach children not to play with the controls
or any other I)iU't o_ tile ovell.
"Never leave the oven door open when you
are not watching the oven.
, Always keep dish towels, dish cloths, pot
holders and other linens a safe distance from
your oven.
" For your safety, never use your appliance for
warming or heating the room.
, Always keep wooden and plastic utensils
and canned food a safe distance away from
yOLW oven.
" Keep the oven free from grease buildup.
, Always keep combustible wall coverings, curtains
or drapes a safe distance from your oven.
, DO NOT STORE OR USE COMBUSTIBLE
MATERIALS, GASOLINE OR OTHER
FLAMMABLE VAPORS AND LIQUIDS IN
THE VICINITY OF THIS OR ANY OTHER
APPLIANCE.
" Do not let cooking grease or other flmnmable
materials accumulate in or near the wall oven.
* Do not use water on grease fires. Smother fire
or flame or use a muhi-l)urpose dr} chemical
or foam-type fire extinguisher.
Flame in tile oven can be smothered
completely by closing tile oven door and
turning tile oven off or by using a multi-
puq)ose dry chemical 05"tilam-type fire
extinguisher.
, Do not use aluminum foil to line oven
bottoms, except as suggested in this manual.
hnproper installation of ahllllilltlul foil ma}
result ill a risk of electric shock or fire,
" Cook meat and poultry thoroughly--meat to
at least an INTERNAL temperature of 160°E
and poultry to at least an INTERNAL
temperature of 180°E Cooking to these
temperatures usually protects against
ti/odborne illness,
"Before performing any service, DISCONNECT
THE OVEN POWER SUPPLY AT THE
HOUSEHOLD DISTRIBUTION PANEL BY
REMOVING THE FUSE OR SWITCHING
OFF THE CIR(R)IT BREAKER.
* Do not store flammable materials in the oven.
Page 5
SA 2TY PP&2CAU770NS
" Do not leave children alone--children should
not be lett alone or unattended in all area
where an appliance is ill use. They should
never be allowed to sit or stand on any part
of tile appliance.
, Do not touch the heating elements or the
interior surface of the oven. These sm'times
may be hot enough to btu'n even though they
are dark in color. Dm'ing and alter use, do not
touch, or let clothing or other flammable
materials contact, any interior area of tile
oven; allow sufficient time fl)r cooling first.
Potentially hot surfimes include tile oven vent
openings and surthces near the openings,
crevices around tile oven doo_; tile edges of
the door window and metal trim parts above
the door.
Remember: The inside surfisce of tile oven
may be hot when the door is opened.
. CAUTION: ITEMSOVINTEr:ST
TO CHILDREN SHOULD NOT BE STORED
IN CABINETS ABOVE A WALL OVEN--
CHILDREN CLIMBING ON THE OVEN
TO REACH ITEMS COULD BE SERIOUSLY
INURED.
" Never wear loose-fitting or hanging garments
while using the appliance. Be careful when
reaching fi)r items stored over tile (wen.
Flammable material could be ignited if
brought ill contact with oven heating
elements and may cause severe bm'ns.
" Do not heat unopened food containers.
Pressure could build up and tile container
coMd bm_t, causing an is_jurv.
* Keep the oven vent unobstructed.
" Place the oven shelf in the desired position
w_e the oven is cool. If shelves must be
handled when hot, do slot let pot holder
contact tile heating elements.
"Never leave jaxs or cans of fat drippings in
or near your oven.
, Pulling out the shelf to the shelf stop is a
convenience in tiffing heavy foods. It is also
a precaution against burns fl'om touching
hot sm_fhces of tile door or oven walls.
, When using cooldng or roasting bags in the
oven, lbllow tile manufimmrer's directions.
" Do not use your oven to dry newspapers.
If o\ erheated, they call catch on fire.
" Do not use oven for a storage area. Items stored
in an oven can ignite.
, Do not leave paper products, cooking utensils
or food in the oven when not in use.
, Do not allow anyone to climb, stand or hang
on the door. They could damage tile oven or
cause severe pers(mal il_jury.
" Use only dry pot holders--moist or damp pot
holders on hot sm'thces ma\ Iesult in burns
fl'om steam. Do not let pot holders touch oven
heating elements. Do not use a towel
or other bulky cloth.
, After broiling, always take the broiler pan out
of the oven and dean it. Lettover grease in tile
broiler pan call catch fire tile next time you use
tile pan.
, Stand away from the oven when opening the
oven door. Hot air or steam which escapes can
cause bm'ns to hands, fi_ce and/or eves.
, Large scratches or impacts to glass doors can
lead to broken or shattered glass.
SEI_ r -CLEANING OVEN
" Do not clean the door gasket. Tile door gasket
is essential fi)r a good seal. Care should be
taken not to rub, damage or move tile gasket.
" Do not use oven deaaaers. No comm ercial
oven cleaner or oven liner protective coating
of any kind should be Hsed ill or aroHlld any
pail of tile oven. P.esidue fl'om ovell cleanel_
will damage tile inside of tile o\en when tile
serf-clean cycle is used.
" CleaJa only parts listed in this Owner's Manual.
, Before self-clem_ing the oven, rein ove the
broiler pan, grid and ()tiles" cookware.
" Be sure to wipe up excess spillage before
staxting the self-deaning operation.
" If the self-clemning mode maJfunctions, turn
the oven off and disconnect the power supply.
Have it sesMced by a qualified technician.
SAVE THESE INSTRUCTIONS
Page 6

Features of Your Wall Oven
I.l_lll Ove*_
Design
inJbrmation
(NO1 all fbal*_r_<s
are o_ all models.
4ppeara_ce may vao,.)
®
.....7................... 5
®
@ IIII
® IIIIIIW
®
®
@
®
®
@
®
@
Feature Index Page
1 Oven Shelves with Stop-Locks 5, 16, 19, 26, 33, 36
Two additio_tal shdve* may b_ orde_vd. Pub No. 3-A014
2 Roasting Rack 25, 33, 36
3 Broiler Pan and (;rid 5, 17, 18, 23, 25, 33, 37
4 Probe D@e_tdi_tg on your ove_4 the probe outld will be located 22, 24, 28, 33, 38
i_t the oven wall or ceili_tg:
5 ()tli4et Shelf (on some mode£) 25, 26, 34, 36
6 Oven Light Pad (s) Lel,_ you rural the ove_t ligt_t on a_d q[]_ 13, 33
D_'pe_di_g" on your ove_4 the ove_ [ig'ht will be located i_ the oven wall or ceili_g'.
7 Oven Corer®l, Clock and Timer 7-12
8 Oven _'m Grille 5
9 Amomatic Oven 15ght Switch (on some models)
10 Oven Shelf Supports Sh_(/ po,_itions a_, sug;,_>_ted in the Cowvection Cooki)_g; 16-19, 25,
Bahing or Roasti) N"a)_d Broili)_g section,s. 26, 28, 34, 36
11 Removable ()_en Floor 37
12 15/1-()ff ()_en Door wilh Broil Stop Position 18, 35, 36
13 Oven Door Gasket 5, 36
14 Convection Fan and Ileating Element @erat(_ during co_rvectio_ cooking: 25-30
15 Oven Broil Elemeni 18, 37
16 Automatic ()_en Door I,atch 33, 34
17 Oven _'m 5
Page 7

Oven Control, Clock & Timer
14%II Oven
BAKI
?
Doubleovencontrolshown.(Appearancemayvary.)
l' atures of
yO_Llr O_CTI
control,
clock and
timo
1 BAI_]. Press to select the bake flmction. 9
2 BROIL HI/LO. Press to select the broil
fimction. 10
3 CONVECTION BAKE. Press to select
baking with convection.
11
4 CONVECTION ROAST. Press to select
roasting with convection.
5 PROOE Press to select a warm environment
useflfl for rising )east-leaxened products. 12
6 START. Must be pressed to start anv
cooking or cleaning flmction.
7 DISPLAY. Shows the operations you have
selected, the time of day and the cooking
or cleaning status.
If "F mad a number or letter" flash in the
display and the oven control signals, this
indicates fimction error code. Press the
CLFAR/OFF pad. Mh)w ()veil to cool for
one hour. Put the oven back into operation.
If flmction error code repeats, disconnect
power to the oven and call for service.
8 OVEN LIGHT ON/OFE Press to turn the
oven lights on or off.
13
14
15
16
PROBE. Press when using the probe to
cook fl)od.
SELF CLF._q. Press to select the self
cleaning fimction. See the Using the
SeltLCleaning Oven section.
DELAY START. Use ahmg with the
COOK TIME or SELF CLFAN pads to
set the oven to start and stop automatically
at a time you select.
COOK TIME. Use tot Timed Bake, Timed
Convection Bake and Timed Convection
Roast operations.
CLF, a,R/OFE Press to cancel any ()veil
operation ex(ept the clock and timer.
CLOCK. Press to enter the time of day.
NUMBER PADS. Use to set anv flmction
requiring numbers--for example, the time
of day on the clock, the timer, the oven
temperature, the internal fi)od teml)erature,
the starting and length of cooking time for
Timed Bake and the starting and length of
cleaning time for Sell=Clean.
TIMER ON/OFF. Press to select the timer
flmction. The timer does not control oven
operations. The timer can time up to
9 hours and 5(.) minutes.
7bnes The control has a series of tones that will
sound at different times. These tones may
st)lind while vou set the control for an oven
flmction or at the end of the oven function.
They will also alert vou when an incorrect time
or temperature has been entered or if there
is a problem with the oven.
When vou press a touch pad you will hear a
beep. This beep will let you know you have placed
enough pressure on the pad to activate it.
When vou set an oven temperature the
oven automatically starts to heat, When the
temperature inside the oven reaches vour,
set temperature a tone will sound to let you
know to place the tood in the oven.
An attention tone will sound if vou set an
invalid flmction or try to set an additional
flmction. The tone can be quickly identified
by watching the display messages.
Page 8
Oven Control, (;lock & Timer
H% II Ove_
Clock
The c[od_ must be svt /br the atttomatic oven liming"
,/Um:tio,s to work p_vperly.
The time of day clock cmmot be changed
during Delay Start. (It can be changed during
a regular bake or broil operation.)
7b set
the cloch
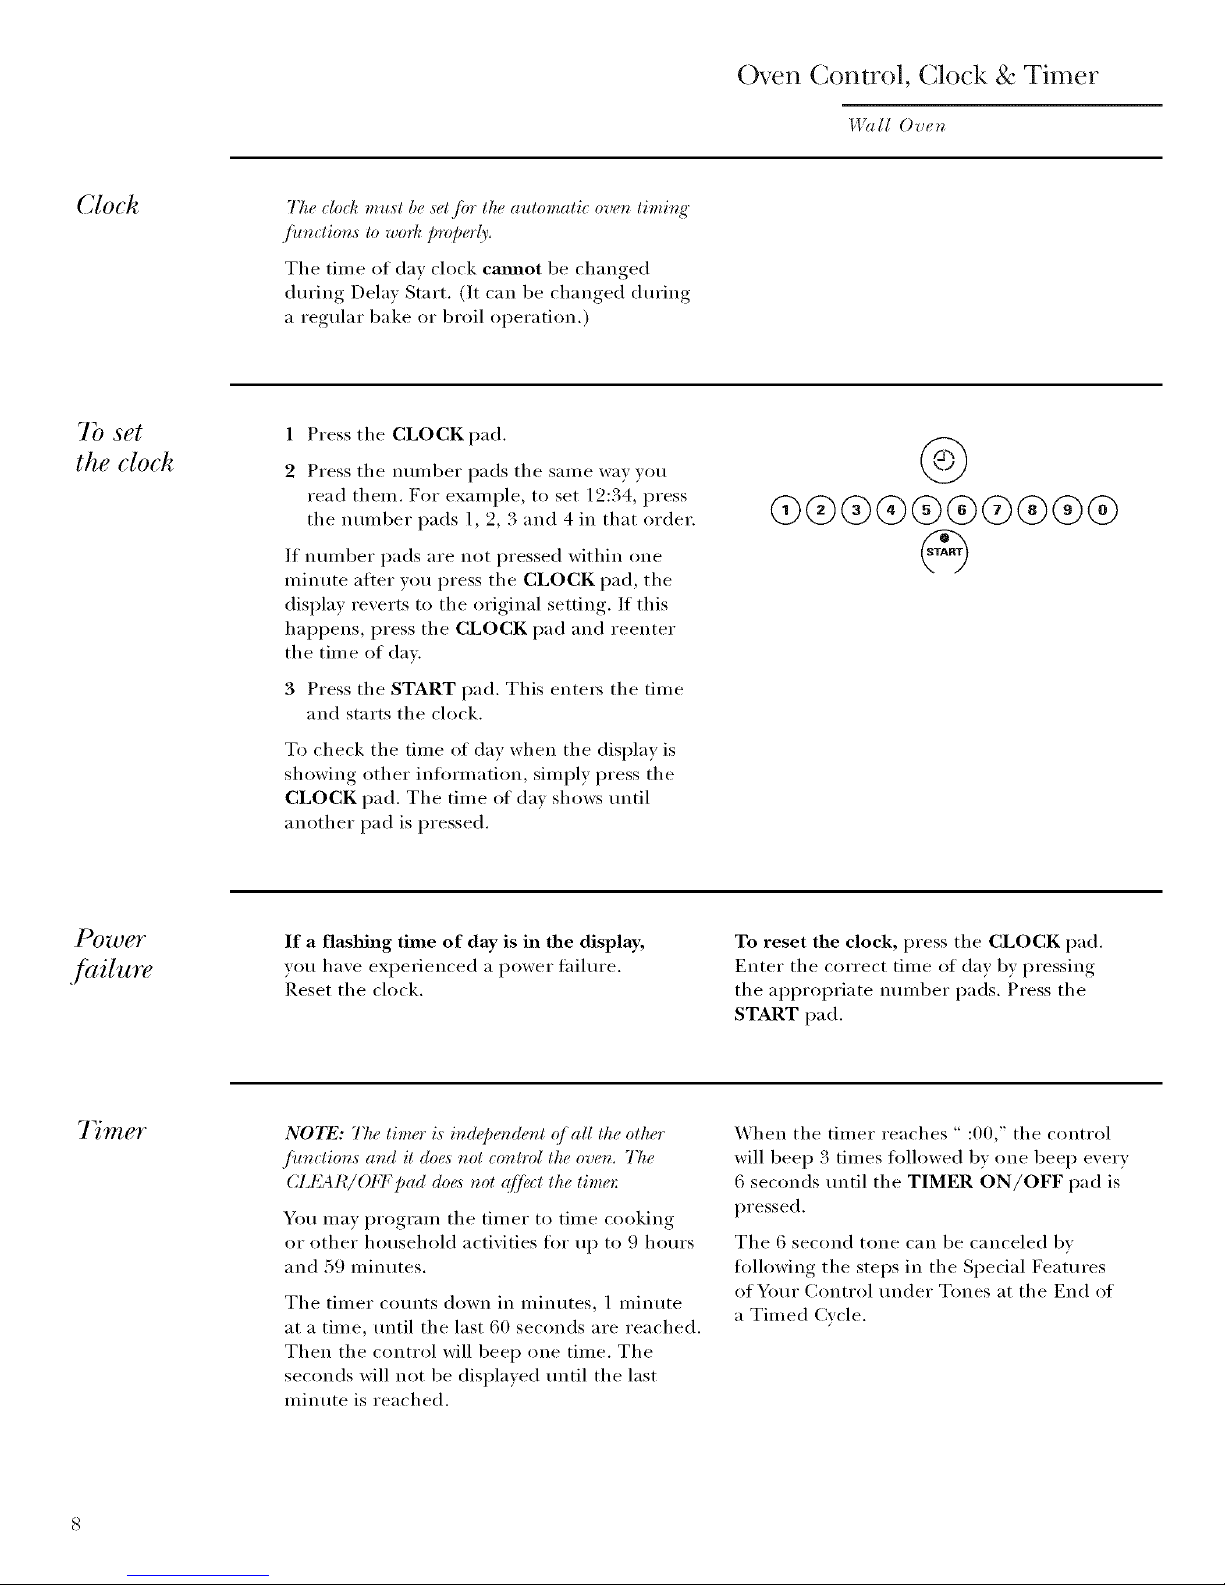
1 Press the CLOCK pad.
2 Press tile nulnber pads tile sanle way you
read them. For example, to set 12:34, press
the number pads 1, 2, 3 and 4 in that order.
If nunlber pads are not pressed within (me
minute atier you press tile CLOCK pad, tile
display reverts t() the ()riginal setting. If this
hal)pens, press the CLOCK pad and reenter
the time of day.
3 Press tile START pad. This ente_ tile time
and starts tile clock.
To check tile time of day when tile display is
showing other infl)rmation, simply press tile
CLOCK pad. Tile time of day shows tmtil
another pad is pressed.
4)
q9®®®®®@®®®
If a flashing time of day is in the display,
you have experienced a power tailm'e.
Reset the clock.
To reset the clock, press tile CLOCK pad.
Enter tile correct time of day by pressing
the ai)i)ropriate nmnber pads. Press tile
START pad.
7 mer
NO_I_: The timer is in@e,&nt q]all the other
./ioz_tions and it doe,_ not _onl*_>lthe oven. The
CId_L41¢/OFF Dad doe,_ not q]fiu:t the time*'.
You may program the timer to time cooking
or other household activities fl)r up to 9 horn's
and 59 minutes.
Tile timer co/mts down in minutes, 1 minute
at a time, tmtil the last 60 seconds are reached.
Then the control will beep one time. The
seconds will not be displayed tmtil tile last
minute is reached.
When tile timer reaches " :00," tile control
will beep 3 times fl)llowed by one beep every
6 seconds tmtil tile TIMER ON/OFF pad is
pressed.
The 6 second tone can be canceled bv
tollowing tile steps in tile Spedal Features
of Your Control under Tones at tile End of
a Timed Cycle.
Page 9

Oven Control, Clock & Tinier
I,DIll Ove_
Using
the timer
1 Press the TIMER ON/OFF pad.
2 Press the nmnber pads to set the time, For
example, to enter 2 hours and 45 minutes,
touch 2, 4 and 5 in that order.
ff you make a mistake, p_v,_sthe TIMER ON/OI:F
Dad aud b_q4u ag'ain.
3 Press the START pad.
After pressing the START pad, "SET"
disappears; this tells you the time is cotmting
down, although the display does not change
tmtil one minute has passed.
4 When time is up, the oven control signals
until you press the TIMER ON/OFF pad.
Display then shows the time of day.
N07_: The miracle timer is iu@er_(leut q/ all the
other /ituctior_,s aud it doe,_ uot cout_ol the oveu.
75e (ZI{A I¢/OFF Dad do+,,_not <(]fi+ctthe tim+,_:
@
O)®®®®®Q®®®
Special
./eatures 4
yOUY O7)eTt
control
_bur new touch Dad control has additional fi_atlm, s
that you may _hoose to use.
They remain in the control's memory m_til the
steps are repeated. When the display shows
your choice, press the START pad. The special
fl_atures will remain in memory aiter a power
fhilure, except fi)_ the Sabbath ieature, which will
have to be reset.
The special feature modes can onl_ be activated
_hile the displa? is sho_ing the time of da?
clock.
The following are the features and how you
ma? activate them.
7bnes at
the end of a
timed cycle
At the e_zd q/ a timed O'cle, 3 shorl be@s will
sound fidlowed by one be@ every 6 seconds uutil
the CIJ_AI¢/OFF pad is pres_sed. Thi,s _ontinuous
6 second beep may be _ance#d. 7b camel the
6 seco_zd beep:
Press the BAKE and BROIL HI/LO pads
(on double oven models use the upper oven
controls) at the same time fiw 3 seconds tmtil
the display shows "SF,"
Press the TIMER ON/OFF pad. The display
shows "CON BEEP" (continuous beep). Press
the TIMER ON/OFF pad again. The display
shows "BEER" (This cancels the one beep
every 6 seconds.)
3 Press the START pad.
NOTE: Or_ double ove_ models lhis cam:el,_ lhe e,d o/
qycle lor_e fia" bolh ove_,s.
@
Page 10

Oven Control, Clock & Timer
Wall Ove_
12 hour
shut off
With this fi_ature, shouhl you fi.]q_4 and leave the
oven oz_, the _ontrol will automati_ al(_' turn q[] the
oven qfler 12 hours duvir_g" bakiz_g'Junctioz_,s or ((]h,"
3 hour,s durir_g" a broil Junction. ([you wish to turz_
off this .ficature, .fidlow the steps below.
1 Press the BAKE and BROIL HI/LO pads
(on double oven inodels use the upper oven
controls) at the same time for 3 seconds tmtil
the display shows "SK"
2 Press the DELAY START pad tmtil "no shdn"
(no shut-oil) appears in the display.
3 Press the START pad to activate the no
shut-off and leave the control set in this
special featm'es mode.
NOTE: On double oven moch,L_thi,_ a_livale,s lhi,s
@ecial fi,ature ir_ both ove,,_.
@
Cook &
hold
}_ltr new control ha,s a cook and hoh/ fi_ature that
keeps coohed fi_o& warmJbr up to 3 hours qfler the
co&i_N'Jit,ction is fini,_hed. 7_ activate thi,Lfi_atlm,,
.iblh_w the ste/),_ bdow.
On double oven models, both ovens tollow the
same step 1. Then proceed with steps 2 through
3, using the pads tot the upper or lower oven.
1 Press the BAKE and BROIL HI/LO pads
(on double oven models use the upper oven
controls) at the same time fl)r 3 seconds tmtil
the display shows "SF,"
2 Press the COOK TIME pad. The display will
show "Hld OFI_2''
Press the COOK TIME pad again to activate
the ligature. The display will show "Hld ON."
Press the START pad to activate the cook
and hold feature and leave the control set in
this special features mode.
10
Page 11

Oven Control, Clock & Tinier
I_1ll Ove_
12 hour;
24 hour
or clock
black-out
}}mr control is set to use a 12 hour clock. (]you
would p_,Ji_r to have a 24 hour military time dock or
black-out the dock di,s])lay, ./bl/ow lhe slep,s below.
1 Press the BAKF and BROIL HI/LO pads
(on double oven models use the upper oven
controls) at the same time fi)r 3 seconds tmtil
the display shows "SK"
2 Press the CLOCK pad once. The display will
show "12 hr." If this is the choice you want,
press the START pad.
Press the CLOCK pad again to change to the
24 hour military time clock. The display will
show "24 hr." If this is the choice wm want,
press the START pad.
Press the CLOCK pad again to black-out
the clock display. The display will show
"OFF." If this is the choice you want,
press the START pad.
NOTE: I]llu" _lod_ is in th(, blaJ¢-oltl _llo(le)'ou trill
nol be ab# to u,s_:lhe Del(O' Start[Unction.
Control
lockout
}_mr control will allow you lo lod¢ down the touch
pads so th_9' _annot be a_tivated when pre,s_sed.
1 Press the BAKE and BROIL HI/LO pads
(on double oven models use the upper oven
controls) at the same time tot 3 seconds tmtil
the display shows "SK"
2 Press the SELF CLEAN pad. The display will
show "I,OC OFE"
Press the SELF CLEAN pad again. The
display will show "I,O(Z"
3 Press the START pad to actiw_te the control
lockout feattu'e and leave the control set in
this special featm'es mode.
To tmlock the control, repeat steps 1 and 2.
Press the START pad when the display shows
"I,OC OFE"
_hen this feature is on and the touch pads are
pressed, the control will beep and the displa)
will show "I,OC."
N07_:
• Or_ double ove_ model,_ lhis aclivales lhis Special
,/i,ature /br both ove_s.
• 77ze cor_lml lockoul mode will r_ol @el lhe
(J_OCK, TIMER ON/OI+7; a_d OIT_N LIGHT
ON/OFF tol_ct_ pads. 11
Page 12
Oven Control, Clock & Timer
_,lOlll Oven
f_threnheit
or Celsius
temperature
sdection
Your oven eonlrol i,s sel lo use lhe Fah_wdwil
lemperalure selections, but you may (hange lifts
lo u,se lhe ( eLsiu,s seleHion,s.
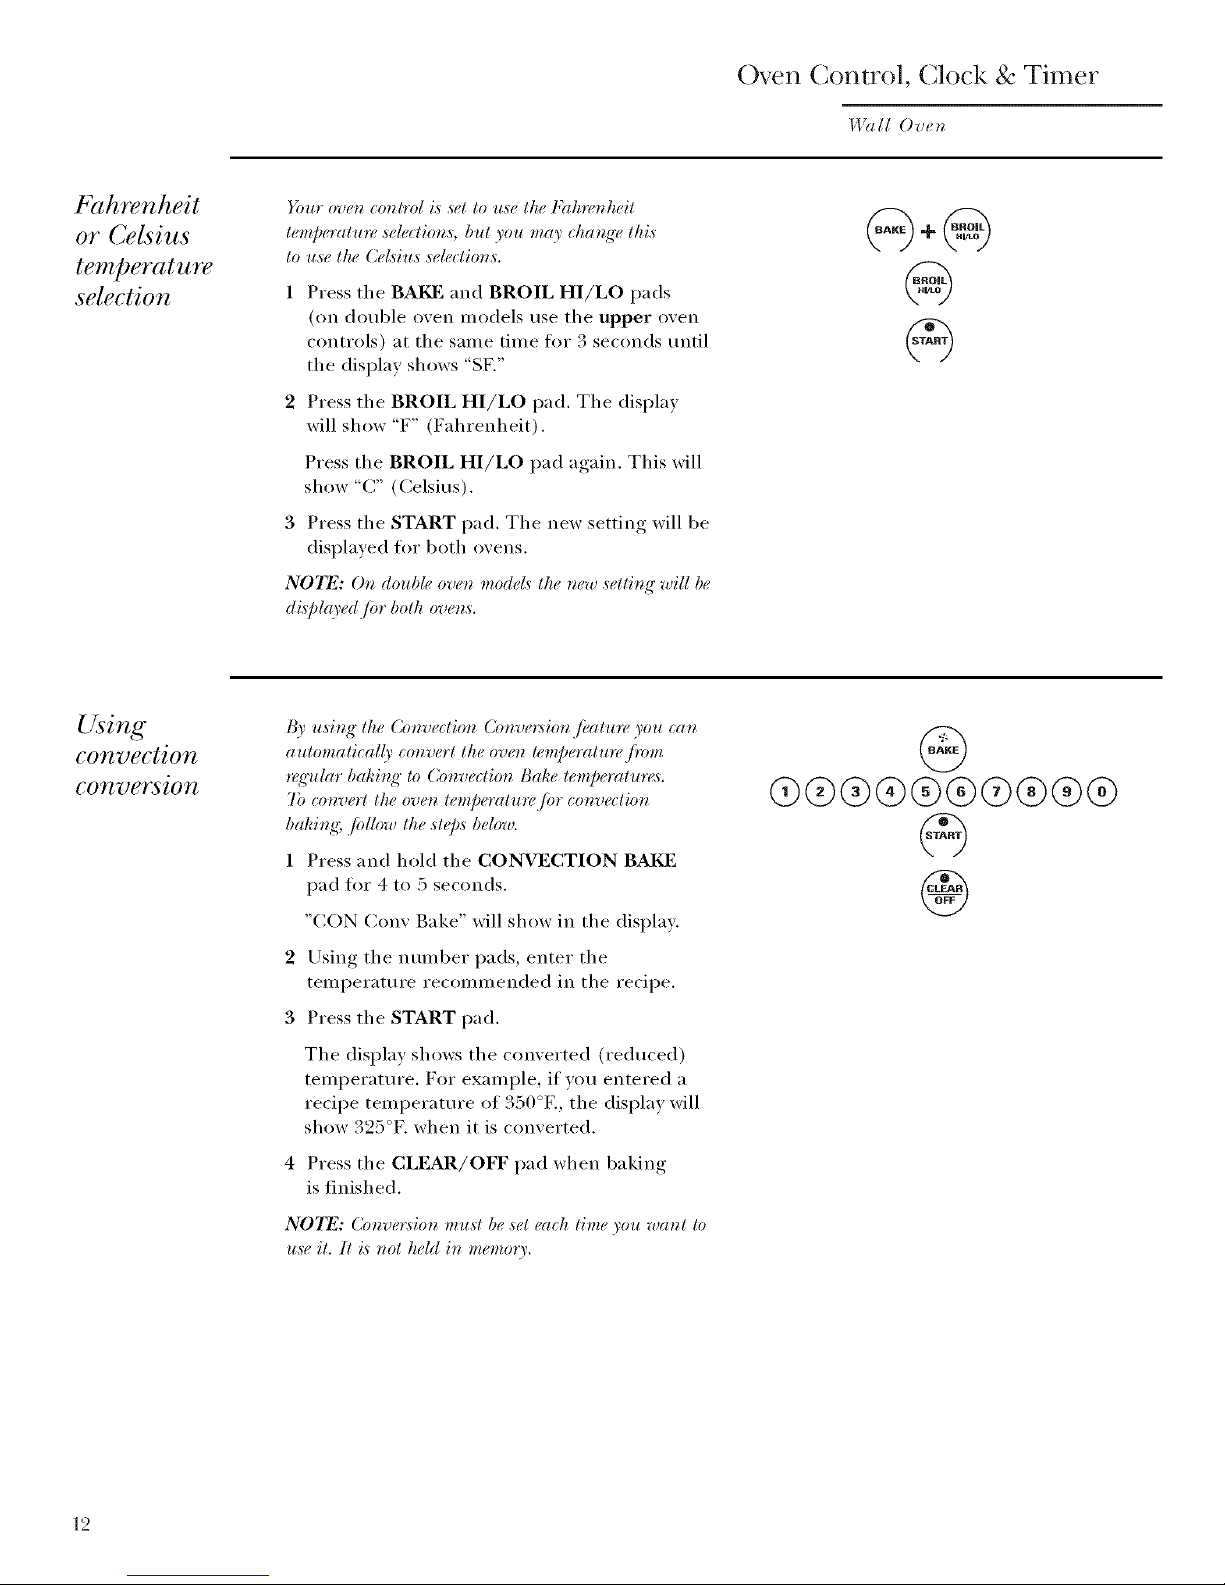
1 Press the BAKF and BROIL HI/LO pads
(on double oven models use the upper oven
controls) at the same time fi)r 3 seconds tmtil
the display shows "SF,"
2 Press the BROIL HI/LO pad. The display
will show "F" (Fahrenheit),
Press the BROIL HI/LO I)ad a_,ain This will
show "C" (Celsius),
3 Press the START pad. The new setting will be
displayed fi)r both ovens.
NOTE: O, double oven models the ,ew setting" will be
di,splto'ed Jbr both oven,s.
Using
convection
conversion
I_' using" the Convection Coaversion Jbatu_¢ you (:an
automatieal(r convert the oven lemperatlm, J)zmz
nqq'ular bakit_g" to Convection Bake temperature,_.
7b convert the oven le,zpemlu_,/br eonvedion
baking; fidlow the sle[),sbelow.
1 Press and hold the CONVECTION BAI_]
pad fl)r 4 to 5 seconds.
"CON Cony Bake" will show in the display.
2 Lrsing the nmnber pads, enter the
temperature recommended in the recipe.
3 Press the START pad.
The display shows the converted (reduced)
temperatm'e. For example, if you entered a
recipe temperature of 350°E, the display will
show 325°K when it is converted.
Press the CLEAR/OFF pad when baking
is finished.
NOTE: Conve_:sion mu,d be ,set each time you want to
u,se it. li is nol held in memory.
@
@@@®@@@@@@
@
12
Page 13

Using the Sabbath Feature (,,,,sortienlodels)
1.19111Oven
Desig_£d for use on theJewish Sabbath and Holidays.
77w Sabbath fieatlm, _a_ be used for bakin@roastinq',,
o_@. It camwt be u,sed fin' com_ectio_, broiling;
self.(leatfin_', or Delay Start cookit_:
NO'I_: TIm ov_'t_[{@t _omes on automatiudly (on
some mode£ ) w/u,n t/u, door is (q)(,m_da_d <g<u'sqff wken
the door is dosed. The bldb m(O' /wrem(_ed. &,e the O'u(_z
L{qllt IO,/)[aceme*ztsectiot_. On mo(lek with a [{@t switch
on th,_comrol p(md, the ou_z /iql_t m(O,be tu*wed on
Sabbath
f ature:
How to set
Jbr regular
baking or
roasting
Make sure the clock sko'ws the correct time (j day and
the ove_ is OFE
1 Press and hold both the BAKE and BROIL
HI/LO pads, at the same time, until tile
display shows "SF'.
NOTE: Ij /mke or t)*vil appea*:_ in the display,
the BAKE and BROIL HI/LO pads were not touched
at the same time. 7bluh the CLEAR/ObT pad and
b,_ffin agzfin.
2 Tap the DELAY START pad tmtil
"SAb bAtH"appears in the display.
3 Touch tile START pad and D will appear
in tile display.
4 Touch tile BAKE pad. No signal will be
given.
5 Using tile number pads, enter tile desired
temperature between 170 ° and 550 °.
No signal or temperature will be given.
6 Touch tile START pad.
7 Af*er a random delay period of
approximately 30 seconds to 1 minute,
D c will appear ill the display indicating
that the oven is baking/roasting. If D C
doesn't appear in tile display, start again
at Step 4.
To a@ust tile oven temperature, touch tile
BAKE pad, enter tile new temperature using
the number pads, and touch the START pad.
NOTE: The CLEAR/ObT at_d COOK TIME pa(Is
a*_,active durb_g" the Sabbath fi, atlm,.
@
03@@@@@@@@@
When the display shows P the oven is
set in Sabbath. When the display shows
D C the oven is baking/roasting.
13
Page 14

Using the Sabbath Feature to. somemodels)
14%dlOven
Sabbath
f_ature:
HOw to set /br
timed baking
or roasting--
immediate start
and automatic
stop
_:\lake su rt_ the clod¢ sho'ws the corr_ct time o/ &O' and
the oven is OFI<
1 Press and hold both the BAKE and BROIL
HI/LO pads, at the same time, until the
display shows "SF'.
NOTE: (/ bake or broil a[)pea*:s in the (lis])[(O',
the BAKE and BROIL HI/LO [a(Ls "we**,not touched
c_tthe same time. 7bluh the CLEAR/OIb\F pad and
b<ffin again.
2 Tap the DELAY START pad tmtil
"SAb bAtH" appears in the display.
3 Touch the START pad and D will appear
in the displa>
4 Touch the COOK TIME pad.
5 Touch the nmnber pads to set the desired
length of cooking time between ] minute
and 9 hours and 99 minutes. The cooking
time that wm entered will be displayed.
6 Touch the START pad.
7 Touch the BAKE pad. No signal will be
given.
8 Using the number pads, enter the desired
temperatm'e. No signal or temperature will
be given.
9 Touch the START pad.
10After a random delay period of
approximately 30 seconds 10 ] minute,
D c will appear in the display indicating that
the oven is baking/roasting. If D C doesn't
appear in the display, start again at Step 7.
To a_!just the oven temperatme, touch the
BAKE pad, enter the new temperature using
the nmnber pads, and touch the START pad.
When cooking is finished, the display will
change flora D C to D and 0:00 will appear,
indicating that the oven has turned OFF but is
still set in Sabbath. Remove the cooked ibod.
@+@
@
@
@@®®®®@®®®
@
When the display shows m the oven is
set in Sabbath, When the display shows
D C the oven is baking/roasting.
14
Page 15

Using the Sabbath Feature Ionsomemodels)
I,l?dl Oven
How to exit
the Sabbath
./kature
1 Touch the CLEAR/OFF pad.
2 If the _wen is cooking, wait for a random
delay period of approximately 30 seconds
to I minute, until only D is in the display.
3 Press and hold both the BAKE and BROIL
HI/LO pads, at the same time, until the
display shows "SF".
4 Tap the DELAY START pad tmtil
"12 shdn" or "no shdn" appears in the
display. "12 shdn" indicates that the oven
will automatically turn off Mter 12 hours.
"no shdn" indicates that the oven will not
automatically tm'n off.
5 Touch the START pad.
NOTE: lj a power outag'e occurz*,d whi& the oven
was in Sabbath, the oven will automatically turn q/j
and stay o/] _g_enwhen the power *_,turns. The ov_n
_ontrol must be *_,set.
@
@
15
Page 16

Baking or Roasting
Wall Ov_,_
Be/bre you
begin...
7b avoid possible burr_,s, place the sheh_.,_ in
the d¢,_bvd position b@_v you turn the over_ or_.
The shelves have stop-locks, so that when
placed correctly on the supports, they will stop
befl)re coming completely out, and will not tilt.
When placing and removing cookware,
pull the shelf ()tit to the bump on the
sh elf suI)port.
To remove a shelf, pull it toward you,
tilt the fl'ont end up and pull it out.
To replace, place the end of the shelf
(stoi>locks) on the sui)port, tilt up the
fl'ont and push the shelf in.
The oven has 4 shelf positions.
®
©
®
®
How to set
the oven jot
bahing or
roasting
1 Press the BAI_, pad.
2 Press the number pads to set the desired
temperature.
3 Press the START pad.
4 Check food for doneness at minimum time
on recipe. Cook longer if necessary.
Press the CLF&R/OFF pad when cooking
is complete.
NOTE: A cooli*_g'/?m may automatically tltr_z on arid
(ffj to cool interr_al parl,s. 75is is _zormal, and the tim
may continue to run even @r the oven is turr_ed (ffJ2
Type of Food Shelf Position
Frozen pies Bor C
(on cookie sheet)
Angel tb_l cake, A
bun(it or potmd cakes
Bisctfits, muflins, Bor C
[)l'O'_,llies,cookies,
cupcakes, layer
cakes, pies
Casser_les Bor C
©
®
®
1{5
Page 17

Baking or Roasting
W(dl Ove_
P, heating
and pan
placement
Preheat the oven if the recipe calls flw it. To
preheat, set the oven at the correct temperature.
Preheating is necessary fl)r good results when
baking cakes, cookies, pastry and breads.
For oyezes without a p*_,heat bzdicator li,gT_to*'ton_;
Baking results will be better if baking pans are
centered ix* the oven as much as possible. Pans
should not touch each other or the walls of the
oven. If you need to use two shelves, stagger the
pans so one is not directly above the other, and
leave approximately 1½" between pans, fl'om
the front, back and sides of the wall.
Aluminum
bil
You can use ahmfilmm loft to line the broiler
pan and broiler grid. However; you must mold
the foil tightly to the grid and cut slits in it just
like the grid.
Alumi*mm fifil may al,_o Iw u,_ed to catch a spillove_:
Never entirely cover a shelf with aluminum foil.
This will disturb the heat circulation and result
in poor baking.
A slnaller sheet of foil inav be used to catch a
spillover by placing it on a lower shelf several
inches below the food.
Cut slits in the foil just like the grid.
17
Page 18

Broiling
_,I_lll Oven
How to set
the oven jbr
broiling
1 Place the nleat or fish on the broiler grid in
the broiler pan.
2 Follow suggested shelf positions in the
Broiling Guide.
I/your oven is _onnecled to 208 voll,_, rare steaks may
be b_viled IO'p_whealiz_g"the broiler and po,sitionir_g" the
oven she(lone po,sition h_ffhct:
3 Press the BROIL HI/LO pad once tot HI
Broil.
To change to LO Broil, press tile BROIL
HI/LO pad again.
4 Press tile START pad.
5 When broiling is finished, press tile
CLEAR/OFF pa d.
NOTE: Broil will r_ot work !] the Icmpe_vllure probe i,_
plug_q_,din.
Leavethe door open to the broil stop position.
The door stays open by itself, yet the proper temperature
is maintained in the oven.
18
Page 19

Broiling
I:1% II Ove_
Broiling
guide
Quantity and/ Shelf First Side Second Side
Food or ThicM_ess Position Time (mln.) Time (mln.) Comments
Ground Beef 1 lb. (4 l)mtit_s) C 10 7 Space exenly. Ep to 8 p_mit_s rake
Well Done 1/2 to 3/4" thick _d)out the '_alne time.
Beef Steaks
Medium
"_\k,ll I)one
Medium
_,\kql I)one
1" thick
1 to 1½ lbs.
1_" thick
2 to 2_ IDa.
C
C
C
C
C
C
6
8
12
10
15
25
5
6
11
7-_
14-16
20-25
Ste_lks less than 1" thick cook
through below browning. Pml
fl-ying is l-_,commen(led.
Slash tht.
Chicken 1 whole A 35 10-15 Reduce time about 5 to 10 lninmes
2 to 2½ lbs., per side ti)l cut-up chicken.
split lel_gthwise BItM_ each side with lnehed ImtteL
Broil skin-side-down first.
Lo_ter Talk 2-4 B 13-16 Do llOt Gilt through back ol shell. Spwad
6 to 8 oz. each tt/lll ox el. open. t_,lush with nlehed I)utter
betol-e bloiling and after half ot
bl oiling time.
Fish Fillets 1/4 to 1/2" thick C 5 5 ttandle alld t//l-ll "_el_,, calcthllv.
Brush with lemon butter belble
and dtuing cooking, if desired.
Preheat broiler to increase bl_wning.
Ham Slk:es 1" thick P, 8 8 Iilcl-(,a,_e tillle 5 tO 10 millt/tes per side
(precooked) for 11½"thick or honle-cured ham.
Pork Chops 2 (1/2" thick) (i 10 10 Slash tht.
_,\k*ll Done 2 (1" thick) about 1 lb. B 1 !3 1!3
Slash tht.10
12
14
17
C
C
C
B
Lamb Chops
Medium
_,\k*ll I)one
Medium
_,\k*ll I)one
9
1t)
12
12-14
2 (1" thick)
about 1(1to 12 oz.
2 (1½" thick)
about 1 lb.
19
Page 20

Timed Baking
I19111 Ovet_
Using the
timed baking
and roasting
./eatures
N07N: lq)o& that spoil t,asil3', sueh as milk, t't,(gs,
.fish, stl{/.fir_<_s,poultry and pork, sholdd not be
alNwed to sit fin too*t" than l hour b@*_, or ({tier
eookit_g: Room temperature p*omotes the ,¢towth o/
harm/hi baeleria. Be sure that the oven ligg_tis ()ff
beeause heat/ram the bun will sped ha*'m/id bacteria
,_'ro'wth.
On double oven models, you call use timed
baking ill one oven while using selfZdean ill tile
other; you can also use timed baking in both
()veils at tile same time.
How to set
an immediate
start and
automatic
st@
Tke oven will turr_ on immediately and eooh Jbr
a sdeeted l(%g¢h (iftime. At the end o/the eooki*_g"
time the oven will turr_ qff alttomatieal@
Make sure the oven ch)ck shows the correct
time of day.
1 Press the BAKE pad.
2 Using the number pads, enter the desired
ten_perature.
3 Press the COOK TIME pad.
NOTE: IJ),our n,_ipe n,quire,_ prekeatit_g; you mc9'
need to add additional lime to the lengCh q/the
eookit_g" lime.
4 Using the number pads, enter the desired
baking time. The oven temperature and
the cooking time that you entered will be
displayed.
5 Press the START pad.
The display shows the oven temperature
that vou set and the cooking time countdown.
(The display starts changing once the
temperature reaches 100°E)
NOTE: Or_ double oven models wker_ usir_K botk
ovens at the same tim6 the limes showb_ K in the
display will be/or the last oven ,s_¢t.7b display the
time set/or the fit:st oven s_,t; press the (;()OK TIME
pad.lot that oven.
The oven will continue to cook ti)r the
programmed amount of time, then shut off
a utomaticallv:
Press the CLEAR/OFF pad to clear the display.
Q®®®®®@®®@
@
@®®®®®@®®®
@
2O
Page 21

Timed Baking
1,19111Ovet_
How to set
a delayed
start and
automatic
stop
}bu can set lhe oven control to delay-slavt the ovet_,
_oo/,b, ..,p_<,!/i_#.g_h (_/ti,,_.._,(/ the<,,t,.._, (_/f
aulomatical@
Make sure the oven clock shows the correct
time of day.
1 Press the BAKE pad.
2 Using the number pads, enter the desired
temperature.
3 Press the COOK TIME pad.
NOTE: {/)'our recipe require,_ p*_,heatir_g; you may
m_ed to add additional time to the h%e,'lh (_/ the
coohb_g" time.
4 Using the number pads, enter the desired
ba king tim e.
5 Press the DELAY START pad.
6 [.rsing the number pads, enter the time of
day you want the oven to tm'n on and start
cooking.
7 Press the START pad.
N07_: Ar_ atter_tior_ tone will soured !/you a*_:usit N"
tired bakb N"and do not p*_s:s the $73 RT pad ({tier
enlerb_ K lhe bahir_g" lempemtu_.
If wm would like to check the times you have
set, press the DELAY START pad to check the
start time you have set or press the COOK
TIME pad to check the length of cooking time
you have set.
When the oven turns on at the time of dav wm
have set, the display will show the changing
temperature (starting at IO0°K) and the
cooking time countdown.
NOTE: On double oven mode5 when u,sb_q"both
oven,_ at the same time, the time,_ ,_howi_" in the
display will be /br the lasl oven ,s_t. 7b display the
lime set /br lhe /b:st oven s_t, p_,_s the DELAY
$7;4 RT pad to che(k the slarl lime you have s_,lor
pre,_sthe ( OOK TIME pad to check the #r*g'lh _]
_ookir_K time you have set.
At the end of timed baking, the oven will mrn
off. The end of cycle tone will sotmd.
Press the CLEAR/OFF pad to clear the display.
@@®®®®Q®®@
@
Q@®®®®®®®®
@
Q@®®®®@®®®
21
Page 22

Using the Probe
I.l?lll Ove_
7kmperature
probe
NO_I_: Double oven model,s have a probe in the
u/Jp_r oven on@
For ninny fi)ods, especially roasts and p(mltry,
internal tood temperature is tile best test fi)r
doneness. Tile temperature probe rakes tile
guesswork out of roasting by cooking fi)ods to
tile exact doneness vo/i w[ln{.
Use of probes other than tile one provided with
this product mav result in damage to tile probe.
Use tile handles of tile probe and plug when
inserting and removing them from tile meat
and outlet.
• To avoid damaging your probe, (1(7not use
tongs to pull on tile cable when removing it.
• To avoid breaking tile probe, make stlre tood
is completely defl'osted befl)re inserting.
• To prevent possible burns, do not unplug
tile probe fl'om tile outlet until tile oven
has cooled.
• Ne'_er lea'_e }our probe inside tile o'_en
during a seltXcleaning cycle.
• Do not store tile probe in tile o_en.
_._ Cable
Plug 1{ 11
Handles
The temperature probe hasa skewer-like probe at one end and a
plug at the other end that goes into the outlet in the oven.
22
Page 23

Using the Probe
I.l?lll Oven
I_l'OpgT
placement
(the probe
After preparing the meat and placing it on
a trivet or on the broiler pan grid, tollow these
directions tot proper probe placement.
1 i,ay the probe on the outside of the meat
along the top or side and mark with your
finger where the edge of the meat comes to
on the probe. The point should rest in the
center of the thickest meaty part of the roast.
2 Insert the probe completely into the meat.
It should not touch the bone, tat or gristle.
For roasts with no bone, insert the probe into
the meatiest part of the roast. For bone-in ham
or lamb, inse_t the probe into the center of the
lowest large m uscle or joint.
Insert the probe into the center of dishes such
as meat loaf or casseroles. When cooking fish,
inset_t the probe fl'om just above the gill into
the meatiest area, parallel to the backbone.
Insert the probe into the meatiest part of the
inner thigh fl'om below and parallel to the leg
of a whole turkev.
23
Page 24

Using the Probe
I.l?lll Oven
How to set
the oven jar
roasting
when using
the probe
1 Insert the i)robe into the n/eat.
2 Phlg the i)robe into the outlet in the oven.
Make sure it is i)ushed all the way in.
Ch)se the oven door.
3 Press the PROBE pad.
4 Press the nunlber pads to set the desired
internal tood or n/eat ten/i)erature.
5 Press the BAKE pad.
6 Press the nunlber pads to set the desired
()veil tell/l)erat tire.
7 Press the START pad.
The di,s]d(O' will flash !/lhe probe i,sin,serled inlo the
out#t and you have not set a probe lempe_vmtre and
pre,_,s_¢dthe ST4 RT pad,
When the oven starts to heat, the word I,O
will be in the disI)lay.
Alter the internal tenll)erature of the n/eat
reaches 100°E, the changing internal
ten/l)erature will be shown in the disl)lay.
8 _,Vhen the internal tenll)erature of the nleat
reaches the nunlber vou have set, the i)robe
and the oven turn off and the oven control
signals. To sto I) the signal, press the
CLI?L_R/OFF i)ad. Use hot i)ads to reinove
the i)robe fronl the tood. Do not use tongs to
I)ull on it--they nlight dan/age it.
To change the oven tenll)erature during the
Roast cycle, press the BAI_: i)ad and then the
nun/ber l)ads to set the new tenll)erature.
• If the I)robe is reinoved fl'onl the tood betore
the final ten/l)erature is reached, a tone will
sound and the disi)lay will flash until the
i)robe is ren/oved fl'oln the oven.
• You can use the tilner even though you
cannot rise tinled oven ol)erations.
@
Q®®®®®®®®®
q)@®®®®@®®®
®
24
Page 25

Using the (kmvection Oven
I,l?lll Oven
Convection
.fitn
hi }1 coil'_ectioil o_,eil, a _111 circulates hot air
o'_er, t/ilder }llld }li'O/llld tile food.
This circulating hot air is evenly distributed
throughout the oven cavity. As a result, foods
are evenly cooked and browned--_)tten in less
time with convection heat.
The convection jim shuts qff when the oven door is
opened. DO NOT #ave the door open,jot long" periods
o/time whi# usb_g" conve_tion _ooking" or you mr O'
shorten the l!/i¢ (the convection heating" element.
(Appearancemayvary.)
Convection
baking
Heat comes fl'om tile heating element in tile
rear of the oven. The convection tim circulates
the heated air evenly over and aro/md the food.
Preheating is not necessa_ y with foods having a
bake time of over 15 nlinutes.
• Ideal fi)r evenly browned baked fi)ods cooked
on multiple shelves.
• Good for large quantities of baked foods.
• Good results with cookies, biscuits, muffins,
brownies, cupcakes, cream pulik, sweet roils,
angel food cake and bread.
Convection
roasting
• Good for large tender cuts of meat, tmcovered.
Heat comes fl'om tile top heating element. Tile
convection tim circulates tile heated air evenly
over and around tile fi)od. Meat and poult_ T are
browned on all sides as if they were cooked on a
rotisserie. Using the roasting rack provided, heated
air will be circulated over; under and around tile
fi)od being roasted. The heated air seals in juices
quickly fi)r a moist and tender product while, at
the same time, creating a rich golden brown
exterior:
Roasts or poultt) should be cooked on tile off,set
shelf in tile lowest shelf position (A).
When you are convection roasting it is important
that you use tile broiler pan and grid and tile
special roasting rack fi)r best convection roasting
results. The pan is used to catch grease spills and
the grid is used to prevent grease spatters.
Place tile meat on tile special roasting rack. Tile
rack holds the meat. The rack allows the heated
air to circulate trader tile meat and increase
browning on tile tmde_ide of tile ineat or poultry.
• Place tile offset shelf in tile lowest shelf
position (A).
• Place tile grid on tile broiler pan and put tile
roasting rack over them making sure tile posts
on the roasting rack fit into the holes in the
broiler pan.
Roasting rack
Post
Grid
Broiler pan
Offset shelf
CAUTION:
When you are using the offset shelf inthe lowest position (A),
you will need to use caution when pulling the shelf out. We
recommend that you pull the shelf out severalinches and then,
using two pot holders, pull the shelf out by holding the sides
of it. The offset shelf is low and you could be burned if you
placeyour hand in the middle of the shelf and pull all the way
out. Be very careful not to burn your hand on the door when
using a shelf inthe lowest position (A).
25
Page 26

Using the ComTection Oven
I.l?lll Oven
You can use }our fiworite recipes ill the
COIIVeCtiOll O_ ell.
When baldng, reduce baldng temperature b} 25°K
No need to preheat when cooking, lonoer_ than
15 minutes.
Use pan size recommended.
Some package instructions for fl'ozen casseroles
or main dishes have been developed using
coI/llllercial convection 55",ells. For best I'estllts
in this oven, preheat tile oven and use tile
temperature on the package.
Multi-shelf
bahing
1,17tenconvection baking" with only l she(fl Jbflow
the she!/ positions *t,5ommengled in the Bakb_g" or
Roasti_g" section.
Because heated air is circulated evenly
throughout the oven, toods can lye baked with
excellent results using multiple shelves.
Multi-shelf baking may increase cook times
slightly tot some too(ls but tile overall result is
time saved. Cookies, m uflins, biscuits and
other quickbreads give vei T good results with
multi-shelf baking.
When baking on 3 shelves, divide the oven into
thirds by placing the offset shelf ill the third
(C) shelf position and the straight shelves ill
first (A) and fom'th (D) shelf positions.
For two-shelf baking, place the ottset shelf ill
the bottonl (A) shelf position. Place the straight
shelf ill the third (C) shelf position.
Multi-shelf position
@
©
®
Coohware jbr
convection
coohing
Before using y(mr convection oven, check
to see if v(5/li" c()()kware leaves i'ooi/l t'oi" air
circulation ill the oven. If you are baking
with several pans, leave space between then/.
Also, lye sm'e tile pans do not touch each
other or the walls of the oven.
Paper m_d Plastic
Heat-resistant paper and plastic containers that
are recoillil/ended tor rise in reg/llar ovens C}lll
lye used ill convection ovens. Plastic cookware
that is heat-resistant to temlYeratures of 400°F.
can also lye used.
Metal m_d Glass
All} t},]yeof cookware will work ill yore" conxectism
oxen. Howexer, metal pans heat tile fastest and
are rec(mm/ended for c(mxection baking
Darkened or matte-finished pans will bake
taster than shin} pans.
(;lass or cerallliC l)_lns cook ll/(Sl'e slowly.
X'_hen baking cookies, }ou will get tile best
results if you use a fiat cookie sheet instead of
a pan with low sides.
For recipes like oxen-baked chicken, use a pan
with low sides. Hot air cannot circulate well
aro/md fis(sd ill a pan with high sides.
26
Page 27

Using the Convection Oven
I,l?lll Oven
How to set
the oven./br
convection
baking or
roasting
7b avoid pos:siblt, burus, place the shehws in the
cor*_,ctposition @tim,you tu*vz on the ove_z.
1 Press the CONVFCTION BAKF or
CONVFCTION ROAST pad.
2 Press the number pads to set the desired
oven tel//perat tire.
3 Press tile START pad.
To change tlle oven temperature, press the
CONVECTION BAKE or CONVECTION
ROAST pad and then tile number pads to
set tile new temperature.
When the oven starts to heat, tlle changing
temperature, starting at lO0°K, will be
displayed. When the oven reaches the
temperature you set, 3 beeps will sound.
4 Press the CLF_kR/OFF pad when finished.
@or@
@@@@(9@@@@@
@
NO_I_:
• You will hear a/hn while co&i_g" with convectio_z.
7"hej}zn will stop when the door is ope_zed but the
heat will not tu*w q_
• You m_O' hear the ove_z clicking" duri_g" bahi_g:
This is normal
Convection
roasting
guide
Meats Minutes/Lb. Oven Temp. Internal Temp.
Beef Rib, Boneless Rib, Rare 20-24 325_K 14@K}
Top Sirloin Medium 24-28 325°K 160'K
(3 to 5 lbs.) Well 28-.32 325°K 17@K
Beef Tenderloin Rare 10-14 325°K 140°K)
Med iu m 14-18 325'K 160"K
Pork Boneqn, Bonele,v_ (3 to 5 lbs.) 23-27 325<K 170°K
Chops (1/2 to 1" thick) 2 chops 30-35 total 325'K 170"K
4 chops 35-40 total 325°K 170'K
6 chops 40-45 total 325'K 170°K
Hmn Caroled, Butt, Shank (3 to 5 lbs.) 14-18 325°K 140'K
(filll} cooked)
Lamb t{oneqn, Boneless (3 to 5 lbs.) Medium 17-20 325°K 16@K
"_\k,ll 2{t-24 325'K 170"K
Seafood Fish, whole (3 to 5 lbs.) 30-40 total 400°F.
Lobster "['nils (6 to 8 oz. each) 20-25 total 350<F.
Potdtry Whole (_hicken (2½ to 31/2lb'<) 24-26 35@K 18tP-185°K
Cornish }tens k nstuflixl (1 to 1½lb',.) 50-55 total 350'K 18@-185°K
Stuf_;.'d (1 to 1½ lbs.) 55-60 total 350'>K 18(1°-185'K
I)uckling (4 to 5 lbs.) 24-26 325°K 180°-182"/K
Turkey, whole*
L nstuft_:d (1t} to 16 lbs.) S-I 1 325°K 180°-185<K
[ nstull>d (18 to 24 lbs.) 7-10 325°K 180°-182"/K
Turkey Breast (4 to 6 lbs.) 16-19 325<K 170°K
* Stu/flcg bi_zZsgv_w_ally _.qui_. 3(_45 mi_zul¢<vadditio_*aI n_a_li_*glime. Shiehl Iq@a_d bn.axt with/oii to/m.ve_*t ovo:b_*nt,*i_*ga_zd
d_)'i_*go/_hb*.
77," {25'. l)@a) lme_*¢o/A@'icu/tu_l, segs ]{a)v be¢'Jis /_@ulm; hue 3ou vhould k_*owCha¢cooki_N it to o_d3 140'7"; ,zea_zvsome /vod
poixo_*i_*go_z(l_lixmvma)' survive." (Source: 5@, l'bod Book. );ore Kitche_z (;u£1e. { _,7)A[?_'v..]u_*e16W5.)
27
Page 28

Using the Convection Oven
I,l?lll Ovet_
How to set
the oven jot
convection
roasting
when using
the probe
CAUTION:To preventpossible burns, do
not unplug the probe from the oven outlet
until the oven hascooled. Donot store the
probe in the oven.
For be,sl re,sull,s when roa,sli*_g" larg'e lud¢ey,s and
roa,sl,s, we recommend u,sing lhe probe included in
1 Place the ottset shelf in the lowest position
(A). Insert the probe into the nieat.
2 Phig the probe into the outlet in the oven.
Make sure it is pushed all the way in.
Close the ()veil door.
3 Press the CONVECTION ROAST pad.
4 Press the nuinber pads to set the desired
oven telllpei'at tli'e.
To change the ()veil teini)eratui'e during the
Convection Roast cycle, press the CONVECTION
ROAST pad and then press the nuniber pads
to set the new desired teini)erature.
5 Press the PROBE pad.
6 Press the nuniber pads to set the desired
internal nieat teini)erature,
7 Press the START pad.
The di,q)lay will flash Iq?OI3E and the ove_ (o_Hnd
will sit€hal !/the probe i,s in,serled into the out#t, and
you have not set a probe lempemtun, and pre,_sed the
$7;4 R 7" Dad,
When the ()veil starts to heat, the word i,O
will be in the display.
Mter the internal teini)erature of the nieat
reaches 100°E, the changing internal
teini)erature will be shown in the display.
8 When the internal tenii)erature of the ineat
reaches the nuinber you have set, the probe
and tile ()veil ttli'n ()t_ and tile ()veil conti'ol
signals. To stop the signal, press the
CLF_R/OFF pad. Use hot pads to reniove
the probe froni the tood. Do not tlse tongs
to pull on it--they nIight daniage it.
g the/,*_*/)ei.,re._oved/}**.zthefi*odI<fi*retheft.a!
lempemhm, is n, aehed, a lone will sound and the
display will /la,sh until the p*vbe is removed /h*m
the oven.
@
@®®®®®®®@®
G
@®®®®®@®@®
@
NOTE:
• };<*Itwill hear afire while co&it_t_" wilh this/kature.
The /hn will stop when the door is opened bat the
heat will not tur_ (:_/:
• };<*It_an u,se the timer even lhout{'h you (alzlzol it,se
limed oven operations.
• On double oven models, you will not be able to u,s*,
the probe in the upper oven during" limed oven
operations. This is because with the probe yoa an,
eookil_t{"b3' lemDemlufe mlher lhan time.
28
Page 29

Timed (;onvection Baking
_,19111Ovet_
Using the
Jbatures./br
convection
baking
N07N: lq)o& that spoil easi(v, sueh as milh, %_s,
.fish, stl¢.fir_:&, poult O' and pod', should not be
allowed to sitjbr too*t, than l hour b@m, or qfier
eooki_g: Room tempemtu:e p*omotes the ,¢mwth _ff
harm/hl baete*'ia. Be sun: that the ovea ligg_tis ()_f
beeause heat fi_mz the bun will sped ha*'_@d bacteria
g'rowth.
On double oven models, you call use timed
baking ill one oven while using selfZclean ill tile
other; you can also use timed baking in both
()veils at tile same time.
How to set
an immediate
start and
automatic
st@
The 0yea will tur*_ on immediat@' aml eookJbr a ,s,4_,cted
l_%q_h(j time. At the eml (j the _oohir_g"6me, tlu, over_
wig tu*w (?ffautomatimlly.
Make sure the oven clock shows the correct
time of day.
1 Press tile CONVECTION BAI_: pad.
2 Press tile number pads to set tile desired
()veil tei/ll)ei'atui'e.
3 Press the COOKTIME pad.
NOTE: (],your n,eipe n:(/ui,_,,spMu, a6r_g; you mr9' _wed
to add a(hlitior_al time to tlu: le_Nlh (:f tlu: eook@g"time.
4 Press the number pads to set the desired length
of cooking time. The minimum cooking time
you can set is 1 minute.
Tile oven temperature that you set and tile
cooking time that w_u entered will be in the
display
Press the START pad.
Tile display shows tile oven mmperature that
w)u set and tile cooking time countdown. (Tile
display starts changing once tile temperature
reaches 100°E)
NOTE: On double over_ modd,s whea usir_g"both over_s
at the same time, the times sh_uir_:{"ir_tlu, disJday will be
Jbr the &st over_,s_:t.7b all,splaytlu, ti_w ,s_:tfi>rtbe fi*:st
ovea,s_:t,pn:xstheCOOK 7L\ IE pad fbr that ovea.
6 At the end d timed convection bake, the oven
will turn off. The end of cycle tone will sound.
Press the CLF_R/OFT pad to clear the display
if necessary.
7 Remoxe tile fi)od from tile oxen. Remember;
foods that are left in tile oxen continue cooking
after the controls are off.
NOTE: }bu will hear afire while eooki_g wi#_ lt_i,s
,fl:ailo'e. 77wfilr_ will ,stop wtwt_ tt_e door is oper_edbut lt_e
heal wig r_ollun_ (?[_
@
@
@®®®®®@®®®
@
@
2<.)
Page 30

Timed (kmvection Baking
How to set
a ddayed
start and
automatic
stop
}_*ucrln ,s*<ttlw oven conlml to deho'-slart tlw oven,
(o0kfin" a sluugyit l(%t{tbgrime aml tlum turn (3//
attlomal ical@
Make sure the oven clock shows the correct
fiine of day
1 Press tile CONVECTION BAKF pad.
2 Press tile nuinber pads to set tile desired
oveil teI/I pei'at/li'e.
3 Press the COOKT1ME pad.
NOTE: (/your *(uipe requi*_,,_pMu, alin_; you m(9' m<ed
Ioadd addilional tbtw to llw l(<tglh (?/the _>&bg" lira<
4 Press tile nuniber pads to set tile desired
cooking tiine.
5 Press tile DELAY START pad.
6 Press tile nuinber pads to set tile fiine of (lay
VO/I WaIlt tile ()veil to t(lI'II oil }lIl(l st_lYt cookillg.
If you would like to check tile tinI es you have set,
press tile DELAY START pad to check tile start
fiIne you have set or press tile COOK TIME pad
to check tile length of cooking tiIne you have set.
7 Press tile START pad.
NO'I_: An atlcntior_ tom<will souml !/)'ou are II,_ing"
limed bakbg" and do twt lm<xstlw START pad ({tier
en/erinj_"the baking" I_,mpemtun¢.
X&]/eIl tile oven turns on at tile tiIne of day you
have set, the display will show the changing
teniperamre (stai*ing at ¿00°E) and the cooking
Ollle CO/liltdowil,
NOTE: On double oven modeh wlu,n u,sing"both (rvera
al ltw same ibm<,ltu<limes skowint{" in ltu, display will be
,fiw tlu, last _en s_,t. 7b di,s]d(9' the lime s_,lfiw the fi*:st
_rvens*<l,p*_<s:stim DISLAY ST_4RT pad Io cluu:l_tke start
lime you bare s_,tor/m<xs the COOK TIME pad to ched<
the lenKIhq/ _oolgng" lime you kave ,s_<L
At tile end of flirted convection bake tile ()veil will
turn off'. Tile end of cvcle tone will sound.
8 Press tile CLFAR/OFF pad to clear tile display
if necessaiT: _]/eIl baking is finished, reniove
tile tood fl'oln tile ()veil. ]).en/elnbeI; even
though tile ()veil shuts off autoniafically, ti)o(ls
continue cooking atter tile controls are off.
NOTE: };m wig hear a/i/n whi# _ool:ing"w#h thh
,fi<atlm<,Tke /in_ wig st@ wlwn the door i,sop(,m<dbut
the lu:at wig not turn (3[_
@
Q®Q®®®®®®®
@
Q®®®®®@®®®
@
Q®®®®®Q®®®
@
3O
Page 31

Proofing
I,I?d[ Oven
How to set
the oven
jot proofing
(on some moddf)
The proofing flmture maintains a warn/
environment useflfl fin" rising yeast-leavened
products.
1 Place the covered dough in a dish in the
oven on shelf B or C.
NOTE: For best results, cover the dough with
a cloth or with greased plastic wrap (the plastic
may need to be anchored tmderneath the
container so the oven tim will not blow it off).
2 Press the PROOF pad and then the
START pad.
The display will read "BRD" (bread).
The oven interior light tm'ns on and remains
on during proofing.
The pro_Nng teature automatically provides tile
desired temperatm'e fin" proofing and therefin'e
does not have a temperature a(!jusnnent.
3 Set the TIMER ON/OFF fin" a maximmn
of 1 horn: Depending upon the recipe, bread
may complete proofing in less than 1 horn:
Check bread as needed fin" progress.
4 _Mter 1 hour Oil)roofing, press the
CLEAR/OFF pad. If proofing is not conlplete,
leave the bread in the closed oven tmtil it
reaches the desired height.
• To avoid lowering the oven temperatm'e and
lengthening proofing time, do not open the
oven door tlnnecessalJlv:
• Check bread products early to axoid
°xeI:l)F°°ling,,
NOTE:
• Do not use the p_x_ofing mode fin" wamfing
tood or keeping tood hot. The proofing
oven temperatm'e is not hot enough to hold
toods at sate temperatm'es.
• Proofing teatui'e oil upper oven only:
• Proofing will not operate when oven is
above 150°E "HOT" will show in the
displa>
NOTE:
Set the oven to PROOF for a maximum
of 1 hour, then leave the bread in the
closed oven until it reaches the desired
height. Using PROOF in excess of 1 hour
may kill the yeast.
31
Page 32

Adjust the Oven Thermostat
1.1?H/ Ove_
_()/l l/lay _]ll(l that VOtlr new oven cooks
dittbrently than the one it replaced. Use your
new oven ik)l" a few weeks to become I/xore
fhmiliar with it. If you still think yore _new
()vex* is too hot or to() cold, you can at{just
the thermostat yourself.
DO not rise therI/xOl/xeters, sixth as those [()/lll(l
in grocery stores, to check the temperature
setting of your oven. These thermometers may
var_ 20-40 degrees.
NOTE: This a@_stmer_t will not q[fi_ct the broilir_g"
or the se(/:c#ani_g" temperatlm_s. The adjustm¢_t will
be *t,tained in memory c{fier a power f_dhm,.
7b a(ljust
the oven
thermostat
1 Press the BAI_] and BROIL HI/LO pads
at the salne tilne for 3 seconds until the
displa) shows "SF."
2 Press the BAI_] pad of the oxen which _ou
want to ac!iust the oxen therlnostat. A tw(t
digit immber shows in the displa).
Press BAt_2 once to decrease (-) the oxen
telnperature, or twice to increase (+).
3 The oxen telnperature can be ac!iusted up to
35 ° _ 35 °
(+) ._ l_. hotter ()r (-) ._ l_. cooler. Press the
immber pads the salne way you read theln.
For exalnple, to change, the oxen
telnperature 1: I% press 1 and 5.
4 X4hen you have inade the a(!iustn_ent, press
the START pad to go back to the tilne of da)
displa). Use xour oxen as you would normally.
@
(9@®®®®@®®®
@
T* etypeof
margarine
will q//eet
bahing
per/brma nee.t
Most recipes %r baking have been deveh)ped
using high tht products such as butter or
margarine (80% tht). If you decrease the fht,
the recipe may not give the same results as
with a higher fht product.
Recipe thilme can result if cakes, pies,
pastries, cookies or candies ale made with
low fht spreads. The lower the fht content
of a spread product, the more noticeable
these diHerences become.
Federal standards require products labeled
"margarine" to contain at least 80% tht by
weight. Low _ht spreads, on the other hand,
contain less tht and more water. The high
moisture content of these spreads attect the
texture and flavor of baked goods. For best
results with yore" old thvorite recipes, use
ma*garine, butter or stick spreads containing
at least 70% vegetable oil.
32
Page 33

Using the Self Cleaning Oven
I.l?lll Ove_
Be/oTe a
dean cycle
77w oven door mu,sl be clo,seda_gl all conlmA
must be ,set(orre(lly Jbr the O'cl_,to wod_ pro/u,rly.
The oxen Inust be cool in order to set the
sell=clean cxcle.
We recommend venting your kitchen Mth an
open window or using a ventilation tim or hood
(hu_ing tile fi_t sell=clean cycle.
Remove tile broiler pan, broiler grid, probe, all
cookware and _lllValulllintlill t0il t1"Oli1tile oven.
The oven shelxes and comection roasting rack
can be sell=cleaned but the_ will darken lose
their luster and become hard to slide.
Do not use abrasives or oven cleaners. Clean
the top, sides and outside ot the oven door
with soap and wateI:
Make stlre tile ()veil light bulb cover (on some
models) is in place and the oven light is off.
IMPORTANT: The health of some birds is
extremely sensitive to the tirades given ott during
the sell_leaning cycle of any oven. Move birds to
another well ventilated room.
Wipeup heavysoil ontheovenbottom.
(Appearancemayvary,)
0_ double ovo_ models, you car_ seI a clea_ cycle b_
bolh oven,s al lhe same lime. The lasl ove_ sel will
attlomali_ ally delay i(,s slarl u_Iil (he e_(I (_/ ltze /b:sI
ove_ is( lea_ cy( le.
0_ double over_ models, you (:at_ use limed bakir_g" b_
or_e over_ ariel se(/:(lear_ lhe olher al lhe ,same lime.
How to set
the oven.jar
cleaning
1 Press tile SELF CLI_N pad.
2 Using the number pads, enter the desired clean
time, if a time other than 4 ho/u_ is needed.
Cl_,ar_O'Cletb_w i,sm>rmallr 4 hom:s. You can
cha_g'e the clean tb?w to a_U lb_w betw+,++_z3 hour_
aml 5 horns; (le/+e_zdi_t_"on h_u dirly your ove_z i,v
3 Press tile START pad.
The door locks automatically. Tile display will
show tile clean time remaining. It will not be
possible to open tile oven door until tile
temperature drops below tile lock temperature
and tile I,OCKED light goes oil
When tile I,OCKED light is off, open tile do(m
• Tile word I,OCK will flash and tile oven control
will signal if w)u set tile clean cycle and tb_get
to close tile oven dooi:
• To stop a clean cycle, press tile CLILM//OFF
pad. When the I,OCKED light goes off
indicating the oven has cooled below the
locking temperature, open the doo_:
@®®®®®@®®®
_9.
Page 34

Using the Self Cleaning Oven
1,17/1/ Oven
How to
delay the
start of
cleaning
1 Press tile SELF CLF_kN pad.
2 Using tile number pads, enter tile desired
clean time,
3 Press tile DELAY START pad.
4 Using tile nmnber pads, enter tile time of
day w)u want tile clean cvcle to start.
5 Press the START pad.
The door locks automaticall> The display will
show tile start time. It will not be possible to
open tile oven door tmtil tile temperature
drops below tile lock temperatm'e and tile
I,OCKED light goes off.
When the I,OCKED light is off; open the door,
NOTE: On double oven mo(h_& )'oil _aa ,s_t a dday
Uean in both oven,s at the same time. The second oven
,s_,twig automatical(y delay the start (_/c#anb_g" until
the end o/thefiz:st oven ]sc#aa O'c#.
7b recall the ,start time g_/the ,second oven ,set, pr¢,s,s
the l)I_LAY S7741¢T pad on the controL*fin" the
,se#ol_([og]g*_,
@@®®®®@®®®
@
@®®®®®@®®®
You may notice some white ash in tile oxen.
"x_iI)e it up with a damp cloth alter the
o_en cools,
If white spots remain, remove them with
a soap-tilled steel wool pad and rinse
thoroughly with a vinegar and water mixture,
These deposits are usually a salt residue that
cannot be removed by the clean cycle,
If tile oxen is not clean after one clean cxcle
repeat tile cxcle.
• You cannot set tile oven fin" cooking tmtil tile
()veil is cool eno/lgh lOf tile door to unlock,
• While the oven is seltXcleaning, you can press
the CLOCK pad to display the time of da>
To return to tile clean countdown, press tile
COOK TIME pad.
• If the shelves become hard to slide, wipe the
shelf sui)ports with cooking oil.
,4
Page 35

(;are and (;leaning
Wall Oven
BE SURE ELECTRJCAL POWER IS OFF AND ALL SUR_YACES ARE COOL BEFOR_ CLEANING ANY
PART OF THE OVEN.
Lo'i-o[f
O_7e7l
d00Y----
removal
(on some modeLQ
The oven door is reil/ovable for easier access
to the light bulb.
Do not l!fl the door by ll_e handl<
To remove the door:
1 Fully open the door.
2 Pull the hinge locks down toward the door
fl'ame, to the tmlocked position. This may
require a tool.
3 Firmly grasp both sides of the door at the top.
4 Close door to the door remowd position,
which is hallway between the broil stop
position and flfllv closed.
5 I,iti door up and out tmtil the hinge arm is
clear of the slot.
To replace the door:
1 Firmly grasp both sides of the door at the top.
2 With the door at the same angle as the
removal position, seat the indentation of the
hinge arm into the bottom edge of the hinge
slot. The notch in the hinge arm must be
fifllv seated into the bottom of the slot.
3 Fully open the dora:
4 Push the hinge locks up against the fl'ont
fl'ame of the oven cavity; to the locked
position.
5 Close the oven door.
Bottom
edgeof
slot
d_
Hingelock(unlockedposition)
earm
Indentation
Sealedhingearm
• .9
Page 36

(;are and (;leaning
I:1%II Oven
Oven door
To cleml the inside of the door:
• Because the area inside the gasket is cleaned
dm'ing the selt:clean cycle, you (lo)lot need
to clean this bv hand.
• The area outside the gasket and the fl'ont
fl'ame can be cleaned with a soai>filled steel
wool or plastic pad, hot water and detergent.
Rinse well with a vinegar and water solution,
To cleml the outside of the door:
• Use soap and water to thoroughly clean the
top, sides and front of the oven door. Rinse
well. You may also use a glass cleaner to clean
the glass on the outside of the door. Do not
let water drip into the vent openings.
• Spillage of marinades, fl'uitjuices, tomato
sauces and basting materials containing acids
)liar cat)se discoloration and should be wiped
up immediately. When surtace is cool, clean
and rinse.
• Do )lot use ()veil cleaners, cleaning powders
or harsh abrasives on the outside of the door.
The gasket is designed with a gap atthe bottom to allow
for proper air circulation.
Do not rub or clean the door gasket--it has an extremely
low resistanceto abrasion.
Ifyou notice the gasket becoming worn, frayed or damaged
in any way or if it has becomedisplaced onthe door,
you should have it replaced.
Ore72
shelves and
convection
roasting
rack
Clean the oven shelves (including the offset
shell) and the convection roasting rack with an
abrasive cleanser or steel wool. After cleaning,
rinse the shelves and rack with clean water and
dry with a clean cloth.
NOTE: The oven shelve,_ and convection roa,sting"
m_k may be cleaned in the se!fideaning" oven.
However; the shelve,_ will darken in _olm; lo,se their
luster and become ha*_l to slide !/ (#aned du*/ng" lhe
se(]:(#anint{" (7_ le. _'_m can wipe the she(]supporl,s
with cooking" oil qfler se(fic#aning" to make the shelve,_
slide more easily.
Roastingrack
Ovenshelf
Stainless steel
(on some mo(Id,_)
& metal parts
36
Do not use a steel-wool pad; it will scratch
the surface.
To clean stainless steel sm'lhces, use a hot,
damp cloth with a mild detergent suitable
fin" stainless steel surfhces. Use a clean, hot,
damp cloth to remove soap. Dry with a dry,
clean cloth.
If fi)od soil remains, try a general kitchen
cleane); such as Fantastik"; Simple Green _,
or Formula 409 _;
For hard-to-clean soil, use a standard
stainless-steel cleanec such as Bon-_Aani:
or Cameo _.
Apply cleaner with a damp sponge. Use a clean,
hot, damp cloth to remove cleaner. D*y with
a dry; clean cloth. Always scrub lightly in the
direction of the grain.
After cleaning, use a stainless-steel polish, such
as Stainless Steel Magic"; Revere Coi:)per and
Stainless Steel Cleaner"; or Wenol All Pro'pose
Metal Polish" Follow the product instructions
fbr cleaning the stainless-steel surlhce.
Page 37

re and Cleaning
Wall Oven
Broiler pan
and grid
Atter br(iiling, reinoxe tile broiler i)an froin tile
oxen. Reinoxe the grid fronl the i)an. Carefllllx
i)our out tile grease fronl tile i)an into a i)roi)er
coiltaiilei',
_'_sl/ and rinse tile broiler i)an and grid in hot
water with a soai)-tilled or i)lastic sc(mring i)ad.
If fi)od has burned (m, si)rinkle the grid with
detergent while hot and cover with wet i)ai)er
towels or a dishcloth. Soaking the i)an will
YelllOVe b/ll'lled-oIl t()ods.
Both tile broiler i)an and grid nlay be cleaned
with a con/n/ercial oxen cleaner.
////'/I/ll I iT///l//\'{\/\\_ t
Both tile broiler i)an and grid can also be
cleaned in a dishwasher.
Do _ol dea_ the broiler fiat_ 0r g'rid i*_ a se(/:( h_ani*_g"
Do not store a soih, d broiler fiat* at*d g'rid at*ywhere
in the oven.
Control
panel
It's a good idea to wipe tile control i)anel after
each use. Clean with n/ild soap and water or
vinegar and water, rinse with clean water and
l)olish (liw with a sott cloth.
Do not use abrasive cleansers, strong liquid
cleansers, i)lastic sc(mring i)ads or oven
cleansers on the c(mtrol i)anel--they will
danlage the finish. A 50/50 sohlti(m of
vinegar and hot water works well.
Pu?movable
oven .floor
To relllove the oven floor:
1 Renloxe tile oven door using tile illstructions in
tile i,itVOff Oxen Dooi" section of this n/anual.
2 Press down and I)ull out tile reinoxable
oxell flooi;
3 Clean tile oxen floor with warn/soap) water.
4 X4l/eil re-installing the oxen floor be sure to
slide it all the way to the back of the oxen.
CAUTION: _Mwa)s rei)lace tile renloxable floor
befi)re tile next use.
Oven heating
elements
Do not clean tile broil eleinent. Am soil will
burn off wh ell the elen/eilt is h ea ted.
Tile bake eleinent is not exi)osed and is under
tile relnowd)le oven floor. If sl)illovers, residue
()I" ash aCC/lllltllate oi1 tile i'ei//ovable ()veil f]ooi _,
wil)e u I) be%re selfXcleaning.
To clean tile oven flooi; take out tile renlowd)le
floor and gently lilt the 1)ake elenlent. Clean
with warnl soai)y water. Alwa):s rei)lace the
reinowd)le floor 1)eft)re next use.
.[
Page 38

re and (;leaning
I,l_ll! Oven
O_)gTt
light bulbs
(oTzsome modeLQ
N07_: The glass cover (on some modds ) should be
removed on(y whe_z cold. 14_ari_g" latex' gloves may
of/br a better gv4p.
CAUTION: Be*{,rerepla{.*g
bulb, disconnect electrical power to the {yen at
the main fuse or circuit breaker panel.
Be sm'e to let the light c{ver and bulb cool
completely.
For wmr safety, do not touch a hot bulb with
bare hands or a damp cloth.
To remove:
1 Tm'n the glass cover cotmterclockwise
1/4 turn until the tabs of the glass cover
clear the grooves of the socket.
2 Using gloves or a dry cloth, remove the bulb
by pulling it straight out.
To replace:
1 Use a new 120-xolt, 35-watt Halogen bulb.
2 Using glo\vs or a &Y cloth, remove the bulb
fl'om its packaging. Do not touch the bulb with
bare finge_.
3 Push the bulb straight into the receptacle
all the wa>
4 Place the tabs ot the glass co\vr into the groo\ es
of the socket. Turn the glass cover clockwise
1/4 turn.
Igor ira/mined I{qT_ling"it_side the o'v_,_,clea_z the g/a,s_s
c<_erjhcqlucnl(V u,si_g"a wet cloth. This sholdd Iw done
wlw_z the _met_i,scom/)Md 3' _ol.
5 Reomnect electrical power to the _wen.
Receptacle Socket
i i
i i
i i
_'_" Bulb
_b
/
Glasscover
Receptacle
Usegloves
orclotb
PrDbe
The temperatm'e probe may be cleaned with
soap and water or a soap-filled scom'ing pad.
Cool the temperature probe before cleaning.
Scorn" stubborn spots with a soap-filled scom'ing
pad, rinse and dry.
Do nol imme*:s_ lhe lempe*whm_ probe in wale*:
l)o nol store ttte temperaho'e probe i_ ttze ovet_.
38
Page 39

Before You (-;all For Service...
I,l?lll Oven
t_eview the
lroub&_hooli?t K lips
oTt d_+_fd&wht¢
pa_>_ /h_t aTtd you
may not need to
call fi_r s<>rvice.
PROBLEM POSSIBLE CAUSE
CLOCK AND TIMER * A hlse ill your home may be blown or the circuit breaker tripped.
DO NOT WORK Replace the fuse or reset the circuit breakel:
• (-)yen controls iml_roperly set. See tile O'v(_z Control, Clock a_zd 7_mer
section.
OVEN LIGHT DOES '_Light bulb is loose or defective. Tighten or replace the bulb.
NOT WORK * Pad operating light is broken. Call for service.
OVEN * Oven thermostat needs ac!jtlstment. See tile A((jl_st the Ove_ T/u,rmo,stat
TEMPERATURE Do it )'ou*se(F section.
TOO HOT OR
TOO COLD
OVEN WILL * A hlse ill yore" home may be blown or tile circuit breaker tripped.
NOT WORK Replace the fuse or reset tlle circuit breakel:
• Oven controls iml)roperly set.
FOOD DOES NOT
BAKE OR ROAST
PROPERLY
FOOD DOES NOT
BROIL PROPERLY
OVEN WILL NOT
SELF CLE_kN
* Oven controls improperly set, See tlle Bakir_g" or I_oa,stit_g" section,
* Shelf position is incorrect or tlle shelf is not level.
* Incorrect cookware or cookware of improper size being used.
* Oven thermostat needs ac{justment. See tlle Adjust the Ov+,_z Thermostat
Do it yol_*:se(F section.
* Door not open to tlle broil stop position as recommended.
* Oven controls improperly set. Make sure you press tile BROIL
HI/LO pad.
* hnproper shelf position being used. See tlle th'oili?_g"Lrui&.
* Food being cooked ill a hot pan. Use tile broiling pan and grid that
came with yore" oven. Make sm'e that it is cool.
* Cookware not suited for broiling. Use tile broiling pan and grid that
came with your oven.
*Tlle probe is plugged into the outlet in tile oven, Remove tile probe
fl'on/ tile oven.
* Aluminum foil used on tile broiling pan and grid has nor been fitted
properly and slit as recommended.
* In some areas the power (voltage) may be low. Preheat the broil
element fin" 10 minutes. Broil %r the longest period of time
recommended in tile Bmiling'Lruide.
'+The oxen temperatm'e is too high to set a seliZc]ean operation.
Allow the oven to cool and reset the controls.
* Oxen controls improperl} set. See tlle Usintg',, the £'elf_(leaninq', Oven
section.
* The probe is l)lugged,, into tlle outlet in tile oxen. Remoxe tile probe
h'on/ the ();ell,
"CRACKING" OR * This is nmmal. It is tile sound of tlle metal heating and cooling
"POPPING" SOUND during both cooking and cleaning hmctions.
FXCESSIVE SMOKING * Excessive soil. Press the CLF&R/OFF pad. Open the windows to rid
DURING CLk_ the room of smoke. _'Ldt until the I,OCKED light goes off.
CYCLE Wipe up tile excess soil and reset tile clean cycle.
39
Page 40

getbre You (;all For Service...
I,l?/11 Oven
Trouble-
shooting tips
40
PROBLEM POSSIBLE CAUSE
• The oven is too hot. Allow the oven to cool belo,_ locking
temperature.
• Oxen controls improperl) set. See the {.'i_i_ff, tlu_ Sdf-(l_ani_ff, Ov_n
section.
OVEN DOOR WILL
NOT OPEN AFTER
A CLEAN CYCLE
OVEN NOT
CLEAN AFTER
A CLEAN CYCLE
* O_en was heavilx soiled. Clean up heav} spillovers before ,startim,_ tile
clean c_cle. Heavilx soiled oxens ma) need to sell:clean again or for a
lonoer_ period of time.
"'LOCK" " The self:dean cycle has been selected but the door is not closed.
FLASHES IN Close the oven dora:
THE DISPLAY
LOCKED LIGHT " The oven door is locked because the temperature inside the ()veil has
IS ON WHEN not dropped below the locking temperature. Press the CLEAR/OFF
YOU WANT TO COOK pad. _Mlow the oven to cool.
CONTROL SIGNALS "YIu forgot to enter a bake temperature or cleaning time. Press the
AFTER ENTERING BAKE pad and desired temperature or the SELF CLEAN pad and
COOKING TIME OR desired dean time.
DE,LAY START
"F AND A NUMBER * You have a function error code. Press the CLEAR/OFF pad. Allow
OR LETTER" FLASH the oven to cool fl)r one hour. Put the o', en back into operation.
IN THE DISPLAY * Discomlect all power to the oven flw 30 seconds and then reconnect
power. If the hmction error code repeats, call fl)r service.
DISPLAY GOES * A fuse in your home may be blown or the circuit breaker tripped.
BLANK Replace the fuse or reset the circuit breaker.
• The clock is in the black-out mode. See the O've_ (2on#'o/, (2lock and
77mer section.
DISPLAY FLASHES * Power fhilure. Reset the clock.
UNABLE TO GET " (-)yen control pads were not pressed properly. The BAKE and the
THE DISPLAY TO BROIL HI/LO pads must be pressed at the same time and held
SHOW "SF" fl)r 3 seconds.
"PROBE" APPEARS * Tiffs is reminding you to enter a probe temperature after phlgging
IN THE DISPLAY in the probe. Enter a probe temperature.
POWER OUTAGE, * Power outage or surge. Reset tile the clock. If the oven was in use,
CLOCK FLASHES you must reset it by pressing the CLFAR/OFF pad, setting the clock
and resetting any cooking function.
STEAM FROM * When using the convection feature, it is normal to see steam coming
THE VENT out of tile oven vent. As the ntln/ber of shelves or amount of fl)od
being cooked increases, the amount of visible steam will increase.
"BURNING" OR * Tiffs is normal in a new ()veil and will disappear in time. To speed
"OILY" ODOR the process, set a self:clean cycle fl)r a minimum of 3 hours. See the
EMITTING FROM { _sing"the Se(/:C/ea_fing" Ove_ section.
THE VENT
STRONG ODOR * Tiffs is temporary. An odor from the insulation around the inside of
the oven is normal fl)r the first tbw times the oven is used.
FAN NOISE * A cooling tim or a convection tim (depending on the function
vou are using) may automatically turn on and off. Tlfis is normal.
;File cooling ihn will turn off and oil. The convection ihn will run
until the hmction is over or the door is opened.
Page 41

£npoi EnIAI lumaodtu I
uo.n aas. o/I d.-tsaata
,anpoa d aoumsuo D
saoue!lddv39
IIIII
Place
I st Class
I et t+.T
Stamp
t ]ere
General Electric Company
Warranty Registration Department
P.O. Box 32150
Louisville, KY 40232-2150
4/
Page 42

Consumer Product Ownership Registration
Dear Custon]er:
Thank _ou for pro'chasing our product and thank _ou for _)lacin,*_}our confidence in us. _e are proud to
have }ou :is a CtlStOl**eF]
Follow these three steps to protect your new appliance investment:
Complete and mall
your Consumer
Product Ownership
Registration today.
Have d_e p_ace of mimt
of knowing we can
contact you ix*the
mdikelv event of a
salcty modification.
After completing this
registration, write your
model and serial
umbers in this manual.
"_km will need this
inlbrmation should y(m
rcqsfire service. The
service 1suiI/ber ils the
USA: 800.444.1845. In
Canada: 1.888.880.3030.
p Read your Owner's
Manual carefully.
h x_ill hel l) }o
Ol)( r_i|c }()sir lsew
Important: To ensure that your product is registered, mail the separate product registration card.
If the separate product registration card is missing, fold and mail the form below. No envelope is needed.
F()I D 1/ERE
Consumer Product Ownership Registration
Product Model Serial
Wall Oven
Mr. [] Ms. [] Mrs. [] Miss []
First ]
Nails(!
Sire(![ I
A(ldress i I
,t,,#I i ,
(;itx' I , ,
[)me l)lac_ d
1.t,s<I I
h,hsntls L1-Ll-I
I1 ,asl I
I I I I I I I I I Name I I I I I I I I I I I I
I I I I I I I I I I I I I I I I I I I I I I
I I I I I ]
I I IZit' I
I I I I I I I I I I I I I I I State _ Co(to I I I
[ )_'_r _ _''_'t" _ Ph°lse I ''N/unhcr I-I , , I-I I
I""-Monogram® _,,_,,,,.,,,o_,,_v',,,,,.co,,
General Electric Company
Louisville, KY 40225
TAPE C1 ,()SED
42
Page 43

Consumer Services
With the purchase of your new Monogram appliance, receive the
assurance that if you ever need information or assistance from GE,
we'll be there. All you have to do is call toll-free!
GE Answer
Center®
800.626.2000
Whatever your question about any Monogram major appliance, GE Answer Center _:
infl)imation service is available to help. Your call--and your question--will be answered
promptly and courteously. And you can call any time. GE Answer Centel _: service is open
24 hours a da> 7 days a week.
OR
Visit our _ebsite at: www.monogram.com
In-Home Repair
Service
In the U.S.A.:
800.444.1845
In Canada:
888. 880.3030
AGE consumer service protessional will provide expert repair service, scheduled at a time
that's convenient flw you. Many GE Consumer Service company-operated locations ottbr
you sexxice today or tomorrow, or at your convenience (7:00 a.m. to 7:00 p.m. weekdays,
9:00 a.m. to 2:00 p.m. Saturdays). Our factory-trained technicians know your appliance
inside and out--so most repairs can be handled in just one visit.
For Customers
With Special
Needs...
800.626.2000
se_N_
GE ot_brs, fl'ee of charge, a brochure to assist in planning a
barrie>fi'ee kitchen fl)r persons with limited mobility.
Consumers with impaired hearing or speech who have access to
a TDD or a conventional teletypewriter may call 800.TDD.GEAC
(800.833.4322) to request inflmnation or service.
Service Contracts"
800.626. 2224
You can have the secure feeling that GE (_onsumer Selwice will still be there after yore"
warranty expires. Purchase a GE contract while your warranty is still in effect and you'll
receive a substantial discount. With a multiple-year contract, you're assured of hmlre
service at today's prices.
Parts and
Accessories
800.626.2002
Individuals qualified to serxice their own appliances can haxe parts or accessories sent direcfl}
to their home. The GE parts s}stem proxides access to oxer 47,000 parts...and all GE Genuine
Renewal Parts are full_ warranted. VISA MasterCard and Discoxer cards are accepted.
User mMntenance instructions contMned in this manual cover procedures intended to be
performed by amy user. Other servicing generally should be referred to qualified service
personnel. Caution must be exerdsed, since improper servicing may cause unsafe operation.
43
Page 44

WARRANTY
YOUR MONOGRAM WALL OVEN WARRANTY
Staple sales slip or cancelled check here. Proof of original
purchase date is needed to obtain service under warranty,
WHAT IS
COVERED
FULL ONI_-YI_R WARRANTY
For one _ear from date of original purchase, _e _dll provide, free of ch'm,e,_ , parts and
service labor in _our home to repair or replace any part of the oven that tails because of
a manufacturing defect.
This warranty is extended to the original pin'chaser and any succeeding owner for products
purchased flw ordinar) home use in the 48 mainland states, Hawaii and _M_shington, D.C.
In Alaska the warrant_ is the same except that it is LIMITED because wm must pay to ship
the product to the service shop or for the service technician's travel costs to your home.
All warrant_ service will be pro'dried b) our Factor_ Ser',ice Centers or b} our authorized
(_ustomer Care ':_:'servicers during normal working hours.
Should )our appliance need service, during *<re'ant) period or be) ond, ill the U.S.A.
call 800.444.1845. In Canada: 888.880.3030.
WHAT IS NOT
COVERED
* Service trips to your home to teach you
how to use the product,
" Replacement of house fuses or resetting
of circuit breakers.
, Damage to the product caused by accident,
fire, floods or acts of God.
, Failure of the product if it is used for
other than its intended purpose or used
commercially.
" Improper installation.
If you have an installation problem, contact
your dealer or installer. You axe responsible
for providing adequate electrical, gas,
exhausting and other cmmecting facilities
as described in the Installation Instructions
provided with the product.
• Incidental or consequential damage caused
by possible defects with this appliance.
Soi/le states do m_t allow the exclusion or limitation of incidental or consequential damages
so the above limitation or exclusion ma) not appl) to )on. This warrant} gi_es )on specific
legal fights, and )on ma) also haxe other rights which varx from state to state.
To know what )our legal rights are in xour state, consult ?our local or state consumer aflhirs
office or )our state's Attornex General.
Warrantor: General Electric Company. Louisville, KY 40225
164D429OP043-1t
49-80085-2
08-01 JR
ZEK937 ZEK957
 Loading...