

Page 1

Monogam.
Use and Care Guide
forJET343G
b
,%%
Microwave/Convection Oven
1992
Momgam.”bf
Mimowavelconuection &en
Page 2

Introduction
Your new Monogram microwave/convection oven
makes an eloquent statement of style, convenience
and kitchen planning flexibility. Whether you chose
it for its purity of design, practical cooking features
or assiduous attention to detail—or for all of
these reasons—you’ll find that your Monogram
microwave/convection oven’s superior blend of form
and function will delight you for years to come.
The Monogram microwave/convection oven was
designed to provide the flexibility to blend in with
your kitchen
cabinetry.
The information on the following pages will help
you operate and maintain your microwave/convection
oven properly.
Optional Accessory
An Installation Kit is available at extra cost from your
Monogram supplier.
JX16W
Installation
fit
converts this oven to a
built-
in wall oven.
This can be obtained from a Monogram dealer.
For a listing of dealers—or if you have other
questions—please call the GE Answer
Center@
(800.626.2000).
Contents
Adapter Plugs
.............................31
Aluminum Foil
..................5, 27-29
Appliance Registration .................3
Auto Start . . . . . . . . . . . . . . . . . . . . . . . . . . . . . . . . . . . .
16
Care and Cleaning ......................30
Clock
. . . . . . . . . . . . . . . . . . . . . . . . . . . . . . . . . . . . . . . . . . . . .
8
Combination Cooking...........24–27
Auto Roast .....................26, 27
Cooking by
Temperature......25
Cooking by Time .................24
Consumer Services .....................34
Control
Panel ............................7, 8
Convection Cooking
. . . . . . . . . . . . . . . . . . . . . . . .
7-10,22,23,28,29
Broiler Pan .......6,7, 10, 28–30
Broiling ..........................28, 29
Cooking by
Temperature......23
Cooking by Time .................22
Extension Cords
....,.....................32
Features . . . . . . . . . . . . . . . . . . . . . . . ..................7
Grounding Instructions .........31, 32
Installation ............................31, 32
Microwave
Cooking..6,
8,9, 11–21
Auto Cook . . . . . . . . . . . . . . . . . . . . . . . . . . . .
11
Auto Defrost . . . . . . . . . . . . . . . . . . . . . . . . 17
Automatic Cooking Control
Guide . . . . . . . . . . . . . . . . . . . . . . . . . . . . . .
13–15
Cooking by Temperature 20,21
Cooking by Time ...........19, 20
Defrosting by Time ........18, 19
Microwaving Tips ..................6
Minute/Second Timer ..........16
Power Levels
....................8, 9, 11, 12, 17-21
Model and Serial Number
Location .................................3
Oven Lamp Replacement ...........32
Oven Shelf
..........................5–7, 10
Precautions to Avoid Possible
Exposure to Excessive Microwave
Energy . . . . . . . . . . . . . . . . . . . . . . . . . . . . . . .............3
Problem Solver ...........................33
Safety Instructions ....................4–6
Temperature Probe
................5,7, 20,21,23,25-27,30
Warranty .....................................35
What Your Oven Can
Do..............9
Ouestions?
Call GE Answer Center
80~626.2000
E
2
Page 3
Before using your oven,
read this book carefully.
It is intended to help you operate and maintain your new
microwave oven properly. Keep it handy for answers to
your questions.
If you don’t understand something or need more help, write
(include
your phone number):
Consumer Affairs
GE Appliances
Appliance Park
Louisville, KY 40225
Write down the model and serial numbers.
You’ll find them on a label on the left side wall of the
control panel seen when the door is open. These numbers
are also on the Consumer Product Ownership Registration
Card that came with your microwave oven. Before sending
in this card, please write these numbers here:
Model Number
Sehal
Number
Use these numbers in any correspondence or service calls
concerning your microwave oven.
If you received a damaged oven...
Save time and money.
Immediately contact the dealer (or builder) that sold you
Before you request service...
the oven.
Check the Problem Solver in this book. It lists causes of
minor operating problems that you can correct yourself.
Be sure your microwave oven is registered.
It is important that we know the location of your microwave oven should a need occur for adjustments.
Your supplier is responsible for registering you as the owner. Please check with your supplier to be sure he has done
so; also send in your Consumer Product Ownership Registration Card. If you move, or if you are not the original
purchaser, please write to us, stating model and serial numbers.
This appliance must be registered. Please be certain that it is.
Write to: GE Appliances, Range Product Service, Appliance Park, Louisville, KY 40225
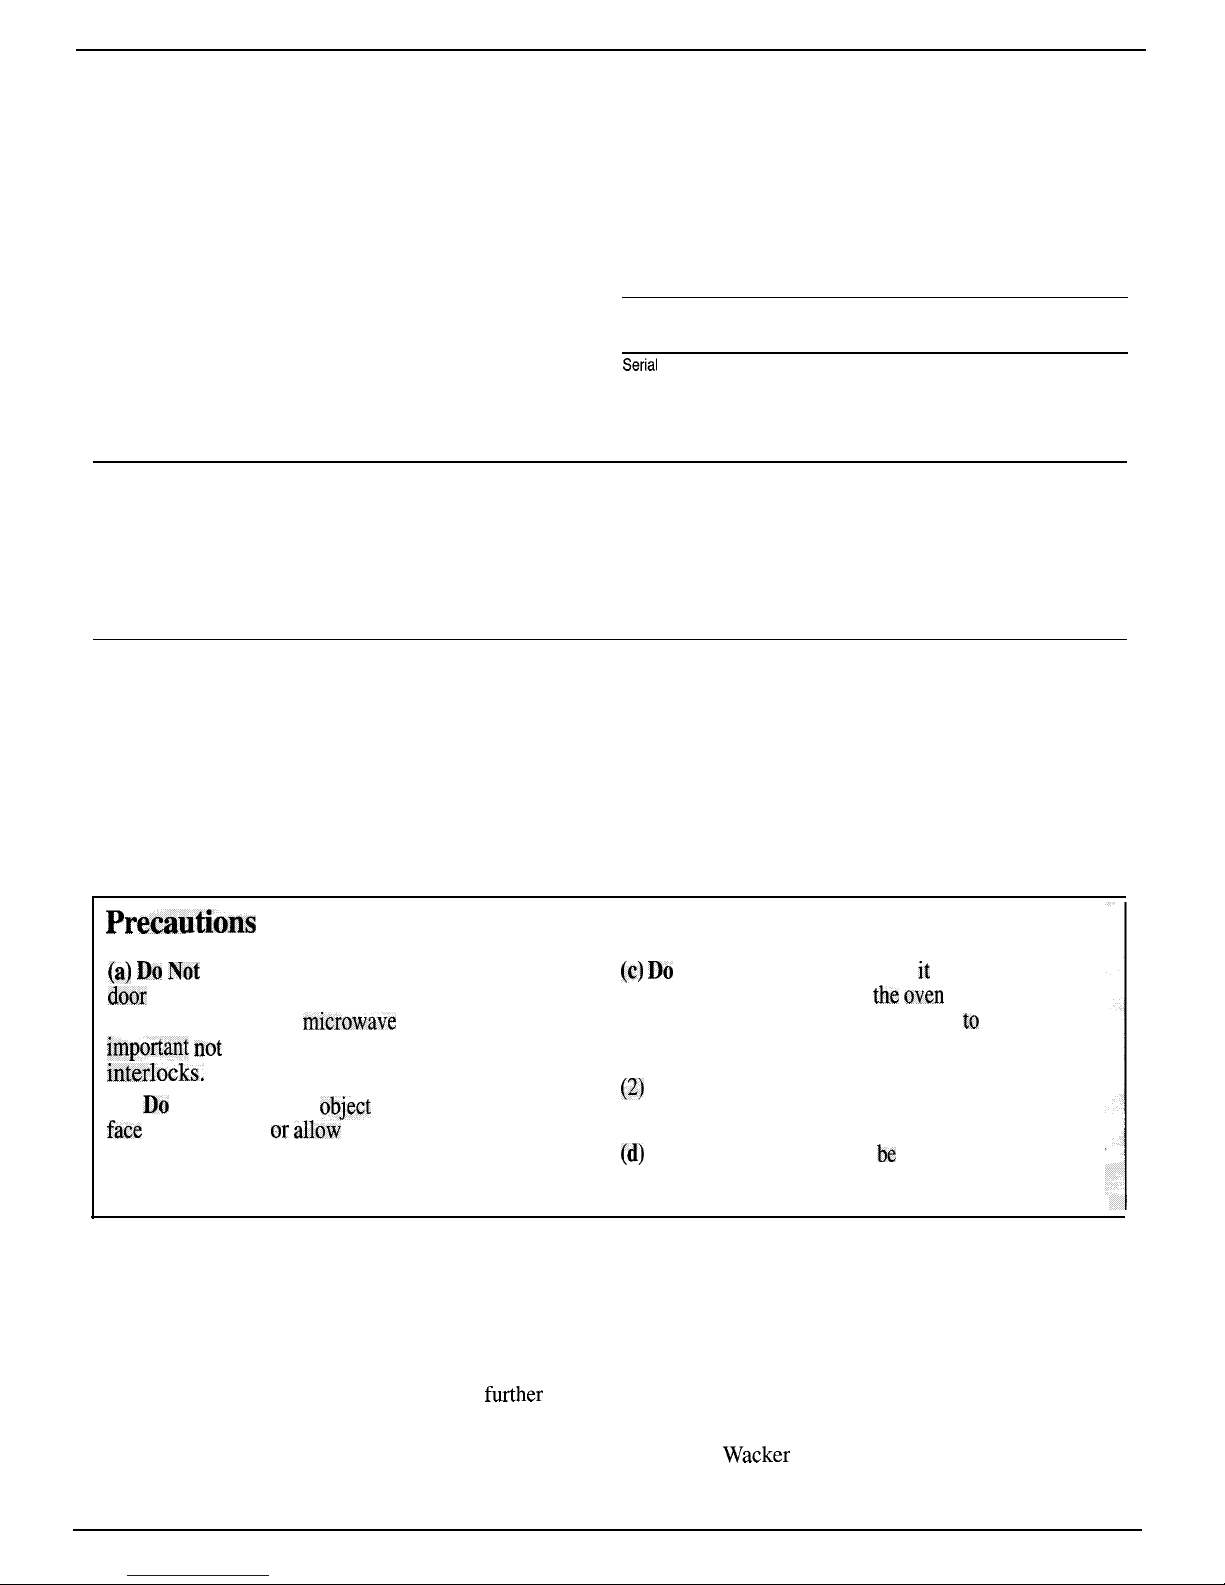
Premutions to Avoid Possible Exposure to Excessive Microwave Energy
(~) DO
Not
Attempt
to operate this oven with the
(c) Do
Not Operate
the oven if it is damaged. It is
door
open since open-door operation can result in
particularly important that
the oven
door close
harmful exposure to
rrdcrowave
energy. It is
properly and that there is no damage to the:
impotiant not
to defeat or tamper with the safety
(1) door (bent)
interlmks.
(b) Do Not Place
any
object
between the oven front
(2)
hinges and latches (broken or loosened)
face
and the door or
allow
soil or cleaner residue to
(3) door seals and sealing surfaces.
accumulate on sealing surfaces.
(d)
The Oven Should Not
be
adjusted or repaired by
anyone except properly qualified service personnel.
If you need service...
To obtain service, see the Consumer Services page in the
back of this book.
We’re proud of our service and want you to be pleased.
If for some reason you are not happy with the service
you receive, here are three steps to follow for
ftiher
help.
FIRST, contact the people who serviced your appliance.
Explain why you are not pleased. In most cases, this will
solve the problem.
NEXT, if you are still not pleased, write all the
details—including your phone number—to:
Manager, Consumer Relations, GE Appliances
Appliance Park, Louisville, KY 40225
FINALLY, if your problem is still not resolved, write:
Major Appliance Consumer Action Panel
20 North
Wacker
Drive, Chicago, IL 60606
3
Page 4

WORTANT
SAFETY
~STRUCTIONS
Read dl
instmctions
before ming this
appfiance.
men
using electrical appliances, basic safety
precautions should be followed, including the
following:
A WARNING-~oreducetheriskof
burns, electric shock, fire, injury to persons
or exposure to excessive microwave energy:
●
Read and follow
tie
specific “Precautions to
Avoid Possible Exposure to Excessive Microwave
Energy” on previous page.
. This appliance must be grounded. Connect only
to properly grounded outlet. See “Grounding
Instructions” in the table of contents.
●
Use this appliance only for its intended use as
described in this manual. Do not use corrosive
chemicals or vapors in this appliance. This
microwave/convection oven is specifically
designed to heat or cook food, and is not
intended for laboratory or industrial use.
●
For best operation, plug this appliance into
its own electrical outlet, to prevent flickering
of lights, blowing of fuse or tripping of circuit
breaker.
●
Do not mount this appliance over a sink. Install
or locate this appliance only in accordance with
the provided Installation Instructions.
●
Be certain to place the front surface of the door
three inches or more back from the countertop
edge to avoid accidental tipping of the
appliance in normal usage.
●
Do not cover or block
any
openings on the
appliance.
●
Do not store this appliance outdoors. Do not
use this product near water—for example, in a wet
basement, near a swimming pool or near a sink.
* Do not operate any heating or cooking
appliance beneath this microwave oven.
●
Do not mount the microwave oven over or near
any portion of a heating or cooking appliance.
●
Do not store anything directly on top of the
microwave oven surface when the microwave
oven is in
o~eration.
@
Do not let power cord hang over edge of table
or counter.
●
Do not operate this appliance if it has a
damaged power cord
or plug, if it is
not
working properly, or if it has been damaged
or dropped.
●
See door surface cleaning instructions in the
Care and Cleaning section(s) of your book,
Q
This appliance
should
be serviced only by
qualified service personnel. Contact nearest
authorized service facility for examination,
repair or adjustment.
●
As with any appliance, close supervision is
necessary when
used
by children.
c
To reduce the risk of fire in the oven cavity:
—Do not overcook food. Carefully attend
appliance if paper, plastic or other combustible
materiaIs me
placed inside the oven to facilitate
cooking.
—Remove wire twist-ties from paper or plastic
bags before placing bags in oven.
—Do not use your microwave/convection oven to
dry newspapers.
—Do not use recycled paper products. Recycled
paper towels, napkins and waxed paper can
contain metal flecks which may cause arcing
or ignite. Paper products containing nylon or
nylon filaments should be avoided, as they may
also ignite,
—Do not pop popcorn in your microwave oven
unless in a special microwave popcorn accessory
or unless you use popcorn labeled for use in
microwave ovens.
—Do
not overcook potatoes. They could dehydrate
and catch
fue,
causing damage to your oven.
—Do not operate the oven in microwave or
combination modes while empty to avoid
damage to the oven and the danger of fire.
If by accident the oven should run empty a
minute or two, no harm is done. However, try to
avoid operating the oven empty at all times—it
saves energy and prolongs
tie
life of the oven.
.
Q
Do not immerse power cord or plug in water.
●
Do not use the oven for storage purposes. Do not
leave paper products, cooking utensils or food in
●
Keep power cord away from heated surfaces,
the oven when not in use.
4
Page 5

WPORTANT
SAFETY
~STRUCTIONS
* H materials inside oven should ignite, keep
oven door closed, turn oven off, and disconnect
power cord, or shut off power at the fuse or circuit
breaker panel.
●
Some products such as whole
eggs
and sealed
containers-for example, closed glass
jars—will explode and should not be heated
in this microwave oven. Such use of the
microwave/convection oven could result in injury.
●
Avoid heating baby food in glass jars, even
without their lids; especially meat and
egg
mixtures.
●
When using the convection or combination
cooking functions, both the outside and inside of
the oven will become hot. Always use hot pads
to
remove containers of
food
and accessories such as
broiler pan, oven shelf and temperature probe.
●
Do not use paper products when the microwave
convection oven is operated in the convection or
combination mode.
●
Don’t
defrost frozen beverages in narrow
necked bottles (especially carbonated beverages).
Even if the container is opened, pressure can build
up. This can cause the container to burst, possibly
resulting in injury.
●
Use metal only as directed in this book. TV
dinners may be microwaved in foil trays less than
●
Thermometer—Do not use regular cooking
or oven thermometers when cooking by
microwave or combination. The metal and
mercury in these thermometers could cause
“arcing” and possible damage to the
oven.
Do
not
use a thermometer in food you are
microwaving unless the thermometer is designed
or recommended for use in the microwave oven.
●
Remove the temperature probe from the oven
when
not using
it to cook
with,
If you leave the
probe inside
the
oven without inserting it in food
or liquid, and turn on microwave energy, it can
create electrical arcing in the oven, dmage oven
walls and damage the temperature probe.
●
Plastic cookware—Plastic cookware designed
for microwave cooking is very useful, but should
be used carefully. Even microwave-safe plastic
may not be as tolerant
of
overcooking conditions
as are glass or cermic materials and may soften
or char if
subiected
to short
~eriods
of
.
.
overcooking. In longer exposures to overcooking,
the food and cookware could ignite. For these
reasons: 1) Use microwave-safe plastics only and
use them in strict compliance with the cookware
manufacturer’s recommendations. 2) Do not
subject empty cookware to microwaving.
3)
Do
not permit children to use plastic cookware
without complete supervision.
●
When cooking pork, follow the directions
Page 6

~ORTANT
SAFEm ~STRUCTIONS
(continued)
*
Not
all plastic
wrap is suitable
for
use in
* Use of the shelf accessory.
(See the
Cookbook
microwave ovens.
Check the package for
for proper
use).
pr~per use
—Remove
the
shelf from oven when not in use,
*Spontaneous boiling—Under certain
—Do not store
or cook
with shelf on floor of
oven,
special circumstances, liquids may
Product damage
may
result.
start to boil during or shortly after
—Use pot holders when handling the shelf and
removal from the microwave
oven.
To prevent bums from splashing
cookware. They may
be
hot.
liquid, stir
the
liquid briefly before
—Do not use microwave browning dish on shelf.
removing the container from the
The shelf could overheat.
microwave oven.
—Use the shelf only when cooking on two levels.
,
~4Boilab1e”
coo~ng
pouches and
tightly
closed
—Be sure that the shelf is positioned properly
plastic bags
should be slit, pierced or vented as
inside the
oven
to prevent product damage.
directed by package. If they are not, plastic could
—Do not use the broiler pan or spatter shield
burst during or immediately after cooking,
while microwaving.
possibly resulting in injury. Also, plastic storage
containers should beat least partially uncovered
. Use of
the
broiler pan—When inserting the
because they form a
tight
seal. When cooking
broiler pan, make sure that
the
two stop-locks
with containers tightly covered with plastic wrap,
on the bottom of
the
drip pan are inserted in
the
remove covering carefully and direct steam away
oven first so that these stop-locks properly lock
from hands and face.
the broiler pan onto the guides on the oven side
walls. When properly inserted, the word
●
Rot foods
and steam can cause
“~ONT,” stamped into the bottom of the drip
burns. Be careful when opening
pan, will be towards the leading edge of the pan
any containers
of
hot food, including
as you pull it out of the
oven.
popcorn bags, cooking pouches and
boxes,
To
pr~vent
possible injury,
direct steam away from
hands
SAVE THESE
and face.
INSTRUCTIONS
MICROWAVmG
TWS
●
Make sure all cookware
used
in your microwave
oven is suitable for
G
‘nicrowavingMost
J
w
glass
casseroles, cooking
dishes, measuring cups,
custard cups, pottery or
china dinnerware which
does not have metallic trim or glaze with a metallic
sheen can be used. Some cookware is labeled “suitable
for microwaving. ”
●
If you are not sure if a dish is microwave-safe,
use this test: Place in the oven both the dish you are
testing and a glass measuring cup filled with one
cup of water—set the measuring cup either in or next
to the
dish.
Microwave 1
minute
at high. If the dish
heats, it should not be used for microwaving. If the
dish remains cool and only the water in the cup heats,
then the dish is microwave-safe.
●
Paper towels, waxed paper and plastic wrap
can be used to cover dishes in order to retain moisture
and prevent spattering. Be sure to vent plastic wrap so
steam can escape.
●
Some microwaved foods require stirring, rotating
or rearranging.
Check the Cookbook supplied.
●
Steam builds up pressure in foods which are tightly
covered by a skin or membrane.
Pierce potatoes, egg
yolks and chicken livers to prevent bursting.
If you use a meat thermometer while cooking, make
sure it is safe for use in microwave ovens.
6
Page 7

FEATURES OF YOUR
OWN
When You Plug in the Oven
The panel displays four 8’s on the upper portion and all of the oven
functions on the lower portion. After
15 seconds, all lights disappear
and
“PF”
comes on in the upper portion. Touch the
CLEAWOFF
pad
and oven is ready for use and the clock can be set.
If power is disrupted at any time, the above sequence recurs, and you
must reset Clock after touching
CLEAWOFF.
1.4 Cubic Foot
Oven Interior
I
1. Door Latch.
Push in to open door.
7.
Receptacle for Temperature Probe.
Probe must be
2. Door Handle.
Door must be securely latched for oven
securely inserted into receptacle before oven will start
to operate.
any temperature cooking.
3.
Door Safety Lock System.
8. Touch Control Panel.
Use touch controls to set all
4.
Window with Metal Shield.
Screen allows cooking to
oven functions. Further detailed explanation is shown
be viewed while keeping microwaves confined in oven.
on following page.
5.
Temperature Probe.
Probe measures internal food
9.
Broiler Pan and Spatter Shield. See
Convection
Broiling section for instructions.
temperature. Must be used when cooking by
temperature in microwave, convection or combination
NOTE:
Oven light and oven vent(s) are located on the
modes and with Auto Roast function.
inside walls of the microwave oven. Rating plate is
6.
Oven Shelf.
Use with convection, combination and
located on the left side wall of the control panel seen
when the door is open.
some microwave recipes.
All These Things are Normal With Your Microwave Oven:
Q
Dimming oven light and change in blower sound may
●
Steam or vapor escaping from around the door.
occur while operating at power levels other than high.
●
Light reflection around door or outer case.
●
Dull, thumping sound while oven is operating.
●
During cooking you will hear “cracking” and “popping”
●
Some TV-Radio interference might be noticed
noises which are nothing more than normal expansion
while using your microwave oven. It’s similar to
of the oven.
the interference caused by other small appliances
●
At the end of microwave cycles you will hear a slight
and does not indicate a problem with your oven.
thum~.
This is normal.
.
7
Page 8
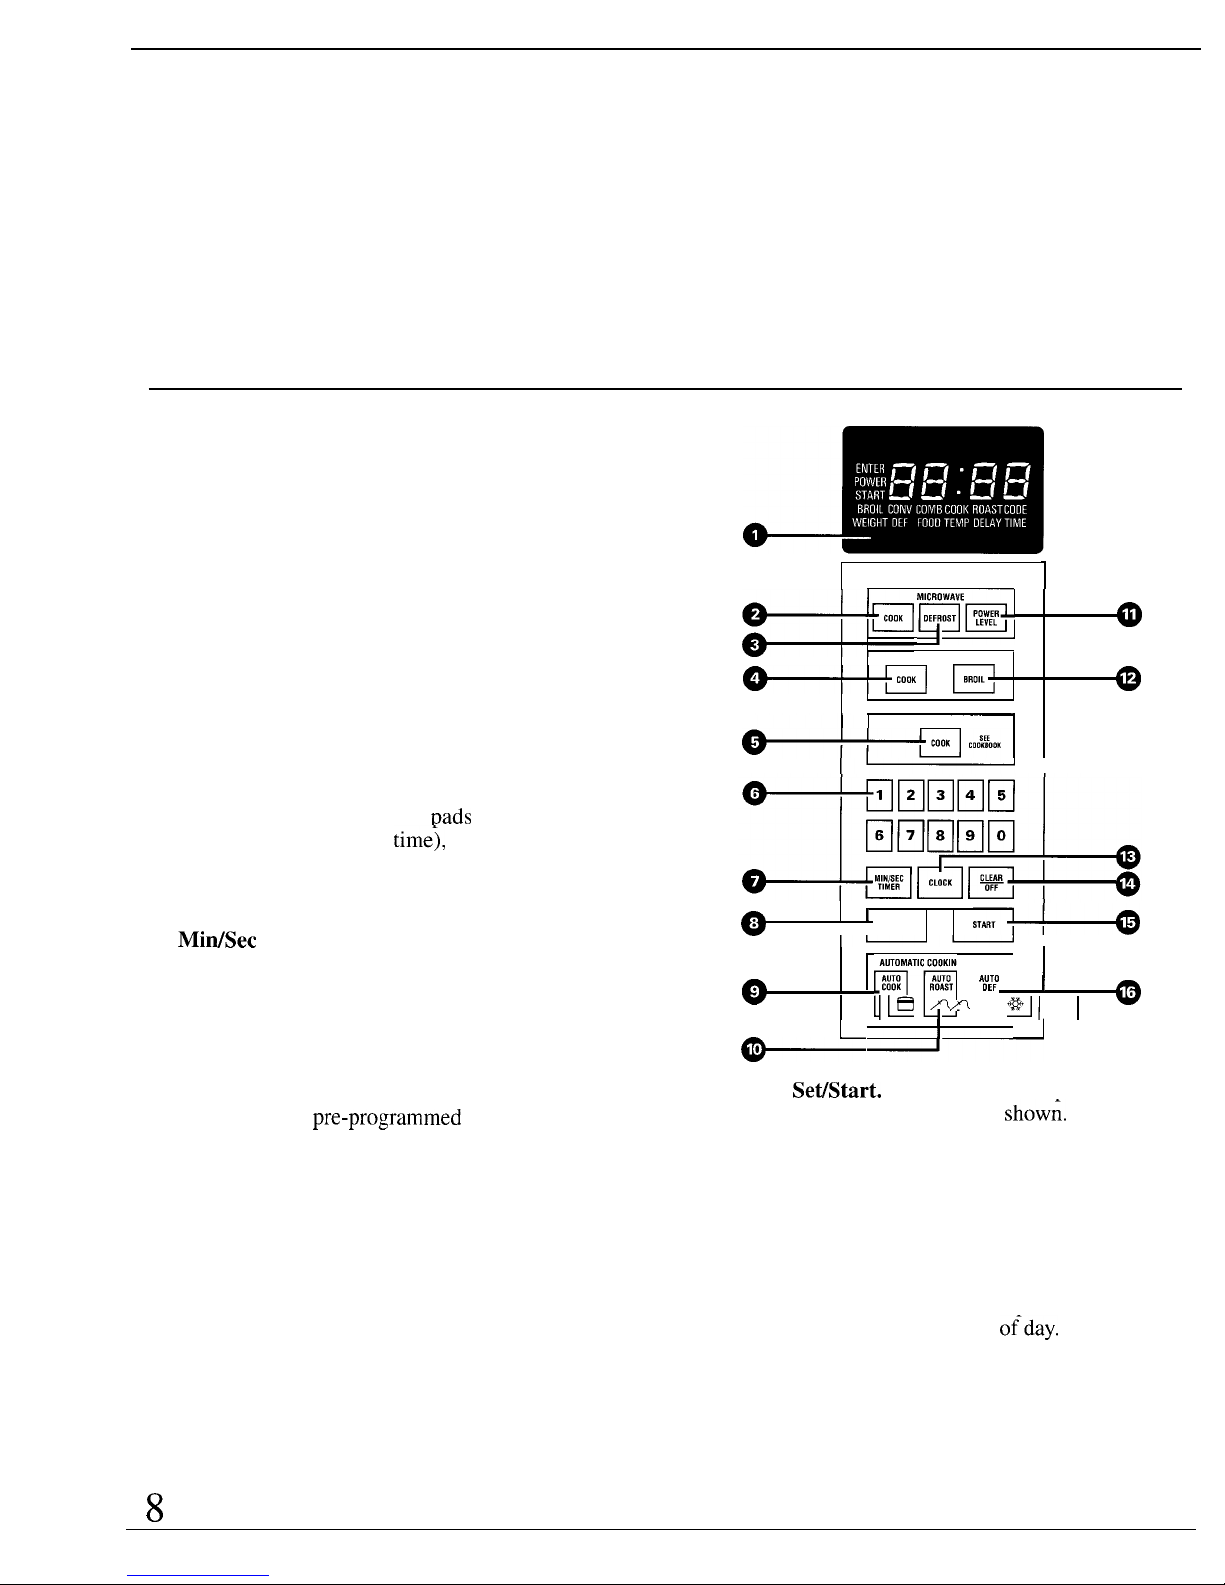
YOUR TOUCH CONTROL PANEL
The touch control panel allows you to set the oven controls electronically
with the touch of a finger. It’s designed to be easy to use and understand.
With your new oven, you have several cooking options. In addition to
microwave or convection cooking, you have combination cooking which
uses both methods. Also automatic microwave cooking (Auto Cook)
and automatic microwave defrosting (Auto Defrost), and automatic
combination temperature cooking (Auto Roast). Or you may make
your own 2 stage programs to suit your individualized cooking needs.
1. Display. Displays time of day, time or temperature
2.
3.
4.
5.
6.
during cooking functions, cooking mode and
pertinent instructions after setting each part of
cooking steps telling you what to do next.
Microwave Cook. Touch this pad before entering
microwave cooking time or temperature. Oven is
programmed for power level 10 automatically but
may be changed after entering time.
Microwave Defrost. Gentle thawing with little or
no attention.
Convection Cook. When convection cooking,
touch this pad before entering desired oven time
and temperature.
Combination Cook. (See Cookbook.) Touch this
pad first when using combination cooking mode.
Number Pads. Touch these
Dads
to enter time
(time of day or cooking
tim~, internal food
temperature (using probe), oven temperature,
power level, or codes during Auto Cook, Auto
Roast, or Auto Defrost.
7.
MitiSec Timer. This feature uses no microwave
energy. It functions as a kitchen timer.
8. Auto Start. Allows you to program your oven to
begin cooking at a preset time of day—up to an
1 l-hour and 59-minute delay.
9. Auto Cook. Touch this pad and then number pad
for desired code number, and oven automatically
microwaves at
pre-programmed power levels and
determines the proper amount of cooking times
until the food is done and oven shuts off.
10. Auto Roast. Insert probe, touch this pad, and
desired number pad for code to combination
temperature cook meat with automatic preset
program.
11. Power Level. Touch this pad before entering
another power level number whenever microwave
energy is being
used.
12. Broil. Touch this pad for broiling. Be sure to use
splatter shield and drip pan.
8
1
r:~’1%:
CONVECTION
COMB
INATIO N
l—
I
1
AUTO
I
START
l——
I
AUTOMATIC COOKING CONTROL
fln
E’ ‘
AUTO AU1O
A:;:
COOK ROAST
I IB
A
*I
I
@
I
1
I
13. Clock SetiStart. When oven is first plugged
14.
in, all segments on display are
show~.
Touch
CLOCK. “ENTER TIME” flashes, colon remains
on, and the four 8’s disappear. Enter time of day
by touching the number pads in sequence. For
example, for 1:30, touch 1, 3, and O. Touch
START. Time is set on display. To reset or change
time, touch CLOCK, enter correct time and touch
START again.
Clear/Off. When touched, it stops the oven and
erases all settings except time
o{day.
15. Start. Must touch this pad for oven to begin
any function.
16. Auto Defrost. Touch this pad, then code number
and food weight and the oven automatically sets
power levels and defrosting time.
Page 9

-T
YOUR
OWN
CAN DO
Cooking with your new oven offers a wide variety
of food preparation options. Microwave cooking
uses very short, high frequency radio waves. The
movement of the microwaves through the food
generates heat and cooks most foods faster than
regular methods, while retaining their natural
texture and moisture. Microwave cooking heats
food directly, not the cooking utensil or the interior
of the oven. Reheating is easy and defrosting is
particularly convenient because less time is spent
in food preparation.
Convection cooking constantly circulates heated air
around the food, creating even browning and sealed-in
flavor by the constant motion of hot air over the food
surfaces.
Your new oven also offers the option of combination
cooking, using microwave energy along with convection
cooking. You cook with speed and accuracy, while
browning and crisping to perfection.
You can use microwave cooking, convection cooking or
combination cooking to cook by time. Simply preset the
length of cooking time desired and your oven turns off
automatically. Or you can cook by temperature, by these
methods, using the temperature probe to determine the
doneness by the internal temperature of the food. This
method takes the guesswork out of cooking, shutting
the oven off automatically when the food reaches the
desired temperature.
The Automatic Cooking Control (AUTO COOK)
feature does your microwave cooking for you. It’s
easy and convenient—just follow the step-by-step
instructions in this manual. A sensor detects steam
from the food and automatically adjusts cooking time
and power level for best results.
AUTO ROAST is a combination cooking function
that uses the temperature probe. You simply select
from 8 Auto Roast codes, and the oven automatically
adjusts power level, oven temperature and internal
food temperature to cook the food the way you want it.
AUTO DEFROST automatically sets the defrosting
time and power levels for you. You choose the
appropriate code number from 1 to 3 from the food
you are defrosting, then enter the food weight in pounds
and tenths of a pound and touch the START pad. The
oven calculates the defrosting time and changes power
levels during defrosting to give even defrosting results.
The Auto Start Timer lets you program the oven to start
cooking at a desired time, even if you’re not at home.
The following guide shows at a glance the difference
between microwave, convection and combination
cooking.
Comparison Guide
Microwave
Convection
Combination
COO~NG
Microwave energy is
Hot air circulates around
Microwave energy and convection
METHOD
distributed evenly throughout
food to produce browned
heat combine to cook foods in up to
the oven for thorough, fast
exteriors and seal in juices.
one-half the time of regular ovens,
cooking of food.
while browning and sealing in juices.
HEAT
Microwave energy.
Circulating heated air.
Microwave energy and circulating
SOURCE
heated air.
HEAT
Heat produced within food
Heat conducted from
Food heats from instant energy from
CONDUCTION by instant energy penetration.
outside of food to inside.
penetration and heat conducted from
outside of food.
BENEFITS
Fast, high efficiency cooking.
Aids in browning and seals
Shortened cooking time from
Oven and surroundings do
in flavor. Cooks some foods
microwave energy, plus browning
not get hot. Easy clean-up.
faster than regular ovens.
and crisping from convection heat.
Read this book to learn the many different things
your MicrowavelConvectionlCombination Oven can do. You will find a wide
variety of cooking methods and programs designed to suit your lifestyle.
9
Page 10
COOKWAM
AND
ACCESSOms
Cookware
Microwave
Convection Combination
Heat-Resistant Glass,
YES
YES YES
Glass-Ceramic (Pyrex@,
Fire
King@,
Corning
Ware@,
etc.)
Metal
NO
YES
NO
Non Heat-Resistant Glass
NO
NO NO
Microwave-Safe Plastics
YES
NO
YES*
Plastic Films and Wraps
YES
NO NO
Paper Products
YES
NO
NO
Straw, Wicker and Wood YES
NO
NO
*Use only microwave cookware that is safe to
450°F.
NOTE: For more information on the proper use of cookware in your oven, see
your Microwave Convection Cookbook.
Cookware Tips
Convection Cooking
METAL PANS are recommended for all types of baked
products, but especially where browning or crusting
is important.
Dark or dull finish metal pans
are best for breads and
pies because they absorb heat and produce crisper crust.
Shiny aluminum pans are better for cakes, cookies or
muffins because these pans reflect heat and help
produce a light tender crust.
GLASS OR GLASS-CERAMIC casserole or baking
dishes are best suited for egg and cheese recipes due to
the cleanability of glass.
Combination Cooking
GLASS OR GLASS-CERAMIC baking containers
are recommended. Be sure not to use items with metal
trim as it may cause
arcing
(sparking) with oven wall
or oven shelf, damaging the cookware, the shelf or
the oven.
HEAT-RESISTANT PLASTIC microwave cookware
(safe to
450°F.)
may be used, but it is not recommended
for foods requiring crusting or all-around browning,
because the plastic is a poor conductor of heat.
Microwave
Convection
Combination
Broil
METAL SHELF
YES’
YES YES
NO
ACCESSORY
NO
NO
NO
YES2
‘Some recipes may call for cooking on this oven shelf, but generally
2
DO NOT USE IN MICROWAVE, CONVECTION OR
microwaved foods should be cooked directly on the ceramic
COMBINATION SETTING,
EXCE~
WHERE NOTED IN
oven floor. See Cookbook for specific instructions.
SPECIFIC COOKBOOK RECIPES.
10
Page 11
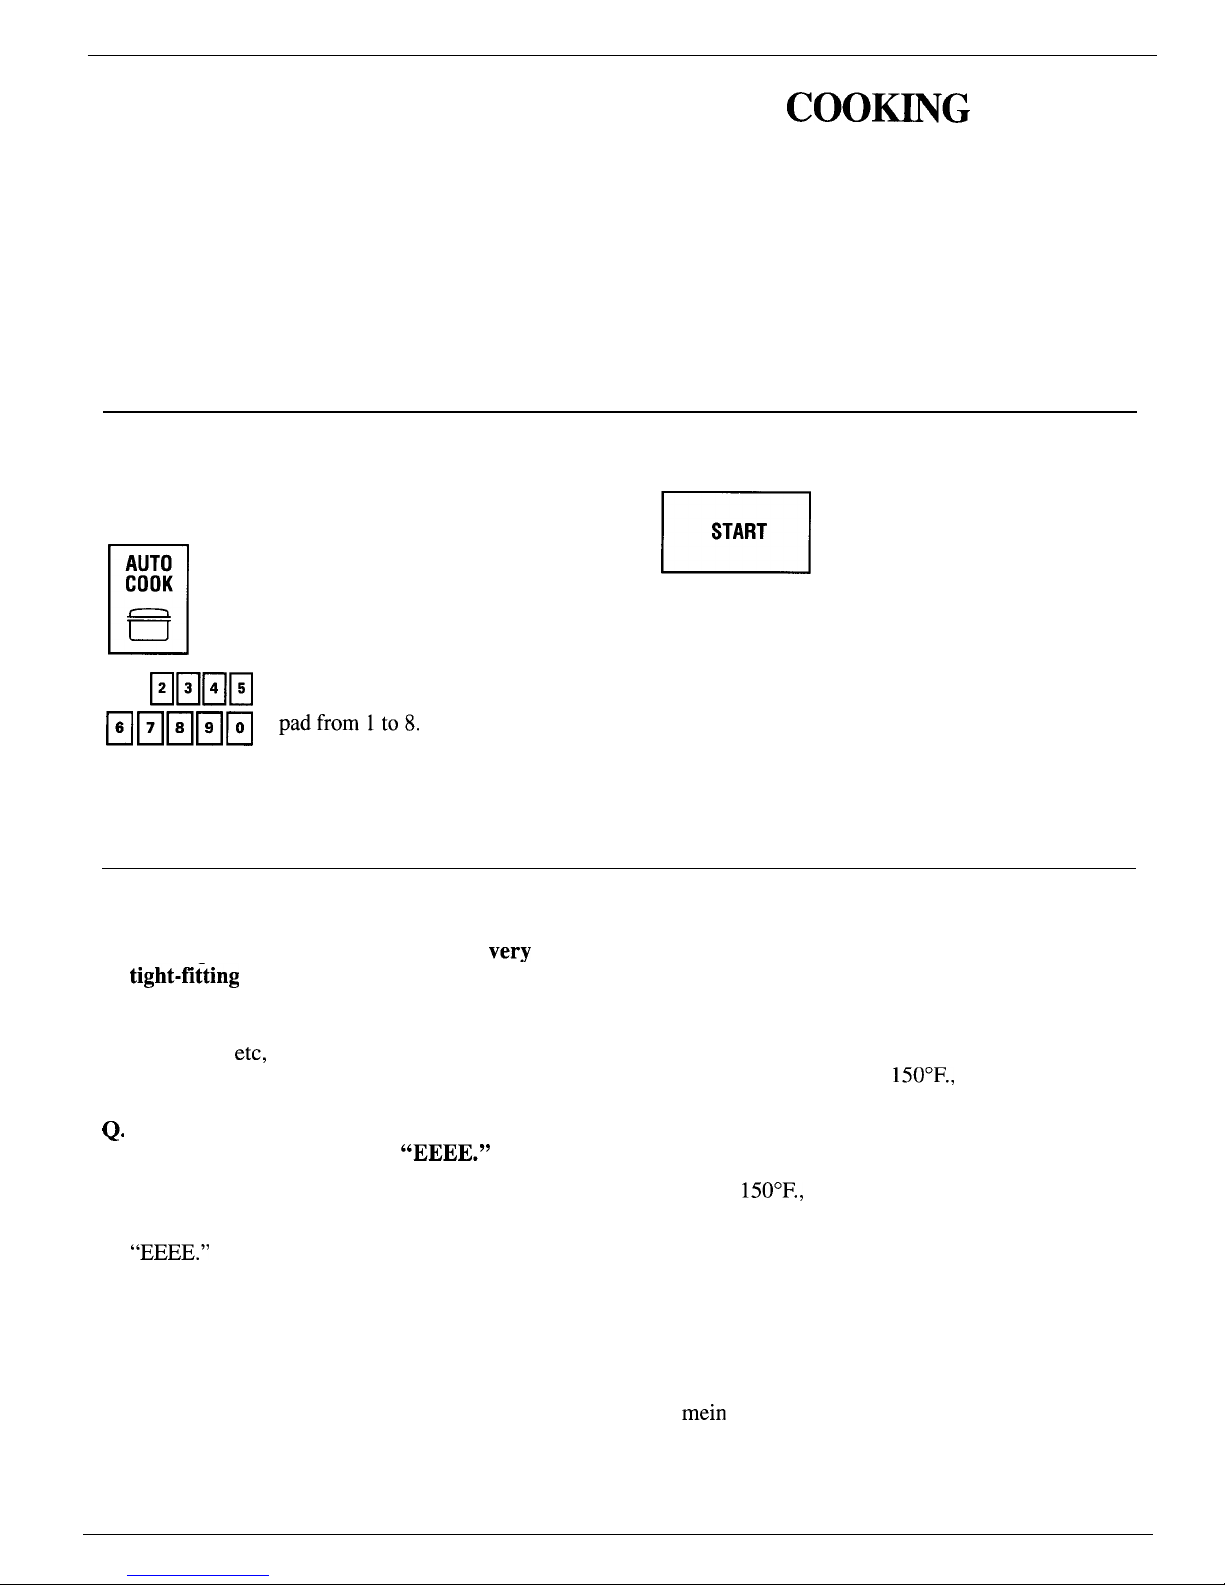
AUTOMATIC MICROWAVE
COOmG
Microwaving with the Auto Cook setting offers
especially convenient shortcut cooking for many
foods. There’s no guesswork about cooking
times, no need to look up suggested times in the
Cookbook. Instead, a sophisticated sensing device
actually detects the steam which escapes from
cooking food, and automatically adjusts the oven’s
cooking time for various types and amounts
of food.
Cooking containers must be covered during Auto
Cook, so this feature is best used for foods which you
wish to steam or to retain moisture. Eight Auto Cook
codes let you select a cycle ideal for many frequently
prepared foods. When oven senses the steam, the
oven signals so that you can stir or rotate the food
as directed. Once steam has been detected, the oven
automatically begins counting down the remaining
cooking time and adjusts power levels as needed.
Setting the Oven Controls
Step 1: Place food in appropriate container and cover
as directed in the Automatic Cooking Recipe Guide.
n
Step 2: Touch AUTO COOK.
AUTO
COOK
B
❑
EHEE
Step 3: Select the desired Auto
Cook code by touching a number
EEEEE
‘adfrom1t08
n
Step 4: Touch START. DO NOT
START
OPEN DOOR DURING THIS
TIME. When steam is sensed,
oven signals. Stir or rotate food
as needed. Touch START to
resume cooking. Display shows
time counting down. When done,
oven displays “End,” signals and
turns off.
NOTE: Oven will not accept “Auto Cook code”
if the oven is hot. If “START” and “Hot” flash on
display and “DELAY TIME” appears, you must
cool the oven before using Auto Cook or you may
choose to use time or temperature microwave
cooking.
Questions and Answers
Q. Would plastic storage containers with
very
Q. When I tried to enter AUTO COOK, “START”
A.
Q.
A.
tight-fi~ting
lids be appropriate for Automatic
Cooking?
No. Most types of plastic storage dishes,
butter tubs,
etc,
with tight-fitting lids are not
recommended for microwaving and do not allow
steam to escape properly.
When I opened the oven door to stir my food,
the oven beeped and flashed
“EEEE.” What
did I do wrong?
If the oven door is opened while “Auto” is
showing in display, it will signal and flash
“EEEE.”
Close door and touch START.
and “Hot” flashed on display and “DELAY
TIME” appeared. Why?
A. If you had previously used your oven for
convection or combination cooking and its interior
temperature was above
150°F.,
“Hot,” “START
DELAY TIME” and an approximate waiting time
will appear on display. If you start the oven at this
time, oven light will come on and cooling fan, but
no cooking will begin. When oven has cooled
below
150°F.,
you can use Auto Cook function.
Q. Are there some foods which do not Auto Cook
well?
A. Yes. Puddings and sauces which require frequent
stirring, candies and melted chocolate, bakery
goods or other foods where a dry or crisp surface
is desirable are best prepared by microwave time
cooking (see the Microwave Time Cooking
section). Also, extremely dry foods such as chow
mein
noodles or potato chips do not have enough
moisture to create steam for the sensor.
11
Page 12

AUTOMATIC MICROWAVE
COOmG
Automatic cooking control is a fully automatic control
system that lets your microwave oven do the cooking
for you. The guides in this section are designed to
help you make the most of this truly new feature.
Standard cooking techniques require setting the oven
for a specified cooking time or a selected finished
temperature. And that means looking up recipes
in a cookbook... trying to convert old recipes for
microwave cooking...or just resorting to guesswork.
This control method works on an entirely different
basis—with a special electronic sensor that detects
steam from cooking food. The oven “knows” how the
food is cooking; so it can automatically set the correct
cooking time and maintain the proper power level for
different types and amounts of food.
NOTE: Oven will not accept “Auto Cook code”
if the oven is hot. If the word “Hot” appears, you
must cool the oven before using Auto Cook or you
may choose to use time or temperature microwave
cooking.
Easy to Use
Simply touch two control pads—AUTO COOK and
Appropriate containers and coverings help assure
the desired code number—and then START. Refer
good cooking results. Containers should match in size
to cooking guide for a complete list of codes for to the size of the food being cooked. Coverings such
frequently prepared foods. The display shows Auto as plastic wrap secured on all sides, the lid that came
until steam is sensed and then signals, and displays with the container, or microwave-safe plastic domes
time counting down. During Auto, oven should not
are ideal.
be opened, but when oven signals, most foods should
be turned, stirred, or rotated. Check the Automatic
Cooking Guide for suggestions.
Foods Recommended
A wide variety of
foods including
meats, fish,
casseroles,
vegetables.
lef{overs,
and
convenience
foods can be
Auto cooked.
Match container
size with the food,
cover securely, and do not open door during Auto
cycle. When oven signals, turn, rotate or stir as
recommended in recipe or in the Automatic Cooking
Control Guide.
Foods Not Recommended
Recipes and foods
which must be cooked
uncovered, or which
require constant
attention, or adding
ingredients during
cooking should be
microwaved by
microwave time
cooking (see Microwave Time Cooking section). For
foods that microwave best using temperature probe, use
Temp
Cook, or Auto Roast. Foods requiring a dry or
crisp surface after cooking cook best with microwave
temperature cooking (see Microwave Temperature
Cooking section), convection cooking (see Convection
Time Cooking, Convection Temperature Cooking, and
Convection Broiling sections) or combination cooking
(see Combination Time Cooking, Combination
Temperature Cooking, and Combination Auto Roast
sections). Note the Cooking Reference Guide.
12
Page 13

AUTOWTIC COO~NG
CONTROL
GU~E
●
Do not open oven door during Auto cycle. May affect
cooking performance. After first beeping signal (time
appears on display for codes except codes 7 and 8), stir
or rotate food.
●
Be sure outside of cooking container and inside of
microwave oven are dry.
●
Stir or rotate after oven signals and time appears on
display.
●
Match the amount of food to the size of container. Fill
containers at least 1/2 full.
NOTE: Oven will not accept “Auto Cook” code
if the oven is hot. If the word
“Hot” appears,
you must
cool the oven before using Auto Cook
or you may choose to use time or temperature
microwave cooking.
●
Add 1/4 to 1/2 cup water to fresh vegetables. Stir or turn
over vegetables and meats after
first
beeping signal.
“
Use microwave-safe plates or containers. DO NOT USE
PAPER PLATES with Automatic Cooking.
1
Auto
cook
Food
Code Container
Approx.
Time
3
to 4 min.
per cup
5 min.
per cup
Comments
Reheating Food:
I
Canned Foods
1
Room Temp. or this (small
amounts at
refrig.
temp.)
Microwave-safe
container matched
to size of food.
Cover with
lid to dish or plastic wrap.
Cover with lid to dish or plastic wrap.
Refrig.
temp. or thick (large
4
amounts at room temp.)
Microwave-safe
container matched
to size of food.
Deli Foods
1
Microwave-safe
container matched
to size of food.
Cover with lid to dish or plastic wrap.
Entrees
Frozen
6
Thin (under 1 inch)
Cover in own container, or for quicker
cooking, in glass container.
NOTE:
If
entree is in aluminum pan, remove from
box, remove lid and put back in original
closed box. If entree is in paperboard
container, remove from the box and
microwave with original plastic covering.
Use bowl with plastic wrap or cover
plate with microwave-safe plastic dome.
Cook in container
(see cements).
8 to 10 min.
2 to 4 min.
per cup
Leftovers
1
TV Dinner
(10 to 12 oz.)
6
Microwave-safe
container matched
to size of food.
Cook in container.
After completion of the cooking cycle,
it may be necessary to stir dense foods,
such as potatoes, and Microwave Cook
on High (10) an additional 1 to 2
minutes. See also Frozen Entree
9 to 11 min.
(see comments)
Comments.
Make sure liquid covers all ingredients.
When oven signals, stir well.
2-qt.
casserole with
lid or cover with
plastic wrap.
25 to 35 min.
Chicken
Breasts (4)
4
(2 to 3 servings)
2-qt.
oblong glass
baking dish. Cover
with plastic wrap.
NOTE: Make
sure
meat doesn’t touch
covering.
17 to 25 min.
No additional liquid needed. When
oven signals, rotate 1/2 turn. Note the
preference control 1 is used with
breasts to decrease cooking time
for best results.
If after completion of Auto Cook cycle food needs additional warming, simply
re-cover
food and use Auto Cook code 8.
(continued next page)
13
Page 14

AUTOmTIc
COOmNG
CONTROL
GUmE
(continued)
4uto
Cook
Code
4
4
Food
Container
4pprox.
Time
2 to 4 min.
per piece
Comments
Chicken (continued)
Pieces
2-qt.
oblong glass
baking dish. Cover
with plastic wrap.
NOTE: Make sure
meat doesn’t touch
covering.
No additional liquid needed. When
oven signals, rotate 1/2 turn.
Whole (3
lbs.)
2-qt.
oblong glass
baking dish or
cooking bag. Cover
with 2 pieces of
overlapping plastic
wrap.
Tie wings and legs and place on trivet.
If breast bone seems prominent, a
1 inch piece of foil maybe placed
over bone to prevent splitting of wrap.
Rotate 1/2 turn when oven signals.
Baste with butter and lemon juice.
20 to 25 min.
Fish
Fillets (1 lb.) Defrosted
8
2-qt.
oblong glass
baking dish. Cover
with plastic wrap.
5 to 8 min.
Fruit
Baked Apples (4)
Baked Pears (4)
Hamburger
Casserole, Convenience
(Up to
3
lbs.)
8
8
2-qt.
casserole with
li(
2-qt.
casserole with
li(
7 to 9 min.
7 to 9 min.
Core apples. No water needed.
No water needed.
2-qt.
glass dish
with lid.
6
2
7
7
6
6
13 to 18 min.
Precook ground beef. Drain. Make
sure liquid covers all ingredients.
When oven signals, stir well and
rotate 1/4 turn.
Meat Loaf (1X lb.)
Glass pie plate. Cover
with plastic wrap.
40 to 45 min.
9 to 10 min.
Patties
(4-5)
8 inch square dish.
Cover with plastic wrap.
Pork
Sausage patties
(1/2 inch thick~)
Chops (3/4-1 inch thick)
8 inch glass square
dish.
6 min.
20 to 25 min.
Cover with plastic wrap.
2-qt.
oblong glass
baking dish. Cover
with plastic wrap.
Baste with 1 tablespoon barbecue
sauce per chop.
Spareribs
3-qt.
glass dish.
Cover with lid or
plastic wrap.
30 to 35 min.
Meat must be covered with liquid.
When oven signals, rearrange meat,
making sure it is submerged in liquid.
It maybe necessary to rearrange
another time during final cooking.
Seafood
Pieces
(1 lb. shrimp or scallops)
8
1
fi-qt.
glass dish. 5 to 7 min.
Cover with lid to dish.
Swiss Steak
(1X
round steak)
2
2-qt.
oblong glass
baking dish. Cover
with plastic wrap.
50 to 55 min.
Cut into pieces. Make sure liquid
covers all meat. When oven signals,
turn over and rearrange meat.
Vegetables, Fresh
Artichokes
(up to 4 med.)
8 to 12 min.
6
5
6
2-qt.
glass dish
with lid.
Place artichokes in dish stem side
down.
Add
1/4 cup water. Rotate dish
1/2 turn after oven signals.
Add
1/2
cup water. When oven signals,
stir well.
No water needed. Start cooking stem
side down.
Carrots (1 lb. sliced)
Cauliflower (1 med. head)
2-qt.
glass dish
with lid.
2-qt.
glass dish
with lid.
10
to 15 min.
12 to 15 min.
14
Page 15

Food
Vegetables, (continued)
fresh
Asparagus (1 lb. cut
spears)
Brussels, Sprouts (1
lb.)
Potatoes, Baked*
2-4 (6 to
8-oz.
each)
Frozen Block (10-oz)
Broccoli
Brussels Sprouts
Leaf Spinach
Mixed Vegetables
Frozen Pouch
Baby
Limas
corn
Peas
Spinach
Auto Cook
Code
6
6
5
5
6
6
6
6
6
6
6
6
Container
2-qt.
oblong glass
baking dish. Cover
with plastic wrap.
1
fi-qt.
oblong glass
dish with lid.
8 inch square glass
dish. Cover with
plastic wrap.
lfi-qt. glass dish
with lid.
1
fi-qt.
glass dish
with lid.
1
fi-qt.
glass dish
with lid.
lk-qt.
glass dish
with lid.
Lay pouch in
microwave-safe dish.
No cover needed.
Lay pouch in
microwave-safe dish.
No cover needed.
Lay pouch in
microwave-safe dish.
No cover needed.
Lay pouch in
microwave-safe dish.
No cover needed.
lpprox.
Time
10 to 12 min.
11 min.
20 to 25 min.
18 to 20
12 to 15
13 to 15
11 to 15
6 to 9
10
to 12
6 to 9
6 to 9
Comments
Add 1/4 cup water. When oven
signals, rotate 1/4 turn.
Add 1/4 cup water. When oven
signals, rotate 1/4 turn.
When oven signals, rotate 1/2 turn.
NOTE: Watch hot dish and steam!
Add 2 tablespoons water. When oven
signals, stir
well.
Add 2 tablespoons water. When oven
signals, stir well.
Add 2 tablespoons water. When oven
signals, stir well.
Add 2 tablespoons water. When oven
signals, stir well.
Make a 1 inch slit in pouch. When
oven signals, break up frozen center
and rotate 1/2 turn. NOTE: Watch for
hot steam.
Make a 1 inch slit in pouch. When
oven signals, break up frozen center
and rotate 1/2 turn. NOTE: Watch for
hot steam.
Make a 1 inch slit in pouch. When
oven signals, break up frozen center
and rotate 1/2 turn. NOTE: Watch for
hot steam.
Make a 1 inch slit in pouch. When
oven signals, break up frozen center
and rotate 1/2 turn. NOTE: Watch for
hot steam.
*Excessively dry potatoes may not release enough moisture to activate sensor. Be sure potatoes are fresh and not old
and dried-out.
How to Adapt Microwave Casserole Recipes
Use the following step-by-step
2. Use microwave-safe containers
4. Allow precooked ingredients
instructions and tips when
that are appropriate in size
or hot sauces to cool slightly
adapting your casserole recipes
to the food amount. Use
3-qt.
before adding other ingredients.
for automatic cooking.
containers or smaller.
5. Meats and vegetables should
1. Select recipes with precooked
3. For saucy casseroles, cover
be submerged in liquid.
ingredients that do not require
container with lid or plastic
6. After oven signals, rotate dish
adding ingredients at different
wrap. (No vents.) For cheese
stages during cooking or recipes
and stir, covering all ingredients
or crumb-topped casseroles,
that require extra attention,
with liquid.
remove cover after oven signals
stirring or rotating.
and add topping, then continue
cooking uncovered.
15
Page 16

AUTO START
The Auto Start control on your new oven allows you to begin cooking
a meal, even if you’re not at home! The convenient Auto Start function
lets you program a time of day, in hours and minutes to begin cooking.
The oven will hold the food while counting down the selected time of
day, then begin cooking after the preset time has been reached.
How to Use Auto Start with a Time or Temperature Cooking Function
Step 1: Touch the AUTO START
m
‘ad
•~~n~
Step 2: Set the desired time of
day by touching number pads in
•~~~~
touch, 0 and,
sequence For example for
2:00,
,,
Step 3: Select the cooking function (Microwave,
Convection, Combination or Auto Roast). Set the
oven for that function, according to the instructions
given in this book.
m
Step 4: Touch START. Correct
START
time of day, cooking function
and “DELAY TIME” appear on
display. When the time of day
is reached at which cooking is
desired to begin, the oven signals
and automatically begins the
cooking function. When cooking
is completed, oven displays
“End,” signals and turns off.
NOTE: Delay times up to 11 hours and 59 minutes
can be programmed. Foods that spoil easily such as
milk, eggs, fish, stuffings, poultry and pork should
not be allowed to sit out for more than one hour.
Room temperature promotes the growth of harmful
bacteria.
M~UTE/SECOm
T~ER
The Minute/Second Timer is a minute timer. The time can range from one
second to 99 minutes and 99 seconds. The Minute/Second Timer operates
without microwave energy.
How to Time a 3-Minute Phone Call
n
Step 1: Touch MIN/SEC TIMER pad.
MIN/SEC
TIMER
m
Step 3: Touch START. Display
START
shows time counting down.
Step 2: Touch number pads 3, 0 and O (for 3 minutes
Step 4: When time is up, oven signals and display
and no seconds).
shows time of day.
16
Page 17

AUTOmTIC
DEFROSTmG
With the Auto Defrost feature, the oven automatically
sets the defrosting time and power levels for you. You
choose the appropriate code number from 1 to 3 for
the food you are defrosting, then enter the food weight
in pounds and tenths of a pound (See Conversion
Guide below) and touch START. The oven calculates
the defrosting time and changes power levels during
defrosting to give even defrosting results.
When the oven reaches one-third of the total
defrosting time, the display flashes “Turn,” telling
you to turn food over and will not continue defrosting
until door is opened and START is touched again.
After defrosting time is complete, the oven
automatically turns off.
How to Set Auto Defrost
NOTE: Before you begin, check Cooking Guide for
minimum and maximum food weights for each code
number. You will need to know your food weight and
corresponding code before beginning.
NOTE: If
“EE
EE” appears after entering food
weight, check the Code Guide to make sure that
weight corresponds to the code number entered.
Step 1: Remove frozen meat from package and place
in microwave safe dish. Place in oven and close door.
n
Step 2: Touch AUTO DEF pad.
AUTO
DEF
❑
EEEE
Step 3: Touch number pad
3.
Step
4: Touch number pads 3 and O for weight of 3
lbs.
m
Step
5: Touch START pad.
START
WEIGHT, DEF and TIME are
displayed and defrost time begins
counting down.
Step 6: When 1/3
the defrosting time is
completed, the oven
signals and “Turn”
flashes on display
instead of time counting
m
down. Open door and
turn package over.
Step 7: Close door and touch the START pad. Display
shows remaining defrosting time counting down.
Step
8:
When defrosting
Endmdtientumsoffm
time is completed the
oven signals flashes
Conversion Guide
Automatic Defrosting Guide
If the weight of food is stated in
pounds and ounces, the ounces
must be converted to tenths
(.1) of a pound.
Ounces
Pounds
1–2
.1
3
.2
4-5
.3
6-7
.4
8
.5
9-1o
.6
11
.7
12-13
.8
14–15
.9
MIN.-MAX.
HOLD
RECOMMENDED
CODE
WEIGHT
TIME* FOOD
1
.5–8.0
lbs.
5-25 min.
Meat
2
.5-8.0
lbs.
5-25 min.
Poultry
3
.5-3.0
lbs.
5-15 min. Seafood
*In Auto Defrost, it is necessary to allow the meat to stand
during holding time. You may take the meat out of the
oven if you prefer. Allow a longer hold time for larger
cuts of meat.
17
Page 18

DEFROSTING BY
TME
Defrosting is one of the most useful microwave
Your new oven can even be programmed to Defrost,
functions of your oven, thawing foods quickly, but
then Time Cook for complete freezer-to-table meal
gently. With no lengthy defrosting required, meal
preparation-automatically ! Refer to the Cookware
planning is easier than ever! You can prepare
and Accessories section of this book or to the
single servings or whole meals ahead of time and
Cookbook for cookware and food preparation
freeze, then thaw and heat them in just minutes.
tips and suggestions.
Setting the Oven Controls
n
Step 1: Touch Microwave DEFROST.
DEFROST
❑
EEEE
Step
2:
Touch the number pads
to enter defrosting time. For
EEEEE
example, touch 8, 0, 0 for
8 minutes. Power level is
automatically set in your oven.
u
START
Step
3: Touch START. When
defrosting time is completed, the
display shows “End,” and the
oven signals and shuts off.
How to Microwave Defrost and Microwave Cook by Time
If you wish to defrost and then cook a particular food,
follow the simple instructions below to program your
oven.
n
Step
1:
Touch Microwave DEFROST.
DEFROST
I
I
•~~~~
Step 2: Set defrosting time in
minutes and seconds by touching
EEEEE
number pads in sequence. The
programmed time appears in
the display.
n
Step 3: To set the time cooking stage,
COOK
touch Microwave COOK.
Step 4: Touch the number pads to enter the cooking
time. Display shows this time. Power level 10 is
programmed into oven. (If power level 10 is not
appropriate, see “How to Change Power Level”
below.)
❑
HEEE
Step
5: Touch START. Display
shows “DEF TIME” and the
EEEEE
preset defrosting time begins
counting down. When this time
is completed, display shows
“COOK TIME” and the cooking
time begins counting down. When
finished, “End” flashes, oven
signals and turns off.
How to Change Power Level
After setting cooking time, touch POWER LEVEL
pad, then touch desired number for new power level.
Then touch START.
18
Page 19

Questions and Answers
Q. Why don’t the defrosting times in the Cookbook
Q. When I defrosted hamburger patties, the
seem right for my food?
edges were already cooked. Why is this?
A. Cookbook times are averages, and defrosting time
A. The density and size of the food makes a
required can vary
accordin~
to the
temperat~re
in
difference-when defrosting.
Try
using the
your freezer. Set your oven for the time given in the
minimum recommended defrost time first.
Cookbook. If your food is not completely thawed at
Most meat patties must be rotated during
the end of that time, reset the oven and adjust the total defrosting time.
time for additional defrosting.
Q. Can I open the door during the Microwave
Defrost cycle?
A. Yes. You may open the door at any time during
microwaving. To resume defrosting, just close the
door and touch START again.
MICROWAVE
T~E COO~NG
Time cooking is a familiar method of cooking food
You can even program your oven to Microwave
for a predetermined length of time. You will find
Cook by time in two stages! Cook at one power
that cooking with microwave energy takes a great
level for a desired length of time; then the oven
deal less time than regular cooking methods. And
automatically changes to a different power
level
your microwave oven, unlike many other ovens,
and continues cooking until the food is done.
turns itself off automatically after the preset time
Check the Cookbook for foods requiring two
has elapsed.
power levels.
Setting the Oven Controls
~
Step 1: Touch Microwave COOK.
I
COOK
I
=EE
Step 2: Enter the cooking time
in minutes and seconds. For
example, touch 1, 2 and O for
1 minute, 20 seconds. When
setting 1 hour and 30 minutes
touch 9, 0, 0, and O. The oven is
automatically set to cook at power
level 10. (If power level 10 is not
appropriate, see “How to Change
Power Level” at right). Touch the
number pad for the desired
power level.
n
Step 3:
Touch START. When
START
time is up, the display shows
“End,” the oven signals and shuts
off. If, during cooking, you wish
to see what power level is being
used, touch POWER LEVEL pad
and the number appears
momentarily.
How to Change Power Level
After setting cooking time, touch POWER LEVEL
pad, then touch desired number for new power level.
(continued next page)
19
Page 20

MICROWAVE
TME COOmNG
We-Stage
a
COOK
u
POWER
LEVEL
(continued)
Microwave Time Cooking
Step 1: Touch Microwave COOK and
the desired number pads for first stage
How to Change Power Level
cooking time, as described in Steps 1
After setting cooking time, touch POWER LEVEL
and 2 on previous page.
pad, then touch desired number for new power level.
Step 2: Touch POWER LEVEL. Touch
the number pad for first stage power
m
Step 4: Now touch START.
level or oven automatically cooks at
First stage cooking time appears
High (10).
on the display counting down.
Step 3: For the second cooking stage, touch
~1
When the first stage time ends,
Microwave COOK and the numbers for second phase
the oven automatically changes
cooking time. If a different power level is required,
to the second stage of cooking
see “How to Change Power Level”
at
right.
and power level. When cooking
is finished, the
dis~lav
shows
“End,” the” oven
s;gn~ls
and
turns off.
Questions and Answers
Q. I touched the number pads to enter cooking
Q. I set my oven to Microwave COOK by time for
time but nothing happened. Why?
the period in the recipe, but the food wasn’t
A. The Microwave Cook pad must be touched before
done at the end of that time. What happened?
setting the number pads or the oven will not accept
A. Since house electrical power may vary, many
the number entries.
microwave time cooking recipes give you a time
range to prevent overcooking. Set the oven for the
minimum time, test the food for doneness, and
cook a little longer if necessary.
MICROWAW
TEMPERATURE
COOmNG
Temperature cooking uses a special food Temperature cooking takes the guesswork out of
thermometer to measure the internal temperature
cooking because the oven automatically switches to
of food as it cooks. For many foods this is the
Hold after reaching the preset food temperature and
best test of doneness. Heating or reheating foods
maintains that temperature until you touch the
accurately to the desired serving temperature
CLEAWOFF
pad.
is easy.
The Temperature Probe
The temperature probe is a food thermometer that
gauges the internal temperature of your food. (Its
appearance may vary from picture at right.) The
probe must be used when using Microwave
Temperature Cooking, Convection Temperature
Cooking, Combination Temperature Cooking and
Combination Auto Roast. To use your probe properly,
follow directions on the next page.
Cable
End
I
20
Page 21

Setting the Oven Controls
Step 1:
Insert temperature probe in food as shown
Step 4: The oven will temperature cook automatically
below or as described in cookbook. Plug other end of
at power level 10, unless a-different power level is
-
probe securely into oven wall receptacle and
cloqe
selected.
oven door.
n
Step 2: Touch Microwave COOK.
COOK
❑
EEHE
Step
3:
Touch the number pads
in the order
vou
read them. For
How to Change Power Level
After setting temperature cooking, touch POWER
LEVEL pad, then touch desired number for new
power level.
•~~~~
ando
example,
fo~ 130°F.,
touch 1, 3,
n
Step 5: Touch START to begin
START
cooking. The display shows
“-80” if actual food temperature
is below
80°F.
After
80°F.
is
reached. the
dis~lav
shows food
temperature as
~t r[ses.
When food
reaches the preset temperature,
“Hold” flashes, oven signals and
holds temperature.
How to Use the Temperature Probe
Place probe so that point rests in
Insert probe into meatiest part of
For dishes such as meat loaf or
center of the thickest meaty part
inner thigh, below and parallel to
casserole, insert probe into center.
of roast, or into the cut end or
the leg of a whole turkey.
meatiest part of boneless ham or
lamb. Point should not touch bone,
fat or gristle. For bone-in ham or
lamb, insert probe into center of
lowest large muscle or joint.
Questions and Answers
Q. Are there any foods I can’t temperature cook?
Q. Can I leave the probe in the oven if it’s not
A. Yes. Delicate butter icings, ice cream, frozen
inserted in the food?
whipped toppings, etc., soften rapidly at warm
A. No. If the probe is touching the oven wall, and is
temperatures. Batters and doughs as well are
not inserted into food, you may damage the oven.
difficult to cook precisely with the probe. It is best
to time cook these foods. Do not use for frozen
foods because probe could be damaged.
21
Page 22

CONECTION T~E
COOmNG
During convection cooking, a heating element is used to raise the
temperature of the air inside the oven. A fan gently circulates this
heated air throughout the oven, over and around the food, producing
golden brown exteriors and rich, moist interiors. Because the heated
air is kept constantly moving, not permitting a layer of cooler air to
develop around the food; some foods cook faster than in regular
oven cooking.
NOTE: For information on suggested cookware, see the Cookware and
Accessories section.
How to Convection Preheat and Time Cook
~
Step 1: Touch Convection COOK pad.
I
COOK
I
I
START
I
Ste~ 2: Enter the oven
temperature by touching the
number pads that correspond with
the desired oven temperature. For
example, touch number pads 2, 7,
and 5 for
275°F.
Step 3: Touch START. The
selected oven temperature
disappears and “-200” appears
until oven temperature reaches
200°F.,
then
d;splays
oven
temperature until preset
temperature is reached. Oven
signals and “ENTER
CONV
TIME” flashes when temperature
is reached. If you do not open
door within 30 minutes, the oven
will turn itself off automatically.
Step 4: When oven is preheated, place food in oven.
“Hot” appears on display when you open the door.
m
Step 5: Set the desired cooking
time in hours and minutes by
touching number pads in
sequence. For example, to set
2 hours and 30 minutes, touch
number pads 2, 3, and O in that
order. To enter time less than one
hour, for example, 30 minutes,
touch 3 and O.
Step 6: Touch START pad. The
display shows remaining cooking
time. If time is less than 1 hour
display shows minutes and
seconds. If longer, time counts
down minute by minute until 59
minutes remain, then switches to
display minutes and seconds.
When cooking is completed, the
display shows “End” and the
oven signals and turns off.
How to Convection Time Cook Without Preheating
n
Step 1: If your recipe does not require
Step 3: Set the desired cooking time in hours and
COOK
preheating, touch the Convection
minutes by touching number pads in sequence. For
COOK pad.
example, to set 2 hours and 30 minutes, touch number
pads 2, 3 and O, in that order. To enter time less than
HHHHE
Step 2: Enter the oven
bne
hour, for example, 30 minutes, touch 3 and O.
temperature by touching the
EEEEE
number pads that correspond
n
Step 4: Touch START pad.
to the desired oven temperature.
START
Cooking begins and cooking time
For example, touch number pads
counts down as described above.
2, 2 and 5 for
225°F.
22
Page 23

CO~CTION
TE~EWTU~
COOmG
You can also convection cook with the temperature probe, to assure
that foods are cooked precisely to the degree of doneness desired,
while the constantly circulating hot air assures even cooking and
delicious browning. The temperature probe monitors the internal
temperature of the food and turns the oven off automatically when
the desired temperature is reached.
How to Convection Temperature Cook
~
“
---“
-
‘“”-”””’”-”””’
Dlep 1:
insert
proDe
in food as directed
in the Cookbook or
in the Microwave
Temperature Cooking
section. Plug other end
of probe securely into
wall receptacle.
n
Step
2:
Touch Convection COOK pad.
COOK
I
I
❑ EEHE
Step 3: Enter oven temperature
by touching the number pads that
EEEEE
correspond with the desired oven
temperature. For example, touch
2,
2;
5 for
225°F.
-
—————
a._—
A.
m—.
.—l
- .1-- —.-. -.. —.-..:
-..
MMMHM
alep 4: loucn
lne appruprlale
number pads in sequence to enter
EEEEE
the desired food temperature. For
example, touch 1, 8 and O, in that
order,
for.180°F.
m
Step 5: Touch START pad.
The display shows “-80” until
the food temperature reaches
~’
above
80°F.,
then it shows
actual food temperature as it
rises. When food reaches
preselected temperature,
display shows “End,” oven
signals and turns off.
Questions and Answers
Q. After I preheated my oven, I tried to set
cooking time, but nothing happened. What is
the problem?
A. Until you open the oven door or touch the
CLEAWOFF
pad, the oven remains in the preheat
mode and no further instructions can be entered.
After 30 minutes oven automatically turns off.
Q. Can I check during the cooking cycle to be sure
that I have set the correct oven temperature?
A. Yes. If you touch the Convection COOK pad at any
time during cooking, the selected oven temperature
is displayed on the display.
Q. Can I store the probe in the oven when it is
not in use?
A.
Leaving the probe in the oven is not recommended.
If you forget and leave it in during cooking,
without having inserted it in food, damage to
the probe or to the oven may result.
Q. May I cook two or more items at one time using
the
shelfl
A. Yes.
During convection cooking the hot air
circulates around each pan in all directions giving
even browning to each food.
23
Page 24

COMB~ATION T~E COOmNG
Combination cooking offers the best features of
Four combination cooking codes make it easy to set
microwave energy and convection cooking.
your oven for combination cooking. Just enter one
Microwaves cook food fast and convection
digit to automatically set both oven temperature and
circulation of heated air browns foods beautifully.
microwave power level.
How to Combination Time Cook
n
Step 1:
Touch Combination COOK pad.
COOK
❑
EHEH
Step 2: Select a combination
cooking code by touching a
EEEHE
number pad from one to four.
Step
3: Enter desired cooking time in hours and
minutes by touching number pads in sequence.
For example for 1 hour and 20 minutes, touch 1,2
and O. To enter time less than one hour, for example,
30 minutes, touch 3 and O.
n
Step 4:
Touch START. Cooking
START
time begins to count down. When
time reaches less than 59 minutes,
display shows minutes on left of
colon and seconds on right. When
time is completed, oven signals,
flashes “End” and turns off.
Questions and Answers
Q. May I use my metal roasting pan to
Combination Cook a roast?
A. No. Do not use metal cookware on the metal wire
shelf when using Microwave or Combination
cooking. Place roast in glass dish on shelf.
Q. Can I switch from one Combination code to
another during cooking?
A. No. The selected Combination code may not be
changed during the cooking operation, but you
may reprogram the complete cooking instructions
if you wish.
Q. Is it necessary to place a glass dish on the oven
floor when Combination cooking?
A. No. For best roasting results, place meat in a glass
dish. Place dish on the oven shelf.
Remember:
● Check the Cookware and Accessories section
and your Cookbook for correct cookware when
Combination cooking.
● For best roasting and browning results, whole roasts
and poultry should be cooked in a dish placed
directly on the oven shelf.
● Place meat in a glass dish on a trivet to collect
juices and prevent spattering. See Convection
preheat instructions in the Convection Time
Cooking section.
● Some recipes call for preheating.
Combination Codes
The guide on the right shows the oven temperature
Microwave Power
and microwave power (watts) that are automatically
Code
Oven Temp.
(Watts)
set when using that particular code number. You must
set the cooking time or internal food temperature as
1
275° F.
220
shown above and in the Combination Temperature
Cooking section. Check your Cookbook for specific
2
300° F.
220
food instructions.
3
325° F.
220
4
I 375°
F.
]
220
24
Page 25

COMB~ATION TEMPE~TU~
COOmG
With this function of your new oven, you can enjoy the benefits of
combination cooking with the precision of the temperature probe.
Four combination codes are shown on the guide in the Combination
Time Cooking section to make it easy to program microwave power
level and oven temperature with only one entry. The probe makes it
simple to cook to the exact degree of doneness desired, by monitoring
the internal temperature of the food. This function is exactly like
combination time cooking except you set internal food temperature
desired instead of cooking time.
How to Combination Temperature Cook
Step 1:
Insert the
temperature probe into
food as directed in the
Microwave Temperature
Cooking section or in
the Cookbook. Plug the
other end securely into
the oven wall receptacle.
~
Step 2: Touch Combination COOK pad.
I
COOK
I
Step 3: Select the combination
code by touching a number pad
from 1 to 4 depending on oven
temperature needed.
Step 4: Enter the desired finished
food temperature by touching
the number pads in sequence.
For example, to set
180°F.,
touch 1, 8 and O in that order.
The selected temperature is
shown on the display.
D
Step 5:
Touch START to begin
START
cooking. The selected food
temperature disappears and the
display shows “-80” until internal
food temperature reaches
80°F.
Then display shows actual food
temperature as it rises. When food
reaches the selected temperature,
the display shows “End” and the
oven signals and turns off.
For information on cookware for combination
temperature cooking, refer to the Cookware and
Accessories section.
25
Page 26

COMB~ATION
AUTO ROAST
Auto Roast is a combination function which is
The food is placed in a glass dish on a trivet for
similar to combination temperature cooking,
cooking during Auto Roast. To select a code from
using both microwave and convection cooking in
1 to
8 see
Auto Roast Guide on this page.
conjunction with the temperature probe. However,
the Auto Roast feature eliminates most of the steps
necessary to program combination temperature
cooking. Instead, you can set the entire cooking
program by selecting just one Auto Roast code.
How to Combination Auto Roast
Step 1: Insert temperature probe into meat and plug
the probe firmly into oven wall receptacle.
n
AUTO
Step 2: Touch AUTO ROAST pad.
ROAST
I
I
❑
EEHE
Step 3: Enter the desired Auto
Roast cooking code by touching
EEEEE
a number pad from 1 to 8.
m
START
Step 4:
Touch START. Auto
Roast Code number disappears.
Display shows “ROAST FOOD
TEMP” and”1 80” until food
temperature reaches
80°F.
Then display shows actual food
temperature as it rises. When
food reaches the programmed
temperature for proper degree
of doneness, the display shows
“End” and the oven signals and
turns off.
Combination Auto Roast Guide
(Use
Probe)
Food
Beef, Rare
-
Medium
Well
Lamb, Medium
Well
Pork
Chicken
Turkey
Temp.
120°F.
130°F.
160°F.
40°F.
60°F.
70°F.
90°F.
90°F.
Code
1
2
3
4
5
6
7
8
26
Page 27

Questions and Answers
Q. When I cook poultry, the thin, small areas like
legs and wings often overcook before the rest
of the bird is thoroughly cooked. How can I
prevent this?
A. Thin, uneven portions of poultry maybe shielded
with aluminum foil during cooking. Do not allow
foil to touch shelf or oven sides, arcing may occur.
Q. Usually my temperature probe gives very
accurate results, but this time it didn’t. What
happened?
A.
If the temperature probe is positioned touching
fat or bone, an inaccurate reading may result. Be
sure to place the probe in solid muscle, usually
the thickest, meatiest part of the roast or poultry,
or in the center of a meat loaf or casserole.
Q. Meats often take longer than indicated in
the guides to reach the desired internal
temperature. Why?
A. If the meat is recently defrosted and still very cold
or icy inside, it will require a longer cooking time
than meat which has been merely refrigerated.
Times shown in the guides are usually for meats
that are refrigerator temperature.
Q. When I tried to program my oven for
combination Auto Roast, it beeped and
flashed “Prob.” What did I do wrong?
A. Auto Roast cannot be programmed without the
temperature probe connected to the oven wall
receptacle. To eliminate the “PROB” display
and continue programming the oven, just
securely insert the probe into the receptacle.
Q. When I touched the START pad the display
showed “180” instead of the food temperature.
Why?
A. If the temperature of the food is lower than
80°F.
the display will indicate “180” until actual food
temperature reaches
80°F.
Then the display will
show the internal food temperature as it continues
to rise.
Q. Do most meats require standing time after
cooking with combination Auto Roast?
A. You may want to let meats stand briefly, to allow
easier carving and serving. Most meat roasts
continue to cook for a few minutes after removing
from the oven. Check the Cookbook for specific
instructions.
27
Page 28

COOmG
REFERENCE
GU~E
This is a Quick Reference to guide you in selecting
*
— Best Method
the best method of cooking. Specific recipes can be
A — Alternate
adapted to any method of
~ooking.
-
.- .- —
N — Not
Kecornmended
Foods
Microwave
Combination
Convection
Appetizers
Dips and Spreads
Pastry Snacks
Beverages
Sauces and Toppings
Soups and Stews
Meats
Defrosting
Roasting
Poultry
Defrosting
*
A
N
*
N
A
*
N
N
*
N
N
*
A
N
N
*
*
A
N
A
N
*
N
A
*
A
Roasting
Fish and Seafood
Defrosting
Cooking
Casseroles
Eggs and Cheese
Scrambled, Omelets
Quiche, Souffle
N
A
N
N
*
*
A
*
A
N
*
N
A
*
A
Vegetables,
Fresh
*
N
N
Breads
Quick
Yeast
*
A
A
N
A
*
MuffIns,
Coffee Cake
A
*
A
Desserk
Cakes, Layer and
Bundt
Angel Food and Chiffon
Custard and Pudding
Bar Cookies
Fruit
Pies and Pastry
Candv
*
N
N
*
N
A
N
A
N
*
A
*
N
*
A
*
N
A
N
*
N
Blanching Vegetables
*
N
N
Frozen Convenience Foods
*
A
A
CO~ECTION BROIL~G
For broiling time and procedures, refer to guide in Cookbook.
Broiling is cooking food by intense heat from the
upper unit in the oven. Most fish and tender cuts
of meat can be broiled. Follow these steps to keep
spattering and smoking to a minimum.
Step 2: Insert spatter shield onto drip pan. Always
use spatter shield so fat drips into drip pan; otherwise
juices may become hot enough to catch fire. You can
use rduminum foil to line your drip pan and spatter
shield. However, you must mold the foil tightly to
the spatter shield and cut slits in it just like the spatter
shield. Without the slits, the foil will prevent fat and
meat juices from draining to the drip pan. The juices
could become hot enough to catch on fire. If you do
not cut the slits, you are frying, not broiling.
Step 1: If meat has fat or gristle near edge, cut
vertical slashes through both about 2 inches apart.
If desired, fat maybe trimmed, leaving layer about
1/8 inch thick.
28
Page 29

n
Step
3:
Touch Convection BROIL pad.
BROIL
❑
EEEE
Step 4: Touch number pad 1 or
2 for desired Broil Code. Code 1
EEEEE
broils at
475°F.
Code 2 broils at
450°F.
Use Code 1 for thinner cuts
of meat. “ENTER BROIL TIME”
flashes on display but usually it
is recommended that you preheat
to preprogrammed broiling
temperature. (See Step 5.)
n
Step 5:
Touch START pad.
START
“-200”
shows on display until
temperature reaches
200°F.
Then
display shows temperature rising
in 5° increments.
Step 6: When preprogrammed temperature is reached,
oven signals and “ENTER BROIL TIME” flashes on
display. Place food on broiler pan assembly.
Step 7: Open the door
and insert broiler pan
with stop-locks resting
on guides on side walls
of oven and push toward
rear of oven until it falls
into correct position
under guides. “Hot”
appears on display
when door is opened.
To remove, lift up rear of pan and pull forward with
stop-locks along top edge of oven guides. Keep the
pan level during removal.
NOTE: If oven door remains closed, oven will hold
preprogrammed temperature for 30 minutes and then
shut off.
Step 8: Enter broiling time by touching number pads
in sequence. For 25 minutes, touch 2, 5, 0 and O.
Step 9: Touch START pad.
I
START
I
Step 10: When broiling is completed, oven signals
and flashes “End.” Oven, light and fan shut off.
Questions and Answers
Q. May I use aluminum foil to
line the drip pan and spatter
shield?
A. Yes, if you mold the foil
thoroughly to the spatter shield
and slit it to conform to the
slots in the shield. Slots permit
proper drainage of meat juices
into drip pan, minimizing
smoking and spattering and
preventing possibility of fire
from overheated drippings.
Q. When broiling, is it necessary
to always use the spatter
shield in the pan?
A. Yes. Using the spatter shield
suspends the meat over the pan.
As the meat cooks, the juices
fall into the pan, thus keeping
meat drier. Juices are protected
by the shield and stay cooler,
thus preventing excessive
spatter and smoking.
Q. Should I salt the meat before
Q. Do I need to grease my broiler
A.
broiling?
No. Salt draws out the
iuices
.
and allows them to evaporate.
A.
Always salt after cooking. Turn
meat with tongs; piercing meat
with a fork also allows juices to
escape. When broiling poultry
or fish, brush each side often
with butter.
Q. Why are my meats not
turning out as brown as they
should?
A. In some areas, the power
(voltage) to the oven maybe
low. In these cases, preheat the
broil unit for 10 minutes before
placing broiler pan assembly
with food in oven. Turn food
only once during broiling.
spatter shield to prevent meat
from sticking?
The spatter shield is designed to
reflect broiler heat, thus keeping
the surface cool enough to
prevent meat sticking to the
surface. However, spraying the
shield lightly before cooking
with a vegetable cooking spray
will make cleanup easier.
29
Page 30

CAm Am CLEANmG
Follow
these simple care rules:
● A browning dish is designed
● Always follow manufacturer’s
● Keep inside of oven clean. Food
only for use on the Microwave
suggestions when using browning
spatters or spilled liquids will
setting. When microwaving,
dish or accessories.
absorb microwave energy and
preheat browning dish or grill
Q
Follow manufacturer’s
reduce efficiency of oven. Wipe
only on ceramic oven floor.
Do not use dish with oven shelf.
instructions when using
up when they are still warm.
microwave cookware or
accessories.
PART
Stainless Steel
Oven Interior
–Side Walls Only
–Ceiling
Ceramic Oven
Floor
Metal
Shelf
Accessory
Broiler Pan
(spatter shield
and drip pan)
Inside Oven Door
and Window
Outside Oven
Surfaces
Touch Control
Panel
Temperature Probe
CLEAN~G GU~E
NOTE: Let oven parts cool before touching or handling.
MATERIALS TO USE
● Damp Cloth
● Plastic Scouring Ball
● Non-abrasive
Scouring Powder
(brush-on type)
● Non-abrasive
Nylon Mesh
Scouring Ball
● Non-abrasive Cleanser
● Soap and Water
● Soap-Filled Scouring
Pad
● Commercial Oven
Cleaner
● Soap and Water
D
Soap-Filled Scouring
Pad
s
Commercial Oven
Cleaner
‘
Soft Cloth
B
Mild Detergent
E
Mild Detergent
P
Soft Cloth
~
Soft Cloth
J
Plastic Scouring
Ball
GENERAL DIRECTIONS
Clean with mild detergent and water, then rinse well with damp cloth. If
desired, a container of water can be boiled in the oven using microwave
energy. This will help loosen soil. For hard-to -remove soil, clean gently
with scouring ball. Do not use abrasive cleaners which could scratch
or damage the surface. For excessive soil, use a chemical cleaner, preferably
the brush-on type. Use on stainless steel
parts
only.
Wash floor with warm
sudsy
water.
Remove shelf and clean with one of the recommended materials. Then
rinse and dry thoroughly. Some commercial cleaners may cause darkening
or discoloration. When using for the first time, test cleaner on small portion
of the shelf.
After broiling, remove the broiler pan from the oven. Remove the spatter
shield from the drip pan. Carefully pour out the grease in the drip pan into a
proper container. Wash; scour if necessary with a soap-filled or plastic
scouring pad, in hot, soapy water. Rinse the drip pan and spatter shield in hot
water. If food has burned on,
spritie
the spatter shield while hot with detergent
and cover with wet paper towels or a dish cloth. That way, burned-on foods
will soak loose while the
med
is being served.
OPTION: The drip pan and spatter shield may
dso
be cleaned in a dishwasher.
Wipe off spills or spatters while they are still warm. Use mild detergent and
water, then rinse with clear water and dry with a soft cloth.
Clean with mild detergent and water, rinse and dry with a soft cloth. Clean
chrome
trim with a damp cloth and polish immediately with a dry cloth.
Open oven door before cleaning to prevent oven from accidentally starting,
Wipe with a damp cloth followed immediately by a dry cloth.
Clean as soon after using as possible. To clean, wipe with
sudsy
cloth, then
mb
lightly with scouring ball if
necess~.
Rinse and dry.
Do
not immerse the temperature probe in water. Do not store the
temperature probe in the oven.
NOTE: If steam accumulates inside or around outside of oven door,
wipe
with soft cloth. This
mav
occur when operating the
oven under high humidity conditions.
30
Page 31

GROU~~G
mSTRUCTIONS
This appliance must be grounded.
In the event of an electrical short
circuit, grounding reduces the risk
of electric shock by providing an
escape wire for the electric current.
This appliance is equipped with a
power cord having a grounding
wire with a grounding plug. The
plug must be plugged into an outlet
that is properly installed and
PREFERRED METHOD
R
@@
+
Ensure proper ground
Fig. 1
exists before use
grounded. (Fig. 1)
WARNING–Improper
use of the grounding plug can
result in a risk of electric shock.
Use of Adapter Plugs
Usage situations where
appliance’s power cord
will be disconnected
infrequently.
Because of potential safety hazards
under
certtin conditions, we
strongly recommend against the
use of an adapter plug. However,
if you still elect to use an adapter,
where local codes permit, a
TEMPORARY CONNECTION
may be made to a properly
grounded two-prong wall
receptacle by the use of a
UL listed
adapter (Fig. 2) which is available
at most
loc~l
hardware stores.
TEMPORARY METHOD
(Adapter
plu
s not
2
pemltted In anada)
Align
Iar
e
Y
m
I
prongsls ots
~“n
/
I I
,.=
“
r
e)
Ensu~e
proper ground
and firm connection
Fig. 2
before use
The larger slot in the adapter must
be aligned with the larger slot in
the wall receptacle to provide
proper polarity in the connection
of the power cord.
Caution: Attaching the adapter
ground terminal to the wall
receptacle cover screw does not
ground the appliance unless the
cover screw is metal, and not
insulated, and the wall receptacle
is grounded through the house
wiring. You should have the circuit
checked by a qualified electrician
to make sure the receptacle is
properly grounded.
When disconnecting the power
cord from the adapter, always hold
the adapter with one hand. If this
is not done, the adapter ground
terminal is very likely to break
with repeated use. Should this
happen, DO NOT USE the
appliance until a proper ground
has again been established.
Consult a qualified electrician or
service technician if the grounding
instructions are not completely
understood, or if doubt exists as to
whether the appliance is properly
grounded.
Where a standard two-prong wall
receptacle is encountered, it is
your personal responsibility and
obligation to have it replaced with
a properly grounded three-prong
wall receptacle.
Do not under any circumstances
cut or remove the third (ground)
prong from the power cord.
Usage situations where
appliance’s power cord
will be disconnected
frequently.
Do not use an adapter plug in
these situations because frequent
disconnection of the power cord
places undue strain on the adapter
and leads to eventual failure of the
adapter ground terminal. You
should have the two-prong wall
receptacle replaced with a
three-
prong (grounding) receptacle by a
qualified electrician before using
the appliance.
(continued next page)
31
Page 32

GROU~~G
~STRUCTIONS
(continued)
Use of Extension Cords
A short power-supply cord is provided to reduce the
risks resulting from becoming entangled in or tripping
over a longer cord.
Longer cord sets or extension cords are available and
may be used if care is exercised in their use.
If a long cord or extension cord is
used—
1. The marked electrical rating of the cord set or
extension cord should be at least as great as the
electrical rating of the appliance;
2. The extension cord must be a grounding-type
3-wire cord;
3. The longer cord should be arranged so that it will
not drape over the counter top or
tabletop
where it
can be pulled on by children or tripped over
unintentionally.
If you use an extension cord, the interior light
may flicker and the blower sound may vary when
the microwave oven is on. Cooking times maybe
longer, too.
OVEN LAMP REPLACEMENT
If oven light burns out, you may replace it by
carefully following the directions below:
Step 1: Disconnect oven power cord from electrical
outlet.
Step 2: Unscrew and remove
oven light bulb cover located
on left side of cabinet. Do
not remove any other part
of cabinet.
Step 3:
Let bulb cool before removing. Gently twist
the bulb to break the silicone adhesive attached to the
bulb and socket to prevent damage during shipping.
Turn bulb counterclockwise to remove from socket.
Step 4: Replace bulb with a special 20 watt light bulb.
Insert bulb into socket and turn in clockwise direction.
Step 5: Replace light bulb cover.
Step 6: Plug oven power cord into electrical outlet.
Reset oven clock.
32
Page 33

QUESTIONS?
USE THIS PROBLEM SOLVER
PROBLEM
OVEN WILL NUT
COME ON
CONTROL PANEL
LIGHTED, YET
OVEN
WILL NOT START
FOODS ARE EITHER
OVERCOOKED OR
UNDERCOOKED
“FFFF”
APPEARS
ON DISPLAY
“EEEE” APPEARS
ON DISPLAY
“PROB” APPEARS
ON DISPLAY
POSSIBLE CAUSE
● A fuse in your home may be blown or the circuit breaker tripped. Replace fuse or
reset circuit breaker.
G
Unplug your microwave/convection oven, then plug it back in.
● Make sure 3-prong plug on oven is fully inserted into
wdl
receptacle.
● Door not securely closed.
● START pad must be touched after entering cooking selection.
● Another selection entered already in oven and CLEAWOFF pad not touched
to cancel it.
“
Make sure
you
have entered cooking time or temperature after touching
COOK pads.
-
CLEAWOFF pad was touched accidentally. Reset cooking program
and
touch
START pad.
●
Temperature
probe
not inserted properly during Temperature
Cook
function or not being
used during
Auto
Roast.
●
Make sure you have entered a desired finished temperature after setting Temperature
ROAST or-AUTO DEFROST pads.
●
Make sure you have entered a code number after touching Combination COOK pad
for Combination Time Cooking or Combination Temperature Cooking,
● Not enough time set when
using
Time Cook function because starting food
temperatures vary.
● The density and amount of foods will vary
and
thus may need more time for
completion.
*
Dish in
Auto
Cook not covered as directed.
● Check Cookbook and Microwave Temperature Cooking section for specific
probe placement.
~
Incorrect code numbers entered after touching AUTO COOK or
AUTO ROAST pads.
● Incorrect power level entered.
● Dish not rotated, turned
or
stirred if these instructions were
given
in the recipe.
● Too many dishes in oven at same time,
● Check Cookbook for correct accessories such as shelves and food placement
on
them.
. Incorrect finished temperature entered with temperature-controlled functions.
●
FIOW
of air blocked with convection or combination
cooking
functions.
● Indicates open or short circuit in any one of a number of components. Power is
shut off automatically. Request service.
Q
Impossible time of day such as
13:00
has been entered for clock.
● Temperature
probe
not plugged in securely when using Temperature Cook
Auto Roast.
If you need more help...call, toll free:
GE Answer Center”
800.626.2000
consumer information service
33
Page 34

Witi
the purchase
ofyour
new
Mono~m
appliance, receive the assurance that
ifyou
ever
need information or
assismnce
from GE, we’ll be
tiere.
All you have to do is call—toll-free!
In-Home
RepakService
80fiGECARES(80a43Z2737)
AGE consumer service professional will provide expert repair service,
scheduled at a time that’s convenient for you. Many GE Consumer Service
company-operated locations offer you service today or tomorrow, or at your
convenience
(7:00
a.m. to 7:
OOp.m.
weekdays,
9:00
a.m. to
2:00
p.m. Saturdays).
Our factory-trained technicians know your appliance inside and out–so most
repairs can be handled in just one visit.
GEAnswer Centep
80~6262000
Whatever your question about any Monogram major appliance, GE Answer
Center@
information service is available to help. Your call–and your
question–
will be answered promptly and courteously. And you can call any time. GE
Answer
Center@
service is open 24 hours a day, 7 days a week.
kr
Customers With SpecialNeeds...
80~62E2000
Upon request, GE will provide Consumers with impaired hearing or speech
who have
Braille controls for
avanety
of
access to a
TDD or a conventional teletypewriter may
Monogram appliances, and a call
800-TDD-GEAC
(800-8334322) to request
brochure to assist in planning a
information or service.
barrier-free kitchen for persons
with limited mobility. To obtain
these items, free of charge, call
800.626.2000.
Service Contracts
8086262224
You can have
tie
secure feeling
fiat
GE Consumer Service will still be there
after your warranty expires. Purchase a GE contract while your warranty is still
in effect and you’ll receive a substantial discount. With a multiple-year contract,
you’re assured of future service at today’s prices.
Pam andAccessories
8006262002
h&tid& qudfied
to service theh own appliances
User
mtitenance instictions contied h this boo~et
can have needed parts or accessories sent directly to
cover procedures
htended
to be performed
byanyuser.
their
home. The GE parts system provides access to
over
Other
seficing generdyshotid
be referred to
47,000
parts... and all GE Genuine Renewal Parts are
qutified
service personnel. Caution must be exercised,
fully warranted. VISA, MasterCard and Discover cards
skce
improper
sefictigmaycause
unsafe operation.
are accepted.
Page 35

YOUR GE
MICROWAVWCONVECTION
OVEN
WARRANTY
I
Save proof of original purchase date such as your sales slip or
cancelled
check to establish warranty period.
WHAT IS COVERED
FULL ONE-YEAR WARRANTY
For one year from date of original
purchase, we
will provide, free of
charge, parts and service labor in
your home to repair or replace
any
part of the microwavdconvection
oven
that fails because of a
manufacturing defect.
LIMITED ADDITIONAL
FOUR-YEAR WARRANTY
For the second through fifth year
from date of original purchase, we
will provide, free of charge, a
replacement
magnetron tube
if the
magnetron tube fails because of a
manufacturing defect. You pay for
the service trip to your home and
service labor charges.
This warranty is extended to
the original purchaser and any
succeeding owner for products
purchased for
ordina~
home use in
the 48 mainland states, Hawaii and
Washington,
D.C.
In Alaska the
warranty is the same except that it is
LIMITED because you must pay to
ship the product to the
sewice shop
or for the
sewice
technician’s travel
costs to your home.
All warranty service will be provided
by our
Facto~
Service Centers or
by our authorized Customer
Care@
servicers during normal working
hours.
Should your appliance need
service, during warranty period
or beyond, call 800-GE CARES
(800-432-2737).
WHAT IS NOT COVERED
●
Service trips to your home to teach
you how to use the product.
Read your Use and Care
material.
If you then have any questions
about operating the product,
please contact your dealer or our
Consumer Affairs office at the
address below, or call, toll free:
GE Answer Center”
800.626.2000
consumer information
sewice
●
Improper installation.
If you have an installation problem,
contact your dealer or installer.
You are responsible for providing
adequate electrical, gas,
exhausting and other connecting
facilities.
●
Replacement of house fuses or
resetting of circuit breakers.
●
Failure of the product if it is used for
other than its intended purpose or
used commercially.
●
Damage to product caused by
accident, fire, floods or acts of God.
WARRANTOR IS
NOTRESPONSIBLE
FOR CONSEQUENTIAL DAMAGES.
Some
states
do not allow the
exclusion or limitation of incidental or consequential damages, so the above limitation or exclusion
may not apply to you. This warranty gives you specific legal rights, and you may also have other rights which va~ from state to state.
To know what your legal rights are in your state, consult your local or state consumer affairs office or your state’s Attorney General.
Warrantor: General Electric Company
If further help is needed concerning this warranty, write:
Manager—Consumer Affairs, GE Appliances, Louisville, KY 40225
JET343G
Page 36

P“b. N“. 49-8332
Part
No. 164 D2588P132
&92
CG
Genera/ Electr;c Company
Lou;sv;//e,
KY40225
 Loading...