

Page 1
GE Consumer & Industrial Appliances
Assembly Instructions
Advantium®240V Built-In Accessory Storage Drawer
JX2200, JX2201, ZX2201
MFL06213303 49-40575 12-07 JRSPECIFICATIONS SUBJECT TO CHANGE WITHOUT NOTICE
NOTE: Appearance will vary by model.
BEFORE YOU BEGIN
Read these instructions completely and carefully. Read
the Installation Instructions for the Advantium 240V oven
completely and carefully for cutout dimensions and
step-by-step instructions.
IMPORTANT — Save these instructions for
local inspector’s use.
IMPORTANT — Observe all governing codes
and ordinances.
•
NOTE TO INSTALLER: Be sure to leave these
instructions with the Consumer.
•
NOTE TO CONSUMER: Keep these instructions with
your Advantium 240V Oven Owner’s Manual for
future reference.
•
SKILL LEVEL: Installation of this appliance requires
basic mechanical skills.
•
COMPLETION TIME: One hour with the installation
of an Advantium 240V oven.
• Proper installation is the responsibility of the installer.
• Product failure due to improper installation is not
covered under the Warranty. See the Advantium
240V Oven Owner’s Manual for warranty information.
TOOLS REQUIRED
• #2 Phillips screwdriver
PARTS SUPPLIED
• 2 Side Supports
• Screws
• Screws (color matched)
MODELS AVAILABLE
Profile Models:
JX2200BB–Black
JX2201SS–Stainless Steel
Monogram Models:
ZX2201SS–Stainless Steel
NOTE: Advantium 240V Built-In Speedcook Oven
model ZSC2202SS CANNOT be installed with an
accessory storage drawer. See Installation
Preparation Without an Accessory Storage Drawer
in the Advantium 240V Built-In SpeedCook Oven
Installation Instructions for this model.
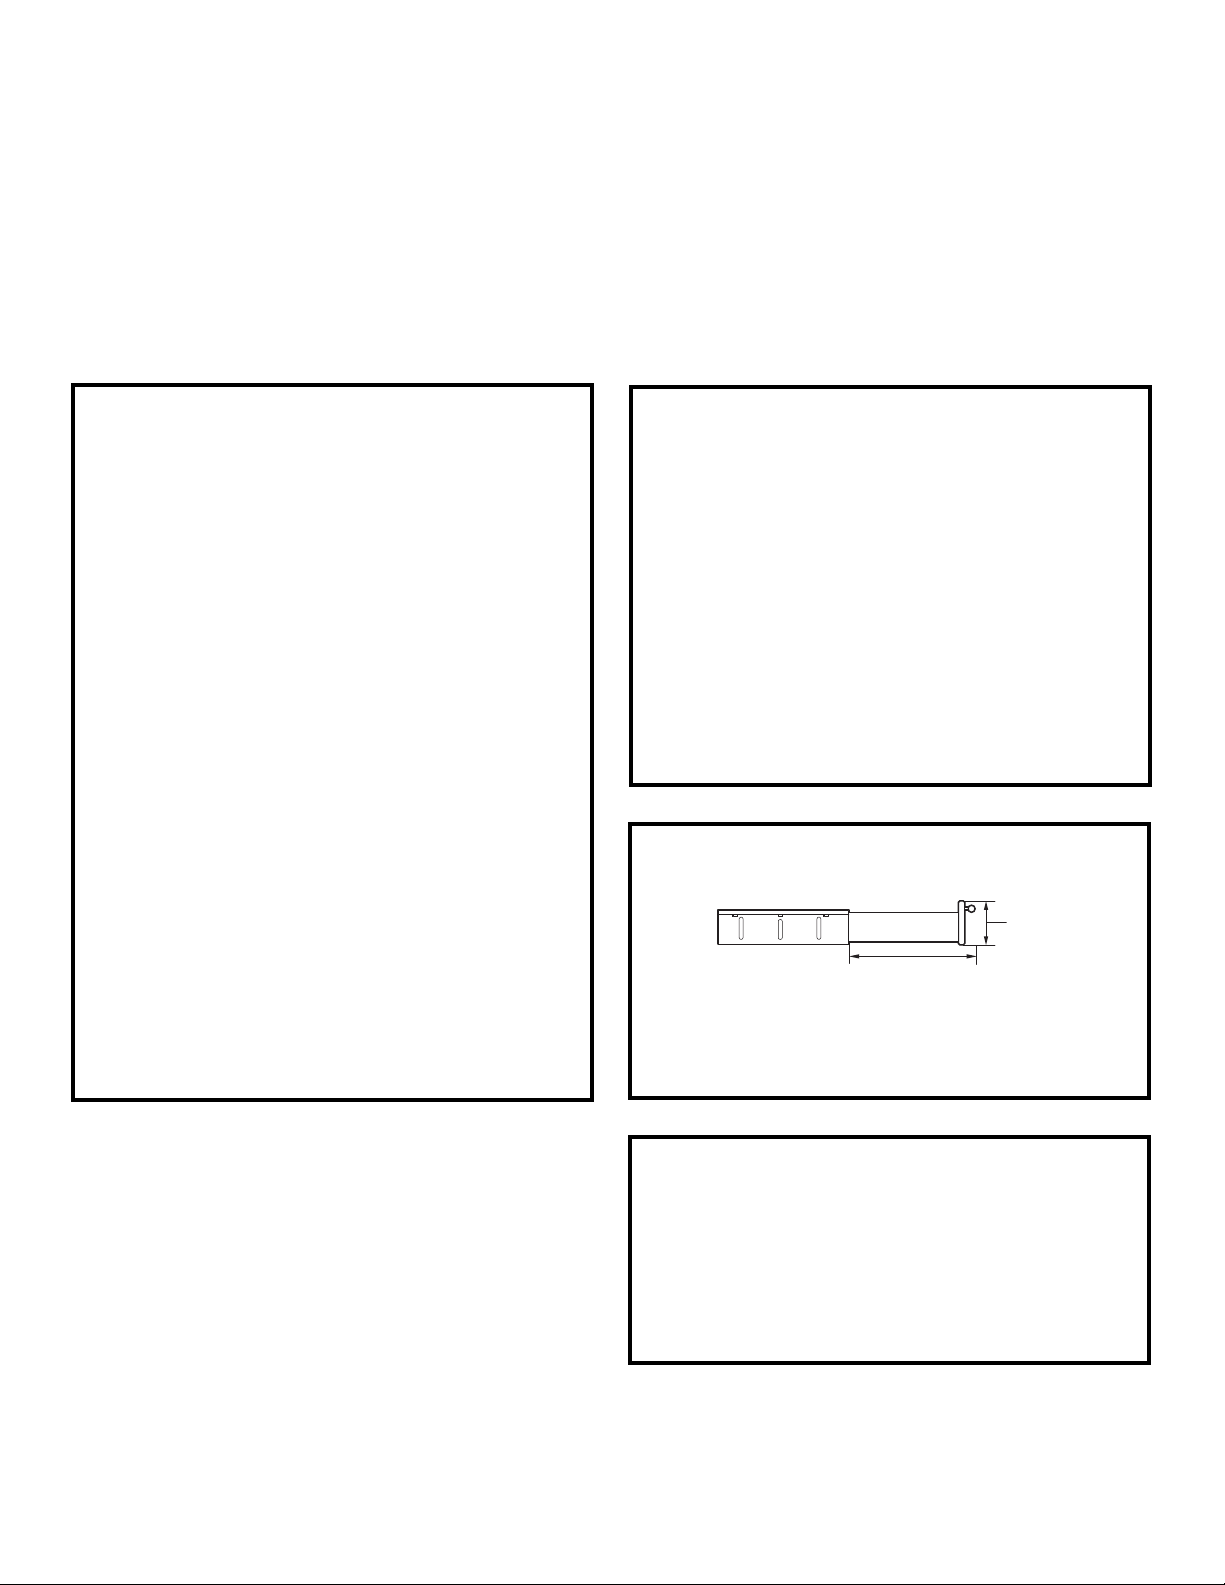
PRODUCT DIMENSIONS AND CLEARANCES
Allow 15” clearance
when fully open
5”
Page 2
2
ASSEMBLY TO ADVANTIUM 240V BUILT-IN SPEEDCOOK OVEN
Printed in Korea
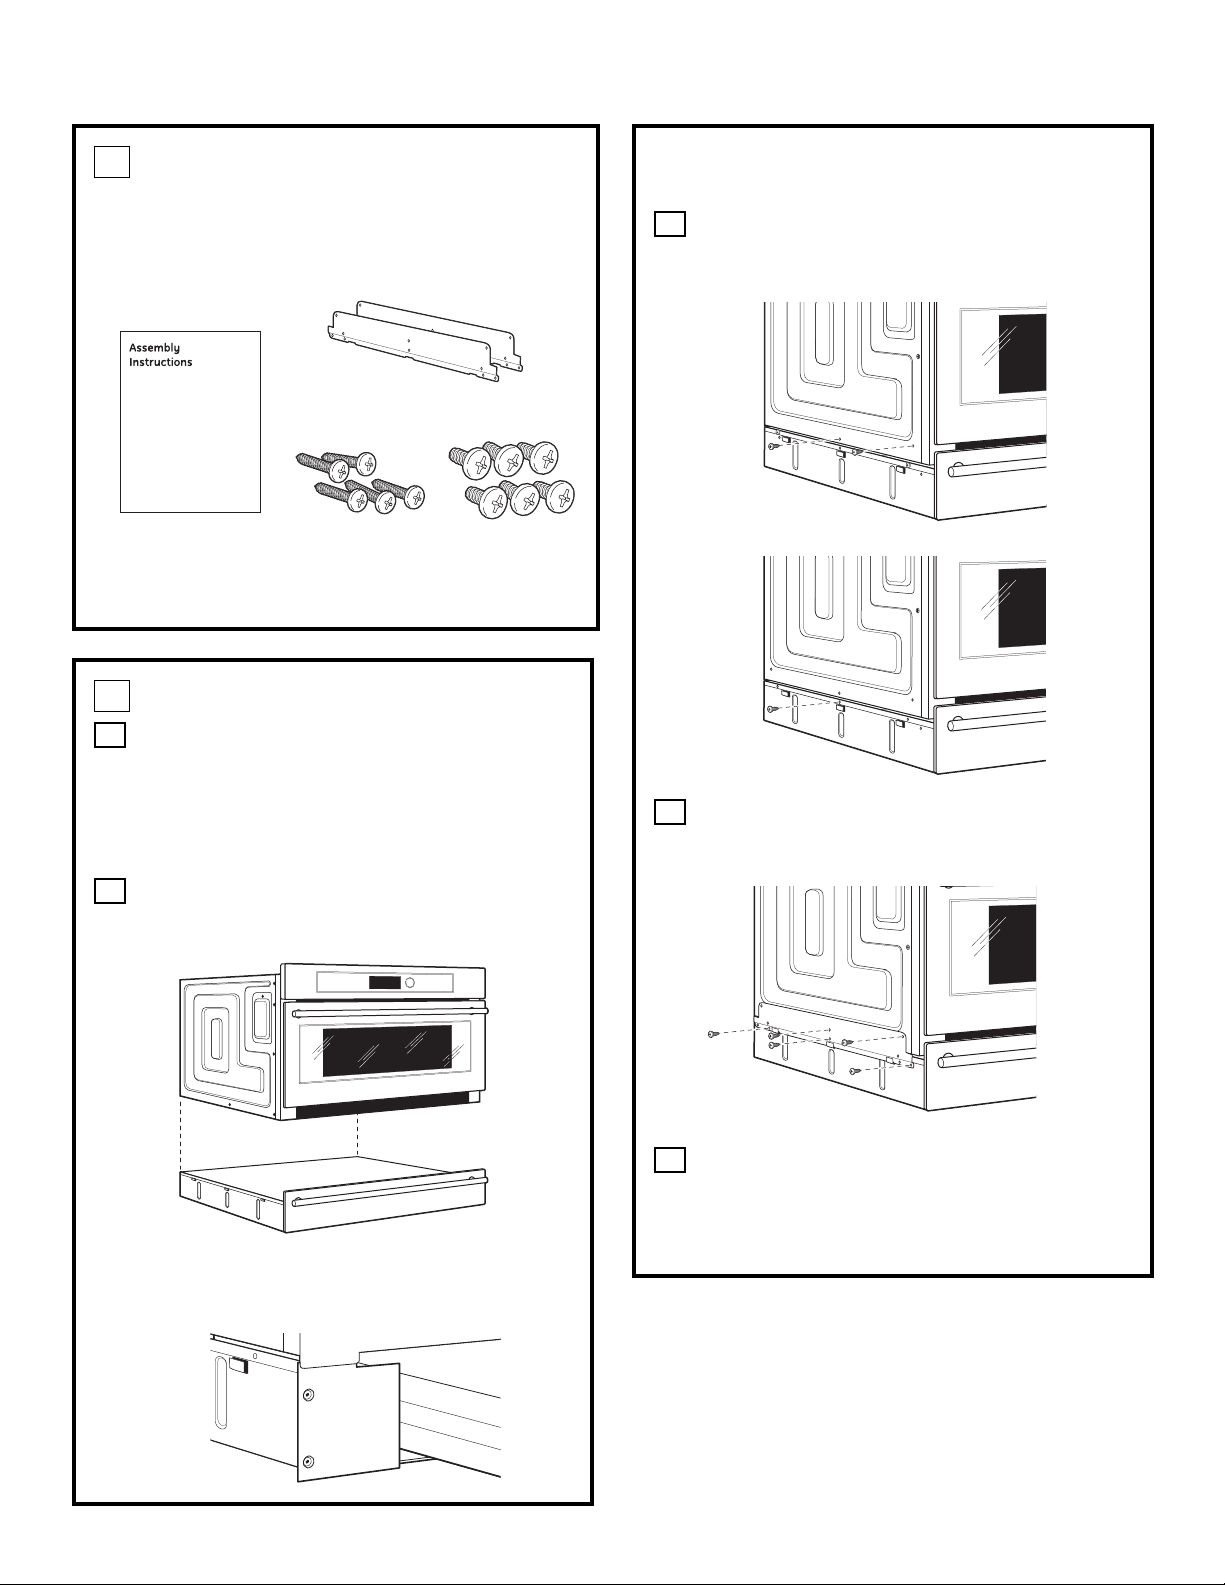
REMOVE PACKAGING AND PARTS
• Remove the drawer from the carton.
• Remove all packing material and tape.
• Open the drawer and remove any parts inside.
• Locate parts.
1
Assembly
Instructions
Side Supports (2)
Color Matched
Screws
(4 required,
1 extra)
Brass Screws
(4 required,
2 extra)
ASSEMBLING THE OVEN TO DRAWER
(CONT.)
Remove the front two bottom screws on each
side of the oven and the top center screw on
each side of the storage drawer.
Place the side supports into the tabs on the
drawer and secure using the screws supplied
and the screws removed in Step C.
The oven and storage drawer assembly is now
ready to be installed. Return to the Advantium
240V Built-In SpeedCook Oven Installation
Instructions to complete the installation.
E
D
C
ASSEMBLING THE OVEN TO DRAWER
Place storage drawer on a surface with the
front of drawer hanging over the edge of the
surface. Not placing the front edge of drawer
over the edge of the surface may result in
damage to the drawer since the front edge of
drawer hangs below the bottom of drawer.
Place the oven on top of the storage drawer.
Make sure that the back and sides of the oven
align with the back and sides of drawer.
NOTE: The bottom of the oven side flanges will
sit directly in front of the top of the storage
drawer side flanges.
B
A
2
 Loading...