

GE JVM1950, JNM1951, DVM1950 User Manual
GEAppliances.com
Safety Instructions .............. 2-8
0
Operating Instructions
Convenience Features .......... 15,16
Exhaust Features............... 28-30
Microwave Terms ................. 20
HyPlute.gov (HyPyramid)
Feature ........................ 16
Oven Features .................. 9-11
Other Features ................. 22-24
Power Levels...................... 21
Replacing the Light Bulb........... 28
Sensor Features................ 17-20
Time Features .................. 12-15
Care and Cleaning ............. 25, 26
Troubleshooting Tips
Before you call for service ...... 30-32
Consumer Support
Consumer Support.................. 34
Optional Kits ....................... 8
Warranty ......................... 33
DVM1950
JNM1951
JVM1950
Write the model and serial numbers here:
Model #
Serial#
You can find them on a label when the
door is open.
49-40642-2 9-11 GE
IMPORTANT SAFETYINSTRUCTIONS.
READALL INSTRUCTIONSBEFOREUSING.
When using electrical appliances basic safety precautions should be followed,
including the following:
WARNING!
To reduce the risk of burns, electric shock, fire, injury to persons
or exposure to excessive microwave energy:
PRECAUTIONS TO AVOID POSSIBLE EXPOSURE
TO EXCESSIVE MICROWAVE ENERGY
(a) Do Not Attempt to operate this (cl
ovenwith the door open since open-
door operation can result in harmful
exposure to microwave energy. It is
important not to defeat or tamper
with the safety interlocks.
(b) Do Not Place any object between
the oven front face and the door
or allow soil or cleaner residueto
accumulate on sealing surfaces.
Do Not Operate the oven if it is
damaged. It isparticularly important
that the oven door close properly
and that there is no damage to the:
(Z)door (bent)
(2)hingesand latches
(brokenor loosened)
(:3)door seals and sealing surfaces.
_d) The Oven Should Not be adjusted
or repaired by anyone except
properly qualified servicepersonnel.
• Reed oll instructions before using
this appliance. When using electrical
appliances, basic safety precautions
should be followed, including the
following:
• Readand follow the specific precautions in
the Precautions to Avoid PossibleExposure
to ExcessiveMicrowave Energy section
above.
• Thisappliance must be grounded. Connect
only to a properly grounded outlet. Seethe
Grounding Instructions section on page 6.
• Thismicrowave oven is ULlisted for
installation over both gas (lessthan
60,000BTU)and electric ranges.
• Thisover-the-range oven isdesigned for use
over ranges no wider than 36." It may be
installed over both gas and electriccooking
equipment.
• Donot operate this appliance if ithas a
damaged power cord or plug, if it isnot
working properly, or if it has been damaged
or dropped. If the power cord is damaged, it
must be replaced by GeneralElectric Service
or an authorized service agent using a
power cord (_v(_ilablefrom General Electric..
• Install or locatethis appliance only in
accordance with the provided installation
instructions.
Do not cleanwith metal scouring pads.
Piecescan burn offthe padand touch
electrical parts involving riskof electric
shock.
2 SAVE THESE INSTRUCTIONS

GEApplionces.corn
Use this appliance only for its intended purpose as described in this Owner's
Manual
• Toreduce the riskof fire in the oven cavity: •
- Donot overcook food. Carefully attend
appliance when paper, plastic or other •
combustible materials are placed insidethe
ovenwhile cooking. •
- Removewire twist-ties and metal handles
from paper or plastic containers before
placingthem inthe oven. •
- Donot usethe oven for storage purposes. •
Do not leavepaper products, cooking
utensils or food inthe oven when not in use.
- Donot pop popcorn in your microwave
oven unlessin a special microwave popcorn
accessory or unlessyou use popcorn
labeledfor use in microwave ovens.
- Ifmaterials inside the oven ignite,keep
the oven door closed,turn the oven off
and disconnect the power cord, or shut off
power at the fuse or circuit breaker panel. If
the door isopened, the fire may spread.
- Donot usethe Sensor Featurestwice in
successionon the same food portion. If food
isundercooked afterthe first countdown,
useCOOKBYTIMEfor additional cooking
time.
- Donot usethe oven to dry newspaper.
• Thermometer--Do not use regular cooking
or oven thermometers when cooking by
microwave. The metal and mercury in these
thermometers could cause arcing and
possibledamage to the oven. Do not use a
thermometer in food you are microwaving
unlessthe thermometer is designed or
recommended for use in the microwave
oven.
• Donot store any materials, other than our
recommended accessories, in thisoven
when not inuse.
• Donot store this appliance outdoors. Do not
usethis product near water-for example,
in a wet basement, near a swimming pool,
near a sink or in similar locations.
Keeppower cord away from heated
surfaces.
Do not immerse power cord or plug in
water.
Do not block or cover any openings on the
appliance.
This microwave is not approved or tested
for marine use.
Usethis appliance only for its intended use
asdescribed inthis manual.
Do not use corrosive chemicals or vapors in
this appliance.
This microwave oven isspecifically designed
to heat, dry or cook food, and isnot
intended for laboratory or industrial use.
• Some products such as whole eggs and
sealedcontainers-for example, closed
jars-are able to explode and should not be
heated in this microwave oven. Such useof
the microwave oven could result
in injury.
• Itis important to keep the area clean where
the door sealsagainst the microwave. Use
only mild, non-abrasive detergents applied
with a clean sponge or soft cloth. Rinsewell.
• Thisappliance must only be serviced by
qualified service personnel.Contact nearest
authorized service facility for examination,
repair or adJustment.
• Aswith any appliance, close supervision is
necessarywhen used by children.
• Donot store anything directly on top of
the microwave oven surface when the
microwave oven isin operation.
• Donot mount this appliance over asink.
• Donot let the cord hang over edge of
counter.
Do not use paper products in oven when
appliance isoperated in any cooking mode
except microwave only.
SAVE THESE INSTRUCTIONS 3
IMPORTANT SAFETYINSTRUCTIONS.
READALL INSTRUCTIONSBEFOREUSING.
WARNING:
Risk of explosion or exposure to toxic
material, the battery should be replaced by
service technician only.
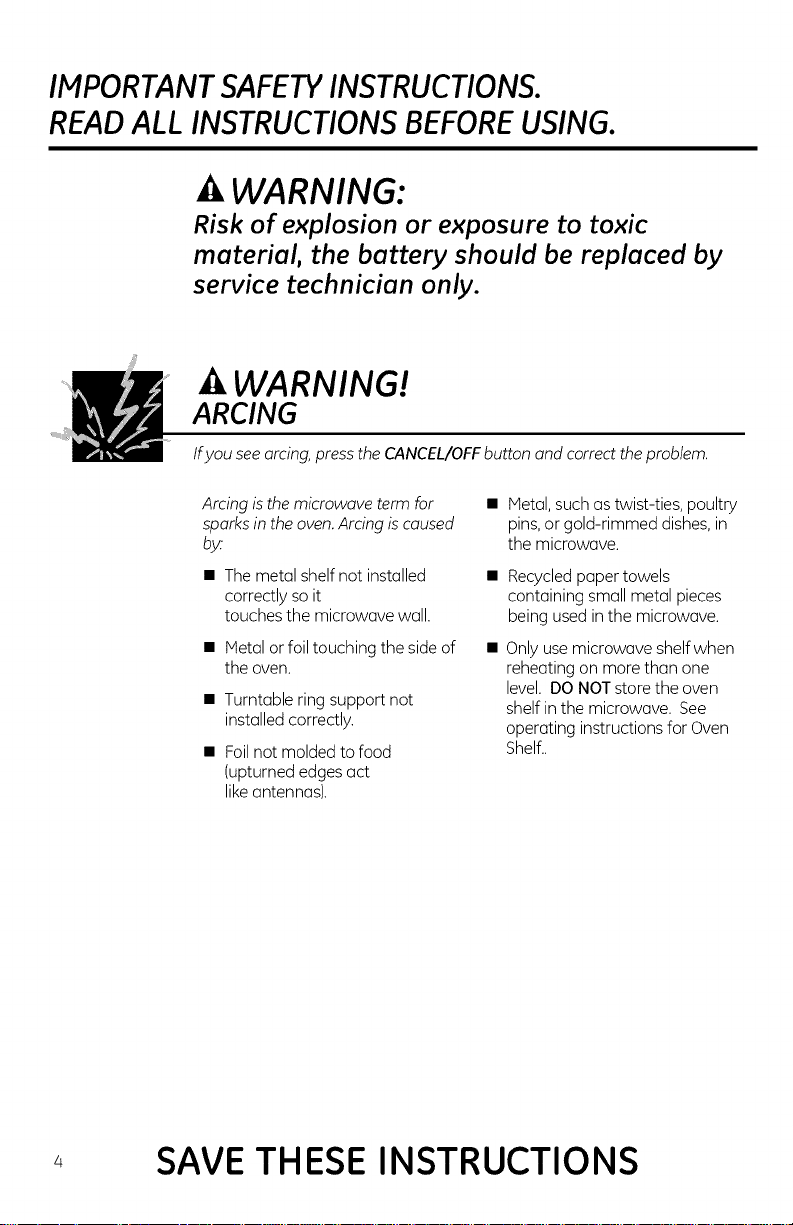
WARNING!
ARCING
lf you see arcing,pressthe CANCEL/OFFbutton and correct the problem.
Arcing isthe microwave term for
sparksin the oven.Arcing is caused
by:
• Themetal shelf not installed
correctly so it
touches the microwave wall.
• Metal or foil touching the sideof
the oven.
• Turntable ring support not
installed correctly.
• Foilnot molded to food
(upturned edges act
like antennas).
Metal,such astwist-ties, poultry
pins,or gold-rimmed dishes,in
the microwave.
Recycledpaper towels
containing small metal pieces
being usedin the microwave.
Only use microwave shelf when
reheating on morethan one
level. DONOT store the oven
shelf in the microwave. See
operating instructions for Oven
ShelL.
', SAVE THESE INSTRUCTIONS
WARNING!
FOOD
GEApplionces.com
• Donot pop popcorn in your microwave
oven unless in a special microwave popcorn
accessory or unlessyou use popcorn
labeledfor usein microwave ovens.
• Donot boil eggs in a microwave oven.
Pressurewill build up inside egg yolk andwill
cause it to burst, possibly resulting in injury.
• Operating the microwave with no food
insidefor more than a minute or two may
cause damage to the oven and could start
a fire. It increasesthe heat around the
magnetron and can shorLenthe lifeof the
oven.
• Foodswith unbroken outer "skin" such as
potatoes, hot dogs,sausages, tomatoes,
apples, chickenlivers and other giblets, and
eggyolks should be pierced to allow steam
to escape during cooking.
• SUPERHEATEDWATER
Liquids,such as water, coffee,or tea, ore
able to be overheated beyond the boiling
point without appearing to be boiling.Visible
bubbling or boilingwhen the container is
removed from the microwave oven isnot
always presenL THISCOULDRESULTIN VERY
NOTLIQUIDSSUDDENLYBOILINGOVER
WHENTHECONTAINERISDISTURBEDOR
ASPOONOROTHERUTENSILIS INSERTED
INTOTHELIQUID.
Toreduce the risk of injury to persons:
- Donot overheatthe liquid.
- Stir the liquid both before and halfway
through heating it.
- Donot usestraight-sided containers with
narrow necks.
- After heating, allow the container to stand in
the microwave ovenfor ashorLtime before
removing the container.
- Useextreme care when inserting a spoon or
other utensil into the container.
Foods cooked in liquids (suchaspasta) may
tend to boil more rapidly than foods
containing lessmoisture. Should this
occur, refer to the Care and cleaning of the
microwave oven section for instructions on
how to clean the insideof the oven.
• Avoid heating baby food in glassjars, even
with the lidoff. Make sure all infant food is
thoroughly cooked.Stir food to distribute the
heat evenly.Becareful to prevent scalding
when warming formula. The container may
feel cooler than the formula really is.Always
test the formula before feeding the baby.
• Don't defrost frozen beverages in narrow-
necked bottles (especially carbonated
beverages).Even if the container isopened,
pressure can build up.This can cause the
container to burst, possibly resulting in
injury.
• Hot foods and steam can cause burns. Be
careful when opening any containers of
hot food, including popcorn bags,cooking
pouches and boxes. To prevent possible
injury, direct steam away from hands and
face.
• Do not overcook potatoes. Theycould
dehydrate and catch fire, causing damage
to your oven.
• Cook meat and poultry thoroughly-meat
to at least an INTERNALtemperature of
160°Fand poultry to at least an INTERNAL
temperature of 180°F.Cooking to these
temperatures usually protects against
foodborne illness.
SAVE THESE INSTRUCTIONS s
IMPORTANT SAFETYINSTRUCTIONS.
READALL INSTRUCTIONSBEFOREUSING.
MICROWAVE-SAFE COOKWARE
Do not operate the oven in the microwave mode without the turntable
and the turntable support seated and in place.The turntable must be
unrestricted so it can rotate. Makesure all cool<woreused in your microwave
ovenissuitable for microwaving. Most glosscasseroles,cooking dishes,
measuring cups,custard cups,pottery or chino dinnerware which does
not have metallic trim or gloze with a metallic sheen can be used.Some
cool<wareislabeled "suitablefor microwoving"
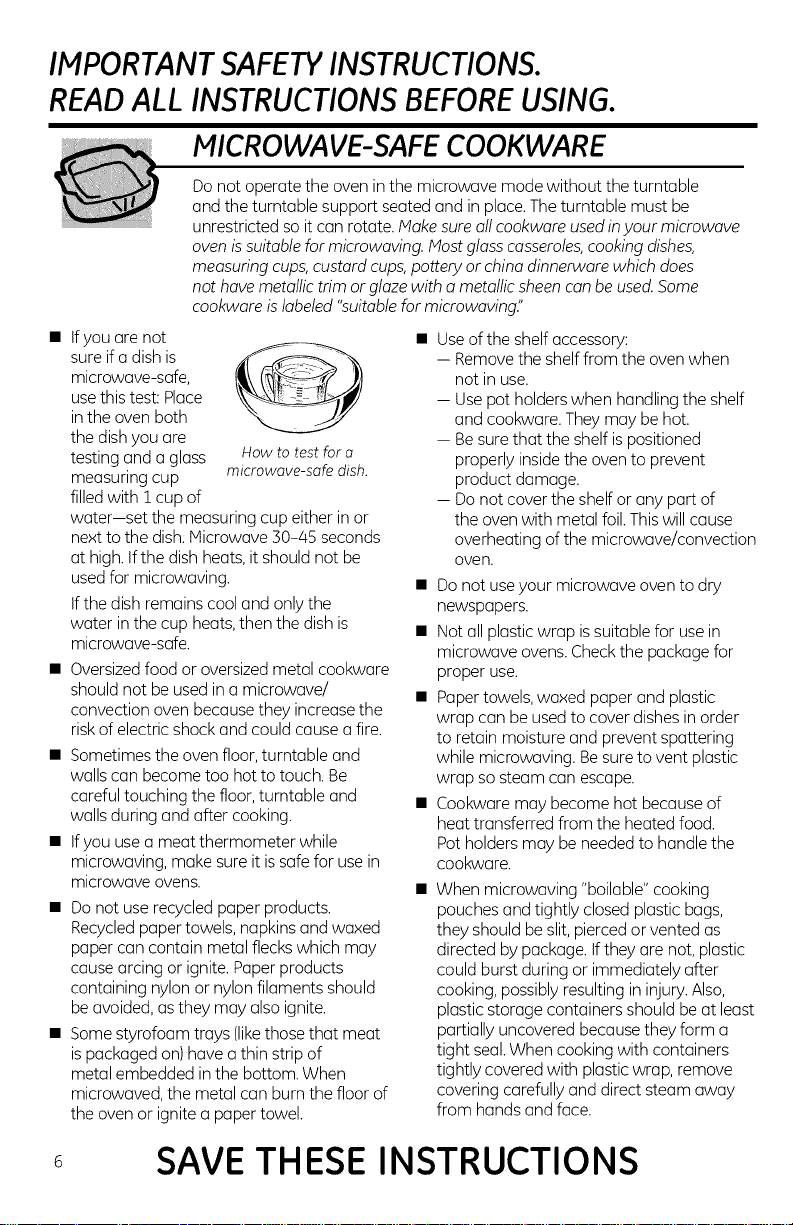
• Ifyou are not
sure if a dish is
microwave-safe,
use this test: Place
in the oven both
the dish you are
testing and aglass
measuring cup
filledwith 1 cup of
water--set the measuring cup either in or
next to the dish. Microwave 30-/45 seconds
at high.Ifthe dish heats, it should not be
usedfor microwaving.
Ifthe dish remains cool and only the
water in the cup heats,then the dish is
microwave-safe.
• Oversizedfood or oversized metal cookware
should not be used in a microwave/
convection oven because they increase the
riskof electric shock and could cause a fire.
• Sometimes the oven floor,turntable and
walls can become too hot to touch. Be
careful touching the floor, turntable and
walls during and after cooking.
• Ifyou use a meat thermometer while
microwaving, make sure it issafe for use in
microwave ovens.
• Do not use recycled paper products.
Recycledpaper towels, napkins andwaxed
paper can contain metal flecks which may
cause arcing or ignite. Paper products
containing nylon or nylon filaments should
be avoided, as they may also ignite.
• Some styrofoam trays (likethose that meat
is packaged on) have a thin strip of
metal embedded inthe bottom. When
microwaved, the metal can burn the floor of
the oven or ignite a paper towel.
How to test for a
microwave-safedish.
• Useof the shelf accessory:
- Removethe shelf from the oven when
not in use.
- Usepot holders when handling the shelf
and cookware. They may be hot.
- Besure that the shelf ispositioned
properly inside the oven to prevent
product damage.
- Donot cover the shelf or any part of
the oven with metal foil.Thiswill cause
overheating of the microwave/convection
oven.
• Donot useyour microwave oven to dry
newspapers.
• Not all plastic wrap issuitable for use in
microwave ovens. Checkthe package for
proper use.
• Papertowels, waxed paper and plastic
wrap can be used to cover dishes inorder
to retain moisture and prevent spattering
while microwaving. Besure to vent plastic
wrap so steam can escape.
• Cookware may become hot because of
heat transferred from the heated food.
Pot holders may be neededto handle the
cookware.
When microwaving "boilable" cooking
pouches and tightly closed plastic bags,
they should be slit, pierced orvented as
directed bypackage. If they are not, plastic
could burst during or immediately after
cooking, possibly resulting in injury.Also,
plastic storage containers should be at least
partially uncovered because they form a
tight seal.When cooking with containers
tightly covered with plastic wrap, remove
covering carefully and direct steam away
from hands and face.
6 SAVE THESE INSTRUCTIONS
GEAppliances.com
MICROWAVE-SAFE COOKWARE (cont.)
• Usefoil only as directed inthis manual.
When using foil in the microwave oven,
keepthe foil at least 1"away from the sides
of the oven.
• Plasticcookware-Plastic cookware
designed for microwave cooking is very
useful,but should be used carefully. Even
microwave-safe plastic may not be as
tolerant of overcooking conditions as
are glass or ceramic materials and may
soften orchar if subjected to short periods
of overcooking. In longer exposuresto
overcooking, the food and cookware could
ignite.
Follow these guidelines:
[] Use microwave-safe plastics only and
use
them instrict compliance with the
cookware manufacturer's
recommendations.
[] Donot microwaveempty containers.
[] Do not permitchildrento useplastic
cookwarewithout complete supervision.
WARNING!
GROUNDING INSTRUCTIONS
WARNING!
Improper use of the grounding plug can result in u
risk of electric shock.
Thisappliance
must be
grounded. In
the event of
an electrical
short circuit,
Ensureproperground
existsbefore use.
by providing an escape wire for the electric
current.
This appliance is equipped with a power cord
having a grounding wire with a grounding plug.
The plug must be plugged into an outlet that is
properly installed and grounded.
Consult a qualified electrician orservice
technician if the grounding instructions are not
completely understood, or if doubt existsas to
whether the appliance isproperly grounded.
grounding
reduces the risk
of electric shock
Ifthe outlet isa standard 2-prong wall outlet,
it is your personal responsibility and obligation
to have it replaced with a properly grounded
B-prongwall outlet.
Do not under any circumstances cut or remove
the third (ground) prong from the power cord.
Do not use an adapter plug with this appliance.
Do not use an extension cord with this
appliance. Ifthe power cord istoo short, have a
qualified electrician or servicetechnician install
an outlet near the appliance.
For best operation, plug this appliance into
its own electrical outlet to prevent flickering
of lights, blowing of fuseor tripping of circuit
breaker.
SAVE THESE INSTRUCTIONS 7
IMPORTANT SAFETYINSTRUCTIONS.
READALL INSTRUCTIONSBEFOREUSING.
THE VENT FAN
Thefan will operate automatically under •
certain conditions (seeAutomatic Fan
feature).Take careto prevent the starting and
spreading of accidental cooking fireswhile the
vent fan is in use.
• Cleanthe underside of the microwave often.
Do not allow greaseto build up on the
microwave or thefan filters.
• Inthe event of a greasefire on the surface
units below the microwave oven, smother a
flaming panon the surface unit by covering
the pan completely with a lid,a cookie sheet
or a flat tray.
PACEMAKERS
Most pacemakers are shielded from
interference from electronic products,
including microwaves. However, patients
with pacemakers may wish to consult their
physicians if they have concerns.
OPTIONAL KITS
Available at extra cost from your GEsupplier.
Filler Panel Kits
• JX52WH-White
• JX52BL--BIock
When replacing a 36" range hood, filler
panel kits fill in the additional width to
provide a custom built-in appearance.
For installation between cabinets only; not
for end-of-cabinet installation. Each kit
contains two 3" wide filler panels.
Use care when cleaning the vent fan filters.
Corrosive cleaning agents, such as lye-
based oven cleaners,may damage the
filters.
When preparing flaming foods under the
microwave, turn the fan on.
Never leave surface units beneath your
microwave oven unattended at highheat
settings. Boiloverscause smoking and
greasy spilloversthat may ignite and spread
if the microwave vent fan isoperating. To
minimize automatic fan operation, use
adequate sizedcookware and use high heat
on surface units only when necessary.
Filter Kits
• JX81H--RecirculatingCharcoalFilterKit
Filter kits are used when the oven cannot be
vented to the outside.
See back cover to order by phone or at
ge.com.
READ AND FOLLOW THIS SAFETYINFORMATION CAREFULLY.
SAVE THESE INSTRUCTIONS
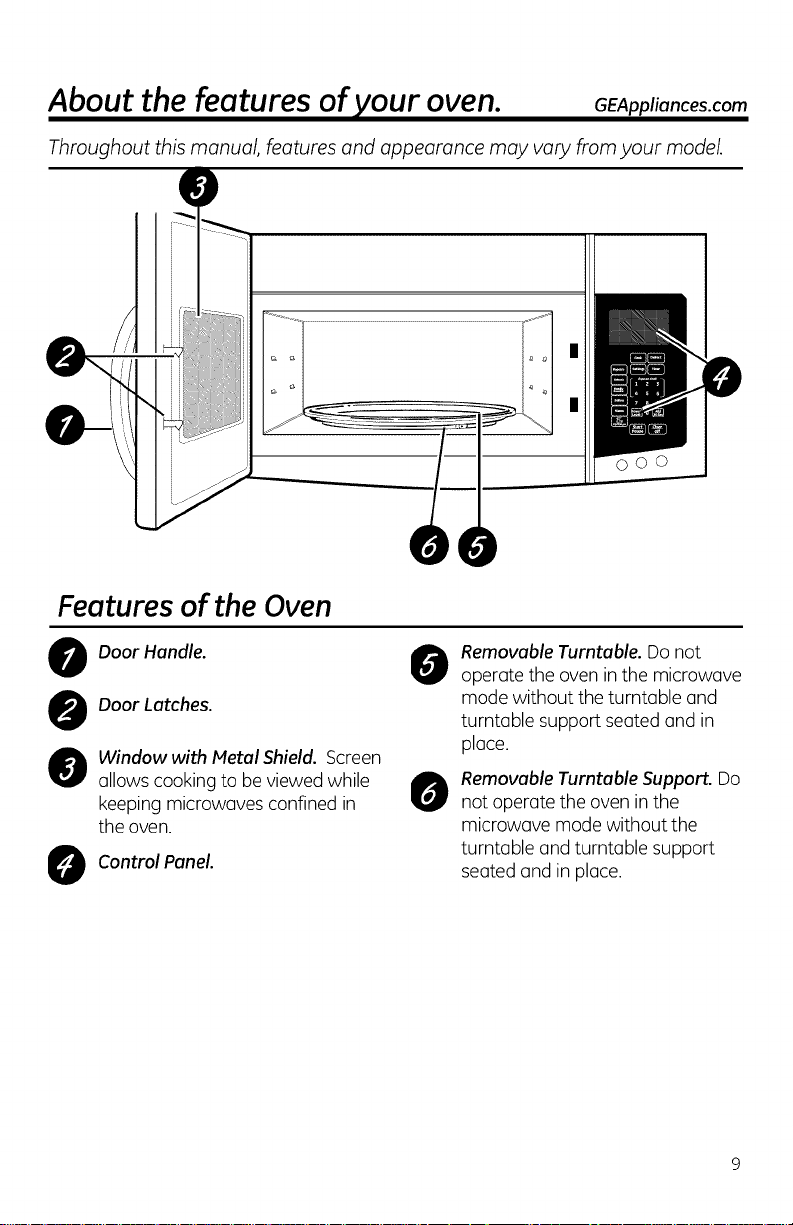
About the features of your oven. GEAppliances.com
Throughout this manual, features and appearance may vary from your model.
|
|
O©
Features of the Oven
O Door Handle. 0
O Door Latches.
O indow with Metal Shield. Screen
allows cooking to be viewed while
keeping microwaves confined in
the oven.
O Control Panel.
Removable Turntable. Do not
operate the oven in the microwave
mode without the turntable and
turntable support seated and in
place.
Removable Turntable Support. Do
0
not operate the oven in the
microwave mode without the
turntable and turntable support
seated and in place.
About the features of your oven.
Power Saver (Energy Saver)
Feature (on some models)
Your GEmicrowave has an Power Saver (EnergySaver)feature. Many electronic appliances,
including Microwaves, consume electric power while they are switched off or in a standby
mode. Eliminating standby power can reduce your operating costs.
ToACTIVATEthe Power Saver(EnergySaver)Feature--
Pressthe Power Saver button on the unit,and the unit will turn off. (Note:If utilizingthis
feature, the clockwill not be displayed on the unit.)
ToDEACTIVATEthePower Saver(EnergySaver)Feature --
U Pressthe Power Saver button on the unit,and the unit will turn on. Thedisplay will read
"On" If the unit has had power aplied recently (within the last few days),the time will be
remembered.
_lf prompted, enter the time of day.
NOTE: Thetime keeping device that keepsyour clock running will need to be recharged every
few days. It is recommended that oncea week you should leave the unit powered on (do not
usethe Power Saver(EnergySaver)feature)for at least 2/4hours. Ifyou are prompted to enter
a time when turning on from the Power Saver (EnergySaver)mode, you should have the unit
powered on for at least/48 hours. When you first installyour unit, you should leave it powered
on for at least/48 hours.
Some features, such as the auto night light, will not function when you are in Power Saver
(EnergySaver)mode.
NOTE:This microwave oven does not detect food inthe oven if food was inserted while the unit
was Off(Power Saver(EnergySaver)active or power loss).As a result, it will ask you to insert
food again when PowerSaver (EnergySaver)isdeactivated orpower is restored to the unit. If
this occurs,just open and close the door to clear the message and the oven will be ready for
cooking.
10
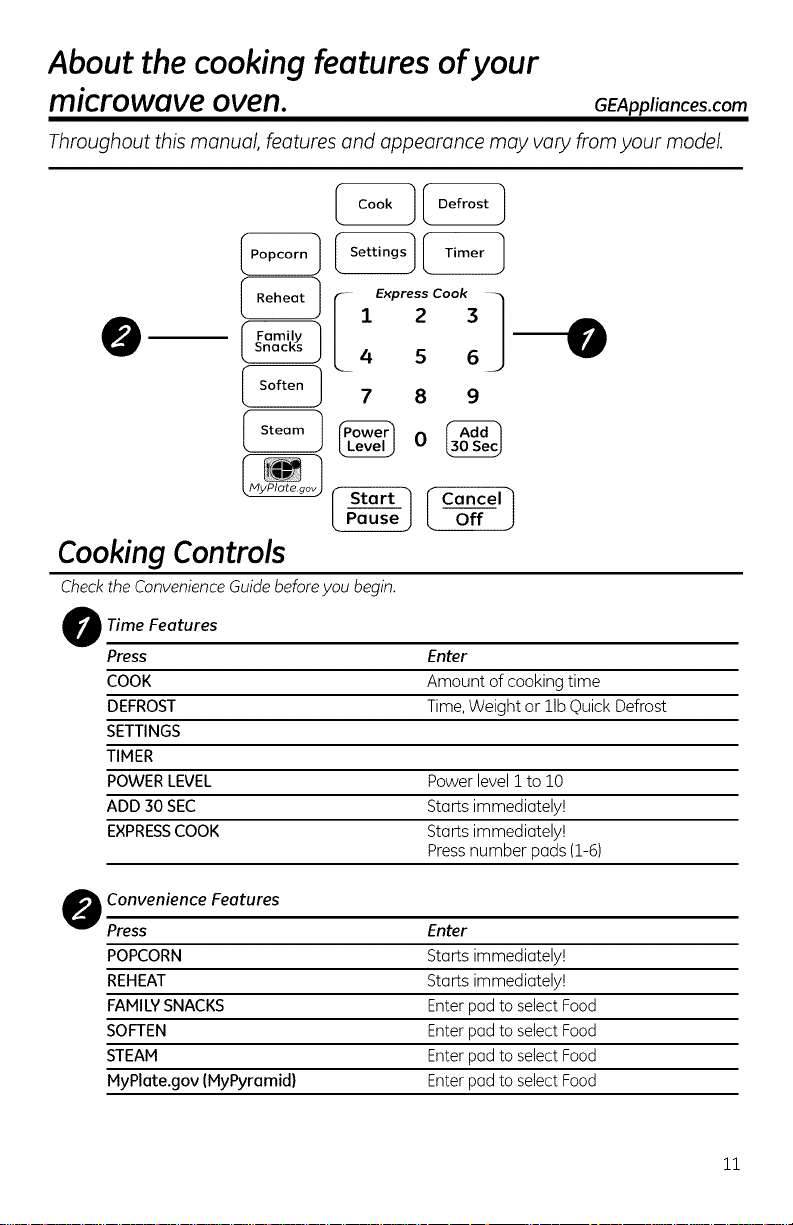
About the cooking features of your
microwave oven. GEAppliances.com
Throughout this manual, features and appearance may vary from your model
e so--o
7 8
9
Cancel}Off
Cooking Controls
Checkthe ConvenienceGuide beforeyou begin.
O Time Features
Press Enter
COOK Amount of cooking time
DEFROST Time,Weight or lib Quick Defrost
SETTINGS
TIMER
POWERLEVEL Power level 1to 10
ADD 30 SEC Starts immediately!
EXPRESSCOOK Starts immediately!
Pressnumber pads (1-6)
O Convenience Features
Press Enter
POPCORN Starts immediately!
REHEAT Starts immediately!
FAMILYSNACKS Enter pad to select Food
SOFTEN Enter pad to select Food
STEAM Enter pad to select Food
MyPlate.gov (MyPyramid) Enter pad to select Food
11
About the time features.
If- oo1o
8 9
0
I StartPause ]
1 2 3
i Express Cook 1
4 S 6
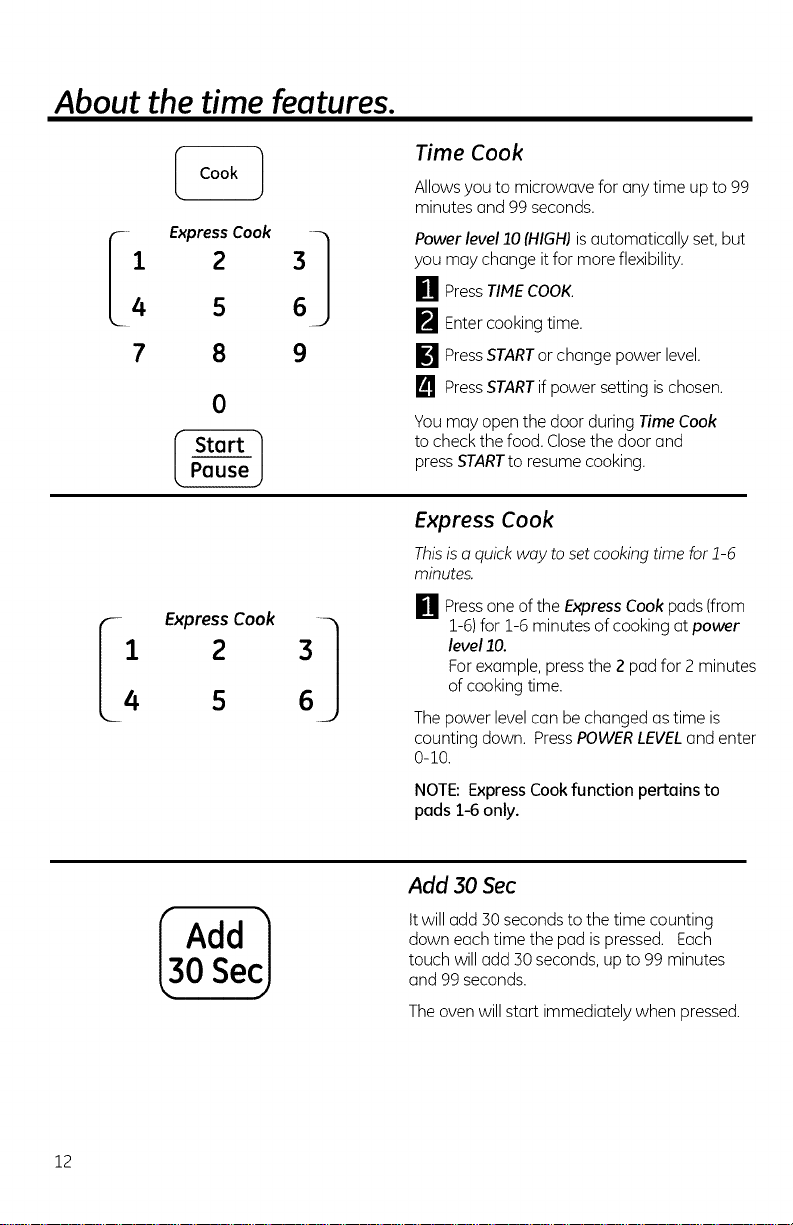
Time Cook
Allows you to microwave for any time up to 99
minutes and 99 seconds.
Power level 20[HIGH) isautomatically set,but
you may change it for more flexibility.
M PressTIMECOOK.
[]Enter cooking time.
[] PressSTARTor change power level.
[] PressSTARTif power setting ischosen.
You may open the door during Time Cook
to check the food. Closethe door and
pressSTARTto resume cooking.
Express Cook
Thisisa quick way to set cooking time for1-6
minutes.
M Pressone of the ExpressCookpads (from
1-6)for 1-6minutes of cooking at power
level 10.
Forexample, press the 2 pad for 2 minutes
of cooking time.
Thepowerlevelcanbechangedas timeis
countingdown. PressPOWERLEVELandenter
0-i0.
12
3Add ]
0 SecJ
NOTE: ExpressCook function pertoins to
pods I-6 only.
Add 30 Sec
Itwill add 30 seconds to the time counting
down each time the pad is pressed. Each
touch will add 30 seconds, up to 99 minutes
and 99 seconds.
Theoven will start immediately when pressed.
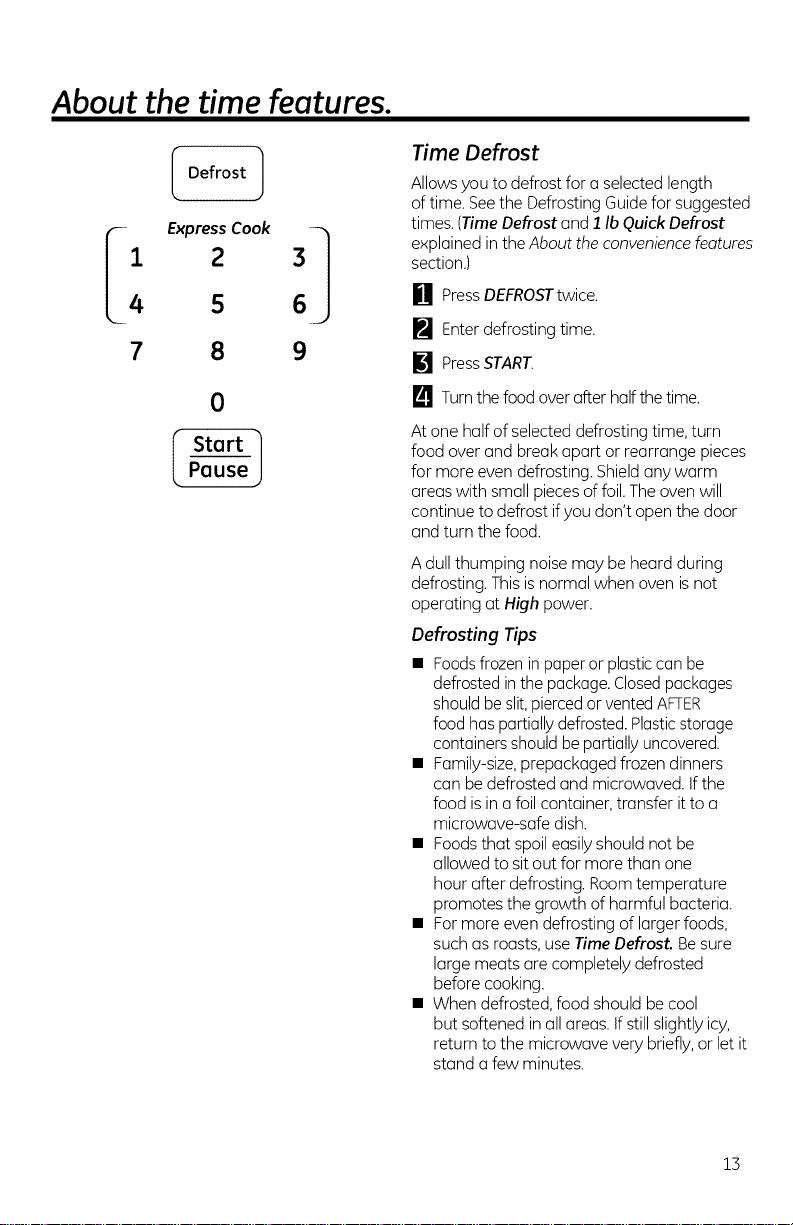
About the time features.
I Defrost 1
7 8 9
0
StartPause ]
Time Defrost
Allows you to defrost for a selected length
of time. See the Defrosting Guide for suggested
times. (Time Defrost and 1 Ib Quick Defrost
explained in the About the convenience features
section.)
[] Press DEFROST twice.
[] Enter defrosting time.
[] Press START.
[] Turn the food over after half the time.
At one half of selected defrosting time, turn
food over and break apart or rearrange pieces
for more even defrosting. Shieldany warm
areas with small pieces of foil.The oven will
continue to defrost ifyou don't open the door
and turn the food.
Adull thumping noise may be heard during
defrosting. This is normal when oven isnot
operating at High power.
Defrosting Tips
• Foodsfrozen inpaper or plastic can be
defrosted inthe package.Closedpackages
should beslit,pierced orvented AFTER
food has partially defrosted. Plasticstorage
containers should bepartially uncovered.
• Family-size,prepackaged frozen dinners
can be defrosted and microwaved. If the
food isin afoil container,transfer it to a
microwave-safe dish.
• Foodsthat spoil easily should not be
allowed to sit out for more than one
hour after defrosting. Room temperature
promotes the growth of harmful bacteria.
• For more even defrosting of larger foods,
such as roasts,use TimeDefrost. Besure
large meats are completely defrosted
before cooking.
• When defrosted, food should becool
but softened in oil areas. If still slightly icy,
return to the microwave very briefly, or let it
stand afew minutes.
13
About the time features.
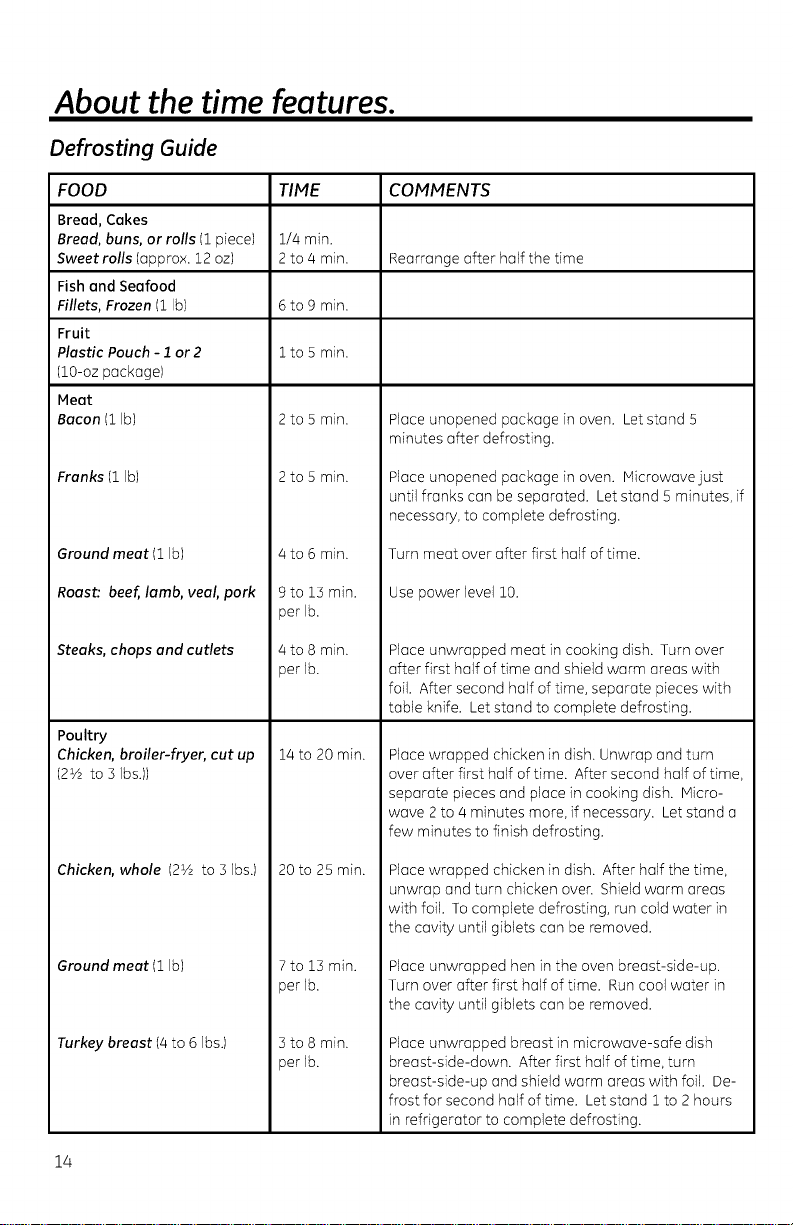
Defrosting Guide
FOOD TIME COMMENTS
Bread, Cakes
Bread, buns, or rolls (1piece) 1/4 min.
Sweet rolls (approx. 12 oz) 2to 4 min. Rearrange after half the time
Fish and Seafood
Fillets, Frozen (1 Ib) 6to 9 min.
Fruit
Plastic Pouch - 2 or2 i to 5 min.
(10-oz package)
Meot
Bacon (1 Ib)
2to 5 min.
Place unopened package in oven. Let stand 5
minutes after defrosting.
Franks (i Ib)
Ground meat (i Ib)
Roast'. beef, lamb, veal, pork
Steaks, chops and cutlets
Poultry
Chicken, broiler-fryer, cut up
(2Vz to 3 Ibs.))
Chicken, whole (2% to 3 Ibs.)
Ground meat (i Ib)
Turkey breast (4to 6 Ibs.)
2to 5 min.
4 to 6 min.
9to 13 min.
per lb.
4 to 8 min.
per lb.
14 to 20 min.
20 to 25 min.
7to 13 min.
per lb.
3to 8 min.
per lb.
Place unopened package in oven. Microwavejust
until franks can be separated. Let stand 5 minutes, if
necessary, to complete defrosting.
Turn meat over after first half of time.
Use power level 10.
Place unwrapped meat in cooking dish. Turn over
after first half of time and shield warm areas with
foil. After second half of time, separate pieces with
table knife. Let stand to complete defrosting.
Place wrapped chicken in dish. Unwrap and turn
over after first half of time. After second half of time,
separate pieces and place in cooking dish. Micro-
wave 2 to 4 minutes more, if necessary. Let stand a
few minutes to finish defrosting.
Place wrapped chicken in dish. After half the time,
unwrap and turn chicken over. Shield warm areas
with foil. To complete defrosting, run cold water in
the cavity until giblets can be removed.
Place unwrapped hen in the oven breast-side-up.
Turn over after first half of time. Run cool water in
the cavity until giblets can be removed.
Place unwrapped breast in microwave-safe dish
breast-side-down. After first half of time, turn
breast-side-up and shield warm areas with foil. De-
frost for second half of time. Let stand 1 to 2 hours
in refrigerator to complete defrosting.
14
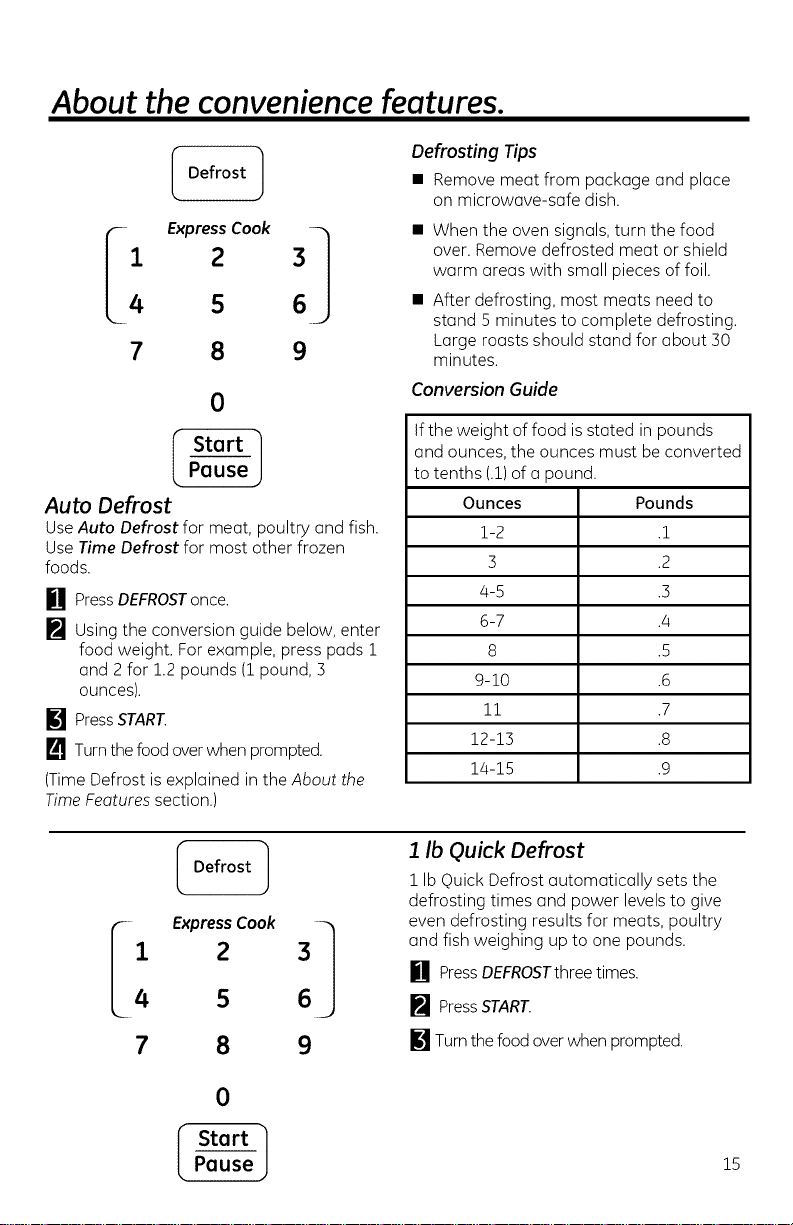
About the convenience features.
Defrosting Tips
Defrost ]
7 8 9
0
StartPause ]
Auto Defrost
UseAuto Defrost for meat, poultry and fish.
Use Time Defrost for most other frozen
foods.
[] Press DEFROSTonce.
[] Using the conversion guide below, enter
food weight. For example, press pads 1
and 2 for 1.2 pounds (1 pound, 3
ounces).
[] PressSTART.
[] Turn the food overwhen prompted.
(Time Defrost is explained in the About the
TimeFeatures section.)
• Remove meat from package and place
on microwave-safe dish.
• When the oven signals, turn the food
over. Remove defrosted meat or shield
warm areas with small pieces of foil.
• After defrosting, most meats need to
stand 5 minutes to complete defrosting.
Large roasts should stand for about 30
minutes.
Conversion Guide
If the weight of food is stated in pounds
and ounces, the ounces must be converted
to tenths (.1) of a pound.
Ounces Pounds
i-2 .i
3 .2
4-5 .3
6-7 .4
8 .5
9-10 .6
11 .7
12-13 .8
14-15 .9
1 Ib Quick Defrost
Defrost ]
7 8 9
1 Ib Quick Defrost automatically sets the
defrosting times and power levelsto give
even defrosting results for meats, poultry
and fish weighing up to one pounds.
[] PressDEFROSTthree times.
[] Press STAR[
[] Turn the food over when prompted.
0
I StartPause ] 15
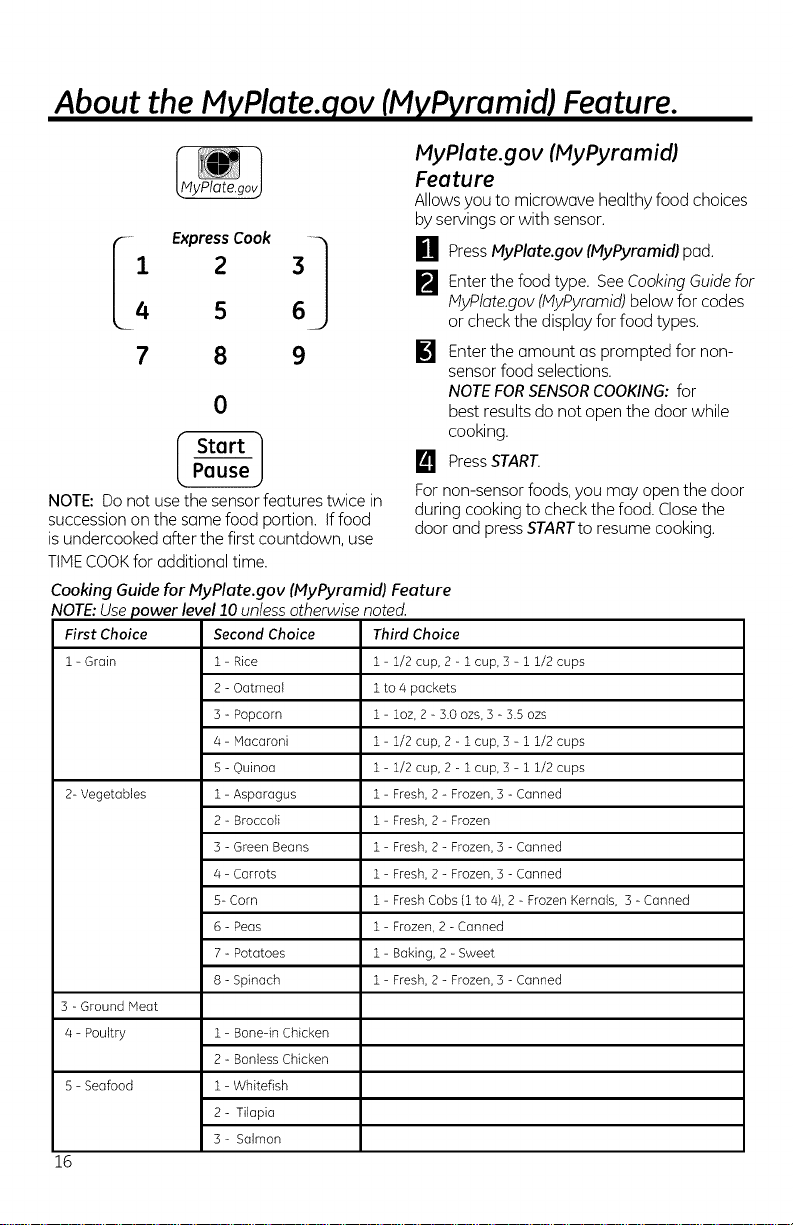
About the MyPlate.qov (MyPyramid) Feature.
PlyPlate.gov (PlyPyramid)
Feature
Allowsyou to microwave healthy food choices
byservings orwith sensor.
B PressMyPlate.gov (MyPyramid)pad.
[] Enterthe food type. SeeCookingGuide for
MyPlate.gov(MyPyramid)below for codes
or check the display for food types.
7 8 9
0
NOTE: Do not use the sensor features twice in
succession on the same food porLion. If food
is undercooked after the first countdown, use
TIHE COOK for additional time.
Cooking Guide for MyPlate.gov (MyPyramidJ Feature
NOTE: Use power level 10 unless otherwise noted.
First Choice Second Choice Third Choice
1 - Grain 1 - Rice 1 - 1/2 cup, 2 - 1 cup, 3 - 1 1/2 cups
2 - Oatmeal 1 to/4 packets
3 - Popcorn 1 - loz, 2 - 3.0 ozs, 3 - 3.5 ozs
/4- Macaroni 1 - 1/2 cup, 2 - 1 cup, 3 - 1 1/2 cups
5 - Ouinoa 1 - 1/2 cup, 2 - 1 cup, 3 - 1 1/2 cups
2- Vegetables 1 - Asparagus 1- Fresh, 2 - Frozen, 3 - Canned
2 - Broccoli 1 - Fresh, 2 - Frozen
3 - Green Beans 1 - Fresh, 2 - Frozen, 3 - Canned
/4- Carrots 1 - Fresh, 2 - Frozen, 3 - Canned
5- Corn 1 - Fresh Cobs (1 to 4),2 - Frozen Kernals, 3 - Canned
6 - Peas 1 - Frozen, 2 - Canned
7 - Potatoes 1- Baking, 2 - Sweet
8 - Spinach 1 - Fresh, 2 - Frozen, 3 - Canned
3 - Ground Heat
4 - Poultry 1 - Bone-in Chicken
2 - Bonless Chicken
5 - Seafood 1 - Whitefish
2- Tilopia
3- Salmon
16
[] Enterthe amount as prompted for non-
sensor food selections.
NOTEFORSENSORCOOKING:for
best results do not open the door while
cooking.
[] PressSTART.
For non-sensor foods, you may open the door
during cooking to check thefood. Closethe
door and pressSTARTto resume cooking.

About the sensor microwave features.
[ 1
Family Snacks
UsetheFamilySnacks featuretocookfroma
varietyof pre-programmedfamilysnackitems.
[] PresstheFamilySnacksbutton.
[] Enterthenumberpad to selectoneof theeight
snackoptions.
[] Enter an amount for the snack selected.
[] PressSTART/PAUSEto start cooking.
Soften ]
Soften (on some models_
Use the Soften feature to soften certain pre-
programmed foods:
[] Press the Soften button.
[] Enter the number pad to select one of the
soften options.
[] Enter an amount for the food selected.
[] Press START/PAUSE to start cooking.
First Choice Second Choice
1 - Burrito 1 to 3
2 - Chicken Nuggets 1 to 2 servings
3 - Oatmeal i to 4 packets
4 - Instant Macaroni and Cheese i to 2 servings
5 - Canned Pasta i to 2 cans
6 - Hot Dogs i to 4
7 - Pizza (5 inch)
8 - Hot Chocolate 1 to 3 cups
First Choice Second Choice
1 - Butter 1 - 1/2 Stick; 2 - 1 Stick;
3 - 2 Sticks
2-CreamCheese 1-3ounces; 2-8ounces;
3 - Ice Cream 1 - 1 pint; 2 - i quart;
Melt
Soften ]
Soften/Melt (onsome models)
Usethe Soften/Meltfeatureto softenor mettcertain
pre-programmedfoods:
[] PresstheSoften/Meltbutton. Pressonetime
forsoftenand two timesfor mett.
[] Enterthenumberpad to selectoneof the
softenor mettoptions.
[] Enter an amount for the food selected.
[] PressSTART/PAUSEto start cooking.
First Choice Second Choice
1 - Butter 1 - 1/2 Stick; 2 - 1 Stick;
2- Caramel 1- 4 ounces; 2- 8 ounces;
3 - Chocolate 1 - 4 ounces; 2 - 8 ounces;
4- Marshmallows 1- S ounces; 2- 8 ounces;
3 - 2 Sticks
3 - 12 ounces; 4 - 16 ounces
3 - 12 ounces; 4 - 16 ounces
3 - 10 ounces; 4 - 16 ounces
17
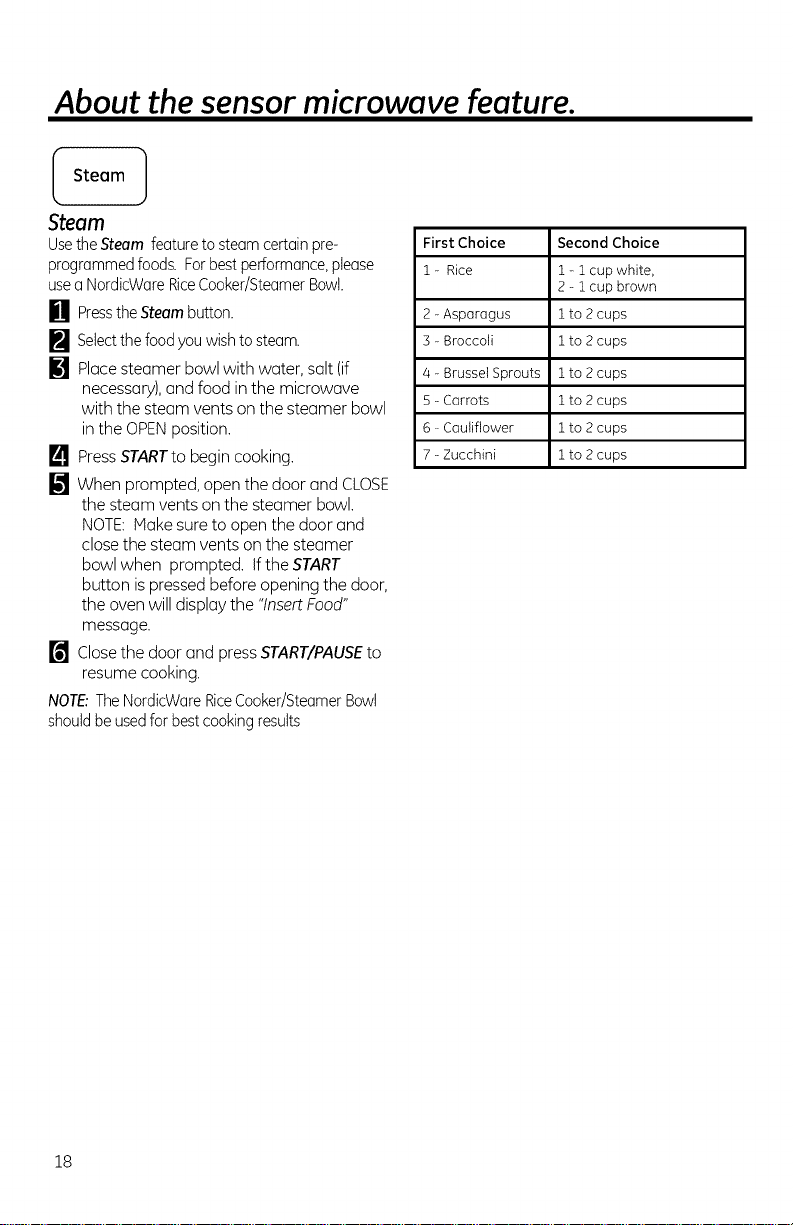
About the sensor microwave feature.
Steam 1
Steam
UsetheSteam featureto steamcertainpre-
programmedfoods. Forbestperformance,please
useaNordicWareRiceCooker/SteamerBowl.
[] PresstheSteambutton.
[] Selectthefoodyou wishto steam.
[] Placesteamer bowl with water, salt (if
necessary),and food inthe microwave
with the steam vents on the steamer bowl
in the OPENposition.
[] PressSTARTto begin cooking.
[] When prompted, open the door and CLOSE
the steam vents on the steamer bowl.
NOTE:Make sure to open the door and
closethe steam vents on the steamer
bowl when prompted. Ifthe START
button ispressed before opening the door,
the oven will displaythe "InsertFood"
message.
[] Closethe door and press START/PAUSEto
resume cooking.
NOTE:TheNordicWareRiceCooker/SteamerBowl
shouldbeusedfor bestcookingresults
First Choice Second Choice
1 - Rice 1 - 1 cup white,
2 - i cup brown
2 - Asparagus 1 to 2 cups
3 - Broccoli 1 to 2 cups
/4- Brussel Sprouts 1 to 2 cups
5 - Carrots 1 to 2 cups
6 - Cauliflower 1 to 2 cups
7 - Zucchini 1 to 2 cups
18

About the sensor microwave features.
Popcorn 1
Popcorn
Touse the Popcorn feature:
[] Follow package instructions, using Cook if
the package islessthan 1.0ounces or
largerthan 3.5 ounces. Placethe
package of popcorn inthe center of the
turntable.
[] PressthePOPCORNbuttononcefor 3.3to 3.5
ouncebagsor twicefor 2.7to 3.0ouncebags
or threetimesfor 1.0to 1.5ouncebags.
Reheat ]
Reheot
Oonotu_theshef_swhen micmwo_cooking.)
TheReheatfeaturereheatsservingsofpreviously
cookedfoodsor aplateof leftovers.
[] Place the cup of liquid or covered
food inthe oven. PressREHEATonce, twice, or
three times. The oven starts immediately.
Pressonce for a plate of leftovers.
Presstwice for a pasta.
Pressthree times for 1/2 to 2 cups of
vegetables.
[] The oven signals when steam is
sensed and the time remaining begins
counting down.
Donot opentheovendooruntiltime
iscountingdown.Ifthedoorisopened,
closeitand pressSTART/PAUSEimmediately.
After remodng food from the oven, stir, if possibfe,
to even out the temperature. Reheated foods may
hove wide voriotbns in temperature. Some areas of
food may be extremely hot.
Iffoodisnot hotenoughafterthecountdown use
TimeCookfor additionalreheatingtime.
Iffood is undercookedafterthe countdown,use
TimeCookforadditionalcookingtime.
Use only with prepackaged microwave
popcorn weighing 1.0 to 3.5 ounces.
NOTE: Do not use this feature twice in
succession on the same food portion--it
may result in severely overcooked or
burnt food
SomeFoodsNotRecommendedforUse
With Reheat
Itisbestto useTimeCookfor thesefoods:
Breadproducts.
Foodsthat mustbereheateduncovered.
Foodsthat needto bestirredorrotated.
Foodscattingfor a dry tookorcrisp surfaceafter
reheating.
NOTE:Do not use this feature twice in
succession on the same food portion--it
may result in severely overcooked or
burnt food.
19
About the sensor microwave feature.
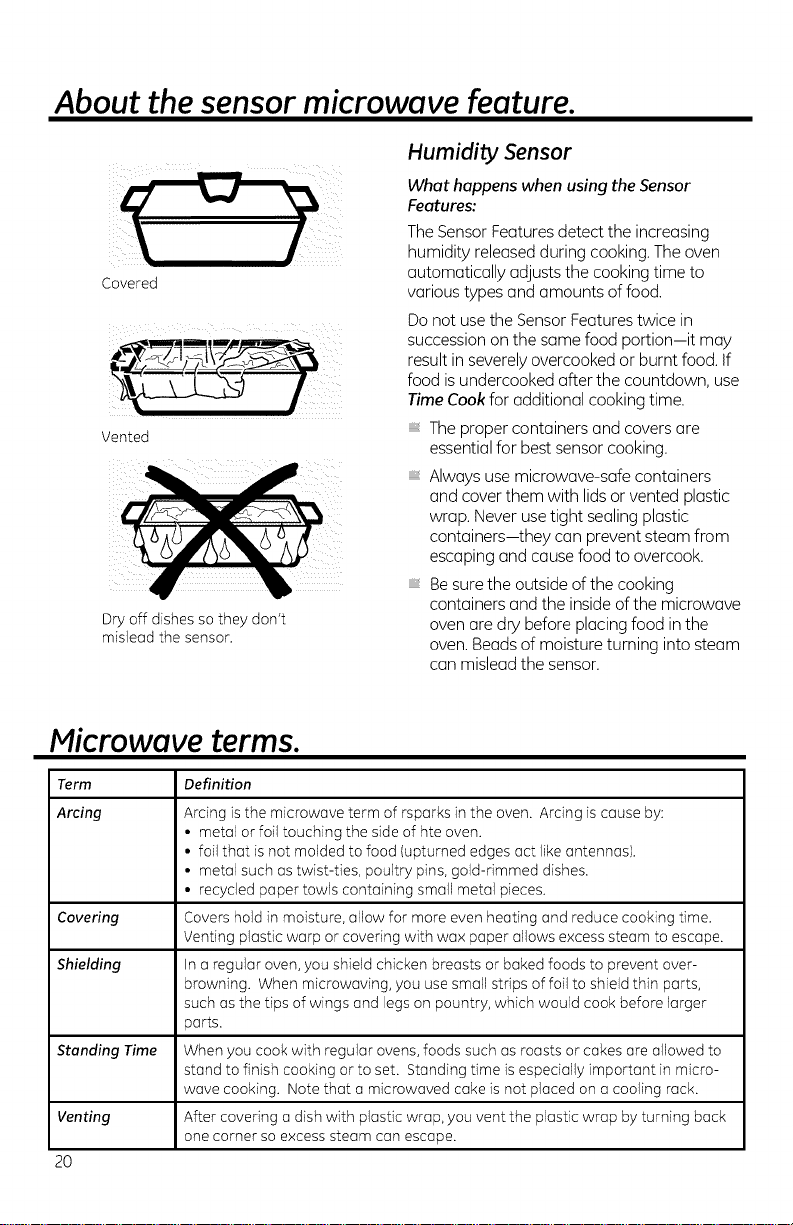
Humidity Sensor
What happens when using the Sensor
Features:
TheSensor Features detect the increasing
humidity releasedduring cooking. The oven
Covered
Vented
Dry off dishes so they don't
mislead the sensor.
automatically adjusts the cooking time to
various types and amounts of food.
Do not usethe Sensor Features twice in
succession on the same food portion-it may
resultin severelyovercooked or burnt food. If
food isundercooked after the countdown, use
TimeCook for additional cooking time.
The propercontainers and coversare
essentialfor best sensor cooking.
Always use microwave-safe containers
and cover them with lids or vented plastic
wrap. Neverusetight sealing plastic
containers-they can prevent steam from
escaping and causefood to overcook.
Besure the outside of the cooking
containers and the inside of the microwave
oven are dry before placing food in the
oven. Beadsof moisture turning into steam
can mislead the sensor.
Microwave terms.
Term Definition
Arcing Arcing is the microwave term of rsparks inthe oven. Arcing is cause by:
Covering Covers hold in moisture, allow for more even heating and reduce cooking time.
Shielding In a regular oven, you shield chicken breasts or baked foods to prevent over-
Standing Time When you cook with regular ovens, foods such as roasts or cakes are allowed to
Venting After covering a dish with plastic wrap, you vent the plastic wrap by turning back
20
• metal or foil touching the side of hte oven.
• foil that is not molded to food (upturned edges act like antennasl.
• metal such as twist-ties, poultry pins, gold-rimmed dishes.
• recycled paper towls containing small metal pieces.
Venting plastic warp or covering with wax paper allows excess steam to escape.
browning. When microwaving, you use small strips of foil to shield thin parts,
such as the tips of wings and legs on pountry, which would cook before larger
parts.
stand to finish cooking or to set. Standing time is especially important in micro-
wave cooking. Note that a microwaved cake is not placed on a cooling rack.
one corner so excess steam can escape.
About the sensor microwave features.
Variable power levelsaddflexibility to
I Cook ]
1 2 3
i ExpressCook 1
4 5 6
7 8 9
0
Start
Pause 1
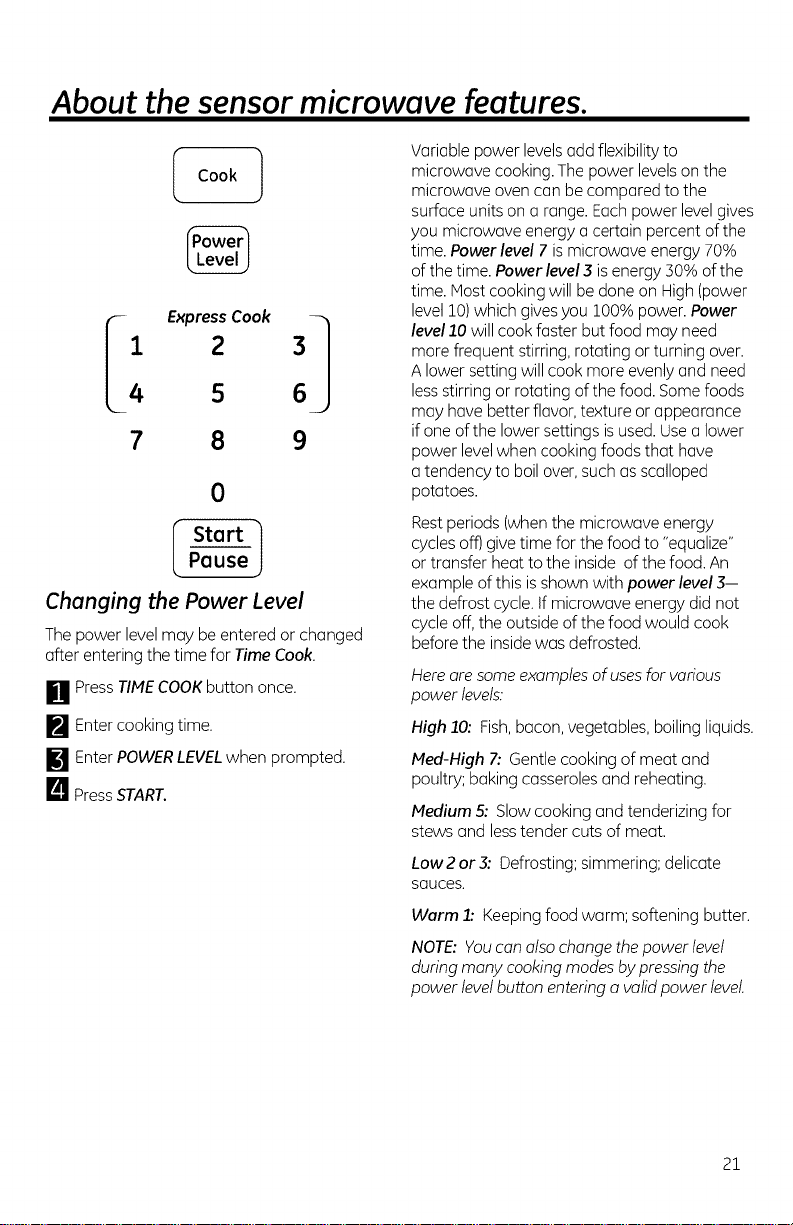
Changing the Power Level
The power level may be entered or changed
after entering the time for TimeCook.
ill press TIMECOOKbutton once.
[] Enter cooking time.
[] Enter POWERLEVELwhen prompted.
I_1 PressSTART.
microwave cooking.The power levels on the
microwave oven can be compared to the
surface units on a range. Eachpower level gives
you microwave energy a certain percent of the
time. Powerlevel 7 ismicrowave energy 70%
of the time. Power level3 isenergy 30% of the
time. Most cooking will be done on High(power
level 10)which gives you 100%power. Power
level10 will cook faster but food may need
more frequent stirring, rotating or turning over.
Alower setting will cook more evenly and need
less stirring or rotating ofthe food. Somefoods
may have better flavor, texture or appearance
if one of the lower settings is used.Usea lower
power levelwhen cooking foods that have
atendency to boilover,such as scalloped
potatoes.
Restperiods (whenthe microwave energy
cycles off) givetime for the food to "equalize"
or transfer heat to the inside of the food. An
example of this isshown with power level3-
the defrost cycle. If microwave energy did not
cycle off, theoutside of the food would cook
before the insidewas defrosted.
Hereare someexamples of usesfor various
power levels:
High 10: Fish,bacon, vegetables, boiling liquids.
Meal-High 7: Gentle cooking of meat and
poultry; baking casseroles and reheating.
Medium 5: Slowcooking and tenderizing for
stews and lesstender cuts of meat.
Low2 or 3: Defrosting; simmering; delicate
sauces.
Warm 1: Keeping food warm; softening butter.
NOTE: Youcan also change thepower level
during many cookingmodes bypressing the
power levelbutton entering a valid power level.
21
 Loading...