

Page 1
GEAppliances.com
Safety Instrudions ...2-9
Operating Instru_¢ions
Auto Features ........ 20
Care and
Cleaning ......... 33, 34
Changing the
Power I,evel .............
Cooking Guide .... 15, 16
Defrosting Guide ..... 18
Exhaust Feature ...36, 37
Features of Your
Microwave Oven ...11, 12
Microwave Temps ..... 32
Other Feattlres .... 25-31
Replacing Bulbs ...... 35
Sensor Features .... 21-24
Time Features .... 14-19
Troubleshooting 7_ps .... 8
Things That Aa'e
Nomml With Yimr
Microwax e (-)\ en ....... 39
Consumer Support
Consumer
Support ...... Back Cover
Optional Kits ......... 10
Product
Registration ....... 41, 42
Warranty ............ 43
Espahol
For a Spanish version
of this m a mla 1,
visit our _,Vebsite at
GEAppliances.com.
PaI'a cons/ll[_lI" tlna veYsion
en espafiol de este manual
de instrucciones, visim
nuestro sitio de internet
GEAppliances.com.
JVMI850
JVM1851
JVM1860
JVM1861
JVMI870
Write the model and serial numbers here:
Model #
Serial #
Find these mmfl)ers on a label inside
the O\ ('11,
164D3370P235 49-40295-1 11-02Jfl
Page 2
IMPORTANTSAFETYINFORMATION.
READALLINSTRUCTIONSBEFOREUSING.
WARNING!
For your safe_ the information in this manual must be
foflowed to minimize the risk of fire or explosion, electric
shock, or to pre vent property damage, personal injury,
or loss of life.
PRECAUTIONSTOAVOID
POSSIBLEEXPOSURETO
EXCESSIVEMICROWAVEENERGY
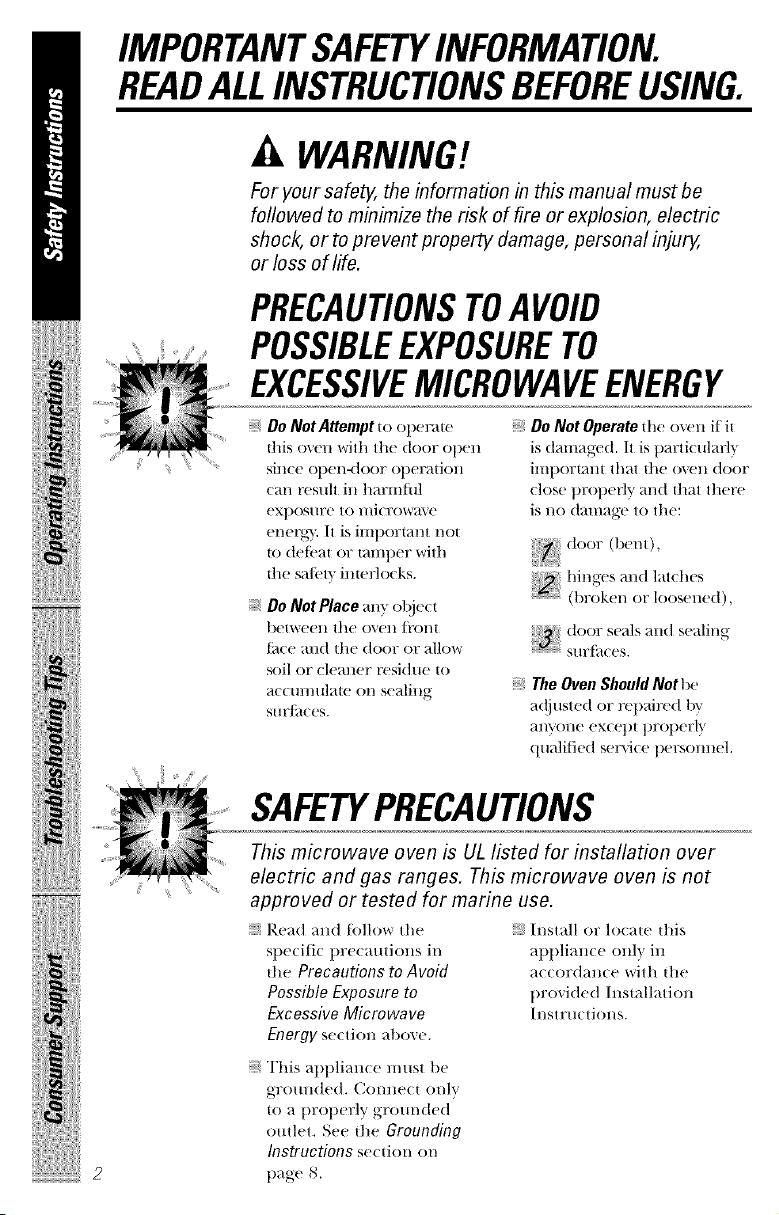
iiii!i}i+!X{q{i!!i/i+iii!+!+iiiiiii
Do Not Attempt t() operam
dfis oxen with the door open
sin(e open-door operation
(an tx'suh in hm:mflfl
exposure to mi€rowave
cnt'rg}, It is important not
|o de|bat or t:alnpcr with
die sal('t_ imcrhxks.
Do Not Place any object
butwccn thu ()\('ll [l'on[
{ime and the door or allow
soil or cleaner residue to
ac(umulmc on scaling
SHI']itC('S.
Do IVotOperate the ov('n if it
is damaged. It is particularly
i))lport;allt that t])(' o_,_'I1 door
close prol)erb! and {|)at thor('
is no damage to the:
doo,_(1,_,.,),
hi,)_-t_.,_,1,,t1.,1,e+
.........................(broken or loosened),
.........................SH]?t_t( (!S.
The Oven Should/V0tt)e
a(!jt tsted or rep;fi)'(,(I by
qualiticd scr\'i(c t)('r.,omu'l.
SAFETYPRECAUTIONS
This microwave oven is UL listed for installation over
electric and gas ranges. This microwave oven is not
approved or tested for marine use.
Read and tolh)w the
spe(iti( precautions in
the Precautions to Avoid
Possible Exposure to
Excessive Microwave
Energy sc(tion abo_e.
;; Install or locate this
appliance only in
accordance with the
provided Installation
Inswuctions.
This applian( c must t)('
grounded. Conne(t only
u) a properly gr(mndcd
outlet. See fl)e Grounding
Instructions sccdon on
page 8.
Page 3
vvvvw.GEAppliance_com
Use this appliance only for its intended purpose as
described in this Owner's Manual
1)o llot lllO/Ult this at)pliance :¢ To reduce tile risk of fire
o_er _t sillk, ill tilt' o\ell c_\'itv:
This ovel=the-r_tll_e ovell _s
desiglled t_)r use (wer ranges
llo wider thall 36'[ It n/a\ be
illstalled over both g:_s and
electric cookillg equipn/em.
I)o llOt operate this _q)l/liance
if it has a dmnaged power
(ord or l)lug, if it is llot
working t)rollerly, or if it has
1)een damaged or dl'otltled.
If tile power lord is
damaged, it must be repla(ed
1)\ Gelleral ElectlJC Ser\'i( e
or an autho]Jzed service
agent using a l/OX_'r cord
_1\_fikd)le ti'on/Gelleral
ElecuJc.
I)o llot coxer or block alw
ot)enings oll tile appliance.
Use this _q)lllim/ce only
t_)r its inteHded use _s
desclJt/ed in this manual.
I)o liar use corl'osive
chemicals or v_q)ors in this
_ll/t)liml( e. This n/i(rowm e
oven is ,_t)ecifi(Mly designed
to heat, dry or cook/()od,
mid is llot iHtended ti)r
lal)ol_ltor\ or industriM use.
I)o not stol'e this _q)llliance
outdoor.',. Do not use this
t)l)odtl(t lle_ll) Vv_lt('r ]()l)
ex_ll//l)le, ill _l wet t)_lsel//en[,
lle_tr _t SWill/i/ling ileal or
lle}tr }t sink,
Kee l) l/O_,,_'r cord _r_ ff()_
heated surtil(es.
- I)o not oxercook ff)o(t.
Careflllly attend alll)liance
if pallel; plastic or ()tiler
colnbustible matelJ_ds are
placed inside tile ovell while
cooking.
- Rem(l_ • wife twist-ties and
meted handles ti'om paper
or plastic contaillers be/[)re
t)laci]lg them in tile o_'n.
-- [)O not use tile ()_,/'I1 tar
stol_ge purposes. Do not
leme paper products,
cooking utensils or/k)od in
tile oxen when llot in use.
- ffmaterials inside tile ovell
should ignite, kee t )tile ()\'ell
door closed, [UFII tile oven
Off and discomlect tile power
col'd, or shut Offl)ower at tile
fllse or circuit breaker t)mlel.
II tile door is ot)elle(t, tile/ire
1//}1}' spread.
;_ See door sur/sce cleallillg
instructiolls ill tile Care and
cleaning of the microwave
over s,t'(tioll O/this n/a]lua].
;_ This _q)l/liance should be
ser\'iced only Ix} qualified
ser\'ice t)ersonne]. Colltact
nearest authol'ized selMce
/itcility/k)r exmnination,
l'epair or _t(!i/IStlI/ellt.
;_ ,kS with ally appliance,
close SUl>er\'ision is llecessarv
whe_l used bv children.
il!i ii+!iiiii!l+"iii iiii!l!
I)o llot immerse power cord
or t)lug in water:
3
Page 4
IMPORTANTSAFETYINFORMATION.
READALLINSTRUCTIONSBEFOREUSING.
WARNING!
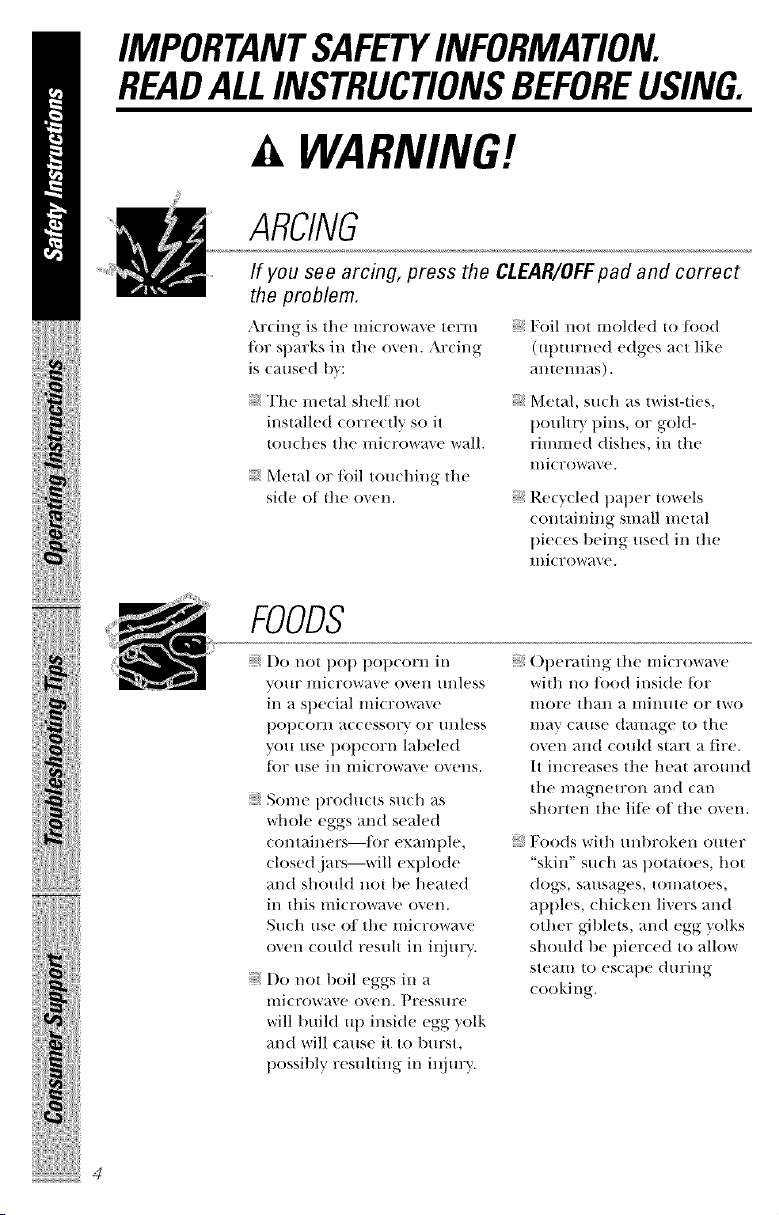
ARCING
If you see arcing, press the CLEAR/OFFpad and correct
the problem.
Arcing is tilt' liliCl'OW_lve tel'l//
/i)r sparks ill the oven. Arcing
is caused by:
The n/etal shelf not
installed correctly so it
touches the n/icrowa_e wall.
Metal or/i)il touching tile
side of tile oven.
FOODS
;+ Foil not molded to fi)od
(upturned edges act like
_llltel/ll_lS).
:+ Metal, smh as twist-ties,
t/ouhry pins, or gold-
rinmled dishes, ill the
llli( low,lye.
:_ Recycled paper towels
containing small n/etal
pieces being used ill the
lnicrowave.
iiii!ili_i_!iiiiii!!i/i_i,ii!_!_iiiiiii
l)o not pot/popcorn ill
VO/IF IIli( 17OW_lVe oven /lnless
ill a special microwave
t)opcorn ac/essory or mlless
you use pOllcorn labeled
ti)r use ill microwave ovens.
Some llro/hlcts such as
whole eggs and sealed
/ ontainers--/or exanlt/le,
dosed jars--will exph)de
and should not be heated
ill this Illi(17()Vv_lve oven.
Such use o/tile mi(row_ve
oven (ould result ill ill.j/IT}i.
l)o not boil eggs ill a
IIIi(Fow_IVC oven, t)FCSSIlFC
will build Ul/inside egg yolk
and will cause it to burst,
t)ossibly resulting ill il_i m_y.
()perating the microwave
widl no food inside tor
more than a minute or two
lna_' cause damage to the
oven all(t Co/lld start a tire.
It increases the heat aromld
the n/agnetron and can
shorten tile lit_' of the oven.
Foods with/lntlrokell Ollte17
"skill" siicl/ as t)otatoes, hot
dogs, sausages, tomatoes,
apples, chicken li_ers and
other giblets, and egg yolks
should tie pierced to allow
stealil to es€ape (lilting
cooking.
Page 5
vvvvw.GEAppliance_com
SUPERHEATEDWATER
Microwaved water and other
liquids do not always bubble
when they reach the boiling
point. They can actuafly get
superheated and not bubble
at all
Superheated liquid will bubble
up out of the cup when it is
moved or when something like
a spoon or tea bag is put into it.
Toprevent this from
happening and causing injury,
do not heat any liquid for
more than 2 minutes per cup.
After heating, let the cup
stand in the microwave for
30seconds before moving it
or putting anything into it.
Axoid heatill}J, baby Jood ill
glass jars, e_en with the lid
off'. Make sure all in/hnt
tbod is thoroughly cooked.
Stir Jood to distribute the
heat evenh. Be (arefitl to
pre_ent scalding when
warming Jorm ula or breast
milk. The container may
ti'el cooler than the milk
really is. Alwa}s test the milk
be/ore/ceding tile baby.
Don't defi'ost fi:ozell
beverages in narrow-necked
bottles (especially
carbonated be_ erages).
Even if tile container is
opened, pressure can build
up. This can cause file
colltainer to burst, possibly
resulting in iqj u W.
:_ Spontaneous boiling -
Under certain special
circumstances, liquids
may start to boil during or
shortly after removal ff()m
the microwave oven.
To |)revent 1)urns fl:om
splashing liquid, we
recommend tile/bllowing:
be/ore removing the
COlltail/er ]i'Ol/l the OVel/,
allow the COl/tailler to
stand iH tile oven tbr
30 to 40 seconds a/ler the
OVel/ has shill o]]_ Do llOt
boil liquids in narrow-
necked COlltail/eFS StlC]l as
soft drink bottles, wine
flasks and especially
narrow-necked co/lbe cups.
E_en if tile container is
opened, excessive sleai//
can build up and cause it
to burst or o_erflow.
;¢ Ilot foods and steam can
cause burns. Be carefltl
when opening any
containers of hot tbod,
including popcorn bags,
cooking pouches and
boxes. To prevent possible
iqjmT, direct steam away
fl:om hands and/hce.
;{ 1)0 llO[ ovel:cook potatoes.
They could dehydrate and
catch fire, causing damage
to your o_en.
:_ Cook meat and pouhr}
thoroughly--meat to at
least an INTERNAl,
temperature of 160°F
and pouhr} to at least an
INTERNAl temperature
of 180°E Cooking to
these temperatures
usually protects against
/ood-borne illness.
iiii/iiili,i iiii:ili
iiiiiliiiii_{{{iiii/i
!_!iiiiiiii!i,,,I__';i;i;_;ii'_'_'_iiii
iilii! iiiiii
!iiiiiiiiiii_iii'_iiii!ii
5
Page 6
IMPORTANTSAFETYINFORMATION.
READALLINSTRUCTIONSBEFOREUSING.
WARNING!
MICROWAVE-SAFECOOKWARE
iiii!ili_i_!iiiqii!!ili_iii!_!_iiiiiii
Make sure all cookware used
in your microwave oven is
suitable tk)r microwaving.
Most glass casseroles, cooking
dishes, measuring cups,
custard Cllt)S , potter} or china
dim_erware which does not
ha_e metallic trim or glaze
with a metallic sheen can be
used. Some cookware is
labeled "suitable/i)r
llliCrowavillg."
:_ If you are not sure if a dish
is microwave-sati,, use tllis
test: Place in the oven both
the dish you are testing and
a glass measuring cup tilled
with 1 cup of watetmset the
measm:ing cup either in or
next to the dish. Microwave
30-45 seconds at high. If
the dish heats, it should not
be used/i)r microwaving.
If the dish remains cool
and only the water in the
cup heats, then the dish is
microwave-sa/i,.
:_ If you use a meat
thermometer while
( ooking, make sure it is
saJi_' t_)r Ilse ill microwa_.e
ovens.
1)o not use recycled paper
products. Recycled paper
towels, napkins and waxed
t)aper can contain illetal
flecks which mm cause
arcing or ignite. Pal)er
t)rod ucts containing I/'vrl()//
or talon /ilamems should
be avoided, as they mm
also ignite.
_Ol//e StVFO/()alll tFaVS
(like fllose fl_at meat is
t)a(kaged on) have a thin
strip of metal eml)edded
in the bottom. When
lilicrowaved, the liletal can
burn tile floor of tile o_en
or ignite a paper towel.
Do not use the microwave
to dr} newst)at)ers.
Not all plastic wrap is
suitable/i)r use in
microwave ovens. Check
tt_e package/i)r proper use.
Paper towels, waxed paper
and plastic wrap can be
used to cover dishes in
order to retain moisture
and prevent spattering.
Be sure to vent plastic wrap
so ste_.m cm/esc_q_e.
(',ookware l//_lv t)econ/e hot
because of heat transti'rred
fl:om tile he,d.ted t_)o(t. Pot
holders may be needed to
handle the cookware.
Page 7
vvvvw.GEAppliance_com
"Boilable" cooking 1)ouches
and tightly closed plastic
bags should be slit, t)ierced
or vented as dire(ted b_
t)ackage. If they are not,
plastic could burst during
or immediamlv atter
cooking, possibly resulting
in ii_im T. Also, plastic
storage containers should
be at least partially
uncovered because tliev
torm a tight seal. When
(ooking with containers
tightly (overed with plasti(
wrap, tel/love coveril/g
caretullv and direct steam
away t_:om hands and fi_ce.
Llse toil only as directed in
dfis nlamlal. TV dinners
may be microwaved in toil
u:ms less than 3/4" high;
remove the to t) toil co_er
and return the tray to tile
box. When using/oil in the
microwave ()veil, kee t) the
foil at least 1" awm/i'on/
the sides of the oven.
;_ Plastic cookware - Plastic
cookware designed fi)r
microwave cooking is very
useflfl, but should be used
(areflllh. Even nlicrowave-
sa/i' plastic may 1lOt be as
tolerant of overcooking
conditions as are glass or
ceran/ic n/aterials and may
sofwn or char if suk!jected
to short periods of
o_ercooking. In longer
ext)osures to o_ercooking,
die/ood and cookware
could ignite.
Follow these guidelines:
Us,, e-safe
t)lasti(s oI/ly all(t
use them in strict
(on/t)lian( e with
the cook\_ are
Illal//l/_tct liter's
recolill//elldat iOl/S.
Do IlOt 1/IiCFOV%t'_e
el//l)t }' (Ol/taillel%.
I)o not permit children
S S
to IL_e t)l_13tl( (ookw_ll?e
without comt)lem
sut)ervision.
il!i ii !iiiii!lli i"iii iiii!l!
7
Page 8
IMPORTANTSAFETYINFORMATION.
READALLINSTRUCTIONSBEFOREUSING.
WARNING!
Improper use of the grounding plug can result in arisk of
electric shock.
GROUNDINGINSTRUCTIONS
This appliance must be grounded. In the event of an electrical
short circuit, grounding reduces the risk of electri( shock by
providing an escape wire {or the electric current.
This appliance is equipped with a power cord ha_ing a
gr(mnding wire with a grom_ding plug. The plug must be
plugged into an outlet that is prot)erly installed and grotmded.
Consuh a q ualified ele( trician or service technician if the
grom_ding instructions are not completely tmderstood, or if
doubt exists as to whether the appliance is properly grotmded.
If the outlet is a standard 2-prong wall outlet, it is your personal
responsibility and obligation to have it replaced with a properly
grotmded 3-prong wall outlet.
Do l/O| /lnder anv circ/lnlStallces Ctl| or relilove the third
(gromld) t)rong/i'om the t)ower cord.
Do not use an adat)ter t)lug with this al)l)liance.
I)o not use an extension cord with this appliance. If the t)ower
cord is too short, have a qualified electrician or service
technician install an outlet near the at)t)liance.
For best operadon, plug this ap1)liance into its own electrical
outlet to t)revent flickering of lights, blowing of fuse or trit)t)ing
of circuit breaker.
iiii!ili+i+!Xiiii!!i/i+i,ii!+!+iiiiiii/
Page 9
www.GEAppliances.com
THEVENTFAN
The tml will operate automatically m_der certain condidons
(see Autolm_.tic F;_.n (k';_.tul'e). Take care to prevent file starting
_md spreading of accidental cooking fires while the vent t_ul
is in use.
;¢ Clean the mlderside of tlle microwave often. I)o not allow
grease to build up on the microwave or the/an filters.
;¢ In the e_em of a grease fire on tlle sm:/hce traits below the
microwave oven, smother a/laliling t)an on the surlhce Illlit
by covering tlle pan completely with a lid, a cookie sheet or
a flat tr_.
;¢ Use care when cleaning the vent/ira filters. Corrosive cleaning
agents, such as lye-based oven cleaners, may damage the tilters.
:¢ When preparing flaming/i)ods raider the microwave, tm:n
the/hn on.
;¢ Never lea_e surthce milts beneath vom: microwave oven
mmttended at high he;_t seuings. Boih)vers (ause smoking
and greasy sl)illovers thin m;ly ignite ;rod sl)read if the
microwave vent /hn is opera, ring. "Ik) minimize mnOlm_tic tml
ol)eradon, use adequate-sized cookware and use high heat
on surlilce units only when ne(essarv.
READANDFOLLOWTHISSAFETY
INFORMATIONCAREFULLY.
SAVETHESEINSTRUCTIONS
N
N;
9
Page 10
Aboutoptionalkits.
iiili !iiil
_iiii/jiiiiW_iiiiiiiiiiiii!iiiiiiii
OPTIONALKITS
Filler Panel Kits
JX52WH- White
JX52BL - Black
JX52CT- Bisque
When replacing _ 36" r_mge hood,/ilh'r pam'l kits till in the
additional width to provide a custom buih-in appearance.
For installation between cabinets only; not/i)r end-otLcabinet
installation. Each kit contains two 3"-wide/iller panels.
Filter Kits
JX81B - Recirculating Charcoal Filter Kit
Filter kits art' used when the lili(row[-iv(' oven ([-illnOt be vented
to the Otltside.
Decorative Panel Kit
JX22SS - Stainless Steel
When repli_cing _ t ]i/I ,()_r _'_l_lg_I, the (le(or_d_e panel kit/ills
in tile area between tile microwave and tile range le/} by tile
t ti!I,ow model.
A_ailable at extra (()st t_'om your GE sut)t/lier.
10
Page 11
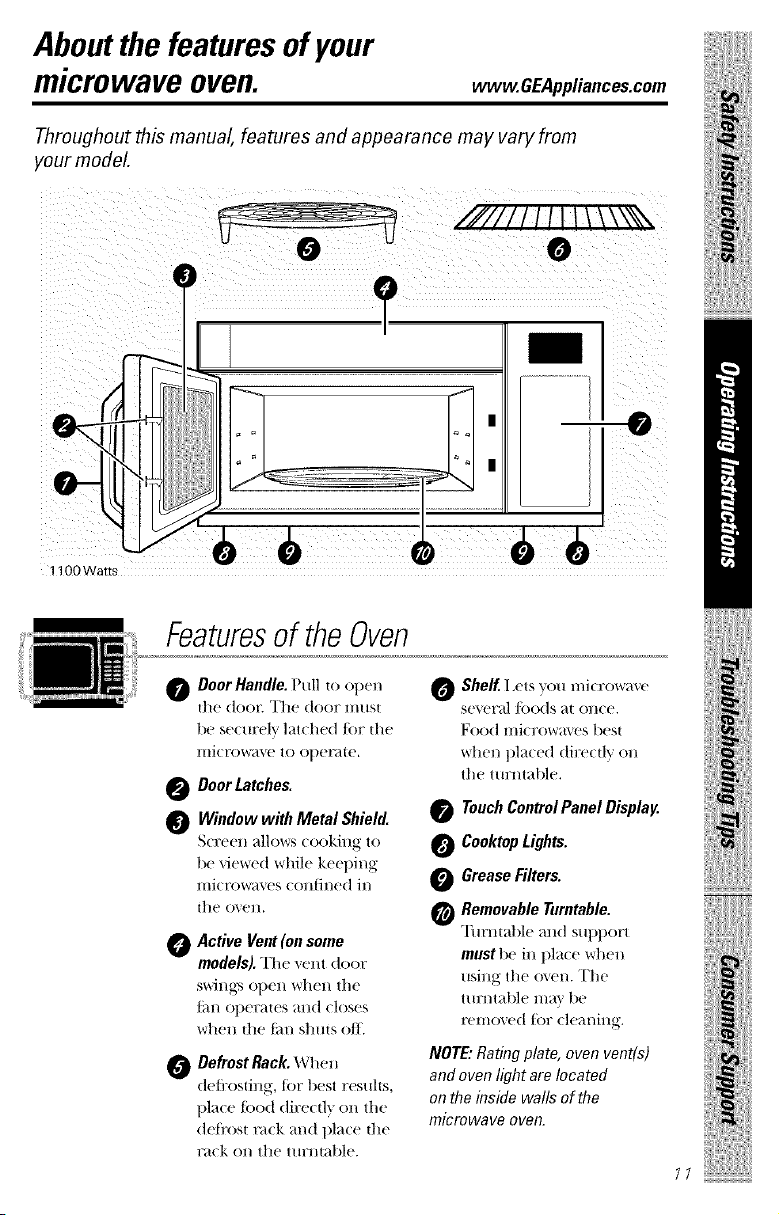
Aboutthefeaturesofyour
microwaveoven.
Throughout this manual, features and appearance may vary from
your modeL
vvww.GEAppliances.com
i+i+iiii!iii:i!iiiiiiiii++i+/¸
/////I / I I I t \ \\\%\
0 O
?
o- .....................6 /)
1100Wa_s
Featuresof the Oven
O Door Handle. Pull to open
the d()()l_ Tlle door must
bt' s('(tll't'lv ]at(h('d ]()l" the
nli(ro_+avc to ()tlel_te.
Door Latches.
Window with Metal Shield.
S('l:('('ll ;-I]]()WS (()()king to
1)(' Vi('W('(| _l/ilc keeping
lIliCl'owdvt's COllJil/ed ill
the o+xel 1+
_ Antive Vent (on some
models). The xent door
SWil/gN op(l/_rh( I/the
[;dl/ Op(?lT+lt(S _t11(t (IOS(!S
x_r]_(_the tin/struts oil
Defrost Rack Wllell
(tefl:osting, tar best results,
place toed (tire(d'_ on the
(tdi'ost m(k and l)la(e the
r_t(k Ol/ tll(f ttll:llta|)l('.
O She/f. I,ets you n/icrowm'('
scv('ral ][)()ds at ()liCe.
Food microwaves best
when placed directly on
the turntable.
TouchControl Panel Display.
O Cooktop Lights.
0 Grease Filters.
@ Removable Turntable.
Turntabl(' mid support
mnst It(' ill llla(e x_r]_(_
using the o\cn. The
turntable lnav be
r(,nlov(,d ibr (lem/ing.
NOTE: Rating plate, oven vent(s)
and oven light are located
on the inside walls of the
microwave oven,
i
iii++iiiiYl+
11
Page 12

iii iHiil!iiii!ili
Aboutthe features of yourmicrowave oven.
Youcan microwave bytime, with the sensor features or with theauto features.
0 0
CookingControls
O Timeand Auto Features
Press Enter
TIME COOKI & II Amountof cookingth_ne
Pressonceor twice
AUTO/TIME DEFROST Amountof defrosting time
Presstwice
CUSTOM Followdisplayedinstructions
EXPRESSCOOK Starts immediately!
ADD 30 SEC Starts immediately!
POWER LEVEL Powerlevel 1-10
AUTO/TIME DEFROST Foodweight
Pressonce upto 6 Ibs.
1 lb. QUICKDEFROST Starts immediately!
iiii!i)):iiiii!!i/i_i,iiiiiiiiiii
12
O SensorFeatures
Press Enter Option
POPCORN Starts immediately! more/lesstime
BEVERAGE Starts immediately!
REHEAT Starts immediately! more/lesstime
POTATO Startsimmediately! more/lesstime
VEGETABLE Startsimmediately!
Pressonce(freshvegetables) more/lesstime
Presstwice (frozenvegetables) more/lesstime
Pressthreetimes (cannedvegetables) more/lesstime
CHICKEN/FISH Startsimmediately! more/lesstime
Pressonce(chickenpieces)
Presstwice (fish)
(onsomemodels)
Page 13
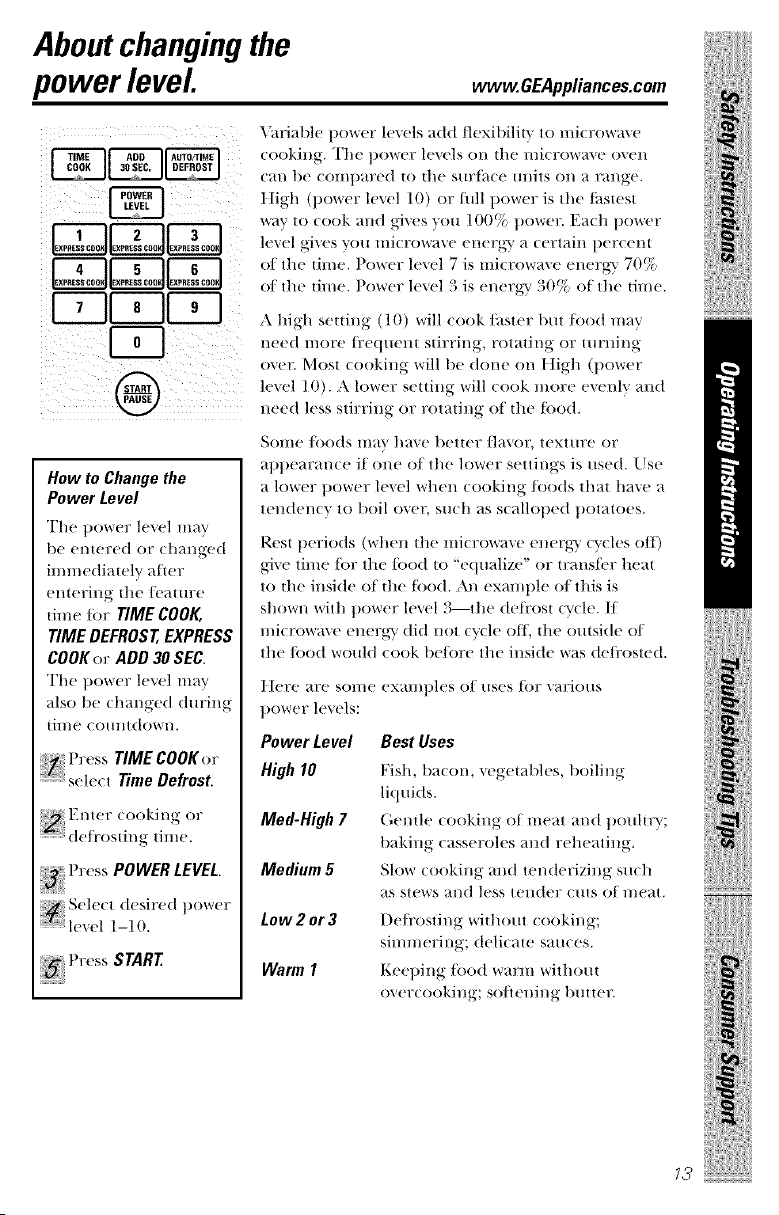
Aboutchanging the
power level. vvww.GEAppliances.com
X_triable power levels add flexibility to microwaxe
cooking. The power le_vls on the mkrowa_e oven
C_tl/ be COli/])ared to tile stlrl_zee tlllits on _t Fange+
Itigh (power level 10) or flfll power is the/ilstest
_lv to cook and gives you 100% power. Each t)ower
level gives you microwave energ-y a certain percem
I+.:000g+ c00
I' II
@
How to Change the
Power Level
The power level may
be entered or (hanged
immediately atter
entering tile/('ature
tinle tot TIME COOK,
TIME DEFROST, EXPRESS
COOK or ADD 30 SEC.
The t)oWeF lev('] IlI_IV
also be changed during
time cotmtdown.
S
++@l++_,+e+s TIMECOOKor
selelt Time Defrost.
+++++ Pr( ss POWER LEVEL
Selelt desired t)OWeF
le'_el 1-10.
of the time. Power level 7 is microwave energy 70%
of tile time. Power level 3 is energy 30% of the time.
A high setting (10) will cook/aster but/ood may
need more fl:equelH stirring, rotating or turlfing
(wet: Most cooking will be done on tligh (power
level 10). A lower setting will cook more e_enlv and
need less stirring or rotating of tile toed.
SolIle ]()o(ts iil}l} ha',e better/lavo_; texture or
appearance if one of the lower settings is used. Use
a lower power level when cooking leeds that have a
tendency to boil ovec such as scallotled potatoes.
Rest lleriods (when tile nficrowave energy Qeles o/t)
give time tot tile food to "equalize" or transt_'r heat
to the inside of tile toed. All example of this is
shown with power level 3--the deti'ost (-vele. If
microwaxe energy did not cvcle ott_ the outside of
tile/ood would cook be/ore tile inside was de/i'osted.
Ilere are some examples of uses tor various
power levels:
Power Level Best Uses
High10 /qsh, bacon, vegetabh's, boiling
liquids.
Med-High 7 (',entle cooking of meat and poultlT;
baking casseroles and reheating.
Medium 5 Slow cooking and tenderizing such
as stews and less tender cuts of meat.
Low2or3 De/i'osting without cooking;
simmering; delicate sauces.
Warm 1 Keel)ing/ood warm without
overcooking; softening butte+:
!@ii+
il!+ ii+!ii++ iiii++iiiiYl+
73
Page 14

iii iHiil!iiii!ili
Aboutthetimefeatures.
Time Cook I
/\l]ows YOU to mi{rowa'_e for mB tillle lip to
(.)(.) l/]illlltes all{t (.)(.) se{ OlldS.
Power level 10 (t ligh) is automatically set, but you
may change it/or more flexibiliD.
You ma} ol)en the door during TIME COOK to
{he( k the 1oo{1. Close tile door alld t)ress START to
resume cooking.
@
P {ss TIMECOOK.
full t}owe_ (Press
POWER LEVEL.
S{,h,{-t a desir{'d
1)OWel"level 1-10.)
Press STARE
iiii!i}i_)X{i{i!!i/i_i,ii!_!_iiiiiii/
Time Cook II
I {'is you change t)owel7 levels automati{ ally (tm:ing
cooking. IIere's how to do it:
' } S
t res. TIME COOK.
iii_Aiiii
Fnter the first (ook time.
:_ ChaHge the 1)ower lexel it you don't %%r_t_n|t[111
power. (Press POWER LEVEL. Sele(t a desired
t)OW{'F level 1--10.)
t}ress TIMECOOKagain.
Enter the se(on(t (ook tilne.
{:l]_l_g_ t]](' 1)(''r{'" ]('Y_I i_ yr(''' (]('']'t '%r_l] [ tI'll
.....................t)oweF. (I)ress POWER LEVEL. Sele{t a t)owel"
level 1-10.)
{ l)ress START
At the end of Time Cook I, Time Cook II {omits do_'ll.
Page 15

www.GEAppliances.com
Cooking Guide for -timeCookI and -time Cook II
NOTE."Use power level High (10) unless otherwise noted.
Amo..t T me Comm .ts
Asparagus
(!i'¢S!1spears)
(fl+ozen spears)
Beans
(fl+esh green)
(frozm_ green)
(fl+ozen lima)
Beets
(fl+esh, M:ole)
Broccofi
(fl+esh cut)
(fl+esh spears)
(fl+ozen,
chopped)
(lk'ozen spears)
Cabbage
(fl+esh)
(wedges)
Carrots
(fl+esh, S!k_ d) 1 lb.
(fl+ozen) 10-oz pa( kage
Caufiflower
(f!owerets)
(fl+esh, 'w!lole )
(fl+0ze::)
] lb. 6 to 9 rain., In ll/_,-qt, oblong glass baking
Med-tligh (7) dish, place 1/4 cup water.
lO-oz package 5 t() 7 rain. In 1-qt. casserole.
1 lb. cutinhalf 9to ll rain.
In 1½-qt. casserole, place
1/2 cup water.
lO-oz pa( kage 6 to 8 rain.
In 1-qt. casserole, ])lace
2 tablespoons water.
lO-oz pa(kage 6 t() 8 rain.
In 1-qt. casserole, ])lace
1/4 cup wate+:
1 1)tmch 17 to 21 rain. In 2-(it. (asserole, place
1,/'2 (up water.
1 t)m'tch 7 to 10 mi+_,.
(1V+ to 1½ lbs.)
1 tmmh 9 to 124rain.
(1V: to 1½ lbs.)
lO-oz pa(kage 5 to 7 rain.
lO-oz package 5 t() 7 rain. In 1-qt. (asserole, place
1 medimnhead 8to ll rain.
(about 2 lbs.)
7 to 10 rain.
7 to 9 rain.
5 to 7 min.
1 medium head 9 to 14 rain.
1 medimnhead lOto 17rain.
lO-oz pa( kage 5 to 7 rain.
In 2-qt. casserole, ])lace
1/2 cup water.
In 2-qt. oblong glass baking
dish, place 1/4 cup water.
In 1-qt. casserole.
.'4tablespoons water.
In 1K,- or 2-qt. casserole, ])lace
1/4 cup water.
In 2- or 3-qt. casserole, ])lace
1/4 cup ware+:
In 1½-qt. casserole, place
1/4 cup water.
In 1-qt. casserole, place
2 tablespoons water.
In 2-qt. casserole, ])lace
1/2 cup water.
In 2-qt. casserole, ])lace
1/2 cup water.
In 1-qt. casserole, place
2 tablespoons water.
!iiiilIii+
!_!ii{iii:i!i,,'I__ :+:+:+++ii:+?+}iii
iil++i! iiiiii
!iiiii}}ii+}_iii++ii{i+ii
75
Page 16

iii iHiil!iiii!ili
Aboutthetimefeatures.
Corn
tfi'ozen kernel l O-oz })_(k_lge r_tO 7 rain. /n 1-qt. (_ssero|e, t)E_(e
Corn on the cob
(lresh) ] t() r_(,m_S 3 tO 4 rain. /n 2-ql. ol)loug gl_ss 1)uking
!lrozell
Mixed
vegetables
(fi'ozen
Peas
(]i'esh. shelled}
!lrozell
Potatoes
ti'esh, eubed. 4 t)otmoes 9 11112 rain.
v,hitc, ,6 1118 oz each)
(ti'esh. whole. ] _ _(1as 11z_ 3 1(14 rain.
sweet or whi_e,
Spinach
(li'esh_ 10 to 16 oz
iiii!ili_i_!iiiqii!!ili_i,ii!_!_iiiiiii
{lrozem l O-oz p;_(k_ge
chol)ped
m_d leM /
Squash
d_i'esh, btlllllller ] |t). sli(-ed
and "yellow
(wimer. acorn, l to 2 s(tu;_sh
btlNerllt/t) (_/bottt 1 lb. each)
76
Amount Time Comments
per i'm _ dish, t)la(e corn. //(orn is iu
] ('_*r Pla(e iv, 2-ill. ol)|(ns, g gl;-_ss
_o 6 em_s Cover wifl_ venwd t)|_stic wr_q).
lO-oz p;wk_ge 5 1(17 rain.
2 |t)s. tmshelled 9 11/12 ntin.
lO-oz ]);wk_ge 5 1(/7 rain.
5 to 6 rain.
3 to 4 rain.
t)er e_lr
5 to 7 rain.
5 to 7 rain.
5 to 7 rain.
8 to 11 rain.
husk, use 11(1 _r_l[el'; it cor]l t|_ts
been husked, _(1(11/4 cup
w_fler. ])_em_rmlge _dl('r b_d/
of time.
1);-ikiv,g dish.
Rearrange ;-_tter h;df of time.
In 1-qt. casserole, t)lace
3 tablesl)oons water.
In 1-qt. casserole, t)lace
1/4 cup water.
In 1-qt. casserole, t)lace
2 tal)lesl)oons water:
Peel and cul inlo 1 inch cubes.
Place in 2-q_. casserole with
1/2 cup water. Stir a/let half
of _ime.
Pierce wid_ cooking tork.
Pla(e in center of the oven.
I,ei sland 5 mim_ies.
In 2-qt. casserole, t)lace washed
st)im_ch.
In 1-qt. casserole, place
3 tal)lesl)oons water.
In 1½-(1t. casserole, place
1/4 cup water.
Cut in half and remove fibrous
membr_mes. In 2-qt. oblong
glass baking dish, t)lace s(tm_sh
cut-side-down. "Ihrn cut-side-u t)
_tt[er 4 lIlilltl|es.
Page 17

i 4 5
I .......... ]1........... J_
I' I1" II-?-]
Press AUTO/TIME
"_DEFROSTtwi( e.
Enter deti'osting
:: :::::::::tilIle+
Press START
vvvvw.GEAppliance_com
Time Defrost
iill
,\]lows you to deJi'ost Jot the h'ngth el time }x)u
sele(t. See the De/i'osting (;ui(h'/k)r suggested times.
t)ower le'_el 3 is amomati(ally set, but you may
change this for more tlexibilitv. 51m may defix)st
small items more quickly tV r_ising tlle }lower level
a/ier entering the time. t]owever, they will need
lnore ti'equetH attention than usual.
Power le'_(1 7 (:tits the total det_:osting time in
al)out half; 1)o_%rerlevel 10 (;tits the total time to
atitiroximately 1/3. Rotate or stir/ood/i'equentl}.
A dull thmntiing noise re;i} be heard dm:ing
(tet_:osting. This som_(t is normal when the oven
is not operating at Iligh power.
Defrosting Tips
For best results, 1)1_(( • {ood directly on the
de/i'ost r_l(k and tiklce the r_l(k on the turntable.
Foods/i'ozen in tiatier or plastic can be det_:osted
in the tia( k+_ge. Tightly closed packages should
be slit, tiier(ed or vented AFTER/ood has
tiartiMly det_'osted. Plastic storage (ontainers
should be at least tiartially tmcovered.
Family-size, 1)retiackaged t_'ozen dinners (an be
de/i'osted and microwaved. If the/ood is in a loll
container, trans/i'r it to a microwave-sa/b dish.
!iiiilIii+
Foods that Sl>oil easily, such as milk, eggs,
fish, stu/lings, tlotflu:y and 1)ork should not lie
alh)wed to sit ()tit t()r lIlore thall one hotll? alter
de/i'osting. UOOlll tel//lierattlre ]lromotes the
growfll of harmful bacteria.
For more even de/i'osting of larger/oods, such
as beeL lamb and veal roasts, use Auto Defrost
Be sure large meats are completely de/i'osted
be/ore ( ooking.
When de/i'osted,/ood should Lie (ool but
so/tened in all areas. If still slightly icy, return
to tlle mi(rowa_e very briefly, or let it stand a
/i'w mim_tes.
il!+ ii+!ii++ iiii++iiiiYl+
77
Page 18

iii i+!iiii!ili
Aboutthetimefeatures.
Defrosting Guide
Breads, Cakes
Bread, buns ot rolls _] pieee, q rain.
Sweetrolls tapprox. ]2 oz :_,, 5 rain.
Fish and Seafood
Fillets, frozen _1 lb3 a to _ rain.
Shellfish, smallpieces (1 lb3 7, to 7 rain. Place t)lock in casserole. Turt_ oxer
Fruit
Plastic pouch- I to 2 3 to 6 rain.
(10-oz pa(kagc,
Meat
Bacon (l lb. _ to 5 rain. Place ttUol)etu'd tm(kage in o_('n.
Franks I lb.
Groundmeat (1 lb.
Roast:beef, lamb, veal, pork
Steaks, chops and cutlets
Poultry
Chicken,broiler-fryer
cutup (2_/.,_o 3 lbs,
Chicken, whole 17 to 21 rain.
,2F_,to 3 lbs.,
+iii!i}i+)X{i+!]i/i+],ii!+!+iii+++i
Cornish hen 7 _<+13 ufiu.
Turkey breast (4 to 6 lbs. 5 to 9 rain.
18
Time Comments
aud break ul) after haft 11/('time.
1].'t st;aud .'+,minute.', after de/_'ostiug.
to ,_ mill
5 ,, 7 min.
12 to 16min.
per |b.
5 _<)7 miu.
per It)
['|ace tmot)ened package in oveu.
Microwave just tmtil R'auks (all be
separated. Let stall(] ."_/Hillttle_,, if
lleCCSS_tF_', 10 cO/ilt)|ete (]eJl'(.+stit/K,
[_llrl/ tile;it o\er Hfter t|a|[ the lime.
Use power le\el 1.
Place tmwrat)t)ed meat in cooking
dish. Turn o_vr after half the time
and shield v+vu'mareas with R)il.
When tinishe(I, set)amte t)ieces and
let stand to comt)lete (te/_x)sting.
15 to 19 min.
per It)
per lb
Place wrapped chicken in dish.
Unwrap and turn over after
half tile time. Wften finished,
Sellarate l)ieces }Ill(| inicrowave
2 to 4 minutes more, if necessary.
let stand to finish defl:osling.
Place _\ral)t)ed chicken in dish.
Alier h+flf tile time, /ll/W]?}l])alia
tun_ chicken o\er. Shield warm
areas x+ith/oil. Finish deti"osting.
It I/e(essEl+V, FtlI/ cold water in the
(_i_it_ r ttntil giblets (all l)e relllO'_e(].
Place tmwrat)t)e(t lien ill tile oven
breast-si(le-ut). Turn over after l/_df
tile iiH/e. Rlln cool '_*,;++Ier ill tile
c_Mlv/lnlil gl|)lels €all 1)e remo\ed.
Place tmwral)l)ed 1)l'easI in dish
1)I'east-side-(town. A[ier tlalf tile
tiIIle, t/lrl/ o\er all(I slfield _v_H'lll
areas with/oil. Finistl (let_'osdng.
I*'t stand I tO 2 tlotlrs ill I'eli'igel_ltor
to conll)lete (le/l'osting +.
Page 19

_!iii;!!iii__ _i_ii_iii!__
www.GEAppliance_com
Express Cook
Th_ _ aquick way _ set cooking time _r I-6 minutes.
Pressone of the ExpressCookpads (/rom [ to 6)
/_)r I to 6 mimm's ot' cooking at power level I0.
For examl)le, t)ress the 2 t)ad/_)r 2 minmes ot'
cooking ume.
The power level can 1)e changed as time is totalling
down. Press POWERLEVELand enter 1-10.
Add 30 Seconds
Youcan use this feature two ways:
It 'will add 30 se(onds to the time (ounting (]()_r_
each time the pad is pressed.
It (an be used as a quick way u) set 30 seconds of
cooking ume.
!iiiilIii!i!ll
iiiiiiiiiiiiiiiiiiiiiiiiiiiiiiiiiiiii
iil!/i
ii ll
!iii!_iiiiiiii
19
Page 20

iii iHiil!iiii!ili
Aboutthe auto features.
2 3
..........II..........,l
L0 00oKIl0xP, o0,1
[-;7 8 II l
F-;-]
@
] Press AUTO/TIME
i_DEFROSTouce_br
AutoDefrost
(;uide
at right, eHter/ood
weiuht. For exam|)le,
press |)ads 1 ;rod 2
ior 1._ polmds
| |)O/Illd. _ O|II/(-(_S
Elite]" weiK]lt /1 t) 10
|i pomMs tot Auto
Defrost.
Press START
Auto Defrost
Auto Defrost automat|( ally sets tile defl:ostiHg times
alia p(l/*,er lexels to gixe exert deilrlsting results ior
meats, pouhr 3 and fish weighing up to six p(mnds.
):: For best results, remove {ood {|'ore tile pa(kage,
pla(e tbod directly on tile de/i'ost ra(k and pla(e
tile rack on till' turntable.
Tv.i( e during Auto Defrost, the oxen signals Turn
Food Over. At ealh signal, turn die food o',er.
Rel//o_e dei}'osted n/e;4t or sllield w;4rl// areas
widl small pie/es ot foil.
After deflx)sting, most meats Heed to stand
5 minutes to (omplete defl'osting, l,arg( roasts
should stand tot about 50 minutes.
Conversion Guide
It the _eigh_ of fbod is stated ill pounds and
Ollllees. I]le OtlllCeS ILIUM be e(lll_(q'led to /ellths
.11 of a pound.
Weight of Enter Food
Food in Weight
Ounces (tenths of
a pound)
1-_2 .l
3 .2
4-5 .3
6-7 .4
- i
Weight of Enter Food
Foodin Weight
Ounces (tenths of
a pound)
9-10 .6
11 .7
1_-13 ._
]4-]5 .9
iiii!i}i_)X{i{i!!i/i_i,ii!_!_iiiiiii
2O
I lb. Quick Defrost
I lb. Quick Defrost automat|l-ally sets till' del_:ostillg
times and power hwels |or |oods weig-hing olle
pound.
Press I lb. Quick Defrost. The oven starts
automati(all_. WheH tile ovell sigHals, tm:n
|ood ()_e_:
For l)est results, remoxe tood fl'om th!_ package,
plale tood directly on the (telir)st ralk and plale
the ra(k Ol/ tile tllrlltable.
Page 21

Aboutthesensorfeatures.
Humidity Sensor
What happens when using the Sensor Features:
rlle SellsOr ]_'eatures dete(t the il/(re_lsillg ]lunlidi W
released dm:ing (ooking. The oven automati_all_
Covered
iii i
Vented
Dry off dishes so they
don't mislead the sensor.
a(!justs the (ooking time to "_arious t'_]_es and
_tl//O/llltS of ti>od.
The proper containers alld €overs are essential [k)r
best sensor cooking.
Always use microwave-sate containers and cover
them with lids or _ented plastic wrap. Never use
tight sealing plasti( containers--they can prevent
steam {tom escaping and cause {i_od to overcook.
Be sure the outside oI the cooking containers and
the inside ot the l//icrow_t'_e o'_en are (ll +} betkn'e
placing ti>od in the o'_en. Beads ot moisture
tUrlling ilHO stealll (_tl/lIlislead the sensor,
vvww.GEAppliances.com
!iiiilIii!i!l+
il!i ii !iiii!li+ iiii++iiiiYl!
27
Page 22

iii iHi+l!iiii!ili
Aboutthesensorfeatures.
i i ¸
Use only with prepackaged
microwave popcorn weighing
3.0to 3.5ounces.
NOTE: Do not use the
metal shelf when using
the Popcorn feature.
Popcorn
How to Use the Popcorn Feature
Folh,w pa(kage illa,ruttiolla, usi,lg Time Cook
; i_ tile pa(kage is less thall _.00tlllteS OF lar'gel?
than 3.5 (luncea. Place the package of pot)corn
ill the (ellter" o] the l//i( r'owa_,e.
Press POPCORN tilr a reg/|lar size C4.0 to 3.5 oz)
l)a_ ()_ t)op( ol'n. [tie o'_en star'|s inl]//e( ately.
I/you open the door while POPCORN is displayed,
an error message will appear. (_lose tilt' door and
press STARE
How to Adjust tbe Popcorn Program to Provide a
Stmrter or Longer Cook Time
I/ you lind that tilt' brand ot t)opt orn you use
m/derpops or o_ereooks consistentl}, you can
add or silt)tract 20-30 seconds t() the autolnatic
popping tin/e.
Toadd time:
After l/ressing POPCORN,press 9 witllin lilt! tllYSt
)_0 seconds aJlel: tile ()veil starts/i)r _tl/ extra
20 seconds.
Press 9 again to add another 10 seconds (to|al
30 seconds additional dine).
Tosubtract time:
Al_er pressing POPCORN, press I within tilt' [irst
30 seconds atter tile oven star|s lilt 20 seconds less
cooking time.
Press I again to red uce cooking tinle another
10 seconds (|otal 30 seconds less time).
iiii!i}i+!X{i{i!!i/i+i,ii!+!+iiiiiii/
Page 23

For reheating single servings
of previously cooked foods or
aplate of leftovers,
metal shelf when using
I OTE:Do not use the
the Reheat feature
www.GEAppliance_com
Beverage
Press BEVERAGEon( e to heat an 8-10 oz (up of
(ofl'ee or otl/er |)e'_era_-e.
Drinksheated with the Beveragefeature maybe very
hot.Removethe container with care.
Reheat
How to Use theReheatfeatnre:
17 Pla(e the (up of liquid or (oxered food in the
? ox, ell. I resd REHEAT ell(e, t_vi(e or |hlTee tillled.
::::::::: tll//e relllalllll/g beg'illS (Otllltil/_ dOWll.
Do not open tile o_en door until time is counting
down. If tile door is ot)ened, dose it and press
STARTimmediateh.
Afterremovingfood fromthe oven,stir,ffpossible,to
even outthetemperature,ff foodis not hotenough,use
TimeCookto reheatfor mere time. Reheatedfoodsmay
have wide variations intmnperatnre.Someareasmay
be extremely hot.
Hew to Changethe AutomaticSettings:
Toreduce time by 10%:
Toadd 10%to cooking time:
SomeFoodsNotRecommendedForUseWith Reheat:
It is best to use TimeCook/i)r dwse/i)ods:
:_ Bread 1)roducts.
:_ Foods that must be reheated tmco_ered.
;_ Foods that need to be stirred or rotated.
:_ Foods calling/i)r a dry look or (risp sur/h(e
after reheating.
) S S
The oven starts immediately.
Press once ti)r a plate of letterers.
Press twi(e/i)r [)_+.st_+.(8-12 OZ).
Press three umes/i)r vegetables (1/2 to 2 cups).
The oxen signals when smam is sensed and the
Press 1 within 30 se(onds a/]er pressing tlle
REHEATpad.
Press 9 within 30 se(onds a/]er pressing tlle
REHEATpad.
!iiiilIii!i!l+
il!i ii !iiii!li+ iiii++iiiiYl!
23
Page 24

iii iHi+l!iiii!ili
Aboutthesensorfeatures.
ONE TOUC_ SENSOR
___VEGETABLE POTATO CH/CsKEN/
Sensor cooking givesyou
easy,automatic resu!ts with
avariety of foods (see the
CookingGuide below).
NOTE:Do not use the
metal shelf with Sensor
Cooking.
Sensor Cookittg
Vegetables, Potatoes, Fish, Chicken Pieces
P]a(ecmer'ed toed in themen. Pressthe
food pad. For _egetab]cs, press die VEGETABLE
p_t(| Ollt t' 1()1" ]i'ush _t'g-('|21blt's, twitt' {()r"
fl:ozcn vegetal/les, or three times fi)r cmmcd
vegetables. For chicken or fish, press tile
CHICKEN/FISH pad once Jbr chicken pietes or
twice tbr fish. The oven starts immediately.
tiIIl( _ l'('l//}tillil/(_" llegins (O/ll/till_ do_*_rn, "[_lll'll OF
stir the tbod it net cssarE.
Do I/Or op(!ll the o'_(?l/doo]?/II/til till/t! is ( Otllltil/g
dOWll. I£ the (1(1o)"is opened, dose it }tl/(t press
STARTimmediatel_.
NOTE: If food is not done ellough, list! Time Cook
tO (00k {(It" IlIOF(! tilll(_.
How to Change the Automatic Settings (automatic
settings for canned vegetables cannot be adjusted
on some models):
"_bu tan at!just tilt' cooking time lot all tbods to
suit yore: ])ersonal tasw.
To reduce time by 10%:
Press I withill _iOsccollds at{or prcssing tilt'
tbod pad.
To add 10%to cooking time:
Press 9 withill 30 St'( ollds M{or prcssing tilt'
{ood pad.
CookingGuide
iiii!i}i+)X{i{i!!i/i+i,ii!+!+iiiiiii
Canned Vegetables 4-16 oz (]O_,(_F with lit] OF _,(_l/tt_d plasd( wrap.
Froze n Vegetables 4-16 oz /_ollow package instructions for adding
Fresh Vegetables 4-16 oz Add 1/4 tup wawr per serxing.
Potatoes 8-32 oz Pierce skin with fork. t late potatoes
Fish 4-16 oz Coxer with xemed p|asti( wFap.
Chicken Pieces 2-8 pieces ( 14()x_rwith "_elltt!d plasti( wFap.
24
Amount
Comments
wawr. Coxer _ritll lid or xemed plastk wFap.
(',o'_(!r with lid or xented plasdc wrap.
)
OI1 tile ttlt'lltabltL
Page 25

Otherfeatures yourmodel
may have.
vvww.GEAppliances.com
Custom
The CUSTOMpad allows vo/l to Sa_(' VO/lr l//()St
ti'equently used settings. (Sensor cooking settings
C_+d/l/()t lie saved.)
To set and sa+,e a setting:
i Press he CUSTOMpad.
:[_ Set the amount of (ooking time.
Set the poweF lexel, if desired. (Frill l)OWel_will
_t/lt()lll_l[ (al b be set it you ( o not (hange it.)
) S
t res, the CUSTOM pad.
Your (uston/setting will lie remen/l)ered for ]tltttlTe
olle tou(h use.
To (lear the (uston/setting, press and hold the
CUSTOM pad tor 2 seconds.
Help
The HELPt)ad dislIlays t_!amre inforn/ation and
heltItul hints. Press HELP; dlen select a t_mtm:e tiad.
!iiiilIii!i!l+
Cooking Complete Reminder
To renlind you that you have R)od in the ()veil,
tile oven will dislIlay FOOD IS READY and beep ome
a mlnme until _r()_ either ot)en tile ()veil door or
press CLEAR/OFE
Clock
t)ress CLOCKto set the tin/e of (tar.
S
r_ 1 _e, s CLOCK.
Enter the time of day.
ii_dii
Press START
T()(he(k the til//e of (lay ,Yl/ile nil( rowaxing,
press CLOCK.
il!i ii !iiii!li+iiii++iiiiYl!
25
Page 26

iii iHiil!iiii!ili
Otherfeatures yourmodel mayhave.
TIME AUTO/lINE
Delay Start
Delay Startallows you to set the mk rowa_e to delay
(ooking up to 24 hours.
Sele(t the ((Joking or (teti'osting t_ature _r()_ _riSl_
to dela}; then enter the ((Joking or defixJsting time.
7 4_ (BE! Sl|l)(_ thE! ]I/i( l'(J_ra_,(_ (lo(k S]I()_rs thE? (()FFE!( t
time of day.)
The start time will be (tisplayed and will ren/ain until
the oven automaticalh starts at the dE:laved time.
The time ot da'y m_y be displayed b} pressing CLOCK.
iiZLi -1ii ;!iil7
iiii!ili_i_)Xiqii!!ili_i,ii!_!_iiiiiii
2_
Timer
Timer(it)creates as _ minute timer and can be used
_lt _llly tiJ//(_, eX('l/ W]I('I/ t|/(_ (J'_ell is (J|)eF_ltill_.
IrEs. TIMER.
tilIl(! "_(Jtl W_tI/| t(J ((Jtll/t d(JwI/.
t rE!S. TIMER to start.
To pause the countdowll, press TIMER.
When time is up, the o_cn will sigmd. To mrn o|t
dw timer signed, press TIMER.
NOTE: The timer indicator will be kit _hih' the timer
is opera, ring.
To cancel the timec press and hold the TIMER pad
|or 2 seconds.
Page 27

ii_ii_i_I_/__ _i_iii_i_I_i
vvww.GEAppliances.com
Reminder
T]w Reminder fl'atur(" (_m b(' usc'd ]ik(' _m a]arm
(lo(k, and (_m bu usc(t at any timu, cvcn wh('ll the
oven is ot)('rating. Th(' Reminder time can be set up
to 24 hours bm'n
!iiiilIii!i!ll
Press REMINDER.
!__i_i__!_i_ii_[-_ [!_i_i_ii__[iii_i_
! ¸
E.t(_r the ti,neyou _r_Ht in(! O_'(_HtO remilld
_OH. (B_' SH]:(_ t]lo ,IIi(]:OWW,(_ (lo(k shows th(_
(orr('(t tilnc o[ (|;ly.)
Sele(t AM or PM.
_ Press REMINDER. When Reminder signal ()(:(in:s,
press REMINDER to turn it off. The Reminder
thnc, m_,v l)_, (tisl_hg._,(t by t)r_'ssing REMINDER.
NOTE: The REM indicator will remain lit to show that the
Reminder is set, To clear the Reminder before it occurs,
press and hold the REMINDER pad for 2 seconds,
Start/Pause
In a(t(huon to _t_lrtlH& HI_IH_ hm(UOllS,
START/PAUSEa||OWS _()tl tO sto|) cooking wJthoHt
ot)cni_,g thc (toot or (leafing the (lisl)l_y.
Child Lock-Out
¥0,1 ]//_' ]o(k th(' (ol/tl?o| |)_H,(_] to |)F(_eHt t]l('
I/_J(F()W_X(_ t]'()IH l)cing a((i(lentally started or used
bv children.
To lock or unlo(k the cow,trois, l)rcss and hold
CLEAR/OFF tot about three se(o,(ts. Whe_ thc
(ontrol |)ariel is |ockcd, LOCKED wi]l be (liSl)lay(M.
27
Page 28

iii i+!iiii!ili
Otherfeatures yourmodel may have.
i¸ ;
i ZI
!iii!!ill ; iii:ii
Turntable
For best cooking results, h'_ve die tm:ntabh' on.
It can be turned off lot large dishes. Press
TURNTABLE to turn the turntable on or off.
Sometimes the turntable can become too hot to touch.
Be caretul touching the turntable during and after
(ooking.
VentFan
The vent [_11 r('IIlOV('s st('_lll _11(t ot]ler v_pors ]_'oH/
sm:_h( e cooking.
Press VENT FAN on( c /or high/hn speed, twice/or
me(titan tsn spee(t, a third time for low tsn speed,
or a fourth time to turn the t_m off.
Press the VENTFAN BOOSTpad {br cxtr;_ {m: speed.
Automatic Fan
An _tHt()IlI_HJ( [_tn ]('_ttHre 1)fort'( ts the IIlitTOW_\e ]i'Olll
too much heat rising fi'om the (ooktop b('low it. It
_UltOlnati(_dlv tilrns on i{ it senses too IIHI(]I ]legit.
+iii!ili+i+!Xiii+!!i/i+:,ii!+!+iii+++i
27.
[] VO/l ]1_1\ e ttlrned t]le [i_n on, _'()ll ]//_ W lind t]l_t VO/l
cmmot tm:n it oil The tm_ will amomaticallv turn off
\_]len the illtern_fl ])_rts _tr(' cool. It ]//_ st_ on [()r
._0 IIlill[Ites or lllore _d]xr the cooktop and lllicl'ow_\ 1'
controls _11_' [[irned ()_t_
Surface Light
Press SURFACE LIGHT on(e tor brig]u light, v,vi( e tor
the night light, or three times to turn the light oil
Page 29

www.GEAppliance_com
Options
Press the OPTIONSpad muhiple times to (v(le
through the axailable options.
Auto Nite Loht
The Auto Nite Light (an be set to (onw on and go
off at desired dines.
'Ik) set the timer:
Press 1.
tllter the till/e of (l_l_ r i()r t]l(_ light to (()Ill(! Oll.
Press the OPTIONS pad.
Enter die time of day tor die light to go off.
Pr( ss the OPTIONS pad.
To review the niw light settings, press 2 a/ler
sele(ting die Auto Nite Light option.
To turn the nite light o/1\ press 0 a/ler selecting
the Auto Nite Light option.
Beeper Volmne
The beeper s(mnd lmel can be a(/juswd. Choose
0-3/or mute to hind.
Charcoal Filter Reminder
The Charcoal Filter Remiuder is a 180-day timer to
remind you wh(ql tO (hange th(' (har(oal/ilw_
Press 0 to turn the reminder o/1_ Press I to set the
remindel: Press 2 to reset the reminder.
!iiiilIii!i!ll
Display Language
The language tbr th( scrolling display may be set at
eidler English or Spanish.
Press I tbr English or 2/or Spanish.
Display On/Off
You (an choose to turn the (lo(k dist)lay on or o/1_
Press 0 to turn th(' display gill Press 1 u) turn the
display on.
Display Speed
The scroll sl)eed o{ the disl)lay (an be (hanged.
Select 1-5 {or slowest to {_lstest s(roll speed.
ii ll
!iii! iiiiiiii
29
Page 30

iii iHiil!iiii!ili
Otherfeatures yourmodel may have.
How to Use the Sheff
When Microwaving
Make sure tile shelf is
positioned properly
inside the microwave
to prevellt (lalllage to
the o_en t_'om arcing.
I)o not use a
microwa_ e browning
dish on the shel/_ The
shelf could overheat.
[)0 llOt Ilse the ()_,ell
with the shelf on _he
microwa_ • floor.
This could damage
the llliCI'ow_ e,
Shelf
turntable or on the shelf in the ]ovqeF position.
()nl) use the shelf when reheating on more
fl_an one lexel. Do not store the shelf inside
For best results
Uneven results
2-1evelreheating
Llse pot holders when
handling the shell
it may be hot.
I)o not use tile shelf
when cooking
])O])COFll.
I)o not use the shelf
iiii!ili_:_):iiqii!!i/i_iii!_!_iiiiiii
with Sensor Cooking
or Reheat
30
Page 31

Switch places after 1/2 time
Switch places after 1/2 time
Switch places twice
vvvvw.GEAppliance_com
Shelf and Reheating
Toreheat on 2 levels
OR
Toreheat2 dishes on the lower levee
Toreheat on 3 levels:
'Ihrn the turntable off'.
Double the reheating time.
i!+i+!+!+_ii
Swit_ h pla_ es twke and gi'+e the dishes a
1,/2 tttrn during reheadng. (Plate dense foods,
or those |ha| re(tuire a ]ol/g(_r (ook tilil(', Oll
the upper shelf tirst.)
!iiiilIii!i!l+
il!i ii !iiii!li+ iiii++iiiiYl!
31
Page 32

iii iHiil!iiii!ili
Microwave terms.
i i:i:i:i Oainition
Arcing .\rein_r is ill(, l//i(]lX)_*(_l_.(,|ell// [()1"sparks in d_e oxen. ,\reing is
ii i i i i
Covering
Shielding In a regular oxen, you shield (hi(ken breasts (n: baked foods to
Standing Time When xou cook with regular oxens, foods su(h as roasts or (akes
Venting _'ler e(,xedng a dish vdth plastic vvrlT_t_l), "}'O/|xell[ the t,lasti( wrap
caused 1)v:
dw metal shelf being installed ineorre(tly and tou(hing
the lIli(Fowaxe walls.
metal or/[)il touching the side of the oven.
t_)il that is not molded to tood (ut)mrned edges act like
_IIIteIll IHS).
metal such a_, |wist-ties, t)ouluT pins, gold-rimmed dishes.
reqvcled paper towels (ontaining small metal tfie(es.
Co_q'.', hold in moistm'e, _dlow/_)r more even heating and re(tu(e
(()()king time. Xi'nting t)lasti( wrap or cox ering with wax t)aper
_{ll()_rs ex(ess siealll to es(at)e.
][,re',ent o'_el:l)l'owllillg. V(llell Hliel'oW_,_,_l/_ ", VOH /lse Sl/lall SHdl)S
of foil to shield dfin parts, sud_ as dw lips of wings and legs on
poultry, whi(h woHld (ook 1)e{()re larger parts.
are _dlovvr(!d to stand to finish cooking or to set. Standing time is
(st)eci_dly important in IIlierowa'_e (ooking. Note that a
mi(_o',*,ra',ed (ake is Dot t)la(ed on a (ooliDg i_'a(k.
t)_' HllTI/il/_" 1)_l(k Olle (Ol_l/eF SO ex(ess ste_ll// (_1/ es( _lt)(!.
iii}!i}i_)X{i{i!!i/i_}ii!_!_iiiiiii/
Page 33

Careand cleaning
ofthemicrowaveoven.
Helpful Hints
An o((_sionM thorough wil)ing with _1solution of
baking soda and _rater keeps the inside ti'esh.
NOTE:Be certain thepower is off before cleaningany
part ofthis oven.
How to Clean the Inside
Walls, Floor, Inside Window, Metal and Plastic Parts
"
on the Door
SolIle St)_ltters (an 1)e re]//o'_ed with _l 1)_ll)er towel;
others may require a damp cloth. Remo_e greasy
st)atters with a Stl(tsv cloth; then rinse with a <tamp
doth. Do not use abrasive cleaners or sharp
utensils on oven walls.
Never use a commercial oven cleaner on any part of
your microwave.
Removable Turntable and Turntable Support
"Ib prevent 1)re+_k+_ge, (1/) not t)lace the turnt+_bh'
into water just alter cooking. \V_lsh it careflfllv
in warm, sudsy water or in the dishwasher. The
turntable and sut)l)ort can be broken if drop1)ed.
Remember, (1/) not operate the oven without the
turntable and sut)l)ort in place.
Shelf
Ch';m with mild soap and water or in the dishwashe+_
Do not clean in a self-cleaning oven.
Defrost Rack
Cl(';m with mild so;q) and _'4_l|eFOF in the top r;_ck
of tlle dishwasher.
vvww.GEAppliances.com
!iiiilIii!i!l+
il!i ii !iiii!li+ iiii++iiiiYl!
33
Page 34

iii i+!iiii!ili
Care and cleaning of the microwave oven.
it j
How to Cleanthe Outside
We recommendagaiost asiog cleaners with ammonia
or alcohol, as they can damage the appearance of the
microwave oven.If you chooseto use a commonhousehold
cleaner, firstapply the cleaner directly to aclean cloth,
then wipe the soiled area.
Bottom
(:lean off the grease alld (]list on the bottom oft('n. Use a
SOI/ltiOI/ O_ _.arl// water and ([('[('l\_('l/t.
Case
Clean the outside of the mi(rowa\e _ith a sudsy cloth.
Rinse and then dr}. Wipe the window eleal/with a damp
cloth.
ControlPanel and Door
Wipe with a (tamp (loth. Dr? thoroughl}. Do not use
(:leaning sprays, large amotmts of soap al/d water,
abrasives or shar l) el)jeers on the panel--they can
damage it. Some paper towels can also scratch the
control panel.
Door Seal
It's important to kee l) tilt' ar('_ (l('an _Q_('re the (leer
seals against tl/_ microwave. Lse only miM, non-abrasive
(l(tergents applied wid/a (lean sponge or soft (lod/.
Rinse well.
+iii!ili+i+!Xiqi+!!ili+i,ii!+!+iii+++i
Staio/ess Steel (on some models)
Donot useasteel-woodpad; it will scratch the surface,
"]'t) c]e?ln the stainless steel s/tr/ilce, tlse a hot, da///p cloth
with a miM detergent suitable [-i>rstainless steel sur[a(x s.
Lse a cl_an, hot, damp cloth to remove soap. Dry with a
dry, clean cloth.
If food soil remains, tl T a general kitchen (leaner.
For hard-to-cl_ an soil, use a standard stainless steel
eleal/er, s/t(;h as gol/_\I//i _ or (]all/eo _+
Apply (;lean_ r wifl/a damp sponge. Use a clean, hot,
damp cloth to remove eleanel; Dry with a dry, clean
cloth. Always scrub lightly in the directi(m of die grain.
Afier elealling, use a stainless steel polish, such as
Stainless Steel Magi(:"! Revere Copper and Stainless Steel
Cleal/er ®or Wenol N1 I)ttrpose Metal Polish _>.Follow tile
prodttet instrttctions lilt" (leaning the stainless steel
sllrJi_(e.
Page 35

Replacing the light bulbs. vvww.GEAppliances.com
Cooktop Light/Night Light
On models JVM1850 and JVM1851, replace the
burned-out bulb with a 4g-watt incandescent bulb
(WB36XIO003), available from your GE supplier.
Remove screw
On models JVM1860, JVM1861 and JVM1870 replace
the burned-out bulb with a 120 volt, 20-watt halogen
bulb (WB36XIO213), available from your GE supplier.
!iiiilIii+
'['o ret)la(e the 1)ull)(s), first dis(onne(t the
t)ower at the l//alll _/l._e or clr(/llt 1)reaker t)anel
or troll die plug.
Remove the screw at the right edge of the light
(o'_er and t)/tsh Oll the left edge of the (o'_er to
Ot)en+
:[_j ge sure the tmlb(s) to be replaced are cool
l)efore remoxing. After breaking the adhesixe
seal, remove tlle bulb by either gently turning
(tor models.I_M 1850 and .]5_M1851 ) or pulling
straight out (Ibr models ]5_M1860, ]VM1861
and JVM1870}. Replace widl the same size and
type bulb.
Raise the light shield and replace die screw.
Colllle(t ele(tri(al power to the ovell.
S
Oven Light
Replace the burned-out bulb with a 120 volt, 20-watt
halogen bulb (WB36X10213), available from your
GE supplier.
"toret)la,e theo,e. light,restdis(o..e(t me
+H })()%_r(_r at the l//aill tllse or (ir(uit breaker t)anel
or troll die plug.
_? Remove the top grille 1)v taking om the s(rews
(m top ot the grille thai'hold it in pla(e and
sliding die grille to the let't (opening die door
makes grille removal easier).
Next, relilo'_e the screw h)(ated al)o'_e the door
near the (?el/telF of the o'_en that sectlres the
light housing.
Remoxe the 1)ull) fl_om the light housing b)'
pulling straight ore. Repla(e with the same size
and t}])e bulb, then replace the light housing.
Replace the grille and screws. (',Onlle(t electrical
:::::::::'_t)ower to tile oven.
!_!iiiiiiii!i,+'I__ ';i;i;+;ii'+?+iiii
iil++i! iiiiii
!iiiii+iii+i_iii++iiii+ii
35
Page 36

iii i+!iiii!ili
Abouttheexhaustfeature.
Charcoal Filter
(on some models)
Reusable Grease Filters
(on all models)
The Vent Fan
The xent f_m h_ls 2 metal reusM)le gre_lse filters.
Models that recirculate air back into the room also
[IS(! a (l/al?Co_tl tiher.
Reusable Grease Filters
The metal fih('rs tral) gr('_s(' reh'_scd b_/oo(ts on
tl't(' (ooktot). Th('y Mso pr('_cnt tlam('s/i'om toods
on the (ookto l) trom damaging the insi(h' o/the
microw+_vc.
];or this reason, the filters must AI,WAYS t)e in
t)la(e when the hood is used. The grease fihers
Removing and Cleaning the Filter
Toremove, slide it to the outside using the tal).
Pull it dOVTll and out.
To clean the grease filter, soak it and then swish it
arotmd in hot water and (tetergent. Don't ttse
alI/lIlonia or _tlttl/lOtli_t t)ro(ttlctS t)ecause they will
darken the metal, light brushing can be used to
remo_e embedded dirt.
+iii!ili+)):(iii+!!i/i+::ii:+:+iii+++i
38
Rinse, shake and let it dry belore replacing.
To replace, slide tlte filler in the/i'ame slot at ttte
outside of the ot)ening. Pull u l) and in to lock
into place.
Page 37

Remove grille screws
to remove the grille.
www.GEAppliance_com
Charcoal Filter (on some models)
The charcoal filter cannot be cleaned. It must be
replaced. Order Part No. WB2X10733 from your
GE supplier.
If the model is not vented to the outside, the air
will be recirculated through _1disl)os_lble ch_u:coM
/]lter fllat helps remo_e smoke and odors.
The charcoal/]her should be replaced when it is
noticeably dirty or discolored (usually atter 6 to
12 momhs, depending on hood usage).
ToRemove Charcoal Filter
To remove the (h_uxoal {ilte_; (liscomle(t t)ower
at the main fuse or circuit breaker panel or pull
the t_lug.
Remove the top grille by removing the screws on
top of the grille that hold it in place and sliding the
grille to the lett (opening the door makes grille
removal easier}. Slide the tiher towards the tkont
of the oven alld relilove it.
!iiiilIii!i!ll
ToInstall Charcoal Filter
To install a new t_lter, remo_e 1)lasd( and other
olNer wr_tl)l)il/g/i'ol// the _'_r tiher.
Insert the Jilter into the to 1) opening of the oven as
shown. It will rest at an angle on 2 side support tabs
and in/font of the right rear tab. Replace tlle grille
_tl/(/ screws.
il!i ii !iiii!lli iiii iiiiYl!
37
Page 38

ii_iiiiiiiiiiiiiii?yiiiiiiiiii!ii'_
Beforeyou call for service...
Troubleshooting -tips
Save time and money! Review the charts on the following pages
first and you may not need to call for service.
Possible Causes What ToDo
Oven will not start
Floor of the oven is warm,
even when the oven has
not been used
"LOCKED" appears on
the display
"SENSOR ERROR" appears
on the display
Youhearan unusual,
low-tonebeep
Foodamounttoolarge
forSensorReheat
A fuse hi your home may Replace fllse or reset
be blown or the circuit dr( uit breakel:
breaker tripped.
Power surge. Unphlg tile lnicrow_we
Plug not fully hlserted
hlto wall oudet.
The cooktop light is
located below the oven
floor. When the light is
on, the heat it produces
may make the oven floor
get warm.
The conwol has been
locked.
When ttshlg a Sensor
feature, the door was
opened before stemn
could be detected.
Steam was not detected
ill nl_illlUlll amotmt
of lime.
You have tried to start
the Remhlder without
a valid time of day.
You have tried to start
the Auto Nite Light
without a valid thne of
day entered for the on-time
mid off-time.
You have tried to chmlge
the power level when it is
not allowed.
Sensor Reheat is for
sil_gle servh_gs of
reconunended foods.
oxen; then plug it back in.
Make sure the 3-prong
phlg on tile oven is dilly
inserted into wall outlet.
"I]fis is norm:d.
Press and hold CLEAR/OFF
/or _ff_out 3 seconds to
/mlock the COlltrol.
I)o not open door until
steam is sensed and time
is shown counting down
on the displa}.
Llse _me Cook to heat
/or more thne.
Start over and enter a
valid time of din.
Start over and enter a
_li(t time of din.
Mallv of tile o_,en's tt'attlres
are preset and cmmot be
changed.
Use Brae Cook tDr large
aI//O/llltS of t()()d.
38
Page 39

vvvvw.GEAppliance_com
ThingsThatAre Normal With YourMicrowave Oven
Stcmn or vapor cs(apingli'ommxmnd the doo1:
I ,ight rcllc(tionaromM door or outer (ase.
Dimming oven lightand dmng+c in the blov,vrsom:d at
Dtt]l thumping sound while o\cn is operating.
TV!r+,dio intcrt}'rcn(e might bc noticed while using the
microx_},\ c. Similm: to the intert}'rcn(e caused bv other small
_})t)lian(cs, it does not in(ti(_m' a t)roblcm with the mi(ro_ve.
Plug the lnicrow;_vc into a dittcrent ele(trical (irct6t, mo\e the
radio or TV as tar _l_r_l_'/i'()lI_ the ii/i(row_lv(' _ts possible, or (he(k
the position mid signal of the TV/radio m:tcm:a.
J
39
Page 40

!iiliilt_ii_ii
I--.
iiii_i/llii
iili@Xiiii/ili,iiiiii/
iiiiiiiiiiiiiiiiiiii 40
Page 41

GE Service Protection Plus TM
(;E, a name recognized worldwide tor quality and dependability,
of J'ers SOil SerxJ(e Prote(tion Plllsr_l--(o]//l)re]lellsi'_e ])rote(tiOll Oll
all yore: applian(es--No Matter What Brand!
Benefits Include:
• Backed by GE
• All brmlds covered
• Unlimited service calls
• All parts mid labor costs hlcluded
• No out-of-pocket expenses
• No lfidden deductibles
• One 800 number to call
¥OI1 will be completely satisfied x_ith our serxice protection or y(m ma[_ request y(mr
lIl()lleX_ ba(k Oll tlle relilailling valtle ot VOtlr (Olltra(t. No (l/lestiollS asked. It's that silill)le.
Prowct your refi:igerator, dishwasher washer and (tr}e_; range, TX; VCR and much more--
rely brmld! Plus dlere's no extra charge for emergency service and low momhly financing
is a_ailable. E_en icemaker coverage and/ood spoilage prowcfion is o/|i'red. "_im can rest
easy, knowing that all your valuable household products are prowcwd against expensive
repairs.
Place "_our confidence in (;E and call us in the U.S. toll-ti'ee at 800.626.2224
ti)r more information.
*-kll ln;mds cOy(led, up Io 20 years old, in Ihe conlinent;d U.S.
We'll CoverAny Appliance.
Anywhere. Anytime.*
._.,_..q_._,:,_".....
Please place in envelope and mail to:
General Electric Company
Warranty Registration Department
P.O. Box 32150
Louisville, KY 40232-2150
47
Page 42

Consumer Product Ownership Registration
I)em: Customer:
Thank you tor pro:chasing our prod uct and dlank you for placing yore: confidence in us.
_;'c arc prolld to haxc veil as a (llStOl/ler!
Follow these three steps to protect your new appliance investment:
your Consmner die registration
Product Ownerslfip beh)w, store this
Registration today, do(inherit in _1sMi_
t lave the pea(e of place. It (ontains
mind ot knowing intbrmation you _ill
we (m_ (ont_l(t you need should you
in the tmlikelv require service.
e_em of a sa/btv Our service number
modification, is 800.(',E.CARES
(800.432.2737).
Manual ( aretulh.
It will help )ou
()peF_lI(_ VO(II _ I/(_W
applian( e propcrl'_.
Model Number Serial Number
ill li II lili ilill II II I1
hnportant: If you did not get a registration card with your product, detach
mid return the form below to ensure that your product is
registered, or register online at www.Gl_ppliances.com.
Consumer Product Ownership Registration
I ........... I I,, ,,,, ,I
@ Model Number Serial Number
First I I_ast I I
Nallle I I I I I I I I I Nallle I I I I I I I I I I I I I
Nil-. [] Ms. [] Mrs. [] Miss []
Strect] ]
,\ddF(_ss I I I I I I I I I I I I I I I I I I I I I I I I I I
Apt. # I I I I I I I I I E-mail Address*.
I I ELI I I
Cit_ I I I I I I I I I I I I I State (_odc I I I I
O GEAppfiances
l)at( Phl(ed [n [is(
GEConsumer Products
General Electric Company
Louisville, Kentucky
ww_GEApptiances com
Phone
* Please prmide your e-mail address to receive, via e-mail,
discomlts, special oflbrs and other important comnmnications
h'om GE Appliances ((;EA).
[ Check here ifvou do not want to receixe communications
from GEA's careflflly selected partners.
42
Page 43

GEMicrowave Oven Warranty.
iiiiiiii!!liii:iii!iii
Aft warranty service provided by our
Factory Service Centers, or an authorized
CustomerCares technician. Toschedule
service, on-line, 24hours a day, visit
us at www. GEAppliances.com,or call
800.GECARES(800.432.2737).
Staple your receipt here.
Proof of the original
purchase date is needed
to obtain service under
the warrant_
GE Will Replace:
origmal purchase one-year warran_ (;E \_i|| a|so provide, free of charge,
;d] ];d)or mid t'(,]a|(,d s(,rvi(€, costs to t'('})air or r('})]a(('
the deJL'(d_(" |)art.
Second Through Tenth Year The magnetron tube,it dw maglleu'(.,n robe tSi|s due to
Fromthedate of the ;, d(,t_.,(-1 it) l//alt,]J_ds or workl/la]lsl/J|), l)tltJllg ibis
original purchase additional nine-year limited warran_ you will Ix,
T_'S] )(>]JSi])]U _>r _] _r ];{])(_r ()t" rt'l;ite(] Setw_ti('u ( ()Sl_.
Service trips to your home to teach
you how to use the product.
hnproper hastallafion.
Failure of the product if it is
abused, misused, or used for other
llama file hltended purpose or used
colmnercially.
Replacement of house fuses or
resetlh_g of circuit breakers.
Damage to die product caused by
accident, fire, floods or acts of God.
Incidental or consequential damage
caused by possible defects wifll rids
appliance.
;iiiiiii[iii_Jiiiii!ilWiiii!iii
iiiiii!iiiiii !ii iili!
iiiiiiiiii: li
Thiswarranty is extended to the original purchaser andany succeediegowner forproducts purchased
for ordinary home use within the USA, le Alaska, the warranty excludes thecost of shipping or service
calls to yourhome,
Some states do not allow the exclusionor limitation of incidental or consequential damages,so the
above limitation or exclusioemay not apply to you. This warrantygives youspecific legal rights, and
you may also haveother rights which vary from state to state. Toknow what your legal rights are,
consult your local or state coesumer affairs office or your state's Attorney General
Warrantor:GeneralElectricCompany.Louisville,KY 40225
liiii_il;iiiY_iijiiiii'_
43
Page 44

ConsumerSupport.
GEAppliancesWebsite GEAppliances.com
I lave a question or need assistant e with your appliance? Try the GE Appliances W_'bsite
24 [tours a tim; ally da) of tilt" year! For gr('at('r (:oil',('ni('n( c told f_Lstt'r s('IMce, you (an
n()w (l()wnload Owner's Manuals, order parts, t at;dogs, or even st hcdulc s('r'dt (' on-lint'.
xl})ll (aIl also "Ask ()llr "Ibam of Experts'"" your questions, and so muth more...
ScheduleService
Expert GE repair s(rvic( is only one sttp away Iiom your doo1= Get on-line and
s(ht dill( VOllt st l-xi(I at VOllr (onveili( n(e _4 hOllrS anv (]av (if th( Veal-! ()r (all
800.(;E.C\RES (800.432.2737) during normal busin( ss hours.
GEAppliances.com
RealLifeDesignStudio GEAppliances.com
GE supports tile I hliv(.rsal Design t otlt eptmprodut 15,ser'dt es and emiromnents that
tall bt used I)}people of all ages, sizes and tapabilities. We ret ognize tile need to
design fi)r a wide range of ph):,,it al and mental abilities and impairnlents. For derails
of GE's I hliversal I)esign applications, inchlding kin:hen design ideas tot people with
disabilities, check out our D,i'bsite toda}: For the hearing impaired, please call
800.TDD.GEAC (800.833.4322).
ExtendedWarranties
Purchase a GE extended warranty and learn about spe( ial dis( oums that are available
while your wan-anty is still in etii.._ t.You can purl hase it on-line anytime, or call
800.626.2224 during normal business hours. GE Consumer Ih)me SelMces will
still be there alter your _rranty expires.
PartsandAccessories
Indhiduals qualified to ser'dce their own appliances can ha\t parts or accessories
sent dire( tlv m thtir homes (VISA, MasterCard and Dis( ov(,r lards at'(! at cepted).
OMer on-line mda 5 24 hours eve W (lay or b) phone at 800.626.2002 during normal
business hours.
Instructionscontainedin this manual coverprocedures to be performed byany user. Other
servicinggenerally should be referred to qualified service personnel. Cautionmust be
exercised, since improperservicing may cause unsafe operation.
GEAppliances.com
GEAppliances.com
ContactUs
If vou are not satistied with the serxice you ret eivc flom (;E, contatt us on our Websiw
wiih all the details int hiding your phone ntnnbel: or write to:
(;eneral Manager; Customer R(!lations
(;E Applian( es, .\pplian( e Park
Louisville, kT 40225
RegisterYourAppliance
Register your new appliance on-line--at your convenience! Timely product registration
will allow tor enhant ed t onmlunit ation and prompt servite under the ternls of your
warrant), should tile nted arise. You mav also mail in the pre-printed registration lard
intluded in the pat king material.
GEAppliances.com
GEAppliances.com
Prlnted I}l Korea
 Loading...