

Page 1
ge.com
0
"m
Safety Instructions ............. 2-6
Operating Imlruaions
Bake Features ............ 10, 18, 20
Best Method of Cooking Chart .... 21
Changing Power Lex>l ........... 14
Cooking Options ................ 10
Cookware Tips .................. 20
Fast Bake Feaulre ......... 10, 19, 20
Featules of Your Oven ......... 8, 9
Microwave Temps ............... 14
Other Features .............. 23-25
Auto Recipe "_Com_rsion .... 18, 24
Automatic Fan ................ 25
Auto Nite I,iOat ............... 24
Bake Temp. Adjust ............. 24
Beeper Volume ............... 24
Child i,ock-Out ............... 23
Clear/Off .................... 23
Clock ........................ 23
Cooking Complem Reminder....23
Displ W i,anguag_ .............. 24
Displ W ON/OH? .............. 94
Displ W Speed ................. 24
Hel I) ........................ 23
Measmes ..................... 25
More Trine Message ............ 95
Resume ...................... 23
Start/Pause ................... 93
Surface Light ................. 95
Timer ....................... 95
Turntable On/Off ............. 95
Vent Fan ..................... 95
Roast Features ............ 10, 18, 90
Sensor Features .............. 15-17
Time and Auto Features .... 9, 11-13
VLmn Feature .................. 22
Care and Cleaning
Charcoal Fihers .................. 29
Inside .......................... 26
Outside ....................... 96
Replacing file Light Bulbs ........ 27
Stainless Steel .................. 97
Vent Filters .................. 28, 29
Troubleshooting Tips ........ 30, 31
Things That Are Nomml
VFith Your Microwme Oven ....... 32
Consumer Support
Consumer Support ...... Back Co_r
Optional Kits .................... 7
Product Regisuafion ......... 33, 34
Warrant;' ....................... 35
Espa_ol
For a Spanish xersion of tiffs
manna], visit our _4:ebsite at g_.com.
Para consultar una version en
espafiol de este manual de
instmcciones, visite nuestro sifio de
inmrnet g_.com.
JI,{_117 90
©
Write the model and serial numbers here:
Model #
Serial #
You can find them on a label when the
door is opell.
3828WSA4_78 49-40480 01-06JR
Page 2
iMPORTANTSAFETYiNSTRUCTiONS.
READALLiNSTRUCTiONSBEFOREUSING.
.4,WARNING!
For your safety, the information in this manual must be followed to minimize the risk of fire, explosion, electric shock,
exposure to excessive microwave energy, or to prevent property damage, personal injury, or loss of life.
PRECAUTIONSTOAVOIDPOSSIBLEEXPOSURE
TOEXCESSIVEMICROWAVEENERGY
(a) DoNotAttemptto operate this oven with the door
open since open-door operation can result in haI_nful
expos/li'e to illicrowave enert,_'i ]t is iIllpOI't;lnt not to
defeat or taniper with tile safeW inteitocks.
(b) DoNotPlaceany object between tile o_en fl'ont face
and tile door or allow soil or cleaner residue to
accunlulate on sealing Slii-ti_ces.
(c) Do Not Operate the oven if it is danlaged. It is
particularly inlportant that tile oven door ch)se
propeity and that there is no danlage to tile:
(1) door (bent),
(2) hinges and latches (broken or loosened),
(3) door seals and sealing sui-ti_ces.
(d) The Oven Should Not be ac!iusted or repaired by
anyone except properly qualified service pei_onnel.
IMPORTANTSAFETYINSTRUCTIONS.
When using electrical appliances basic safety precautions should be followed, including the following:
_: Read and follow tile specific pi'e(atlfions in tile _: To reduce tile iJsk of fii'e in tile ()veil (-avil_':
PRECAUTIONSTOAVOIDPOSSIBLEEXPOSURETO
EXCESSIVEMICROWAVEENERGY secdon ab_)ve.
_: This appliance inust be grounded. (]onnect only
to a properly grounded outlet. See tile GROUNDING
INSTRUCTIONSsection on page 6.
_: hlstall or locate this appliance only in accoMance with
tile provided hlsmllation hlstructions.
::Ji::This niicrowave ()veil is UI, listed tor installation over
electric and gas ranges.
_: This nlicrowave ()veil is not approved or tested for
i/laiJne tlse.
_: This ovei:the-range oven is designed for use over ranges
no wider than 362, It nlay be installed over both gas and
electric cooking equipnlent.
::Ji::Do not operate this appliance if it has a danlaged power
cord or phIg, if it is not working propeity, or if it has
been danlaged or dropped. If tile power cord is
danlaged, it ni ust be replaced by General Electric
Service or an authoiized service agent using a power
cord awfilable fl'oni General Electric.
--Do not overcook todd. Careflilly attend appliance when
papei; plastic or other conlbustible inaterials are placed
inside tile ()veil while cooking.
--Reinove wire twist-ties and nletal handles ti'onl paper or
plastic containeis before placing thenl in tile ()veil.
--Do not use tile (wen for storage ptli])oses. Do not leave
paper products, cooking utensils or food in tile oven
when not in/Ise.
--Do not pop popcorn in your inicrowave ()veil unless in
a specM i/licrowave popcoi'n accessolw or unless VO/l use
popcorn labeled tor use in niicrowave ovens.
--If InateI_ials inside the ()veil ignite, keep the ()veil door
closed, turn the oven off and disconnect the power cord,
or shut off power at the fllse or circuit breaker panel.
If tile door is opened, tile fire nlay spread.
--Do not use tile Sensor Features twice in succession oil
tile sanle tODd portion. If tODd is undercooked after
tile fiI_t countdown, use time Cookti)i" additional
cooking tiine.
::Ji::Do not cover or block any openings on tile appliance.
?_:Use this appliance only for its intended use as described
in this nlanual. Do not use corrosive chenlicals or vapois
in this appliance. This nlicrowave oven is specifically
designed to heat, dry or cook tODd, and is not intended
for laboi'atorv or industI_ial use.
SAVETHESEINSTRUCTIONS
Page 3
IMPORTANTSAFETYINSTRUCTIONS.
ge.com
?_: When using the Bake, Roast or Fast Bake flulctions,
both the outside and inside of the ()veil will beconle
hot. Mwa):s use hot pads to reinove containei_ of fl)od
and accessories such as the oven shelf,
_: Thermometer--Do not use regular cooking or oven
thermoinetei_ when cooking by niicrowave or using
the fastBake nIode. The metal and nlercui y in these
thei_noinetei_ could cause arcingand I)ossible danlage
to the (wen, Do not rise a theiillOilletei" in tood )'Oil ai'e
inicrowa_ng unless the theimoineter is designed or
i'ecoi/lillended tk)i" rise in the illici'owave ()veil,
::Ji::Do not clean with inetal scouting pads. Pieces can burn
off the pad and touch electrical parts involving risk of
electric shock,
::)i::Do not stoi'e [llly IllateI_als, otheI" th[ln o/ii"
reconlniended accessories, in this oven when not in use.
9_:Do not store this appliance outdooi3. Do not use this
l)roduct near watei_fl)r exainl)le, in a wet basenlent,
near a swinmling pool, near a sink or in sinlilar locations.
WARNING!
9_: Kee I) power cord away fl'onl heated suYfhces.
::Ji::Do not iinnieise power cord or phig in water.
_: Do not inount this al)pliance over a sink.
_Ji::See dIIor sui_i_ce cleaning instructions in the Care and
cleaning of the microwavo ovon section of this nlanual.
_Ji::This appliance ni ust only be seiMced by qualified service
i)ei3onnel. Contact nearest authorized service ti_cilitv fi)r
exaininafion, repair or a(!justnient.
_: _s with any apl)liance, close SUl)er\'ision is necessai T
when used bv chiMren.
::Ji::Do not store anything directly on top of the niicrowave
oven suil'i_ce when the niicrowave oven is in oi)eration.
SAVETHESEINSTRUCTIONS
ARCING
If Vousee arcing, press the C£EAR/OFFbutton and correct the problem.
Arcing is the niicrowa\'e teim fi)r spar!cs in the ()veil.
Arcing is caused by:
_: The nletal shelf not installed correctly so it
touches the niicrowave wall.
::Ji::Metal or fi)il touching the side of the oven.
_: Turntable ring SUl)port not installed correctly,
::Ji::Foil not niolded to fi)od (Ulmirned edges act
like antennas),
::Ji::Metal, such as twist-ties, poultI T pins, or gold-
i_iinined dishes, in the nlicrowave.
_ Recycled paper towels containing snlall nletal
pieces being used in the nlicrowave.
Page 4
iMPORTANTSAFETYiNSTRUCTiONS.
READALLiNSTRUCTiONSBEFOREUSING.
WARNING!
FOODS
Do not pop popcoi'n in VO/IF i//ici'owave oven
unless in a special microwave popcorn accessory
or unless you use popcorn labeled fiw use in
microwave ovens.
_: Do not boil eggs in a microwave oven. Pressm'e
will build iiI) inside egg yolk and will cause it to
bm_t, possibly resulting in iqjurv
_: Operating tile microwave with no food inside for
I/loI'e than a Illintlte oi" two II/ay Catlse dalilage
to tile oven and could start a fire. It increases tile
heat around the magnetron and can shorten
the life ot the oven.
::Ji::Foods with tmbroken outer "skin" such as
potatoes, hot dogs, sausages, tomatoes, apples,
chicken live_ and other giblets, and egg yolks
should be pierced to allow steanl to escape
(hllJng cooking.
::Ji::Some products such as whole eggs and sealed
containei_--lbr example, closed jade--are able
to eN)lode and should not be heamd in this
iilici'owave oven. Stlcl/ rise of tile iilici'owave
oven could result in injury:
::Ji:: SUPERHEATEDWATER
Liquids,such as water,coffee,ortea, are ableto
be overheatedbeyondtheboilingpoint without
appearingto beboiling. Visiblebubblingor boiling
whenthecontainer isremovedfromthe microwave
ovenis notalwayspresent.THISCOULDRESULTIN
VERYHOTLIQUIDSSUDDENLYBOILING0VERWHEN
THECONTAINERIS DISTURBEDORA SPOONOR
OTHERUTENSILISINSERTEDINTOTHELIQUID.
::Ji::Foods cooked in liquids (such as pasta) may
tend to boil more rapidly than foods containing
less inoisture. Should this occtli; refer to tile
Care and cleaning of the microwave oven section
fin" instructions on how to clean tile inside of
tile oven.
_: Avoid heating baby fi)od in glassja_s, even Mth
the lid off, Make sm'e all infimt tood is thoroughly
cooked. Stir tood to distribute the heat evenly:
Be carefifl to prevent scalding when wamfing
tommla. Tile container may feel cooler than tile
tommla really is. Mwa\:s test tile titan ula befi)re
fi_eding tile baby.
_: Don't defl'ost fl'ozen be\'erages in narro_necked
bottles (especially carbonated beverages). Even if
tile container is opened, pressm'e can build ill).
This can cause the container to bulst, possibly
resulting in iqjtu T
_: Hot foods and steam can cause burns. Be caretul
when opening any containei_ of hot food,
including popcorn bags, cooking pouches and
boxes. To prevent possible iqjm'y, direct steam
away fl'om hands and tace.
Do not overcook potatoes. Thev could dehvdrate
and catch fire, causing damage to yore" oven.
Cook meat and poultry thoroughl}_meat to at
least an ]NTERNM, temperature of 160°F and
poulti T to at least an INTERNAl, temperatm'e of
180°E Cooking to these temperatm'es usually
protects against ti_odborne illness.
To reduce tile risk ot iqjm y to pei_ons:
--Do not overheat the liquid.
--Stir tile liquid both before and halfway through
heating it.
--Do not use straight-sided containers with narrow
necks.
--_dter heating, allow tile container to stand in tile
microwave oven fi:,r a short time before removing
tile container.
--Use extreme care when inserting a spoon or
other utensil into tile containe_:
4
Page 5

_e.com
MICROWAVE-SAFECOOKWARE
Do not operate the oven in the microwave mode without the turntable and the turntable support seated
and in place. Theturntable must be unrestricted so it can rotate.
Make sure all cookware used in your microwave oven is suitable for microwaving. Most glass casseroles,
cooking dishes, measuring cups, custard cups, pottery or china dinnerware which does not have metallic
trim or glaze with a metallic sheen can be used. Some cookware is labeled "suitable for microwaving."
::Ji::If you are not sure ifa
dish is microwave-sate,
use this test: Place in the
()veil both the dish you
are testing and a glass
ineasulJng cup filled with How to test for a
1 cup of watei_set the microwave-safe dish.
illeastlYing ('tip either in or next to tile dish.
Microwave 30-45 seconds at high. If tile dish
heats, it should not be used %r microwaving.
If the dish remains cool and only the water in
the cup heats, then the dish is microwave-sale.
N OveI_ized food or oveIMzed metal cookware
should not be used in a microwave/convection
()veil because they increase the risk of electric
shock and could cause a fire.
Sometimes tile oven flora; turntable and walls
can become too hot to touch, Be careful touching
tile flora; turntable and walls during and after
cooking.
If you use a meat tl/emlometer while
microwa\ing or using the FASTBAKEmode,
II/ake stII'e it is sate fin" rise in i/li(ToWa;'e ovens.
Do not use rec)'cled paper products. Recycled
paper towels, nal)kins and waxed paper can
contain metal flecks which may cause arcing
or ignite. Paper products containing nylon or
nvhm filaments should be avoided, as they
may also ignite.
Some swrotbmn trays (like those that meat
is packaged oil) have a thin strip of metal
embedded in tile bottom. When microwaved,
tile metal can burn tile floor of tile oven or
ignite a paper towel.
::Ji::Use (ff tile shelf accessory:
-- Remove tile shelf" fl'on/ tile (wen when
not in rise.
-- Use pot holdeI_ when handling tile shelf and
cookware. They may be hot.
-- Be sure that tile shelf is positioned properly
inside tile ()veil to prevent product damage.
-- Do not c(wer tile shelf or any part of tile oven
with metal fifil, This will cause overheating of
the illiCi'OWa;'e/convection oven,
_: Do not rise votIr illiCi'Owave/convection ()veil
to (liT newspal)ei_.
::Ji::Not all plastic wrap is suitable fin" use in
microwave ovens. Check tile package fi)r
proper tlse.
::Ji::Paper towels, waxed paper and plastic
wrap can be used to cover dishes in order to
retain moisture and prevent spattering while
microwaving. Be sure to vent plastic wrap so
ste_lI// C_lIl escape.
?_:Do not use paper products when tile microwave/
convection oven is operated in the BAKE,BOAST
or FASTBAKEmode.
_: (_ook\vare may become hot because (ff heat
transferred fl'(nn tile heated fl)od. Pot holdei_
may be needed to handle tile cookware.
::Ji::When microwaving "boilable" cooking pouches
and tightly closed plastic bags, they should be slit,
pierced or vented as directed by package. If they
are not, plastic could built duiJng or immediately
after cooking, possibly resulting in injury. Mso,
plastic storage containeis should be at least
partially uncovered because they timn a fight seal.
When cooking with containei_ tightly covered
with plastic wrap, remove covering careflllly and
direct steam away fl'om hands and ti_ce.
::Ji::Use toil (rely as directed in this manual. X4]/en
using tbil in the microwave oven, kee I) the fifil at
least 1" away fl'om the sides of the oven.
Plastic cookware--Plastic cookware designed fin.
microwave cooking is vei N useflll, but should be
used carefilllv. Even Inicrowa;'e-sate plastic may
not be as tolerant of overcooking conditions as
are glass or ceramic materials and may soften or
char if subjected to short periods of overcooking.
In longer exposures to overcooking, tile fi)od and
cookware could ignite.
Follow these guidelines:
_Use microwave-sale plastics ()Ill}' and use
them in strict compliance xdth the cookware
illan tililcttii'eY's i'e COilli//e ndatio ns.
_Do not i//ici'owa_,e eilll)t}, containeis.
_Do not pemfit children to use plastic
cookware without c(nnl)lete superxision.
Page 6
IMPORTANTSAFETYINFORMATION.
READALLINSTRUCTIONSBEFOREUSING.
WARNING!
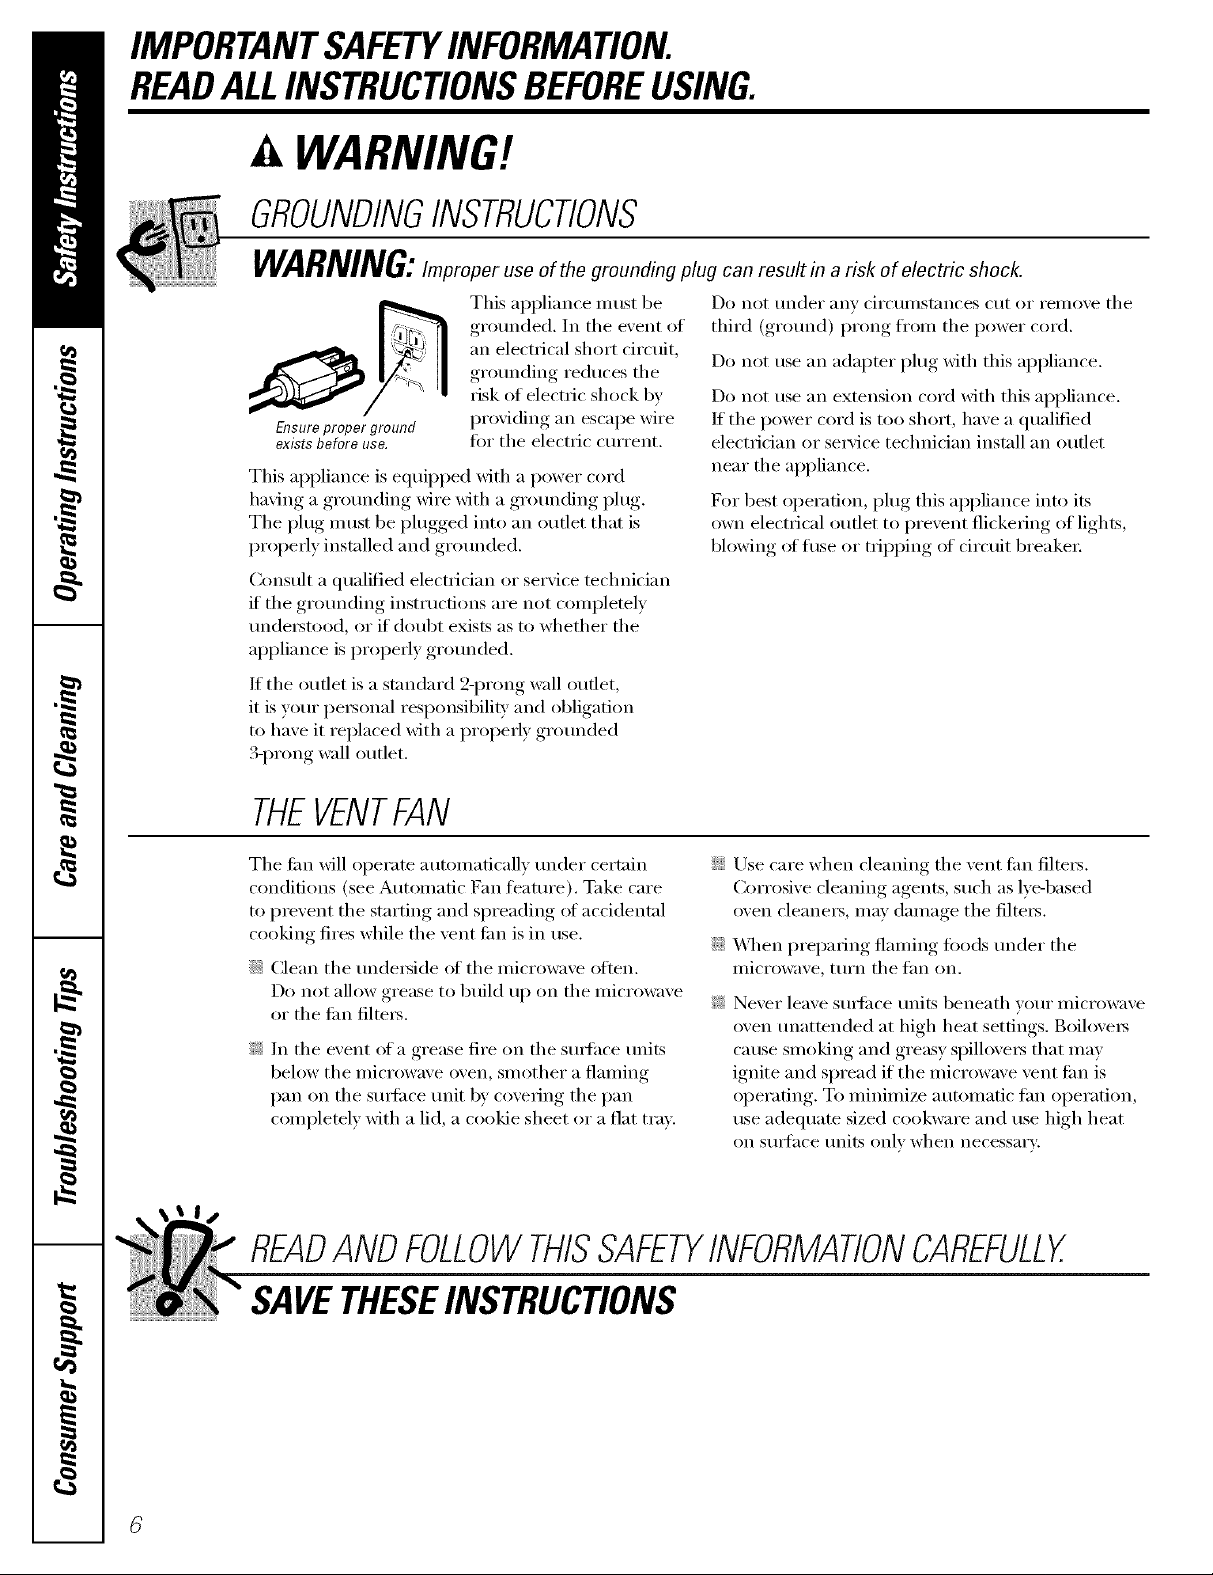
GROUNDINGINSTRUCTIONS
This appliance must be
grounded. In tile e\'ent of
an electrical short circuit,
gro/mding reduces tile
risk of electric shock by
Ensure proper ground
exists before use.
This appliance is equipped Mth a power cord
having a gm/mding Mre Mth a gm/mding plug.
Tile plug Inust be plugged into an outlet that is
properly installed and grolmded.
Consult a qualified electridan or service technician
if the gro/mding instructions are not completely
tmde_tood, or if doubt exists as to whether tile
appliance is properly gro/mded.
If tile outlet is a standard 2-prong wall outlet,
it is yore" personal responsibili_' and obligation
to have it replaced with a properly gro/mded
B-prong wall outlet,
providing an escape wire
ti:,r tile electric cmTent.
THEVENTFAN
Tile tim will operate automatically trader certain
conditions (see Automatic Fan feature). Take care
to prevent tile starting and spreading of accidental
cooking fires while tile vent tim is in use.
::Ji::Clean tile trade,Male of tile microwave often.
Do not allow grease to build up on tile microwave
or the tim filte_s.
9_:In tile event ot a grease fire on tile sur{hce units
below tile microwave oven, smother a flaming
pan on the sur{i_ce trait b)' covering the pan
completely with a lid, a cookie sheet or a fiat tray.
Do not tinder [lliV cii'Clli/]stances Cllt or i'elilo_,e tile
third (grolmd) prong fl'om tile power cord.
Do not use an adapter plug Mth this appliance.
Do not use an extellsion cord with this appliance.
If tile po_vr cord is too short, have a qualified
electridan or service technician install an outlet
near tile appliance.
D)r best operation, plug this appliance into its
own electrical outlet to prevent flickering of lights,
171()wing of fllse or tripping of circuit breaker:
::Ji::Use care when cleaning tile vent tim filtet_.
Corrosive cleaning agents, such as lye-based
oven cleane_, may damage the filte_.
::Ji::_._]/en preparing flaming ti)()ds tinder tile
IllicI'OWaVe_ t/lI'n tile J[_lIl Oil.
9_:Never leave sm-li_ce milts beneath vom" microwave
oven tmattended at high heat settings. Boilove_s
Catlse Sll/oking and greasy spillove_ that may
ignite and spread if tile microwave vent tim is
operating. To minimize automatic fan operation,
use adequate sized cookware and use high heat
(711 S/lI'J_lce units only when necessai'v:
READANDFOLLOWTHISSAFETYINFORMAtiONCAREFULLY.
SAVETHESEINSTRUCTIONS
Page 7
Optional kits 9e.co,.
Available at extra cost from your GEsuppfier.
Filler Panel Kits
_ JX4OWH--White
_: JX41--Black
When repladng a 36" range hood, filler panel kits
fill in tile additional width to provide a custom
built-in appearance.
For installation between cal)inets only; not fin.
end-of:cabinet installation. Each kit contains
two 3" wide filler panels.
Filter Kits
::Ji::JX81D--Recirculating Charcoal Filter Kit
Filter kits are used when
tile ()veil cannot be
vented to tile outside.
Available at extra cost
fron/w_ur GE supplier.
See tile back cover fi_I"
ordei_ing by phone or
at ge.coIn.
JX40,JX41
JXSID
Page 8
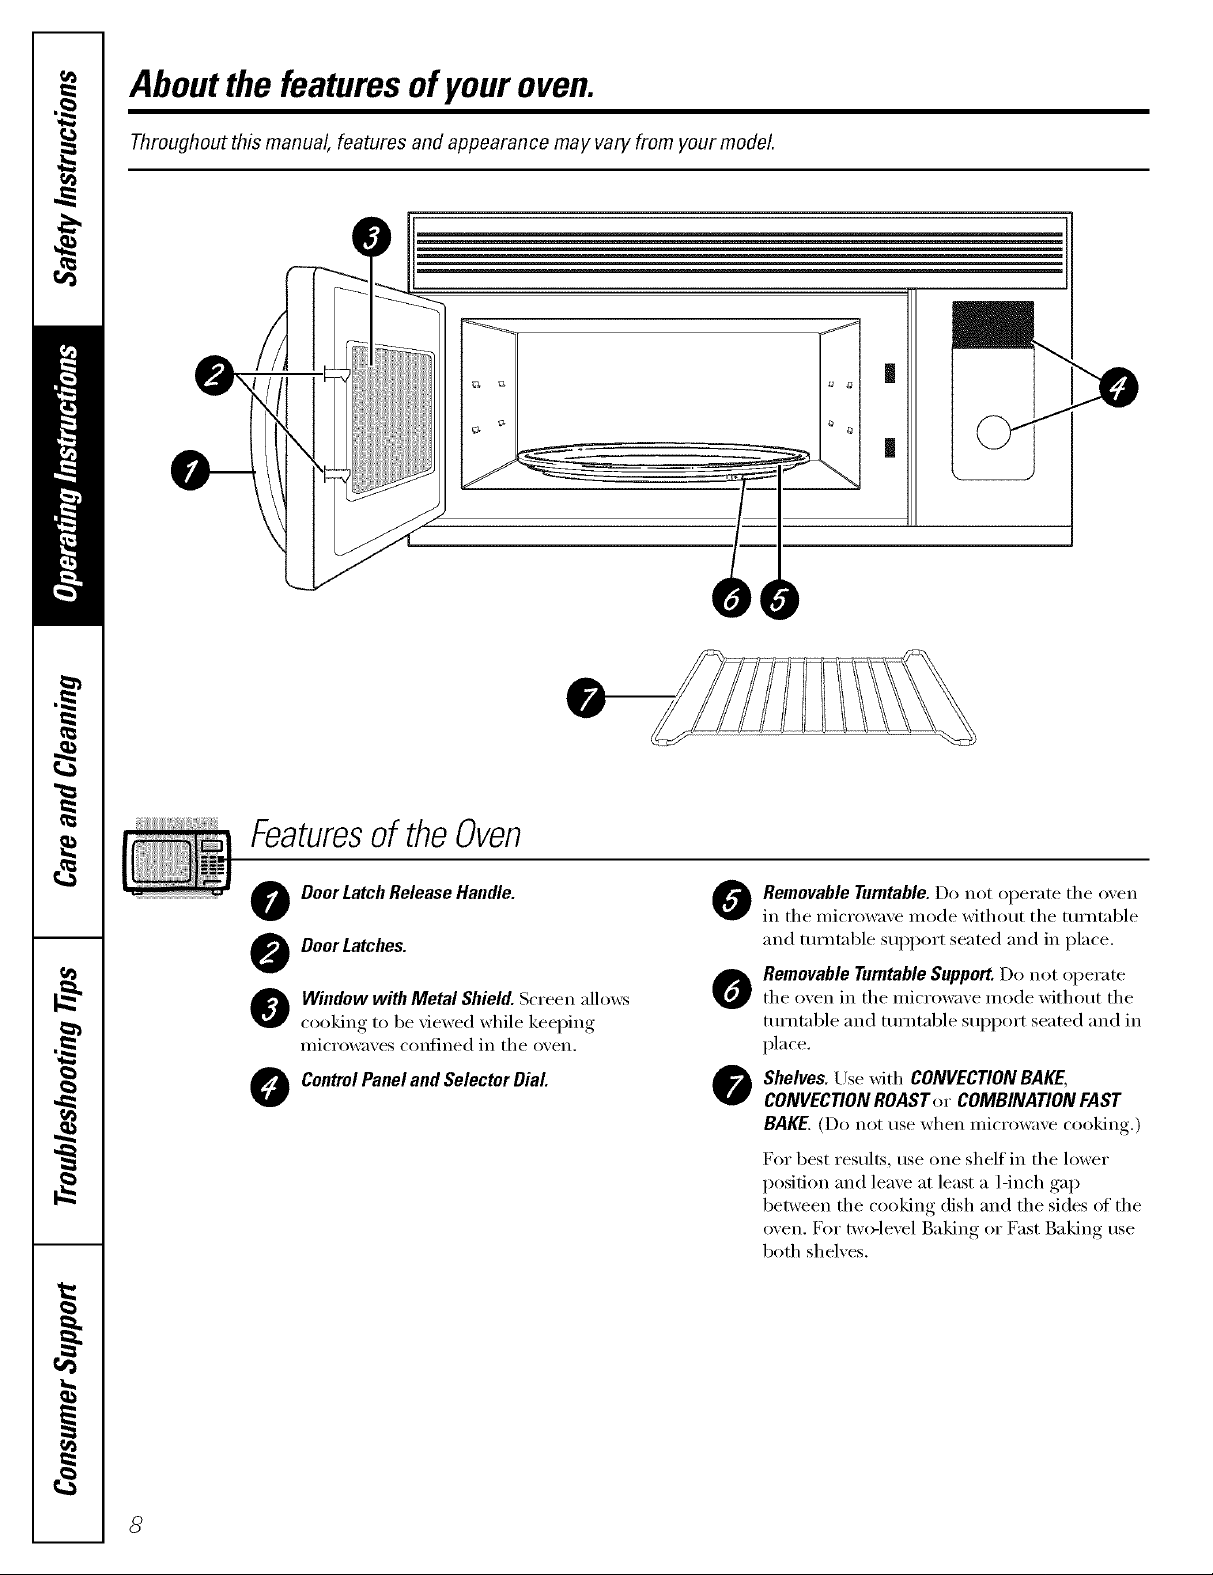
Aboutthe featuresofyouroven.
Throughout this manual, features and appearance may vary from your model.
|
|
Featuresof theOven
O Door Latch Release Handle.
O DoorLatches.
O indow with Metal Shield. Screen allows
cooking to be viewed while keeping
microwa;es confined in the o;en.
ControlPanel and Selector Dial
O Removable Turntable.Do not operate the oven
in the microwave mode with(rot the turntable
and turntable suppml seated and in place.
O Removable TurntableSupport.Do not operate
the oxen in the microwaxe mode without the
turntable and turntable support seated and in
place.
O Shelves. Use with CONVECTION BAKE,
CONVECTIONROAST or COMBINATION FAST
BAKE. (Do not use when microwave cooking.)
For best results, tlse one shelf in the lower
posit.ion and leave at least a 1-inch gap
between the cooking dish and the sides of the
oven. D)r two-level Baking or Fast Baking rise
both shelves.
Page 9

Aboutthe cookingand warmingfeatures ofyour
microwave/convectionoven. gecom
Youcan cook by Microwave, Convection Bake, Convection Roast or Combination Fast Bake. Keep hot, cooked foods at
serving temperature with the Warm feature.
_ START/PAUSEj_
CookingControls
o Microwave Cooking Time and Auto Features
Press Turnandpushdialtoenter
TIMECOOK Amountofcool<ingtime
Pressonce(TimeCool<I)to microwave
anytimebetween15secondsand95minutes.
Presstwice(TimeCookII)to changepower
levelsautomaticallyduringcooking.
MICROEXPRESScook/Add30sec. Startsimmediately!
DEFROST
Pressonce(Fast) Foodweightuptoonepound
Presstwice(Auto) Foodweightuptosixpounds
Pressthreetimes(Time) Amountofdefrostingtime
BEVERAGE Startsimmediately!
Pressonce(6-7 oz.)
Presstwice(8-9oz.)
Pressthreetimes(10-12oz.)
POWERlevel Powerlevel1-10
Sensor Features
Press Turnandpush dialtoenter Option
POPCORN Startsimmediately! more/lesstime
REHEAT Startsimmediately! more/lesstime
Pressonce(plate)
Presstwice(pasta)
Pressthreetimes(½to 1cup)
Pressfourtimes(1to2 cups)
AUTOCOOK Foodtype more/lesstime
Convection Baking or Convection Roasting
O
Press Turnandpushdialtoenter
CONVECTIONBAKEor Oventemperatureandcool<time
CONVECTIONROAST
o ombination Fast Baking
Press
COMBiNATiONFASTBAKE
O,Warming
Press
WARM Oventemperatureandwarmtime ,9
Turnandpushdialtoenter
Oventemperatureandcool<time
Turnandpushdialtoenter
Page 10
Available cooking options.
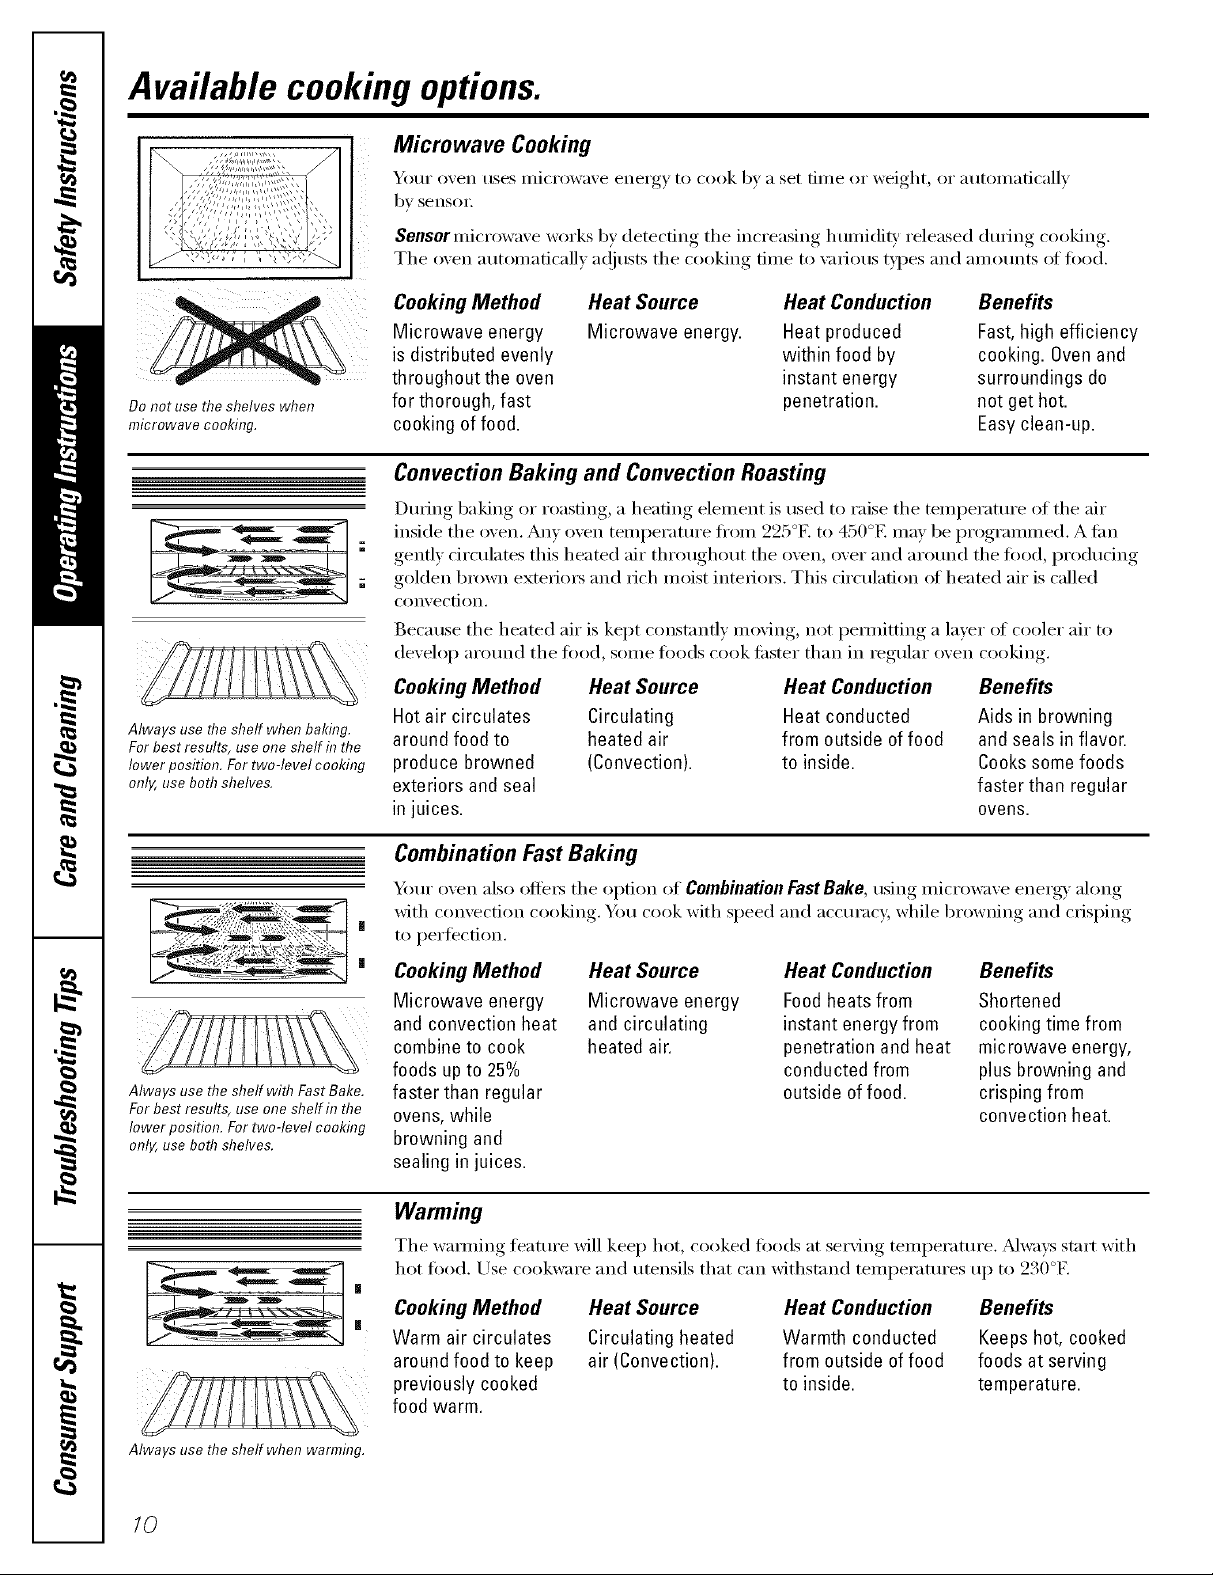
Microwave Cooking
_OtlI" oven rises Illi(I'()wave energy to cook by a set [ii/le or weight, or a tltOillati('allv
by sensoI:
Sensor micr()wave w(wks by detecting the increasing h umidiw released during cooking.
The oven automatically a(!iusts the cooking time to \m_ous types and amotmts oI tood.
p
Do not use theshelves when
microwave cooking.
Always use the shelf when baking.
For best results, use one shelf in the
lower position. For two-level cooking
only, use both shelves,
Always use the shelf with Fast Bake.
For best results, use one shelf in the
lower position. For two-level cooking
only, use bothshelves.
Cooking Method
Microwave energy
is distributed evenly
throughout the oven
for thorough, fast
cooking of food.
Heat Source
Microwave energy.
Heat Conduction
Heat produced
within food by
instant energy
penetration.
Benefits
Fast,high efficiency
cooking. Oven and
surroundings do
not get hot.
Easyclean-up.
Convection Baking and Convection Roasting
During baking or roasting, a heating element is used to raise the temperature ot the air
inside the oven, Any ()veil temperature fl'onl 225°F. to 450°E may be progranmled, A tim
gently circulates this heated air throughout the ()veil, over and around the fi)od, producing
golden brown exterim_ and rich moist intefioi_. This drculafi(m ot heated air is called
convection.
Because the heated air is kept constantly moving, not pemlitting a laver ()f cooler air to
develop around the fi)od, s(nne foods cook tipster than in regular oven cooking.
Cooking Method Heat Source
Hot air circulates Circulating
around food to heated air
produce browned (Convection).
exteriors and seal
in juices.
Heat Conduction
Heat conducted
from outside offood
to inside.
Benefits
Aids in browning
and seals in flavor.
Cookssome foods
faster than regular
ovens.
Combination FastBaking
Your oven also oflei_ the option of Combination Fast Bake, using microwave energy along
with convection cooking. Ym cook with speed and accuracy, while br()wning and crisping
|
to perfection.
|
Cooking Method
Microwave energy
and convection heat
combine to cook
foods upto 25%
faster than regular
ovens,while
browning and
sealing in juices.
Heat Source
Microwave energy
and circulating
heated air.
Heat Conduction
Foodheatsfrom
instant energy from
penetration and heat
conducted from
outside of food.
Benefits
Shortened
cooking time from
microwave energy,
plus browning and
crisping from
convection heat.
Always use the shelf when warmflTg.
10
Warming
The wamling feature will kee I) hot, cooked too(ls at serving temperature. _Mways start with
hot food. Use cookware and utensils that can withstand temperatures up to 230°F.
Cooking Method
Warm air circulates
around food to keep
previously cooked
food warm.
Heat Source
Circulating heated
air (Convection).
Heat Conduction
Warmth conducted
from outside offood
to inside.
Benefits
Keepshot, cooked
foods at serving
temperature.
Page 11
Aboutthe timeandautomicrowave features, ge.com
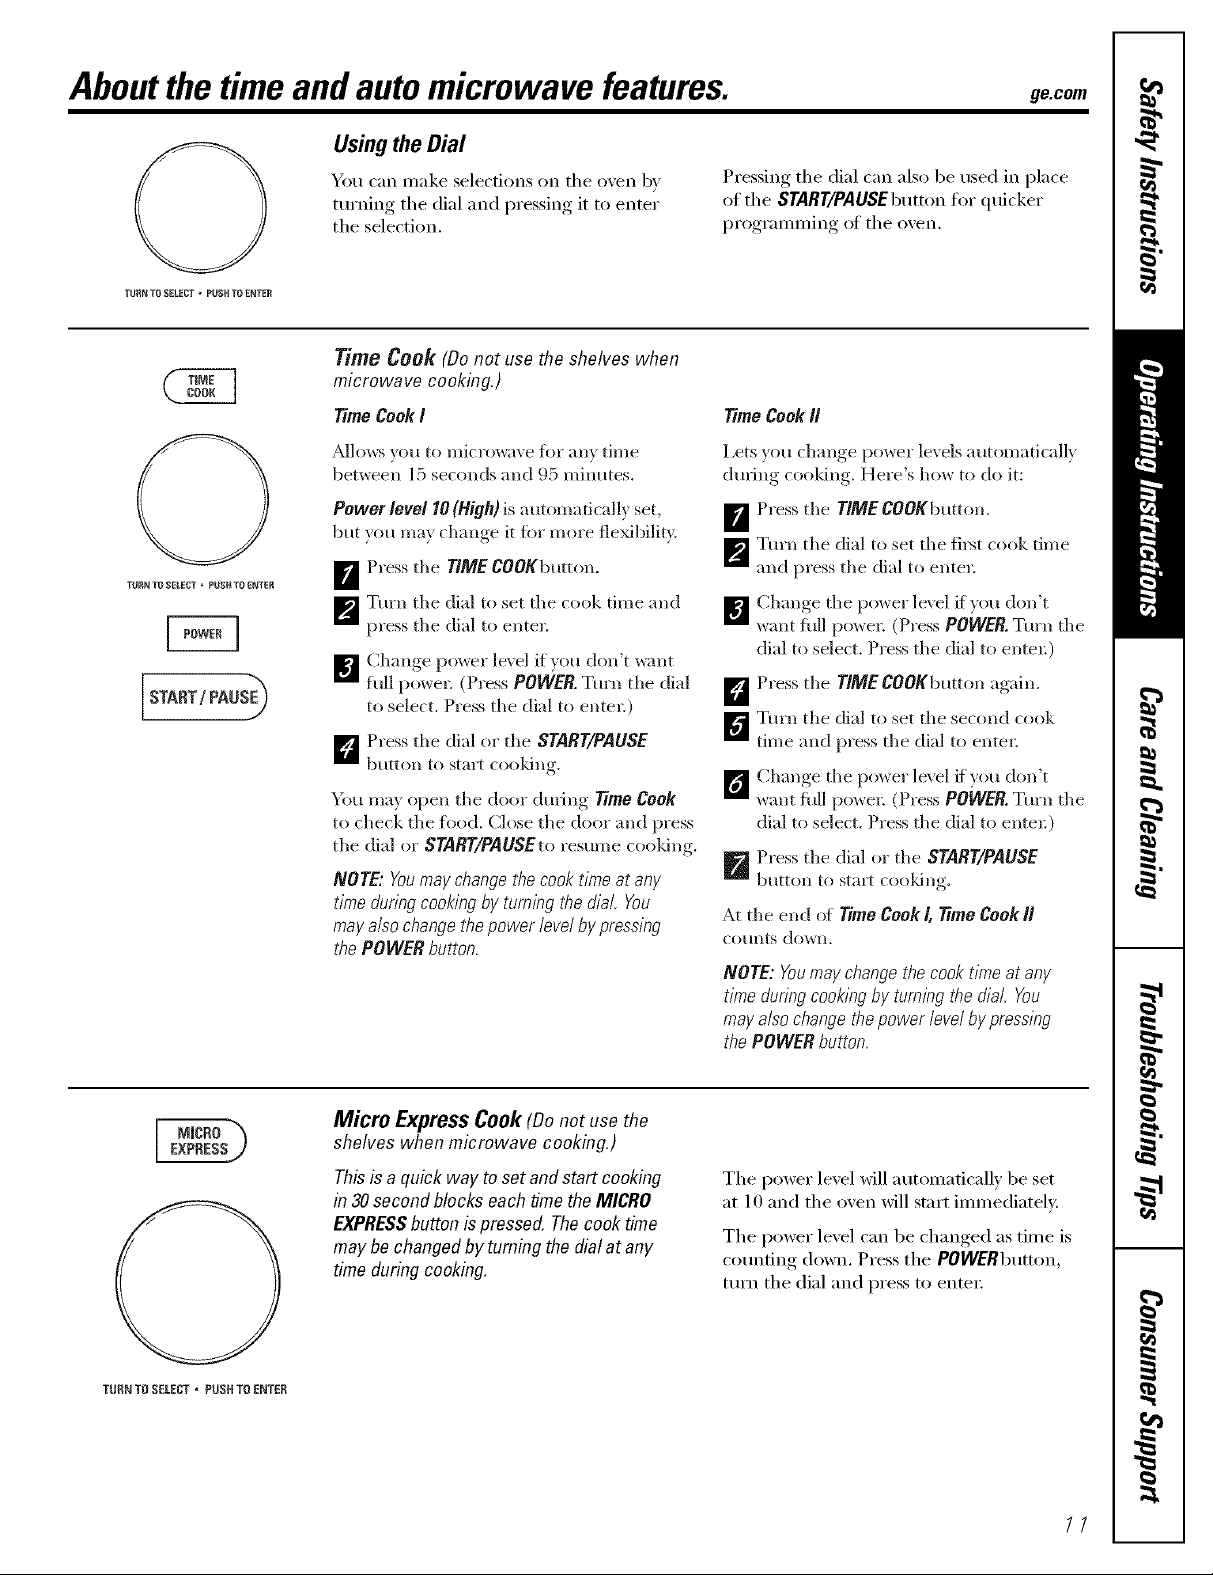
Usingthe Dial
You can make selections on the oxen b',
turning, the dial and l)ressing, it to enter
the selection,
TURN TR SELECT _ PUSH TR ENTER
Time Cook (Donot use the shelves when
microwave cooking.)
TimeCookI
Pressing the dial can also be used in place
of the START/PAUSEbuttonfor quicker
I)r°gramming, , of the oxen.
Time CookII
TURN TO SELECT _ PURUTO ENTER
_6dlows xou to nlicrowave lbr all} time
bep,_een 15 seconds and {)5 I-ainutes.
Power level 10(High) is a utomadcallx set,
but }ou me} change it fin more fleMbilit}
Press the TIME COOKbmton.
m
Turn the dial to set the cook time and
m
press the dial to enter:
]_'l] Change po_er lexel i_vou don't w:mt
full powel: (Press POWER.Turn tile dial
to select. Press the dial to enten)
k_'_ Press tile dial or the START/PAUSE
button to start cooldng.
You may open the door during 17meCook
to check the _bod. (;lose the door and press
the dial or $TART/PAUSEto resume cooldng.
NOTE: Youmay change the cook t/nTeat any
time during cooking by tumlhg the dial You
may also change the power level by pressing
the POWER button,
Lets you change power levels automatically
during cooldng. Here's how to do it:
_ Press the TIMECOOKbmton.
_'_ Turn the dial to set the fi_t cook time
and press the dial to enter=
B Ch'm,,e the power level _fxou don't
*<rot full pox_e_: (Press POWER. Turn the
dial to select. Press the dial to ente*:)
D Press the TlMECOOKbutton again.
_Tm'n tile dial to set the second cook
time and press the dial to enter=
[_ Ch'm,,e the po_er level ff_ou don't
want full powe_: (Press POWER. Turn the
dial to select. Press the dial to entel:)
p_ Press the dial or the START/PAUSE
button to start cooldng.
At the end of Time Cook/, time Cook//
CO/lnts down,
NOTE: Youmay change the cook time at any
time &ring cooking by tumlhg the dial, You
may also change the power level by pressing
the POWER button,
TUI{N T{} SELECT * PUSH TO E_JTER
Micro ExpressCook(Donot use the
shelves when microwave cooking.)
This is a quick way to set and start cooking
in 30 second blocks each time the MICRO
EXPRESSbutton is pressed. The cook time
may be changed by tuming the dial at any
time during cooking.
The power level Mll automatically be set
at 10 and the oven will start immediateh'.
The power level can be changed as time is
counting down. Press the POWERbutton,
ttlrn the dial and press to enter:
//
Page 12

Aboutthe timeandautomicrowave features.
Fast Defrest (Do not use the shelves when
microwave cooking,)
FastDefrost automadcalh' sets the
defl'osting times and power levels to give
even defl'osting results ibrmeats, poult_y
and fish weighing up to one pound.
_ Remove meat from package and place on
microwave-sale dish.
TURN TO SELECT • PUSHTO ENTER
START/ PAUSE_
B Press the DEFROSTbutton once.
_'_ Turn the dial to the food weight,
using the Conxe_ion Guide at fight.
For example, dial ,5 fin" .5 pounds
(8 oz.) Press the dial to enter
_] Press the START/PAUSEbutton to start
defrosting.
D Turn the food oxer if the oxen signals
TURN FOODOVER.
?_:Remove defl'osted meat or shield wam_
areas with small pieces oftoil.
_: _Mier deli'osfing, most meats need to
stand 5 minutes to complete defrosting.
ConversionGuide
If thewel)htof foodisstatedinpoundsand
ounces,theouncesmustheconvertedtotenths
1)ofa pouncL
WeightofFeed EnterFoodWeight
in Ounces (tenthsofa pound)
1-2 .1
3 .2
4-5 .3
6-7 .4
8 .5
9-10 .6
11 .7
12-13 .8
14-15 .9
TURN TO SEEECT - RUSH TO ENTER
Auto Defrost (Be not use the shelves when
microwave cookhTg.)
Lrse Auto Defrost fin- meat, poultry and fish
weighing up to six pounds. Use time Defrost
tk)I" ll/OSt other ti'ozen ti)ods.
Auto Defrost automatically sets the
defrosting times and power levels to give
even defrosting results tot meats, poult_ T
and fish.
iJi::Remoxe meat fl'om package and place
on microwaxe-satb dish.
_ Press the DEFROSTbutton twice.
_'_ Tm'n the dial to the lord weight,
usino the Comersion (;uide at fi ,ht
For example, dial 1.2 fin" 1.2 pounds
(1 pound, 3 oz.) Press the dial to enter:
_ Press the $YARY/PAUSEbutton to start
deti'osting.
F'j Turn the food oxer if the oxen signals
TURN FOODOVER.
::Ji::Remove defl'osted meat or shield w;mn
areas with small pieces of toil.
ConversionGuide
If thewe/)htoffood isstatedinpoundsand
ounces,theouncesmustheconvertedtotenths
1)era poun_
WeightofFood EnterFoodWeight
& Ounces (tenthsofa pound)
1-2 .1
3 .2
4-5 .3
6-7 .4
8 .5
9-10 .6
11 .7
12-13 .8
14-15 .9
12
_: _Mter deli'osting, most meats need to
stand 5 minutes to complete deli'osting.
Imge roasts should stand tot about
30 minutes.
Page 13

'l_JRN TO SELECT , PUSH TO E_TER
START / PAUS_
Time Defrost (Donot use the shelves when
microwave cooking.)
Use time Defrost to defl'ost fin" a selected
length ot time.
B Press the OEFROSTbutton three times.
_'_ Turn the dial to select the time you
want. Press the dial to enter:
[]Press the START/PAUSEbutton to start
defrosting.
D Turn the fi_od o_er if the men signals
TURN FOODOVER.
ge.com
DefrostingTips
?_:Foods frozen in paper or plastic can be
defl'osted in the package. Closed packages
shouM be slit, pierced or vented AFFER
fi_od has partially defrosted. Plastic storage
containers should be partially tmcovered.
::Ji::Famil)_size, prepackaged fl'ozen dim_e_
can be deli'osted and micro_z_ved. If the
food is in a foil containe_; transter it to
a microwave-sale dish.
[B_E_GE i
You may change the defrost time at any
time dining defl'osting by turning the dial.
Power level is automatically set at 3, but can
be changed. You can defl'ost small items
quickly by raising the power level alter
entering the time. Power level 7 cuts the
total defl'osfing time in about half:, power
level 10 cuts the total time to approximately
1/ 3. H_weve_; fi_od will need m ore
fl'equent attention than usual.
A dull thumping noise may be heard
dining defl'osfing. This is nomml when
oven is not operating at HighpoweI:
Beverage (Donot use the shelves when
microwave cooking.)
The BEVERAGEle'ature heats beverages
ti'OIll 6 to 12 otln('es.
Press once tot (3-7 oz.
Press twice fin" 8-9 oz.
Press three times fin" 10-12 oz.
::Ji::Foods that spoil easily should not be
allowed to sit out fin" more than one hour
alter defl'osfing. Room temperature
promotes the growth of hmmflfl bacteria.
_: D)I" inore even deli'osfing of linger foods,
such as roasts, use Auto Defrost. Be sure
lmge meats are completely deflx)sted
before cooking.
_: \_]/en defl'osted, food should be cool
but softened in all areas. If still slightly i%
return to the microwave ve_T brieR 5 or
let it stand a tew minutes.
DnhksheatedwiththeBeveragefeaturemaybe
veryhot Removethecontainerwithcare.
/3
Page 14

Aboutchangingthepowerlevel.
0
TURN TQ $£LEST * PUSHTO ENTEB
START / PAUSE_
Tile power level m;n be entered or
changed immediately otter entering tile
time filr Time Coo& Time Defrost or Express
Cook. Tile power le\ el may also be changed
during time countdown.
[] Filst, tbllow directions tor _me Cook,
_me Defrest or Express Cook.
_'_ Press tile POWERbmton.
]_'1 Turn tile dial c]ock_ise to increase and
countelclockwise to deciease tile power
le\vl, Press tile dial to enter=
_ Press tile SYART/PAUSEbutton to start
cooldng.
Variable power levels add fle_bilitv to
microwave cooldng, Tile power levels on
the l//icrow_lVe oven Call be COl//paI'ed to
tile suntitce units oil a lange. Each power
level gives }_m microwave energy a certain
percent ot tile time, Power level 7 is
Faicrowave energy 70% ot tile time, Power
1eve13 is energy 30% ot tile time. Most
cooldng will be done on High (power level
I01 which gives you 100% poweI: Power level
10 will cook ii_ster but iood may need more
fl'equent stiI_ng, rotating or turning ove_:
A lower setting will cook more evenly and
need less stirring or rotating of tile filed.
Some fl)ods may have betteI navel, texture
or appearance if one ot tile h)wer settings is
used. Use a lower power level when cooldng
fi)ods that have a tendency to boil ovel;
such as scalloped potatoes.
Rest periods (when tile micIowa_v
energy cycles oft) give time fi)r tile filed
to "equalize" or transfbr heat to tile inside
of tile filed. An example of this is shown
with power level3_the defi'ost cycle. If
microwave energy did not cycle ofl_ tile
outside oI tile tbod would cook befiwe
tile inside was def/"osted.
Here are some examples of uses for various
power levels:
High 10: Fish, baron, vegetables, heating
]iqui(ls.
Med-High 7: Gentle cooldng of meat and
poultry; baking casseroles and reheating.
Medium 5: Slow cooking and tenderizing
for steers and less tender cuts of meat,
tow2or3: Defl'ostim," simmering; delicate
sauces.
Warm 1: Kee)ingl, fl_od _<mn; softening,
buttel=
Microwave terms.
Definition
Arcing •_r(im,_is,tile microwaxe teml for sparks in tile oxen. Arcing is caused b_:
:}::_tile metal shelf being installed incorrectly and touching tile microwaxe wails.
_:i!::metal or foil touching tile side of tile oven.
foil that is not molded to filed (upturned edges act like antennas).
? metal such as twist-ties poultry pins gold-rimmed dishes.
_ recycled paper towels containing small metal pieces.
}N tile turntable ring support beino_ inst;flled incorrectly.
Covering Covets hold in moisture, allow fiw more even heating and reduce cooking time. Venting plastic wrap or
co_,elJng with wax paper alleles excess stean/ to escape.
Shielding In a regular oxen, you shield chicken breasts or baked foods to prevent oxe>browning. _Aq/en microwaving,
you use small strips of fi)il to shield thin parts, such as tile ti )s of wings and legs on
cook ben)re larger parts.
Standing _me _'\ hen _ou cook with regular oxens, filods such as roasts or cakes are allowed to stand to finish cooking or
to set. Standing time is especially important in microwaxe cooking. Note that a microwaxed cake is not
placed on a cooling rack.
Venting _Mter coxering, a dish xdth plastic wrap, you lent tile plastic wrap b) turnim*_ back one corner so excess
stean/C_lll escape.
/4
• I , poultry, which would
Page 15

About the sensor microwave features, gocorn
HumiditySensor
What happens when using the Sensor Features:
The Sensor Features detect the increasing humidit_ released (lurhlg cooidng. The oxen
automatically ac!}usts the cooking time to xr_i_)t_S t}])es and amounts of food.
Do not use the Sensor Features twice in succession on the same fi)od po_qtion--it may
result in sex erely o\ ercooked or bm'nt tbod, If fi)od is tmdercooked after the countdown,
use 7"/meCooktbr additional cooldng time.
NOTE"Sensorfeatures wi//notoperatewhentheovenishot. If oneof thesensorcook/bgbuttonsis pressed
when the temperatorebside the ovenis greaterthan 200°F,"OVENTOOHOTFOilSENSOflCOOKING---
USINGALTEflNATEMETHOD"will be displayed Theoven will automatisallychangeto cookby tkne (follow
the directions b the display)or oncethe oven is coolenough,the sensorfeatureswill functionnormally
i# The proper containers and coxets are essential fiw best sensor cooking.
Covered
:_: _dwavs use microwaxe-sate containers and coxer them with lids or xented plastic wrap.
Never use fight sealing plastic containers--they can prexent steam fl'om escaping and
cerise ti)od to oxercook.
Vented
Dry off dishes so they don't mislead
the sensor.
if? Be sure the outside of the cooking containers and the inside of the microwave oxen are
(h T before placing toed in the oxen. Beads of moisture turning into steam can mislead
tile sensoi:
Auto Cook (Be not use the shelves when microwave cooking.)
Because most cooking (-ontaine_ must be covered (huing Auto Cook, this teattu'e is best
with t0ods that VOII want to stealll or i'etain illoistui'e.
NOTE" Use of the metal shaft with Auto Cook is not recommended
Recommended Foods
A wide \miet}' of leeds including meats, fish and vegetables can be cooked
using this timtm'e.
Foodsnot recommended
Foods that must be cooked uncovered, foods that require constant attention, foods that
require addition of ingredients dining cooking and toods calling fi:,r a d_,' look (:,r crisp
surti_ce alter cooking should not be cooked using this ligature. It is best to Time Cook them.
15
Page 16

About the sensor microwave features.
Auto Cool( (Do not use the shelves when
microwave cooking.)
B Place cmered fi)od in the o_en and
close the do(m Press the AUTOCOOK
button. ENTERFOODTYPEappea_ in
the displa).
]Turn fl_e dial to the desired fi)od tf,]_e.
Press to entei:
See the SensorFood Type Guide below for
specific foods and instructions.
The oxen starts immediately:
NOTE: Do not use this feature
twice in succession on the
same food portion--it may
result in severely overcooked
or burnt food.
NOTE"If the door was open while the
control was being set, close the door and
press the START/PAUSE button to begin
cooking.
If food is tmdercooked after the
COtlntdown, rise TimeCooktk)I" additional
cooking time.
Do not open the oven door before the countdown
t/me ls &splayed--steam escaping from the oven
can affect cookingperformance.If the door is
opened,close the door andpressSTART/PAUSE
immedlate/g
If ground meat was selected, the oven II_ r
signal you to drain and stir the nleat. Open
the do())', drain the meat and close the door.
Press the START/PAUSEbummif necessai T
t() I'eStlI//e cooking.
CookingTips
_: \4l_en oven signals and countdown time
is displayed, the door may be opened
for stirring, turning or rotating food.
To resume cooking, close the door and
press SNRT/PAUSE
iJi::Match the amotmt offi)od to the size of
S ccontaine_; Fill containe_ at lea,_t 1/2 fifll.
iJi::Be sm'e outside of container and inside
of o_,en aI'e (lI'_i
!i?: _dter completion of Cook cycle, if fi)od
needs additional cooking, return fi)od to
o',en and use Time Cook to finish cooking.
How toAdjust the Oven'sAutomatic
Settings for a Shorter or Longer Cook Time
(Not available for all food types)
To subtract 10% from the automatic
cookingtime:
Within the ti_t 30 seconds after the oven
starts, turn the dial cotmterclockwise, until
a minus ("-") sign appea_, and press to
enteI:
Toadd 10% to the automatic cooking time.
Within the fi_t 30 seconds after the oven
starts, mrn the dial clockwise, until a i)lus
C+") sign appea_, and press to enteI:
Sensor Food Type Guide
Servings Serving Size
Chicken Pieces 1 to 4 2 to 8
pieces
Fish 1 to 4 4 to 16 oz.
GroundMeat 8 to 32 oz.
(Beef,Pork, Turkey)
Potatoes 1 to 4 8 to 32 oz.
Canned Vegetables 1 to 4 4 to 16 oz.
Fresh Vegetables 1 to 4 4 to 16 oz.
Frozen Vegetables l to 4 4 to 16 oz.
Comments
Use el)long, square or rotmd dish.
Cover with vented plastic wrap.
Use obhmg, SqtlaYe 01" I'Otlnd dish.
Cover with vented plastic wrap.
ILrse round casserole dish. (_iulnble ineat
into dish. Cover with vented plastic wrap.
Pierce skin with fi)rk. Arrange in a
star pattern in center of turntable.
Use microwave-sail _ casserole or bowl.
Cover with lid or vented plastic wrap.
Use microwave-sail _ casserole or bowl.
Add 2 tablespoons water fi)r each serving.
Cover with lid or vented plastic wrap.
Use microwave-safe casserole or bowl.
Follow package instructions for adding
water. Cover with lid or vented plastic wrap.
16
Page 17

Useonlywithprepackaged
microwavepopcornweighflTg
1.5to Z5ounces.
NOTE:Donotusethisfeature
twice in Succession Oll the
same food portion--it may
result in severely overcooked
or burnt food.
Popcorn (Donotusetheshelveswhenmicrowave
cooking.)
To use the Popcorn f_tm_:
B Foll(_ )ackage instructions, using Time
Cook if the package isless than 1.5 ounces
or larger than 3.5 ounces. Place the package
of popcorn in the center of the turntable.
_7_ Press tile POPCORNbutton. The oxen starts
immediatel_
If you open the door while POPCORNSENSOR
is (tispk_yed, an error message will appea_: Close
the (lool; p_ss CLEAR/OFFandbeg4n ag_dn.
If tbod is undercooked after file c()tmtdown, use
Time Cook %r additional cooking time.
9_com
HowtoAdjusttheAutomaticPopcornSettingto
Providea ShorterorLongerCookTime
It you tind fllat the brand of popcorn }_ot,use
tmderpops or (Berpops consiswntl_, p)u can add
or subm_ct 20-30 seconds m the automatic
popping time.
Tosubtract time:
Within tile fir,st 30 seconds _dter the oxen starts,
turn the dial cotmterelock_ise, mltil a mbms
("2') sign _q)pears, tar 20 seconds less cooking
time. Press to enter. Tm'n ag_,dn, [mdl two minus
("_ 2') sig_ls appem; to redt_ce cooking time
another 10 seconds tbr a total of 30 seconds
less time. Press to enter
Toaddtime:
Within tile first 30 seconds _dter the (wen st_lrts,
turn the dial clockwise, [mill a plus C+") sign
_q)pears, t})r an exu'a 20 seconds cooking time.
Press to enter. Turn ag;dn, until Bye plus ("++")
signs _q)peac to add another l0 seconds for a
total]of 30 seconds a(l(liti(m_d time. Press m
ell[Or,
REHEAT
NOTE: Do not use this feature
twice in succession on the
same food portion--it may
result in severely overcooked
or burnt food.
Reheat(Donotusetheshelveswhenmicrowave
cooking,)
Tile Reheat ieature reheats servings of px_viously
cooked foods or a plate of ]efiovex_.
B Place the cup of liquid or coxered
toad in the oven. Press REHEATonce, t_ice,
three times or four times. The o\en starts
immediatelt.
Px_ss once ii)r a plate of ]eflo_ex_.
Px_ss t\_ice for a pasta.
Px_ss three times for 1/2 to l fldl cup.
Px_ss four times for 1 to 2 fldl cups.
_The oxen sigmds when steam is
sensed and the time remaining begins
colmting down.
Do not open file o_en door until tirne
is counting (to_]. If file door is ot)ened,
close it and press START/PAUSEimme(fiatel}.
After removingfoodfromtheoven,stir,ifpossible,
toevenout thetemperature.Reheatedfoodsmayhave
widevariationsin temperature.Someareasof foodma
beextremelyhot.
If food is not hot enoug]l ;dier the countdo_n
use Time Cook for additional reheating tirrle.
SomeFoodsNotRecommendedforUse
WithReheat
It is best to use TimeCookibr these ioods:
N Bread t)ro(hmts.
N Foods that ll/llS[ be reheated m]co_e_(1.
N Foods that need to be stirred or rotated.
N Foods calling for a dr? look or crist) surfilce
after reheating.
HowtoAdjusttheOven'sAutomatic
Settingsfora ShorterorLongerTime
Tosubtract 10%from the automatic
cookingtime:
Within the first 30 seconds after tile o_en starts,
turn the dial counterclockwise, until a mimas
("2') sign _q)pears, and i)_ss to enter.
Toadd 10%tothe automatic cooking time:
Within the first 30 seconds after tile (Ben starts,
turn the dial clockwise, until a t)lus ("+") sign
_q)pears, and l)_ss to enter:
17
Page 18

About the baking and roasting features.
Baldng or roasting uses a heating element to raise tile temperature of the air inside tile
oven. Any o\en temperature fl'om 225°F to 450°F may be set. A tim gently drculates this
heated air throughout tile oven, over and around tile filed, producing golden brown
exteriors and rich, moist interiors. This drculation _ff heated air is called convection.
Correctshelfposition
Incorrect shelfposition
TURN TO SELECT _ PUSH TOENTER
Because tile heated air is kel)t c(mstantlx, moving,, n(/t permittinao a la_"e_" of" cooler all" to
develop al'(/Hlld tile tbod, s(/me f(/(/ds c(/(/k ii_stel" thall ill reg/llar ovell c(/(/]dllg.
For Best Results...
Useoneshelf /e the/owerposition andleaveat leasta 1-/echgap between thecooklbgdl2hand the sidesof
theoven.Fortwo-level cooklbgonly,use both shelves.
Tile shelt is required for good air circulation and exvn browning.
See the Cookware Tipssection for ibformat/enonsuggestedcookware
Bake or Roast with Preheat
_ Press tile BAKEor ROASTbutton.
_'_ Tm'n the dial to set tile oven
temperature and press dial to entel:
Do not enter bake time now. (Tile cook
time will be enteied ]atec after the oven
is preheated.) See tile AutoRecipe TM
Conversion section below.
_] Press the dial or tile START/PAUSE
button to strut I)reheating,.
D \'\qlen the oven is preheated, it will
signal. If _ou do not open tile door
within 1 hotll', tile oven will turn off
automaticall}.
_"_ Open tl_e oven door and, using
caution, place tile food in tile oven.
1_ Close tile oxen door Turn tile dial
to set tile cook time and press tile dial
o, START/PAUSEto stmn: cooldng.
i \'\qlen cooking is complete, tile oxen
will signal and turn off.
NOTE: Youmay,changethe cookt/nTeat any,t/nTe
dunbg cook/bgby tum/eg the dial,
Youmay,changetheoventemperatureatany,t/nTe
&nbg cooklbgby,presslbgthePOWERbutton.Turn
thedialto settheoventemperatureandpressthe
dialtoenter
Towewthecookt/nTeandoventemperaturedunbg
cook/bgpresstheBAKEbutton.
TURN TO SELECT _ PUSH TOENTER
18
Bake or Roast without Preheating
FJ If your recipe does not require
preheating, press the BAKE or
ROASTbutton. See tile Auto Recipe TM
Conversion section below.
_'_ Turn tile dial to set tile oxen
teli/pei'attli'e and press to entei:
_Turn tile dial to set tile cook tilne and
press t() enter
D Press tile dial or tile START/PAUSE
btltton to stnrt tile o;en.
Auto Recipe TM Conversion
\_l/en using CONVECTION BAKE,tile Auto Recipe TM Conversionfeature will automatically
convert entered regular leaking telnperatures to convection leaking telnperamres.
This teature is activated so that the display will show OFFSET ON and the actual converted
(reduced) telnperature. For exalnple, if you enter a regular recipe telnperature of 350°F
and press tile STARTbuttolL tile display will show tile converted telnperamre of 325°E
This ti_ature can be turned off in the OPTIONS inelm. See tile Auto Recipe TM Conversion
Selection in tile About the other features section.
NOTE:If convecfi(n_ baldn_ and tile Auto Recipe Conversionteature is turned off,
o TM
reduce tile oxen telnperature 2: I_ti'oln tile recipe to prexent oxerbrowlfing on tile
top of baked goods.
NOTE:Youmaychangethecookt/Yneat anytime
duringcooklbgbytum/egthedial.
YoumaychangetheoventemperatureatanytlYne
duringcooklbgbypressingthePOWERbutton.Turn
thedialto settheoventemperatureandpressthe
dialtoenter
ToviewthecooktlYneandoventemperatureduring
cooklbgpresstheBAKEbutton.
Page 19

About the Fast Bake feature, gecom
FastBake offers tile best features of microwave energs' and convection cooking. Microwaves
cook food ti_st and convection drculation of heated air browns fi)ods beaufiflfllv. Any oven
temperatm'e fl'om 925°F to 450°F may be set.
L/
Correctshelfposition
Incorrect shelfposition
For Best Results...
Useoneshelf in the lower position and leaveat least a l-inch gap between the cooking dishandthe sidesof
the oven.Fortwo-level cookingonly,useboth shelves.
Tile shelf is required fin" good air circulation and even browning.
See the Cookware Tips section for information on suggested cookwara.
See the Best Method of Cooking section to determine the which foods areappropriate tocook
using FastBake.
Fast Bake with Preheat
TIJR_ TO SELECT . ptl$}{ TO E_TER
START/ PAUSE_
B Press tile FASTBAKEbutton.
_'J Tm'n tile dial to set tile oxen
temperatm'e and press dial to enter.
Do not enter FASTBAKE cook time
now. (Tile cook time will be entered
late_, after tile oxen is preheated.)
_ Press tile dial or tile START/PAUSE
button to start preheating.
L_ xA hen the oxen is preheated, it will
signal. If you do not open tile door
within 1 horn, tile oxen will tm'n off
a utomaficallv.
|r_ Open tile oven door and, using
caution, place tile toed in tile oxen.
_ Close tile oven dora: Tm'n tile dial to
set tile cook time and press to enter
Press tile dial or tile START/PAUSE
button to start cooking
_"_ _'_hen cooking is complete, tile oxen
will signal and turn off.
Fast Bake without Preheat
B If )our re(ipe does not require
I)reheating,, press tile FASTBAKE
btltton.
_p_ Turn tile dial to set tile oxen
ten/perature and press to entel:
_Turn tile dial to set tile cook time and
press to entel:
D Press tile dial or tile START/PAUSE
1)tlt[()ll to start tile oxell.
NOTE:Youmaychangethecooktimeat anyt/}ne
duringcookingbyturningthecMI.
Youmaychangetheoventemperatureand
microwavepowerlevel atanytimeduring
cookingby pressingthePOWERbutton. Tomthe
cMIto set theoventemperatureandpressthe
d/alto enter.Then,turnthed/altosetmicrowave
NOTE: Youmay change the cook time at any time
during cooking by turning the dial
Youmay change the oven temperature and
microwave power level at any time during
cooking by pressing thePOWER button. Turnthe
dial to set the oventemperature and press the
dial to enter. Then, turn the d&/ to set microwave
power level 1through 4 andprass the dial to
enter. The default power level is 4.
Toview the cook time and oven temperature
during cooking press the FAST BAKE button.
_: Check tile Cookware tips section fin.
correct cookware when using FastBake.
::Ji::Do not use metal cookware with
FastBake.
::Ji::Reduce tile recipe cook time by 25%.
::Ji::See tile Best Method of Cooking section
to detemfine tile which leeds are
appropriate to cook using Fast Bake.
power level 1through 4 andprass the dial to
enter. The default power level is 4.
Toview the cook time and oven temperatura
during cooking,prass the FAST BAKE button.
NOTE"
::Ji::Some recipes call fin" preheating.
_: Check tile gookwaro 7/ps section fin.
correct cookware when using Fast Bake.
_: Do not use metal cookware with
FastBake.
_Ji::See tile Best Method of Cooking section
to detemfine tile which leeds are
appropdate to cook using FastBake.
::Ji::Reduce tile recipe cook time by 25%.
19
Page 20

Cookware tips.
ConvectionBake or Roast
MetaJ Pmls are x'ecomn/ended fin" all types of baked products, but especially where
browning is important.
Dark or dull finish metal pans are best fin" breads and pies because they absorb heat and
produce crisper crust.
Shinv ahlnlinunl pans are bettor for cakes, cookies or inttflins because thev reflect heat
and help produce a light tender crust.
Glass or Glass-Cermnic casserole or baking dishes are best suimd tot egg and cheese
recipes due to the cleanabili_' of glass.
CombinationFastBake
Glass or Glass-Cermnic baking containex_ are recommended. Be sure not to use items with
metal trim as it may cause arcing (s.I)arkin'"_ with o'_en wall or oxen shelf. This can damage
the cookware, the shelf or the oxen.
Heat-Resistaut Plastic microwaxe cookware (sate to 450 °F) mar be used but it is not
recomlnended fin" foods i'e(luifim*_ all-arotmd browning, because the plastic is a poor
condHctoi" of heat.
Convection Bake Combination
Microwave
or Roast Fast Bake
Heat,Resistant Glass, Glass,Ceramic '_s 5,_s
® ® ®
(Pyrex , Fire King , Coming Ware , etc.)
Metal No _e.•s No
Microwave-SafePlastics _s No _s*
Plastic Films and Wraps _s No No
Straw, Wicker and Wood _s No No
Use only microwave cookware that is safe to 450°E
_s
No No No
_s No No
2O
Page 21

Select the best method of cooking, gecom
Use the folio wing guide to select the best method of cooking. Recipes can be adapted using the guidelines below to
determine the appropriate cooking mode.
Foods Microwave Bake Roast FastBake
Appetizers
Dips and Spreads ,/
Pastry Snacks ,/ v" v"
Beverages ,/
SaucesandToppings v"
SoupsandStews v"
Meats
Defrosting ,/
Roasting v" v"
Poultry
Defrosting ,/
Roasting v" v" ,/
Fishand Seafood
Defrosting ,/
Cooking ,/ v" v"
Casseroles v" ,/ v"
EggsandCheese
Scrambled, Omelets v" ,/
Quiche, Souffle v" v"
Vegetables,(fresh) v"
Breads
Muffins, Coffee Cake ,/ ,/
Quick v"
Yeast v"
Desserts
Cakes,Layerand Bundt v"
Angel FoodandChiffon ,/
Custardand Pudding v"
Bar Cookies ,/ v"
Fruit v"
Pies and Pastry v"
Candy v"
BlanchingVegetables v"
FrozenConvenienceFoods v" ,/ v"
Recipe conversions.
CombinationFastBake
WhenusingCOMBINATIONFASTBAKE,reducerecipecooktimeby25°/o.
For Example: A recipe states to cook a roast fin" 60 minutes at 400°1'2
60 ininutes x 0.95 15 ininutes saved
So the new cook time in FASTBAKEmode will be:
60 minutes- 15 minutes 45 minutes.
2/
Page 22

Abeut the warming feature.
The WARM feature will keep hot, cooked ioods at ,servino_temperature. ,Mx_a_s, start _ith
hot tbod. Use cookware and utensils that cml _dthsmnd ten/peratHres tip to 230°E
For Best Results...
Correctshelfposition
Incorrect shelfposition
WARM
TURN TO SELECT • PUSH TO ENTER
Alwaysusetheshelfinits "low"pos/t/onwhenwarming.Theshelfisrequiredforgooda/rc/rculat/onand
evenwamT/ng
SeetheCookware Tipssectionfor/nfomTat/ononsuggestedcookware.
F_ Press the WARM button.
_'_ Turn the dial to select the oxen
temperature. See the chart and tips
belong: Press the dial to enter:
I,OW 150°F
MEDIUM 170°F
HIGH 210°F
_j Press the dial or the START/PAUSE
b/itton 1o start WaIIl/ing.
Temperature Selection Chart
If the oven door is opened dining wamfing,
PAUSEwill appear in the display. Close the
door and press START/PAUSE.
ToCrisp Stale Items:
_ Place toed or dishes directly on the shelf
in the low position.
!i( Use LOWsetting.
_: Check crispness after 45 minutes.
Add time as needed.
Control Setting Moist/Crisp
Bread, Hard Rolls Medi um Crisp
Bread, Soft Rolls MedJ um Moist
Casseroles Medi um Moist
Fried Foods High Crisp
Meats _ and Fish Medi mn Crisp
Pancakes, Waffles High Crisp
Pizza High Crisp
Potatoes, Baked High Crisp
Potatoes, Mashed Medi um Moist
Poultry High Moist
Tortilla Chips Low Crisp
Vegetables MedJ um Moist
USDA/FSIS recommends an internal temperature of 145°Fas the minimum aloneness for bee_
Use a portable meat flTermometer to check internal temperatures.
Tips for Crisp Foods:
::Ji::I,eave fi_o(l uncovered.
::_)::Do not rise plastic containers or
plastic wrap.
TipsforMoistFoods:
::Ji::Cover toed with lid or almnimm/ fifil.
::Ji::Do not rise plastic containe_ or
plastic wrap.
22
Page 23

About the other features. 9eco,,
H0/p
The HELP button displa):s teatm'e
infimnafion and helpflll hints.
Press HELP, then turn the dial to select
a teature and press the dial to enter:
TURN TUSELECT * PUSff TO ENTES
Cooking Complete Reminder
TURN TO SELECT " PUUHTO ENTER
To remind you that you haxe fi)od in the
oxen, the oxen will display YOURFOODIS
READYandbeep once a minute until you
Resume
The cooking program just used stays in
memory fi)r 5 minutes. _Mter that vou will
need to begin the program again. To ttlrn
this option off; see the More TimeMessage
section.
B lf )ore" fi)od needs to cook a bit longe_;
you can restart the oxen by pressing
theSTART/PAUSEbutton or selector dial.
Clock
Press to enter the time of da} or to check
the time (>f da? _dfile cooking,
B Press the CLOCKbutt(m.
_'_ Turn the dial t(> set horns. Press the dial
to ellteE
B Turn the dial to set minutes, Press the
dial to enter.
either open the oxen door or press the
CLEAR/OFFbumm.
_RESUMECOOKINGMll be displayed and
the oven will restart immediately at 10%
of the original time.
_Turn the dial to select _JM or PM.
Press the dial t() enter.
START/PAU@
CLEAR/ OFF I
CLEAR/ OFF ]
Start/Pause
In addition to starting manv flmctions,
START/PAUSEallo_vsyou to stop cooking
without opening the door or clearing the
display.
Clear/Off
Press the CLEAR/OFFbutton to stop and
cancel cooking at any time.
ChildLock-Out
You may lock the control panel to prevent
the oxen fl'om being accidentall_ started or
used l)_ children.
To lock or mflock the controls, press and
hold the CLEAR/OFFbutton fi)r about three
seconds. When the control panel is h)cked,
CONTROLLOCKEDwill be displayed briefly
anytime a button or dial is pressed.
23
Page 24

About the other features.
Auto Nite Light
TURN TO SELELq"* PUOHTO ENTER
The AutoNite Lightcan besetto come on
and go off at desired times.
_r_ Press the OPTlONSbutton and turn the
dial to select AUTO NITE LIGHT Press the
dial to enter.
_'_ Tm'n the dial to select SET TIMES. Press
the dial to enter:
m Enter the time of (la)fi)r the light to
come on by turning the dial to select
the houi; minutes and _'1 or PM. Press
the dial to enter after each selection.
Bake Temp.Adjust
Use to set the oven to automaticall)' at!just
set temperatures by 5, 10, 15, 20 or 25
degrees.
_ Press the OPTIONS button and mrn the
dial to select BAKE TEMPADdUST Press
the dial to entex:
D Enter the time of day for the light to
go off by tm'ning the dial to select the
hem; minutes and _AA4or PM. Press the
dial to enter after each selection.
NOTE: TheNITEindicator will be fit wheneverthe
nite h_ht is set tooperate.
To review the nite light settings, mrn
the dial to select REVIEW SETTINGS after
selecting the Auto Nite Light option. Press
the dial to entex:
To clear the nite light settings, turn the
dial to select CLEARSETTINGSafter selecting
the Auto Nite Light option. Press the dial
to enteE
Beeper Volume
The beeper sound level can be a(!justed.
_F_ Press the OPTIONS button and turn the
dial to select BEEPER VOLUME. Press the
dial to enter.
_'_ Ttu'n the dial to select mute to h)ud.
Press the dial to enter:
TURN TO RELECT o PUONTO ENTER
0
TURN TO SELECT * PUOHTO ENTER
O
TU_{NT8 SELECT _ PUOH TFi ENTER
_'_ Tm'n the dial to select NO CHANGE, 5,
10, 15, 20 or 25 degrees and press to
enter,
Auto RecipeTM ConversionSelection
_4]/eil ON the oven will automatically
convert entered regular baking
temperatm'es to convection baking
temperatures. See Auto Recipe TM Conversion
in the About the baking and roasting features
section.
_ Press the OPTIONS button and turn
the dial to select OFFSET. Press the dial
to enter,
_'_ Turn the dial to select CONVECTION
BAKE TEMP OFFSET-ON/OFF and press
1o enter,
DisplayON/OFF
Use to turn ",our clock displa) on or off.
B Press tile OPTIONS button and tm'n the
dial to select DISPLAYON/OFF.Press the
dial to enter;
_'_ Tm'n the dial to select ONo_ OFF. Press
the dial to enter_
NOTE:TheMUTEindicatorwill belit wheneverthe
beepervo/umeissettomute.
Display Language
The language tbr the ,scrollim,_ (lispla,_ can
be set to either English or Spanish.
B Press the OPTlONSbutton and mrn the
dial to select DISPL4YL4NGUAGE Press
the dial to entex:
_'_ Ttn'n the dial to select ENGLISHor
SPANISH. Press the dial to entex:
Display Speed
The scroll speed of the (lisplax can be
ch:mged,
B Press tile OPTIONS button and mrn tile
dial to select DISPLAY SPEED Press the
dial to enter_
_'_ Tm'n the dial to select slowest to fi_stest.
Press the dial to entel:
24
Page 25

ge.com
TUB_JTOSELEL'T * PUSH TO ENTER
Measures
Measurements can be set to display in
Defimlt (English) or metric.
m Press the OPTIONS button and turn the
dial to select MEASURES. Press the dial
to entei:
_/_',_Tm'n tile dial to select DEFAULT())"
METRIC and press to ente):
Surface Light
Press SURFACELIGHT (mce fin" bright light,
twice tOT the night light or a third time to
tt)Y)l tile light t)fl_
Timer
Tile Timer operates as a minute timer and
can be used at any time, exert when tile
o_,en is ol)erating,.
B Press tile TiMERbutton.
_'41 Tm'n tile dial to select tile minutes.
Press tile dial to ente):
More TimeMessage
_dter cooking is complete, a message Ean be
displayed giving you the option to cook the
toed longer at the same settings. See the
Resumesection.
B Press tile OPTIONS button and turn tile
dial to select MORE TIME MESSAGE.
Press tile dial to ente):
_I_'_Turn tile dial to select MESSAGE ON or
OFFand press to enter.
Tocancel, press the TIMERbutton.
_]/en time is up, tile (wen will signal.
To tt)Y)lOff' tile fi)ner signal, press TIMER.
NOTE:TheTIMERindicatorwi//belit whilethe
timeris operating.
THRR TO SELECT - PUSHTO ENTER
THRN TO SELECT= pUSH TO ENTEH
VENT FAN ]
_,"] Tm'n tile dial to select tile seconds.
Press the dial to enter
D Press tile dial or TIMERto start.
TurntableOn/Off
For best cooking results, leaxe tile turntable
on. It can be turned off fi)r large dishes.
Press tile TURNTABLEON/OFFbutton.
_p'J Turn tile dial to select ON or OFF.
Press tile dial to ente):
Vent Fan
Tile vent tim removes steam and other
v;IpOlN J[l'Ol// Stll_ilce cooking,
Press VENTFANonce fi>r high tim speed,
twice fi)r medium tim speed, three times tOT
low tim speed (n a fi>m_h time t(>turn tile
tim off.
NOTE."TheFAN/nd/katorwill behtwhile
thefanisoperating.
Sometimes tile turntable can become too
hot to tot)oh.
Be carefld touching tile turntable dtwing
and alter cooking.
Automatic Fan
An automatic tim _bamre protects tile
microwave ti'om tot) much heat vising fi'om
tile cooktop below it. It automatically turns
on if it senses too much heat.
If you have turned tile tim on you may find
that you camlot turn it ore The tim will
automatically turn off when the internal
pa)*s are cool. It may stay on fix)"30 minutes
or illole aiter tile cooktop and microwave
CHilli'HIS are ttlrlled o_
25
Page 26

Careandcleaning of the oven.
=
Helpful Hints
An o(casion_d thorou-h,_ wii)ing, _ith a s(dution of b;ddng soda
and water keeps the inside fi'esh.
Be sure the power is off before cleaning any part of this oven.
How to Clean the Inside
Walls, Floor, Inside Window, Metal and Plastic Parts on the Door
Some sl)atte_ can be remoxed with a paper towel; othe_ may require a damp cloth.
Remoxe oreas_ _)atte_ with a sudsy cloth, then rinse with a dam ) cloth. Do not use
abrasi',e cleane_ or shaq) utensils on oxen walls. I
Never use a commercial oven cleaner on any part of your microwave.
Removable Turntableand TurntableSupport
To prevent breakage, do not pla(e the turntable into water just after cooking. Wash it
carefully in warm, sudsy water or in the dishwashen The turntable and support can be
i
broken if dropped. Remember; do not operate the oven in the microwave mode without
the turntable and support seated and in place.
Shelves
Clean _ith mild soap and _ater or in the dish_ashe_:
Donot clean in a self-cleaning oven.
How to Clean the Outside
We recommend against using cleaners with ammonia or alcohol, as they can damage
the appearance of the microwave oven. If you choose to use a common household
©
cleaner, first apply the cleaner directly to a clean cloth, then wipe the soiled area.
Case
Clean the outside of the microwaxe with a su(ls_ cloth. Rinse and then oh)'. _4ipe the
window clean with a damp cloth.
ControlPanel
_4ipe with a damp cloth. Dry thoroughly. Do not use cleaning spra}s, large amounts of
soap and water; abrasixes or shaq) objects on the panel--they, can dama_,e it Some paper
towels can also scratch the control panel.
DoorPanel
Before ('leaning the ti'ont door panel, make sure you know what _:l)e of panel you have.
Reter to the eighth digit of the model number. "S" is stainless steel, "i," is CleanSteel and
"B", "W' or "C" are plastic colo_.
26
Stainless Steel
The stainless steel panel can be cleaned with Stainless Steel Magic or a similar product
using a clean, soft cloth. Apply stainless cleaner carefully to avoid the surrounding plastic
i)art,_;. Do not rise appliance wax, polish, bleach or prodtlcts containing chlorine on
Stainless Steel finishes.
Page 27

go.corn
CleanSteel
Use a clean, soft, light and lightly dampened ch)th, then dry thoroughly. Do not use
appliance wax, polish, bleach or products containing an_ chemical agent on the CleanSteel
S//I'_il ces,
Plastic ColorPanels
Use a clean, soil lightly (lampened cloth, then (h y thoroughly.
Door Seal
It's important to kee I) the area clean where the door seals against the microwave. Use only
mild, non-abrasive detergents applied with a clean sponge or soft cloth. Rinse well.
Bottom
Clean off the grease and dust on the bottom often. Use a solution ot wam_ water and
(lete_gent.
Replacingthelight bulb.
Cooktop L_ght/Nite Light
Replace with a 120 volt, 40 watt (max.) halogen
bulb. Order WBOSXIO051 from your GE supplier.
Remove screw.
F_To replace the cookto l) light/hire light,
first discomlect the pox_er at the main
fuse or circuit breaker panel, or pull
the plug,
_'_ ]_.emox e the scre*_ fl'om the side of the
light compamnent cover and lo_er the
cover until it stops.
_jBe sm'e the btdb is cool befiwe
removing. Break the adhesi* e seal
17}genfl_ unscreMng the bull).
_ Screx_ in the ne*_ bull), then raise the
light coxer and replace the screw.
Com_ect electl_ical po_er to the o\en.
27
Page 28

Aboutthe exhaustfeature.
Charcoalfilter (onsomemodels).
i,
Reusable vent filters
(onall models).
Vent Fan
The vent tim has two metal reusable
vent filte_.
Models that recirculate air back into the
l'O01// illSO Hse ;I chal'CO;l] filteE
Reusable Vent Filters
The metal filte_s trap grease released by
foods on the cooktop. They also prevent
flames fl'om fi)o(ls on the cooktop fl'om
damaging the inside of the oven.
Removingand CleaningtheFilters
Toremove, slide them to the rear usino the
tabs. Pull down and out.
To clean the vent filte_, soak them and
then swish arotmd in hot water and
detergent. [)on'[ tlse _lli/iilOili_l oi" _liilii/oili_l
products because they will darken the
metal. Light brushing can be used to
remove embedded dirt.
For this reason, the filte_s must always be
in place when the hood is used. The vent
filte_s should be cleaned once a month,
or as needed.
Rinse, shake and let dry befi)re replacing.
Toreplace, slide the filtex_ into the fl'ame
slots on the back of each opening. Press up
and to the fl'ont to lock into place.
28
Page 29

Charcoal Filter
ge.com
Remove2 grille screws toremove
the grille.
___.__.___1 LI '-
The charcoal filter cannot he cleaned. It must
be replaced. Order Part No. WBO2XI0943 from
your GEsupplier.
1_the model is not vented to the outside,
the air will be recirculated through a
disposable charcoal filter that helps
reli/(Ne smoke and odoi_.
ToRemovethe Charcoal Filter
To remove the charcoal filter, first disconnect
power at the main fl_se or drcuit breaker;
or pull the plug. Remo_ e the top grille
by removing the two screws that hold it
in place.
Youmay need to open the cabinet doors to
remove the screws.
ToInstall the Charcoal Filter
The charcoal filter should be replaced
when it is noticeably dirty or discolored
(usually after 6 to 12 months, depending
on usage). See "Optional/<its," page 7,
flw more infimnation.
Lift the filter at the bottom until it
comes fi'ee of the tabs. Slide the filter
do_+n and OUt.
Toinstall a new charcoal filter, rein oxe
plastic and other outer wrapping fl'om the
new filtei;
Insert the top ot the filter up and into the
grooves on the inside of the top opelfing.
Push the bottom ot the filter in until it rests
in place behind the tabs.
29
Page 30

Beforeyoucall forservice...
Troubleshooting -tips
Save time and money! Review the charts on the following
pages first and you may not need to call for service.
Possible Causes
Ovenwill notstart
Controlpanel lighted, Door not securely closed. • ()peu the door aIld close sectu'elv.
yet oven will not start
A fuse in your home may be
blown or the circuit breaker
tripped.
Power surge. • Unplug tile mi('ro_lve oven, then l)lug it back in.
Plug not fully inserted into wall • Make sure the 3-l)roug plug on the oven ix hilly inserted
outlet, into _zdl outlet.
Door not securely closed. • Ol)eu the door and close securely.
What ToDo
• Replace fuse or reset circuit breaker;
START/PAUSEbuttonnot pressed • Press START/PAUSE.
after entering cooking selection.
Another selection entered • Press CLEAR/OFF
alreadyin ovenandCLEAR/OFF
hutton not pressed to cm_cel it.
Cooking time not entered after • Make sure rot! have entered (()okh_g time after l)ressiug
pressing TIMECOOK TIMECOOK
CLEAR/OFFwaspressed • Reset cooking program and press START/PAUSE.
acddentally.
Food weight not entered after • Make sure VOt! have eutered fi)od weight after selecting
selecting AUTODEFROSTor AUTODEFROSTor FASTDEFROST
FASTDEFROST
Food type not entered after • Make sure you have entered a food b])e.
presshag AUTOCOOK
CONTROLLOCKED The control has been locked. • Press and hold CLEAR/OFFfor about 3 seconds
appears on display to uuh)ck the control.
OVENTOOHOTFOR
SENSORCOOKING--
USINGALTERNATE
METHODappears
One of the sensor cookhlg
buttons was pressed when the
temperature inside the oven
was greater thm_ 200°E
• These teattu'es will not operate when the (wen is hot.
The oven will automatically change to cook by time
(fi)llow the directions in the display) or once the oven is
cool enough, the sensor tbatures will fiulcfion nonnallv.
ondisplay
Floorofthe oven is warm The cooktop light is located • This is nomml.
evenwhentheovenhas below the oven floor. When
oot been used light is on, the heat it produces
may make the oven floor get wm'm.
You hear an unusual You have tried to chm_ge • Many of the oven's tFattu'es are preset and
Iow-tonebeep the power level when it is cannot be chan ,ed
not allowed.
Oven emits a smoky odor Oils on the staJ_ess steel cavity • This is noxmal.
and gray smoke after axe burning off after using the
using the Bake feature Bake feature the fh-st few times.
30
Page 31

gacom
Possible Causes
Foodbrownsontopmuch Rack has been placed in the
faster than on the bottom "high" position.
Oven temperature The cooking dement cycles * This is n(mnal.
What ToDo
• _Mwavsuse the rock in its "low" position.
fluctuatesduringcooking on and off to man" ltain the
oven telnperature at the
desired setting.
Vent tan comes on The vent fan automatically turns * This is nomml.
automatically on to protect the microwave if it
senses too much heat rising from
the cooktop below.
During Bake, Roast or Fast Bake * This is nomml.
(after preheating), the vent fan
will automatically come on to
cool the oven components.
SENSORERRORappears When using a Se_lsor feature, * Do not open door until steam is sensed and dine
on the display the door was opened before is shown (ounfing down on the display.
steam could be detected.
Steam was not detected in a * Use TimeCook to heat fi)r more time.
maximum amount of thne.
37
Page 32

Beforeyou call for service...
Things That Are Normal With YourMicrowave Oven
::Ji::Moisture oil the oven door and walls
while cooking. _4'ipe the n/oisture off
with a paper towel or soft cloth.
::Ji::Moisture between the ()veil door
panels when cooking certain foods.
Moisture should dissipate shortly afier
cooking is finished.
_: Steani or vapor escaping fl'oni around
the dooI=
iJi::I,ight reflection around door or
(I/Iter case,
::Ji::Dinnning ()veil light and change in
the blower sound at power levels other
than high.
_: Dull thuInping sound while ()veil is
operating.
::Ji::The vent thn operating while the
inicrowave is operating. The vent tan
will not go oft nor can it be ttli'ned ott'
until the niicrowave is off.
::Ji::TV-radio interterence inight be noticed
while using the niicrowave, Siniilar
to the interference caused by other
sInall appliances, it does not indicate a
problein with the inicrowave. Phig the
inicrowave into a different electrical
circuit, inove the radio or TV as tar
away fl'oni the inicrowave as possible
or check the position and signal of
the TV/radio antenna.
32
Page 33

GE Service Protection Plus rM
GE, a name recognized _x(wldwide fbr quality and dependability, offers you
Service Protection Plus'"--comprehensive protection on all your appliances--
No Matter What Brand!
Benefits Include:
• Backed by GE
• All brands covered
• Unlimited service calls
• All parts and labor costs included
• No out-of-pocket expenses
• No hidden deductibles
• One 800 nmnber to call
You _ill be completel} satisfied x_ith our service protection or }on ma} request }our mone} back
on the remaining value of your contract. No questions asked. It's that simple.
Protect your refl'igerator, dishwasher, washer and d_Ter, range, TV_ VCR and much more--any brand!
Plus there's no extra charge _k)r emergency ser',ice and low monthly financing is available. Even icemaker coverage
and _bod spoilage protection is offered. You can rest easy, knowing that all your valuable household ])Fodtlcts are
protected against expensive repairs.
Place ,our confidence in (;E and call us in the U.S. toll-free at {$UU.DZD.ZZZ_
foF I//ol'e illfOFI//atioIl.
*MI b_;ulds co_<led, up to 20 y<al3 old, in Ih< continental U.S.
We'll CoverAny Appliance.
Anywhere. Anytime.*
Please place in envelope and mail to:
General Electric Company
Warranty Registration Department
P.O. Box 32150
Louisville, KY 40232-2150
33
Page 34

Consumer Product Ownership Registration
Dear Customer:
Thank you tbr purchasing our product and thank you for placing your confidence in us.
VVe are proud to haxe you as a customer'.
Follow these three steps to protect your new appliance investment:
Important: If you did not get a registration card with your
................................................................................................... _,-- (Mr h(r(
Consumer Product Ownership Registration
Complete and mail
your Consumer
Product Ownership
Registration today.
ttaw' tim peace of
mind of knowing wc
Call colltact VOl/ ill
tile tmlikely event of a
satiAy modification.
Alter mailing the
registration below,
store this docmnent
ill a sati' place. It
contains inlkmnation
you will need should
you require service.
Our selwice number is
800.GE.CARES
(800.432.2737).
Model Number Serial Number
I I I
product, detach and return the form below to
ensure that your product is registered, or register
online at ge.com.
Read your Owner's
Manual carefilllv.
It will help you
operate your lle'*_
appliance properly.
@ Model Number Serial Number
M_ Ms. M1_,. Mi,_s
Fir"l I I Lasll
Name I I I I I I I I I Nain(! I I I I I I I I I I I I
_11-( (!1 I
Addr(ss I I I I I I I I I I I I I I I I I I I I I I I I
I I I I I I E-lnailAddress ,_:
Nulnl)erl I I I-I I I I-I i i i I
* Please provide your e-mail address to receive, via e-mail, discounts, special o[tk,l-, and other
important COlnmunications trom (;E Appliances (GEA).
[ Check here if wm do not want to receive communications ti-om GEA's careflflly selected
p_lrtllers.
FAILI JRE TO COMt)IA_TFI_2AND RETI JRN TIIIS CARD DOES N(YI' DIMINISII h_)[ R
"_LXRRAN'IY RIGIfFS.
For more intormation about GEA's prixacy and data usage policy, go to ge.com and click on
'Pri_acy Poli(T" or (:all 800.626.2224.
I _,,_,,I, 1 ,:ode '' I , I
t)holl(
zipI
1)me P[aced
34
Apt. # I i i
(;i,,I I I
In Use III
Monlh
GE Consumer & Industrial
Appliances
General Electric Compang
Louisville, KY40225
ge.com
I
Page 35

GEMicrowave Oven Warranty.
All warranty service provided by our Factory Service Centers,
or an authorized Customer Care®technician. Toschedule service,
on-line, 24 hours a day, vis# us at ge.com, or calI SOO.GE.CARES
(800.432.2732k Please have serial and model numbers available
when callin(, for service.
GE Will Replace:
One Year Anypart(>f the microwaxe oxen which tifils due to a defect in materials or w()rkmanship.
Fromthedateof the During this limRedone-yearwarranty,GE will alsoprovide, free ofcharge,all labor and related
origina!purchase serxice to replace the delbcti',e part.
Five Years The magnetron tube, if the magnetron tube tifils (lue to a defect in materials or workmanship,
From the date of the During this five-year limited warranty, you will be responsil)le fi)r an) labor or in-home
originalpurchase set\ ice costs,
::Ji_:Service trips to your home to teach you how to use
the product.
!i_ Improper installation, delivery or maintenance.
!i/_ Product not accessible to provide required service.
::Ji_:Failure of the product or damage to the product if it is
abused, misused (for exmnple, cavity arcing from wire
rack or metal/foil), or used for other than the intended
purpose or used commercially.
iJi::Replacement of the cooktop light bulbs.
iJi::Replacement of house fuses or resetting of circuit
breakers.
!i/_ Dmnage to the product caused by accident, f'we, floods
or acts of God.
!i_: Incidental or consequential dmnage caused by possible
defects with this appliance.
_';_:Dmnage caused after delivery.
Staple your receipt here.
Proof of the original purchase
date is needed to obtain service
under the warrantz
EXCLUSION OF IMPLIED WARRANTIES--Your sole and exclusive remedy is product repa# as provided
in this Limited Warranty, Any implied warranties, including the implied warranties of merchantability
or fitness for a particular purpose, are limited to one year or the shortest period allowed by law.
This warranty is extended to the original purchaser and any succeeding owner for products purchased for home
use within the USA. If the product is located in an area where service by a GE Authorized Servicer is not available,
you may be responsible for a trip charge or you may be required to bring the product to an Authorized GEService
Location for service. In Alaska, the warranty excludes the service calls to your home.
Some states do not allow the exclusion or limitation of incidental or consequential damages. This warranty gives
you specific legal rights, and you may also have other rights which vary from state to state. Toknow what your
legal rights are, consult your local or state consumer affairs office or your state's Attorney General
Warrantor: General Electric Company. Louisville, KY 40225
II
35
Page 36

ConsumerSupport.
GEAppliancesWebsite ge.com
Have a question o_ need assistance with your ;q:_pliance? Try the GE Appliances Website 24 hom_ ;i day,
any day of the year'. For greater comvnience and fhster se_Mce, pm can now download ()wner's Manuals,
order parts, catalogs, or e\ en schedule se_Mce on-line. You can also "_a_skOur Team of Experts .....
your questions, and so l/](lCll l//ore._
ScheduleService
Expexl GE repair service is onl) one step awa} fl'om }our doo_: Get on-line and schedule xour serx]ce at
xour, convenience 24 hom_ an} da? of the }ear! Or call 800.(;E.(;_M_ES (800.432.2737) dining nom_al
1)(IsilIess II ohio.
go.corn
RealLifeDesignStudio ge.com
GE suppolnrs the LJnixw_al Design concept--pxoducts, selMces and enviromnents that can be used by
people _d all ages, sizes and capabilities. We recognize the need to design tbr a wide range of physical and
mental abilities and impaim_ents. For derails of GE's Llnivel_al Design applications, including ldtchen
design ideas fbr people with disabilities, check out our Website today. For the heating impaired, please call
800.TDD.GEAC (800.833.4322).
ExtendedWarranties
Purchase a GE extended warrant} and learn about special discounts that are available while }our warrant}
is still in effect. You can pro'chase it on-line anytime or call 800.626.2224 during normal business hours.
GE Consumer Home Services will still be there after _our _arrant? expires.
PartsandAccessories
go.corn
go.corn
Individuals qualified to se*_'ice their own appliances can have parts or accessories sent directly to their
homes (VISA, MasterCaid and Discover cards are accepted). Order on-line today, 24 hem> e\v_)' clay or
by phone at 800.626.2002 during nomml business hom_.
Instructions contained in this manual cover procedures tobeperformed by any user. Other servicing generally
should he referred to qualified service personnel. Caution must he exercised, since impreper servicing may cause
unsafe operation.
ContactUs
If you are not satisfied with the service you receive fl'om GE, contact us on ore" Website with all the details
including yore" phone numbe_; or wlJte to: Gener;d Manage_; Customer Relations
GE Appliances, Appliance Park
Ix}uisville, KY 40225
RegisterYourAppliance
Register your new appliance on-line---at your convenience! Timely, l_r°duct registration, will allow _or
enhanced communication and prompt serxice trader the terms of _our _arranty, should the need raise.
You ma} also mail in the pre-plinted registration card included in the l)acldw"_ material.
Printed in Korea,
go.corn
go.corn
 Loading...