

Page 1
1990Watts
Models: JVM1653
SpacemakerXL Microwave Oven
Owner'sManual
Important Safety Information
[]
m £xcessiv_ Mic_ew,_M,eY_;e_%y
SI2edal NotesAB#_*Mmmwa d#%
2
S
zuz
OperatingInstructions
I1
T_e Co#fYoB; e_ Ye_Y MF_'_'ewave
7})#eCeeM_g
[]
Helpful Information
12
15
22
20
3t
If SomethingGoes Wrong
GEAppliances
'V_P
Page 2
READ ALL SAA_2TY
INFORMATION BEFORE USING
For your satbty die infbrlnafion in this mamlallnus/be tollowe(1 re Ininimize the risk of fire
DRI_"t°A _#1"UI'lY)IUI_3_kTq or explosion or ,o prevem property damage,
F!_(_ t_J'l Ilersonal i,_juI_ or loss of life,
_TO AVOID ol, er_,te this oven wi,h oven ifi, is damaged.
Do Not Attemptto Do Not Operate tile
die door o',)en snlce [/is particularl)
open-door operation ilnportan/Ilia! thc
Call resull in |larllltill oven door close
I o EXCESSIVE eXl,OS,lretO,lncro,va,,eprollerl_nd,lla__l_ere
energy'. It is impormm is no dalnage to /tie:
MICROWAVE not ,o deteat or ,anlpeI /door(bent),
ENER GI_ imerlocks, broken or loosenedL
with tile sati_t} 2 hinges and la/clles
Oe/Vet Place ally object 3 door seMs mid sealing
betweeIt/he o_ql _i'Oli/ suI [_lces.
Ihce and llle door or The Oven Should Not "
allo_ soil or cleaneI be adjusted or reI/aired
residue /o acctnllulale bv allyolle exce][/I
on sealing surlaces, properly qualified
Page 3
WelcometotheGE/amilv.
We'reproudofourquality
productsandwebelieve
independableservice.
51)u'llseeitinthiseasy-to-
usemanu_dandyou'llhear
itinthe/i'iendlvvoicesof
O/IF (-onslliiler service
det)artmem.
Start Here!... Before using your Microwave
Best of all, you'll
experience ihese values
each time voll use VO/lr
microwave. That's
important, because your
new microwave will be
part of your tiunily ti)r
a long time.
Beli)re you call ti)r service,
there are a/ew things you
can (to [o hel t) llS serve
vo[i 1)elleE
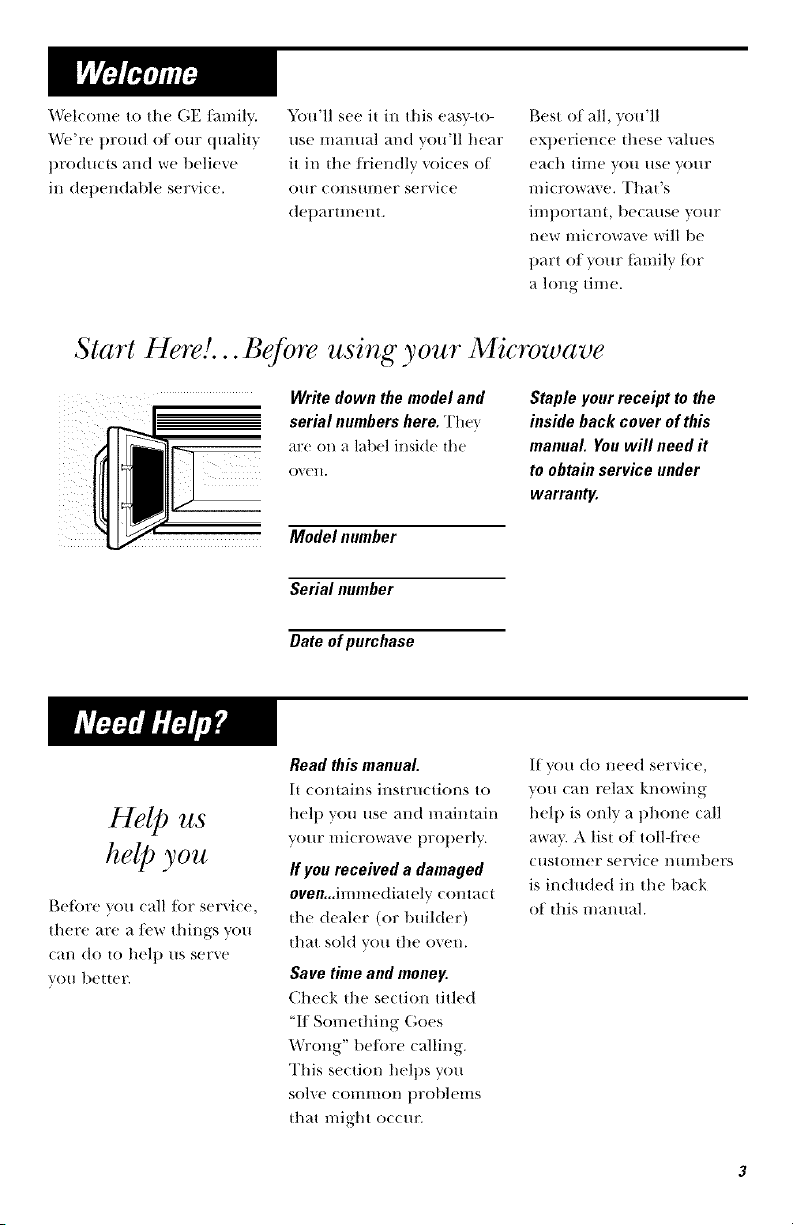
Write down the model and
serial numbers here. "I'h(?
are on a label inside the
i
()'_ el I,
Model number
Serial number
Date of purchase
Read this manual.
It contains instructions t_
help you Ilse and maintain
VO/lr lilicrowave properly.
If you received a damaged
oven...immediately (onta( t
the dealer (or buiMer)
that sold you the oven.
Save time and money.
(_he(k file se(tion tith'd
"l/ Something (;oes
Wrong" t)e/i)re calling.
This section helps you
soEe common problems
tl'_t might ot im'.
Staple your receipt to the
inside back cover of this
manual. You will need it
to obtain service under
warranty.
If you do need service,
you can relax knowing
hel t) is only a t)hone call
away. A list of toll-fi'ee
customer service mmlt)(rs
is included ill the back
of this mmmal.
Page 4
READ ALL SAA 2TY
INFORMATION BEFORE USING
ranges.
This inicrowave oven is
i not approved or tested
for lnarine use.
• Read and/ollow the
speci[ic "Precamions to
A_oid Possible Exposure
t/) Excessive Micro_vv_\ e
Energ-y" on page 2.
• This appliance must be
grounded. Comlect only
t/) properly g*ounded
/)inlet. See (',rom_ding
Instr/lct]olls sect|on
on page 10.
• 1)1)not mount this
applian(e over a sink.
• Install or locale dlis
al)pliance only in
accordance with the
t)rovide(I Insiallation
InstlTllCt] OilS.
• This ovel:the-range I)\'('I1
was designed t6r use over
ranges no wider than 36."
It may be installed over
1)oth g_lsand electric
cooking equipment.
• [)1) not operam this
appliance if it has a
damaged p/)wer cord 1)17
plug, if it is not workillg
proi)erl}; or if it has been
damaged or dropped.
If the power cord is
damaged, it must be
replaced l)} General
Electric Set\ice 1)1:an
authorized se_Mce agent
/lsiI/g a 1)()_ er cor(/
available |i'om General
Electric.
• Do not cover or block
any openings on the
appliance.
• Use this appliance only
/or |is i11tende(I lisp as
descdbed in this mmmal.
Do n/)t use (orrosive
chemicals or vapors in this
al)pliance. This microwme
o\en is specilically
designed to heat, dry or
cook t()o(t, and is not
intended t_)r laboratory
or indusu:ial use.
Page 5
[!l.
• Do not store this
applian¢e outdoors.
Do not use this product
near watelmfl)r exanlple,
in a wet basement, near
a swimming pool, near
a sink or in similar
locations.
• Kee t) power cord away
troln heated surthces.
• Do not il/)l//erse power
cord or phlg in watel:
• To reduce the risk of fire
in tile ()veil cavity:
-- Do not overtook tk)od.
Carefllllv attend
appliance when paper,
plastic or other
c()mbustible materials
are placed inside file
()veil while cooking.
-- Remove wire twist-ties
and metal handles
from paper or plastic
eontainel:s beti)re placing
dlen/ ill the o_en.
-- Do not use the oven
ti)r storage purposes.
1)o not leave paper
products, cooking
utensils or ti)od in the
oven when not in use.
-- If materials inside the
oven ignite, keep the
()veil door ch)sed,
ttlrn the ()Veil ()it and
diseollnect the power
cord, or shut off power
at the fuse or circuit
breaker panel. If the
door is opened, the
tire ma} spread.
-- Do not use the Sensor
Features twice in
succession on the same
tbod portion. If/i)od
is mldercooked after
|he tirst (o/lnt(tOWll, /Ise
Time Cook/i)r additional
cooking time.
• See door sur/hce
cleaning instructions ill
the Care and Cleaning
section(s) of this manual.
• This appliance must only
be serviced by qualified
service personnel. Contact
nearest authorized service
/imilitv tor exanlination,
ret)air or a(!iHStl/lent.
• As wifll any appliance,
close supervision is
ne(ess;_.r_ when used
bv children.
• Do not store anyflfing
(tirectly on top of the
microwave oven surta(e
when the nlicrowave oven
is ill ot)eration.
SAVF,THF,SE INS TR UCJ TONS
Page 6
SPECIAL N07 2S ABOUF MICRO WAVING
Arcing is the n/icrowave
term lot sparks in the
oven. Arcing is caused by:
• The metal shelf not
installed correctly
so it touches tile
microwave wall.
• Metal or loll touching
the side of the oven+
• Do not pop popcorn in
your microwave oven
mlless ill a special
microwave popcorn
accessory or unless YOU
use popcorn labeled tor
use in microwave o_ens.
• Sortie products such as
whole eggs and settled
containers /or exmnple,
dosed jars--m:e able to
exl)lode and should not 1)e
heated in this microwme
oven. Such use of tile
microwave oven cotfld
resuh in il_iury.
• 1)o not boil eggs ill a
microwave oven. Pressure
will build ut) inside egg
yolk and will cause it to
burst, possibly resuhing
• Foil not n/olded to/ood
(ut)turned edges act like
antennas).
• Metal, such as twist-ties,
poultry pins, or gold-
rinm/ed dishes, in the
n/icrowa_ e.
• Recycled paper towels
containing sn/all metal
pieces being used in
tile nlicrowave.
• Operating the microwave
with no tood inside tot
more than a minute or
tWO n/ay cause danlage to
the ovell alld ¢otlld start a
/h:e. It increases the heat
aromld the nlagnetron
and can shorten the litc
of tile o_,en.
• Foods with unbroken
OtlteF "skill" S/ICh _!S
potatoes, hot dogs,
sausages, tOli/at oes,
apples, chicken li_ers
and other giblets, and
egg yolks shouM be
pierced to allow stean/
to escape dm:ing
cooking.
Page 7
I'.1
SAFETYFACT
SUPERHEATEDWATER
Liquids,suchas water,
coffee ortea are able to
he overheatedbeyondthe
boilingpoint without
appearingtohe boiling.
Visiblebubblingorboiling
whenthe container is
removedfromthe microwave
ovenis not always present.
THISCOULDRESULT
IN VERYHOTLIQUIDS
SUDDENLYBOILINGOVER
WHENTHECONTAINERIS
DISTURBEDORA SPOON
OROTHERUTENSILIS
INSERTEDINTOTHELIQUID.
To red uce the risk o/illj mT
to persons:
-- Do not ow'rheat tile
liquid.
-- Stir the liquid both
be/i)re and hail'way
through heating it.
-- Do not use straight-
sided containers with
narrow necks.
-- Atter heating, allow
tile contahler to Stal/d
ill the microwave ()veil
/k)r a short time belt)re
rel//OVil/g tile COl/tailleL
-- Use extreme care when
illsertillg a sl)OOll or
other/ltensil il/to tile
container.
• A\old heating baby food
in glass jars, even with
tile lid ott. Make sm:e all
in/ant t_)od is thoroughly
cooked. Stir/i)od to
distribute tile heat evenly.
Be (areful to prevent
scal(fing when warming
ti)rnlula or t/reast nlilk.
The container max/i'el
cooler t]lal/ the milk
really is. Always test the
nlilk be/i)re ti'eding
tile baby.
• Dol/'t det_'ost tl'ozell
beverages ill I/arrow-
ne(ked bottles (especially
(arbonated beverages).
Even if tile (ontainer is
ot)elled _ t)ress/lre C_lll
1)till(/ up. This (an (ause
tile COlltainer to bllrst,
possibly resulting in
injut}.
• t lot foods and steam
call cause burns. Be
careflll when opening
any containers of hot
R)od, including popcorn
bag.s, cooking pouches
and boxes. To prevent
possible il{jm:y, direct
steam awm/i'om hands
and/h(e.
• Do not overcook
potatoes. They could
dehydrate and cat(h
fire, (ausing damage
to your men.
• Cook nleat and poultr}
thoroughl}--meat to
at least all INTERNAI_
temperature of 160°E
al/d t)otlltry to at least aH
INTERNAI, ten/perat ure
of 180°E Cooking to
these tenlperat ures
usually protects against
/i)odborne illness.
Page 8
SPECIAL N07 2S ABOUF MICRO WAVING
Make sure all cookwal:e used
in _X)/lr nlicl:owa_x' /)_X'll is
suitable tot n/icrowaving.
Most glass cassetx)les,
cooking dishes, n/easuring
cups, custard cups, pottery
or china dilmerware which
does not l/m_' metallic tlJm
or glaze with a metallic
sheen Call lie Itse(t. SolI/e
cookwal:e is labeled "suitable
/or nlicr{lwming."
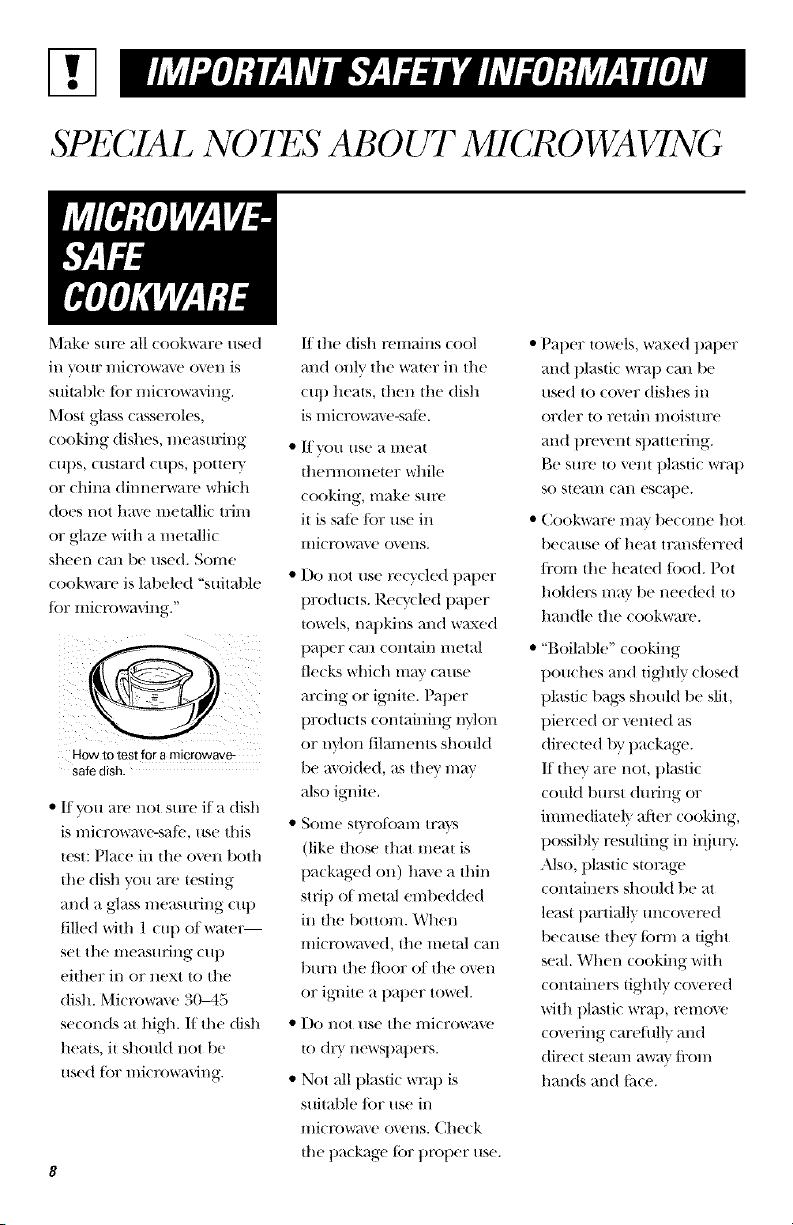
How to test for a microwave-
safe dish.
• If you are not sure ifa dish
is microwa\ e-sale, use this
test: Place in the oven both
the dish you are testing
and a glass measuring CUll
filled with 1 cup ofwaml_
set the XIleasHXJllg CIll)
eithel: in or Hext to the
dish. Microwa\ e 30M5
seconds at high. If the dish
heats, it should not be
used tbr micx'owavilxg.
ff the dish remains cool
and only tile water in tile
cut) heats, then the dish
is lnicrowa_ e-salb.
• [/ VO/I rise a xIleat
tlxel+u/ometer while
cooking, make sm'e
it is sale/Ol: use in
micmwm e o\ ens.
• Do not use recycled tlaper
1)roducts. ReQ,_ led paper
towels, IX_lllkilxs alld waxed
1);-IlleF (';-Ill ('()lXt_lilX lxxetal
flecks whi(h may (mxse
mxixlg Or iglxite. Paper
products contailfing nyloll
or I]vlon filmnents should
be avoided, as th(\v may
also ignite.
•SOHIe St_l:()l{/;,llXX IFW_2_4
(like those that meat is
t)ackaged on) hm e a thin
strip of metal eml)edded
ill the bottoI//. Whexl
XXli(-x'{i_l\ ell, t]xe ii/et;,ll (;,ill
lItllPIX t]xe Jlool? oJ tlxe ovelx
or iglxJte a t)aller towel
• Do Hot use the ini{1Powave
to dr} xlewsl)_qlelPs.
• Not all t)lastic wrap is
suital)le lot use in
HIi(X'O_I\ e O\CXlS. Check
the tla(kage {or tlrOtx'r use.
• Pal)el: towels, waxed ]}al)er
and plastic wra 1) can be
used to co_vr dishes ill
Ol'(lelP tO 1)etail/ lXXOiStlllPe
all(t l)x'evellt Sl);,ittevixlg.
Be sure to veto ]}lasti{ wrap
SO St(TlI// (;,llX es(;,llle.
• Cookware lXX;,ivt)ecoxlle hot
be(a/lse ot l/(';,it tl:alxsl{'lTed
/t'om the heaWd/ood. Pot
holdelPs may be Ixeeded to
halxdle the cookware.
• "B(/ilable" cookilxg
t}ouches and tightly closed
t}lasti( bags should lye slit,
tlier{ ed or vented as
(tire(Wd by package.
It th(\v alPe not, ])ktsti(
(ouM burst during or
immediately a/ier cookilxg,
possibly x'esuhJlxg in il_jtwy.
Also, plastic storage
contaillers should be at
least partially uncovered
1)ecause th(\_ Ibm] a tight
seal. When cookilxg with
COl]tainers tightly co\ ered
with plastic wrap, remove
c(Befing carefiflly mid
direct stemn awm {i'om
halxds and {i_ce.
Page 9
I!1
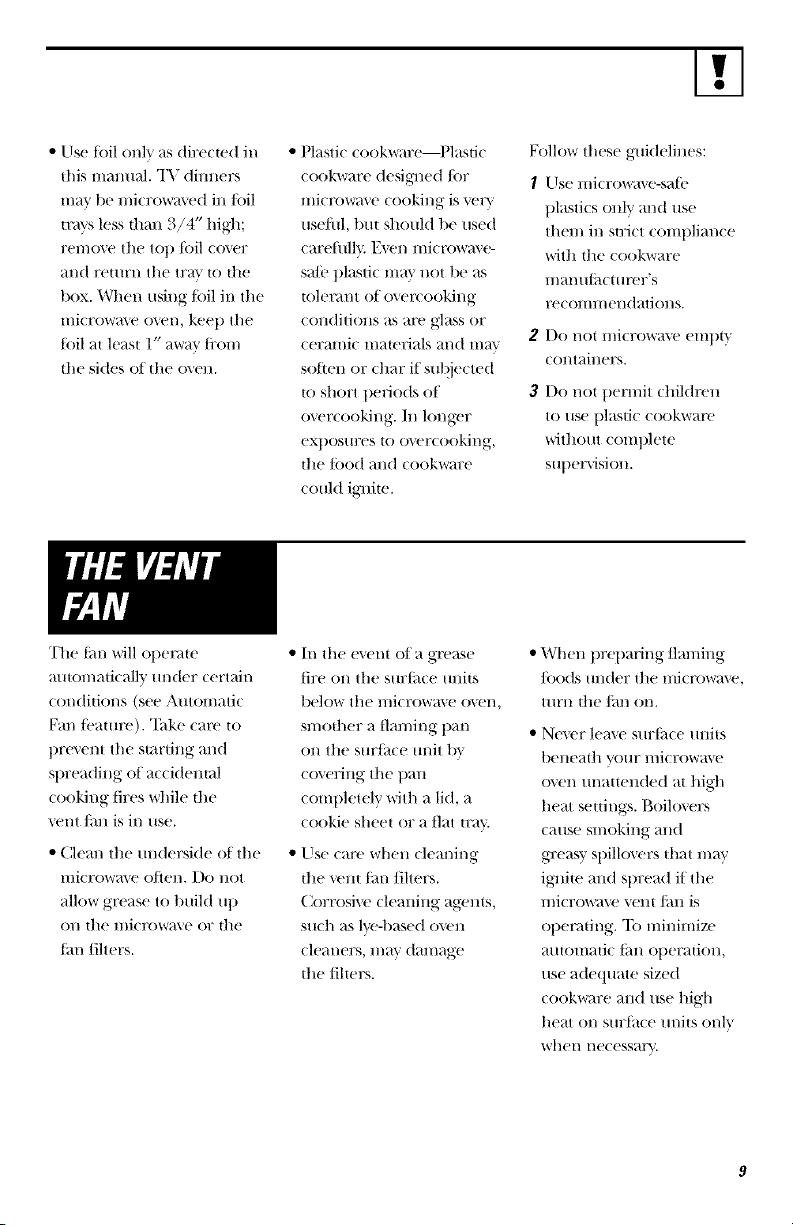
• rise toil only as directed ill
this manmd. TV dinners
ram' be microwmed in/oil
mr_s less than 3/4" high;
remove the toll toil eoxer
_lll(l retlH'll tile trm to the
box. When using/oil in the
mierowme o_en, kee t) the
toil at least 1" away ti'om
tile sides of tile ()\ell.
"It)e tim will ol)emte
auton/aticallv tll/der certaJl)
CoI/ditiollS (see Automatic
Fan/_'atm'e). Take care to
t)re\ ell[ tile starting and
spread)rig of aceideHtal
cooking fires while tile
vent/ira is in use.
• Clean the underside of the
microwmv often. Do not
allow grease to buiM up
OH the IIliCI'OVv_l\ e or the
tan filters.
• Plastic cookx_mre--Plastic
eookware des)greed/or
mierowa\ e cooking is _'++_r
use/ul, but should be used
( aretifllv E_en mi( rowax e-
st/i: plastic ma} not be as
tolenmt of o\ el'cooking
conditions as are glass or
ceramk matmfials and may
solten or )t)ar if sul!jected
to short periods of
o_vr) ooking. Ill longer
exl)osures to overcooking,
d)e tbod and cookware
could iguim.
• In tile e\ ent of a grease
fire on tile surtime units
below tile l//icrow_l_,_ _ ()_,_+l/,
smother a flaming 1)an
oil the sur/i)ce ullit l>x
( o\ ering tile pan
completely with a lid, a
cookie sheet or a {]at trav.
Use ca)'e when cleaning
the veto tan filters.
Corrosive clealliHg agelltS,
S/Ich as 1,)'-based OVell
eleal/ers, l//}ly dalllage
the filters.
Follow these guidelines:
I Llse microwa_v-satb
plastics only and use
them in strict COml)liance
with the cookware
l//aH/ltilct t I)'er+s
reCOil ll//ell(tati OHS.
Do I/Ot l//iCl?OWaVe elllt)t }
COl/tai)lers.
3 Do not t>ermit children
to use t)lastic cookwatx'
without complete
supervision.
• When t)rel)aring flaming
/()o(Is tlllder the II/JCI'OWHVe_
tllrIl the ]ill/ Oil,
• Never lea\ e stlrlilce till)IS
beneath your microwave
oxen unattended at high
heat settings, goiloxers
cause smoking and
gTeasy sl)illovers that may
ignite and spread if the
l//icrowave Velll/illl is
operating. "Ib minimize
all)ore)lie till/ ot)eralioH ,
use adequate sized
cookx_u:e all(t use high
heat on sin:thee units only
when he( essarv.
Page 10
GR0 UND1NGINSTR UC770NS/ OfflTONALKf lS
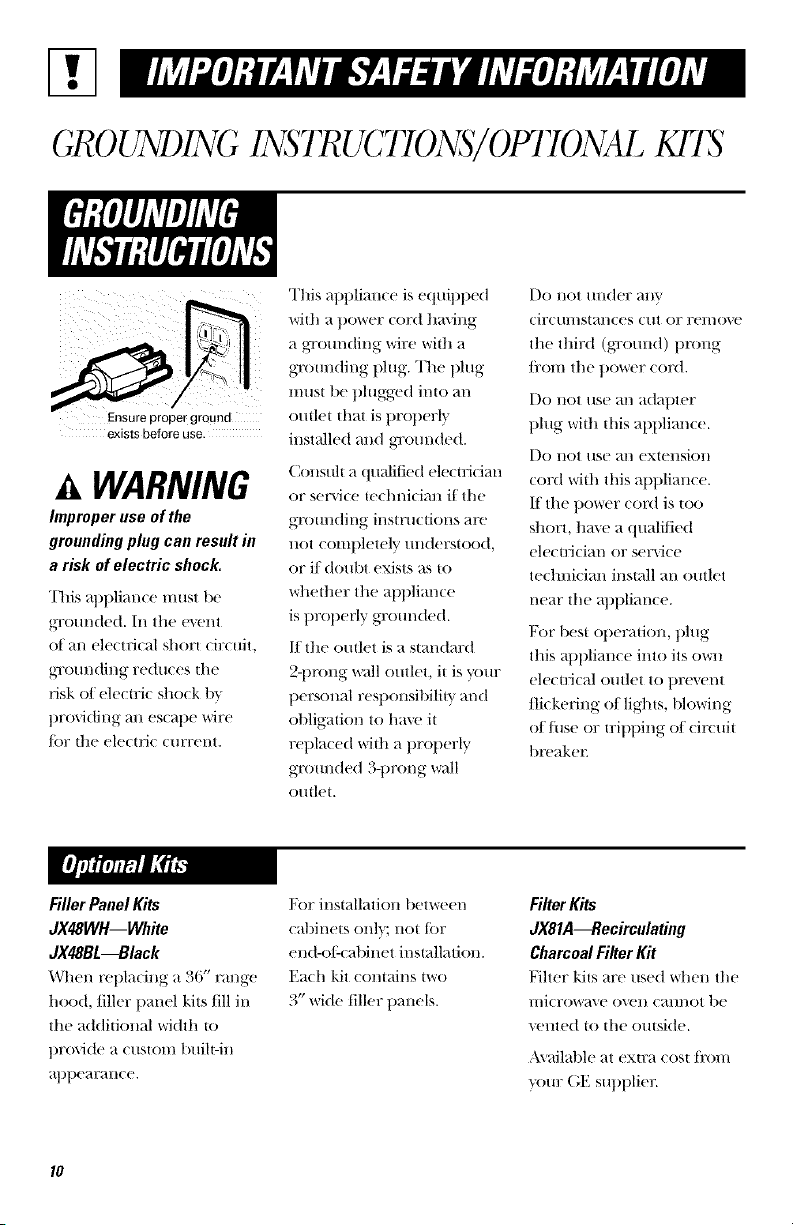
Ensure DroDer grouna
existsbeforeuse.
A WARNING
huproper use of the
grounding plug can result in
a risk of electric shock.
This appliance must be
gTom_ded. In the event
of an elecuJcal short circuit,
gTounding reduces the
risk of electric shock 1)_
t)roviding an escape wire
/or the electric current.
This appliance is e(tuip1)ed
with a power cord t'taviu, g
a gT(mn(ting _,ire with a
groml(ling plug. The plug
must l>e t)h:tgg`(,d into an
outlet that is t,rot)erl}
installed and gTotm(ted.
Constflt a qtmli[ied electrician
or service technician if the
grotto(ling instructions at'('
not completely tmderstood,
or i/(toul)t exists as to
whether the al)l)liance
is t)rol)erly grom_de(t.
If the outlet is a standard
2-t)rong wall outlet, il is yore:
personal responsibility and
obligation to have it
replaced with a t,rol)erly
gtxmnded 3-t,rong wall
outlet.
[)O not /lll(lel: _lllV
('il;('/lI//slan( es €lit or 1;el/love
the third (gTomld) prong
/i'om the power eot'(I.
Do not use an adal)ter
plug with this appliance.
Do not use an extension
cord with this appliance.
If the power cot'(/is too
short, hm e a qualilied
elecuJcian or ser_iee
technician install an outlet
near the al)l)lian(e.
For best ol)eration, plug
this at)l)lianee into its own
electlJcal outlet to t)re_'nt
flickering of lights, blowing
offllse or tril)l)ing of eit`(uit
1)t'('aket;
Filler Panel Kits
dX48WH--White
JX48BL--Black
When tvl)lacing a 36" range
hood, filler panel kits Jill in
the additional width to
t)rovide a cttstom lmilt-in
al)l)earance.
For installation between
eat)inets only; not Jot
end-o/:cabinet installation.
Each kit contains two
3" wide filler panels.
Filter Kits
dX81A--Recirculating
Charcoal Filter Kit
Fiher kits are used when the
microwa,, e ovelJ, cannot be
+,vnt,.'d to the outside.
,\\ailable at extra (()st Ji'om
xx)tu: GE sut)l)liel:
Page 11

1000 Watts
///////I I I I\
| I
1 Door Handle. Pull to 4 Shelf. I ets you
open the door. The dool: micr()w_l_e several
must t)(' s('(ur('h l_t(h('(t too(ts at on(e. IFoo(I
J()t" ill(' IIIi(FOW_W(' to IIIi(FOW_W('S b('st wh(']l
ot)('t;_t(', t)la(cd (tJr('(th' on ill('
2 Door Latches. oven tloor or tm:ntabl('.
3 Window with Metal 5 Touch ControIPanel
Shield. S(w('n alh)ws '_bu must s('t dw
(ooking- to b(' vi(,w(,d
(lo(k l)('tbr(' using
whil(' kc('l)ing th(' mi( row_w('.
I/]](])OV¢_.X(!S (OI]_]l/(!(t 6 Cooktop Lights.
ill th(' o\('n. 7 Grease Filters.
8 Removable Turntable.
Tm:nt_l)l(' and SUl)pOl:t
must b(' in t)l_w(• wN('I/
using the o_vn. The
ttlt'llt_lbl(' Ill}iV t)('
relno\ed/_)r cleaning.
9 Convenience Guide.
NOTE: R_lting plate, (wen
vent (s) and o_vn lJght are
located on the inside walls
oJ th(' _/ic_'owa\ (' ov(ql.
Page 12
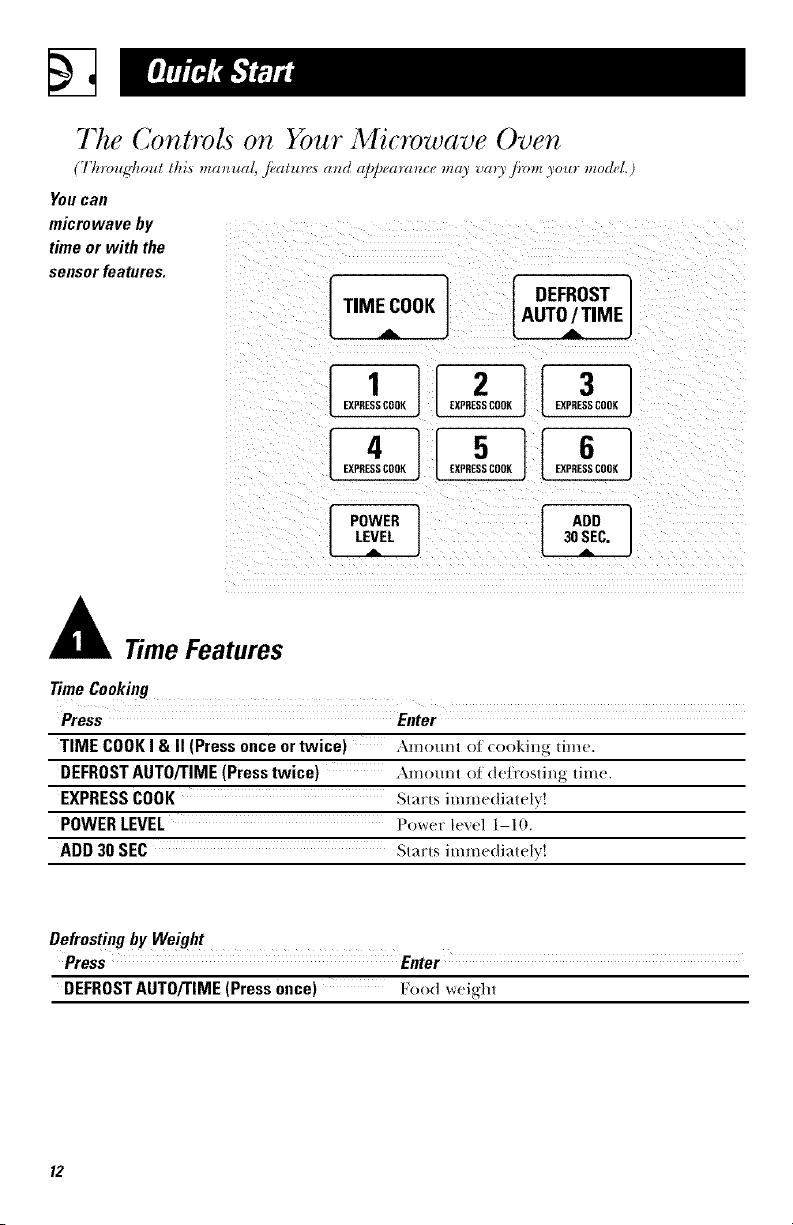
The Controls on Your Microwave Oven
(Tlnvugt_oul this ma_ua!, f.alur_'._ m_d a/_/_earm_c_ma) vm3 ji_m 3our model.)
You Call
microwave by
time or with the
sensor features.
TIMECOOK ] [ DEFROST
rPowE.1 I,°o]
_ LEVEL J 30SEC. _
AUTO/ TIME
Time Features
TimeCooking
Press Enter
TIME COOKI & II (Press once ortwice) Amount of (ooki.g time.
DEFROSTAUTO/TIME(Presstwice) Amount of (te_'osting time.
EXPRESSCOOK Starts immediately!
POWERLEVEL [_()_r_"h!xel l--I O.
ADD 30 SEC Starts imm_,(liatelv!
Defrostingby Weight
Press Enter
DEFROSTAUTO/TIME(Pressonce) /'_ood'_'vr_!i_']lt
Page 13
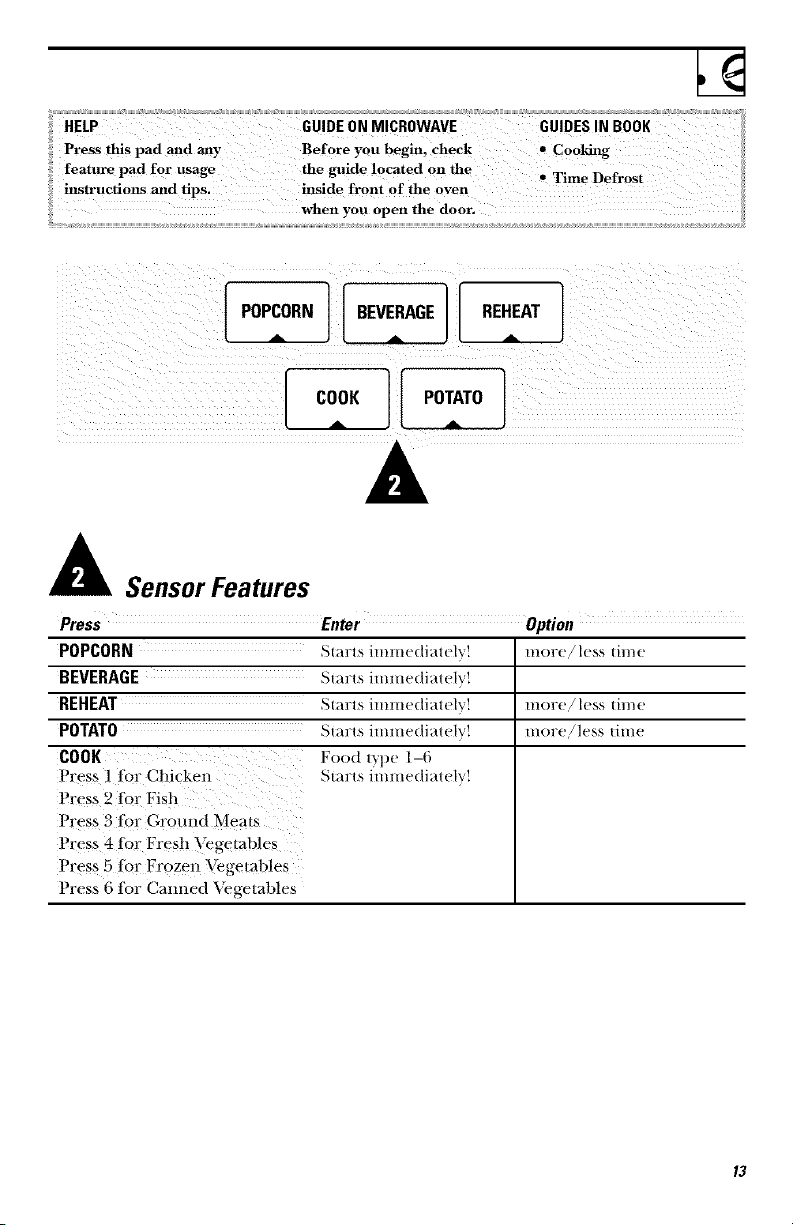
I POPCORN] BEVERAGE1 I REHEAT
I COOK ] [ POTATO
SensorFeatures
Press Enter Option
POPCORN Starts iHiHlediatelv! Hlore!less time
BEVERAGE Starts immediately!
REHEAT St art s JlllllledJat ely! lllore! less |Jl//e
POTATO Starts immediately! more!less time
COOK Food tT_l)e1-6
Press i for Chicken Starts immediately!
Press 2 for Fish
Press 3 for Ground Meats
Press 4 ibr Fresh _getables
Pres s 5 tbr Frozen Vegetables
Press 6 tbr Cairned Vegetables
Page 14
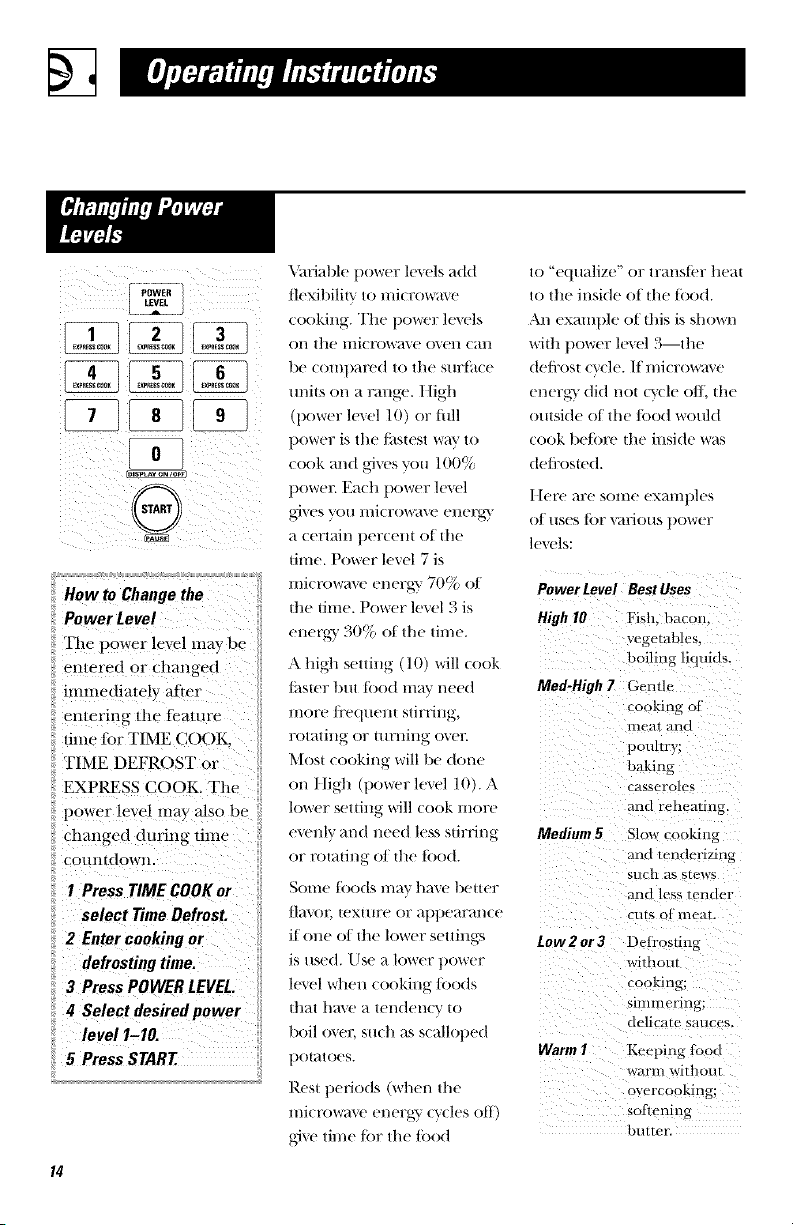
ii(i7) IP
TI_e power levd m_y be
entered or changed
.....immediately after
enterin ' tile feature
ime tbr TIME _L_OOf_,
['IME DEFROST or
EXPI_ESS COOK. The
power leve! may also be
changed during time
ou.ldow.
III Press TIME COOK or
.... Select Time Defrost.
2 Enter cooking or
V;iriable 1)ower h'_'ls add
flexibilip_ to microwave
cooking. The 1)o_,_'r levels
on the IIli(ToWa\ e o\en (_tn
be (Oml)at'ed to the sm:t_t(e
units on a rallge. Iligh
(power level 10) or flfll
power is the/i,stest way to
cook and gives you 100%
t)ower. Each 1)ower h'_'l
g,J_'s _'()t_microwavt enet'_}
a certain percellt of tile
lime. Power level 7 is
IIliCt'owa_' energ?' 70% of
the time. Power level 3 is
enet'g-y 30% of the time.
A high setting (10) will cook
tipster but toed may need
more/i'e(lt_em stirtillg,
rotating or turHing o\er.
Most cooking will be done
on Itigh (t)o_,,_'r le_'l 10). A
+
lower setting will (ook more
evenly and need less stirt'ing
}
or rotating of the toed.
Some ti)o(ts may ha_' be|ter
llama)r, texture or at)pearance
if one of the lower settings
is used. Use a lower power
le_'l \vllen cookillg/[)ods
that ha_' a tenden_v to
boil o\er, such as scalloped
potatoes.
Rest t)eriods (_*_rt'ten the
rail rowaxe (_(_:_r (_'cles ott)
gJxe time for the food
to '_'qtlalize" or lr_ll/sler ]|ca|
to 1]/e insi(le o[ |h(' J_)o(t.
All exal/ll)]_ +O[ IBis is sh(>wn
witt_ power )e_('l 3 lhe
(teli_ost (, cle./f lnicrowa_.e
(+l/(+l_'\did 1/OI (V(-|( + Oil lhe
oulside ot lhe ][>od wotfld
(o(,k bclk_t'_+the inside was
(teli_(_Med.
I/(+r_+are SO/lie cxal[l] i](_s
el/lses toT _,3tlJO[IS power
levels:
Power Level BestUses
High 10 Fish. b_,con.
ve_e_bles.
boiling liquids.
Med-High 7 Gentle
cooking oi
nle_ll and
poultry:
baking
('ass_'roh's
and reheating.
Modiom 5 Slow cooking
k,nd tenderizing
SIlCh _lb _[{-'WS
am tcs,, r_rldt_r
CUIS O1 lne_lL
tow 2 or3 Deti'osting
wi_hot_t
cooking;
simmering;
delic_,_e s_,uces.
Warm 1 Ke_ ping fbod
_,Vflrill x_'it|l on r
ov,'rcooking;
sofiening
bult('lL
Page 15

Time Features
TIME COOl(
11+,,,&lI &l
E55
@
I Press TIME COOK.
2 Enter cooking time.
13 Change power level
if you don't want full
power. (Press POWER
LEVEL.Select a
desired power level
1-10.}
i14 Press START.
Time Cook I
_+kll()ws VO/I tO lIli(row;tve
ibr any time up to 99
mimttes and 99 seconds.
Power level 10 (t[igh) is
automatically set, but you
may change it/or more
tlexibilitv.
You may ot)en tile door
d m:ing Time Cook to
(he(k the/ood. Close die
door and press S'I;+\l_'I"
to resmne cooking.
Time Cook II
I x'ts you (hange 1)ower
levels amomafically dm:ing
cooking. Here's how to
do it:
I Press TIME C()()K.
2 Enter the first cook time.
3 Change tile power level
if you don't warn full
t)owet: (Press POWER
I,I+;\'EI. Select a desired
power level 1-10.)
4 Press TIME COOK
again.
5 Enter the se(ond cook
time.
6 Change the power level
if you don't want full
t)owet: (Press P()WER
I,EVEI. Sele(t a power
level 1-10.)
7 Press ST\R+E
At the end ot Time Cook I,
Time Cook/l (omHs do_rn+
Page 16

Cooking Guide jot Time Cook I & ll
NOTE:Usepower level High (10)unlessotherwise noted.
Vegetable Amount Time Comments
Asparagus
(fl'esh spearsl ] lb.
(frozen spearsl lO-oz, package
8eans
(fi'esh g'reen _ I lb. _ut in halt
(frozen a-reenl ]O-oz. pa_kage
,frozen lima, lO-oz, package
Beets
di'esh, whole J ] lmu('h
Broccoli
(Ii'esh cm 1 t)mwh
11/+to 1½ lbs.)
(fi'esh spears _ ] t)mwh
11/+t() 1½ lbs.)
,frozen. ] O-oz. package
chopped)
(fi'ozen spearsl ]O-oz. package
Cabbage
(li'esh)
(wedges,
Carrots
(fresh. sliced} 1 lb.
(fi'ozen ] O-oz. pa,. kage
Cauliflower
(ilowerets, ] ]n{'(tium head
(fresh. whole I ] lneditll/l head
(Ii'ozen ] O-oz. })a{ kage
1 m(+dimn head
M)out 2 lbs.)
6 to 9 rain.,
Meal-High (7)
5 t() 7 min.
9 to 11 min.
6 to 8 rain.
6 to 8 lt}i_}.
17 to 21 min.
7 to 10 min.
9 to 124min.
5 to 7 min.
5 to 7 min.
8to 11 mi+}.
7 to 10 min.
7 to 9 min.
5 to 7 min.
9 to 14 mitt.
10 to 17 min.
5 to 7 min.
IJ,],1½-qt. obl(mg glass baking dish,
)]a(e ]/4 (tip water.
In 1-qL (asserole.
In 1 _/>(tt. ( asserole, place 1+/2 {up water.
hi 1-qL (asserole, pla(e 2 tablespoons
w_lter.
In 1-qt. casserole, place 1/4 cut) water.
In 2-qt. casserole, place 1/2 cup water.
In 2-qt. casserole, place 1/2 cup water.
In 2-qt. oblong glass baking dish, place
1/4 cup water.
In 1-qt. casserole.
In 1-qt. casserole, place 3 tablespoons
water.
In 1V_,-or 2-qt. casserole, place 1/4 cup
W_lter.
h] 2- or 3-qt. (asserole, pla(e 1/4 (up
water.
In 1½-qt. (asserole, place 1/4 {up water.
In 1-qt. (asserole, pla(e 2 tablespoons
water.
In 2-qt. casserole, 1)lace 1/2 cut) water.
In 2-qt. ( asserole, pla(e 1/2 (u 1) VQlter.
In 1-qt. (asserole, pla(e 2 tal)lespoons
W;+l t er.
Page 17

Vegetable AmountTimeComments
z
Core
(fl'ozen kernel) ] O-oz. t)a(kage 5 to 7 rain. In 1-qt. (asserole, t)la(e 2 tal)lest)oons
CoN oe the cob
(tiesh) 1 to 5 ears
(frozen) ] ear
2 to 6 ears
Mixed
vegetables
(frozen) ] O-oz. t)a(kage
Peas
(flesh, slml!ed) 2 lt)s. unshelled
(fl'ozen) ] O-oz. t)a(kage
3 to 4 rain.
)er e;-ir
5 to 6 rain.
3 to 4 rain.
)er e;-ir
5 to 7 rain.
9t(/ 12min.
5 to 7 rain.
Potatoes
(fl'esh, cubed,
wffite)
(freslb _l!ole, ] (6 to 8 oz.)
sweet or white)
Spinach
(ti-gsh) 10 to 16 oz.
(Ii'ozen, lO-oz, t)a( kage
chopped
and lea 0
Squash
(fi'esl!, summer 1 lb. sli(ed
an d yellow)
(winteb acorn ] to 2 s(ltlash
butternut ) (abottt 1 lb. eath)
4 t)otatoes
(6 to 8 oz. each
9 to 12 min.
3 to 4 rain.
5 to 7 rain.
5 to 7 rain.
5 to 7 rain.
8 to 11 rain.
W_tt er.
In 2-qt. oblong glass baking dish, t)lace
(orn. It corn is in husk, use no water;
it corn has been husked, add 1/4 (u l)
water. Rearrange a/ier hal/o/time.
Place in 2-qt. oblong glass baking dish.
Cover with w:med t)lastic wrap.
Rearrange alter half of time.
In 1-qt. casserole, t)lace 3 tal)lesl)oons
water,
In l-(it, casserole, t)lace 1/4 cut) Bater.
In 1-qt. (asserole, pla(e 2 tablesl)oOns
water.
Peel and cm into 1 inch cubes. Place in
2-qt. casserole with 1/2 cut) water2 Stir
after half of time.
Pierce with cooking tbrk. Place in
cel/ter of tile ovell. I,et sialld ,Tl//ill/lleS.
hi 2-qt. casserole, t)lace washed sl)inach.
In 1-(it. (asserole, ])la(e 3 tal)lesl)oons
war er.
hi 1½-(I t. casserole, t)lace 1,/4 ctq) water.
Cut in half and remove fibrous
membranes. In 2-qt. oblong glass
baking dish, ])la{e squash {m-side-
down. Turn ( ut-side-u l) after 4 minutes.
Page 18

Time Features
AUTO/_ME
@
1 PressDEFROST
AUTO/TIMEtwice.
2 Enterdefrostingtime.
3 PressSTART
4 Turnfoodoverwhen
theovensignals.
5 PressSTART
(AutoDefrostexplained
in thesectionon
ConvenienceFeatures.)
Allows you to de/i'ost/i)r
the length of time you
sele(t. See the Detrosting
Guide/i)r suggested times.
Power level 3 is
atltOl//atJcally set, bill vo[i
nlay change this/i)r inore
flexibility. 51ill may dell:liSt
sinall items inore quickly
b} raising the power level
atter entering the tittle.
t towe_er they will need
IIlore ]i'eq[lent attention
thal/ /istlal.
Power level 7 cuts the
total detrosting time in
about hall power level 10
C/ltS the total tittle to
approxinlately 1/3. Rotate
or stir/i)od/i'eq uently.
At one half of selected
de/i'osting time, the oven
signals TURN. At this time,
turn/i)/)(t over and break
attart or rearrange pieces
tor n/ore exen defi_osting.
Shield tory warn/areas with
snlall pie(es oI foil.
A dull ttmintting noise mm
be heard during defl:osting.
This Somld is norn/al when
the oven is not operating
at t tigh t)ol_,e_
Defrosting Tips
• Foods/rozen in t)al)er or
t)lasti( (an be (/e/i'l)ste(t
in the package. Tightly
closed packages should
be slit, pierced or vented
AFTER/ood has partially
det_:osted. Plasti( storage
containers should tie at
least partially mlcovered.
• Family-size, prepackaged
/i'ozen dinners can tie
de/i'osted and n/icrol_,\'ed.
If the tk)od is in a toil
container, transter it to
a mi(rowave-sati' dish.
• Foods that spoil easil_
su(h as milk, eggs, fish,
stuttings, pouhv} and
pork, should not tie
allowed to sit out tor
n/ore than one hour
after de/i'osting. Room
teinlterat ure ttron/otes
tile grol,,th of harn/tul
bacteria.
• For more even de/i'osting
of larger/oods, such as
beef, lamb and veal
roasts, use Auto Delrost.
• l_e sure large meats are
con/ltletely det_:osted
be/kite cooking.
• When deti'osted,/k)od
should be cool but
s/)/tened in all areas. If still
slightly icy, return to the
microwaxe _wy briefly, or
let it stand a tew n/inures.
Page 19

D rosting Guide
Food Time Comments
Breads,Cakes
Bread,bunsorrolls !] piece' 1 rain.
Sweetrolls _approx. 12 oz.. 3 to -, mil_.
Fishand Seafood
Fillets, frozen(1 lb., 6 m _ rain.
Shellfish,small pieces (1 lb3 5 i_, 7 rain.
Fruit
Plastic pouch--1 to2 3 m _ rain.
(lO-oz. package J
Meat
Bacon (1 lb.. 2 to -, rain.
Franks (l lb. _ 2 u) u rain.
Groundmeat _] lb,,
Roast:beef, lamb, veal, pork
Steaks, chops and cutlets
5 io 7 min.
12 -_ |6 rain.
per )b
5 io 7 min.
per )b
Poultry
Chicken,broiler-fryer
15 t() |9 min.
cut up 12½ lo 3 lbs.
Chicken, whole
17 t() 21 miu.
12½ to 3 lbs.,
Cornishhen
7 t(, 13 1/1i1/.
per lb
Turkey breast (4 lo 6 lbs,
Place block in casserole. Tm:n over and
break up ailer half die time.
Place mml)ened package in oven,
Iet staHd 5 mimues after defl:ostiHg.
Place mmpened package in o_en.
Microwave just m_til Ji'anks can t)e
separawd. Iet stand 5 mimues, if
necessar}, to complete de(i'osting.
"Ihrn meat over atier half the time.
Use power level 1.
Place m_wral)l)ed meat in cooking dish.
Turn o_er aller half die time and shield
warm areas wifll toil. When tinished,
setlaraw pieces and Met stand to complete
de/i'osting.
Place wrapped chicken in dish. Unwrap
and turn over a/let half die time. When
finished, setlm:ate pie(es and microwa\e
2 io 4 l/lillil|eS iilOre, if necessary.
I,et stand to tinish del_'osdng.
Place wrapped chicken in (lish. Aller half
tl/e Iilile, /ll/Wr}t]) }tl/(t tllrll €hickelJ, oveE
Shield warm areas widl loll. Finish
(le/i'osting. If necessar}, rLm cold water in
the cavity m_til giblets call t)e removed.
Place m_wrat)ped hen in the oven breast-
side-up. "Ihrn over alter half the time.
Rm_ cool wawr in the cavity m_til giblets
(an Lie removed.
Place m_wrapped breast in dish breast-
side-down. Afwr half the time, mrn o_er
and shield warm areas widl/oil. Finish
deli'osting. I,et stand 1 to 2 hours in
refi'igerator to (omplew (te(i'osting.
Page 20

Time Features
30 SEC.
I Aoo]
This is a quick way to set
cooking time for 1-6 minutes.
Press one of the Express
Cook pads (/i'om 1 to 6)
li)r l to 6 minutes o/
cooking at t)ower h*vel l O.
For examl)le, 1)tess the
2 pad/i)r 2 minutes of
( ()oking time.
You can use this feature
two waits:
• It will add 30 seconds to
the tiltle COtlnting down
each time the pad is
pressed.
The t)ower level can be
changed as time is
Co/lntillg down, Press
POWER I ,EVEI _and
enter 1-10.
• It (an be used as a (tui(k
_r(_' t() set 30 secolJ, ds ot
((>()king time.
2O
Page 21

AUTO/TIME
G
1 Press DEFROST
AUTO/TIME once.
2 Using the Conversion
Guide at right, enter
food weight. For
example, press pads 1
and2 for 1.2pounds
(1 pound, 3 ounces).
3 Press START
(Time Defrost is
explained in the 77me
Features section.)
The De/i'ost Auto!Time
_'_tllre gives yO/l two ways
to (tefi:ost /_'ozen/oo(ts.
Press DEFROST
AUT()!TIME once tor
Auto l)el_:ost or twice/i)r
Time De/i'ost.
Use Auto Del_:ost/_)r meat,
t)ouhvy and fish up to
6 1)ounds. Use Time
De/i'ost tor lllost other
fl:ozen/i)/)(ts.
Auto Defl:ost amomati(allv
sets the (tel_'osting times
and power levels to give
e_en del_:osting results tor
meats, t)oultry and fish.
There is a handy guide
located on the inside fi'ont
1)t the ovell.
Guide
Conversion Guide
If"the weight of Ibod is
stated in pounds and
or!rices, tile ot!Iices lnttst
be converted to tenths
(A) ofa potmd.
Weight of Enter Food
Food in Weight
Ounces (tenths of
a pound)
1-2 .1
3 .2
4-5 .3
6-7 ' 14
8 .5
9-10 .6
11 ' 17
12-13 .8
14-15 .9
• Rel//()'_e 1/1eat 1171)111
pa(kage and t)la( e (m
n/i( rowax e-sat)! dish.
• "I\s'ice during de/i'ost,
the oven signals TURN.
At each TURN signal,
tttr]J, tt'te t()/)d over.
Remove de/i'osted 1//eat
or shield warm areas
with small pieces of/i)il.
• Atter det_'osting, most
111e_l|s 11('1'(/ |0 S|Hll(t
l/Ill/tiles to ( Ollll)lete
defi'osting. I,arge roasts
should stand tor about
30 mimltes.
21
Page 22

Sensor Features
What happens when
using the Sensor
Features...
I'he Selisor Femures
detect tile increasing
hmnidi D' released
during cooktiig. The
ovel/",1 tl/olnaticall}
adjusts tile cook*rig-
time /o various lypes
and amotm/s of fbod.
Do 1,ol use lhe Sensor
Features twice in
succession ol1 lhe same
lood portion 11lil}ly
result in severely
overcooked or bl/Fn[
tbod [ftood is
tmdercooked after the
COUllldOWll. tlse Time
Cook t,)r additional
cooking dine.
Co_ered
• The proper ( Olltainers
and co'_ers are essential
tor t)est sensor cooking.
Vented
• Always/ise l//icrowa_,e -
sati' containers and co_er
them with lids or vented
plastic wrap. Never use
tight sealing plastic
containers--they can
prevent steam t_:onl
escaping and cause
tbod to overlook.
Dry off dishes SO they don't
mislead the sensor.
• ge sure the outside of
the cooking containers
and the inside of die
microwave oven are dry
before placing food in
the oven. Beads of
lt/OiSllll?e {lll?ni11_ illtO
slealt/ C_tl/ nlislead the
sensor.
22
Page 23

leSSIIme) (more time)
Use only with prepackaged
microwave popcorn we #nlng
1.7 5 to 3.5 ounce, _
NOTE: Do not use the
metal sheff when cooking
popcorn.
NOTE: Do not use this
feature twice in
succession on the same
food portion--it
may
result in severely
:_overcooked or burnt food.
How to Use thePopcorn
Feature
1 Follow package
instructions, using Time
Cook if tlle package is
less than 1.75 otm(es or
larger than 3.5 omlces.
Place the package of
pot)cOrll ill tfte center
of tfte microwave.
2 Press P()PC()RN. The
o'_ell S|_'trts il//lllediatelv.
If you open tile door while
"P()PC()RN" is dist)layed,
"SENSOR ERR()R" will
al)l)ear. Ch)se |fte door;
t)ress CI EAR!()FF and
begin again.
If ibod is mldercooked
after the comudown, use
TimeCook/i)r additional
(ooking time.
How to Adjust the Popcorn
Program to Provide a Shorter
or Lmlger Cook Time
I/vou lind |hat the brand of
t)ot)(orll voH rise oll(lerl)Ol)S
or over(ooks (Ol/Sistentl},
you can add or subtract
20--30 seconds to tile
automatic t)Ol)t)ing time.
To add time:
)d'ler pressing P()PC()RN,
press 9 immediately after
the o_en starts tor an extra
20 se( oHds.
Press 9 again to add
another l 0 seconds (total
30 seconds additional time).
To sublraet thne:
M'ler pressing POPC()RN,
press 1 immediately after the
o_en starts tor 20 seconds
less (ooking time.
Press 1 ag_dn to re(tu(e
(()()king tinle another
10 se(onds (total 30 seconds
less time).
Press BE'_)2I{+\GE to heat
a cup of collee or other
beverage.
If tood is mlder(ooked
after the comudown, use
Time Cook/i)r additional
( ooking time.
Drhlks heated with the
Beverage feature may be
very hot. Remove the
container with care.
23
Page 24

Sensor Features
{less tlmet iro, c-e time
For reheating $1ngle servings of
prevtouslv cooked foods or a
plate of leftovers.
How to Change the
Automatic Settings
Reduce time by 10%:
P]'ess I a/i(w the {;t'atm'e
pad.
Add 10% to cooking time:
Press 9 after the ti,ature
pad.
successiononthesame
i_i iii
::foodportion--it maY :
::result inseverely
How toUse theReheat
Feature
I Place co'a.Ted(bud in
the ov(']:_.Press I@_t]EA'E
The oxen stalls
imme(tiatel>
2 The o\en sigmals \dlen
steam is sensed and the
time remaining begins
counting do_rn.
Do not open the oven door
umil dn;e is couutiug do_,,u.
If the door is opened,
(lose it and press S'E\RT
immediatel>
Afterremovingfoodfrom
theoven,stir,if possible,to
evenoutthetemperature.
Reheatedfoodsmayhave
wide variations in
temperature.Some
areas/naybe
extremelyhot.
[/J'ood is not hot ('noug]l
alt('r the (Otll/tdowI/, tlS('
Time Cook|b,: additional
l"(,]l('ating {ira('.
SomeFoodsNet
RecommendedFor
Use WithReheat
It is best to use Tim(' Cook
/6r these/oods:
• Bread products.
• Foods {hat I///IS[ be
F{']l(_?.te(| /lncov(_Fed,
• Foods t]lat need t()be
StJFl'ed OF 17otP.ted.
• Foods (ailing {or a dF,'
look o]"(;dsp sur/i_('{'
aIRT F(']lt'atJng.
24
Page 25

Ld
POTATO
NOTE: Do not use the
metal sheff with Sensor
Cooking.
NOTE: Do not use this
feature twice in
succession on the same
food portion--it may
result in severe/y
1 Pierce potato skill with
ti)rk and place potato in
the oven.
2 Press PO'IXI'O. The
()Veil stm:ts il//liledi_ttelv.
3 The oven signals x'_rhell
ste_tl// is Sellsed _lll(t tin/e
remaining is counting
down. "hlrn or stir the
ti)od if necessary.
Do not open the ()Veil
door until time is counting
down. If the door is
opened, close it and press
START immediately.
If ti)od is mldercooked
alter the com/tdown, use
Time Cook/i)r additional
cooking time.
How to Change the
Automatic Settings
You can a(/just the cooking
tin/e t_)l" all t_)o(Is to suit
}'our peI'son_t] [;iste.
0ess time) (m0retim_)
Reduce time by I0%:
Press 1 alter the ti)od pad.
Add 10% to cooking time."
Press 9 alter the ti)od pad.
25
Page 26

Sensor Features
NOTE: Do not use the
metal shelf with Sensor
Cooking.
NOTE: Do not use this
feature twice in
succession on the same
food portion--it may
result in severely
overcooked or humt food.
CookingGuide
Sensor Cooking gi_es you
eas?', a/tt()l//_ltJ( results with
a xarietv ot foods.
I Place coxered food in
the (J'_,el/.
2 Press the C()()K pad.
3 Select/k)od type 1-6
(see file Cooking Guide
below), The oven starts
immediately.
4 The oven signals v_rl/ell
steam is selJ, sed _'tlJ,([time
remaining is corn:ring
down. Tm:n or stir the
t_)od if necessary.
Do not open the oven
door m_til time is comlting
down. If tile door is
opened, close it and press
START immediately.
If t_)od is m:dercooked
a/leF the COHllt(towl/, Hse
Time Cook/i)r additional
cooking time.
How to Change the
Automatic Settings
(automatic settings for
caroled vegetables cammt
be adjusted on some models)
(lesstime) (moretime)
You can a(/just the cooking
time ti)r all ti)o(Is to suit
your personal taste.
Toreduce time by 10%:
Press I a/ler the ti)o(I pad.
Toadd 10%to cooking time:
Press 9 M'ter tile food t)ad.
FoodType Amount Comments
I. Chicken Pieces 2-8 t)ie(es Coxer _rittl xemed t)lasd(_r_]).
2. Fish 4-16 oz. (_ox er '¢dth xente(t t)l;-istic wrat).
3. Ground Meats 1/2 - 2 lbs. Llse round (asserole (tish. Crmnl)le meat illto
(Beef, Pork, Turkey) dish. (;(Jxel: with lid or xellte(t t)lastic wrat).
Drain and stir at signal.
4. Fresh Vegetables 4-16 oz. \dd 1/4 (u t) _r_(_]: t)(_]: serdng.
Coxer with lid or xented t)lasti(wF_lt).
5. Frozen Vegetables 4-16 oz. Follow t)ackage illstrtt(tiOllS ti)r adding water.
Coxer with lid or xented t)lasti(wr_q).
6. Canned Vegetables 4-16 OZ. Coxel _ with lid or xented t)lasti(wr_lt).
26
Page 27

Other Features Your Model May Have ___
The HEI,P t)ad displays
t('ature in/i)rmation _md
hell)rid hints. Press t ]El P,
then sele(t a/i'amre pad.
To remilld you that you
have/i)od iH the oven, the
oven will dist)k_y "F()()[) IS
RIL_\DY" and beep once
_ mbmte mltil you either
open the o_en door or
press C] EAR!()FE
CLOCK
AM/PM
G
Press to elite); the tiH/e of
day or to check the time of
d_ly while microwaving.
I Press CI,()CK.
2 Enter time of din.
3 Select AM or PM.
4 Press STkRT or CI_()CK.
27
Page 28

Other Features Your Model May Have
The scroll sl)eed of the
SCROLL SPEED 3 seconds to bring u t)
the displa}. Select 1-5 tor
slow to thst scroll st)eed.
[DISPLAY ON/OFF]
To turn the (lock display'
off, press and hold 0 tor
al)O[lI Ihl?ee se(ollds.
Delw_' Start allows VO/I to se|
the microwave to delta
cooking up to 24 hours.
1 Press DEI ,AY START.
2 Enter the time you
want the o_en to start.
(Be sure the microwave
clock shows the correct
time of (/a_z)
3 Select AM or PM.
To redisl)lay the clock,
rel)e_tt.
4 Select any combination
of I)eli'ost Auto!I'ime
or Time Cook I 8-:II.
5 Press S'EM),I'.
The Delay Start time will
be disl)la}'ed plus "DS."
The oven will au|omaticallv
start at the (telaved time.
The time of day may be
displaye(t 1)}' t)ressing
CI ,()CK.
28
Page 29

Timer ()n/Off operates as
a milmte timer and Call be
om/o_
Ii......... II]E.....................
used at any time, even
wl/en the o_en is ot)erating-.
I Press TIMER ()N!()FF.
2 E1Her time VO/l W_lllt to
count down.
3 Press TIMER ()N!()FF
to start.
hi addition to starting
lIlal ly/illlCtions,
START!PAUSE allows you
to stop cooking without
ot)ening the door or
clearing the displ_ly.
When time is up, the oven
will signal. To turn off tile
timer signal, press TIMER
()N/l) FF.
NOTE: The timer indicator
will be lit while the timer
is operating.
1 2 3
scRo_sr_o
The Reminder/cature can
be used like an alarm clock
all(t Call 1)e tlsed at ally
time, even wl/en the oven
is operatil]g. The
Reminder time can lie set
u I) to 24 hours later.
1 Press RI_;M/NI)ER.
2 Elller the lili/e voH want
the o_en to ren/ind you.
(Be sure the iili(row_lve
clock shows the correct
time of day.)
3 Select AM or PM.
4 Press I@_MINI)ER. When
Ren/iIMer signal occurs,
press I/EMINDER to turn
it oIL The Reminder
time 1nay be (tispl;+_}ed by
pressing I)d+]MINI)ER.
NOTE: The P,EM indicator
will remain lit to show that
the Reminder is set. "Ib
clear the Reminder betore
it occurs, press RI{MINI)ER,
then 0. The REM indicator
will no longer be lit.
29
Page 30

Other Features Your Model May Have
HI-LO-OFF
Wotl IIl+lV lock the COlltrol
panel to prevent the
nlicrowave/i'om being
accidemallv started or used
by children.
For best (ooking resuhs,
leave tlle turntable on.
It can be turned ol]/or
large dishes. Press
TURNT.\BI,E to tm:n
the turntable on or oil
The ,_ent fan relllOx, es
steam and other'_al/ors
fi:om sm:thce cooking.
To lock or unlock die
controls, press and hoM
CI ILkR!()FF/or about
three seconds. When tile
control panel is locked,
an "I" will be displayed
to the extreme right.
Sometimes the turntable
cml become too hot to
touch. Be carehfl touching
tile tmTnt_d)le during and
after cooking.
Press X_3N'I" FAN once fi)r
high tml speed, twice tor
low tml speed or a dfird
time tO ttlrll tile tklll Off.
3O
All a/ltomati€ t_111 ]batHre
protects tile n/icrowa_e
fi'onl too much heat rising
fi'om tile (ooktop below it.
It automatically turns on if
it senses too umch heat.
If you have turned tile fan
on vo/l ill,iV lind that vo/l
cam/ot turn it ol]_ The/ml
will automatically ulrn oil
when tile internal parts are
cool. It l//av sta', on [_)r
30 n/inutes or more after
tile cooktot) and n/icrowa\e
comrols are turned off.
Page 31

kM
SURFACE
LIGHT
BRiGHT-NiGHT
OFF
]i]
Press tO |tlrl] the sHr{_l(e
light on or off.
You can set tile night
light to tm:n on and off
Hil|()l//atl(allv _1| _l]lV tiH/e
yotI wallt.
1 Press ,XUT() NITE
I ,[(;I tT.
2 Ellter the tilIle VOH W;-Illt
the light to tttrn on.
Sele(t ,\M or PM.
3 Press AUT() NITE
I,[(;IIT again and enter
tile lime vo[i wallt tile
light to turn olE Select
AM or PM.
4 Press AUT() NITE
1+[(;I IT.
()n some models, there is
a night light option.
Press SLIRFA(]E I,IGItT
once/i)r bright light, twice
/or the night light or tlu'ee
times to ttn'n the light ott.
NITE will stay lit to remind
go/l that tile/eature is set.
You can review the Auto
Nit(' I,ight settings t)v
pressing ALrF() NITE
I ,I(;I IT.
To erase your settings
al/d ttlrll ()/I tile a/lton/atic
/eamre, press AUT() NITE
I,I(;I{'K then 0.
[B+.1
The beeper s()tmd level
can be a(!justed. Press
BEEPER VOI+LIME.
Choose 0-3 tor mute
to lot_d.
31
Page 32

Other Features Your Model May Have
How to Use theShelf
WhenMicrowa ring
If//I I/ / I I\ \ \",kk\
• Make sure tile shelf is
posiuoned properly
inside /he microwave
to prevellt dalnage/o
dm oven fl'om arcing.
• Do no[ t/se a lllicFowave
browning dish on file
shelf The shelf could
ovelllea/.
'_Do not use lhe ove/]
wifll/he shelf Oli file
microwave flool: This
could damage tim
lilicl'O_Vktve.
• Use pot holders when
handling the shelf -
it may be hol
• Do llo/ust tile shelf
_llen cooking
popcorn.
• Do nol use the shelf
•villi Sensor Cooking
or Rehea_.
]?ood IIli/Fowa'_es best
%_r]_(_l_pla(ed on the
mrntat)le or on the shelf
Ill {tie lower posilion.
Onh' use the shelf when
reheating (Ill nlore |hall
one level. 1)o ll(/l StOl?e the
shelt inside the men cavity.
For best resul*s
Uneven results
The shelf gives you tile
option to reheat lIIOFe
than one dish of tbod
at the salne tinle.
2,level reheating
32
Page 33

Switch places after 1/2 time.
i i
Switch places after 1/2 time.
Switch places twice
• To reheat on 2 levels
or
• To reheat 2 dishes on the
lower level:
I Mtfitiply reheat time
2 Swit(']l places Mter l/2
the time.
• To reheat on 3 levels
I I)out)le the reheating
til//e.
2 Switch places twice and
give the dishes a 1/2
mrn d uring reheating.
(Place dense/i)()(ts,
or those that require
a longer (ook time, on
the upper shelf/irst.)
33
Page 34

Microwave 7?rms
Term Definition
Arcing \rcin_ is Ill(' microwave term R_r sparks in time oven. Arciug is
catlsed t)_ :
• the metal shell being installed iucorrectlv and touchiug tile
lmticrowave wails.
• metal or Rill touching time side of the o\en.
• oil that is not tu,olded to/bed (tq)ttlrned edges act like
altteltDas
• metal such as twist ties. poultl T t)ius, gold-rimmed dishes.
• F(+(vcled paper towels comainil_,g small metal pieces.
Covering (:overs hold iu lmlOiS|llF(+, allow t()F l/more e_ett heatil/g au, d )'edIIce
cooking, mime. Veltliltg plastic \vYa t) Or co_eriug witlm \vax paper
allows ex(ess steal/m to es(al)e.
Shielding In a r_ uular o\(qL _ou shield (hicken breasts or baked leeds to
tn'(',,cm ()',clqn'()wldug +.VVhelt lm/icFowavittg +, }'Oil rise small strips el
Rill to shicM thin ])arts, su(h as time tips el Wiltg+s alto ]Cg+s()It
t)Oll]tF_.. \vhich WOtlld cook beJ()Fe larger parts.
Standingrime Wh_'u veto| cook with regulm" OVelJ,S, R)ods such as roasts or cakes are
allowed to Slaltd to/iuish cooking or to set. Standing time is
''1 ,eciallv itmtt)oFlaltl ill microwaxe cooking. Note tlmal a microw_wed
cake is uo_ placed on a cooling rack.
Venting \lier (overin_ a dish witlm plastic _rl_t)), _'()tl \eut the plastic wya t) bv
unqun_ back one coni, er so excess steam can escape.
34
Page 35

Care and Cleaning
An occasional thorough
wiping with a solution of
baking soda _md i_lter
keeps the inside fi'esh.
NOTE: Be certain the power
is off before cleaning any
part of this oven.
Walls,Floor,Inside Window,
Metal and PlasticPartson
the Door
Some spatters can be
removed with a paper
towel, others may require
a damp cloth. Remove
grea._y spatters with a sudsy
ch)th, then rinse with a
dam I) ch)th. I[)/) not use
_lbr_lsive (leaners or sharp
[l|ensils 011 ovell W_tllS.
Never use a commercial
oven cleaner on rely part
of your microwave.
Removable Turntable and
Turntable Support
To prevent breakage,
(t1) not place the turntable
into water just atter
cooking. W_lsh it carefully
in warm, sudsy water or in
the dishwasher. The
tm:ntable and support
can be broken if dropt)ed.
ReIneml)er, (t1) 11o| operate
the o_en without the
turntable _md support
in place.
Shelf
Clean with mild soap and
water or in the dishwasher.
Do not cleau hJt a self-
clemfing oven.
35
Page 36

FC
Care and Cleaning
We recommend against
using cleaners with
ammonia or alcohol, as
they can damage the
appearance of the
microwave oven. If you
choose to use a common
household cleaner, first
apply the cleaner
directly to a clean cloth,
then wipe the soiled area.
36
Case
Clean tile outside of tile
microwave with a su(tsv
cloth. Rinse and then (lye..
Wipe tile window clean
with a (tam]l cloth.
Control Panel and Door
Wipe with a damp cloth.
Dry thoroughl}. Do not use
cleaning stlrays, large
amounts of soa]l and water,
abrasives or shartl ok!je(ts
on tile tlanel--they can
damage it. Some paper
towels can also scratch tile
control tlanel.
Do not use a stee[-wool pad;
it will scratch the surface.
To clean stainless steel
sur/imes, use a hot, damp
cloth with a mild detergent
suitable/or stainless steel
sur/imes. Use a clean, hot,
dalll]l cloth tO relilOVe soa[).
Dry with a dry, clean cloth.
If/ood soil remains, try a
general kitchen cleanel;
such as Fantastik_'_ Simtlle
Green_'_ or Fornmla 409_'!
For hard-to-clean soil, use a
standard stainless steel
cleanec such as Bon-Ami °'
or Cameo?
Door Seal
It's important to keep tile
area clean wllere tile door
S(';-IIs ag_lillSt the llli(1X)Vv;-Ive.
Llse only mild, non-abrasive
detergents atll)lied with a
clean sponge or so/t cloth.
Rinse well.
Bottom
Clean off tile grease and
(ttlSt on tile bottoll/ oJ]ell.
Llse a solution of warm
water an(t (tetergent.
Apllly cleaner with a dam]l
SllOnge. Llse a clean, hot,
damp cloth to remove
cleaner. Dr} with a dry,
clean cloth. Alwm_'_ scrub
lightly in tile direction of
tile grain.
At]er cleaning, use a
stainless steel ]lolish, such
as Stainless Steel Magic, °'
Revere Copper and
Stainless Steel (;leaner, °'
or \_i'nol All Puqlose
Metal Polish°'? Follow tile
tlro(tuct instructions tor
cleaning the stainless steel
SllrJilCe.
Page 37

LightBub placeme,zt Ill
/ "I(_ replp.(e the |)lllb(s),
:: bulb with a 40-watt at the main h,se or circuit
:: incandescent bulb
::(WBZ6X10003), available breaker panel or pull the
froth your GE supplier, ph,g.
2 Remme the s(rew at the
front of the light co'_er
)lIl(t lower the (o_er.
ili i
REMOVE SCREWS
1
"Ib ret)la(e the oven light,
first disconnect the t)ower
ii bulb with a 40-watt _!ieoandescent bulh
¢WBa6X10003),available
frmnyour GEsupplier.
at the main/use or _ir(uit
breaker panel or pull the
plug.
2 Remo'_e the top _,nll_ t
taking out the 2 s( rews
that hold it in place.
(. • • )
3 Be sure tile bulb(s) to be
replaced are cool 1)eli)re
removing. Aller breaking
the adhesive seal, remo_e
the bull) by gently turning.
4 Replace the screw.
Connect electrical power
to the oven.
[
3 Next, relllo'_e the screw
lo(ated abme the door
I/ear |he cel/ter of the
oven that se( ures the
light housing.
4 Repla(e the screv_ r.
COlllle(t ele(tri(al ])ower
tO tlle o'_en.
37
Page 38

The Exhaust Feature
Charcoal FiRe-
Ion some mooel5
Reusable Grease Filters
(on all models}
S cThe xent thn ha,_ 2 metal
I'eusM)le gre_lse filters.
The metal filters trap
grease released Lw/i)ods
on the cooktop. They also
prevent [lmnes/i'om/i)ods
OH the cooktop t_:om
damaging the inside of
the lilicrow_lve.
Models that re(ir(ttlate air
1)_.(k illtO the rooli/_.lso
use a (har(oal fiher.
For this reason, the filters
must AI ,WA'_% be in place
when the hood is used.
The grease filters shotfld
be elealJ, ed OllCe a n/Ollth,
or as needed.
To relnove, slide it to the
rear using the tal). Pull it
down and out.
To clean the grease filter,
soak it arid theH swish it
aro/ll/d ill hot water alld
detergent. Don't use
all/l//Ollia or alIllIlOl/ia
Rinse, shake and let it dry
be/i)re replacing.
To replace, slide the filter
iH the fi;ame slot OH the
back ot the ot)elfing. Pull
u t) and to the t_'ont to lock
into t)bwe.
prod uets because they will
darken the metal. I,ight
brushing can be used to
remove embedded dirt.
38
Page 39

The Exhaust Feature
Remove 2 gNle screws to
remove the grille.
If the model is not vented
to the outside, the air will
be recirculated through a
disposable charcoal filter
that helps remove smoke
_Hd odors.
To remove the charcoal
tilter, disconne(t power at
the main fi_se or circuit
breaker panel or pull
ttle plug.
'1"(/install a Hew fiher,
remove plasti( and other
new fiher.
o/lter wr_ll)l)illg fi'Olll the
The charcoal filter
should be replaced when
it is noticeabh' dirty or
discoh)red (uslmlly after
6-12 months, depending
()n hood usage).
Remove the top grille tU
removing the 2 screws that
hold it in t)lace. Slide the
filter towards the/i'ont of
the ()veil alld remove it.
Insert the fiher imo the
top opening of the oven
as shown. It will rest at an
angle on 2 side support
tabs and in/i'oHt of the
right rear tab. Replace
the grille and 2 s(rews.
39
Page 40

Before You Call For Service
Problem PossibleCause Whatto Do
Oven will not A fuse in your home • Rcpla(c tuse or reset dr(uit 1)reakcr.
start may be blown or the
circuit breaker tripped.
Power surge. • Unplug the llliClX)V4_'tx,(!()x_(!ll, then plug
Plug not fully inserted • Make sm:e the 3-prong plug (m the
into wall outlet, oxen is hdlv inserted into wall outlet.
it ba(k in.
Floor of the oven is The cooktop light is
• This is normal.
watlo, even when located below the oven
the oven has not floor. When the light
been used is on, the heat it
produces may make the
oven floor get warm.
"LOCKED" appears The control has been
on display locked.
Youhear an
unusual low-tone
beep
You have tried to start
the Reminder widmut
a valid thne of day.
You have tried to start
the Auto Nite Light
• Press and hold (]I,EAR!()I;F tor
lbo/ t 3 SC(OI/(tS 10 11111(7(kthe (OlltFOl.
• Start (TXel _ alld el/ter a xalid til//e
oI day.
• Start oxer alld el/tel _ a xalid til//e
oI (lay
without a valid thne of
day entered for the
on-thne and off-thne.
You have tried to change
the power level when it is
• _[a11v of the o'_ell'S t(_atlllTeS are preset
alld cal/ll()t bc Challge(].
not allowed.
"SENSORERROR"
appearson display
When ttsh N a Sensor
feature, the door was
opened before stemn
• [)(7 11(7t ()pCll (t(7(717 /ll/til steal// is
SellS(_d al/d til//(_ is S]lOWll (_(7/111ti1/_
dov41/ (711 display.
could be detected.
Steam was not detected
ill nla,Xiluulll mnotmt of
thlle.
• Use Time (_ook t() heat fbr re(Ire time.
Food amount too Sensor Reheat is for • Use ['ime Cook tbr large am(routs
large for Sensor single servings of ot tbod.
Reheat recoulnlended foods.
40
Page 41

Before You Call For Service
• Ste_/II/ oF "_k/t)()F es(_/l)illg
_]'()i/l _/l'Otllld tile dool'.
• I,ight reflection around
dool _ o1" ottteF (ase.
• Dimming oven light and
cl/a_lge in the blower
soulld at power levels
other than high.
• Dull thumI/ing sound
while oven is operating.
• TV-radio i_ltertbrence
might be noticed while
/lSillg tile micl:ow;ive.
Similar to the inter[brence
caused 1U other small
appliances, it does not
indicate a problem with
the microw_x e. Plug the
microwave i't/to a difJere_lt
electrical circuit, move the
radio or TV as lhr _/w_W
]1701/1tile l/lic17owttve as
possible, or check the
position and sig_ml of
the TViradio antenna.
41
Page 42

We?lBe
assislan('e widl your
www.GEAppliances.com ap1)liance? Tr} the (;E
Applian(es Wcbsite ,24 hours
a ( av, t l'V (ta_ of lie ve tr!
• , , , •
FoF gl'{';-ilel? ('OllV('lliell((' alia
]ils|(T S(TVi{'(', _'OII ('_tll IIOW
download Owner's Manuals,
order parts, catalogs, or ('VOll
schedule selMce on-line. "_bu
(an also 2Ask Our "l_'am o1
Expertg"" your questions,
and so much more...
Exp(,r| GE repair service is
Ollly Oll{:_ St(}]) aw "iv tlX)]//
www.GEAppliances.com "your doo_; (;et onLline and
sch( dule vo/itl _S{!l_,iC(? at
800.GE.CARES _our (onv(!nien{ e 24 hours
(800.43Z2737) an?<t_' 5 <:'t: tt*_ _ V F " '
GE supports tile Universal
Design concel)t--l)ro(hlcts '
S(!I'\_( (!S _tl/([ (!nvilx)nIIl{!ll[S
car:
www.GEAppliances.com
800.TDD.GEAC ot all ages, siz{'.sm]{t
(800.833.4322) the need to d(!sign for a
cat)abilifes. W(' recognize
\_(te rang(' oft)hysical an(/
mental al}iliti(,s and
Purchase a C,E {'xw]]d(x:l
www.GEAppliances.com warramy and learn about
800.626.2224 availat)le while your warmn|y
special (tiscom]ts |hat are
is still in elt{'ct. 3bu can
tmrchase it on-line am|ime ,
()r {all 800.GE.(2 \/@_S
(800.4a_.2/a/) during
n(}l_]lal b/Isilless ]1()111_s.
impairments. For de|ails of
(',E's Universal Design
at}t)lica|ions, including
kitchen (tesigal ideas {br
people wiIh disabilities,
check out our W('bsite today.
For die heanng impaired,
please call 800.-[I)D.GIL_\C
(800.833.4322).
or (Pall 800.626.2224 dm'ing
nol'lIlal ])llsiness holllN.
(;E Consumer t tome
Set%ices will still be there
a{ieF VOIllP waFrall W expires.
42
Page 43

www. GEAppliances.com
800.626.2002
Individuals qualified
to service their own
_ppli_mces {m}, h_v_e
t)arts or ;_.{cessori{'s SellI
directly to their home.
(VISA, MasterCard [t//d
Discover cards are
_1{-{{'t}t{'(/. )
Order (m-line today,
_4 ho/lrs eve]T d_F¢ or
1}}phone _lt 800.628.2002
d m:ing normM business
hollrs.
If Ibr some reason you are
not hal)py with the service
yo/l receive, h{re _re steps
to/ollow {or fluPther helt).
First contact the peot)le
%_r]]() S{']'%¢i ( {_{t _)() [i];
;ll)plian{ e. Explain why
yon are n()t t)leased.
/Vex{ i/ you rex, still not
t)leased, wriw all the
det ails_inchl(ting yollr
t)hone munb_ r--lo:
Customer Relauons
GE At)t)liallces
I,ouisville, KY 40225
Instructions contained
in this manual cover
procedures to be
performed by rely user.
Other servichlg generally
should be referred
to qualified service
personnel. Caution
must be exercised, since
improper servichlg may
cause mlsafe operation.
www.GEAppliances.com
Register your new
appliance on-lhle-
at your couveltience!
Timely product registration
will allow/br enhmlced
communication and
t)rompt service raider the
wrlns o/yore" warranty,
should the need _trise.
_)[i _]_r Mso mail in the
t)re-prillt ed regJstrazioll
(ard in{luded in die
packing m_m'rial.
43
Page 44

Staple.,al('_'l!p o, ea,,em.I et,,.el_I,,.,.. P,-,,dd o,_d,,.l
purehase date is m'(,d('d to obtai_t sc'rviee under warra_tO'.
FULL ONbL YEAR WARRANTY
For one year fi'om (late of original
tmrcl/_lse, we will provide,/)'ee of (h_u:ge,
parts _uld service labor ill VOllr home
to rel)_dr or replace a_0' part o/the
microwav(. 0vim tl/m tbils t)ec_lllse Of
a n/amttheturing deject.
LIMYI_D ADDITIONAL
NINE- YFAR WARRAN'IT
For the second through the tenth year
/i'om the date o/original pur(hase,
we will 1)rovide, fi:ee of charge, a
rel)lacen/em mag'nehon tube if tile
nlagnetron tube/ifils because of a
mamlti_(turing de/oct. "_bu pay tor
the service trip to yore: home and
service labor charges.
Warrantor is not responsible for consequential damages.
This warramv is ex{en(led to the original
pro:chaser and any su(ceeding owner tor
t)rod ucts t)m:chased lot ordinary home use
in tile 48 m_dnland states, t]awaii _uld
W_shington, D.C. In Alaska the warramv
is ttle same ex(ept that it is I JMITED
because you must 1)a} to ship tile product
to the servi_ e shop or tor the servi_ e
te(hnician's rowel costs to your home.
All warramv service will be t)rovided bv
o/lr ]_'_lct()rv' Servi(e (]ellters or 1)v ()/1)7
authorized Cusiomer Care _' servicers
dm:ing normal working hours.
Should yore: appliance need service,
during warranty period or beyond, call
800.GE.CAI_,ES (800.432.2737).
• Service trills to VO/lr hol//e 1o teach
roll how to use tile t)roduct.
• hnproper insmllati(m, deliver} or
maintenance.
If you hme an installation l)robl(m, comact
your d(al( r or install(l'. You are responsibl(
lot providing ad(quat_ electrical,
(xha/tstJng and other conn(cting/i_ciliti( s.
• R(plac(ment of the cookt(/p light bulbs.
• Faihtre of tile prod uet if it is n/isused,
or used/i)r other than the intended
t)/lrl)ose or/lse(t (ol//l//er(ially,
• Dan/age to product caused l)} accident,
fire, floods or acts of (',od.
• hlcidental or consequential danlage
caused by t)ossible deti'cts wifll this
appliance.
• Damage caused tiler delivery.
• Rel)lacement of house fuses or resetting
o/(ircuit bre_&ers.
Some states do not al!o w t!le exclusion or limitation of incidental or consequential dmnages _
so th e abov e limitation or exclusion m_O, _!ot apply to you. This warranty gives you specific
legal rights, and you tmQ, aIs0 have other rights "wilic!l vary ii'om state to state. To k!_ow what ]
your legal rights _Jre in your state, consu!t y0ml !0C!}!0r s!ate COnSumer _,tthirs office or your
statels Att0rney Genera L
Warrantor: General Ele_¢rieCompan3_Lo_dsville, KY 40225
164D3370P271
49-40341 os-o3JR
PrintedinKorea JVM1653
 Loading...