

GE JT952SK4SS, JT952SK3SS, JT952SK2SS, JT952SK1SS Owner’s Manual
ge.com
Safety Instructions . ........ 9-4
©
Operating Instructions
Clock and Timer ............ 19
Control i,ockout ............ 19
Controls .................... 5
Convection .............. 15-17
Oven .................. 1O, 11
Probe .................. 14, 17
Sabbath Feature ............. 9
Self Cleaning Oven ....... 20, 21
Special Features ............ 6-8
Thermostat ................ 19
Timed Baking
and Roasting ............ 13, 18
Care and Cleaning
Cleaning Oven Door ......... 23
Control Panel .............. 25
Lift-Off Oven Door .......... 23
Light Bulb ................. 22
Oven Floor ................ 23
Probe ..................... 24
Removing Packaging Tape .... 22
Shelves .................... 24
Stainless Steel Surfaces ....... 25
f1"912-30" Single Wall Oven
,f1"952-30" Double Wall Oven
Troubleshooting Tips ..... 96-28
Consumer Support
Consumer Support ...Back Cover
Product Registration ...... 99, 30
Warranty .................. 31
0
Writethemodelandserial
numbershere:
Model #
Serial #
You can find them on a label
on the flont of the oven behind
the oven door on single oven
models, or the flont of the lower
oven behind the oven door on
double oven models.
49-80470 07-07 JR
IMPORTANTSAFETYINFORMATION.
READALLINSTRUCTIONSBEFOREUSING.
WARNING!
For your safety, the information in this manual must be followed to minimize the risk of fire or
explosion, electric shock, or to prevent property damage, personal injury, or loss of life.
IMPORTANTSAFETYNOtiCE
The California Safe Drinking Water and ToxicEnforcement Act requires the Governor of California
topublish a list of substances known to the state to cause cancer, birth defects or other reproductive
harm, and requires businesses to warn customers of potential exposure to such substances.
Thefiberglass insulation in self-clean ovens gives off a very small amount of carbon monoxide during
the cleaning cycle. Exposure can be minimized by venting with an open window or using a ventilation
fan or hood.
SAFETYPRECAUtiONS
When using electrical appliances, basic safety precautions should be followed, including the
following:
Use this appliance only for its intended
purpose as desoibed in this Owner's
Manual.
iiiiiiiiiiiii!!
iiiiiiiiiiiii!!
Be sure your appliance is properly
installed arid _ounded by a qualified
technician in accordance Mth the
prox,ided installation instructions.
Do riot attempt to repair or replace any
part of your oven unless it is specifically
recommended in this manual. All other
ser\,icing should be referred to a qualified
technician.
Have the installer show you the location
of the circuit breaker or fuse. Mark it fi)r
easy reference.
Before perfiwming any ser\,ice, disconnect
the oven power supply at the household
distribution panel by removing the fuse or
switching off the circuit breaker-
Do riot leave children alone---children
should riot be left alone or unattended in
an area where an appliance is in use. They
should never be allowed to sit or stand on
any part of the appliance.
Do riot allow anyone to climb, stand or
hang on the door- They could damage the
oven, or cause severe personal in,juU.
_ Be sure the oven is securely installed in
a cabinet that is firmly attached to the
house structure. Never allow anyone to
climb, sit, stand or hang on the oven door:
Never leave the oven door open when you
are riot watching the oven.
Always keep combustible wall coveting,
curtains or drapes a s_e distance fiom
your overI.
Always keep dish towels, dishcloths, pot
holders arid other linens a s_e distance
from your oven.
Always keep wooden arid plastic utensils
arid canned food a s_e distance m_,ay
from your" oven.
Teach children riot to play xdth the
controls or any other part of the oven.
Large scratches or impacts to glass doors
can lead to broken or shattered glass.
2
WARNING!
SAFETYPRECAUTIONS
iiiiiiiiiiiii!
Do not store flammable materials in
all oveil.
CAUTION:,temsofi.terestto
iiiiiiiiiiiii!
children shouM not be stored in cabinets
above an oven; children climbing oll the
oven to reach items could be seriously
in,jured.
iiiiiiiiiiiii!
Never wear loose-fitting or han_ng
garments while using the appliance. Be
careful when reaching fi_r imms stored in
cabinets over the oven. Flammable material
could be i_dted if brought in contact with
hot surfaces or headng elements and may
cause severe burns.
iiiiiiiiiiiii!
Use only d U pot holders--moist or damp
pot holders oll hot surf`aces may result in
burns flom steam. Do not let pot holders
touch hot headng elements. Do not use a
towel or other bulky cloth.
For your safety, never use your appliance
for warming or heating the room.
iiiiiiiiiiiii!
Do not let cooking grease or other
flammable materials accumulate in or
ilear the oveIl.
iiiiiiiiiiiii!
Do not use water oll _ease fires. Never pick
up a flaming pail. Turn the controls off{.
Flame in the oven can be smothered
completely by closing the oven door and
turning the oven off or by using a multi-
purpose dU chemical or fkmm-type fire
extinguisher.
iiiiiiiiiiiii!
Do not touch the heating elements or the
interior surface of the oven. These surf`aces
may be hot enough to burn even though
they are dark in color During and _ter
use, do not touch, or let clothing or other
flammable materials contact any interior
area of the oven; allow sufficient time fi)r
cooling first.
Potentially hot surf`aces include oven vent
openings, surf`aces near the openings,
cre\,ices around the oven dooi, the edges
of the window and metal trim parts above
the door
REMEMBER:The inside surf`ace of the oven
may be hot when the door is opened.
ge.com
Never leave,jars or cans of f`at drippings in
or ilear your oveIl.
Do not store or use combustible materials,
gasoline or other flammable vapors and
liquids in the x,icinity of this or any other
appliance.
Stand away from the oven when opening
the oven door. Hot air or steam which
escapes can cause burns to hands, face
and/or eyes.
Do not heat unopened food containers.
Pressure could build up and the container
could burst, causing an in,juU.
Keep the oven vent unobstructed.
Keep the oven flee from grease buildup.
Place the oven sheff in the desired position
while the oven is cool. If shelves must be
handled when hot, do not let pot holder
contact the heating elements.
When using cooking or roasting bags in the
oven, follow the manuf`acturer's directions.
Pulling out the sheff to the stop-lock is a
convenience in lifting heaxT foods. It is 'also
a precaution against burns from touching
hot surf`aces of the door or oven walls.
Do not use the oven to diy newspapers.
If overheated, they can catch oll fire.
Do ilot use the ovell f()r a storage area.
Items stored in an oven can ignite.
Do not leave paper products, cooking
utensils or food in the oven when not
in use.
After broiling, always take any broiler pall
out of the oven and clean it. Leftover
grease in a broiler pan can catch fire next
time you use the pail.
Clean only parts listed in this Owner's
Manual.
Do not use aluminum foil to line
oven bottoms. Improper installation
of aluminum fifil may result in a risk
of electric shock or fire.
3
IMPORTANTSAFETYINFORMATION.
READALLINSTRUCTIONSBEFOREUSING.
COOKMEATANDPOULTRYTHOROUGHLY...
Cookmeat andpoultry thoroughly--meat to at leastan INTERNALtemperatureof 160°Fandpoultry
toat least an INTERNALtemperatureof 180°ECookingto thesetemperaturesusuallyprotectsagainst
foodbomeillness.
SELF-CLEANINGOVEN
Do not clean the door gasket. The door
gasket is essential for a good seal. Care
should be taken not to rob, damage or
move the gasket.
Do not use oven cleaners. No commercial
oven cleaner or oven liner protective
coating of any kind should be used in or
around any part of the oven. Residue from
oven cleaners will damage the inside of the
oven when the self clean cycle is used.
Before selfk:leaning the oven, remove
shiny, silvePcolored oven shelves (on some
models) and all other cookware.
Be sure to xdpe up excess spillage before
starting the self cleaning operation.
If the self cleaning mode malfunctions,
turn the oven off and disconnect the power
supply. Have it ser\@ed by a qualified
technician.
READANDFOLLOWTHISSAFETYINFORMATIONCAREFULLY.
SAVETHESEINSTRUCTIONS
4
Usingthe ovencontrols.
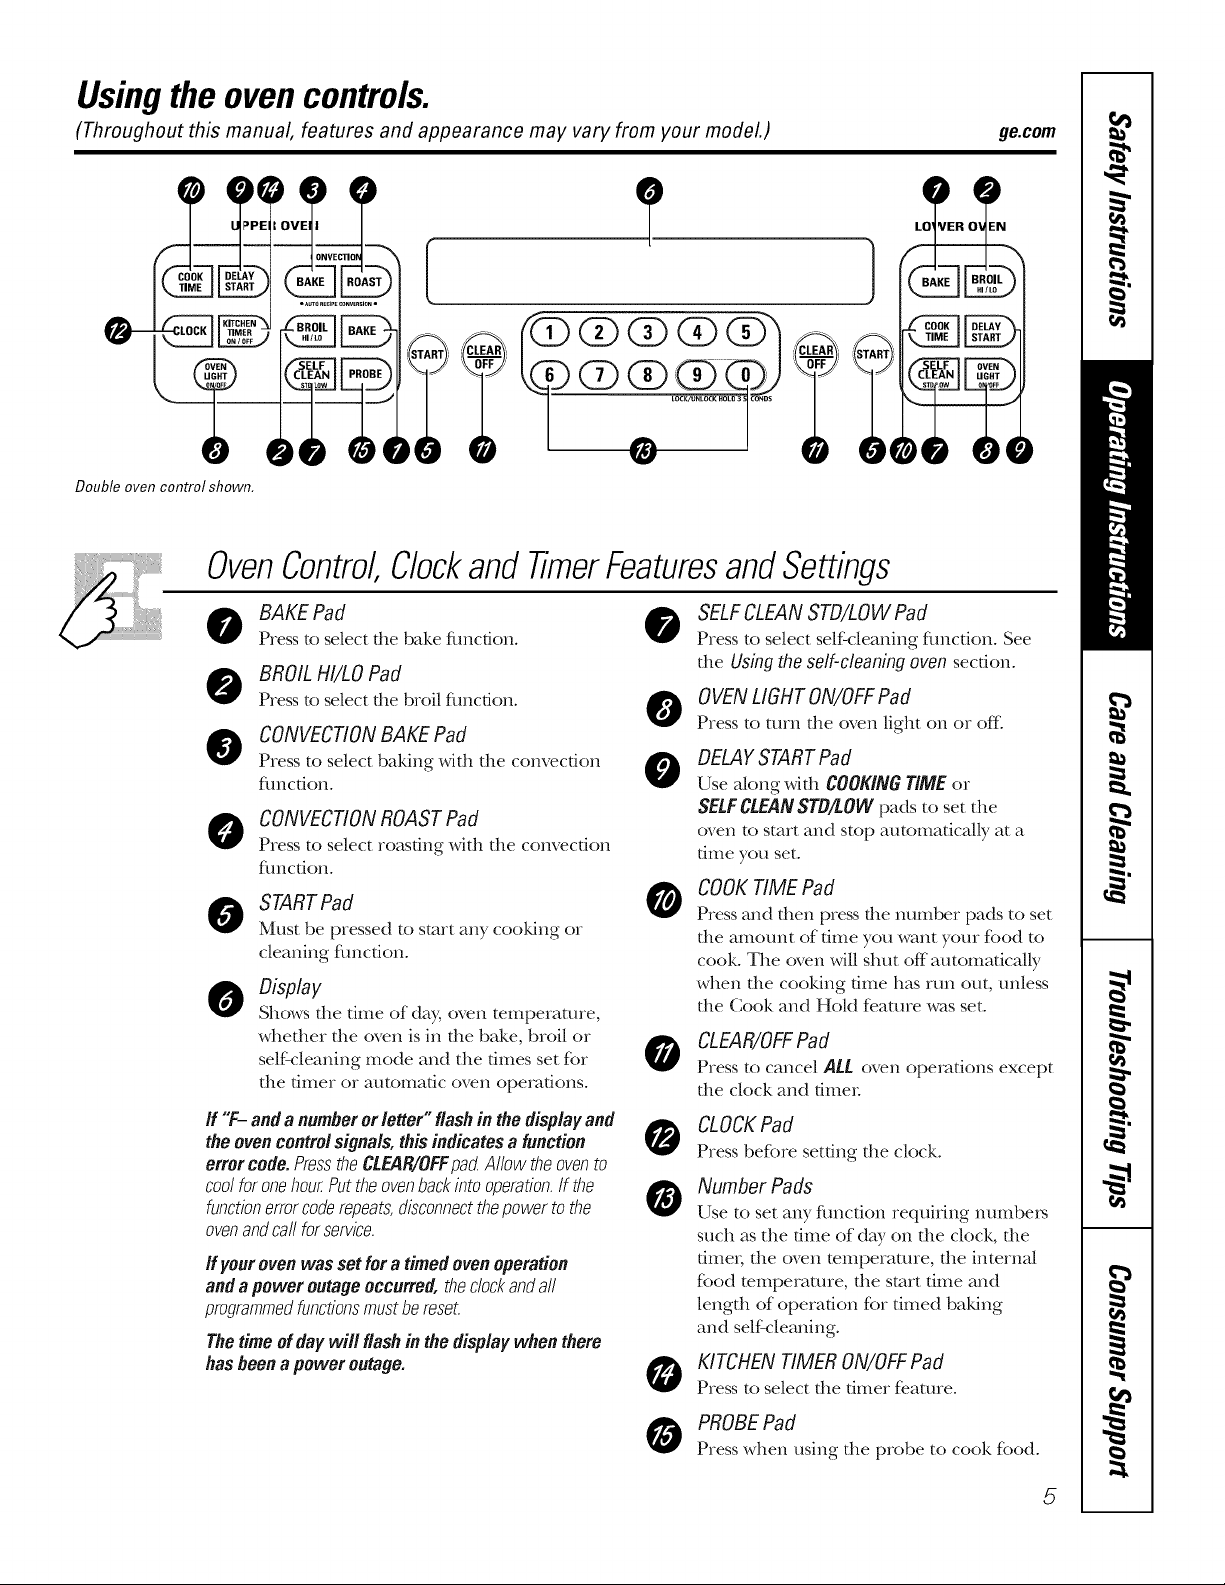
(Throughout this manual, features and appearance may vary from your model.) ge.com
Double oven control shown.
OvenControl
BAKE Pad
0
Press to select file bake fimcdon.
BROIL HI/LO Pad
0
Press to select the broil fimcdon.
CONVECTIONBAKE Pad
@
Press to select baking with tile convection
flmcfion.
O ONVECTIONROASTPad
Press to select roasting with the convection
flmcdono
STARTPad
Must be pressed to start any cooking or
cleaning flmcfion.
Display
Shows file time of day, oven temperature,
whefller rile oven is in file bake, broil or
self'cleaning mode and tile times set for
rile timer or automatic oven operations.
If "F-anda numberor letter" flashin the displayand
theovencontrolsignals,thisindicates a function
errer code. PresstheCL,91R/OFFpactAllow theovento
coolforonehou_Puttheovenbackintooperation.If the
functionerrorcoderepeats,disconnectthepowertothe
ovenandcallforservice.
If your ovenwasset fora timedovenoperation
andapower outageoccurred, theclockandall
programmedfunctionsmustbereset.
Thetimeofdaywill flashin the displaywhenthere
hasbeena poweroutage.
Clockand TimerFeaturesandSettings
SELFCLEAN STD/LOWPad
Press to select self'cleaning fimction. See
the Usingtheself-cleaningoven section.
OVENLIGHTON/OFFPad
Press to turn tile oven light on or of_
DELAYSTART Pad
0
Use along widl COOKINGTiMEor
SELFCLEANSTB/LOWpads to set tile
oven to start and stop automatically at a
time you set.
COOKTIME Pad
0
Press and then press the mmlber pads to set
file amount of time you want your food to
cook. The oven will shut off automaticaUy
when file cooking time has run out, unless
rile Cook and HoM feature was set.
CLEAR/OFFPad
Press to cancel ALL oven operations except
tile clock and filller
CLOCKPad
Press before setting tile clock.
Number Pads
Use to set any fimcdon requMng ntm).be_
such as tile time of day on tile clock, tile
fime_; tile oven mmperamre, tile internal
food temperature, tile start dine and
length of operation for dined baking
and self cleaning.
KITCHEN TIMER ON/OFFPad
Press to select tile timer fe.ature.
PROBEPad
Press when using tile probe to cook food.
5
Special features ofyour ovencontrol.
Yournew touch pad control has additional features that you may choose to use. Thefollowing are the features
and how you may activate them.
Thespecial feature modes can only be activated while the display is showing the time of day. They remain in
the control's memory until the steps are repeated.
When the display shows your choice, press the STARTpad. The special features will remain in memory after
a power failure, except for the Sabbath feature, which will have to be reset.
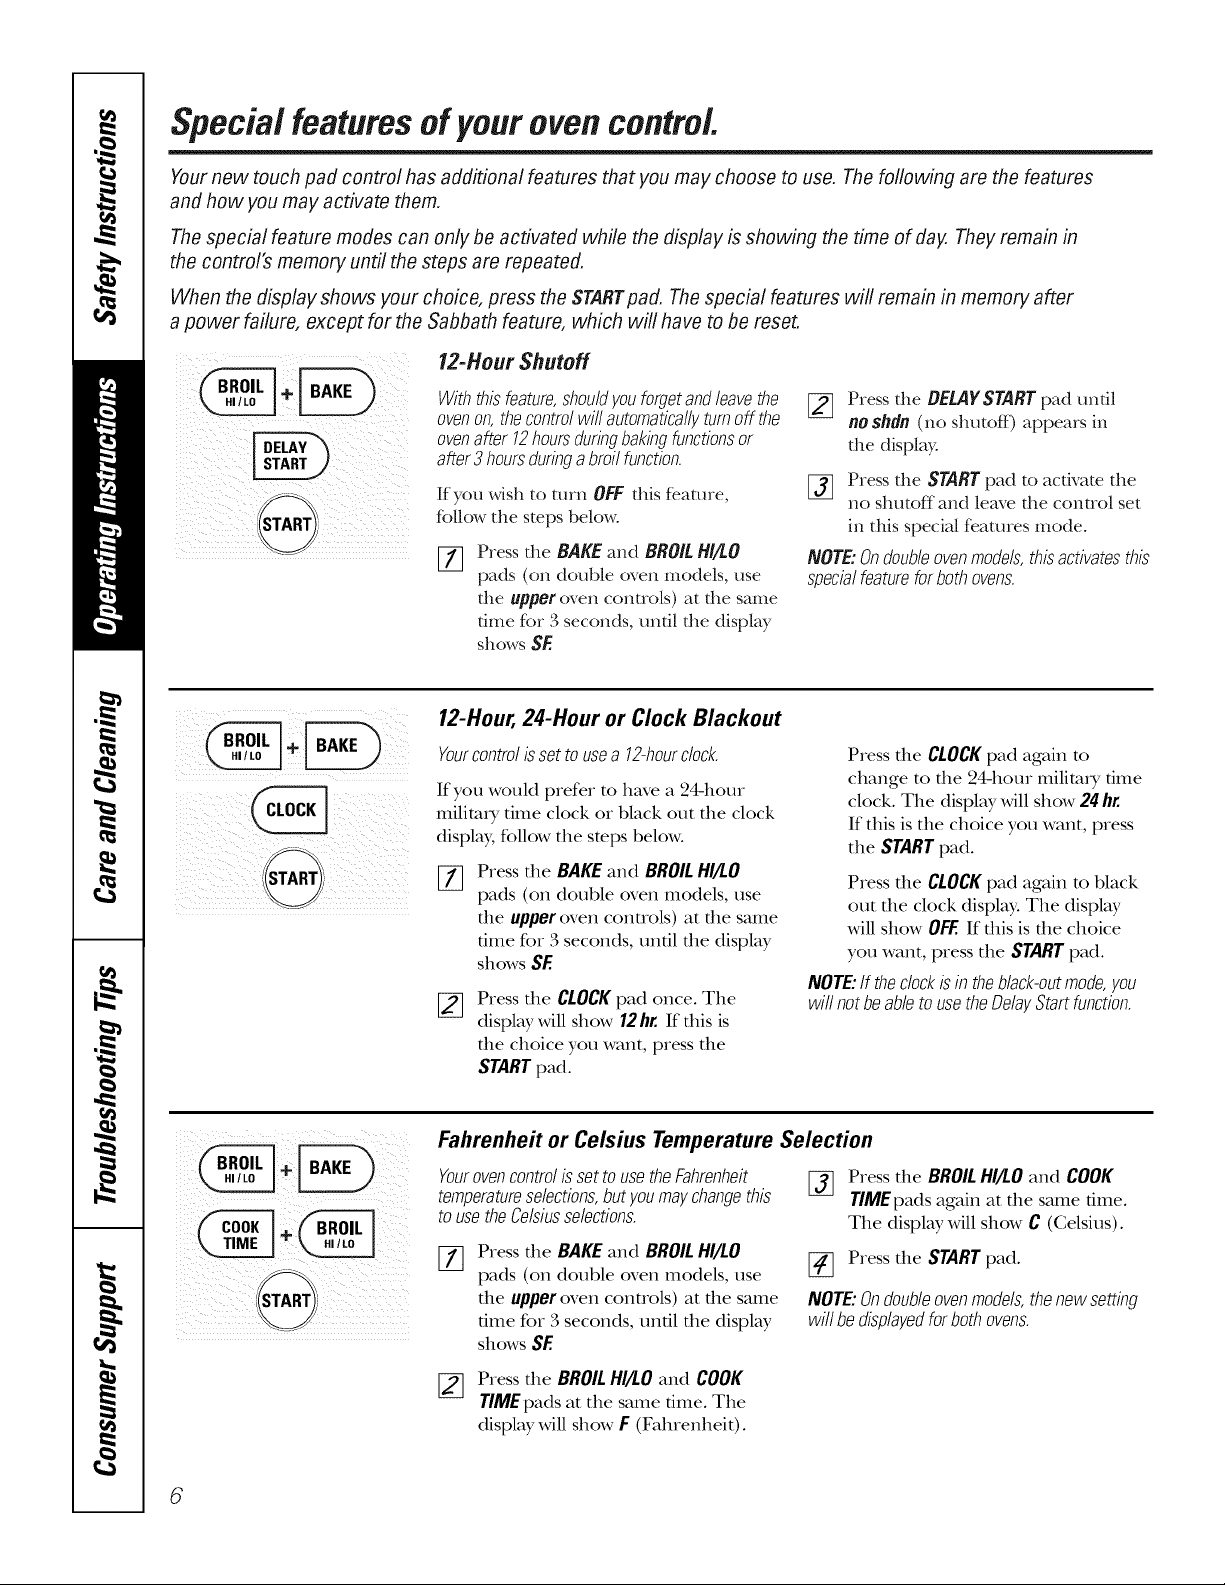
12-Hour Shutoff
Withthisfeature,shouldyouforgetandleavethe
ovenon,thecontrolwill automaticallyturnoff the
ovenafter 12hoursduringbakingfunctionsor
after3 hoursduringabroilfunction.
If you wish to turn OFF this feature,
follow the steps below.
[77 Press the BAKEand BROILHI/LO
pads (on double oven models, use
the upperoven controls) at the same
time for 3 seconds, undl the display
showsSE
12-Hour, 24-Hour or Clock Blackout
Yourcontrolis settousea 12-hourdock.
If you would prefer to have a 24-hour
milimi T time clock or black out the clock
display, follow the steps below.
Press the BAKEand BROILHI/I.O
%
pads (on double oven models, use
the upper oven controls) at the same
time for 3 seconds, until the display
showsSE
Press the CLOCKpad once. The
display will show 12hr. If tiffs is
the choice you want, press the
STARTpad.
[_ Press the BEL4YSTARTpad undl
noshdn(no shutoff) appears in
the display.
[_] Press the STARTpad to activate the
no shutoff and leave the control set
in this special features mode.
NOTE:Ondoubleovenmodels,thisactivatesthis
specialfeaturefor bothovens.
Press die CLOCKpad again m
change to file 24-hour milim_y time
clock. The display will show 24 hr.
If this is the choice you want, press
the STARTpad.
Press die CLOCKpad again m black
out the clock display. The display
will show OFF.If this is the choice
you want, press the STARTpad.
NOTE:If theclockis in theblack-outmode,you
willnotbeabletousetheDelayStartfunction.
ill _ _ _i_
6
Fahrenheit or Celsius Temperature Selection
Yourovencontrolissetto usetheFahrenheit
temperatureselections,butyoumaychangethis
tousetheCelsiusselections.
Press the BAKE and BROILHI/LO
pads (on double oven models, use
the upper oven controls) at the same
time for 3 seconds, until the display
shows SE
[_ Press the BROIL HI/LO and COOK
TIME pads at the same time. The
display will show F (Fahrenheit).
[_ Press the BROIL HI/LO and COOK
TIME pads again at the same time.
The display will show C (Celsius).
[_ Press the STARTpad.
NOTE:Ondoubleovenmodels,thenewsetting
willbedisplayedforbothovens.
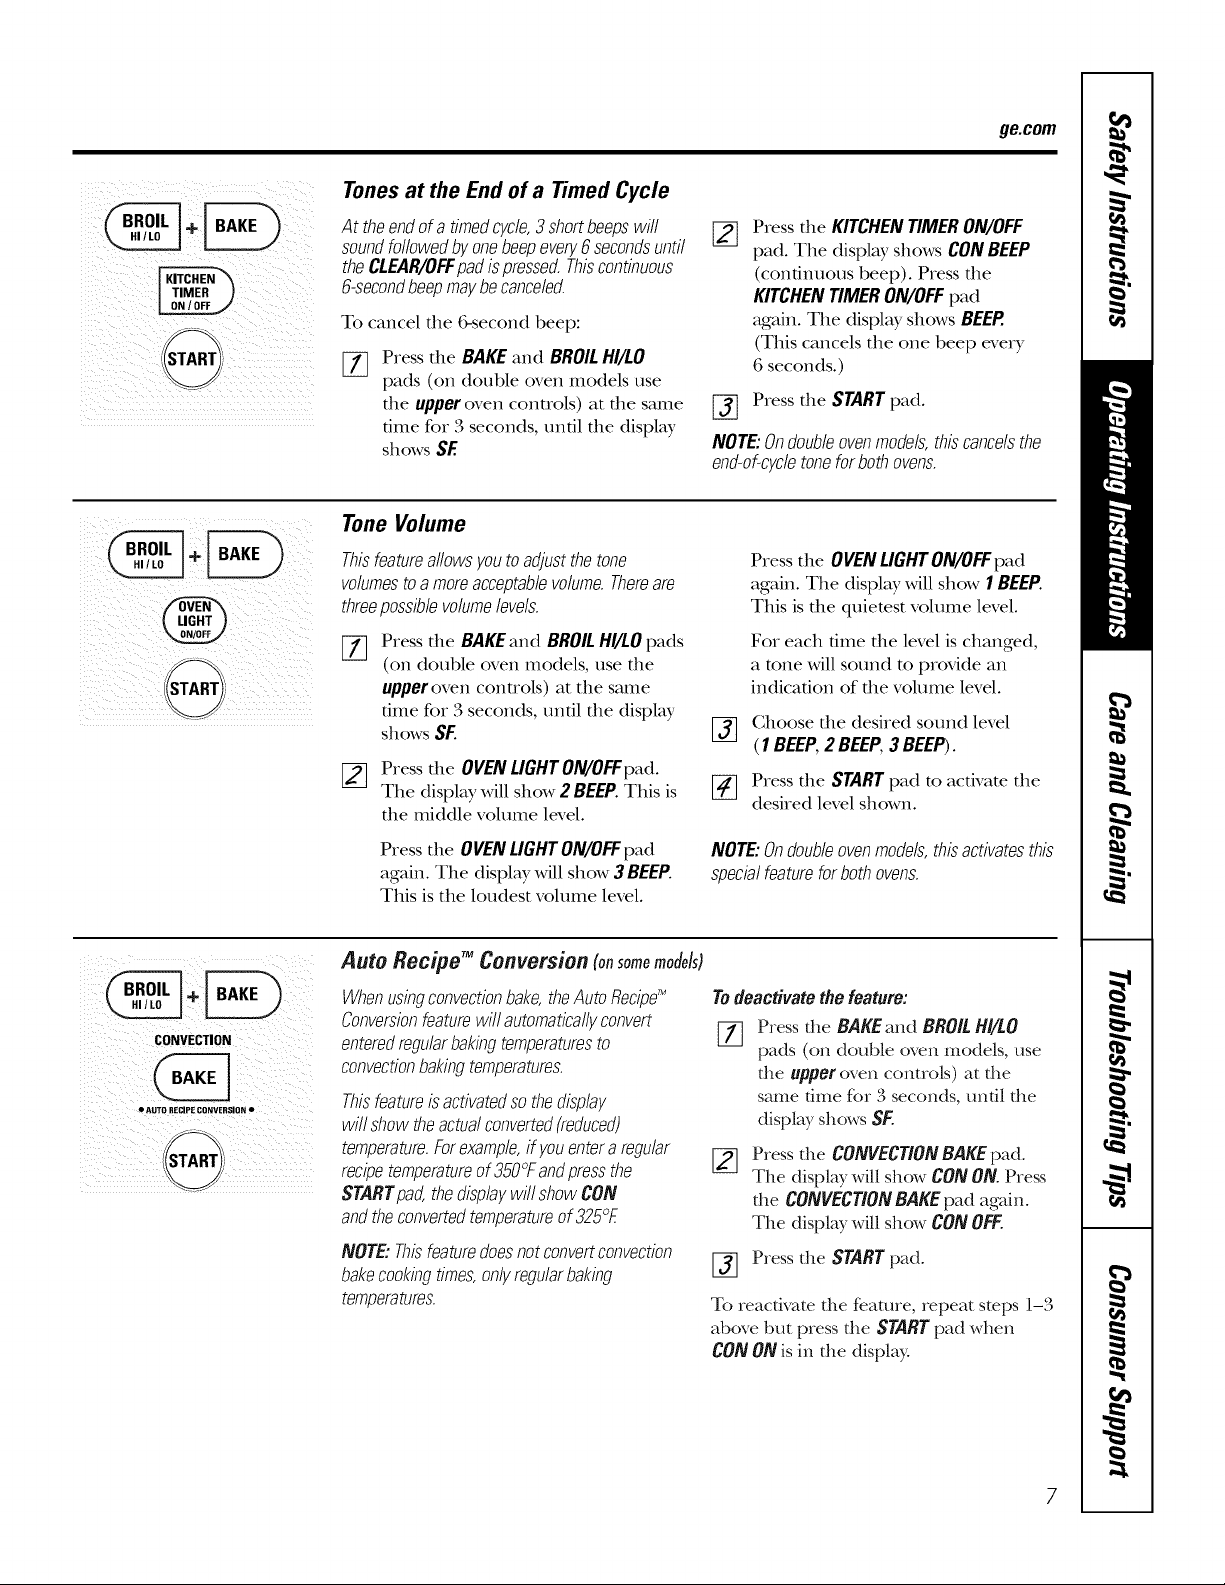
Tones at the End of a Timed Cycle
At theendof a timedcycle,3 shortbeepswill
soundfollowedbyonebeepevery6secondsuntil
theCLEAR/OFFpadispressed.Thiscontinuous
6-secondbeepmaybecanceled.
To cancel the &second beep:
Press the BAKE and BROIL HI/LO
%
pads (on double oven models use
the upper oven controls) at the same
time for B seconds, until the display
shows SE
Tone Volume
ge.com
Press the KITCHENTIMERON/OFF
[]
pad. The display shows CONBEEP
(continuous beep). Pressthe
KITCHENTIMERON/OFFpad
again. The display shows BEEP.
(This cancels the one beep every
6 seconds.)
Press the STARTpad.
NOTE:Ondoubleovenmodels,thiscancelsthe
end-of-cycletoneforbothovens.
! i_ i i I
CONVECTION
• AUTO RECIPE coNVERSION •
Thisfeatureallowsyoutoadjustthetone
volumesto amoreacceptablevolume.Thereare
threepossiblevolumelevels.
Press the BAKEand BROILHI/LOpads
%
(on double oven models, use the
upper oven controls) at the same
time for Bseconds, until the display
shows SF.
[_ Press the OVENLIGHTON/OFFpad.
The display will show 2 BEEP.This is
the middle volume level.
Press the OVENLIGHTON/OFFpad
again. The display will show 3 BEEP.
This is the loudest volume level.
Auto Recipe TM Conversion (onsomemodels)
Whenusingconvectionbake,theAutoRecipe'_
Conversionfeaturewill automaticallyconvert
enteredregularbakingtemperaturesto
convectionbakingtemperatures.
Thisfeatureisactivatedsothedisplay
willshowtheactualconverted(reduced)
temperature.Forexample,ifyouentera regular
recipetemperatureof350°Fandpressthe
STARTpad,thedisplaywillshowCON
andtheconvertedtemperatureof325°E
NOTE:Thisfeaturedoesnotconvertconvection
bakecookingtimes,onlyregularbaking
temperatures.
Press the OVENLIGHTON/OFFpad
again. The display will show 1BEEP.
This is the quietest volume level.
Fox each time the level is changed,
a tone will sound to provide an
indication of the volume level.
[_] Ghoose the desired sound level
(1BEEP,2 BEEP,3BEEP).
[_ Press the STARTpad to activate the
desired level shown.
NOTE:Ondoubleovenmodels,thisactivatesthis
specialfeaturefor bothovens.
Todeactivatethe feature:
[77 Press the BAKEand BROILHI/LO
pads (on double oven models, use
the upperoven controls) at the
same time for 3 seconds, until the
display shows SE
Press the CONVECTIONBAKEpad.
The display will show CONON.Press
the CONVECTIONBAKEpad again.
The display will show CONOFF.
[_ Press the STARTpad.
To reactivate the feature, repeat steps 1l-3
above but press the STARTpad when
CON ON is in the display.
Special features ofyourovencontrol
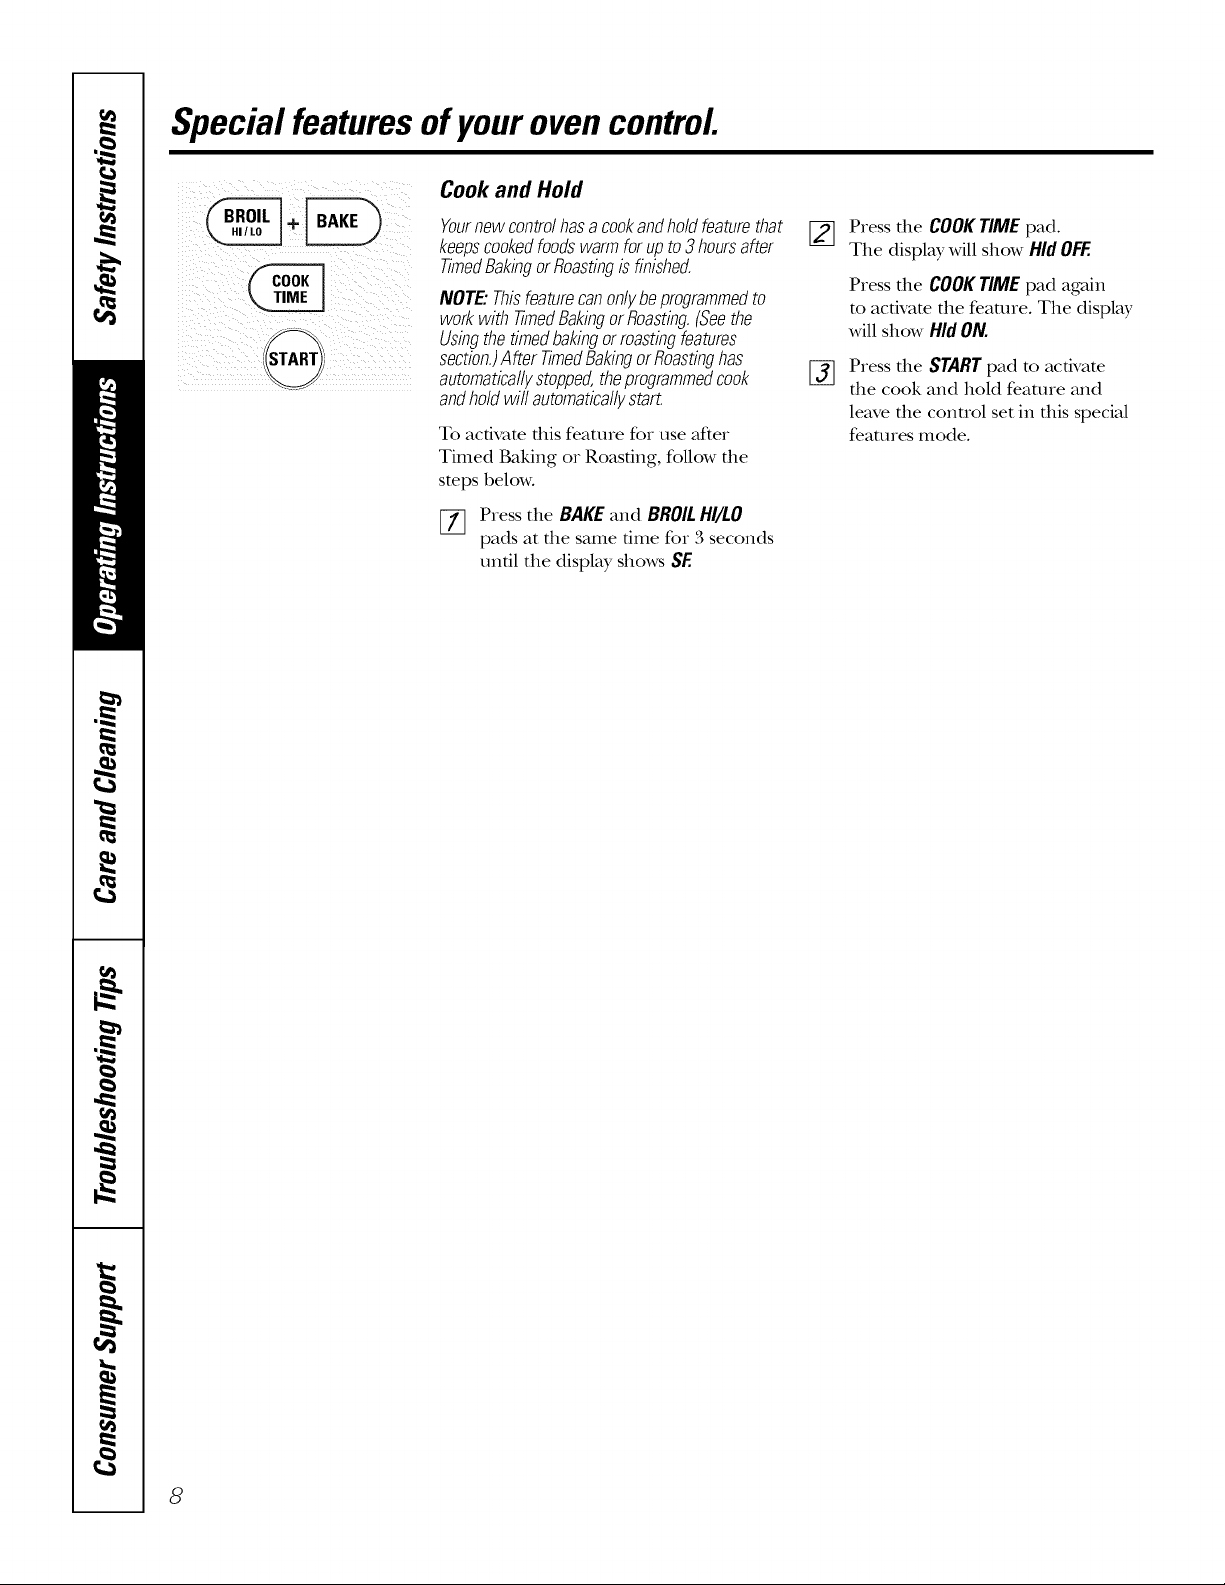
Cook and Hold
Yournewcontrolhasacookandholdfeaturethat
keepscookedfoodswarmfor upto 3hoursafter
TimedBakingorRoastingis finished.
NOTE."Thisfeaturecan only beprogrammedto
work with timed Bakingor Roasting.(Seethe
Usingthe timed baking ormasting features
section.)After TimedBakingorRoasting has
automaticallystopped, the programmedcook
andhold wit automaticallystart.
To activate this feature for use after
Timed Baking or Roasting, follow the
steps below.
[7] Press the BAKE and BROILHI/LO
pads at the same time for 3 seconds
until the display shows SE
[_ Press the COOK TIME pad.
The display will show Hid OFF.
Press the COOKTIME pad again
to activate the feature. The display
will show Hid ON.
Press the STARTpad to acdvate
%
the cook and hold feature and
leave the conuol set in this special
features mode.
8
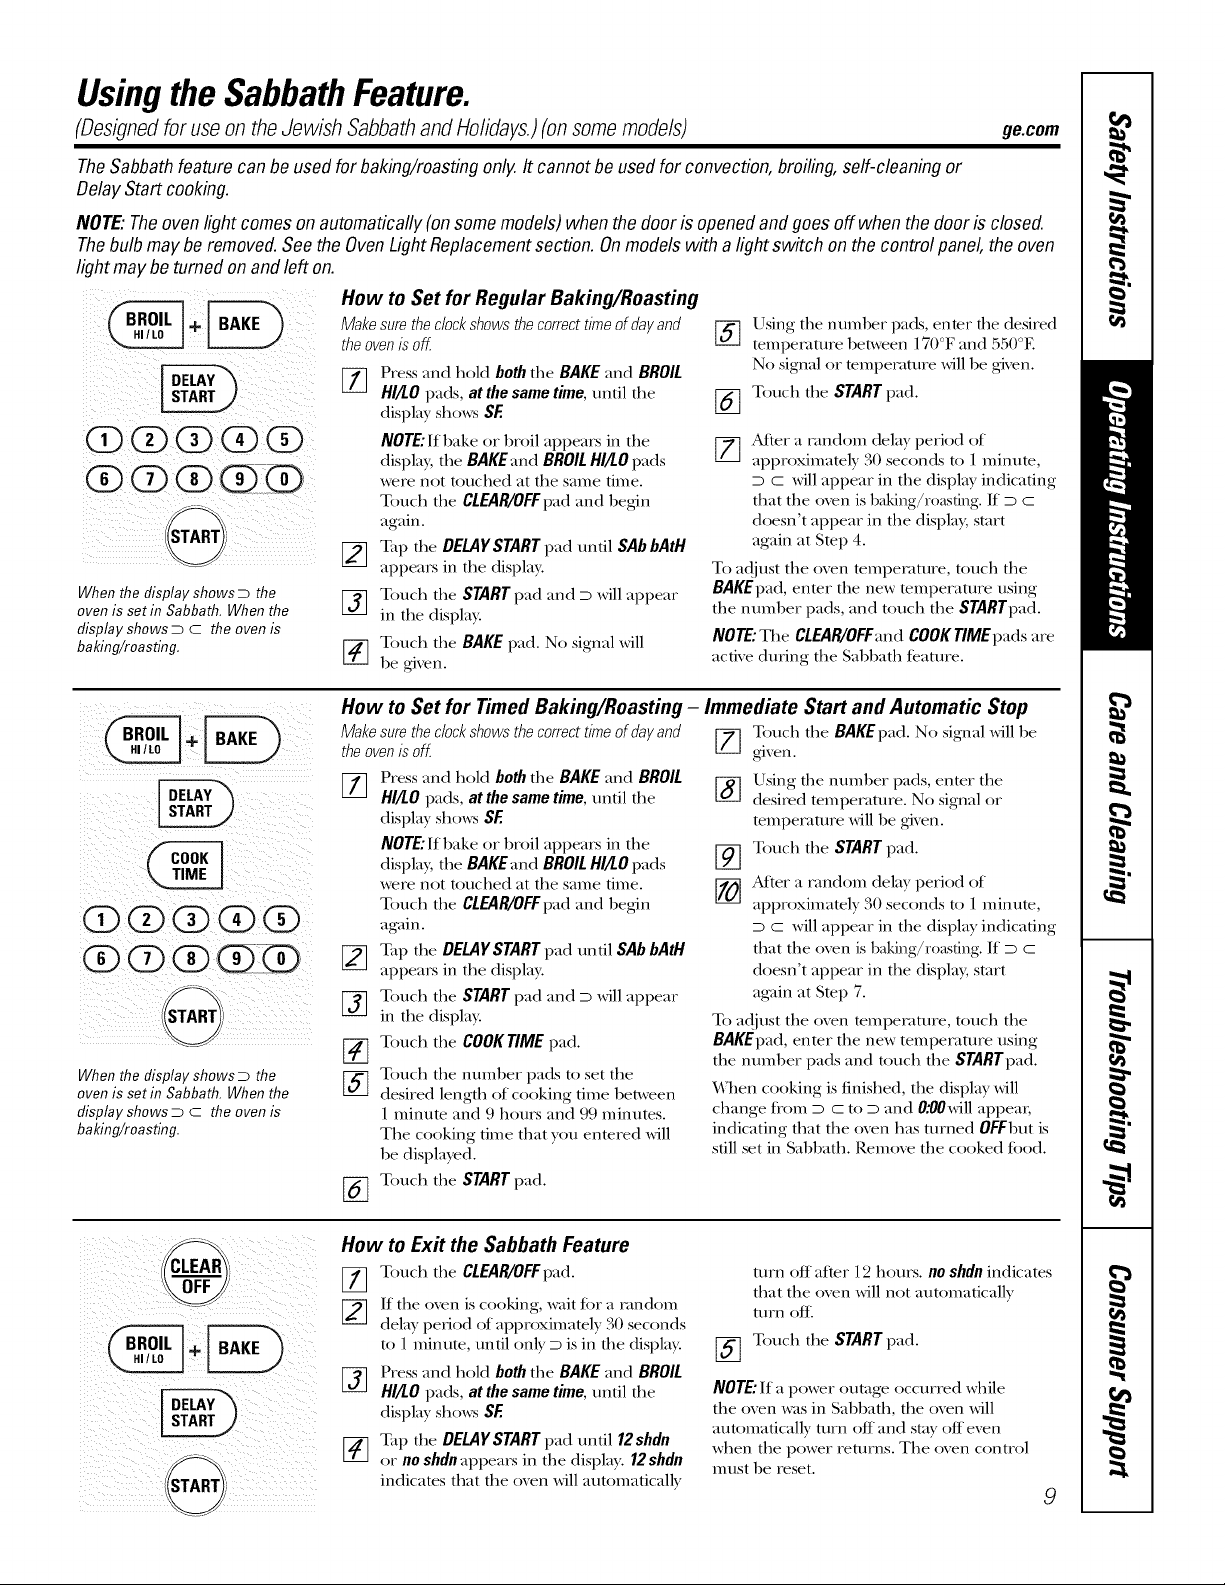
Usingthe SabbathFeature.
(Designed for use on the Jewish Sabbath and Holidays.)(on some models) ge.com
TheSabbathfeaturecan beusedfor baking/roastingonly.It cannotbeusedfor convection,broiling,self-cleaningor
DelayStart cooking.
NOTE:Theovenlight comes onautomatically(on somemodels)when thedooris openedandgoesoff whenthedooris closed.
Thebulbmaybe removed.Seethe OvenLight Replacementsection.Onmodelswith alightswitch onthe controlpanel, the oven
lightmaybe tumedon andleft on.
How to Set for Regular Baking/Roas_g
When the display shows D the
oven is set in Sabbath. When the
display shows D C the oven is
baking/roasting.
Make sure the clockshows thecorrect t/me of day and
the ovenis of[.
VT] Press and hold both the BAKE and BROIL
HI/tO pads, at the same time, until the
display sho_vs SE
NOTE" If bake or broil appears in the
displa), the BAKE:rod BROIL HI!tO pads
were not touched at the same tittle.
Touch the CLEAR/OFFpad and begin
again.
F_] Tap the DELAYSTART pad until SAb bAtH
I¢-I
appears in the display.
[_] Touch the START pad ;and D will appear
in the displa?c
[-_ Touch the BAKE pad. No signal will
be given.
Using the number pads, enter the desired
%
temperature between 170°F ;and 550°F.
No signal or temperature will be given.
Touch the START pad.
%
[_] After a 1,mdom delay period of
approximately 30 seconds to 1 minute,
D C will appear in tlae display indicating
that tlae oven is baking/r0asting. If D C
doesn't appear in the displa); start
again at Step 4.
To adjust the oven tempelature, touch the
BAKEpad, enmr the new mmperature using
the number pads, and touch the STARTpad.
NOTE"The CLEAR/OFFandcoogrlMEpadsare
active during the SabbatlJ feature.
ii /ii i i _ i
When the display shows D the
oven is set in Sabbath. When the
display shows D C the oven is
baking/roasting.
i!i i iiii! iii!@i! iii IIIII
How to Set for Timed Baking/Roasting - Immediate Start and Automatic Stop
Make sure the clockshows the correct t/me of day and Touch the BAKEpad. No signal will be
the ovenIS off. [_ gixen.
[_q Press ;and hold both the BAKE ;and BROIL
/LLJ
HI!tO pads, at the same time, until the
displa) shows SE
NOTE" If bake or broil appears in the
displa); the BAKE;rod BROILHI!tOpads
were not touched at the same time.
Touch the CLEAR/OFFpad ;and begin
again.
I-_ Tap the DELAYSTART pad until SAb bAtH
appears in the display.
_-] Touch the STARTpad ;and D will appear
in the display.
[_ Touch the COOKTIMEpad.
[_ Toucla the number pads to set the
desired length of cooking time between
1 Imnute ;and 9 hours ;and 99 minutes.
The cooking time that you enmred will
be displayed.
Touch the START pad.
%
Using the number pads, enter the
%
desired tempelature. No signal or
tempelamre will be gixen.
Touch the START pad.
%
After a 1,mdom delay period of
approximately 30 seconds to 1 minute,
D C will appear in tlae display indicating
that tlae oxen is baking/r0asting. If D C
doesn't appear in the displa); start
ag'ain at Step 7.
To adjust the oxen tempelature, touch the
BAKEpad, enter the new tempecature using
the nmnber pads ;and touch tlae STARTpad.
When cooking is finished, the display will
change from D C to D ;and 0:00will appem;
indicating that tlae oxen has turned 0rEbut is
still set in SabbatlJ. Remoxe the cooked tood.
How to Exit the Sabbath Feature
Touch the CLEAR/OFFpad.
If the oven is cooking, wait tor a candom
dela) period of approximatel)30 seconds
to 1 minute, until onl} D is in the displa}c
Press ;and hold both the BAKE ;and BROIL
HI!tO pads, at the same time, until the
displa) sho_vs SE
Tap the DELAYSTART pad until 12shdn
or no shdn appears in the displa}. 12shdn
indicates that the oxen will automaticalls
turn off after 12 hours, no shdnindicates
that the oxen will not automaticall}
turn ott:
[_ Touch the START pad.
NOTE"If a power outage occurred wlaile
the oven was in Sabbath, the oven will
automatically turn off ;and stay off even
when the power returns. The oven control
mtlst be reset.
9
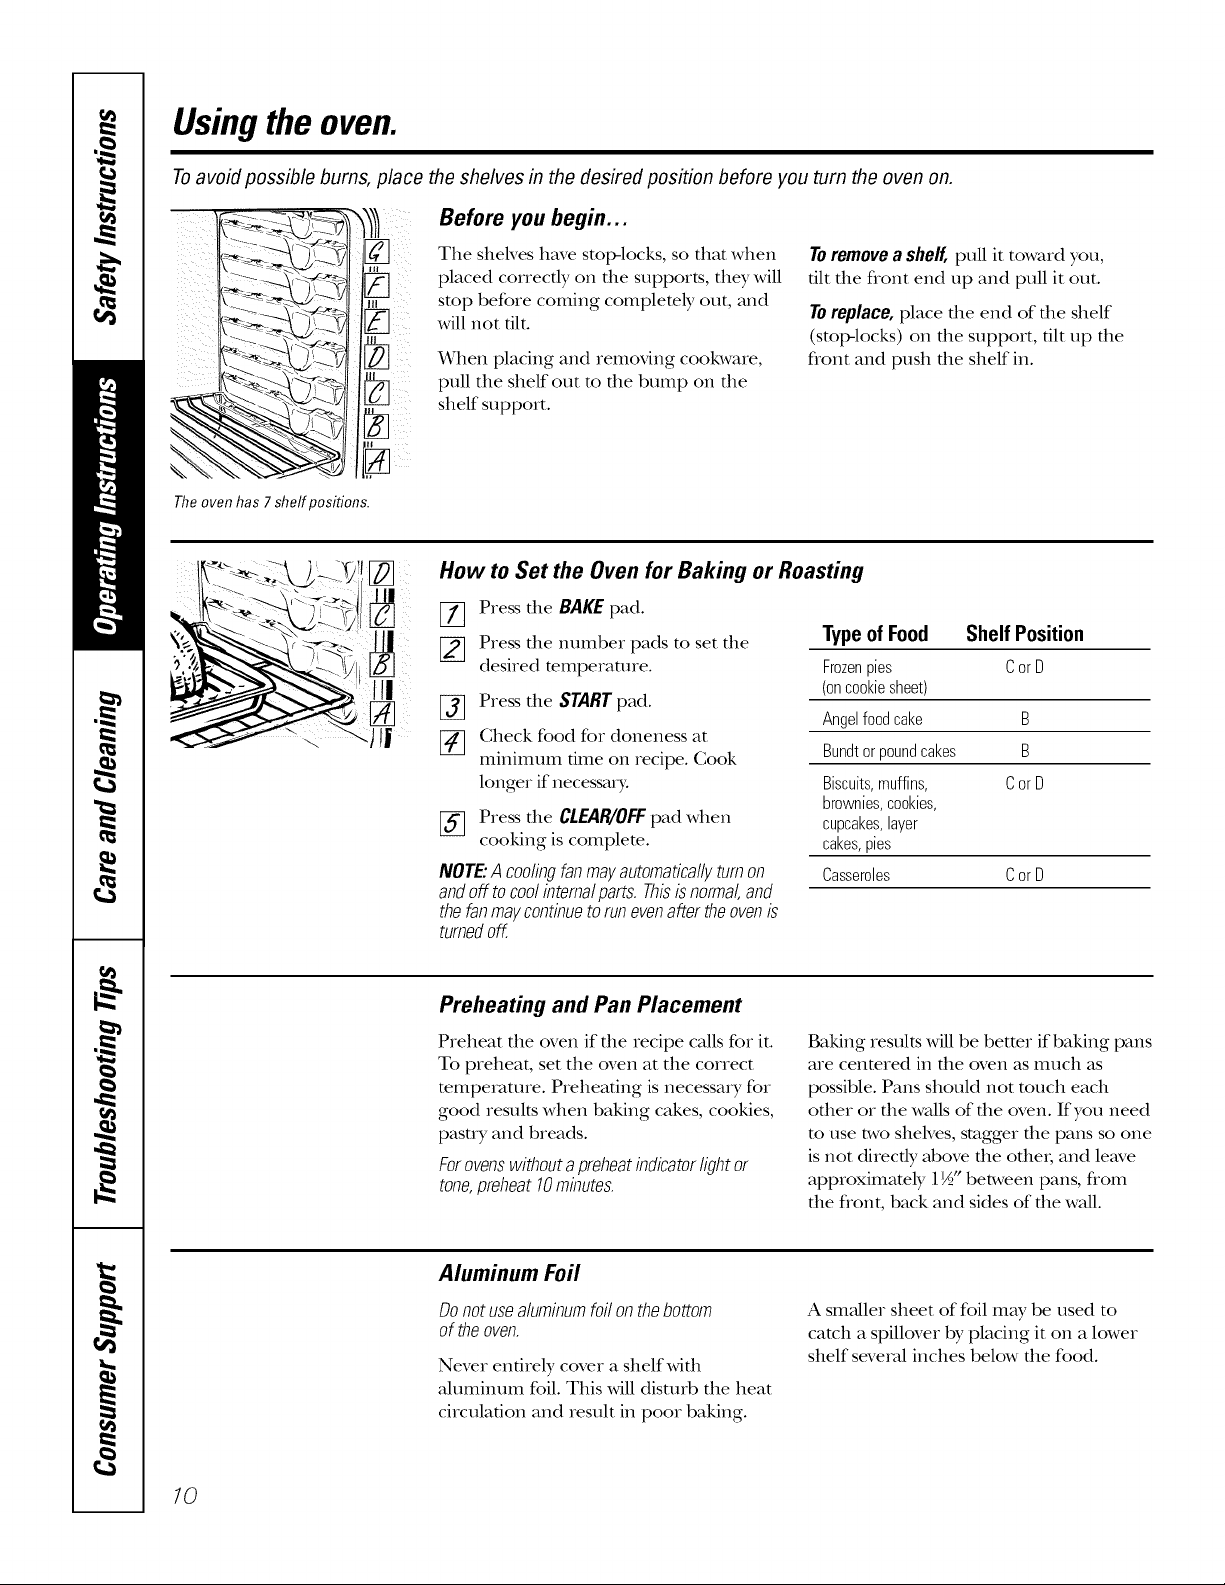
Usingthe oven.
Toavoid possible bums, place the shelves in the desired position before you turn the oven on.
Before you begin...
Theoven has 7shelf positions.
C
The sheNes have stop-locks, so thin when
placed correctly on file supports, they will
stop before coming complemly out, and
will not tilt.
When placing and removing cookware,
pull the shelf out to the bump on the
shelf support.
How to Set the Oven for Baking or Roasting
[7] Press the BAKEpad.
[_ Press the number pads to set the
desired temperature.
[_ Press the START pad.
[_ Check food for doneness at
minimum time on recipe. Cook
longer if neces_uT:
[_ Press the CLEAR/'OFFpad when
cooking is complete.
NOTE"Acoolingfanmayautomaticallyturnon
andoff tocoolintemalparts.Thisisnormal,and
thefanmaycontinuetorunevenaftertheovenis
turnedoff.
Toremovea shelf,pull it toward you,
tilt the flont end up and pull it out.
Toreplace,place the end of the shelf
(stoI>locks) on the support, tilt up the
flont and push the shelf in.
Type of Food Shelf Position
Frozenpies CorD
(oncookiesheet)
Angelfoodcake B
Bundtorpoundcakes B
Biscuits,muffins, CorD
brownies,cookies,
cupcakes,layer
cakes,pies
Casseroles CorD
10
Preheating and Pan Placement
Preheat the oven if file recipe caUs for it.
To preheat, set the oven at the correct
mmpemture. Preheating is necessa_ Tfor
good results when baking cakes, cookies,
pasuT and breads.
Forovenswithoutapreheatindicatorlightor
tone,preheat10minutes.
Aluminum Foil
Donotusealuminumfoilonthebottom
oftheoven.
Never entirely cover a shelfwifll
ahllIlintllI1 foil. This will disturb the heat
circulation and result in poor baking.
Baking results will be better if baking pans
are centered in the oven as much as
possible. Pans should not much each
other or the waUsof the oven. If you need
to use two shelves, stagger the pans so one
is not directly above the otbei; and leave
approximately 1½" between pans, from
the flont, back and sides of the waU.
A smaller sheet of foil may be used to
catch a spillover by placing it on a lower
shelf several inches below the food.
 Loading...